RobertRoche
-
Posts
462 -
Joined
-
Last visited
-
Days Won
12
Content Type
Profiles
Forums
Events
Gallery
Blogs
Everything posted by RobertRoche
-

Wexford Model Railway Club Festival Open Day 2021
RobertRoche replied to Irishrailwayman's topic in What's On?
Update from WMRC Preparations are well underway for the WMRC Open Day this Sunday. We hope to see lots of you there for this first post-covid model railway show. In line with public health measures that will come into effect this Friday, COVID Certs/proof of vaccination will be checked at the door, face masks must be worn indoors including in the main hall and social distancing should be observed. There will be ample room for social distancing in the hall. The hall opens at 11am on Sunday. Donations will be accepted at the door for WMRC building extension and club funds.- 98 replies
-
- 4
-

-

-
- model railway exhibition
- trade stands
- (and 3 more)
-
Leave them in the water for longer as Eoin has said, I find that some of the transfers might need a minute or two in the water before they start to move. If you leave them too long they might come off in the water, but you can experiment with that.
-
Pricey coaches: https://www.ebay.ie/itm/Bachmann-Murphy-Models-34-251Z-34-226Z-34-226Y-CIE-Flying-Snail-Green-Coach-x-3-/144055216360?&_trksid=p2056016.l4276
-
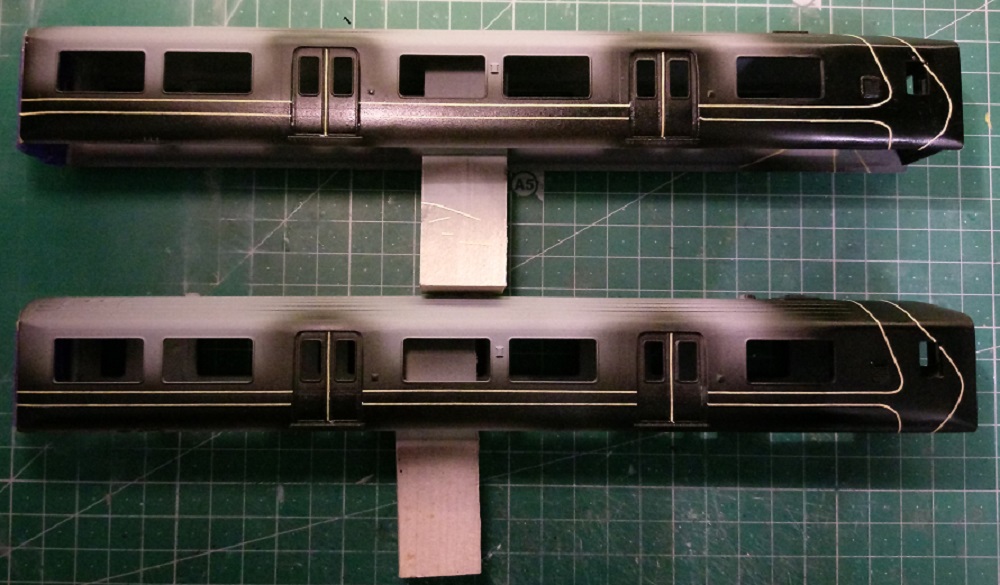
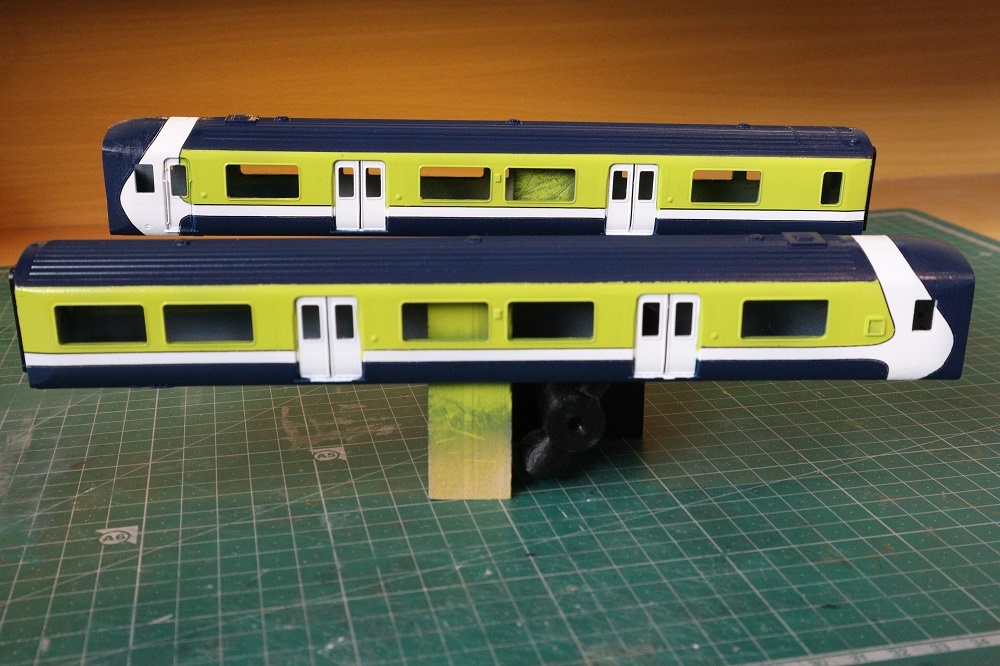
Thanks, this is the Bachmann class 150. The only alteration that I made was to remove the driver's door on one side, remove the exhaust and remove some of the roof ridges towards either end. I started with black and masked off the lining using 0.5mm tape. I then applied the white, blue, green and yellow ends in that order. Overall I am satisfied with how it came out but there are a significant amount of paint errors to correct.

-
Currently on the workbench is this paint job which required plenty of masking. There are some areas that have suffered from overspray and poor finish before I hand paint some details and add decals. The lighting circuits will also require some work to get the appropriate headlights.
-
Irish Footbridge - Expression of Interest
RobertRoche replied to RobertRoche's topic in Irish Models
A big thank you to IRM for taking on this project, and thanks to everyone for the support and interest. I'm really looking forward to seeing the finished product, it will be worth the wait!- 101 replies
-
- 12
-
-
-

-
Some IR/IE 071s on eBay at the moment: https://www.ebay.ie/itm/Murphy-Models-Class-071-number-080-orange-and-black-tippex-with-small-IR-logo-/124712522011?&_trksid=p2056016.l4276 https://www.ebay.ie/itm/Murphy-Models-Class-071-number-078-orange-and-black-tippex-with-small-IE-logo-/124712515053?&_trksid=p2056016.l4276
-
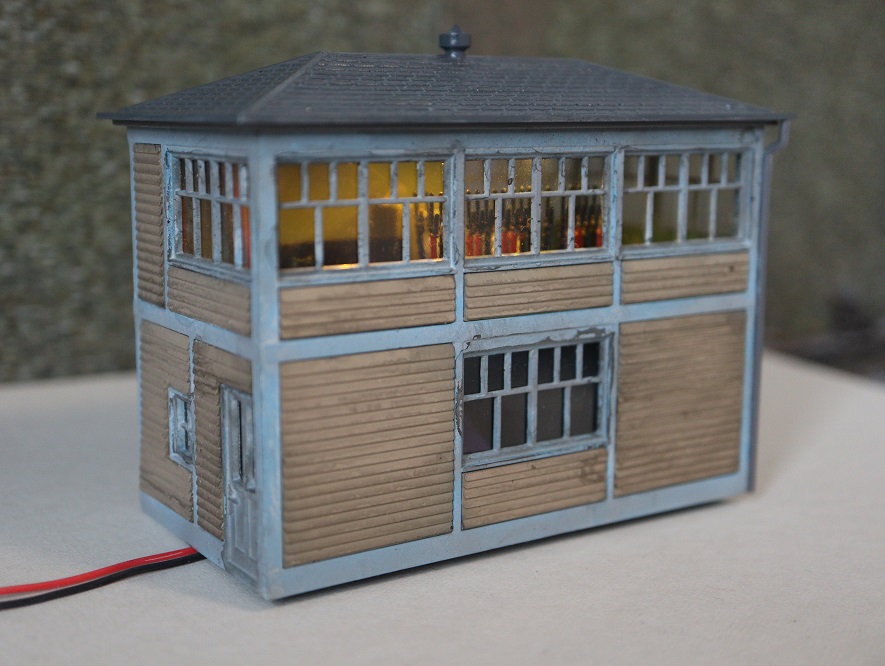
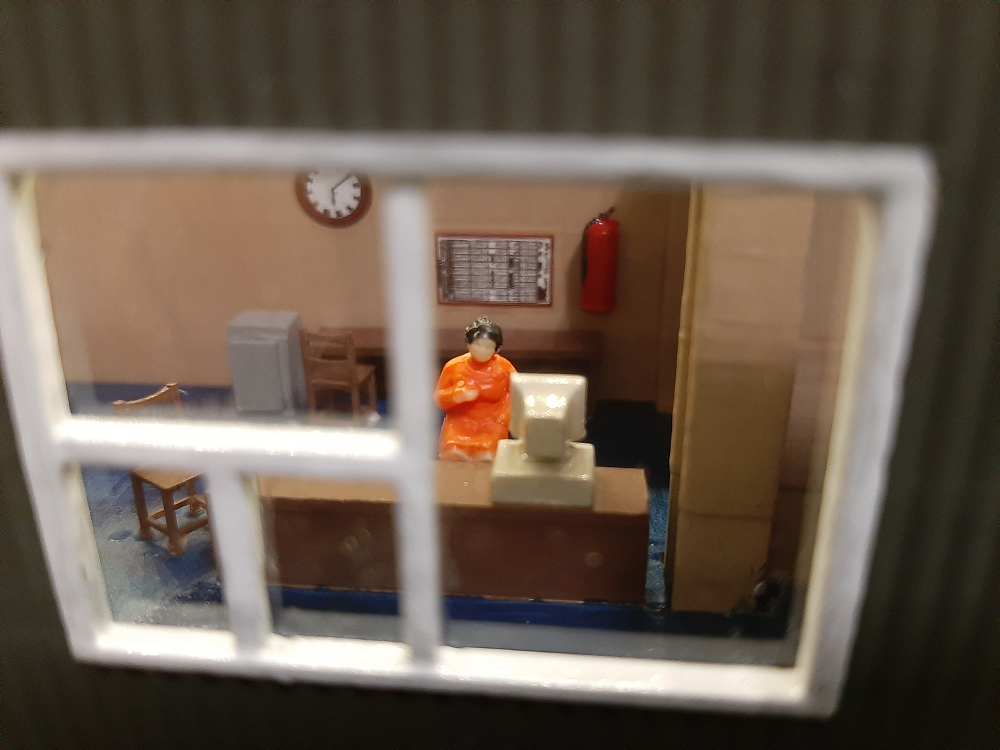
Hi everyone, thanks, I am still working on the trackplan taking a lot of these suggestions into consideration. As an aside to that I built this Gaugemaster kit for the cabin on the station. There is some interior detailing and lighting.
-
Excellent result, lovely model!
-
They take PayPal according to the contact us page.
-
Thank you everyone. I forgot to mention that the layout will be set in approximately 2000-2010. Some of the track arrived today. I'll be sure to include catch points, though I don't like the look of the Peco offering as it doesn't match what you see in Ireland. I am considering this, and good to see the example of Longford station, thanks. The yard will likely only be a single track. I'm still working out where would be best to place the crossover points, and placing one or both further down the line is an option. It will be a reach stacker in the yard, though placing the loco siding to the yard side of the layout may be more realistic regarding operations. Sorry! The inspiration is coming from the other end of the country.
-
I am starting my lockdown layout a year late. It is a continuous run layout with a scenic side which is connected at both ends to a yard section. Both sides of the layout measure 16 feet by 2 feet and are connected by bridges at both ends with the operator working from a central well. The baseboards for the scenic section have been built using 6.5mm birch plywood and the baseboards for the yard have been reused from a previous project. The layout is being built in a hostile attic environment, pictures will follow after some more work on insulation, lighting and backscenes. The layout will be based on the fictional station of 'Carrick' which is a mainline, double track station. The station forms the heart of the layout with small areas of countryside to both sides. The station will be reminiscent of the Waterford to Limerick line, will feature a bay platform for local services, an oil transfer siding similar to Arklow Station and either a container or permanent way yard to the front. I have not fully decided on the track plan, particularly in the bay platform/oil siding/loco storage area (I have realised that the attached track plan does not allow for a crossover into the bay platform from the westbound line). I have provided the crossovers for running around the train in the main station. I have the option of moving one of these 'off-layout' if required - doing this would allow the station to move west slightly and either a) provide easier access to the container/permanent way yard or b) allow access to the yard from the west of the station. I have a good amount of space at the front of the layout to represent a container yard, however this would probably lack a run around track to release a loco after driving in from the east. The station is long enough to accommodate 6 carriages and a locomotive, with the bay platform designed for a 2-car unit. The layout will be DCC operated and will be wired for block detection which will allow for the future automated running of the layout, with trains being automatically dispatched and stabled in the yard. This will be achieved using MERG hardware and Rocrail software. Main line signalling will be minimal using Berko 2-aspect colour light signals, and I will provide shunt signals as required. Comments on the operability of the below track plan (zoom in for more detail) are welcome and I plan to keep this updated as I make more progress.
-
View Advert 44-141 Bachmann Scenecraft OO Two Lane Traction Depot As-new, unused Bachmann Scenecraft OO gauge Two Lane Traction Depot. In original box with polystyrene insert. Resin model building, painted, dimensions 320mm x 150mm x 140mm. Postage within Ireland €12. Payment by Revolut, transfer, cash or PayPal. Advertiser RobertRoche Date 15/04/21 Price €80.00 Category Parts & Accessories
-
When multiple people choose the same location (e.g. Dublin - O'Connell Street) it shows one marker with presumably the last name that used that location. The map is good at showing the spread of users and gives an indication of where there are concentrations of users.
-
There is the option of stating your location on your profile. I guess that people that want to state their location can do it there. It is a compromise between showing where all members are and complete anonymity. As an aside, the 4 section headers on the profile page have said converted since the last time the forum back end was updated @Warbonnet
-
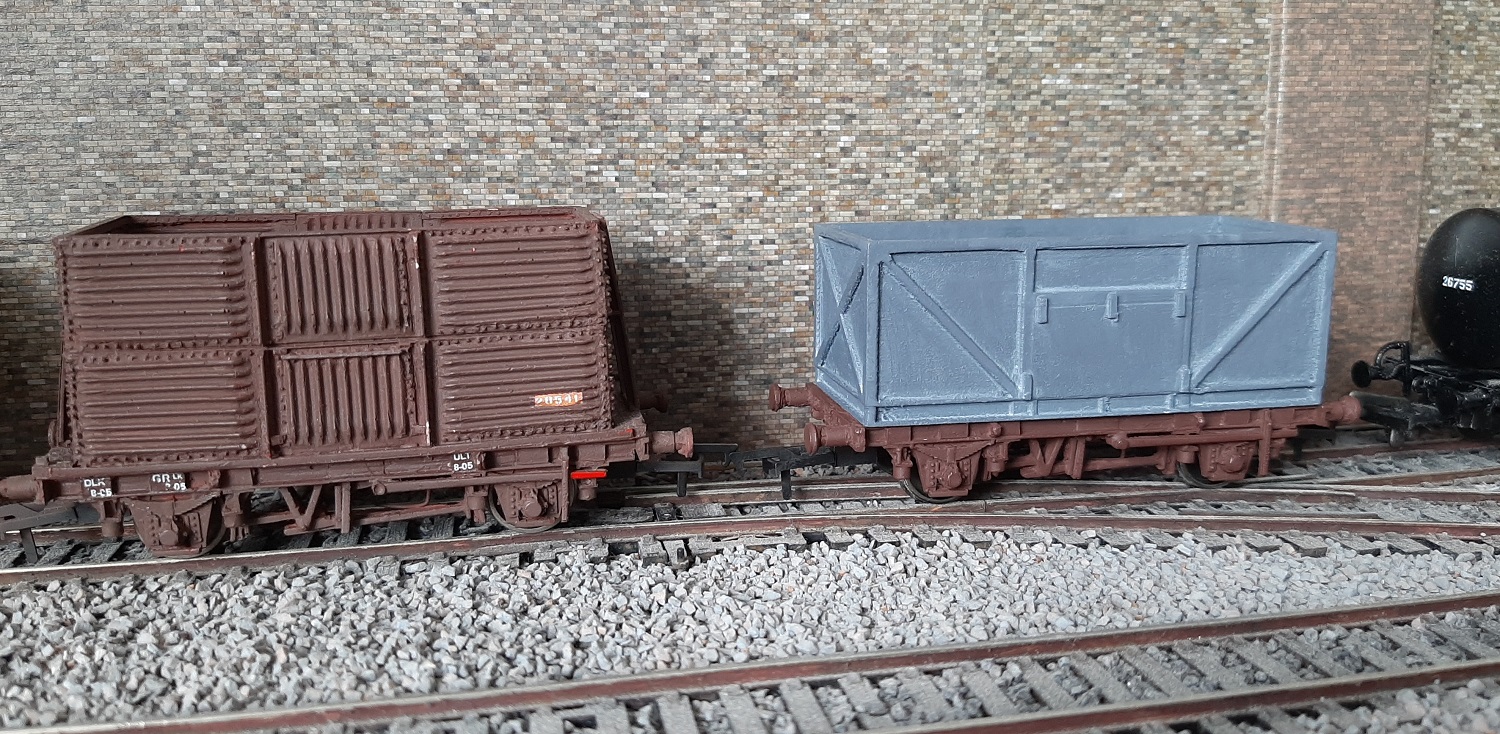
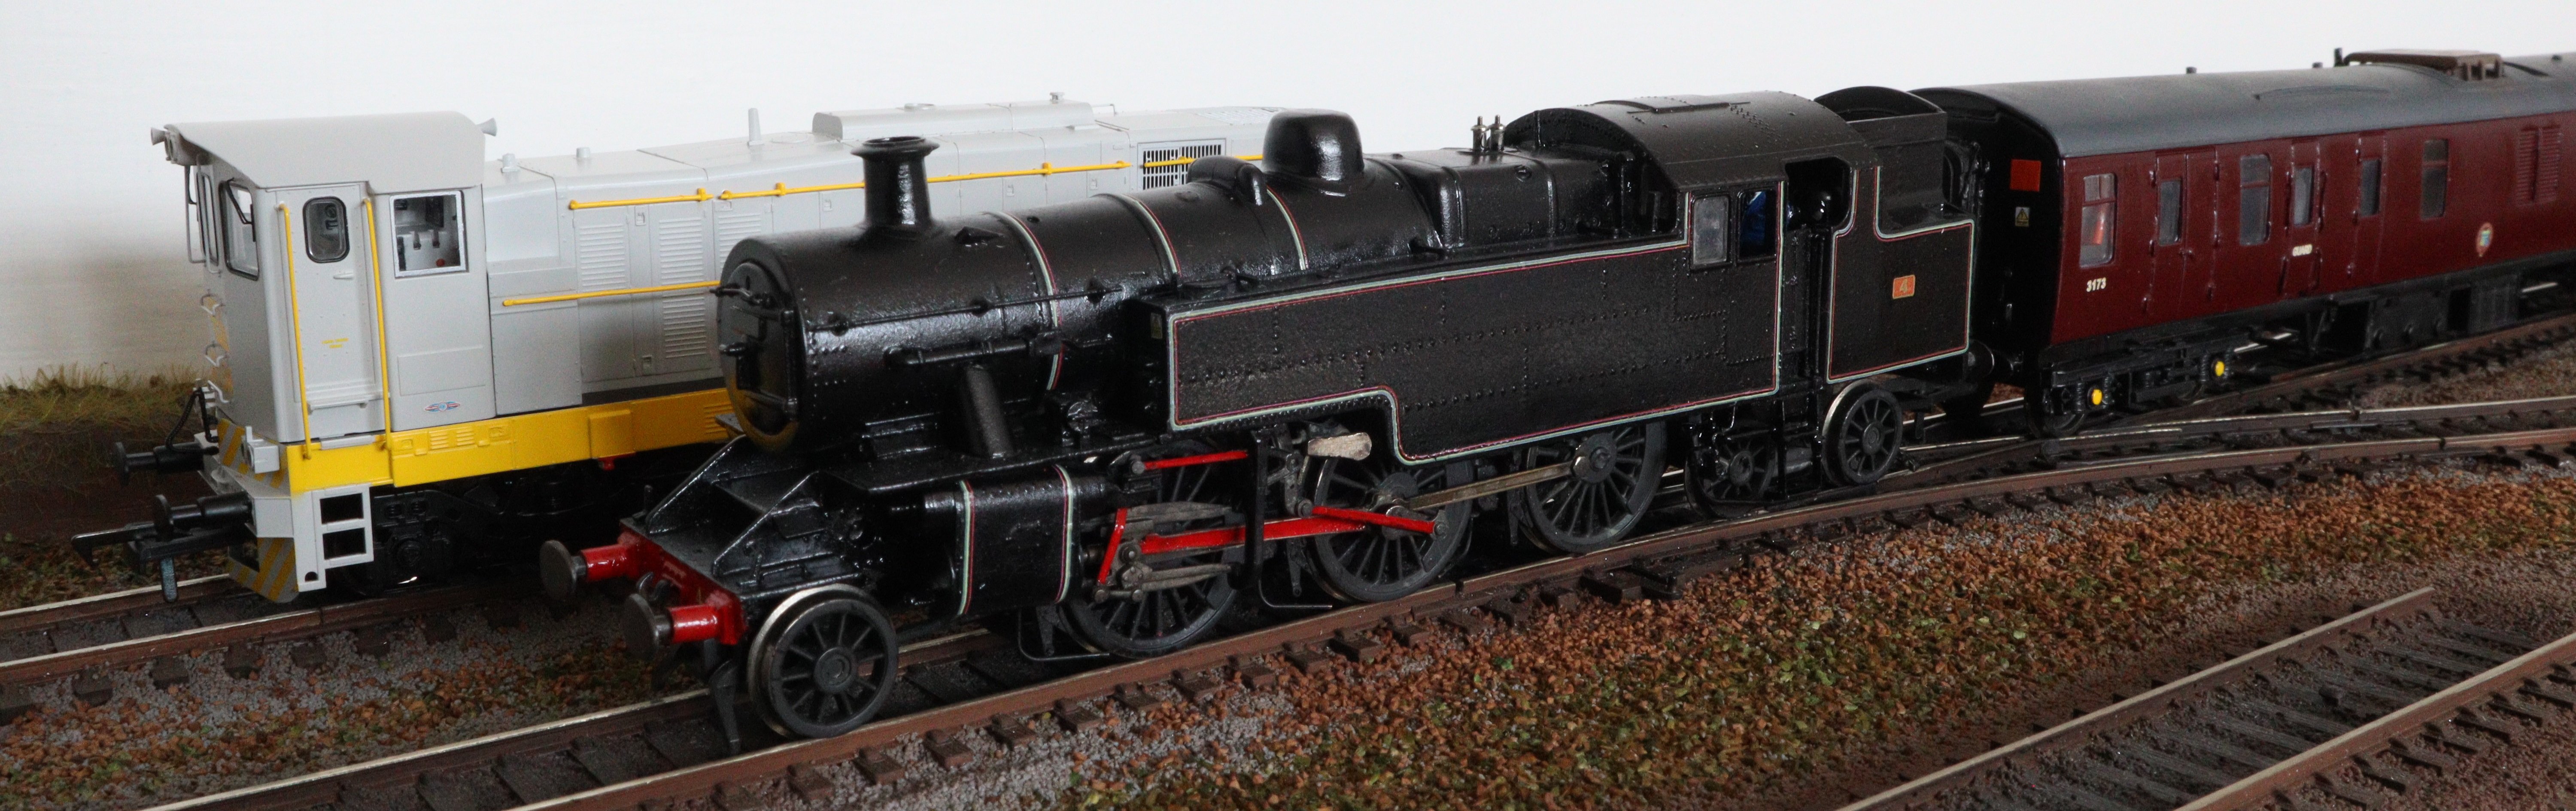
I have finally put a chassis under the prototype beet wagon.
- 233 replies
-
- 14
-
-
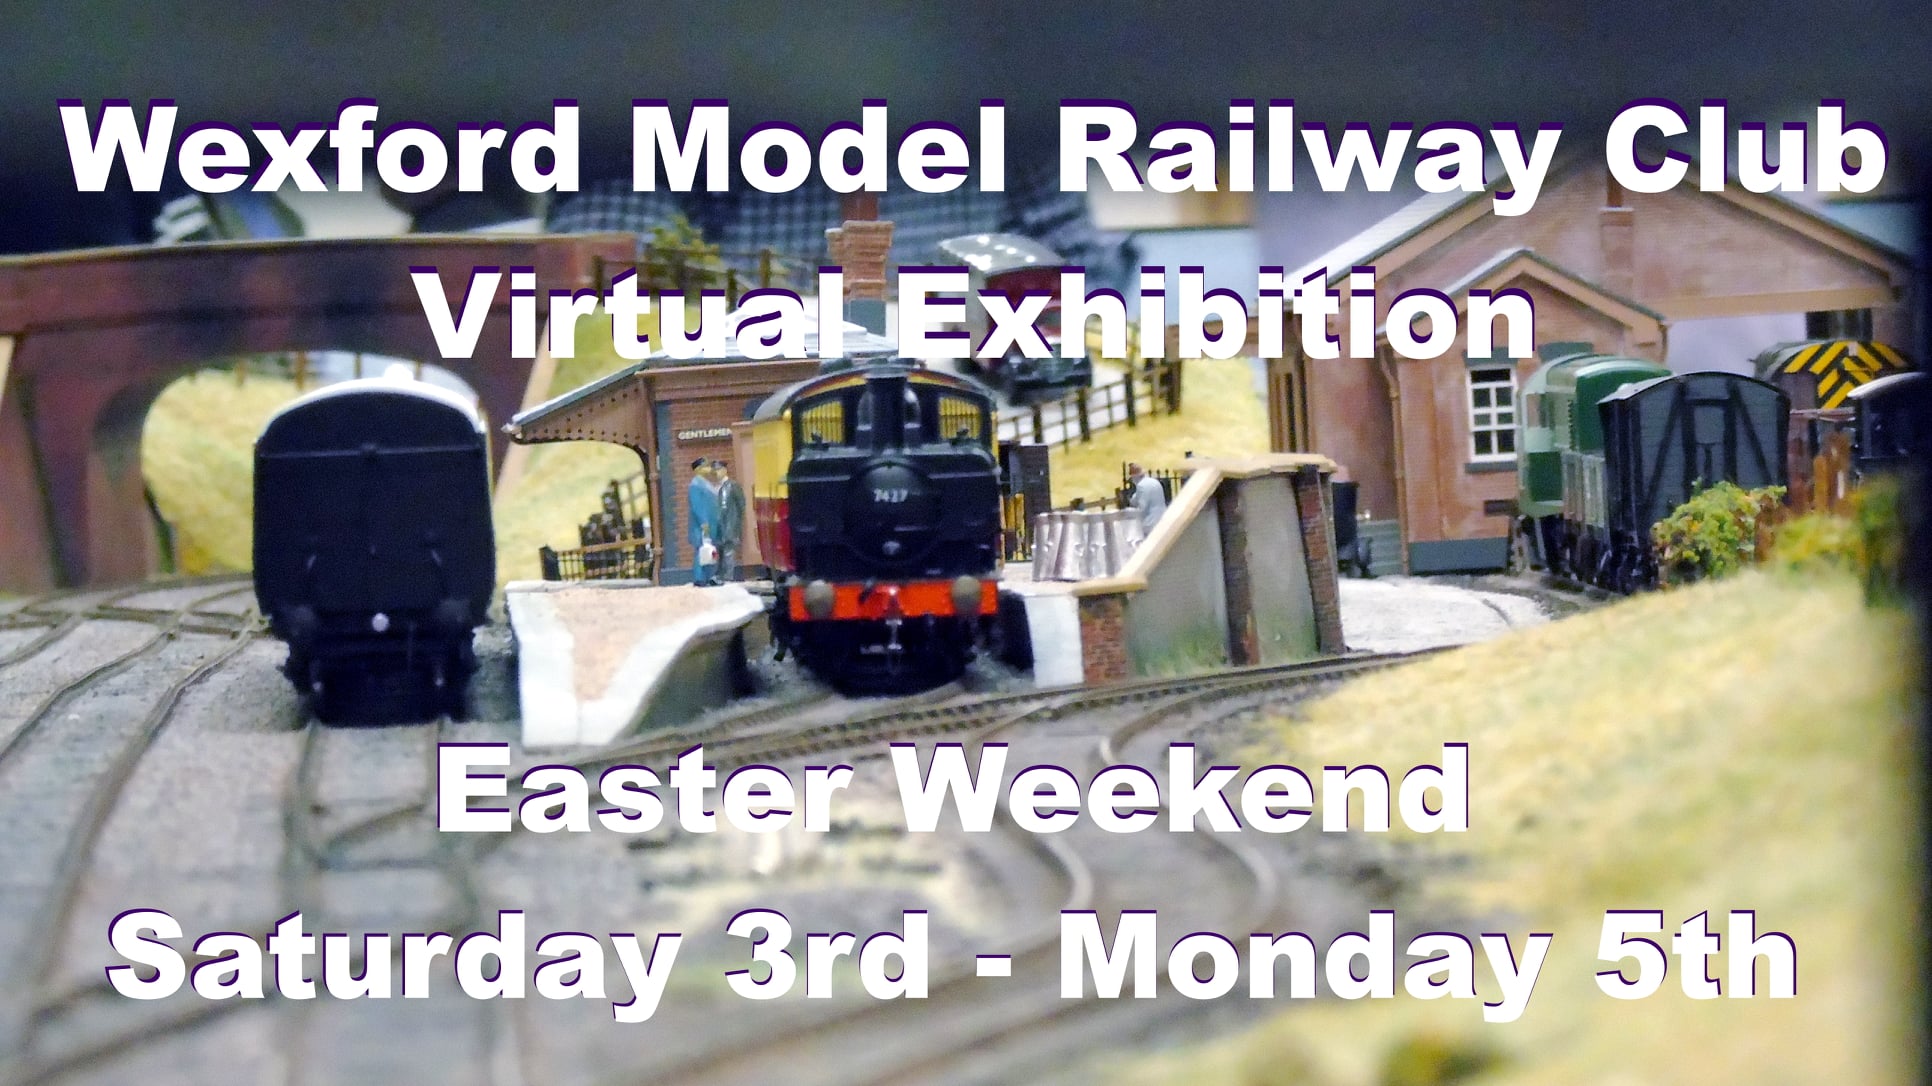
Wexford Model Railway Club is hosting a Virtual Model Railway Exhibition on our Facebook Group again this 2021 Easter weekend (3 - 5 April). This is our second virtual event following our popular Easter 2020 Virtual Exhibition. We hope you join us over the Easter weekend to share photos and videos of your model railways. We will show our club layouts and what our members have been up to over the past year. We would also love to see what progress you have made over the year - please join in wherever you are around the world! We will be posting some of the layouts on our website over the weekend also for those that don't use Facebook and want to join in. Link to the Facebook Group: https://www.facebook.com/groups/WMRCVirtualExhibition/ Link to our website: https://www.wexfordmodelrailwayclub.ie/VirtualShow2021
-
- 4
-
-
More coaches going with a high asking price: https://www.ebay.ie/itm/BACHMANN-00-MURPHY-MODELS-4x-CIE-IRISH-LIVERY-GREEN-COACHES-BOXED-RARE-/233944756322?&_trksid=p2056016.l4276
-
Irish Rail Commuter Livery colours
RobertRoche replied to RobertRoche's question in Questions & Answers
Based on drawings kindly provided I make the colour out to be closer to 376C, but the two are very close. I think I will get some mixed just to try it out, though sometimes using the prototype colour on the model can look 'off' for some reason. -
Irish Rail Commuter Livery colours
RobertRoche replied to RobertRoche's question in Questions & Answers
Thanks Noel, that is a nice green, as expected the actual colour used is not available off the shelf. -
Could anyone please suggest a suitable colour for the green and blue on the Commuter livery? A Tamiya colour code would be great but a RAL or Humbrol etc would also help.
-
While the resin itself may be cheap, particularly at a production level there is still set-up time, consumables, wages, power, insurance, and machinery to buy. We know that 3D printing does not scale like injection moulding - if one 3D print takes 10 hours, 2 of them are generally going to take 20 hours (assuming you can't cram more onto the build plate). 3D printing isn't a magic bullet, particularly when discussing many small detail parts that it takes to make a model. If my machine is working all day, it's preventing me from printing something else - just in the same way that an injection moulding facility also has a limit on what it can produce. If you're working at a production level, you need to cover all costs and make it worth while, otherwise it is a loss making endeavour.
-
Weathering suggestions for Mk2/3 coaches
RobertRoche replied to Bumble_Bee's question in Questions & Answers
For fading paint a very very light airbrush of white across the surface might be enough. I just found this video of a method using oil paints: -
Thanks everyone. This is a background scene so I really haven't gone overboard on it. The interior will be lit and the confuser will be plugged in. The figure is from China and they usually find themselves in carriages after getting their legs chopped off.
-
A few details added to the beet sampler office to give it some life.