Tullygrainey Posted Saturday at 22:27 Author Posted Saturday at 22:27 Spoke too soon! Looking again at the Casserley photo in Leslie's post above, the running plate narrows ahead of the tanks. Bu**er.
Mayner Posted Sunday at 00:53 Posted Sunday at 00:53 5 hours ago, Tullygrainey said: While waiting for replacement wheels, I've made a start on No 9's running plate in 16 thou (0.4mm) brass. Buffer beams are 2 layers of 16 thou nickel silver plus an extra 5 thou brass layer on the front one - photos of the prototype suggest it might be made of wood with a metal facing. Buffer shanks are from Alan Gibson (4908, Early GWR, Dean). Reggie the Soldering Unit made a neat job of soldering these on. 1.5mm square brass rod for the valances stiffens the whole thing nicely and gives it some much needed strength. The front chassis spacer slides under a little bit of 1.5mm brass angle the same width soldered to the back of the buffer beam. This secures the chassis and keeps it centred. At the back there's a 10BA bolt into a captive nut on the running plate. No disasters today. Alan Fair play Alan in building quite a fleet of BCDR locos, stock and Kilmore largely using traditional scratch building techniques. How do you cut brass/nickle silver so neatly? 1
Tullygrainey Posted Sunday at 08:35 Author Posted Sunday at 08:35 7 hours ago, Mayner said: Fair play Alan in building quite a fleet of BCDR locos, stock and Kilmore largely using traditional scratch building techniques. How do you cut brass/nickle silver so neatly? Ah John, I play safe. After scribing guide lines, I drill holes near each corner and cut inboard of the lines with the piercing saw. No need to be too precise (first photo). Then I file up to the lines using needle files (second photo). 3 1
Tullygrainey Posted Sunday at 14:04 Author Posted Sunday at 14:04 15 hours ago, Tullygrainey said: Spoke too soon! Looking again at the Casserley photo in Leslie's post above, the running plate narrows ahead of the tanks. Bu**er. I could've left the running plate as it was - scratch building in 4mm is full of compromises, a track gauge of 16.5mm being not the least of those - but I knew it would bother me so, biting the bullet and ladling on the flux, the valances came off again. Not particularly neatly. New shaped valances made up and soldered in. Bending that 1.5mm square brass rod is no joke, even after annealing it. Running plate shaped to match and cleaned up. Shuffling forward quietly and pretending it never happened Alan 7 1
Mol_PMB Posted Sunday at 14:06 Posted Sunday at 14:06 1 minute ago, Tullygrainey said: I could've left the running plate as it was - scratch building in 4mm is full of compromises, a track gauge of 16.5mm being not the least of those - but I knew it would bother me so, biting the bullet and ladling on the flux, the valances came off again. Not particularly neatly. New shaped valances made up and soldered in. Bending that 1.5mm square brass rod is no joke, even after annealing it. Running plate shaped to match and cleaned up. Shuffling forward quietly and pretending it never happened Alan Well done! You'll soon forget the pain and be glad you did it. 1 1
popeye Posted Sunday at 16:25 Posted Sunday at 16:25 When you know it's wrong it won't leave your head until you fix it. 1
Colonel Posted Monday at 06:24 Posted Monday at 06:24 I must try harder when using those fine saw blades as your results speak for themselves. Have I said that I use a slitting disc in a Dremel for such stuff? Crude in the extreme, though sort of works in 7mm scale, even if it does feel like using a chainsaw at times. 1
Tullygrainey Posted Monday at 07:01 Author Posted Monday at 07:01 (edited) I think it's worth paying a little extra for decent piercing saw blades. I've found that the cheaper ones are harder to control and the cut tends to drift sideways. I always buy Vallorbe blades now - grades 2, 4 and 6 - the bigger the number the finer the cut. Edited Monday at 07:04 by Tullygrainey typo 1 3 1
Galteemore Posted Monday at 07:38 Posted Monday at 07:38 Horrible experience Alan. Reminds me of ‘boiler gate’ when I had to shorten a rolled and soldered boiler that I had made too long, by removing a slice of about 2mm in the middle. But once you’ve seen the error…. 1
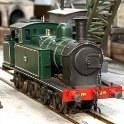
Tullygrainey Posted 3 hours ago Author Posted 3 hours ago (edited) Moving forward again with No.9. First, a cab flatpack in 16 thou nickel silver. A jolly afternoon spent with piercing saw and files, listening to the rain on the roof window. The window surrounds on the cab front sheet came from this lovely Mainly Trains etch (MT226) designed by Iain Rice and available from Wizard Models. Bunker bits. More nickel silver and some embossed rivet detail. Boiler rolled from a rectangle of 10 thou brass... Firebox end has 3 additional layers with the front edge contoured. The smokebox will get another layer to incorporate the smokebox saddle. Given that this one will be driven on the front axle, I'll need to keep clearance for the gearbox. Haven't quite sorted this yet. Travelling hopefully Alan Edited 2 hours ago by Tullygrainey 4 1
.png.c363cdf5c3fb7955cd92a55eb6dbbae0.png)
Recommended Posts
Create an account or sign in to comment
You need to be a member in order to leave a comment
Create an account
Sign up for a new account in our community. It's easy!
Register a new accountSign in
Already have an account? Sign in here.
Sign In Now