David Holman
-
Posts
4,332 -
Joined
-
Last visited
-
Days Won
117
Content Type
Profiles
Forums
Events
Gallery
Blogs
Store
Community Map
Everything posted by David Holman
-
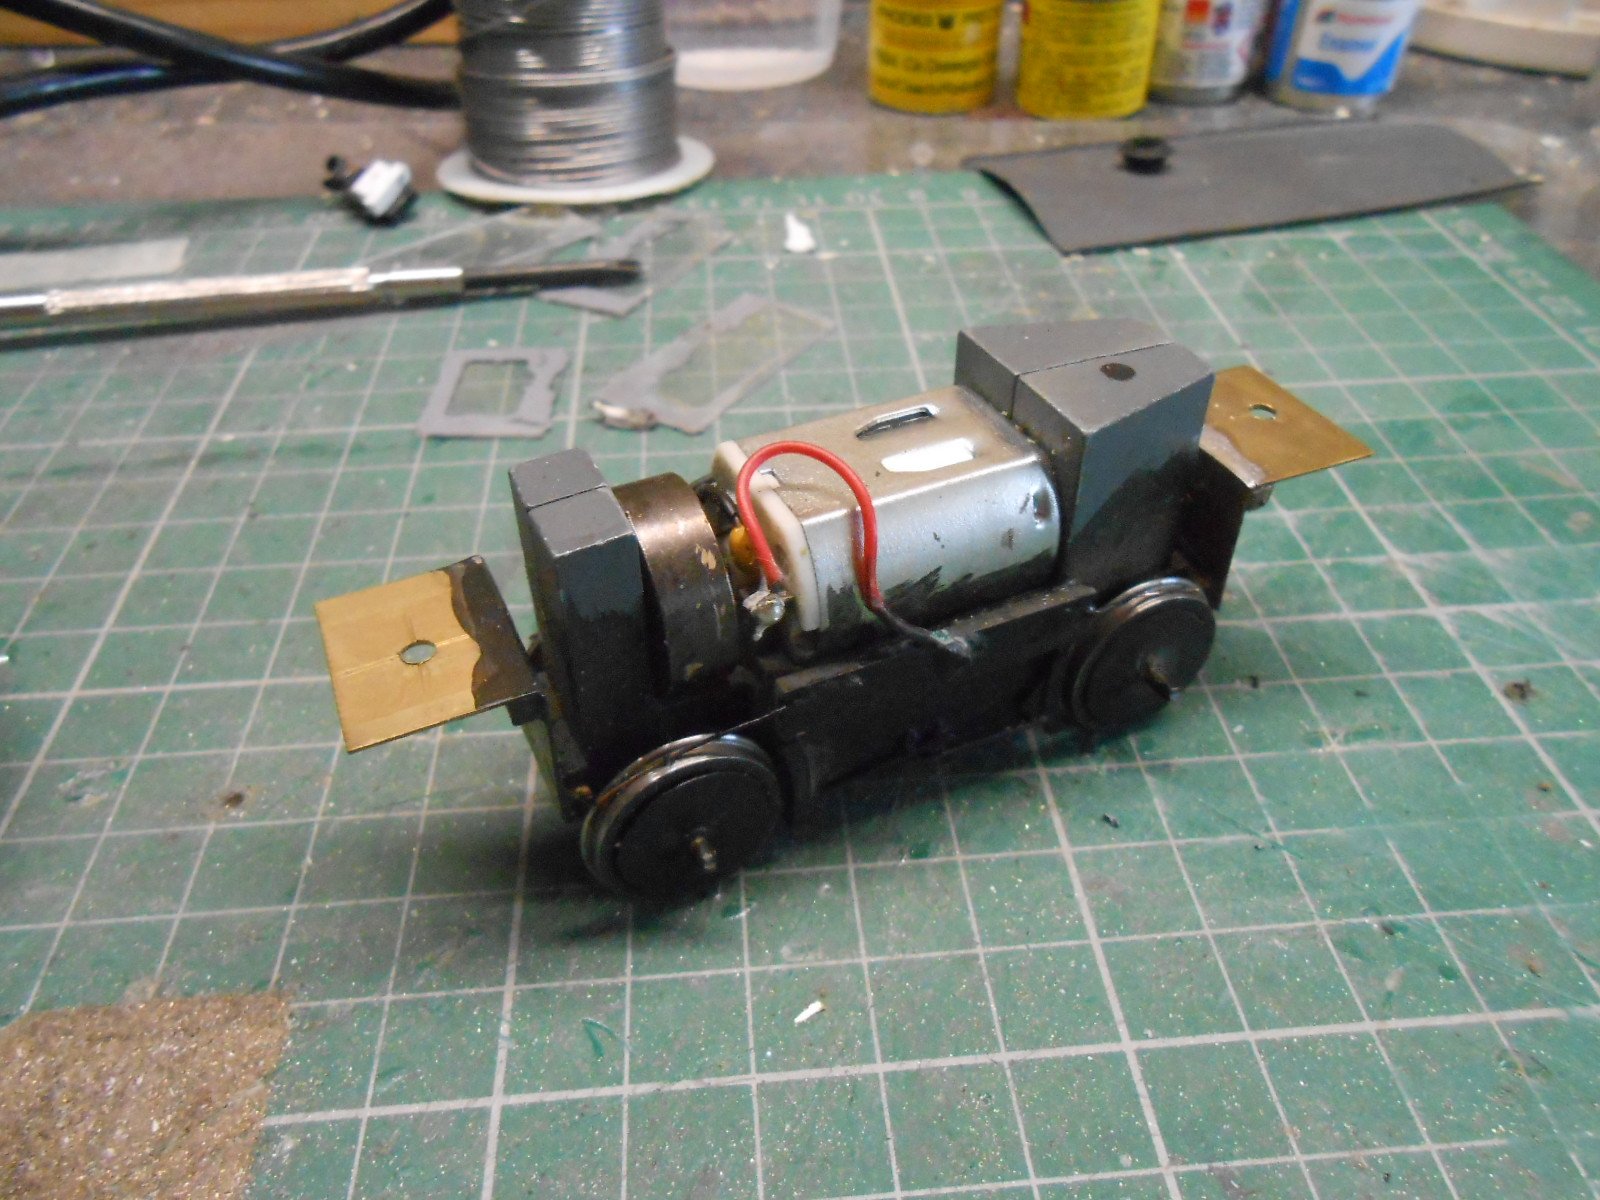
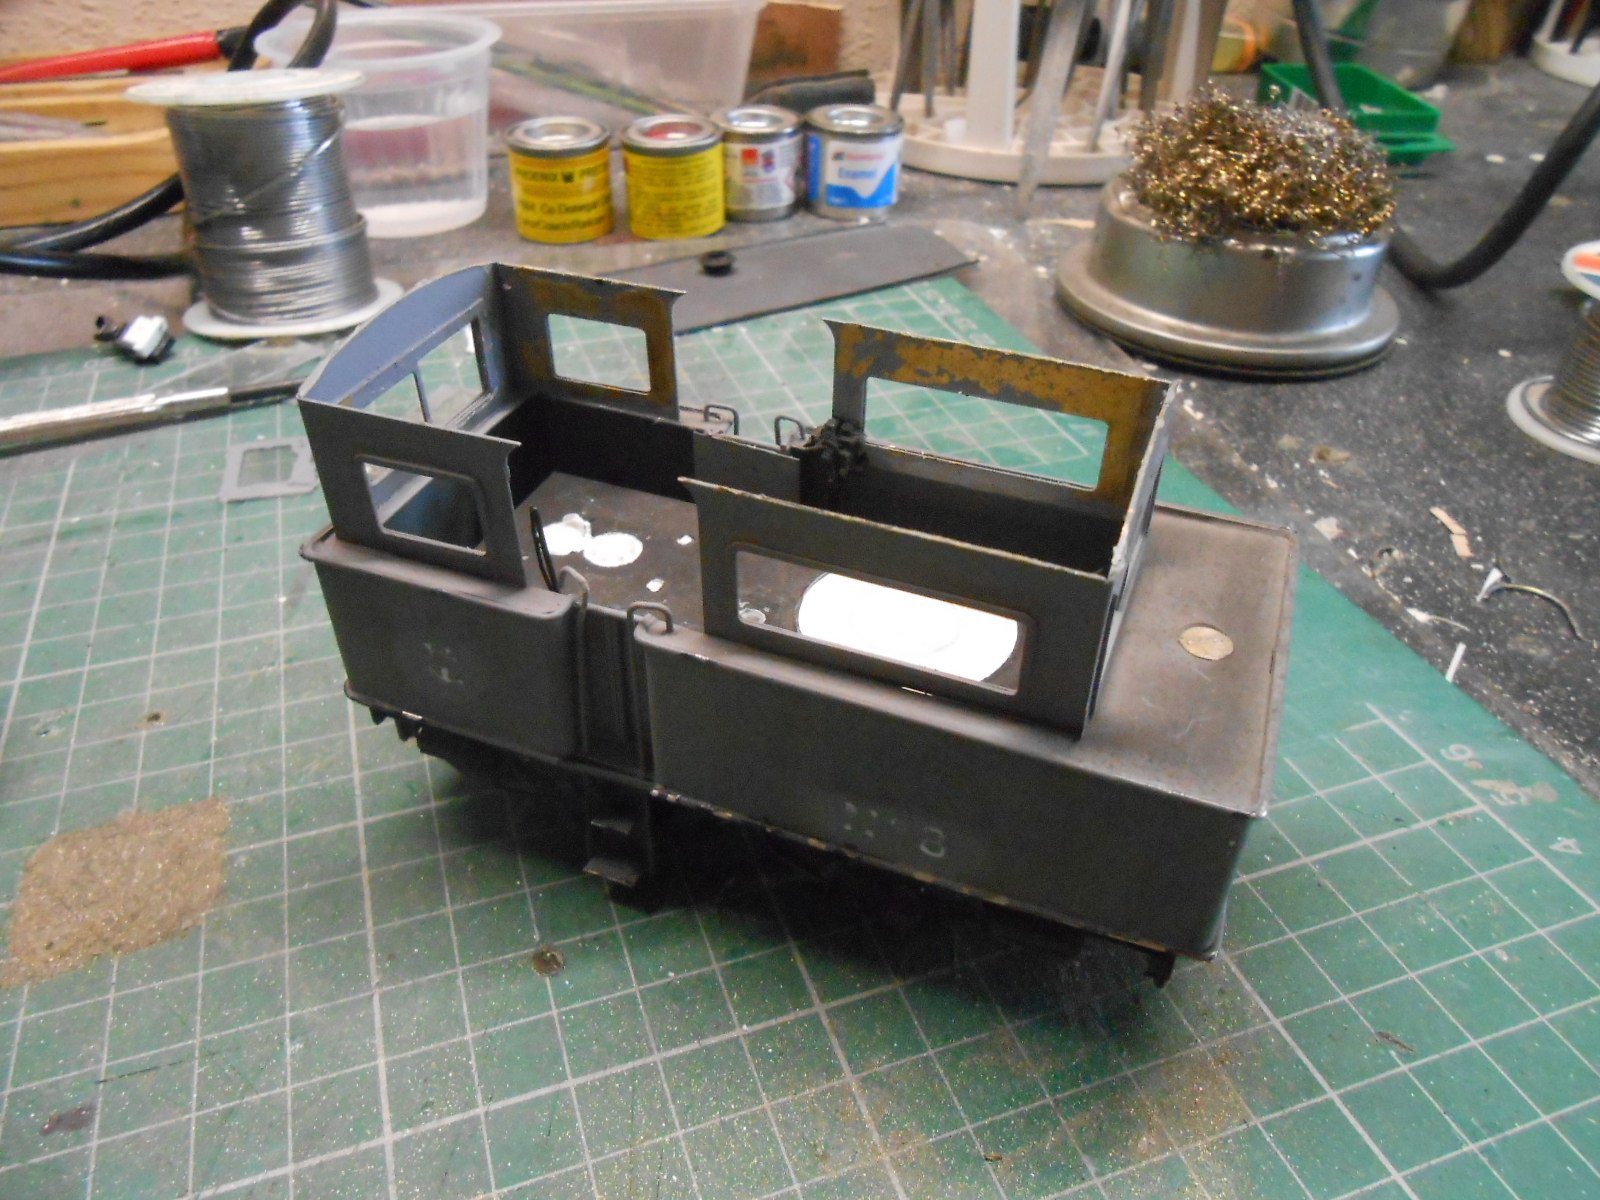
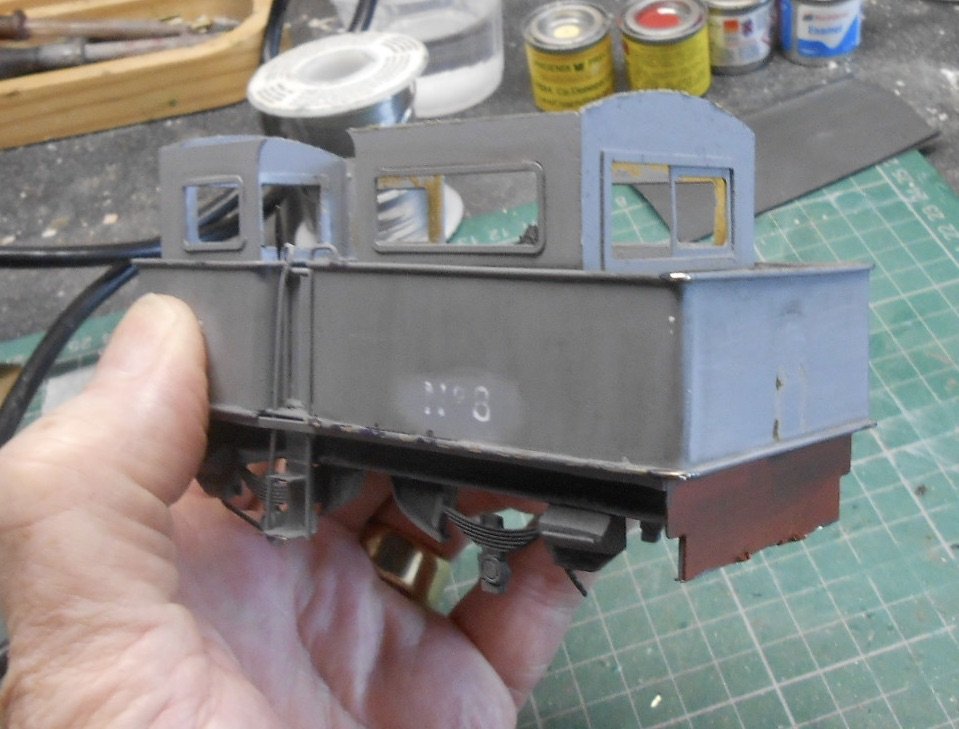
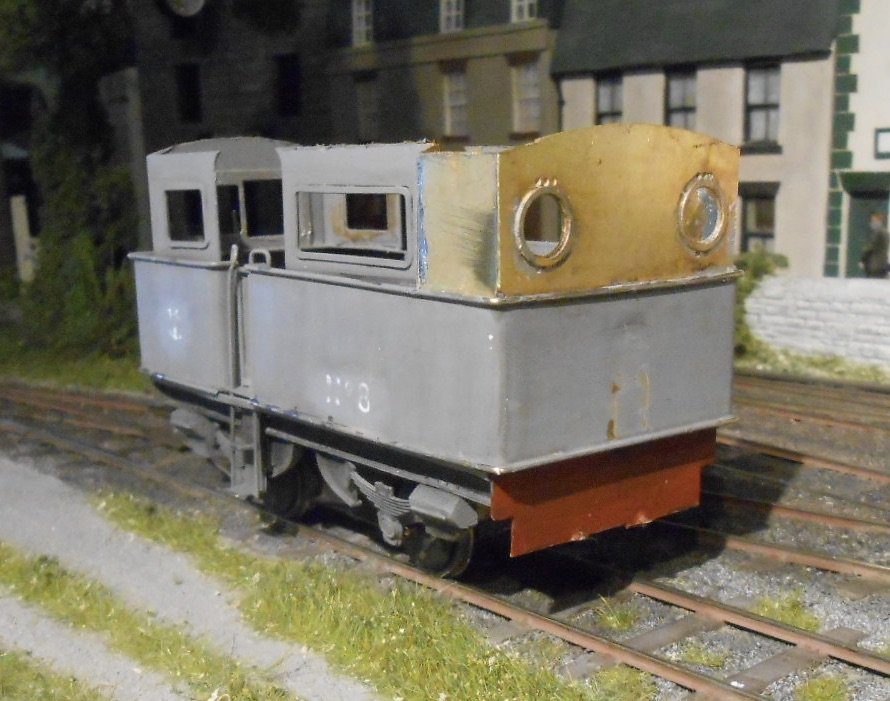
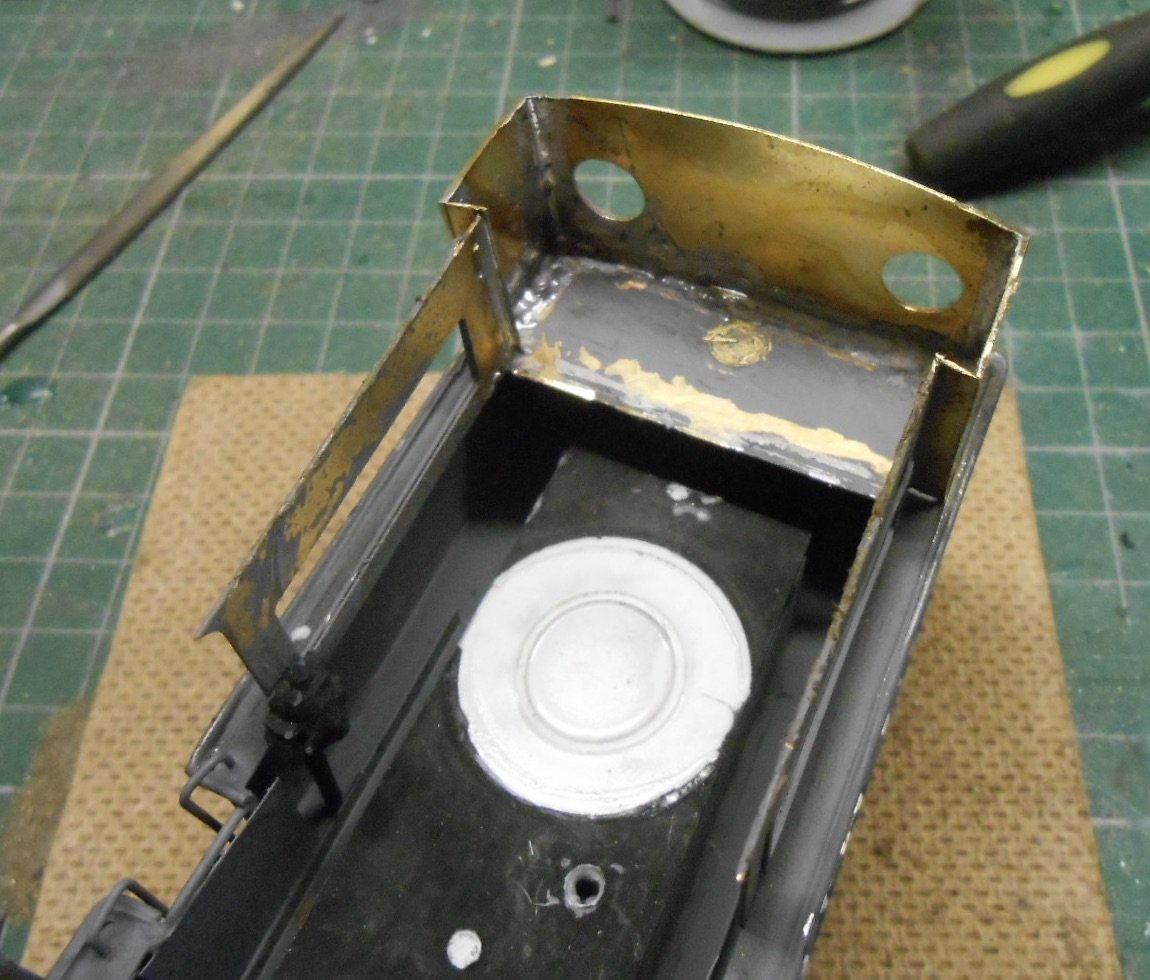
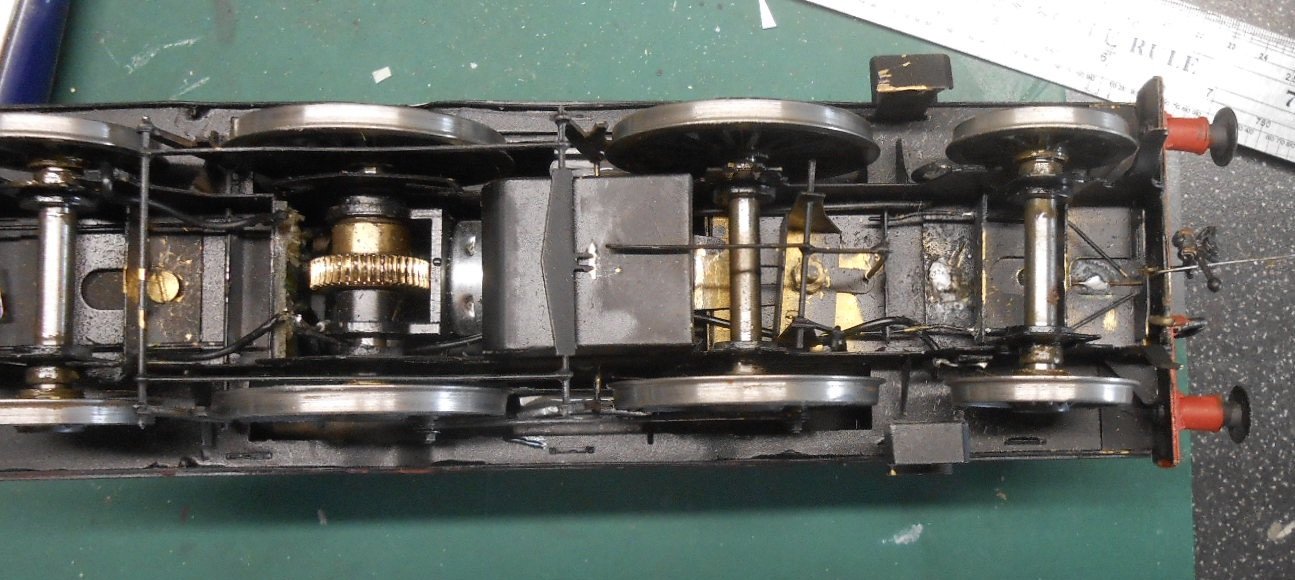
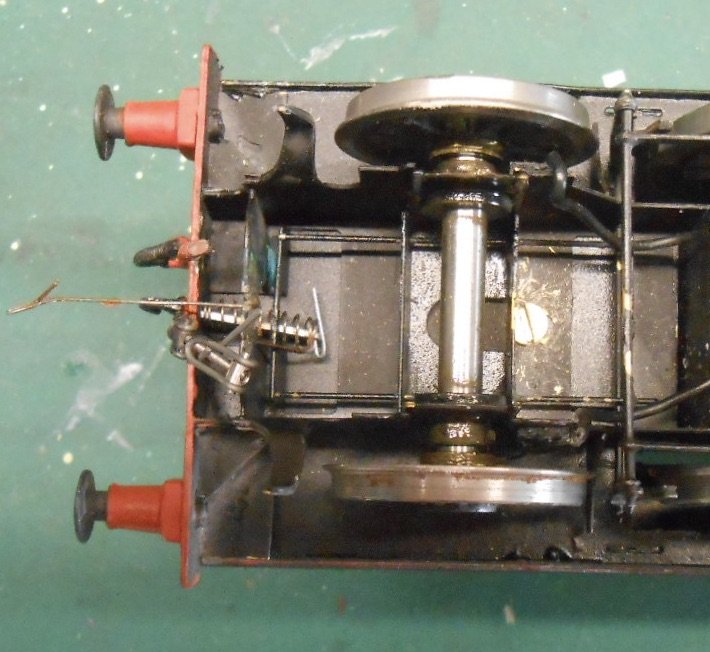
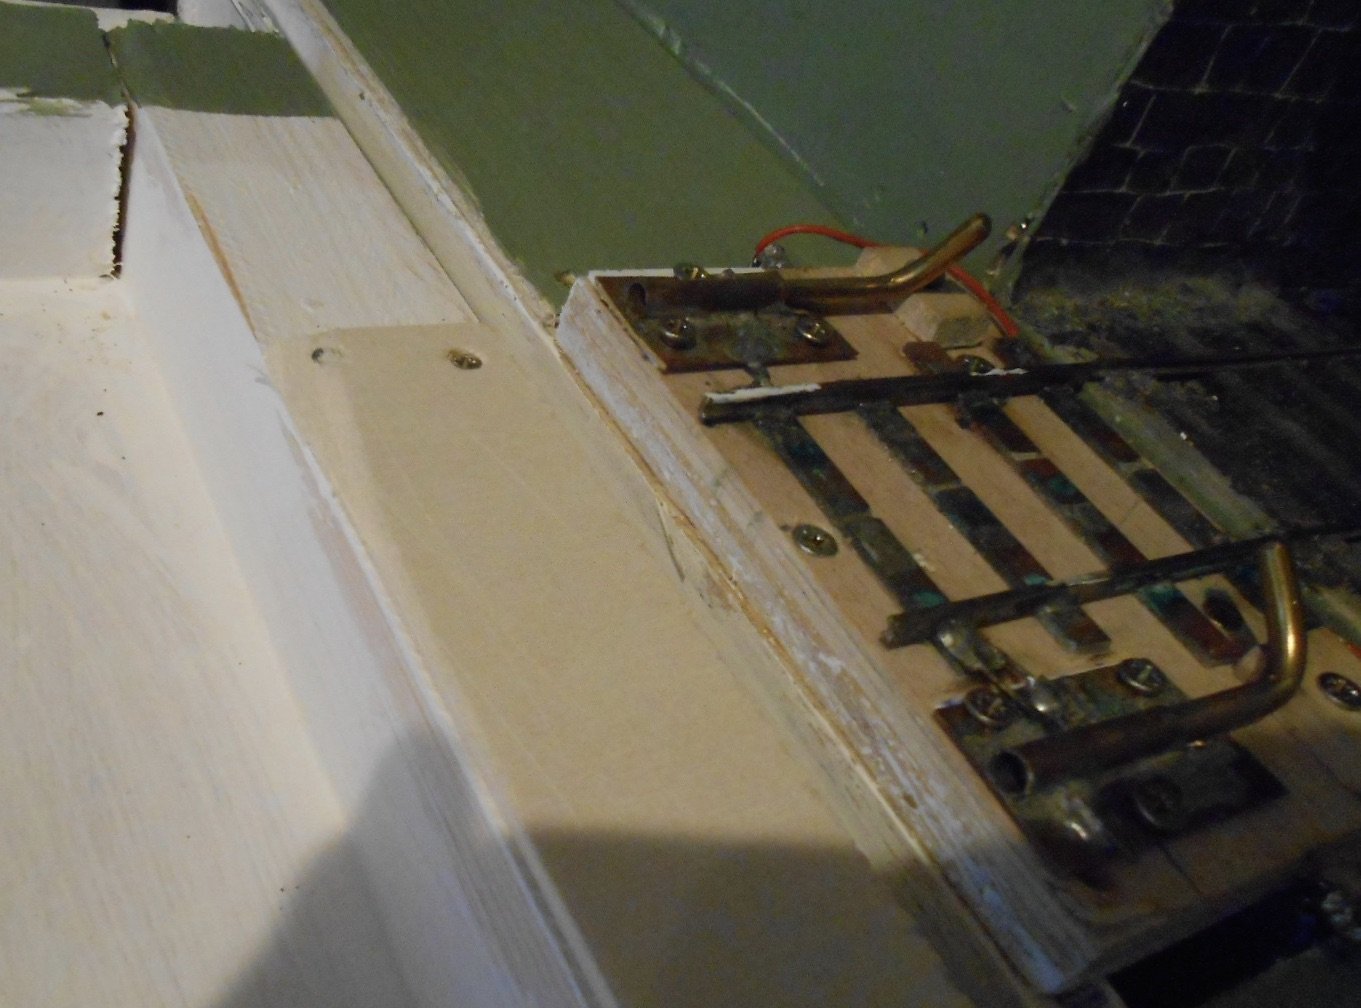
While the Railcar and Unit were little more than repaints, a fair bit more work is required to turn the Atkinson-Walker tractor into Phoenix. The model started life as a set of etches from Worsley Works, but as these were actually for Phoenix, I had to adapt them for the tractor. This involved making a new, shorter 'bonnet', different roof, 'steam' chimney, fenders, headlights on the lower body and a representation of the vertical boiler and steam engine. All these now need replacing to put it back [forward?] to Phoenix! The first picture shows the chassis I used - a motor bogie I picked up from a second hand stall at Expo Narrow Gauge several years ago. While there is no evidence of a manufacturer, I think it might be Rivarossi. Either way, it is four wheel drive and comes with a flywheel too, albeit also a top speed much higher than required. Glued a couple of L shaped bits of brass to it, drilled to take fixing bolts to the body. The next pictures show the body, with some of the bits removed - headlights, roof, interior, fenders, etc. This morning I unsoldered the 'front?' windscreen and then set about altering the bodywork. Was hoping that I would find I still had the Worsley etches in my scrap box, but no. However, a reasonable substitute appeared in the etches from the J26 kit - namely the cab extension to turn it into one of the Waterford & Tramore locos. A bit of trimming was required, but along with a couple of spectacle rings I found, it all saved me a lot of awkward work. The cab extension on Phoenix is wider than the A-W body, so needed a couple of strips of brass to fill the gaps, but otherwise it was only a couple of hours cutting, filing and soldering to get the basic bodywork to its new outline. The original tractor wasn't pretty, but Henry Forbes conversion did it no favours at all! Plenty still to do mind.

-
In 7mm scale, if you want to do 36.75mm gauge, the instructions say you simply solder the top hat driving wheel bearings back to front, which gives a decent spacing for the drivers, plus a bit of side play which can be taken up by washers if required. Sounds a bit crude and when I made my first J26, I did consider making plasticard overlays for the frames to hide the gap. However, perhaps because we mainly see our models side on, the difference hasn't been noticeable and over many exhibitions, nobody has yet commented on this and all subsequent kits have been built the same way. Presume it would work ok in 4mm scale too, but if the bearings stick out too far, it would be a simple matter to file them down a bit. Another thought on 21mm gauge is curve radii. On Fintonagh, the points are 900mm radius, which has been fine for the 0-4-2Ts and railcars, but when I built the Barclay 4-6-0T, found this was a bit tight as I'd made the frame spacers the same width. Hence a rebuild may be necessary with narrower spacers to enable a bit more side play.
-
Code 70 better for lightweight track Colin. Nothing wrong with EM standards. Indeed, have used 4mm finescale standards on Fintonagh for 3' gauge, 21mm track in 7mm scale. So 1mm flangeways through the points, standard finescale wheels/flanges and 19.2mm back to backs. Has worked well over the years.
-
Would think there's a High Level gear box that will fit. The crucial thing will be to fill every available space with lead to ensure enough adhesion. No worries about binding coupling rods or quartering driving wheels though!
-
Well done! At the time, always thought it was one of their better models and nice to see it running well. Will today's high quality mechanisms still do the same in 40 years time? Who knows?
-
There is no doubt that a lot of these old models have plenty of charm, though few compare to what is available today. Good fun doing them up though and nice to give them a new lease of life.
-
Interesting, but then Rice always is. Since his dad demise some of his books, especially the American track plan ones are going for silly money, like £200+... Will be good to see how you get on, as there is certainly room for improvement on my model!
-
Fine progress thus far, Alan. Don't know if this will help, but here are a couple of pics of my AlphaG GSWR 2-4-2T. The pony trucks sort of float on a couple of 0.9mm N/S wires, though am wondering if 0.7 would be better. 0.5mm phosphor bronze wire for the pickups on these wheels, but they have tendency to stop turning going through points.
-
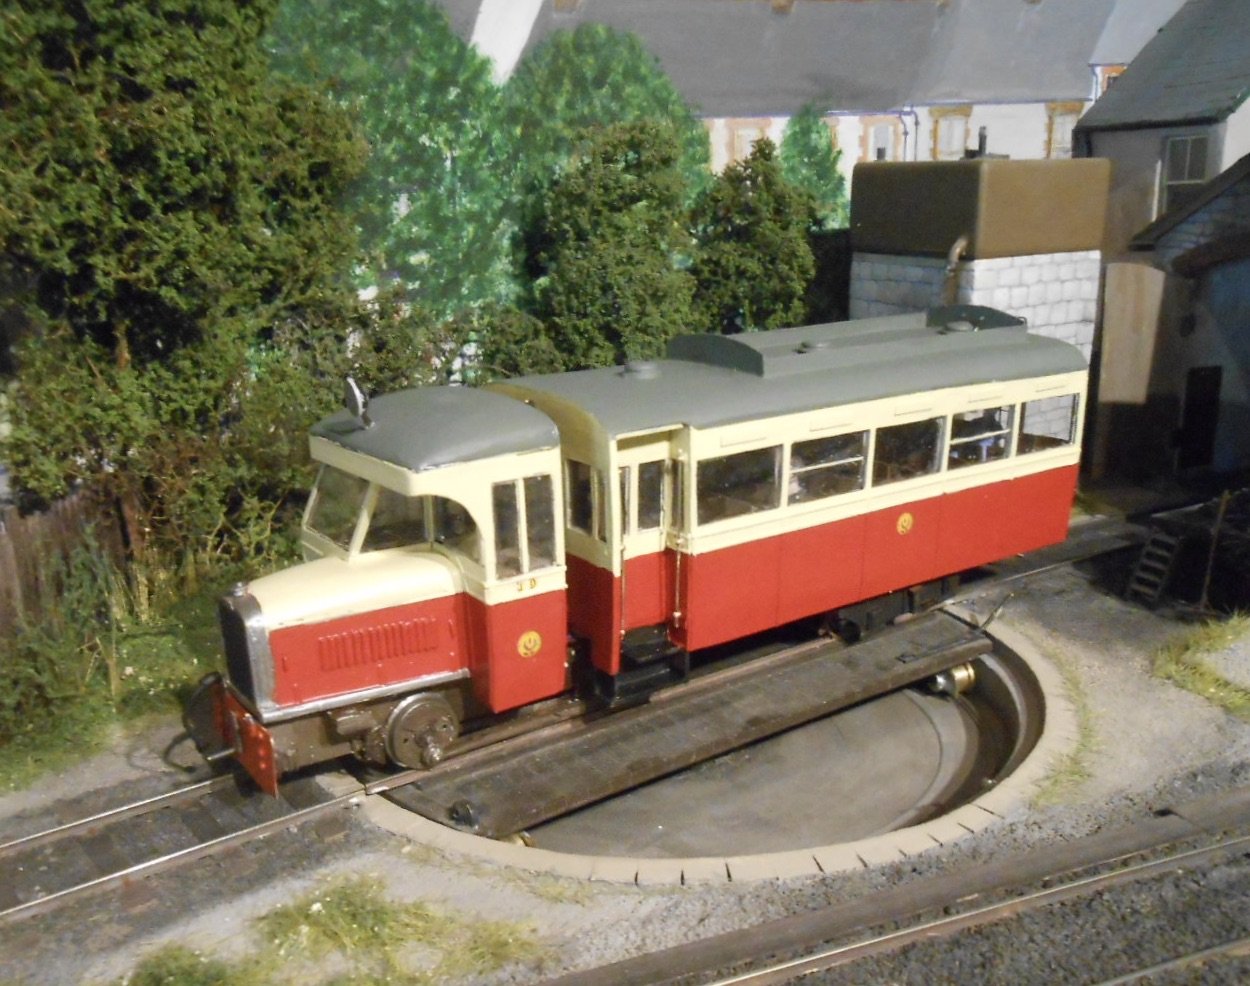
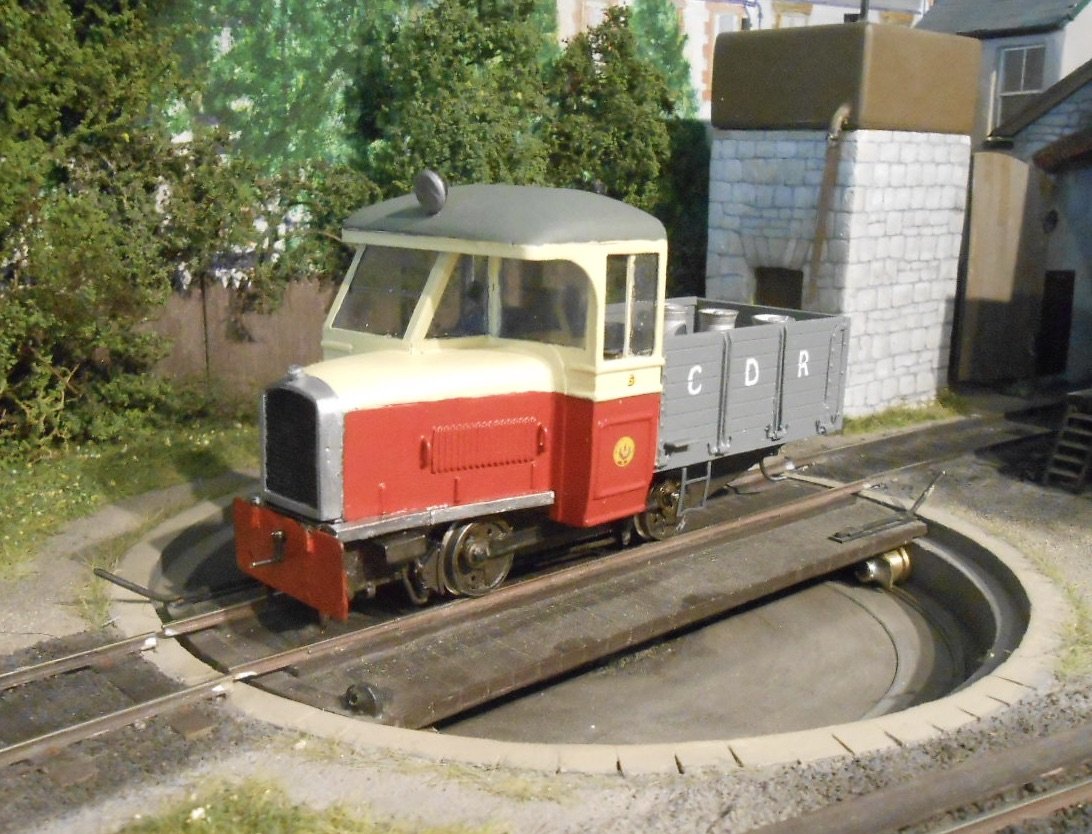
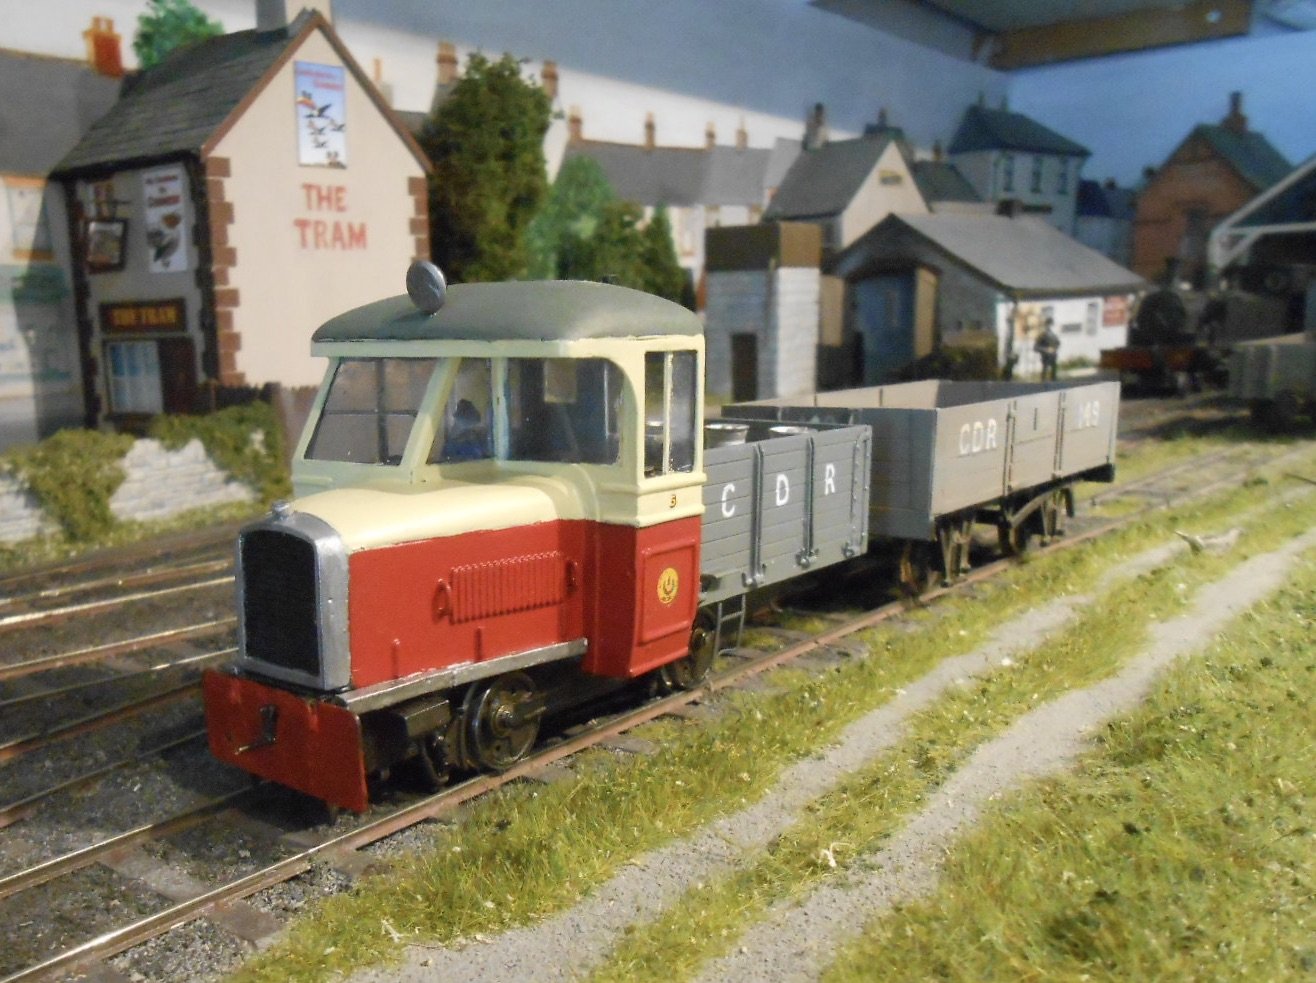
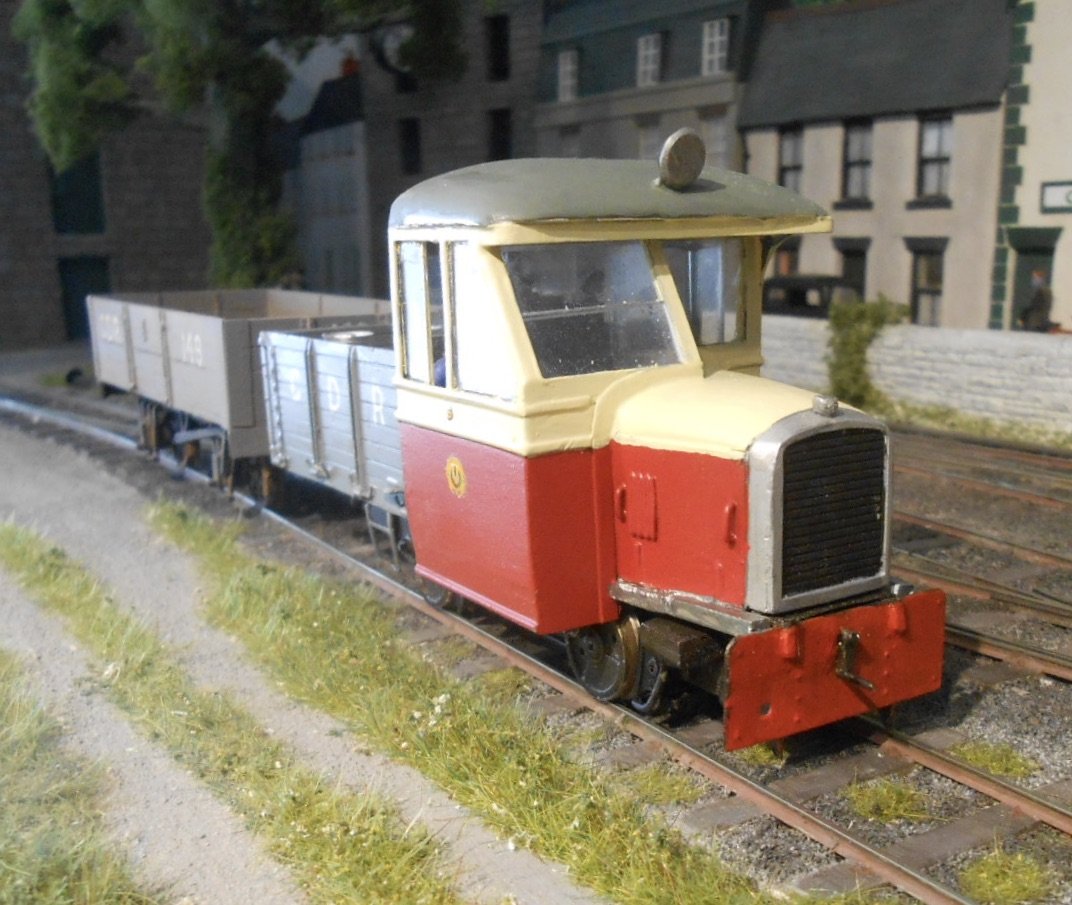
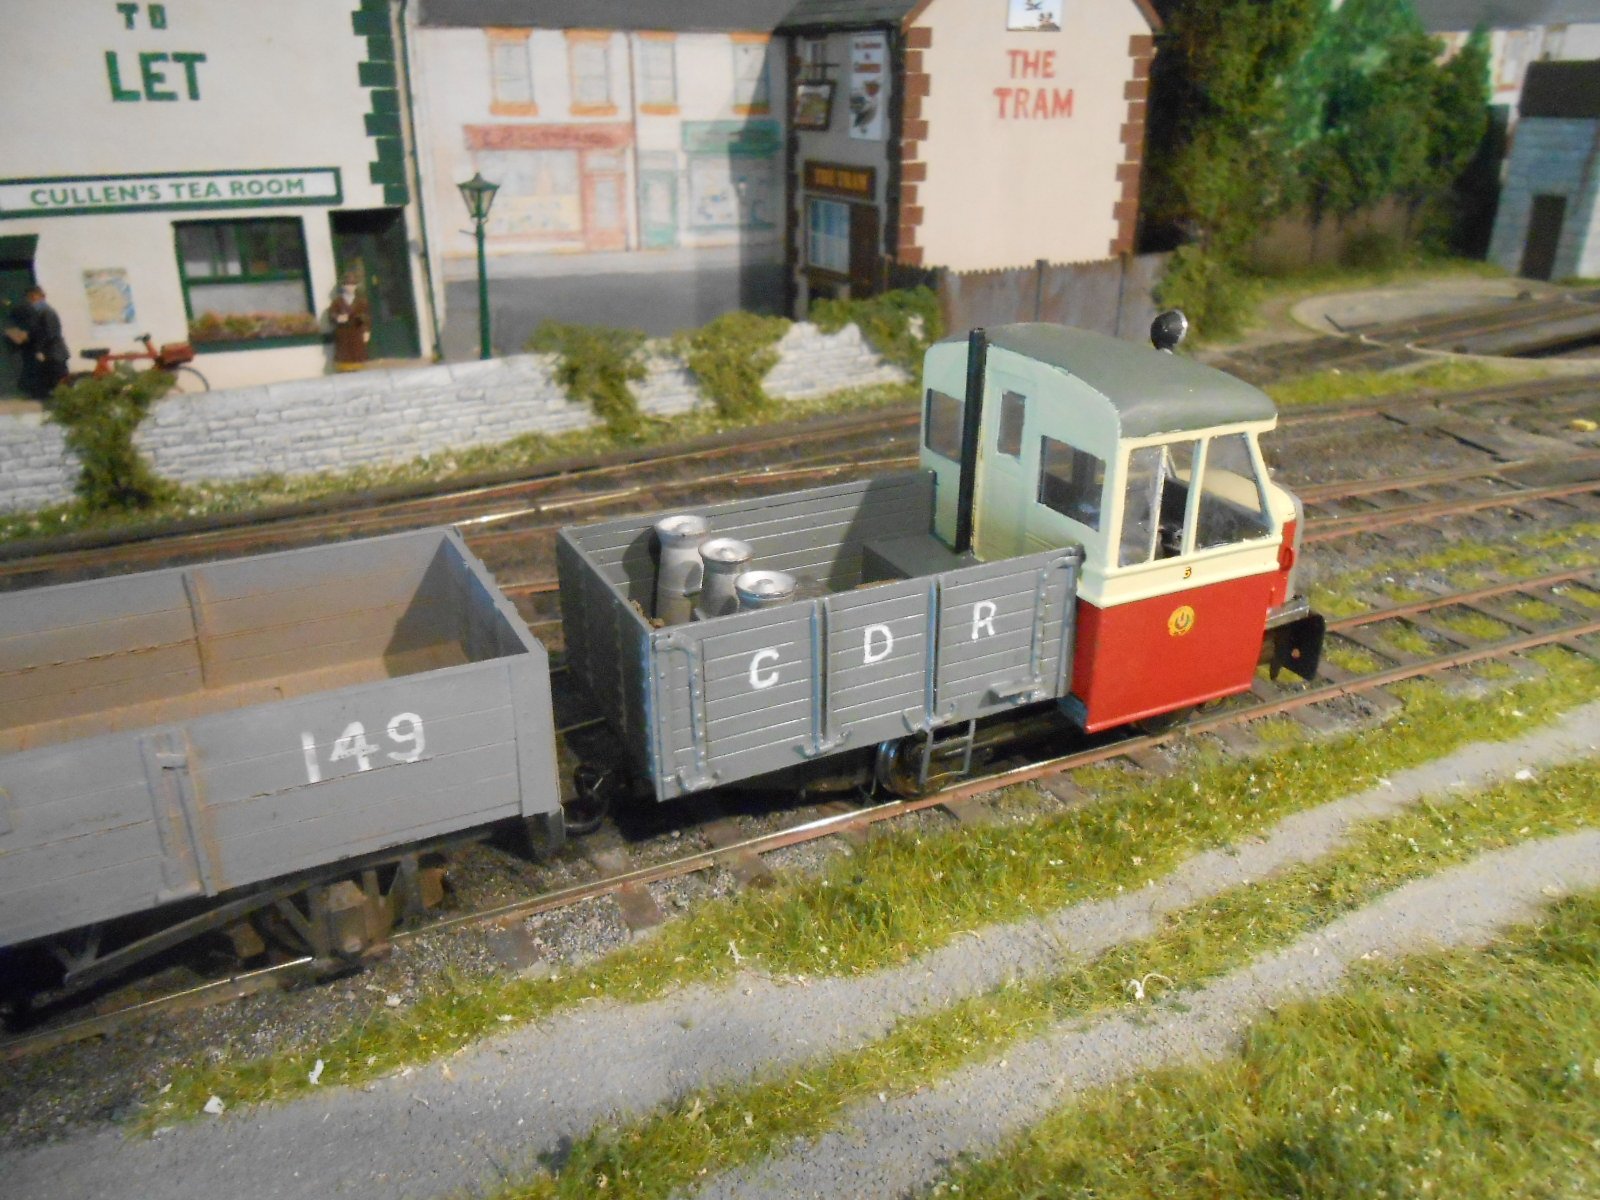
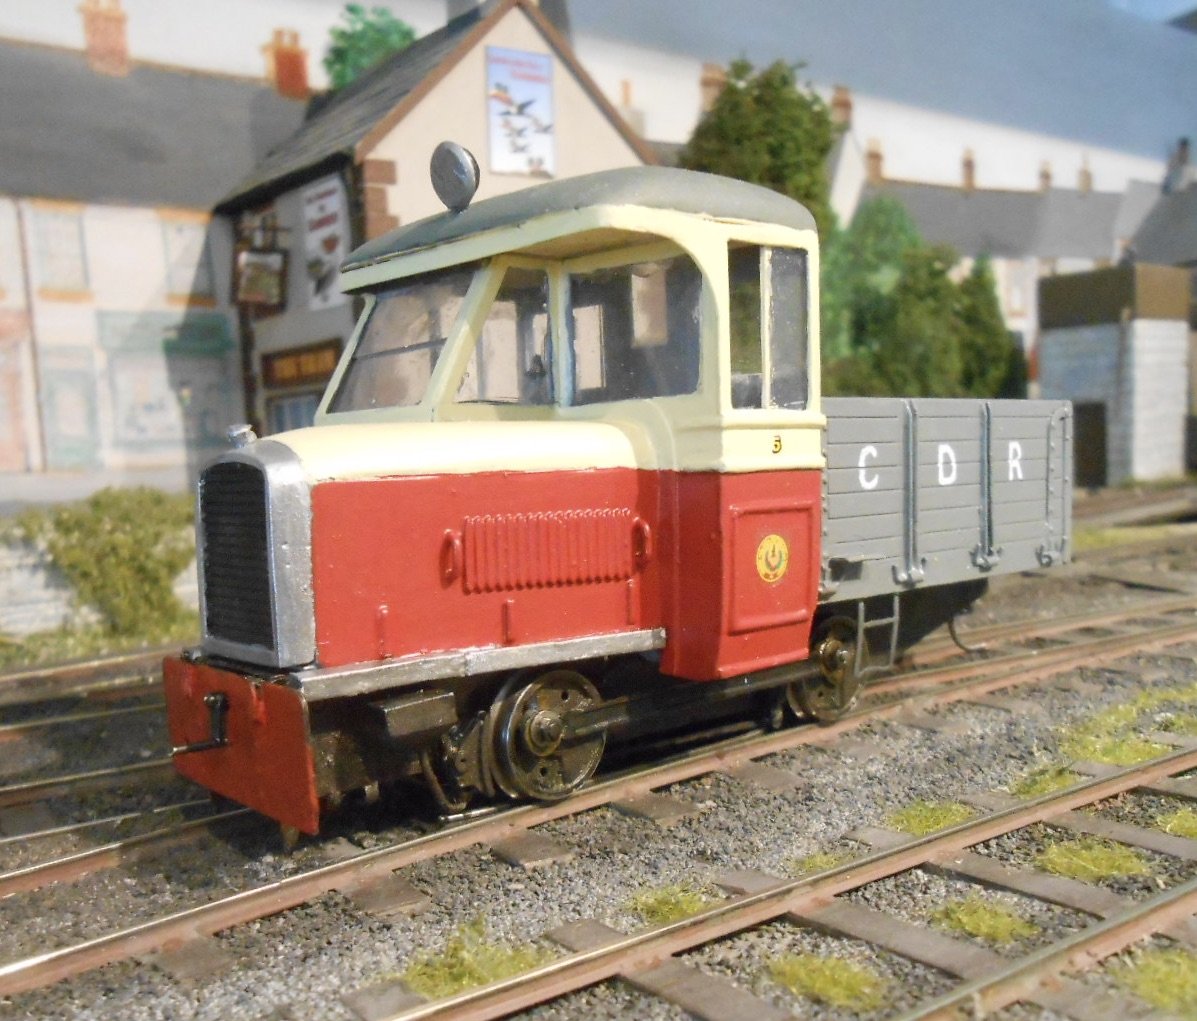
Thanks folks - certainly helped with my thinking. Here is the Unit, now Donegal No5 in its new, two tone livery. Very much shades of BR parcels lorries?
-
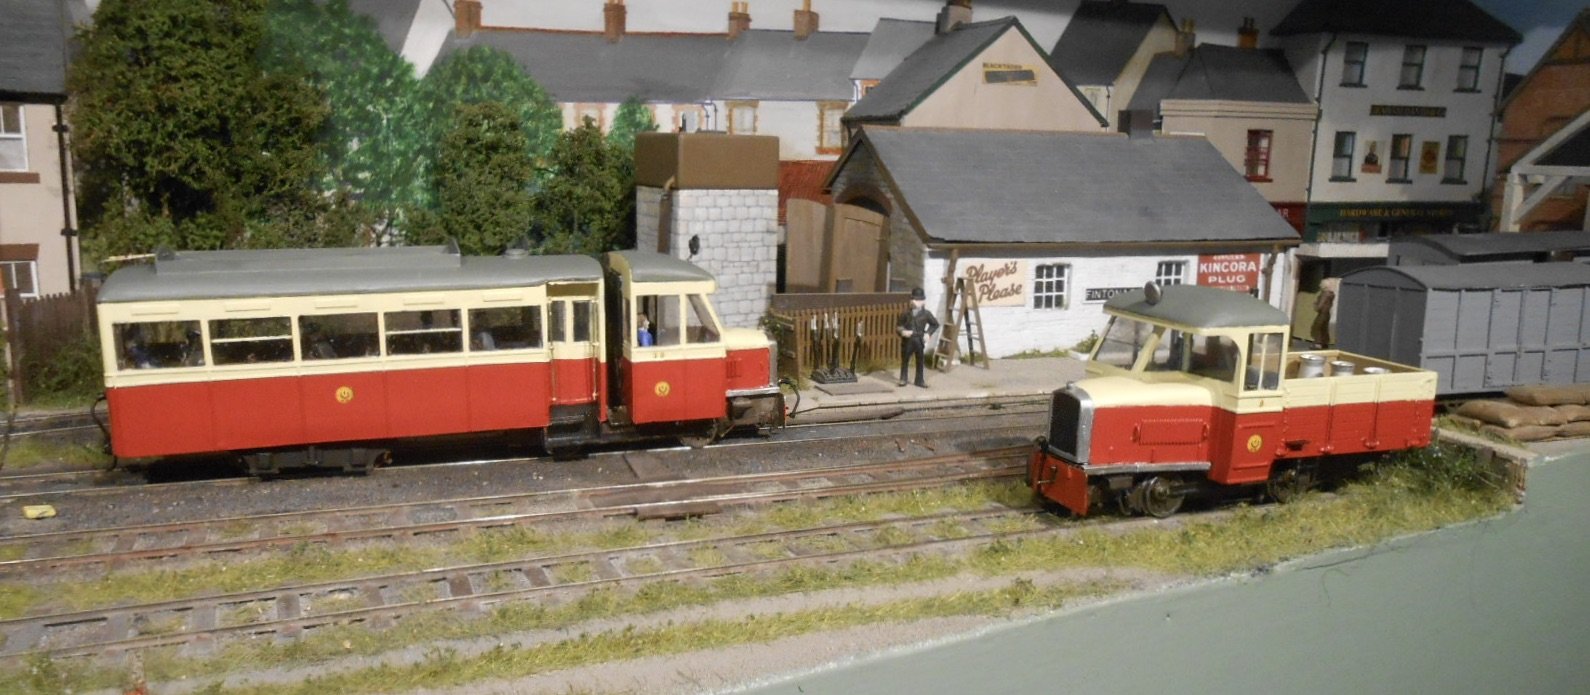
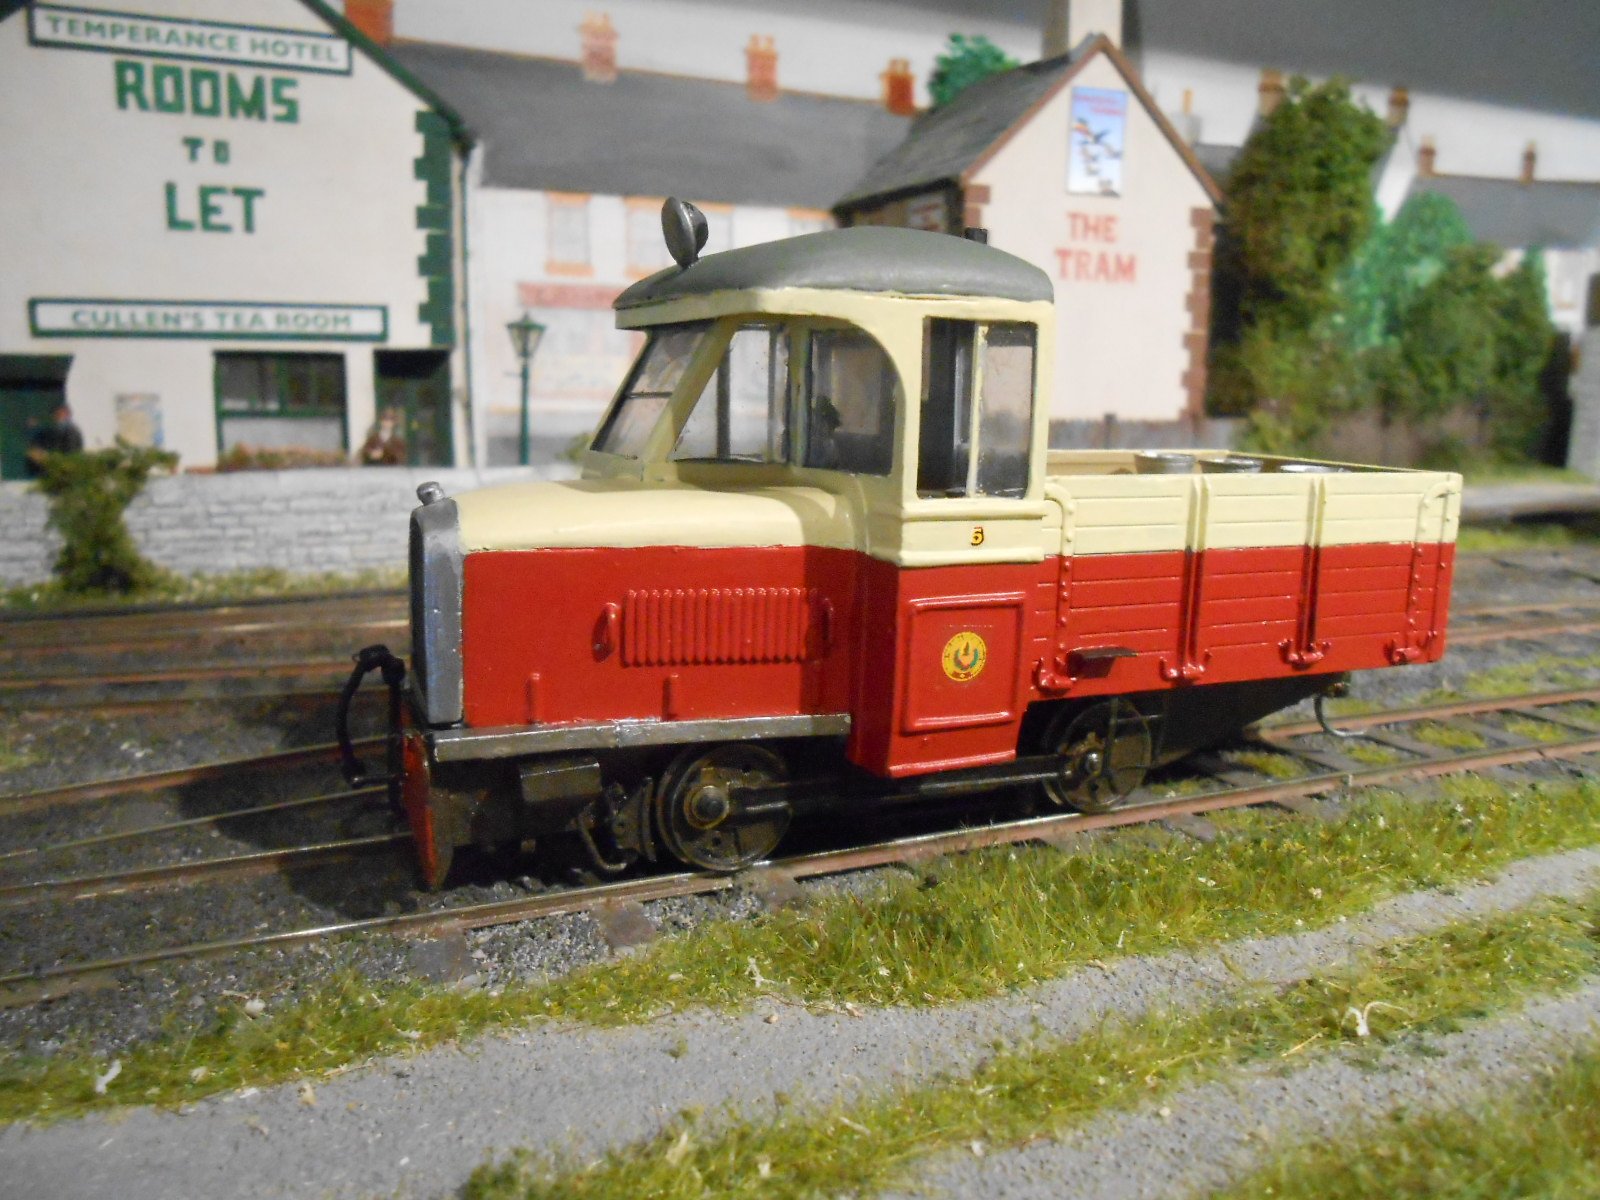
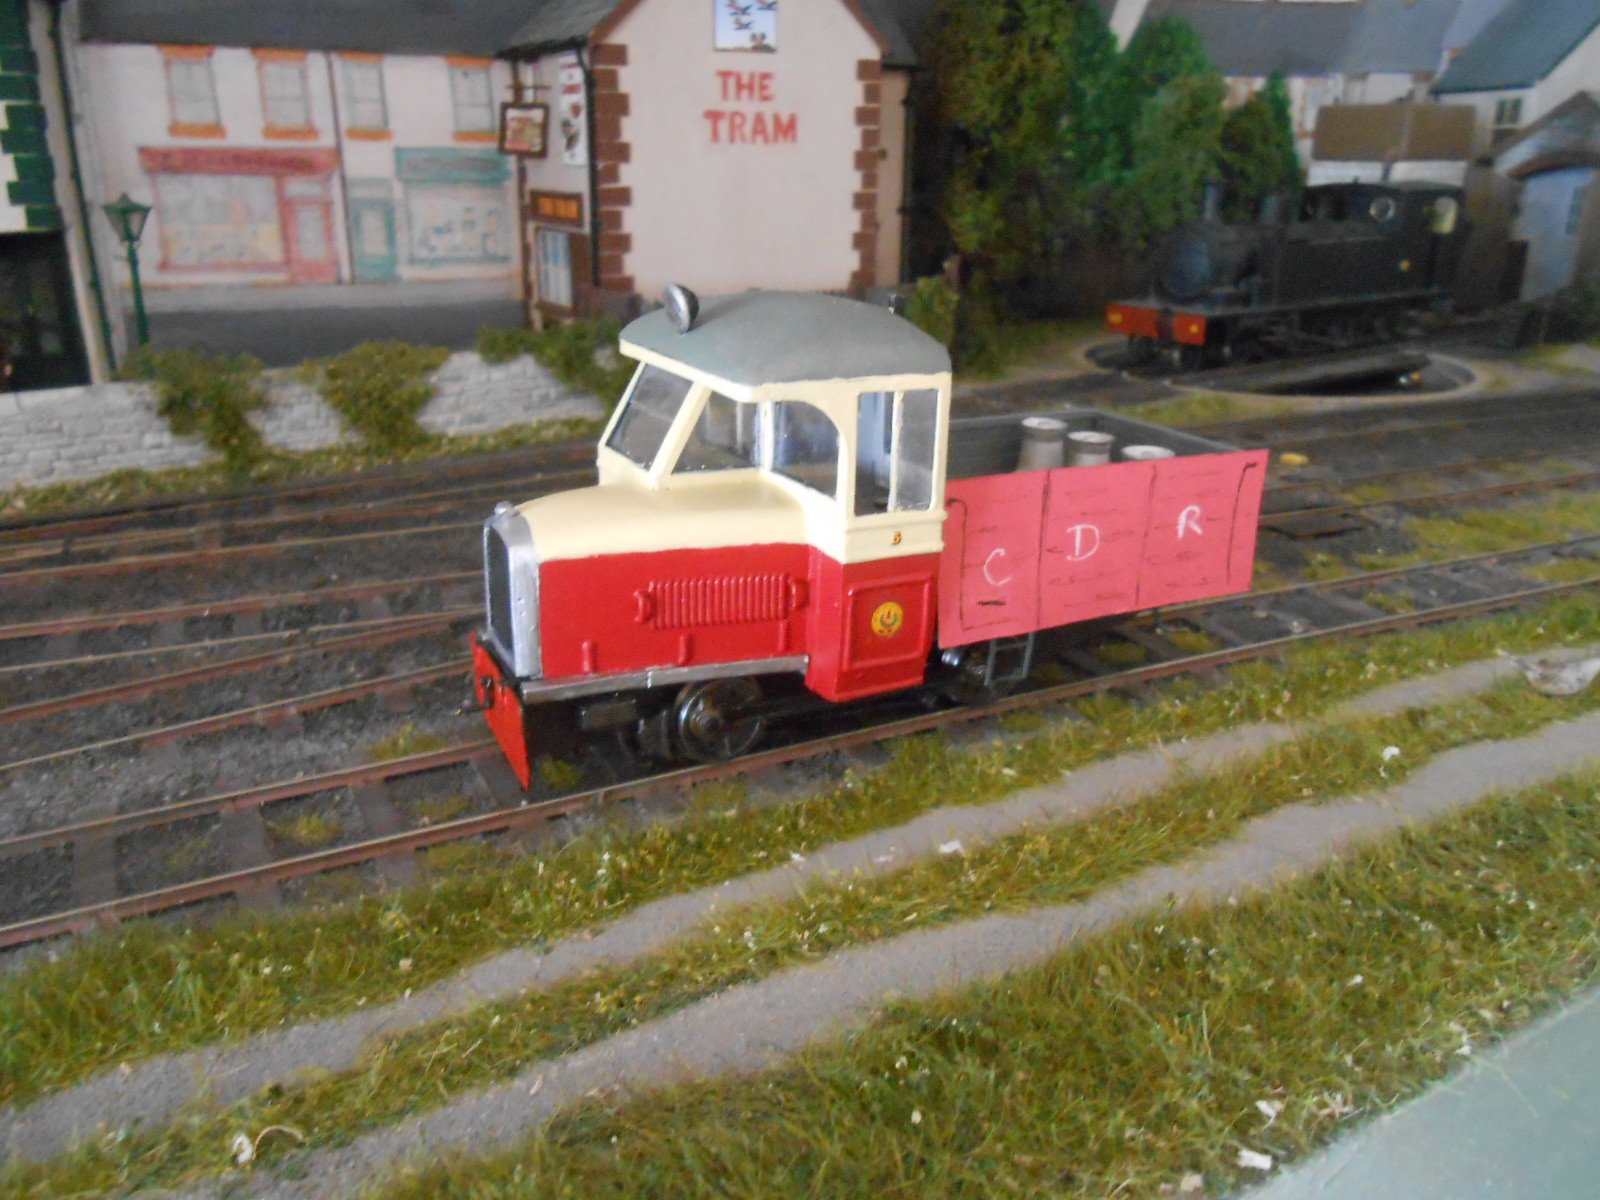
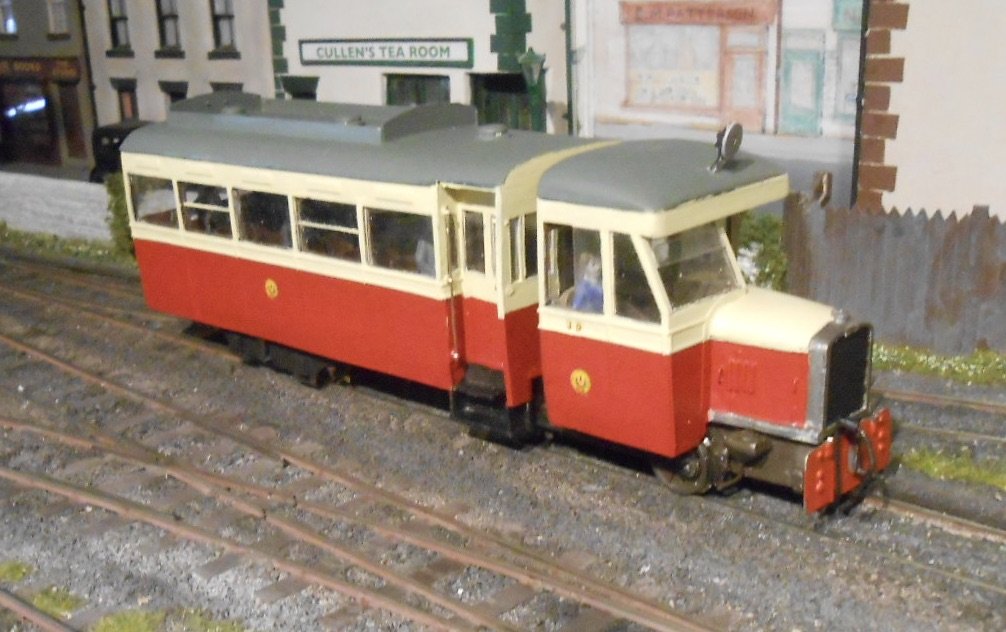
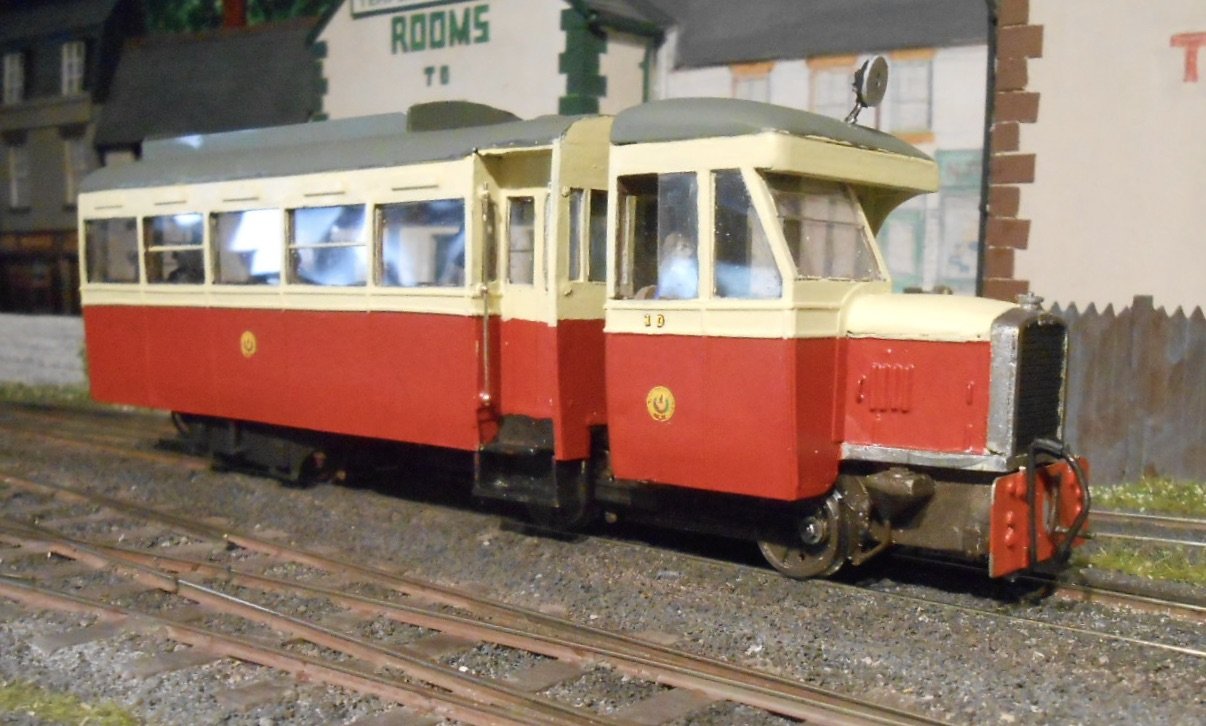
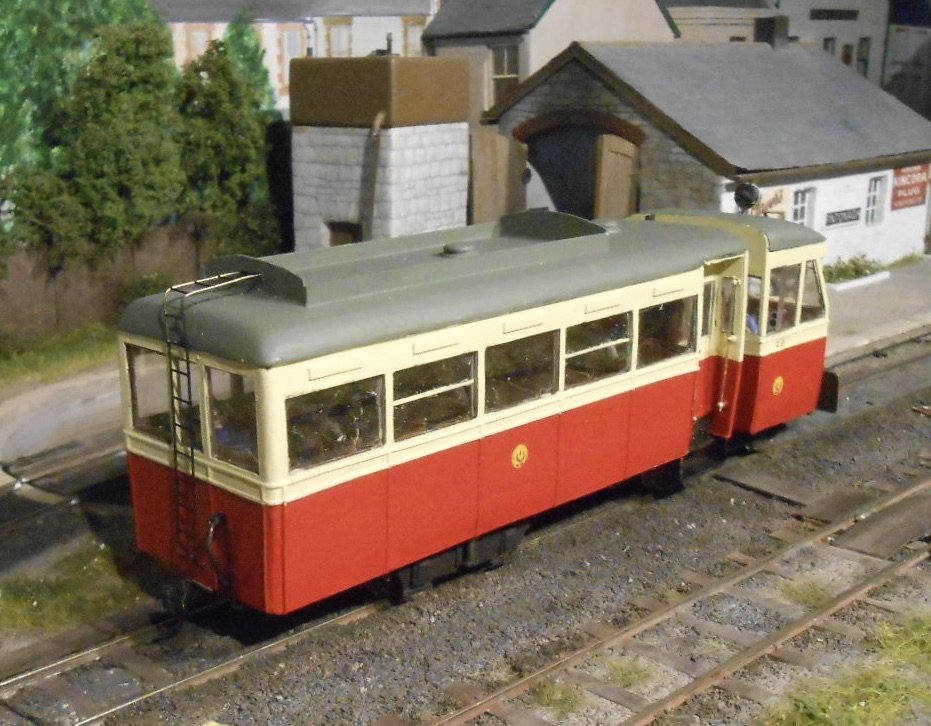
So, from a might have been to an actual, with the Donegalification of CVR Railcar 1. Had the privilege of exhibiting Fintonagh in front of Railcar 10 at Cultra's last show a couple of years ago, but like the Unit, it was made in 2017 and is covered from page 11 on this Workbench thread. Unlike the Unit, it was a scratch build, owing to the Worsley Works etches not being available at the time. The chassis is brass & nickel silver, but most of the bodywork is plasticard sheet and strip. As far as I can tell, the main changes in going to the Donegal involved moving the headlight from the bonnet to the cab roof and adding a luggage rack and ladder to the roof. Needless to say, it wasn't a quick paint job & has been going on at the same time as work on the Unit. Being a dark brown on the Clogher, the first step was to paint the whole model in Precision Paints Donegal cream, to act as a kind of undercoat. Several coats were needed of this colour as it is not very opaque. The same makers Donegal red is much better and only needed a couple of goes over the cream for the lower panels. Transfers are as per the Unit and overall think the model is now looking very dapper in its new livery. Returning to the Unit, followed Galteemore's excellent idea and cut a suitably sized piece of thin red card and used Blutack to fix it to one wagon side. However, as well as this Plan B, also thought of a Plan C, which simply involves painting the top two planks cream - essentially matching the cab. Must admit, I quite like this, but will throw my self at the mercy of the jury, so please let me know!
-
In 7mm scale, the kits are pretty accurate in terms of fitting together without needing filler or fettling. Reducing to 4mm shouldn't affect that. St Mologa is tiny, so wouldn't recommend it as a first attempt if you've got little or no experience of brass kits, but the J26 was a lovely, simple model to make. Likewise the 2-4-0s should be ok.
-
Just arrived in my email inbox. Lots of terrific stuff from regular contributors here. Well done folks!
-
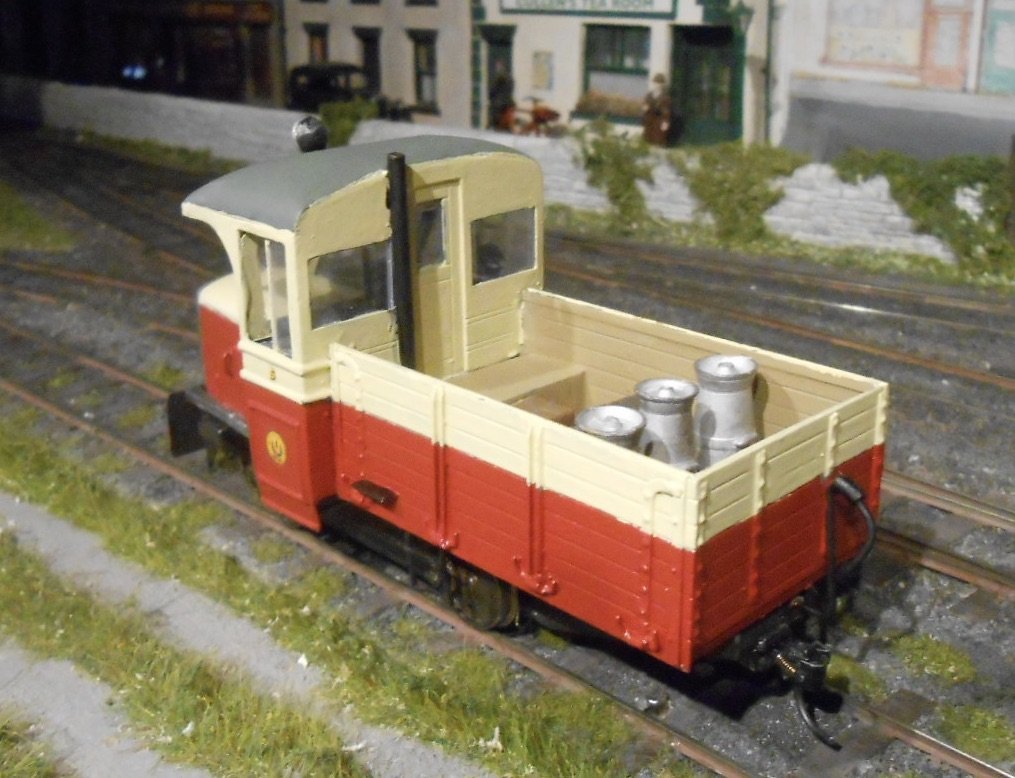
It does indeed, Paul. The model looks better in the flesh than it does in the photos, but Am still wondering if the wagon bit would look better in red. Think I'll try Galteemore's idea to compare the two.
-
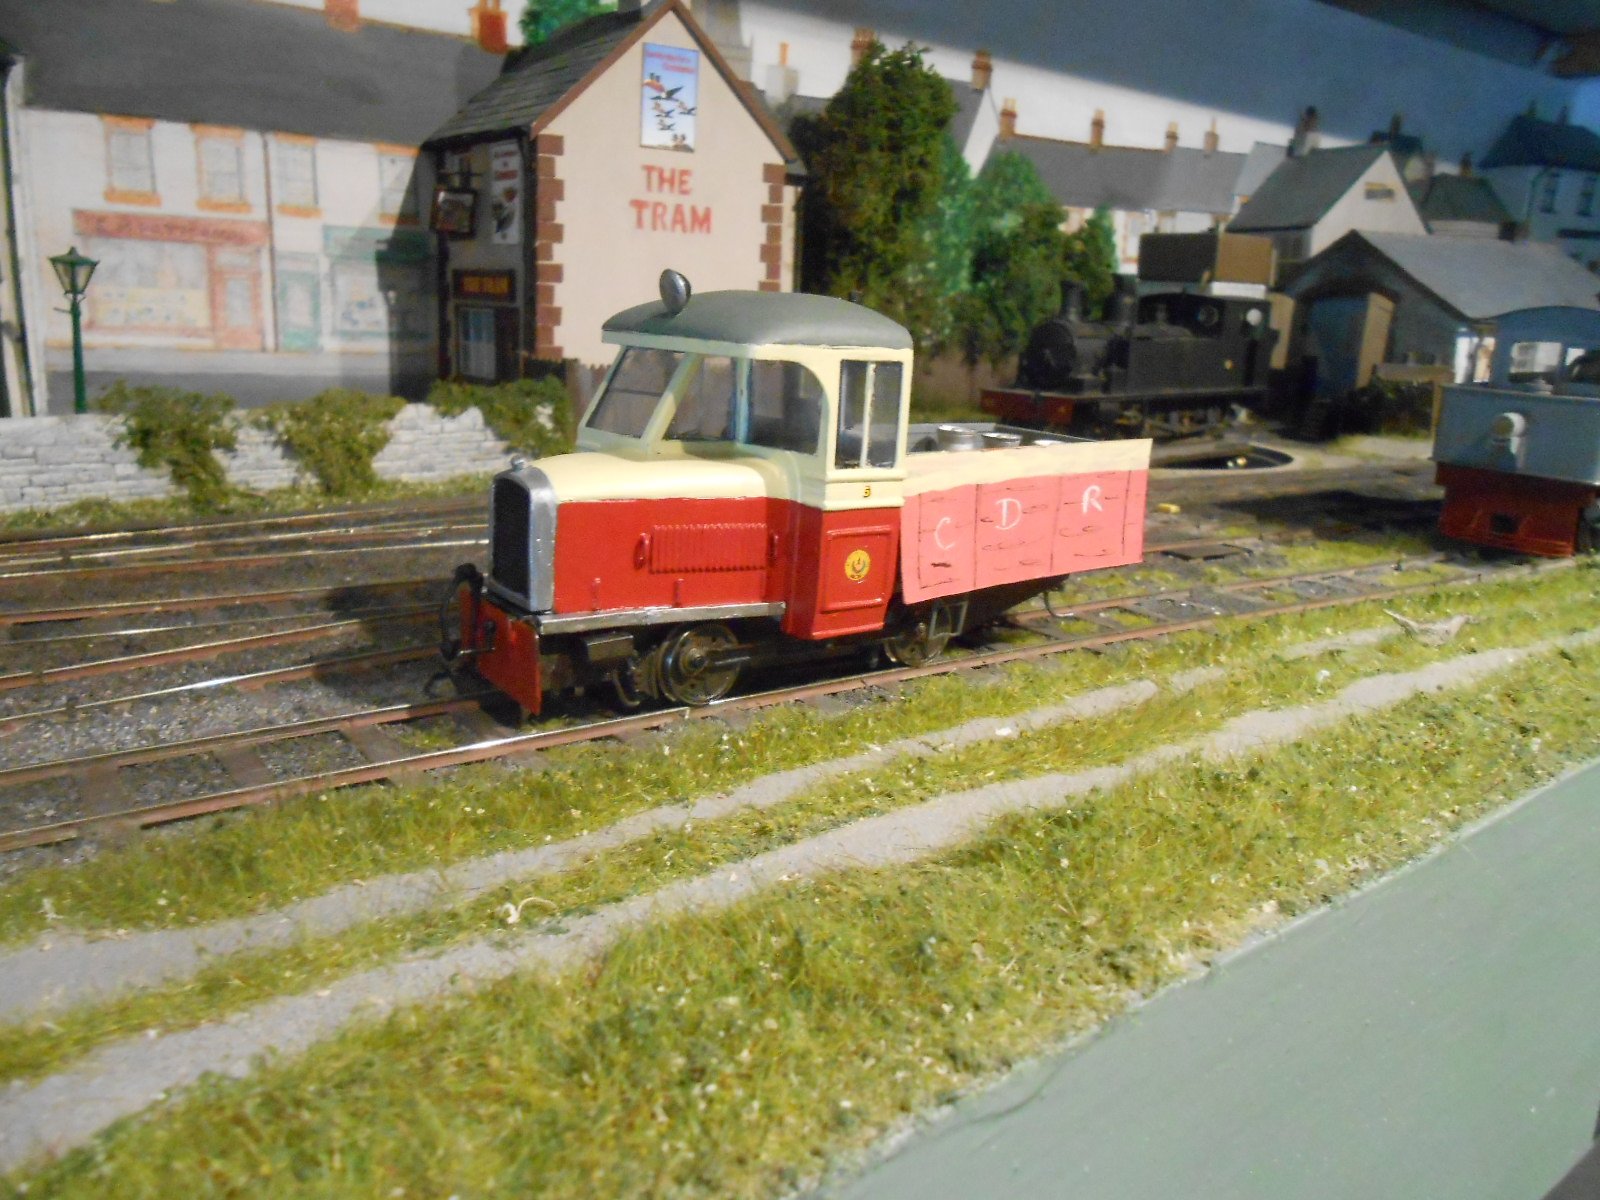
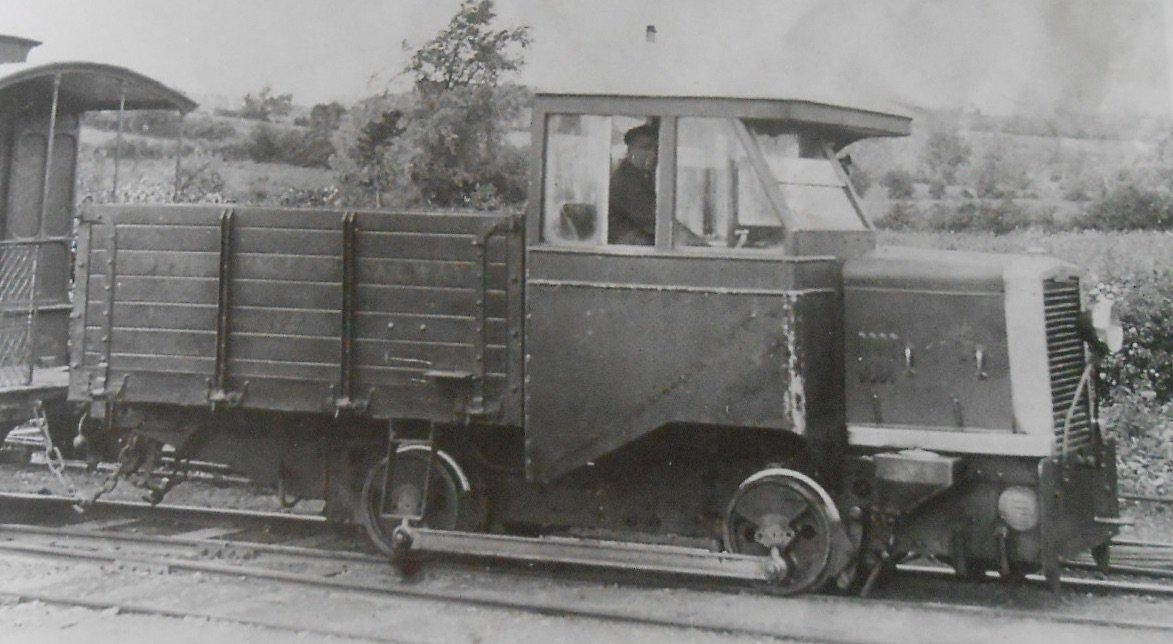
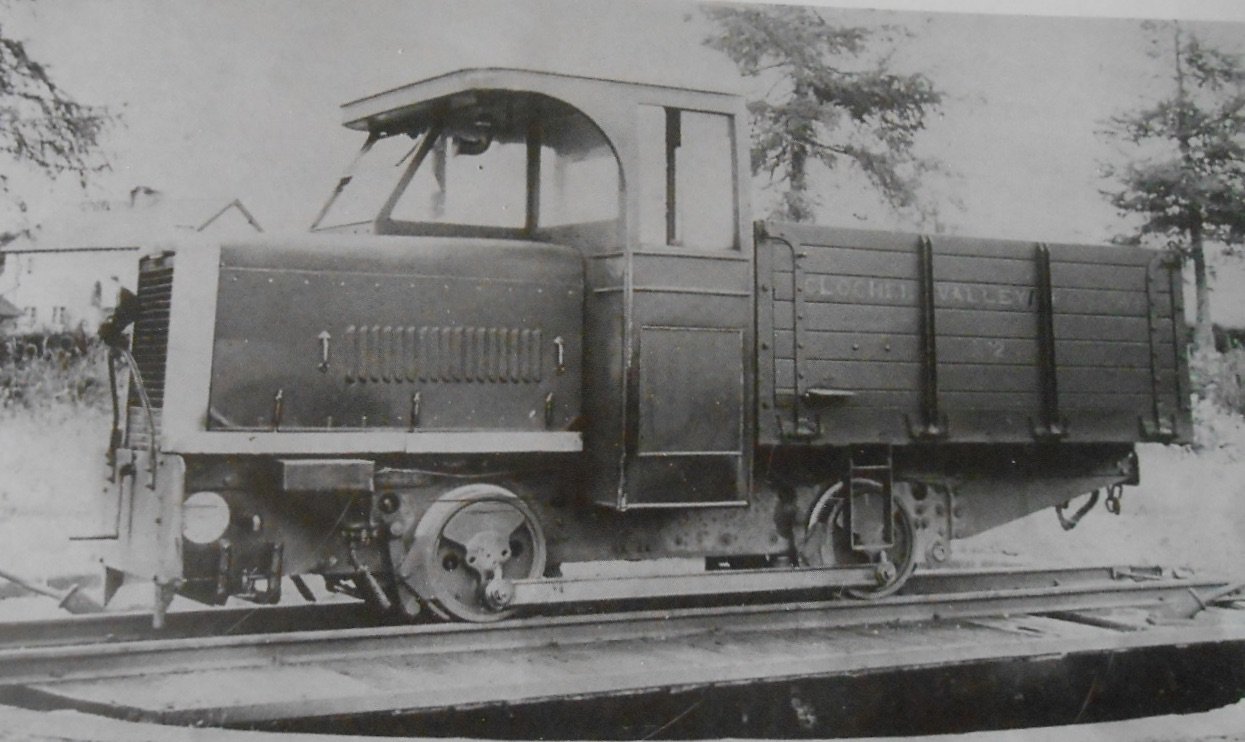
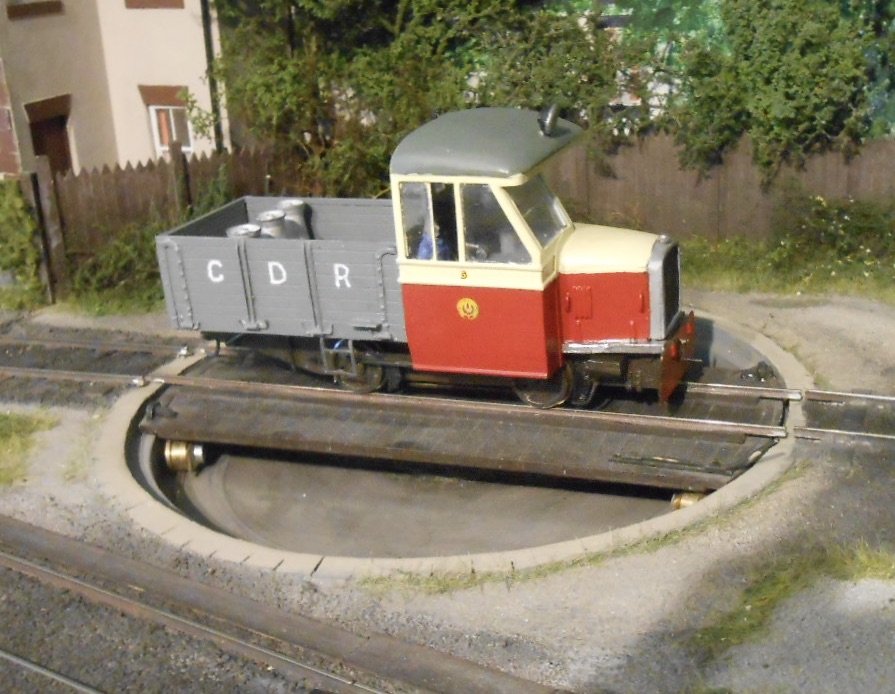
When the Clogher Valley Railway closed in 1941, Henry Forbes of the County Donegal Railway purchased three items of motive power. The Atkinson Walker tractor became Phoenix, while Railcar No1 became No10. Then there was 'The Unit'. Essentially a second tractor unit for the Railcar, it was fitted with a wagon body & indeed the loco parts were interchangeable. I guess Henry Forbes was hoping to continue the idea, though one of them was badly damaged, so there was only ever Railcar 10. Shame, as the Unit proved itself very useful on both passenger and freight work for the Clogher. Converting Fintonagh to a Swilly/Donegal branch means I can repaint all three of my CVR models just mentioned, so decided to make a start on the Unit. Working on the principle that, being a bit of a 'Rail-Lorry' decided to do the cab in red and cream, with wagon body in grey. The only other work has been moving the headlight from in front of the radiator to the cab roof. Not entirely sure about this livery combination & am wondering if the lorry bit would be better in red - as per a 'red van'. Let me know what you think. The cab side crests and numbers are from an LMS sheet of transfers by the way. Not too bad under the 'two foot' rule, I hope. I've given it the number 5, as this appears to be vacant by the time the CVR stuff went to the Donegal, though given the Unit's interchangeability with the railcar, may 10A might also be appropriate. The model was originally built in 2017, using a set of Worsley Works etches and if you go back to that time in this thread, you'll see a few posts on its construction.
-
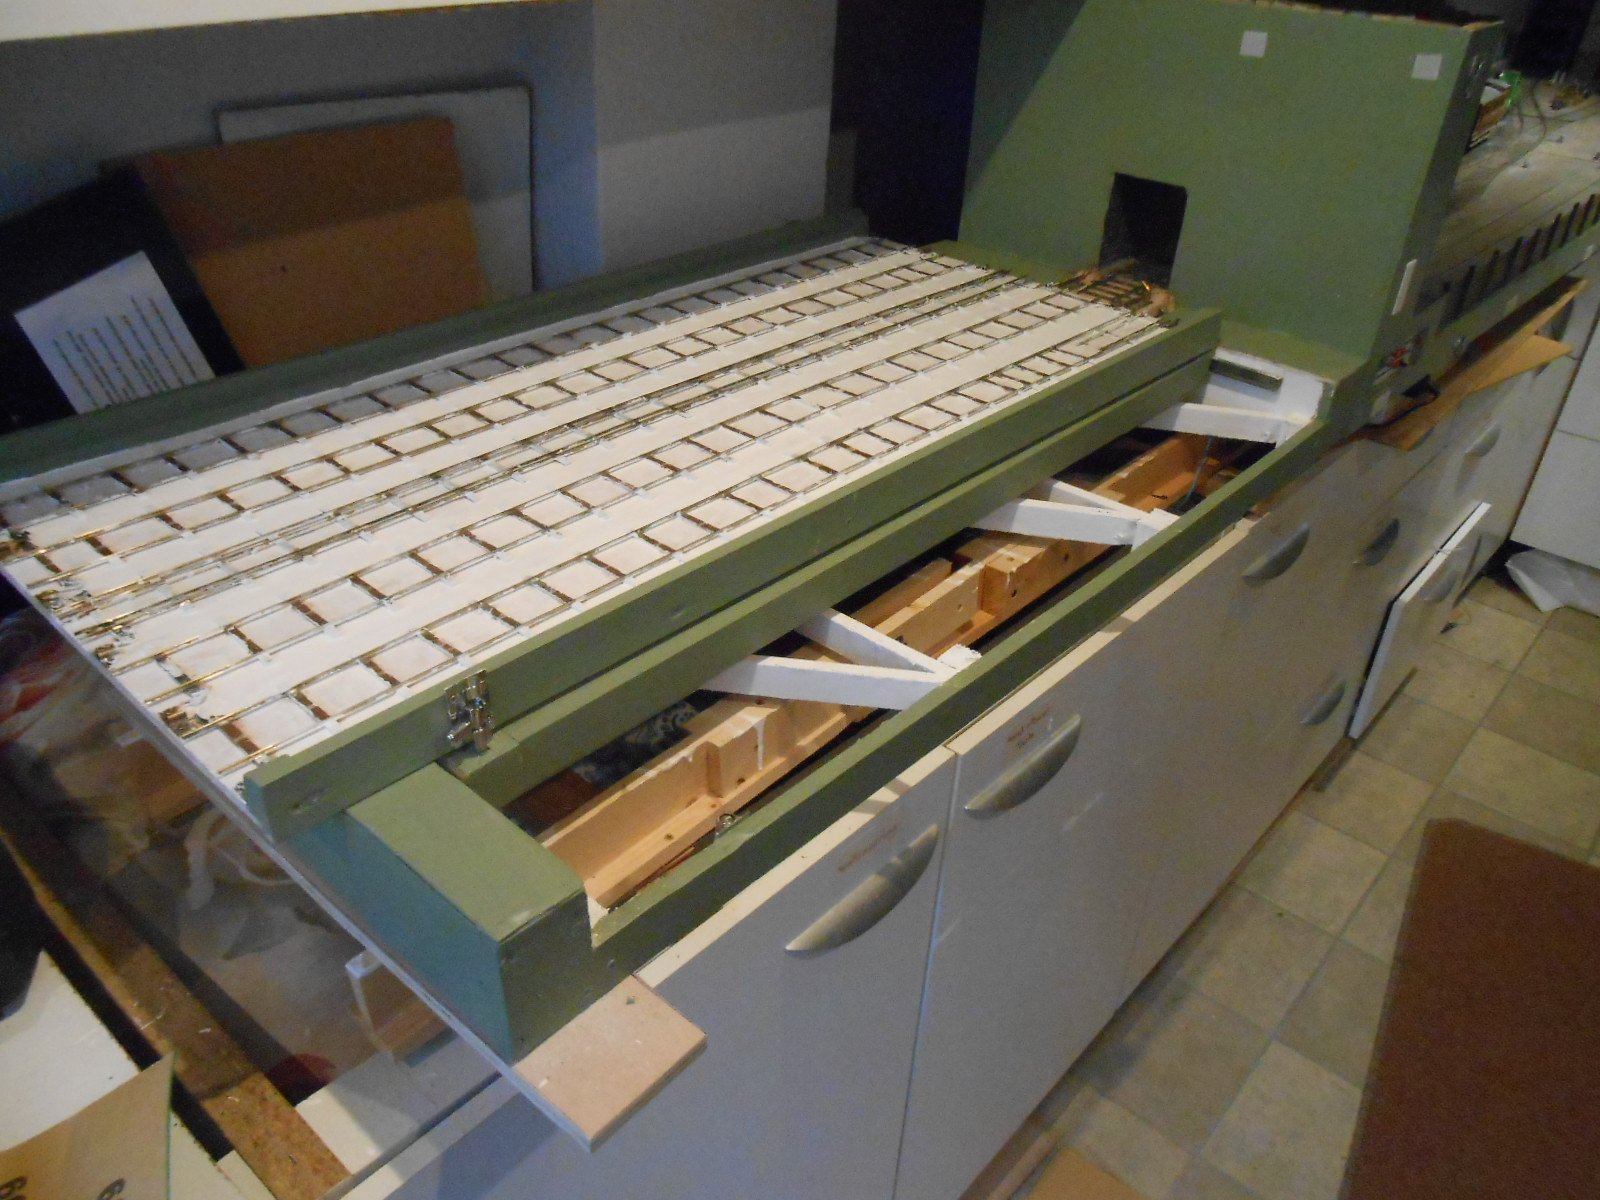
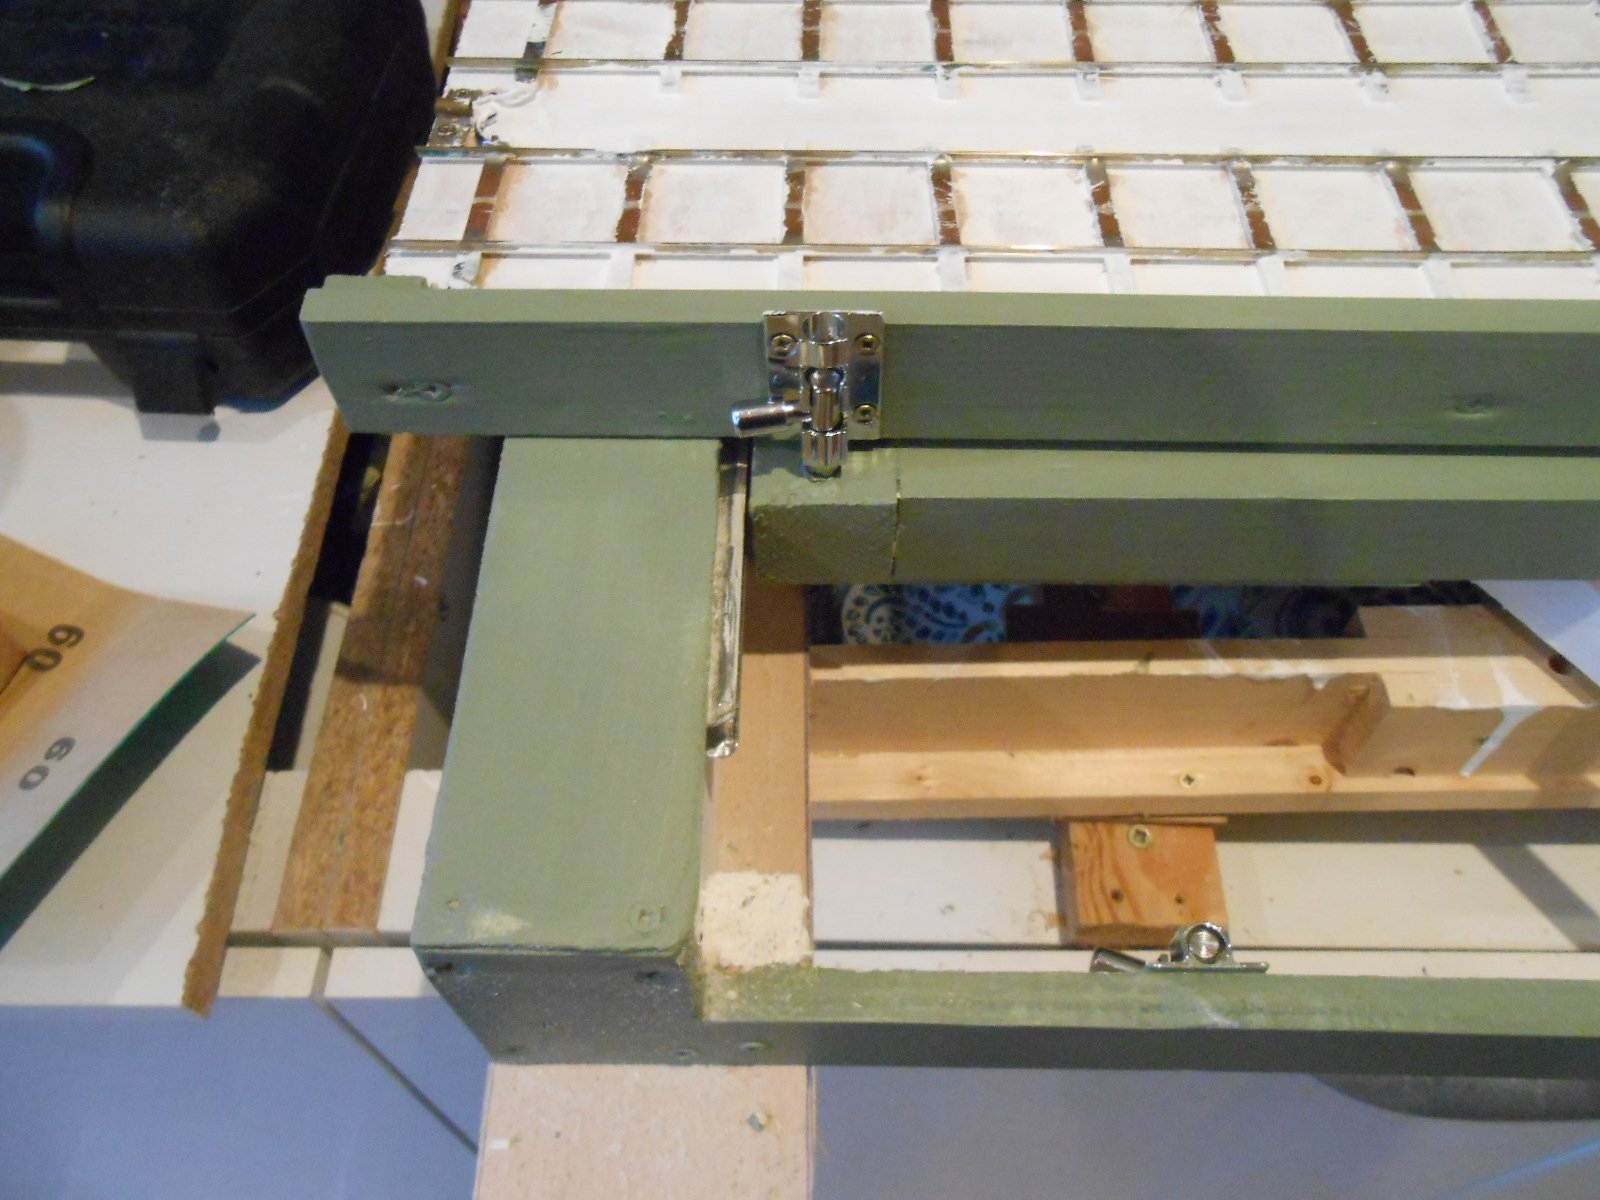
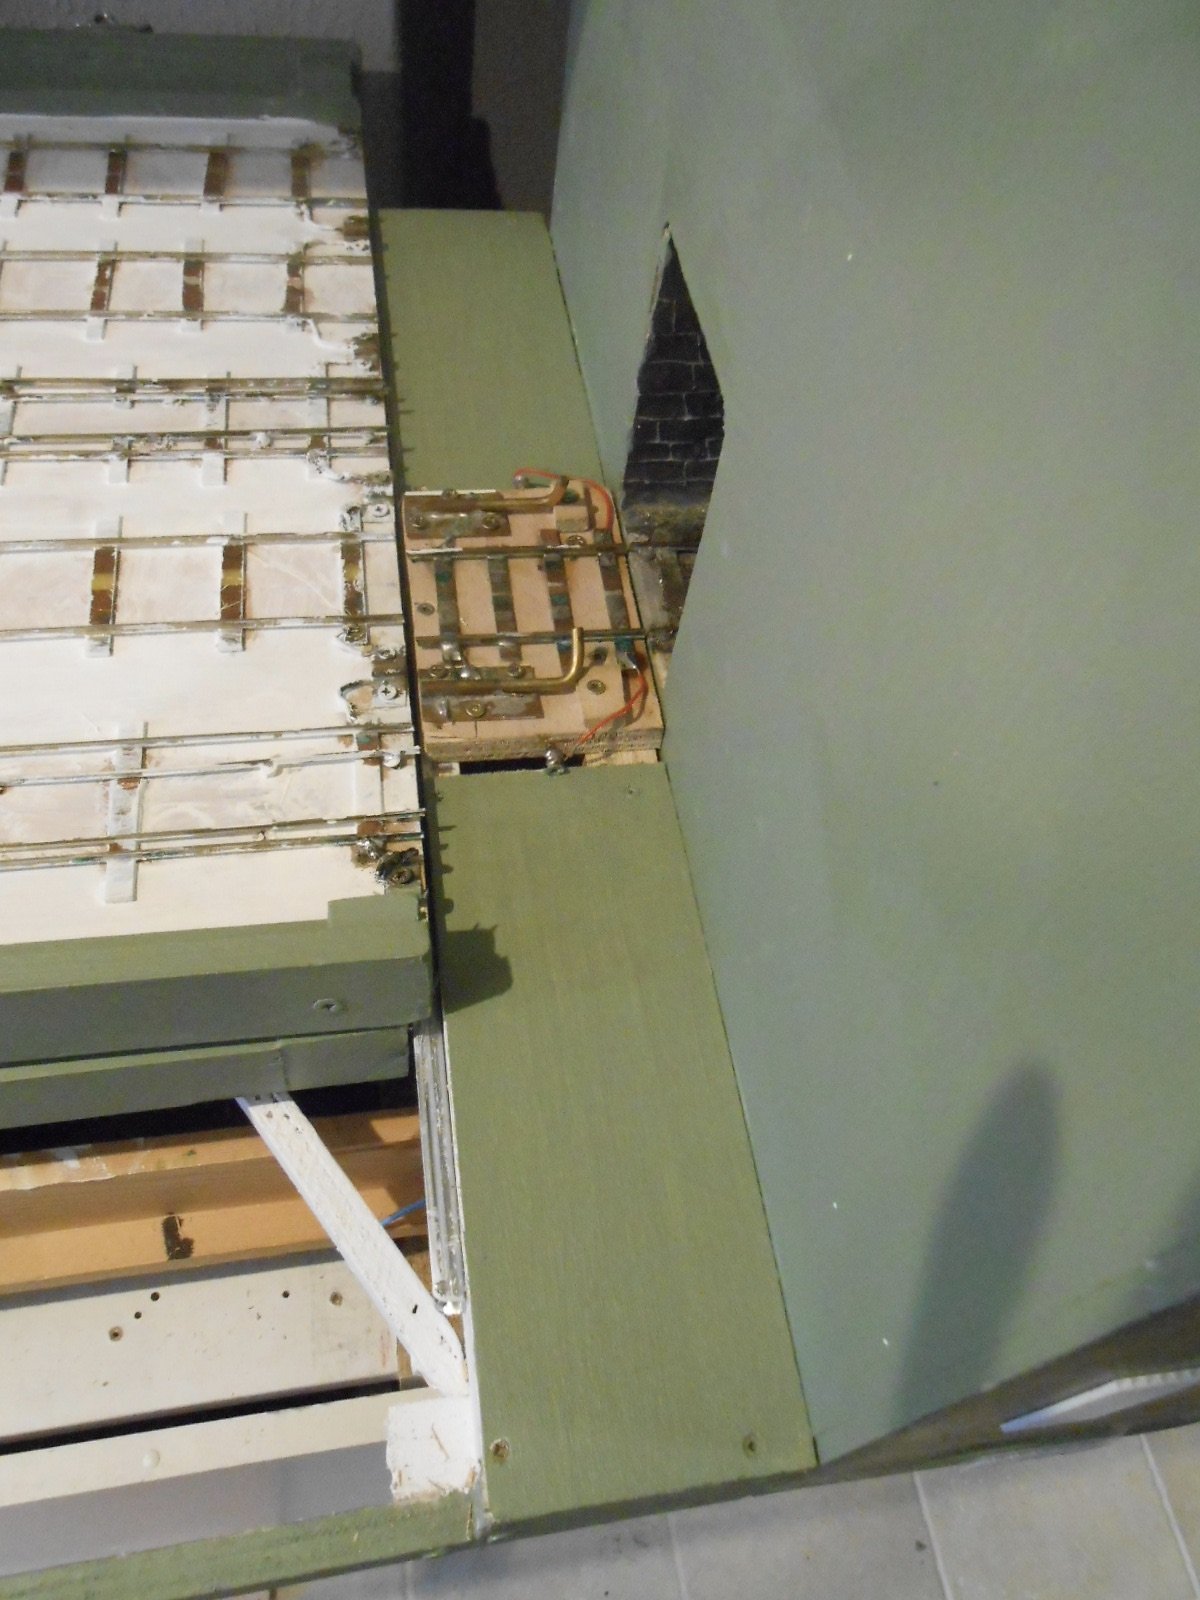
Fingers crossed, the fiddle yard is now finished - at least as far as Northport Quay is concerned, though narrow gauge track still needs laying, once I eventually get hold of some Code 83 rail. Painting is a mixture of Sage Green, to match the layout baseboards and plain white [on primer] for the rest, mainly to put a protective seal on the timber. A couple of additions come from getting some 3mm ply sheet from Hobbycraft, to cover the open topped framework at each end. The 3.6mm ply I'd used elsewhere was just a tad too thick and made the sliding and rotating actions a bit stiff, especially when the table is fully loaded with trains. My locos weigh between one and two kilos each, so five trains come to between 10 and 15 kilos in all. A bit of sanding was needed in key areas of the 3mm ply, so that when the train table is turned, it rides smoothly over the ends. I've also reversed the electrical connection, with the crocodile clip connectors on the other end of the wire from the screw clipping onto the leads from the main baseboards.
-
Clogher Valley Railcar No1 went to the Donegal, becoming their No10. They took the 'Unit' too, which was exchangeable with the power unit of the railcar. Indeed, I believe the latter soon became part of Railcar 10, following accident damage to the other power unit. However, what if the Unit had survived as a separate tractor/loco, complete with its wagon body? It could have been very useful for light freight or even passenger haulage and if so, what would the livery have been? Am assuming the cab would have been as per Railcar 10, but what about that wagon body? Would this have been painted in the geranium red, or left in wagon grey? Am in the process of converting both my CVR models to Donegal form, along with the Atkinson Walker tractor to Phoenix, so any ideas welcome please.
- 1 reply
-
- 2
-

-
Seriously clever stuff - got to love those jigs! My Alphagraphix 2-4-2T uses a similar system to the one for Cleminson 6w coaches with the pony wheels lightly sprung to both guide into curves and stay on the track. Mostly successful, but remains a bit of a problem child because the pony wheels can stick, while in a ideal world it would be nice to have them with pick ups to spread that load as well. Hence will be watching with even more interest than usual. Looks a super project and having just bought some universal rods from Gibson, that little jig is a very timely reminder!
-
All are available in 7mm scale, from Alphagraphix, along with six wheel coaches, various wagons etc. Go on, you know it makes sense!
-
Would have made an ideal preservation project. City to seaside, holidays and weekends, while if the single wheeler had survived, what a draw that would have been!
-
Not many points either!
-
Two in a week and two too many. So sad. Many condolences.
-
Towards the end of page 20 of my Work bench thread, you'll see how I represented peat on a pair of 7mm scale turf wagons, using matchsticks.
-
That's pretty much the standard way of doing things, though rather than brush the excess away, it is worth putting a handkerchief over the nozzle of a vacuum cleaner to hoover it up and thereby save it for further use.
-
Interesting. Over many years and at least a dozen layouts, would say that a through layout needs more stock than a terminus to fiddle yard set up. The former needs more operators too - especially if there is a fiddle yard each end, rather than a continuous run where you can just let trains circulate. Fintonagh, my Clogher Valley layout, has just four trains and at shows, a sequence takes around 30-40 minutes to complete, depending on how much visitors want to talk to you. Incidentally, over 100+ shows, have found that, for me at least, there needs to be a balance between sequences that are interesting to operate, but not too complicated so that it becomes stressful. Overall therefore, half a dozen trains can be plenty to keep visitors amused, because the vast majority will only spend a few minutes in front of a layout. A couple of spare locos is always a good idea though, because at shows there is always a greater chance that things will go wrong. After all, not many folk operate trains at home for 6-8 hours on the bounce and that is another reason to avoid making operation too complex. Another factor with exhibiting is that the more stock you have, the longer it takes to set up before a show and likewise put everything away at the end. I can get Fintonagh set up in about 45 minutes and back in the car afterwards in half that. Then there's the issue of moving everything too and from the car/van/trailer, including when it might be raining, or worse. I could go on, but if you can get hold of any of Iain Rice's books like Cameo Layouts, he goes into detail about all the things to consider. Exhibiting is good fun, but it's not easy!
-
Given the site of the station, a fair bit of engineering would have been needed to make it into a through line. Would make an interesting model though! More than one person on this forum has pondered on the other line out of Sligo, namely the branch down to the quay. Have often thought it would have made a nice passenger line if extended up the coast a bit.