David Holman
-
Posts
4,359 -
Joined
-
Last visited
-
Days Won
117
Content Type
Profiles
Forums
Events
Gallery
Blogs
Community Map
Everything posted by David Holman
-
Back in the day, there were rumours of Stanier 8F 2-8-0s bricked up in abandoned mines and tunnels as standbys for a/the apocolypse. These days, we'd struggle to find enough coal to power them...
-
British locos and stock that can be disguised as Irish
David Holman replied to Westcorkrailway's topic in Irish Models
Some have also gone to Nigeria. -
Is there a project all these gems are part of?
-
The Donegal was noted for mainly using a brake 3rd coach at the end of its freight trains, but when Phoenix went off on its forays (mainly to pick up wagons from the border), was a brake van of some sort included and if not, was a guard present and if so, did he travel on the loco?
-
Obtaining a jig for handmade points
David Holman replied to raymurph's question in Questions & Answers
I just file the rail in a vice and keep comparing against the plan/drawing. Haven't found it a problem, but with plenty to do, a jig will certainly help. -
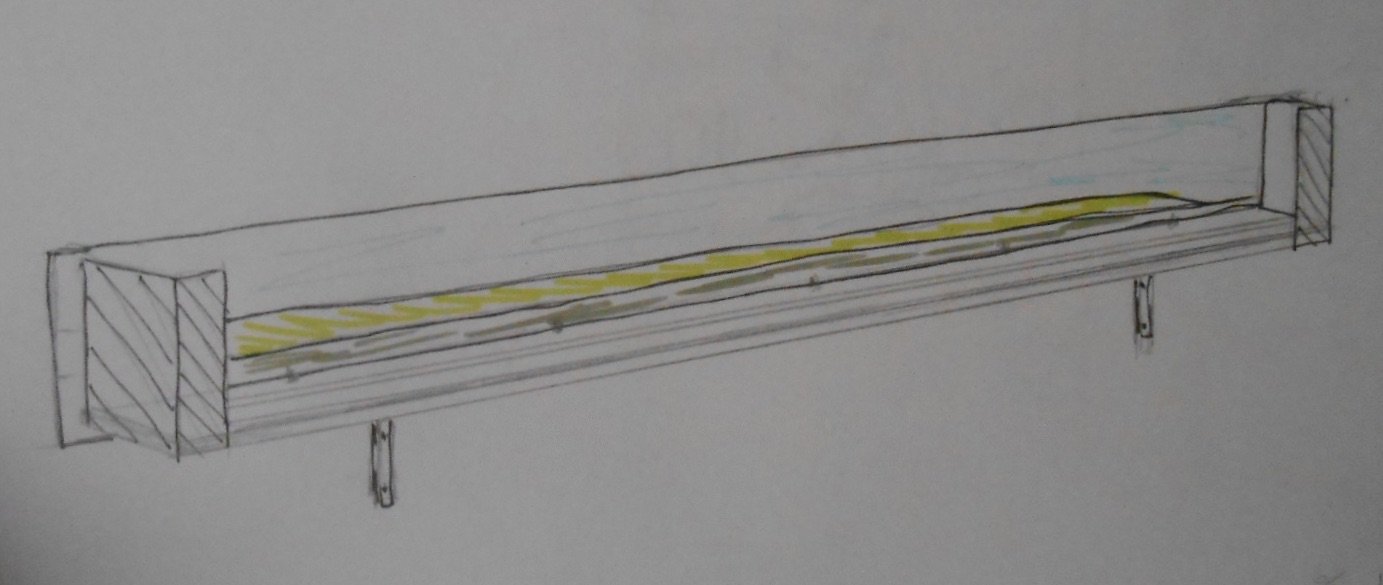
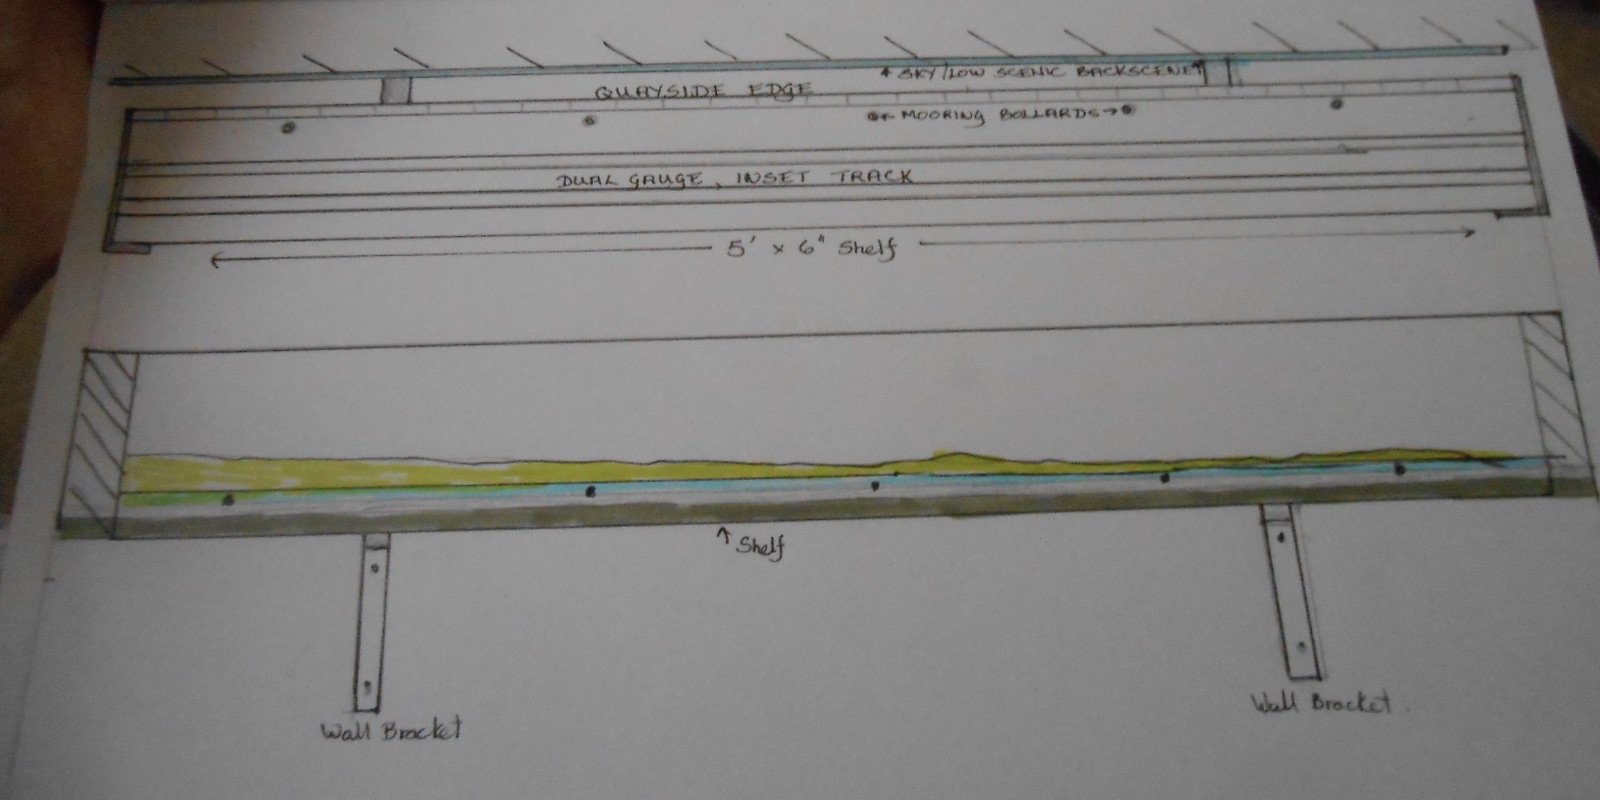
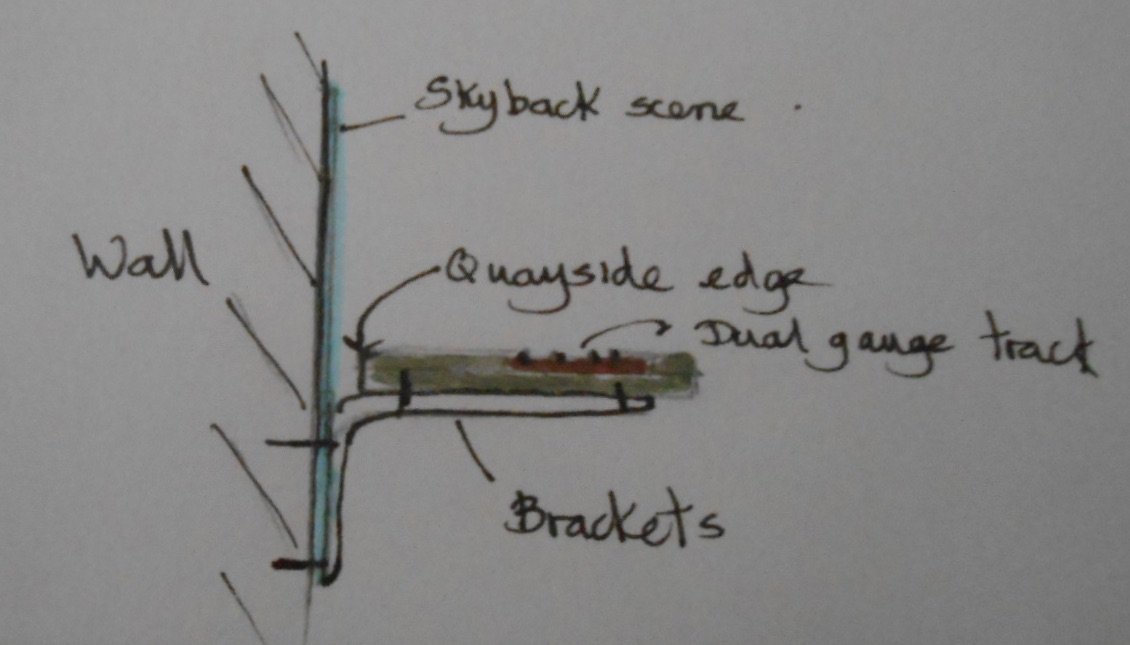
Recently, I was very taken by Tullygrainy's fully scenic shelf test track. Such a splendid idea to combine the chance to run in locos while enjoying seeing them do so in a proper setting. Plus, as the man said at the time, having such a thing next to your workbench makes an ideal foil for those times when building projects are not going as well as they might, because seeing your models trundle back and forth has to be good for the soul. In addition, I feel for those on this forum who have collections of locos [large and small], but nowhere to run them and dislike the thought of so many models sitting on shelves, not doing what they are meant to. So this is now a bit of a mission to get a few more engines running, because I really can't see why everyone shouldn't have space for one of these! My own needs are for 21mm [3 foot gauge] and 36.75mm [5'3] track in 7mm scale. My workbench sits against a blank wall, with about 5 feet of space available. Hence, my design will form a piece of dual gauge track, inset into a quayside, looking out across a sea inlet to low lying land on the other side - a blend of places like Wexford, Cork, Sligo and so on. The aim is for it to be as simple as possible, using a 6 inch/15cm wide bit of shelving as the 'baseboard'. This will be fixed to the wall with a couple of shelf brackets, but will sit about an inch out from the wall, with a gap to the back scene - probably a sheet of painted hardboard - fixed to the wall, so that the inner edge can represent a quayside, complete with a few mooring bollards. Track will be code 100 flatbottomed rail, soldered to a minimum of copper clad sleepers. Ground surface can then be built up close to rail level to represent a quayside road, with edging stones on the inner face [next to the wall]. Narrow wings each end should help to frame the picture, which will hopefully provide a nice backdrop to photograph my models. As for operation, without any hidden sections are each end, it makes sense to consider a shuttle unit that incorporates a gentle start and gradual slow down, rather than a sudden start/stop. I do have one of these, but couldn't get it to work; however our Club electrics wizard as said it should do and [hopefully] will work on a completely isolated piece of track. We will see - eventually... The chances of this little project getting started any time soon are fairly slim, but I would love to see others take up the challenge, even if it is only via suggestions for other themes - eg multiple tracks or different settings. Food for thought? I hope so!

- 10 replies
-
- 13
-

-
N Scale Ballywillan, Co Longford.
David Holman replied to Kevin Sweeney's topic in Irish Model Layouts
Interesting concept too, especially in larger scales and certainly food for thought and all the more remarkable in 2mm scale. -
Never trust your pride and joy to run well first time in public, especially on someone else's tracks. I should know, with a drawer full of t-shirts to my name... Sir Henry wasn't exactly happy that day either, though (fingers crossed), after tweaking the headshunt point and levelling the track across the baseboard joint, all should now be well for both locos. We can but see. Aldershot in October, or Chatham in July, maybe? Enniskillen certainly looks at home in its namesake setting, as does coach No9. Worth investing in a couple of shuttle units, a la Tullygrainy? Or a sound system - decent speakers under the baseboard should do it. We had a little RTR early diesel mechanical shunter on the club O gauge layout on Tuesday. The sound chip even features gear change noises. Ideal for the railbus... Always been good at spending other people's money!
-
Worth going back to page one of this post, showing the early days, track plan and so on. Now in its 12th year, it is one of those layouts that clearly stand the test of time - and keeps getting better!
-
Remarkable and wonderful on so many levels. It is rare to see urban scenery like this done so well.
-
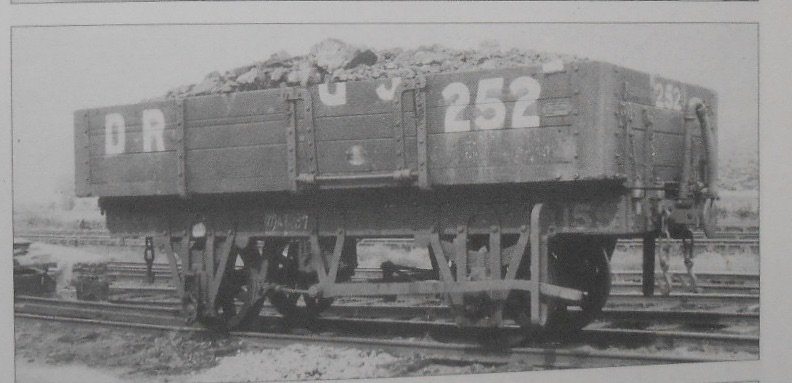
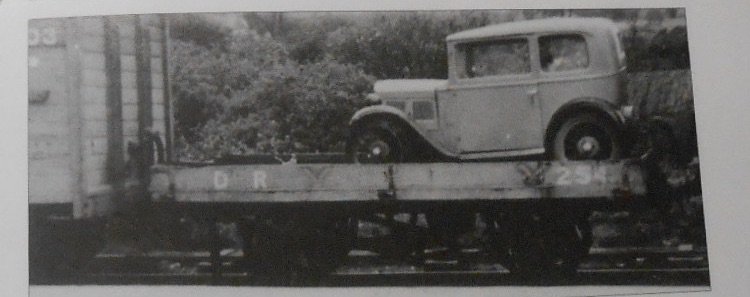
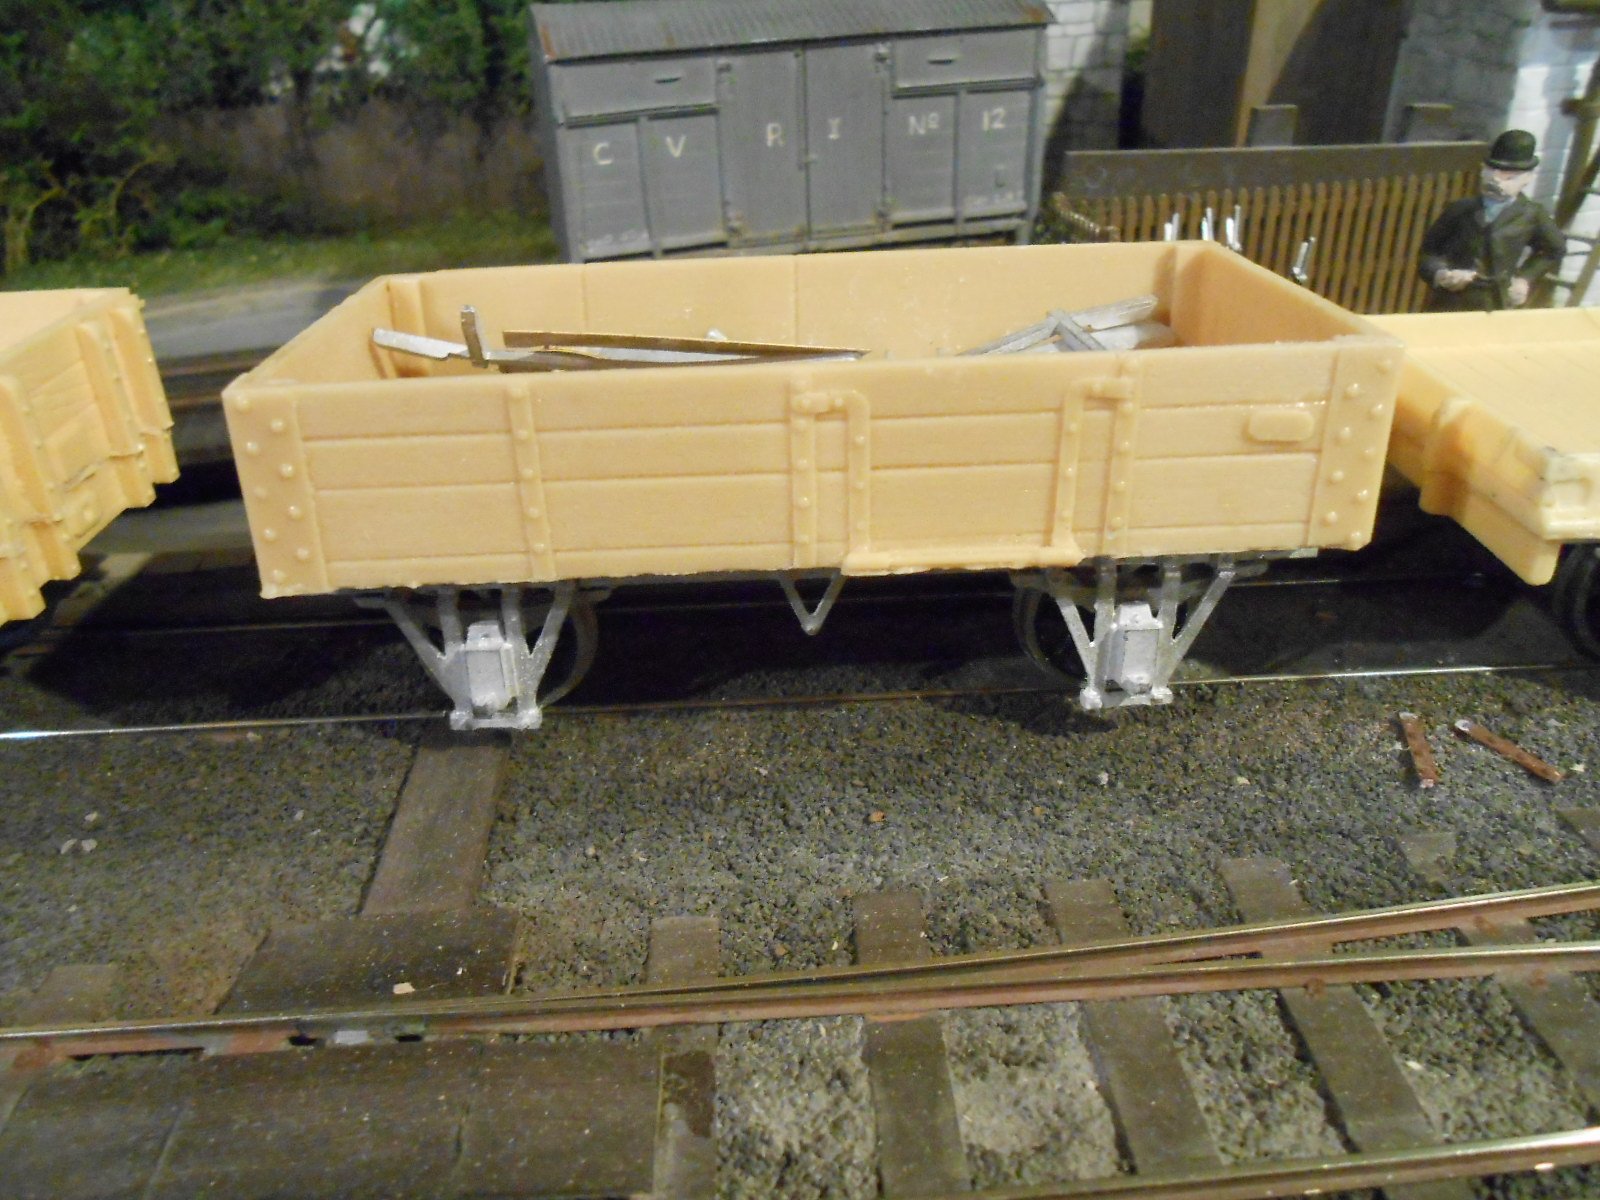
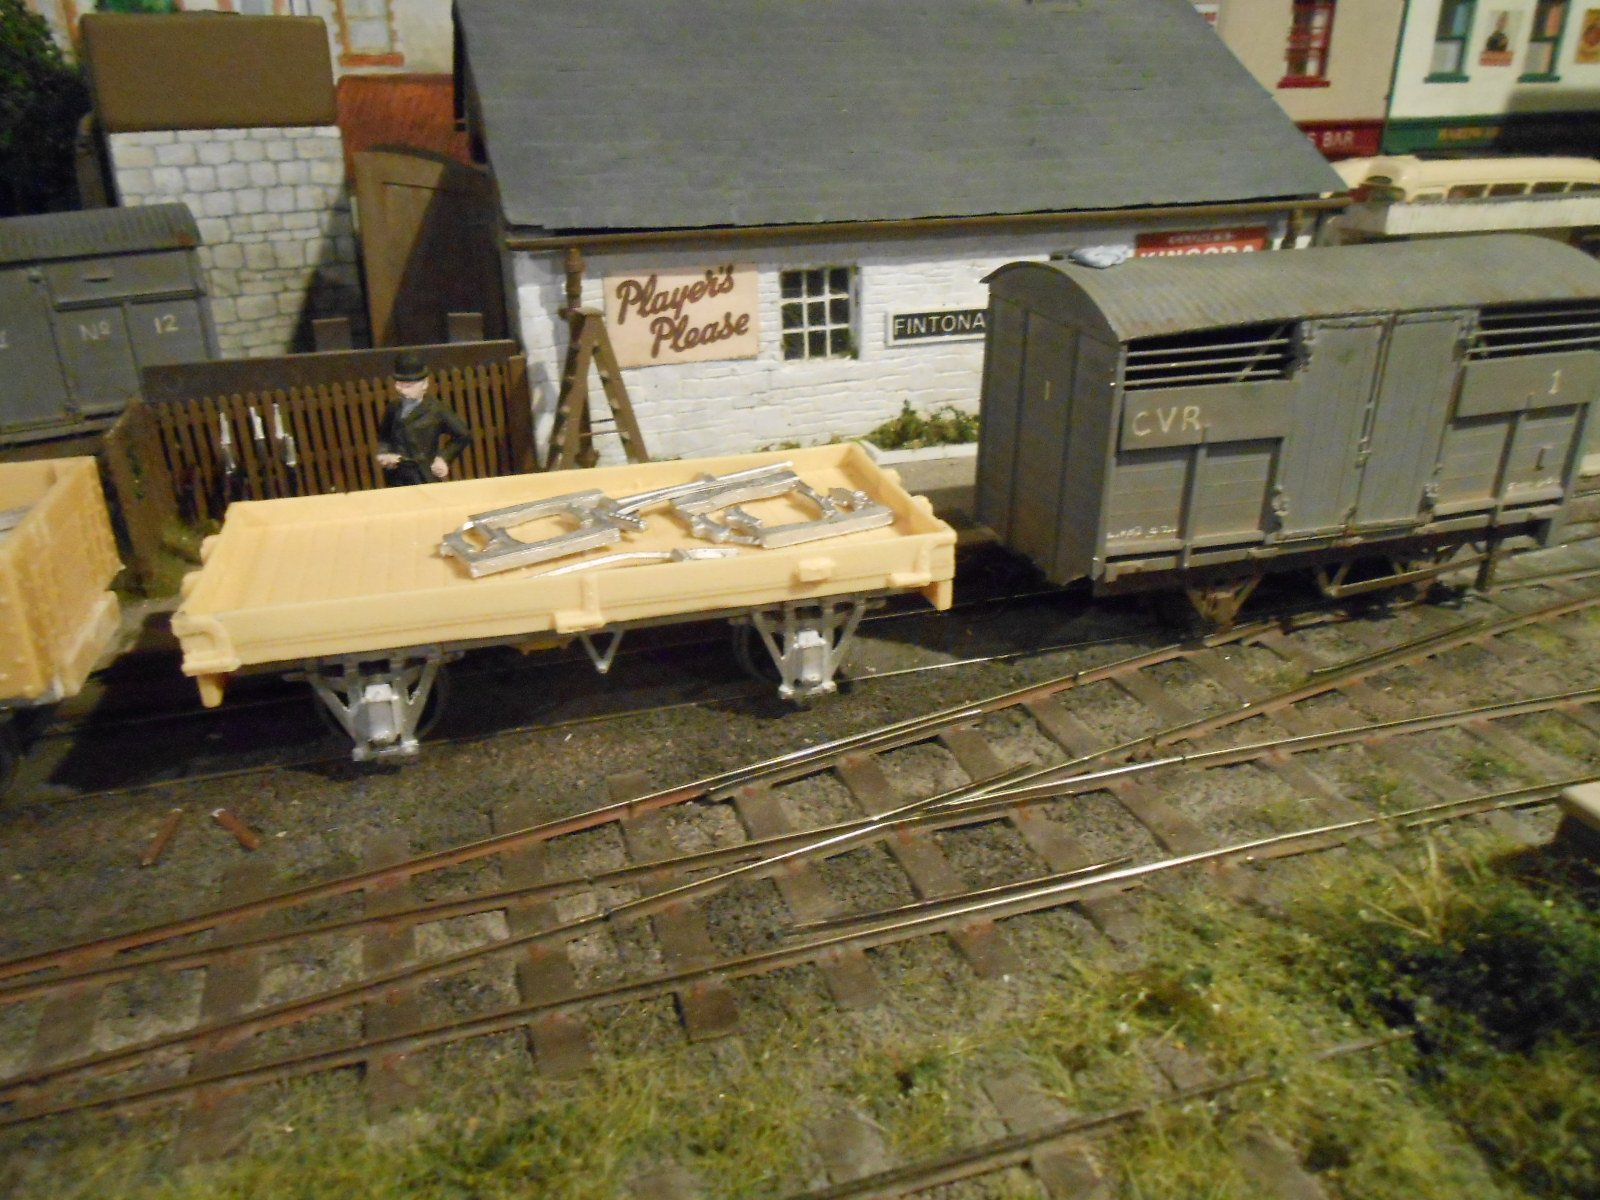
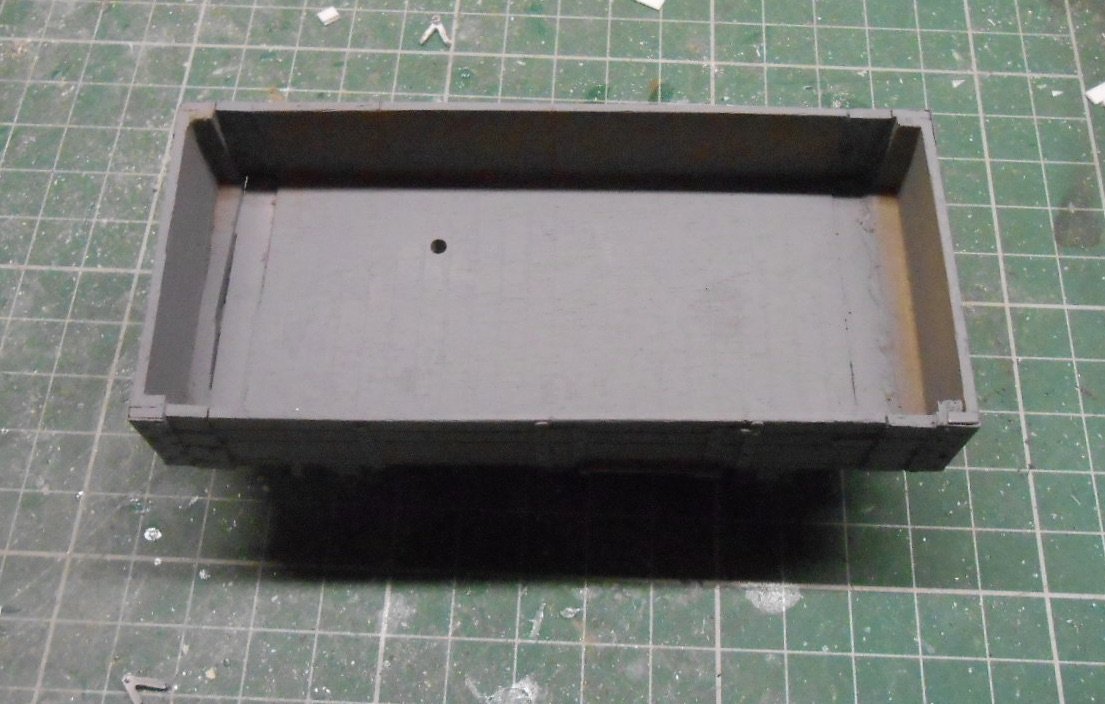
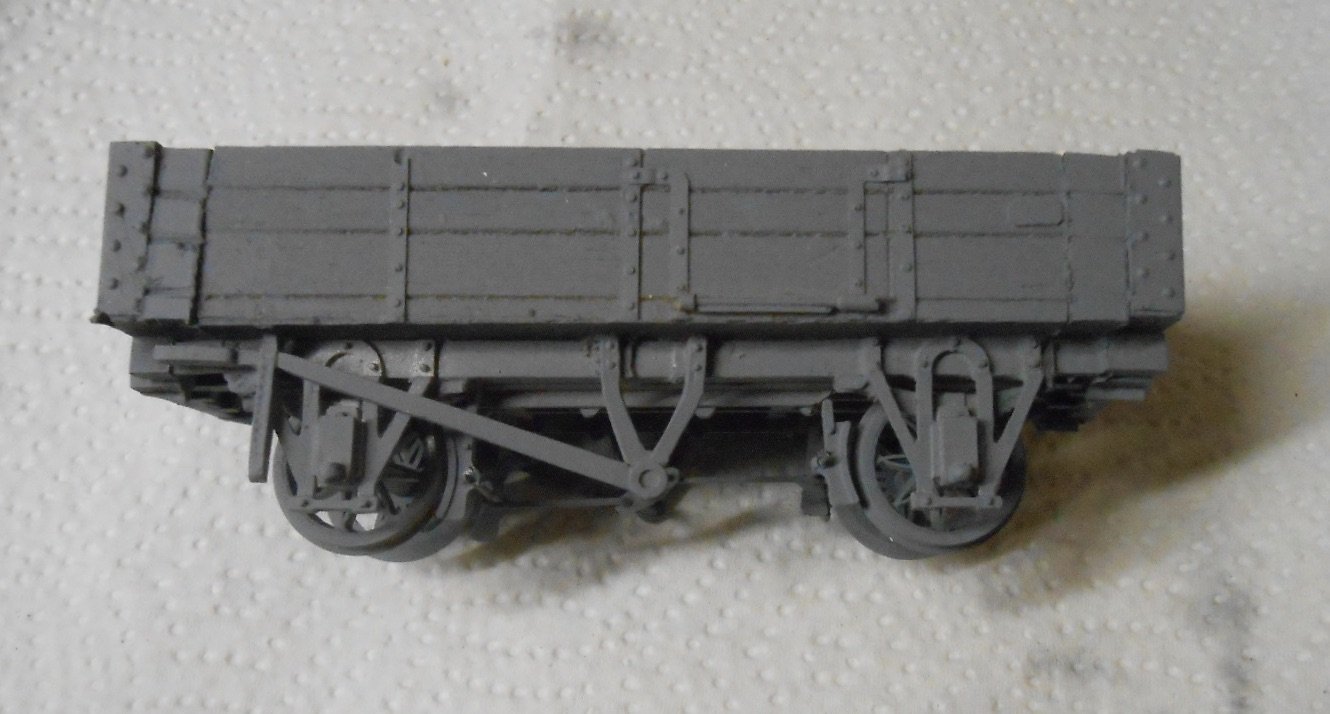
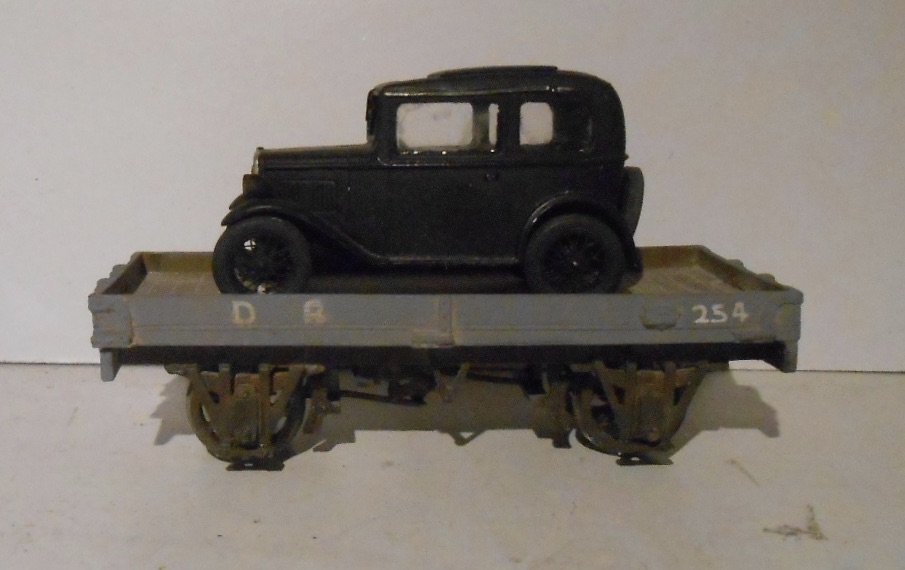
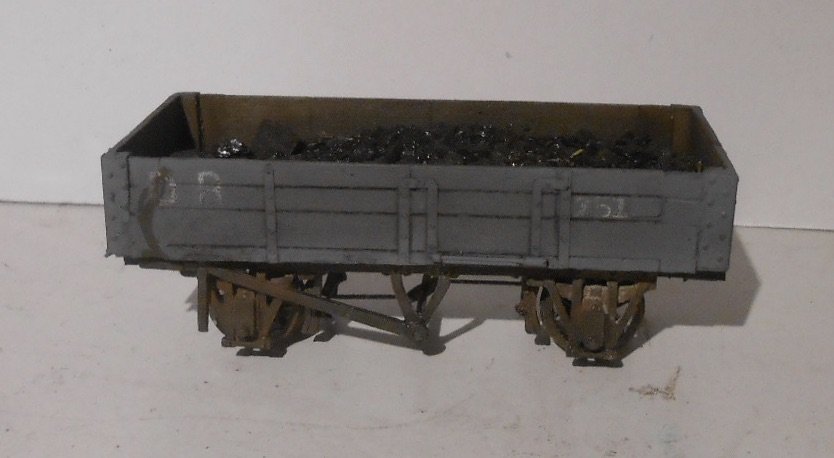
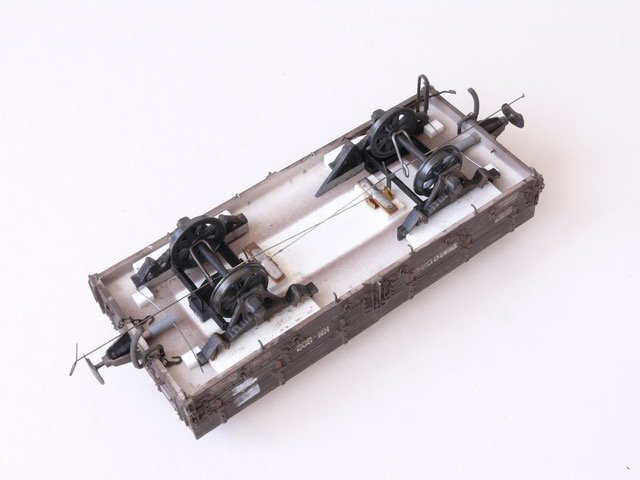
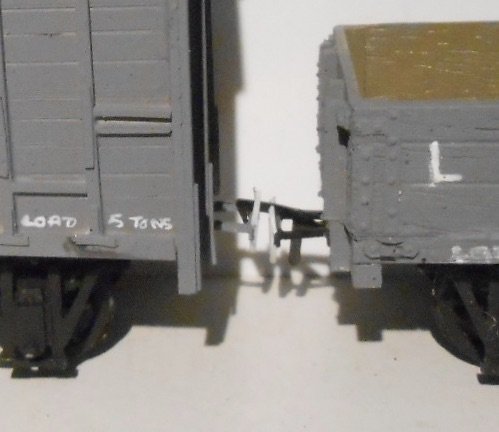
Early last year, Alphagraphix kindly supplied me with a range of discontinued kits and castings for Swilly and Donegal projects. Among them were two resin and white metal kits of Donegal wagons, which I've finally got around to doing more work on. I'd put the major parts together, but before I went further, it seemed a good idea to try and find out what they were representing - I know, impetuosity can be a middle name... As far as I can tell, the high sided one is a transhipment wagon, designed for easier movement of coal and minerals, with the body able to be transferred to a suitable broad gauge wagon via rollers and the mixed gauge turntable at Strabane. The one plank, dropside wagon is shown carrying an Austin Seven and as I happen to have a model of one of these, it will make a nice load. Finishing the one plank only required the addition of brake gear, but I'd made several mistakes with the transhipment wagon, not least that the wheel base should be shorter. However, getting the castings apart without damaging them looked difficult. On top of that the cast resin body is 18 inches too short. After a bit of thought, the solution has been to chop off each end of the wagon and insert two nine inch sections to make the overall length right - though the wheelbase remains too long, so I will have to live with that. After a bit of sanding and scribing in the plank lines, a spray of grey primer is all that is needed for the body livery, while lettering is the usual white gel pen. Couplings still need fitting, while I need to make some more coal dust and decide how the Austin should be secured.
-
First met Gordon and Maggie at the Chatham Show, sometime in the early '90s. In those days, club members were asked if they cost host a couple of exhibitors. We'd had Barry Norman a couple of years earlier, but knew little about the Gravetts. Next day, was treated to Ditchling Green and our exhibition manager commented that 'You went down well last night'. Reason? A bottle of wine was ready and open when they came through the door and have been privileged to be friends ever since! Gordon really is a master craftsman, able to turn his hand to anything, while Maggie is very talented too, some of the buildings on Pempoul are hers. Genuinely nice people too.
-
Yes Alan, it is on loan to a museum of model railways near Ashford in Kent - a project started by Cliff Parsons of Gresley Beat fame. Several other gems too. Gordon has since moved on to a couple of cameo projects: Arun Quay - a stunningly atmospheric shunting yard, based in Sussex and now a new Reseau Breton project which is just as good as anything he's done in the past. Makes my efforts look very ordinary, but always inspirational in everything he does.
-
Fabulous work, Ken. Shows what a great investment you've made in developing your CAD skills. Everything is so neat and clean - well worth the time and effort.
-
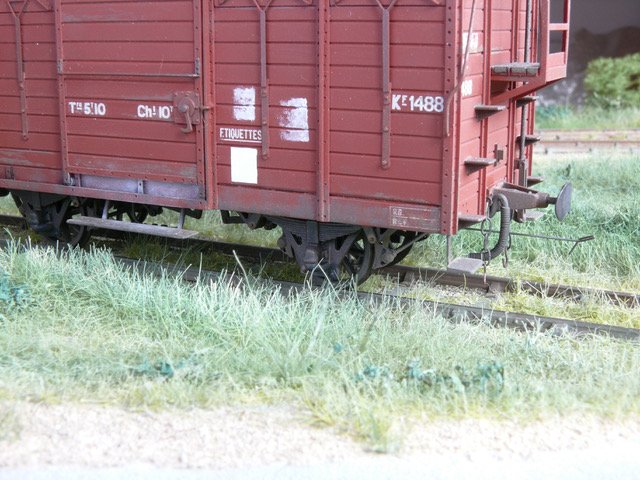
Many thanks folks - as ever. Gordon sent me some interesting info about the Reseau Breton - which had a single centre buffer, but with screw link coupling underneath, something which even a man of his undoubted skills was reluctant to replicate. Hence he uses Alex Jacksons on Pempoul & sent me the photos below showing how he did it. Needless to say, they are just the highest quality. Look at the third picture which shows how he fitted AJs around vacuum brake gear and other underfloor clutter. Stunning!
-
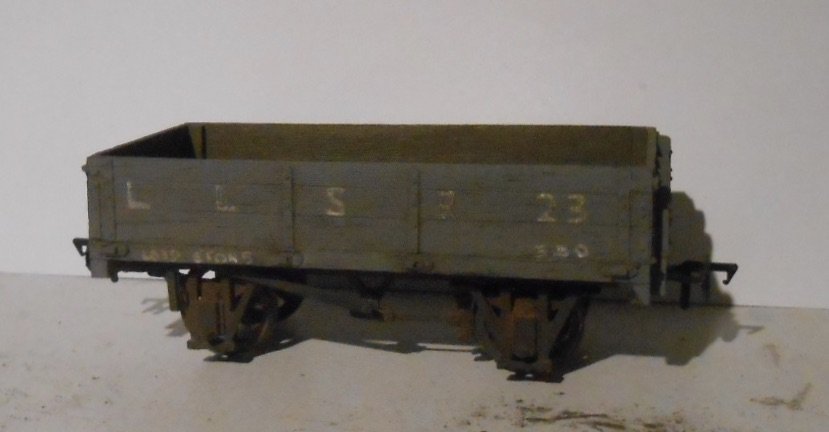
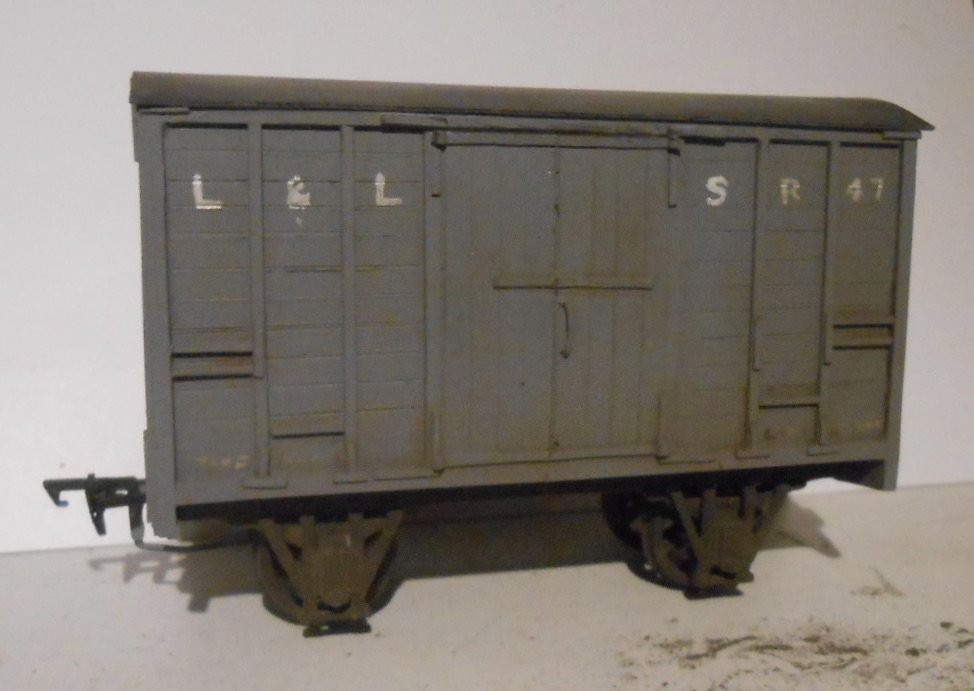
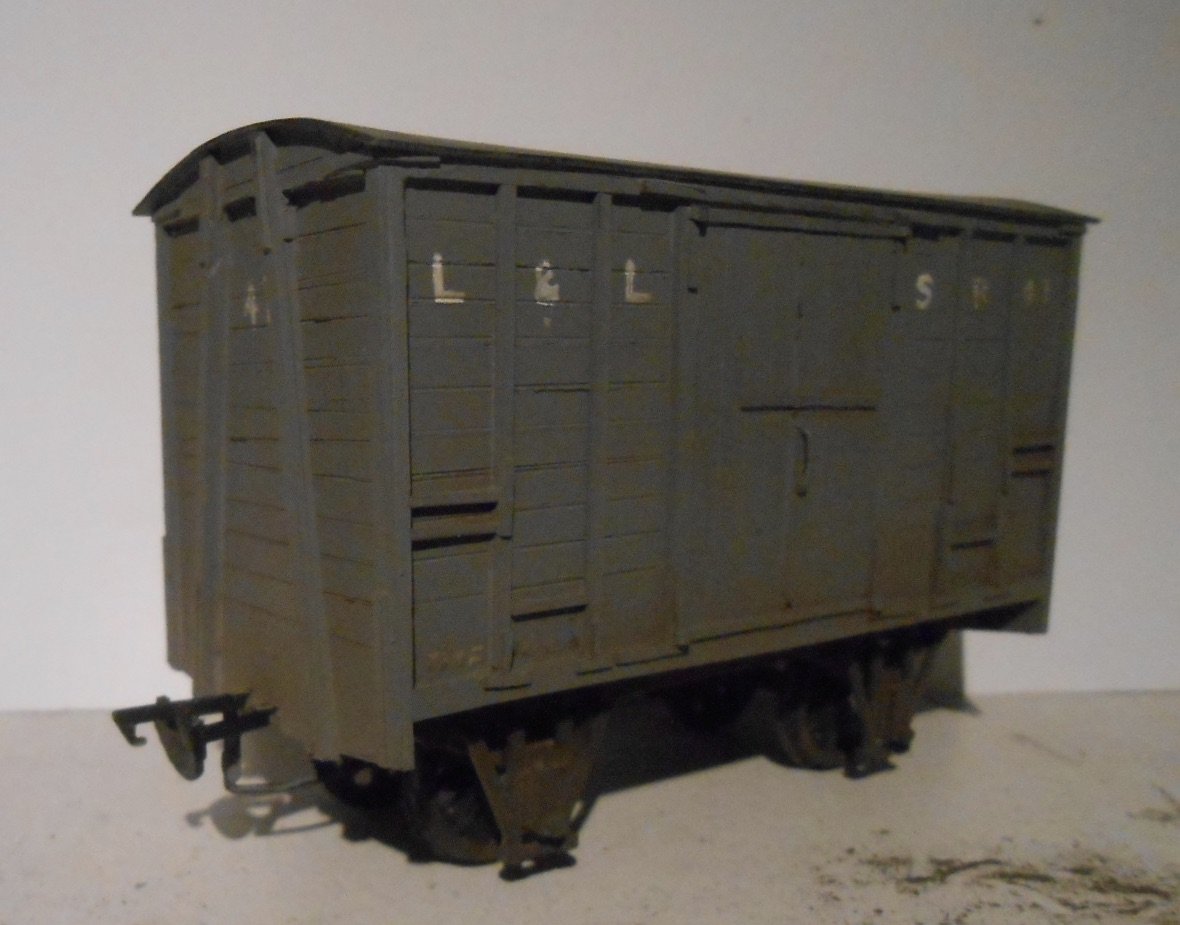
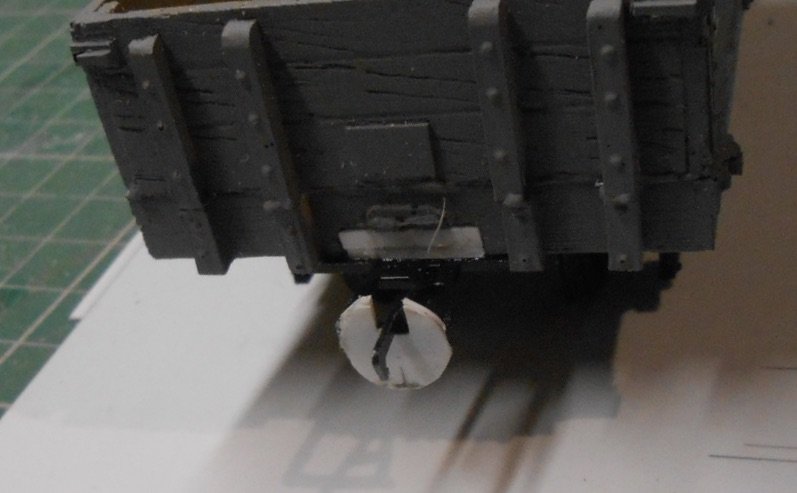
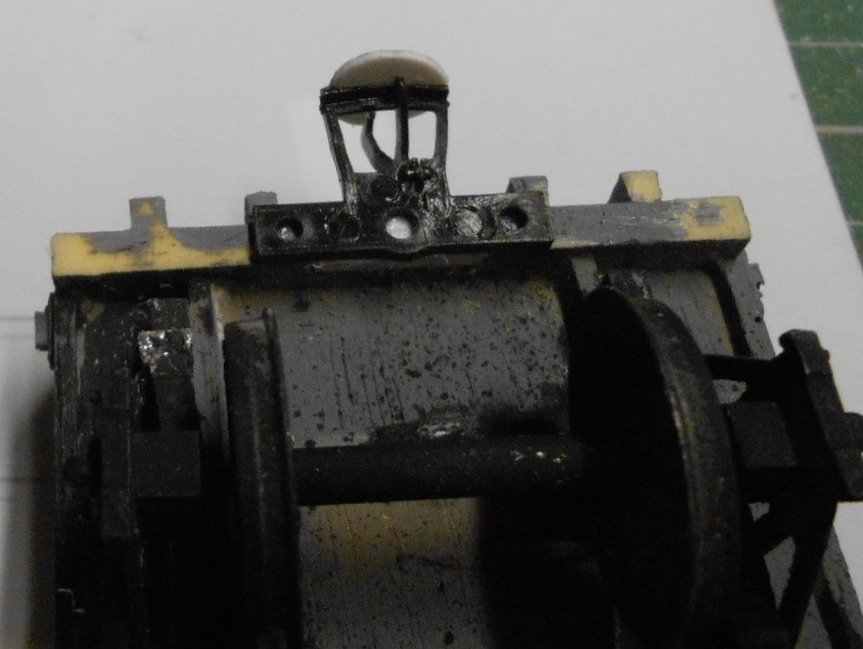
Getting closer to a Swilly mixed train, with the completion of three wagons to go with my brake 3rd coach. The open wagon is an Alphagraphix resin cast kit, the other two are my scratchbuilt 5 ton vans. Lettering is white gel pen and weathering is various powders. Couplings remain work in progress, but have been experimenting further with narrow tension locks, adapting them by joggling the hook so [because there is just a loop at the other end], it sits fairly central. In an effort to give them more of a narrow gauge 'chopper' look, have added circles of plasticard to the buffing plate, though am thinking these could be thicker. Dropper wires, so they can be worked by electro-magnets, are yet to be fitted - indeed, this will probably have to wait until Fintonagh's final outing in CVR form at the Eastleigh show in April. So, the mixed train sequence will go something like this: the Barclay, two vans and a coach arrive in the platform. The loco uncouples and then goes to the turntable. After, it picks up the open wagon [hooks both ends, just loops on the loco], from the siding, then uses this to shunt the two vans into the platform headshunt. Running round the coach, the loco and wagon can then pick up the two vans and move one of them to the loading bay, before uniting again with the coach in the platform, ready for departure. Am still to gird up my loins to get the Barclay finished, because I haven't painted the crew yet and am still waiting for the builder's plates to arrive. That, plus I really do have to be in the mood to get the air brush out!
-
Terry and Adrian's kits were beautifully drawn and (because of the time) am assuming they were done by hand, not CAD. Either way, the etches are superb, with the parts fitting together as well as any locos I've made - and the list is approaching 100 in both 4 and 7mm scales. Terry enlarged his 101 etches to 7mm scale for Richard Chown in 1998, a kit he never built, but which I acquired in 2018. That too went together really well, with minimal filler required - a true mark of a quality kit in my experience.
-
N Scale Ballywillan, Co Longford.
David Holman replied to Kevin Sweeney's topic in Irish Model Layouts
Splendid. -
Beating the French at rugby is akin to an Ashes win in cricket, but rolling them over on their own patch is very special. The other four nations should be very afraid. Nice models everyone!
-
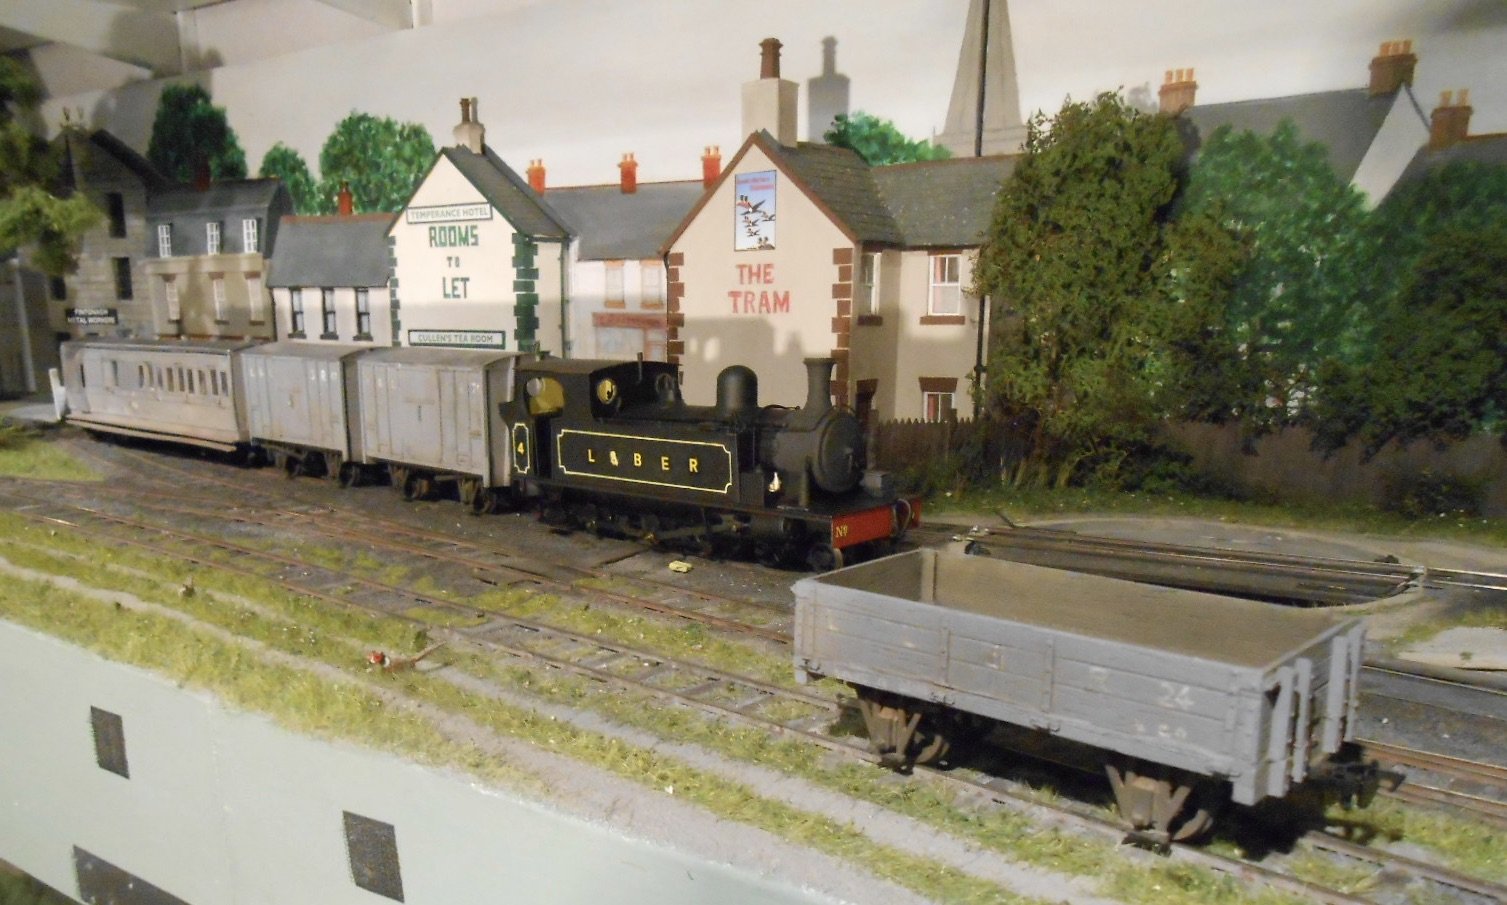
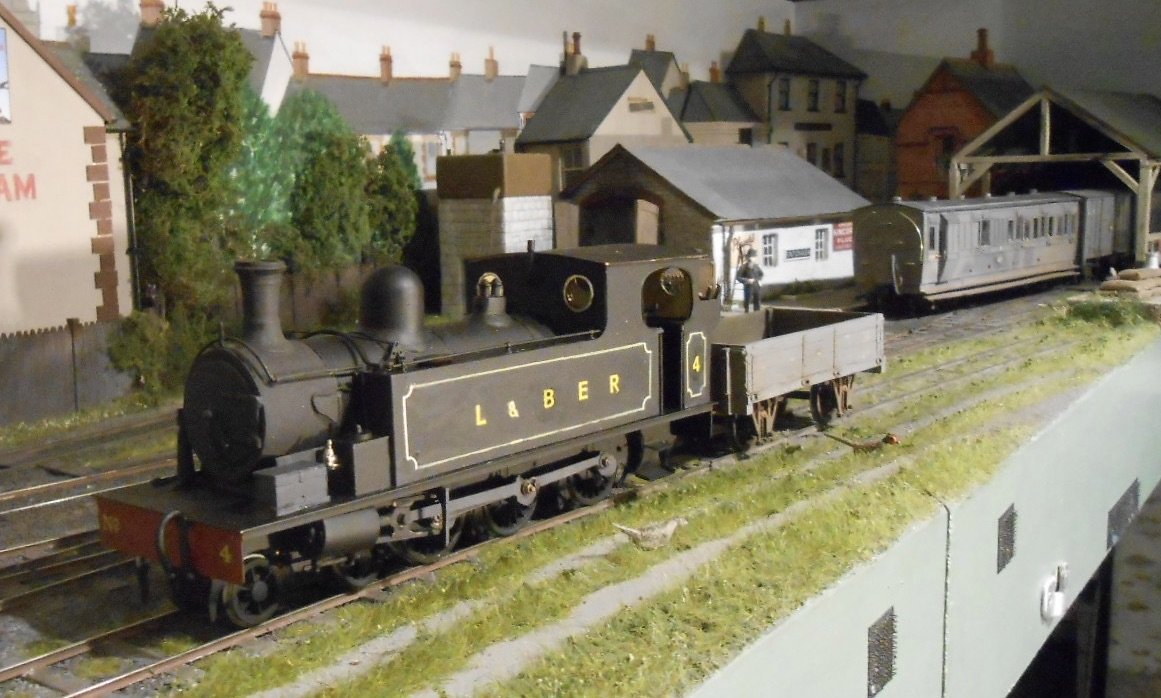
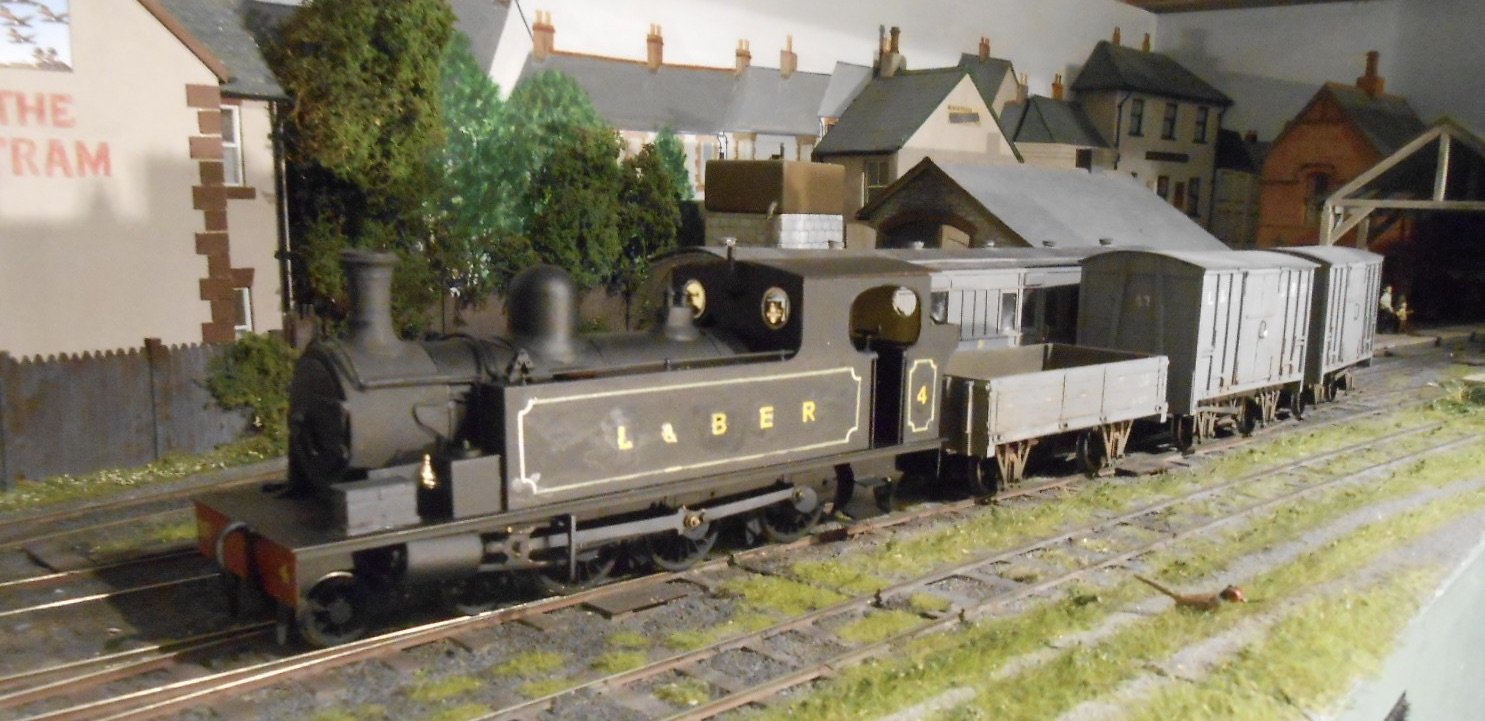
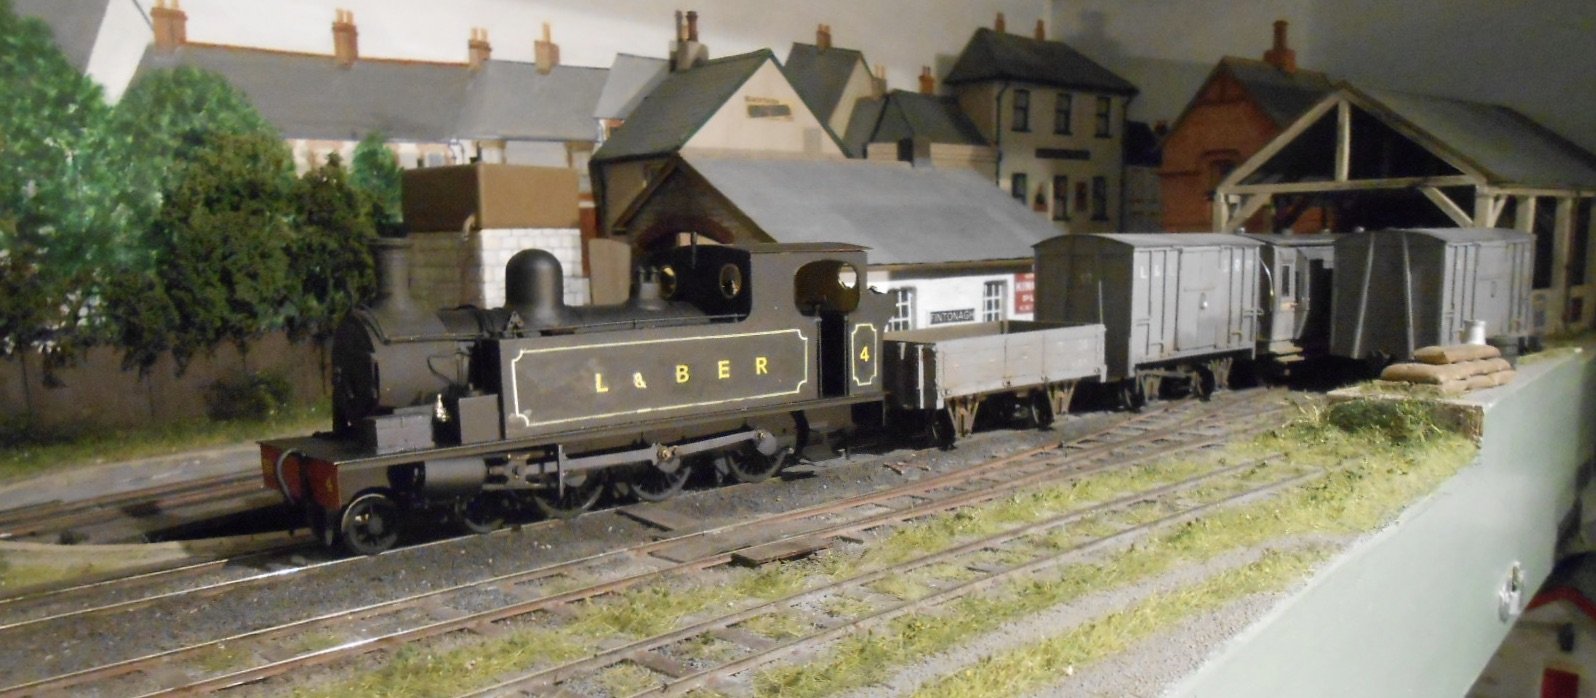
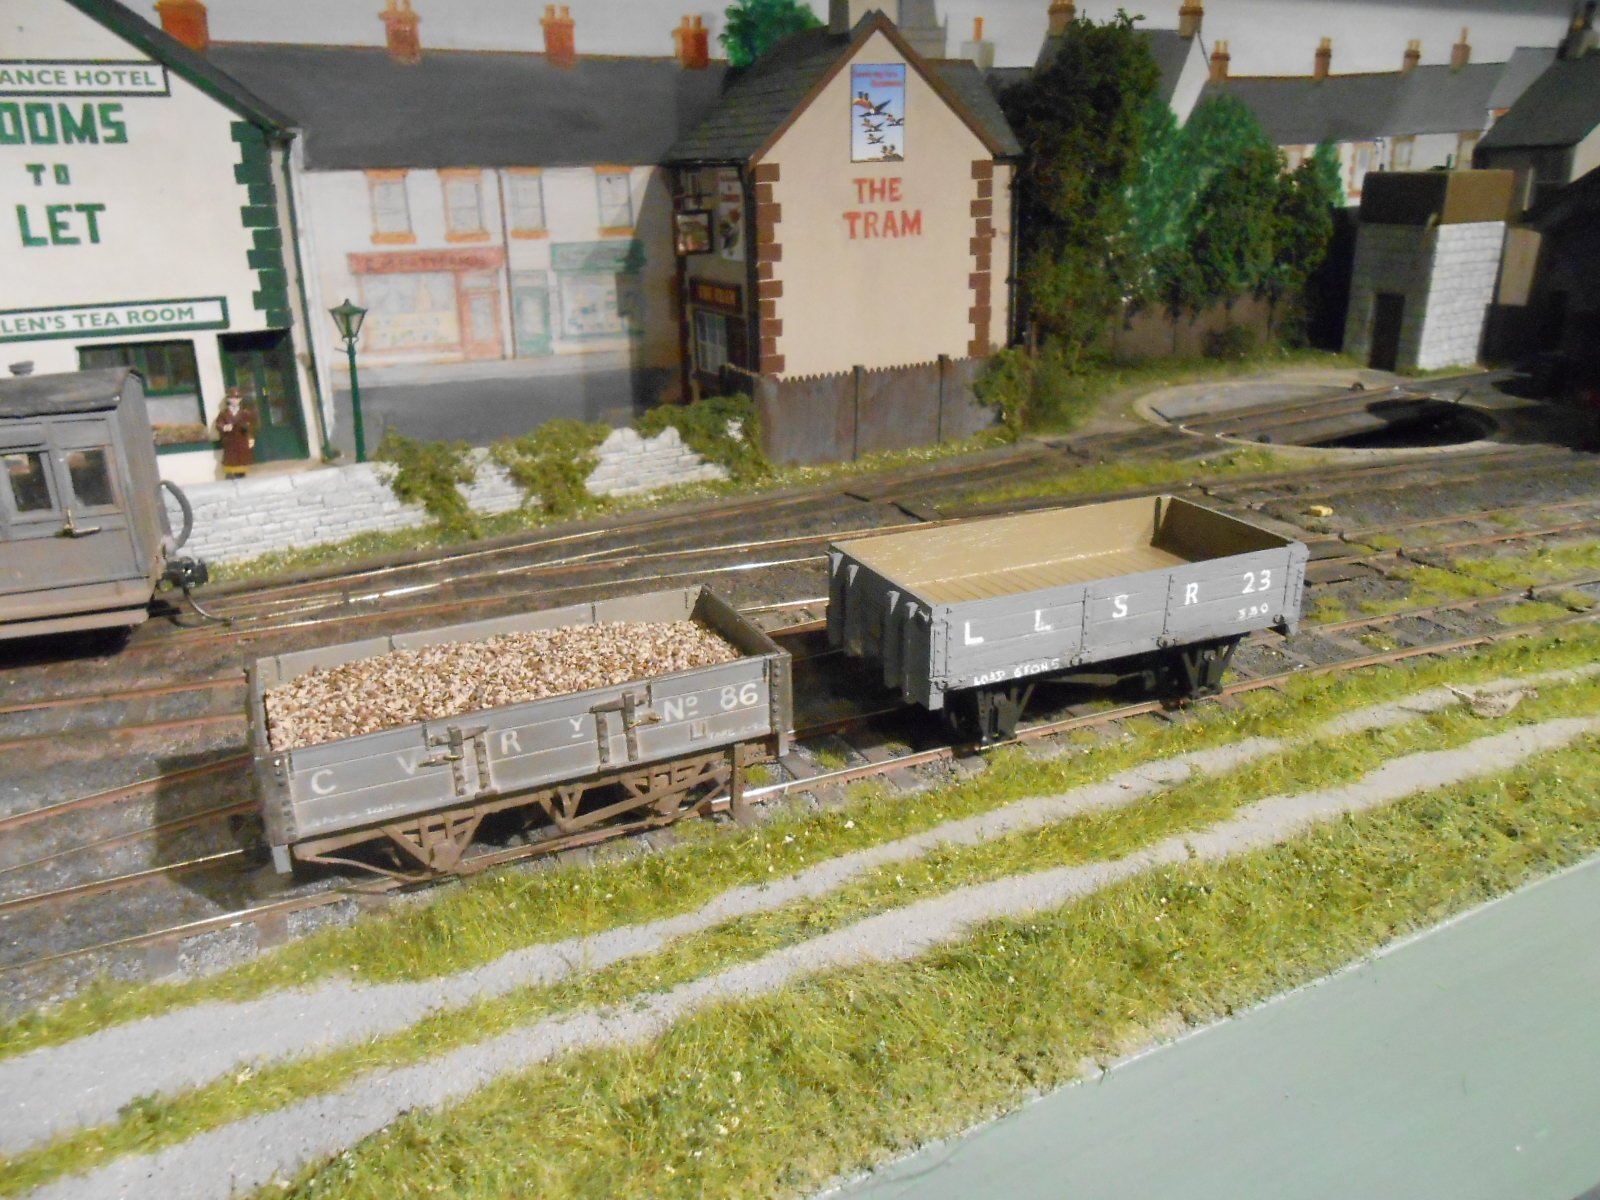
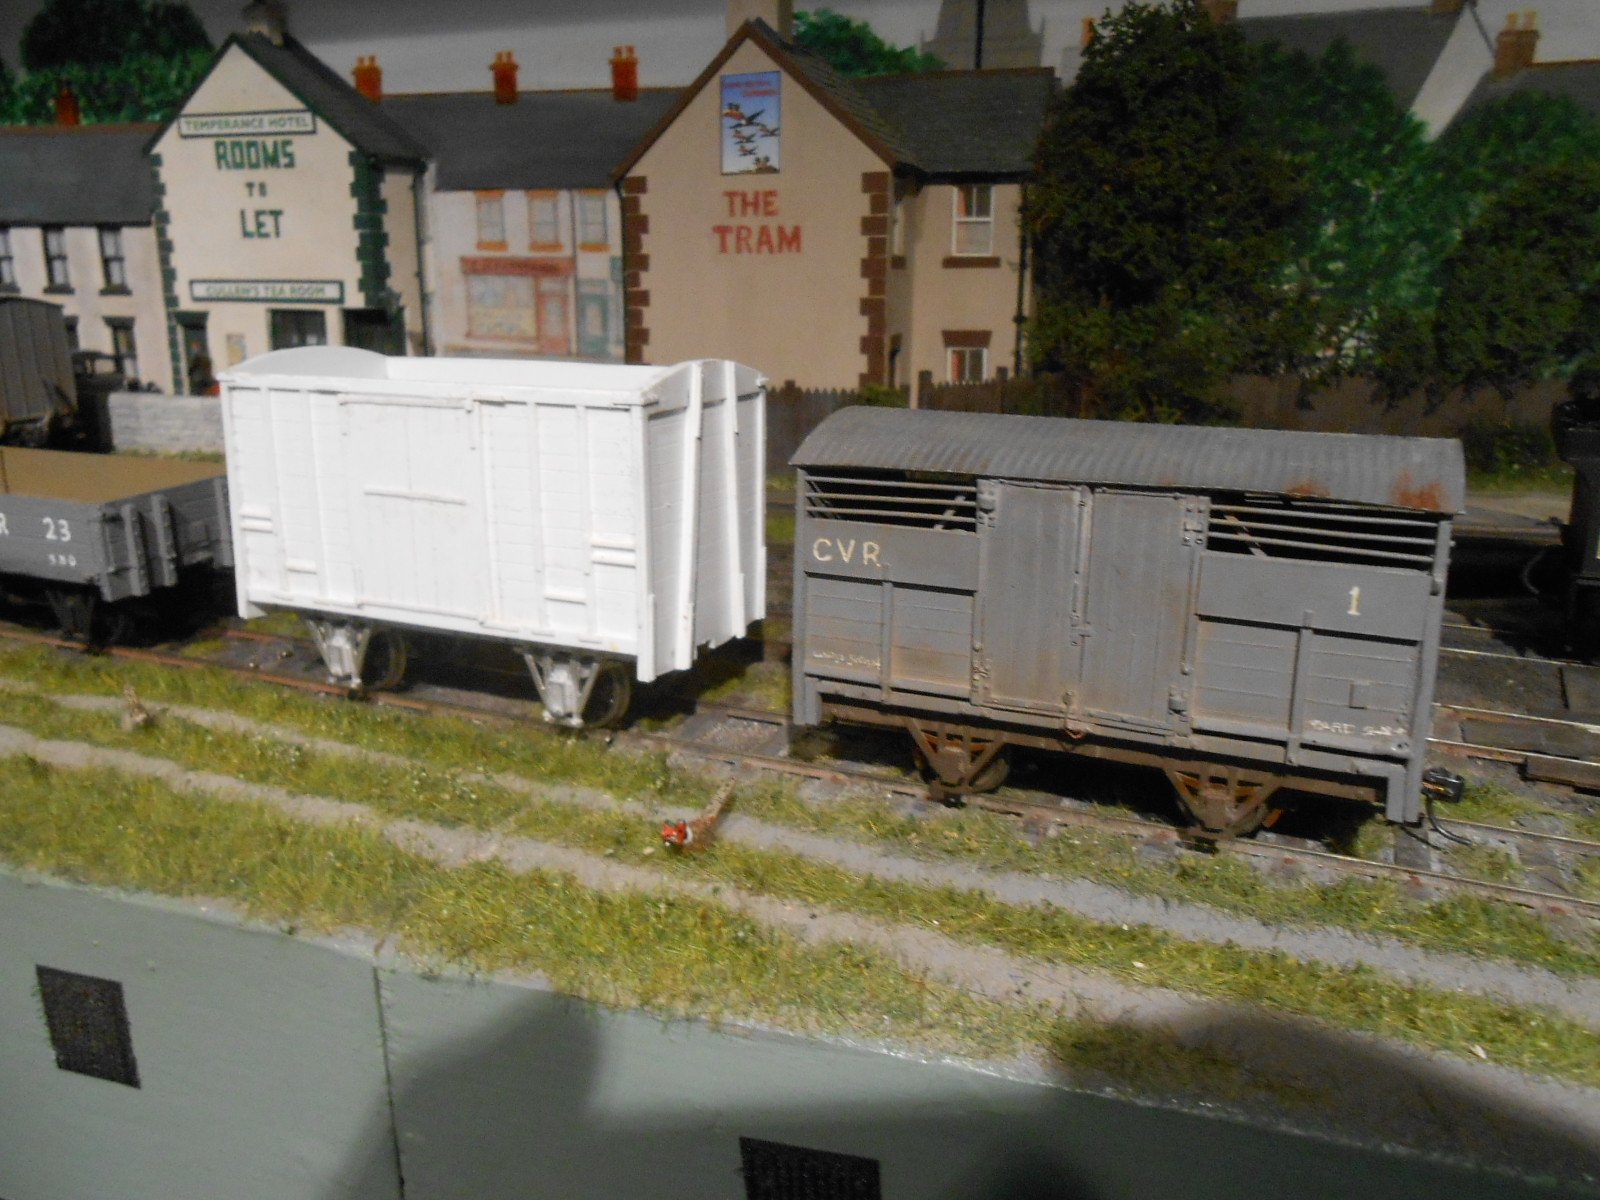
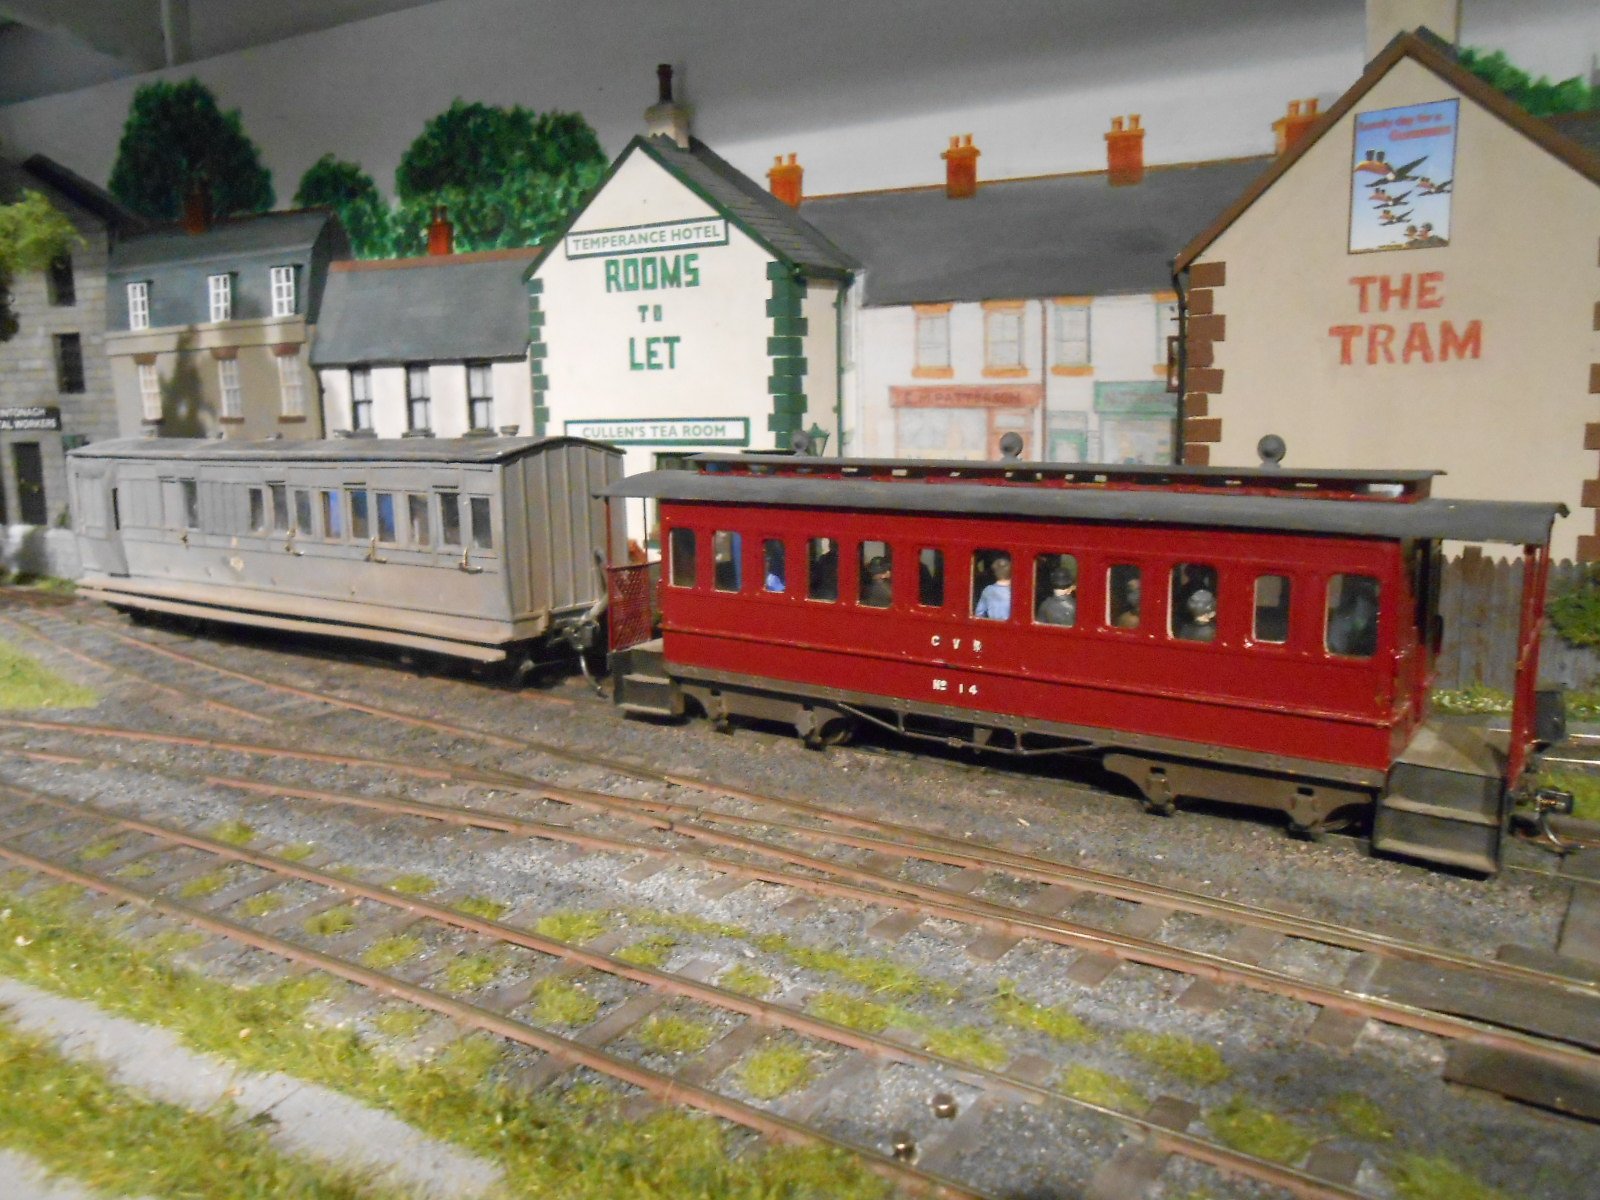
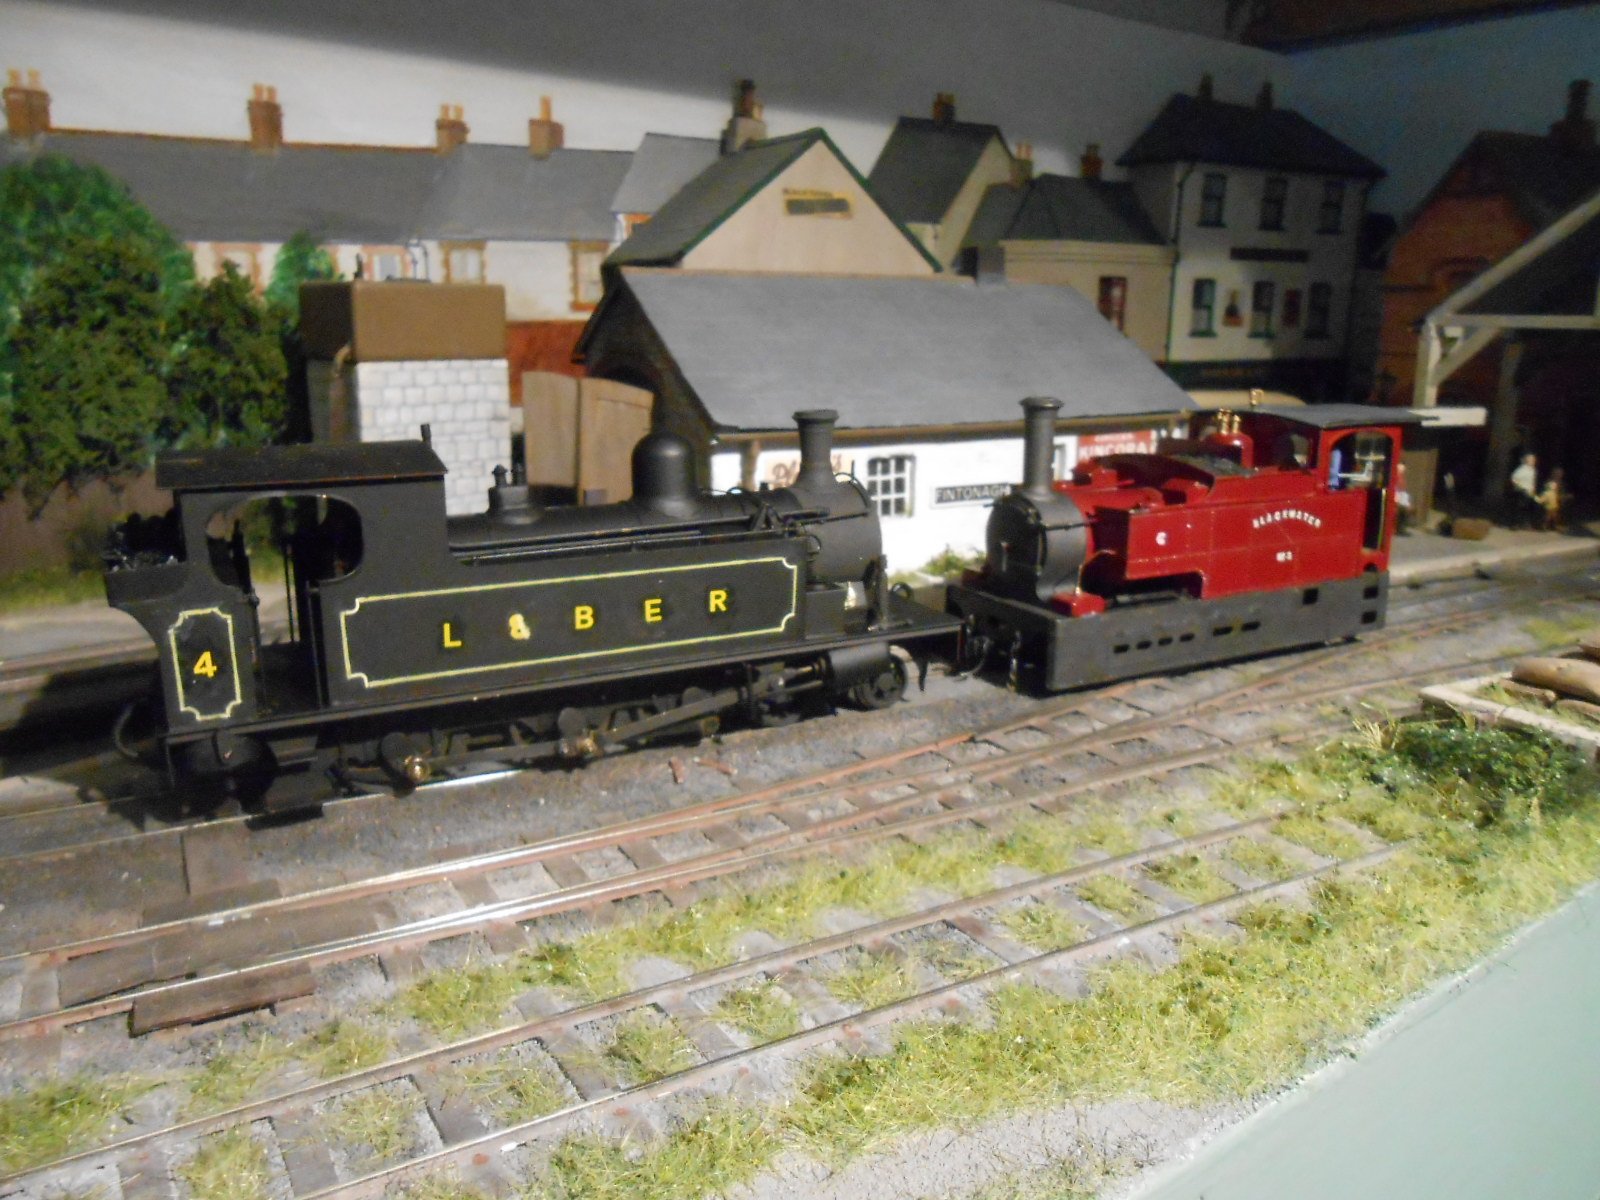
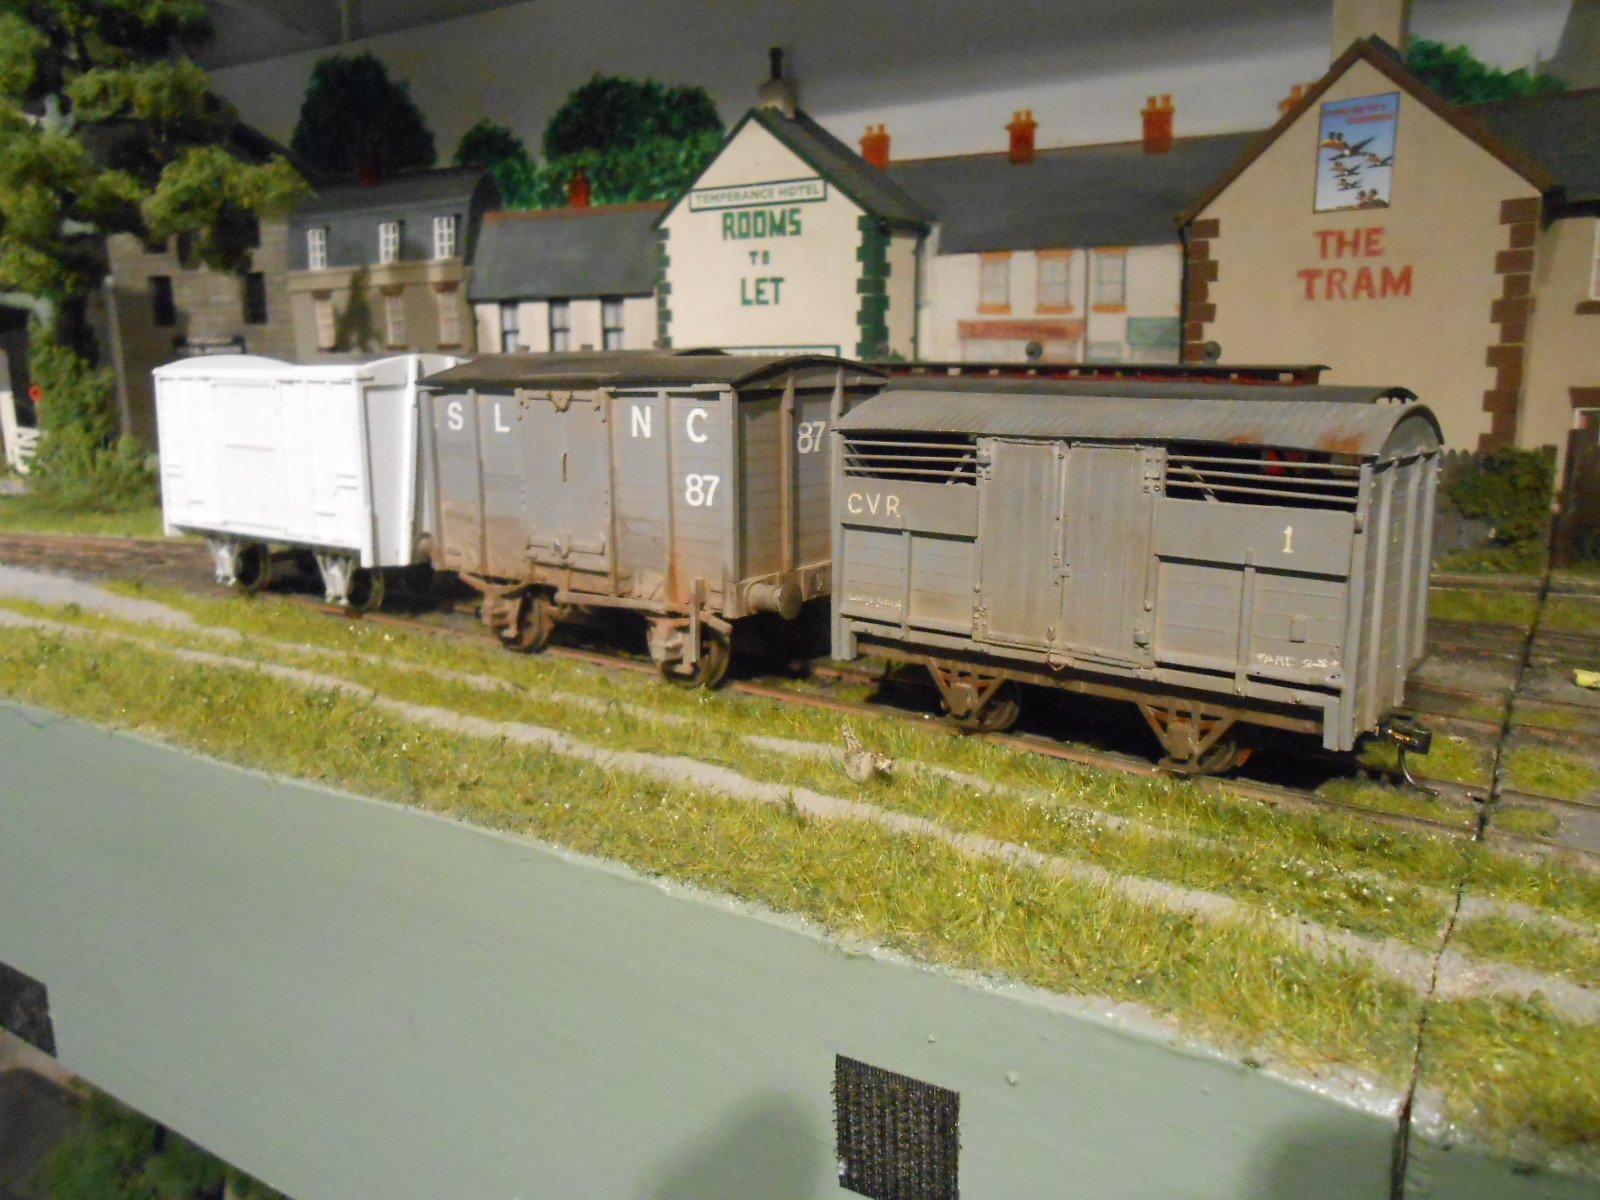
Thought it would be interesting to compare Clogher Valley, Swilly and Sligo stock. The first picture, below, shows a Clogher and Swilly open alongside each other. Apart from the CVR's smaller wheels, there is not a lot between them However, when we look at a van from each railway, the Swilly one certainly looks a lot bigger, while the third picture has a Sligo Leitrim 5'3 gauge van between them, which is actually about the same size as the narrow gauge Swilly van - albeit about a foot wider. Next, we have a Swilly Brake 3rd alongside a CVR 3rd class, end balcony coach. The latter's smaller wheels again mean it sits lower, though overall dimensions are about the same. Finally, we have a CVR 0-4-2T tram loco next to the Barclay 4-6-0T. The former were chunky little locos, especially with their side skirts, but the Barclay is much closer to a standard gauge loco, even though height and width are about the same. As for couplings, though I toyed with Plan C - using AJs under dummy chopper couplings, but have decided to go with modified slimline tension locks. While using AJs would have enabled delayed action uncoupling, hiding them under the choppers would not make seeing what was going on very easy, plus I can get away without the need for delayed action anyway. In addition, slimline tension locks only need a piece of paperclip soldering to the hook to make them work, whereas using AJs and dummy choppers required another half dozen bits to be fabricated, along with are the setting up and adjusting. Hopefully more pictures at the weekend.
-
He did Paul, and must admit I thought Reseau Breton stock had side buffers, but they did indeed work with a combined centre buffer/coupling. Hmmm! Have emailed the good Mr G to see how he made the centre buffer, though suspect something could be readily fabricated from U channel brass for the shank and sheet (with a slot in it) for buffing face. And AJs look like they should fit underneath, so thanks for the suggestion.
-
Remarkable. With the low viewing angle the scene is so spacious and looks far bigger than we know it actually is. The lighting works well too, while is a leaky roof responsible for that damp patch in the first picture? Really coming to life.
-
Thanks chaps. Must do a comparison of Swilly, Donegal and Clogher stock, though I know that Sligo wagons are not much longer than Clogher ones and only a foot or so wider. Came across the couplings idea while doing an online trawl. Paper clip wire (or something fairly fine) is important for the actuating "tail", to make sure it's overall weight doesn't permanently lift up the hook. At the moment, can't see any way of doing delayed uncoupling, as per Kadee or AJ, but hopefully the shunting moves on Fintonagh won't need this feature. That, or I'll need a lot more electro-magnets! As for Alphagraphix card kits, Alan, have never tried making one but am sure they would be pretty fiddly in 4mm scale and am convinced it would be almost impossible to make Railcar 2b in card - way too many complex curves! They make a great starting point for scratchbuilding in plastic, but worth checking dimensions as the Sligo cattle wagon is definitely on the small side.
-
Fab and, for obvious reasons, I also feel your pain!
-
Such a great idea. At its most basic level, there is surely nothing to stop anyone fixing a metre or so of track to a bit of wood, then wiring in a shuttle unit, so you can enjoy your loco of choice running back and forth. You can buy shuttle units that will slow down before stopping and reversing, but looks like Alan has used simple stop/start modules, with this bit being hidden off scene. It is very much a high end model, fully scenic, with multiple tracks [which is wonderful], but don't see why with a bit of ballasting, basic scenics and a printed back scene couldn't make a simple but nonetheless satisfying back drop to enjoys your models, while all manner of other options are surely possible. I think we should all have at least one of these!