David Holman
-
Posts
4,359 -
Joined
-
Last visited
-
Days Won
117
Content Type
Profiles
Forums
Events
Gallery
Blogs
Store
Community Map
Everything posted by David Holman
-
Love the muted colours and the sense of space in the first and last pictures.
-
Inchicore Class J10 Conversion From LNER J72
David Holman replied to murrayec's topic in Irish Models
Quart into pint pot epitomised! -
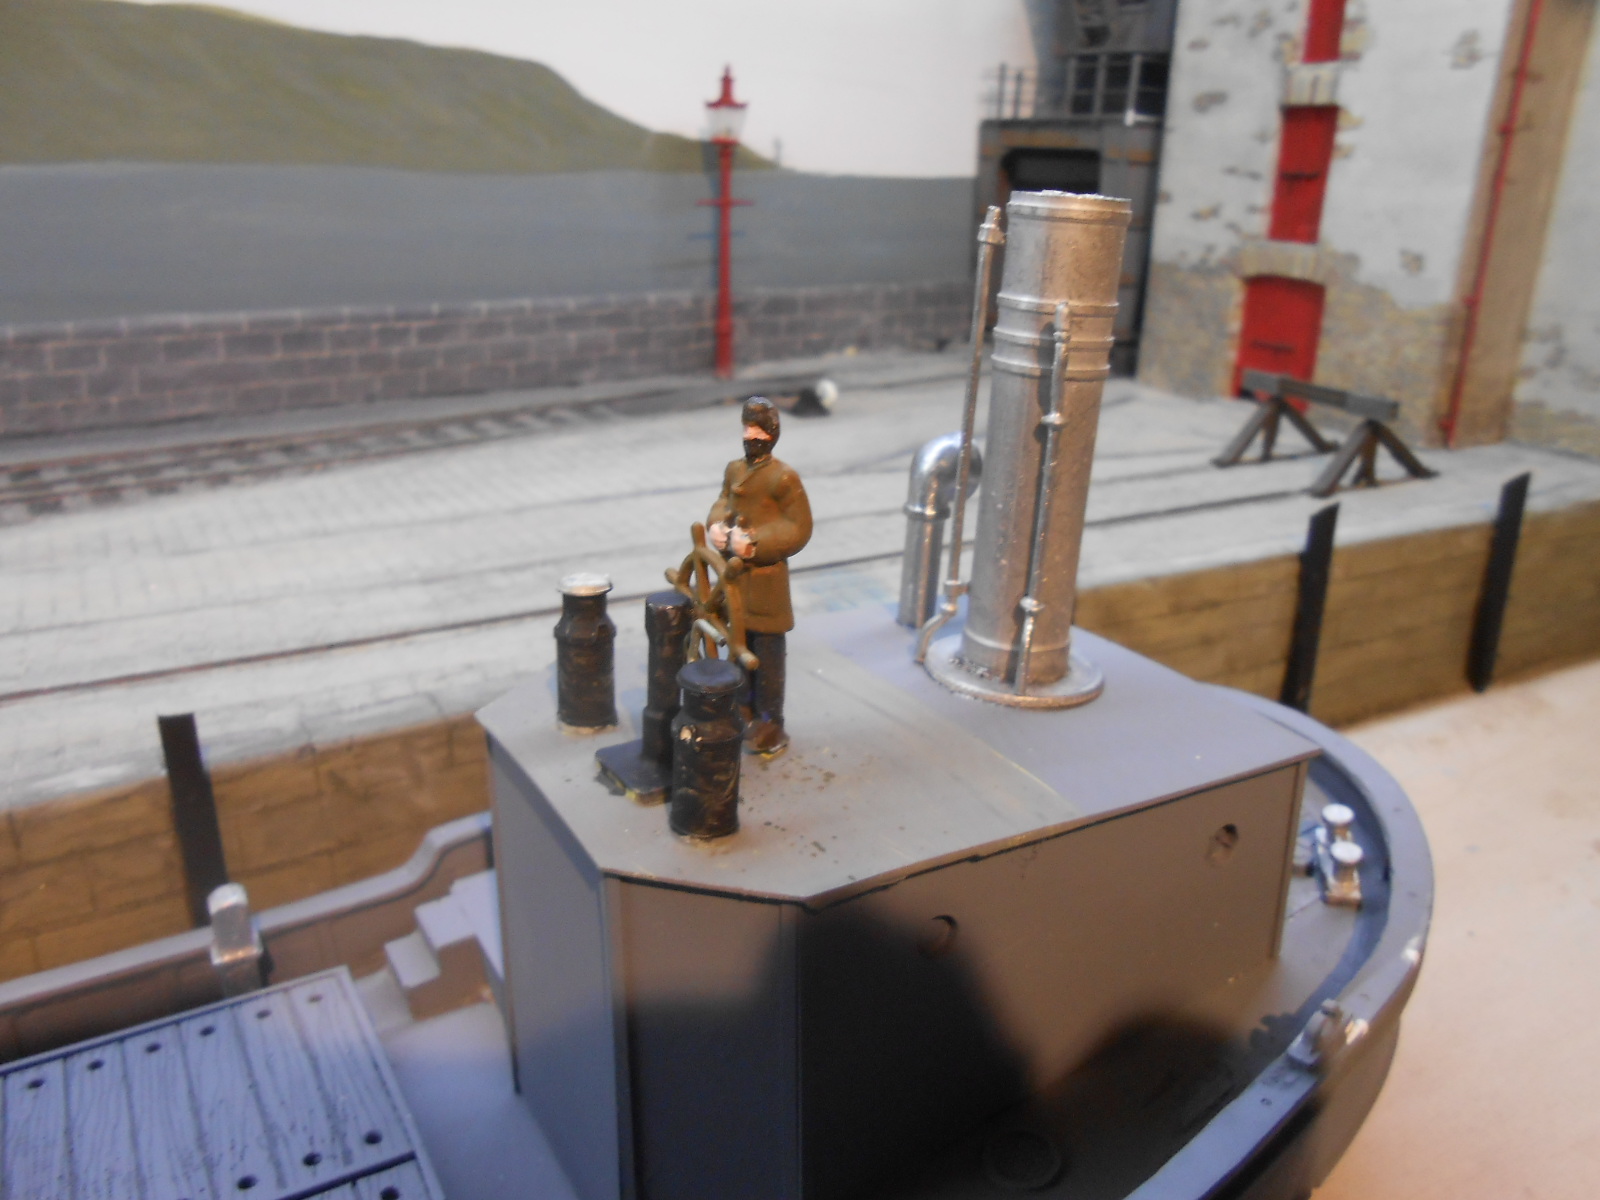
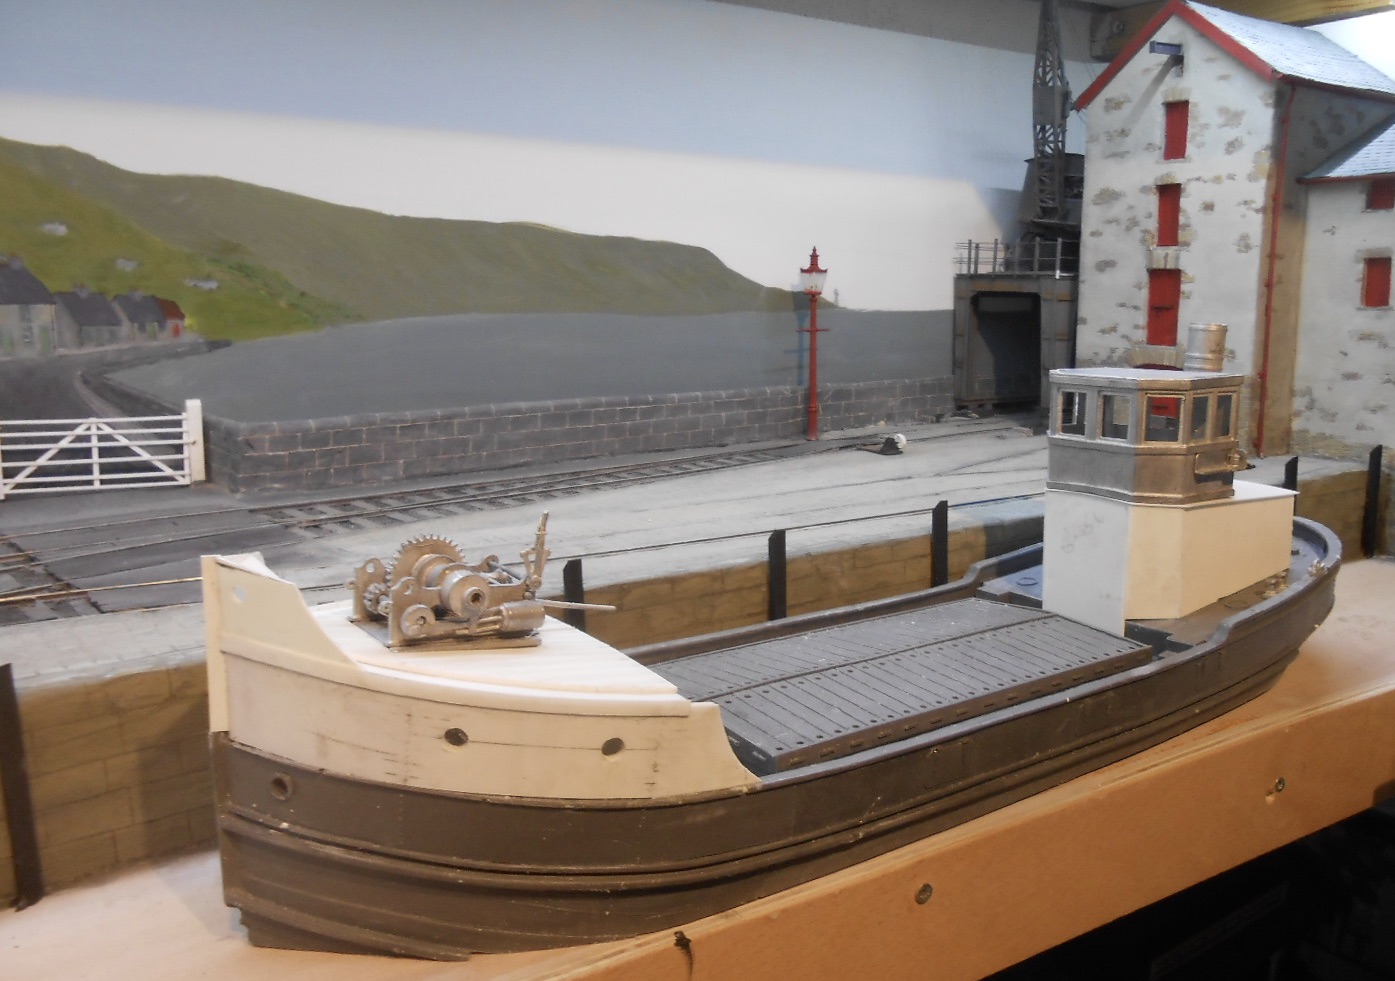
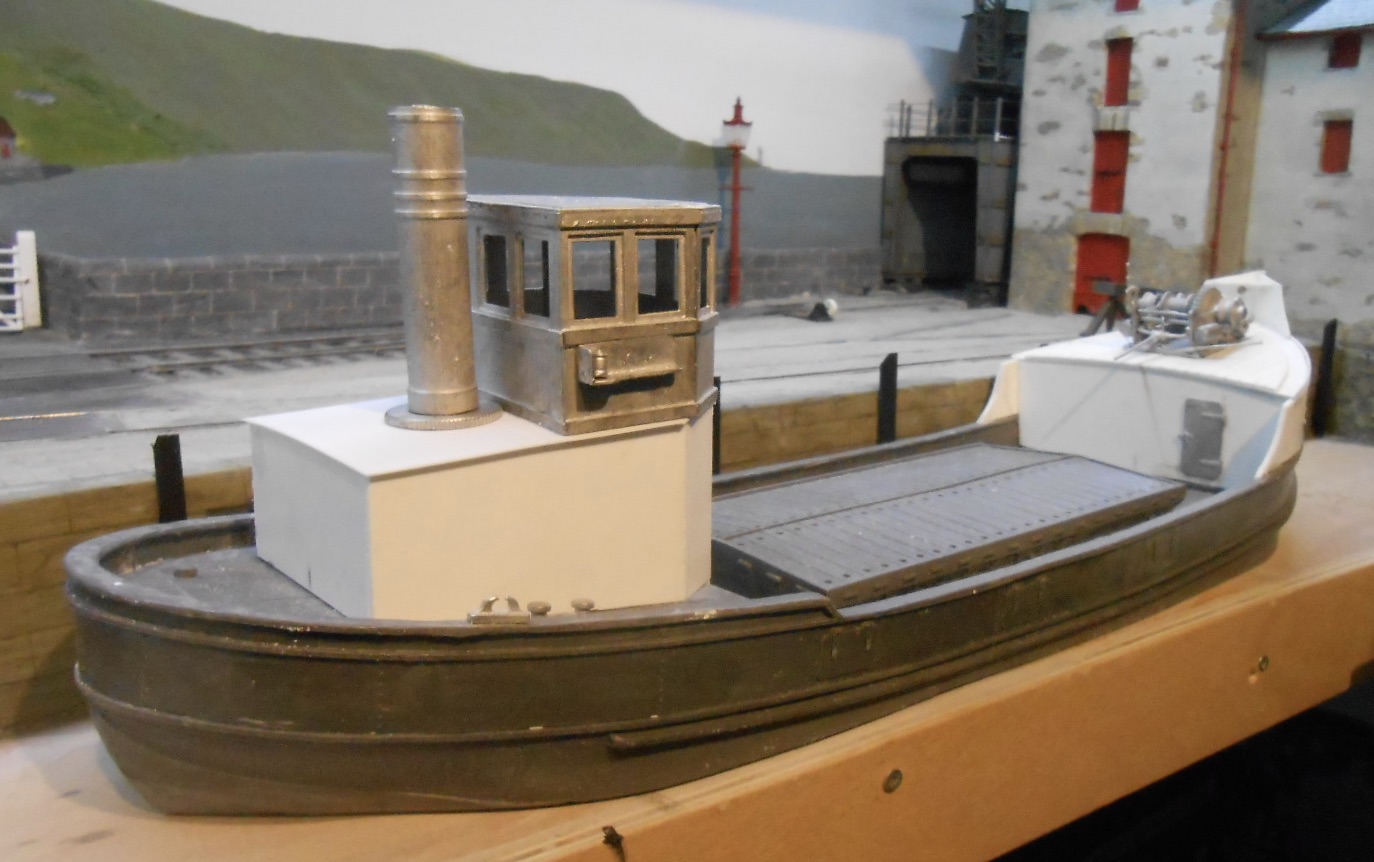
Work continues on the Acla, though it has taken longer than I thought to get to the kit parts. Indeed, trying to decide when to prime the hull and likewise paint other bits has stirred the grey matter somewhat this week. Then, when I did get the Halford's rattle can out, it showed a fair few flaws that needed sorting. It's not called a 'witness coat' for nothing... There was also the matter of a bit of extra detailing for the wheelhouse. Managed to find a duffle coated figure in my box of little people, so, with a repaint [including a bushy beard], he now stands at the wheel. Clyde Puffers has pretty vestigial controls - a stop/go lever and another to engage reverse seems to be about it. With Acla being more 'sea-going', seemed appropriate to to have something a bit more sophisticated. So, we have a compass binnacle and a connection to the engine room - though both are actually white metal milk churns! No matter, they can barely been seen anyway - its more about just creating an impression. Today, I did actually get around to adding some bits from the kit - some of which I can identify, others, I don't have a Scooby. Steam pipes, ventilators, hooter and capstan are all fairly obvious, as is the funnel of course, but quite what the difference is between a fairlead and a bollard I'm not sure and Samson posts likewise. The instructions for fitting the rudder and steering gear were pretty vague - so I took the easy way out and omitted most of them, I'm afraid. Steering gear on the Acla is much more 'internal' than external! What I can't avoid is all the rigging on the mast and derrick. This is going to require some careful planning, as I'd prefer to make this bits either removable, or capable of folding down for transport.

-
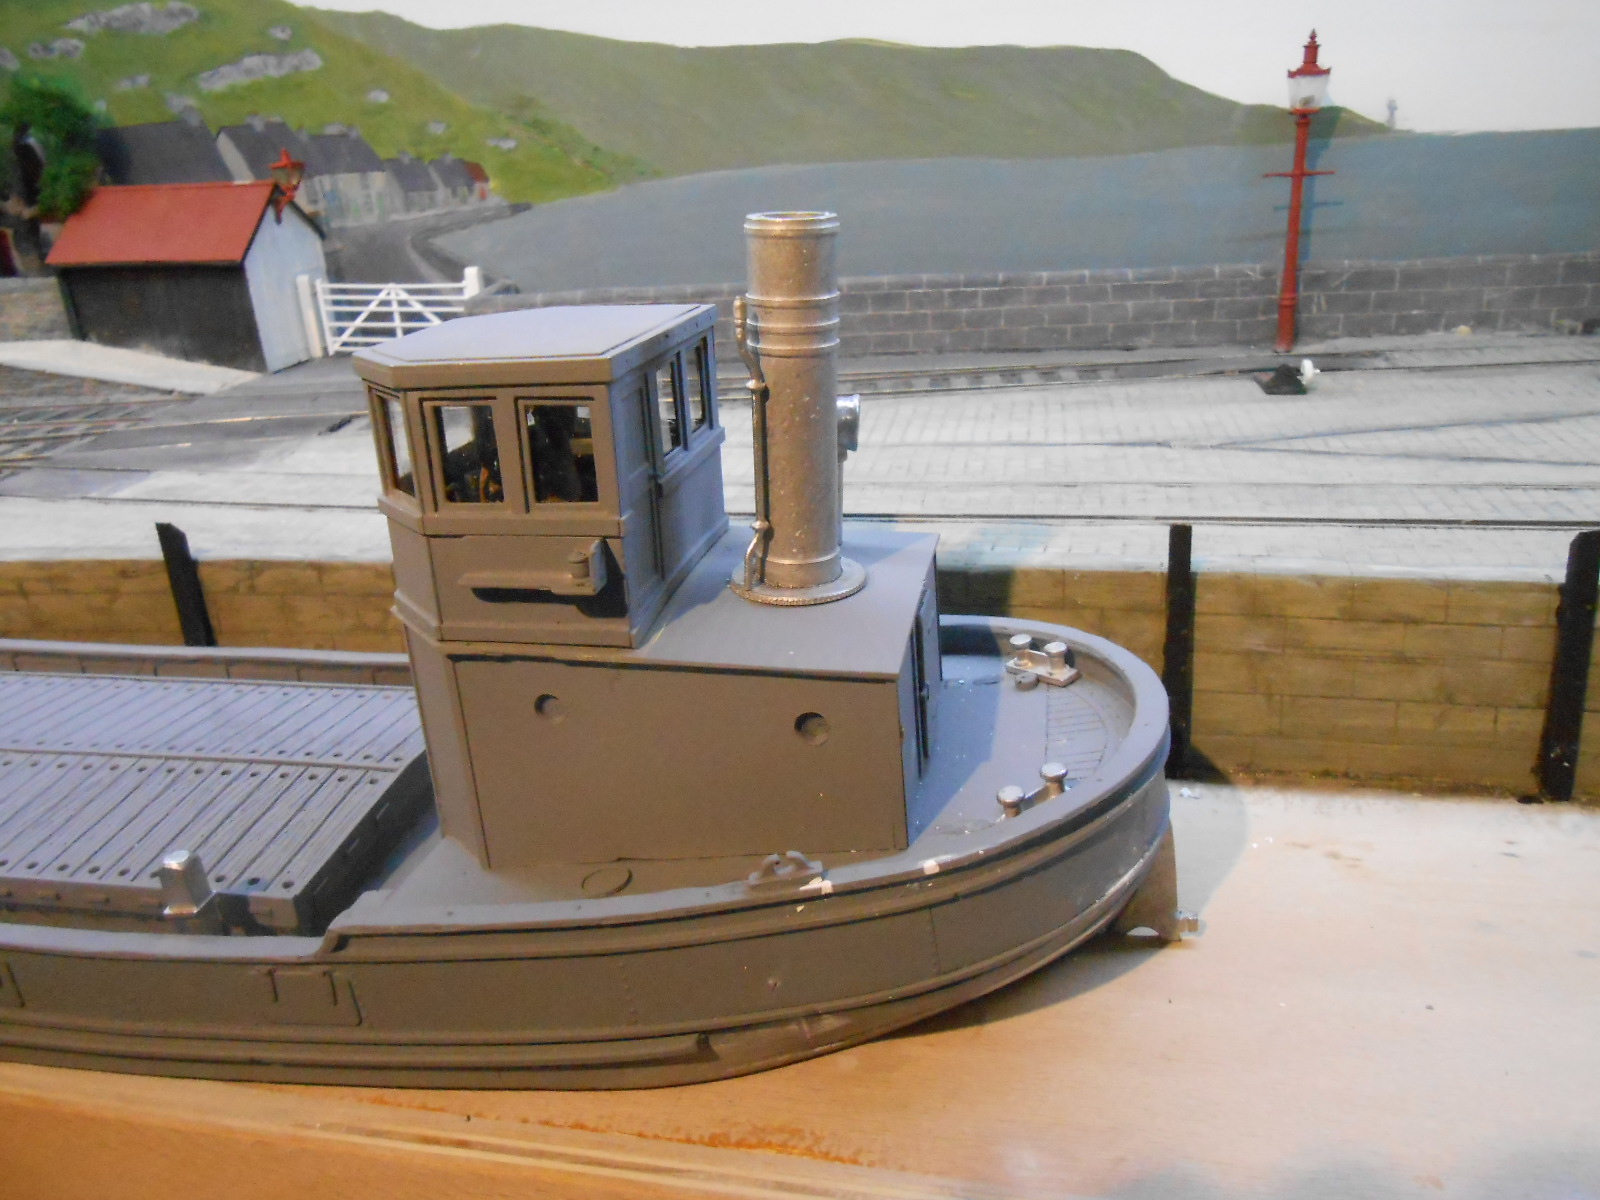
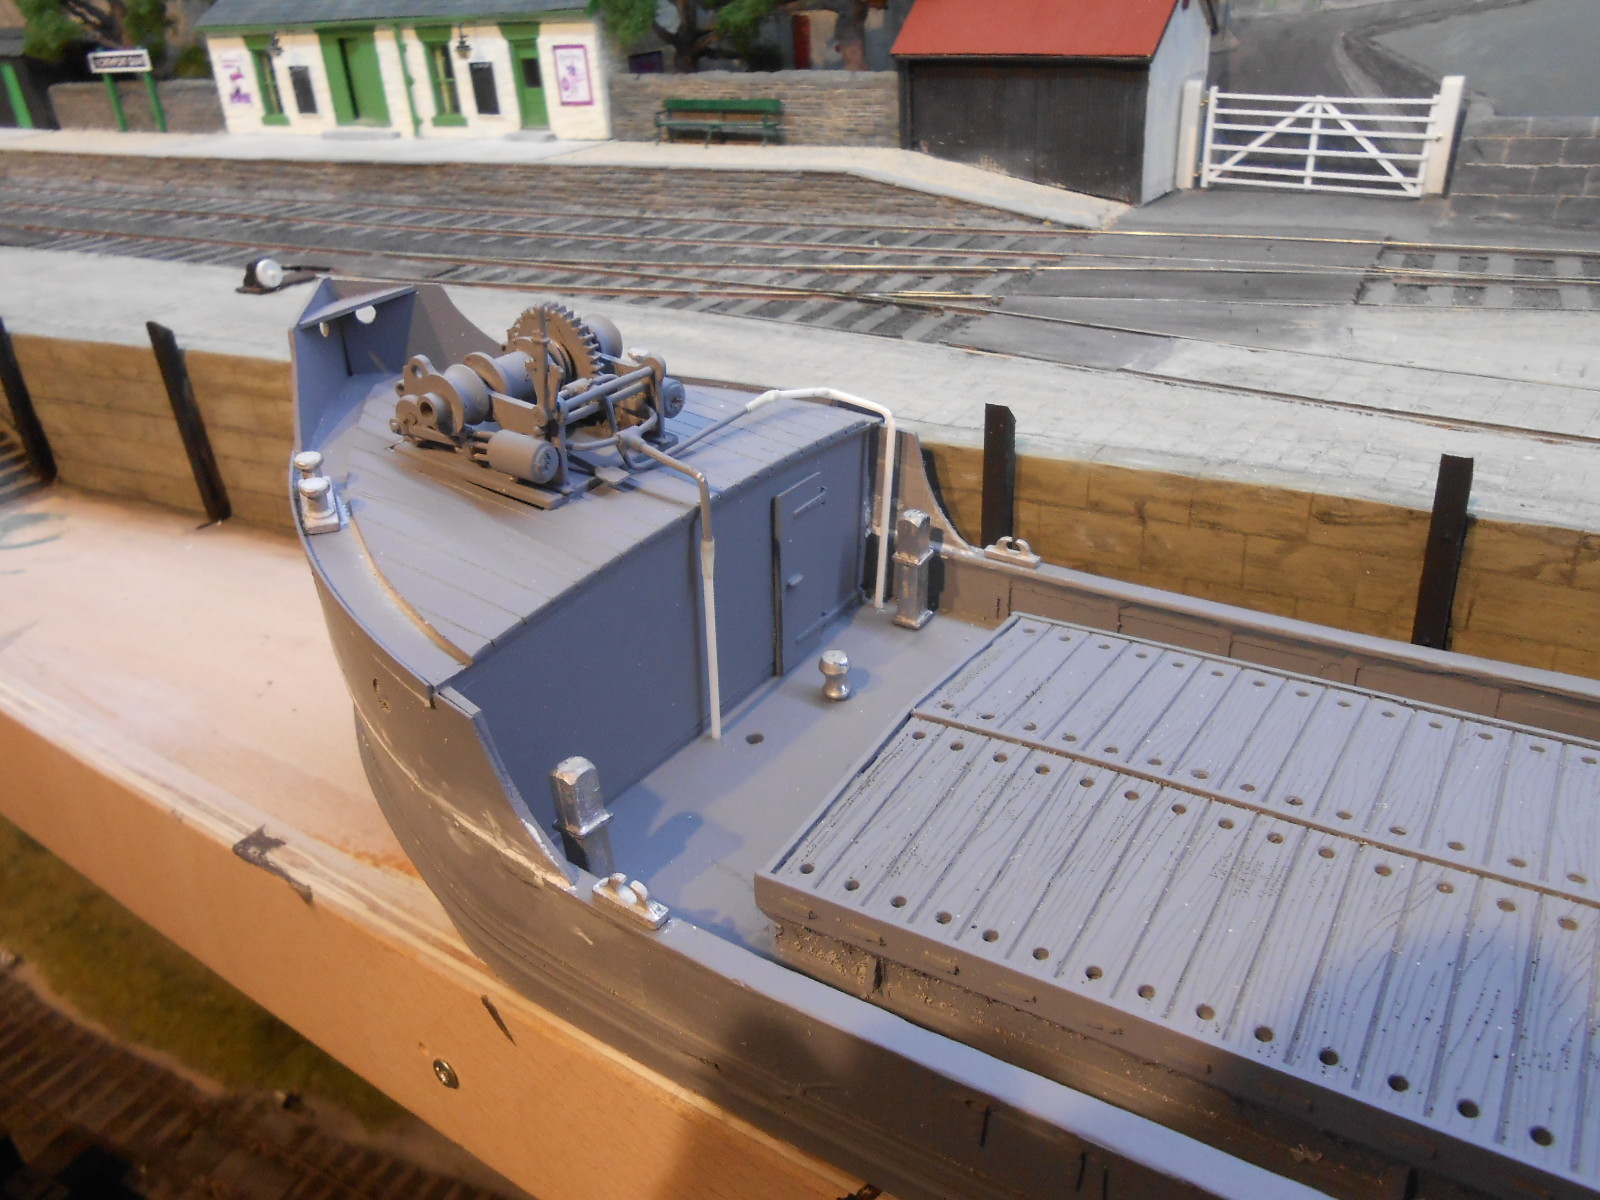
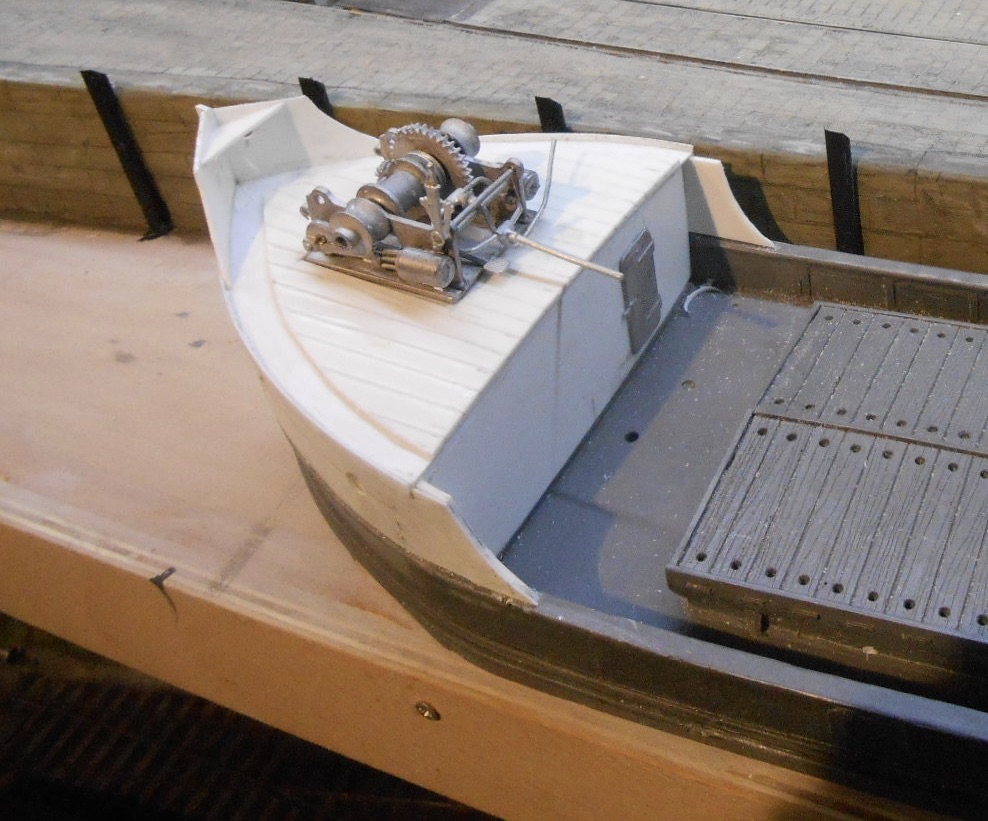
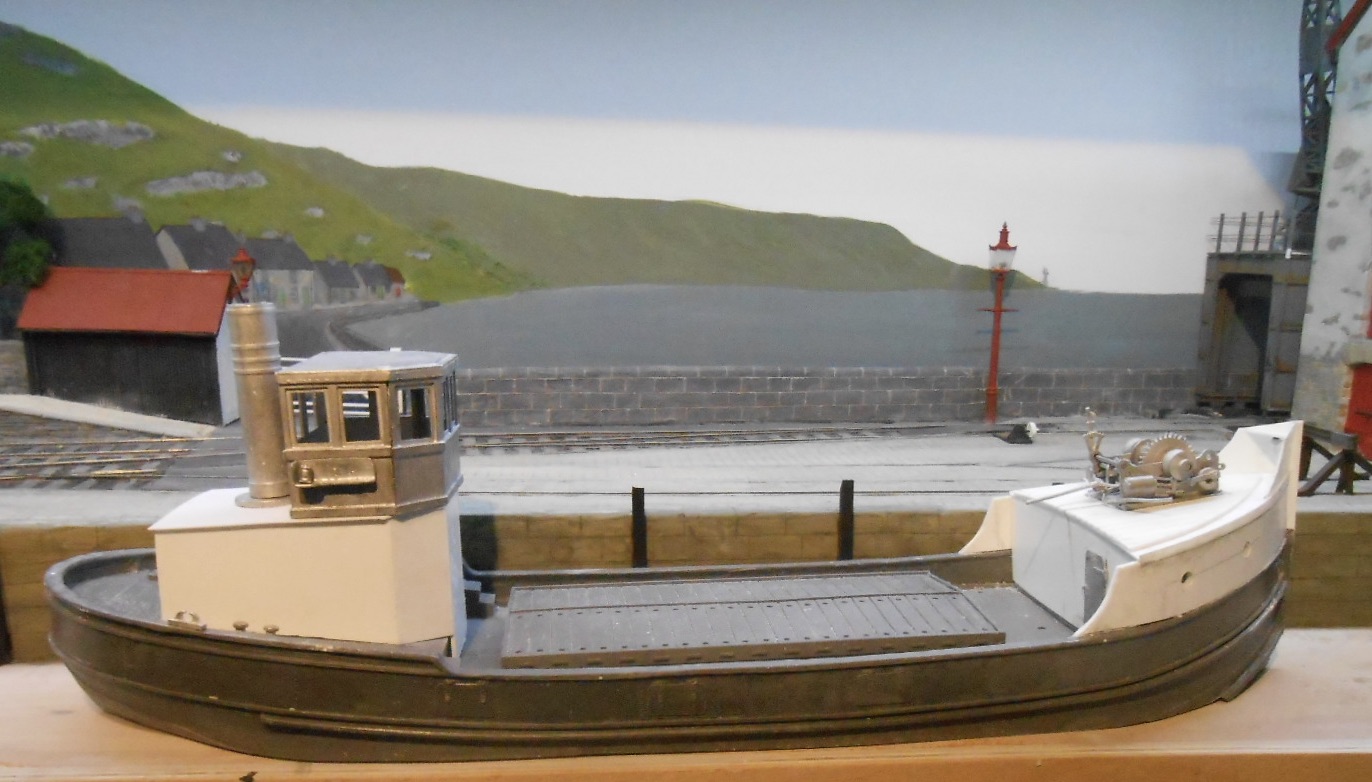
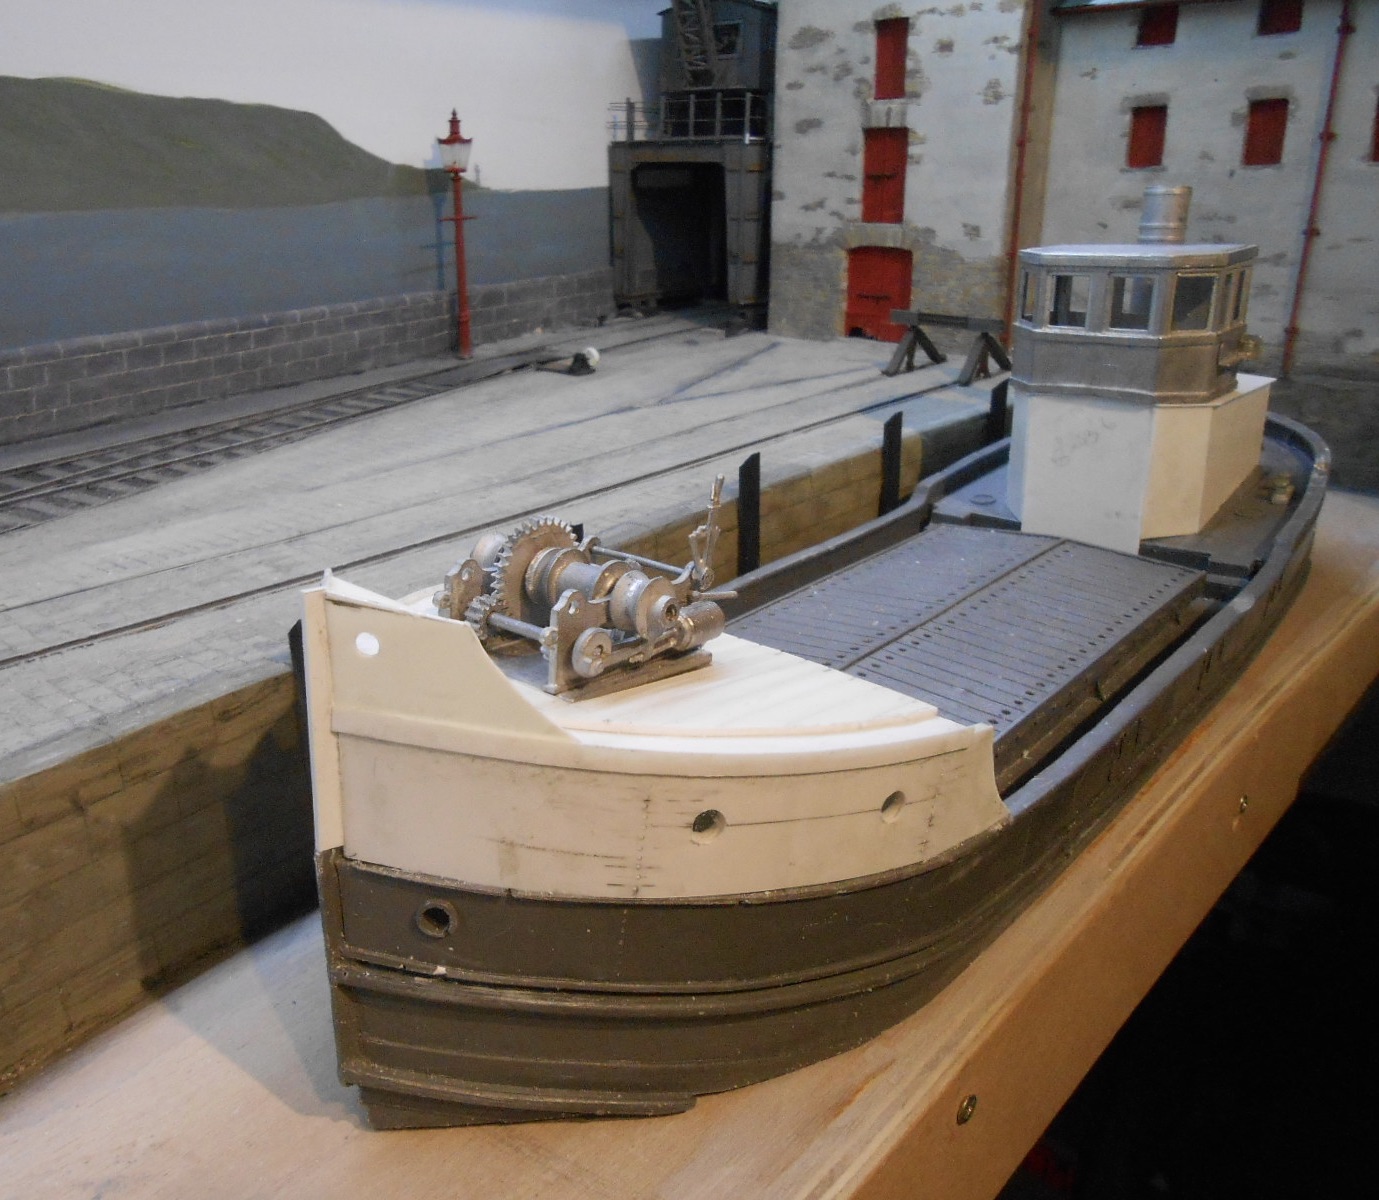
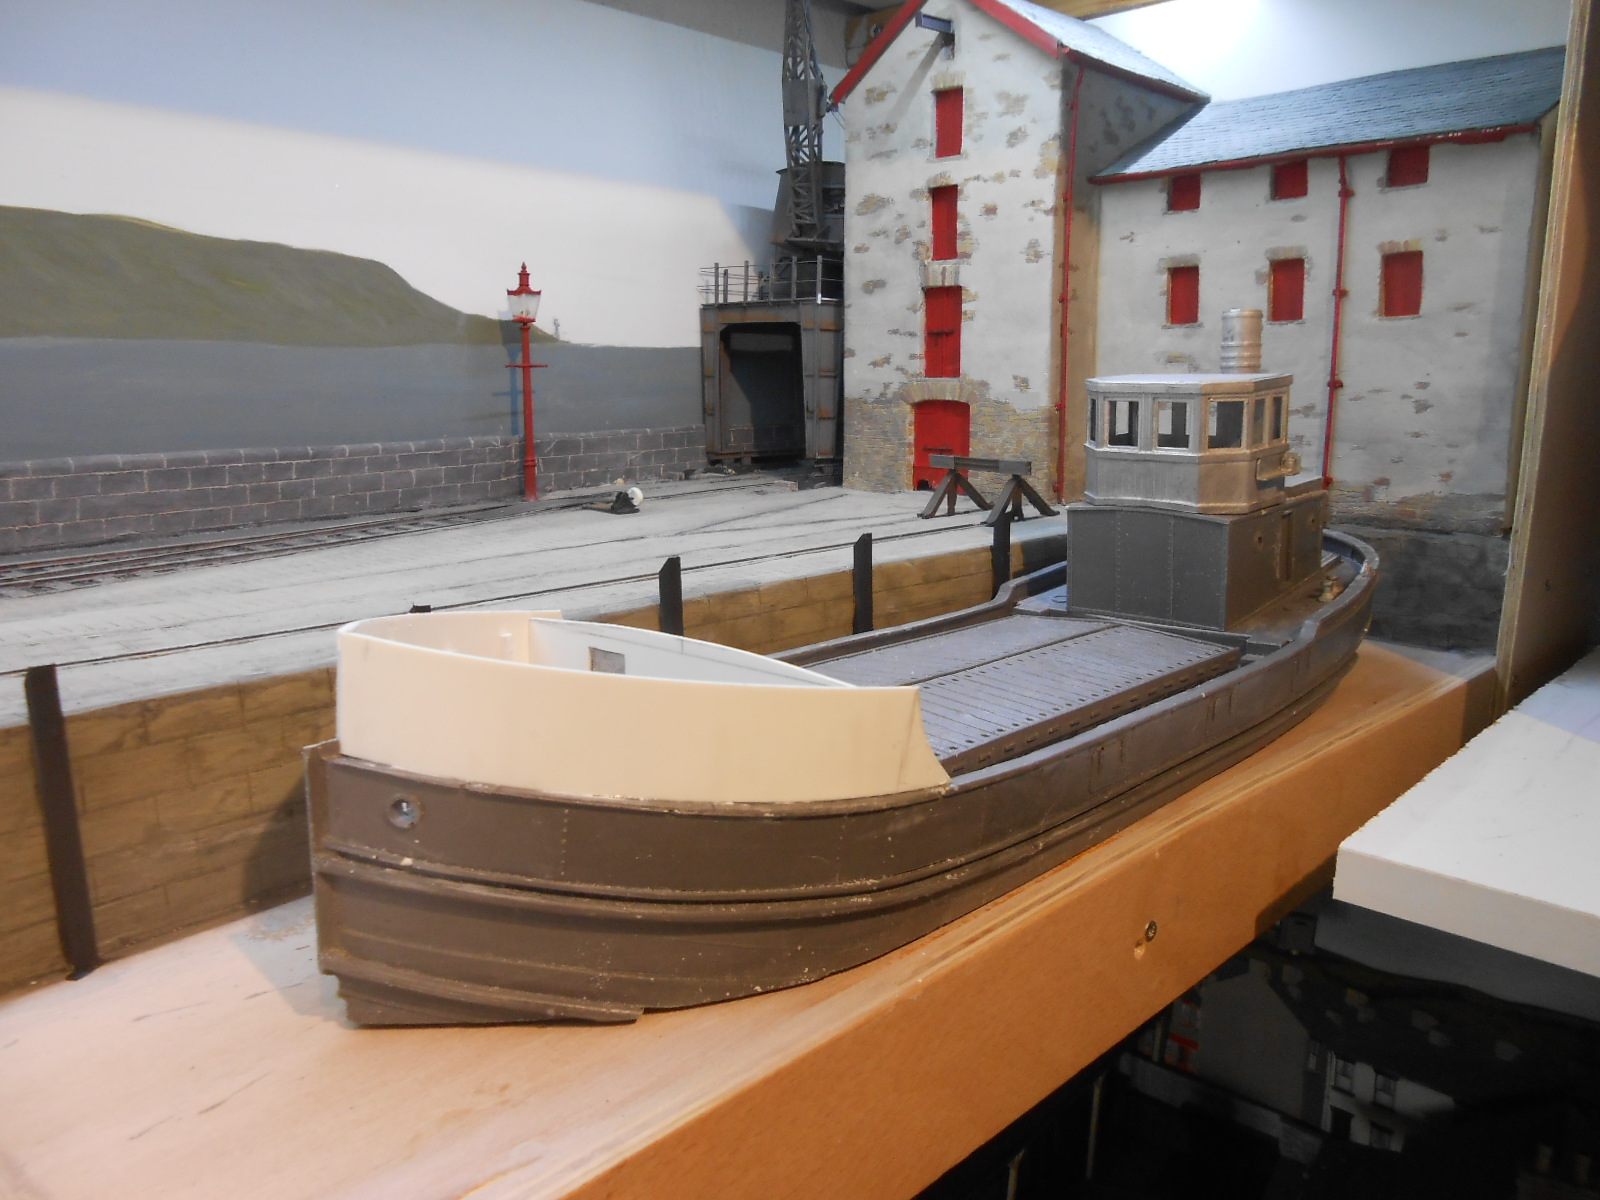
I've been concentrating on trying to get the balance of the superstructure right on my coaster. For me, the trouble with a Clyde Puffer is it looks unbalanced with its low bow [almost no forecastle] and the wheel house right at the stern, with the funnel in front. Clearly it worked, but not for me. So we have a higher forecastle and the wheelhouse is now in front of the funnel. All done with plastic sheet and strip. I've ended up discarding the stern superstructure, as it would have been too much of a faff to mount the wheel house at the front of it. Instead, made a new one and I think it all looks better for it now. Apart from the forecastle, nothing is fixed down, including the steam winch, which I made up ages ago. Most of the rest of the work should now be using the castings and fittings from the Langley kit, though I'm probably going to need a couple more ventilators, several ladder type steps and quite a lot more handrails. I've been looking at my road atlas of Ireland, in search of a suitable name for the coaster. After discarding various place names, bays and mountains, realised the answer was staring me in the face: "Acla". This is the Gaelic for Achill [island], which is very much central to the little ship's route from Broadhaven [Port Ross?] down to Westport. Hope you approve JB!
-
Just heard we have lost one our most creative modellers, thinkers and writers, with the news that Iain Rice died on 8th October. There is a short obituary online, but others are sure to follow. For me his books and articles were eagerly looked forward to as he always had something interesting to say and likewise in colourful prose too. One of his last works, his book 'Cameo Layouts', will I'm sure remain a standard text for many years to come. Many thanks for all your ideas, Iain.
- 6 replies
-
- 13
-

-

-

-
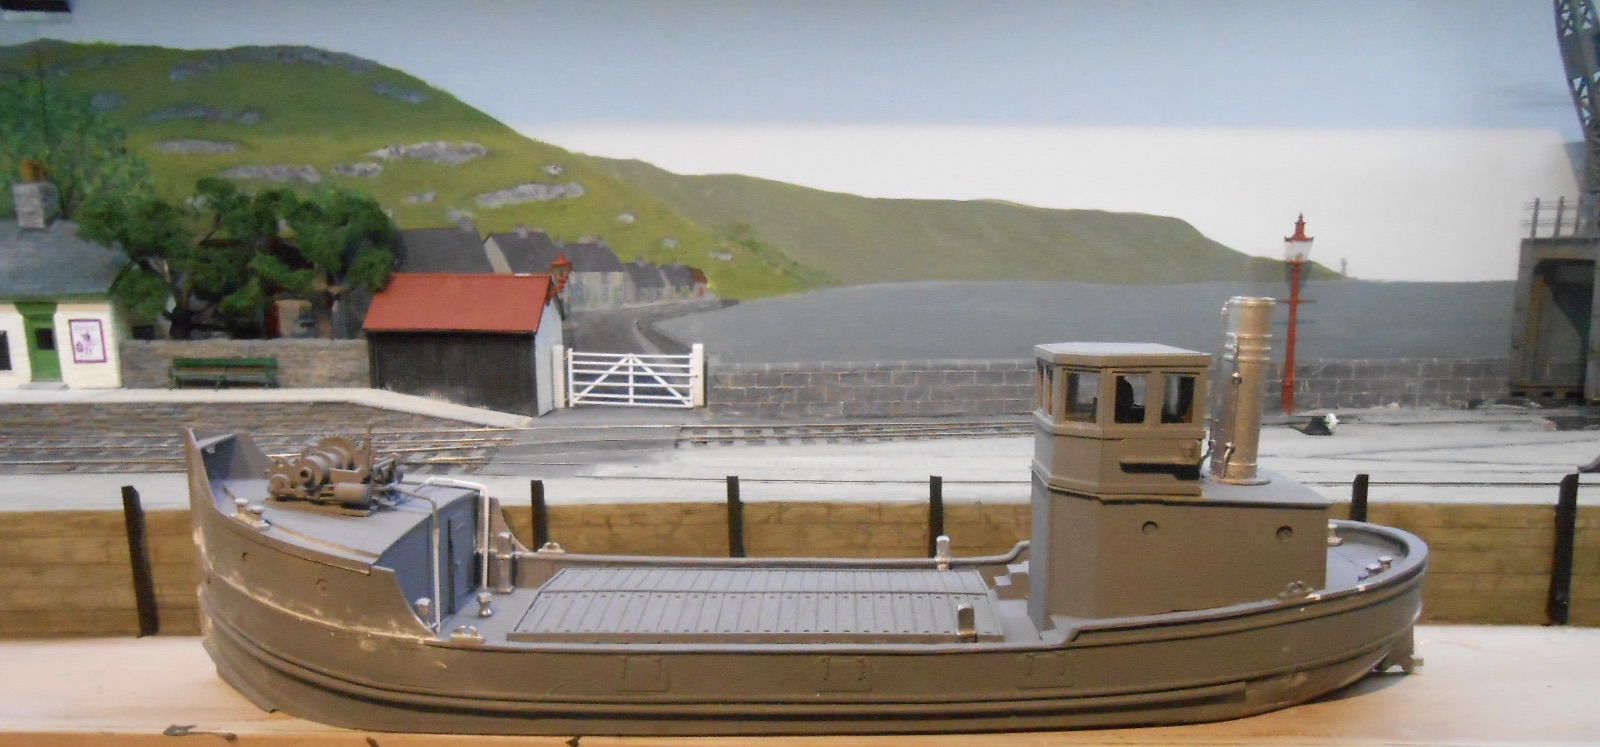
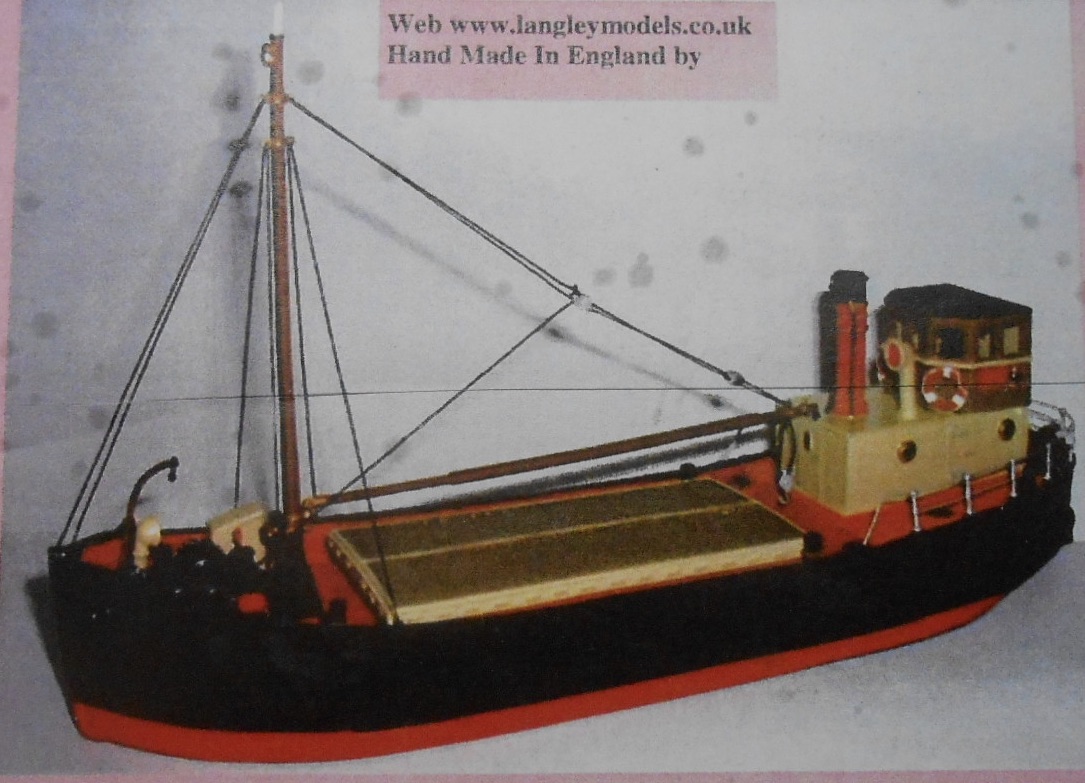
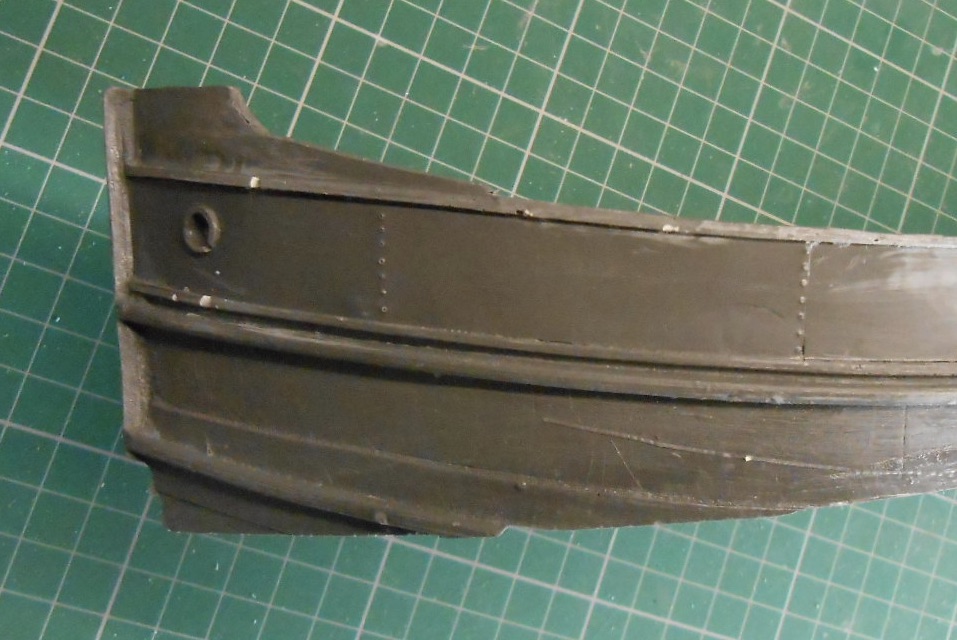
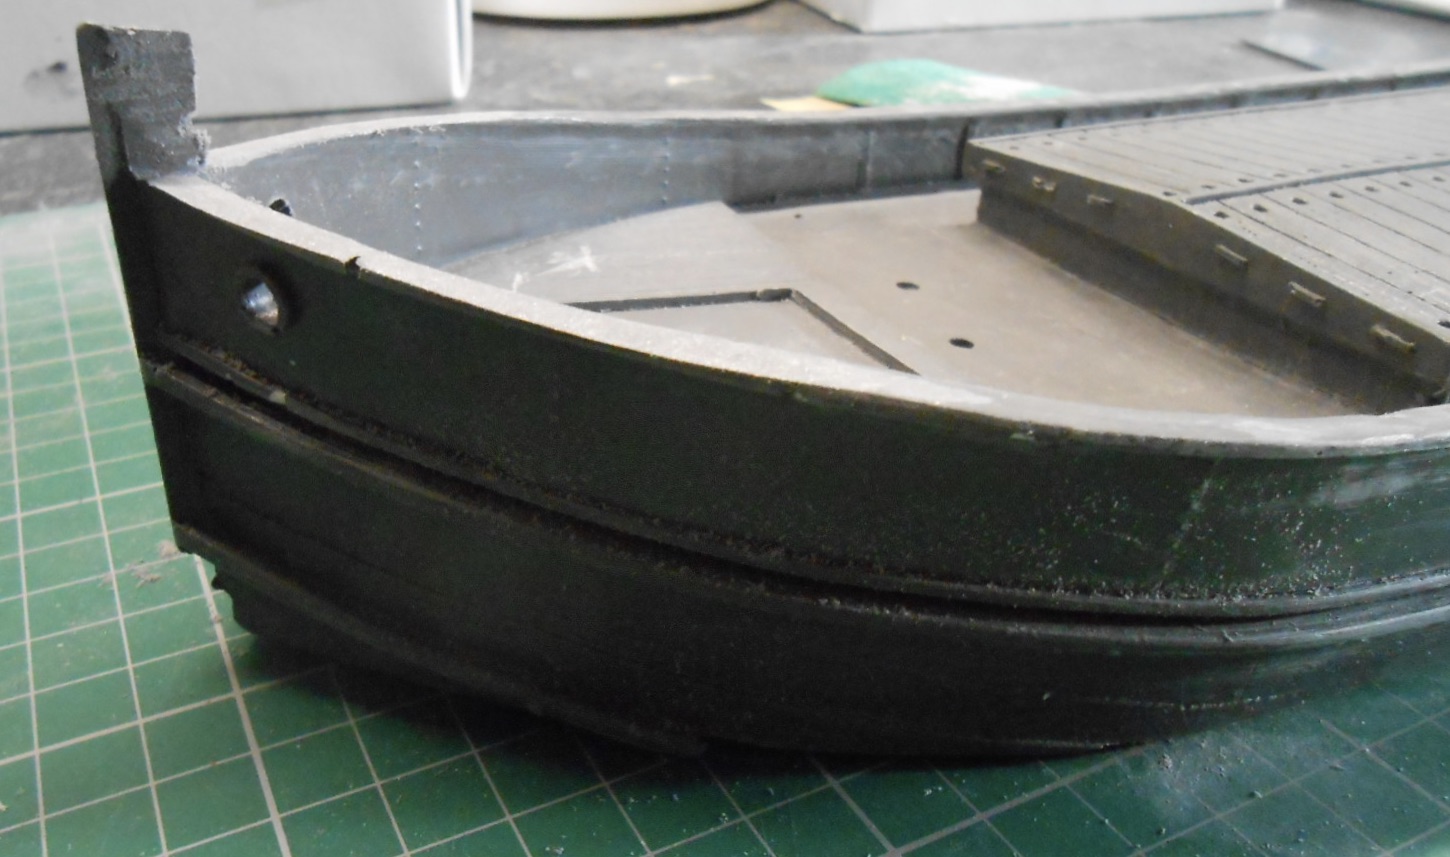
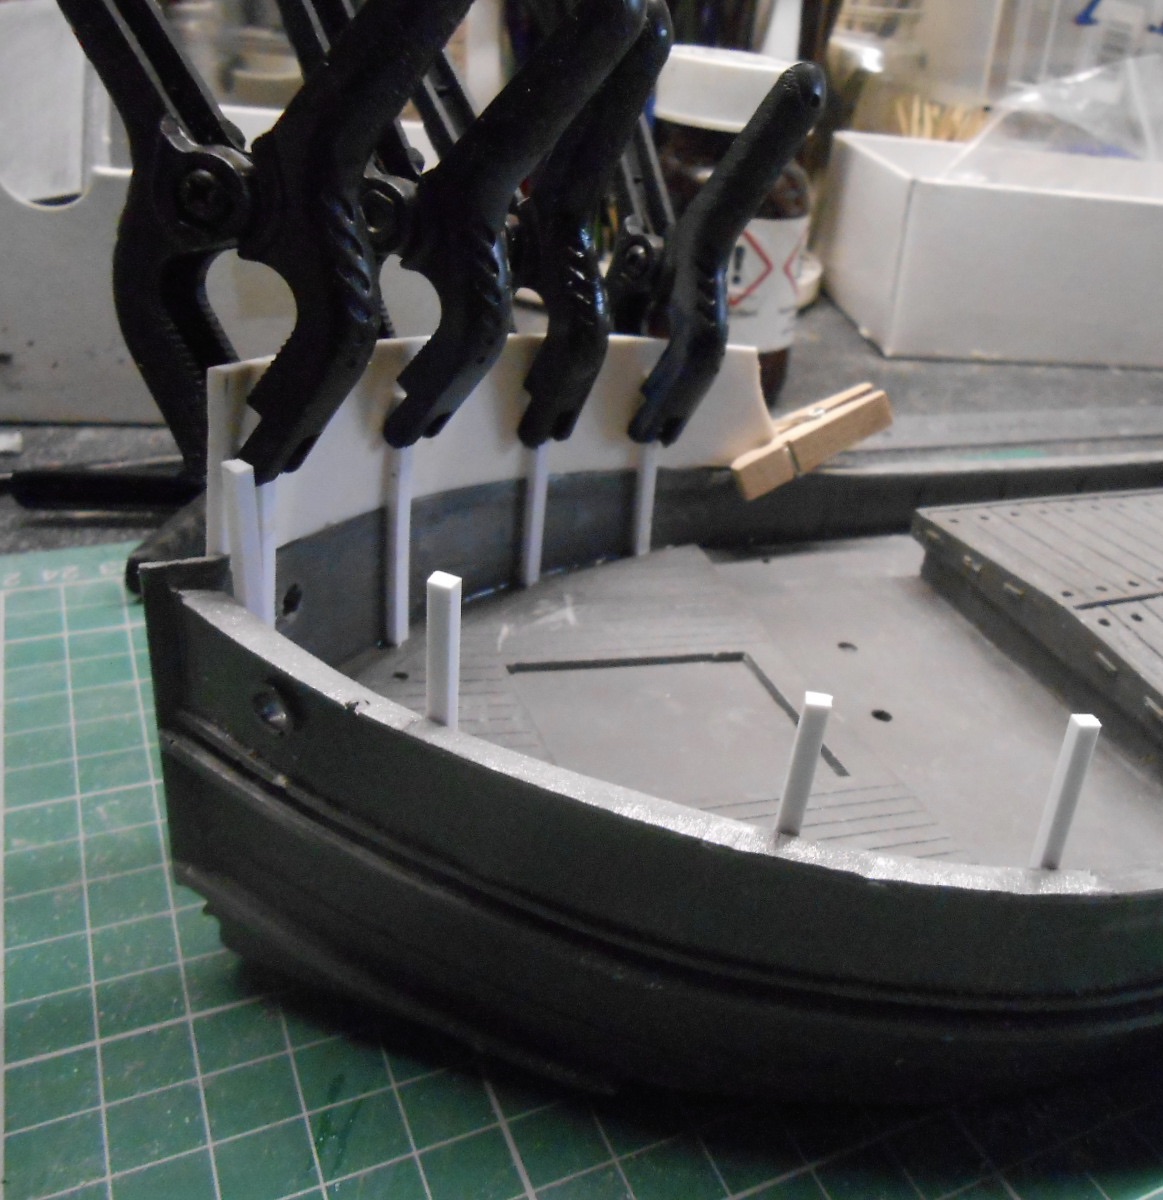
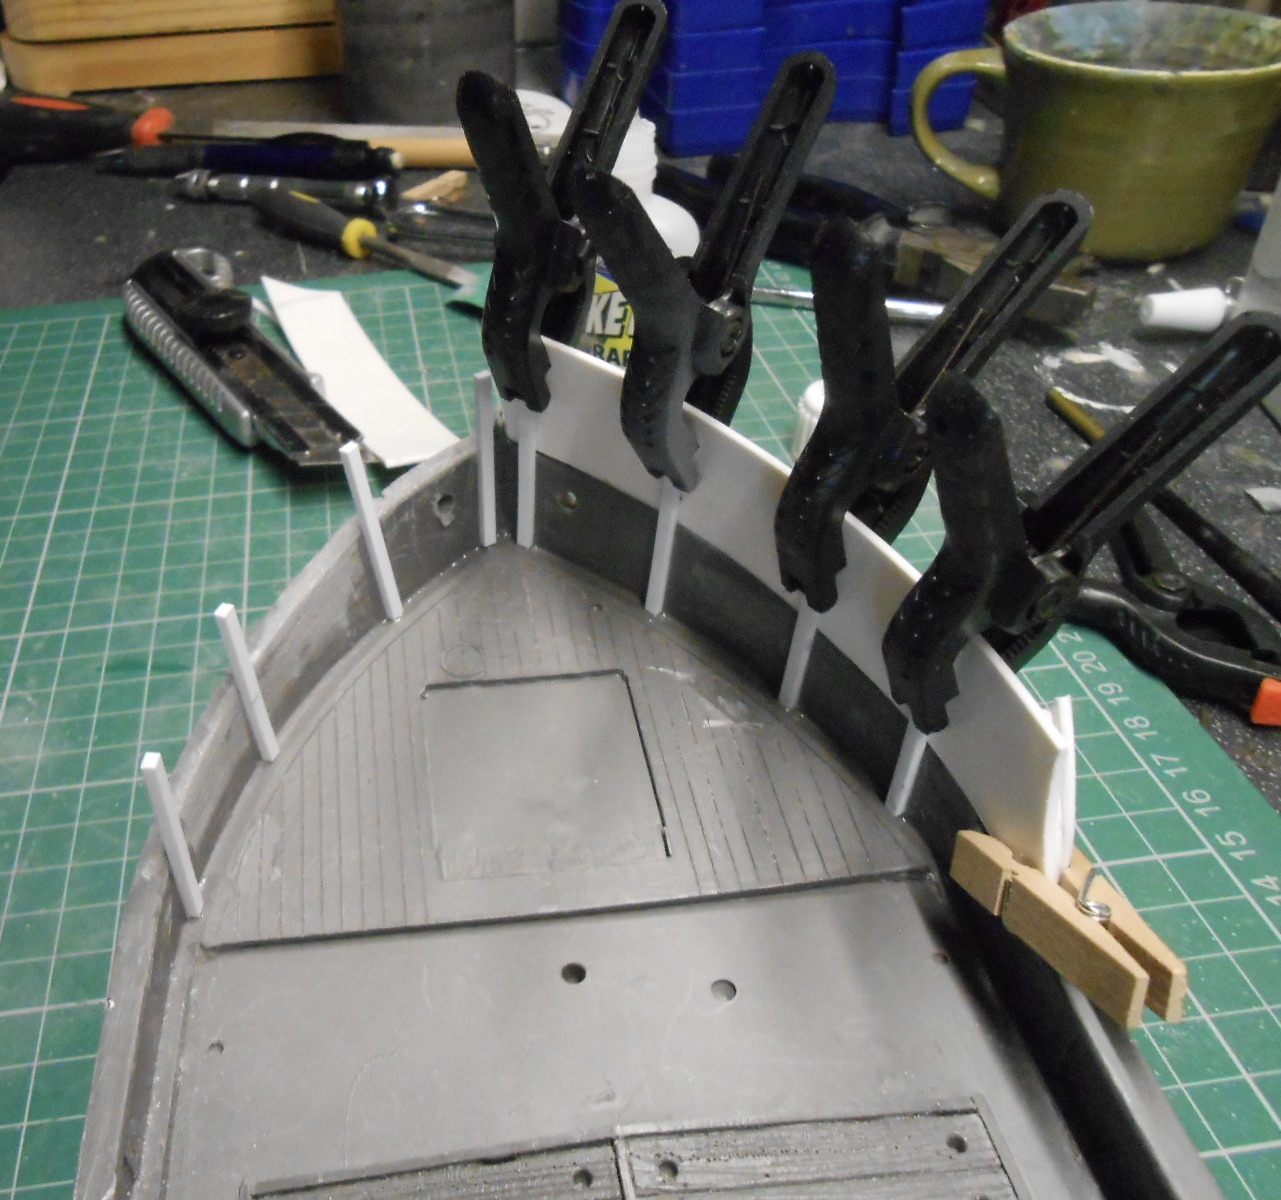
Puffer/Coaster Am almost ashamed to admit that I bought this Langley kit of a Clyde Puffer the best part of ten months ago. Others will keep kits for years, but I much prefer to get on with what I have, so it is unusual for me to have an unmade kit this long. However, the time is now right to get it built - so here goes. I doubt that many, if any, Clyde Puffers ever made it to the west coast of Ireland, while I'm afraid I've never found the design particularly attractive. However, in Chatham Dockyard we have VIC96, a post war naval tender very much based on the Puffers and to my eyes, far more attractive, so this is going to form the basis for my model. There is a picture of the VIC in my Northport Quay thread. It is not going to be a slavish copy & this also adds to its allure, because what I'm trying to create is a small coaster, able to ply its trade between Broadhaven, Westport and Galway. The numerous offshore islands give a degree of protection from Atlantic storms, while there are enough small communities that would no doubt have benefitted from a weekly visit from a little ship. So what's to be done? The only model ships I've ever built were Airfix kits in my youth, but am hoping the skills I've built up since then are transferable! The main tasks are to build up a much more substantial forecastle, plus altering the stern area so that the wheelhouse sits in front of the funnel. The Langley kit is based around a large, heavy, resin casting for the hull, so the first job has been to carefully saw off the small extensions on the bow and then build up the new shape with plastic sheet. The photos below show how far I've got today. The main problem is that there are very few straight lines on the kit, so new pieces need to be carefully filed to fit. Note however, that this is just a subframe [60thou sheet]. An outer layer of 20thou will go on top to represent the hull plates, rivets and so on. Have used cyano to attach the plastic to the resin hull, plus additional ribs made from 80x100 strip to reinforce things.
-
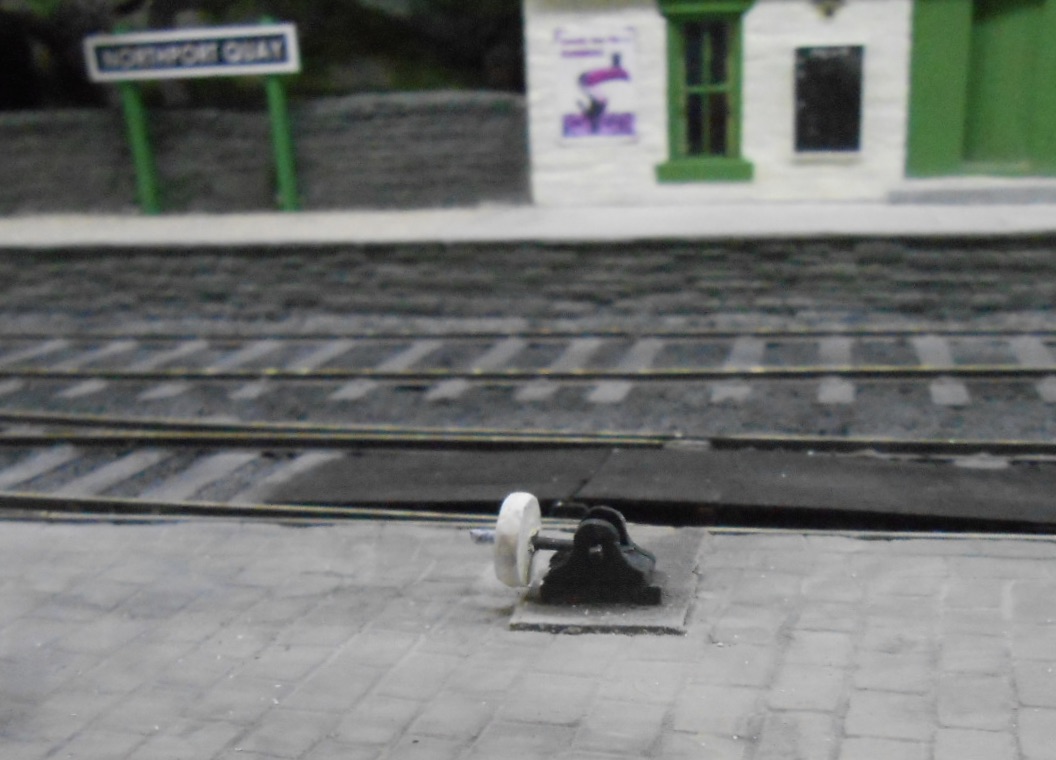
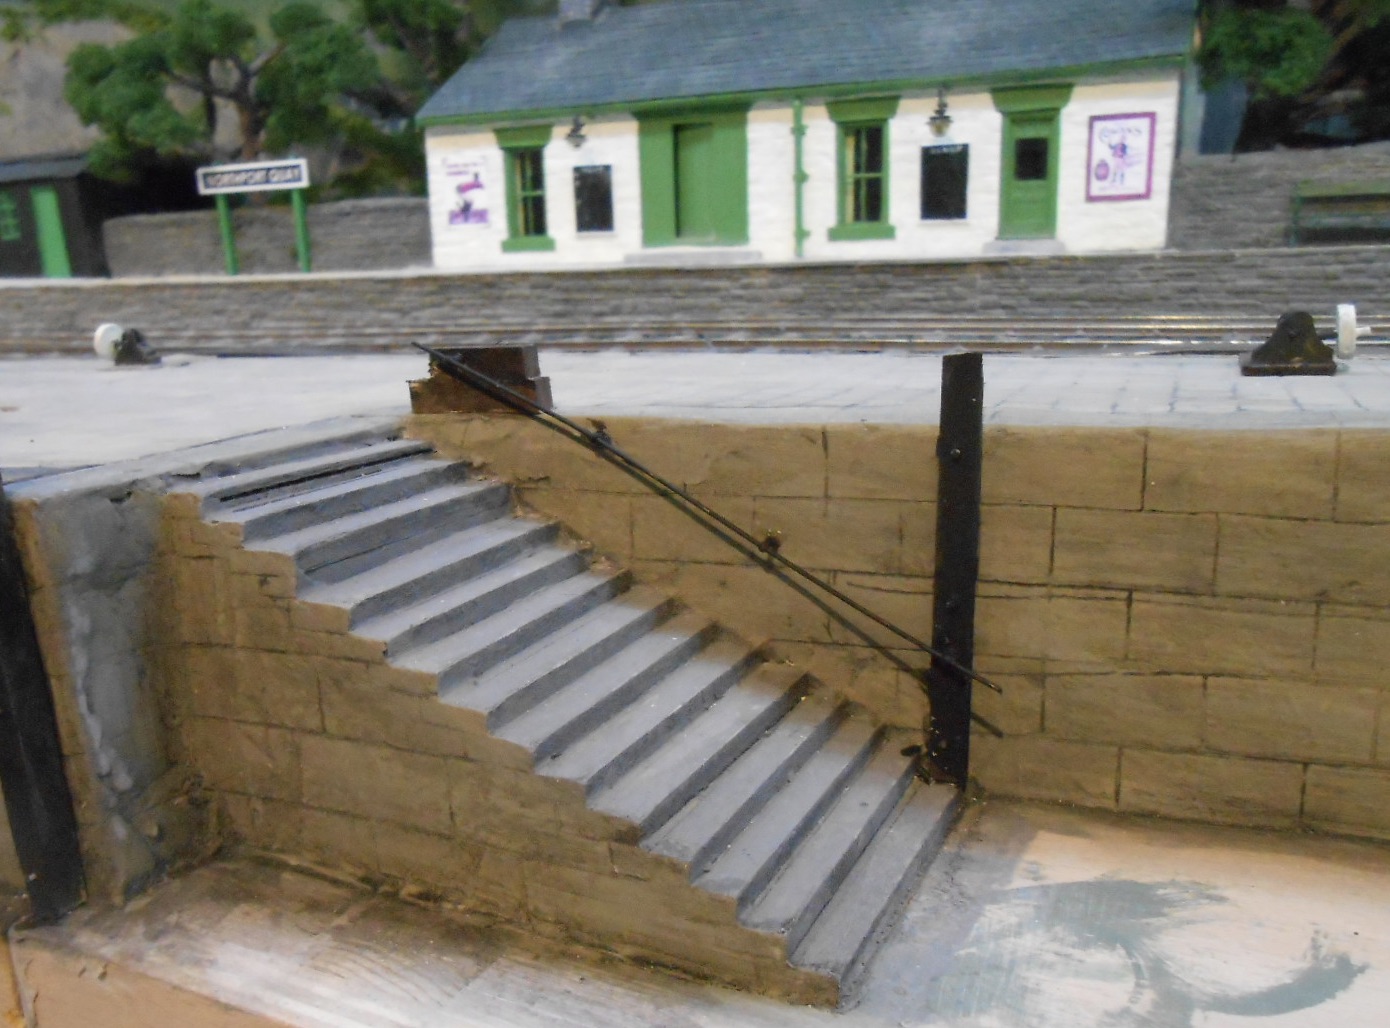
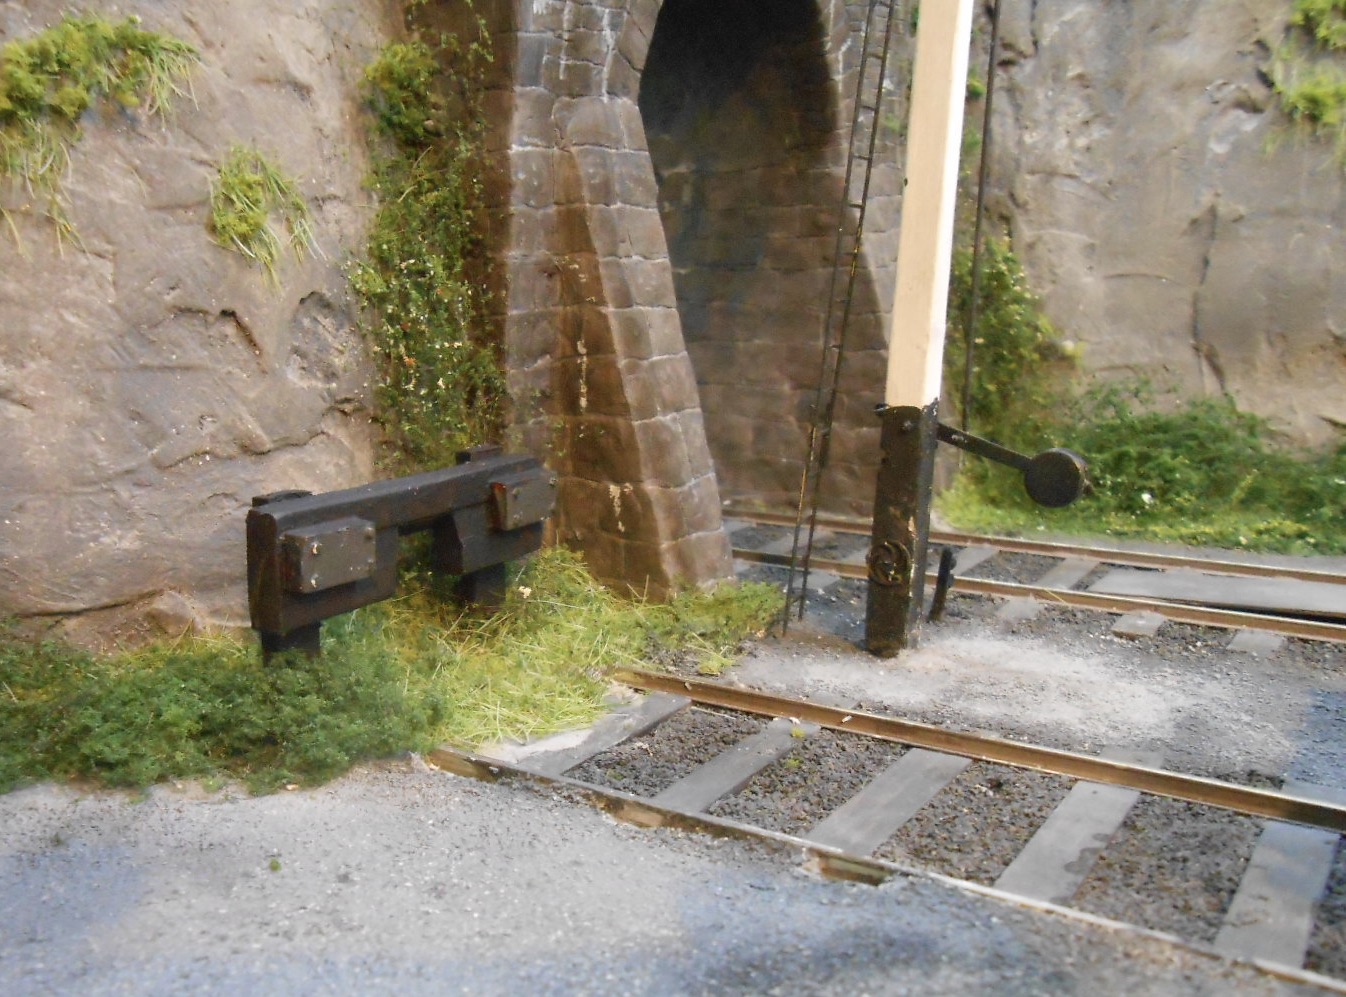
Finally getting back to doing things on the new layout, spurred on a little that it is the Uckfield Show next weekend and it is booked to appear there next year... It's been little bits and pieces mostly - trying to complete key bits of the scenery, prior to building the coaster. So, we have the [non-working] weighted point levers, handrails to the steps going down the quayside and a new set of buffer stops by the tunnel mouth. All very much hand made.. The weights on the point levers are a couple of washers soldered together, while the pivot is a short piece of brass wire and the side frames are plastic sheet, filed to shape. The step hand rails use locomotive handrail knobs and brass wire. Where the handrail rises above the quayside, I've contrived a couple of large wooden block to put the top knob in, because it is right on the baseboard joint. This will hopefully be less likely to be knocked off than a wire post - or indeed to puncture the hand of anyone assembling the layout! The buffer stop meanwhile is recycled from Arigna Town & is very much a locally made affair, as were so many around Ireland. I've also painted out a section of hillside with sky, as it was rater dominating the backscene.
- 242 replies
-
- 14
-
-
Thoughts and prayers for all those affected.
-
Great project!
-
Much depends on the nature of the work. Is it cosmetic (paintwork or body damage), or is it mechanical (motor, gears and so on). Also, what are the models, specifically? Older stuff is probably easier to repair, being essentially simpler. Modern models are wonderful, but can be complex and not so easily fixed.
-
Have long thought that 0n16.5 is a great way into scratchbuilding and it certainly got me going. Plenty of cheap chassis available for mechanisms (which run better too in the larger scale), while hacking bits of bodywork and adding things like a new cab or taller chimney are easy to do. Such models may be at the freelance end of the scale, but you learn a lot and techniques soon become refined enough to enable having a go at something closer to a particular prototype, or indeed building a loco kit. Most of all, it can be good fun and you end up with a fleet of individual models that do not come out of a box, but still look good and work well as Tullygrainy has shown here.
-
Brookhall Mill - A GNR(I) Micro Layout
David Holman replied to Patrick Davey's topic in Irish Model Layouts
Hope you didn't do what I did when researching how to paint my nuns. An internet search resulted in some very interesting suggestions of how to dress up for the weekend! -
Looks pretty darned good to me! Sound advice too.
-
A pox on spellcheckers! Foynes also comes up as found, sounds, fitness and corners. Suspect it works by translating Cantonese into Serbo-Croat, via Martian and Klingon...
-
This may appear elsewhere, but a report in Railway Magazine for September, p102, says the Found a line is to be repaid and rebuilt as part of the Irish Rail development plan for freight.
-
It's the colours for me. A lovely muted palette, so subtle, so effective.
-
Superb buildings and scenery. The stock ain't half bad either - love that wooden wagon.
-
I've certainly been called worse! Maggie will be making her debut at Sudbury, Suffolk on 1st October, afterwards travelling to Cultra on 12th November.
-
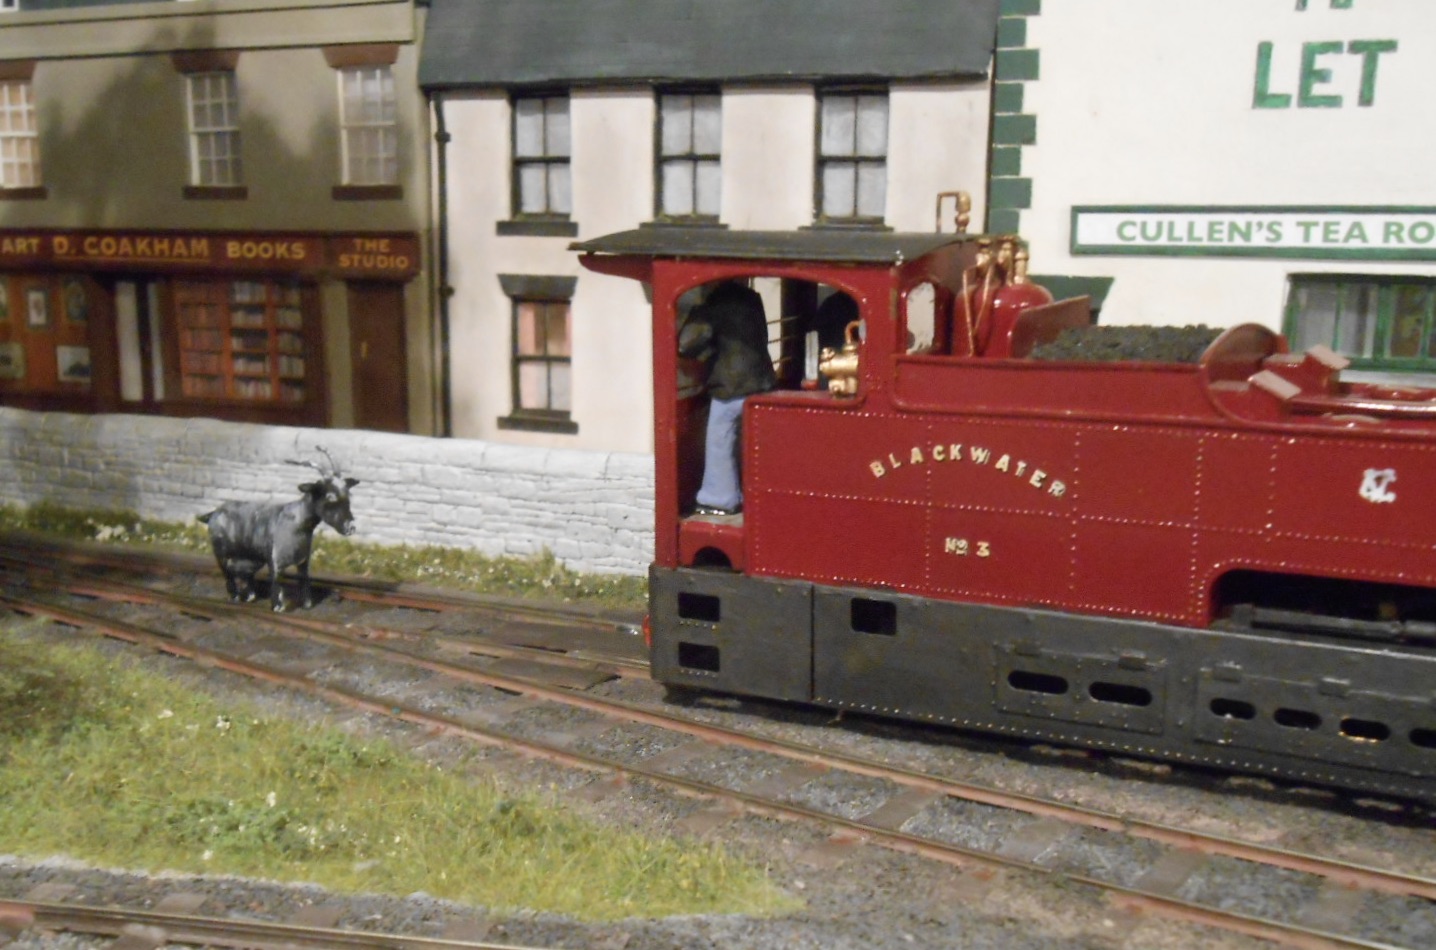
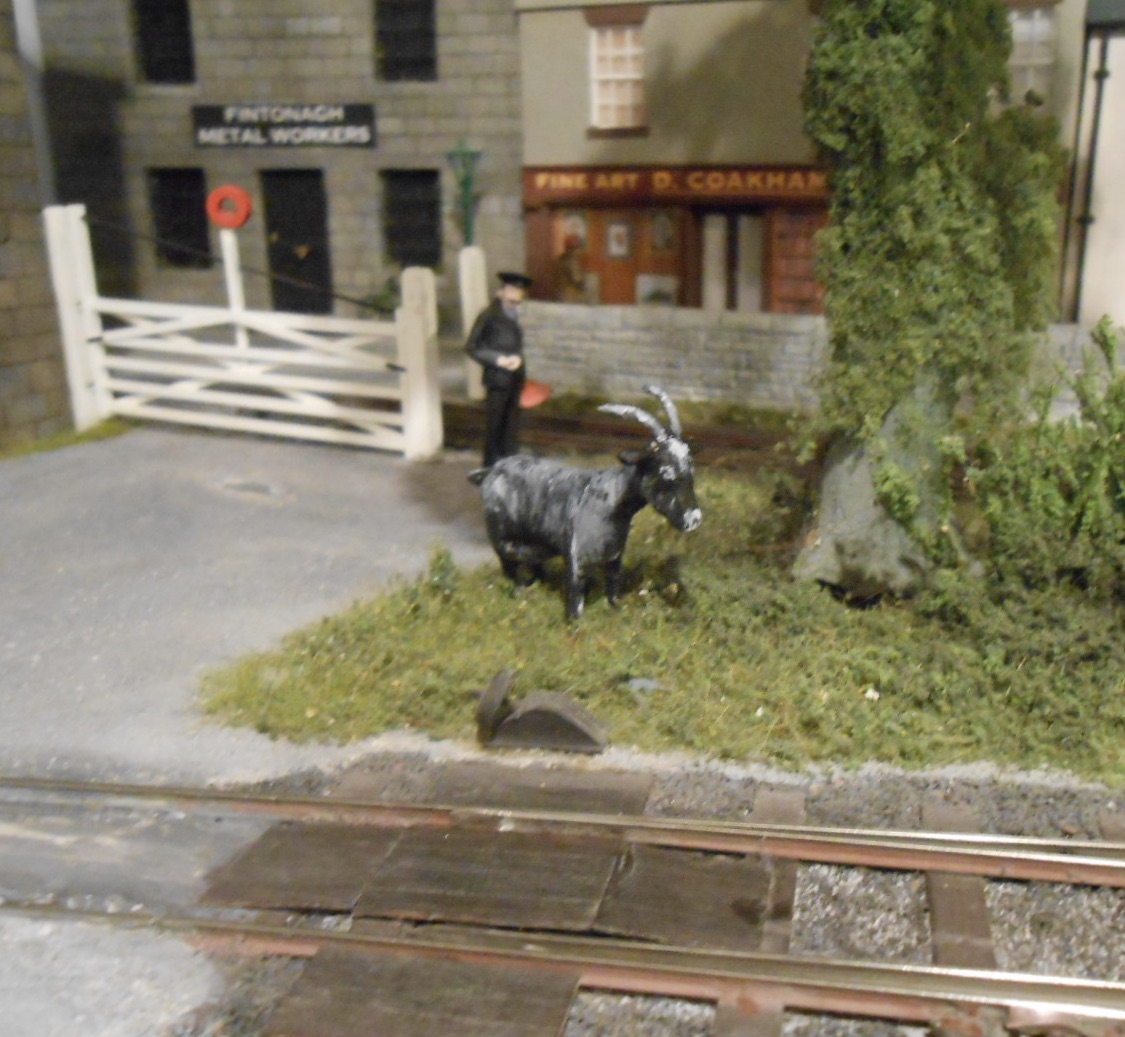
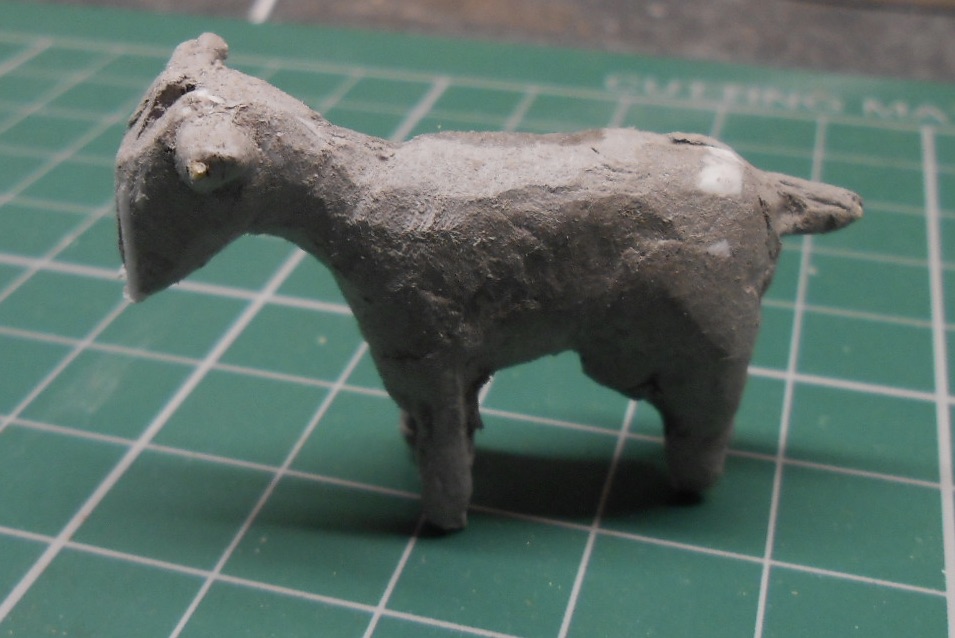
Plenty of gentle filing today has resulted in Maggie looking a lot more goat like. I also added some small blobs of PVA to thicken the hooves and build up the area around the eyes. Horns came next - small lengths of 1.5mm brass wire, filed to a point, bent to shape, then fitted to holes drilled in the top of the head. Decided not to worry about making the figure hairy. In fact, by using fairly thick acrylic paint and a short, hogs hair brush, managed to create a bit of texture. Started with matt black, then dry brushed white and grey on top to highlight the coat, eyes and hooves. Couldn't resist posing Maggie looking threatening, in front of a departing train, though she will actually live under the big tree. Making this little model has been a fun distraction from other tasks. Overall, it has probably taken me about 6-8 hours over 3-4 days. Had their been a suitable figure to buy, then I would have definitely gone along that route. However, making one myself certainly means I now appreciate how much effort goes into making the masters for figures like this.
- 266 replies
-
- 13
-
-

-
Just be careful with the con rods on the S class, because they are outside the front drivers. On the real thing, clearance could be pretty tight, which on a model often equates to fag paper thickness. The good news is that, with a semi freelance model, nobody is going to notice of you move the cylinders out a bit. The other modelling dodge is to bore the cylinders slightly off centre to create more room.
-
A layout of the Antrim narrow gauge is long overdue, methinks - so it will be great to follow progress. One thought about 5.5mm scale on 16.5mm track is that the rail height might be a bit big. Peco NG track used Code 100 flat bottomed rail. Not sure, but seem to remember bull head track was used on some of the Antrim lines. From my own experience 0n16.5 is a nice format to work in. There are any number of second hand wagon, coach and loco chassis available cheaply second hand, while in the larger scale, 00 mechanisms seem to run better. Being inside framed, there are no outside cranks to worry about, though those four coupled locos all had outside valve gear and all had outside cylinders - am sure this is a reason why we rarely see them modelled. You could always start with The Bruiser, I suppose - I did an approximation of it once using a Lima GWR 2-6-2T chassis, minus the rear wheels. You could go the whole hog and do 0n21 of course, but this means making your own track too. Another option would be to model in 1:48/6mmft, where there are still lots of figures and road vehicles available. 16.5 track is not far off, while EM is spot on of course. Gauge 1 (10mmft) on 0 gauge track might be fun too if you have the space!
-
Thanks Mark, had been thinking about that, but getting the fibres to fall the right way could be difficult. The model is only 3cm long and there's a danger of over doing things! Worth a try though.
-
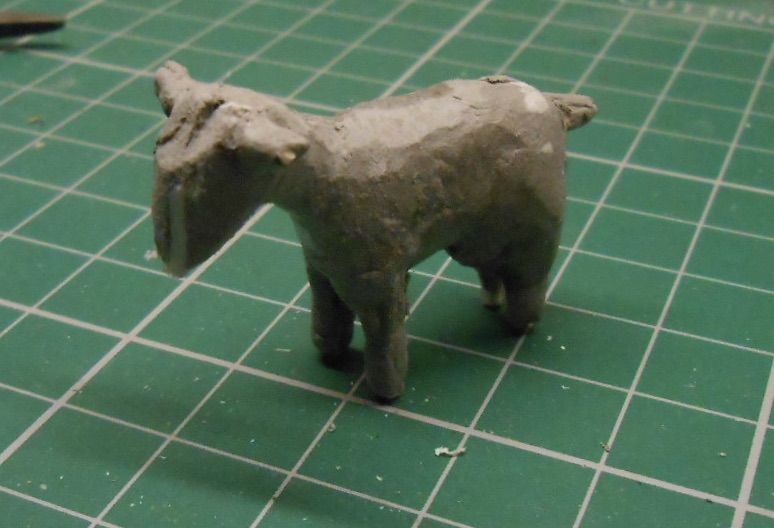
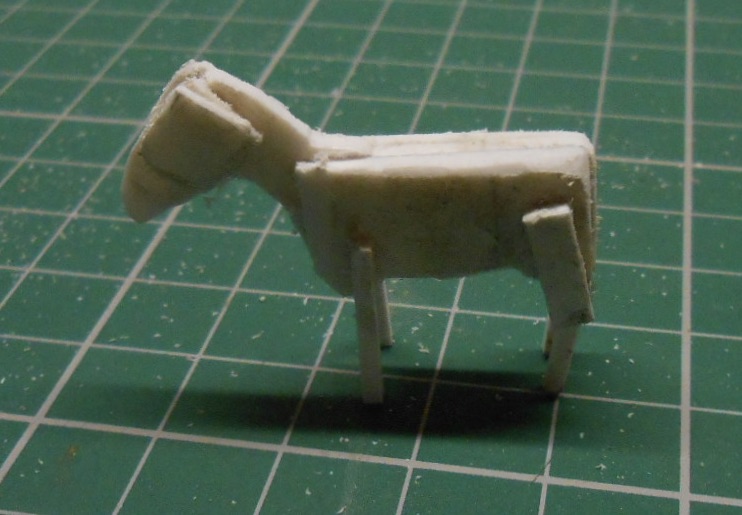
Stage two of the model goat has been to add a layer of DAS clay, along with a piece of wire [passing right through the head] as a frame for the ears. An initial bit of sanding to shape has taken place, though still a long way to go, as at the moment, it resembles a sheep - just like my cattle models. Strange that... Boris has also undergone a sex change, as looking at the photo, Maggie's goat was clearly a nanny. Far more useful to her when you think about it. Am probably now going to call it Margaret, after another robust politician who was never going to change her ways either! Maggie's goat looks like it was a fairly long haired specimen, so am currently pondering how I might represent that. Haven't used teddy bear fur for years, though still have a piece, but, with the model being so small, it may be better to just scratch a representation straight on to the clay. We're having a bit of a family gathering over the weekend, so unlikely to get much done for a couple of days.
-
Only if it is ready to run!
-
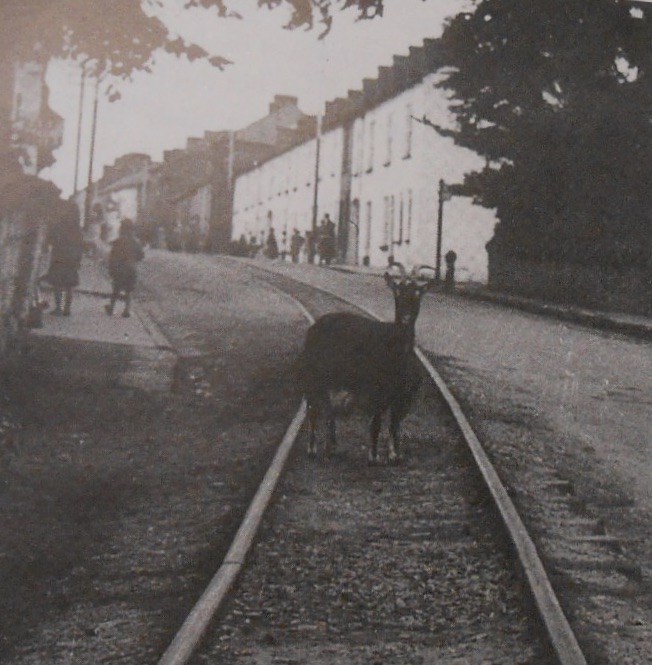
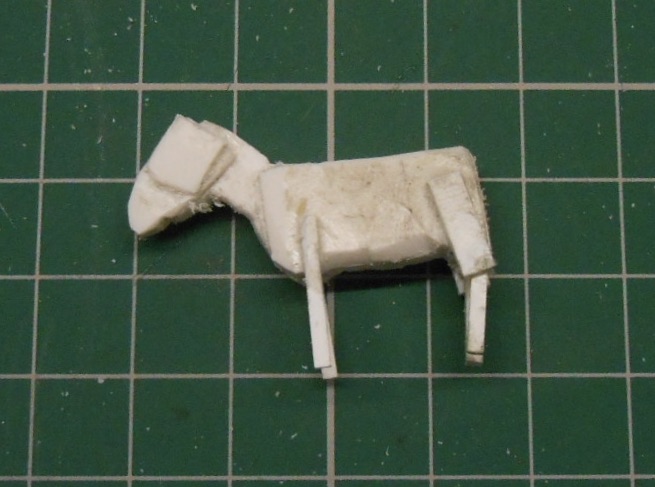
Maggie Coulter's Goat Students of the Clogher Valley Railway will no doubt be aware of this infamous animal. EM Patterson's history of the line says: "Approaching Fivemiletown, you pass the spot where drivers were often confronted by Maggie Coulter's goat, standing resolutely on the line. The goat was rarely intimidated by the approaching train, or by the whistles, but would shift if live coals were thrown at it. Local wags claimed that Maggie deliberately placed the goat on the line to get coals for her hearth and that she never wanted a heart for her fire!' I've had a goat on my wish list for a while, but apart from a couple of cast figures from Duncan Models have not been able to find anything suitable - especially given that Maggie's one has a real 'Don't mess with me, sunshine' look about it. Therefore, decided I had no alternative but to make one of my own. Did this with some cattle a few years ago for Arigna Town - mainly because it was a lot cheaper than buying 20+ cast metal ones! Ultimately, it is a simple case of making a plastic sub-frame, to give the general body shape, then add DAS clay to flesh it all out. Seem to remember that at first, the cattle all looked like giant sheep and suspect this will also be the case with the goat, so a fair bit of judicious filing will be in order. Given that the goat was clearly a bit of a feisty character, completely averse to the following of rules, but happy to indulge itself at others' expense, have decided he will be called Boris. No prizes for working out why...