David Holman
-
Posts
4,359 -
Joined
-
Last visited
-
Days Won
117
Content Type
Profiles
Forums
Events
Gallery
Blogs
Community Map
Everything posted by David Holman
-
And we all thought it was safe to go in the water! A very interesting topic and utterly horrendous for anyone fickle enough to want everything right. RTR track very unlikely to be correct unless following modern practice, never mind the gauge. Just as well therefore that our eyes rarely look that closely at such things, though on a small layout, it might make a difference. C&L have produced a few variations of chairs for several years now - mainly two or three bolt, I think. They also do slide chairs for pointwork and offer the chance to make sure the oak 'keys' are facing the right way - on double track trains should be pushing them into the chairs, while on single track they need to be mixed. Amazing the lengths we might go to...
-
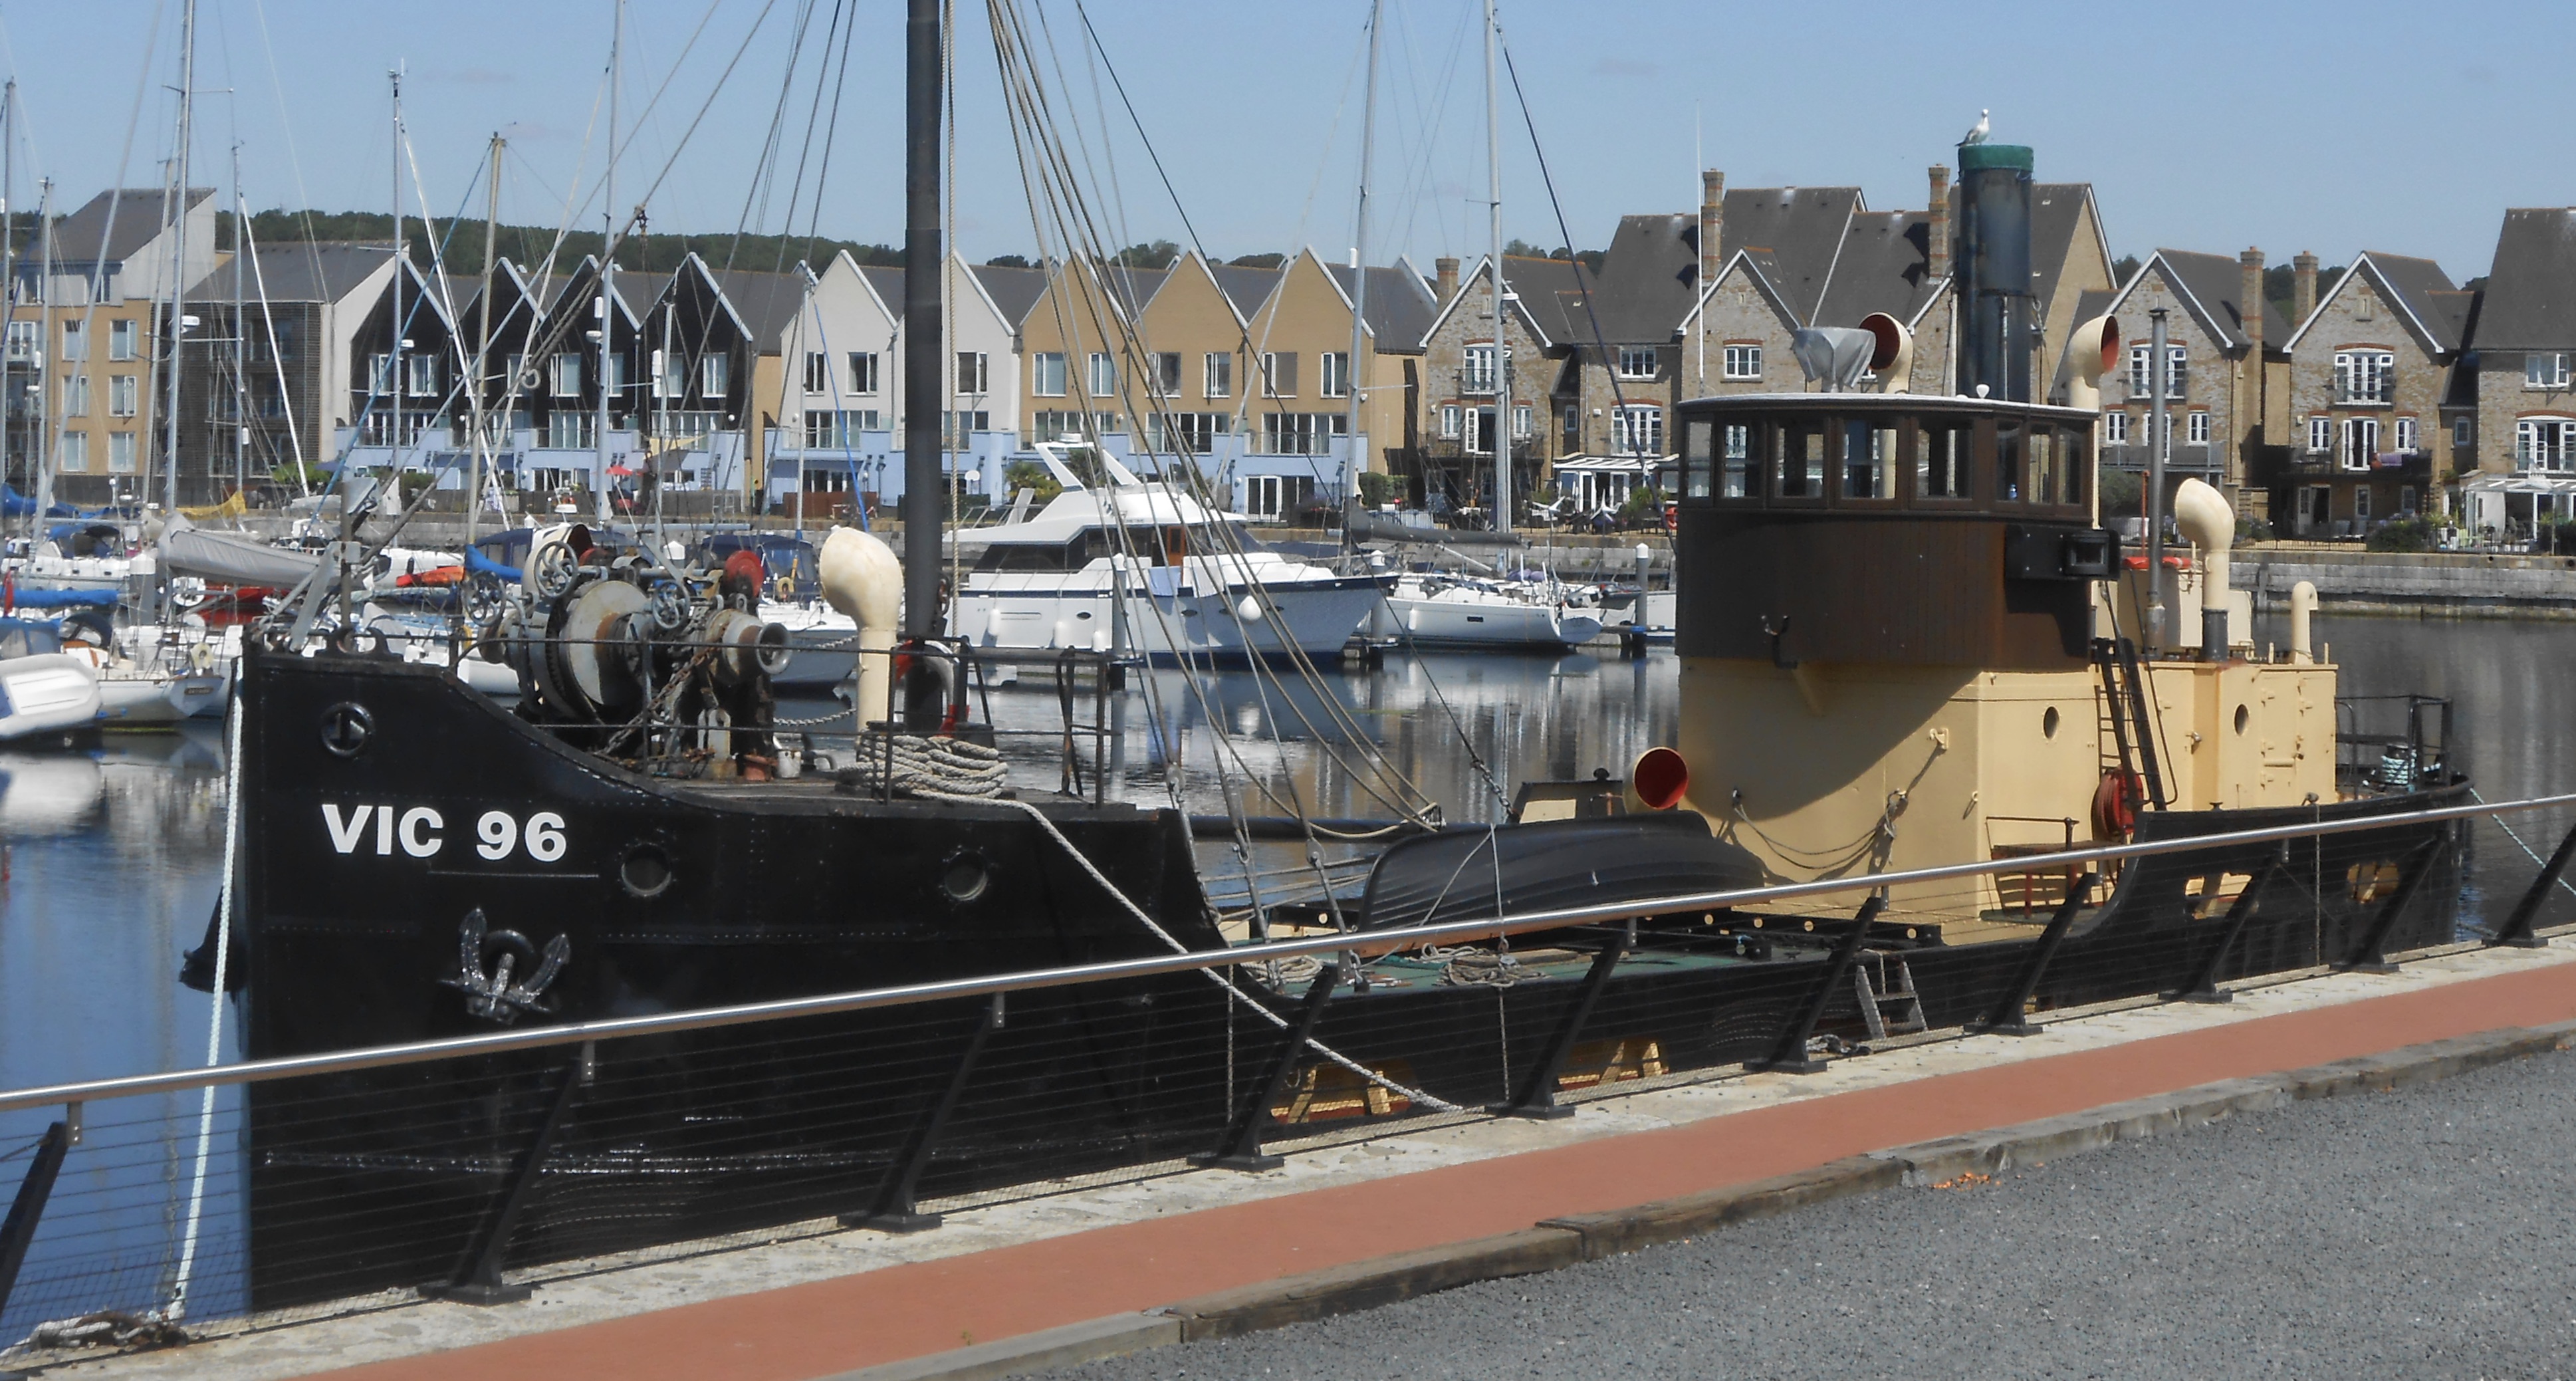
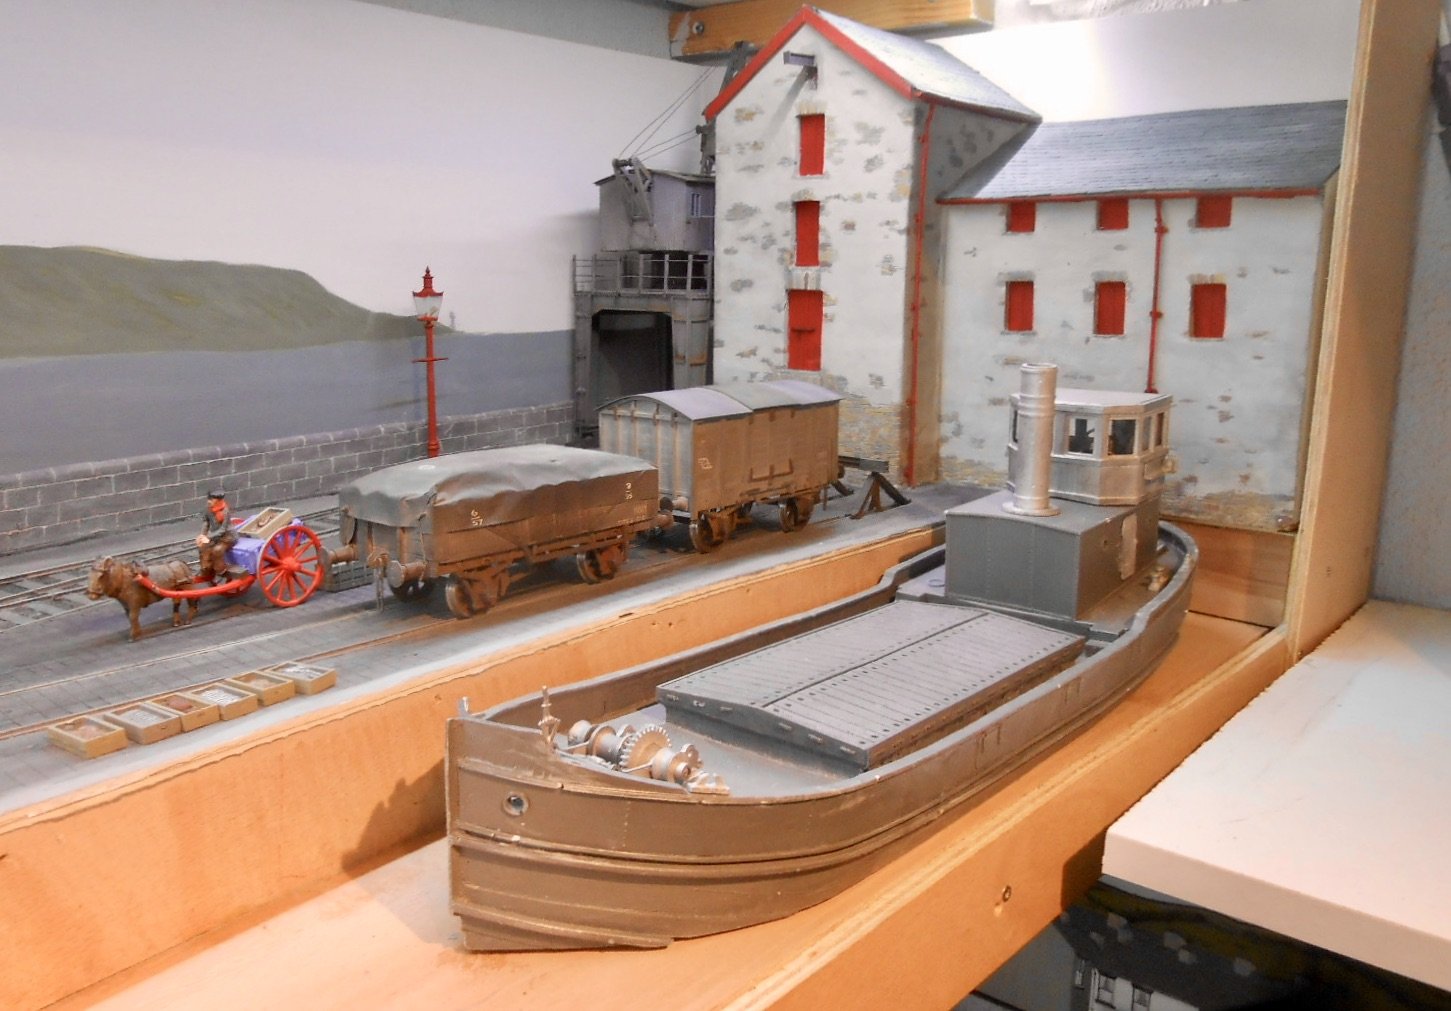
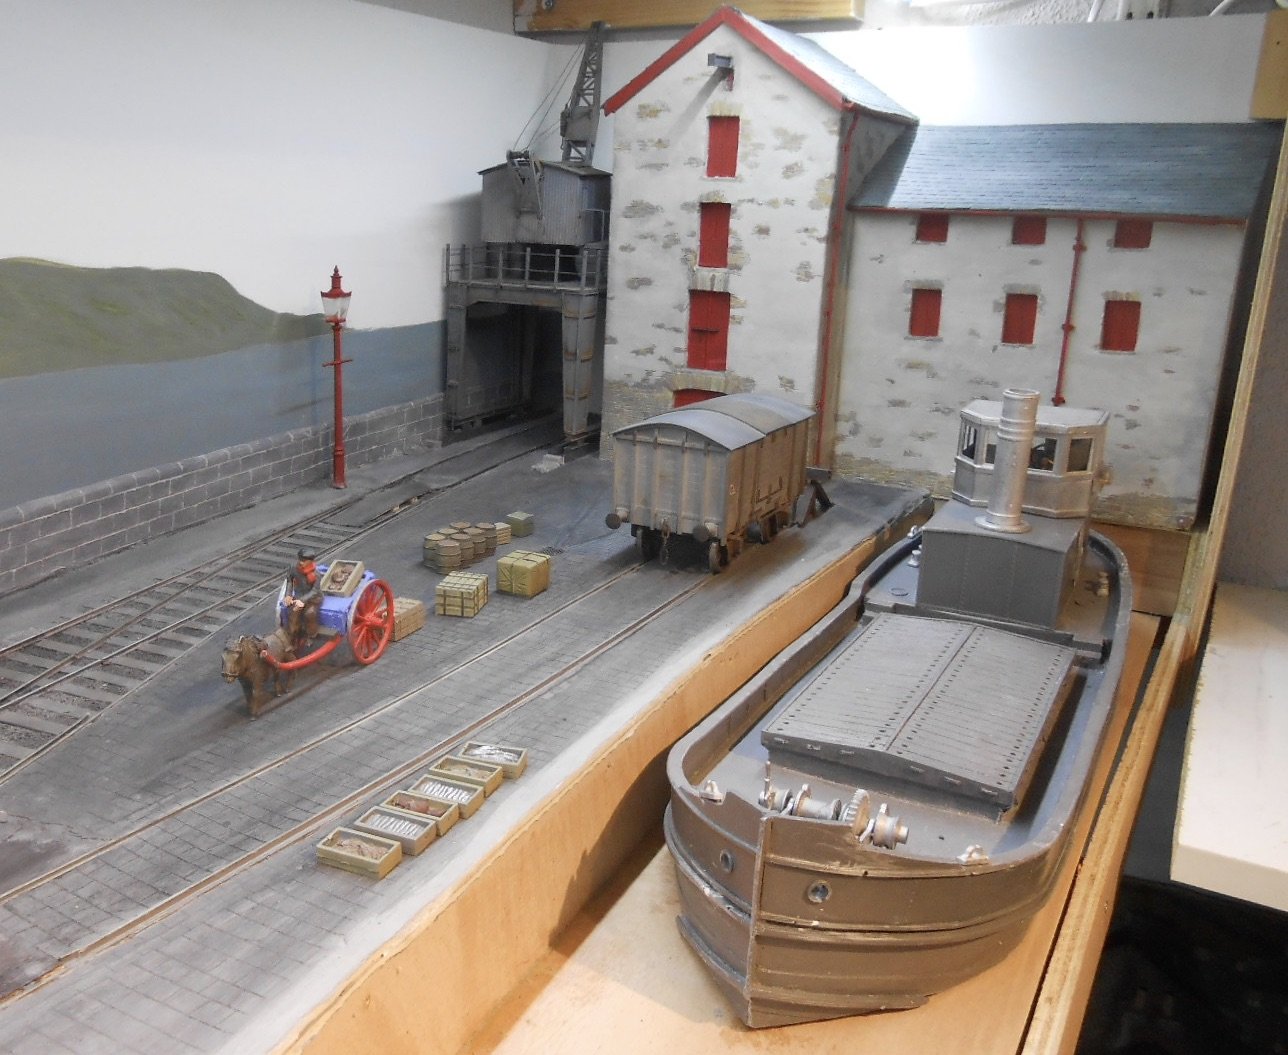
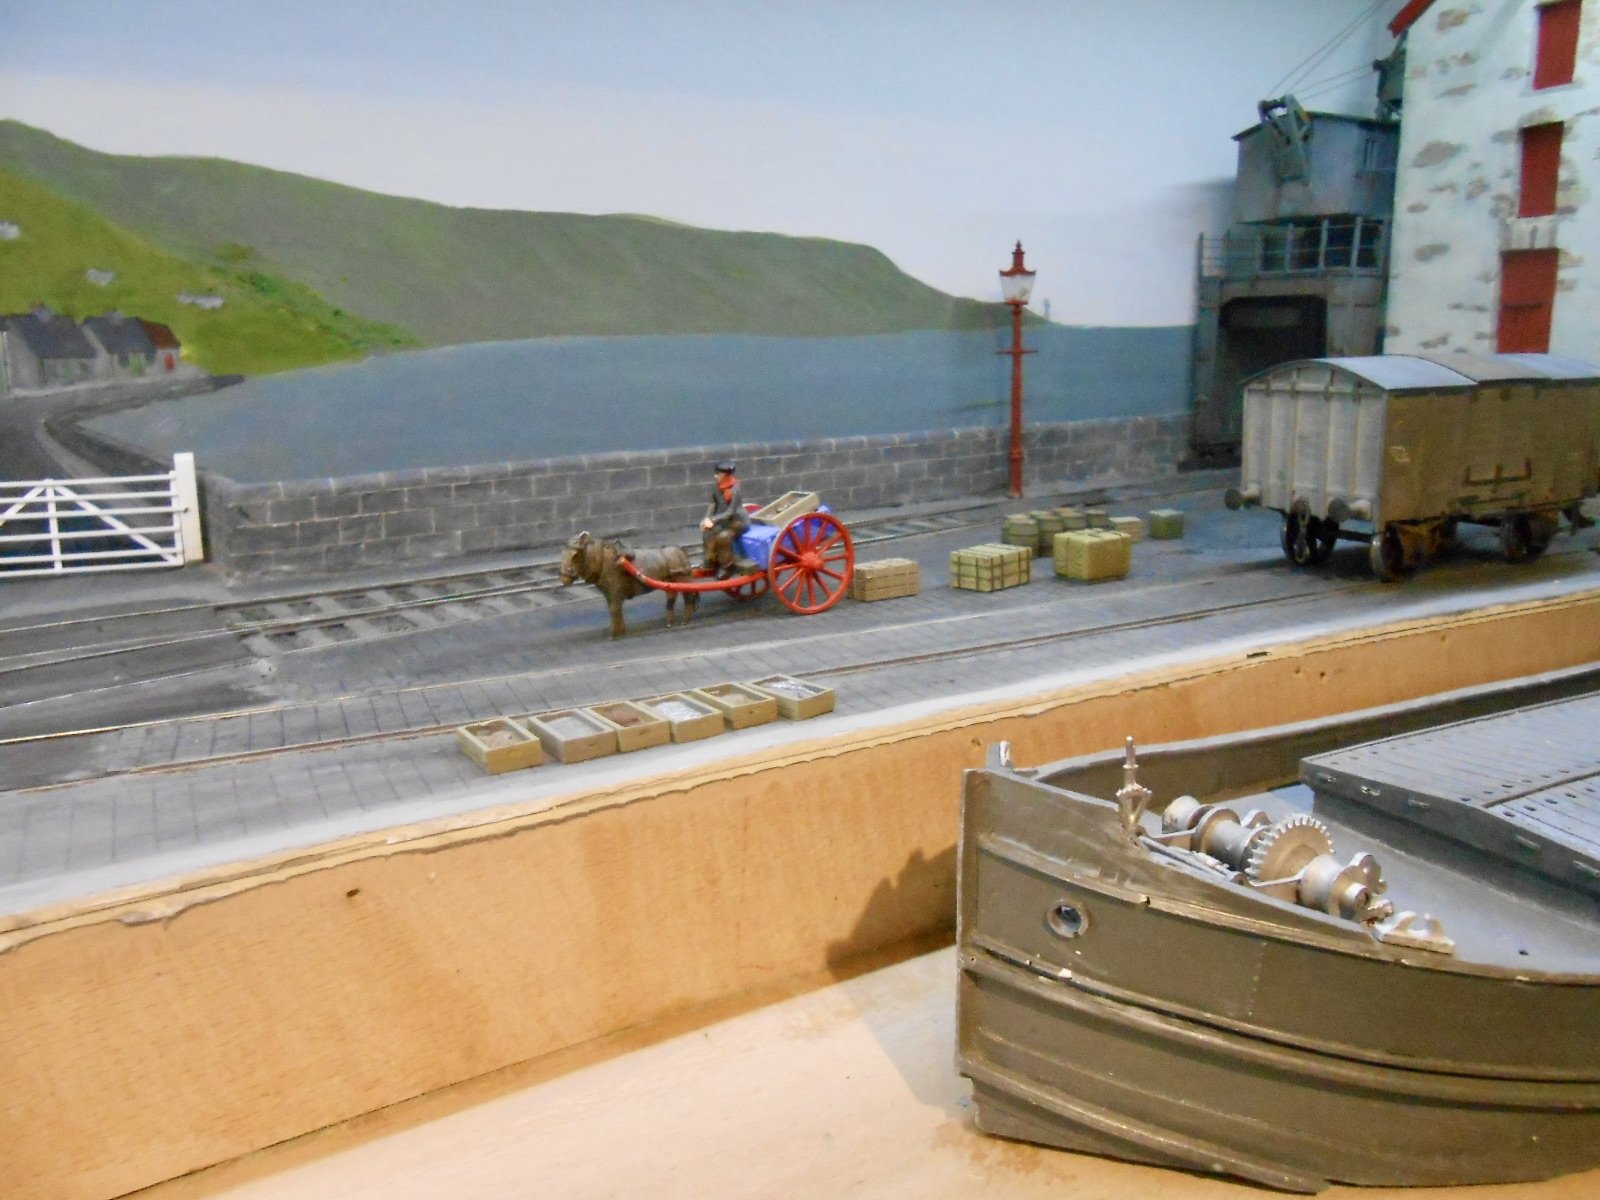
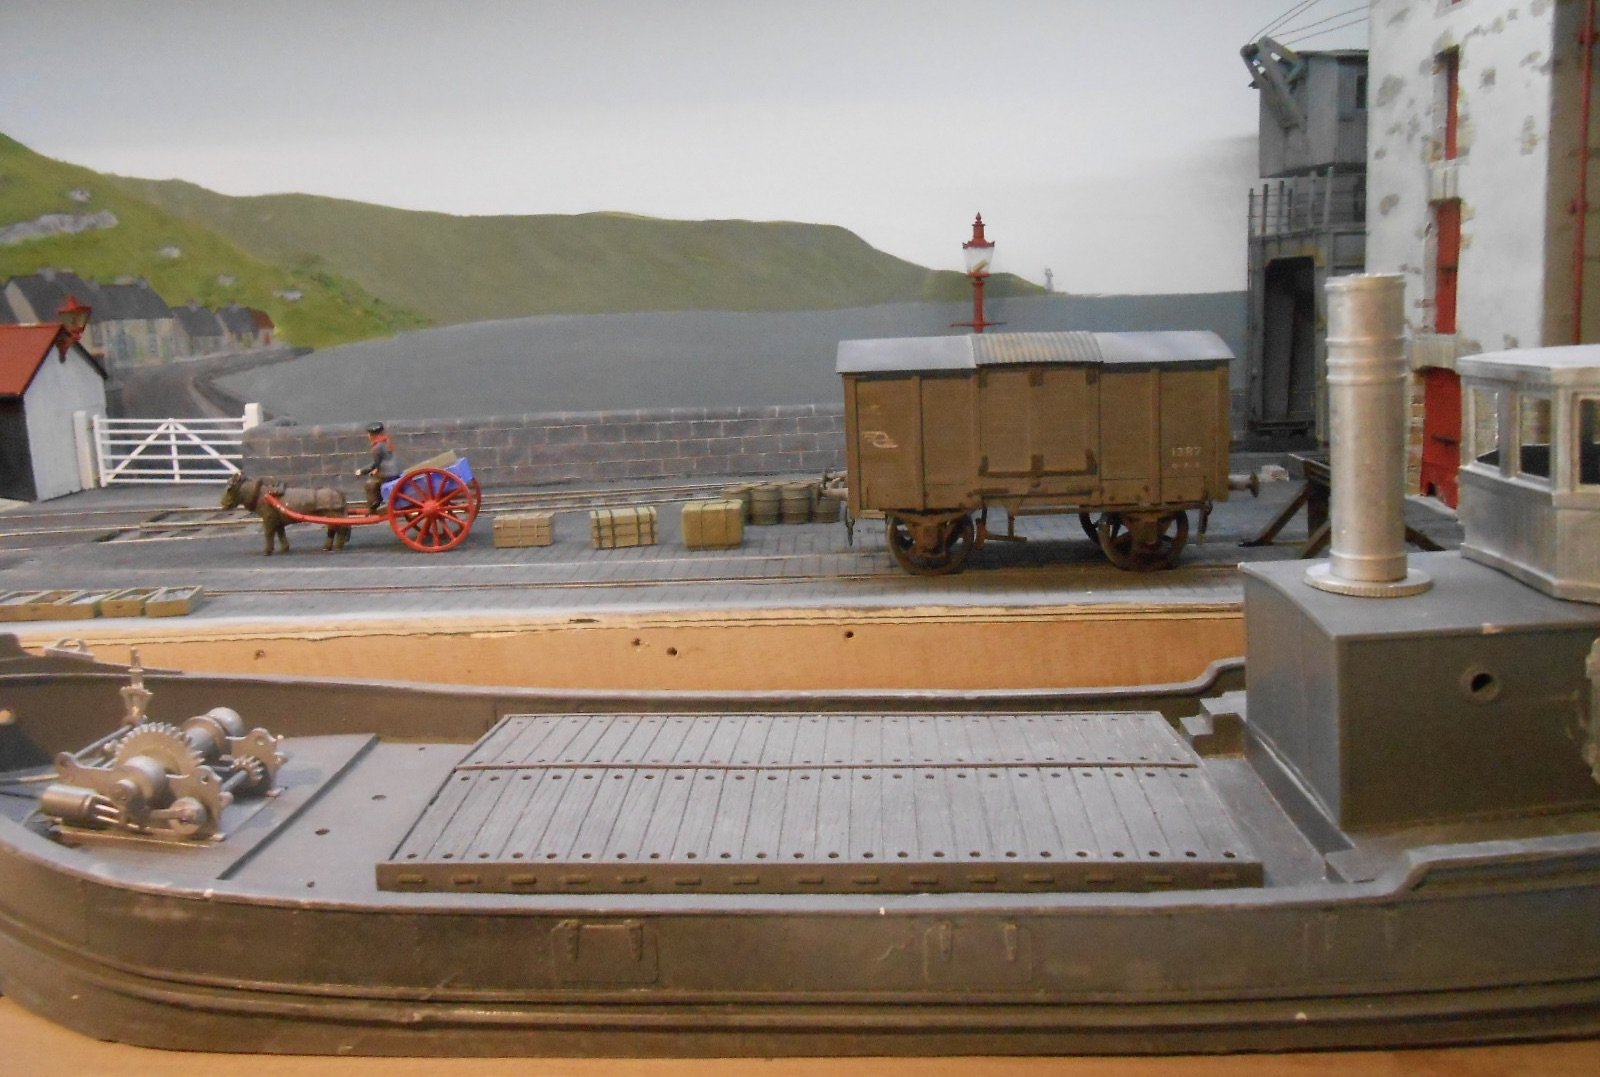
Nothing much to report, except that this is the first modelling I have done for a month! Rare for me, as I like to keep the pot simmering, as it were. However, a holiday, followed by that spell of inordinately hot weather was not exactly conducive to creative pastimes. Forgive the prose - 'Emma' is on the TV... Anyway, am trying to finish off the right hand quayside [yet more DAS], while the 'water' surface needed attention, so much use of car body filler and sanding smooth afterwards has been a gentle step back into things creative. What I am looking forward to it getting to grips with the Langley 'Clyde Puffer' kit. Bought this before Christmas & it has been mostly sat on a shelf since then, becoming ever more an itch that needs scratching. Whether a Puffer would ever have got to the west coast of Ireland is a moot point, so the aim is to adapt it to a more conventional coaster outline. An ideal prototype for this resides in Chatham's marina in the form of Vic 96. Built as recently as 1948, but looking at least 50 years older, these 'victualling ships' were used to provision larger craft off shore. Around 20 feet longer, the heritage is nevertheless easy to see. I actually prefer the high forecastle and especially the fact that the funnel sits behind the wheelhouse. So, photos have been taken and sketch plans are starting to be produced, so hopefully it won't be too long before I can get started.

-
Also puts more than a few of our railway rooms to shame, in terms of overall presentation too - mine included!
-
The Official Irish 'Might Have Beens' Thread
David Holman replied to minister_for_hardship's topic in General Chat
From Newry to Clifden, is the answer, via the Bessbrook tramway and C&L among others. Three foot gauge, with sleeping cars to boot. Never really got started, but have often thought it would make a fine basis for all sorts of layouts. Would probably need lots of space to do the concept justice though. -
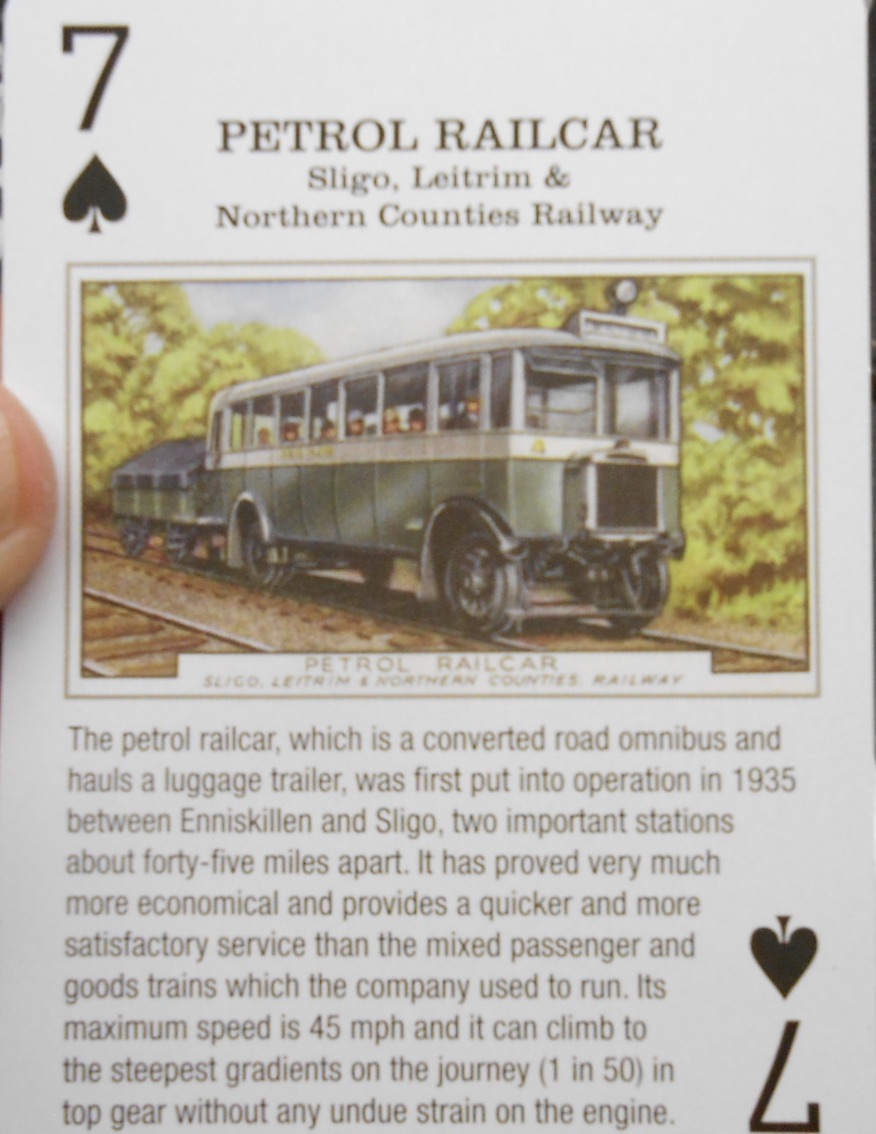
Thanks for the mention, John. Alphagraphix do a 7mm scale card kit of the Sligo railbus, which I used as a drawing when scratchbuilding my model. Last time I looked, I think it was four quid. Not for the faint hearted though, all those angles and complex curves make for a very challenging build. The issue with the trailer is that, whatever scale you do it in, the W iron/spring/axlebox units are very small, so ordinary wagon ones look too big. When I did mine, decided it was important to fit pick ups to the trailer, but this compromised the ability of the single axle bus to haul it and ensure the trailer wheels rotate. On reflection, fitting a motor bogie type mechanism in the trailer might be a better solution, but hiding the gears would not be easy. Now then Angus, how about a 2mmFS one???
-
DWWR 1:1 scale building for sale
David Holman replied to minister_for_hardship's topic in General Chat
Could make a very chic railway room in the garden for a modeller with deep pockets! Buy, dismantle and remove to the place of your choice. However, if this side of the water, there might not be much space left inside once insulated against expected 40c heat. The forecast here is also suggesting a 20c drop in temperature, Tuesday to Wednesday, in just 12 hours. Bonkers, but hopefully might get back to some modelling after that. -
Westport Quay and the Project 42 Inglenook
David Holman replied to Sean's topic in Irish Model Layouts
A couple of thoughts. As your baseboards line up nicely, if you want to avoid the earthquake crack between them, use car body filler. Put clingfilm on one face, liberally smear the filler on the other and clamp firmly together. Once the filler has set, you should have a nice, almost invisible join, though if the boards are going to be permanently joined, you can fill over it anyway. As for the quayside surface, am guessing you are aiming for something post 1960s and if so any setts, cobbles etch would probably have been main be covered in tarmac or concrete, so a lot less work to model. -
Westport Quay and the Project 42 Inglenook
David Holman replied to Sean's topic in Irish Model Layouts
Lessons for us all on certain types of track, especially colours of rail, sleepers, ballast and so on. -
Suspect the main reason behind these sort of model releases is to appeal to the collector's market and most will never turn a wheel. Seems folk will speculate on almost anything and 10, 20 years from now such a niche model may turn out to be valuable, though wouldn't hold my breath!
-
Brookhall Mill - A GNR(I) Micro Layout
David Holman replied to Patrick Davey's topic in Irish Model Layouts
Nice. And very neatly done. -
Will look forward to seeing progress!
-
Their track is really good too. All of my 5'3 points on Arigna/Belmullet were made by them and have proved very reliable.
-
I think the 1028mm radius Galteemore refers to is what the Peco 0 gauge set track is. That will be fine for small wheelbase locos and four wheel wagons, but if you want to run mainline locos, then six feet/1.8m is probably essential and with a whole garden to play with, as he says, the bigger the better. three metres/ten feet would certainly look nice if you have the room.
-
And especially if we are allowed to choose what they are suspended by... There again, if you have ever visited the Naples area, the stock of the Circumvesuvious Railway is SO plastered with graffiti that it is impossible to know what it original livery might have been.
-
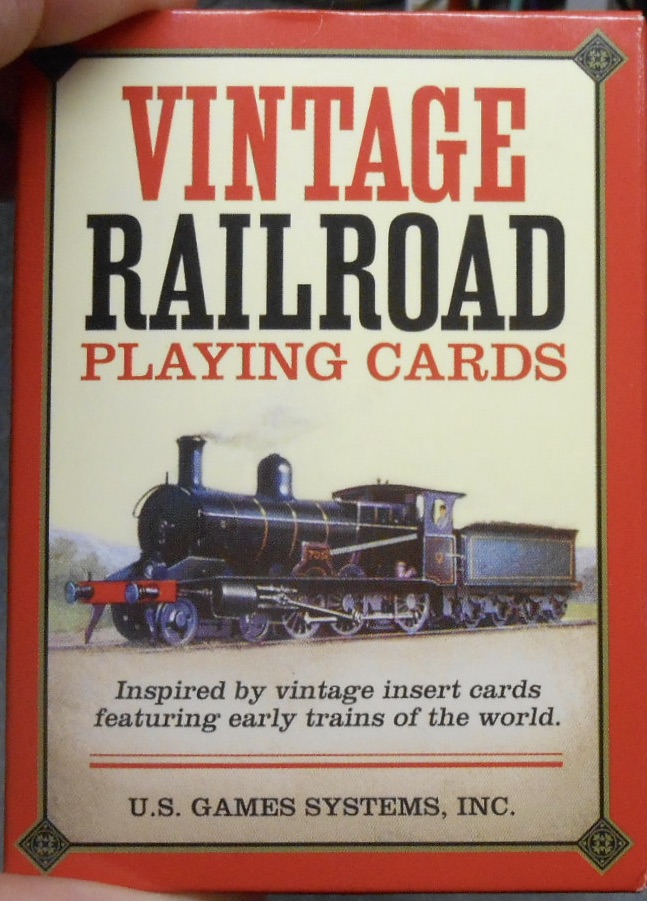
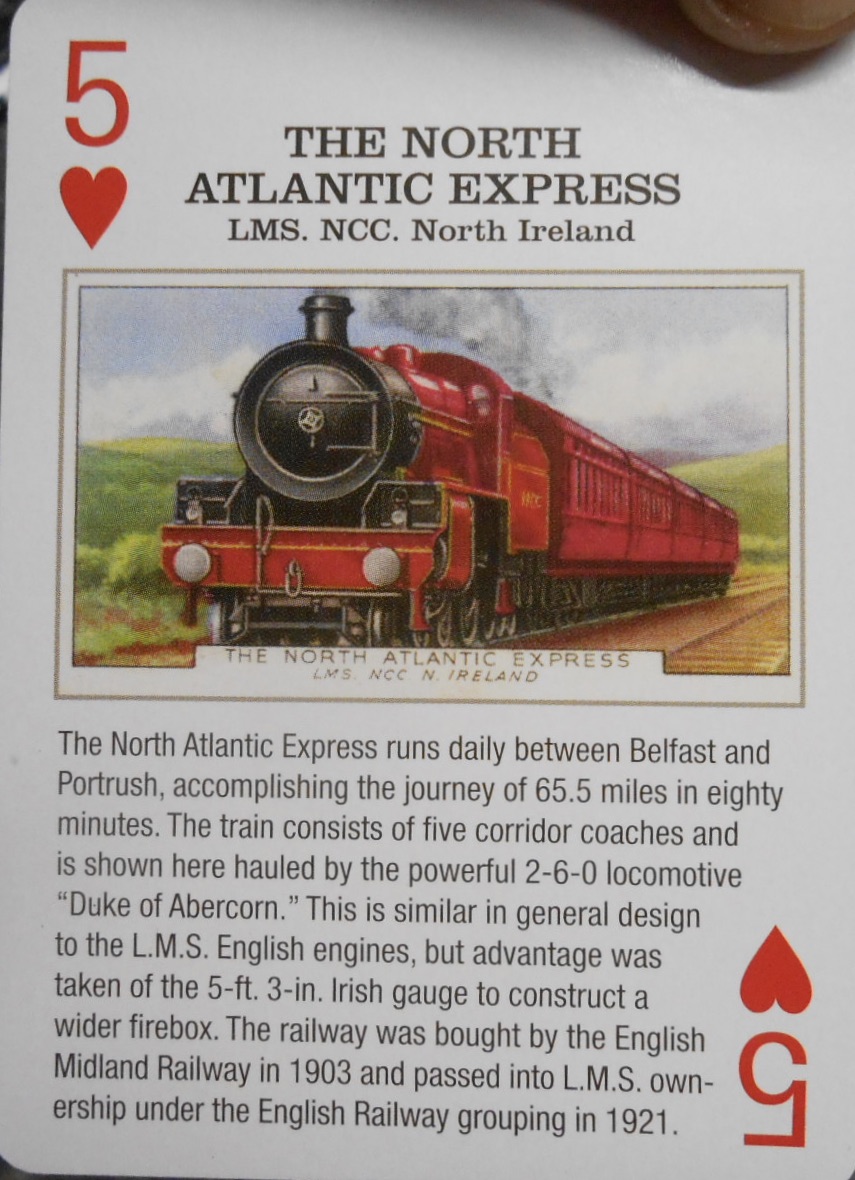
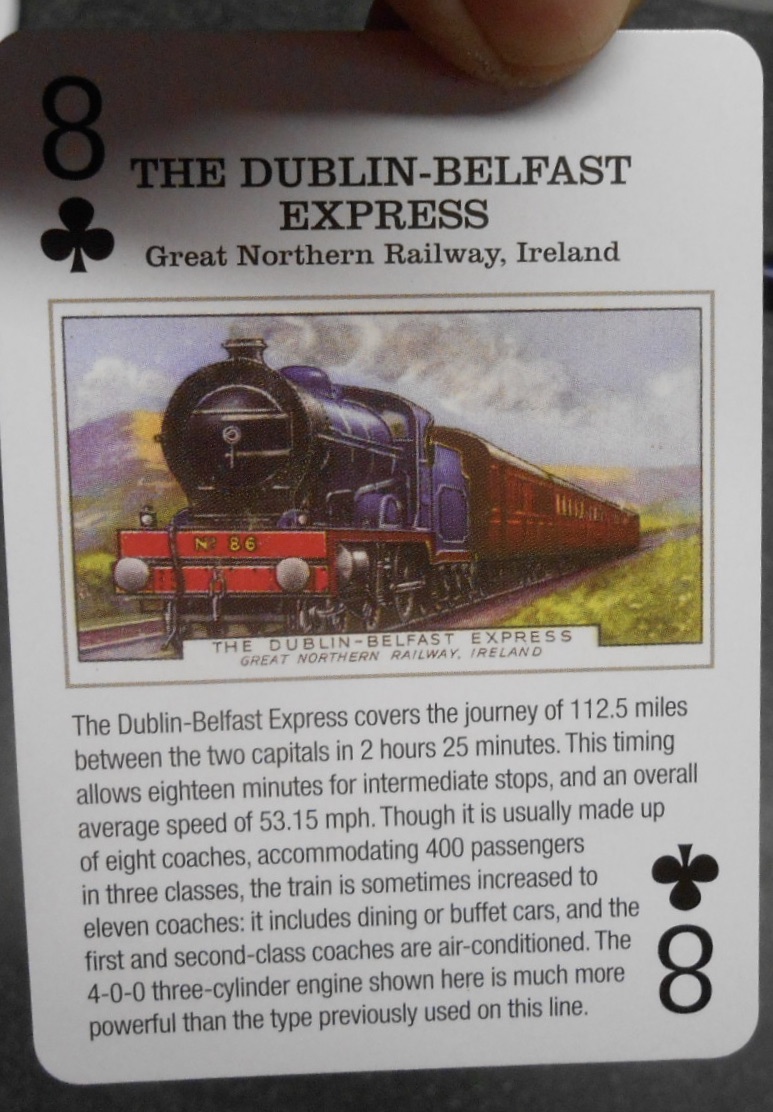
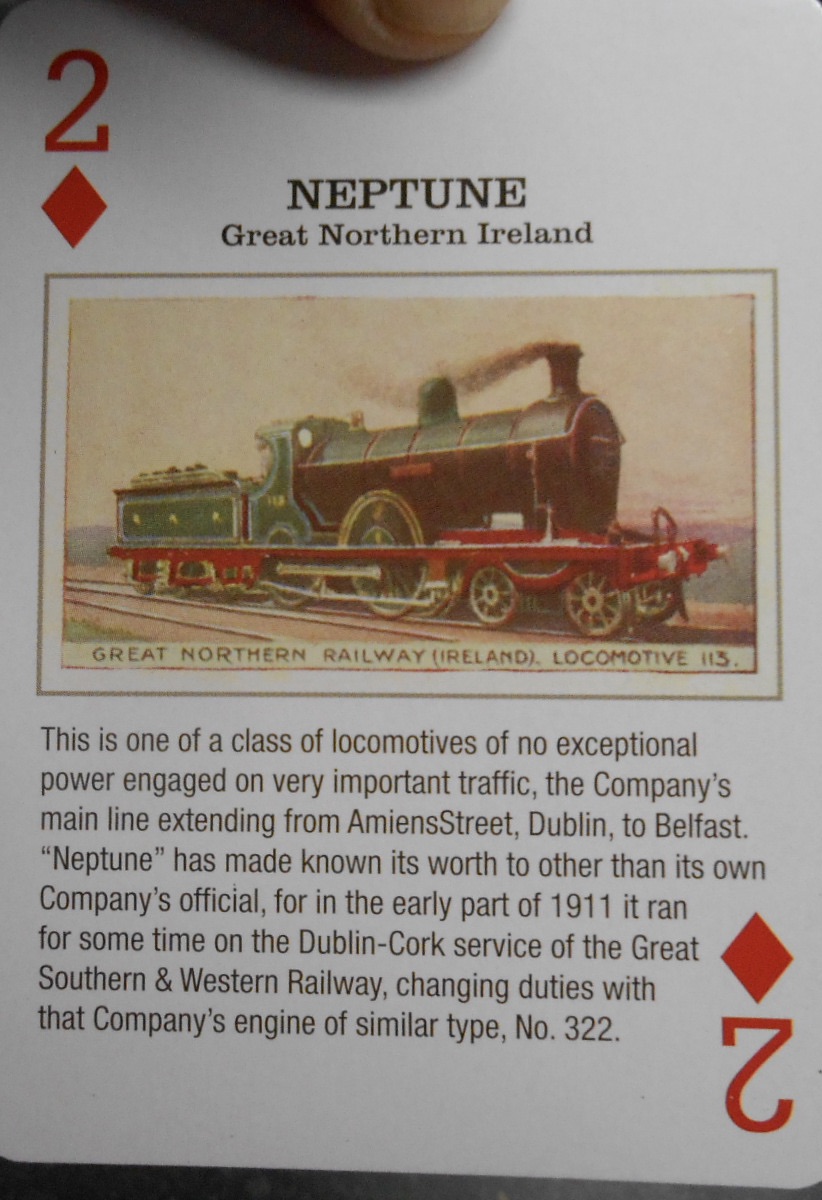
Rather than start a new topic, I think this fits in here & is certainly historical. No modelling for me these past couple of weeks as we've been on a New England fly drive [postponed twice because of Covid], starting in Boston, moving up into the White Mountains before making our way south to Rhode Island and Cape Cod. Anyway, one place we visited was the former home of Robert Lincoln, son of Abraham and founder of the Pullman car Company. In the gift shop my wife bought me a pack of reproduction playing cards, featuring important trains of the 20th Century. Imagine my surprise and delight to find that the seven of spades is an SLNCR railsbus! Obviously whoever choose each subject has very good taste, but given the amount of Irish heritage over the Pond, perhaps it is not too surprising - though the little railbus sits among what might be more expected in terms of 'Great Trains', like the Flying Scotsman, 20th Century Limited and so on. Further on in the pack, the five of hearts is the North Atlantic Express, the eight of clubs the Dublin - Belfast express and the two of diamonds a GNRI 4-4-0 'Neptune'. Been to North America several times, so it was nice to see there are lots of heritage railways in New England too, albeit most of them using first generation diesels. Food and drink can be eye wateringly expensive though, but is at least off set by the price of petrol. They think it is expensive at under $5 a gallon or less than one euro a litre - needless to say, we made sure they knew the cost over here!
-
Inchicore Class J10 Conversion From LNER J72
David Holman replied to murrayec's topic in Irish Models
As always, a joy to behold. -
Lovely stuff! Really like how the various scenes hang together. It is one thing to make nice buildings and structures (which they most certainly are), but assembling them into a coherent, believable whole like this really makes the layout shine. The bus outside the station and the overbridge scene already have that certain something. As others have said, more please and don't forget the track plan too.
-
Lovely stuff. Shame the rest of Swilly No 6 isn't still with us - or a section of the railway too for that matter!
-
Always good to see how different projects emerge and especially the thinking that goes into them. That track plan has a very nice flow to it.
-
At the very least you need a break in the rails somewhere and probably a soft switch too, so you can reverse the po!arity, like the direction.
-
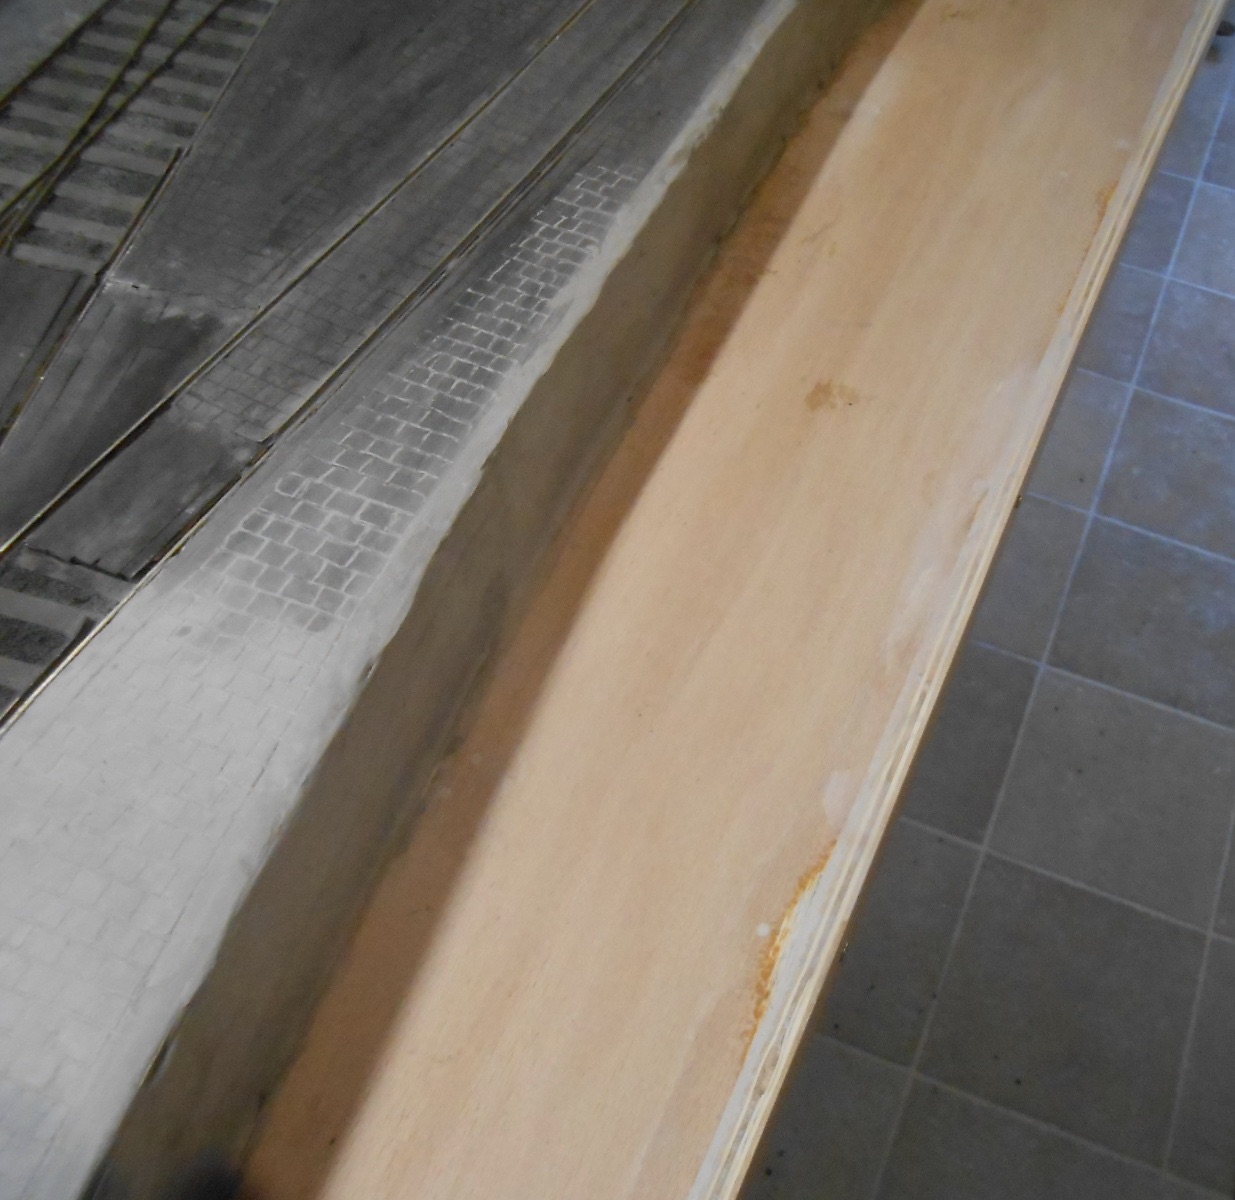
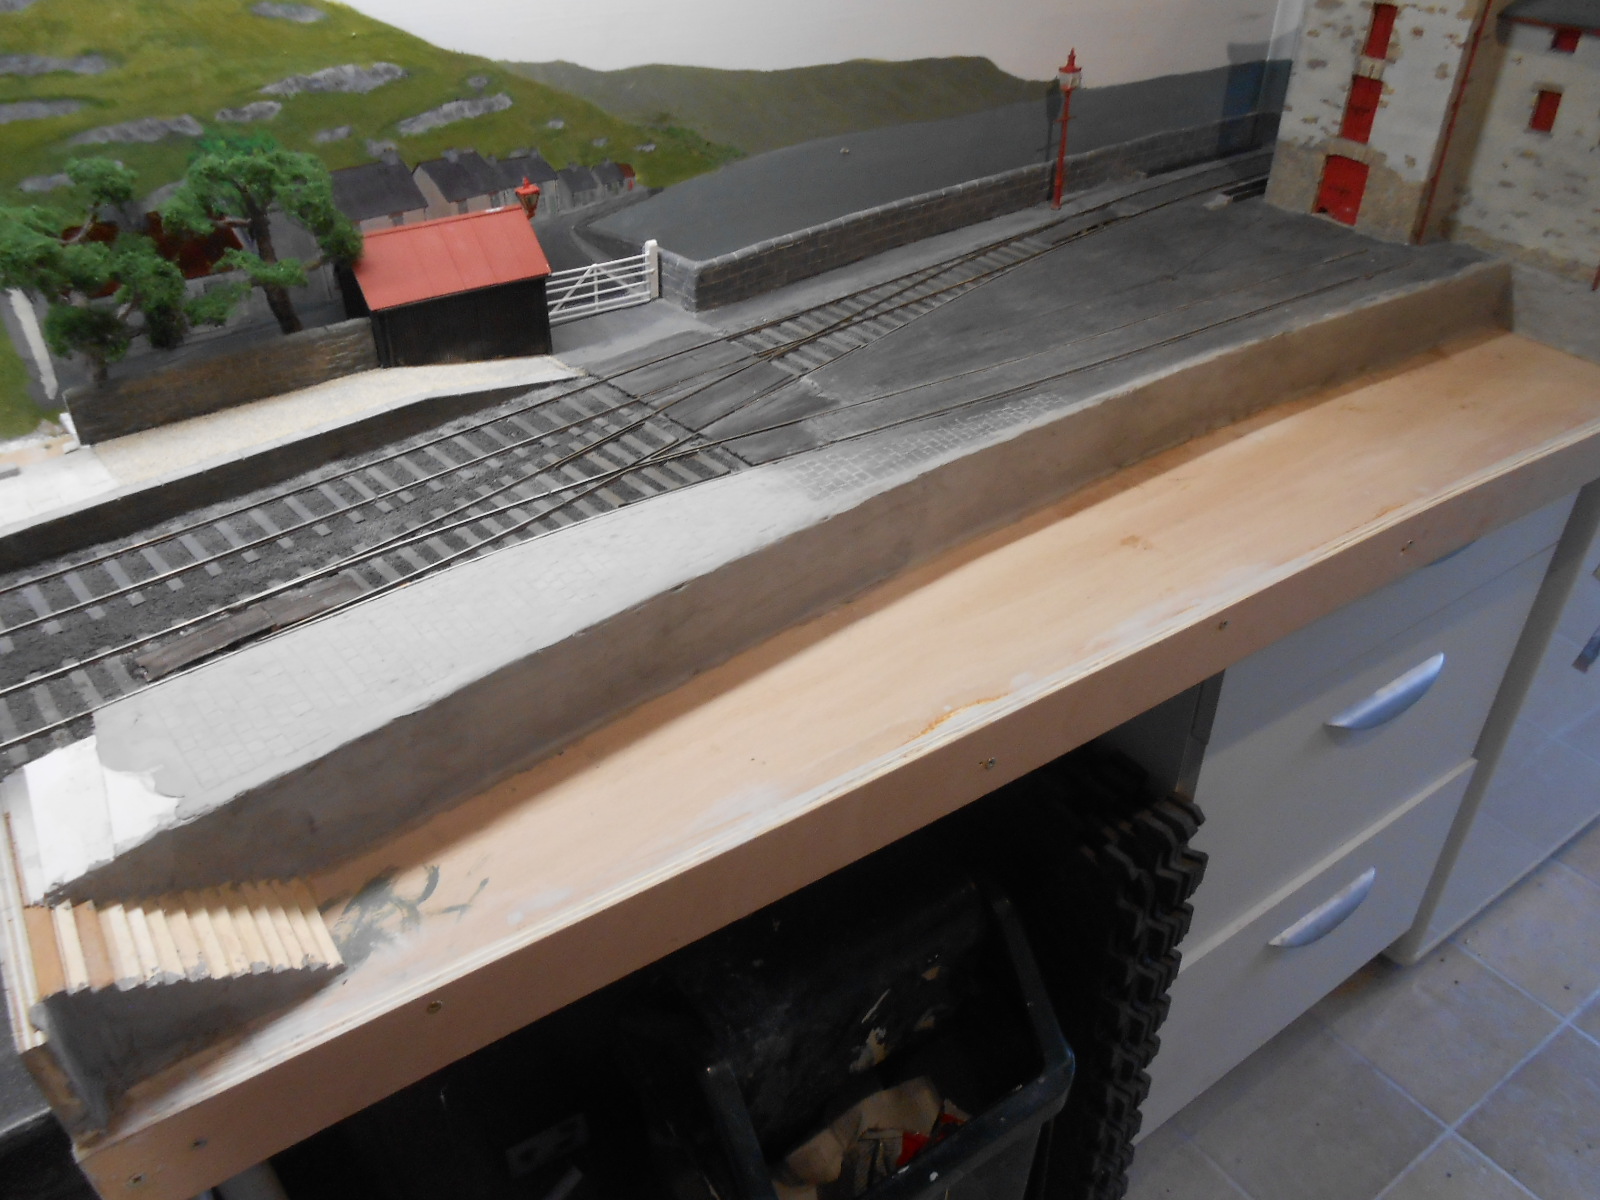
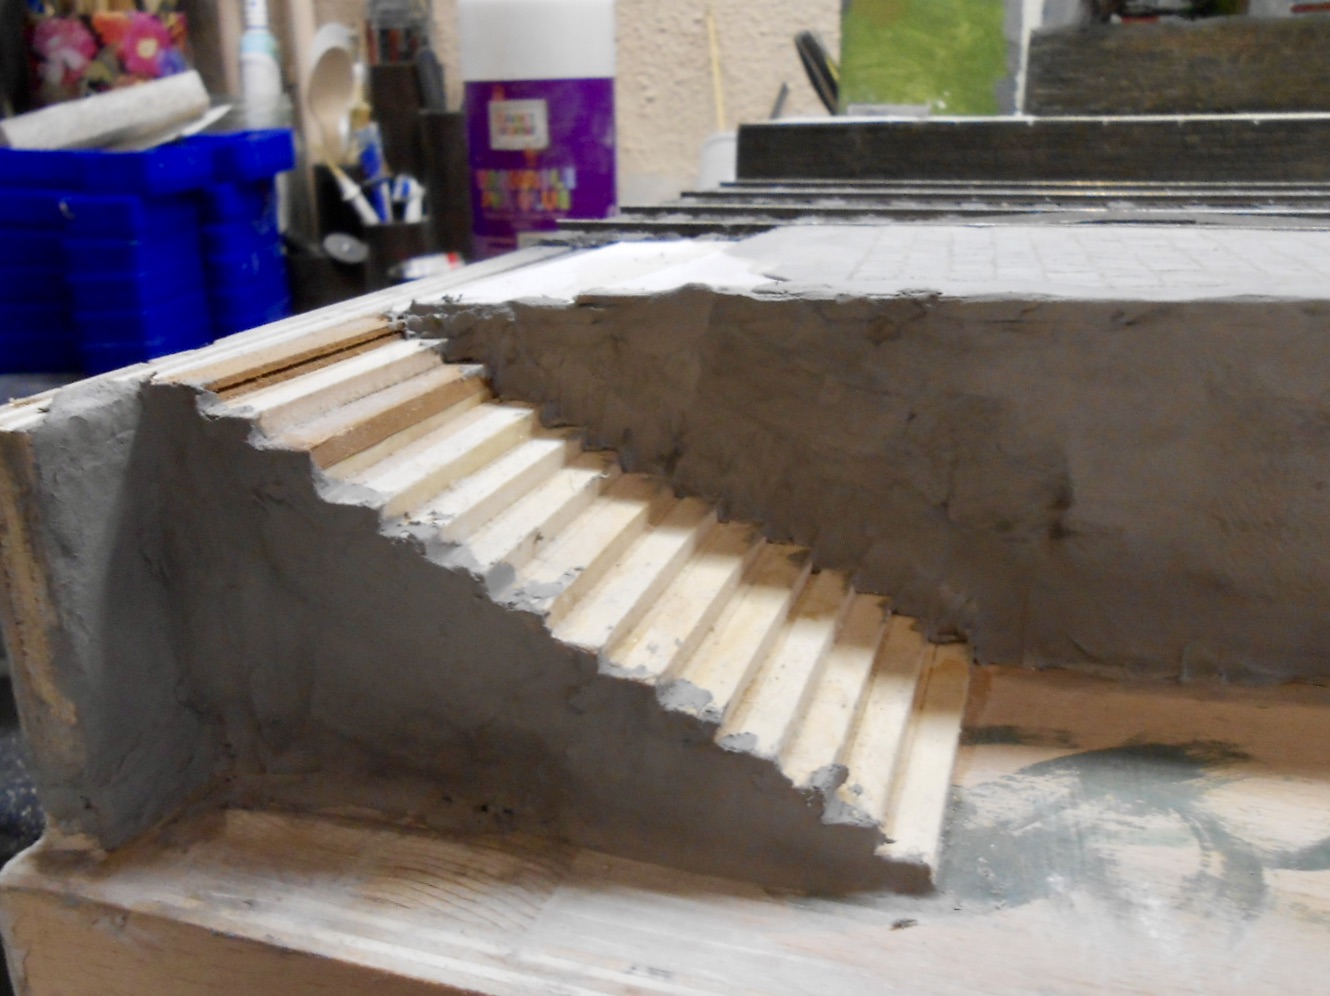
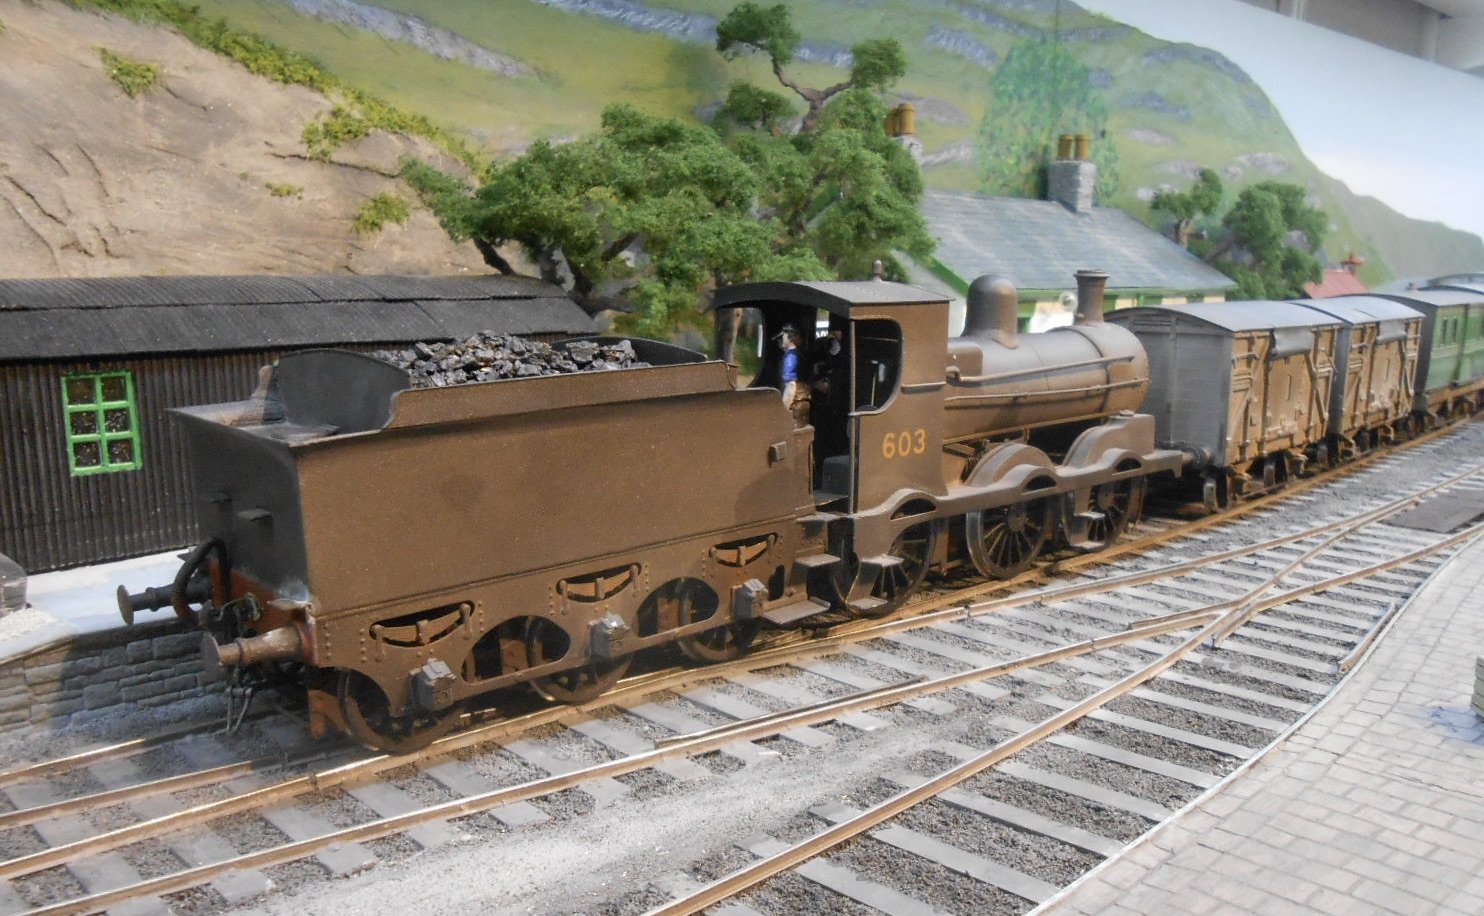
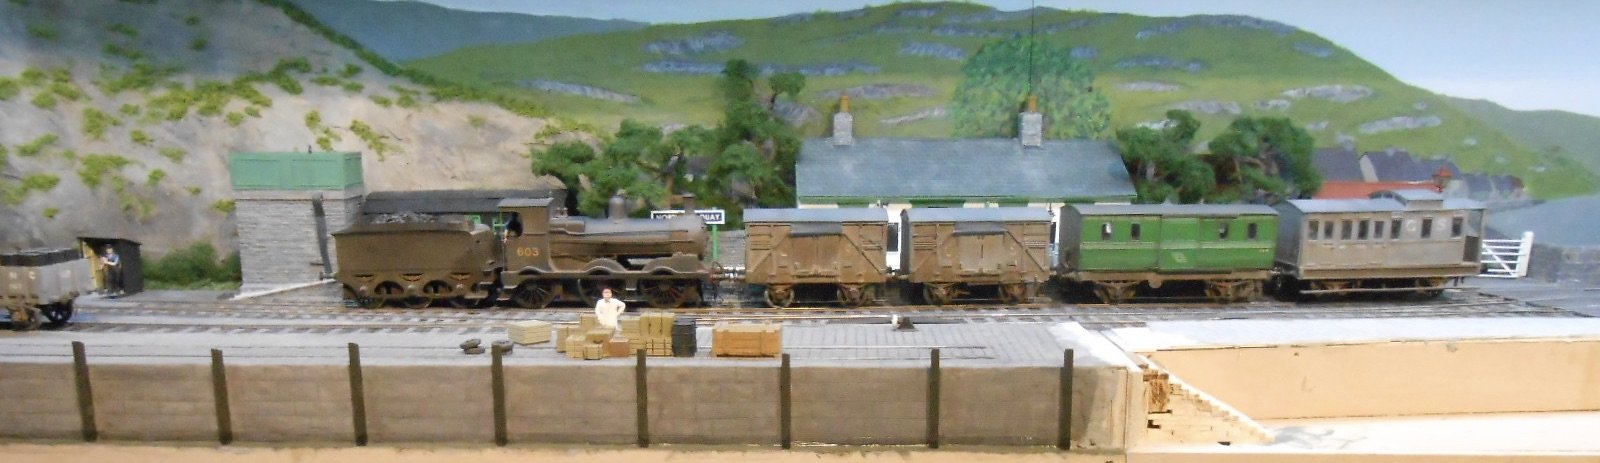
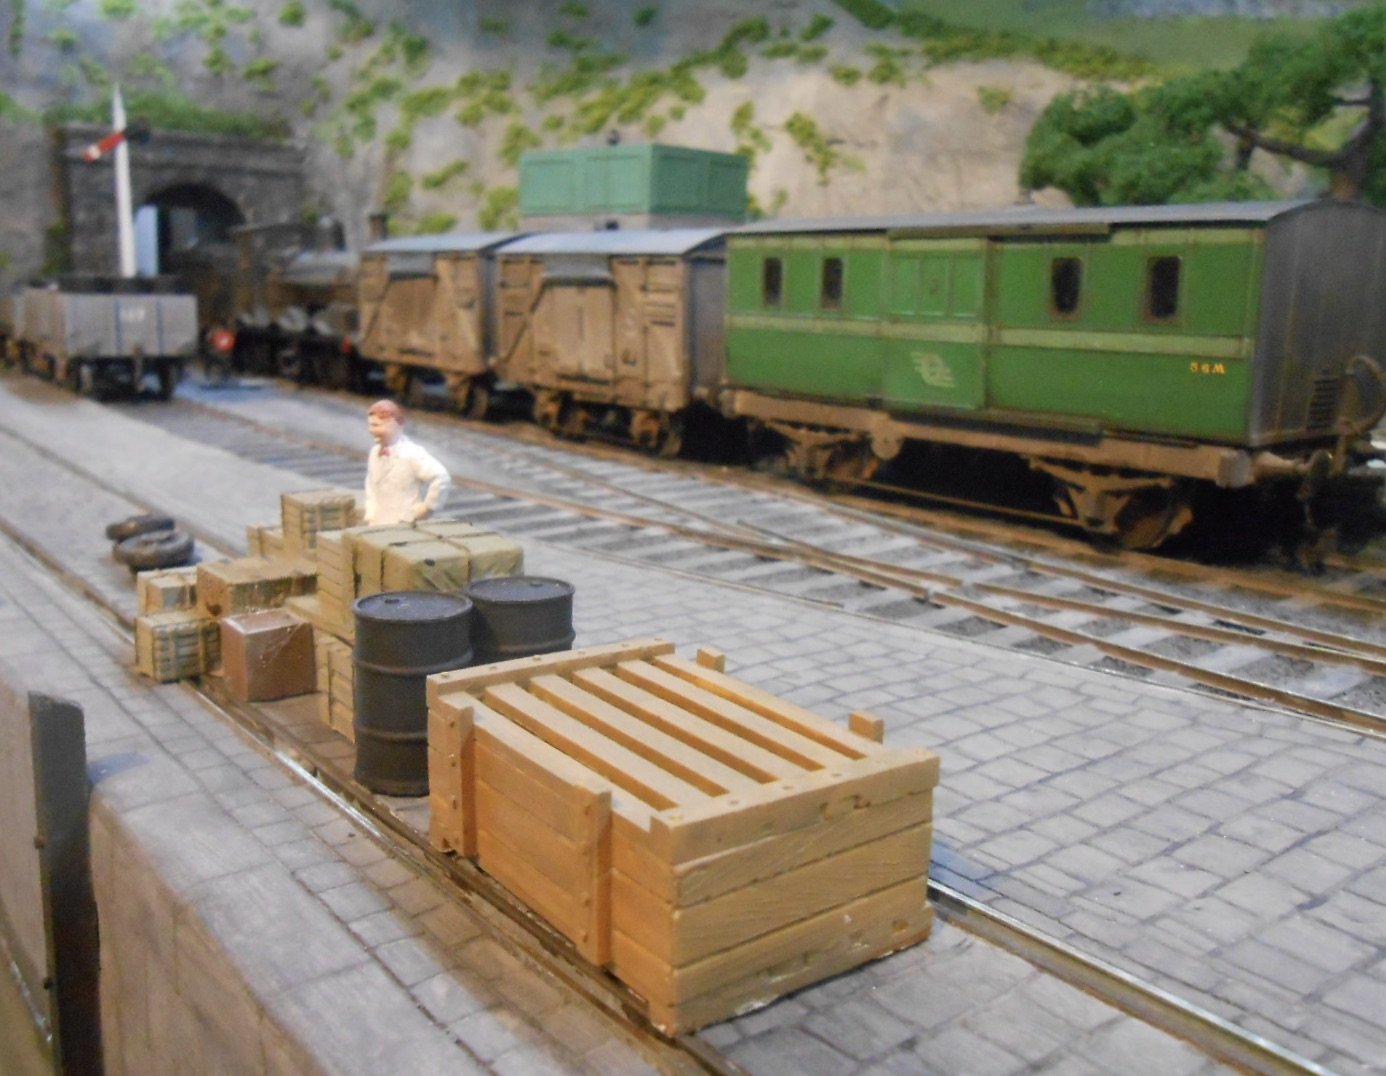
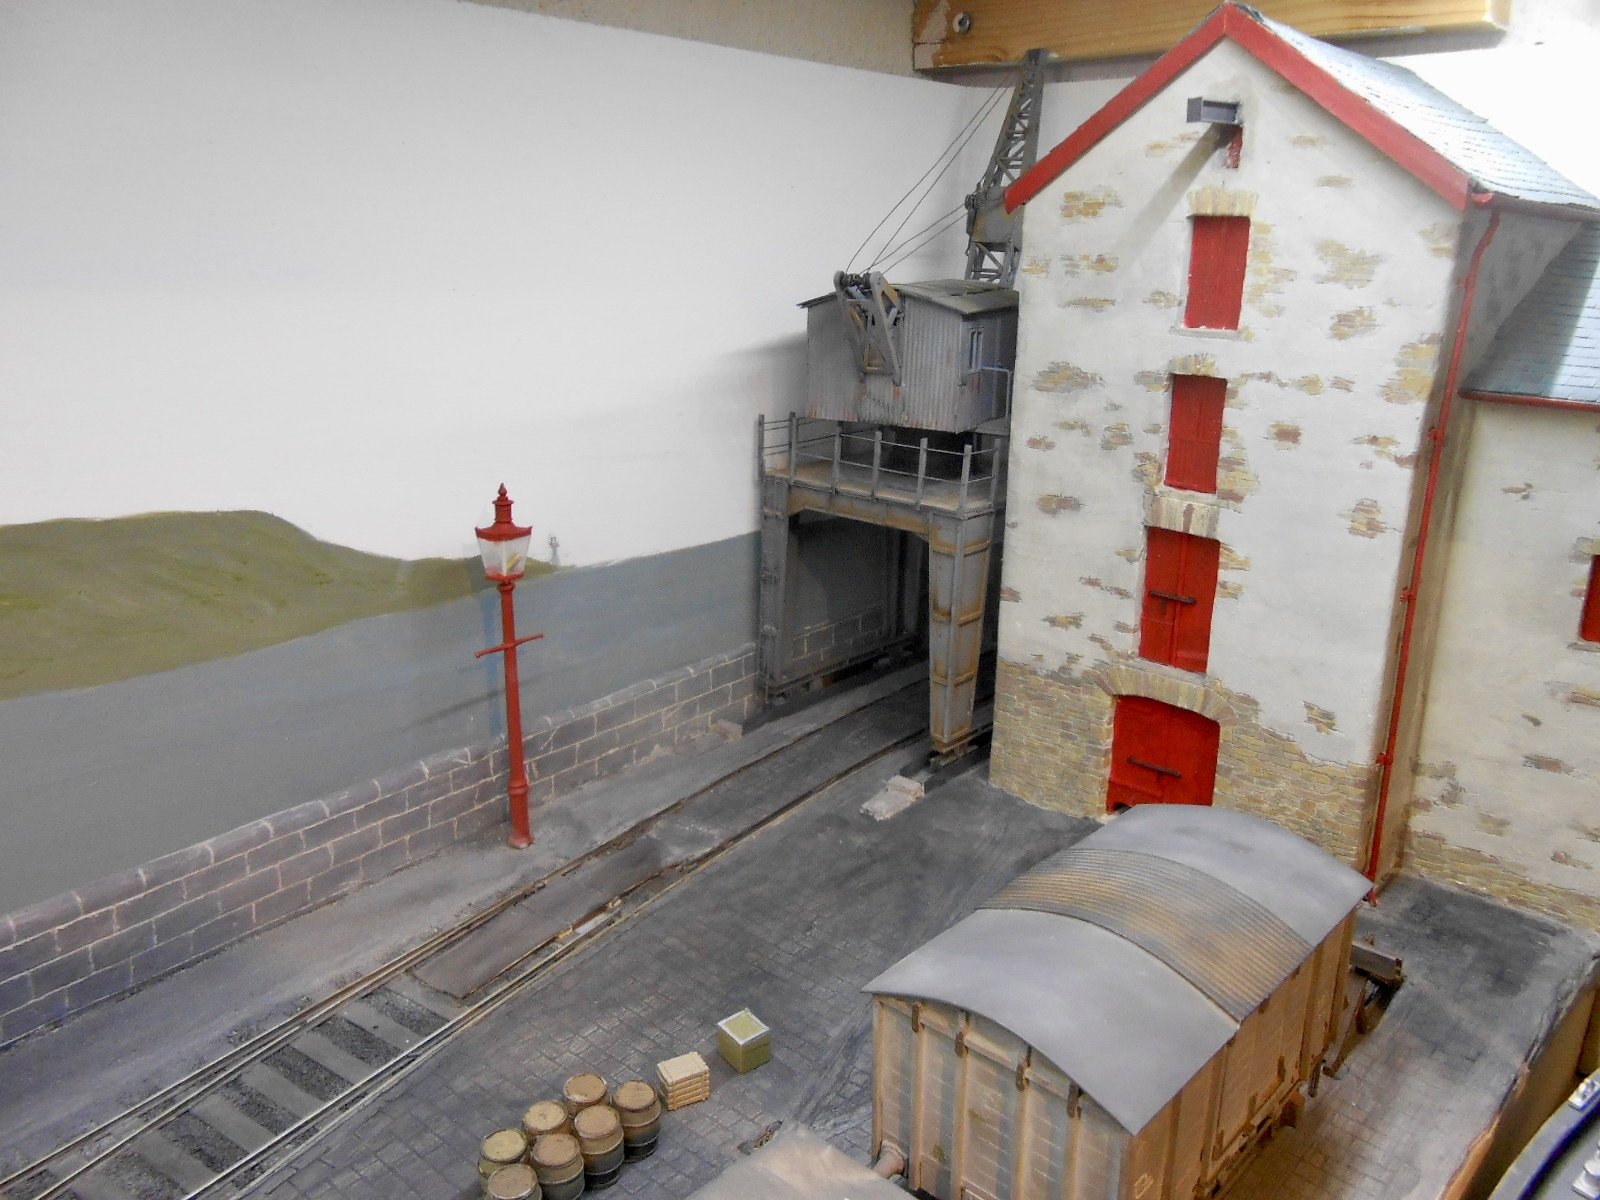
Slow progress, but the right hand board is starting to come together. Mostly, it has been a case of more of the same: gloss paint and chinchilla dust for the road surface and the 'cess' alongside the track, plus lots of DAS [and even more scribing] for the quayside. However, the warehouse is pretty much finished and has certainly been fixed down. There has been a small addition too in the form of a 'lucam' - the hoist at the top, which enables goods to be moved up to/down from each floor. Another small adaptation has been to the mobile crane. After brooding over how the real thing might have been powered, have come up with the idea that, like the Giant's Causeway tramway, it is deemed to be electric. Somewhere out of sight is a hydro electric generator, which feeds power to the rails that the crane runs on. Workmen get a measure of protection from the wooden boards that shield these, plus of course, power is only on when the crane is working. Not entirely sure how plausible this is, but the crane is essentially just a different type of view blocker, hiding the exit along the pier, so hopefully this will do. Speaking of view blockers, a piece of plywood has been added to the front of the far right side, which, when a top pelmet is eventually added, will frame the overall scene. As for the train, it is the 1950s this time and my J19 has appeared with the fish train, the latter an eclectic mix of pre-grouping stock, including one of the MGWR four wheel hearse vans, which were later used for parcels and fish. Like the loco, it is an Alphagraphix kit, while the wagons are scratch built.
- 242 replies
-
- 20
-

-

-
Ideally, clean wheels with solvent like meths, isopropyl, lighter fluid, using a cotton bud. I either use a couple of crocodile clips, from my old H&M Clipper, or two bare wires from a redundant wall plug transformer, pressing on the wheels. Make sure it is DC and no more than 12v though! I use Peco lubricating oil on bearings and gears, giving all locos a thorough wheel clean before a show. Also check pick ups for dirt - likewise where these bear on the wheels. Keep track clean the same way, especially as soon as running becomes hesitant. Cleanliness comes well before godliness where model railways are concerned! Reminds of the joke about the man who prayed everyday that he might win the lottery jackpot. Eventually after a particularly impassioned prayer, there was the crack of thunder and a voice from on high said 'My son, at least do me the favour of meeting half way by actually buying a ticket'. Probably why I don't win either.
-
Now what are Starskey and Hutch doing over here? Won't be chasing criminals in that car - however fine it looks - not if the recent Top Gear episode is true! Fire up the Quattro, Gene...
-
Splendid stuff, everyone!
-
You are never alone with a clone.