murrayec
-
Posts
2,731 -
Joined
-
Last visited
-
Days Won
70
Content Type
Profiles
Forums
Events
Gallery
Everything posted by murrayec
-
heirflick Humbrol 27 for the grey & I'd say you couldn't go wrong with a few 6 wheelers at a guess..... and don't forget the tool box. Eoin
-

Walker Diesel Class F - ECMbuild in 4mm for OOn3
murrayec replied to murrayec's topic in Irish Models
Hi Colin R I found pictures of the Chinery Bogies on the other site! and also info on Mike Savage- thanks for the above contact info While doing the Google search, it lead me back to the Bullant bogies, I developed a bogie for the DART model like a Bullant which I don't use any more, but I did buy gears and shafts from Branchlines to motorise them back at the time! I may revisit for this project... It needs a bit of working out but I have the parts and it could be fun. Still interested in seeing the bits, especially if you have bogie sides..... Eoin- 136 replies
-
- 1
-

-
- class f
- west clare
- (and 1 more)
-
Walker Diesel Class F - ECMbuild in 4mm for OOn3
murrayec replied to murrayec's topic in Irish Models
Oooch!- 136 replies
-
- 1
-

-
- class f
- west clare
- (and 1 more)
-
Walker Diesel Class F - ECMbuild in 4mm for OOn3
murrayec replied to murrayec's topic in Irish Models
Hi Andy Any chance you could post up or pm me a few photos of the bogie sides? even better if you could post a picture of Mike Chinery's complete bogies? and does Mike still make these? Thanks Eoin -
Walker Diesel Class F - ECMbuild in 4mm for OOn3
murrayec replied to murrayec's topic in Irish Models
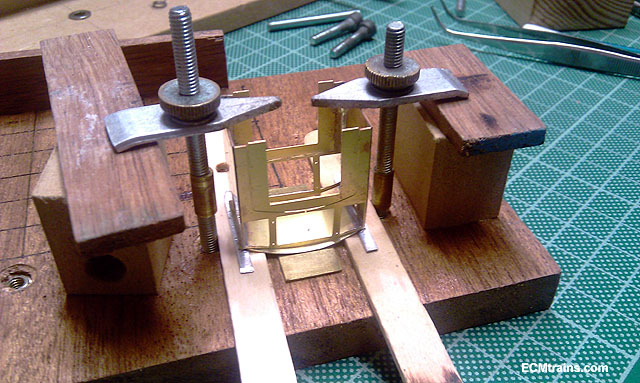
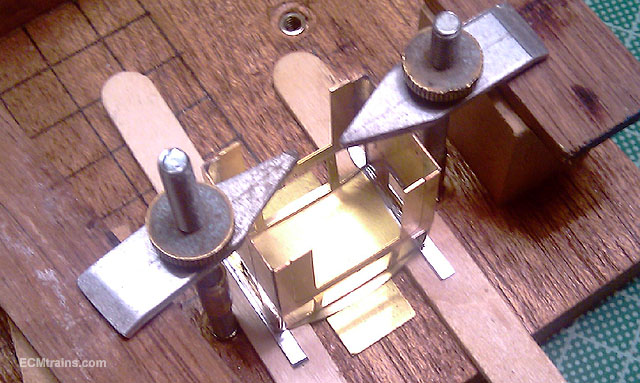
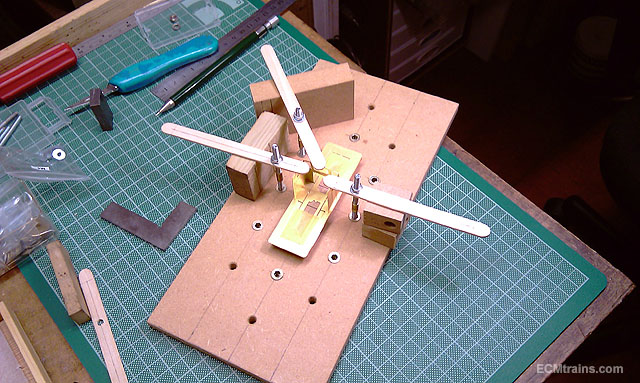
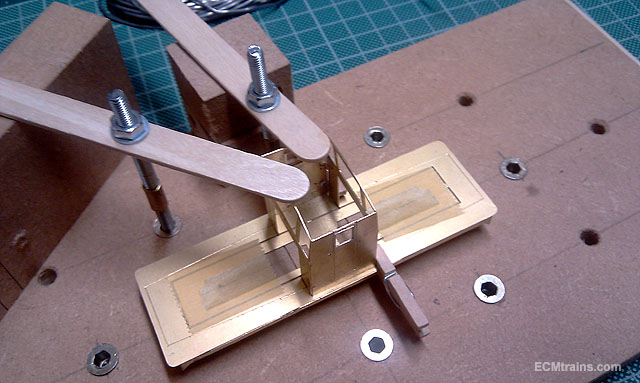
Hi Colin R The jig is a sheet of 9mm MDF with two screw holes on the centre line to hold, from the underside, different blocks of MDF to mount the chassis on- all depending on the job. Then there are a number of 4mm threaded inserts fixed into the base dispersed around the work area to take M4 threaded rods to clamp down the model parts with lolly-pop sticks supported with off cut bits of timber to the rear of the sticks to allow clamping. M4 threaded bar is impossible to buy so I used bolts with the heads cut off and made up a few brass threaded sleeves to join two rods together. When setting up the clamps the support timber to the rear should be higher than the part being clamped, and as far away from the threaded rod as can be so the main down force is on the part, holes in the LP stick should be 4.5 - 5mm to allow the stick to be angled. The clamping force required on the nut is small, just enough to pinch it. New holes can be drilled in all this stuff for other jobs...... The second clamp seen above is a new soldering jig I made out of hardwood, my old one made with MDF started to bloat with the flux and heat so while making the kit jig I made a new one. It's featured here, the old one that is;- You mention bogies in your post, are they for the Walker? if so can you post up a few pictures to give us a look at them, thanks Eoin- 136 replies
-
- 3
-

-
-
- class f
- west clare
- (and 1 more)
-
Walker Diesel Class F - ECMbuild in 4mm for OOn3
murrayec replied to murrayec's topic in Irish Models
heirflick Where did you get that kit! I'd like to stick one of them together Thanks Eoin- 136 replies
-
- 3
-
-
-
- class f
- west clare
- (and 1 more)
-
Walker Diesel Class F - ECMbuild in 4mm for OOn3
murrayec replied to murrayec's topic in Irish Models
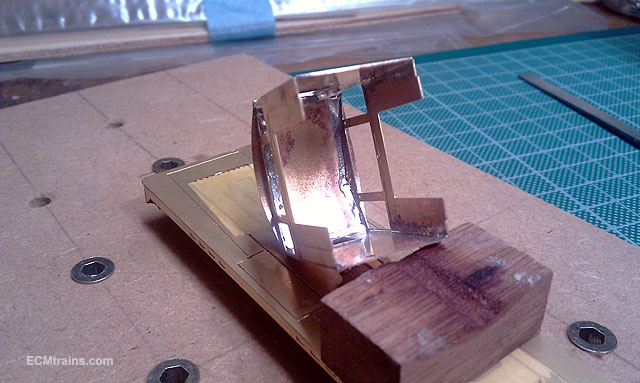
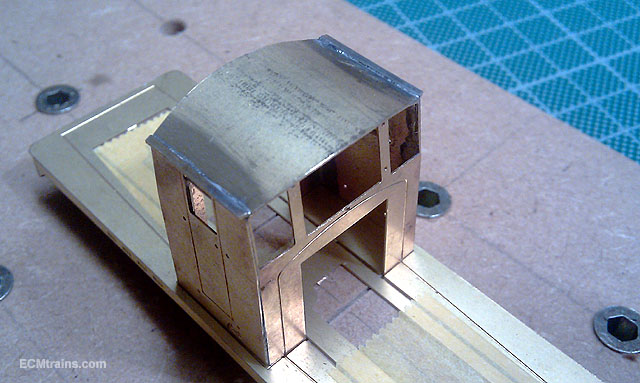
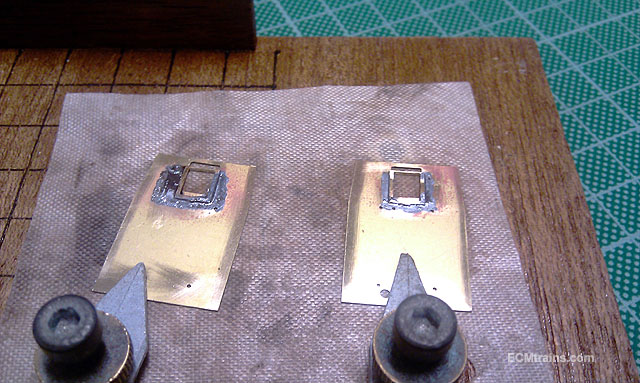
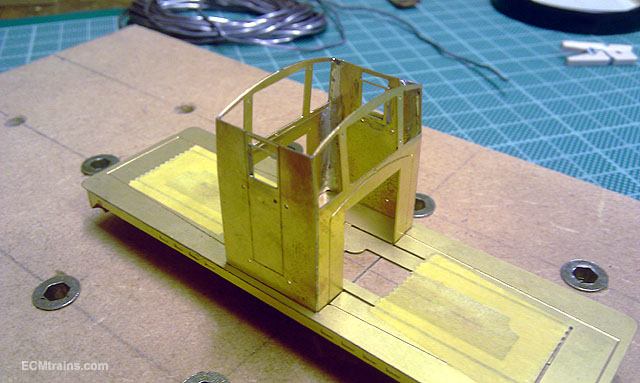
Then the roof was slip rolled and sized up, it comes short at the sides! ah thats for the gutters, those little 1x.4mm brass lengths below in the photo. The gutters were sweated onto the roof sides and the roof and cab were jigged up as below. Spacers were used to support the curve of the roof, aluminium ones under the gutters so they wont stick, and mild pressure applied with jiggery-poke to line it all up. Tack soldered first and then soldered all over while still in the jig. and done, a nice little cab with straight and perpendicular bits and the gutters stayed in place! Eoin
- 136 replies
-
- 9
-
-

-
- class f
- west clare
- (and 1 more)
-
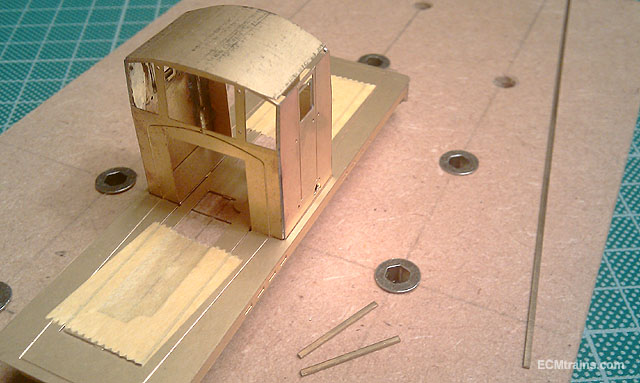
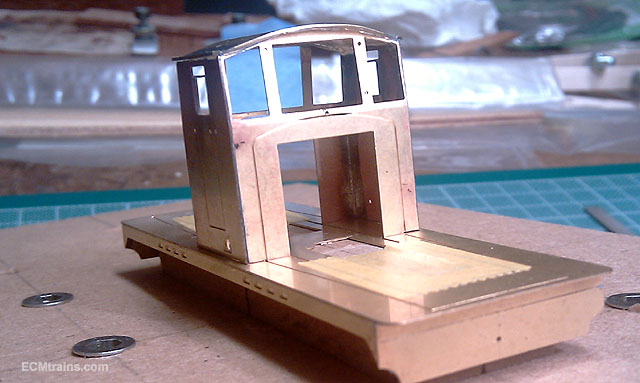
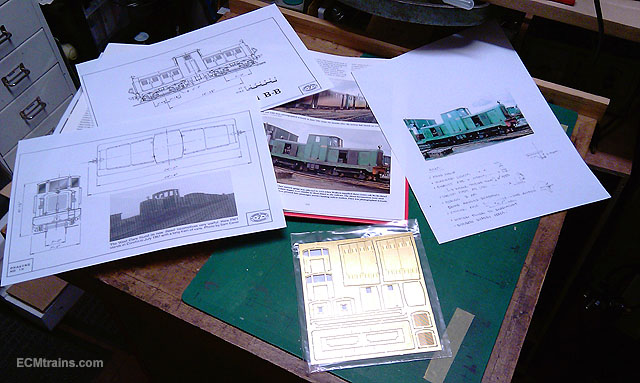
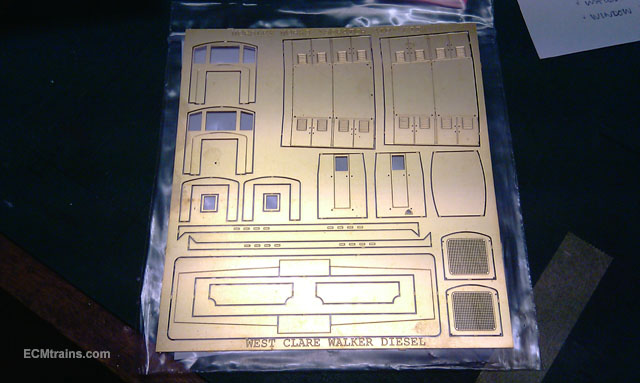
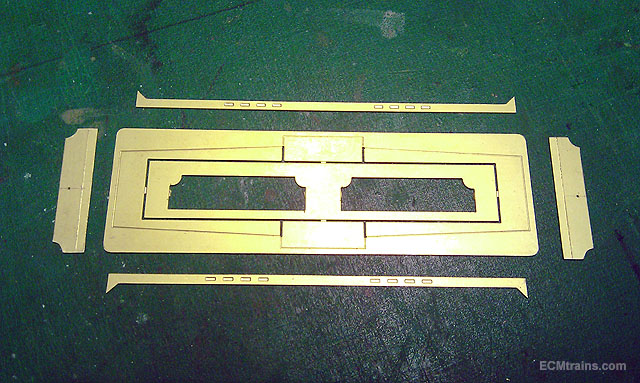
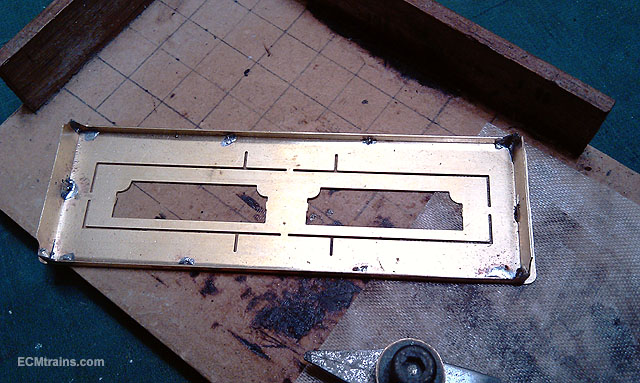
Hi Here is my take on a West Clare Walker Diesel in 4mm for a chap doing 00n3. The body is a Worsley Works brass etch which looks very nice and shiny in its bag, after doing a bit of research I reckon it will need a few extra holes and some score lining... Extra .5mm holes being added for; - Head Lamps, Marker lights, Water fill, Exhaust brackets, Screen wipers, Horns, Vacuum pipes, & Couplers. This was all done with the parts still in the sprue as its easier to hold this way. After cutting out the chassis and cab parts, removing the cusp and sizing things up, a plan of action was formulated. There will be four main components to build as individual items- Chassis, Cab, Bonnet 1, & Bonnet 2. When these parts are complete it will be decided how to put it together. I left some of the sprue in the chassis to give a bit of reinforcement while building, this will be removed when the time comes. After playing with the cab parts for a while I decided it was time to build the jig I had been thinking about for holding body parts while soldering. This cab is a bit twee and just about fits together, there is a few gaps when assembled on the chassis, I think the magic etch offset line was not used so gentile persuasion will be required and a jig is the man for this! This unit is designed to be adaptable for other kits n stuff Windows on first, slightly ajar Then three sides are jigged up, the chassis has slots and half etched lines to aid, but the parts just don't quite make it- a bit of filling later I think. The fourth side goes on when the other three are soldered. Tack soldering here only, to get it held in place, then finally soldering off the jig to complete.
- 136 replies
-
- 5
-
-
-
- class f
- west clare
- (and 1 more)
-
Hi George He's all heart, eah! I feel for you, cause I know what it's like..... and I don't have theys or a wife Eoin
-
Hi chris That's the Maritime Museum Boys - it's a ship from the Museum as far as I know, scratch built by a patron some time ago..... Eoin
-
Excellent George Great to see the above and to see you this weekend Keep it coming Eoin
-
South Dublin MRC Exhibition Oct 28th - 30th Blackrock College
murrayec replied to Warbonnet's topic in What's On?
A video of SDMRC's Dun Laoghaire DART Station Eoin -
Back in style heirflick Nice tank 279 coming on there Eoin
-
...I don't have them, yet Eoin
-
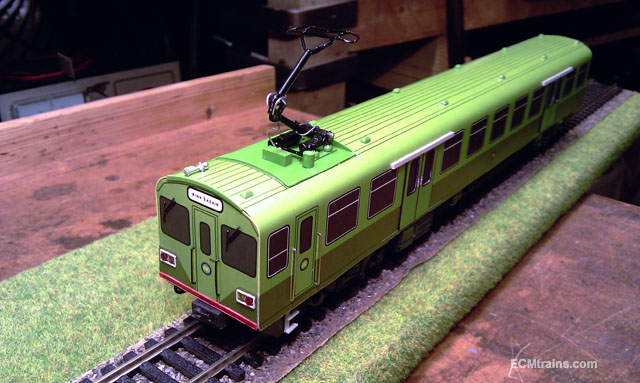
Hi Borithe I could do this with the DART- put an Gauge N DART in an OO DART Eoin
-
Stunning Borithe Now that's a proper model village Eoin
-
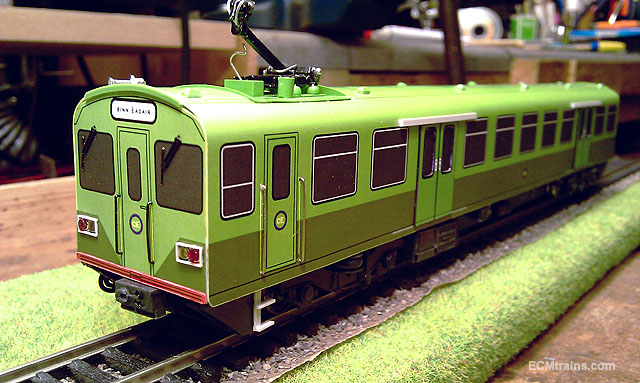
Hi A know someone who will be delighted to see this, and I know a few who wont! It's the Mock DART, the body was made pre window era and sat in a box until recently, now it's just about finished and ready to go into service.... .......the Mock DART was a model built back in early 1980's to show the public what the train was going to look like, so this is a model of a model! I wonder is that a first? Eoin
-
Hi Glover It's this one.... .....I'm told by one of the chaps involved that they were the same down south Eoin
-
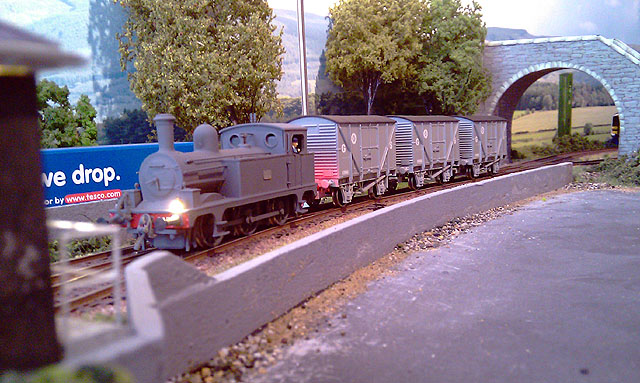
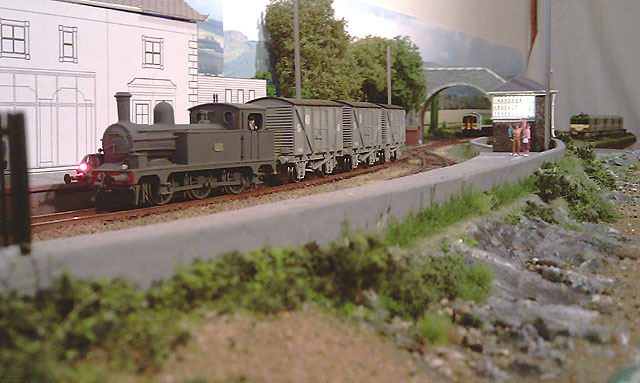
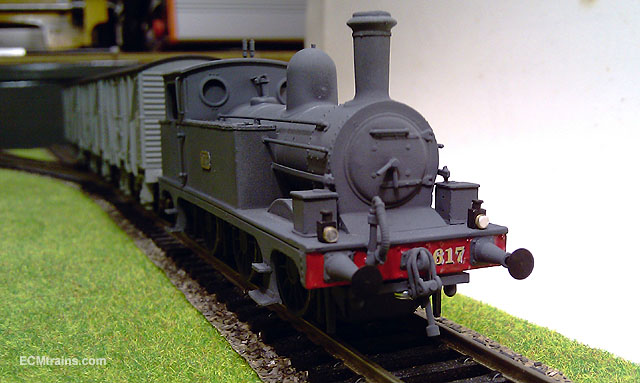
Just keeping you up to date, I know the photos are the same as previous but the J10 617 are in these ones, testing out it's new legs n gears, a few problems with the track showed up- 0-6-0 loco is a good engine to test track!! ....and pushing back to Dublin as the DART is on its way.... Eoin & CM
-
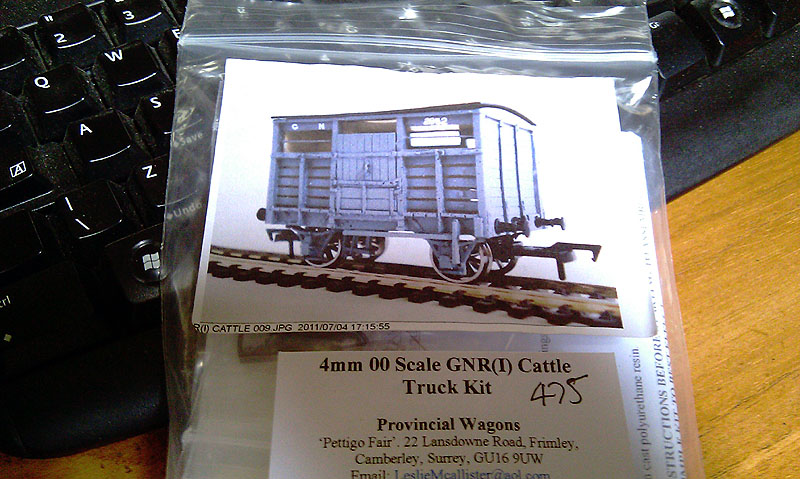
Hi Glover Have you seen Provincial Wagons now do a pretty good Cattle Wagon kit? its not the same satisfaction as kit-bashing to achieve a goal, but if your thinking of a train of them this might be a quicker starting point.... Eoin
-
Decisions, decisions, - when in doubt do them all..... Eoin
-
I really like the new system for inserting photos, makes it far easier to add in text descriptions now that one sees the photo in the editor Great Eoin
-
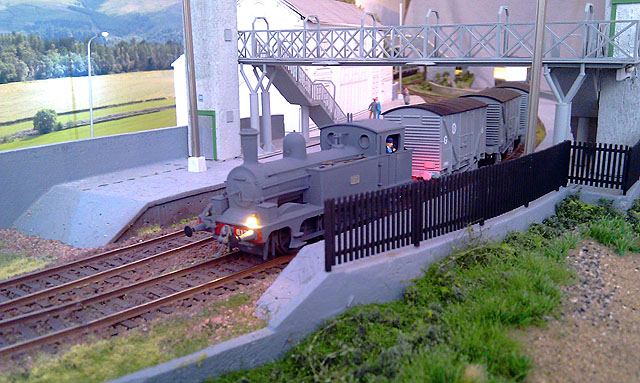
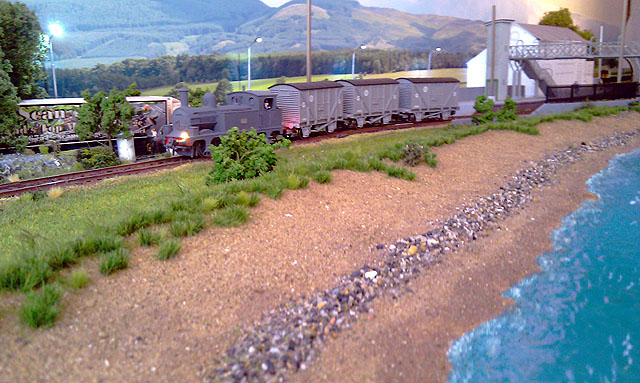
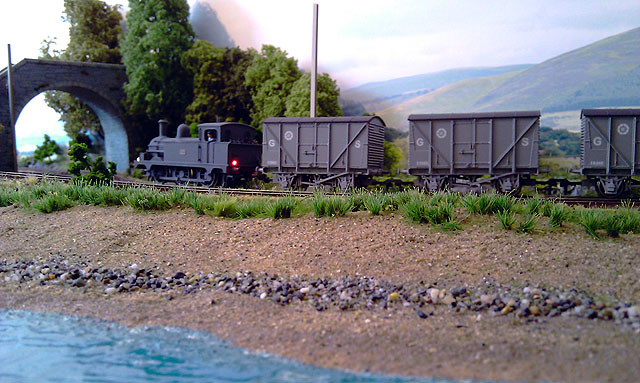
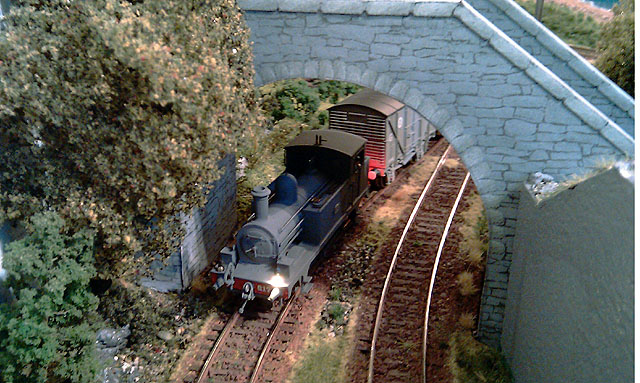
Hi 617 had its buffers painted red, SMM decal number added to the front buffer beam, new axle spacers and final drive gear installed which has improved the running- minimal lurch now. I sourced the replacement axle spacers from Peters Spares.... And a shot pulling a bit of freight out at Greystones yesterday morning Eoin
-
Train & Model Fair at Bray Wheelers Clubhouse, Schools Road, off Boghall Road. Bray 10.30 to 2.30
-
Nice one BosKonay, it's looking great Eoin