David Holman
-
Posts
4,333 -
Joined
-
Last visited
-
Days Won
117
Content Type
Profiles
Forums
Events
Gallery
Blogs
Store
Community Map
Everything posted by David Holman
-
Arigna Town - this week's scenery
David Holman replied to David Holman's topic in Irish Model Layouts
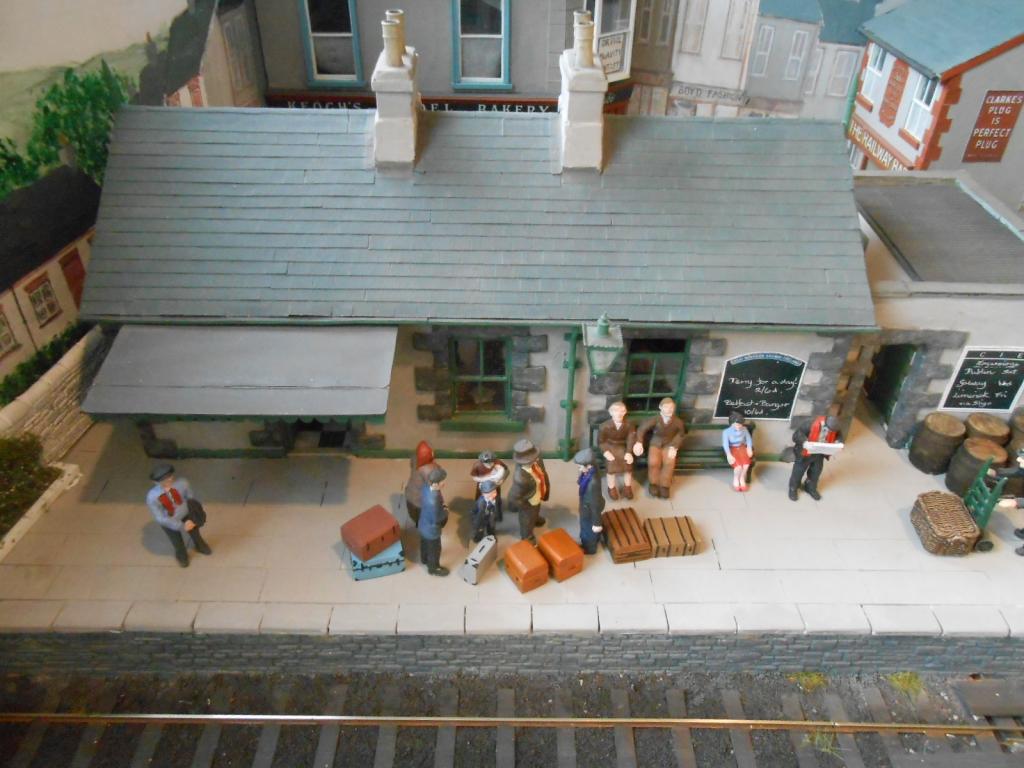
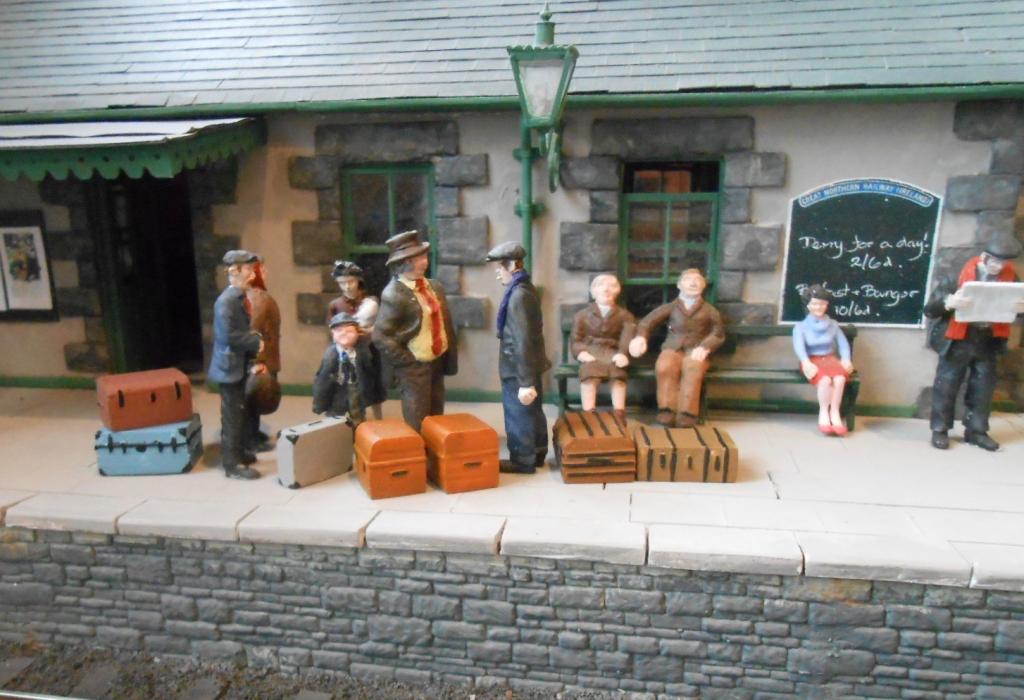
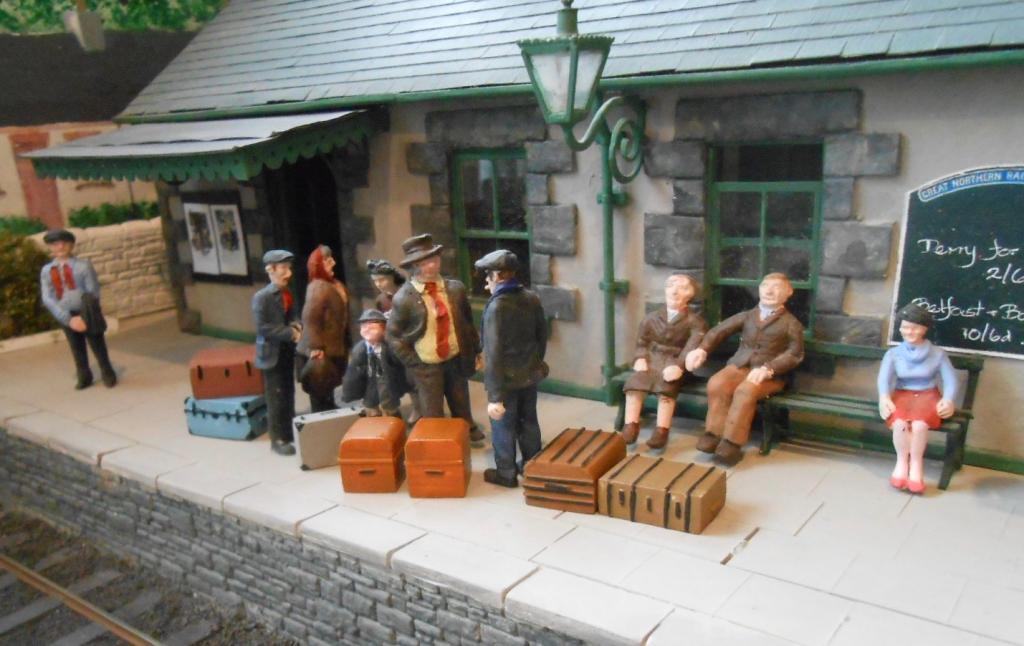
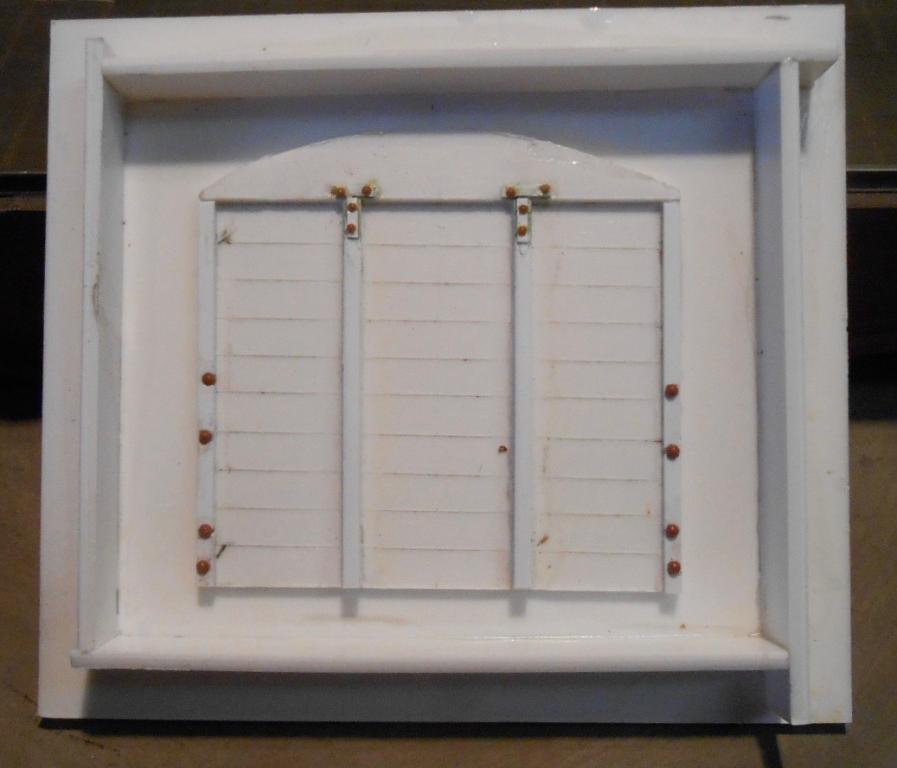
A visit to Sheffield Park in Sussex to admire the autumn colours also enabled a look in at the Bluebell Railway. Nice to see the S15 [Green King] and the Q 0-6-0 on duty, but also of interest were the stacks of old time luggage on the platforms. Took a couple of pictures & realised that it would not be too difficult to make some from plastikard. Various rectangles of 60 and 80 thou were used, laminated to give different styles/types. A few cases were given additional bits of microstrip, for strapping and handles etc. Final touches were the painting, particularly touches of black to represent corner plates, hinges, locks etc. So, at last I have my 'emmigration' scene, just in time for Cultra next week.
-
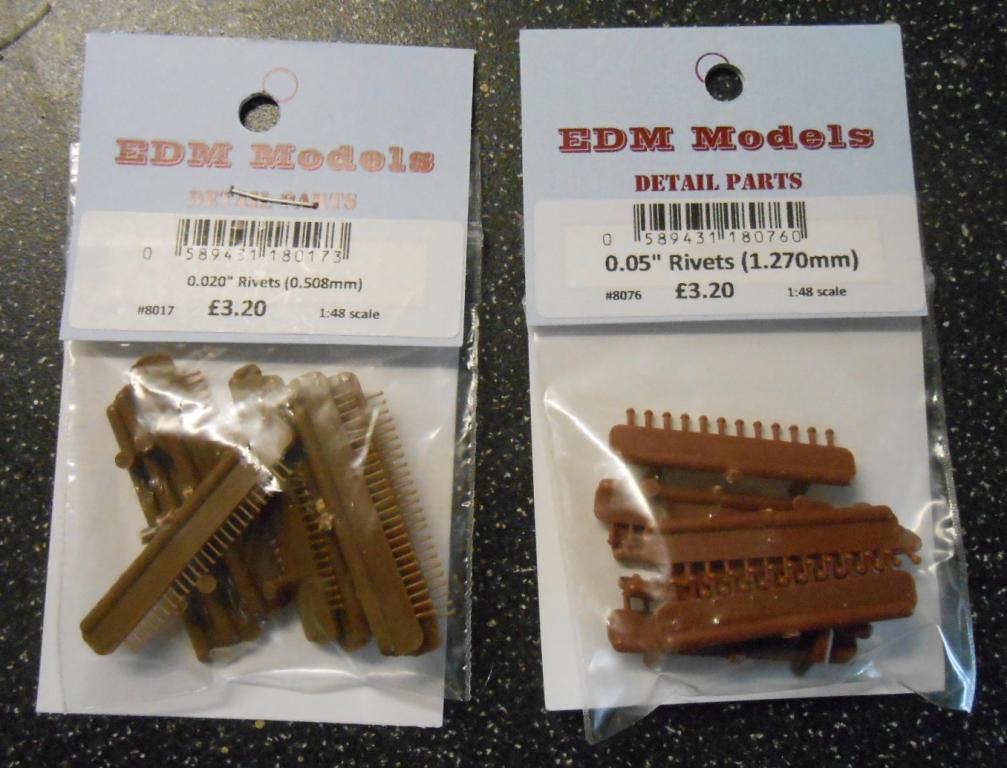
Haven't tried the rivet strips, but they look really promising. A rivet press is one alternative & there are many varieties - mine comes from GW Models, expensive, but a quality piece of kit. At Expo Narrow Gauge last week found some EDM rivets - checkout http://www.ngtrains.com - they come in various sizes, from as small as 0.5mm. Am told that, unlike Grandt Line rivets, their 'pegs' are dead centre, so if you drill holes to take them, they should follow the line and not be wobbly. I decided to chop off just the heads and position them with an Exacto blade, with a dab of solvent. A couple of pics below, but will say more in my workshop page on CVR wagon body masters.
-
Two weeks to go. Arigna Town is getting the once over, so hopefully it will be as good as it can be for the show. Really looking forward to it and likewise meeting some of you folk. Am told the layout's pitch is near the BCDR tank. Given several of my locos are from Beyer Peacock, I think that is rather splendid.
-
Anyone who quotes from Suite:Judy Blue Eyes deserves to do well!
-
I'm with Mayner - get scratch building! Unfortunately there is still a catch as stuff like Evergreen strip comes from the USA, while I am guessing items like motors will also soon go up. Equally, particularly for buildings, much can be free.
-
Depends how tight your curves are J. In 7mm scale, 6' radius is the norm, though on the club layout my coaches go round a 5'6 circle without problems. On my previous exhibition layout, they only had to go back and forth, but there again, with Dinghams, you are still using the buffers when propelling, so whatever the scale this is the limiting factor. There is a nice 00 model in the current BRM using Kadees. They are mounted below the buffer beam, but forward if the buffers and seem pretty unobtrusive. Rare earth magnets seem to work better than the Kaydee planks too. For me, autocouplings work really well for just running round at a terminus. For actual shunting, am not sure. Shuffling back and forth over a magnet is hardly prototypical, nor completely reliable in my experience. That was way I found Dinghams a decent compromise - hands free for platform work, but still able to connect with three links when shunting the yard. I had Kaydees between coaches too! A case of finding what works and you are visually happy with, but always a compromise somewhere...
-
Neil Sprinks books on the Sligo contain several photos. Likewise both Tom Ferris colour albums. Alphagraphix do a card kit of railbus 2a in 7mm scale for just £3-4. I scratch built mine using it as a drawing. See David's workbench and earlier Arigna Town reports in the workbench and layout sections.
-
Nice brake, while can also vouch for the Dinghams too. They work really well in 7mm scale and work effectively with both fixed and electro magnets. The only problem with them is that they are 'handed', so if you use a turntable, they are not viable, hence the need for three links on Arigna. Otherwise, unobtrusive, easy to fit and compatible with three links, so you can mix and match.
-
Whole layouts have been built in less space, but just fabulous!
-
Surprised myself with how quickly and well this went. Have tried to keep things tidy below the baseboard by threading wires through staples. The only problem was tracing short and eventually found it where two copperclad sleepers on one of the points were touching and ungapped. Such are the vagaries of this method. So, have been able to run my loco around, along with a single coach and wagon - all I have at present. In the process, cooked my transformer (two bare wires touching). A bad smell and the fact it was still hot half an hour later a bit of a giveaway! Was hoping to add photos I took on my phone, which is where I am posting this from, but do not seem able to access these pics. Any ideas why anyone?
-
Arigna Town - this week's scenery
David Holman replied to David Holman's topic in Irish Model Layouts
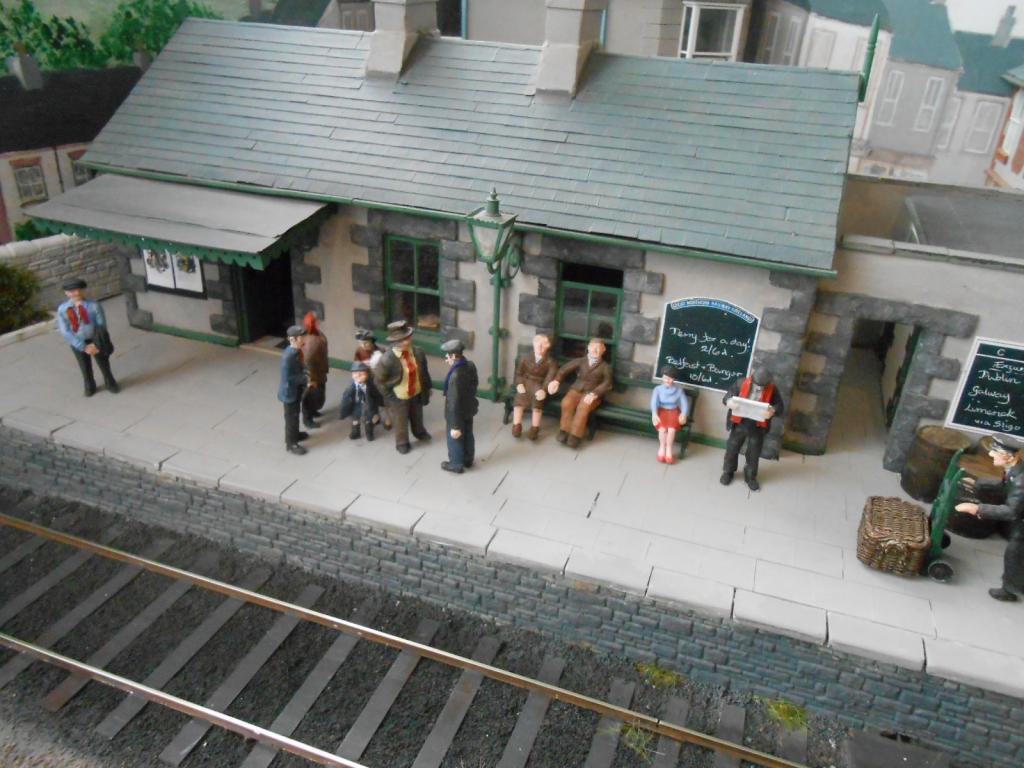
The last time Arigna Town was at a show was at Reading, back in May. At home, it occupies one wall of my workshop, often doing little more than gather dust. Much as I enjoy operating at shows, at home I am very much a builder and the new Clogher Valley project has taken all my attention. However, a trip to Croydon beckons this weekend, followed by East London Fine Scale Show in early November and Cultra [really looking forward to that] the week after, finishing the year at Manchester in December. As ever there were a few things that needed attention from last time out, notably one of the signals wasn't operating properly. A couple of new washers sorted that one out [i hope], but a much bigger job was the turntable. The word 'refurbish' had been on my to do list for a while. It was working ok, but the top of the well 'wall' was showing under the coping stones in places. Fortunately the whole well can be unscrewed from underneath and be removed completely. Trying to avoid a total rebuild, the best option seemed to be to trim the inner part of the wall and replace it with a new layer on the outside edge. That all went well, so feeling pretty pleased with myself, I was soon disappointed to find the hand crank mechanism was jamming somewhere. Eventually traced it to the coping stones around the top & despite some vigorous sanding it soon became clear that replacing them was the only option. The originals were 40thou plastikard, so replaced them with 20thou. Further tinkering seems to have got it running well again, but am resigned to the fact that, as a £5 Dapol kit, I will no doubt have to do a replacement eventually. The scenic side of things was covered by a general tidy up, including touching up parts of the back scene, but also spent time on some new figures I'd bought a while ago. The long term aim has been to create an 'emmigration' scene, with a family gathering saying farewell to those going overseas. Have managed to get what I hope are some suitable figures [mainly S&D Models], but still want to find some appropriate luggage. A few large barrels also now adorn the platform - for the black stuff, of course. If you manage to make it to any of the above shows, be sure to come and say hello.
-
The adventure continues! Very different, VERY impressive...
-
Fabulous work. Though my knowledge of Irish coaches is decidedly limited, having built many model coaches in various scales & gauges over the years I can certainly vouch for the fact they are labour intensive. Indeed, a coach can take as many hours to complete as a loco. The basic shell goes together quite quickly, but interior details, bogies, under frames, grab handles etc etc take a lot of effort, while painting & lining adds further layers. Well done John.
-
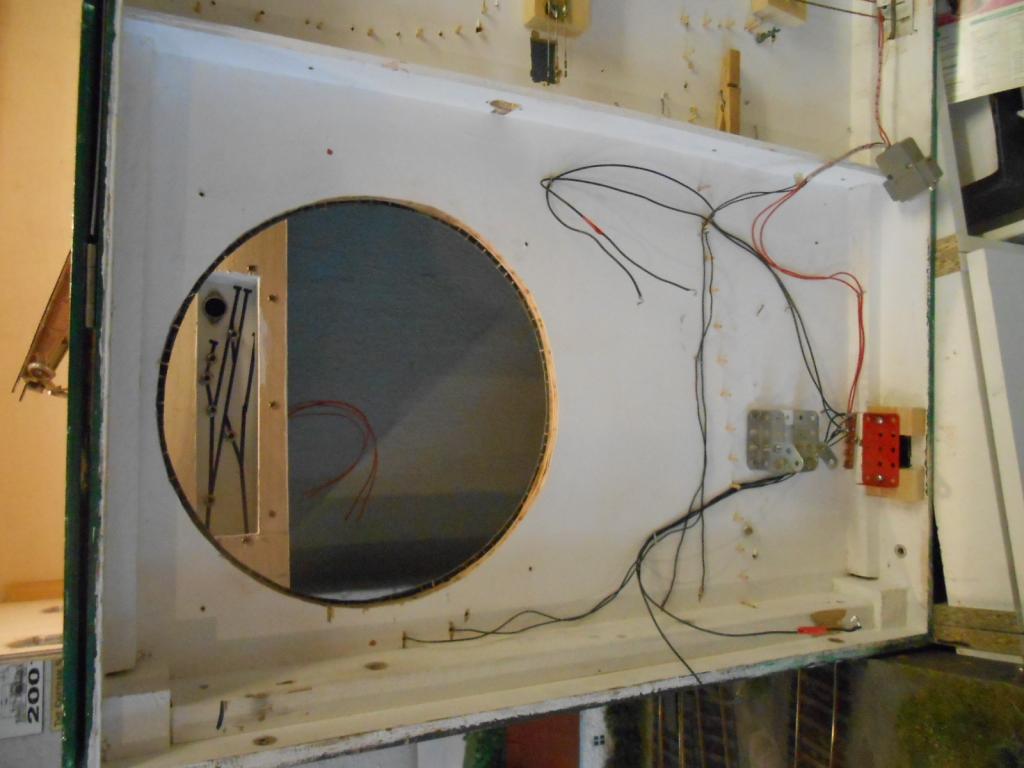
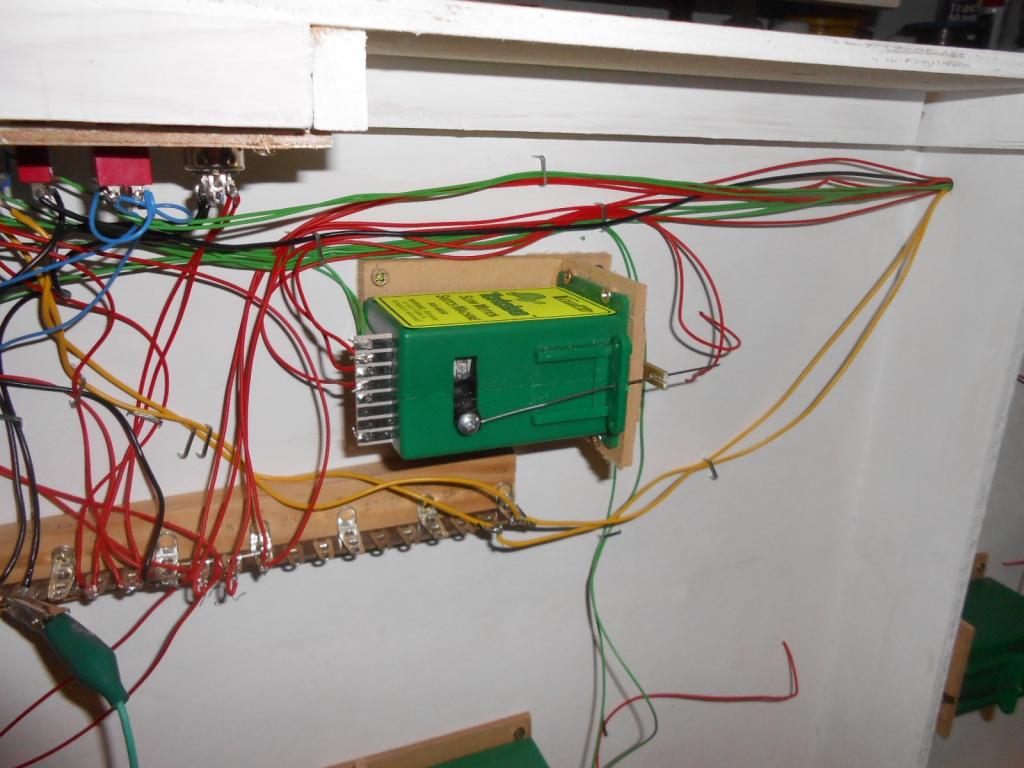
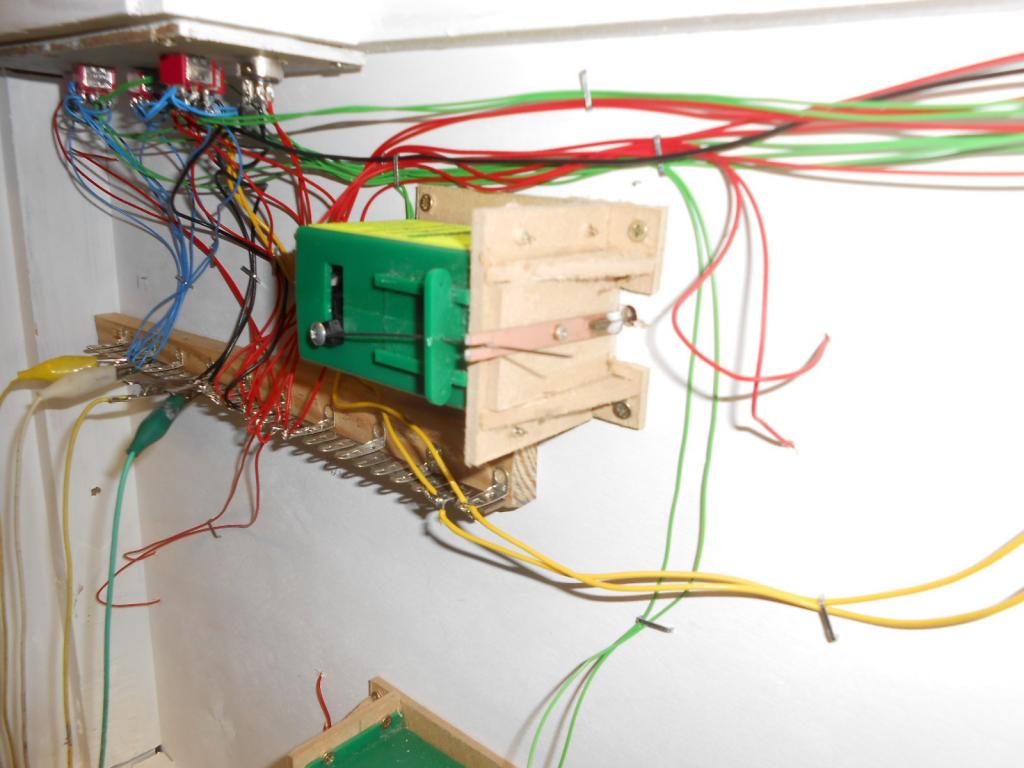
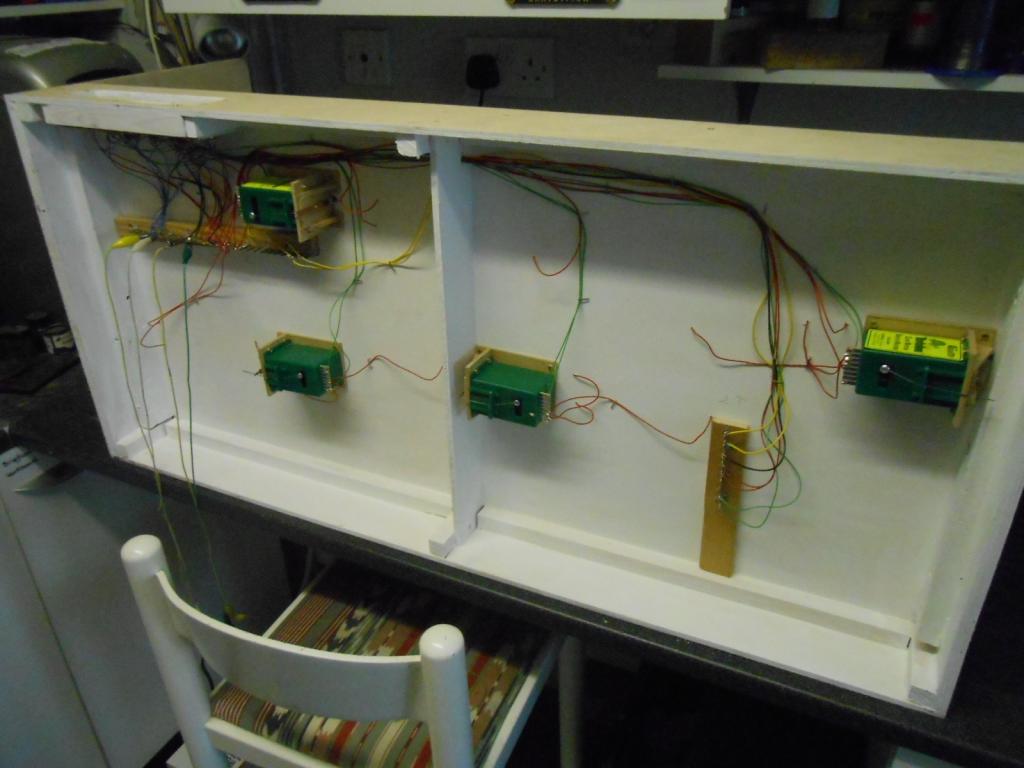
At 5pm today, my one and only loco moved under its own power around Baseboard 1. For those of you well versed in electrickery no doubt the comment 'so what' is already on your lips. However, for a numpty like me, whose entire knowledge of wiring can be written on a postage stamp with room to spare, applying power to track and points is always fraught with anxiety. In fact, with handmade track and fairly shallow baseboard frames to contend with, there is actually quite a lot of work & certainly exponentially more than adding 'two wires'. First off, blew nearly £100 on six Tortoise point motors. However, these are nearly 10cm deep and my baseboard frames are only 75mm. Therefore, very grateful to Gordon Gravett, who showed me how he turned Tortoises on their side, with simple brackets, when Pempoul came to Chatham in June. Made mine from off cuts of hardboard, but any material will do I guess. A piece of copper clad sleeper strip was used as a pivot, with 1mm piano wire soldered on one end [going to the point tie bar] and a slot cut in the other to take the Tortoise actuating rod. The wire supplied is too thin for this scale, so 0.8mm piano wire is substituted. Lots of head scratching went into the wiring diagram & there is exponentially more wire under the baseboard than on Arigna, despite it being only half the size. A Tortoise needs 5 wires [two for power & three more to switch track power], while DPDT switches need another six. Two pairs of points are wired as cross overs, so that cuts things down a little, while there are only three actual track feeds on Baseboard 1. There will be a single section switch on Baseboard 2 [in the loco shed], otherwise any isolation with be by the points themselves. The only other thing of any note is that a DPDT switch is being used to switch between track power and that for the turntable motor. Hopefully, once a loco is driven onto the TT, flicking this switch will transfer power to reverse the locos/railcar, while always went cab first on the CVR. I'd love to say I can now go on & wire the second board and play trains, but a certain amount of adjustment is needed to get the tie bars closing properly. With only one engine at the moment, itself not yet fully tested or run in, there are a fair few variables to be ironed out.
-
An extraordinary project continues to inspire. Superb workmanship.
-
Congratulations to the Ballyconnel Road team, whose layout features in Model Railway Journal 249. A very enjoyable read it is too, helped by avoiding the 'how I began with Hornby' syndrome and enhanced by some fine photos of this lovely layout. MRJ rarely strays offshore and in 250 editions (it began with Issue 0...), the number of layouts outside Great Britain is probably still in single figures. Quite a coup. Well done chaps.
-
Me too. A real beast!
-
Very much agree with Glenderg, for though I have no knowledge of 3d printing, resin castings from your own masters is easy and relatively cheap for small runs. Many of Arigna Town's wagons are resin cast and the moulds even pick up 'wood grain' made by scuffing the surface with a fibre glass pencil.
-
Indeed, the Land Rover compliments the scene nicely too.
-
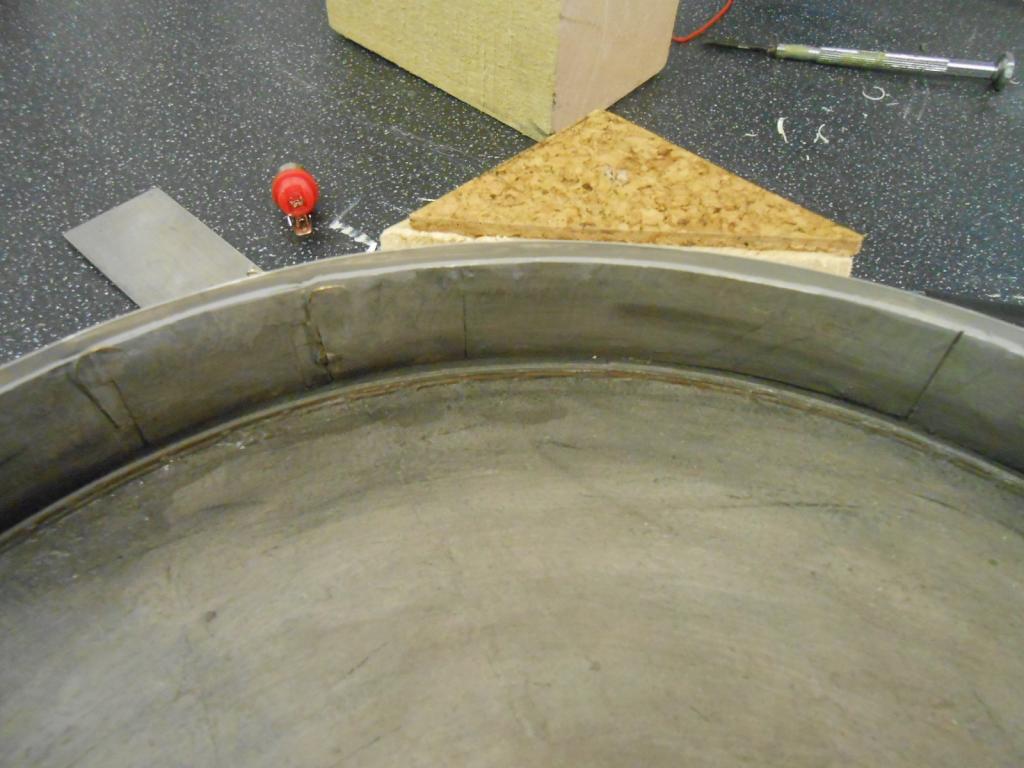
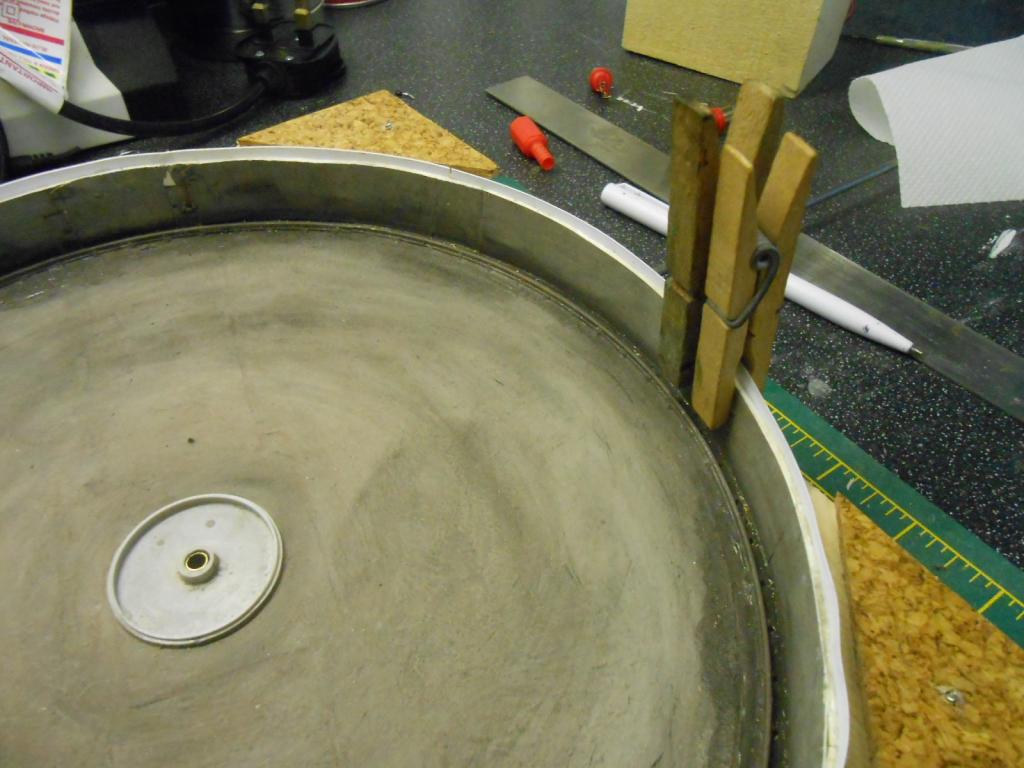
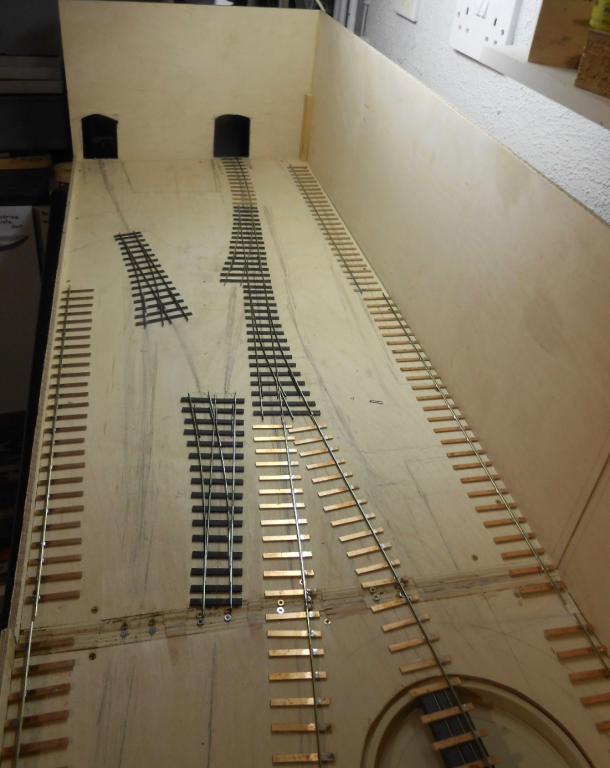
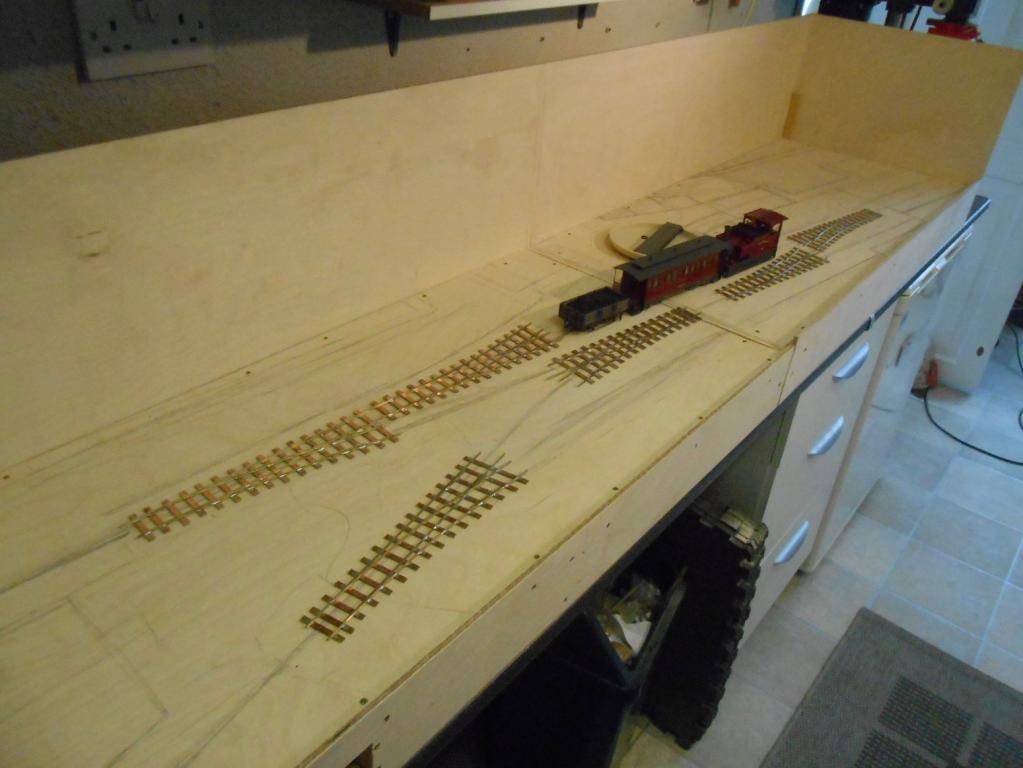
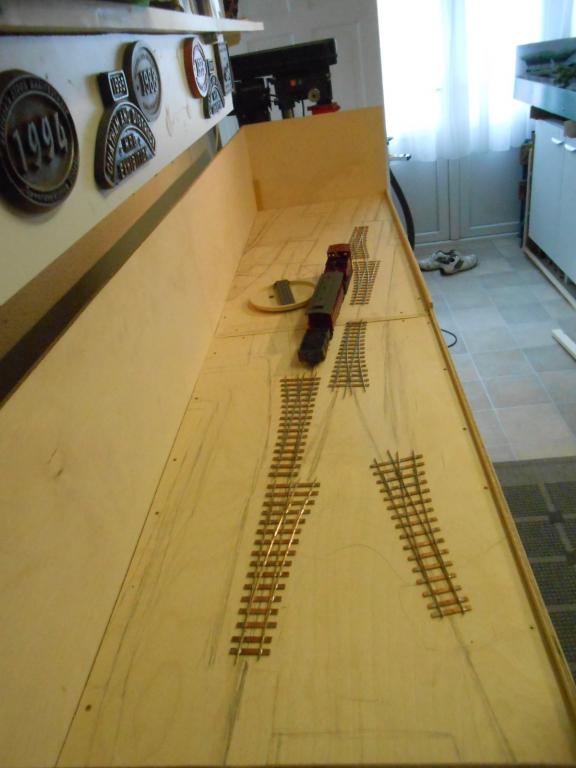
A week in Brittany stopped modelling, but a fine place to visit, not least because of the similarities to Ireland in terms of music & culture. Narrow gauge was nearly the same too! Doubt Cork & Kerry saw 34c though... Anyway, Fintonagh's baseboards are at last ready for track laying & the pictures show progress so far. Normally, I would use 3mm cork floor tiles as an 'underlay', but on a small layout, I am not sure if there will be much benefit in sound deadening, while the station site means almost all ground cover will be at rail level or above. So, track is being laid straight onto the baseboard surface. One further bit of preparation was to drill & fit small screws at the baseboard joints. Rails will be soldered to these & it makes for a bit of security at the baseboards ends when the layout is being transported to exhibitions. Also, I sprayed the points matt black in the hope of minimising bits of copper clad shining through the ballast later on. Once enough half track was made up, actual track laying could begin. I'm going to wire up as I go along, so the first section is also the first wiring section. With copper clad track, there are a lot of insulation gaps to cut, so I am hoping that by completing one wiring section at a time, I can minimise the potential for short circuits. Also, I hate wiring, so doing it a bit at a time may limit the number of rude words! In the background, you might spot a box of Tortoise point motors. Very much my favourites, though, post Brexit, they are now even more expensive than ever. When I first bought them in the early '90s, they were about ten quid each. My 'bargain box' of six cost me nearly £100 - mainly down to the falling exchange rate - a small, but not insignificant reason why I voted to stay, but there we go. The redoubtable Mr Gravett has showed me how to make a simple bracket, so they can be mounted on their sides [as he did with Pempoul], for they are over 3" deep, which is more than my baseboard frames. You can also see the Peco N gauge turntable. Its 150mm diameter is more than enough for the Sharp Stewart locos and just enough for the railcar when it gets built, though the latter will foul the main track whenever it is turned. However, on a one engine in steam branch, this is hardly an issue methinks.
-
Thanks chaps, much appreciated. No plans to market anything, but would be happy to cast a few more wagon sides if anyone was interested. They are really just a short cut for batch building in that you only need to make a single side and end for however many wagons required. I then use the Branchlines chassis. Currently out of the goo that makes the moulds, but will probably buy some more in the autumn, once have got track laying completed!
-
£750 seems a remarkably low price for a large express loco when the likes of Lee Marsh and even DJH are over twice that for rtr. A set of Slaters wheels for a pacific and tender will set you back at least £150. So, worth watching. RTR coaches always seem expensive and a decent rake of 8 will come to two grand, but anyone who has ever built a coach kit will know they are almost as labour intensive as a loco. Suggest anyone without at least 10m x5m of vacant space checks out their local model clubs,vwhere hopefully there might be a continuous run to let you enjoy your pride and joy once it arrives. If not, there are now quite a few small locos available rtr that you can have much fun with in the same space as an OO layout...
-
Not necessarily re space. Mainline trains, yes, but there are plenty of layouts within 3-4 metres of length. Continuous runs need 2m radii to look good though and that does mean space. Arigna Town is just 5m long, my NG CVR project will be 3m. Note that 7mm scale is VERY addictive once you get started! Easy to see where Nelson's modelling talents have come from!
-
Interesting. May also have something to do with the prevailing wind, especially if it is fairly strong. A case of do you want a breeze in your face or up your bum! Having a tail may help the latter maybe... Have certainly noticed that wildfowl at rest often all face the same way when it is windy. Just goes to show there really is a prototype for everything.
-
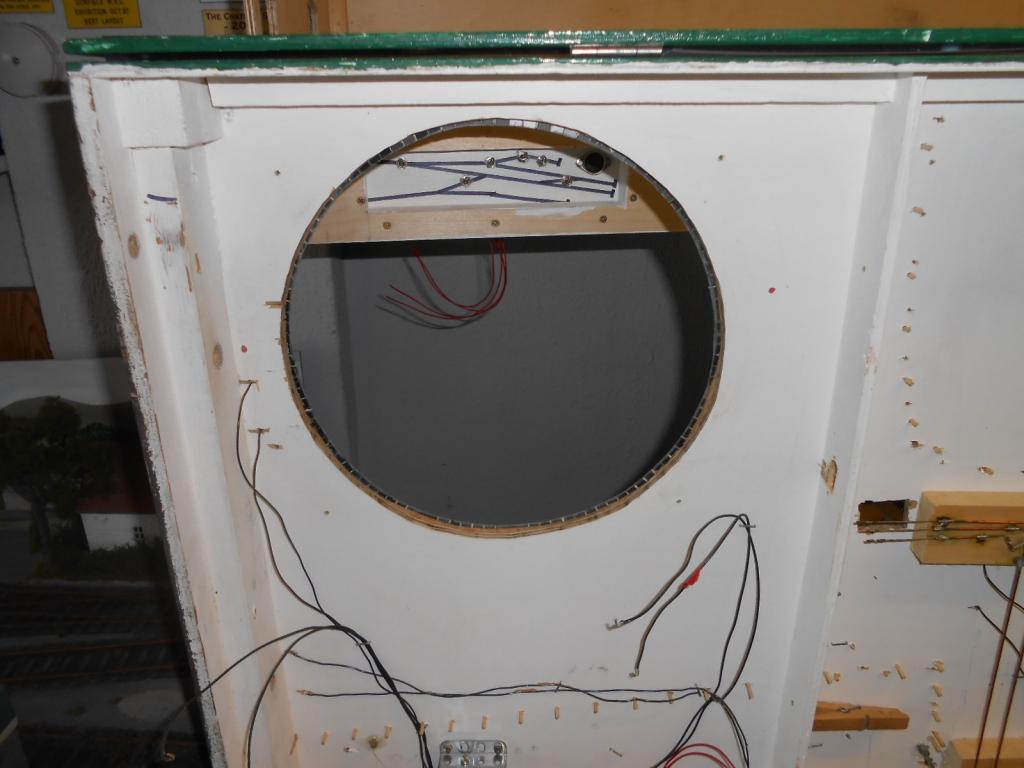
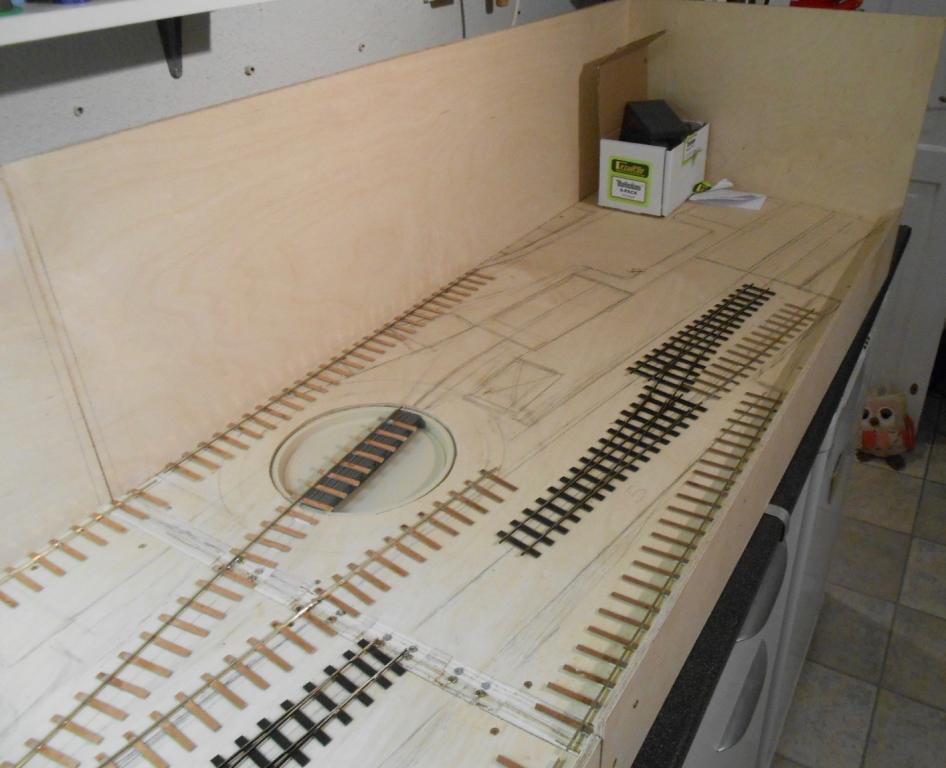
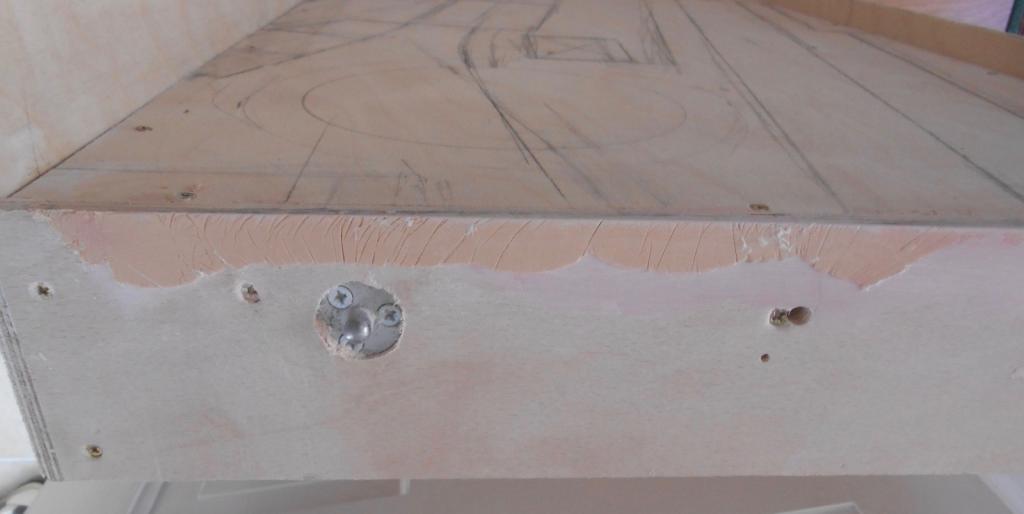
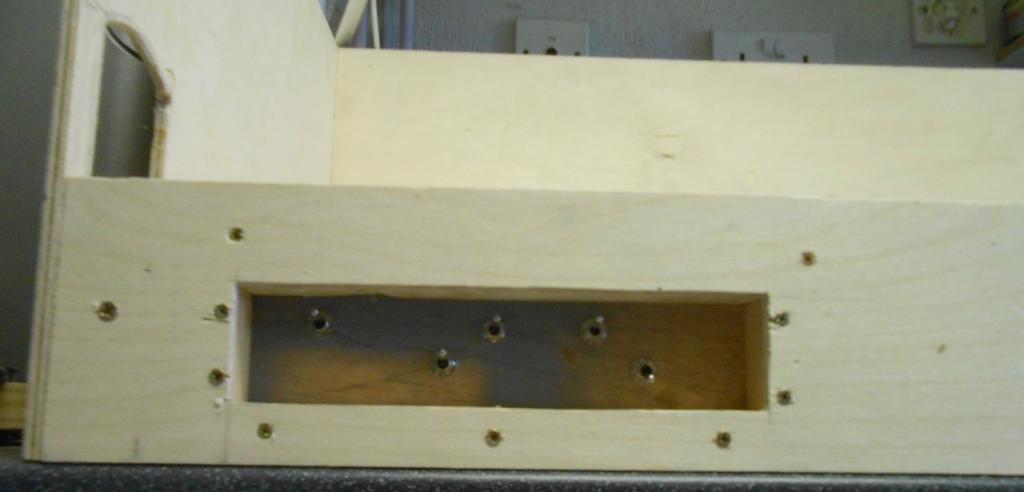
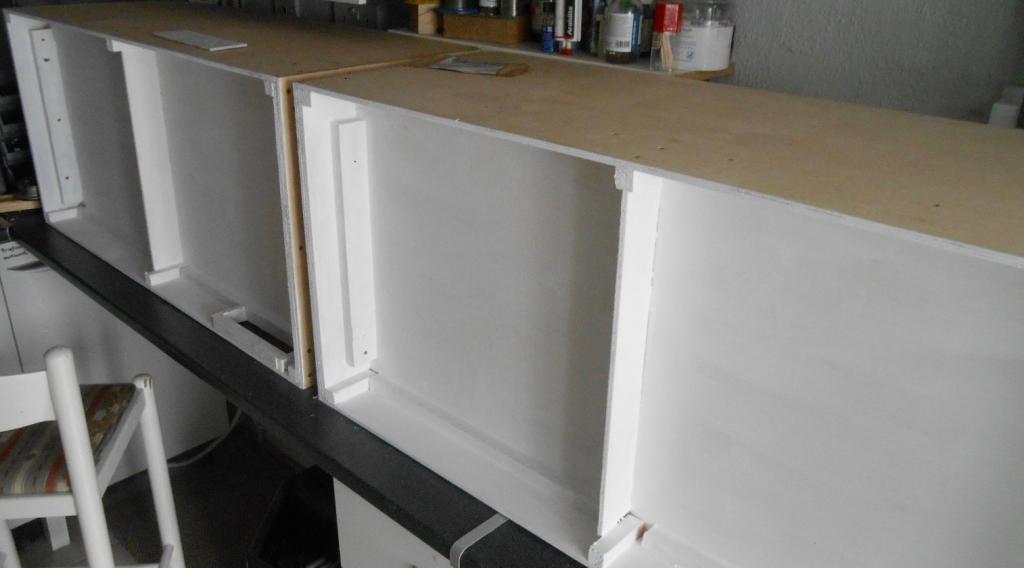
Another factor with portable layouts compared to permanent ones is baseboard joins. There are various tricks to disguise potential earthquake cracks in the scenery, though it is surprising how many exhibition layouts seem to sit on major fault lines. At the building stage, making sure that all mating surfaces are flush is a good start, which is why I always use 'end plates', rather than rely on baseboard tops lining up absolutely square. However, even 12mm ply can bow a little, as was the case between the two scenic boards. Hence pinched a trick showed me by Gordon Gravett. Basically, one covers one end plate with cling film and then smear a good dollop of car body filler on the other before clamping the two together & leaving to set. Crude, but very effective. The back scenes came next, with a couple of holes needing to be cut out to enable tracks to go into the fiddle yard. After that, the two back scenes were carefully sanded to be as flush as possible, though am not too bothered here as most of the joint will be covered by a [removable] building. Next cut out a hole in the fascia of baseboard one to take the control panel. This is rebated about 30mm, so the toggle switches are not damaged when the layout is moved around. Five switches in all - four to cover the six points and a fifth to switch power from the tracks to the turntable motor. A socket for the handheld controller lead still needs to be drilled out. Finally, primed the underside of the baseboards, partly to seal the plywood but also to make wiring more visible. Since then, have completed all six points [no tie bars yet], so could then draw out the track plan & make sure everything would line up. Pictures show where I've got to, including the three items of stock so far to give everything a bit of scale. Remember, the whole scenic section is just two metres long. The rest of my Code 82 rail arrived yesterday, so hopefully track laying can begin soon, but given that it is actually staying summery at the moment, I'm not exactly in a rush to be indoors in the workshop...