irishthump
-
Posts
1,849 -
Joined
-
Last visited
-
Days Won
7
Content Type
Profiles
Forums
Events
Gallery
Blogs
Store
Community Map
Everything posted by irishthump
-
I converted a few of the older Hornby mk3's myself a while back. The difference in length was'nt an issue to me and I think they look fine, but judge for yourself here; http://www.irishrailwaymodelling.com/showthread.php/77-Graham-s-Workbench/page2 I'll warn you though, they are a bit of a pain to repaint because of how the glazing is done!
-
Thanks for the info! I assume she's back in traffic now?
-
How recent are these little "mishaps"?
-
Was I imagining things or did I see Joe Duffy in the Stillorgan Park hotel a couple of weeks back.
-
Great work and a lovely layout. Is the layout DCC controlled?
-
Absolutely not. DCC sound is not for everybody, it's just another facet of the hobby that you're either into or you're not. Obviously the sound can never match that of the real thing and for some that's a deal-breaker but I can understand that. It's the same as some modellers deciding to go with 21mm gauge track as opposed to 00 gauge just to go that extra mile in favour of realism. I myself have a half-and-half mix of sound and non-sound locos. I love the "play" factor of driving the sound equipped locos but an just as happy letting them run (almost) silently around the layout as well. And yes the novelty can wear off after a few hours but who ever gets the chance to run their locos for more than a few hours?!!!
-
Looks the business! All he needs now is some stock to fill them...
-
Sorry to put a damper on things but I got one of those soldering irons and I would recommend you to stay clear! The tips are of poor quality and are of the screw-in type so they are difficult to replace. On the plus side you get a set of tips for engraving wood which you might find useful. The stand works well though!
-
Yes, removing the back can alter the sound, that's why most guitar amps have an opening at the back. But I noticed no difference when testing the speaker with and without the back. In fact I was careful to place the speaker face up under the roof grill with the metal chassis of the loco forming a box around the back of the speaker which DID improve the sound.
-
I rememer reading that article when I was thinking about installing sound in my 141's. I did'nt fancy having to fettle any of the loco's innards to get a speaker to fit. Gareth in Model Shop Belfast recommended this speaker: http://modelshopbelfast.com/index.php/railways/irish-and-local/4-ohm-bass-enhanced-speaker.html If you remove the back of the plastic casing (which DOES NOT affect the sound in any way) the speaker will fit perfecly under the roof grill on the 141.
-
Yeah, but a 4 ohm bass enhanced speaker will fit without any surgery.
-
Well actually all that's needed on the 141/181's is to solder the connections for the speaker, it's not a huge job. I found the hardest part was getting the bloody body off!
-
So these chips are seperate and noting to do with Model Shop Belfast?
-
Lovely paint job, Anto. Certainly looks the part!
-
Yeah, lovely piece of film. And that's Dun Laoghaire/Mallin station before they wrecked it!
-
Have to agree. I would'nt dream of getting anybody else to build, paint or weather any of my stock. It would'nt be mine otherwise!
-
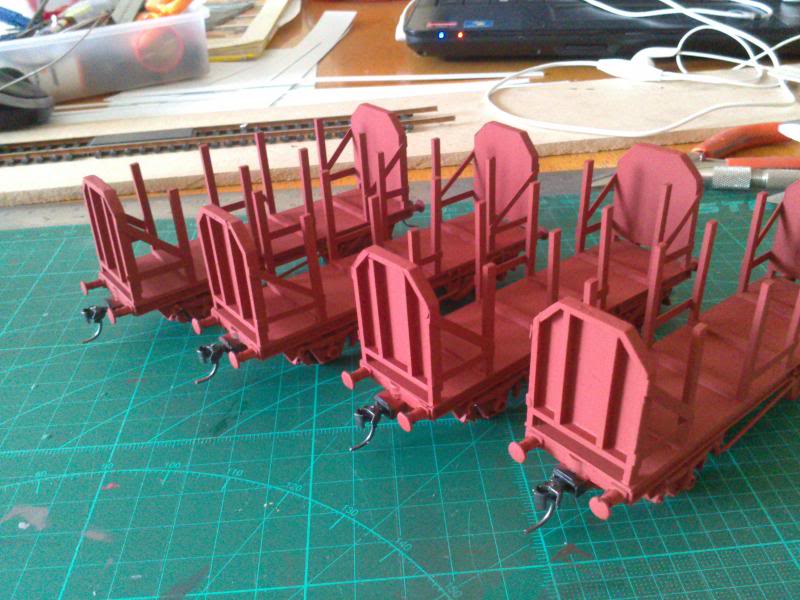
Well, finally got the flats and timber wagons weathered. Here are a few pics... Weathering was done with washes and powders.
-
Is that a statement of opinion or a statement of fact?
-
I can understand that!
-
I think having the choice of both would be the best way to go as I the thought of assembling a kit can be terrifying to some modellers! But I do agree that the kits can be just as costly as RTR when you factor everything in, price permitting I would be happy to go the RTR route.
-
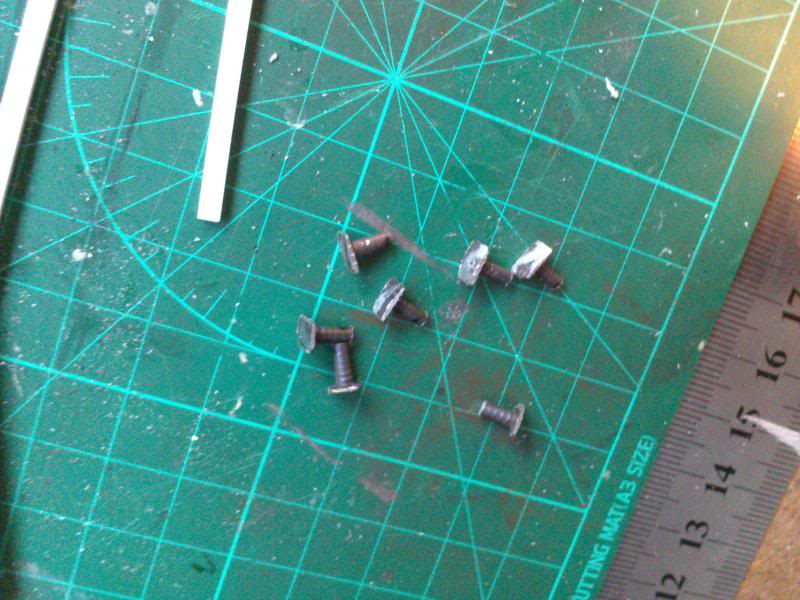
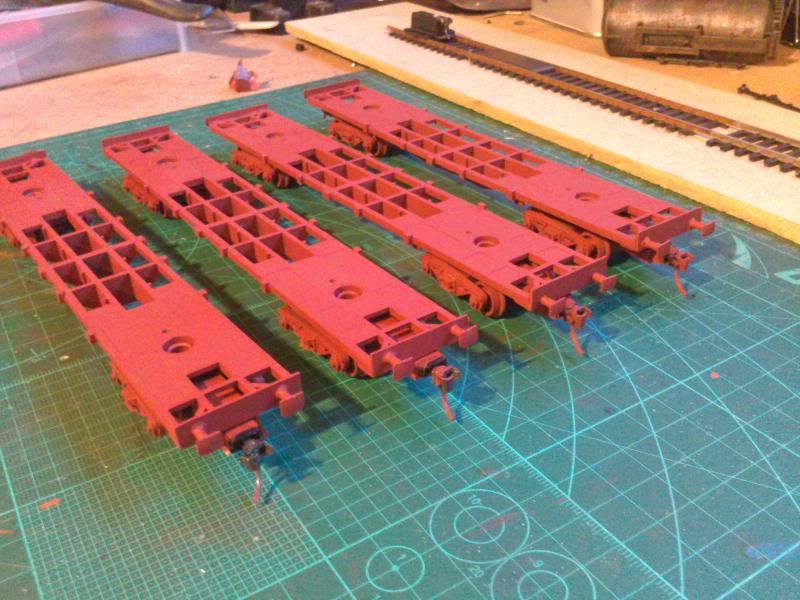
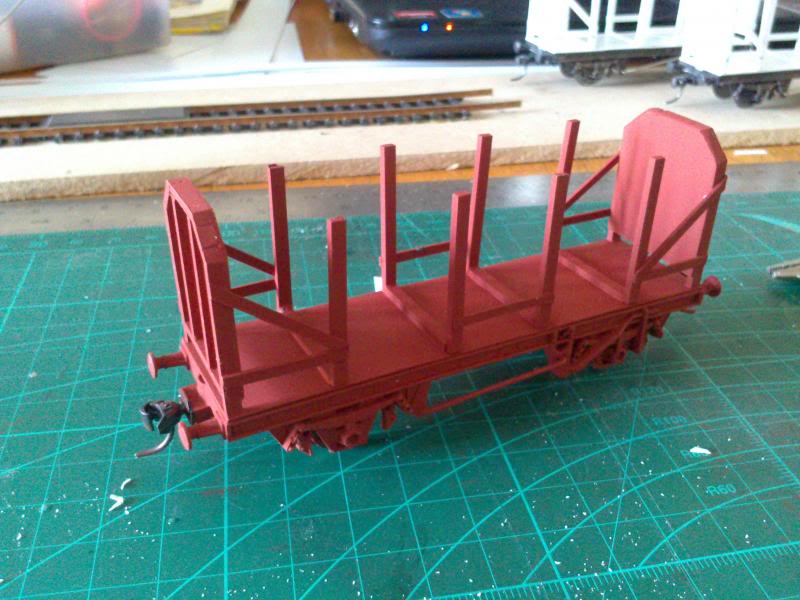
Well, close to 42'9" anyway! I had a few Hornby Railroad flats which I decided to cut-and-shut. Here's one glued up... A couple after the glue had set (I used 5 min epoxy). Some buffers made from filed-down tacks. Added some styrene detailing and Kadee couplers. All four finished and sprayed with red oxide.

-
My own little fleet: B141, 161sa, and 182 all sound chipped, and B165.
-
I also never considered the cost of keeping the site running. Well done to you, sir. The site is an invaluable resource for the Irish modelling community and I'm one of many who have benefitted from the advice and expertise of it's members.
-
Hello, Jamie and welcome to the site. Nice to have someone from so far afield! Sounds you already have a nice collection of stock. With a small space a nice little shunting layout with a goods or container yard might be a good idea. Or maybe even a diesel maintenance depot and refueling point. Try this site for track plan ideas - http://www.freetrackplans.com/Home.php
-
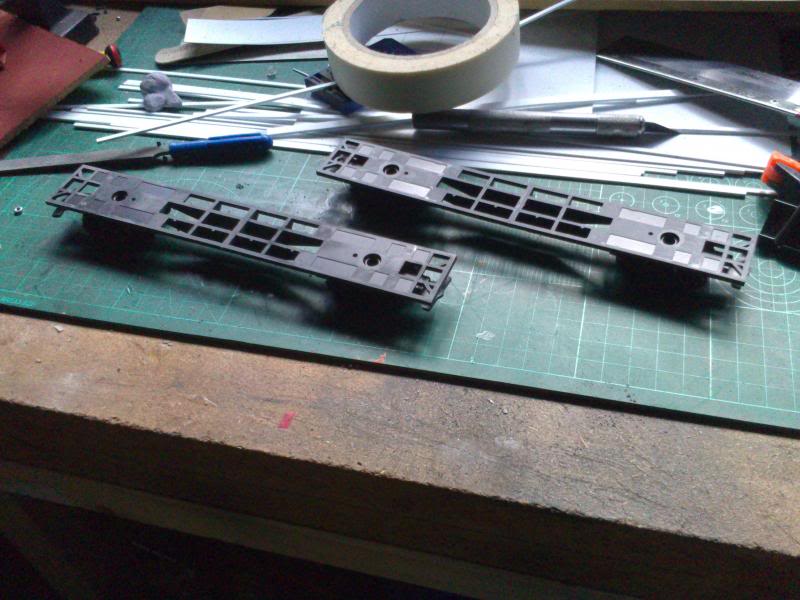
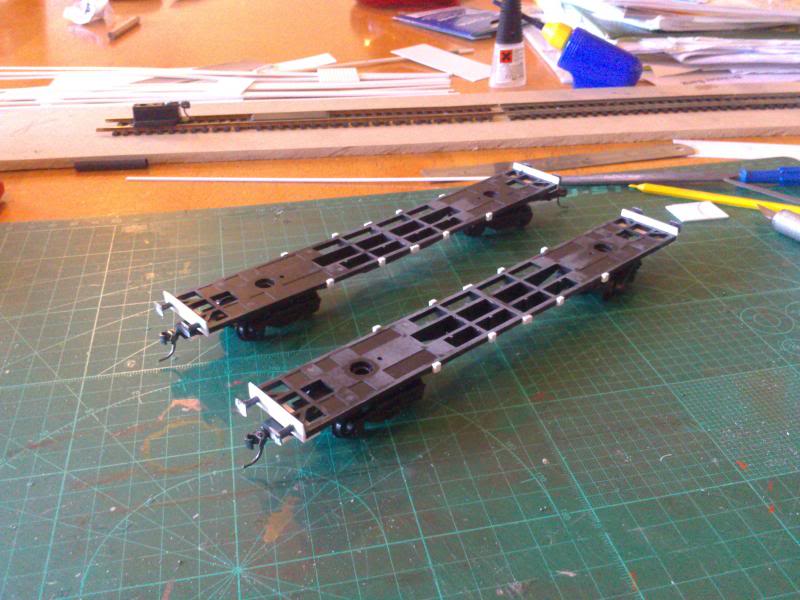
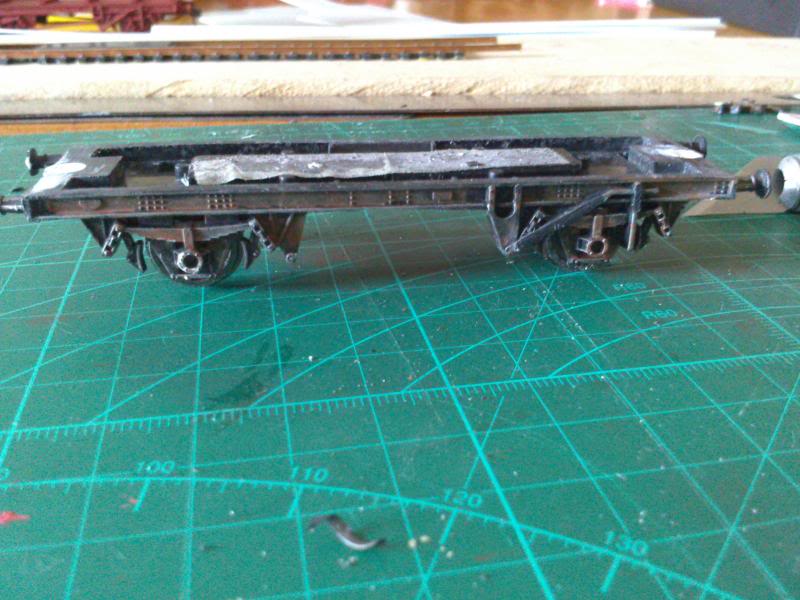
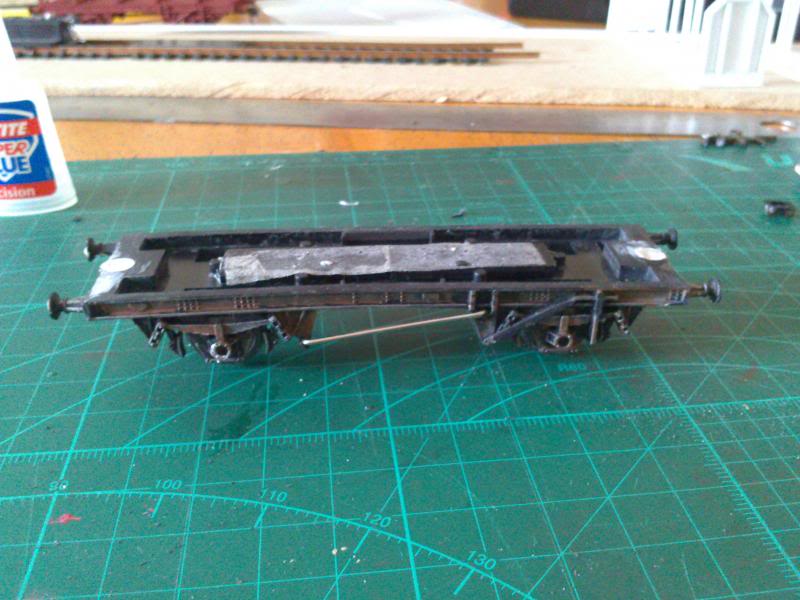
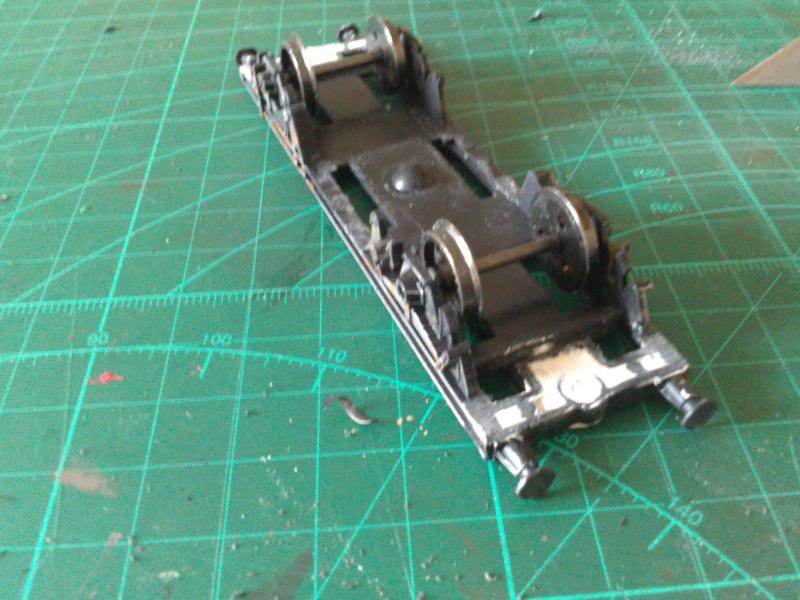
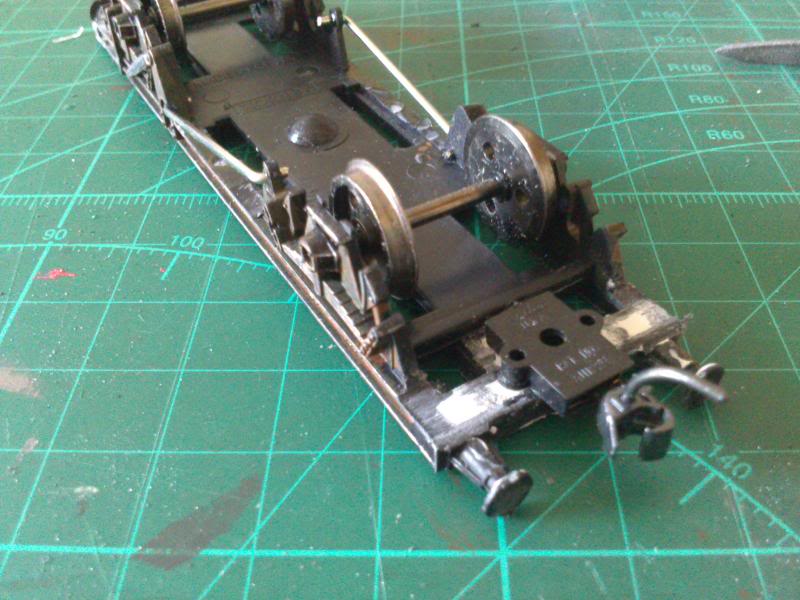
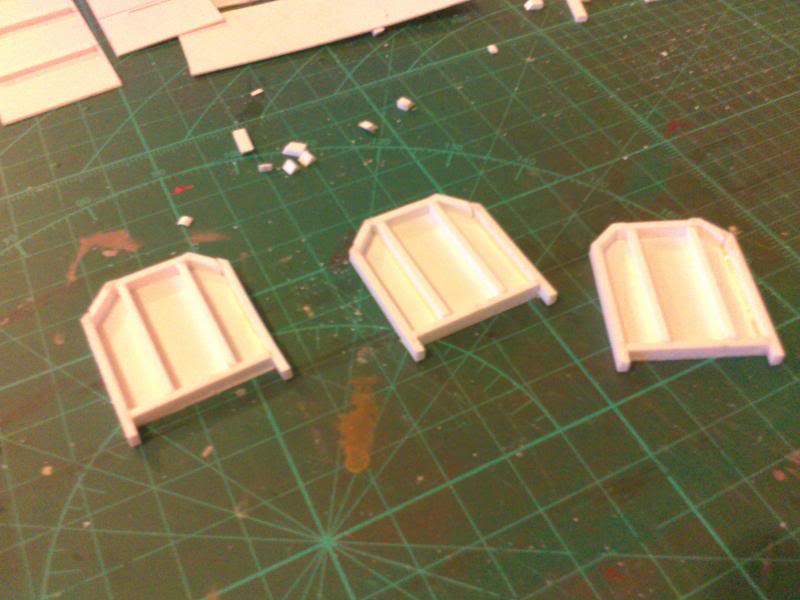
I had been planning to buy a few Hornby timber wagons but after seeing this thread http://irishrailwaymodeller.com/showthread.php/1212-Four-Wheeler-Timber-wagons I decided to go the scratchbuilt route. I had a few of those horrible Hornby Railroad range tanker wagons so I decided to use the chassis as it looks roughly the right size. I cut away most of the underframe detail. An old paperclip makes some passable brake gear and makes the chassis look a little less bare! I removed the tension lock couplers and used filler to make a suitable mounting point for a Kadee No.5 coupler. Coupler mounted... The wagon bodies were built from styrene. Fitted to the chassis and given a coat of oxide primer, weathering to follow... Hardly prototypical but I think they'll look good on the layout!