Mayner
-
Posts
5,021 -
Joined
-
Last visited
-
Days Won
126
Content Type
Profiles
Forums
Events
Gallery
Blogs
Community Map
Everything posted by Mayner
-

Weathering Murphy Models 121 Class Locomotives With Mick Bonwick
Mayner replied to Warbonnet's topic in Tips & Tricks
The original B121 gray and yellow scheme looks very close to the livery worn by the Clinchfield Railroad & Louisville and Nashville Railroad first generation diesel locomotives. The Clinchfield was a heavy duty Appalachian coal hauling railroad with steep grades and long tunnels which painted its second generation locos and surviving first generation locos in a black and yellow scheme. Ironically a version of the (Confederate?)grey scheme was revived when the Clinchfield became part of the "Family Lines" system in the mid 1970s and CSX Corporation during the 1980s. http://www.rrpicturearchives.net/showPicture.aspx?id=4840568 http://www.rrpicturearchives.net/showPicture.aspx?id=414271 http://www.trainweb.org/csxphotos/photos/SW1500/1101CSX-yg.jpg -
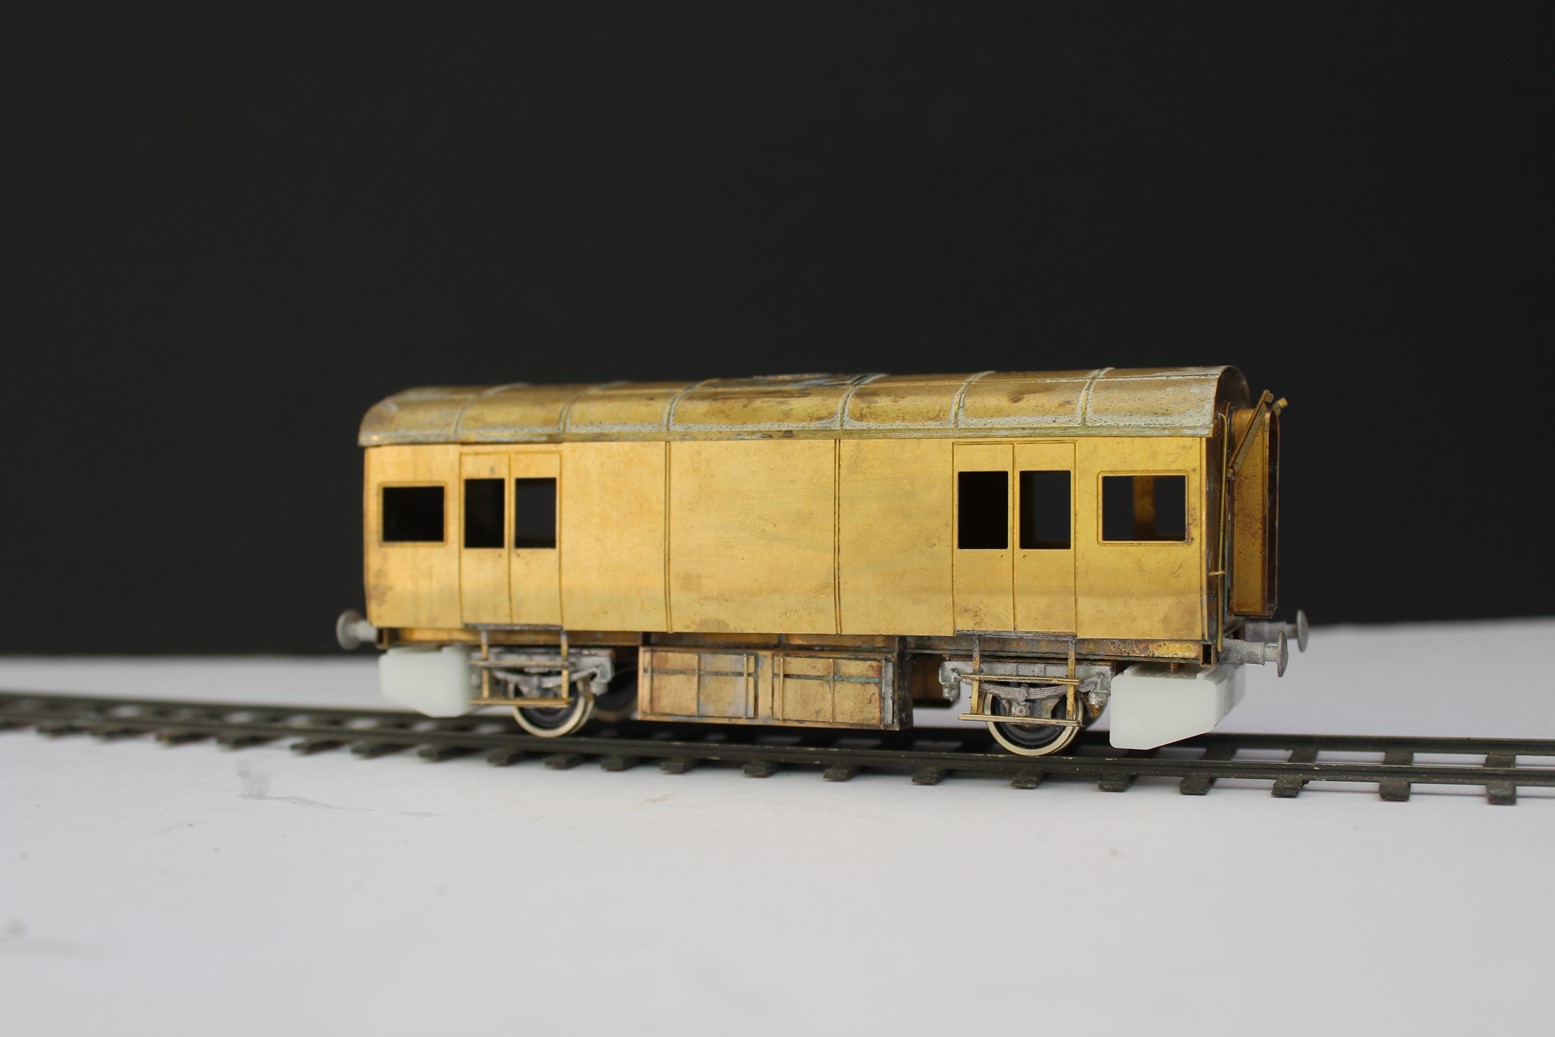
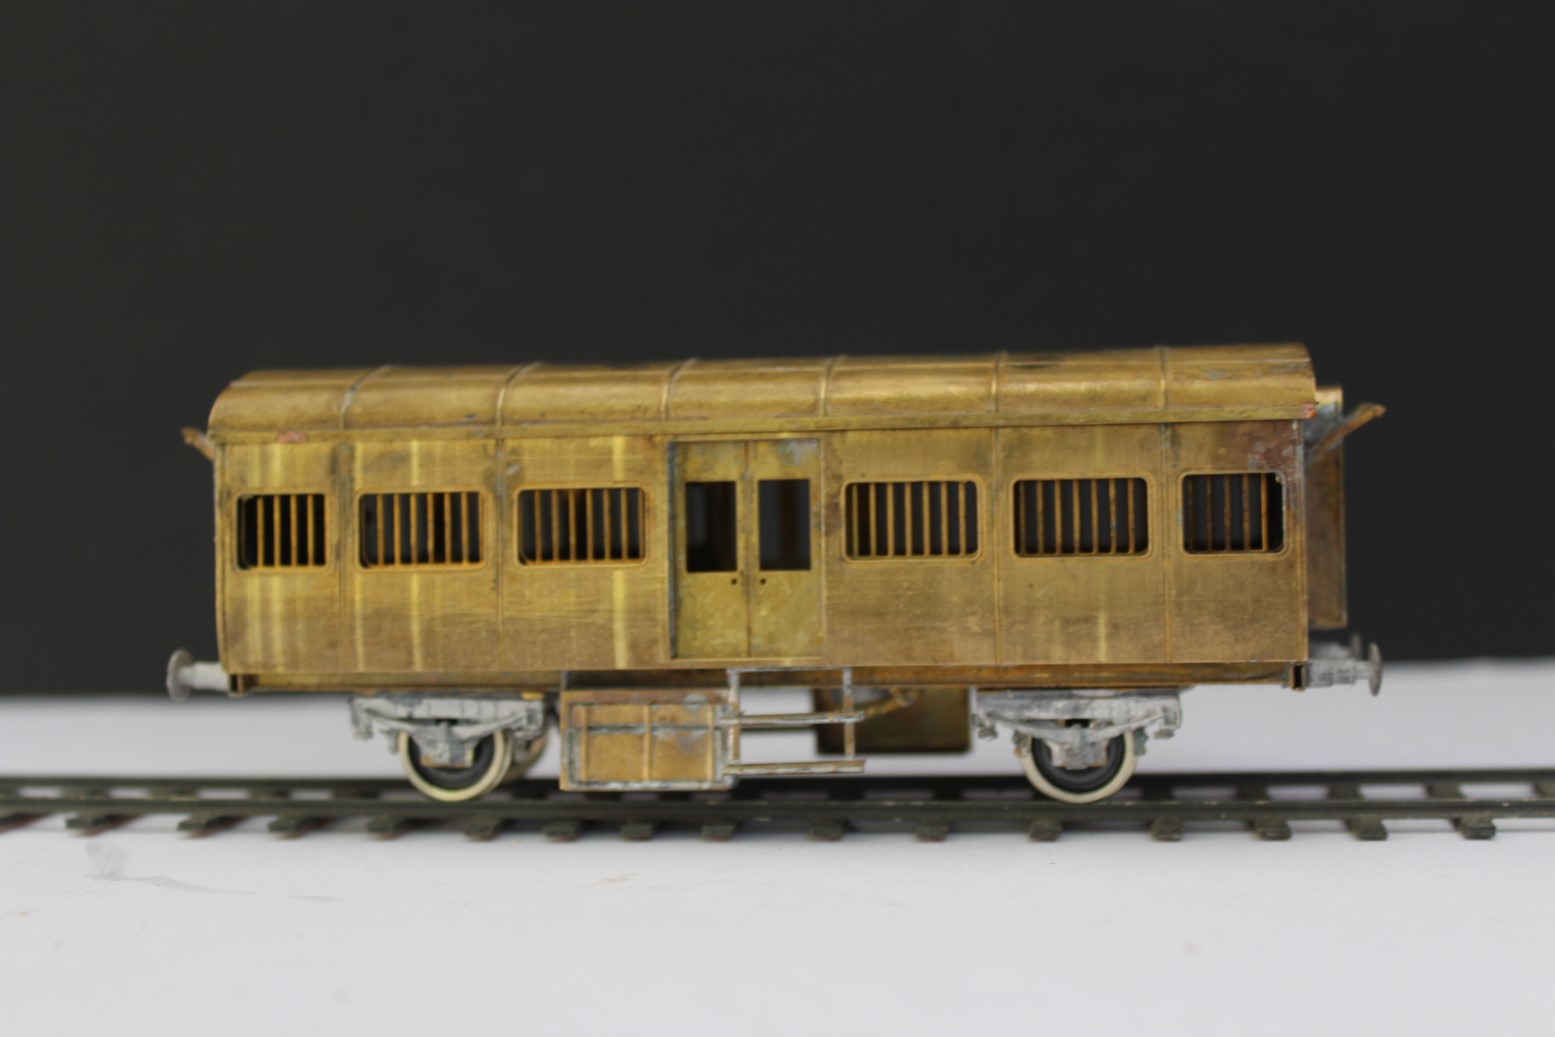
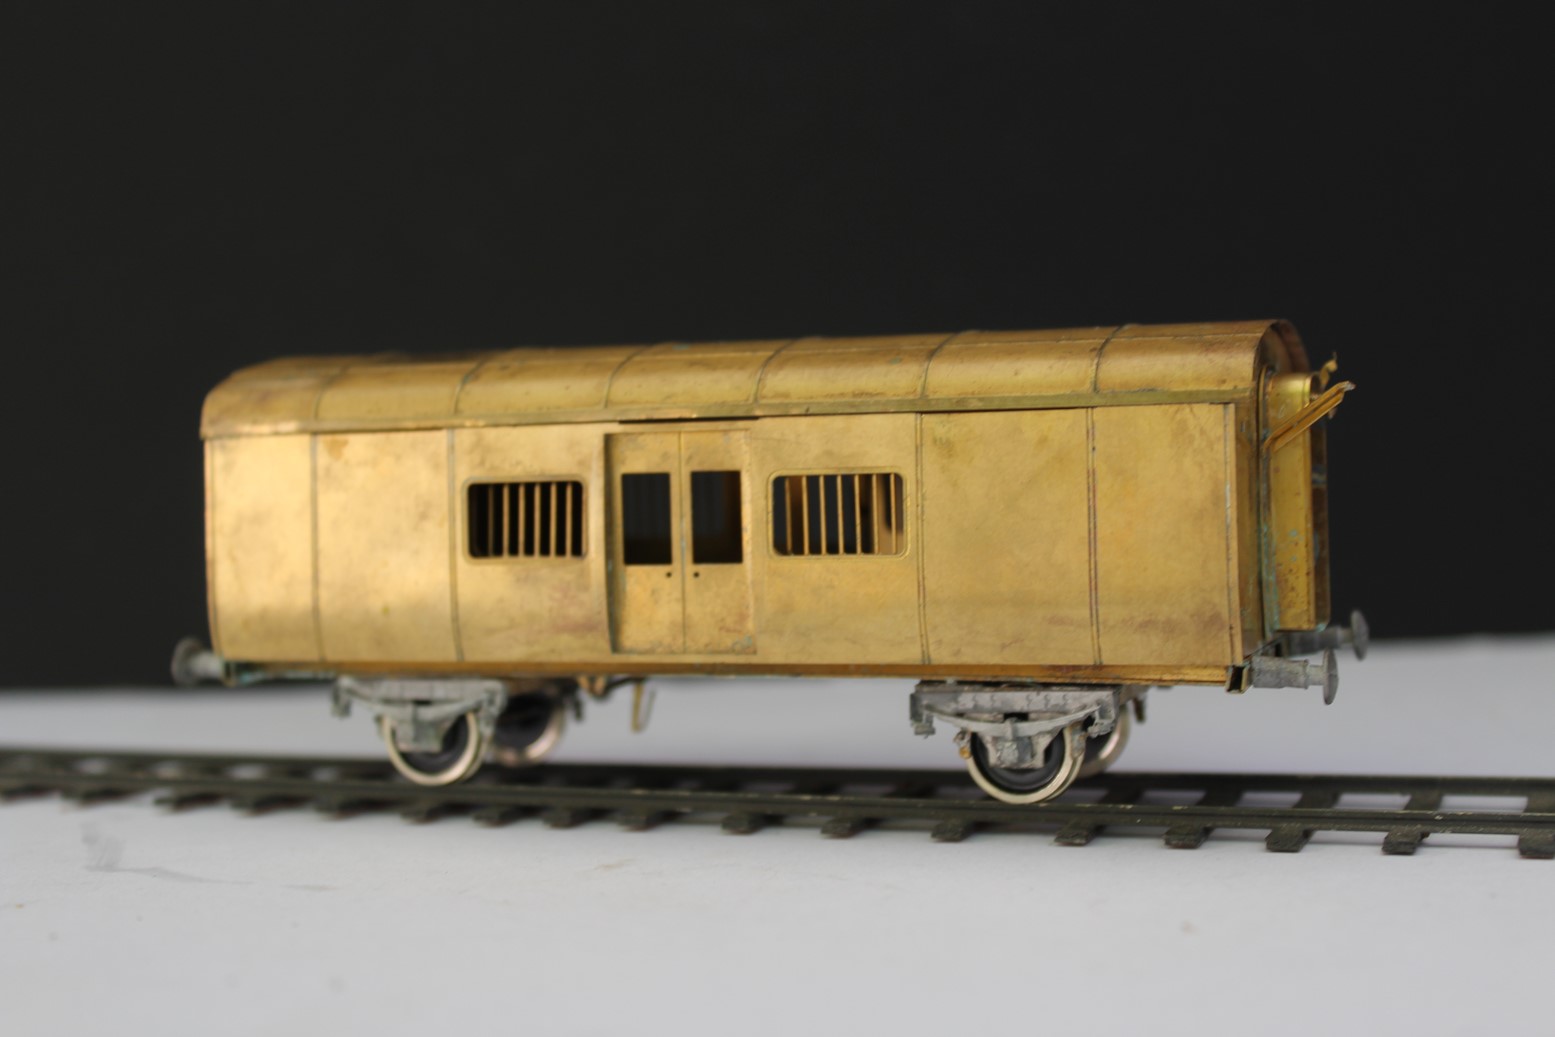
I have completed the test build of the updated Heating & Luggage and Luggage Van kits and expect to release the kits during the first quarter of 2021. The principal updates are screw fixing of the roof, revised gangway design, 3D printed tanks with provision for Kadee No36 coupler. Heating and Luggage (standard version) Photos shows up misaligned buffer & verdigris around door! I didn't bother rinsing the model to remove traces of flux after each soldering session which leads to tarnish and verdigris. Heating & Luggage van 3134 late 1960s condition. (roof is a stock item from an earlier build) Luggage Van original condition. I assembled the kit a number of years ago, but had run out of castings, hence the tarnished look. Luggage Van 2713 (battery boxes and steps to be fitted) I will give these vans a thorough cleaning and sand blasting before painting, I will probably finish the standard luggage in ex-works condition in the original silver the other three in black and tan as they are largely in late 60s/early 70s condition.

-
Brookhall Mill - A GNR(I) Micro Layout
Mayner replied to Patrick Davey's topic in Irish Model Layouts
The combination of your realistic GNR(I) buildings and multi levels should make this layout visually interesting without trying to fit too much intro a small space. -
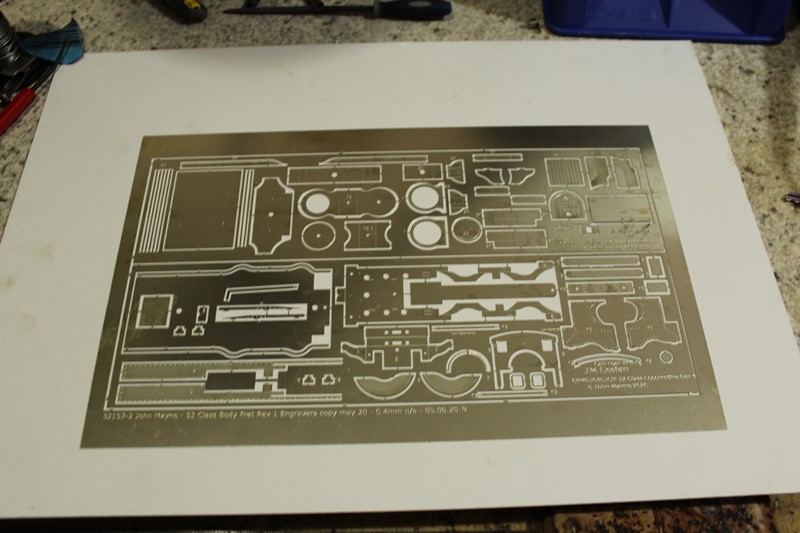
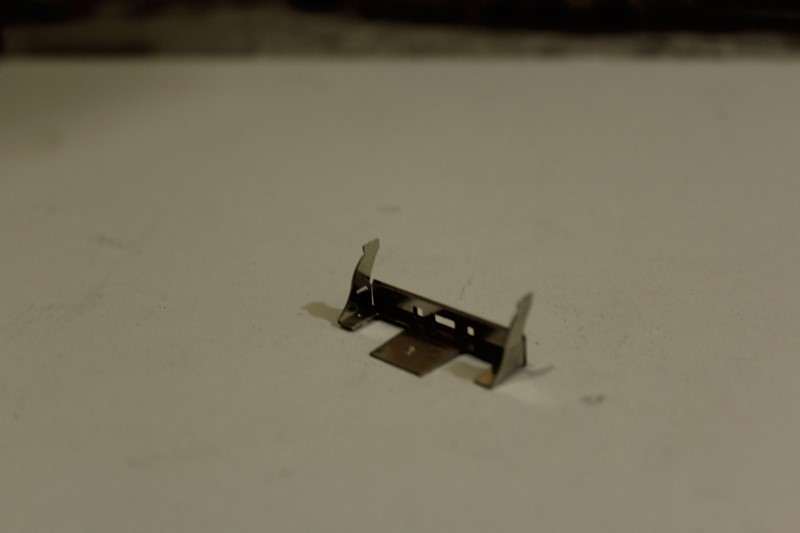
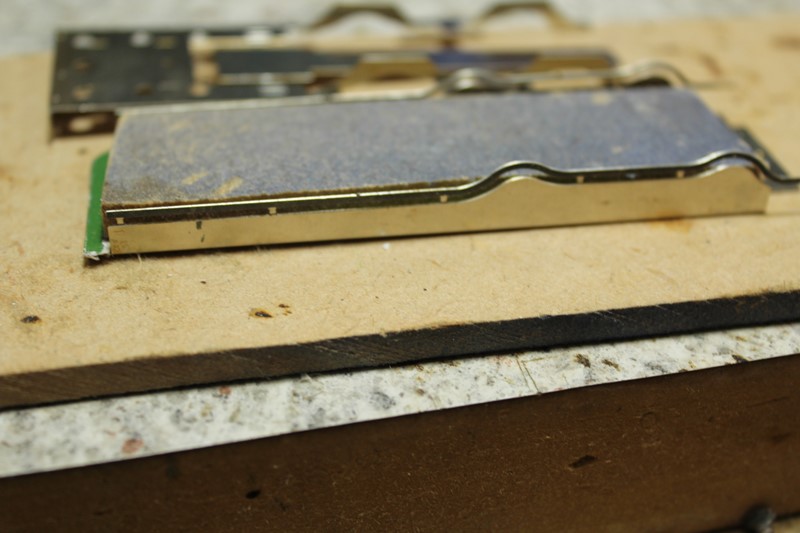
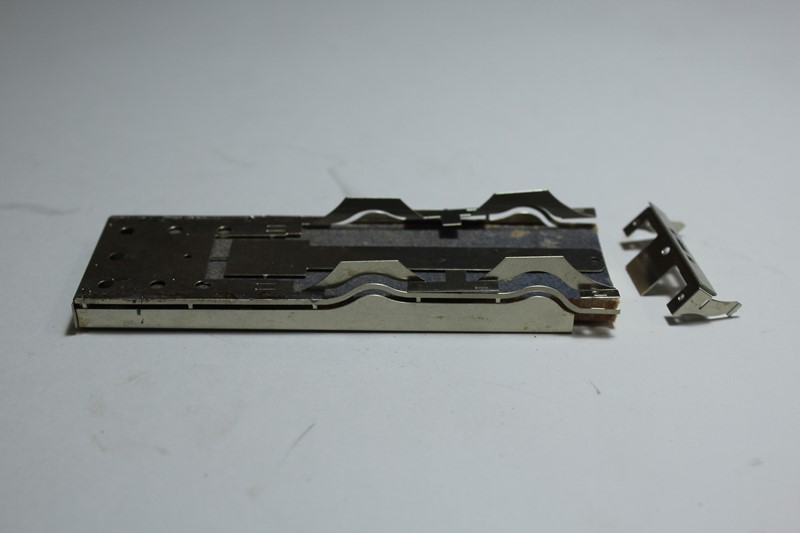
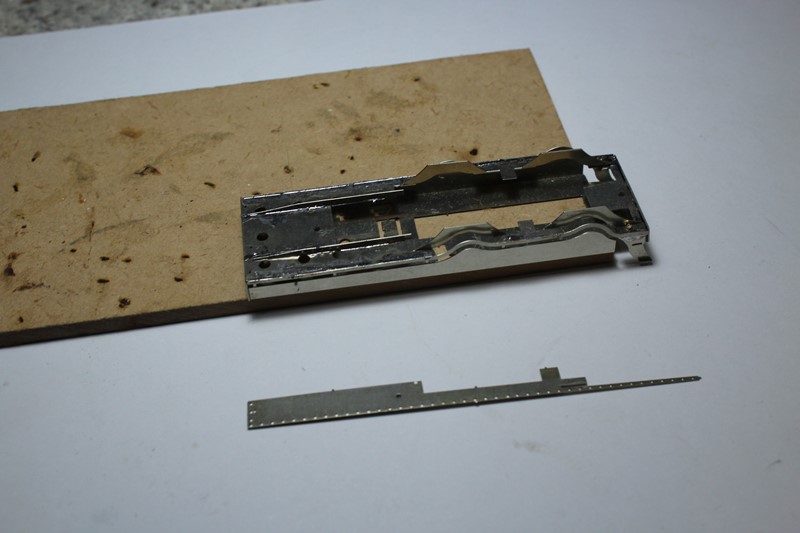
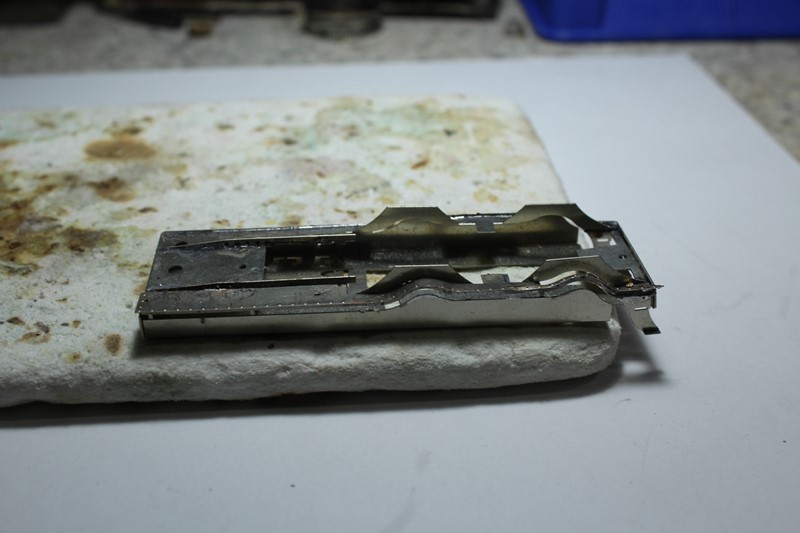
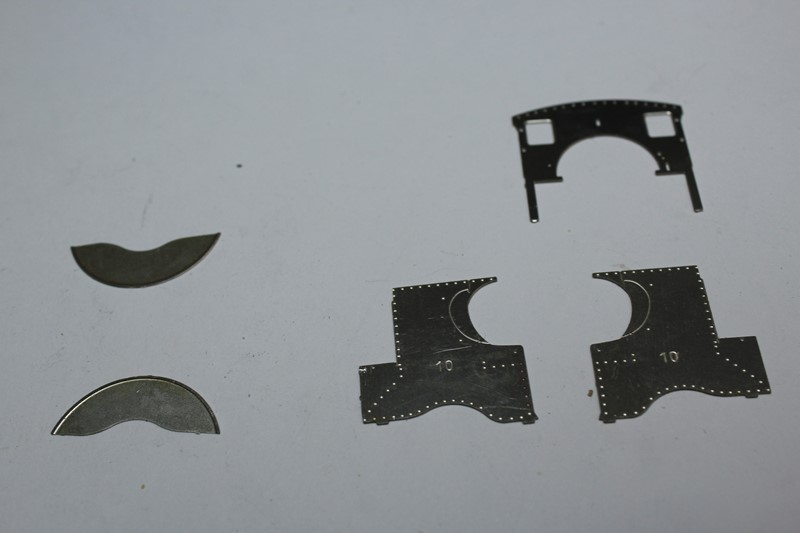
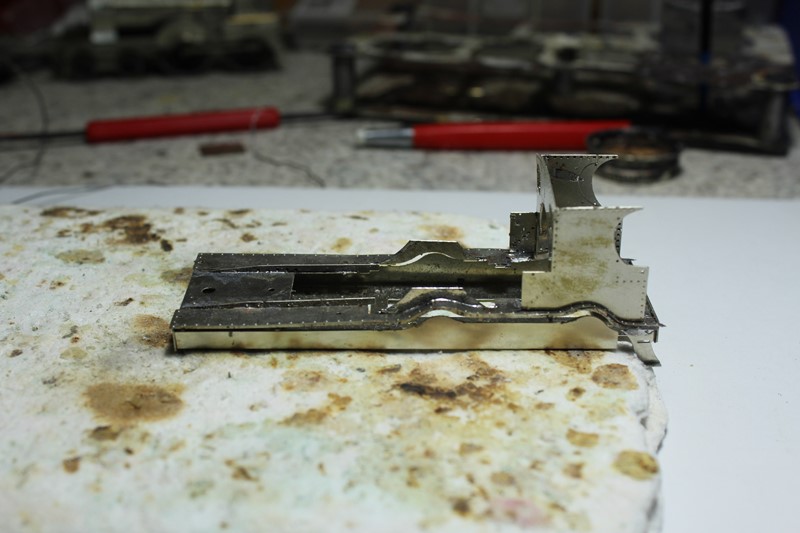
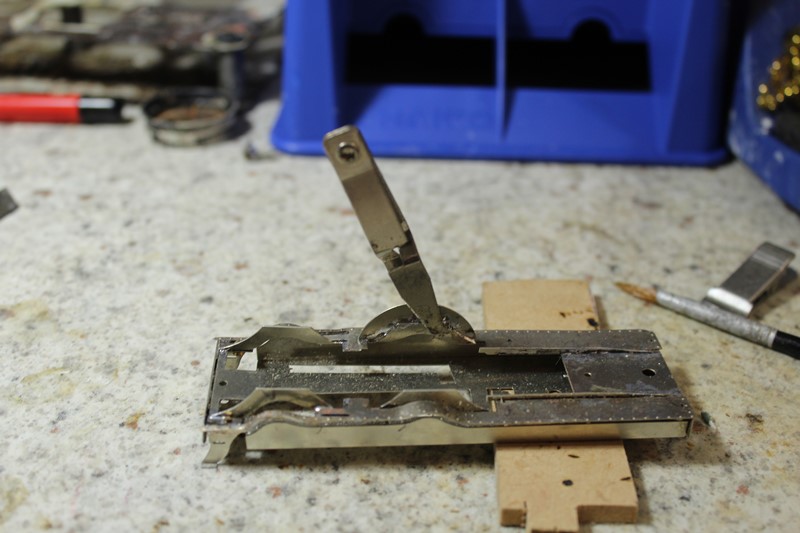
Body assembly running board and cab. The Beyer Peacock style running board with its curves multiple levels and shallow valence is probably the most challenging aspect of building a model of a 19th Century GSWR passenger. Drew Donaldson apparently got over this problem by forming the valences from rail or square section metal over a former. In the kit the valences form part of jig which supports the valences and running board during assembly. Body fret: The etch was prepared in June but I did not have time to tackle the assembly until this week. Running board parts including valences and running board. Running board assembly jig folded up, this is based on a concept used by Terry McDermott in the TMD J15 kit in 1985. The rear of the running board together with cab steps and drag beam is formed separately from the main part of the running board as its not practicable to form the running board from a single piece of brass due to the multiple level nature of the running board. Bending the drag beam to shape, the visible outer section of the beam folds outwards at 180° rather than conventionally on the inside of the fold line. Completed drag-beam and step assembly I used a piece of mdf and card to pack the running board to the correct height with the top of the running board level with the top of the valences. I used s/s clamps to secure the running board in place while soldering the flat front section of the running board to the valence one edge at a time. I used a higher temperature (180°) solder for this stage of the assembly to minimise the risk of joints failing during the more detailed stage of the assembly (overlays, cabs splashers) with 145° solder. The leading flat section of the running board is now soldered to the valences/jig. The holes at the rear of the running board and drag beam are tapped 10BA before bolting the drag beam in place. Drag beam now bolted in place the running boarded can be soldered to the drag beam and remainder of the running board soldered to the valences. Running board overlays, these are fitted by thinning the underside of the overlay and top surface of the running board with 145° solder and sweating with an iron with a clean tip working from the front edge of the running board and working backwards. There are etched lamp iron holes in both the overlay and running board to assist alignment. I again used s/s clamps to hold the flat front section of the overlay in place while soldering and used a soldering tool to dress the overlay to the curved section of the valence while soldering in place. https://nz.rs-online.com/web/p/soldering-accessories/2266331/ Overlays soldered to the running board and valences. I next soldered the cab to the running board to provide some rigidity to the weakest section of the assembly. The cab sides are designed so that the loco can be assembled in either GSWR condition with a short roofed cab and little or no visible riveting or CIE version with longer cab roof and side-sheets and visible riveting. I impressed the rivet detail using a rivet press. Starting to look like a loco, the cab sides locate into slots in the running board which helps keep everything square. I again use a soldering clamp while soldering splasher sides in place. I removed the jig once the cab was soldered in place and fitted to the chassis to check that everything was sitting level. With the jig removed I checked that the soldering of the joints between the overlays/valences and running boards was adequate reinforcing the joint between the valences and running board where necessary particularly around the curved sections of the running board . The assembly threw up one or two glitches which are easier to rectify at this stage.
-
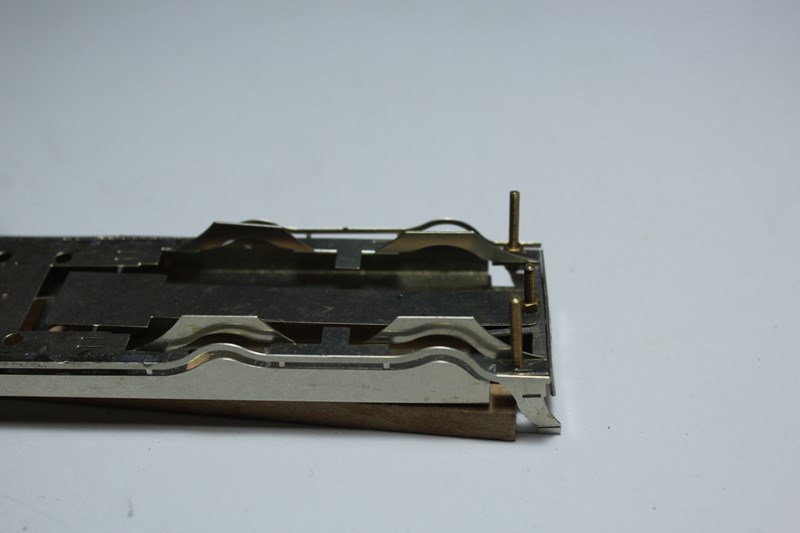
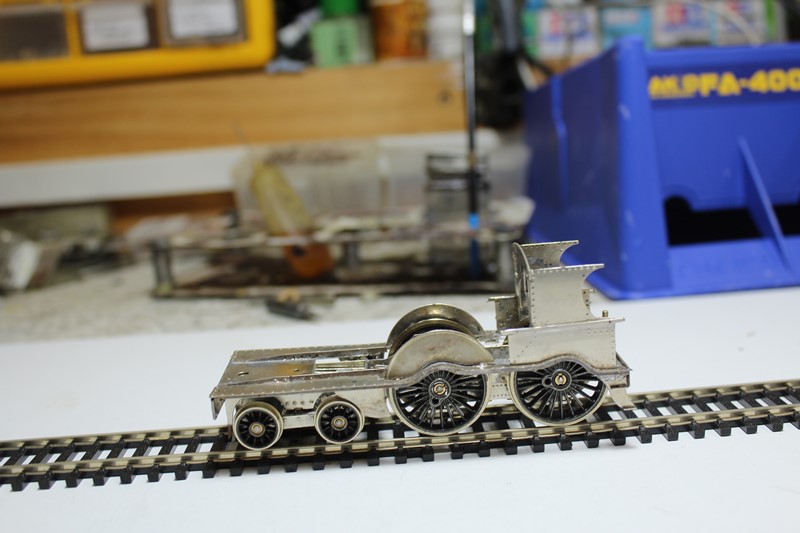
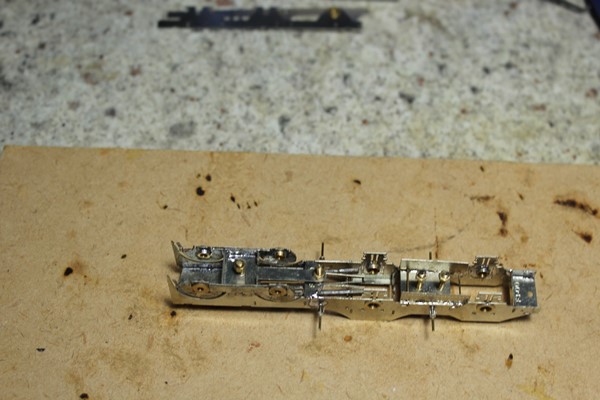
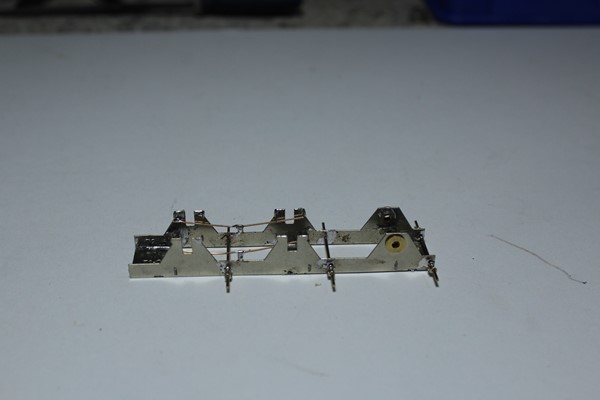
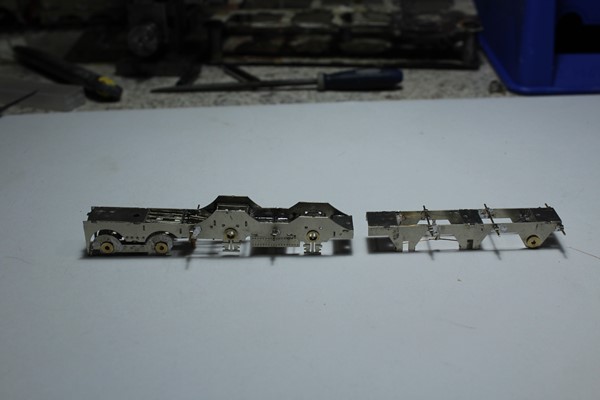
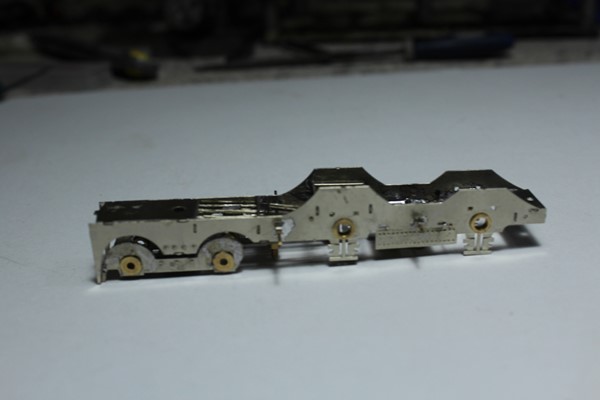
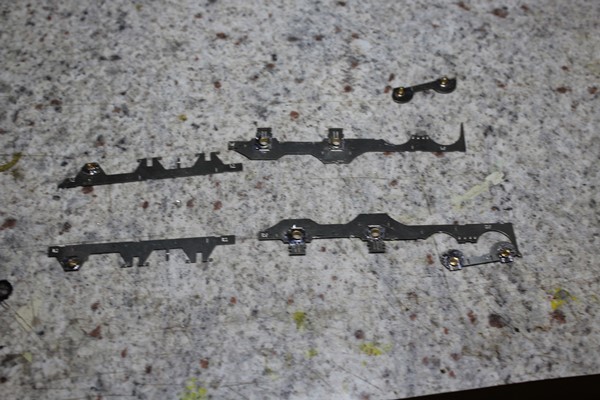
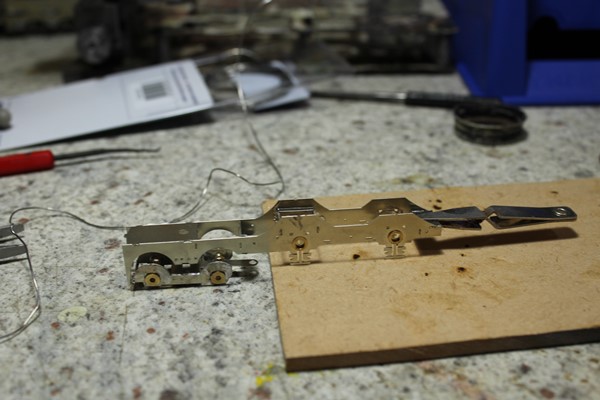
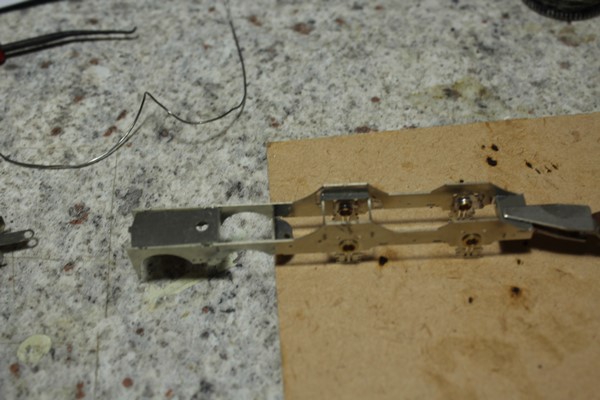
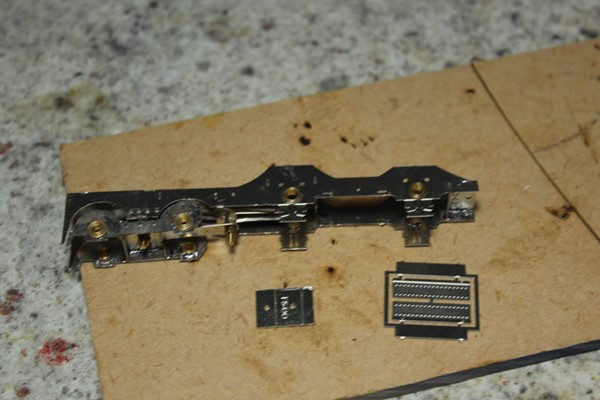
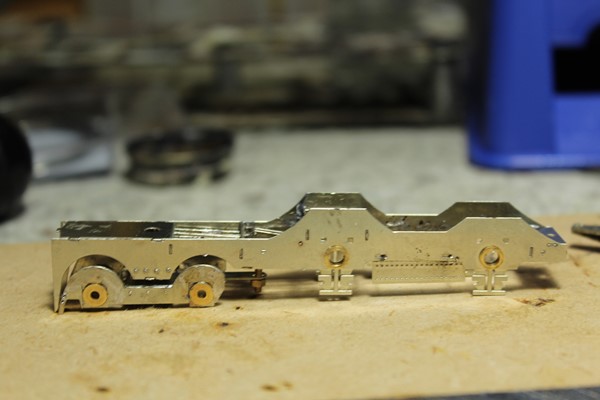
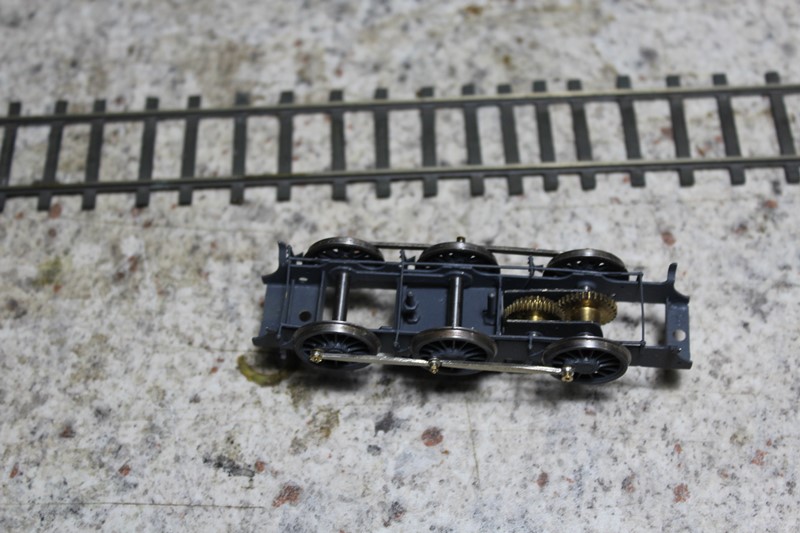
Pressing on with the loco and tender chassis assembly. Underside of loco chassis showing pick up plate & 0.7mm brake hanger supports. Tender chassis, with U shaped spacers for aligning brake hangers and shoes. Chassis is designed on the same principals as the loco chassis with the frame spacers slotting into tabs in the frames, the kit is supplied with frame spacers suitable for OO and 21mm gauge. Photos look clearer on a white background. The tender chassis is based on the weighted tender principal with the drawbar transferring weight to the loco and the leading and center axle lightly sprung to stay on the track. Springs are 0.4mm phosphor bronze wire. Assembled loco and tender chassis. I will fit the brake gear after I have fitted the wheels and test run the loco. Loco chassis, surplus solder to be cleaned up.
-
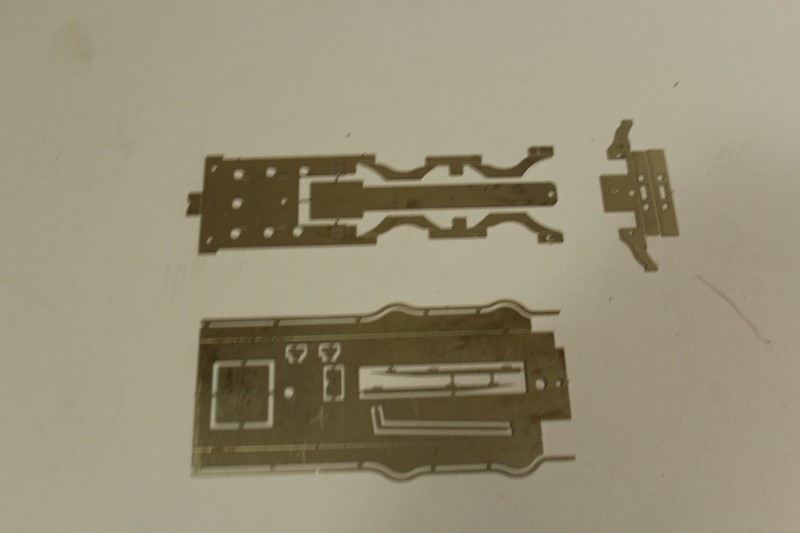
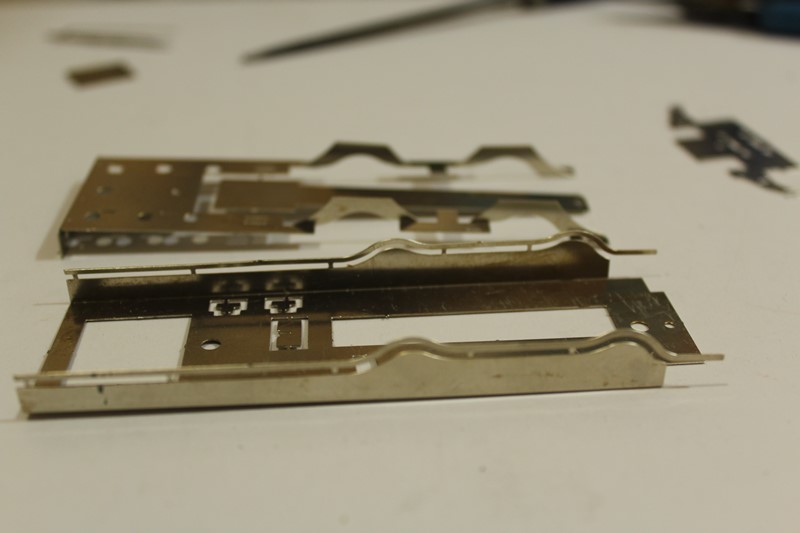
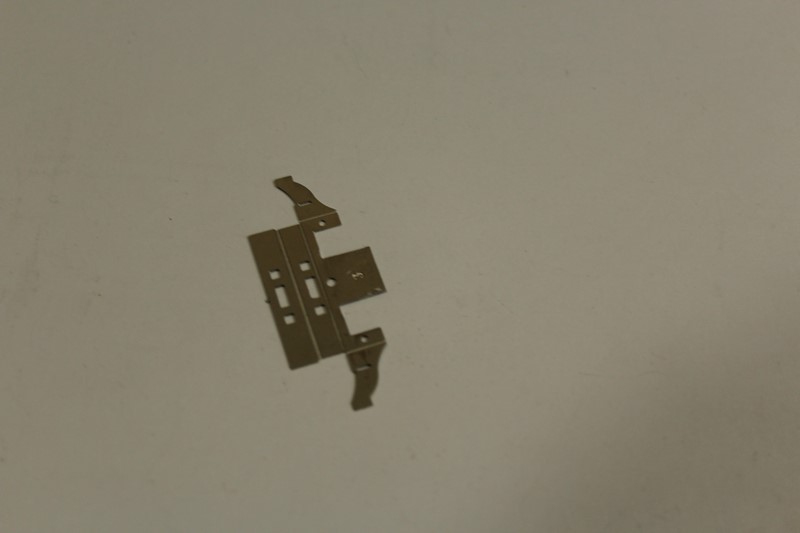
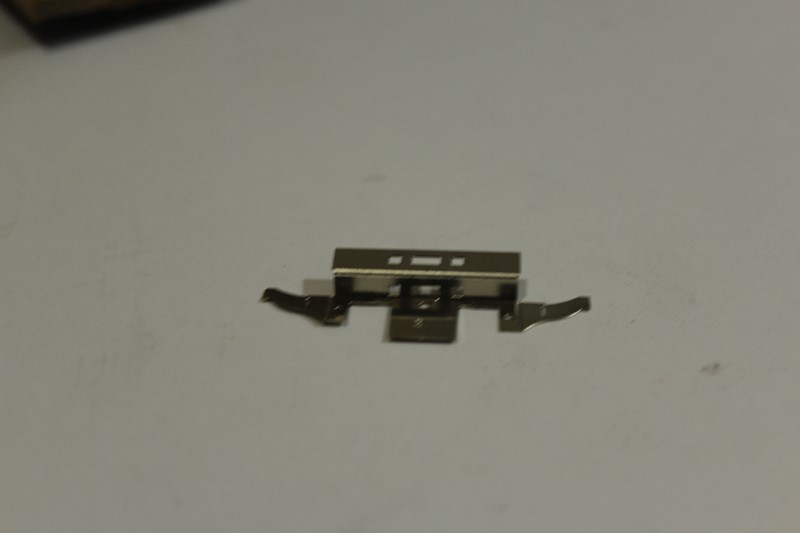
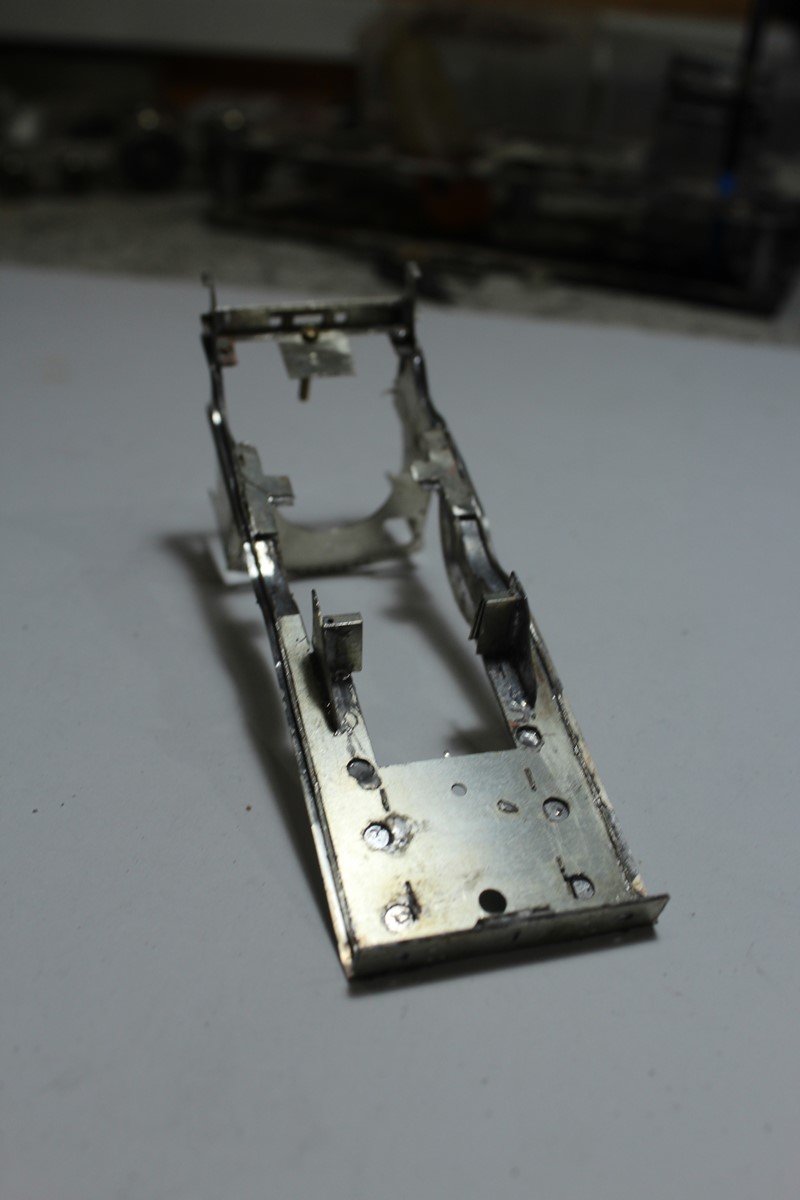
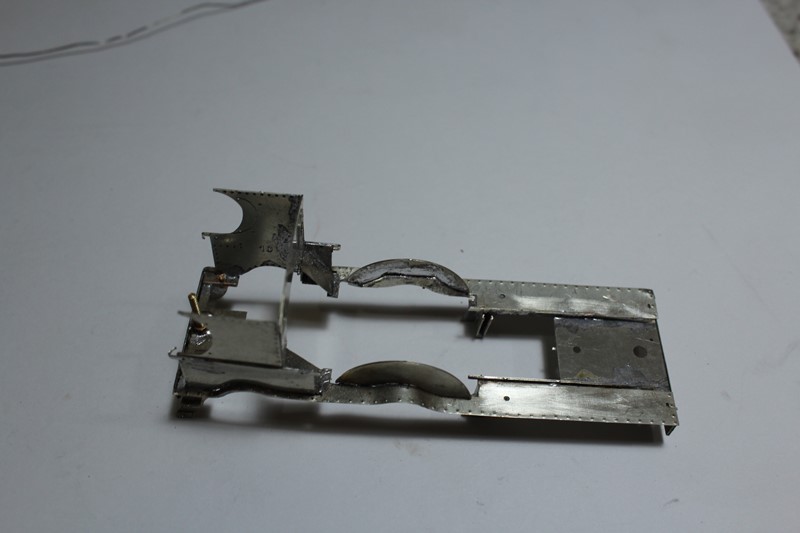
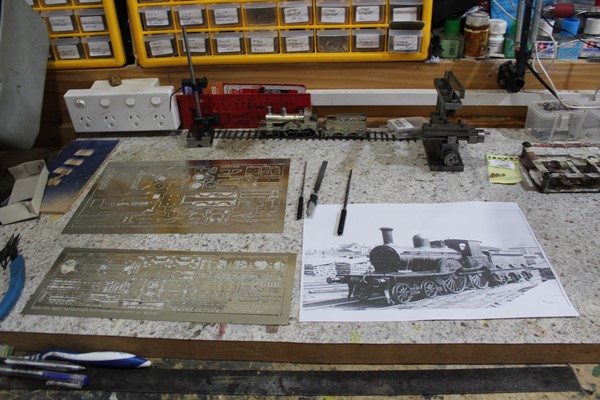
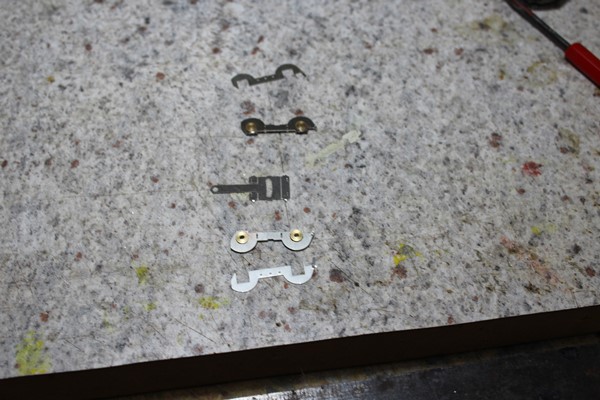
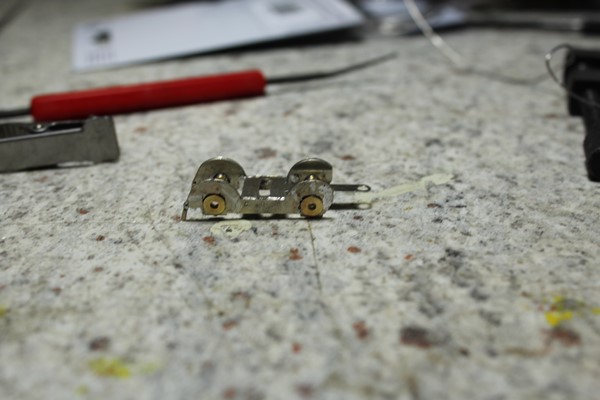
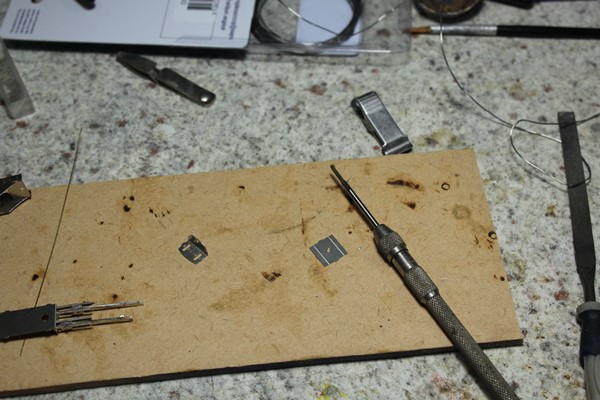
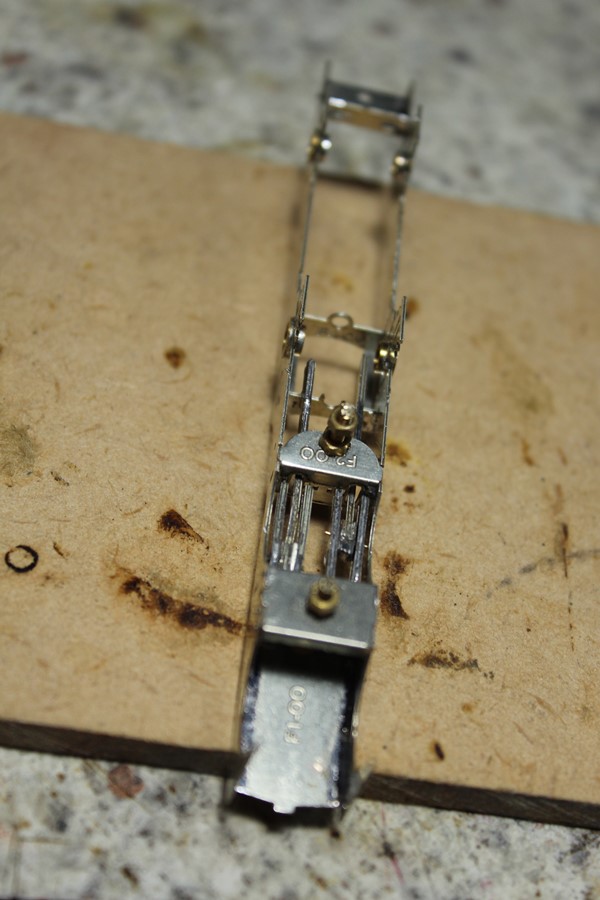
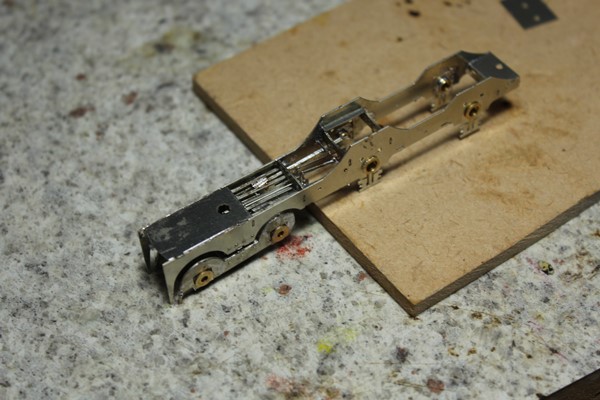
I updated the artwork for the model on completion of the assembly of the test etch and was finally able to schedule time to start assembling the updated version of the model. The original test build was based on No1 in early GSWR/early GSR condition with 3 ring boiler with raised firebox and short "sports" cab, this build is based on a photo of No 98 in early CIE condition with a 2 ring boiler with raised firebox and longer J15 style cab and side sheets. The parts are etched in 0.4mm nickel silver for it greater strength and rigidity than brass. The metal is also easier to work with than brass and provides a superior key for paint. Basic tools include a tapered broach for opening out the axle holes for bearing brushes, needles files, the rivet press is not an essential for this build! Loco, bogie and tender frames laid out and bearing brushes soldered in place. Bogie awaiting assembly, the tabs on the center section of the bogie (bolster) fit into the slots in the bogie sideframes, the complete assembly self aligns when assembled on a flat surface. I used a toolmakers clamp to keep everything square when soldering the bogie sideframes to the bolster. Completed bogie assembly with cosmetic sideframes soldered in place. I thinned the back of the cosmetic frames with 145° solder and sweated the cosmetic frames to the bogie using a small stainless steel clamp. Jumping ahead a bit! Main frames and bogie. The clamp is to keep the mainframes from tipping forward. I aligned the loco main frames by first soldering the framespacer that fits above the driving axle in place, then checking/adjusting the chassis that everything was flat before soldering the rear frame spacer in place. In the absence of a clear datum I used the guard irons and springs to check that the chassis was sitting on a flat surface. Chassis with leading frame spacer and motion bracket slotted in place. These can be soldered in place at this stage if the loco is assembled without inside valve gear! I hope to cover the assembly of the valve gear separately. Bogie pivot and motion bracket tapped 10BA for bogie pivot bolts, bolts then soldered in place. Frames with motion bracket and bogie pivot plate soldered in place. Bogie and frames united. Ashpan and power pick up mounting plate. Chassis with ashpan sides and pick-up plates fitted. The ashpan sides and frames are aligned using pieces of 0.45 wire that fit through pre-formed holes. I will cover the remainder of the chassis assembly in another post.
-
The closure date was usually the last day for officially accepting traffic at a station, some lines continued to operate and stations accept traffic for several weeks after "closure". The County Donegal operated a "interim" goods service with 3 trains daily (2 railcar 1 steam) on the Strabane-Stranorlar section of its main line for several weeks after closure and later operated goods trains as-required until the company was able to haul all its traffic by road. Beet Specials continued to operate on the Loughrea Branch for several weeks after the line closed to passenger and general goods traffic in November 1975. Most of the activity seemed to be centered at Dunsandle Halt which continued to receive beet pulp in H Vans and load out Beet in Bulleid opens with trains continuing to Loughrea to run round. "Post closure" beet working were featured in a recent IRRS Film Show. An impending closure could result in a short lived surge in goods traffic as Co-ops and Merchants "stocked up" on heavy or bulky goods like coal, grain or fertiliser taking advantage of the once lower freight rates offered by rail. The last goods over the West Donegal was a special goods for Ballyshannon (on the day before the line closed) with 9 wagons of coal and nearly 20 covered wagons which would have taken several days to unload! There seems to have been a surge of grain traffic on the Ballinamore-Belturbet section of the Cavan & Leitrim before closure with trains running for approx 10 days after closure to clear empty wagons from the section. During the "Block Train" era Newcastle West received two "Back to Back" fertiliser specials during the final weeks before closure of the station and Ballingarne-Listowel section of the North Kerry, probably more goods traffic than the line had carried during the 12 months before closure.
-
C227 appears to have worked the last non-public train out of Cahirciveen on 11th February 1960. There is a photo of the train in Vol 1 of Patrick O'Sullivan's book on the Farranfore to Valencia Harbour Railway (Oakwood Press 2003). The train appears to be made up of 3 coaches and approx. 20 4 wheel wagons. Interestingly there 3H vans are visible in the yard although the "final" train is made up and ready to depart!
-
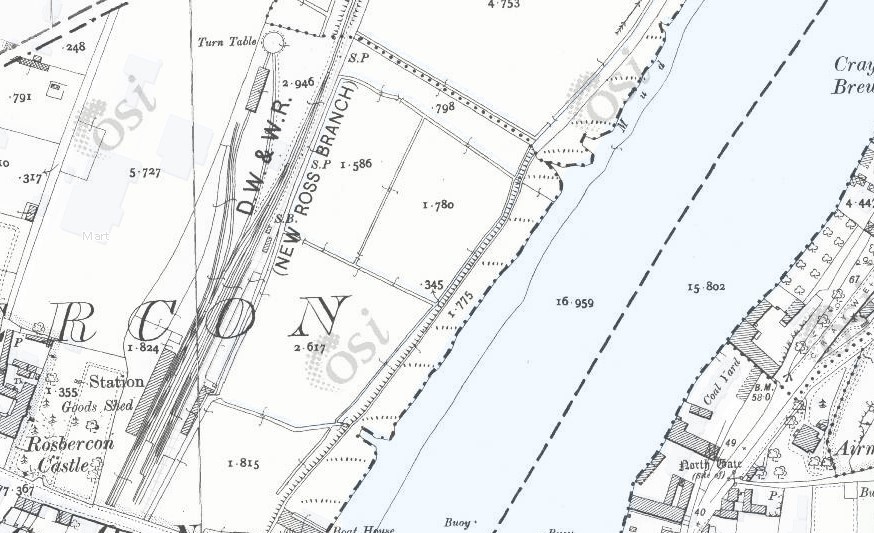
The turntable and loco shed may have been removed at some stage after the New Ross-Waterford Extension was opened. No turntable is listed at New Ross in the Waterford-Macmine Junction section of the 1960 CIE WTT. I visited New Ross on an IRRS special in 1977 the second platform and at least two goods yard roads were still in place. A section of the main line towards the Barrow Bridge was still in place as a shunting neck. The station appears in its original form as the terminal of a branch from Macmine Junction in the OSI 1888-1913 & Cassini on OSI Map viewer.
-
The Blue Pullman hits British rails again this week....sort of...
Mayner replied to Galteemore's topic in News
CIE seriously considered buying and re-gauging the original "Blue Pullmans" sets from BR in the early 70s instead ordering the "Supertrain" sets from BREL. -
I have accepted an offer for these wagons.
-
I have accepted an offer for these wagons.
-
I have accepted an offer for these wagons.
-
I would recommend checking whether the loco is designed to fit a Terrier chassis before buying. The full sized locos were slightly smaller than the Brighton locos shorter in overall length, smaller wheels and shorter coupled wheelbase. Its possible the 3D printed model was designed to fit the Hornby chassis as building a chassis for the loco in 4mm would have been challenging due to the small size of the loco and absence of suitable wheels. Tim Cramer built a 4mm 21mm gauge model of No90 in lined green which featured in the Railway Modeller along with a "Bandon Tank" & J26 in the early 1970s (possibly May 72) but later moved up to O Gauge.
-
View Advert CIE/IE Ballast Hopper Wagon Set 1 IRM1001 IRM Set 1 Ballast Wagons 24122,21427,24132 in original packaging incl. IRM flyer. Test run only. Shipping €17 to Europe, USA & UK I will combine shipping for multiple purchases Advertiser Mayner Date 03/11/20 Price €70.00 Category Wagons
- 1 reply
-
- 1
-

-
View Advert CIE/IE Ballast Hopper Wagon Set 2 IRM1002 IRM Set 2 Ballast Wagons 24133,24138,24141 in original packaging incl. IRM flyer. 24133---flange on bearing housing trimmed flush with axleguard on one axle, slight damage/twist on brake lever see photos. Other wagons test run only. Shipping €17 to Europe, USA & UK I will combine shipping for multiple purchases Advertiser Mayner Date 03/11/20 Price €65.00 Category Wagons
- 1 reply
-
- 1
-
-
View Advert CIE/IE Ballast Hopper Wagon Set 3 IRM1003 IRM Set 3 Ballast Wagons 24142,24253,24254 in original packaging incl. Test run only. Shipping €17 to Europe, USA & UK I will combine shipping for multiple purchases Advertiser Mayner Date 03/11/20 Price €70.00 Category Wagons
- 1 reply
-
- 1
-
-
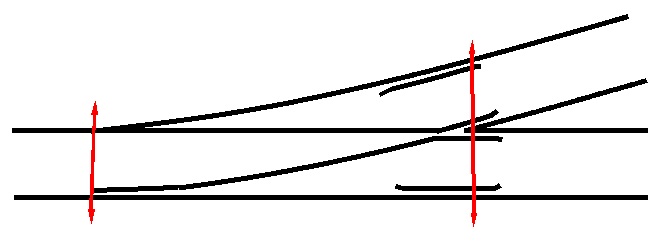
You are likely to get derailments if the transverse or cross-level across the blades and crossing of a point are not absolutely level. You can check the baseboard with a spirit level or the actual point with a small boat or torpedo level. https://www.stabila.com/en-US/products-553/list/torpedo-and-pocket-spirit-levels.html
-
I explored the station site and walked along the trackbed towards the tunnel when I was living in UK in the early 90s. I was exploring the remains of the ironstone tramways in the area, I think the gateway to the quarry tramway was still in place 30 years after the quarry closed.
-
The use of a train of fertiliser wagons by the S&E department for removing telegraph poles was mentioned in the news section of the IRRS Journal during the mid 1990s, but there was no detail about the plant or removal methods. Its possible IE used excavators with grab attachments to drop the poles at the time IE used to hire excavators with a range of attachments for p.w. & S&E work and used grabs for handling rail which would also have been suitable for dropping poles. There are also a grab attachment that incorporates a saw which are used for three felling, which would have eliminated the risk of people working close to plant and machinery in the dark with chainsaws. there is also a tree felling attachment attachment which is basically a grab with a
-
Lighting was required for working during night time possessions after scheduled passenger and freight services had cleared section. Pole lines became redundant during 1990s with most signaling and communication cabling transferred underground. I think one train 10 wagons? was converted for S&E use initially removing telegraph lines between Dublin & Mullingar. Fertiliser traffic dropped off during the 1990s due to reduced demand for chemical fertiliser. At least one rake of fertiliser wagons was converted to carry container traffic during the mid 1990s by removing everything above the chassis!
-
I don't remember whether I got round to using Advanced Consisting as I was introduced to the concept shortly before I dismantled the N Gauge layout because of a house move several years ago. At the time I was experimenting with JMRI https://www.jmri.org/help/en/html/apps/DecoderPro/Tour.shtml for decoder programming and may have used Decoder Pro to set up consists before the house move. Universal Consisting should be adequate for all except a large Irish layout as small Bo Bos were usually multi-united in pairs, consists of several locos would be exceptional if they ever run. Universal Consisting gives an identical speed and direction command to each loco in the consist, the individual locos in the consist should have similar operating characteristics or speed, acceleration and braking settings individually programmed so that the can run together I usually consisted locos with the same or similar running characteristics in a single consist as in my experience it was very difficult and time consuming to programme a consist of 3-4 locos with dissimilar characteristics to run together. In general I did not mix different manufacturers locos in the same consist as Atlas, Bachmann & Kato locos had completely different operating characteristics and did not run well together. While each loco had a separate decoder a pair of locos which were used on banking duties (which always ran together) were programmed with the same decoder address.
-
There are a number of different ways of consisting locomotives. Basic Consisting: where you programme each loco with an identical address. Command or Universal Consisting: Where a consist is set up in the Command Station. Advanced Consisting: Where a consist is set in the individual decoders. The set up/interface depends on the specific DCC system. Tony Trains Guide to Consisting describes the individual systems in greater detail. https://tonystrains.com/news/complete-guide-to-consisting/#:~:text=Basic consisting is the simplest,each have there own decoders. I used to use Universal Consisting for operating a American N gauge layout with multi-unit consist of up to 4 locos, but was effectively limited to 4 consists due to Command Station capacity. I used Digitrax, the advanced Throttles are set up to control two locos with separate speed and direction controls which is very handy for setting up and breaking down consists. I usually used the train number as the consist address and could control the lead loco headlights separately from the consisted loco. I avoided changing acceleration and braking from the default decoder settings it was extremely difficult to custom match individual loco acceleration and braking settings within a consist and lead to problems with train handling.
-
Narrow Gauge in the Rockies not quite
Mayner replied to Mayner's topic in US / Canadian Railway Modelling
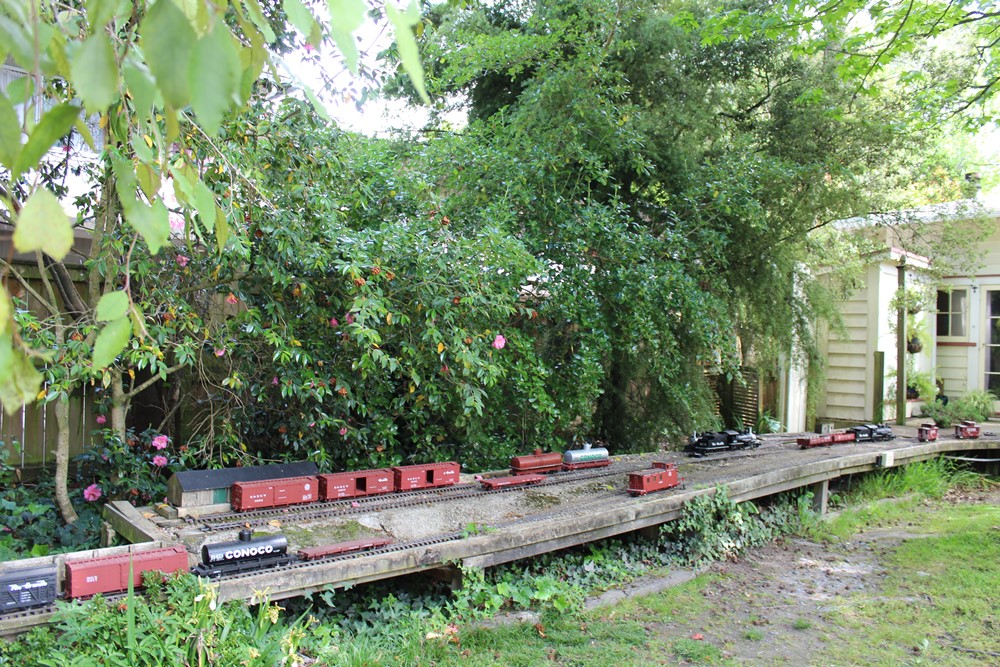
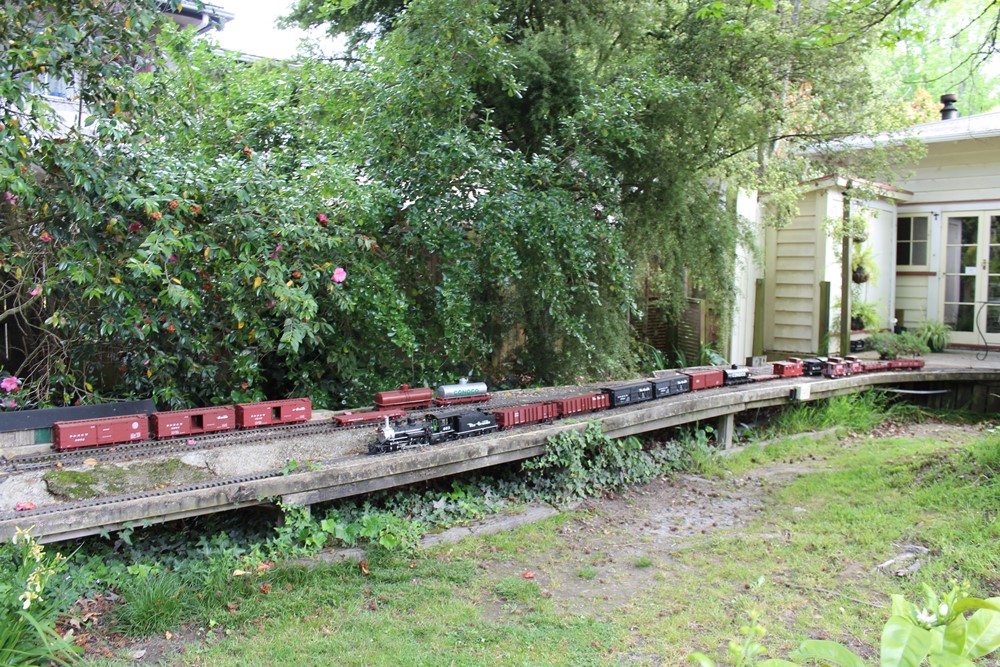
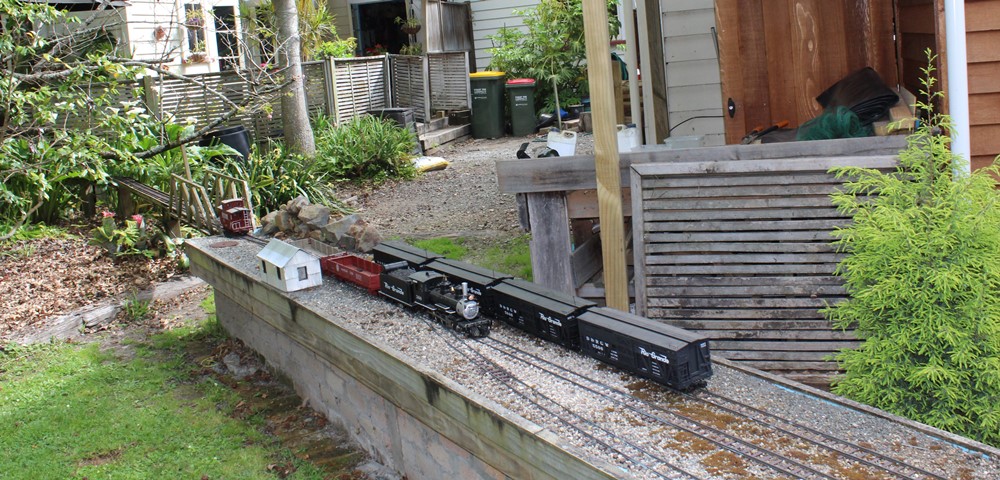
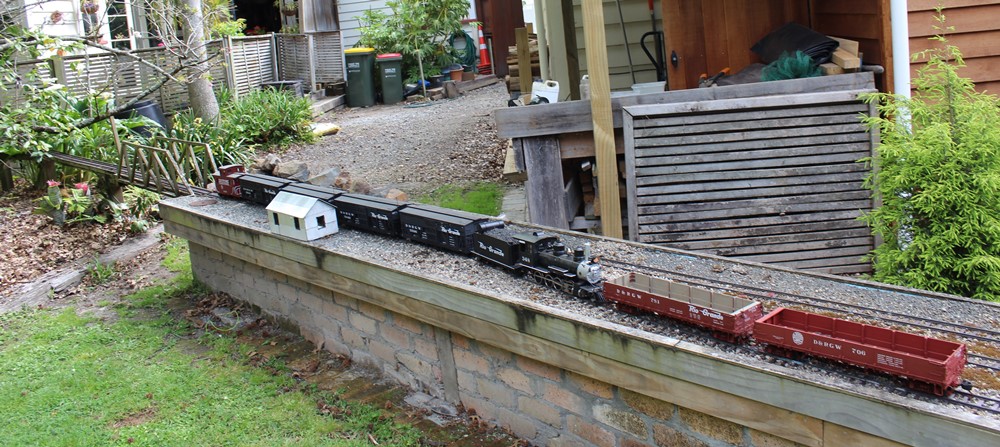
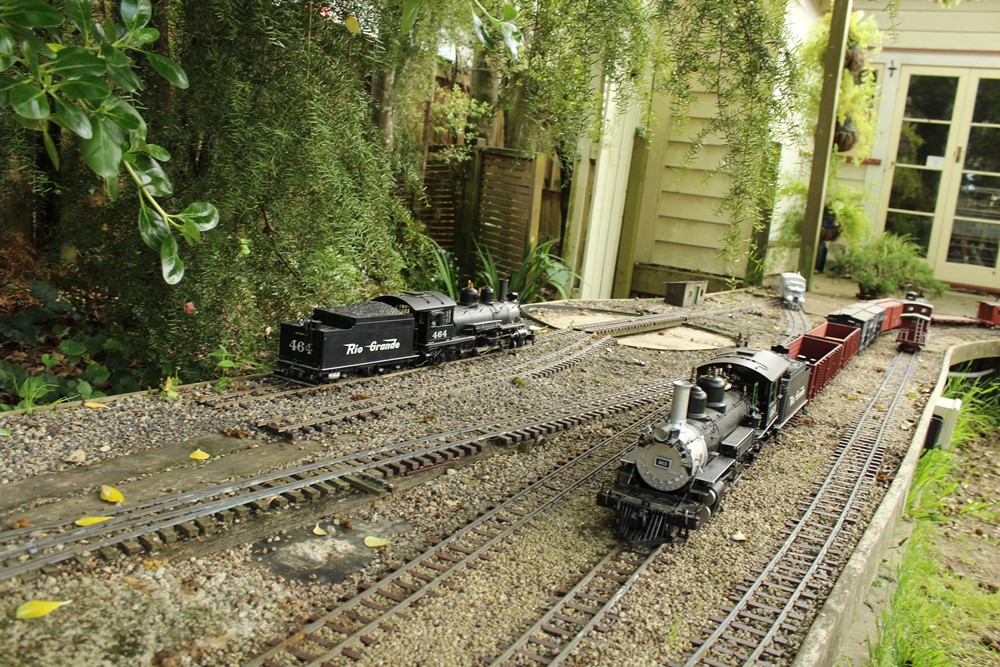
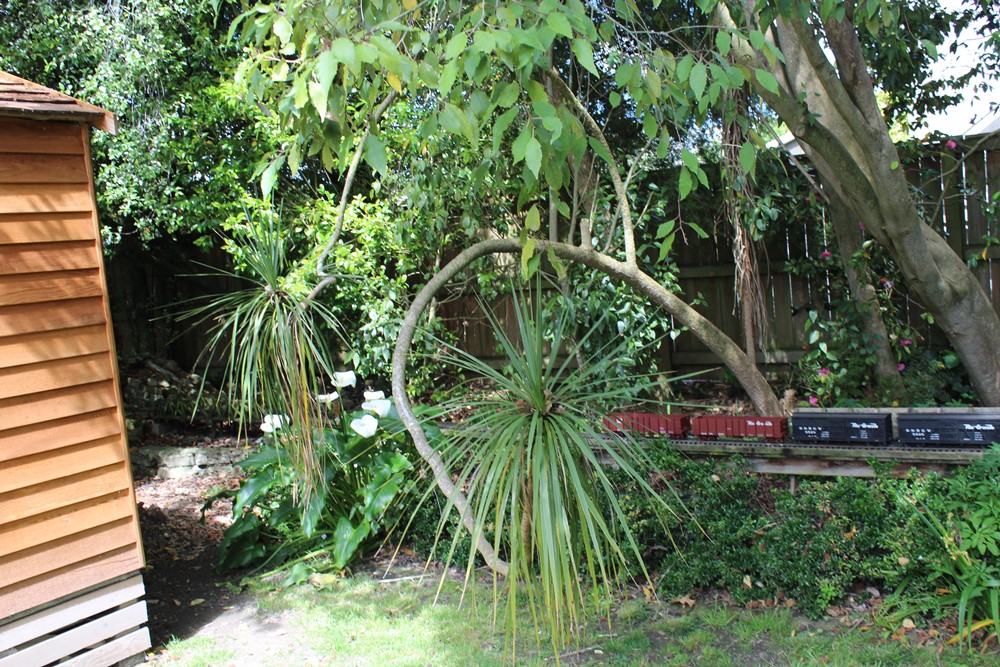
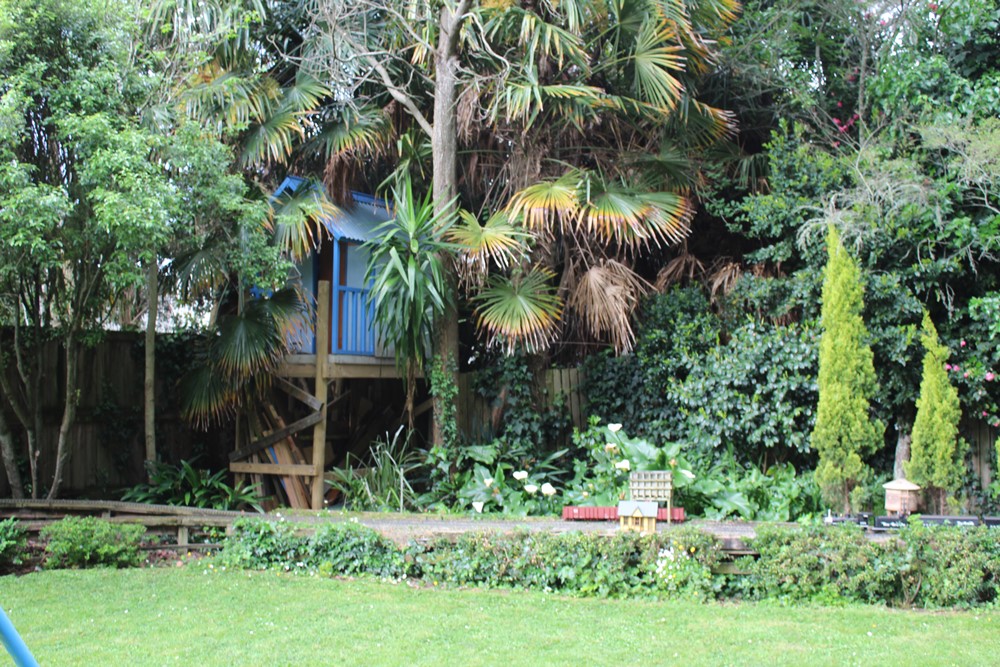
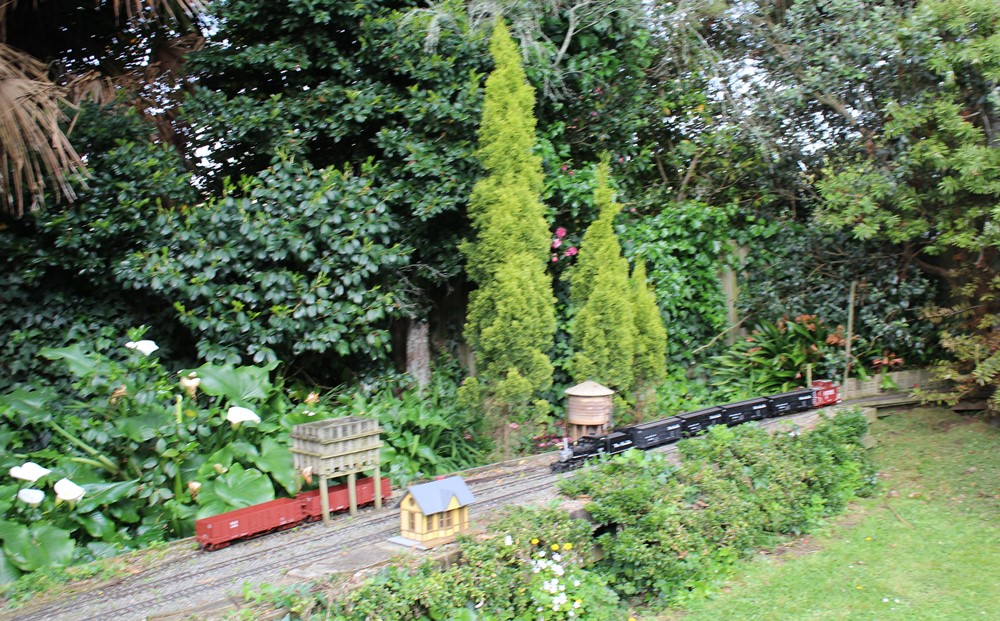
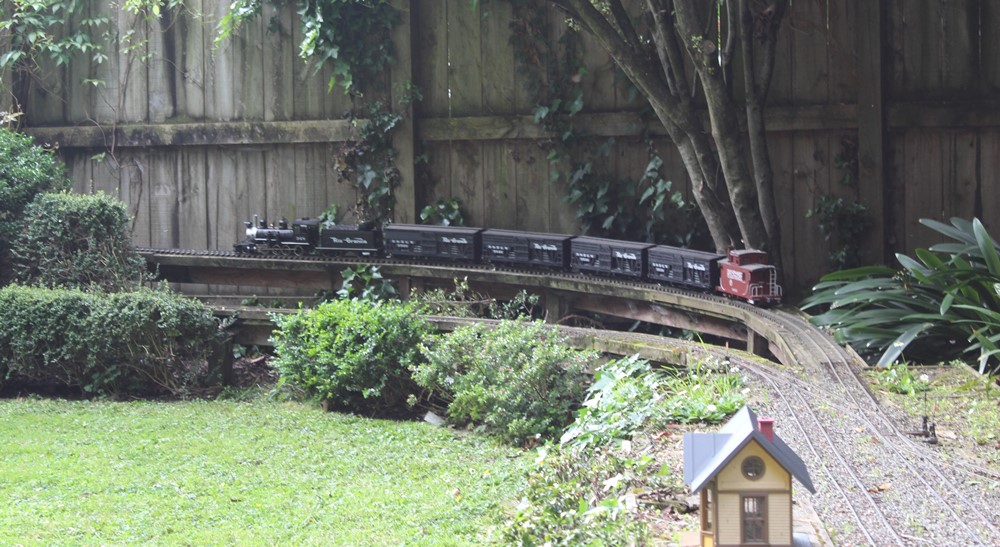
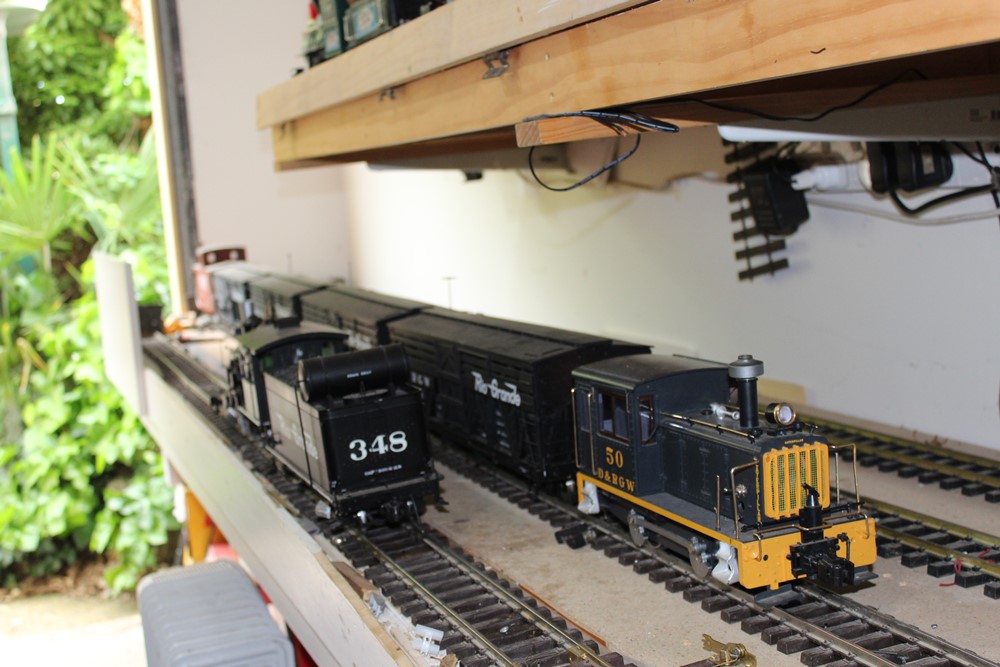
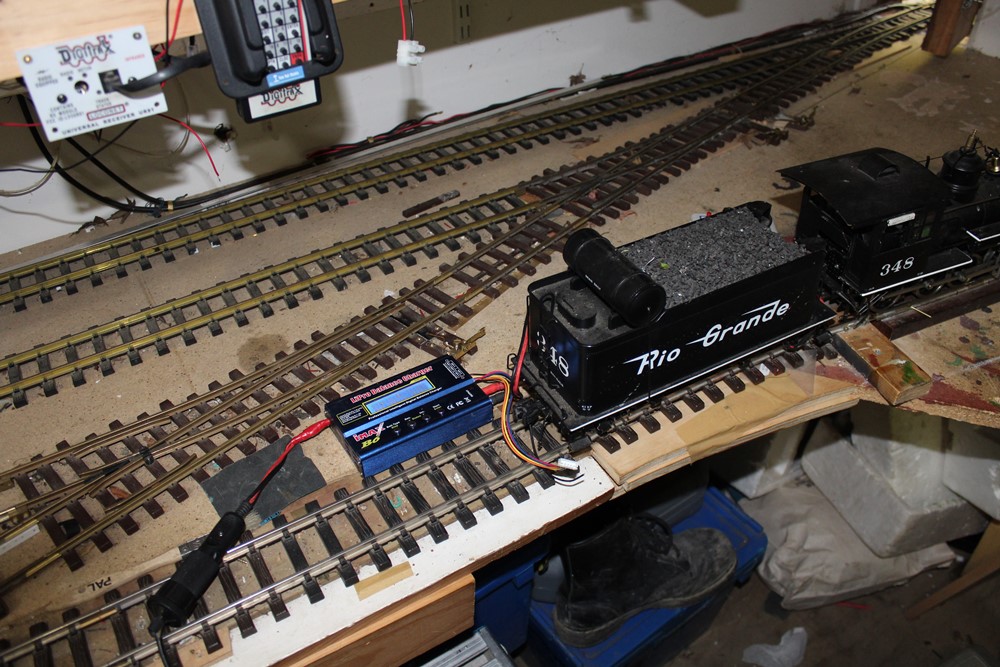
New Zealand's October "Labour Day" Weekend is in someways similar to the the Northern Hemispheres May Holiday weekends with people heading to the great great outdoors though we tend to stay at home on weekends and another excuse to play trains. I haven't really looked at or taken a picture of the main yard from this view point as it was occupied by a play house until fairly recently. General view of the yard with cars for a departing westbound freight incl Conco tank wagon positioned on the main line. K27 464 with two cars in right distance, had arrived with a freight the positioned the outbound cars from the yard on the main line, before switching her cars to the yard leaving the caboose on the main line and is about to couple two drop bottom gondolas (ballast or ash) on to the caboose on the departure road in the right distance. C19 346 & K27 463 await their next assignments in the loco yard while Motor 4 hides behind and under plant pots on the loco yard lead in the far distance. 464 has completed her switching having coupled the caboose on to the departing Westbound freight and pulled the train clear of the siding switch allowing 463 to couple on and prepare for departure. 348 has turned and is waiting on the loco yard lead to couple on to her two cars and caboose once the departing train and 464 have cleared the east end of the yard. 348 finally on her way has uncoupled from her caboose and her cars and is about to couple on to the stock special on the siding. 348 pushes the gondolas on to a dead end spur before setting back and departing with the special. This section of the railway uses the nearest to conventional baseboard construction with plywood on treated timber framing with glued ballast and ground cover using a concrete bonding agent with a waterproof membrane to protect the ply. Station building is based on Pen y Mount on the WHHR. 464 waits in the Yard & Motor 4 at the Bay platform as 463 run through with a freight. Later 464 will turn and clear the yard and Motor 4 operate a Mail and Passenger until the next operating session. "Cabbage" tree originally grew reasonably upward until forced to adapt to faster growing screening! Re-locating the play house was an April Covid lockdown project, I just about managed to collect the material the day before the lockdown came into force. 348 and her train have turned on the Wye and reversed direction and are about to take the "High Line' 4 cars and a caboose are just about the limit on a dry day for 348. 463 & 464 both needed assistance with 11 cars while putting the trains way later in the evening. Staging yard switcher No 50 has released 348 to back down to the turntable to turn and for charging. Charging Stations! Locos are fitted with 2 NiMh 7.2V model racing car battery packs as standard and are good for approx 1hrs running on a standard charge. Charger & transformer lives in a pocket under the staging yard lead is long enough to reach any point on the loco ready/servicing track.
-
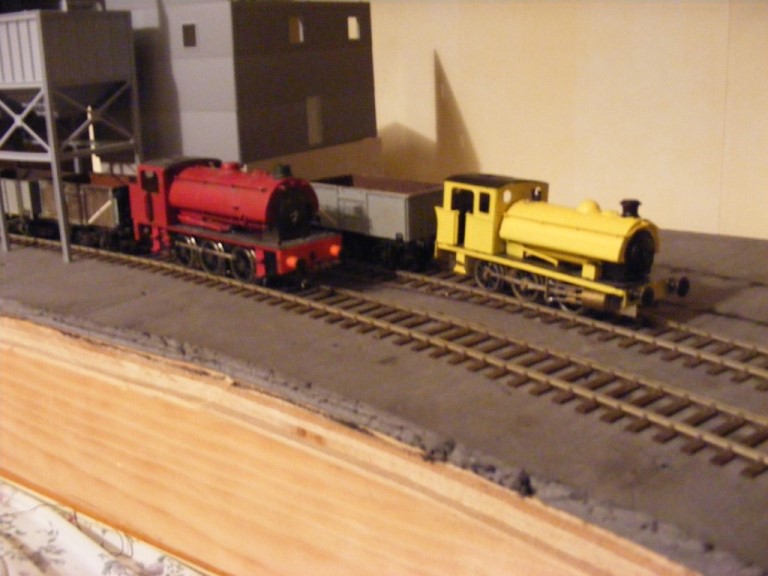
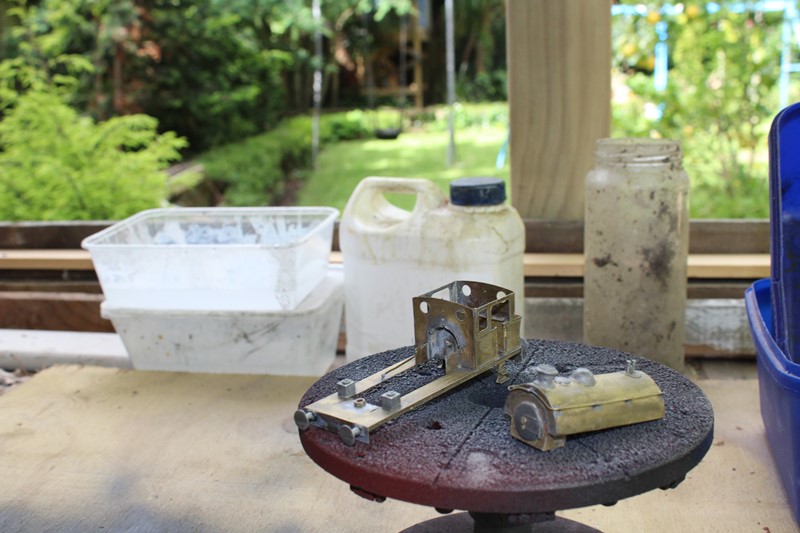
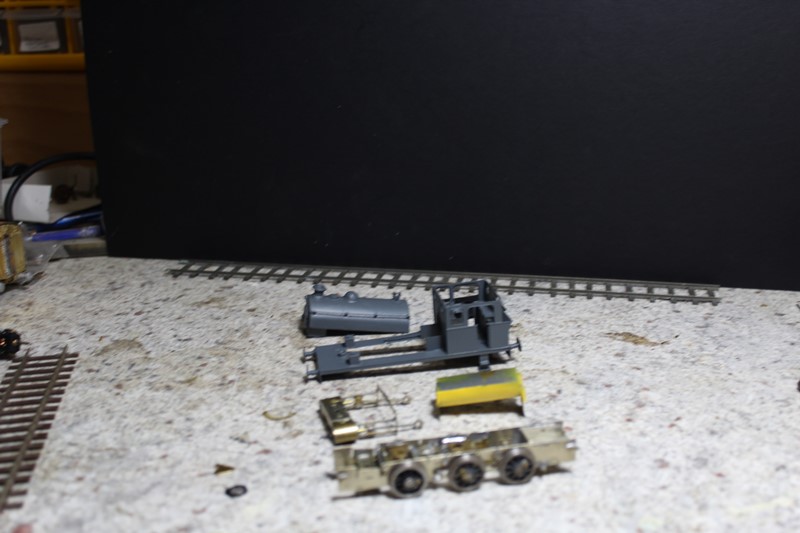
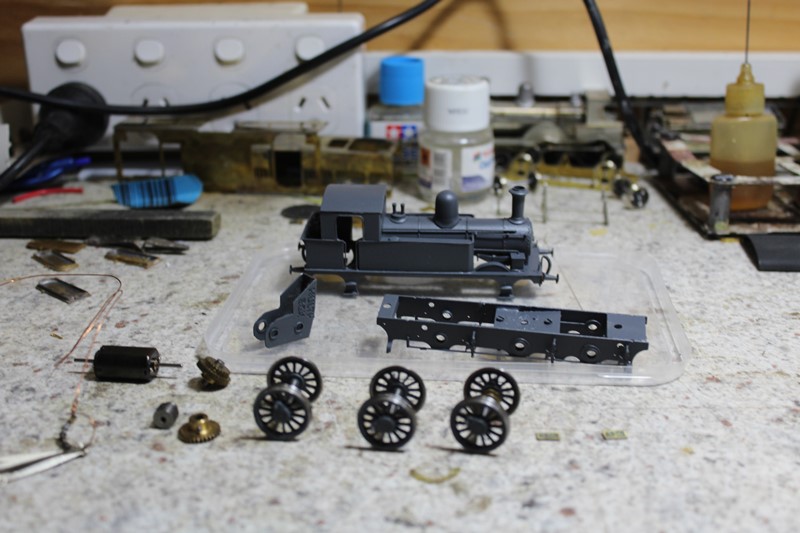
I was tempted to have a go at building one of the SLNCR 0-6-2T as a teenager but ended up building on of the "Large Tanks' out of re-cycled cans on a re-wheeled Triang Princess chassis a good reliable runner despite the crude appearance. I seem to have begun digging deep into my collection of un-finished projects and hopefully clear enough space to start building an Irish Broad Gauge Layout starting with two relatively straightforward projects. High Level RSL saddle tank. I bought the kit when I was going through a "British Industrial" phase and completed most of the assembly while on holidays in the United States/travelling to New Zealand in 2004. Completing the loco was low priority as I did not have a suitable layout and problems I created for myself during the assembly. I had to replace the connecting rods as I drilled the holes in the original oversized and ran into clearance problems between the leading crank pins and back of the crossheads 9 pistons. I replaced the Gibson driving wheels with Ultrascale a better quality wheel with a superior crankpin system. First priority is to replace that yellow paint, some industrial locos were painted in high-vis colours during their final years including a RSL tank, but in the end a traditional red, green or black would look better! Boiler and saddletank awaiting sandblasting after stripping in a bath of acetone. There are some dents in the saddle tank though the model otherwise appears sound. Component parts with saddle tank and cab and running board sprayed with a dark grey etched primer. I forgot to strip the underside of the boiler! TMD MGWR E Class I found this kit as a "bonus" as part of a job lot of part built TMD & SSM kits I bought at a UK exhibition about 20 years ago, I started to assemble the kit several years ago as a second "Midland Tank" to run alongside my model of 553 which I originally bought when the kit was originally released in the early 1980s and upgrad3ed about 10 years later. I assembled the loco in late GSR/early CIE condition with riveted smokebox from my own etch, built up chimney and ross pop safety valves. 556 awaiting final assembly. Motor is a Mashima 10X20, Gearbox is a Branchline Multibox from my stock of parts wheels are Gibson on extended axles cut to length and faced off on a lathe for 21mm gauge. I usually use a wheel press for assembling "push fit" wheels like AGW or Ultrascale, but was unable to do so in this case as I had Lockset one wheel on each axle during an earlier test assembly. I "quartered" the wheels in the time honored fashion by setting the cranks on the leading driving wheels at approx. right angles by eye before pushing the "loose" wheel home on its axle, then setting the cranks on the second wheel set in a similar manner, adjusting the angle slightly on one axle if necessary using the leading pair of coupling rods to check that both wheel sets ran freely without binding before pushing home on its axle. Then repeating the process for the final axle. While I normally use a 10BA bolt to secure the coupling rod and crankpin bush in position with Gibson or Sharman wheels, I used Markits threaded crankpin bushes for the leading and trailing driving wheels on this loco to prevent the crankpins striking the loco footsteps. An almost complete 556, power pick-ups, couplings and ballast to be added. The number-plates are brass and were supplied with the original kit. The GSR apparently picked out the edges of the whitemetal numberplates in straw or light yellow rather than polished whitemetal.
- 403 replies
-
- 11
-