Mayner
-
Posts
5,086 -
Joined
-
Last visited
-
Days Won
126
Content Type
Profiles
Forums
Events
Gallery
Blogs
Everything posted by Mayner
-
There is a 1958 Keith Bannister photo of a BUT 900 Class railcar in GNR Blue & Cream with Ulster Transport crests leading a Derry-Belfast train at Strabane in "Irish Railways in Colour" a second glance. The train appears to be made up of 4 power cars, 2 non-powered trailers and what looks like a GNR 4w Bread Van. In addition to the front of the railcar a crest is visible midway along the side of the railcar. Dundalk appears to have completed the BUT railcar assembly programme in October 1958 after the assets of the company were divided between the CIE & UTA https://web.archive.org/web/20191101134727/http://www.irrs.ie/Common Files/GNRB.htm
-
Interesting the down Sligo? Goods with cuts of tank wagons (& new car deliveries) marshalled in the center of the train in a similar manner to the rules for marshalling steam hauled good trains. The majority of loose coupled goods trains had banking assistance with a C or E Class loco from the North Wall yards to Liffey Junction or Glasnevin Junction & Kingsbridge Goods to Cabra and up the Gullet to Inchacore. Does anyone know if banking assistance was provided to Clondalkin or Clonsilla? There is a photo of a 1930s photo of ex-GSWR 213 Class 0-6-2T banking a southbound goods past Inchacore Works in Donal Murrays GSR Irish Railways Pictorial album. The four members of the 213 Class were introduced in the early 1900s as heavy banking transfer locomotives, two were converted to tender locomotives for slow heavy main line freight work in the Waterford area, the unaltered locos appear to have continued in their original duties as heavy banking transfer locos in the Dublin area until withdrawn in the late 1940s.
-
Saturday's plans were similar to John Allen's classic "Timesaver" switching puzzle https://en.wikipedia.org/wiki/Timesaver I think the basic constraint was that the loop is just long enough to run around two wagons and the siding or industry tracks a loco and two wagons. The Timesaver is basically a board game using model trains as pieces.
-

Ernies Massive Irish 1930's to 2005 Photo Archive
Mayner replied to Glenderg's topic in Photos & Videos of the Prototype
I saw a similar move at Longford during the same era when the loco and stock of the evening Connolly-Longford commuter train shunting the evening Longford-North Wall Liner Train. After unloading its passengers the Commuter propelled back along the main line towards Dublin, before running forward into the Gantry Loop and coupling on to the Liner, the loco then pushed and pulled the combined train along the loop until the coaches were positioned in the yard clear of the running lines. The loco then uncoupled from the Commuter and continued to push the Liner along the loop and on to the Main Line until clear of the points at the Sligo end of the station before departing for Dublin. Railway men and women will tray and complete a shunt with the minimum number of moves to both to save time and reduce the amount of walking by staff on the ground. -
CIE locomotive livery variations 1960-1990
Mayner replied to jhb171achill's question in Questions & Answers
Many of the rails re-covered from the Sligo line re-lay was 84lb with MGWR 1922 stamped on the web part of an order of Belgian rail ordered to re-lay the system in the early 20s, its possible older C-1900 rail was still in use on the Ballina Branch. The Waterford-Rosslare line still retains some original GSWR bull head rail dating back to the opening of the line in 1906. GSR & CIEs basically got by with careful maintenance and patching after the post WW1 renewals, deferred maintenance from the 70s onwards contributed to a backlog of renewals that contributed to the collapsing infrastructure in the early 1990s. Under the Governments Building on Reality programme no further new investment was planned in the railways apart from completing the Cork Line CTC & MK3 rolling stock programme. Enthusiasts tend to overlook the 1965/66 rebuilding of C233 & 234 with Maybach MD-650 (1200hp) engines, the conversion seems to have been successful with the two Maybach-Metrovicks (which unlike the GM rebuilds regularly worked in multiple with B141/181 Class). The Maybachs regularly worked Dublin-Limerick via Nenagh passenger trains and Dublin-Limerick freights. One of my personal disappointments is that CIE did not top and tail Dublin-Limerick and Dublin-Waterford Supertrains with B201s in a similar manner to the BR Edinburgh-Glasgow Intercity or NIR Enterprise as sort of Irish diy IC75 service. -
CIE locomotive livery variations 1960-1990
Mayner replied to jhb171achill's question in Questions & Answers
Track on the IE network got into a really bad state in the early 1990s due to deferred maintenance and the pounding received from heavy locomotives, temporary speed restrictions were imposed on many lines after a system wide safety audit following the Knockcrockery de-railment. The Ballina Branch was one of the worst sections of Network and Ennis-Claremorris was closed to provide material for emergency track repair on the branch and other sections of the Midland. The external auditors were shocked at the state of p.w. on the Midland the 90Lb rails installed by the MGWR & GSR in the 1920s were inadequate for 071 & 201 locos and then current line speeds (60-70mph). On the positive side the derailment and audits forced politicians to sit up and invest in the railways so that they survived another 20 years rather than wither on the vine as intended under the "Building on Reality" policy. -
It might be worth contacting the Historical Model Railway Society https://hmrs.org.uk/drawings.html at one stage Richard Chown of Castle Rackrent fame acted as "Irish Steward". A lot of the rolling stock on Castle Rackrent appears to have been built by British builders rather than by Irish companies. Its possible that British builders like Metropolitan Carriage & Wagon, Ashbury etc. built "Cattle Brakes" for the Dublin Wicklow and Wexford Railway in the mid-late 19th Century
-
CIE locomotive livery variations 1960-1990
Mayner replied to jhb171achill's question in Questions & Answers
According to Irish Metrovick Diesels B201s for a short while B201s worked Dublin-Cork Trains of 6-7 MK 2D coaches in the 1972 timetable. The 13:30 ex Heuston & 17:30 ex Cork were regular B201 hauled Supertrain workings. Following re-building B201s regularly hauled long distance passenger trains in the late 60s early 70s including Heuston-Cork, Limerick and Tralee trains, Connolly Galway and Sligo workings plus some main line freight workings including Dublin-Drogheda bulk and bagged cement (H wagons) trains. Its possible the operating people preferred the B201s to the Yanks and Bo Bos for main line passenger working as they may have been steadier at speed with their Commonwealth bogies than the GMs. After the 1973 "Oil Crisis" CIE dropped its policy of operating light fast frequent trains, CIE returned to its earlier policy of running less frequent heavier trains using 001 Class or pairs of small GMs, though the B201s continued to Drogheda-North Wall cement trains into the late 70s in addition to Dublin inner and outer Suburban duties. I spent a Saturday afternoon watching a procession of B201 hauled bagged and bulk cement trains passing Howth Junction while surveying a site on the then new Baldoyle Industrial Estate in 1978. Hopefully a B201 is on the IRM to do list. -
Possibly Industrial Alcohol (methanol) or glucose traffic from a Cemici Teoranta plant. The company products were shipped by rail from Ballina, Derry and Dundalk from plants at Corry Co Mayo, Carndonagh Co Donegal and Cooley County Louth. The location looks like Ballina, I vaguely remember seeing several 10' tank containers during a visit to the station in the mid 1980s The Corroy plant was/is alongside the Ballina branch but no siding was provided Cooley was served by a private siding from the Dundalk-Greenore line.
-
I think the "Tan" livery which first appeared on the new Van Hool Atlanteans in the late 70s was not exactly well received by the travelling public and local enthusiasts who in plain speaking Dublin fashion described it as s--t. The public seemed to prefer the blue and cream and the Golden Brown or all over tan scheme was replaced with a smart two tone green with the arrival of the Bombardier buses on Dublin City Services in the early 80s.
-
It looks like a Sulzer hauling a C Class, there was speculation on a earlier thread whether the C had broken down and the B101 had rescued the train. My theory is that the C is being hauled to Dungarvan to shunt the yard and return with a goods to Waterford. Its doubtful a C would have been up to hauling and stopping a heavy goods train on the steeply graded and sharply curved Waterford-Dungarvan section. At the time there was a one daily goods in each direction between Waterford & Mallow and a daily out and back Waterford-Dungarvan Goods.
-
1361 & 1367 were 64 seat Open Second's introduced in 1953 to run with the AEC railcars. Early (up to 53) are best described as Mk2 Bredins as they used traditional coach building techniques (hardwood timber framing), conventional steel underframes and ran on GSR style bogies. The Open Seconds and Buffet Cars were completely new designs, though the side corridor stock was based on existing 1930s Bredin designs. The end profile of the 1930s Bredin and new CIE built stock was quite different, slightly wider and more upright in profile. To complicate thinks further CIE started using Bulleid Triangulated underframes and Commonwealth bogies under coaches built from late 1953 onwards including 2422. In short CIE built 3 distinctive designs of main line coaching stock in the 1950s there was no such thing as a Standard CIE coach during the 1950s. In the 1950s AEC railcars worked the most prestigious main line passenger services, with steam and later diesel working the (slower) heavier mail and perishable trains. Westland Row-Galway/Westport services were dieselised in 1953? with a single return railcar daily a 4 coach train with 2 power cars and 2-1904 Brake Second Opens (fitted with driving cabs) which divided at Athlone. The train was strengthened to 6 coach the following season with 4 powered cars, an open standard and a buffet. The 4 car set with buffet running to Galway, the 2 car railcar to Athlone, this seems to have been the standard formation for the Cu-na-Mara up to the late 1960s, when the Westport connection operated as a through train to and from Dublin. AEC railcar sets could be made up to 8 coach formations with gangway connections throughout 2 2600 Driving Cars, 2 Powered Intermediates and four coaches, the 8 coachs sets appear to have been used on Kingsbridge-Cork and Tralee express trains. Some of the Powered Intermediates were rebuilt from Inchacore built AEC cars and were slightly higher than other stock, giving these sets an up and down roof profile.
-
My two most effective and efficient job interviews were approximately a year apart in the Mid-80s when when I worked as an "engineer" manager in construction. I was out scouting around for work possibly trainspotting around Donabate and called into a site where the contractors had recently broke ground. A couple of the workers recognised me and asked if I was looking for work. It turned out the contractor was former client of mine and were looking for someone to run the job, the contracts manager "Dennis" offered me the job straight away, but I was not happy about the rate of pay, I met the big Boss the following day who put me on a bonus but told me not to say anything to Dennis. We had a very enjoyable summer/autumn in Donabate developing a housing subdivision beside the main line (I never brought my camera to work!) pretty much left to our own devices, the economy and construction was going through a tough time the boss closed the business and moved to Atlanta Georgia and I headed for Holyhead! The second interview was on my first day in London in between visits to W & H Models in New Cavendish St. and Victors of Islington, I spotted an add for an engineer with an Irish owned Civil contracting company in the Evening Standard and asked to immediately report for an interview in the companies Wembley Office. I was interviewed for a completely different but better paying role by one of the Directors most likely because they needed someone for that role immediately. The company was very good to work for in terms of pay and conditions, paying a retention bonus to its Irish migrant workers, the downside was the people were locked into particular roles because of very rigid senior management thinking. I ended the day with a job and parts to complete a J15 and a copy of Model Railway Journal.
-
Feast or Famine - Passenger Stock for A's and 121's
Mayner replied to DJ Dangerous's topic in Irish Models
The question is whether there is sufficient demand to sell 3000 of each type @€65 or 1000 of each type @ €195 each to provide a similar return on investment to the commissioner. When I introduced the JM Design tin van kits approx 10 were commissioned as rtr models in the €150 price range which covered my costs but did not return a profit. While there is reasonable interest in the re-run of the heating and luggage van kits only two people have expressed an interest in the TPO/heuston Tool Van. -
A Bachmann Class 66 chassis may fit, quieter more reliable running https://www.ebay.com/sch/i.html?_from=R40&_trksid=p2499334.m570.l1313&_nkw=bachmann+ews+class+66+&_sacat=122604
-
There are a number of pre-War "logs" with average speeds in the mid-eighties on the Dublin-Cork and Dublin-Belfast main lines in O.S. Nocks Irish Steam. There is a record CJ Allens log of the 1934 record breaking non-stop Cork-Kingsbridge run of the rebuilt Watson 4-6-0 402 with 3 coaches (MGWR Royal Saloon, Dining Car & Bogie Full Brake) conveying the newly appointed United States Minister to the Free State. Average speeds in the high 60s-70s were maintained north of Limerick Junction with an average of 85.6 between Ballybrophy and Portlaoise (Maryborough) where the record 87mph was recorded. A top speed of 82.5 was recorded between Rathduff and Blarney on a 1937 southbound run of the Kingsbridge-Cork (English mail) with a 9 Coach 290/310 train behind Caprotti rebuilt Watson 4-6-0 401 average speed seems to have been in the high 60s north of Mallow with a maximum of 72 recorded between Templemore and Thurles. Nock described the coal as little better than slack which tended to congeal when sprayed with water to control the dust, at station stops two men came forward to assist the fireman trim the coal forward otherwise it would have been difficult for the fireman to maintain speed. 401 was recorded at a maximum of 71 between Hazlehatch and Lucan with a 360 ton train on the return leg of the "English Mail" probably the GSRs crack train. "Maeve" was reportedly achieved a maximum of 92mph on a demonstration run in July 1939. Nocks detailed August 1939 log of Maedb with a 450 ton train on the up "English Mail" achieved a maximum of 79mph between the Curragh and Newbridge with speeds in the high 60s-mid 70s onwards to Clondalkin. The train was strengthened to accommodate a large number of returning passengers off a Transatlantic Liner and an opportunity to test how much the new locomotives could haul without assistance up the steep grades out of Cork station. 800 hauled the train out of Cork without a problem train and kept time despite problems with poor quality coal and the regulator sticking briefly. There was a full house with 7 people on the footplate as far as Mallow with the District Locomotive Inspector, Cork Shedmaster, a local running inspector and an engineer from Inchacore coming along for the ride! The book includes a log of a Belfast-Dublin run of the Up Limited mail behind 173 Galteemore with 225 tons or 7 coaches to Dundalk and 8 coaches or 260 tons onwards to Dublin a maximum of 86.5 was recorded on the downhill section between Adavoyle and MP55.5 with speeds in the 70s between Moira and Castlebellingham. South of Castlebellingham speeds were mainly in the high 60s with a maximum of 78 between mp 16 and Malahide, the crew also had to contend with fog between kellystown Box and Drogheda.
-
Kilmacthomas would make an excellent scenic and operational layout, with the river, town and the railway structures against the backdrop of the Comeragh Mountains. Goods traffic appears to have been quite heavy with a small goods yard at the station and the Fair Green siding which connected to the main line on a ridge between the two viaducts. Flavahan's appear to have been the biggest shipper their porridge by rail! The signal box, crossing loop and a short siding was retained at Kilmacthomas when the line was re-opened for Quigley Magnesite traffic in the early 70s until final closure in 82? The Dolomite trains from Bennetts Bridge to Ballinacourthy were the heaviest in Ireland up to the start of Tara Mines traffic in the late 70s, two trains daily in each direction 20 wagon rakes of 4w hopper wagons (same as IRM model) worked by pairs of B141/181 diesels. The daily Tivoli-Ballinacourthy Magnesite & oil train was regularly hauled by a single 001 Class hauling a mixed rake of covered magnesite hoppers and tank wagons. In steam days Woolwich Moguls worked the trice-weekly Cork-Rosslare Express with a small wheeled Coey 333 Class 4-4-0 working the Daily Cork-Waterford Passenger & the 101 or J15 Class the goods. B101 Class took over passenger & possibly goods workings until replaced by B121 & B141 Class and A Class before the 1967 closure of the line.
-
Feast or Famine - Passenger Stock for A's and 121's
Mayner replied to DJ Dangerous's topic in Irish Models
There is always the option of following the late David Jenkinson's example in "Carriage Modelling made easy" and scratchbuilding the models that are not produced as rtr models or kits. David Holman's MGWR brake and convertible wagons are excellent examples, using simple techniques. -
I love the BW Beetle presumably delivering milk to the creamery, the Mercedes and green sports car evidence of 1960s rural prosperity. My mother and father were invited to a wedding in Ballinasloe around the same time and were totally taken aback by the signs of my fathers farming cousins prosperity, flash cars, high fashion and extravagant hospitality.
-
Re-building is covered in the August blog, https://cpineroad.blogspot.com/2020/08/00-works-class-330.html. The builder ended up replacing the chassis, motor and gears to improve the standard of low speed running! It looks like a decoder would have to be hard wired just might fit in the tank
-
Link to a review of the Southern Railway version of the model and the potential challenges in fitting a decoder. https://cpineroad.blogspot.com/2020/07/00-works-class-0330-0-6-0-saddleback.html The buyer re-built the loco with a two stage High level gearbox and Mashima motor because he was not satisfied with the slow running characteristics on the loco
-
Cattle traffic ceased in 1975, the heaviest traffic used to be from the seasonal cattle fairs from cattle breeding country in the West and Southwest to farms in the East for fattening (finishing) and for export. Most of the cattle traffic was lost with the shift from seasonal cattle fairs to cattle marts and the shift from live exports to meat processing during the 1960s. In later years cattle was transported by rail to meat factories plants at Roscrea and Grand Canal Street Dublin were served directly by rail, the Leixlip Plant was served by road from Hazlehatch on the Cork Line and Leixlip on the Galway Line. Leixlip and Hazelhatch were among the last stations to handle livestock traffic.
-
Thursday Walkabout on the Main Trunk Line
Mayner replied to Mayner's topic in Photos & Videos of the Prototype
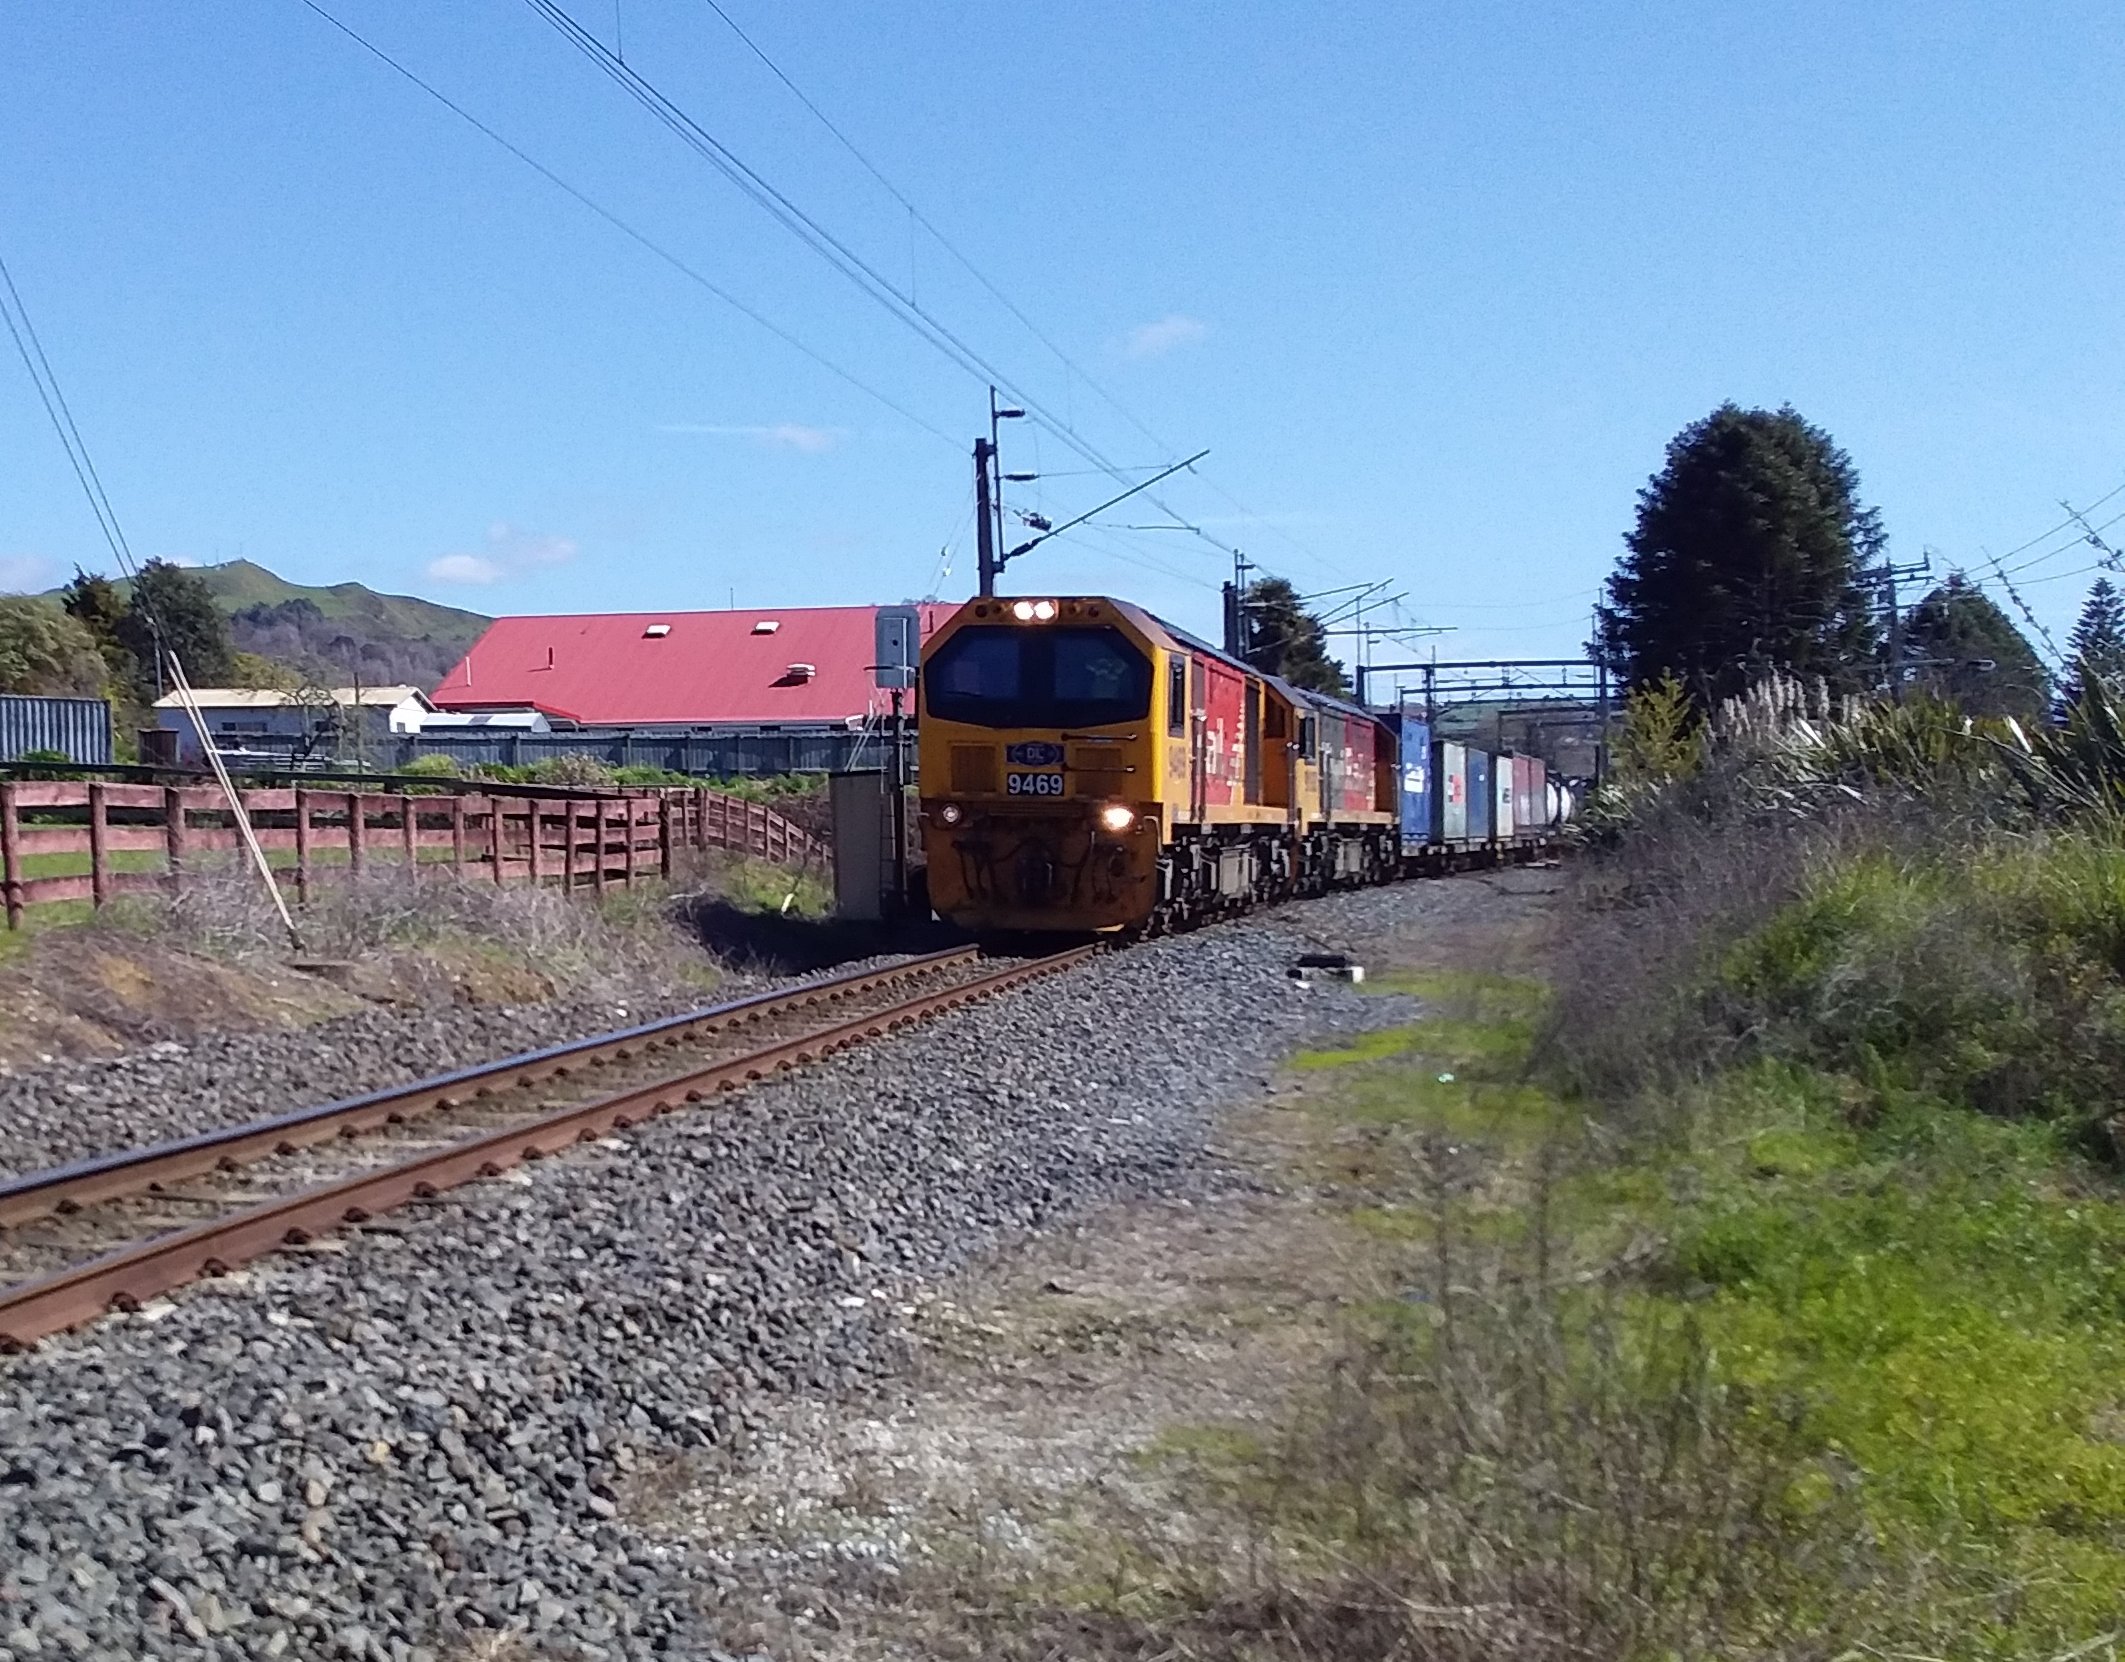
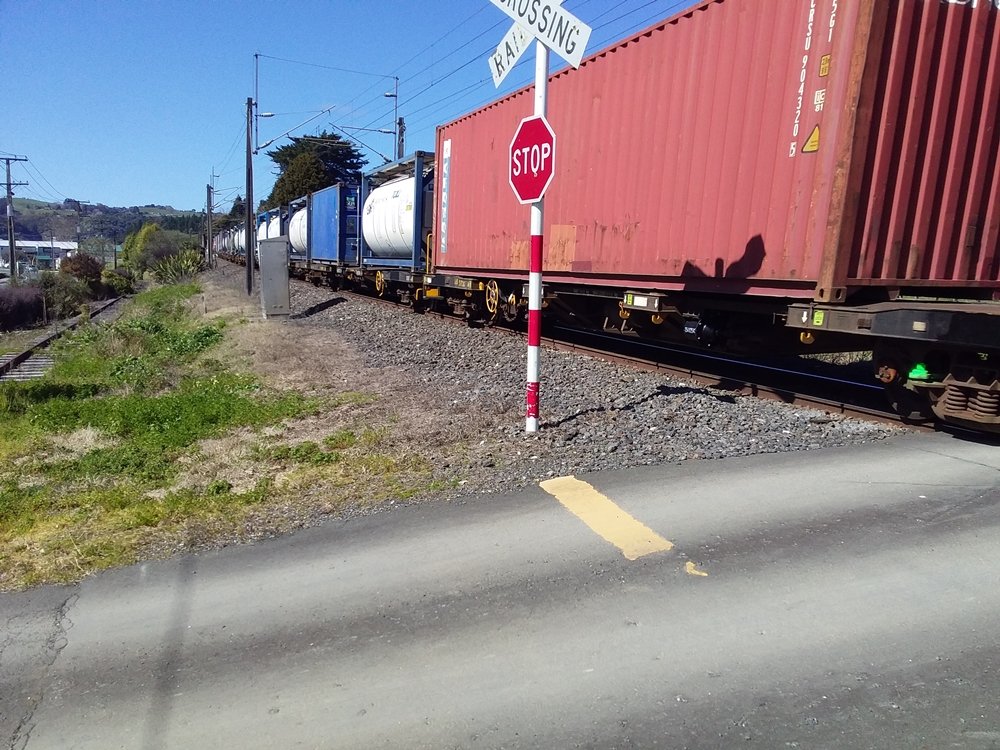
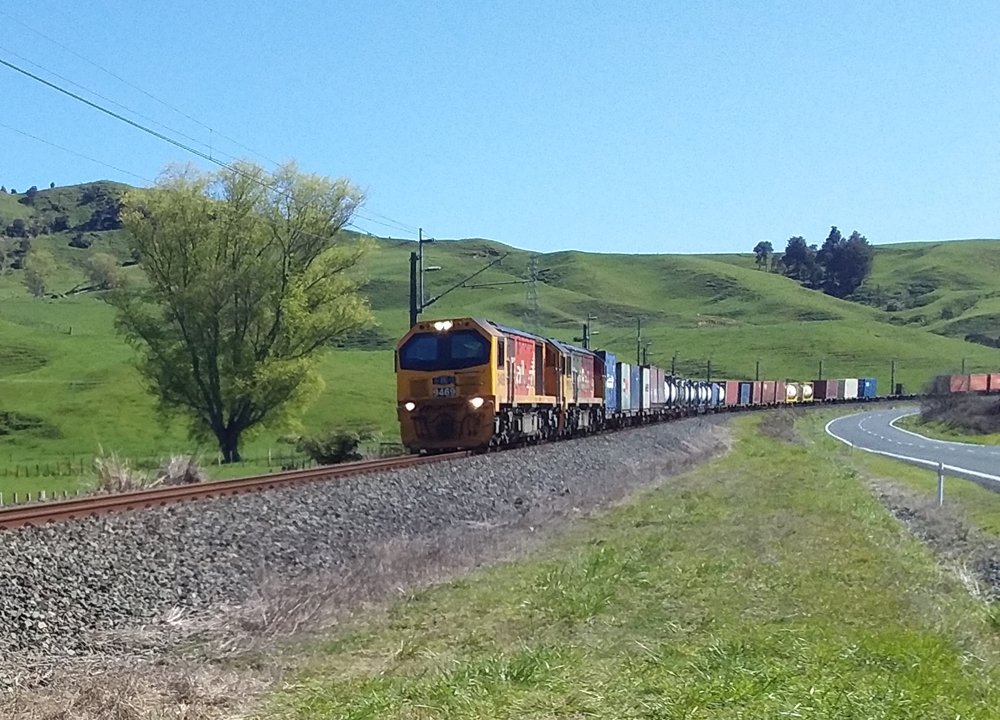
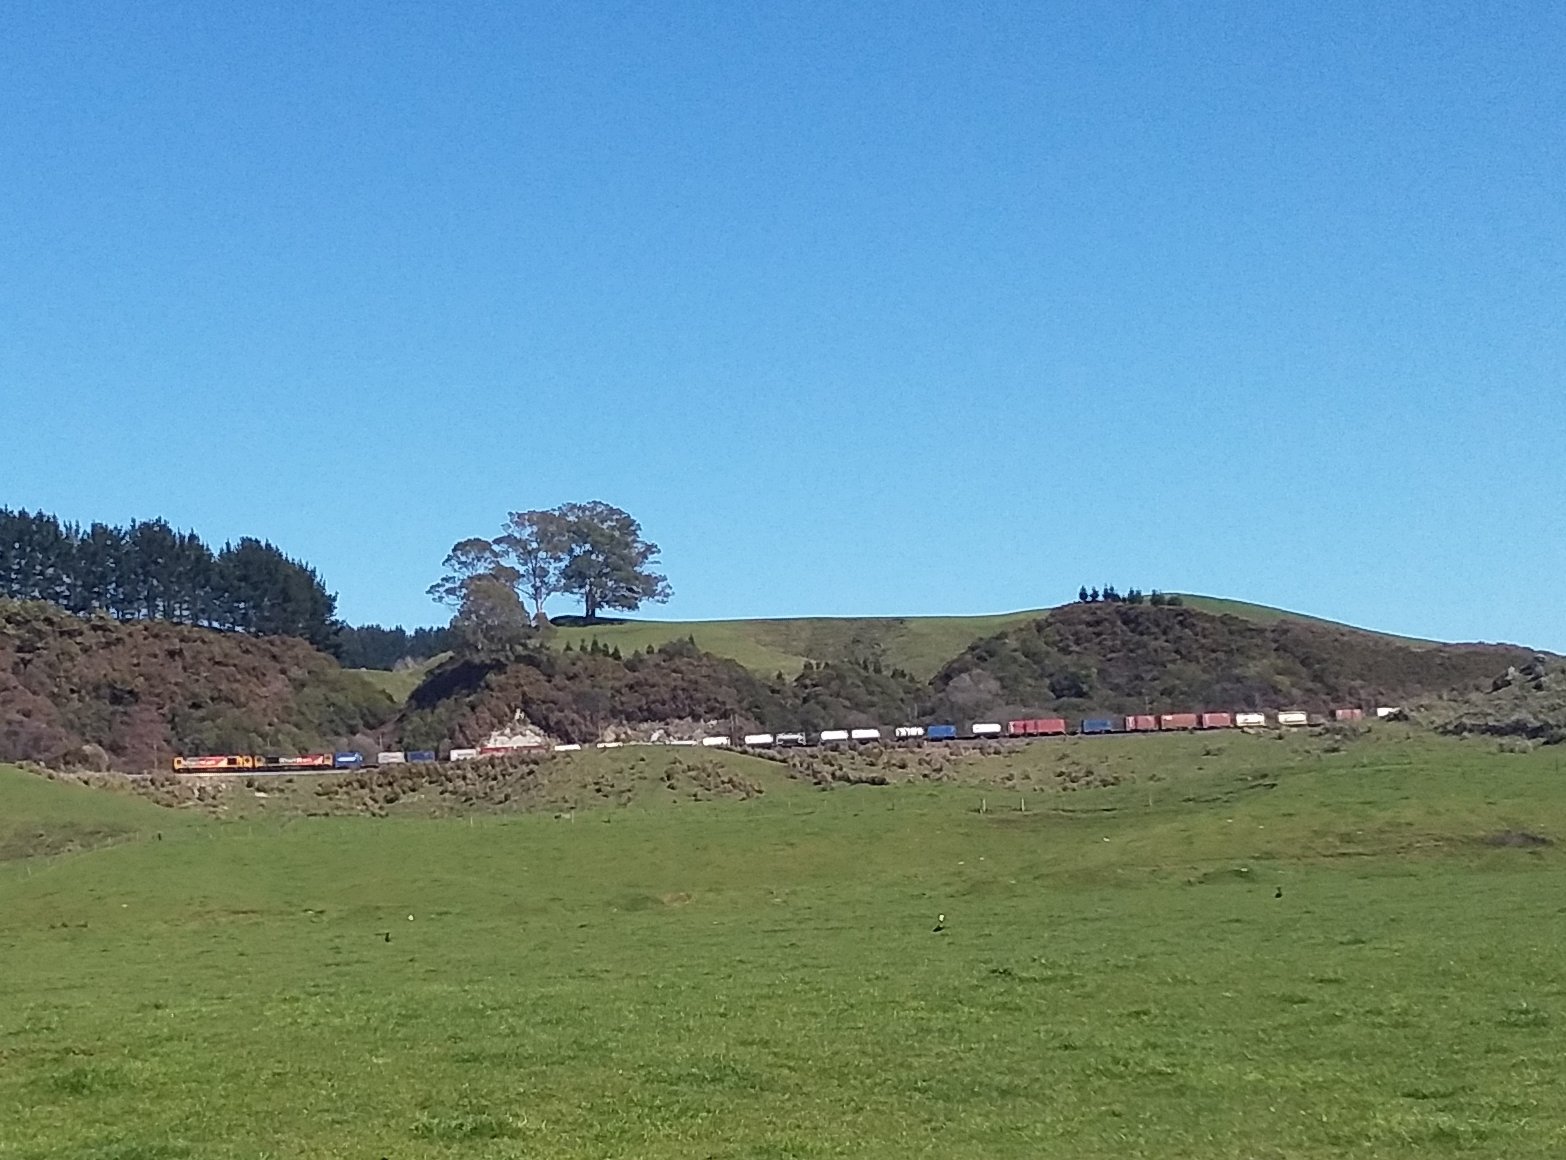
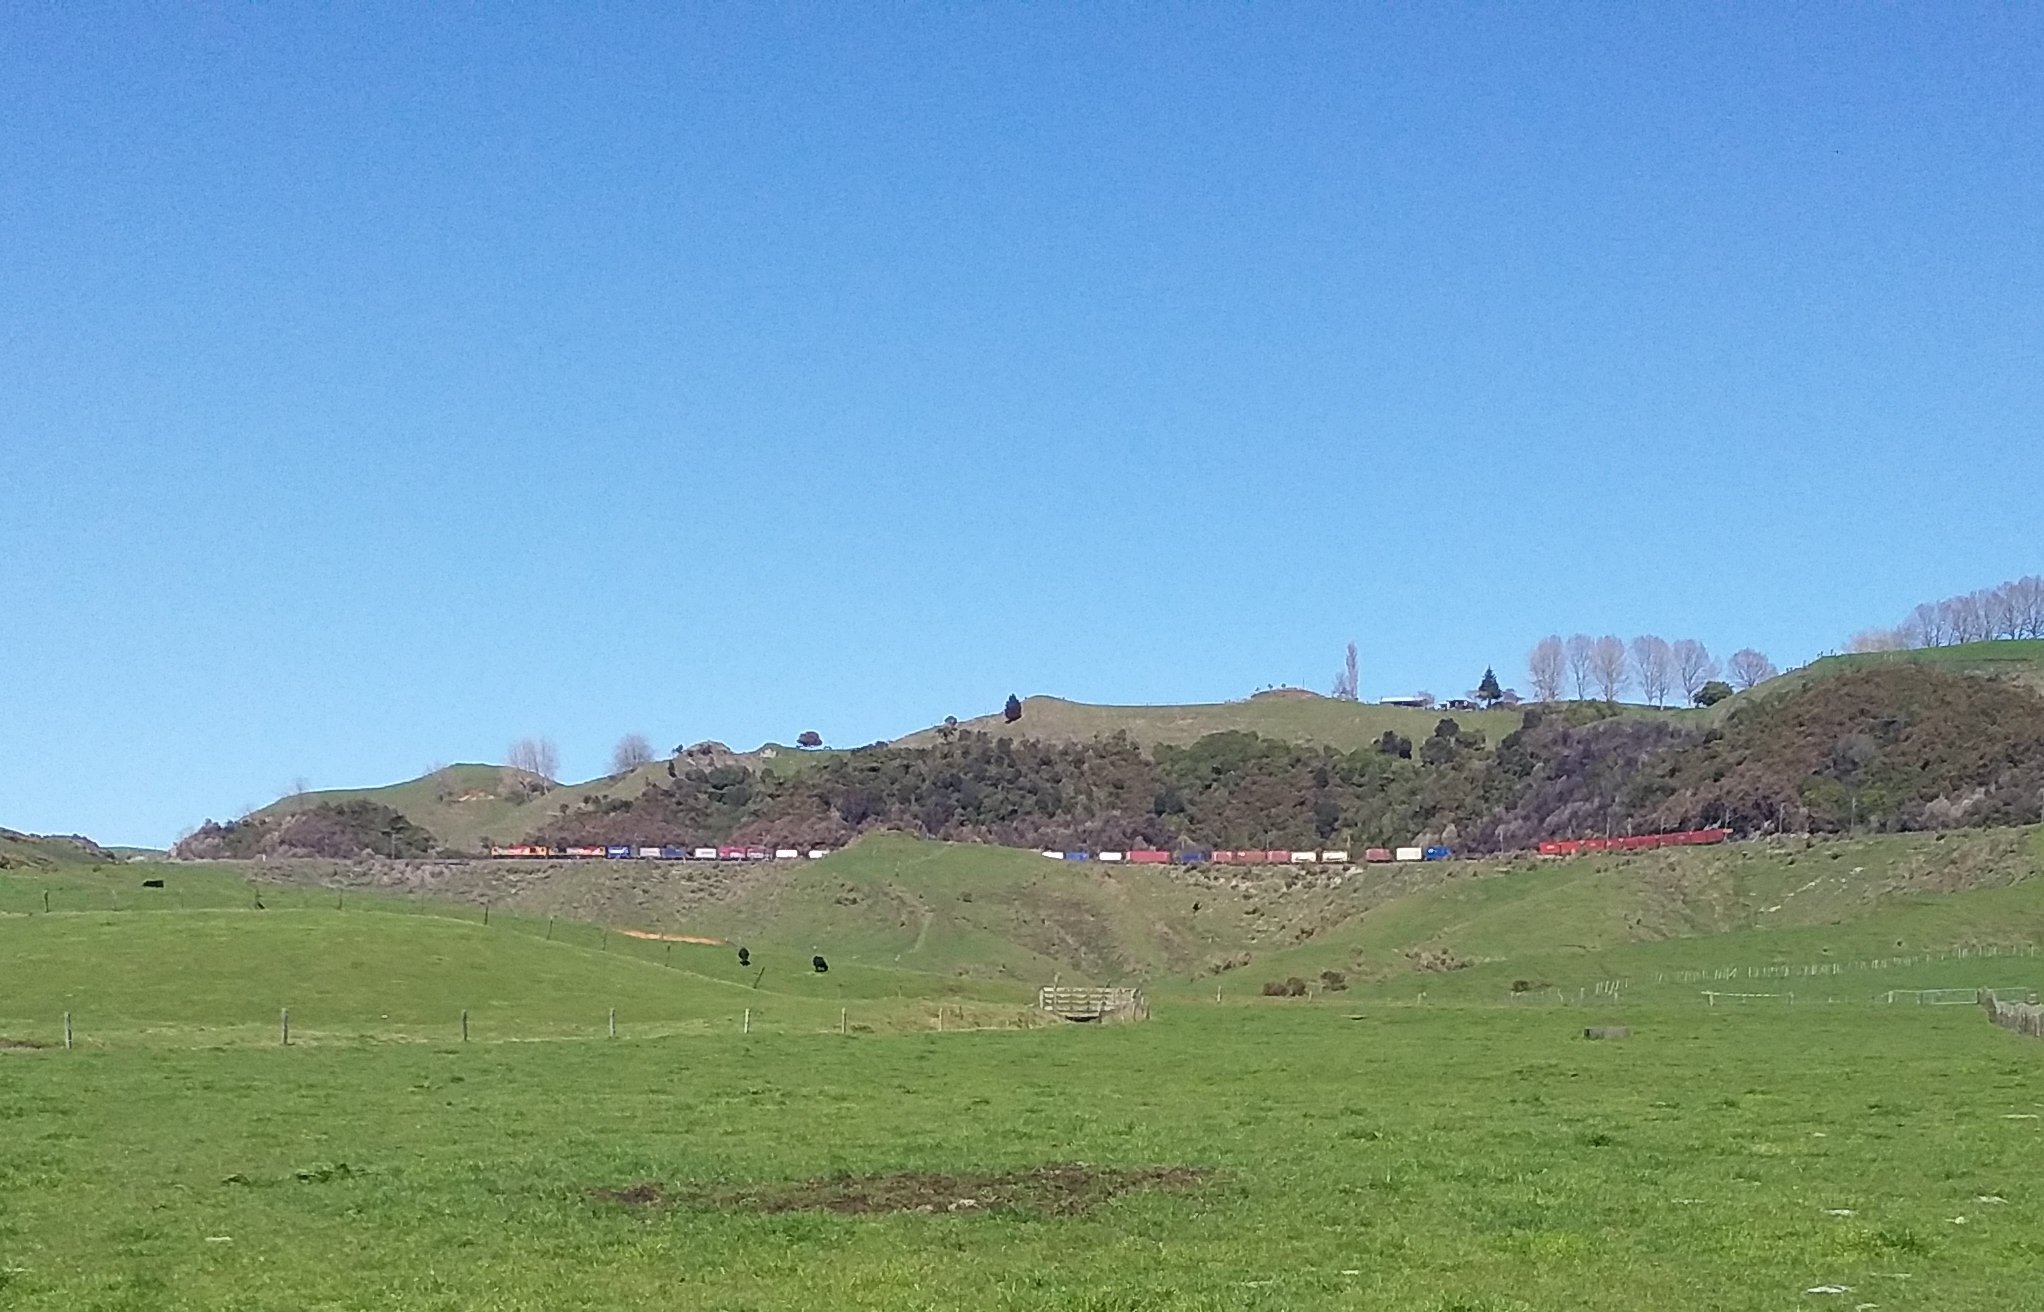
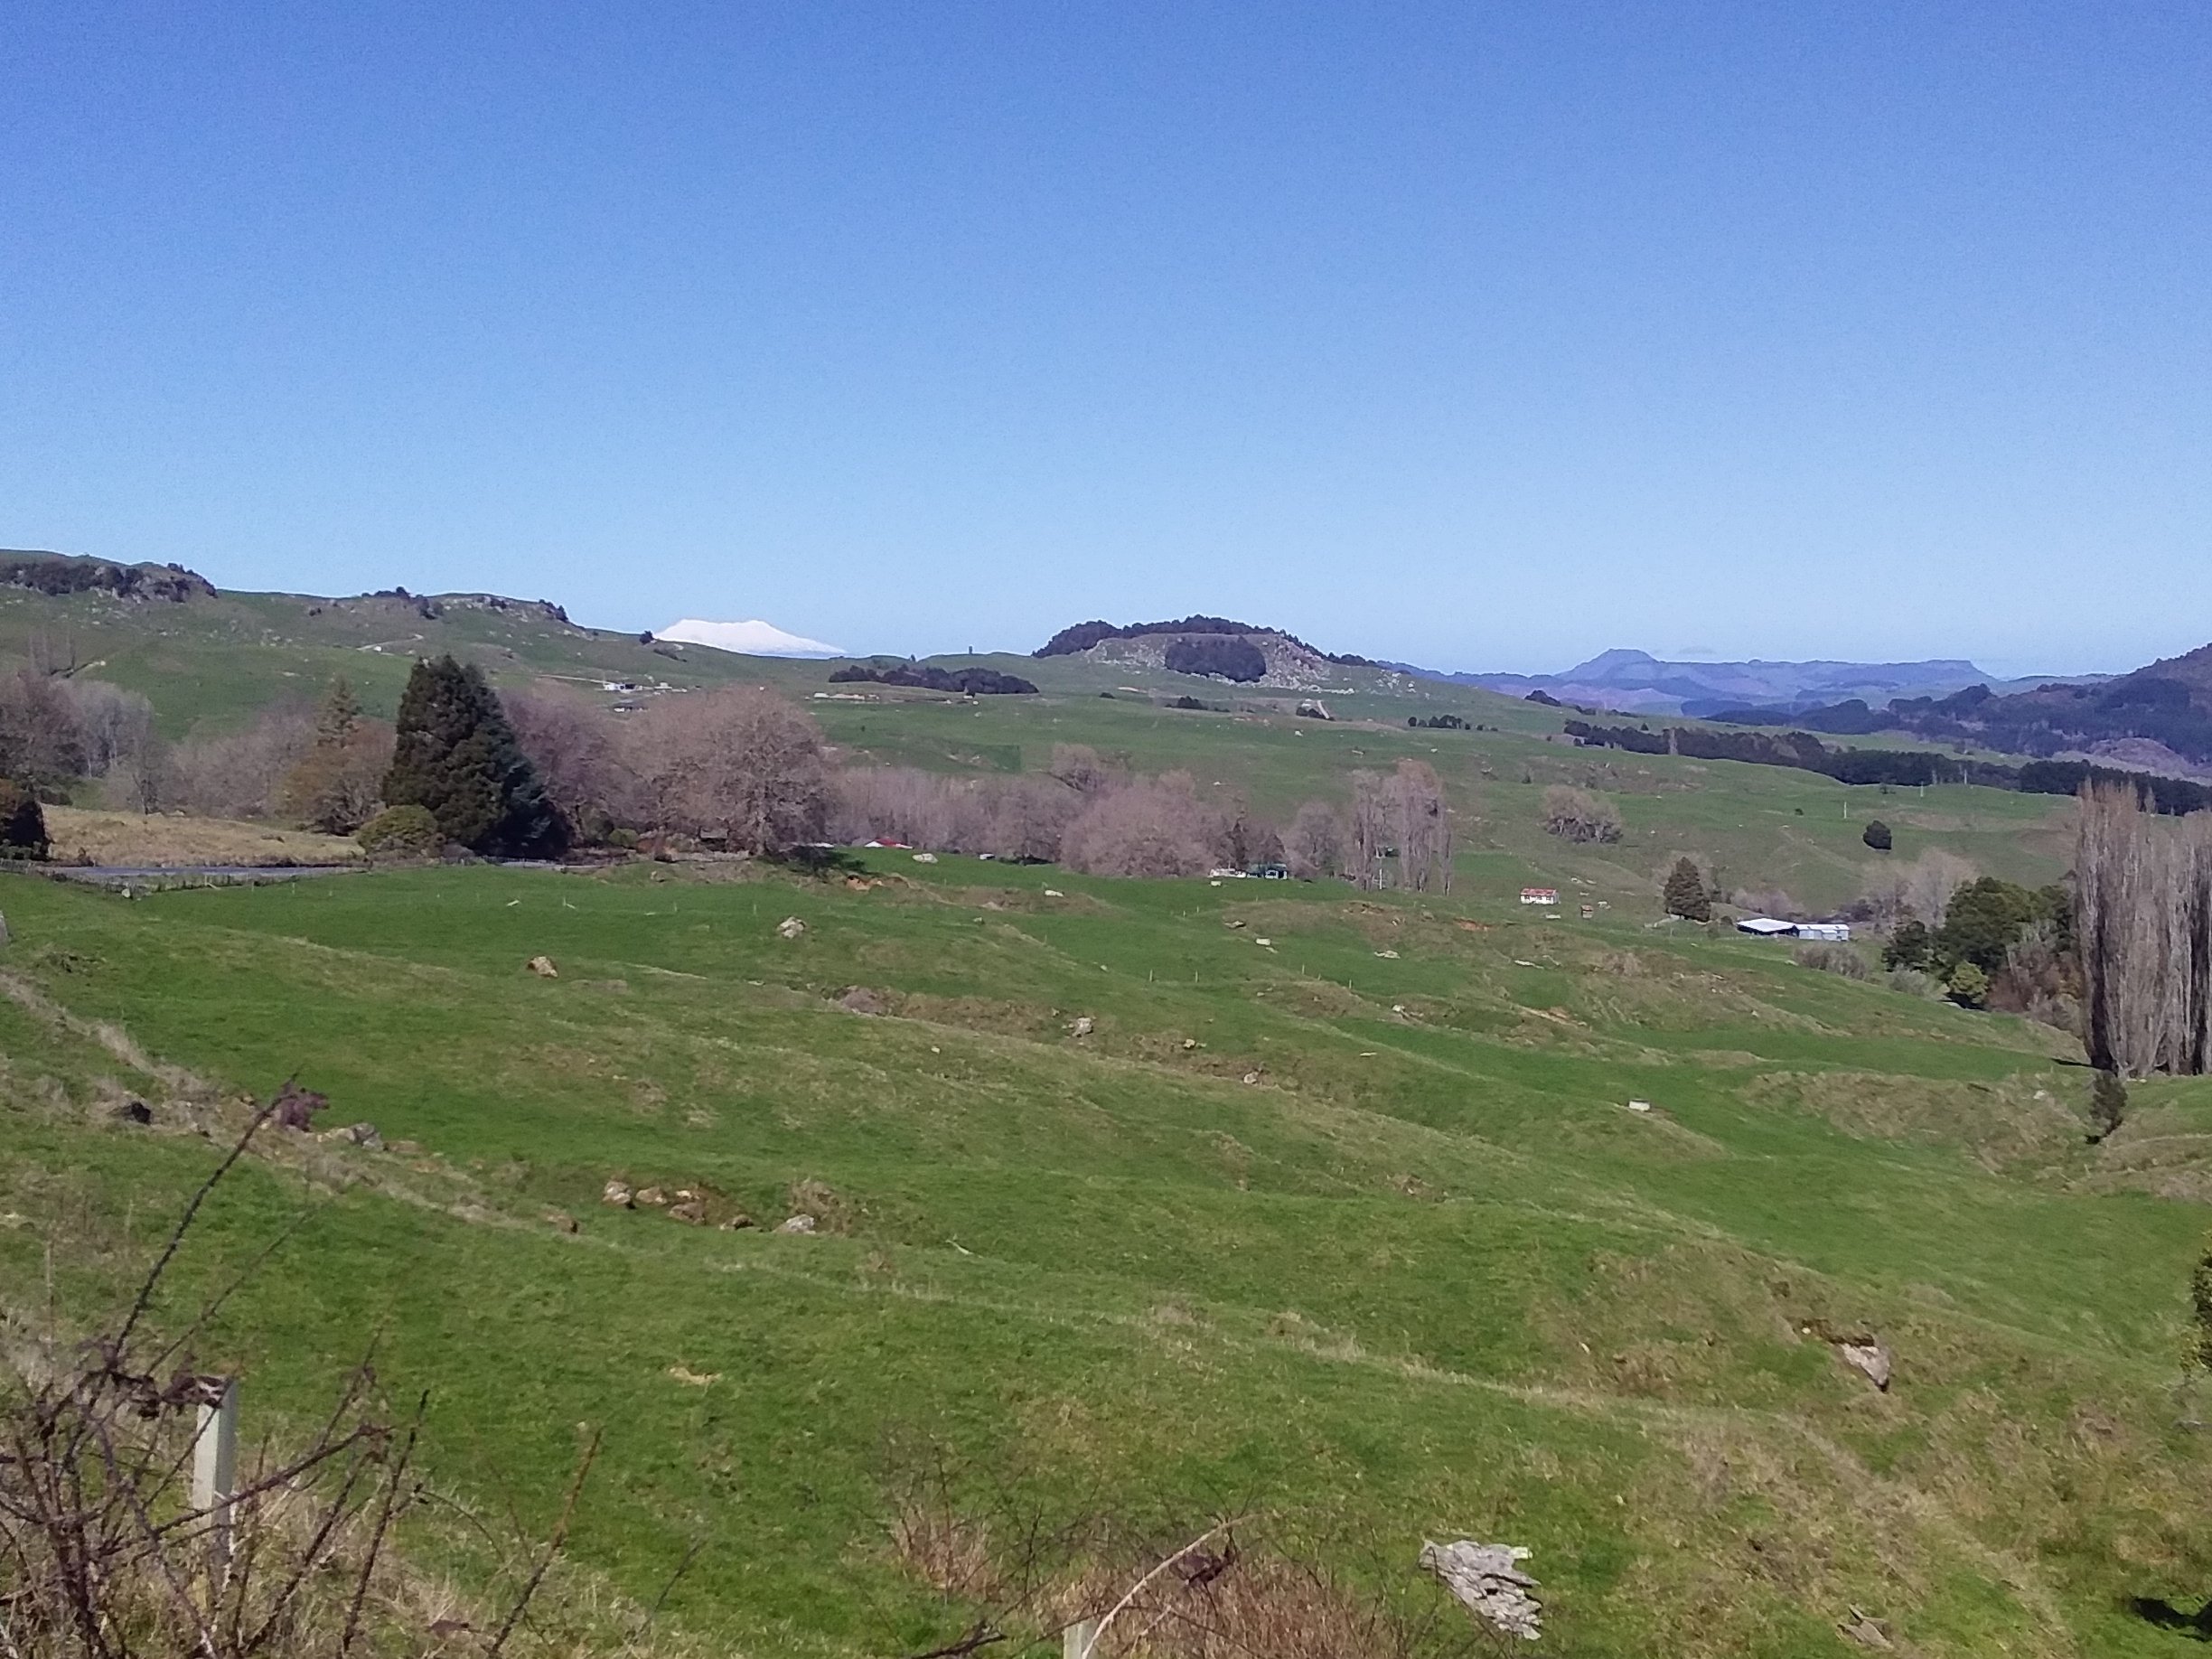
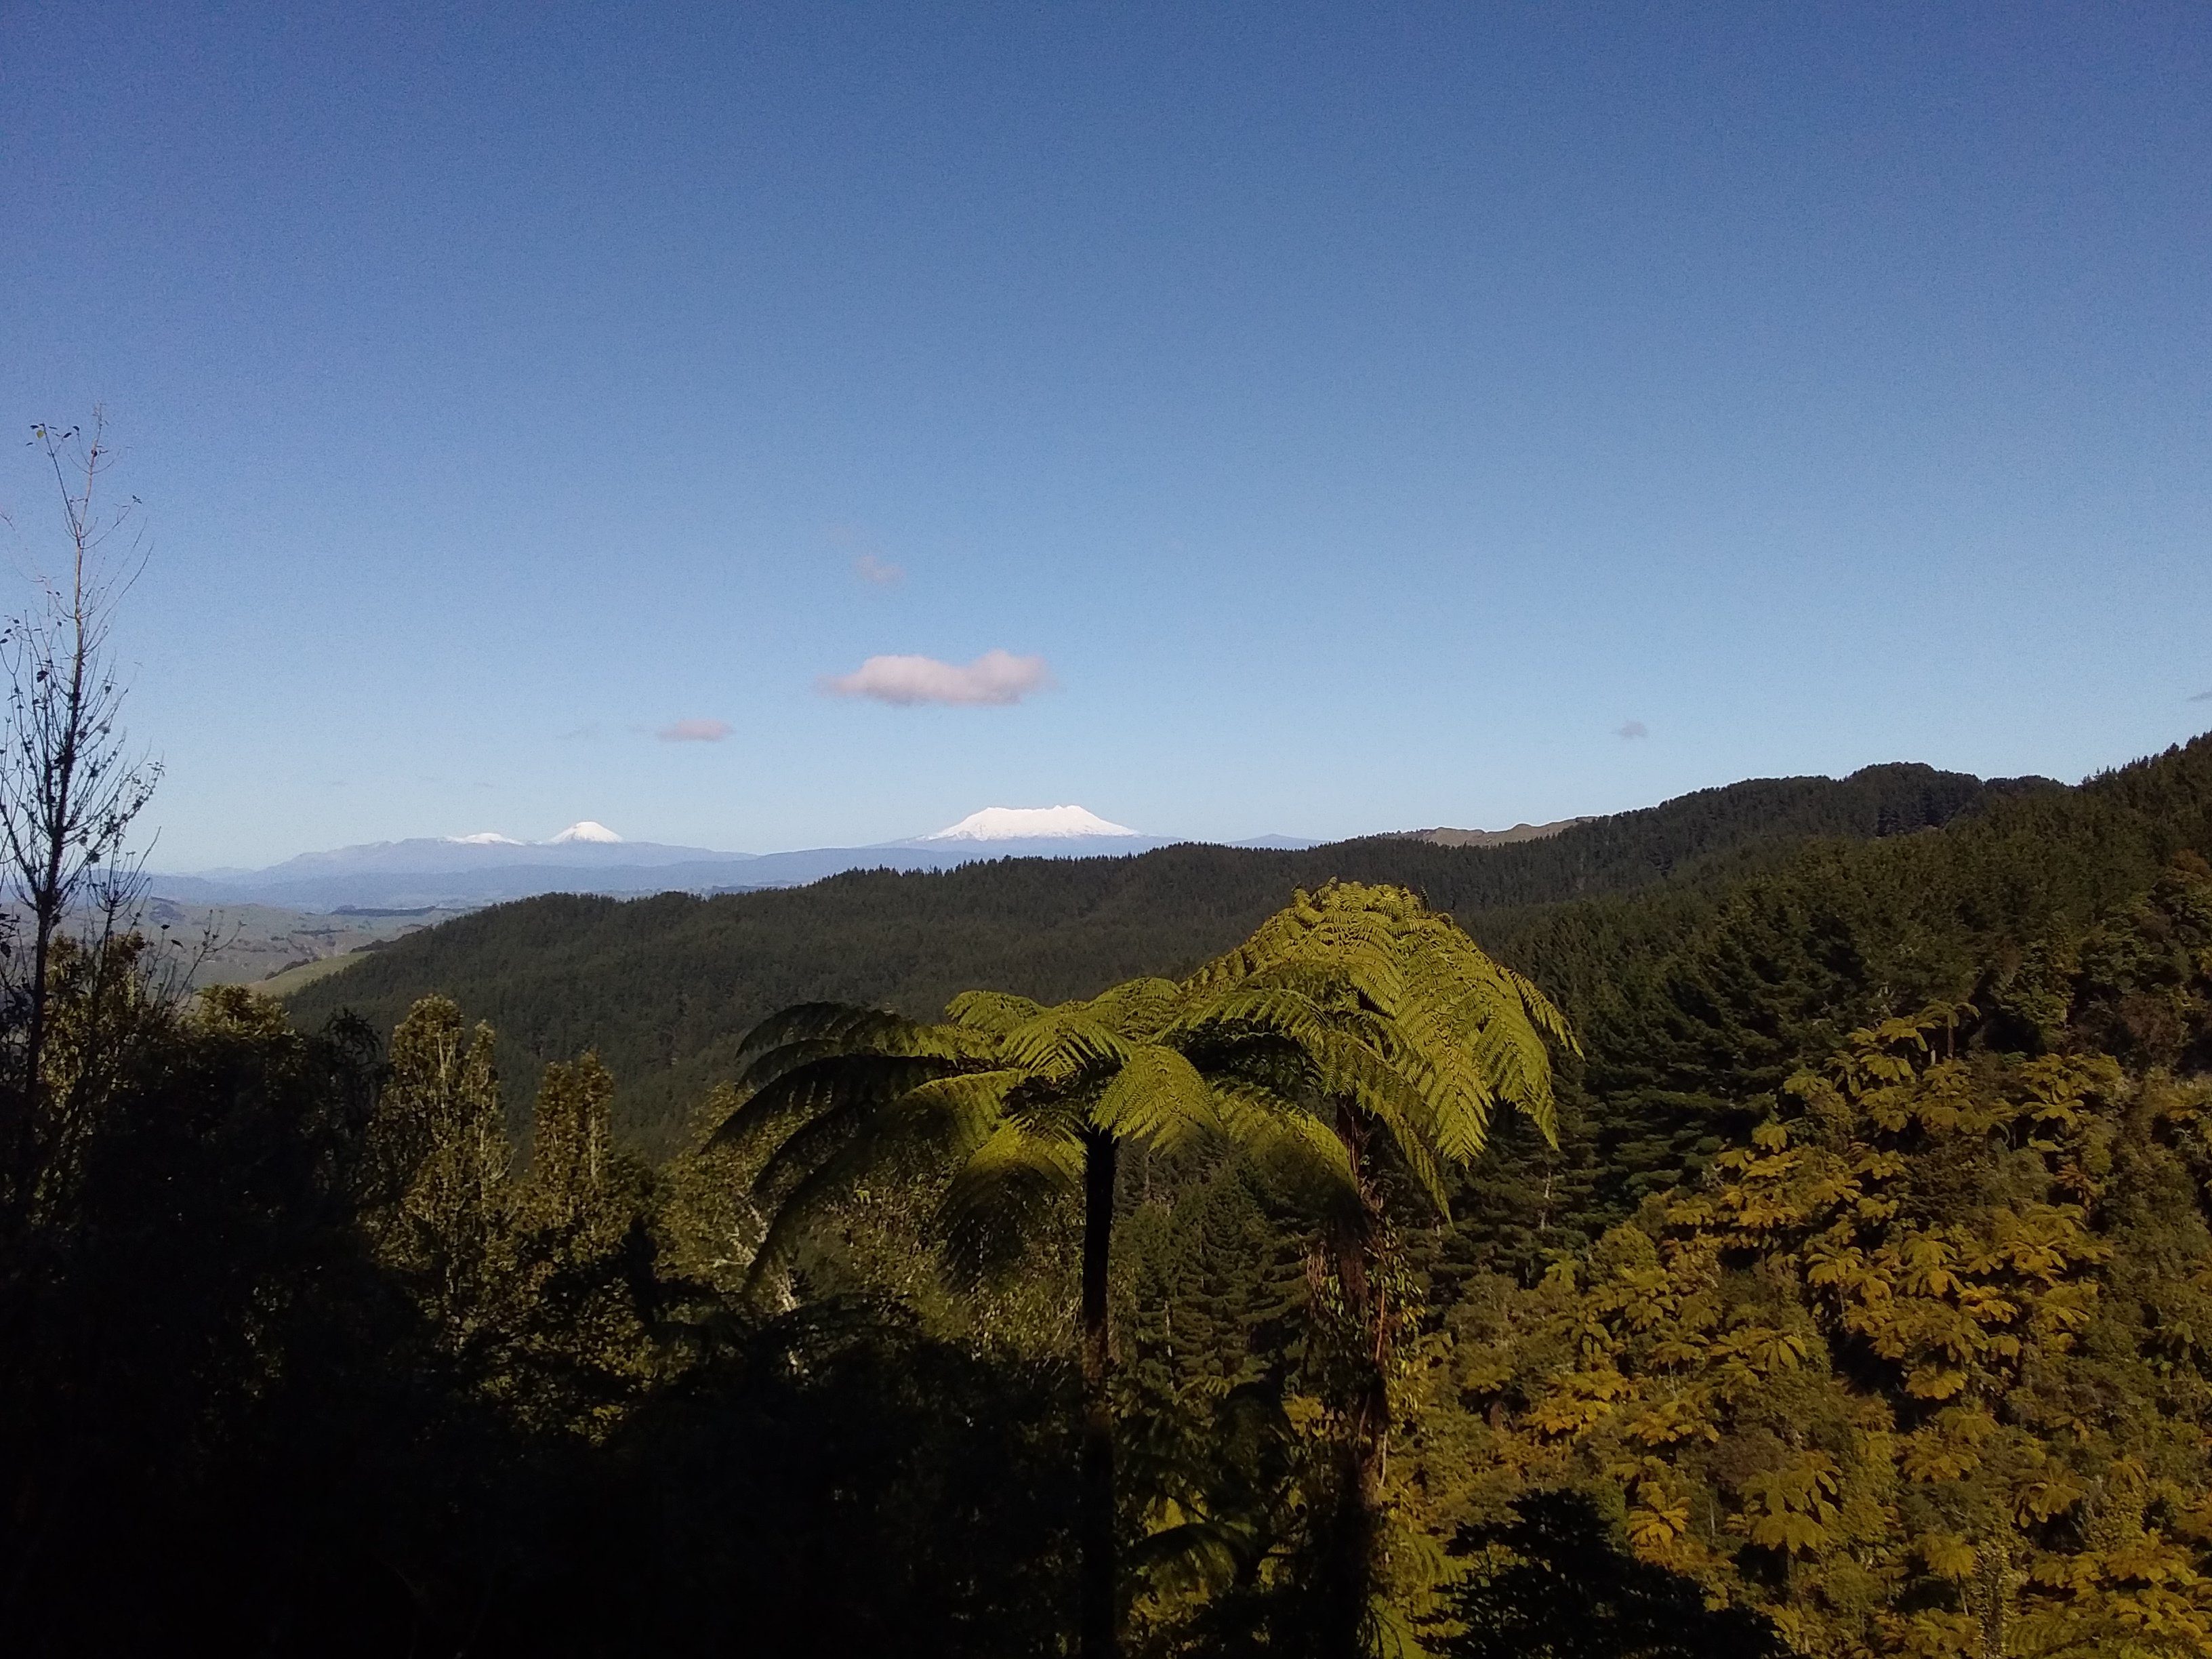
Eight months later another day on Walkabout in King Country that did not exactly go to plan. The basic idea was to cycle the remains of the Ongarue Tramway and famous Spiral https://www.doc.govt.nz/parks-and-recreation/places-to-go/waikato/places/pureora-forest-park/ongarue-tramway-and-spiral/ but my knees were no longer up to it and I had to turn back after 3km. Still it was a beautiful sunny day a good escape from the cabin fever of the last 5-6 months. Signals were clear for a Southbound train at Te Kuiti so I decided to follow the railway line than the more direct SH3 & 4 Route to Ongarue. The Southbound freight was not far off, the Northern Explorer passenger train as overseas tourists are 3extremely scarce with the drop off in international air travel. After the almost level 200Km run from Auckland a pair of 3,600Hp Chinese built DL locos at the beginning of the approx 32km 1:70 climb from Te Kuiti to the summit at Poro-O-Tarao tunnel. The railway line on the left is the remains of the 2km Te Kuiti Industrial line which served local industries including a limeworks and a bulk fertiliser depot. Further up the valley the railway runs alongside SH30 before entering a narrow gorge where the railway climbs to a higher level. I was using an Android phone and had hoped to capture the train passing a distinctive round roof barn, a distinctive structure on this section of the line but could not see the screen in strong sunlight! Once clear of the gorge the line runs along a ledge between the valley floor and surrounding hill country. Train is about to pass through a shallow cutting as it approaches the Kopaki Passing place before passing into another gorge before entering a wider section of the valley. View of snow clad Mt Ruapehu from the watershed between the Waikato and Waunganui river systems, leaving the Poro-O-Tarao tunnel the railway runs through the Ongarue River Valley on the extreme right of the photo. The Ongarue system which lasted into the 1960s used American Climax, locally built AJ Price geared logging locos. https://teara.govt.nz/en/photograph/12244/wooden-trestle-viaduct Typical central North Island bush and the three active volcanoes from right Ruapehu, Ngauruhoe and Tongariro. A former workmate found this particular viewpoint while working in the area in 2017 and it sounded like it was worth checking out. Most of the bush (forest) is second or possibly 3rd generation re-growth after the land was cleared for agriculture about 100 years ago.
-
Feast or Famine - Passenger Stock for A's and 121's
Mayner replied to DJ Dangerous's topic in Irish Models
Even long distance Intercity services from Heuston to Tralee & Westport made up of conventional stock could include quite a mix of coaching stock until replaced by MK3 & MK2D rolling stock in the mid 1980s. A typical Heuston-Tralee or Westport service would included a mixture of Craven, Park Royal and Laminate stock, a Buffet Car and BR van regularly loading up to 8-10 coaches regular formations on the Connolly Sligo & Rosslare services tended to shorter 5-6 coaches including Buffet & Van. Formations were strengthened off with older stock borrowed from Dublin Suburban services at weekends and for peak Summer and Christmas/New Year traffic. CIE had a habit of reducing train frequency, running longer trains and sometimes combining trains for different destinations during periodic economy drives. Midland Section trains sometimes loaded to 12-14 coaches on a number of occasions when Dublin-Galway-Westport-Sligo services were combined into a single train with Dublin-Galway trains detaching through coaches for Sligo at Mullingar and Westport at Athlone combined trains last operated for a short period during the 1970s oil crisis. Knock specials regularly loaded to 12-14 coaches of conventional stock into the mid 1980s. -
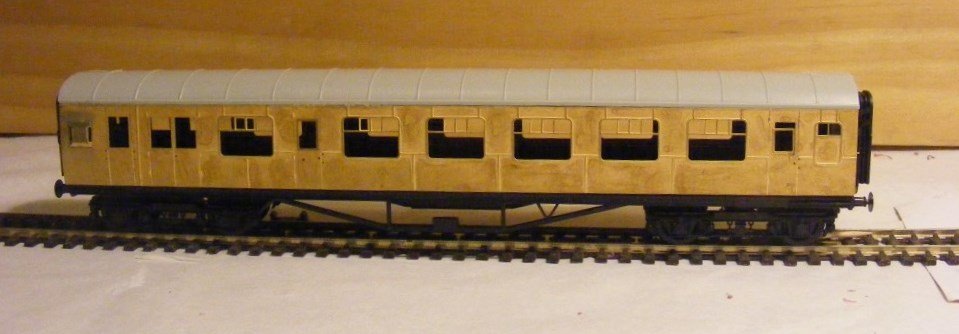
The saga of CIE Brake Standard coaches is a bit complicated. CIE built 10 Brake Standards of two different designs in 1950s and converted a further 23 Standard and Composite coaches to Brake Standards and Brake 1st in the early 1970s. A Laminate Brake Standard from the 1909-1913 series dating from the late 1950s was fitted with storage heaters for use with the G611 Class locos on the Branch in 1963. The "Loughrea Coach" (I don't recall the number) entered service on the branch in the light green livery. Jonathan Allens 1971 photo of B163 with a Laminate Brake at Loughrea. https://www.flickr.com/photos/152343870@N07/26240340648/in/album-72157714061635252/ The Laminate appears to have been replaced at some stage by 1904 a 1904-1908 series Brake Standard dating from 1953. https://www.flickr.com/photos/152343870@N07/40357066271/in/album-72157714061077963/ Locomotives & Rolling Stock of CIE & NIR (1979) notes that 1904 is fitted with storage heaters and in use on the Ballina Branch. The 1970s Brake Standards & Brake 1st were converted from Laminate Suburban coaches (one survives in use with the RPSI) and 1951-1953 stock and differ significantly in appearance. Silver Fox produce a rtr model for the 1953 Brake Standard http://silverfoxmodels.co.uk/ir-ie-open-brake-3rd-coach/ (some lost their guards look outs), I produced a set of side overlays complete with lookouts to fit a Dapol Stanier Coach & Worsley Works produce a set of brass parts (sides, ends underframe) as a scratchbuilders aid to build a 1909-1913 Laminate Brake The Dapol overlays are a compromise in terms of length, width and end profile, but less of an undertaking than scratchbuilding or building a coach with the assistance of the Worsley Works parts.


.jpg.17f74d98295f230d7811b9e0975dacd2.jpg)