Galteemore Posted April 4, 2019 Author Posted April 4, 2019 Primer’s on and she’s off to bake in the hot press for 2 days.... 6
Galteemore Posted April 5, 2019 Author Posted April 5, 2019 (edited) Sorry JHB - all his etched kits are 7mm. Come on in, the water’s lovely! Edited April 5, 2019 by Galteemore 3
jhb171achill Posted April 5, 2019 Posted April 5, 2019 6 hours ago, Galteemore said: Sorry JHB - all his etched kits are 7mm. Come on in, the water’s lovely! Jhb171Senior (whom you may remember) was a big 0 gauge man. All gone now, unfortunately, beautiful old coarse scale 1920s stuff. I could be tempted - but where to put it!
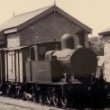
Galteemore Posted April 6, 2019 Author Posted April 6, 2019 (edited) Indeed I do remember JHB senior - proper railway gentleman of the old school. If it’s any consolation I’m sorely tempted by what OO works have been churning out but after experimenting in a variety of scales this is where I’ll stay for now. O gauge needn’t take up too much space though - Some pics of my now sold English light railway - all in 5’ by 1’.... Edited April 6, 2019 by Galteemore 2
NIR Posted April 6, 2019 Posted April 6, 2019 (edited) 7 hours ago, Galteemore said: Indeed I do remember JHB senior - proper railway gentleman of the old school. If it’s any consolation I’m sorely tempted by what OO works have been churning out but after experimenting in a variety of scales this is where I’ll stay for now. O gauge needn’t take up too much space though - Some pics of my now sold English light railway - all in 5’ by 1’.... That is the one area of British outline I would consider modelling, a quiet Southern branchline terminus or Colonel Stephens light railway Edited April 6, 2019 by NIR
Galteemore Posted April 9, 2019 Author Posted April 9, 2019 No progress on the hearse as I’m away with work. First green coat will go on when I get back. But what to do on my week away? I packed a basic modelling box to use in the downtime and set about my first ever scratch build. This is the result of the first burst of activity. It’s a 3 plank MGWR open from a plan in Ernie Shepherd’s MGWR book. Loads of mistakes already but as ever learning as I go...wheels,body and underframe are currently at 3 different locations around the UK so it won’t be finished as soon as I’d like. If it goes well I may get more adventurous. 3
Galteemore Posted April 9, 2019 Author Posted April 9, 2019 (edited) Tonight’s little experiment. Wagon body is made from 60 thou plasticard which makes a strong carcass but doesn’t really offer much scope for detailing beyond grooving planks. So tonight’s effort has been a sheet of 10 thou with rivets pressed in by hand to make the corner strips..it’ll look ok from a distance ! Edited April 9, 2019 by Galteemore 4
David Holman Posted April 9, 2019 Posted April 9, 2019 It will, for sure, though there is a lot more work in an open wagon than two sides, two ends and floor. My Clogher Valley opens had around 200 separate pieces if you count each rivet - though best not to! A coat of paint and it will look fine, to say nothing of the immense satisfaction of having made it yourself. Nice one! 1 1
Galteemore Posted April 11, 2019 Author Posted April 11, 2019 The wearing of the green - part 1 CIE mid 50s green - now there’s an issue! Being a former modeller of 1930s Southern Railway, I had a tempting can of olive green. But no - not quite the thing. My cunning plan that followed was Ford Meadow Green - but that’s not quite right either..I took a long hard look and tried again but I’ll post that one later tonight when it’s dried a bit 1
jhb171achill Posted April 11, 2019 Posted April 11, 2019 It's not 100%, but it's not far off it either. Since a vehicle like this would rarely see a paintbrush, it would spend almost all of its life very weathered looking. Once you've applied the lining and "snails", I suspect it would look just right with mid to heavy weathering on it. The green you've used is fortuitously somewhat "flat" compared with what a newly painted vehicle would look like. That would fit very well with the above idea. Seeing it in daylight is the key to judging it. ....And you're quite correct in not using British SR green - it was nothing like the CIE shade!
Galteemore Posted April 11, 2019 Author Posted April 11, 2019 (edited) Thanks JHB - I then tried this...the wearing of the green part 2.... Which to my eye looks closer out of the two to this... Edited April 11, 2019 by Galteemore 2
jhb171achill Posted April 11, 2019 Posted April 11, 2019 That is SPOT on. I spent the first 25 years of my life looking at an actual sample (with a flying snail on it; my "logo" here) on the wall in our house. That's exact, whatever shade it is.
Galteemore Posted April 11, 2019 Author Posted April 11, 2019 4 minutes ago, jhb171achill said: That is SPOT on. I spent the first 25 years of my life looking at an actual sample (with a flying snail on it; my "logo" here) on the wall in our house. That's exact, whatever shade it is. Thanks - that’s endorsement! I’ll post a better pic later. But it’s Rover Brooklands green over Ford Meadow Green over Grey Primer... all from Messrs Halfords
jhb171achill Posted April 11, 2019 Posted April 11, 2019 Worth making a note, for others following in your footsteps. I suspect, though, that while car paint is perfect for 0 gauge, for smaller scales it might look a bit shiny - perhaps others here might like to comment on that, as I'm not an expert on paint? 1
murrayec Posted April 11, 2019 Posted April 11, 2019 4 minutes ago, jhb171achill said: perhaps others here might like to comment on that, as I'm not an expert on paint? Hi Guys After decals and lining is done spray with a satin or matt varnish- 'Alclad II Semi-Matte' does a fantastic dullish job..... Other possibility's if using Halfords paint for air brush- is to ask for matt paint not gloss when ordering, or use Phoenix Pints Matting Agent. Eoin 1 1
jhb171achill Posted April 11, 2019 Posted April 11, 2019 Naturally, the post-1955 green (as applied to laminates and Park Royals and anything else painted after that) is a different lighter colour.
Galteemore Posted April 11, 2019 Author Posted April 11, 2019 (edited) I won’t bore you with pics of this ad nauseam but here’s one last look without masking tape as promised. Travel commitments mean this will not progress any further for a week or two but when the black bits and stripey bits are done I may post a pic or two. Edited April 11, 2019 by Galteemore 3
Galteemore Posted April 11, 2019 Author Posted April 11, 2019 (edited) 50 minutes ago, murrayec said: Hi Guys After decals and lining is done spray with a satin or matt varnish- 'Alclad II Semi-Matte' does a fantastic dullish job..... Other possibility's if using Halfords paint for air brush- is to ask for matt paint not gloss when ordering, or use Phoenix Pints Matting Agent. Eoin That’s absolutely right. The gloss finish helps the decals fix. Here’s one I made earlier which was so treated. Now sold to fund Irish kits, it’s a 4’8” former royal saloon built for the LSWR which finished up with Col Stephens. I used maroon car paint on it which was really glossy but a few coats of satin varnish calmed it down. Edited April 11, 2019 by Galteemore 2 1
Galteemore Posted April 24, 2019 Author Posted April 24, 2019 (edited) Some black on at long last...Eau de nil next ...and thanks to the pics I can see the bits I missed! Edited April 24, 2019 by Galteemore 2
Galteemore Posted April 24, 2019 Author Posted April 24, 2019 (edited) On a roll of sorts tonight. Did a bit more work on the MGWR open / end stanchions and some 10 thou riveted overlays fitted..crude but fun. Edited April 24, 2019 by Galteemore 2
Mayner Posted April 25, 2019 Posted April 25, 2019 I love that LSWR Royal Saloon the Timpleague & Courtmacsharry seems to be the closest thing in Ireland to a Colonel Stephens light railway. I built a pair of standard GSR open wagons in 4mm using similar techniques to your MGWR coal wagons simple and great fun to build, though still have not gotten round to fitting the break gear 20 odd years later. 1
Galteemore Posted April 27, 2019 Author Posted April 27, 2019 (edited) A mixed few days. Attempt at eau de nil lining on the MGWR van did not go well. There’s no way I’m posting pictures of what happened! Basically because the bilious green running everywhere was washed off as quickly as I could manage it before it dried! So I’ve requested Railtec for a 7mm version of their lining transfers to be added to my flying snail order. The open wagon inches towards the paintshops. Drilled out the axleboxes tonight and glued in the bearings. Glued on buffers at one end and couldn’t resist a dummy run with the wheel sets...the brown bit you see at the end of the buffer beam is a cut up coffee stirrer to blank off the open ends of the plastruct channel used for the beam. Thank you Starbucks! Edited April 28, 2019 by Galteemore B 4
Galteemore Posted May 1, 2019 Author Posted May 1, 2019 (edited) On wheels now. Brake gear and a solebar overlay to do with a few other little bits.....and then she’s off to the paint shops .... Edited May 1, 2019 by Galteemore 4
Galteemore Posted May 3, 2019 Author Posted May 3, 2019 (edited) Next stop - Primertown - and after that Greyville. But first an apology - to the thousands of humble open wagons everywhere. For years I’ve slighted you, distracted by your more alluring siding mates. The tank wagons, the box vans, the parcels vans. I paid little heed to you - just a crate on wheels. How wrong I was. Your solebars, your planking, your door fastening and even your brake gear is full of mystery. My rather histrionic way of saying that even this beginner’s scratch-build of a ‘simple’ wagon hasn’t been that simple! It’s been a mixed media effort in recent days - white metal castings and brass wire. Looking forward to a nice coat of grey to blend it all in.... Edited May 3, 2019 by Galteemore 2
Galteemore Posted May 8, 2019 Author Posted May 8, 2019 (edited) Thanks JHB! A few transfers are bringing it to life a little more.... Edited May 8, 2019 by Galteemore 4
Galteemore Posted May 9, 2019 Author Posted May 9, 2019 (edited) Doesn’t look quite so pristine now. Had all been going so well too. A coat of varnish over the transfers turned milky white . A few washes with dirty thinners later and hopefully something has been salvaged that I can bear to look at! Well that’s it for now. First scratchbuild done. More or less. Lessons duly learned. Onwards and hopefully upwards... Edited May 9, 2019 by Galteemore 3 1
Irishrailwayman Posted May 9, 2019 Posted May 9, 2019 On 3/13/2019 at 7:32 PM, jhb171achill said: I’m sending off for an Alpha etc catalogue tonight! I will write a letter, stick a stamp on it and put it in a local Edwardian letterbox tomorrow. My letter will go to Kingstown Pier, and onto the steamship for Holyhead, from where a big LNWR locomotive will bring it to the capital of the Empire. A postman with a big hessian sack will then deliver it to Alpha. I hope they are well stocked up with tallow candles to read mail on these dark evenings...... I hope you wrote the letter with a quill pen!
jhb171achill Posted May 9, 2019 Posted May 9, 2019 I received said missive and perused it. A veritable cornucopia of shtuff, some even in the right liveries.....! All credit for variety and rarity value, and low price, to be fair. And some interesting 0 gauge - a rare thing in the Irish market. 1
Galteemore Posted May 9, 2019 Author Posted May 9, 2019 Yes, Roger is basically the Bachmann and Hornby of Irish 7mm. We’re lucky to have him ! 1
Recommended Posts
Create an account or sign in to comment
You need to be a member in order to leave a comment
Create an account
Sign up for a new account in our community. It's easy!
Register a new accountSign in
Already have an account? Sign in here.
Sign In Now