Midland Man Posted April 19, 2020 Author Posted April 19, 2020 Thanks but yes I have got the book one of my first books in Irish modeling. Eire trains has a lot of pic but none inside. Anyway I building a small model with the scraps of plaster card so anything O is on hold. MM 2
Midland Man Posted April 22, 2020 Author Posted April 22, 2020 Attempts a scratch building. Praying this will go well. If you don't know what it is ( and don't worry I didin't know either I was told by an Angel) it a midland open wagon and will be painted in that livery (midland livery) Hope you all like as more will come soon. The sides are of by a mill or two but they will be covered in plaster card and putty will be put on them. MM 7
Midland Man Posted April 24, 2020 Author Posted April 24, 2020 Decided not to do make it with card but with matchsticks. MM
Galteemore Posted April 24, 2020 Posted April 24, 2020 Great stuff - let’s see pics as you progress! 1
Midland Man Posted April 24, 2020 Author Posted April 24, 2020 THANKS Pics will come at probably 8 or 9 pm as that is the time i model. MM 2
Midland Man Posted April 26, 2020 Author Posted April 26, 2020 Sorry I was late about posting. Never got the time. Here are the awaited pics. sides will ne to be worked on but for now I am statistfyed. If any one could help me with the details please reply as I need the help as I am a newby 5
David Holman Posted April 28, 2020 Posted April 28, 2020 Suspect the sides are a bit overscale in thickness, MM, but no matter, you can easily hide that with a tarpaulin. Make mine from masking tape, painted with Humbrol gunmetal, No 57. Looks like the body is card or wood, in which case strapping can be made from strips of thin card, stuck on with PVA. Likewise corner plates. As ever, check prototype photos to see where it all goes. If there are rivets, you can now get transfer sheets for these, the Grandt Line to tiny stick on ones, which are fiddly but very effective. Great to see some scratchbuilding! 3
Midland Man Posted April 28, 2020 Author Posted April 28, 2020 Hi @David Holman its not really made to scale and it's not meant to be perfect it just made for fun until I get SSM kits (probally MGWR closed wagon and GSR open wagon) and some kit to work with. So where can you get soldering heads and flux (could not find it at Marks. 2
David Holman Posted April 29, 2020 Posted April 29, 2020 Try Eileen's Emporium. Presume they are still doing on line sales. Squires another good source of tools and mateeials.
Midland Man Posted May 2, 2020 Author Posted May 2, 2020 Hi all last night I do some scratch building and I have to say it's quite fun even if you make a mess. I built just a small little shed and put it on a little diorama. I now know what to improve on. 1. Coners are quite hard and need to be perfect 2. Doing strate lines is quite easy only I have to take my time. 3. Finish probally the hardest part for me but the most important. Good finish good model. I will leave with some pics. Not there is no roof but I am waiting for good materials to build it. I will get better pics soon. One thing I do like about this is the wethering on the road. Hope you all like. MM 7
2996 Victor Posted May 2, 2020 Posted May 2, 2020 Great work! Keep the photos coming, please. How about corrugated iron for the roof? With kind regards, Mark 1
Midland Man Posted May 2, 2020 Author Posted May 2, 2020 (edited) 2 hours ago, JasonB said: Scale wise, are they 2 mtrs apart? I took them off the model to see and yes they are 24mm apart so they are scale wise they are. 2 hours ago, 2996 Victor said: Great work! Keep the photos coming, please. How about corrugated iron for the roof? With kind regards, Mark Yes that was what I was thinking as well problim is the plaster card ain't square so the roof will be kind of bent. MM Edited May 3, 2020 by Midland Man
2996 Victor Posted May 2, 2020 Posted May 2, 2020 19 minutes ago, Midland Man said: I took them off the model to see and yes they are 12mm apart so scale wise they are. Yes that was what I was thinking as well problim is the plaster card ain't square so the roof will be kind of bent. MM You could use bargeboards to disguise any small discrepancies between the walls and the roof? Best regards, Mark 3
Galteemore Posted May 2, 2020 Posted May 2, 2020 Nice start. Reminds me of a few sheds I’ve seen in north Leitrim.
Mayner Posted May 3, 2020 Posted May 3, 2020 On 4/28/2020 at 8:17 PM, Midland Man said: Hi @David Holman its not really made to scale and it's not meant to be perfect it just made for fun until I get SSM kits (probally MGWR closed wagon and GSR open wagon) and some kit to work with. So where can you get soldering heads and flux (could not find it at Marks. If you intend to solder SSM whitemetal wagon kits, you will need a low melting point 70°C or 100°C solder, a suitable flux & a temperature controlled soldering iron https://eileensemporium.com/index.php?option=com_hikashop&ctrl=category&task=listing&cid=1125&name=brass-3&Itemid=189, as there is a real risk of melting the castings. 145°C from Eileenn's, Carrs or DCC Concepts in conjunction with a phosphoric flux is the best option for soldering brass or nickle silver I would recommend Carrs or DCC Concepts 100°C solder as its less hazardous than 70°C which usually contains cadmium which is more dangerous than lead, 100°C also has advantages in soldering whitemetal to brass, however you solder make sure that you have good ventilation as solder and flux fumes are quite hazardous to health it possible to set up an ordinary soldering iron to solder whitemetal by wrapping thick copper wire around the element and establishing the length of the new tip by trial and error A less risk alternative until you have mastered soldering is to use superglue or a 5minute epoxy. Whether you glue or solder of the great advantages of whitemetal is that its very easy to dismantle the kit if you are not happy with the result. You can dismantle a soldered kit by placing it in boiling water and paint stripper has a similar effect on superglue or epoxy. 2 1
Galteemore Posted May 3, 2020 Posted May 3, 2020 (edited) Another top tip is to lightly coat the brass with a patch of ordinary 145 solder in the area where the w/m solder is to go, rather than attempting to solder the w/m directly on to brass. So for a chimney, for instance, I put a small patch of solder around the hole in the boiler, then get the low melt solder out. Also, wash off the work with Cif or Viakal after every solder session or the flux starts getting nasty and turning green...not good for your kit in the long run. As Mayner says, take good safety precautions. Lots of good advice on brass work here.http://www.jimmcgeown.com/Print Off FAQ Booklet pdf.pdf.. Edited May 3, 2020 by Galteemore 1 2
Angus Posted May 3, 2020 Posted May 3, 2020 (edited) I always used to struggle soldering white metal to white metal (when working in 7mm scale not 2mm scale! Soldering white metal in 2mm scale would soon reduce everything to a small blob!). I was given a tip at an exhibition from the chap on the S&D castings stands, which works for me. Use low melt solder in the bar form, the strip solder has been melted to get it into this form so is slightly less user friendly (I don't know if this is true but I find the bar solder easier to deal with) Use a low wattage iron without temperature control, you get the heat at the tip to melt the solder but there is not sufficient power to sufficiently heat a large surface to do any real damage to the main structures (unless you dwell for a really long time with the iron). Tin both surface you want to join with the low melt solder. I have a cheap 15w iron set aside for just this use. Edited May 3, 2020 by Angus 1 1
David Holman Posted May 3, 2020 Posted May 3, 2020 5 min epoxy for me - especially for adding things like boiler fittings as it gives you just the right amount of time to make sure they are sitting properly.
Midland Man Posted May 3, 2020 Author Posted May 3, 2020 Hi all I am going to use DCC concepts flux and solder for this project. If all goes well I am thinking of doing more wagon kits an for a first loco south eastern fine cast SECR 2-6-0 white metal kit will be quite good and what I have heard of them quite easy. I plan to modify the tender to look like a CIE oils burner as i fine the Bachman that everyone has are not nice and unrealistic so a oils burner will give me more interest than that of a coal one. MM 3
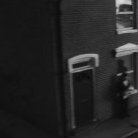
Midland Man Posted May 9, 2020 Author Posted May 9, 2020 Hey all Over the past few days I have been doing some building an trying to improve my standards as a modeler. I have been working on a 7mm scale shed that will probally end up in a diorama. Th shed is still in a messed up state but I am sure that when finished it will look fabulous. Here are some pics. Yesterday I bought some wills stone sheet whitch will be the final finish on the walls as for the roof slate using individuals prices of 0.5 plaster card soulds like an interesting idea. The window is not to be to scale but rather a catonistic type of window. The side window is meant to be covered up to have a disused feel. So then hope you all like and stay safe. MM. 6
NIR 450 ‘Castle’ Class Posted May 9, 2020 Posted May 9, 2020 (edited) Good start there MM, looks like it will turn out nicely. NIR 450 ‘Castle’ Class Edited May 9, 2020 by NIR 450 ‘Castle’ Class 2
Midland Man Posted May 15, 2020 Author Posted May 15, 2020 Back we go them hey. Have not been working but rather planing Glendelogh road so this project will be a slow one. I plan to have Glendelogh road 75% done by the end of summer. I also plan to get one of those SSM wagon kits built for a different project but for know I am working on this shed......... The next pic is the original drawing for it which sparked me amagination. So can sea where this is going. A nice collection of out buildings and sheds. In other news I got a new knife YAY! Over the moon with it. The blades are not the best but are far better than the old knife. The old one was a revel one and gave me 5 1/2 years of great service. Here is a pic of both of them lined up. If you don't know which one is the new one I would have to call you a big dumb bo$&x. The new one is going through its paces never the less. Hope you all like. stay safe. MM 2
David Holman Posted May 17, 2020 Posted May 17, 2020 (edited) Snap off blade knives have been my go to for years. Apparantly, it is the tip that does all the work and soon gets dulled, so snapping off for a new one is easier than sharpening. Foam board for some reason a real villain here. That said, I often use one of my Exacto blades on foamboard - the long, triangular sort seem to work especially well. Edited May 17, 2020 by David Holman 2
Midland Man Posted May 17, 2020 Author Posted May 17, 2020 Here is how the shed can out. I have to say I am still a newbee to this hobby so expect some problems in the build. First attempt came out bad so the model had to be cut down by 14mm which is a lot. has not been painted yet but soon will be. Corners came out a lot nicer than my first build. Back windows also got a new feature. I the plastic 1mm bigger on all sides to create more depth. Need a bit of TLC in my mind. For some reason the pic will not upload and I will try and upload it a later date. Good news on Glendelogh road. It's going to be O again. Is made the track plan as simplistic as they go and I find its not as fidily as OO gauge. So yeh hope you like and agree on my new change of heart and stay safe. MM 6
Galteemore Posted May 17, 2020 Posted May 17, 2020 (edited) Nice authentic look to it. Reminds me of a shed on my grandparents’ farm in Connaught. Edited May 17, 2020 by Galteemore 2 1
Midland Man Posted May 17, 2020 Author Posted May 17, 2020 Thanks David and Galteemore. It's based on one of the Aran Islands and the model will be kept white. I hate a lot of modern architecture due to that they ruin lovely lovely building or prices of land. When building models I find that the classic designs are symmetrical in shape and are easy to build. I beleive architecture changed for the worst when they realized that can drawn circles and irregular shapes using a computer. I always wonder how Barrow street is built due to the amount of irregular shaped buildings on the model. But any way this is not the Irish architecture forum but rather the railway model one.... stay safe MM 2
Broithe Posted May 17, 2020 Posted May 17, 2020 45 minutes ago, Galteemore said: Nice authentic look to it. Reminds me of a shed on my grandparents’ farm in Connaught. The very slightly off-white wash and that red on the door are bang on for the style of these things. 4
jhb171achill Posted May 17, 2020 Posted May 17, 2020 3 hours ago, Midland Man said: Here is how the shed can out. I have to say I am still a newbee to this hobby so expect some problems in the build. First attempt came out bad so the model had to be cut down by 14mm which is a lot. has not been painted yet but soon will be. Corners came out a lot nicer than my first build. Back windows also got a new feature. I the plastic 1mm bigger on all sides to create more depth. Need a bit of TLC in my mind. For some reason the pic will not upload and I will try and upload it a later date. Good news on Glendelogh road. It's going to be O again. Is made the track plan as simplistic as they go and I find its not as fidily as OO gauge. So yeh hope you like and agree on my new change of heart and stay safe. I like the finish you've ended up with on the walls. It looks very good for an old stone building which has been whitewashed over countless times in a century and a half! 2 1
Midland Man Posted May 17, 2020 Author Posted May 17, 2020 Thanks question for everyone. Should I paint the all the wood used on the model white or should it stay the same as it is?
Mayner Posted May 18, 2020 Posted May 18, 2020 I like your sketches and general approach to modelling buildings, the Wills white washed stonework and wooden lintol really catches the unique character of these buildings. I am a great fan of Wills scenic sheets for modelling traditional Irish buildings Trends in architecture is a bit like generational change in music and fashion, each new generation of architects tend to rebel against the established styles of architecture by developing new concepts, although it sometimes ends up in building failure. Builders, structural and civil engineers then try to convert these concepts into reality not always successfully. 1 1
Midland Man Posted May 18, 2020 Author Posted May 18, 2020 Thanks Mayer. I have an idea for my next project but for now i am thinking of getting these kits to put beside the shed. The company is called Artitec and they make resin kit like Provincial wagons. They have great detail and there made in Germany. Here is there link. https://www.artitecshop.com/en/scenery/h0-187/kit/
Midland Man Posted June 13, 2020 Author Posted June 13, 2020 Moc up of the railcar a body is conplete. I could not find any drawings from the D&B so I had to use drawing made up by the Kent and east Sussex railway. The mic up can out well. The only thing I dislike is the spaceing at the entrance of the model. It's quite simple but it's a start. I am also thinking about changing the scene of Glendelough road into a country scene. I think it would work a lot better and since it's a small model more realistic. 3
Recommended Posts
Create an account or sign in to comment
You need to be a member in order to leave a comment
Create an account
Sign up for a new account in our community. It's easy!
Register a new accountSign in
Already have an account? Sign in here.
Sign In Now