Northroader
-
Posts
333 -
Joined
-
Last visited
-
Days Won
2
Content Type
Profiles
Forums
Events
Gallery
Blogs
Community Map
Everything posted by Northroader
-
A model full of character, looking great. A couple of wagons and a van, a cassette each end, and you’ve got a really nice layout. “Keep it simple” is the best motto going.
-
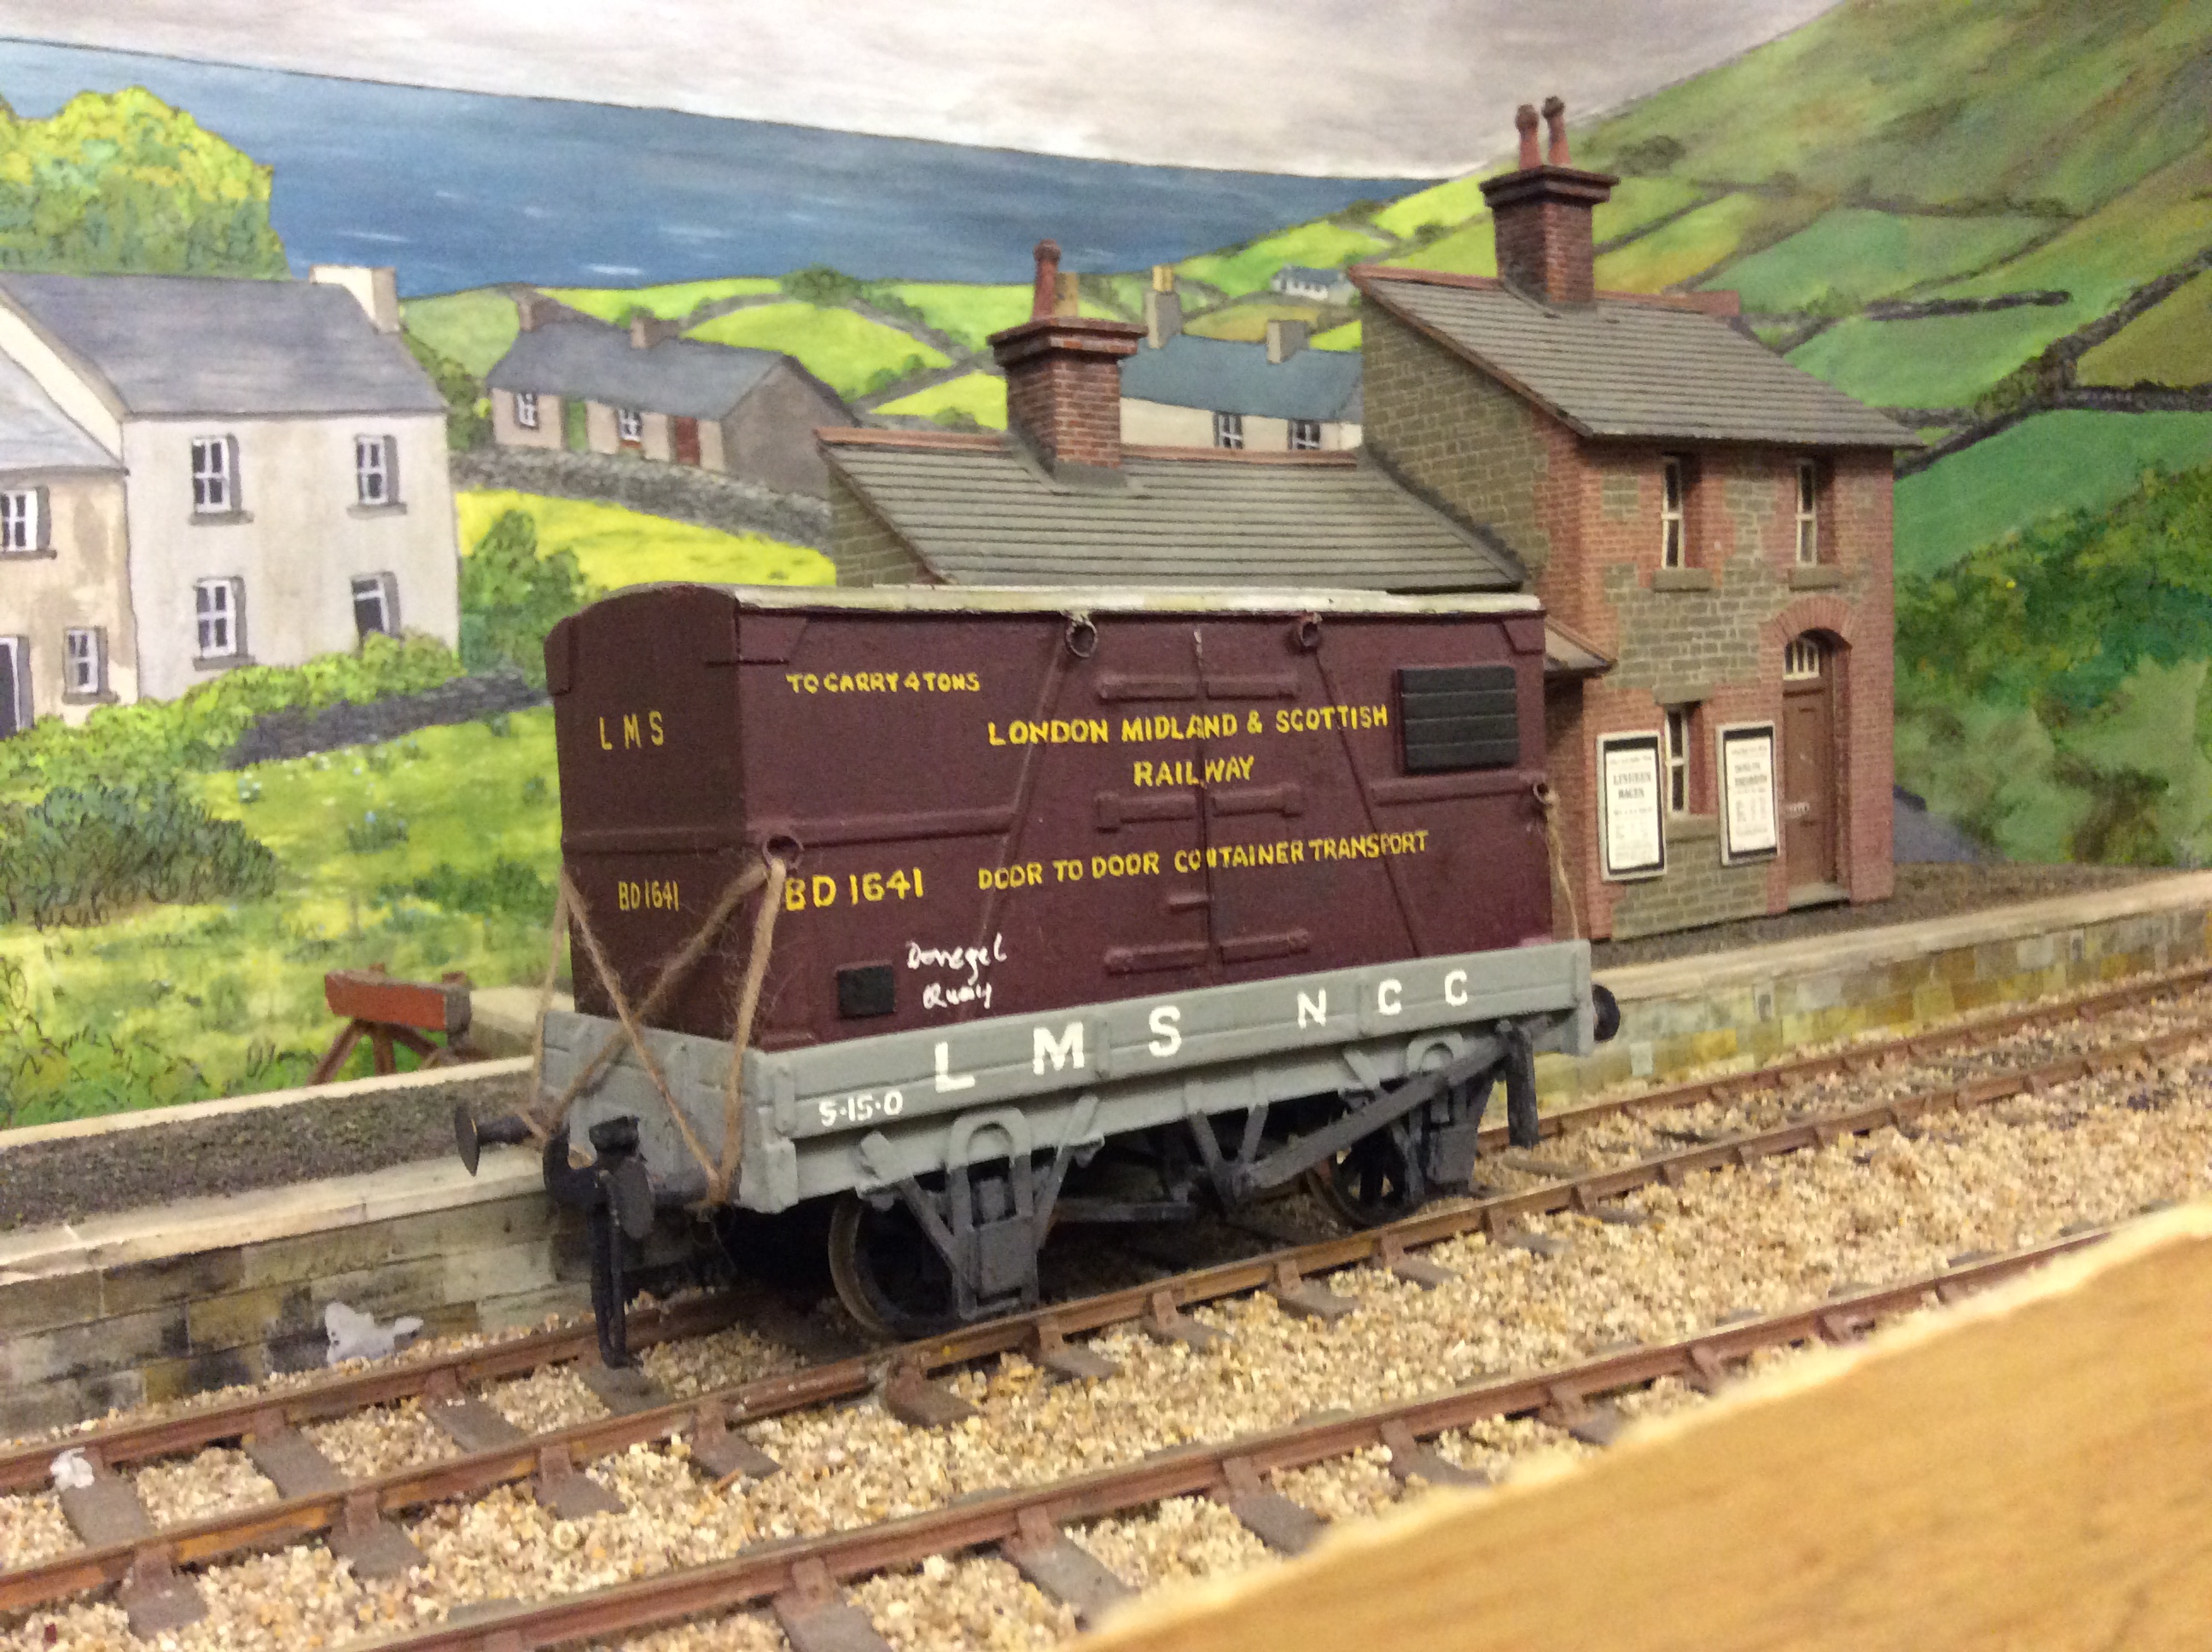
Looking through the Midland Publications “LMS in Ireland” and “Rails around Belfast” there’s pictures of flats, lowsides, and opens with containers on Donegal Quay, and an NCC goods with two containers in opens, so “fair enough for a model” I think.

-
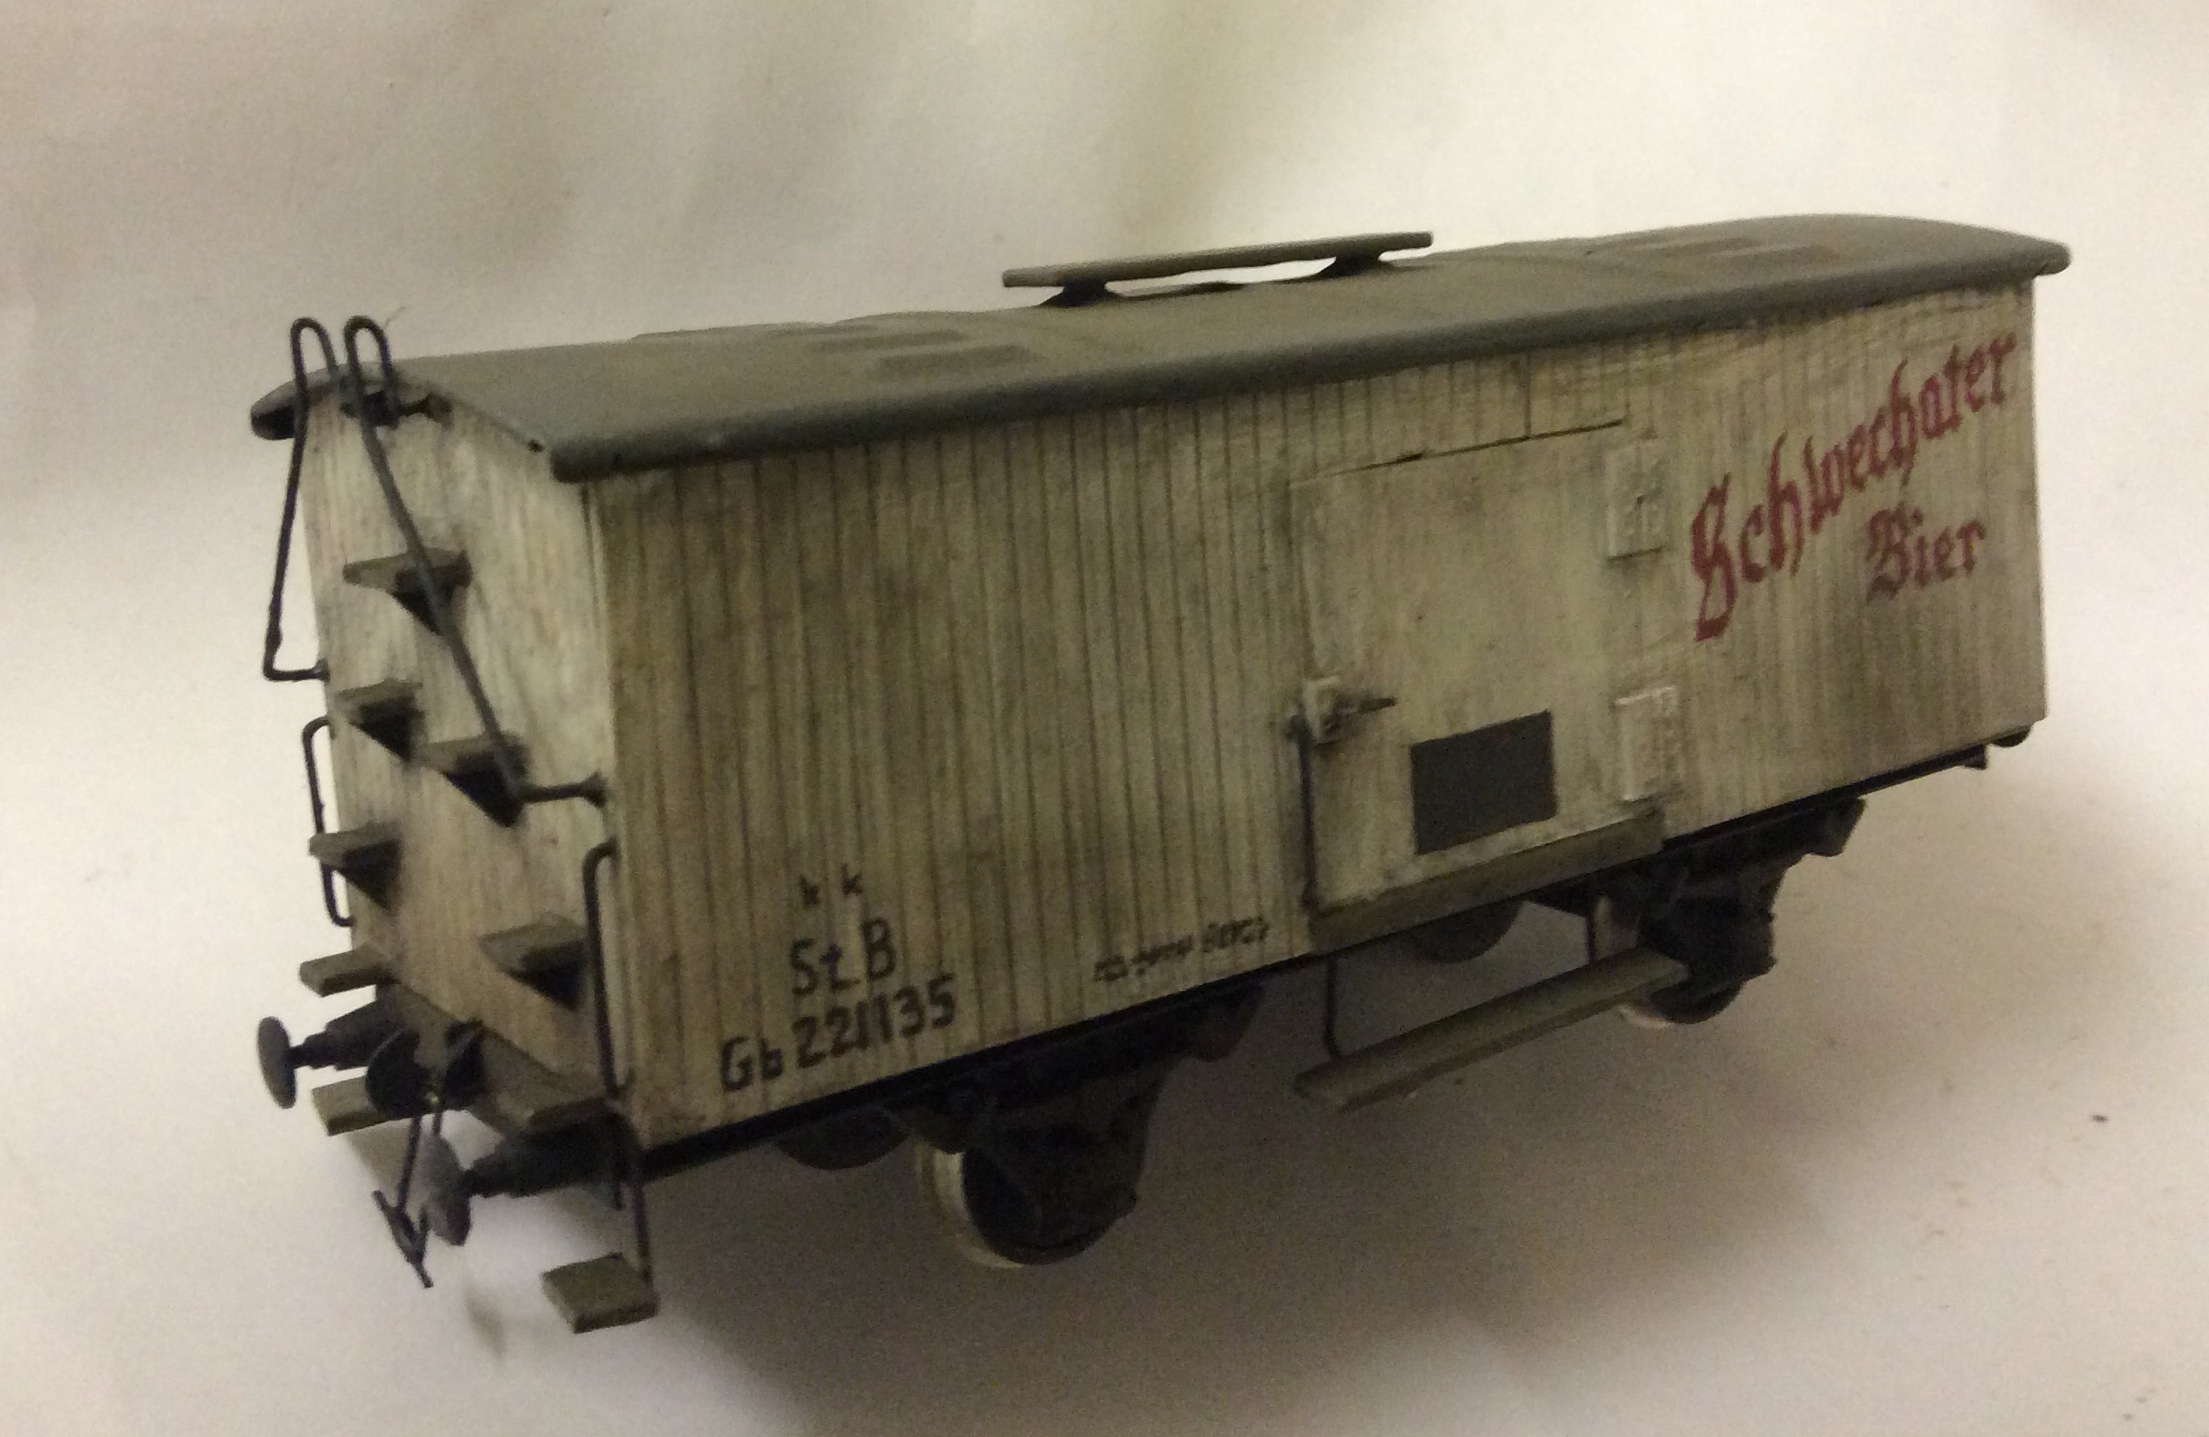
Here’s a recent beer van, and I think if you paint a wagon white, and stick it in a goods train, you’re asking for trouble. Anyway, being white, you can pick up what’s been done easier. Mainly a wash with very diluted Matt black, far more white spirit than paint, then some black and brown chalk, more on the ends. A bit of mainly brown brushed crosswise on the roof, and a bit of brown on the axleguards. Looking at my Irish pregroup, it’s a bit too clean for a weathering thread!
-
For weathering powders I go to an artists shop, and buy sticks of pastel chalk. Rub one on some emery paper and you get some fine powder. Scatter this lightly over where you want, then brush it over with a dry fine hair paintbrush. Usually I go for umber, burnt sienna, orange, tan brown, and black. More on the undercart and ends. It can be washed off with soapy water if you dont like it.
-
What are you using for bait?
-
Aluminium/Silver/ Stainless Steel Effect
Northroader replied to dave182's question in Questions & Answers
I used to make model aircraft for my son, most having an “aluminium” finish. I used Humbrol “silver” paint, with a metallic finish. However, I found with handling, the finish wore badly (“A” class diesels comes to mind!) So, to do better, I do a 50/50 mix of the silver paint with a Humbrol flat light grey, and I find this works quite well. -
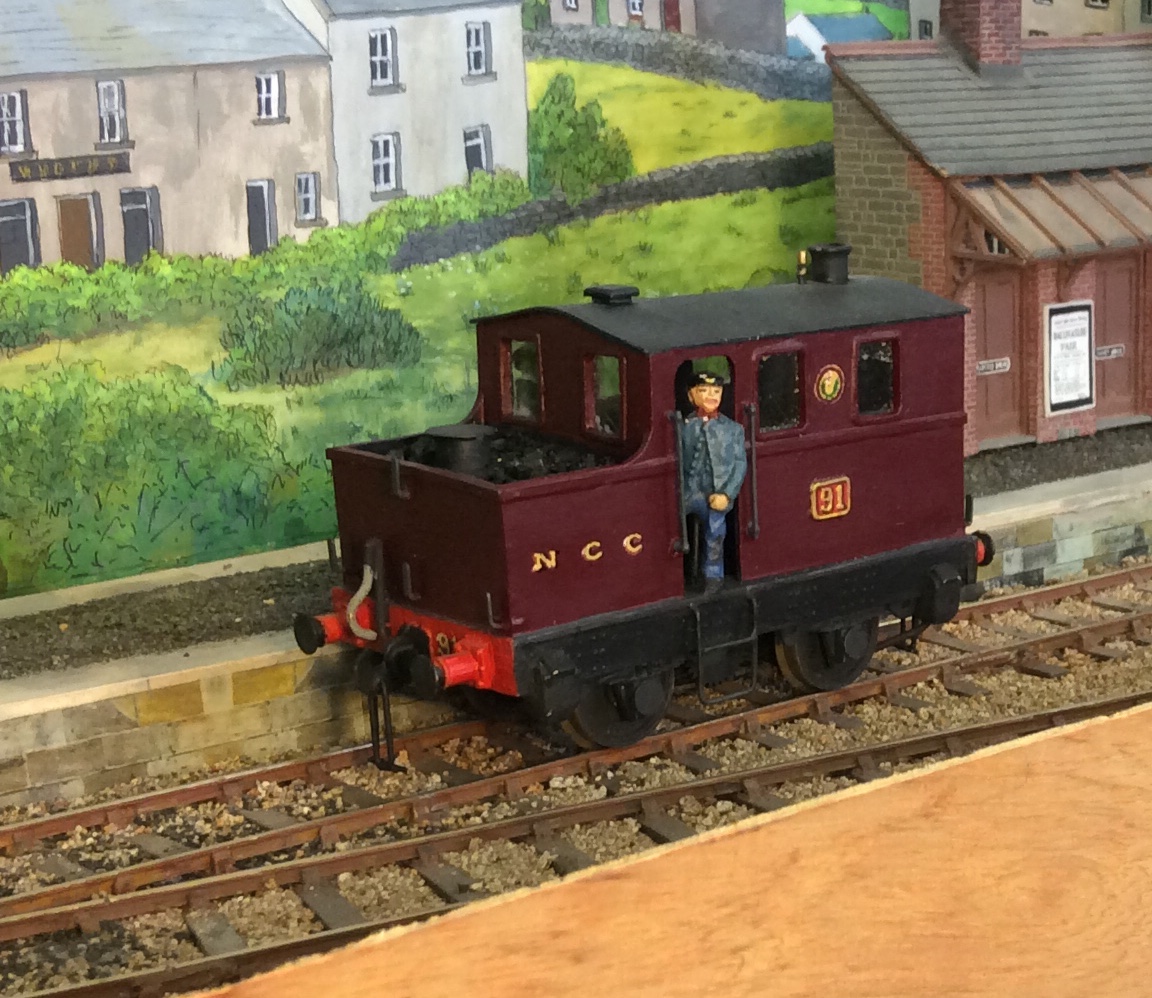
Usually you’d get a chimney towards the rear, over the boiler. The nature of the intermittent working is such that you couldn’t rely on the blast from the cylinders to create a draught, so you’d have a fairly tall stovepipe, hinged for loading gauge clearance, and the steam exhaust would be from a plain pipe on the back corner of the cab. Before each lift you’d want the cylinders warmed up, so the crankshaft would be run before getting engaged, and a shower of hot water coming out of the exhaust.
-
Best wishes to everyone, have a great time with your folks, and good progress with your modelling in the new year. bob
- 30 replies
-
- 11
-

-
Garda ERU / ATLAS training.
Northroader replied to Broithe's topic in What's happening on the network?
I think if certain security forces were present at that exercise, they don’t like having pictures taken which may show their identity. -
I use their “premium” service, which is to me quite reasonably priced, certainly cheaper than getting an “ad-blocker” app. It gives you a reasonably clear screen, although some home site ads still appear, and that repetitive movie in the lower RHS corner has gone. As it does not need all the ads refreshing, it seems to me to be much faster response as well.
-
The NCC had a go with one of them, there’s a picture with it teamed up with a pair of sixwheeler coaches, though I fancy the idea didn’t get much further, pity, it would make a nice little branch line set. my Model is a plastikard body on top of a motor bogie from an old Lima class 33 diesel, and I might have missed some louvres off the end. I fancy a new Dapol one would perform much better.
-
Glad you’ve done the planking.
-
Two Axel Coaches in Ireland?
Northroader replied to Auto-Train Original's topic in Photos & Videos of the Prototype
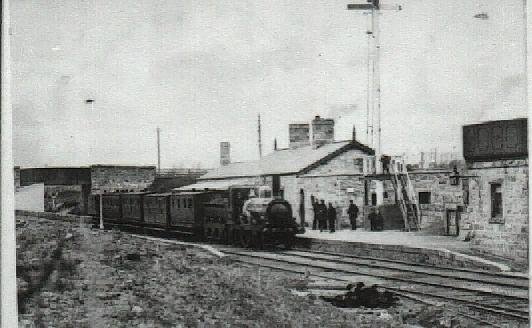
There’s a nice collection of four wheelers in the old photo of Castlebar, MGWR:
-
Looking good, the only item I would question is the rubbing strake(?) low down on the bow disappearing under the waterline. Wouldn’t it look better if that was removed?
-
mgwr preserved railway Connemara Railway project.
Northroader replied to ttc0169's topic in What's happening on the network?
Great to see things happening over there, the thing that really stood out for me in those pictures is how the sky changed through the sequence. Any one of them would look great on a model backscene, and yet they’re all very different. A day for staying close to the pub. -
The cone shaped objects above the footplate are screw jacks, with a transverse table under them with another screw to shift them sideways. Used with hardwood packing blocks and a wood “biscuit” on top, where a minor derailment has happened. The couplings look like “Norwegian” or “chopper” couplings, common for a lot of n.g.lines. There’s a spring at the back, which helps with buffering up. One coupling carries a chopper on a pin, and the opposing coupling carries a pin for it to hook on to. The pins are removable, and can be swapped around if necessary. https://www.wikiwand.com/en/Norwegian_coupling
-
CIE locomotive livery variations 1960-1990
Northroader replied to jhb171achill's question in Questions & Answers
If you’re doing silver,paint, mix some of the metallic silver paint 50/50 with a Matt light grey paint. It will look realistic and wear much better when handled. -
Johnny, when you’ve got your engine and wagons and coaches, any thought as to where you’ll be putting them, and what sort of space you’ll be using?
-
All that —- and BLUE engines!!
-
Very kind of you to say so, sir. Actually, I’m slowing down appreciably, and I’ve reached an age where I’m having to think of the future, how am I going to downsize? I should try to progress jobs, finish stuff off, then another bright (?) idea hits me.
-
Beautiful job, looks good, well made, and runs smoothly.
-
Mark, perhaps I should add to my remarks on compensation, thinking it over. If you’re modelling in P4 or S7, it’s really compulsory to use compensation. This is because the wheel flange depth is minimal, and you must ensure the wheels are fully in contact with the rail, all the time. With the usual modelling standards most folks use, you have deeper wheel flanges which do give more latitude for any errors, particularly with track-laying. The Leinster and CCW kits I started with showed me that accurately drilled frames, with the “finescale” wheel flanges, could run over carefully laid track without springing or compensation, and this simplifies building a loco no end. You can still aspire to using the finer standards and methods, but it is more demanding for your craftsmanship and skills, and I’d advise a “knife and fork” approach to start with, giving a approach which realistically caters for the conditions you’re going to encounter. It’s one step up from a “tinplate” approach, with four coupled locos and very deep flanges are placed on sections of track clipped together in a tight curve and laid on the carpet. The one layout which did impress me at a show was the Merseyside MRC “Adavoyle”, Irish gauge to P4 standards, which performed flawlessly in running and performance, but done painstakingly by skilled craftsmen.
-
I’m not a fan of beam compensation, as being very fiddly. I picked up a loco on eBay recently and found the whole lot jammed up with paint anyway, and a very poor runner in consequence. I think if you compensate just the carrying wheels, you’d introduce a hard spot somewhere which would compete with the drivers for adhesive weight. Having one set floating, and bringing the c.o.g. close to the drivers does work well.
-
Photographic Website Updates
Northroader replied to thewanderer's topic in Photos & Videos of the Prototype
Thanks for those, they’re a really beautiful and informative set of pictures.