David Holman
Members-
Posts
4,359 -
Joined
-
Last visited
-
Days Won
117
Content Type
Profiles
Forums
Events
Gallery
Blogs
Store
Community Map
Everything posted by David Holman
-
And the dirty windscreens, with the areas wiped clean by the wipers.
-
Neat, clean soldering too.
-
Indeed - though varnish will do the same.
-
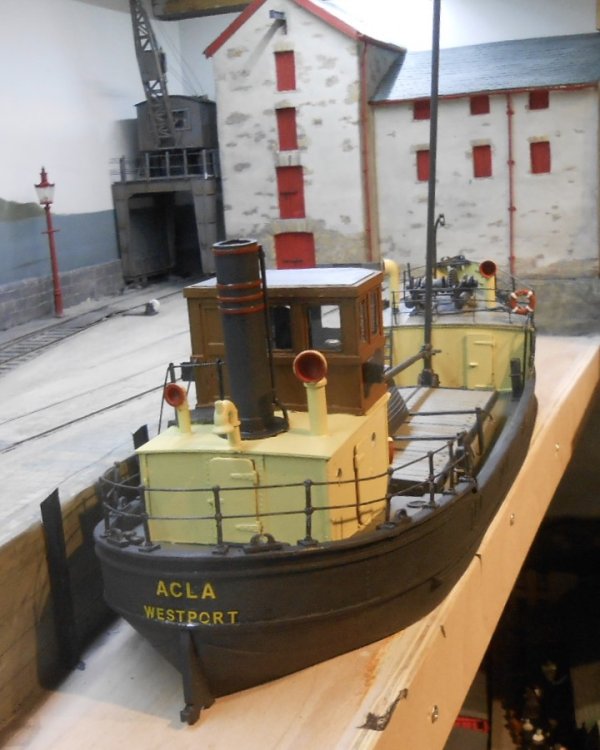
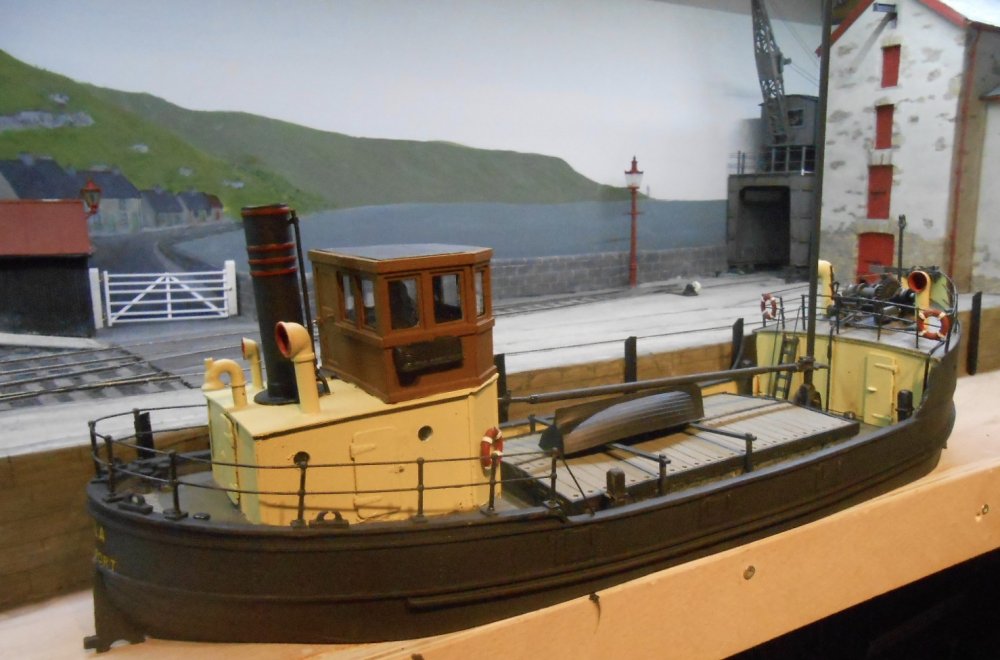
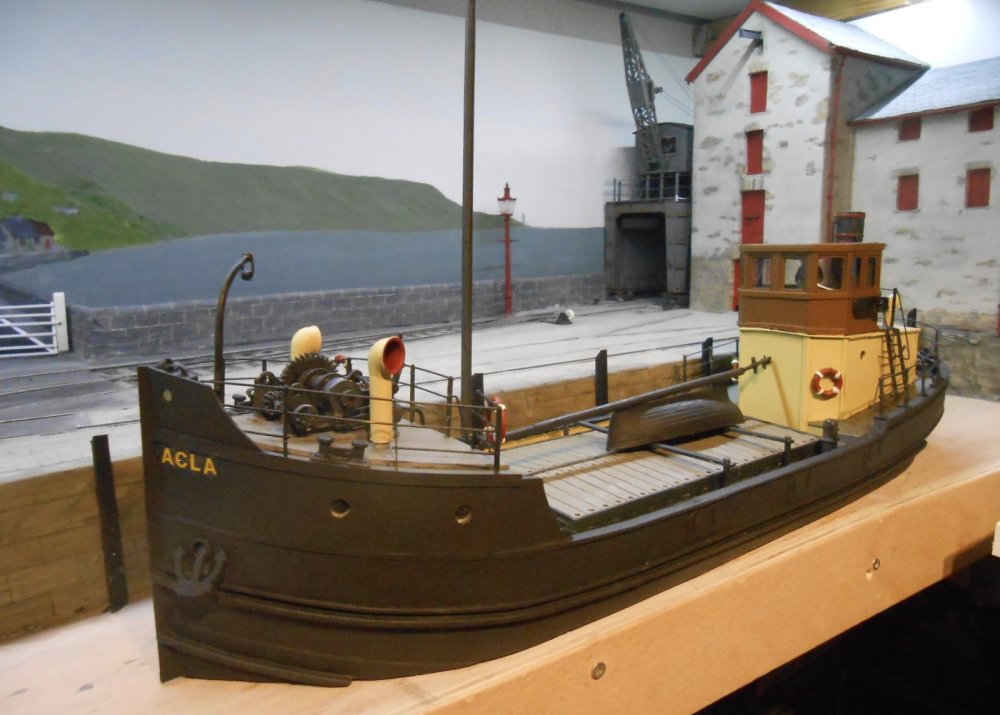
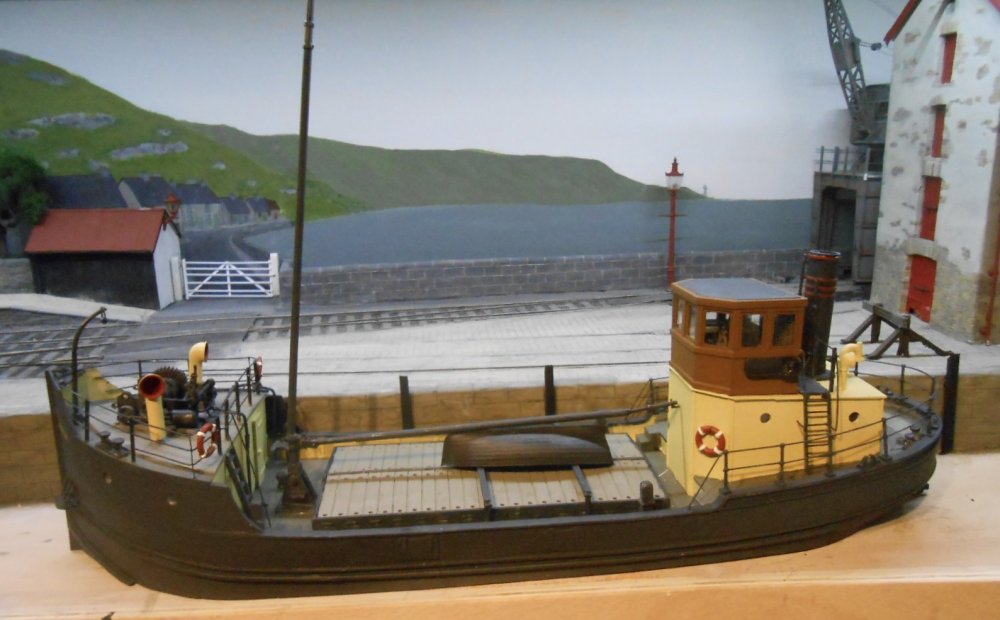
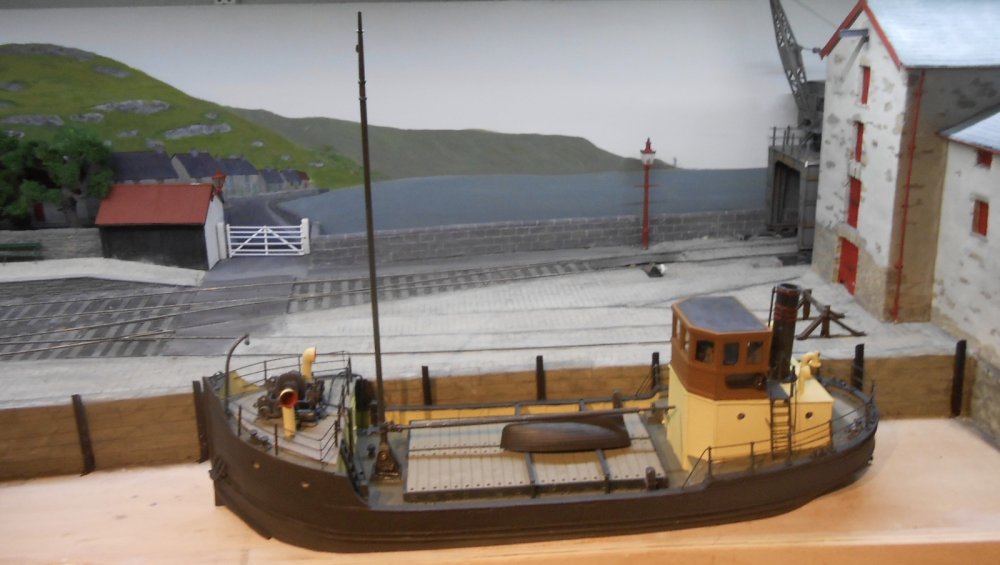
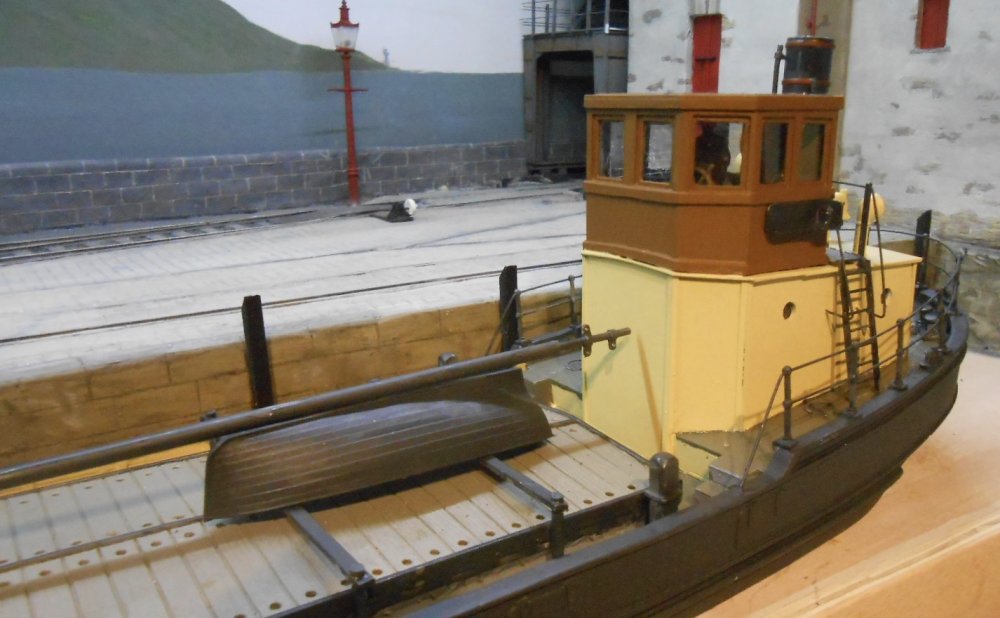
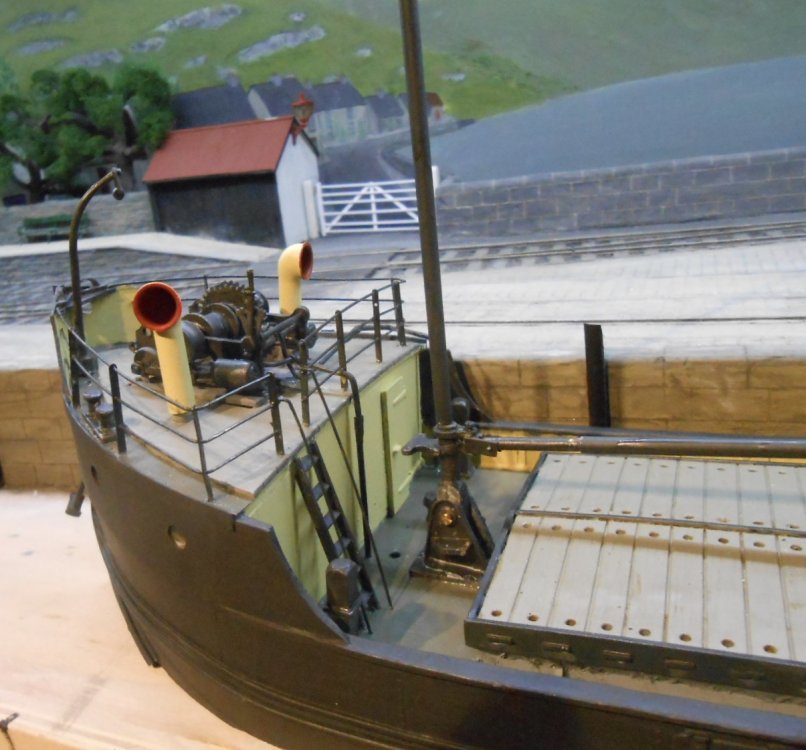
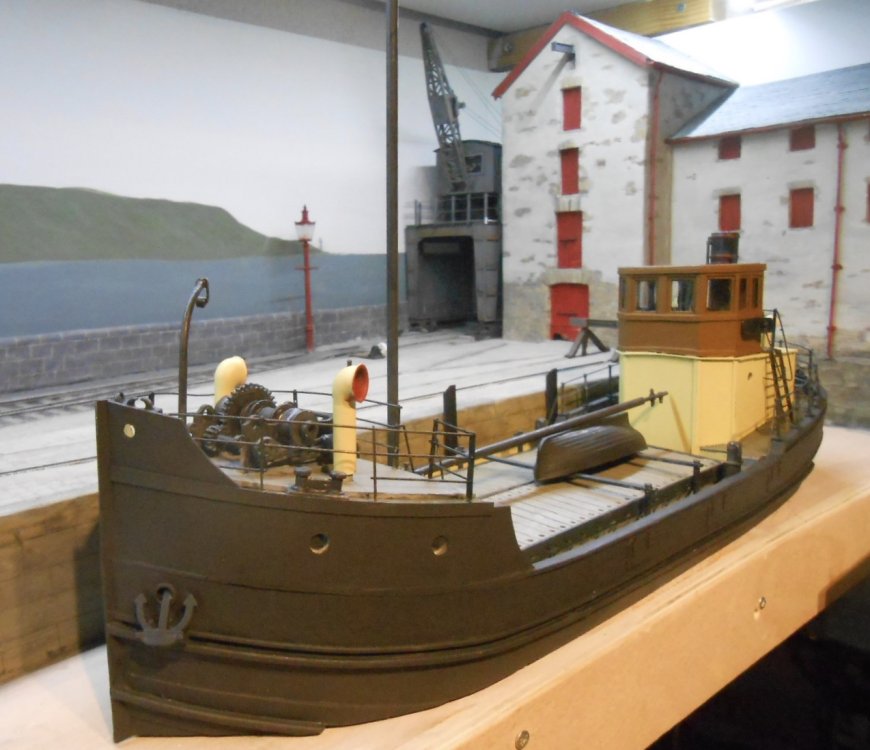
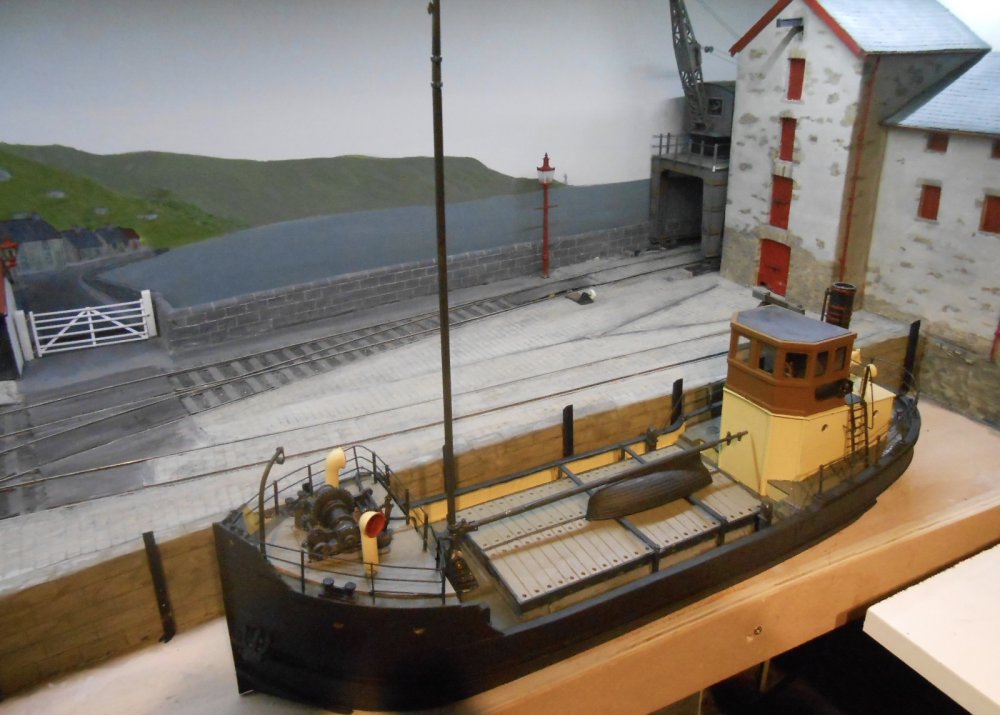
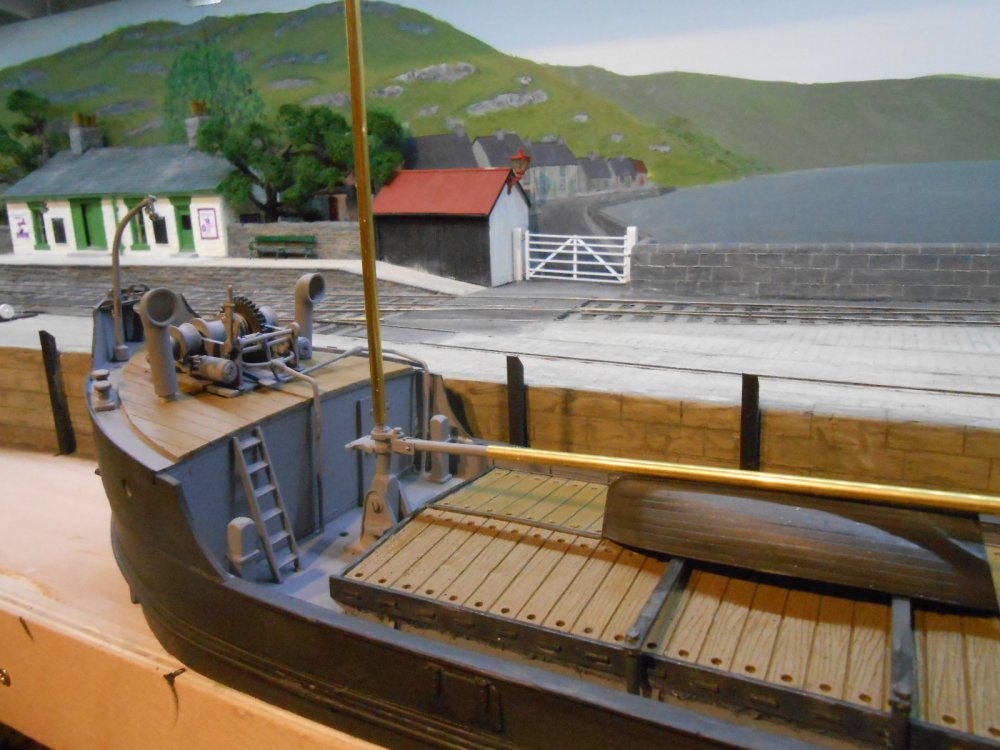
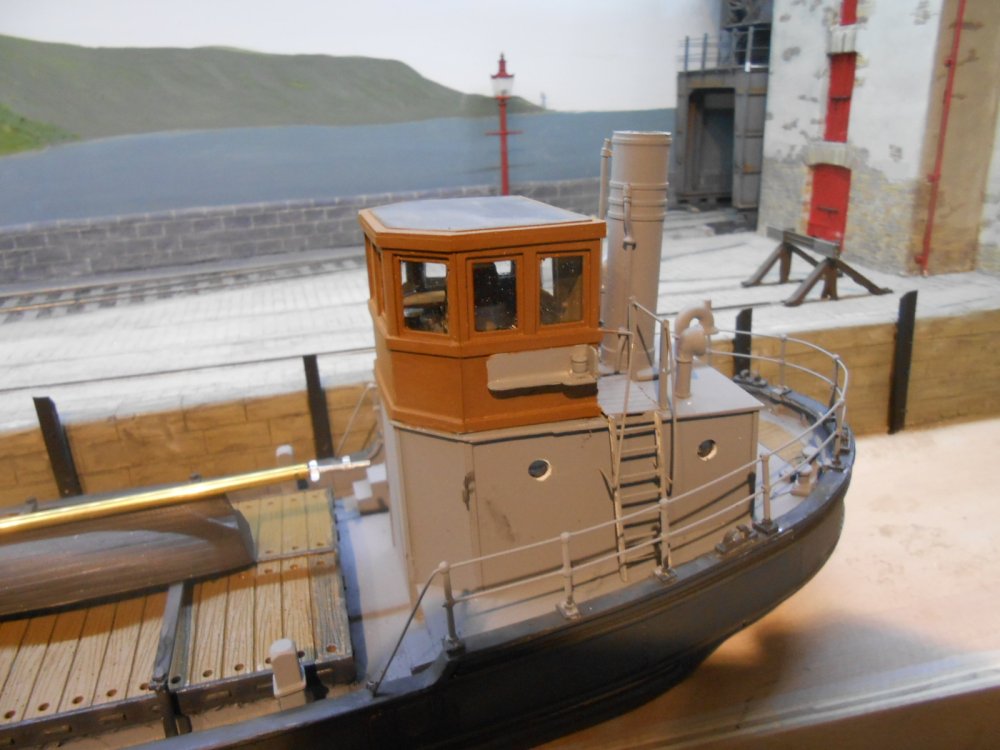
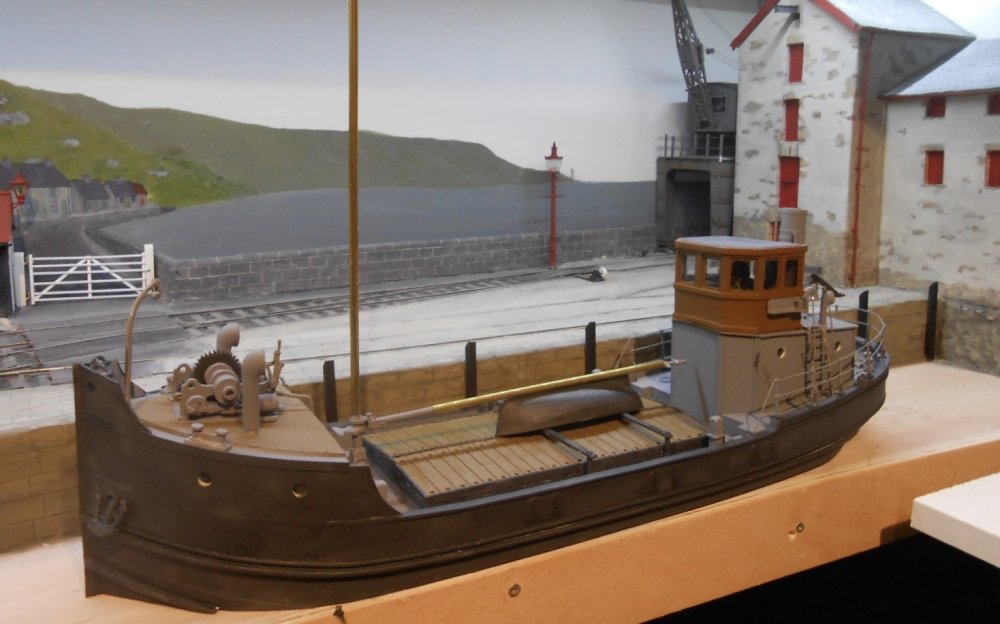
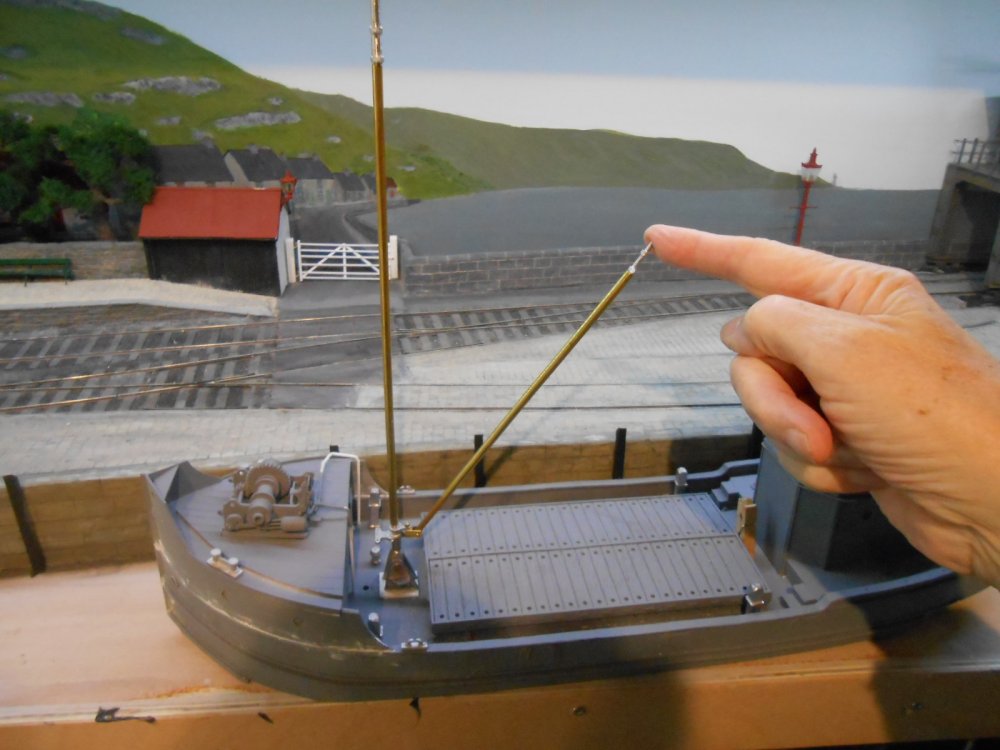
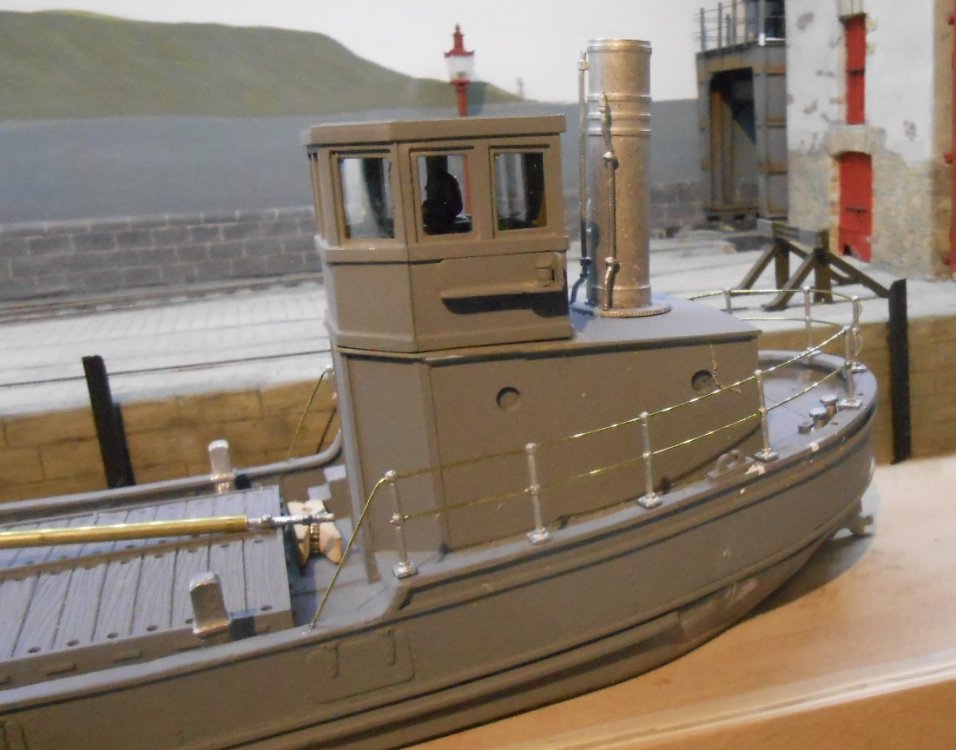
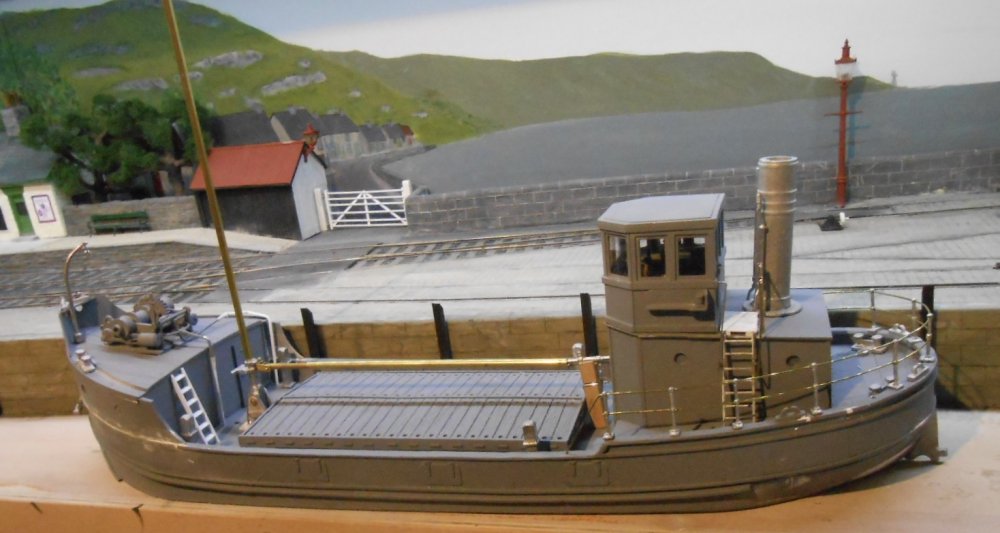
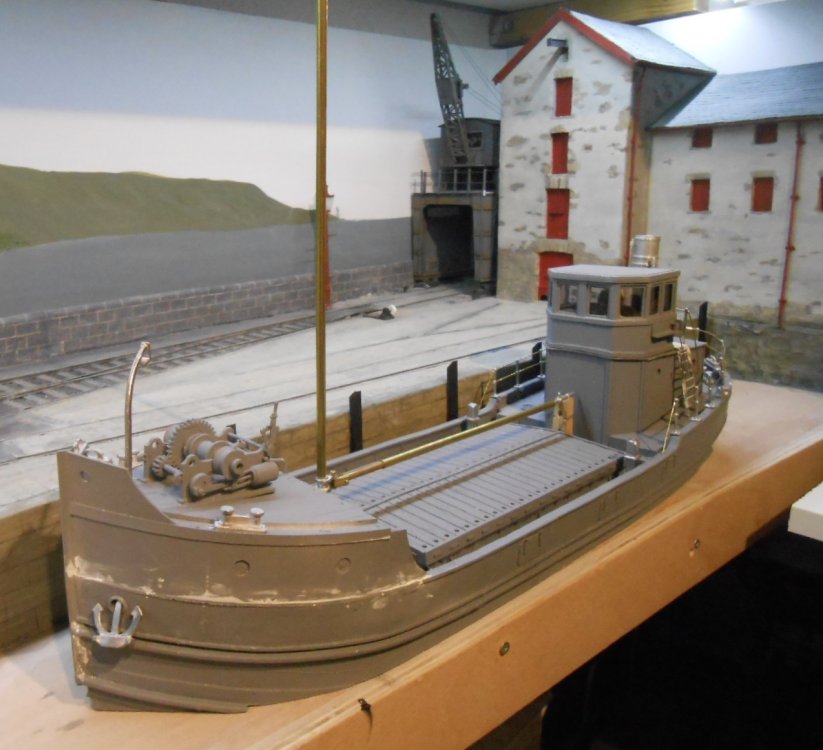
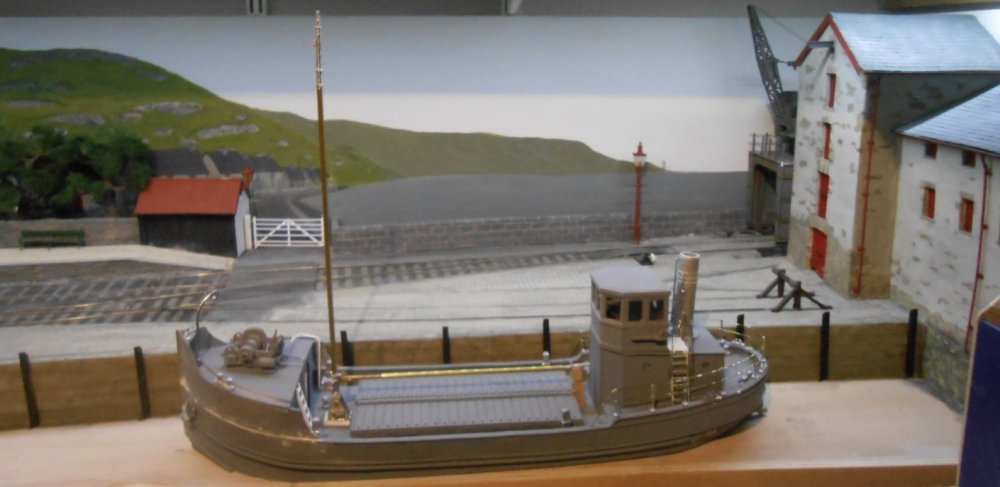
The last few bits and pieces for a few days, as I need to transfer my attentions to getting Fintonagh ready for Cultra. Always best to go through preparations and servicing a few days early - just in case! Anyway, as I'm sure most of you know, it is the little things that seem to take longest, especially when they need painting as well. So, did the four lifebelts and got them fixed this afternoon. Also shortened the mast by 3cm, as it was higher than the backscene, while the derrick's boom now has a bracket on the main superstructure to rest on. Spent the most time on a bit of lettering - though not sure if the yellow text [all I had] is correct, or indeed if Westport is an appropriate place for Acla to be registered, so it may be temporary... As already mentioned, the name is Gaelic for Achill, which seems appropriate as this is a key part of the little coaster's territory. Oh yes, there are photos of the other side too.
-
Fintonagh, my Clogher Valley Railway layout is making the long trek over, via Cairnryan - Belfast ferry. 7mm scale/21mm gauge, with its own thread on this forum. Hopefully going to be in front of Phoenix, or CVR railcar 1 (Donegal 10). Very much looking forward to meeting folk from this forum, so please say hello if you are attending.
-
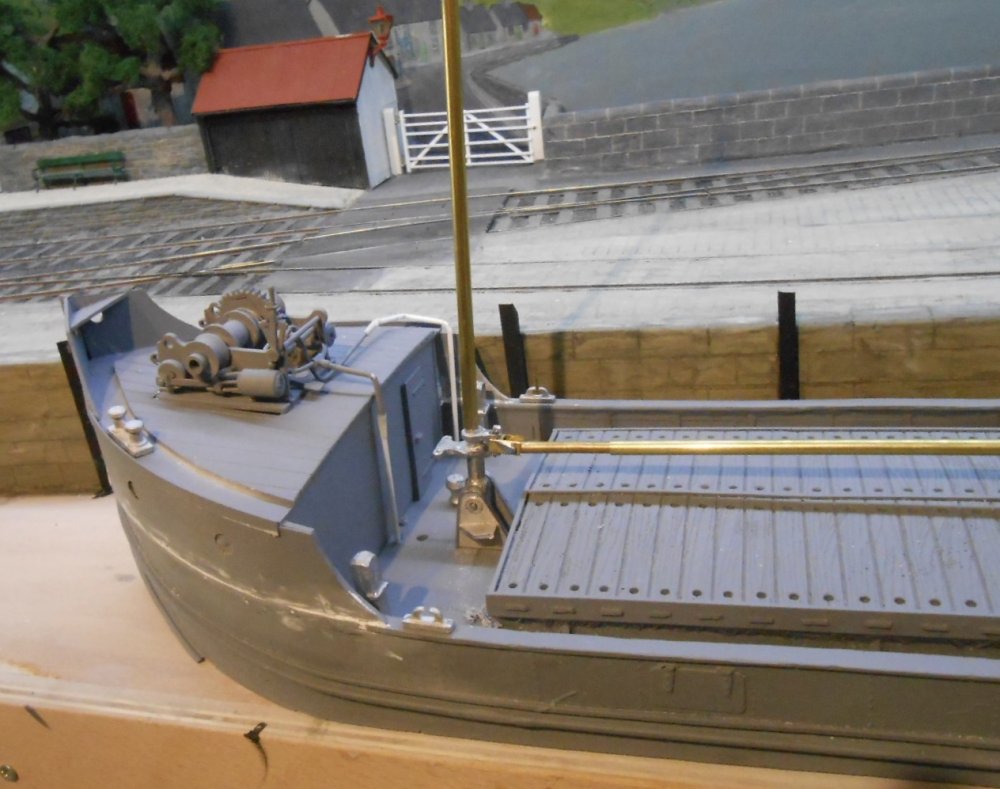
Recently added handrails to the forecastle of the Acla, thanks to Gordon Gravett who kindly sent me some spare etches he had from previous projects. Since then, have been trying to complete the general painting. Not entirely successfully as every time I think I've got everything covered, the next day I am still finding areas of primer showing through! Am starting to think that using an airbrush might be better, though the amount of masking required would still take a lot of time. However, slowly getting there, after which there is the weathering [essential to giving the model more texture], plus lettering and the dreaded rigging. Model ships, I'm finding, cannot be done quickly...
-
Doing b&w photos as a bit of proof reading is a fine idea and one to remember. As for the rocks and stones, generally they were there before the foliage, so would put them in first. I'd be tempted to paint undiluted pva on the surface and then place/scatter the stones and gravel on that. The pva will dry shiny, but this will then get hidden under the foliage. Static grass machines are great fun and therefore worth experimenting with different lengths of fibres according to pictures you are using. Liquid sunshine makes Irish grass fairly bright green, but find that keeping tones a bit more muted is effective and in the boggy areas there may be more yellowy/lighter tones anyway. Spread pva over an area of about 10x20cm, push a small nail into the scenery and clip the grass machine to that, then do the fibres. Repeat as required, vacuuming up loose fibres after a few minutes [hanky over the nozzle to minimise waste] - this also helps the fibres to stand up a bit more. To turn plain grass into other plants, next day, I dip a finger into pva and then lightly run it over the tops of the grass, on to which you can then sprinkle different colours of fine crumb. Works a treat and is very satisfying. You can also use spray mount over previously sown grass and use the static machine again to make longer growth. All very addictive, so don't be surprised if you find a static grass machine soon appears on your Christmas list!
-
The scenery is already looking somehow very good to me. That uneven (post glacial?), surface really looks the part.
-
Hatton's are keen to sell remaining 0 gauge Gresley stock it seems. A3 Pacifics (£750) are now priced at £299, with A4s at £350. Gresley coaches are down to £115 each, which in this scale is ridiculous, especially when latest Bachmann 4mm coaches can retail at £75 each.
-
The Limerick Market branch used a couple of Sentinels. Dapol do a rtr version in 0 gauge and often wonder how easy it would be to convert. Feel sure 4mm versions are available.
-
Lovely stuff. Great to see brass work being done - and very neat it looks too. Ultimately, it all disappears once painted, so nothing wrong with mixing materials. Brass is very satisfying though!
-
Beat me to it John, sounds very much like a Castle Rackrent type project - that first stage anyway. Let's face it though, doing any Irish outline modelling, apart from modern image, has never been easy, but that is part of the attraction. My WCI four wheeler was indeed inspired by the grainy photo in Ernie Shepherd's WL&WR book, which also includes several better pictures of other early coaching stock. However, there really isn't a lot around and what there is is probably in JHB's head! Quite where he gets all the livery stuff from, I've no idea, but am certainly very grateful and likewise to all the other good folk on this forum. Anyway, for what it's worth, my own forays into Irish Railways have shown me that there is stuff out there if you look hard enough, though it does diminish the further you go back in history. Hence a degree of compromise becomes necessary, very much the case with my four wheel coach and why those generic Hatton's coaches aren't the worst idea either. If you are starting from scratch, I'd certainly encourage you to do the right gauge and likewise 7mm scale is arguably easier too. The Alphagraphix catalogue has some wonderful stuff in it, including a 2-2-2WT and four and six wheel coaches, plus a host of card kits for wagons all of which would make great starting points for a WCI project. Come on in, the water is lovely!
- 45 replies
-
- 4
-

-

-
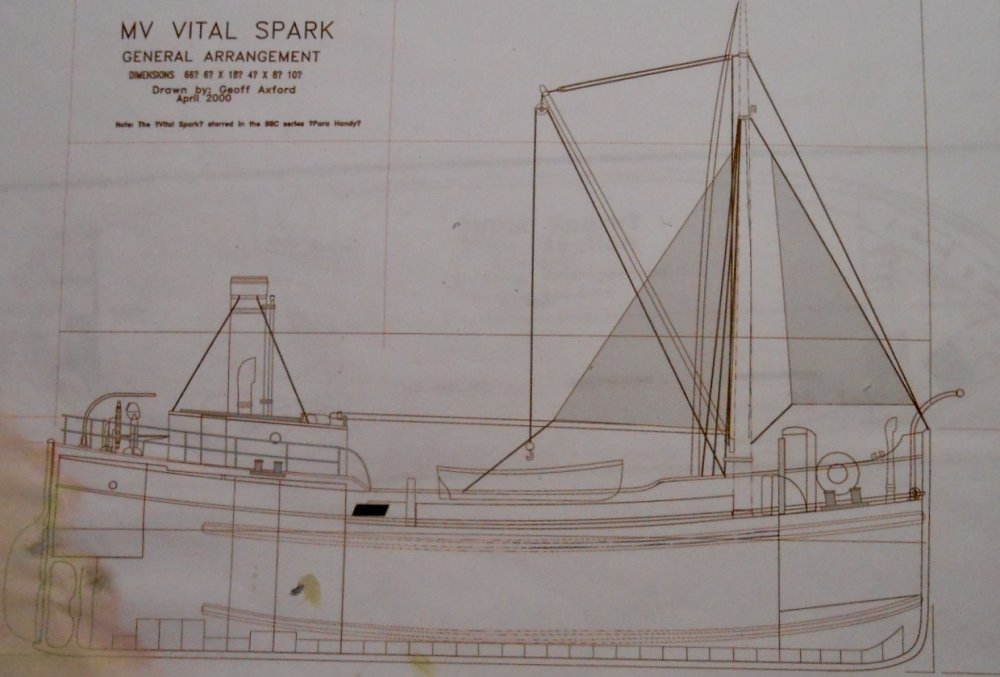
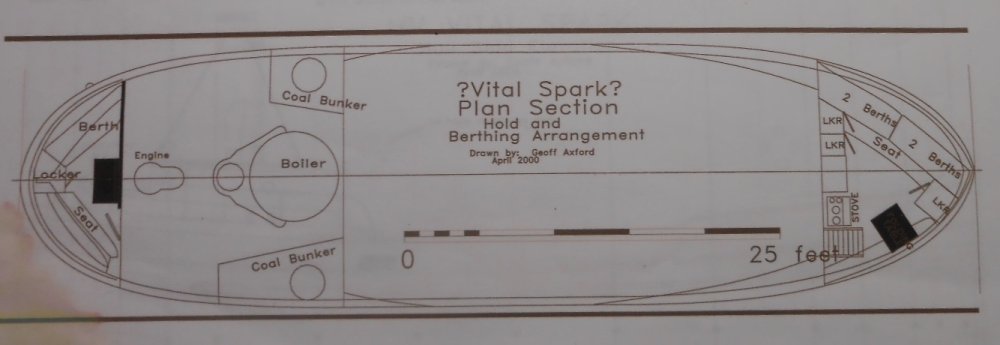
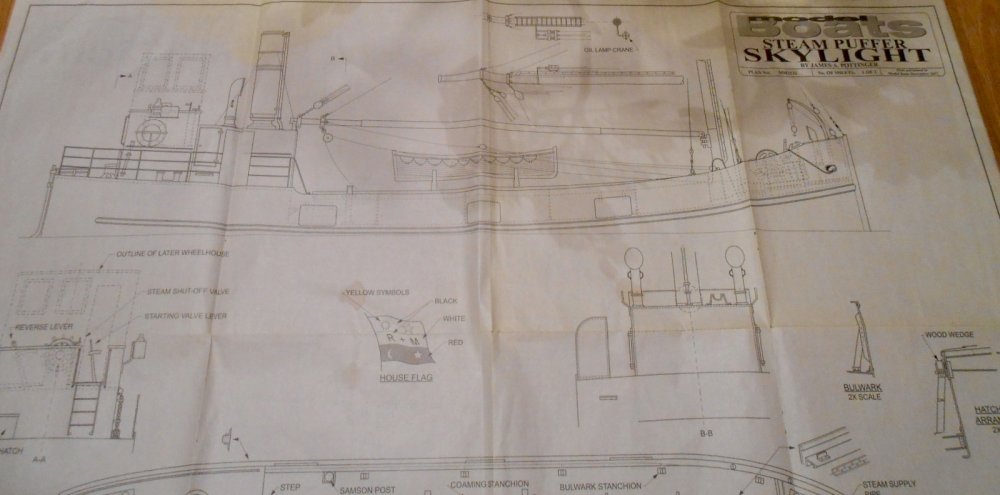
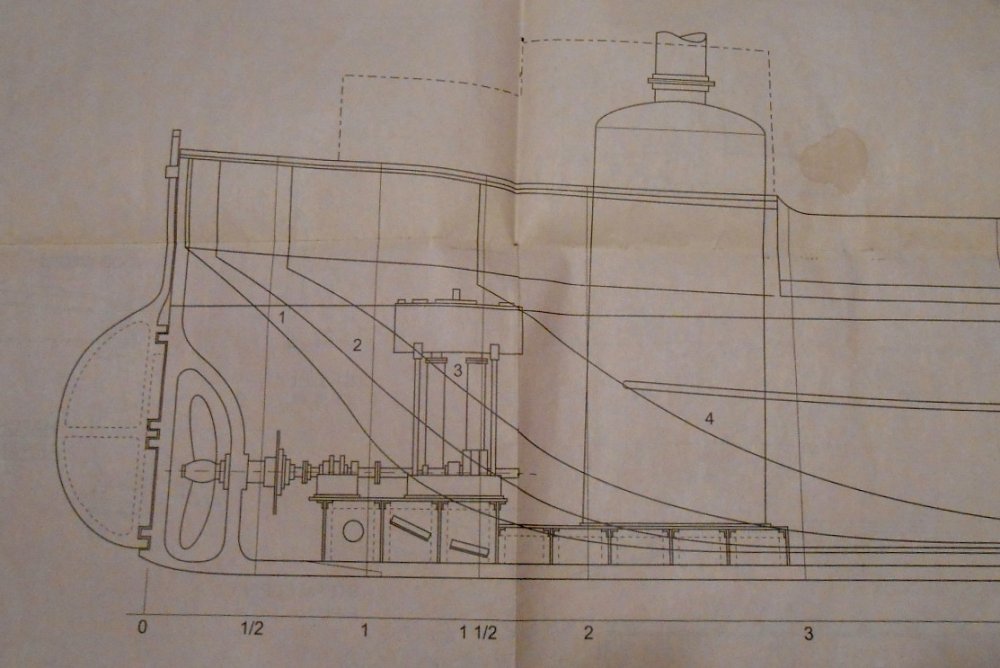
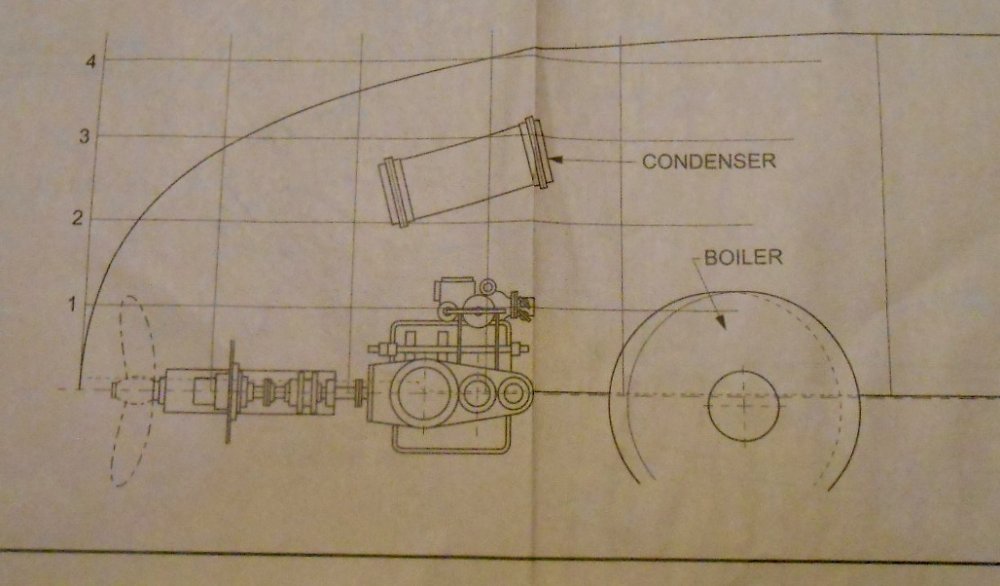
You may well be right, Mike. Various drawings below show the interior detail of two different Puffers - an early 'Vital Spark', with just a tiller and no wheelhouse, plus a later one - the Skylark. Interesting to see the berthing arrangements on the Vital Spark. the skipper had a rear cabin to himself, with a couple of berths for crew in the bow, along with basic cooking facilities. No ensuite bathrooms though! The Skylark drawing gives basic details of the wheelhouse controls, along with the arrangements in the boiler/engine room, which show the importance of weight distribution & why the funnel is where it was. Am hoping the built up forecastle on my Acla allows the boiler & funnel to be behind the wheel house! Meanwhile, much as it would have been nice to include all this interior detail, the fact that none of it will be seen means it just aint going to happen.
-
Thought as much - there is some serious metal forming going on there!
-
Lovely stuff. Amazing what can turn up - when I bought my two, they were the last that Northstar had and he only let them them go when I agreed to buy both. For me, the artwork on the etchings is still some of the best I've ever worked with and suspect it was probably an early use of CAD. Hope you enjoy the build as much as I did. Indeed, still find it hard to believe someone would do a kit of such an obscure loco in the first place - but then they are rather splendid!
-
Can only echo everyone else's comments, Ken. Hope the modelling is proving to be good therapy - the results are certainly doing the rest of us good!
-
Worsley Works do etches, though not sure this is one of them?
-
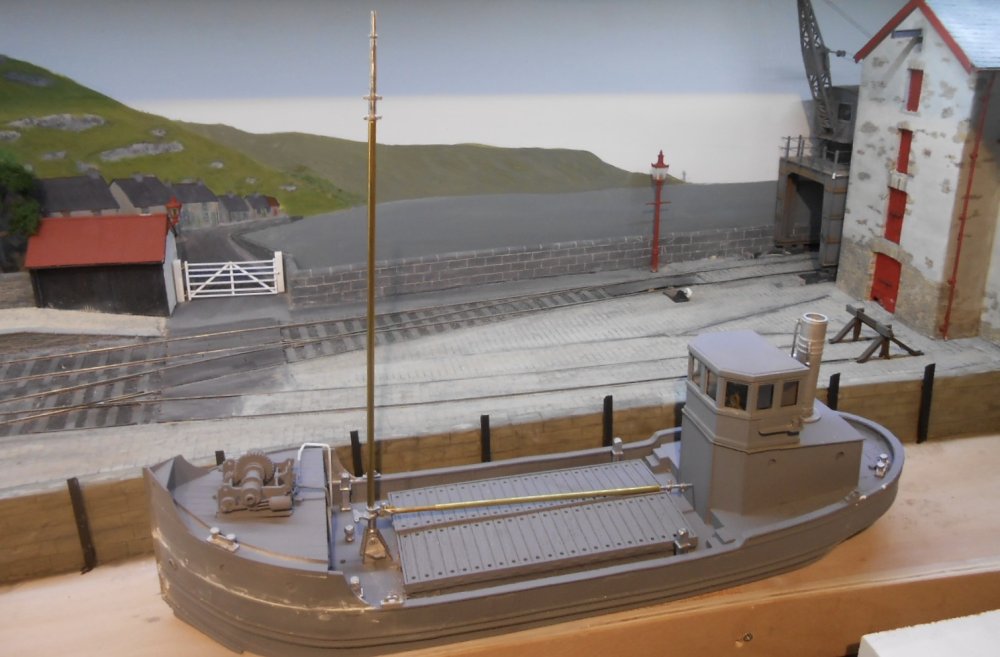
That looks interesting - thanks Ken. The model boat shop in Chatham Dockyard yielded a few goodies on Saturday, including some nicely printed ventilators and a likewise 3D 'lifeboat'. These have been added to the Acla, along with a bit more tidying up of the hull, ready to start painting. This is proving challenging, mainly because the model is actually quite heavy, so needs careful handling. Talking to Gordon, another tip he shared is that he never uses black when painting, so the hull of the Acla is actually a dark grey. Am using Humbrol enamels & it is nice to see more of the model emerging with the addition of some colour.
-
Louvres are the spawn of Satan and should be banned from existence.
-
Just goes to show how designs evolve. I have drawings of an earlier Vital Spark, where there is no wheel house, just a big tiller at the stern, comp!early open to the elements. I still wonder why it would be a neat idea to put the funnel in front of the wheelhouse on the Puffers, but someone's eventually seen sense. There again, we only have to look at some of the early petrol and diesel railcars to see that thinking wasn't always logical. How many railcars did Walkers build before they finally decided to put a driving cab at each end, as on Sligo B? What on earth were they thinking when the D82xx and D84xx locos were designed, with what must be terrible views for the driver? My favourite is those Northern Ireland railcars where the driver perched on a kind of cupola on the roof. Visibility must have been terrible going backwards! Great picture, which for me shows there is nothing wrong with a bit of interpretation, so thank you.
-
Somebody's copied my ship!
-
Interesting comment on that running strip. Looking at the Vic, there seems to be no need for that lower strip. Will check some more, but could be a bit of filing is required.
-
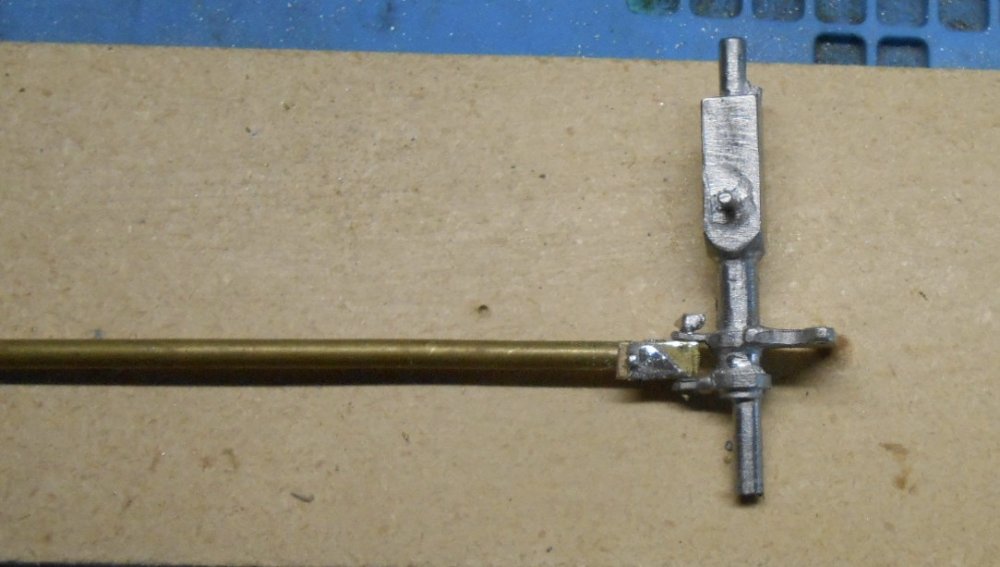
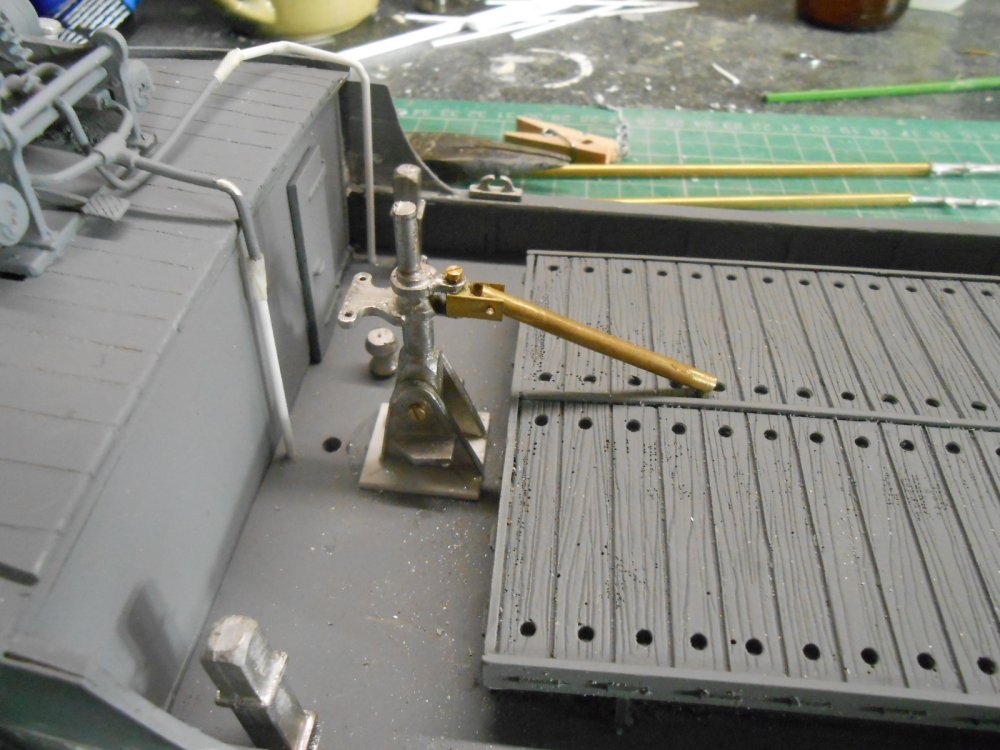
Steadily chipping away at fitting the bits and pieces from the kit this week. First job was the mast and derrick. I adapted the castings with brass tube, pins and 10ba bolts so the the derrick can swing from side to side as well as up and down. I then did the same thing to mast, so it can be unplugged from the ship's hull for safety. Probably one of the finest model shipbuilders around is Gordon Gravett, who actually did it for a living and having met up with him at the Uckfield show this weekend, it was great to talk further over the phone later this week and get some advice. On his demo stand at Uckfield were two stunning models of Somerset & Dorset colliers - very much along the same lines as my Puffer hybrid. The detail he has included is amazing & I was keen to find out where he gets some of his bits & pieces. Turns out I have a very good option locally in the Model Shop in Chatham Historic Dockyard, so a visit is planned to see what I can find. I also quizzed him on things like handrails, ropes and rigging. Just as Broithe suggested, elastic thread seems to be the way to go on the latter here. Another aspect was how to do water - both colour and material. I'd been brooding on using some of the Woodlands Scenics resin, but Gordon suggested using 2mm acrylic sheet, carefully cutting out the outline of the hull, so it sits in the water, rather than on it. However, that is for the future. The rear handrails have been made using the white metal castings from the kit, which needed careful drilling out, plus 0.7mm brass wire The last couple of days have seen work on the two sets of steps, which have had to be scratch built, using various bits and pieces from the spares box, plus their associated handrails. A few other items like the anchor [and its davit] and mast head light have been added too. The aim is to get as much detail added as possible before painting, with the rigging added last. It's not a good idea to try painting [especially airbrushing] once the rigging has been attached, as it makes it go hairy.
-
A few from Malahide Model Railway Museum
David Holman replied to jhb171achill's topic in Irish Models
Quality!
.png.c363cdf5c3fb7955cd92a55eb6dbbae0.png)
