David Holman
-
Posts
4,359 -
Joined
-
Last visited
-
Days Won
117
Content Type
Profiles
Forums
Events
Gallery
Everything posted by David Holman
-
It's a four page article, and and reading it through seems a bit complex, albeit very effective looking. Any water based sealant ought to do, though to be honest, the method used by weathering guru Martyn Welch is a lot simpler. Ordinary masking tape, cut to size, then painted with Humbrol gunmetal, looks pretty good and have been using that method for years.
-
Couple of things may be of interest in the latest edition. First an article on creating wagon tarpaulin from bath sealant and Kleenex. Second a remarkable couple of photos on page 77. Hard to tell if they are of a model, or the real thing. In fact they are neither, instead being virtual images (made using Fusion 360) of High Wycombe station buildings in broad gauge days. Very clever, though one wonders if in future, folk will actually be making real models and it will be all virtual stuff instead!
-
Always enjoy seeing the latest updates. A fine quality rake, which must have needed more that a bit of discipline and patience!
-
A former member of the Chatham Club was in the Royal Engineers. Did some time in N Ireland during the Troubles and also went to Falkland after that war. Couple of times he did a slide show and remember see photos of the Donegal stock, taken at some personal risk because at the time it was not a good idea for a squaddie to stick his head above parapet... When on Falkand, also got to visit South Georgia, so this slide show had pictures of the whaling station railway, plus lots of penguins too!
-
Not sure and other things have taken precedence! The problem is that the kit underframe seems very close to prototype dimensions, so unlike the usual van and open kits, there is not a lot of wiggle room to move the wheel back to backs out to 33mm. Suspect the cure may be to make new buffer beams, or add a fillet to move the buffer spacing out to 6'3. So much easier to do at the start methinks!
-
He certainly knew what he was doing! Lovely models. As for Queen v GM, the diesels were 950hp, I think, but electric transmission would reduce that by about 100hp at the rail, while top speed was 75mph. Feel sure the Queen would be capable of putting out well over 1000hp and over 80mph, so no contest!
-
Nice conversion JB and like the idea of using a glasses cleaning cloth for the canvas. Another method is to use masking tape, which simulates canvas quite well. The only British wagon I've found that directly converts to Ireland is the Slater's standard/RCH tank wagon. It's a nice kit, though have found that building mine to 5'3 has caused the wheels to short out against the frames, so it is currently malingering as a rather expensive static model. However, would certainly encourage anyone to have a go at wagon scratchbuilding - even if it is just a case of making bodies to go on second hand chassis. Vans are probably easier to do than opens, especially empty ones as you need to put in all the interior detailing. At the end of the day, a van body is two sides, two ends and a roof, plus strapping and planking, the former only needing some microstrip. Alternatively, start off by doing a grounded van body that has been repurposed as a store. Either way an enjoyable exercise that can be done with the minimum of tools.
-
Article by Colm Flanagan in the latest RM, which describes this 4mm scale, 00 gauge layout. Very nicely done, with the 16x12 space enabling generous curves and a lot of railway. Innovative adaption of rtr stock to create a convincing depiction of County Down. Well worth reading and some great pictures too.
- 1 reply
-
- 6
-

-
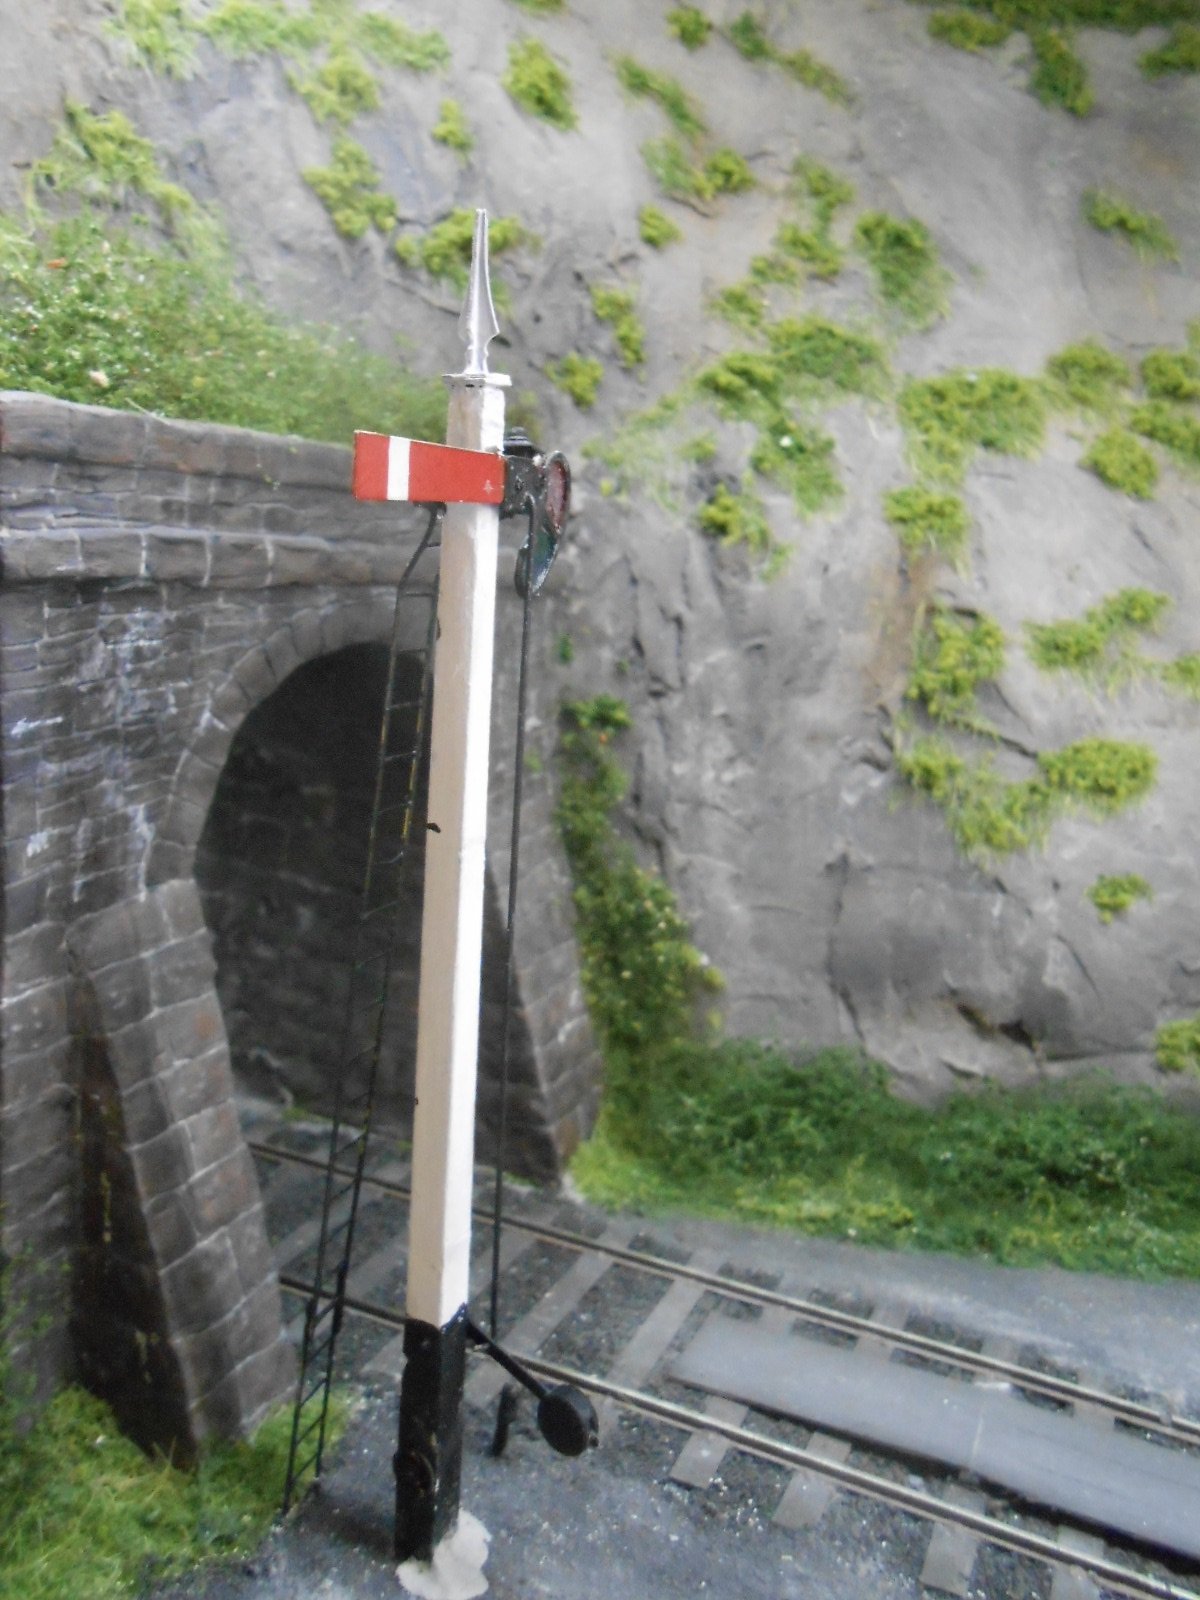
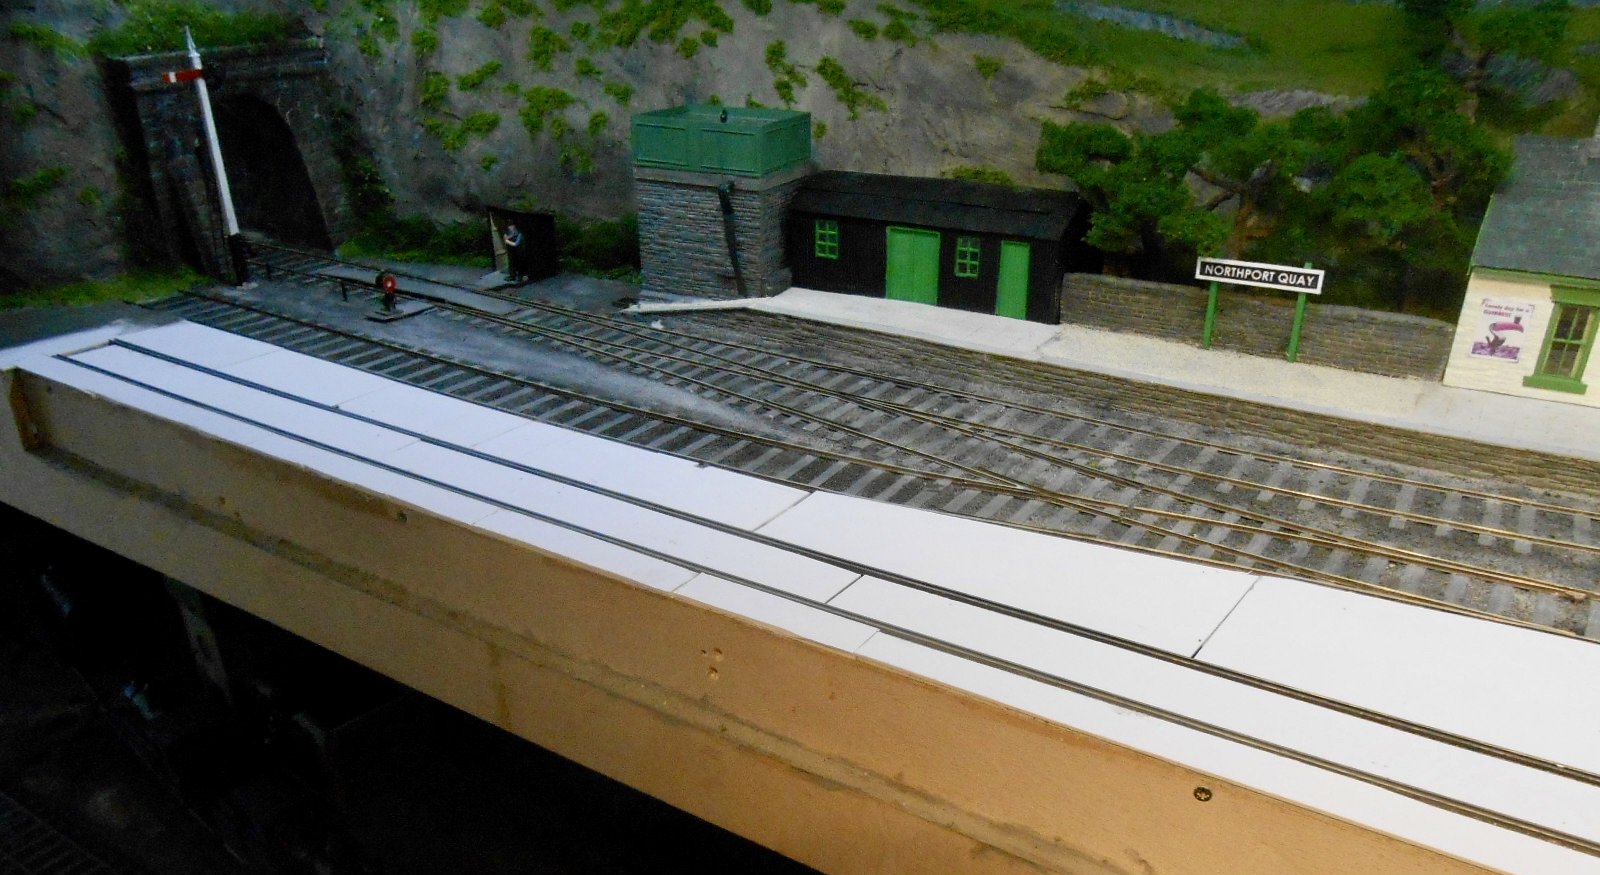
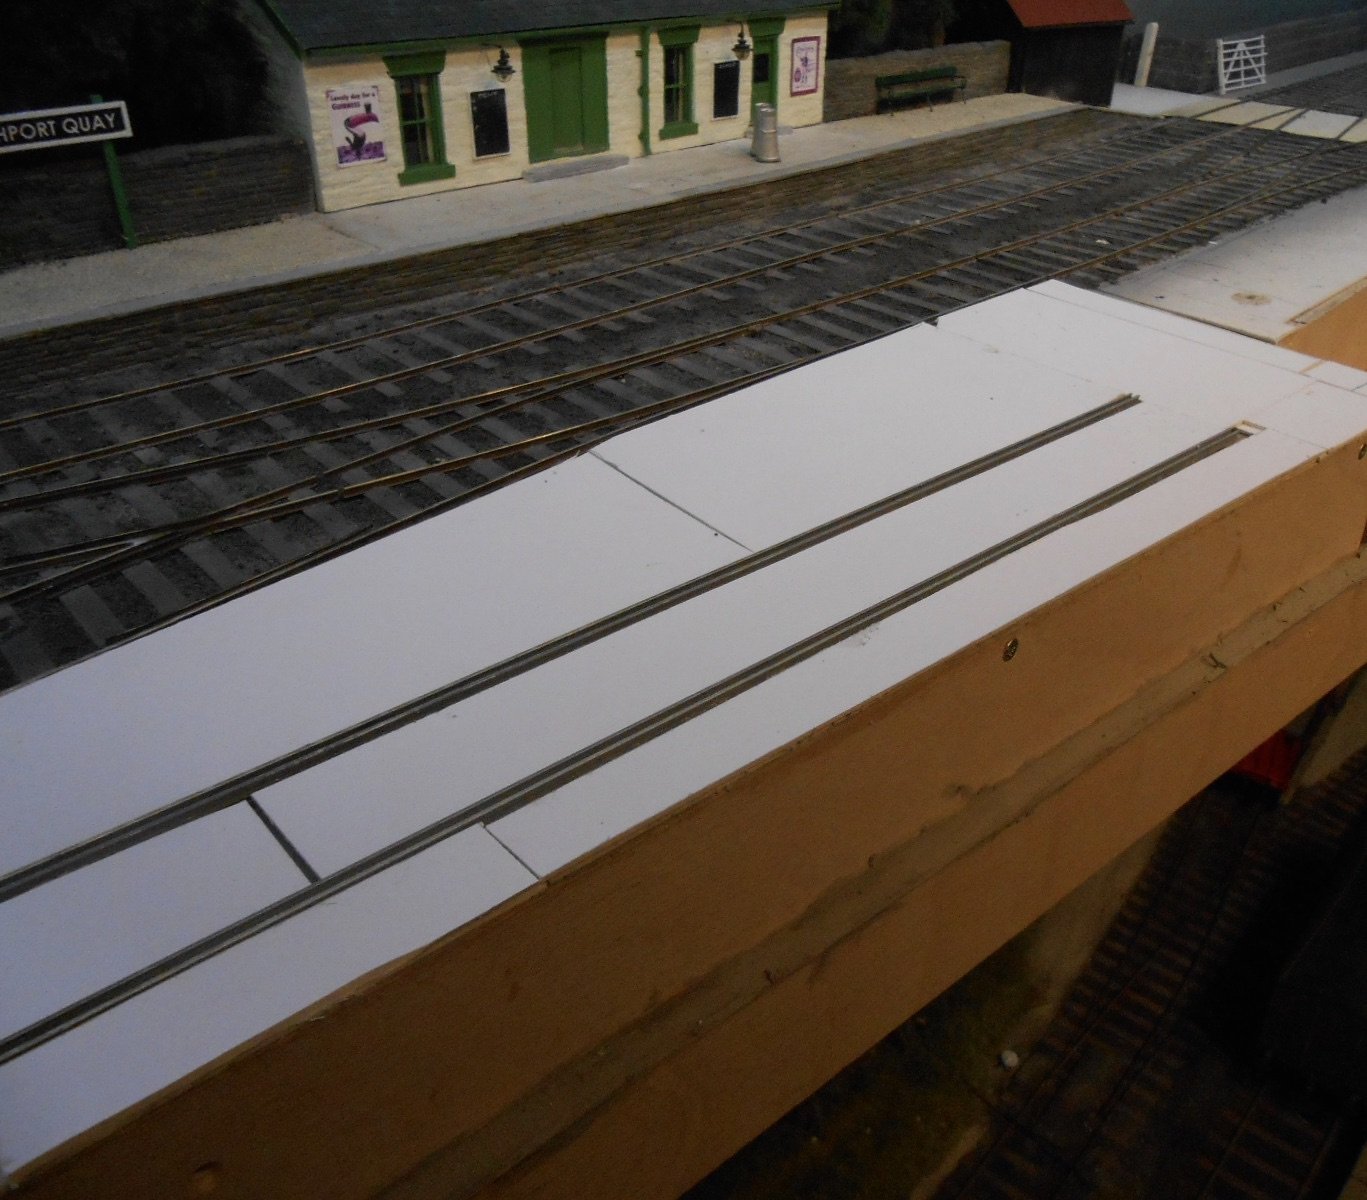
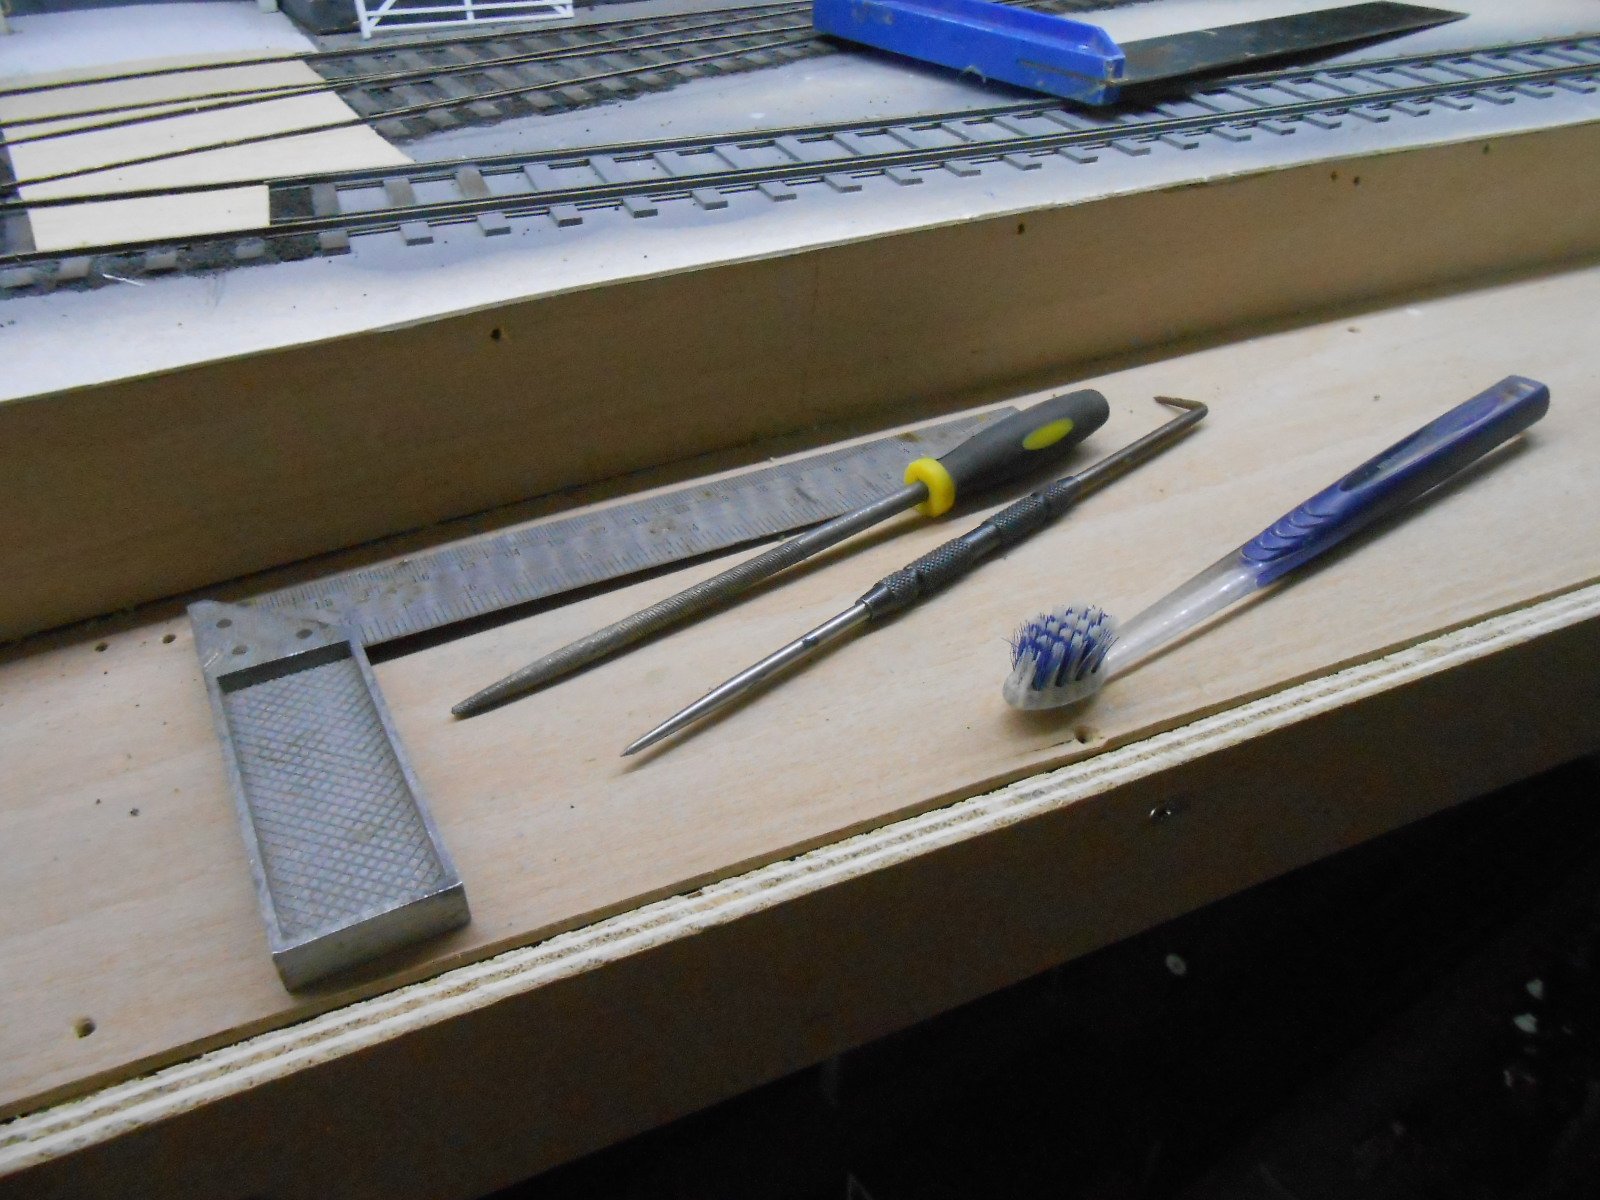
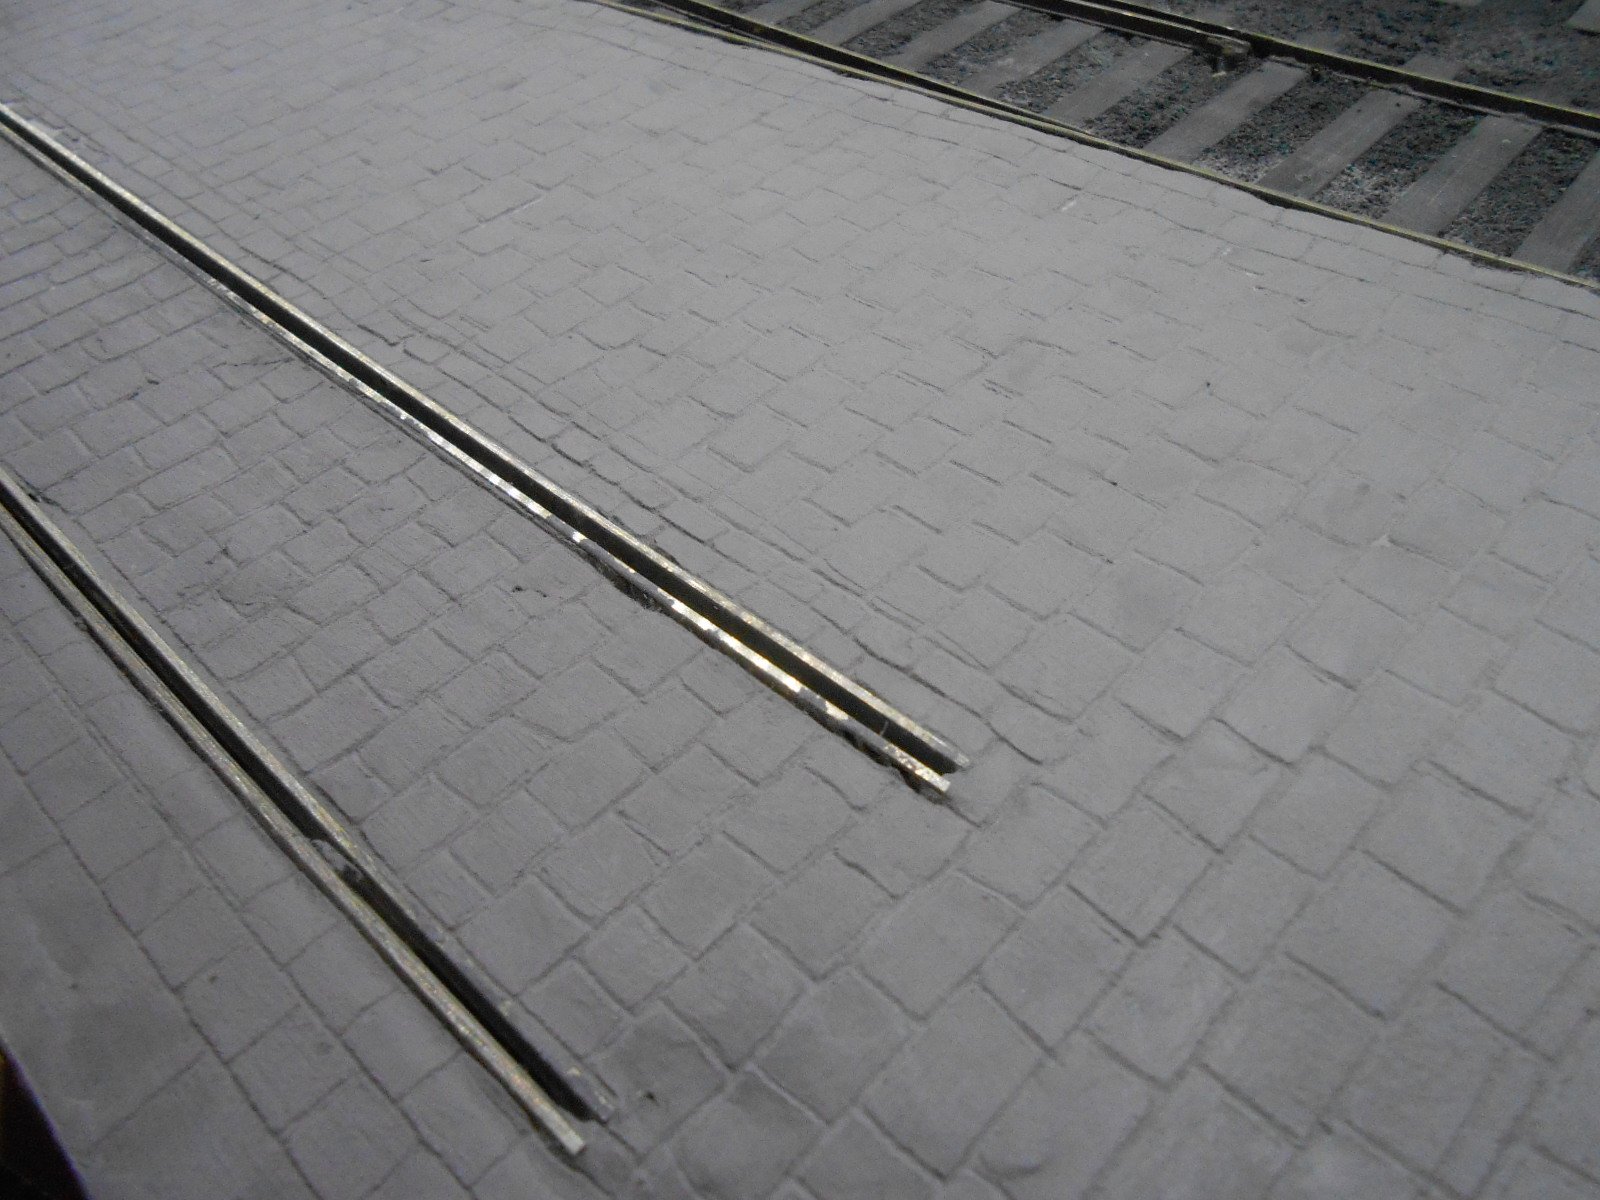
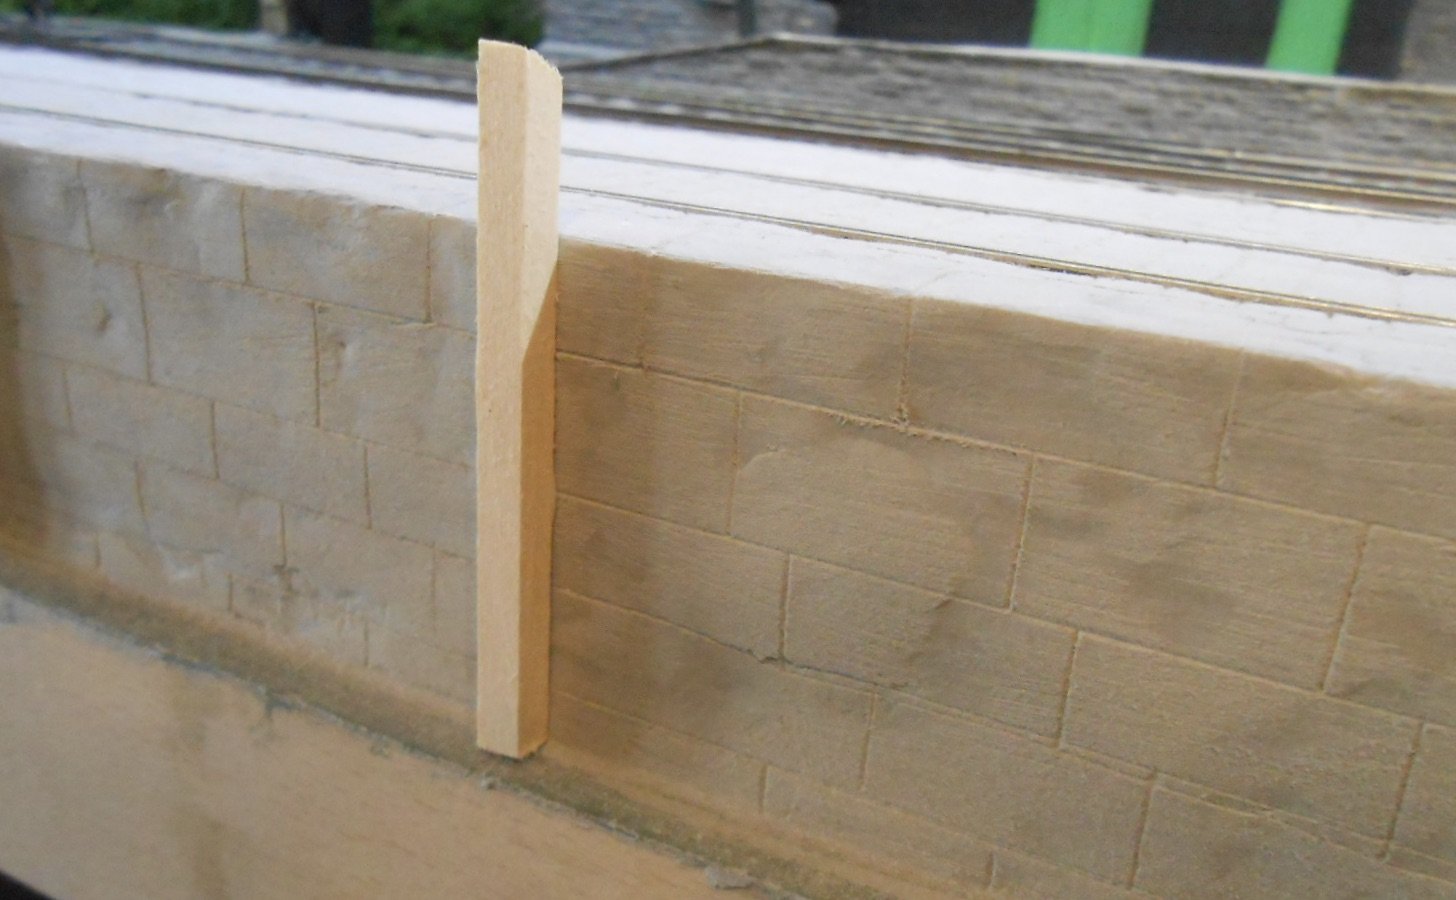
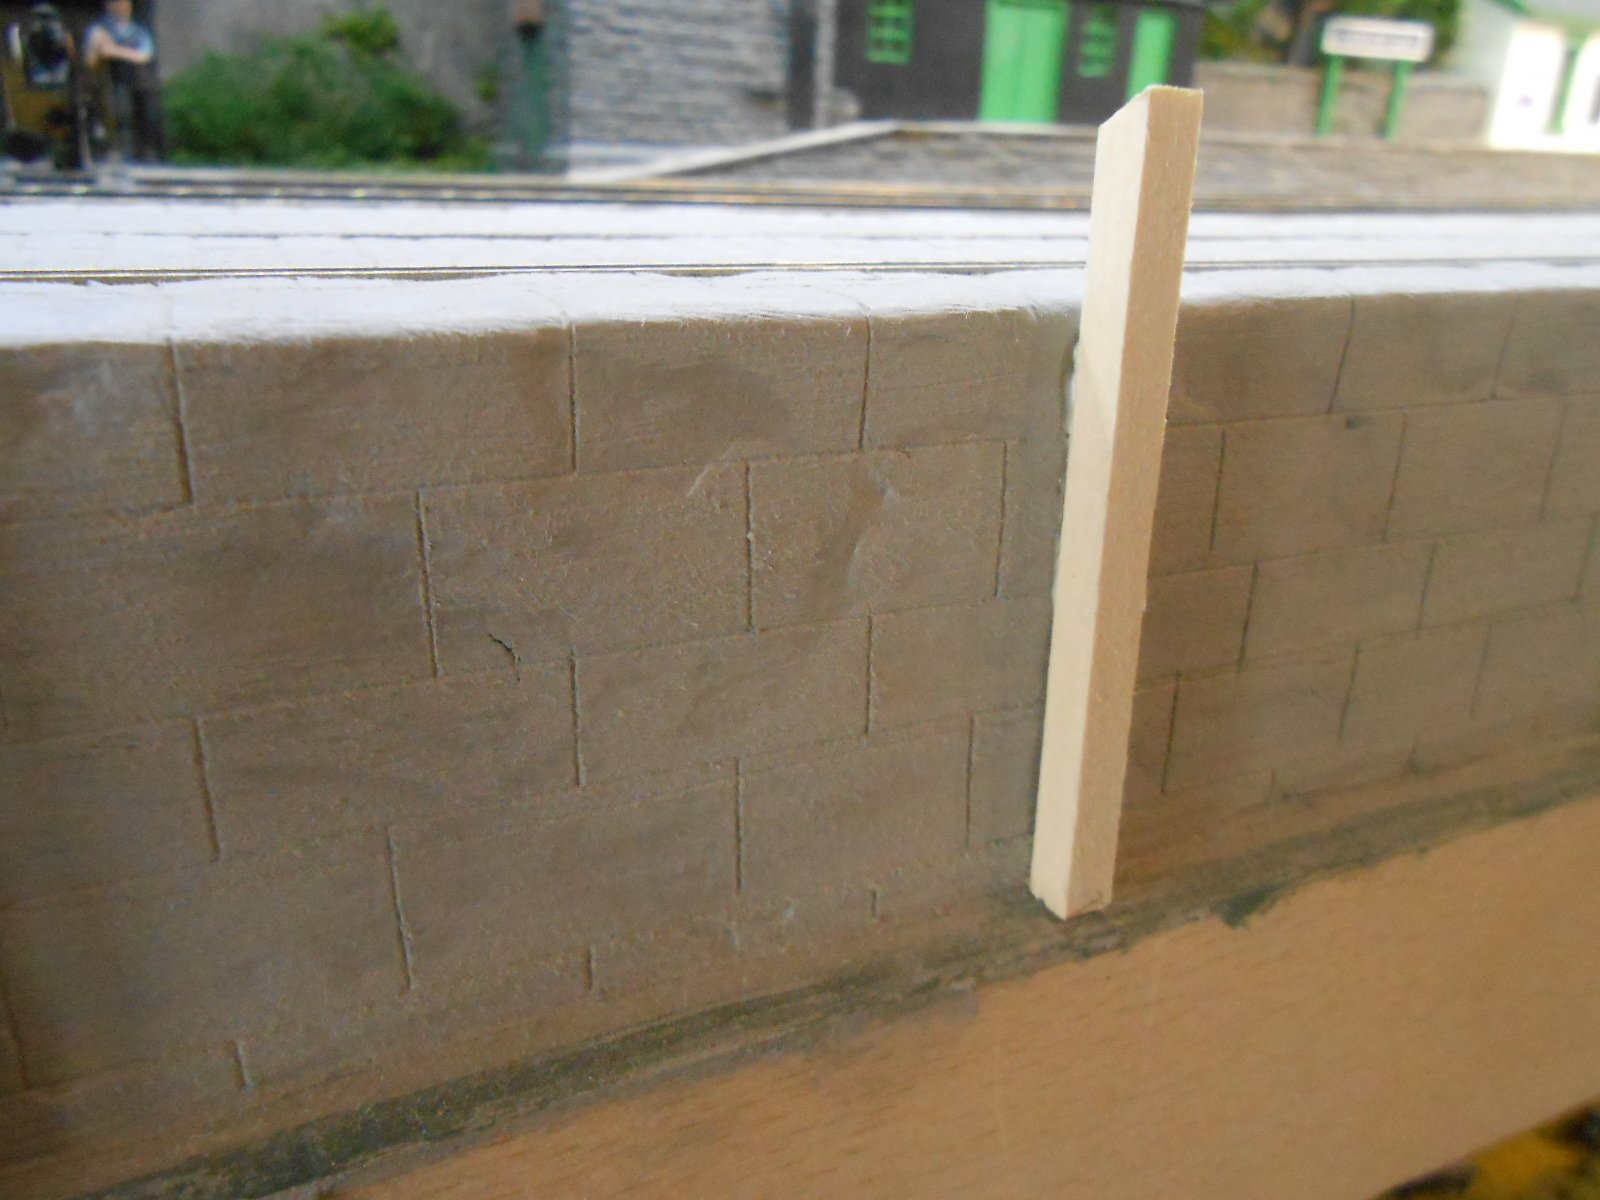
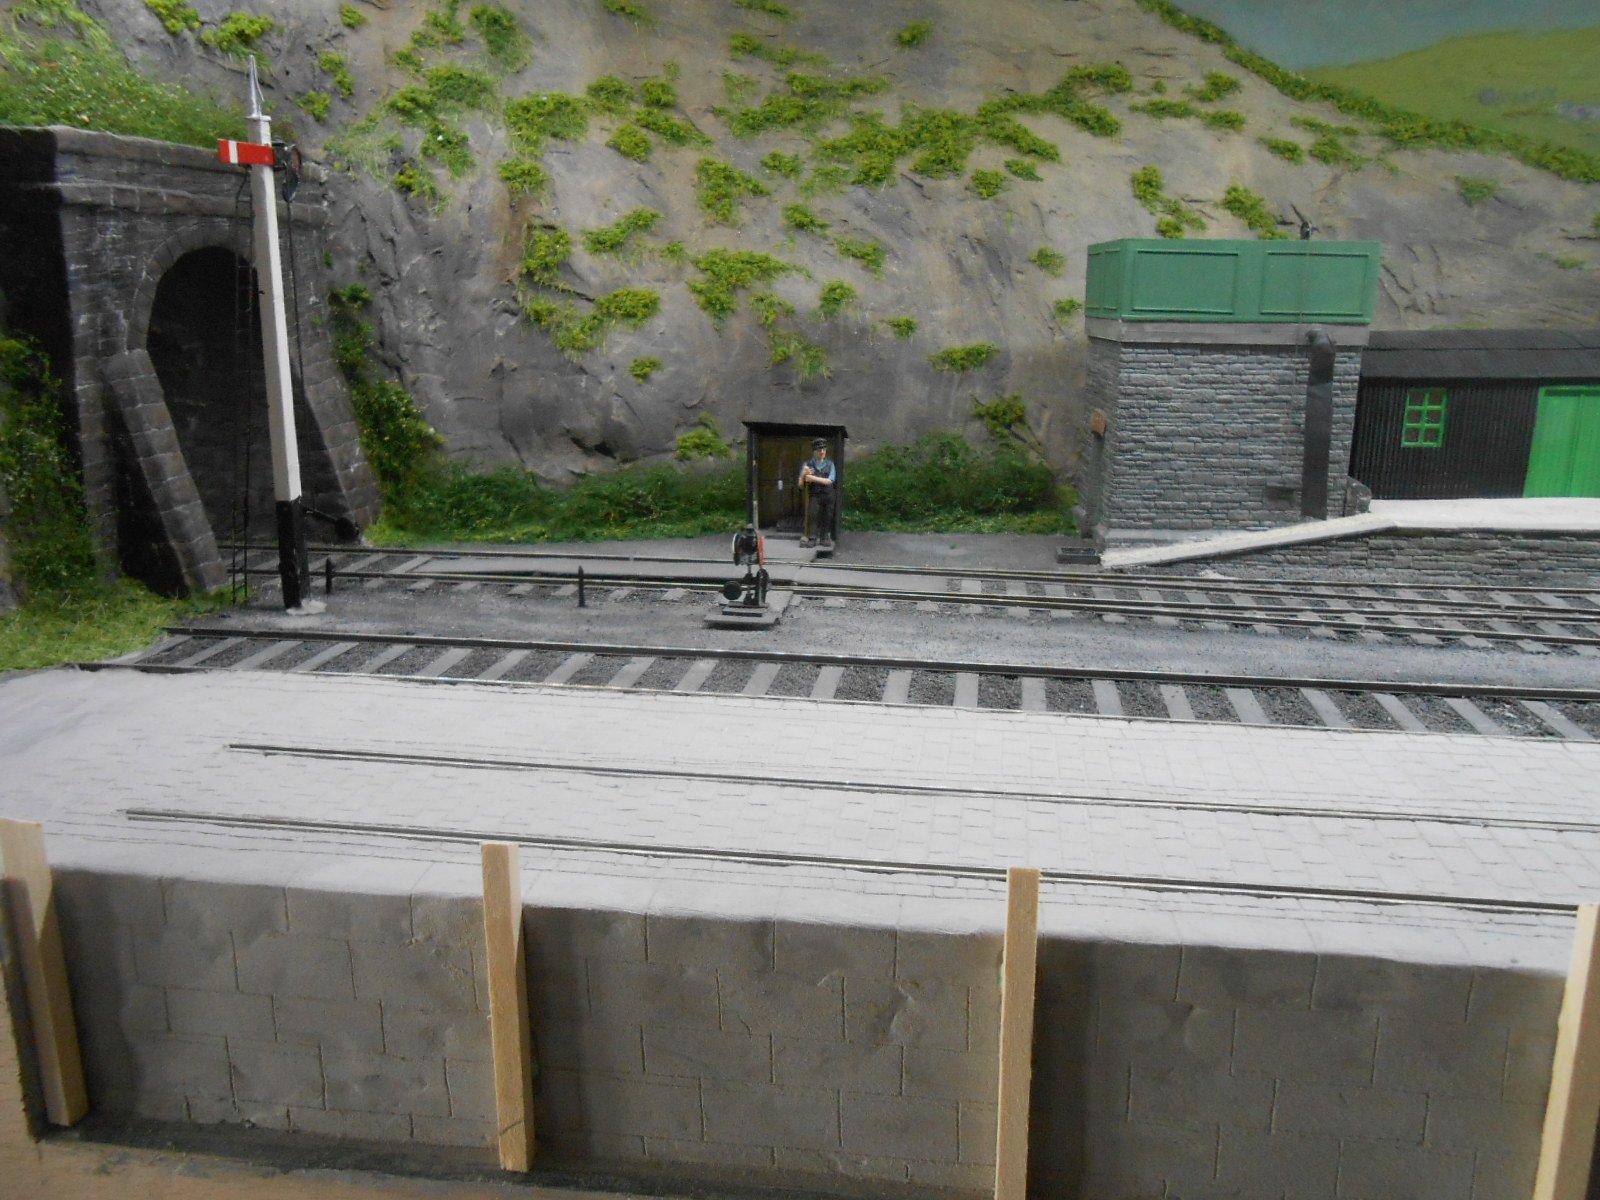
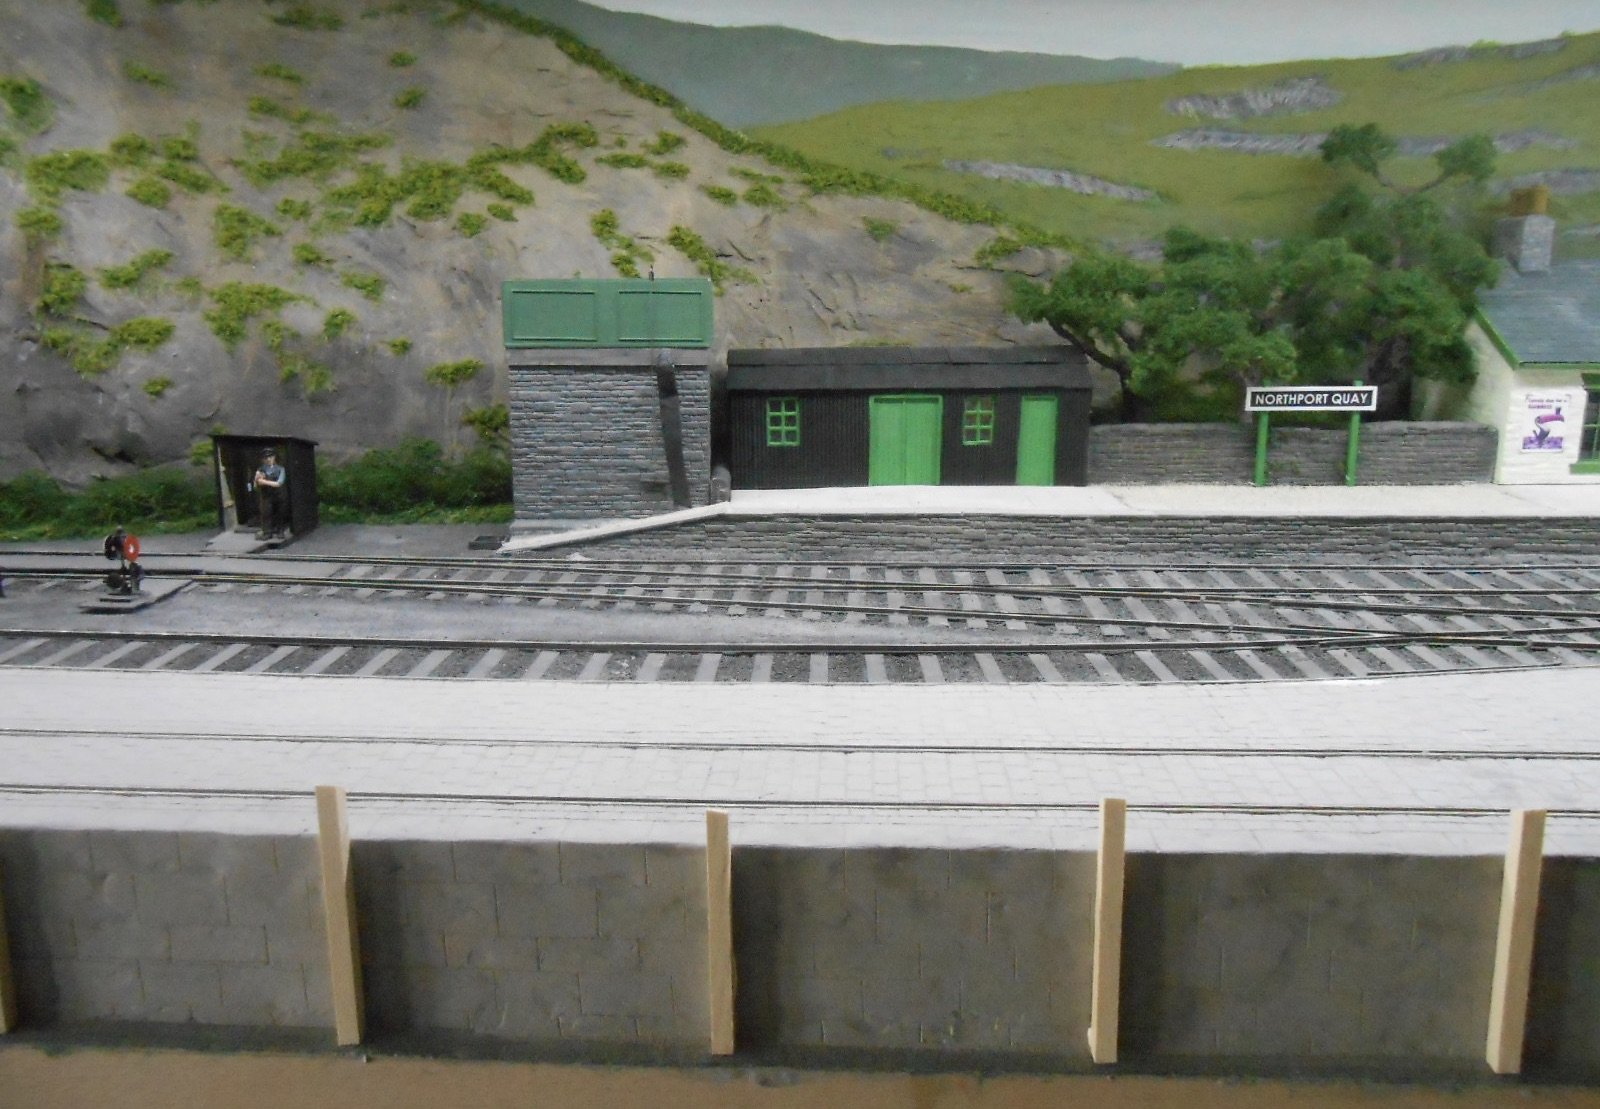
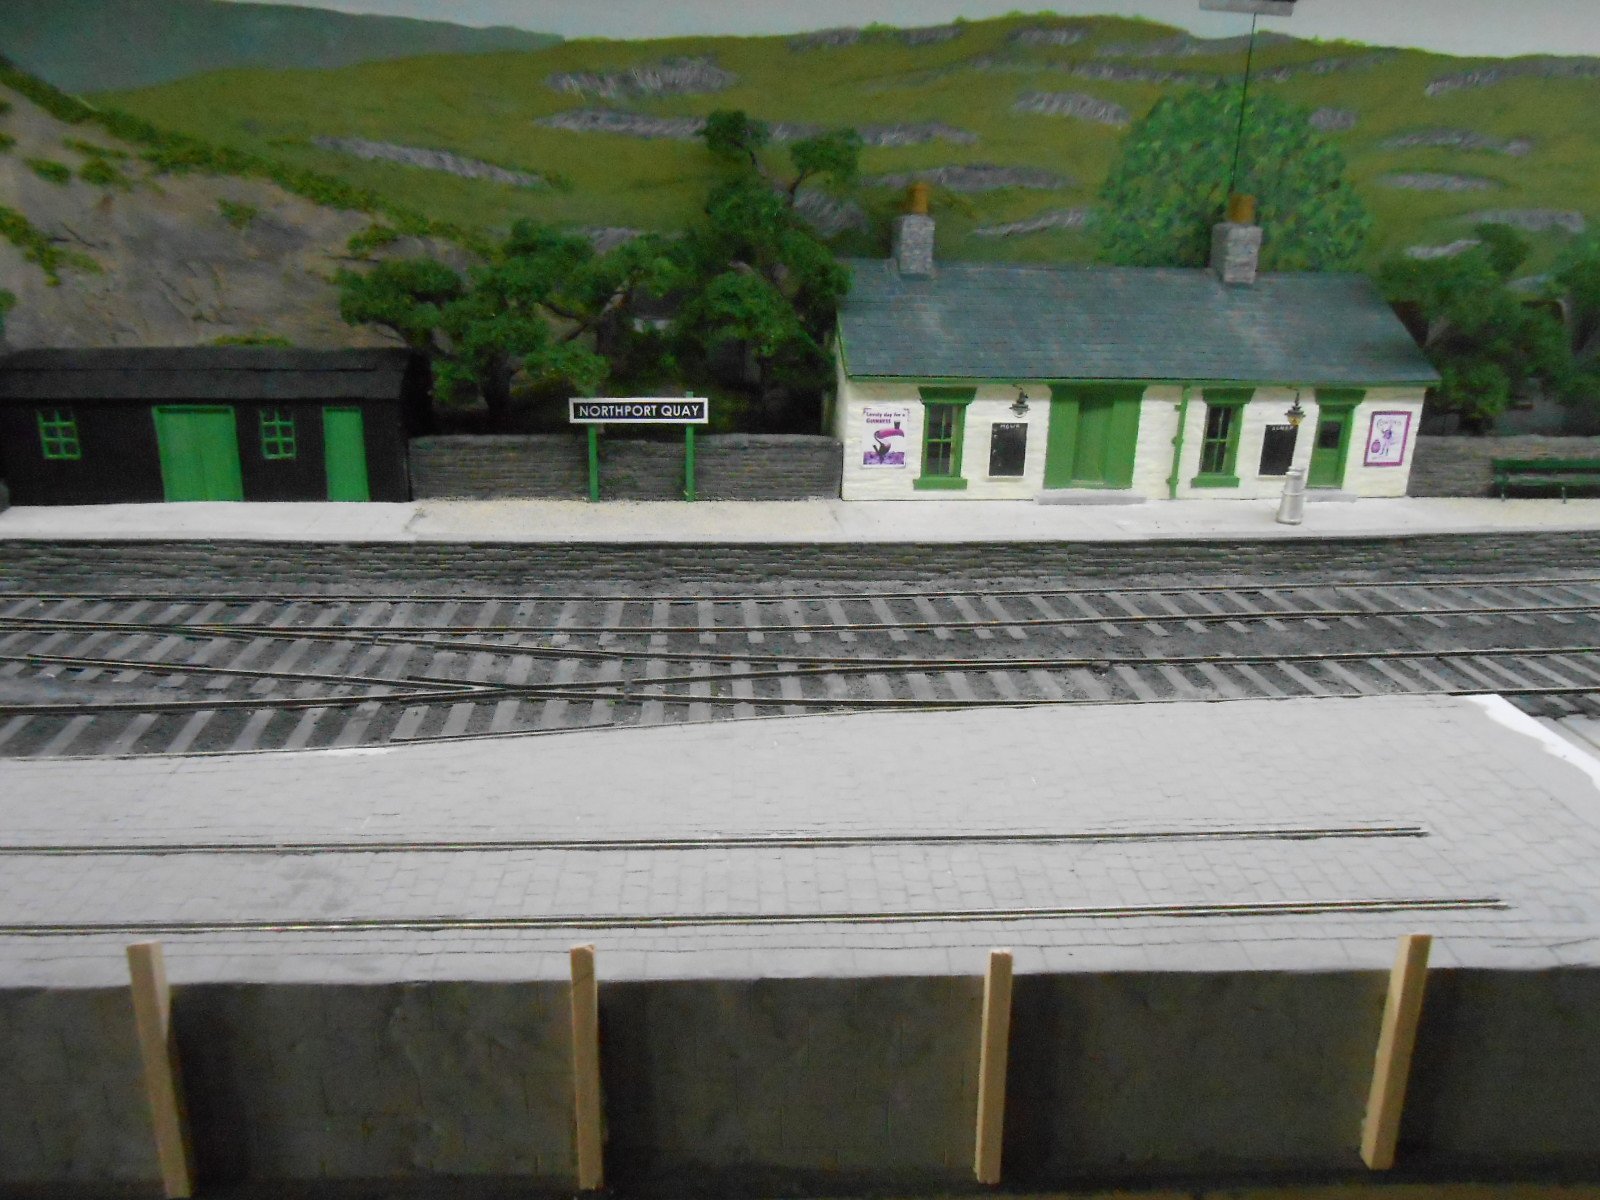
With the left hand baseboard going fairly well, it made sense to try and finish it, so that meant addressing the quayside and ground cover. First though, I finished off the above ground parts of the signal, by adding the ladder and finial, before touching up more of the paintwork. The idea for the ground work was that there would be substantial stone blocks making up the harbour wall itself, with various sized stone setts filling in between the tracks. In practice, that has meant a lot of scribed DAS clay. Began with a foundation of mounting card, to bring the ground level up to about 1.5mm below the rail tops. This was fixed down with contact adhesive, which was then lightly painted with PVA, before smearing/thumbing on the DAS to about 1mm thick. I smoothed the surface and rubbed it down once dry, but the surface is far from even. Ok, the variations are probably only +/- 0.25mm, but that is enough to create a bit of texture. After that, came the laborious process of scribing in all the setts and stones. The tools for this are very basic - a square and a scriber, plus a rat tailed file for making some of the scribed lines a bit wider/deeper. An old toothbrush is also important for clearing away the dust. Half an hour in, it occurred to me that some of you out there would be contemplating laser printing various sections, but once you get in the zone, it is a pleasantly mindless operation - although best done in chunks of no more than half an hour or so. I used a straight edge for the long lines, but everything else was done by hand in a deliberately random fashion. Smaller setts go parallel to the rails, with larger ones at right angles in between. For the harbour wall, the large stone blocks have much smaller gaps between them, while I have added some 5mm square strip wood to act as a barrier to any craft moored against it. The not insignificant task of painting everything comes next, but thus far, it seems to look the part.

- 242 replies
-
- 16
-

-
-
Layout Idea: GNR(I) Bundoran-Sligo line
David Holman replied to RaglanRoad's topic in Irish Model Layouts
There was also the Mullaghmore harbour tramway (1820-1840) and Barium Consolidated's 2' gauge line (late 1920s) en route. By the by, I may have to start and a thread on the bizarre interpretations of an Amazon Tablet. This morning, it replaced tramway with 'grandpa'! Not sure what planet it comes from, but if ever strange words come out in my posts, it is not me! -
Ordinance Survey - the organisation behind all map making in these islands.
-
Well done Mark and we'll done, Ken!
- 11 replies
-
- 2
-
-

-
- 4mm scale
- 21mm gauge
- (and 2 more)
-
I've got LEDs in the trainshed and locoshed on Fintonagh, which give a nice low level light. Unfortunately, no idea what type they are and pretty much impossible to access now...
-
The line at Clifden was a two foot gauge, isolated affair, serving the Marconi radio transmitter station. Not much to it, though a couple of well known photos exist showing Alcock and Brown after their historic flight across the Atlantic, having crash landed nearby. They were transported down to Clifden in a rail mounted motor car, which could make a nice diorama. Clifden was also the intended terminus of the Ulster and Connaught Railway - a three foot gauge line starting at Newry, taking in some of the Cavan and Leitrim, then wandering across to the West coast. No exactly micro layout though, but the possibilities are endless.
-
Pretty high tech for the day and still look great now.
-
Works beautifully through the windows.
-
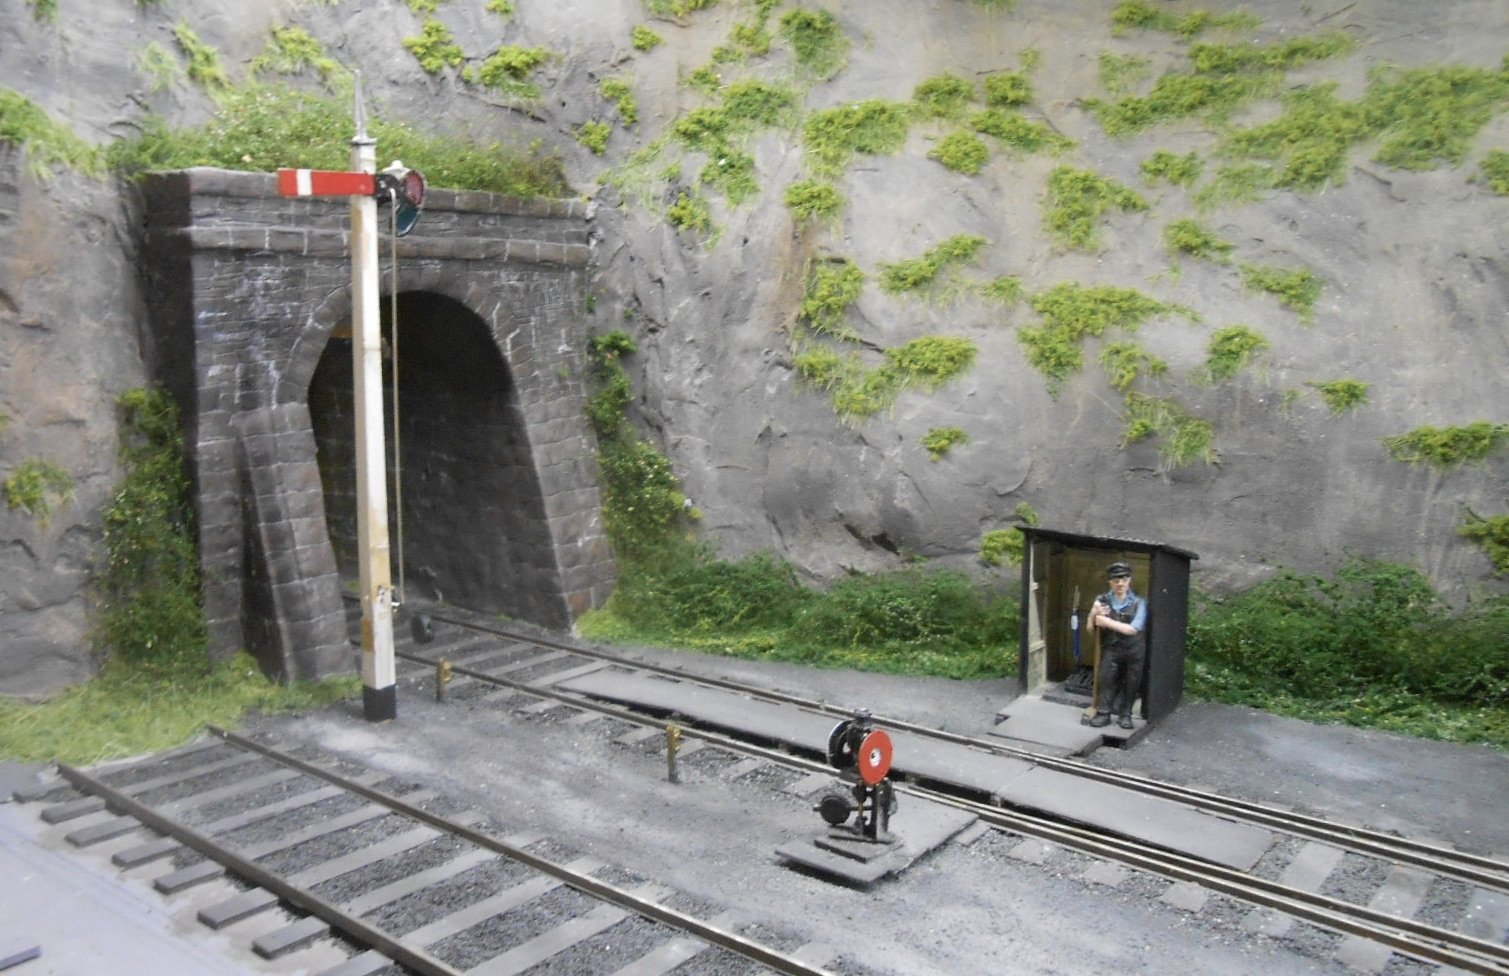
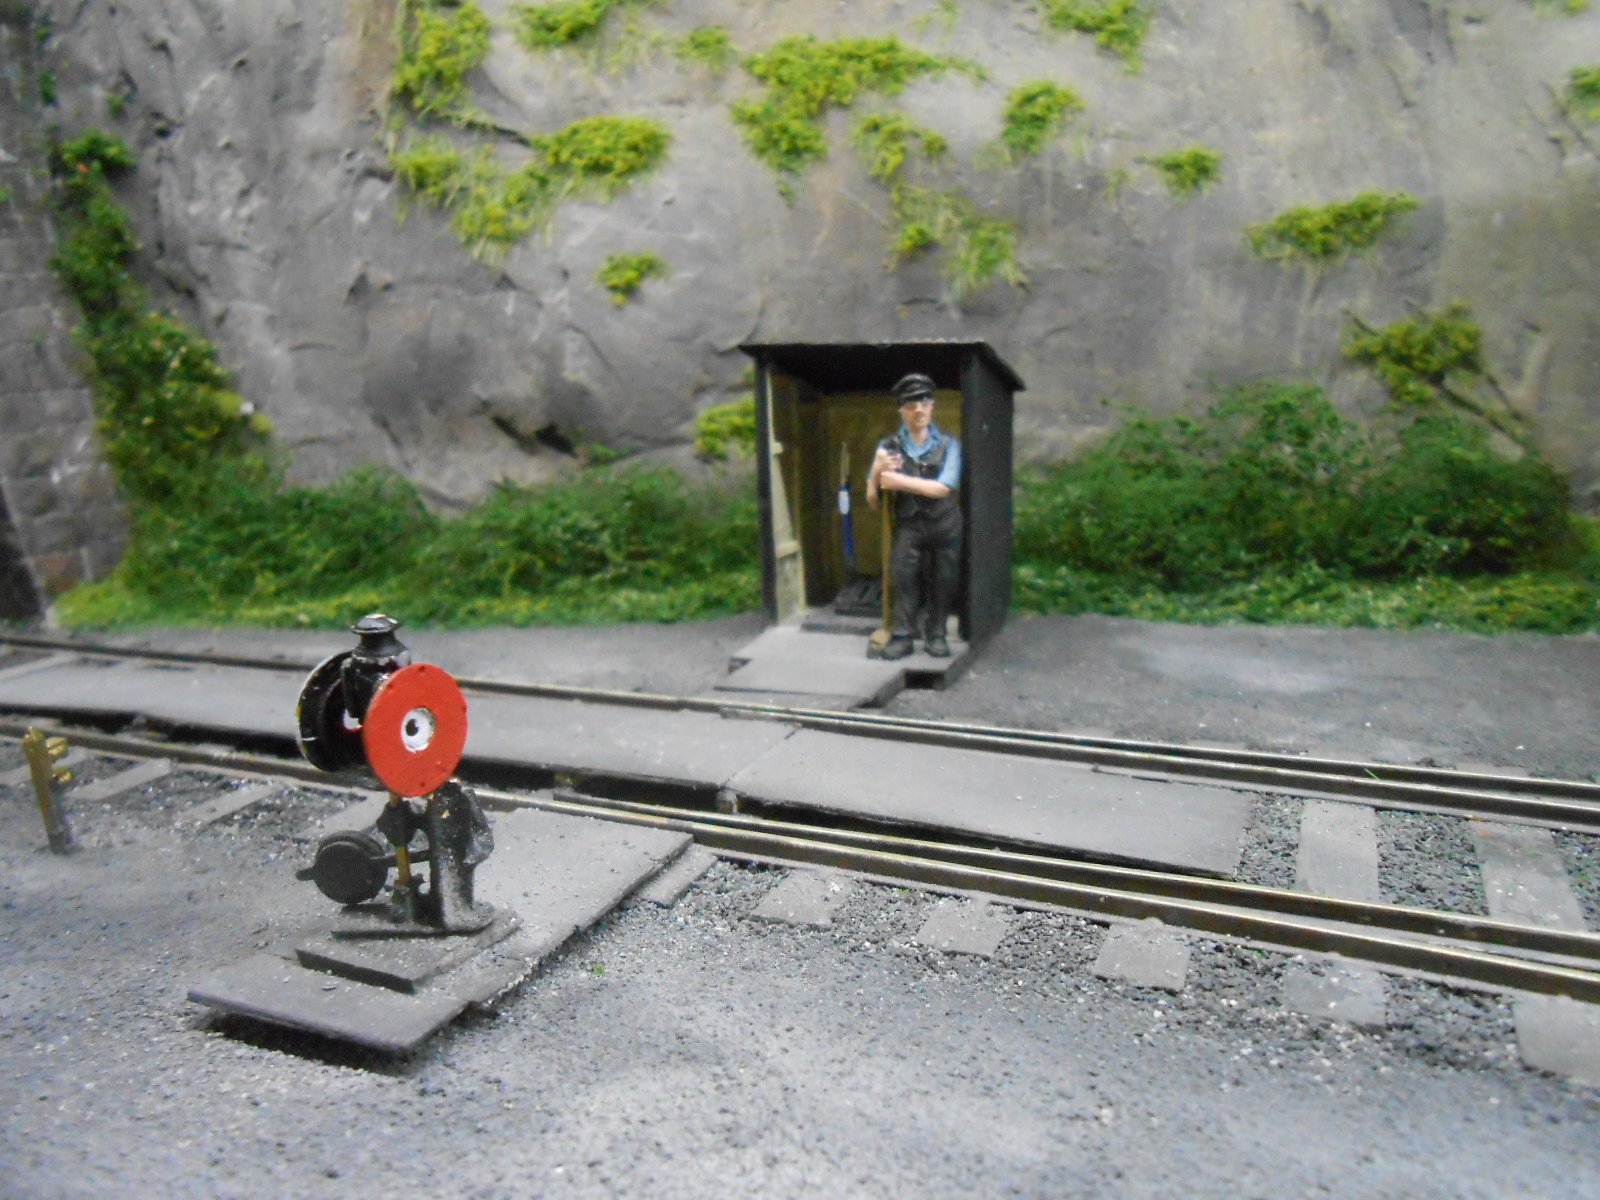
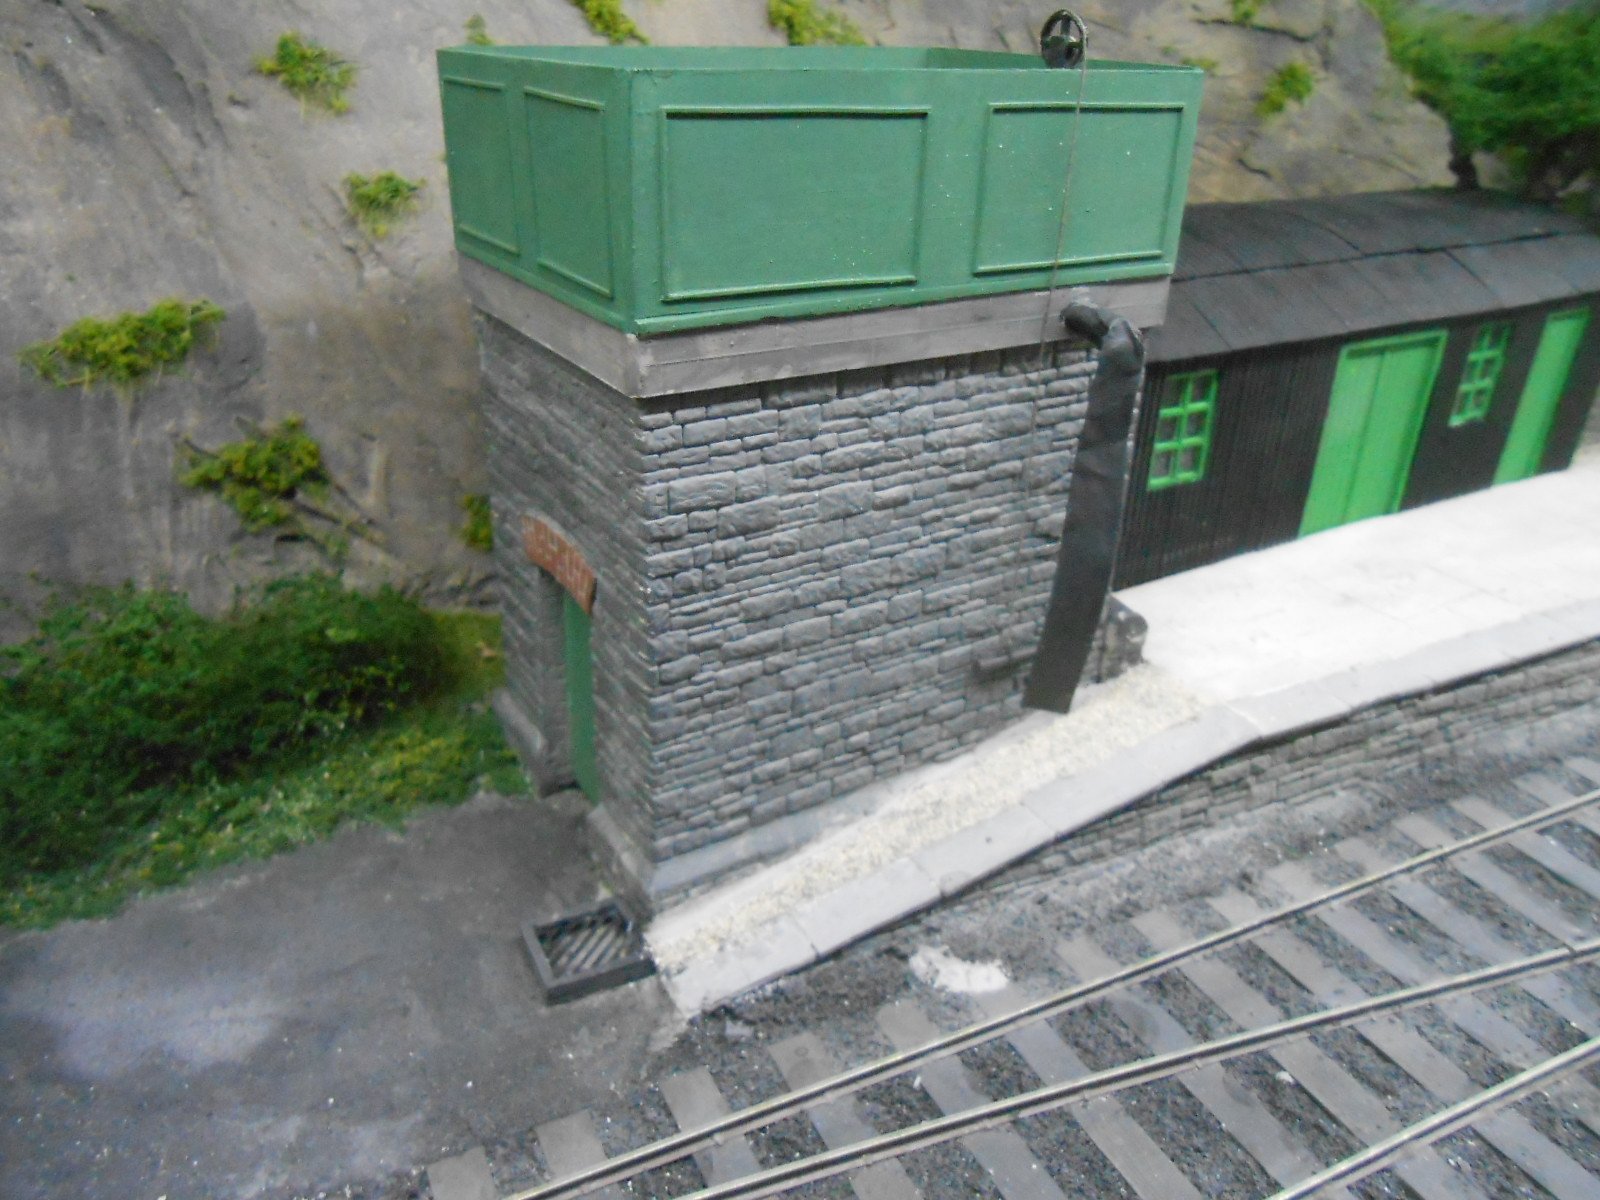
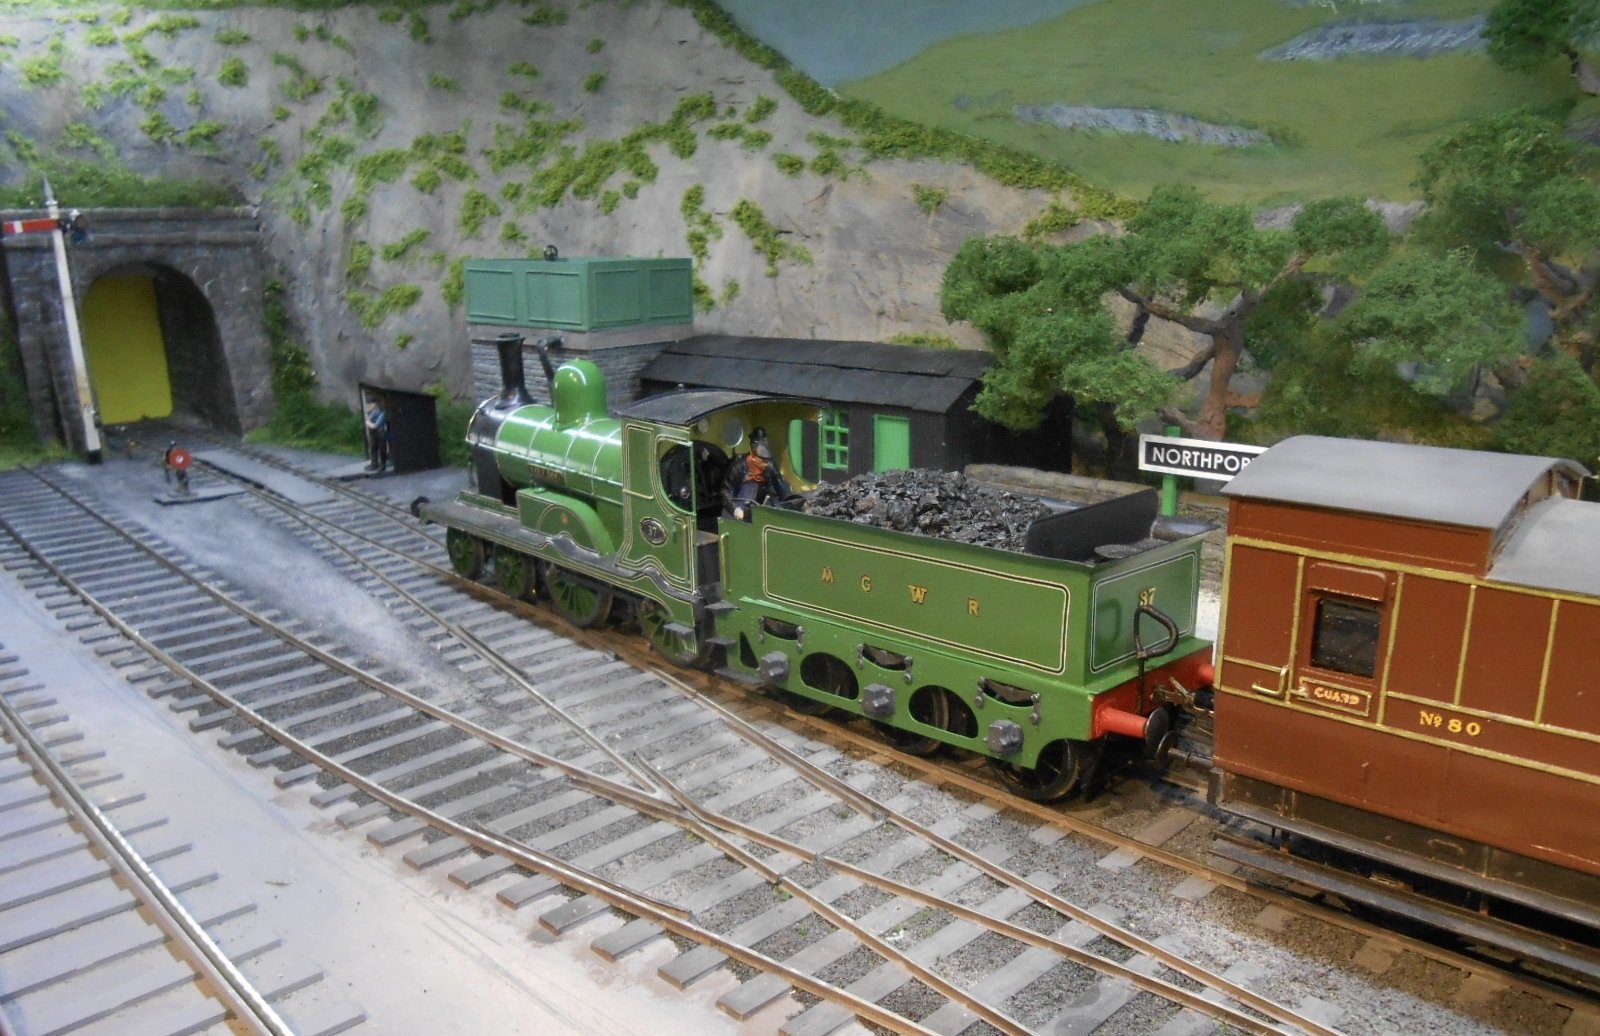
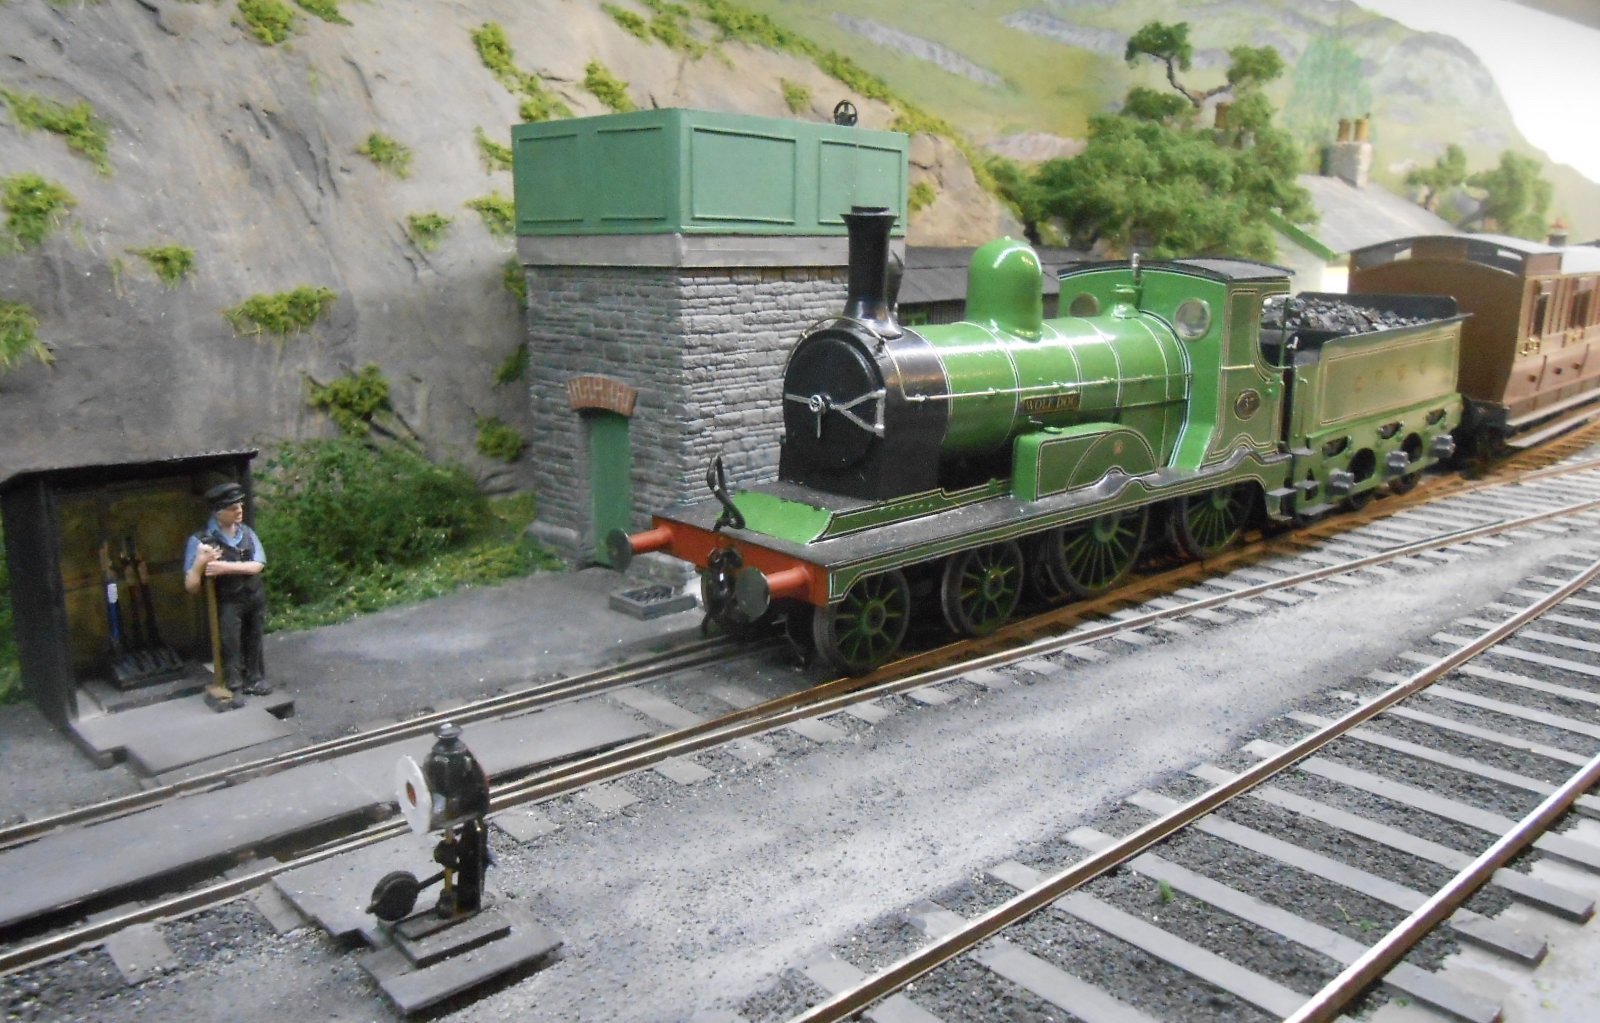
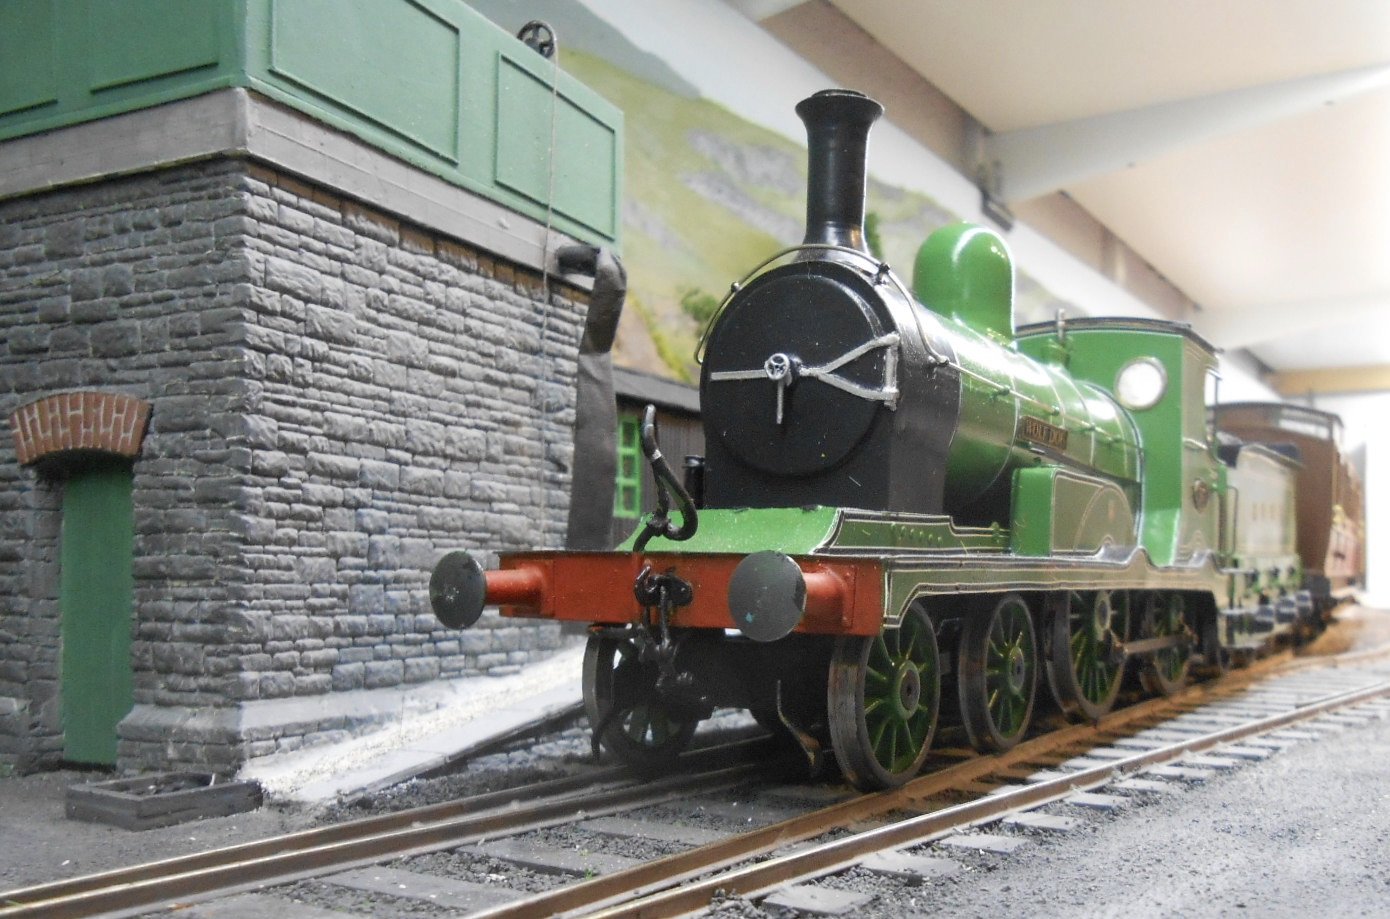
A bit of gentle fettling for the area around the ground frame this week. Chinchilla dust on gloss black paint for the ground cover, subsequently gone over with acrylics and weathering powders when dry. The water tank has been fixed down and any gaps fills with DAS. On the platform ramp, made a gulley, down to a raised drain to take away excess water when loco tanks are being filled. As for the signalling, you can see the ground frame hut has been finished off & now sports a porter, leaning on his broom, as suggested by Mayner. On the other side of the track, the point rodding has been boxed in, Sligo Leitrim style - my excuse is that it protects the metalwork from the salty air, plus being a lot easier to make... Spent this morning trying to make the signal work, though it still needs to be hooked up under the baseboard as well as needing a repaint and the all important ladder. Given the recent photos of MGWR locos, thought I'd include another in that glorious green livery, so here we have Achill bogie 'Wolf Dog' and a short mail train, which will grow after reversing at Northport/Belmullet, for the trip to Ballina & Claremorris.
- 242 replies
-
- 16
-
-
-
MGWR Passenger and Goods Stock - is there a need?
David Holman replied to 2996 Victor's topic in Irish Models
Resin casting also has merit, as Andy suggests. Have used it a lot on my 7mm scale standard and narrow gauge projects. Make one side and one end from plasticard, then make a mould of each ( plenty of materials available on line). This bit takes 24 hours to set, but after that the two part resin sets in 45 minutes and can be assembled with superglue. Very cheap to do, though you still need wheels and chassis of course. -
Fab - and pretty decent build time too.
-
High Level gearboxes are very good too.
- 309 replies
-
- 1
-
-
- mgwr
- 21mm gauge
- (and 1 more)
-
third radius points and do i really NEED a second running loop.
David Holman replied to Sean's question in Questions & Answers
You will have problems with the second plan because the tracks are too close together and passing trains will collide. The tighter the curve, greater the overhang and third radius, which looks about 15" /375mm is hideously tight for anything other than short, four wheel stock. Even if stuff will go round it, bogie stock really won't look right. -
Good to hear. Go for it and enjoy the journey.
- 309 replies
-
- 1
-
-
- mgwr
- 21mm gauge
- (and 1 more)
-
It is a bit scary when you research something obscure, only to find not far down the listing, your own 'might have beens ' staring back at you!
-
This is probably going off at a slight tangent, but does the old Wrenn/Hornby South Eastern R1 translate into anything vaguely Irish? Converted one to EM without any problems and the motor/gears were good for the day. Mind you, that was nearly 40 years ago, when I returned to model railways following the usual sojourn of pushing up the value of brewery shares and chasing girls. At the time, I knew almost nothing of modelling and the tool kit was vestigial, so an R1 might be a starting point perhaps and there must be a few out there second hand.
- 309 replies
-
- 1
-
-
- mgwr
- 21mm gauge
- (and 1 more)
-
Brookhall Mill - A GNR(I) Micro Layout
David Holman replied to Patrick Davey's topic in Irish Model Layouts
Looks like 'grey board', which you can get from artshops. Hobbycraft usually sell it too. UHU sticks it well, likewise Resin W. Lots of nice 'gingerbread' in the details, especially that penultimate photo.