murrayec
-
Posts
2,725 -
Joined
-
Last visited
-
Days Won
70
Content Type
Profiles
Forums
Events
Gallery
Blogs
Store
Community Map
Everything posted by murrayec
-
PP Try Slaters I believe they can supply broad gauge axles- could be corrected on this though! Eoin oops! narrow gauge Eoin!!
-
PP David Rowlands book 'The Tralee & Dingle Railway' has a picture (as Galteemore's post above) of No.2T page 70 and again its shown on page 29 from the other side- indicating the doors are opposite each other. Eoin
-
Thanks Fran I'll come back to you on the A4!! there is a lot of stuff queued up for the workbench and current stuff to be finished first...... Eoin
-
Thanks man, and great to have your support to Eoin
-
Thanks guys for your comments and that you followed it along, as I said above- knowing your following it and getting feedback makes the fun even greater.... Eoin.
-
Hi David Thanks, yes its great to get it complete, its been in my head for the last 4 years and its probably going to take some time to get it out! The client will also be delighted. 'What's Next' - I'd like to get back to finishing the development of the 'Hibernia' kit, which features earlier in this thread. I recently conserved the Fry Hibernia model for the new museum in Malahide and now my version is back out of the attic! Though I have a number of jobs that have to be done- Gauge 1 Class 800, Gauge O Class 800, B2 Class 400, GNRi Class 43, CIE D19, Gauge OO Laminates and.......... oh my G, Eoin
-
Hi popeye Yes, I am delighted. I stopped counting the hours about halfway through as that was getting scary, I just concentrated on having fun! well most of the time. Thanks for your comments & support along the way, and to all others that did the same. Having this thread going at the same time as the build added another dimension to model building, looking forward to showing the work and getting feedback & discussion really helps. Eoin
-
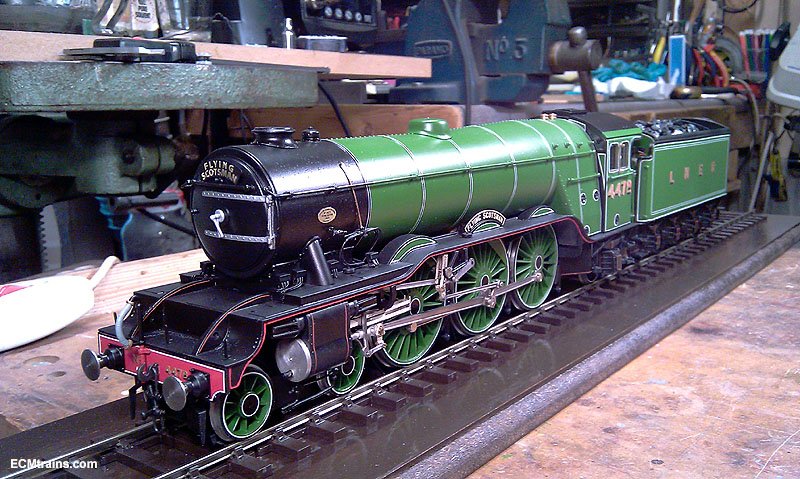
The Flying Scotsman kit build is complete. It was touch and go assemble it- as its a hard beast to handle without damaging the finishes with screwdrivers, files and the like doing final adjustments. I'm pretty happy with the way it has turned out. I'll post up a few more photos later when I get it out into the daylight. I should have it on display this coming Sunday at the Train & Model Fair in Bray if anyone would like to see it for real. Eoin

-
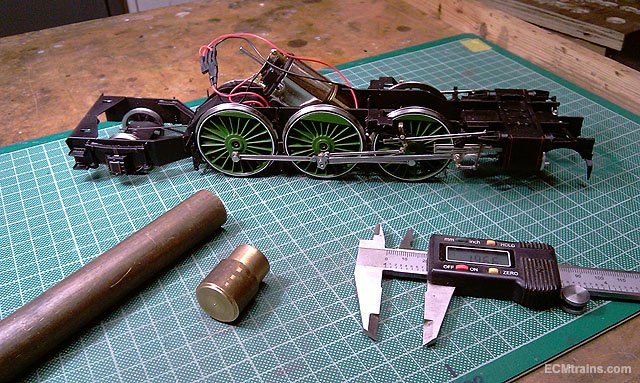
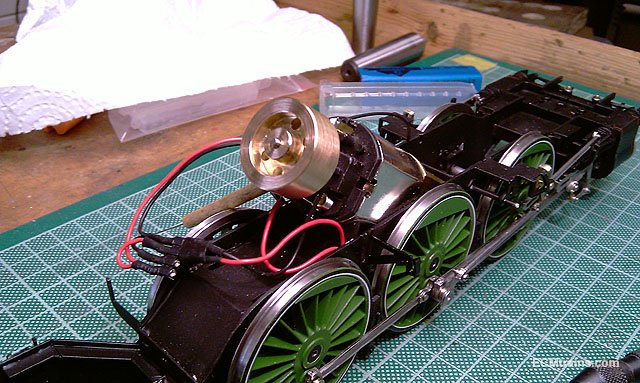
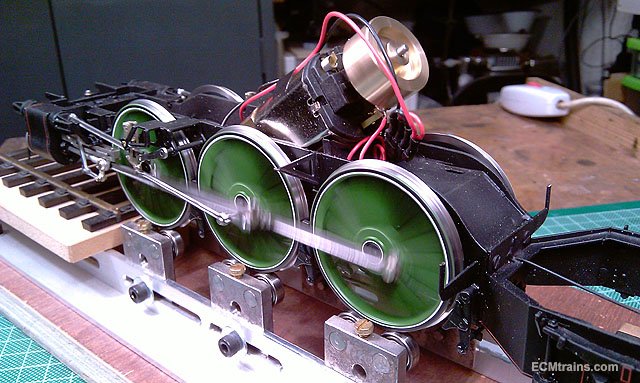
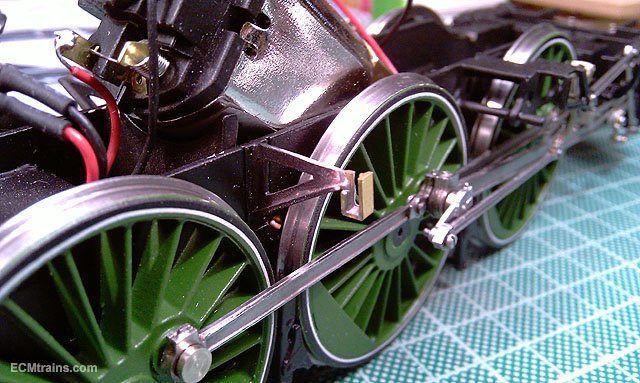
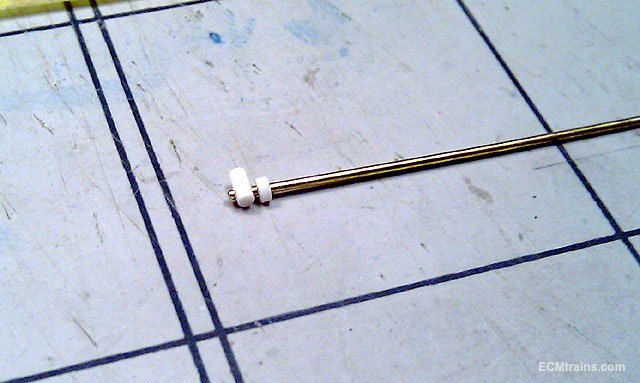
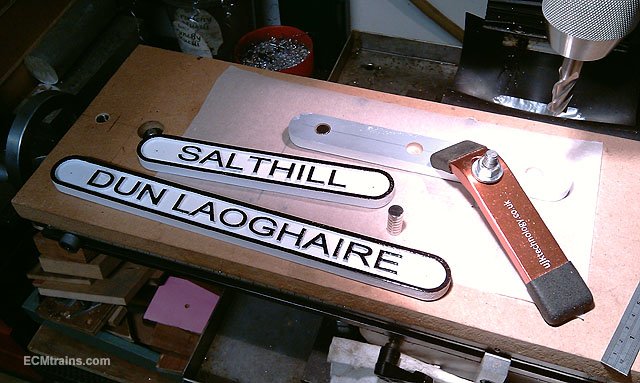
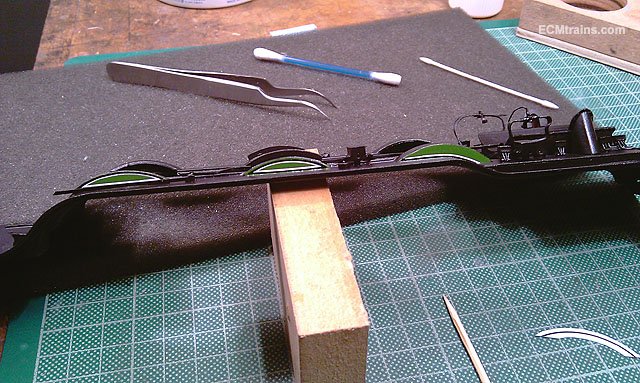
Another thing I remembered to do on the Flying Scotsman- a motor flywheel. A bit of brass from the scrap box, its going to be 22mm dia with a few holes like spokes and a recess cut to get the weight on the outside for maximum flywheeling! Turned on the lathe and now transferred to the mill rotary table to drill the holes and mill the slot. Done and Loctited on. A quick test run to check all systems are OK before the body goes on. And now the best bit! Just about to get stuck in and guests arrived........ Eoin
-
Hi PP David Holman's thread on building Clogher Valley layout has some good stuff about building 7mm track;- You can buy rails and sleepers from Peco rather than cutting up track, Marcway is also a good source. You'll need a few track gauges to set everything up and that might be a problem finding them for narrow gauge- some of the societies may sell them! A good reference book on building track is;- 'Finescale Track in 4mm' by Ian Rice, Wild Swan Publication, ISBN 1874103003. A different scale but the approach can be applied to what your doing..... Eoin
-
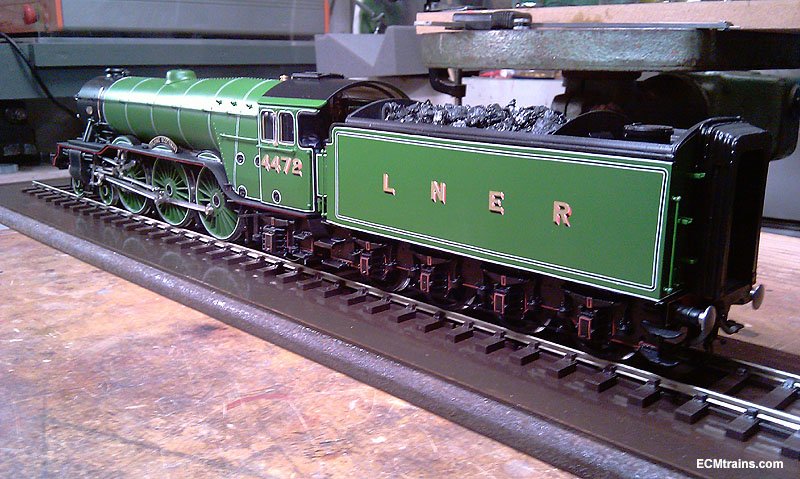
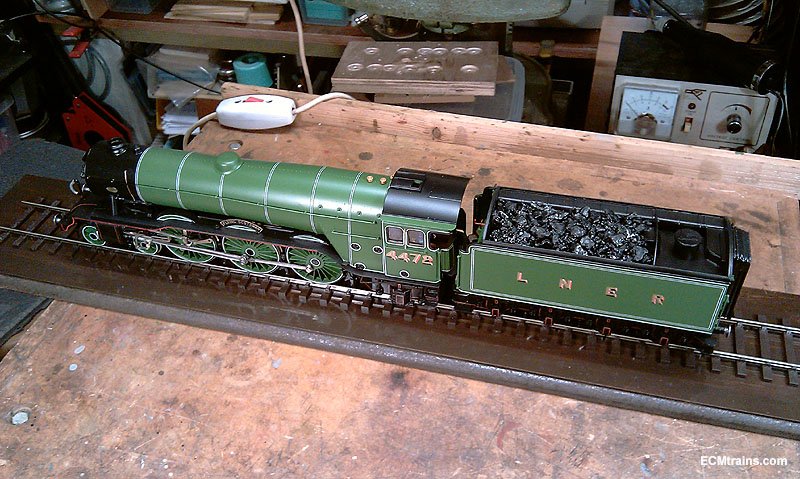
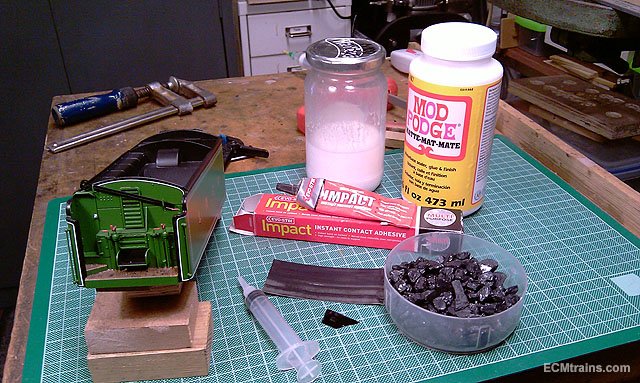
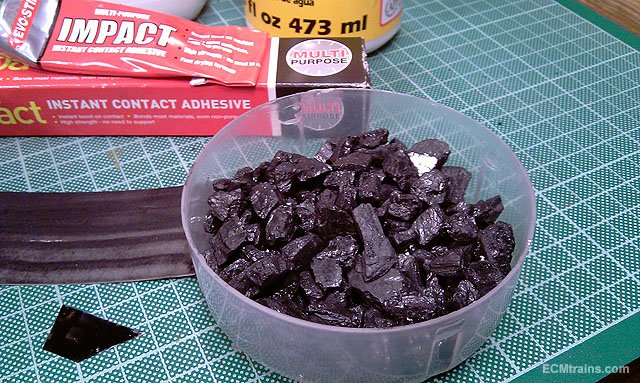
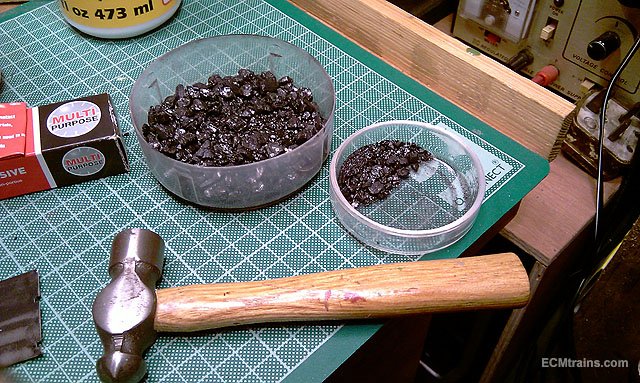
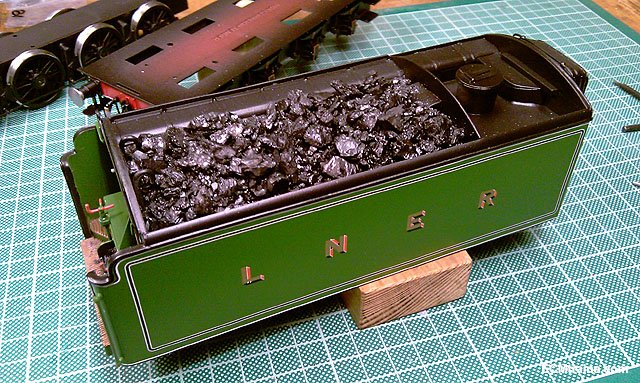
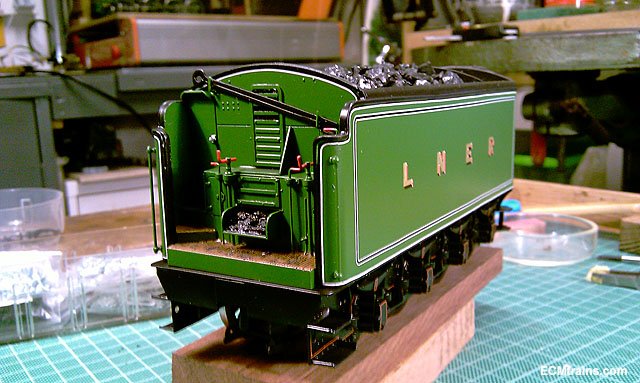
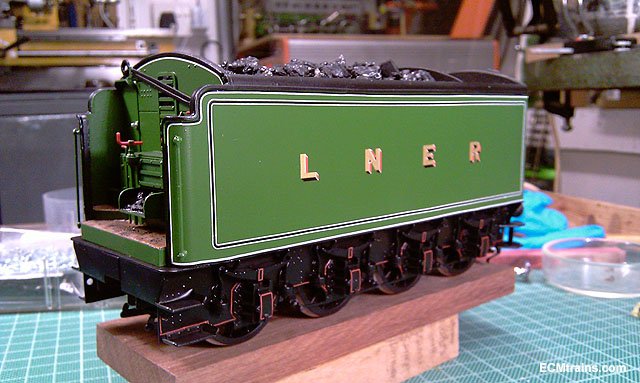
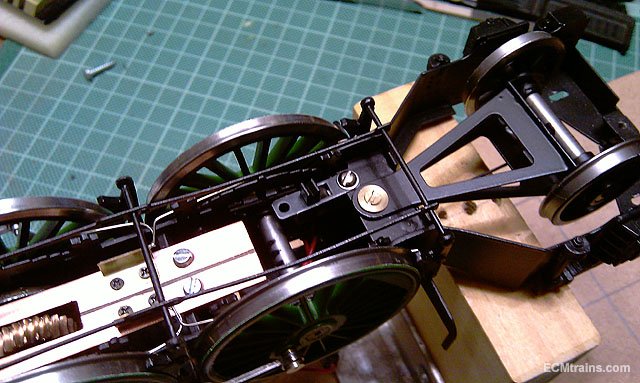
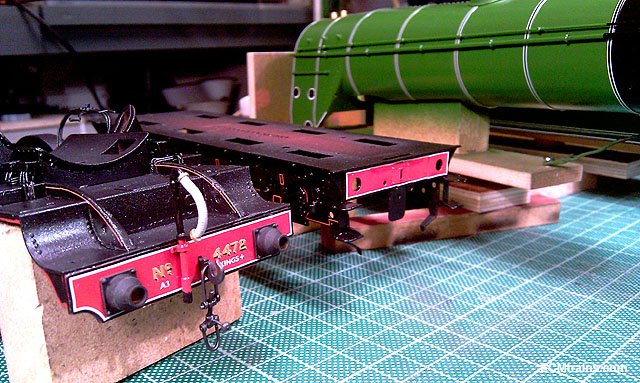
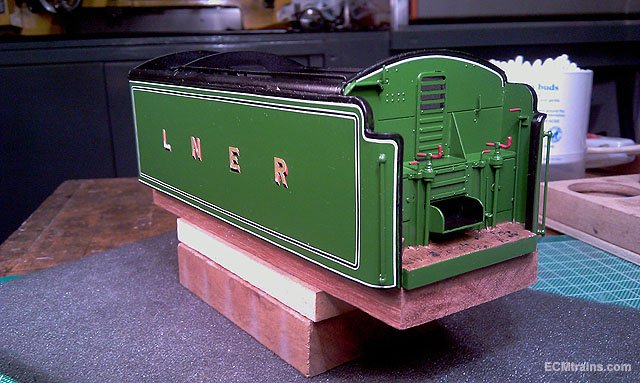
Coaling up the Flying Scotsman's tender....... Two pieces of cardboard were cut out to close off the coal chute and the top of the tender, painted black and stuck in with impact adhesive. Dilute Mod Podge was used to glue the coal in. The coal that came with the kit was a bit chunky- almost the size of a man! So with the 'modellers magic wand' I reduced the size a bit- small coal for in the chute and bigger in the tender, the fireman will have to use the lump hammer as the big stuff comes to the chute. All done. Tender body now on its chassis. Port hole window glued on and buffers installed. I then started getting the chassis ready for the fitting of the footplate, cab & boiler. First was to install the valve reversing rod and gear- oops! had not looked at the chassis for a while and realised the reversing rod support bracket required modification, the kit provided the incorrect bracket, but they did follow up with a mod part which I butchered and soldered onto the installed bracket- needs a bit of paint now. I installed a switch to turn off the power to the motor so that the loco can be displayed static with the fire running. Another item missing in the kit was the whistle, so I made up my version of one with .7mm brass wire and styrene- needs painting now. The display plinth and track is complete, cut from mdf, with a bit of a moulded edge and painted brown to give a dark hardwood look. Wheel sanding piping was made up from .7mm brass wire and will be epoxied on when the paint is dry- these, the wheel centre lining and fitting the body tomorrow....... Almost there! Eoin
-
Hi PP The 7mm Narrow Gauge Association Book No. 6 has Mr Emslie's- side elevation, back n front drawings (no plan) in 7mm scale, there are axle ctr dimensions given only- but the drawings could be scaled! Diarmuid Byrne of Wierpark Books had a copy of this booklet at the last Stillorgan Show, you can catch him in Fairyhouse Market tomorrow, and he's on facebook...... Eoin
-
Lads would you stop just buy two! "Their going to be great" Eoin
-
Hi John As Ken says 'essential' if you want to get accurate folds, they are also very helpful for clamping small parts when soldering. I use the type from Eileens and have 3 sizes- 2'', 8'' & 14'' https://eileensemporium.com/index.php?option=com_hikashop&ctrl=category&task=listing&cid=1128&name=soft-iron&Itemid=189 I also use clamping bars- two 6mm square bright steel bars that bolt together with counter sunk hex bolts, clamp the parts to be bent in the bars and then mount it in the bench vice for bending, I have a few of different lengths and thickness..... Tamiya do photo etch folding pliers, also pricey but very handy- especially folding a part thats already soldered on a model. Come in a few different sizes also. https://www.emodels.co.uk/tamiya-bending-pliers-mini-for-photo-etched-parts-74084.html Eoin
-
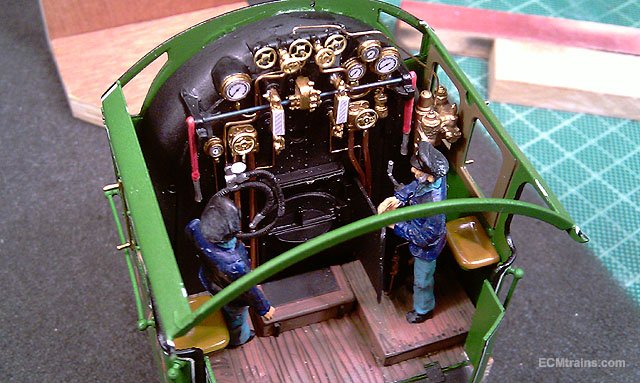
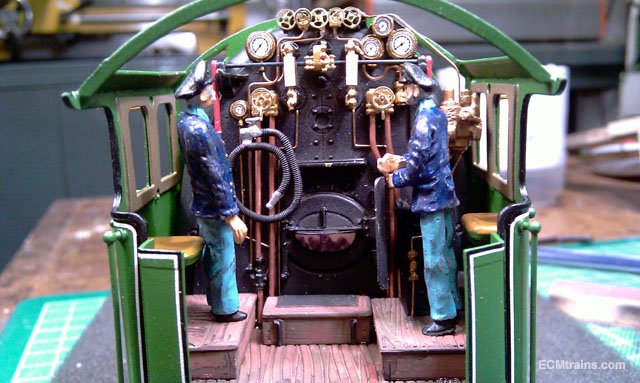
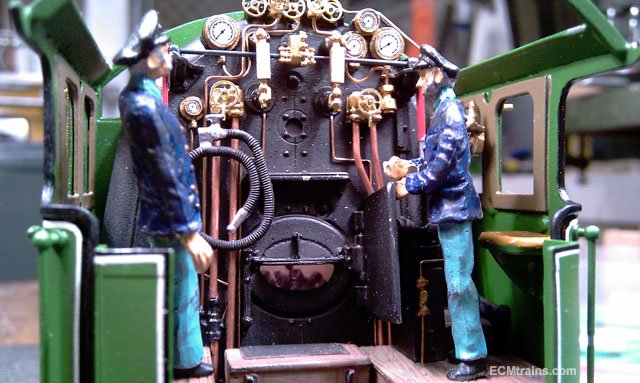
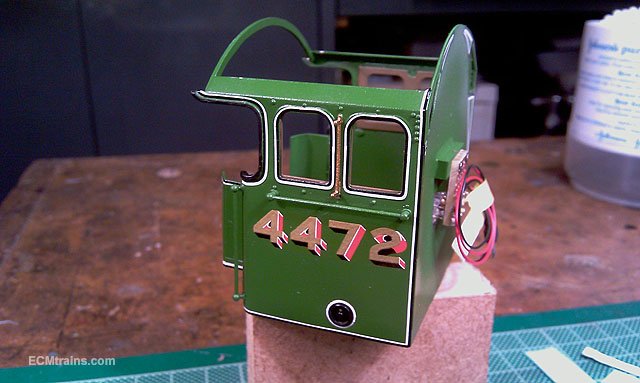
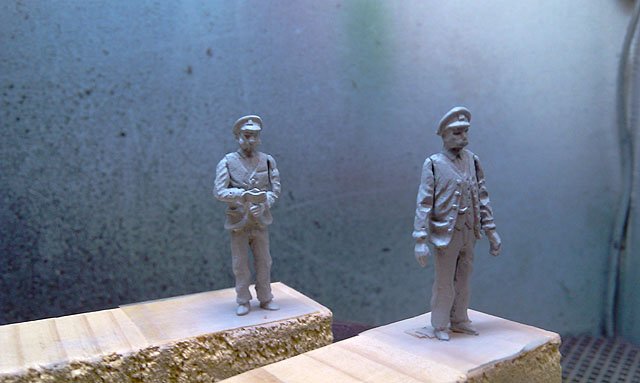
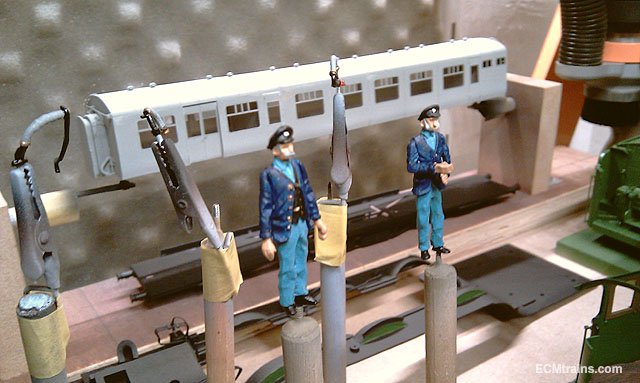
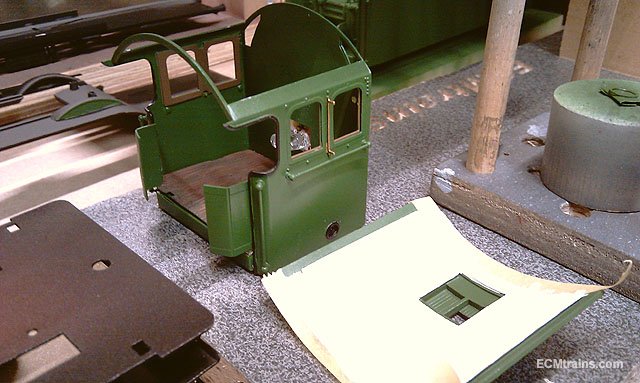
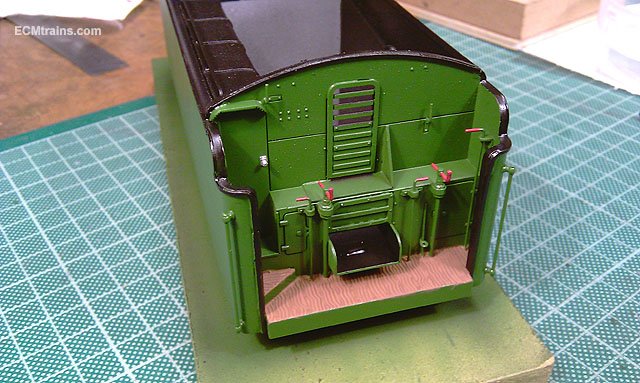
The Flying Scotsman crew inspecting the cab of their new command before it goes onto the footplate. Eoin
-
until
-
Train & Model Fair date for July;-
-
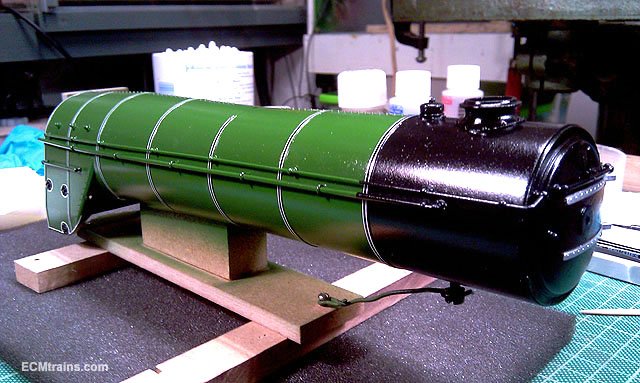
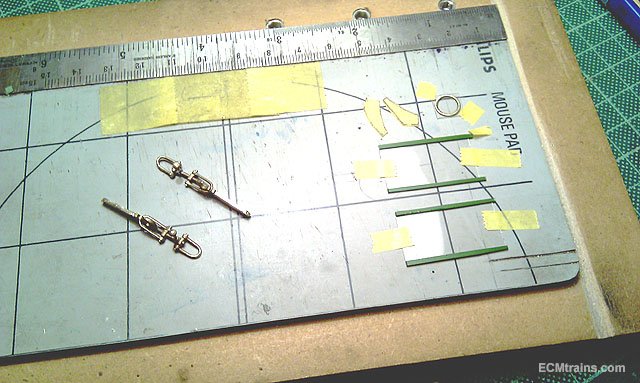
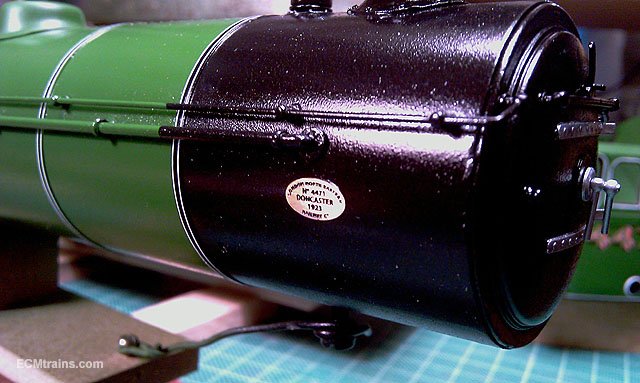
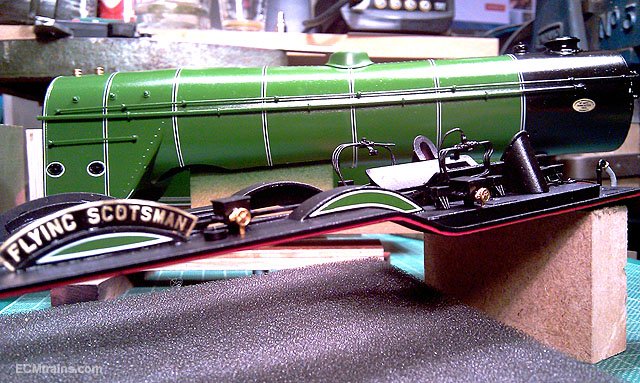
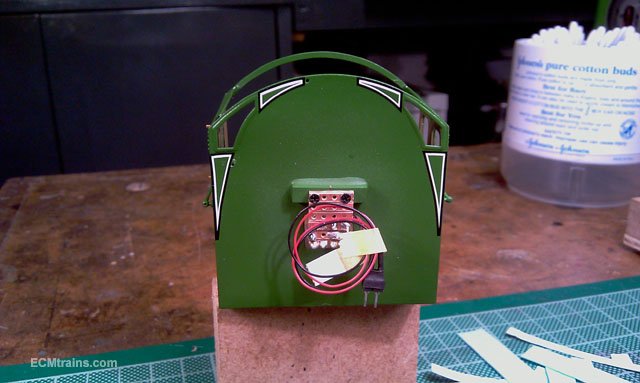
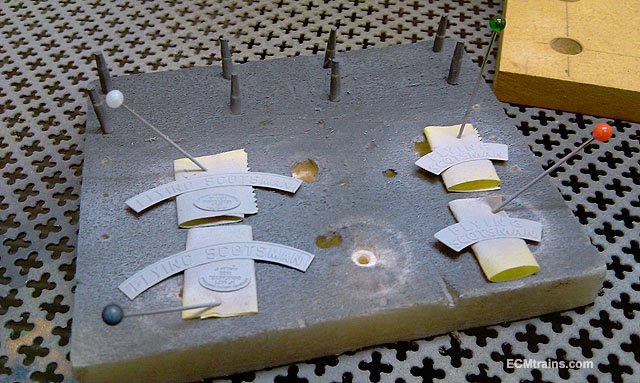
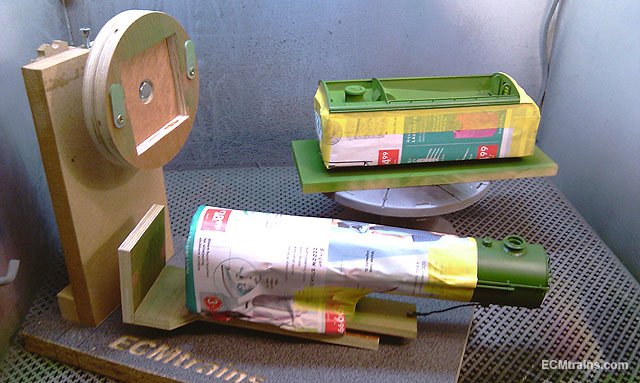
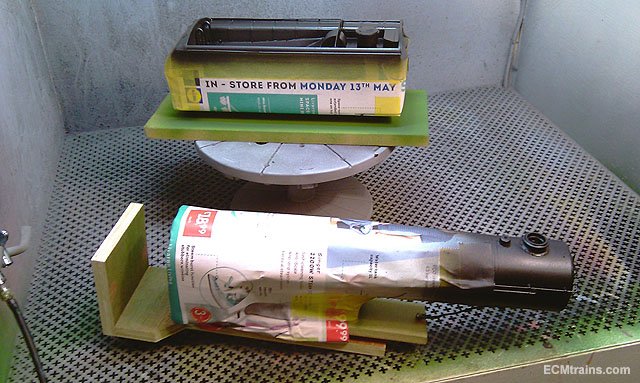
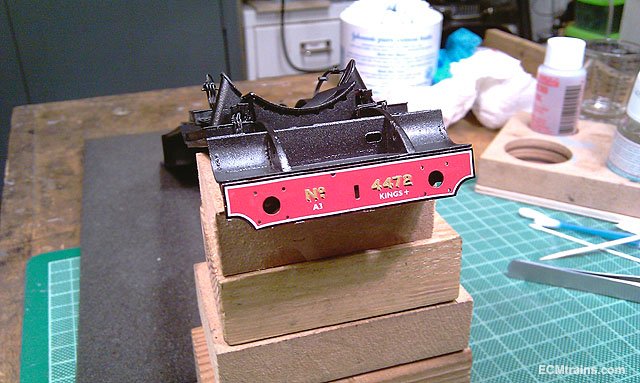
Flying Scotsman lining is complete, I'm glad that's done..... I set to do the boiler band lining thinking this would be the hardest, but no- it was the easiest? The spraying stand gives a great handle to hold the boiler without touching the paintwork. Complete, the satin varnish finish will bring the shine down. Brass couplers just about to be chemical blackened, and the window glazing cut to size- spectacles at top left, cab side below, with internal frame feature stuck on- top n bottom, and the round one is the port-hole type window on the rear tender to light the inside of the crew corridor, it's a brass frame. Detail parts been fitted- buffer shanks, blackened coupler & vacuum pipe to the fotplate front , a little bit of black touch-up to be done on the buffer beam edge. Makers plates and smoke box door handle stuck on, I used Humbrol Clear for the plates and epoxy on most other bits. Footplate has the brass oiler gear and nameplates stuck on with epoxy. A few more detail parts to be done and then ready for a clean down and few coats of satin varnish. Eoin
-
Yes, on the tender chassis lining I had to use the 10x magnifiers, it took so long to get the lines reasonable in position my eyes took about 2 days to recover!! Eoin
-
Great stuff Ken Looks really good, as we discussed last Sunday- when ready you are more than welcome to display it at the Train & Model Fair, I know many of our visitors to the Fair would be delighted to see it and the fabulous locos n stock you build. Eoin
-
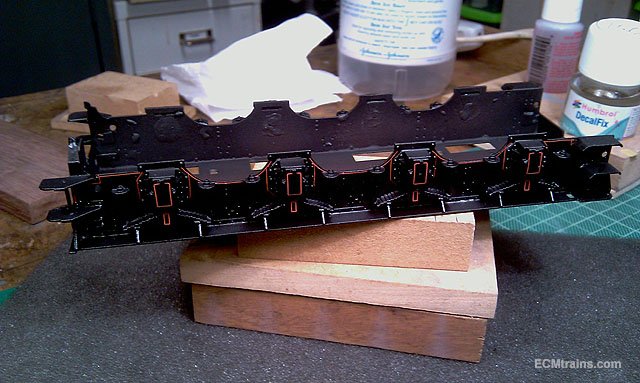
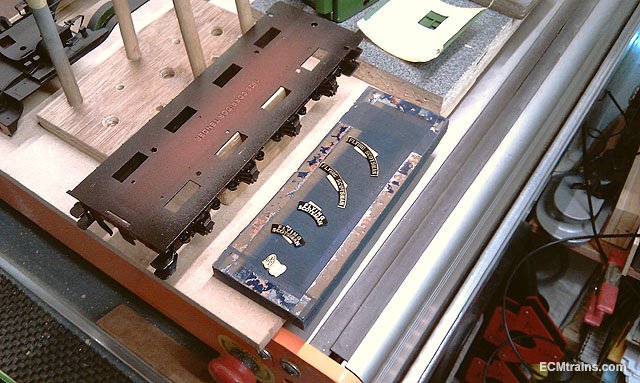
Lining and numbering on the Flying Scot continues....... The cab is finished, except for some black paint touch ups and a blast with some satin varnish and the internals can go in. The tender body is nearly there, one side is done. Pretty hard to get all the lines straight and level, on the edges I did every curve separately and then joined up with the straight bits. The panel I did in 4 bits, and used marked up masking tape to locate the letters. Tender chassis lining is complete. This was the hardest bit so far. Here is a tip- during construction of a chassis when sticking on the horn blocks n suspension ensure that the gap is completely filled and sealed, otherwise the lining decals will slide in under due to capillary action, I spent far more time easing them back out than actually sticking them on!! A bit of black touch up required on the buffer beam and its ready for varnish. Eoin
-
OOOh! do I see some rods! in there Ken? Very nice Eoin
-
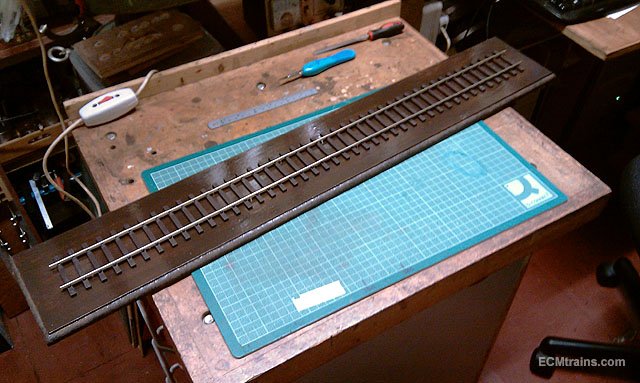
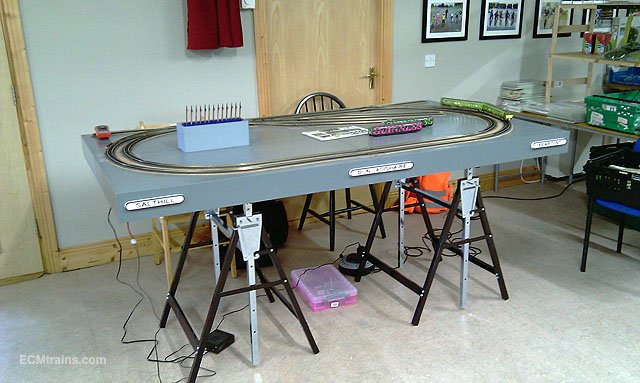
The baseboard signs getting their magnets installed to mount them onto the front edge of the board, sticking to the screw heads in the framing.... .... and the second outing of a bald board at the Train & Model Fair today. This shows the ScrewFix trestle supports, which will eventually have a curtain screen. The trestles are at their lowest setting here, but they can be extended to bring the board up to chest height- ideal for a framed cameo type display at the front of the board! Eoin
-
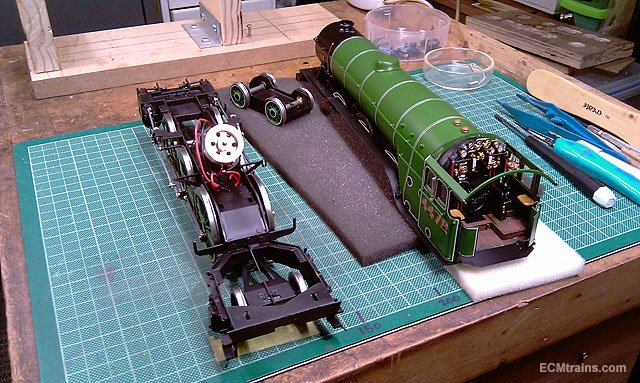
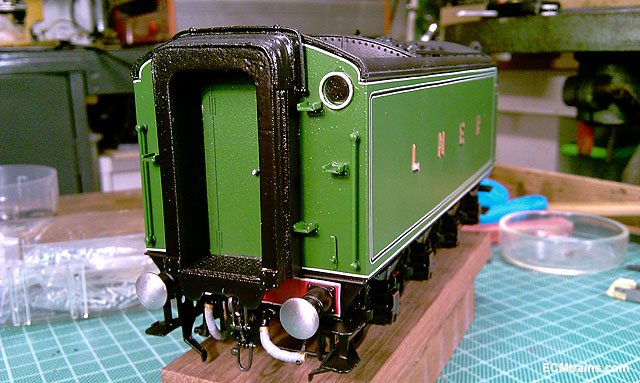
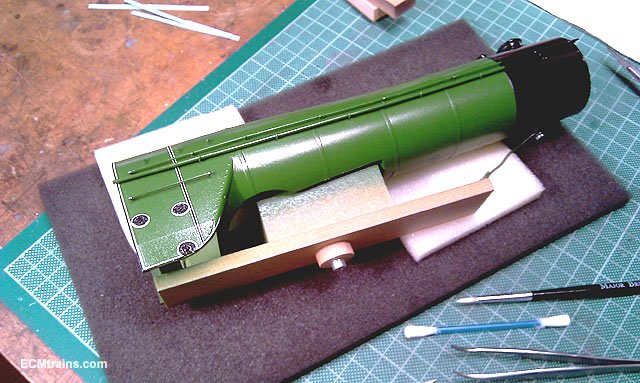
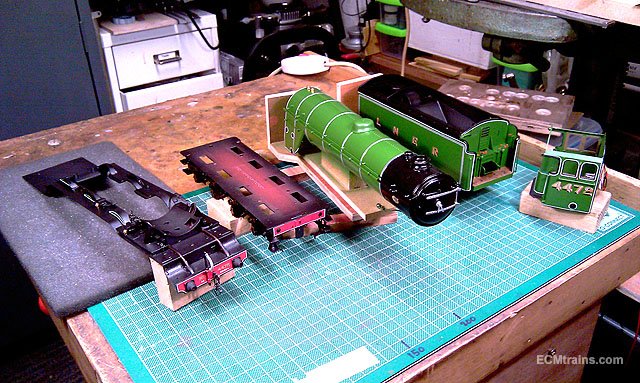
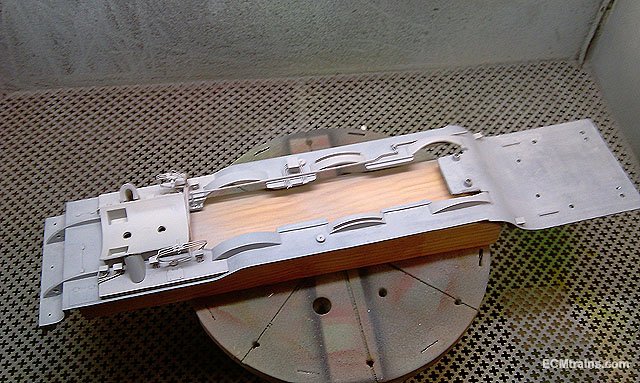
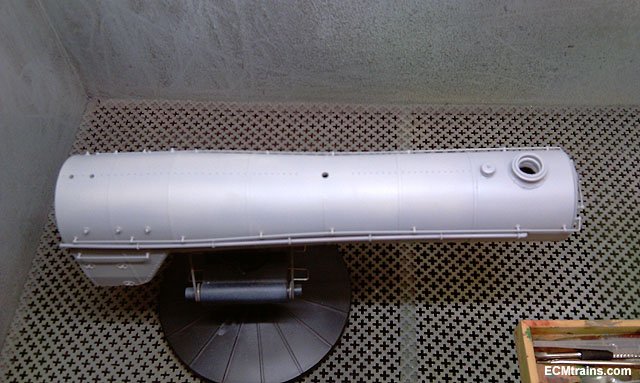
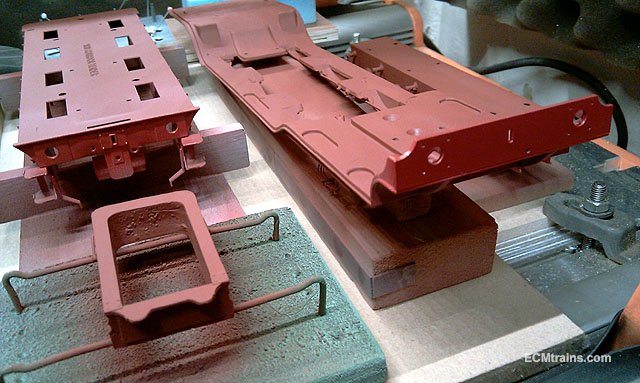
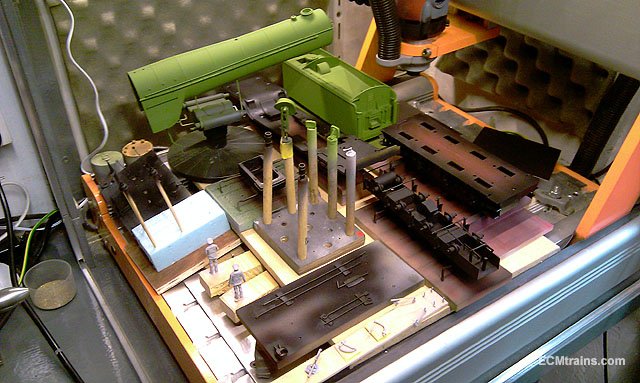
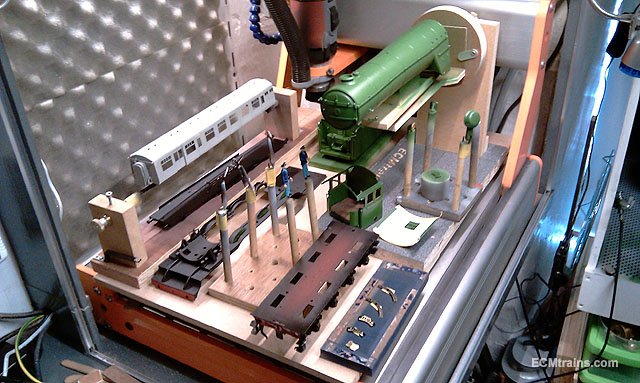
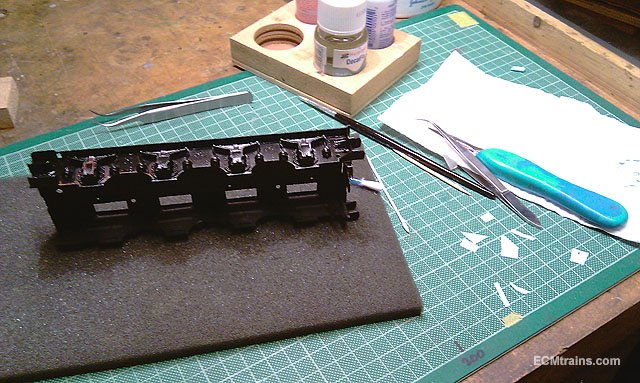
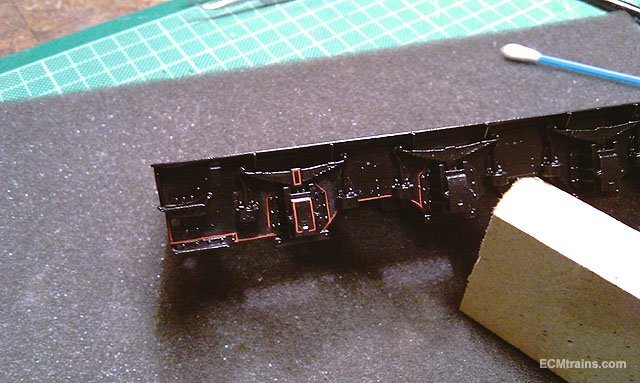
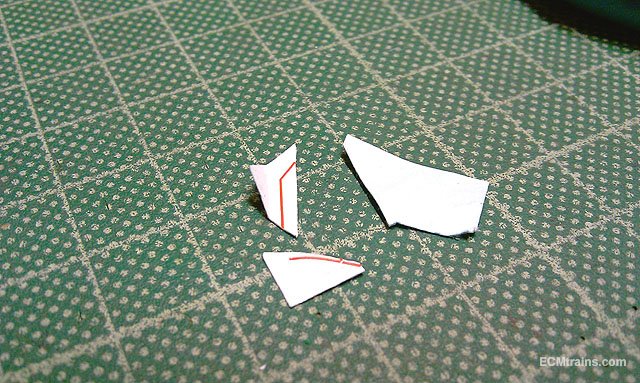
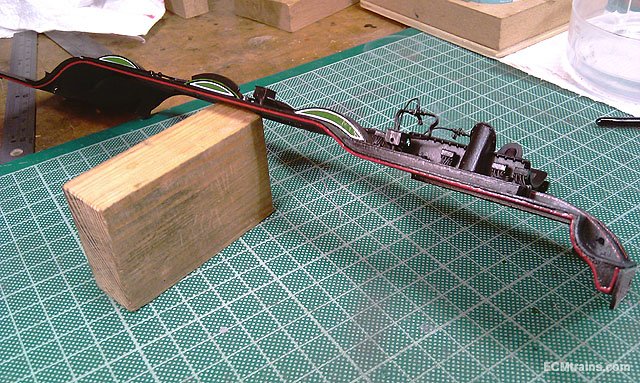
I have not posted on the Flying Scotsman build for some time, work has been proceeding but I had a slight hiccup with the boiler and tender body green paint- the paint dried before hitting the parts and ended up with a sandpaper kind of powder finish, that came off the parts if rubbed with ones finger!. So an annoying complete rub down was required- so I took a break....... Now back on track, here are some photos before the disaster and post;- Everything cleaned and ready for paint priming. Etch primer on the footplate, this is a very light coat so that one can see the metal under, this allows the etch to do it's job properly. Tender chassis was given the same treatment. Name plates and makers plates etch primed. Boiler and tender body being plastic was ordinary primed but some metal parts were etch primed. Chaps primed ready to put on some cloths. Next was red oxide under coat on parts that are going to be black. Black and green on, it was at this point I had the green powdery paint problem..... I put everything away for a while and got on with other projects......... After rubbing down the paint problem parts I set about respraying the green- after working out I had blocked side air vents on the nozzle of the gun!! Parts back out of storage and green paint looking good. Name plates were painted satin black and then rubbed down on emery paper to bring up the text in brass finish, the makers plate is done the opposite way- brass plate and black text. Chaps done. Cab roof painted cream white. Footplate with buffer beam and splashers painted ready to start the lining. Boiler and tender were masked off for painting the black bits. I started on the tender chassis lining first, not an easy job! Here is a trick that helps, cut every decal into small parts as they are impossible to put on in one piece and remove as much of the backing card with a scalpel so you end up with the decal on a very thin backing which is more flexible and the lining is less prone to get stuck over the edge of the thicker card- if you know what I mean. The blank paper in the photo below is the back peeled away from one of the lines. Splashers being lined, the decals are incorrectly sized but work, the front ones needed cutting and improvisation. Buffer beam lined and numbered. I started on the lining under the footplate with the decals- but was impossible, so I changed to using a bow pen which is less frustrating and done in 1/6th of the time. Paint detail being added to the tender and just about ready for lining this. I'm pretty excited at this point, the end is so close, it will be amazing to see it done, also to get it behind me n out to the client......... Eoin
-
Lovely model Warb One of the nicest buildings in Dun Laoghaire, such a pity the Authority built that lump behind it! Another beauty behind it- the Harbour Master's Offices has been messed up to! Eoin