Mol_PMB
-
Posts
2,301 -
Joined
-
Last visited
-
Days Won
127
Content Type
Profiles
Forums
Events
Gallery
Everything posted by Mol_PMB
-
Hold on, are you a cat?
-
Maybe they were prompted by a loco named after a sauce? If the layout is to be set in Dublin, I think that poster in the background may need replacing, nice though it is!
-
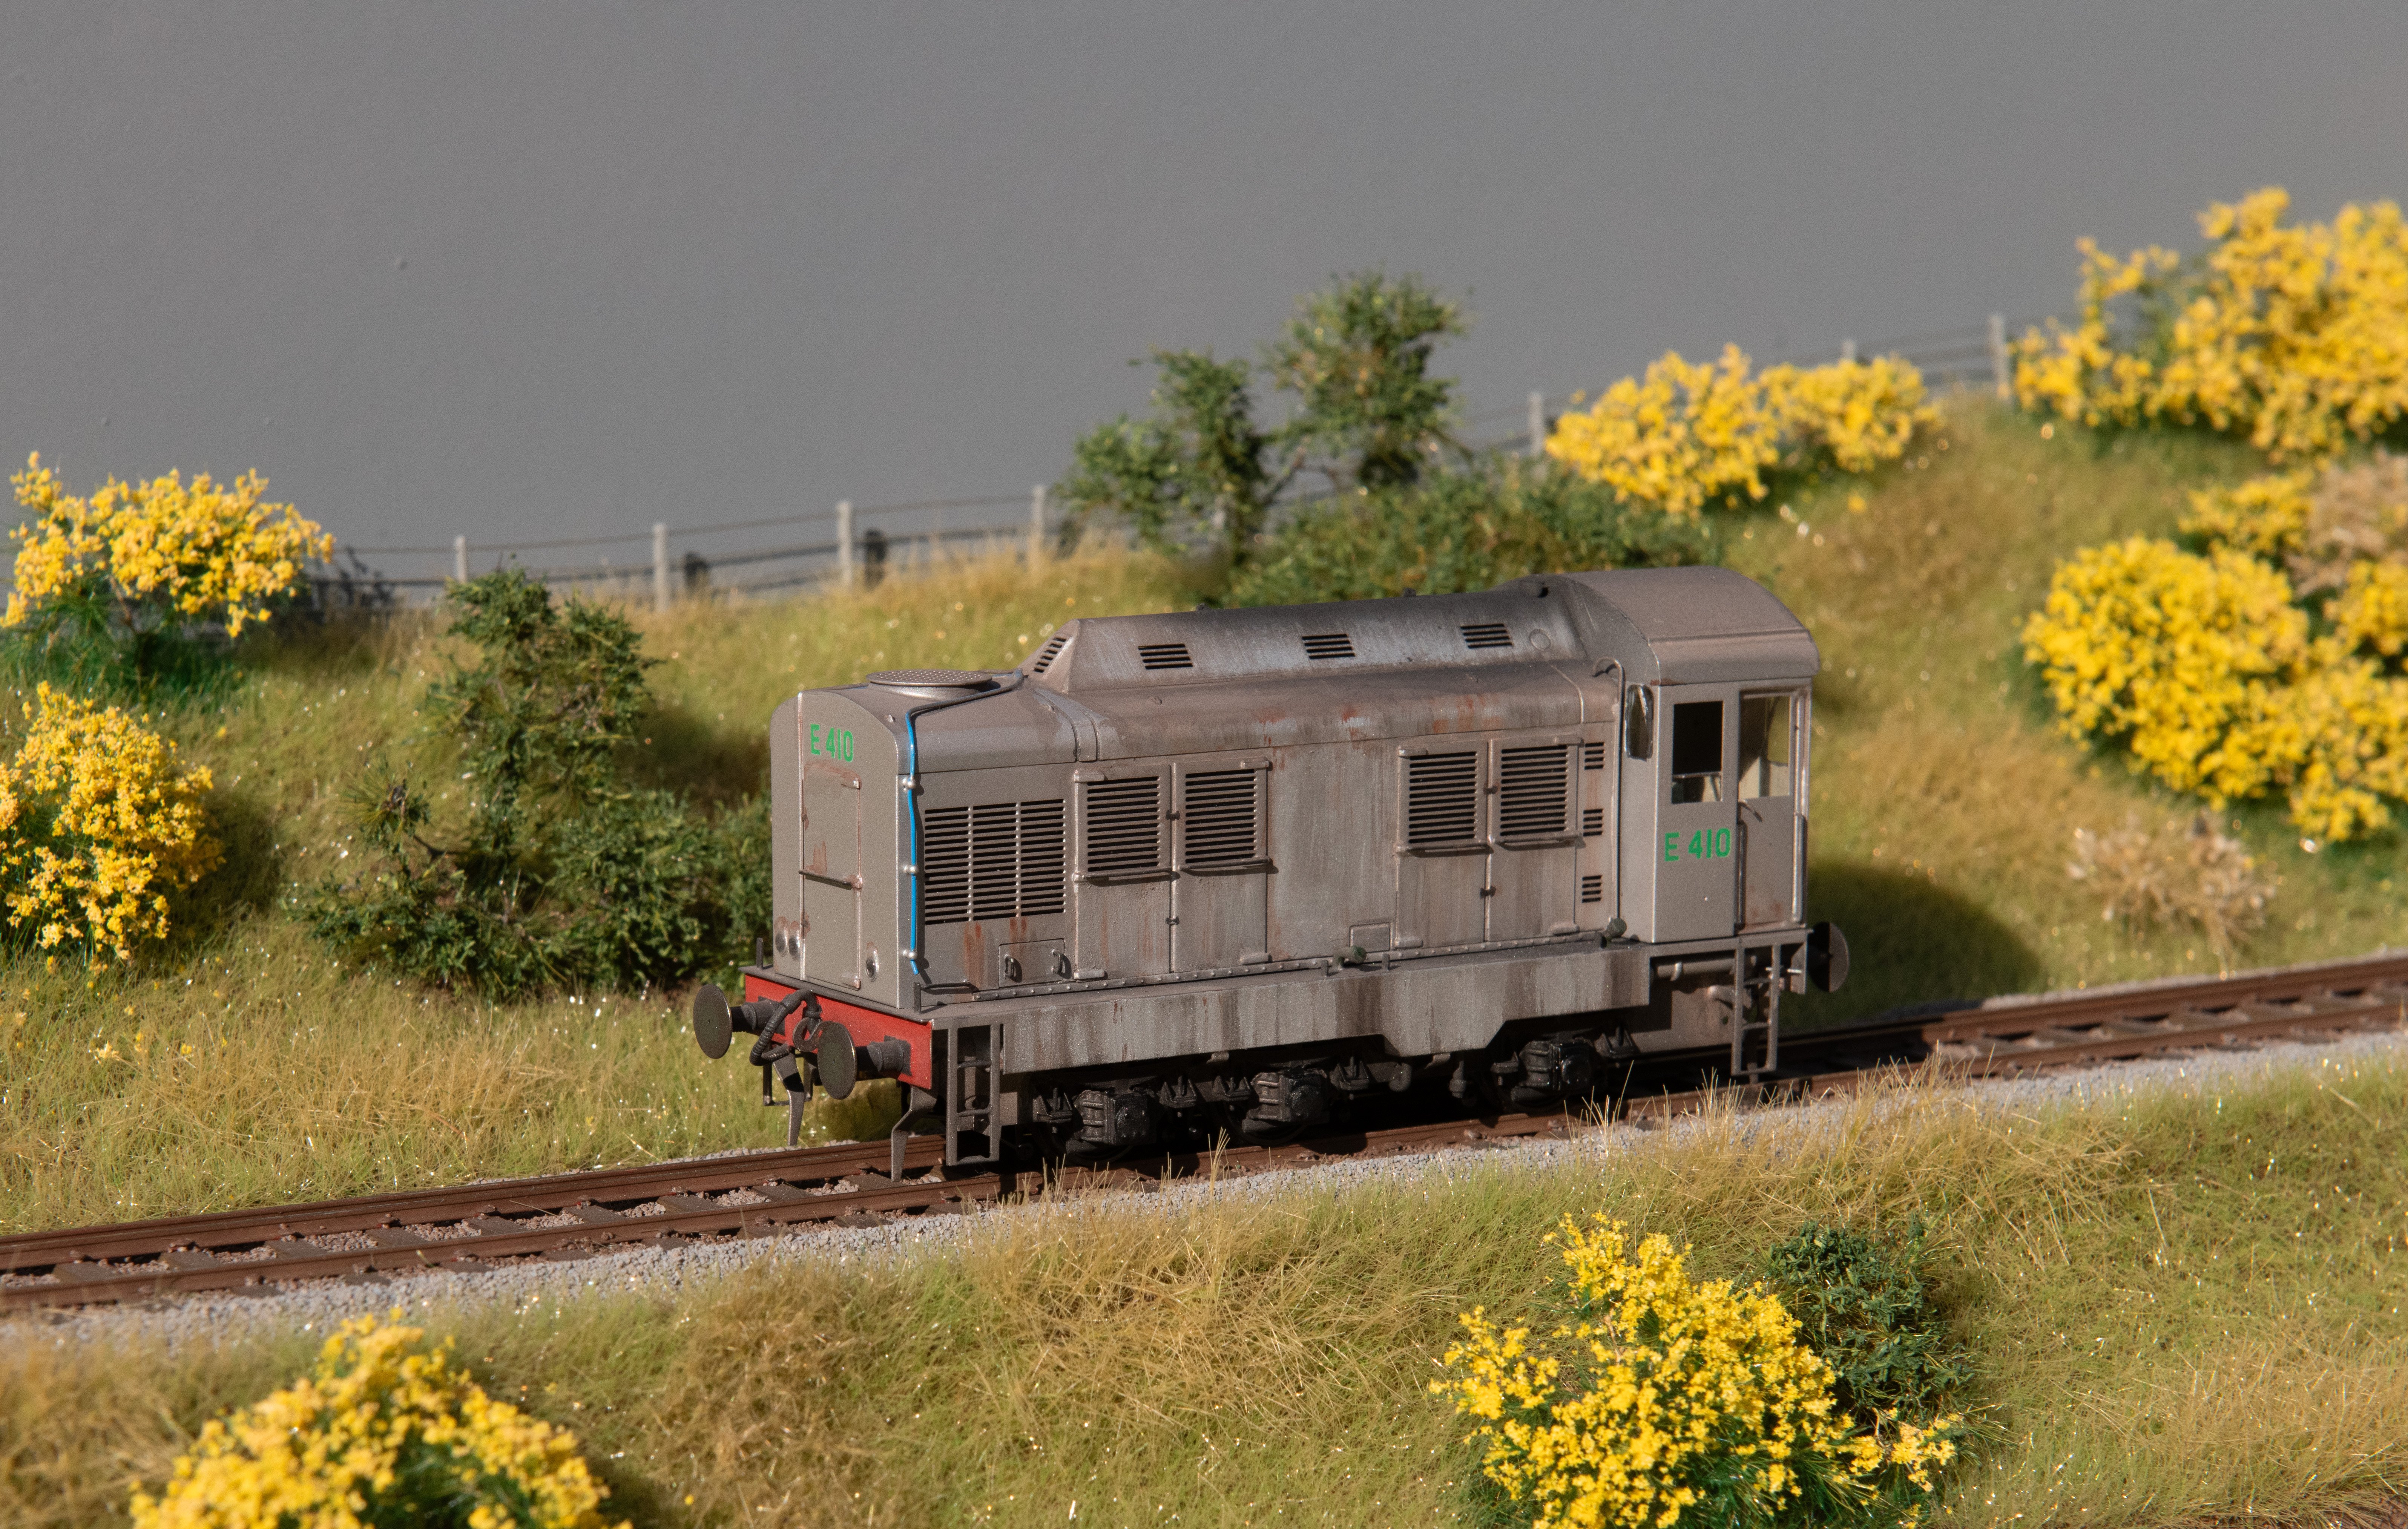
Welcome! I'm a few months ahead of you with building a 2-point layout as a first step in 21mm gauge, so it's great to see someone else following the same path. Here's my journey so far: I look forward to seeing your progress. Feel free to ask if you have any questions on regauging stock etc. Have you chosen which wheel/rail standards you're using? Some people use P4-based dimensions but others (myself included) use EM flangeways and wheel profiles. As for silver locos, this is my attempt: Cheers, Mol

-
"Voiding the Warranty" - Mol's experiments in 21mm gauge
Mol_PMB replied to Mol_PMB's topic in Irish Models
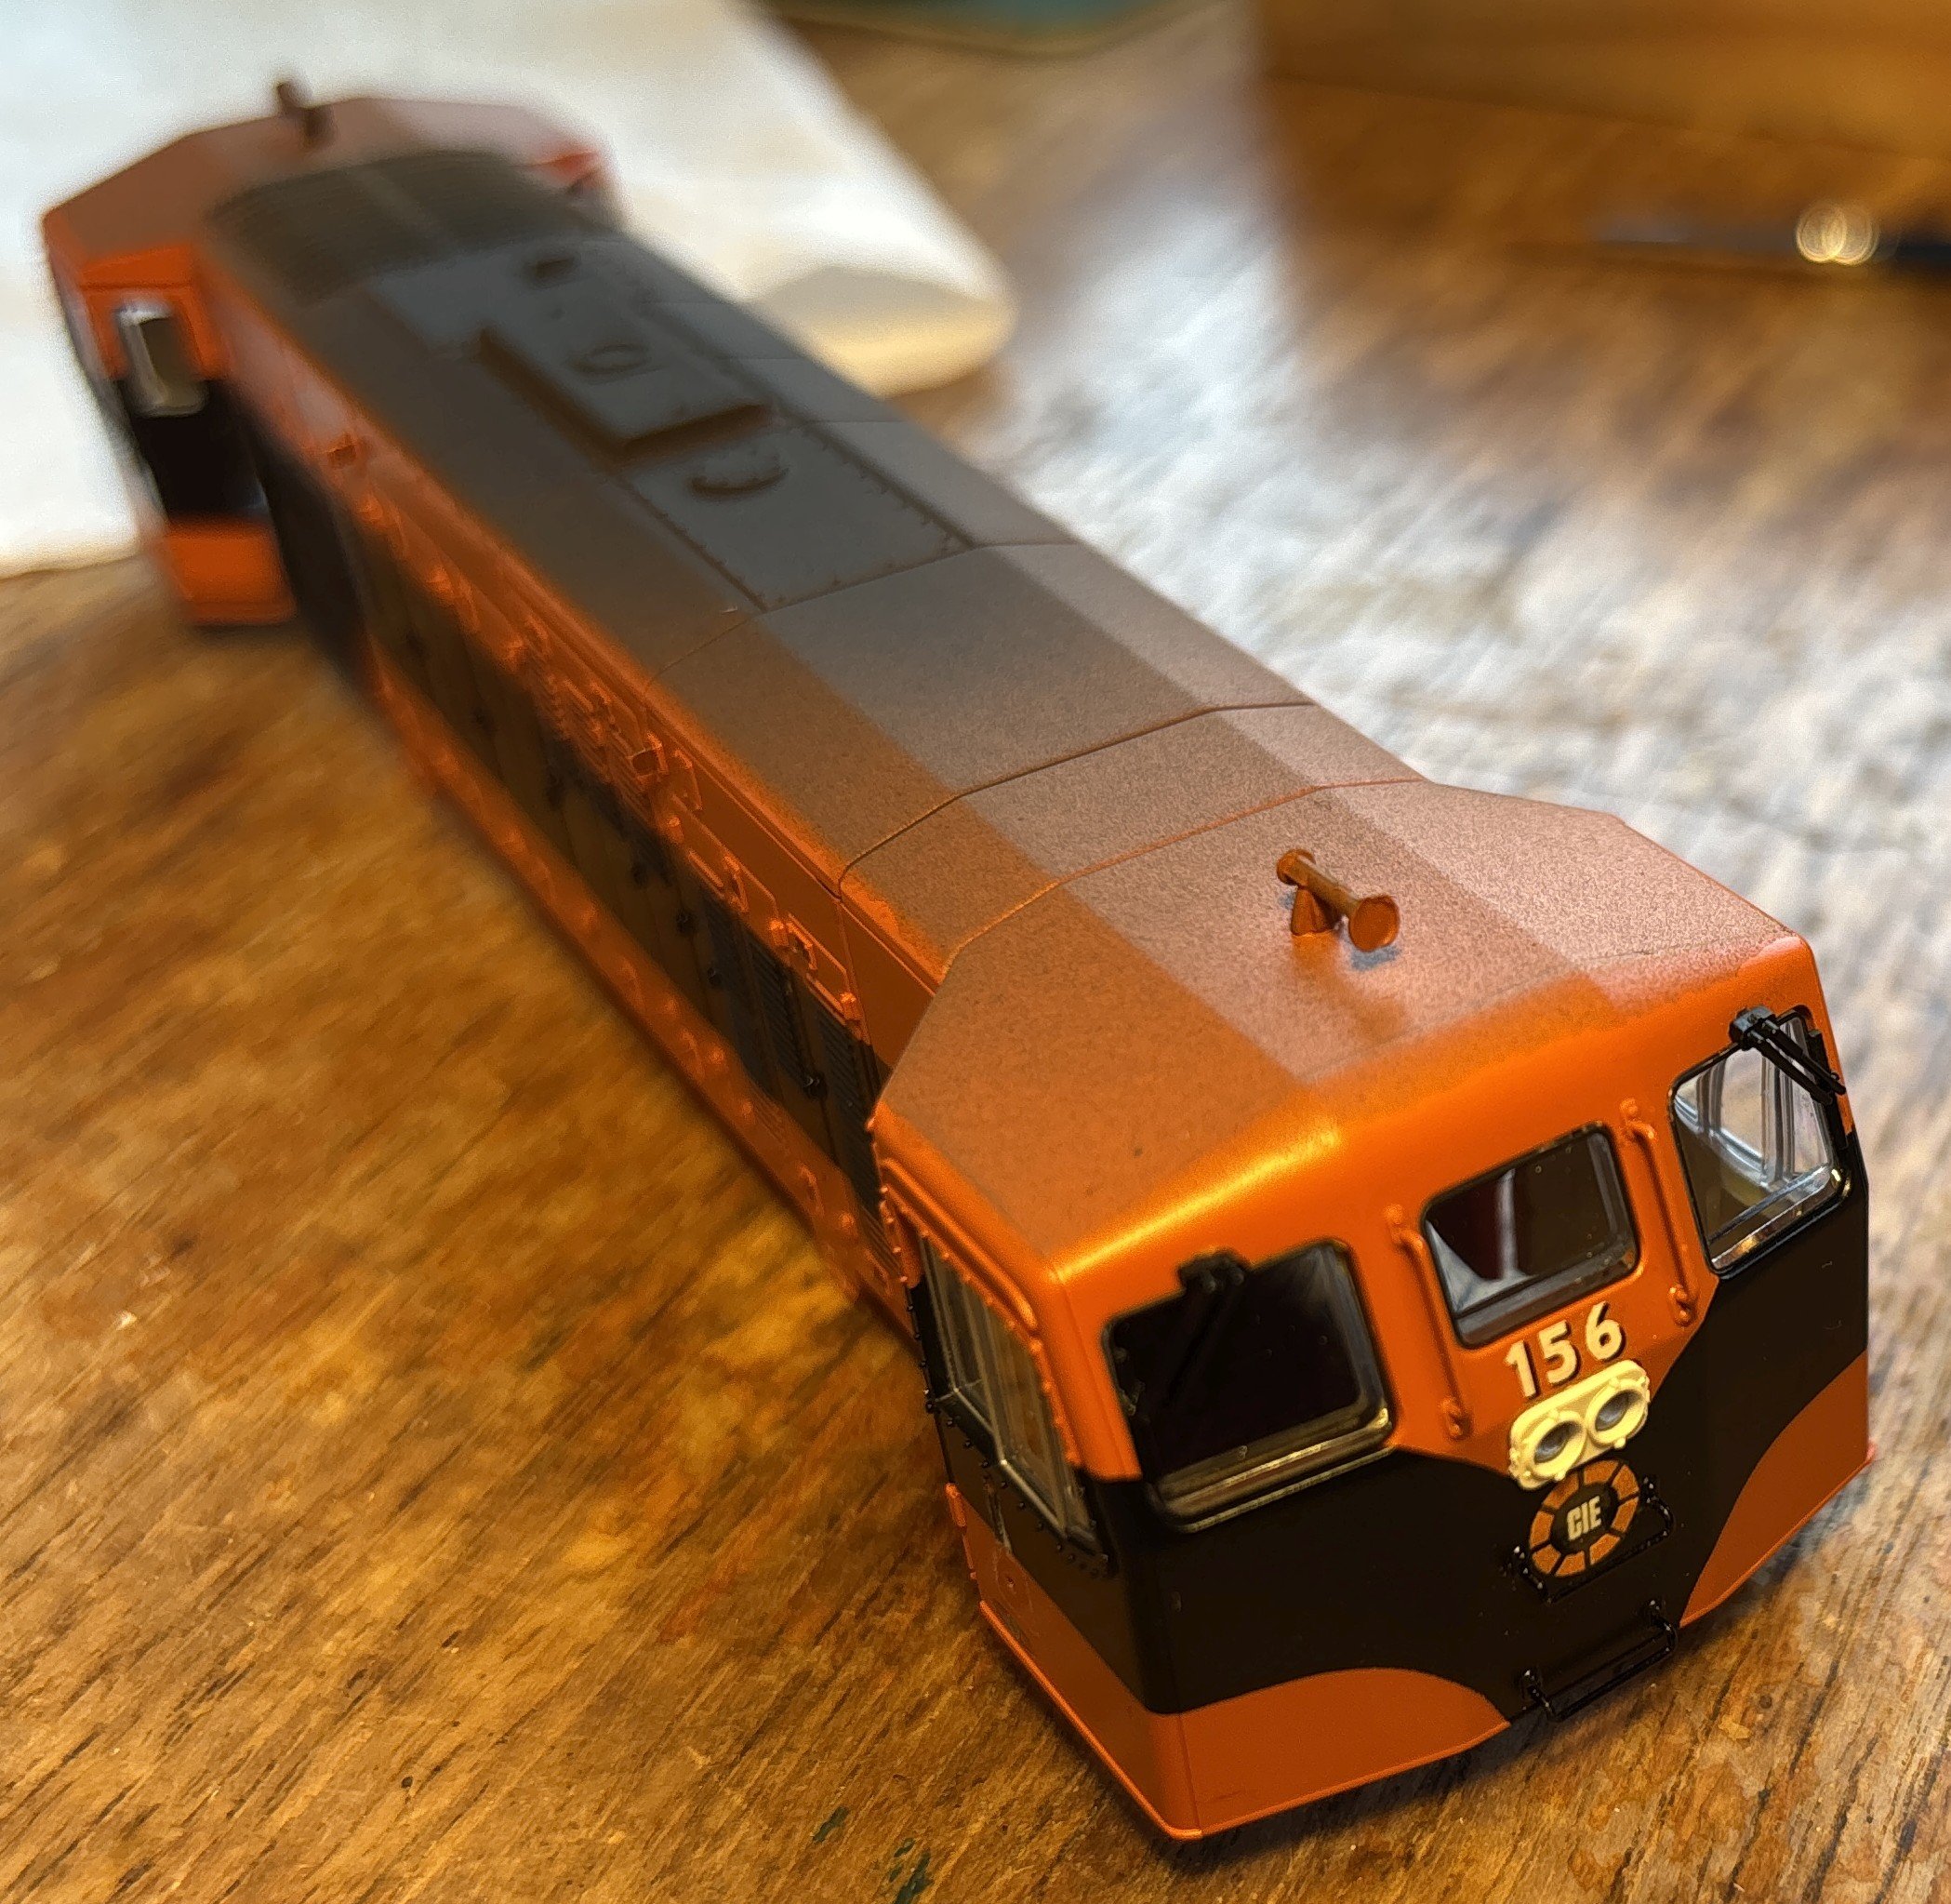
Progress on several fronts today. 156's front valances have been rubbed down and had a coat of paint which has shown up the imperfections! However, I think once the couplings and hoses are fitted and a bit of weathering applied, this will be good enough: I have also painted the hoses ready to fit. The approved colours for these seem to have changed over the years, but based on early 1970s photos the multi-working hoses had orange fittings, while the (single) air brake hose had yellow fittings which would normally indicate a main res pipe (train pipe would be red). I guess this was before the locos were fitted for working air brake trains? The postie delighted me this morning with a very prompt delivery from Modelu, which has enabled me to paint up the drivers for 156. In the absence of working DCC humans, I'm going to put one in each end. Hopefully I've got the dress code about right for the 1970s. The eagle-eyed will spot that Modelu have also supplied some residents for my trees. They're probably a bit big for red ones - I should have got them in TT scale - but I understand that red squirrels are appropriate for county Cork. I have also bought some residents for the mill (pigeons and rats) but those are staying the box until the buildings have progressed a bit further. Meanwhile, on the layout I have done the messy bit of landscaping the two areas that have a 'natural' surface. I use a mix of plaster powder, brown and black poster paint, water and PVA glue to create a chocolatey gunge, and then apply that with strips of newspaper (in several layers) to give some gentle contours. The dowels and bits of wire are there to maintain the holes for planting the trees - they are greased with vaseline so hopefully they'll come out again once the gunge has set. This evening I may recommence battle with the bitumen tank chassis. Winding the clock back to my circa-1960 early period, I have also been doing some research on 6-wheel coaches and I think I've found a suitable prototype for my kit of a GSWR lavatory composite. I'd better get the current projects finished before opening that box. Merry Christmas to all!
-
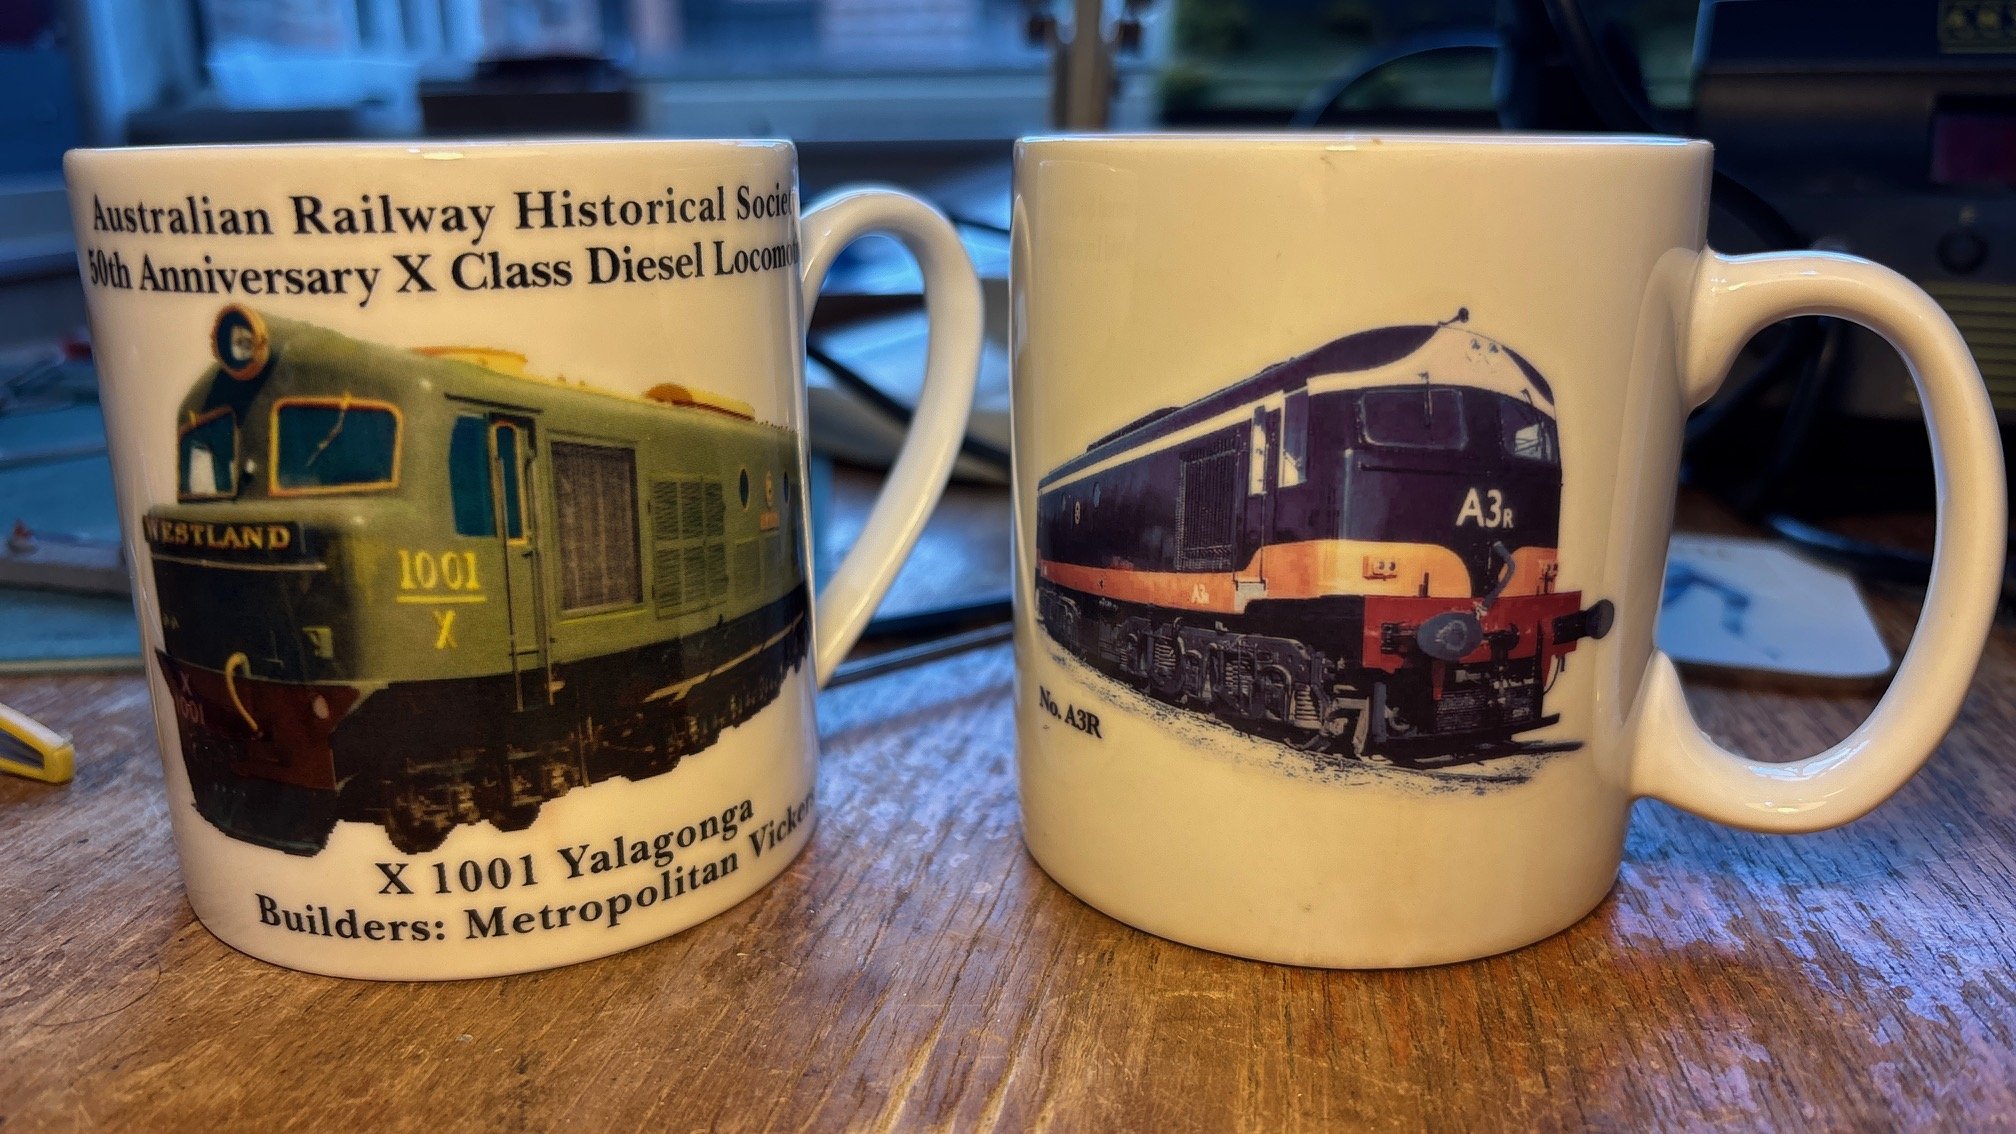
I like that! I'm very tempted to get one. I'm currently drinking a brew from my old ITG mug, featuring A3R now also at DCDR. My Irish mug has a 'twin' acquired during a work trip to Perth:
-
Murphy 141 buffer replacement - has anyone done it?
Mol_PMB replied to Mol_PMB's question in Questions & Answers
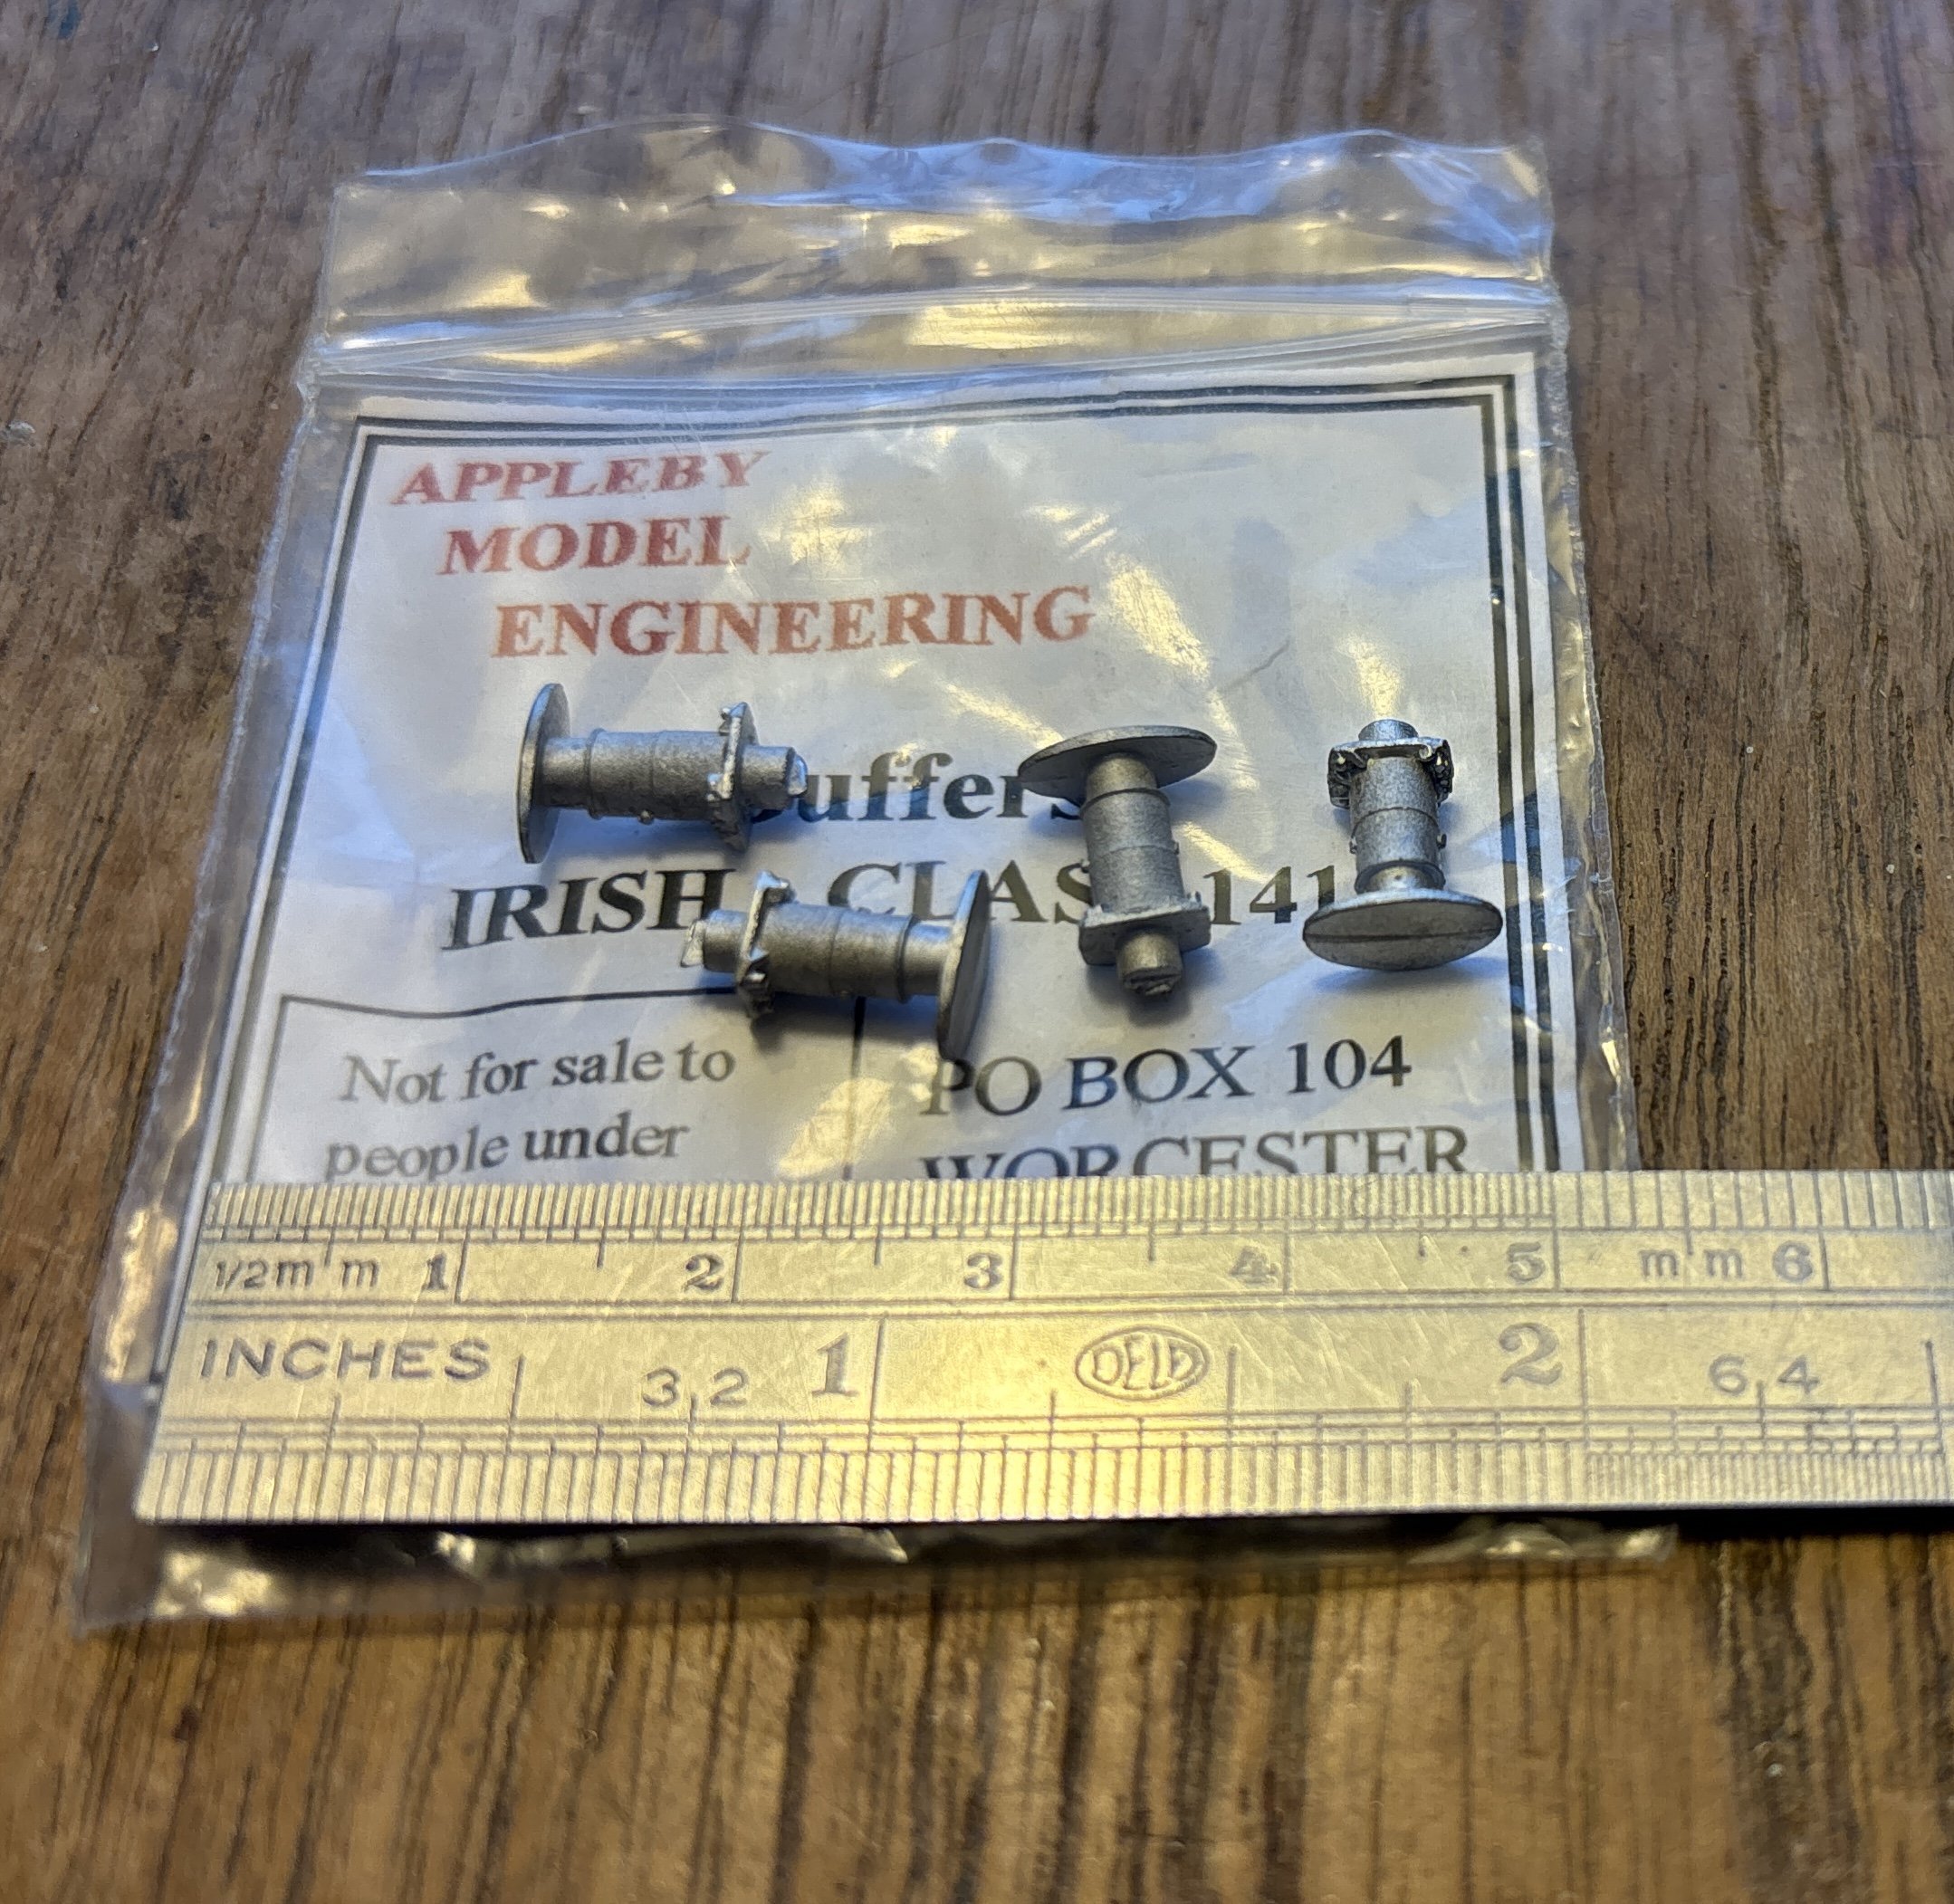
Indeed. That doesn't make the size or spacing correct. I have seen some comments online about the buffers, and I believe the spacing was corrected for the 121s. However, it is a good indication that no-one else thinks it's worth the effort to correct them. So I think I'm probably ploughing a lonely furrow here, and it's unlikely that it will make financial sense to spend a lot of money replicating some buffers that no-one else wants. -
Stunning! What beautiful locos and rolling stock.
-
"Voiding the Warranty" - Mol's experiments in 21mm gauge
Mol_PMB replied to Mol_PMB's topic in Irish Models
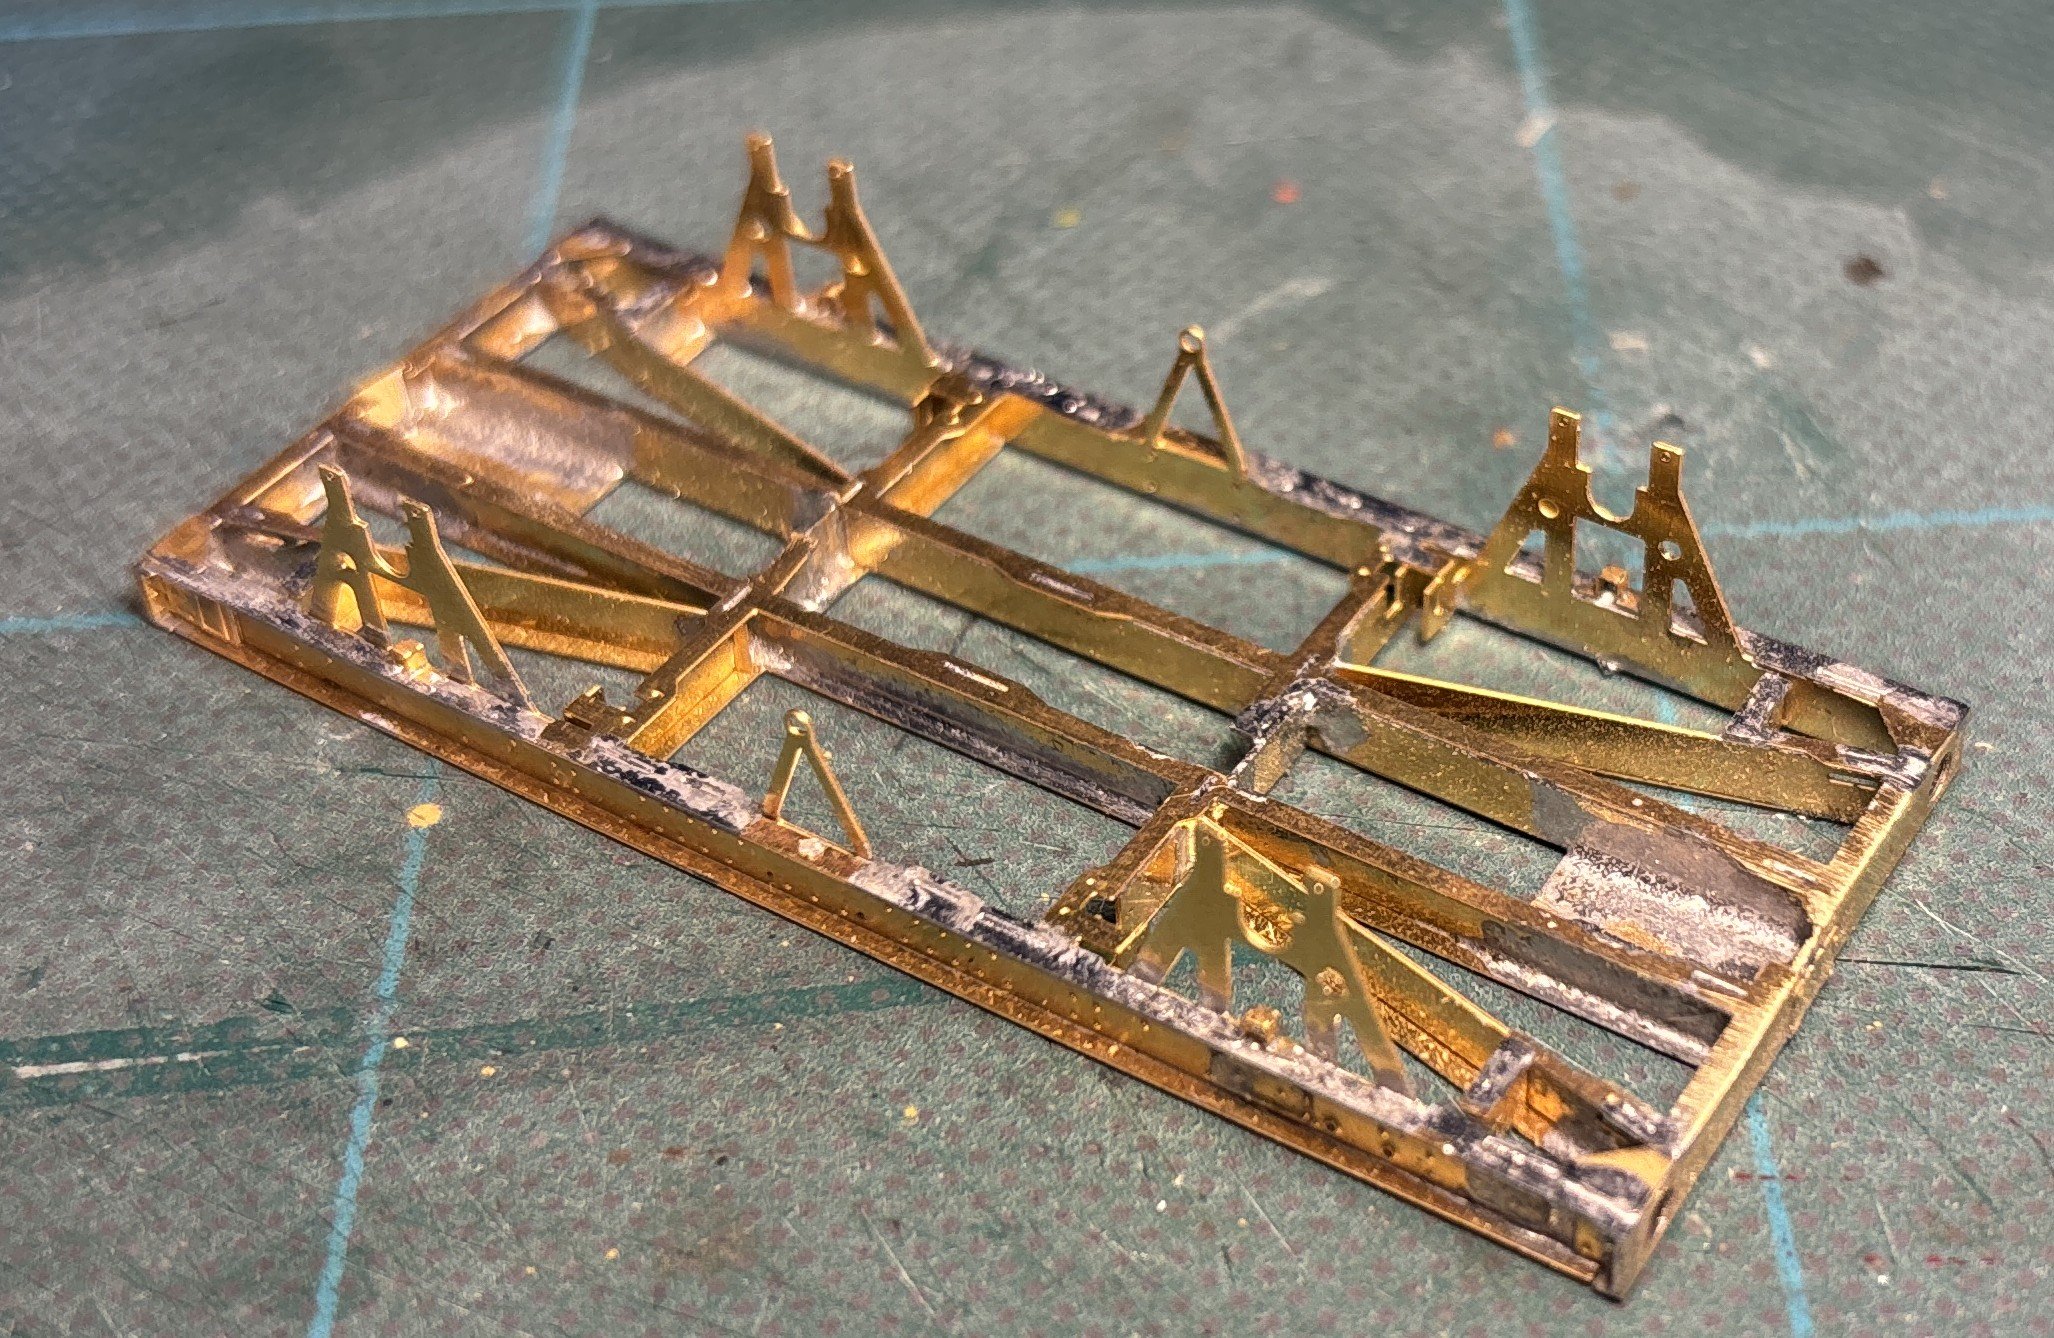
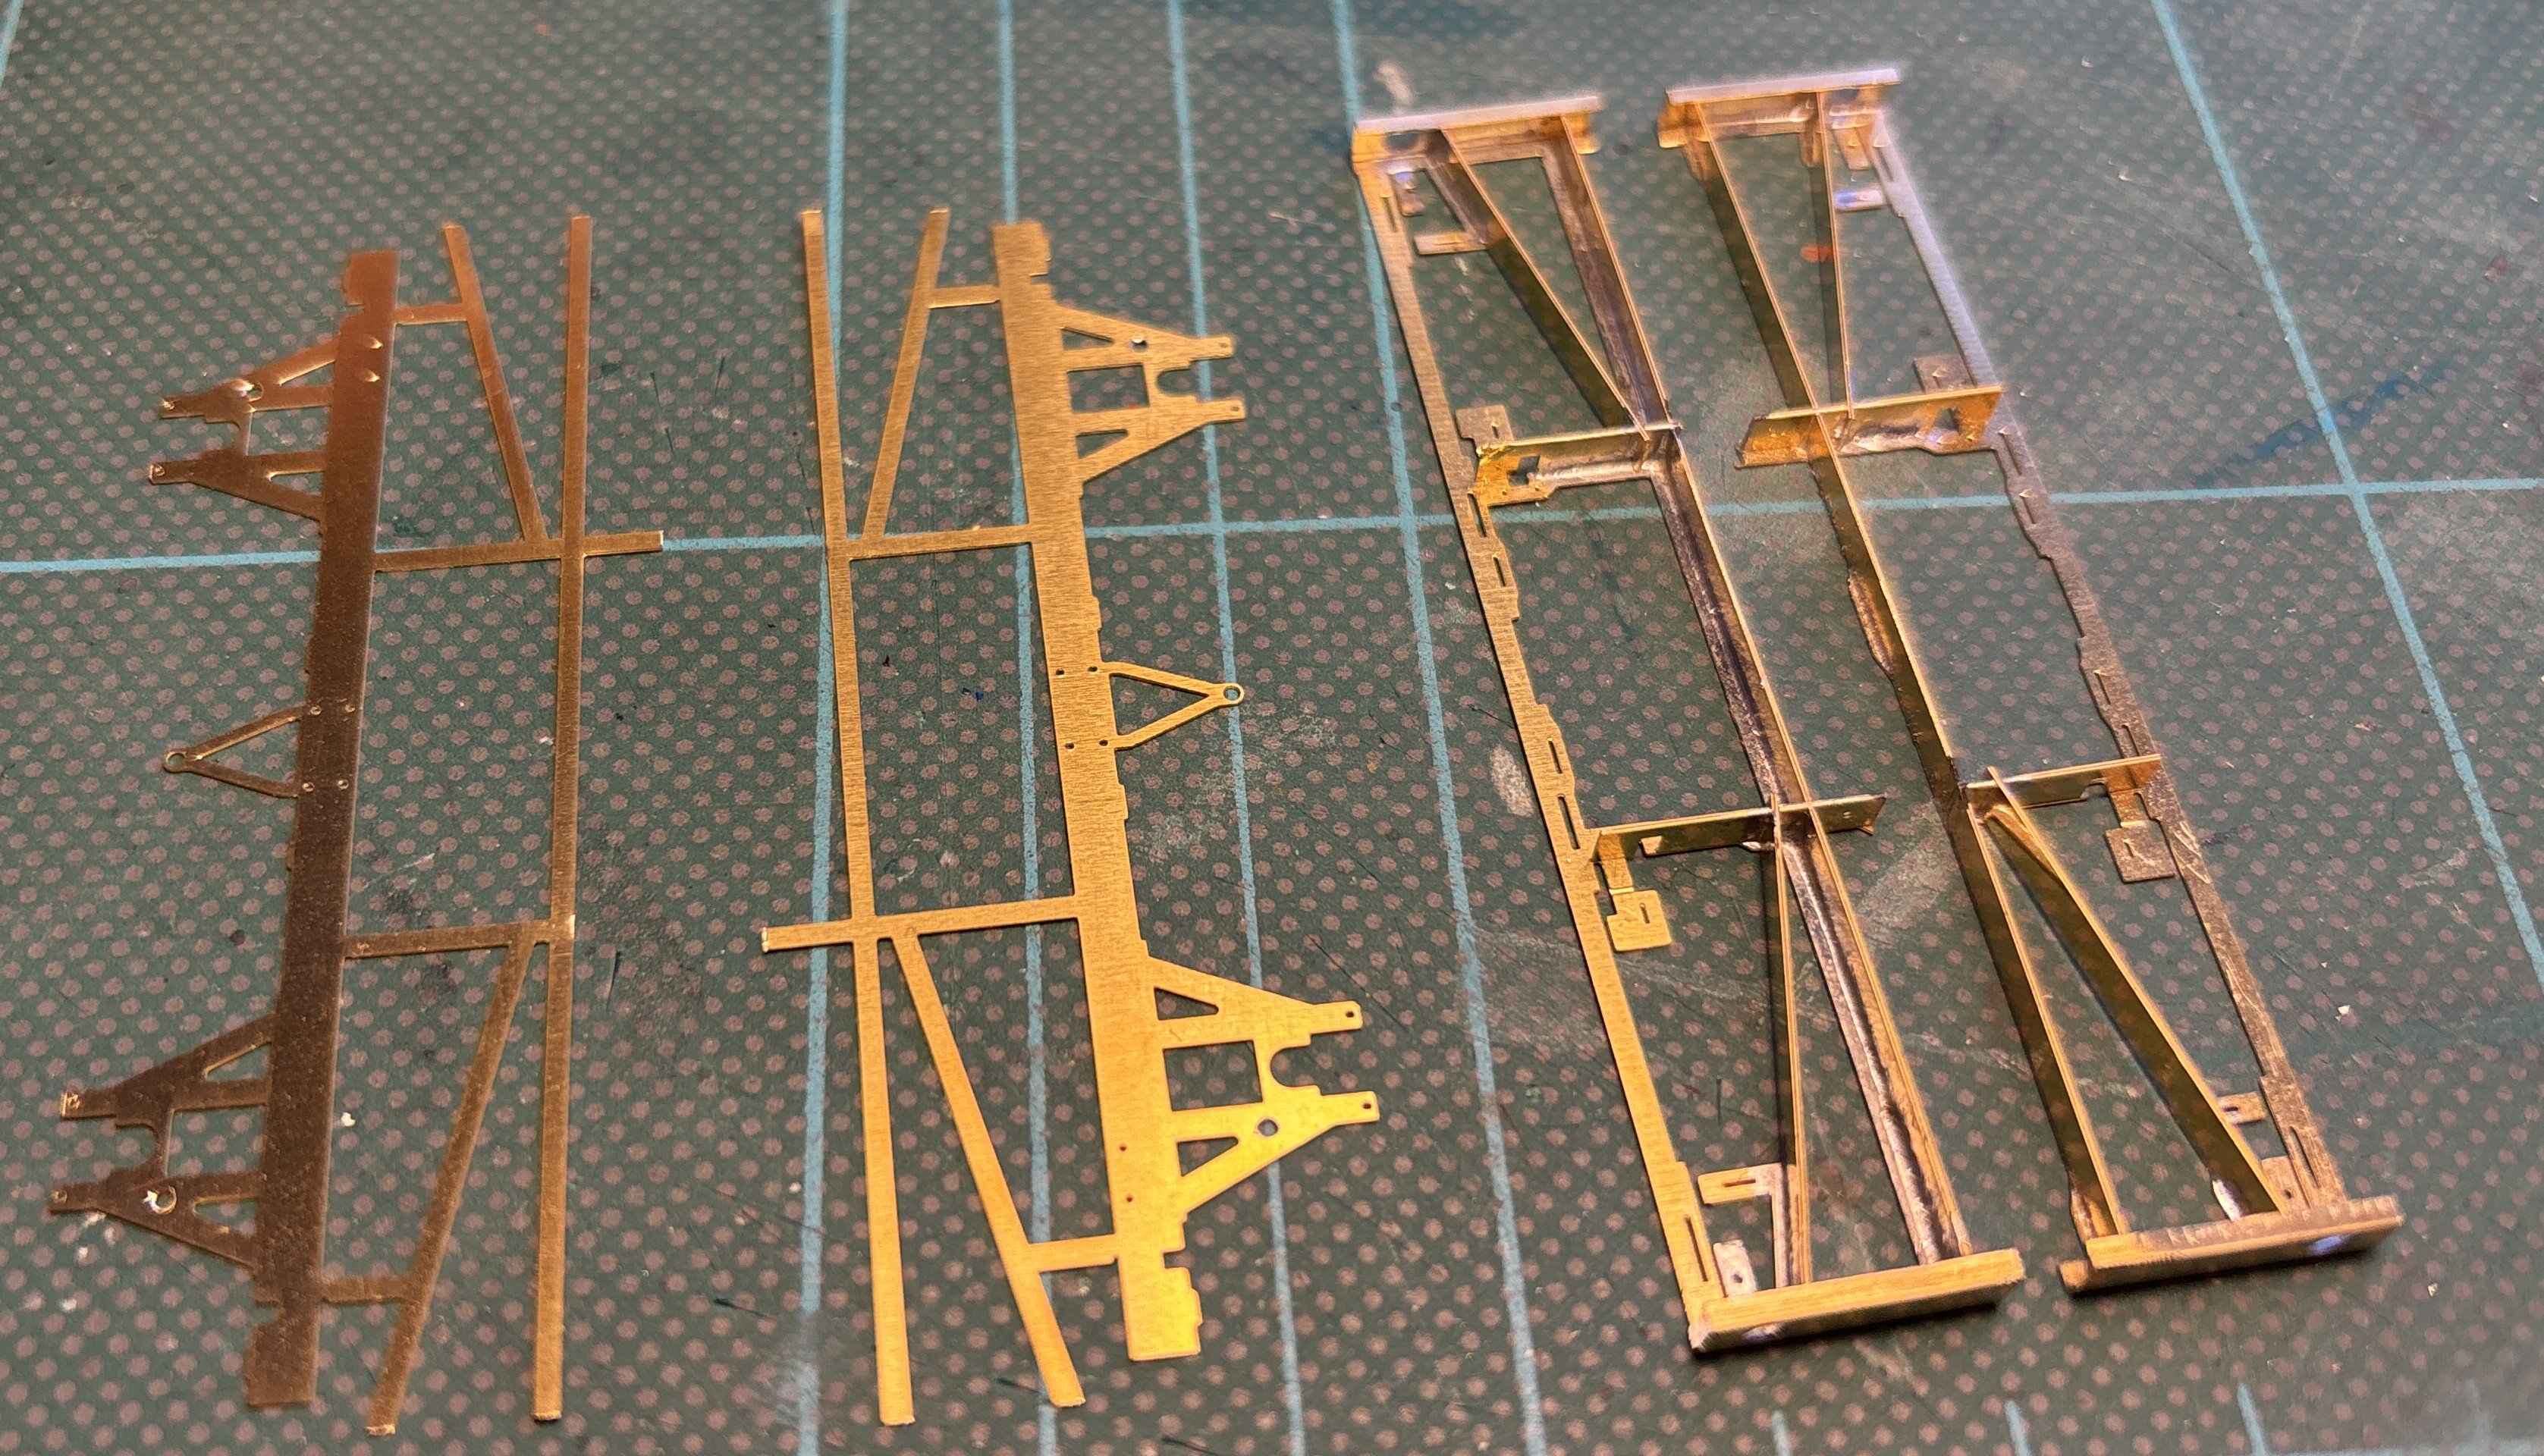
I did some more work on 156 this morning, including rebuilding the front valances with the coupler pocket rigidly mounted, reinforced from behind and with filler in the joints. I had to set that aside to set fully, so made a start on the next project. I took a look at A42 but decided to leave that for now, and instead make a start on the bitumen tanker. Rumney Models make a very nice etched kit to replace the chassis on the Bachmann anchor-mount tank, intended for EM/P4 modellers. I bought one of those and have started to assemble it. It is beautifully engineered and etched and goes together well, but there are a lot of small fiddly bits! To add to the complexity, of course I have had to widen it by 2mm. I started assembly of the frame and then made some incisions: Then I continued assembly, adding some plates and strips to give the correct width and reinforce the joints. This is as far as I've got so far: I thought my soldering was reasonably neat until I saw these photos blown up on the screen to much bigger than life size! Anyway, it's now having an ultrasonic bath and I'll do some more on it tomorrow. I'm still only on page 12 of the instructions (of 28 pages) so there's a way to go yet! Eventually it will look a bit like this one, but more filthy:
-
Murphy 141 buffer replacement - has anyone done it?
Mol_PMB replied to Mol_PMB's question in Questions & Answers
I don't know what's happened to Lanarkshire models, except that they're no longer available either. They were indeed very good and I have used them on some of my Irish wagons. I'm not very keen on 3D printed buffers (or resin cast) as they can be very fragile. The problem with getting extra castings is the cost. It's £115+VAT for the mould, plus £8.65+VAT for each time a set is cast. That's not unreasonable considering the manhours and materials needed, but works out way too expensive for 4 buffers. However, there would be space in the mould for more items, it doesn't change the prices but means that more bits are produced each time. I'm going to have a think if there are any other things I have in stock that would be useful to duplicate. -
Murphy 141 buffer replacement - has anyone done it?
Mol_PMB replied to Mol_PMB's question in Questions & Answers
Ah, many thanks. I’m looking in to getting some more made, but the cost may be prohibitive. We’ll see. cheers, Mol -
Murphy 141 buffer replacement - has anyone done it?
Mol_PMB replied to Mol_PMB's question in Questions & Answers
Have you still got a stock of them? -
Murphy 141 buffer replacement - has anyone done it?
Mol_PMB replied to Mol_PMB's question in Questions & Answers
Aha! So that's the origin of them. The supply has now dried up, sadly. Though I'm sure modellers around these islands have some sets stashed away in boxes. -
That's coming together very well!
-
Like this?
-
Murphy 141 buffer replacement - has anyone done it?
Mol_PMB replied to Mol_PMB's question in Questions & Answers
Arch60 (former 4Dmodelshop) that I use for custom etches are able to duplicate the buffers as white metal castings. Would anyone else like some, if I get some made? Here are the originals:
-
"Voiding the Warranty" - Mol's experiments in 21mm gauge
Mol_PMB replied to Mol_PMB's topic in Irish Models
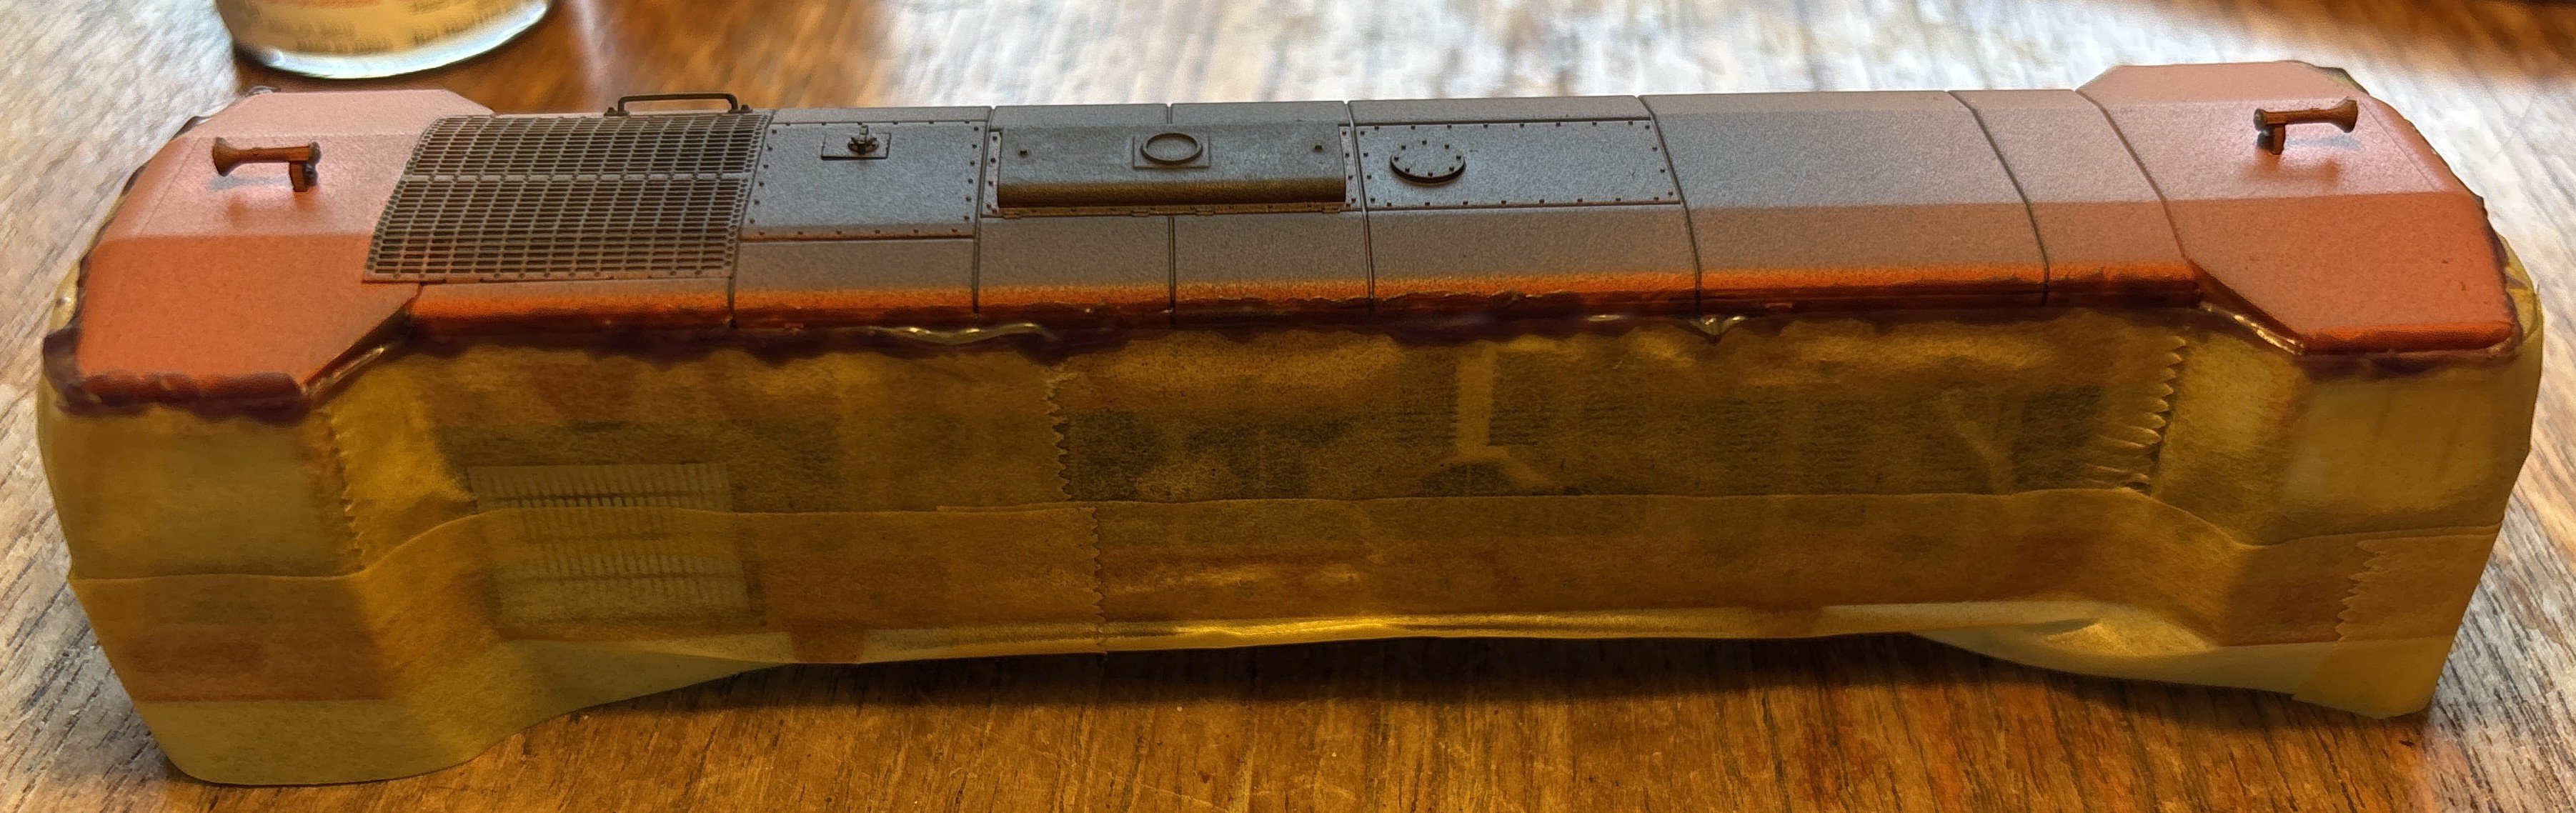
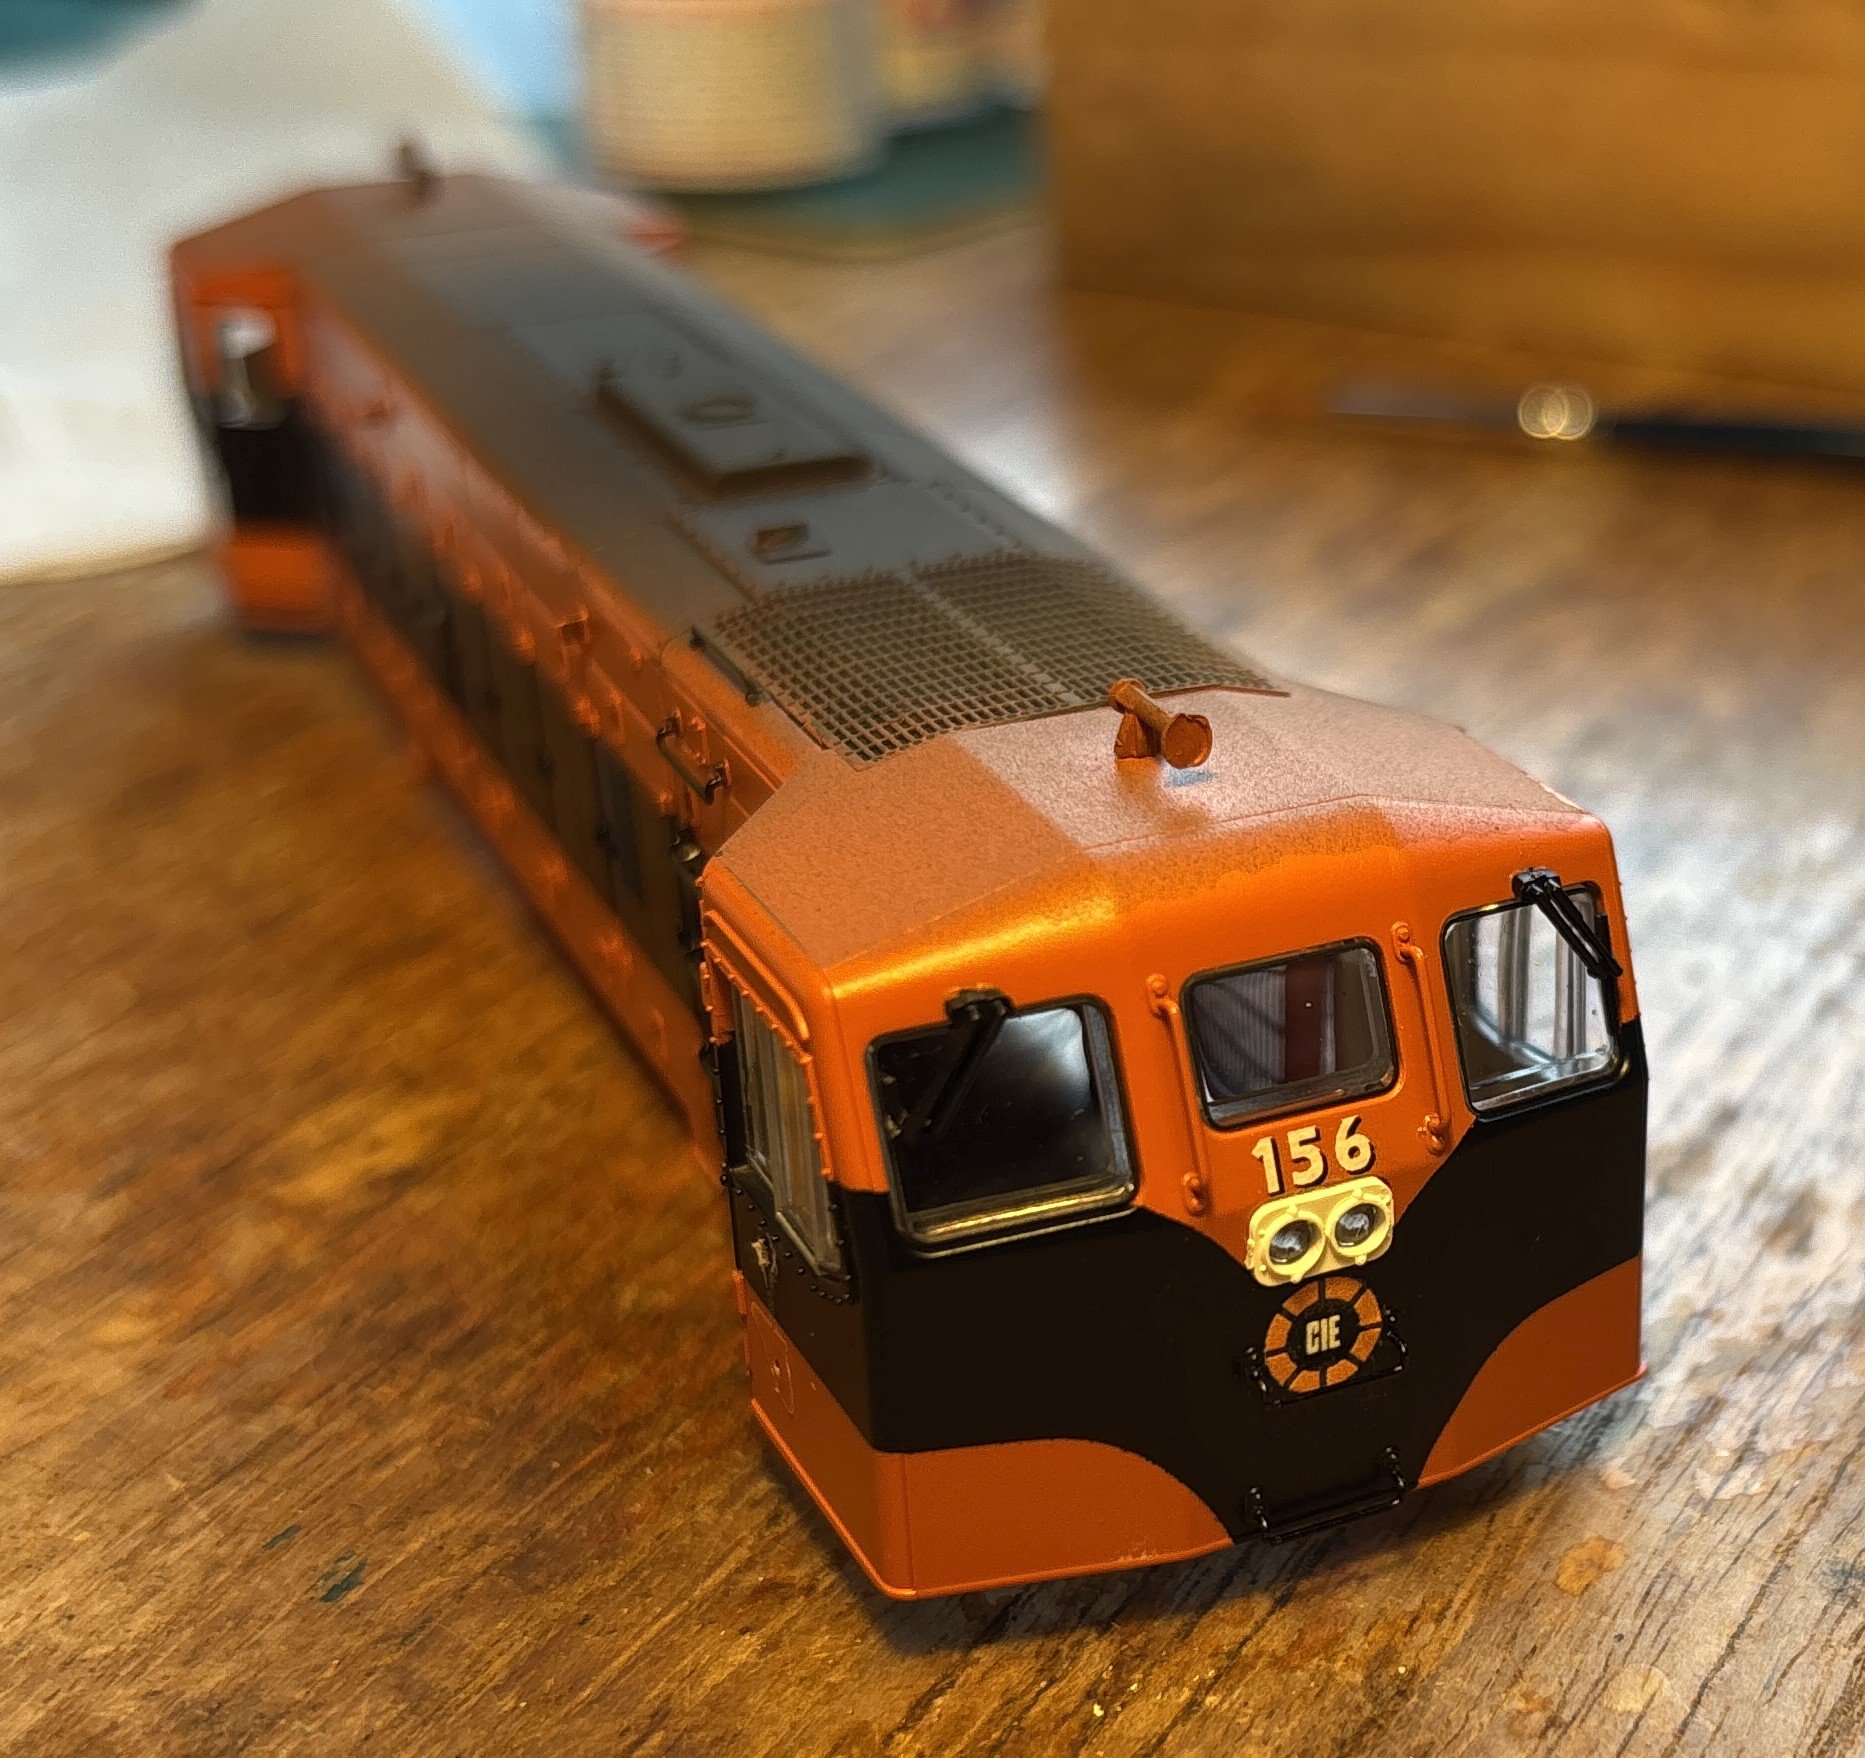
I've just weathered the roof. I used an experimental technique and it seems to have worked reasonably well. I masked off most of the body with tape, and then dabbed on Maskol for the top edge, so that it was slightly uneven. Then I did the spraying, a dirty brown/grey mix over the whole roof but heavier in the middle, followed by 'rubber black' focused around the exhaust. It seems to have given the desired effect - with the edge looking like it has been cleaned slightly unevenly: A bit like the loco in Ernie's photo here:
-
Derailers, sometimes used in place of catch points. They would be worked in association with the position light signals on the post nearby.
-
"Voiding the Warranty" - Mol's experiments in 21mm gauge
Mol_PMB replied to Mol_PMB's topic in Irish Models
To be fair, I've not been diagnosed with OCD, but I do have an obsession with detail and I suspect I'm somewhere on that spectrum. I find modelling very helpful. My work also requires a lot of attention to detail and the hardest part is when there isn't time to do a job to the standards I set myself. Anyway, I'd better get on with some modelling! -
"Voiding the Warranty" - Mol's experiments in 21mm gauge
Mol_PMB replied to Mol_PMB's topic in Irish Models
Buffers are a complex shape though - would need a multi-part mould I think? And fragile in resin. It's not something I have any experience of. I'm also wary of stopping progress on the loco rebuild because bitter experience of my own uselessness is that if I stop now the bits will sit in a box forever and never get finished! -
"Voiding the Warranty" - Mol's experiments in 21mm gauge
Mol_PMB replied to Mol_PMB's topic in Irish Models
Is there a firm that would do that? I have no experience of making castings? -
"Voiding the Warranty" - Mol's experiments in 21mm gauge
Mol_PMB replied to Mol_PMB's topic in Irish Models
Short answer - Railtec sheet number 5710. Long answer - that isn't what I used - see the diatribe below... I drew my own artwork for these, shaping each digit individually based on dozens of photos (OCD in action again...). Then I got them printed by Precision Decals. I offered the artwork free to Steve at Railtec too, in case he wanted to produce them commercially. It was at that point I discovered that he does produce something similar - sheet number 5710: https://railtec-models.com/showitem.php?id=11581 I have found it hard to search the Railtec website effectively for Irish items. You can only search for one word or phrase (no and/or functionality). Sometimes they are listed as 'Irish' or 'Ireland' but there are many Irish items labelled CIE, such as the broken wheels. However, a search for 'CIE' returns hundreds of irrelevant transfers - so many that the ones you actually want are off the bottom of the page, and there isn't a 'next' button... (FYI, broken wheels are in sets 5605, 5606, 5607). So that's my excuse for not finding this set on the Railtec website! Anyway, I like my custom ones better. The differences in the shape of the numbers may be small, but I know mine are right. Steve's are pretty close though. Anyway, back to 156, here's the prototype at Ennis in the late 1980s, about to haul me to Limerick. This is about 15 years later than the period my model represents; by this time the loco had been repainted and received unshaded numbers on the cab fronts, and the roundel moved down to the 'standard' position. Also it has an S suffix to the numbers on the sides, OHLE warning flashes, upward-facing headlight and the tablet catchers had been removed.
-
Murphy 141 buffer replacement - has anyone done it?
Mol_PMB replied to Mol_PMB's question in Questions & Answers
Many thanks @Rob R I’m using kadees so the buffers are mainly visual. At present I think I will do the buffer swap on this loco and see how it goes. The idea of producing more of these buffers is very appealing! Cheers, Mol -
Murphy 141 buffer replacement - has anyone done it?
Mol_PMB replied to Mol_PMB's question in Questions & Answers
All I can do is apologise. Again. I am sorry. -
"Voiding the Warranty" - Mol's experiments in 21mm gauge
Mol_PMB replied to Mol_PMB's topic in Irish Models
Interesting thought. Years ago I did a bit of Irish O gauge but used the American scale as it was closer to broad gauge. An Atlas switcher on flexicoil trucks had the right style of bogies though not 100% perfect. It looks like the US version of the Flexicoil is now available as a 3D print: https://3dcentraltrains.com/products/51001-flexicoil-p48-emd-truck-atlas-o-upgrade-kit -
"Voiding the Warranty" - Mol's experiments in 21mm gauge
Mol_PMB replied to Mol_PMB's topic in Irish Models
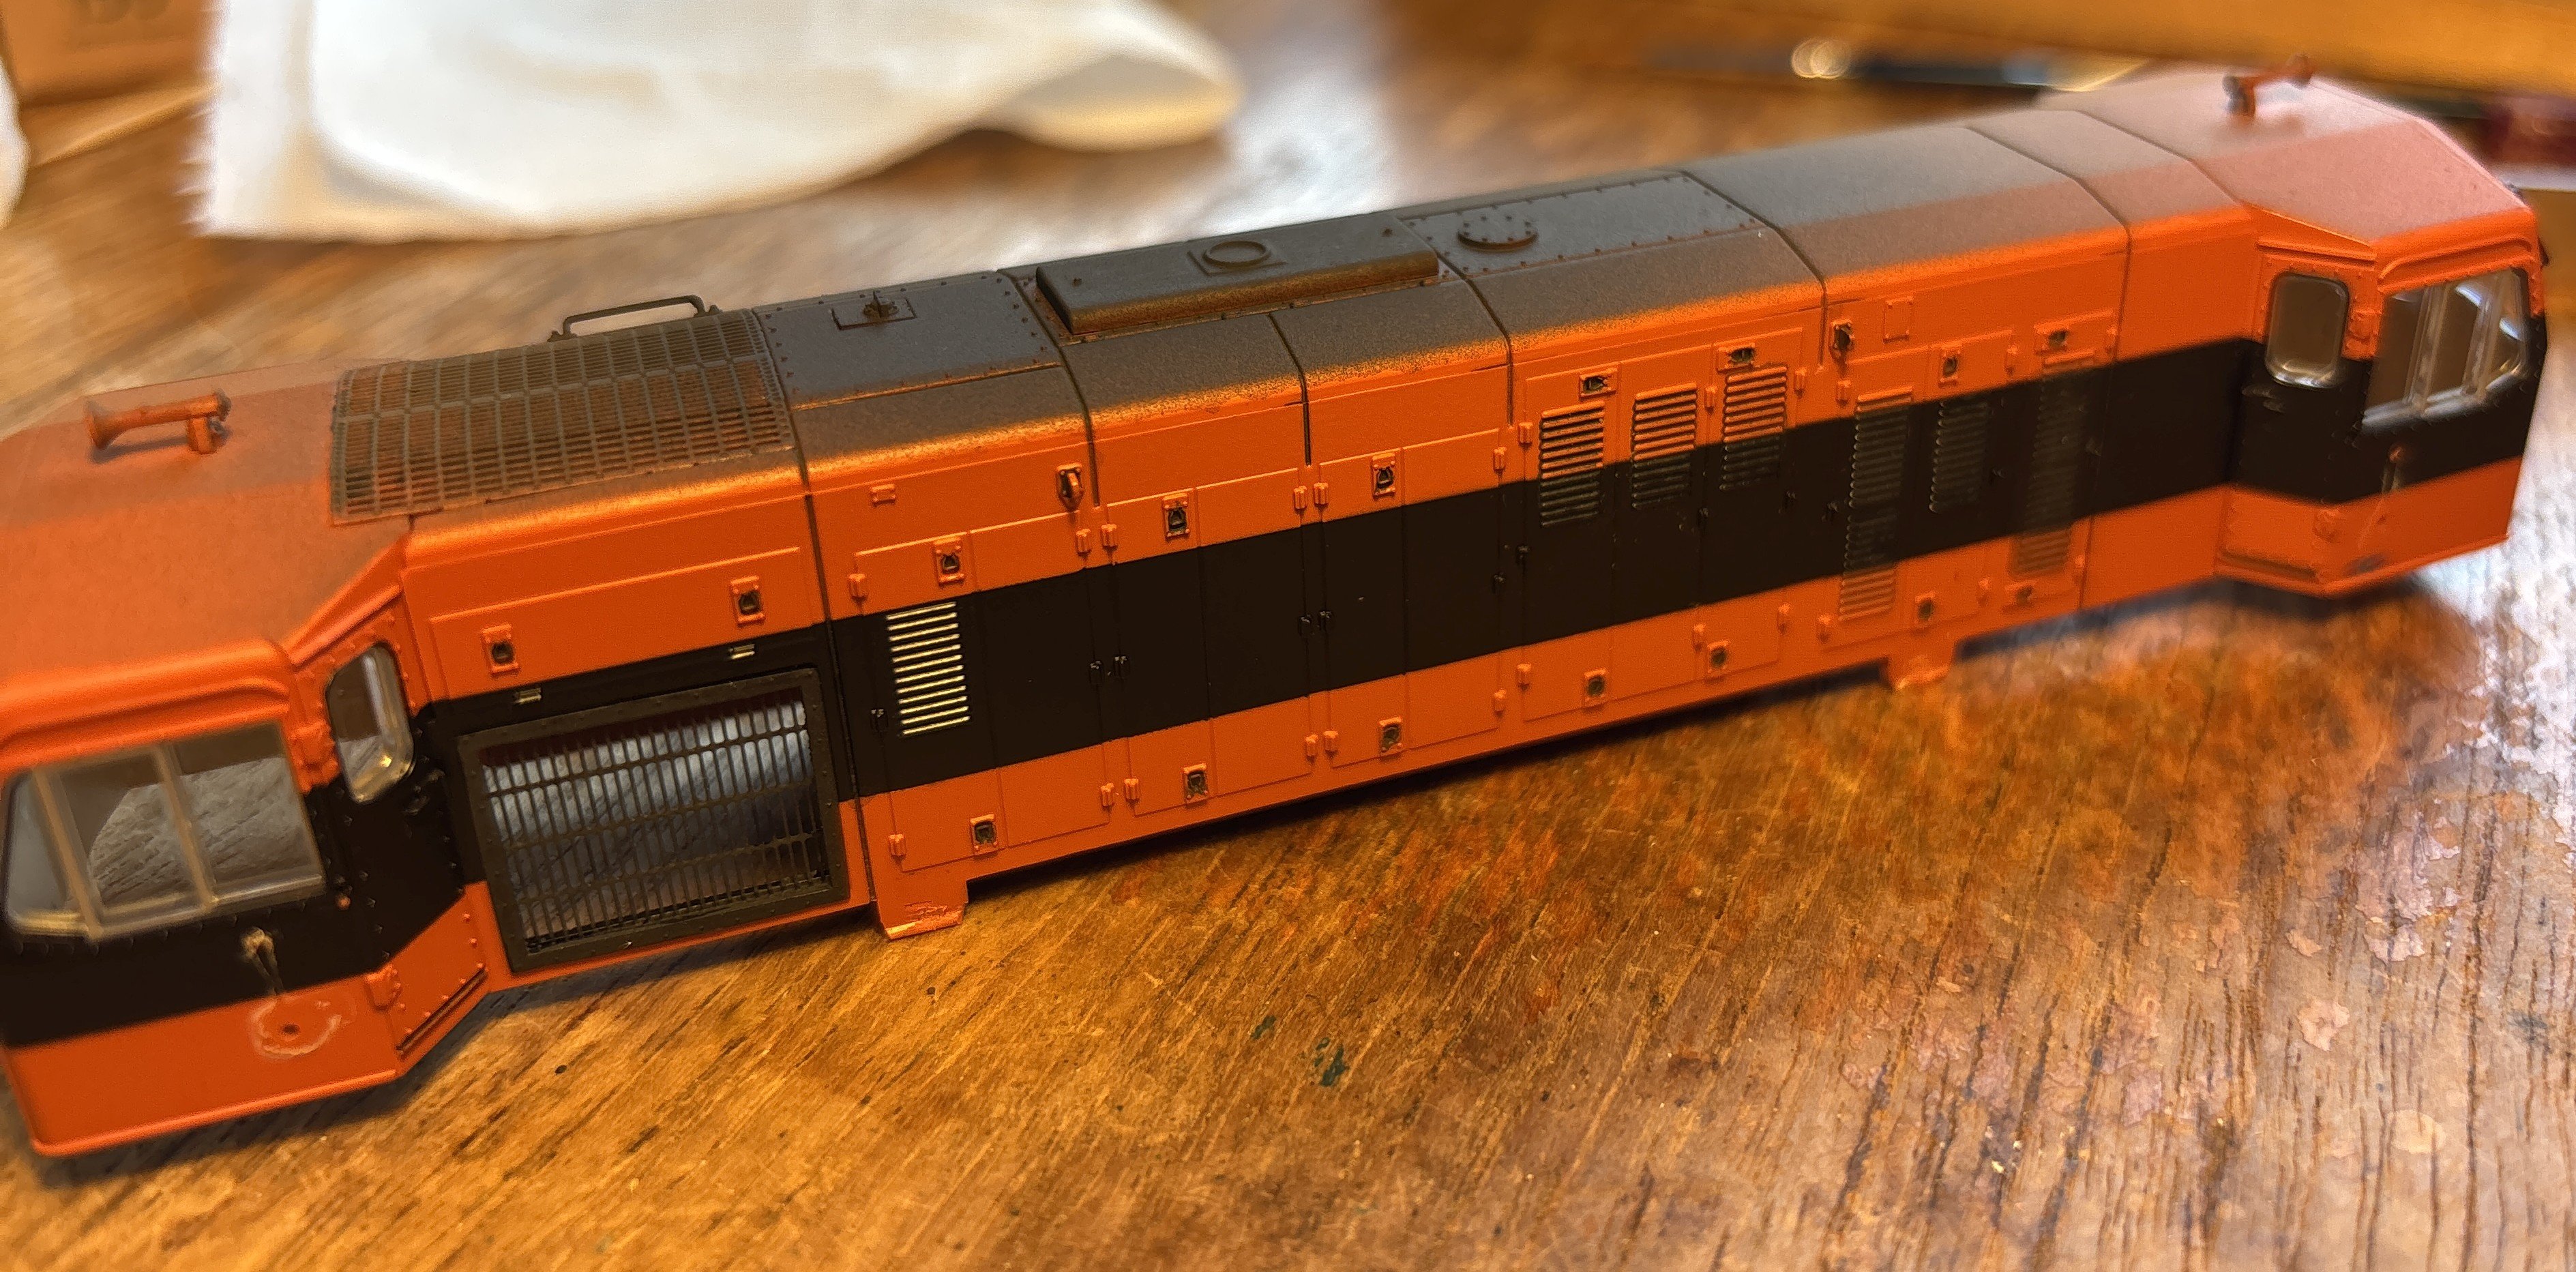
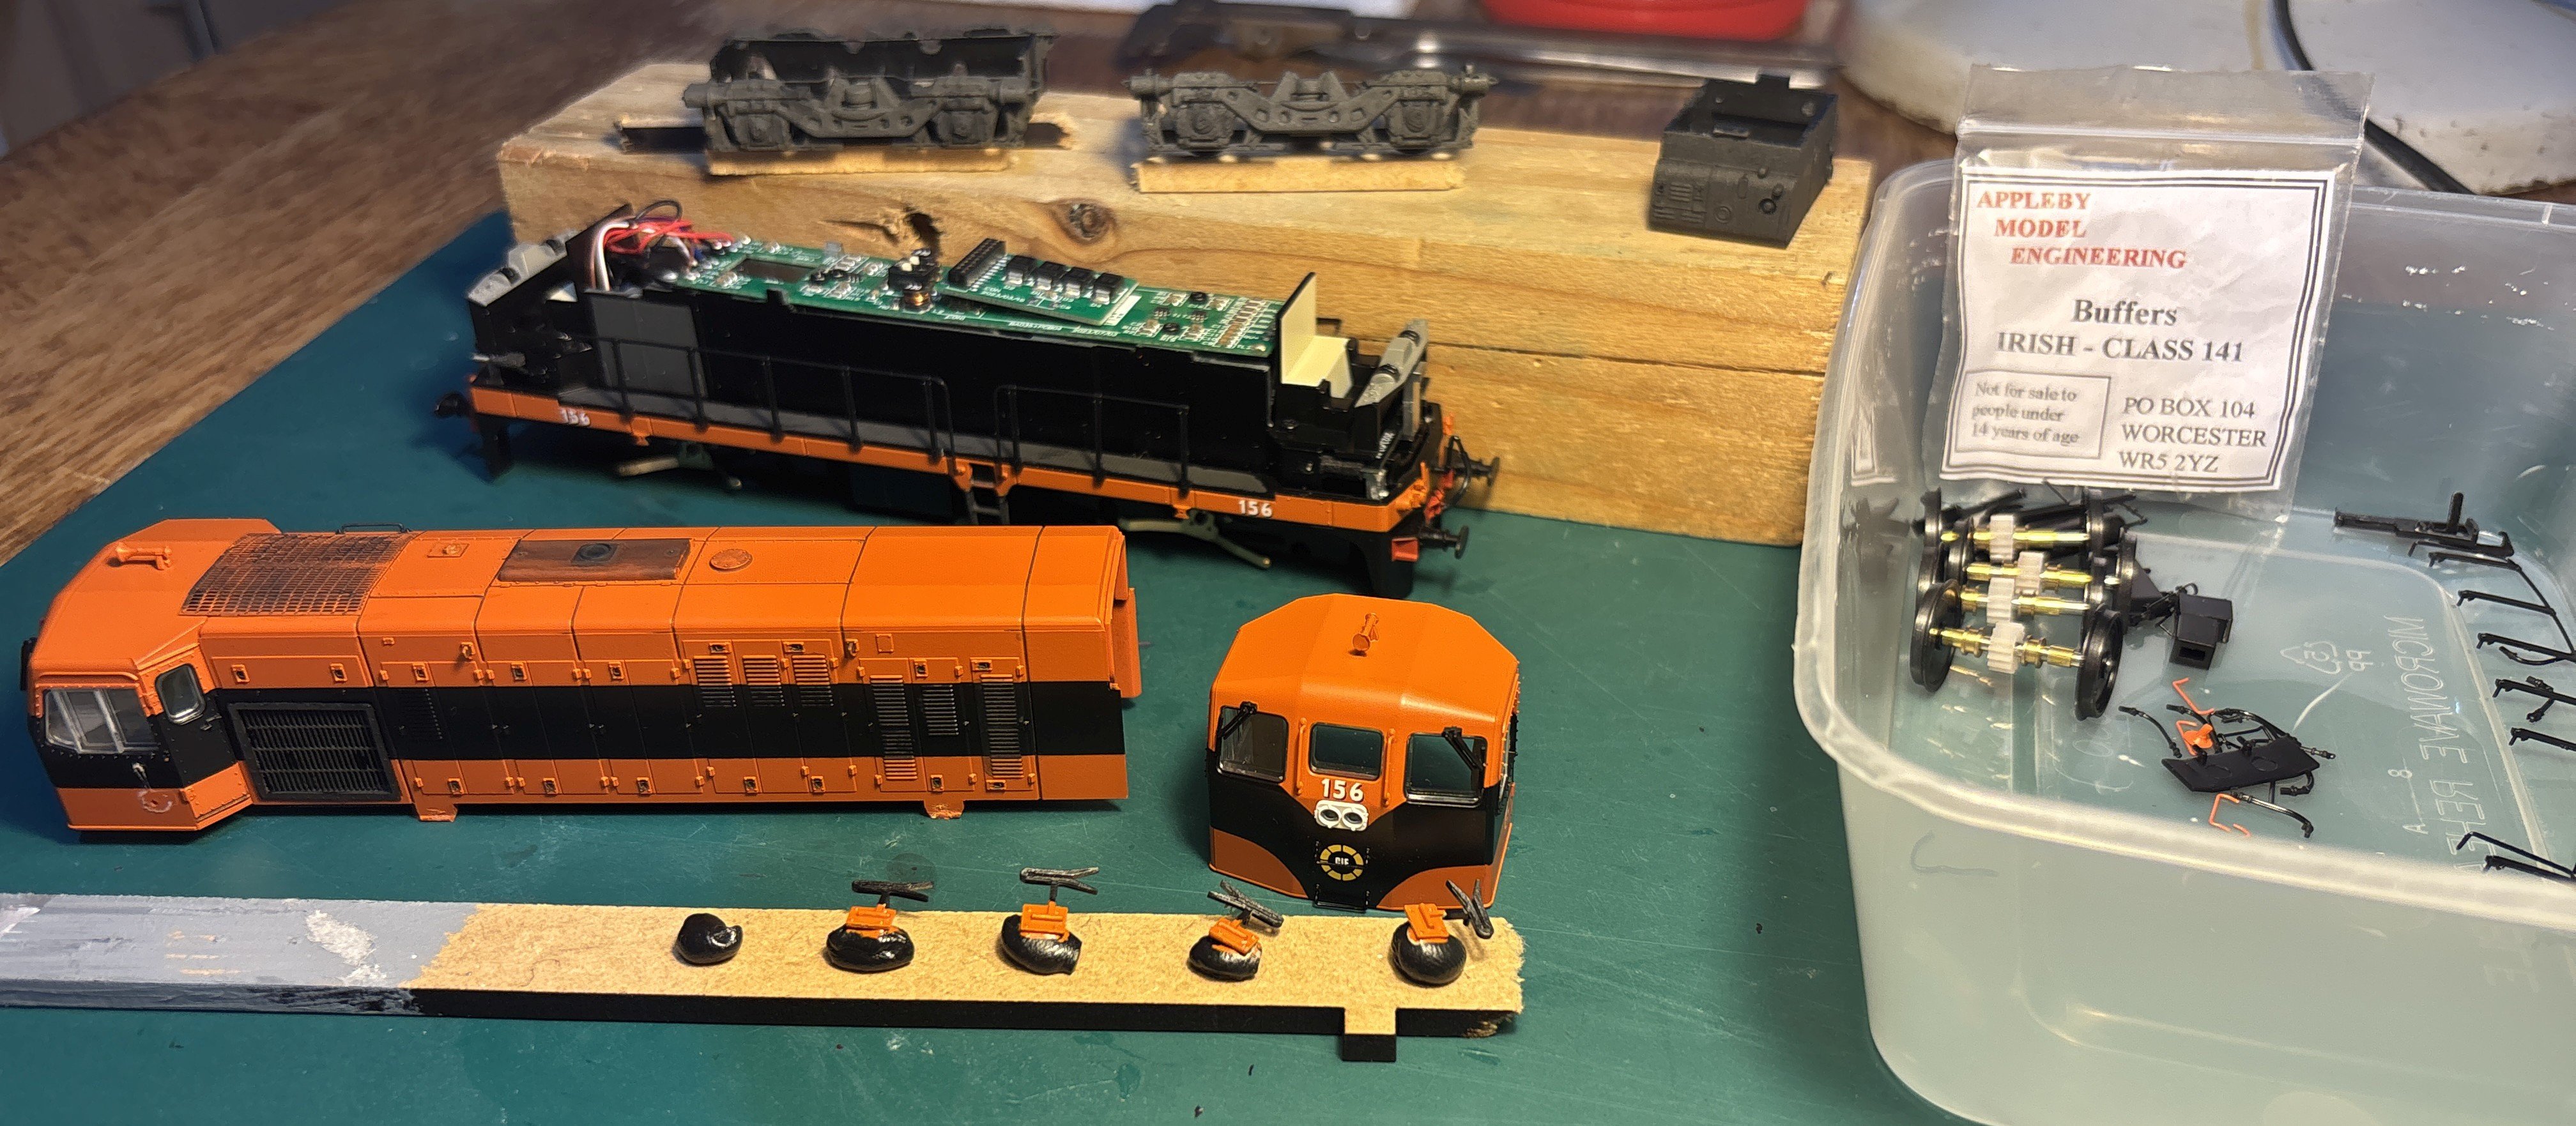
Another warranty voided. A perfectly functional Murphy 141 class now in a million bits. I have removed the cosmetic bogie frames and the fuel tank and started the weathering process on them. Also I removed the wheelsets, dismantled them and reassembled with new longer axles, Gibson carriage wheels and some spacer tubes to keep the wheelsets central. Removing the body was quite an ordeal involving an excess of swearing, but eventually it came apart. I scraped off the old numbers (149) with a cocktail stick, and renumbered it to 156 using some custom transfers I had printed a while ago. In this case, it is correct to have the large shaded numbers on the front. I've also removed the tablet catchers and repainted them, ready to refit. I found that Precision Paints gave a better match to the Murphy orange than Railmatch did. I've started the weathering process on the body, running a dirty wash into the crevices. There's plenty more to do and I'll get the airbrush out tomorrow. I'm aiming for a loco that was recently repainted but has got a bit grubby in traffic and then been well cleaned on the bodysides and ends, but with a grubby roof and bogies, something like this 181 from Ernie: It's interesting that even this pair specially prepared for a royal train still have grubby bogies! 156 ought to have its roundel a bit higher up than the one on the model, and I'm trying to decide whether to scrape them off and add new transfers in the correct place. It's tricky as they are under the handrail. I have some Railtec roundels which are the right size but are very 'orange' - they match the paint. These roundels faded quickly and the printed Murphy models roundels nicely capture the faded colour. Hmm... I have not yet taken the plunge and tackled the buffers. I need to decide whether to hack then off and replace with unsprung, larger ones at the correct spacing. Or live with the ones that are already fitted. I was only able to get one set of the correct type and they're no longer made, so if I do the modification it will be my only 141 with correct buffers. Also I'll need to refit the coupler pockets into the front valance. More tomorrow, hopefully.