
BosKonay
-
Posts
8,837 -
Joined
-
Days Won
2
Content Type
Profiles
Forums
Resource Library
Events
Gallery
Blogs
Store
Community Map
Everything posted by BosKonay
-
Probably. I find that solid sections like my viaduct are practically silent whereas the framed out areas are much noisier.
-
You should be able to set the device to 'remember password' and also ensure you have enable tracking and cookies enabled. If your privacy settings are too tight the forum can't maintain your session which could be causing it to keep requesting your credentials.
-
I use woodland scenic foam and use copydex to fix the ballast. It's not silent but it's pretty good.
-
Hi Noel Drop me a pm with the url you are using? Make sure the phone allows cookies also ( does the up change a lot or are you on 3/4g)?
-
Just stunning!
-
Just wow Dave!!!
-
Congratulations John
-

SDMRC Exhibition - Blackrock Collage October 24th-26th.
BosKonay replied to steventrain's topic in What's On?
Lol, they look well Wrenn -
Glad I wasn't the only one who got unnaturally excited by that suggestion
-
The 40% stat is off the production phase (how close to models in hand) and nothing to do with numbers sold (which ironically is just around 40% now
-
-
SDMRC Exhibition - Blackrock Collage October 24th-26th.
BosKonay replied to steventrain's topic in What's On?
Congratulations to the SDMRC for a well organised, well structured, thoroughly fun show. The quality and mix of exhibitors and layouts was excellent, and the whole thing a joy to attend! -
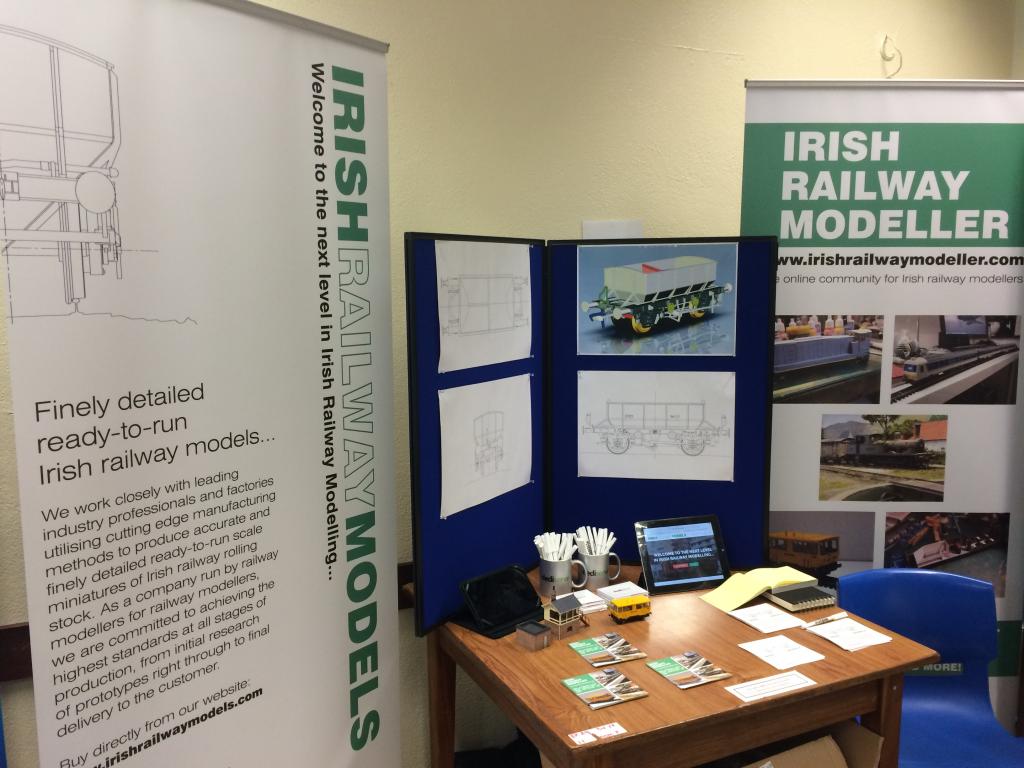
Yes - certainly once we have the models in hand, we'll be doing our best to hand deliver via shows as much as possible to keep the costs down for everyone The Stand looked well to day, thanks to all those who popped by to say hello and drop in a deposit You can place orders / deposits on the website - http://irishrailwaymodels.com - which based on the last few days, would be strongly advised to avoid disappointment!

-
Just a note to echo the appreciation for the staggering support. I'll be there this afternoon myself too and looking forward to meeting as many of you as possible!
-
-
Some nice prices there - was mentioned here too http://irishrailwaymodeller.com/showthread.php/5017-Marks-Models-Irish-Railway-Sale
-
:)
-
Lovely shot
-
In simple terms, you have a front and rear bogie to 'lead' the loco into turns, and 8 driving wheels, fixed, in the centre
-
Lovely!!!
-
5 minutes of viewing pleasure ! Thanks for sharing
-
Well done that was quick
-
It's a new offering from Bachmann Scenecraft
-
New from Bachmann