-
Posts
4,883 -
Joined
-
Last visited
-
Days Won
119
Content Type
Profiles
Forums
Events
Gallery
Blogs
Community Map
Everything posted by Mayner
-
The MGWR track re-laying train was designed to quickly catch up on deferred track renewal that arose during WW1. The Dublin-Galway-Sligo & Mayo lines were re-laid in the 1920-30s, the recovered material re-used to re-lay branch lines. The train was also used to re-cover track material when the double track sections of the Midland west of Clonsilla were singled and to lift the Western Branches during the 1930s. The crane was also used for bridge replacement. A centralised p.w. maintenance depot with overhead gantry was set up at Mullingar capable of operating 24 7 where new track panels were assembled, recovered panels refurbished for further use or dismantled for disposal, and a re-laying train to do the work on site. The main limitation was the re-laying train was limited to 45' rather than 60' track panels due to the length of the war surplus bogie flat wagons and probably more significantly difference in p.w. practice between the Southern and Midland sections, track was laid with staggered rail joints on the GSWR and possibly there may have been less of a need for large scale track renewal on the Southern than the Midland, the original 1906 rails were still in use on the South Wexford line at the time of closure.
-
Its the chassis of the Bretland gantry re-laying crane https://patents.google.com/patent/US1547019. The whole train appears to have been built using war surplus material it looks like Bretland grafted a war surplus 6 w bogie on to a war surplus bogie flat wagon. A standard gauge version the Morris Tracklaying Machine with a pair of 6wheel bogies was built for use in the UK and lasted into BR days https://picclick.co.uk/Morris-Railway-Track-Laying-Machine-Permanent-382880753675.html#&gid=1&pid=1
-
Possibly MGWR signal Seamus. Signals controlling the down running line from the platform end to Mullingar West box and connection to the loco depot. The Midland appears to have introduced concrete signal posts at some stage before the Amalgamation (signal beside the loco shed Loughrea http://eiretrains.com/Photo_Gallery/Railway Stations L/Loughrea/IrishRailwayStations.html#Loughrea_20080327_008_CC_JA.jpg). Besides the DSER the GSR used lattice posts possibly to replace timber posts at some stations on the Midland (Up starting signal Loughrea)
-
There is a considerable market for rtr batch produced brass models in the United States https://www.overlandhobbies.com/HO_Scale_s/232.htm, a much more valid comparison with OO Works Locos than a brass kit assembled by an in-experienced or careless builder. There is a reasonable market for rtr brass models in O gauge and the larger scales, but its hard to see too many Irish modelers being prepared to shell out £1000+ for a brass rtr Irish steam loco & £500 each per individual coach. A rtr injection moulded plastic or die-cast model is obviously designed for ease of assembly by semi skilled workers, while a sheet metal model by its sheer nature requires a higher level of craftmanship in its assembly which is reflected in its price. Some Bokety Brass rtr models. 1 Bokety brass Accucraft (China) electric large scale 2-8-2 $2-2500 on US second hand market. (the switch stands are pissed). The loco was factory assembled from milled and etched brass & stainless steel components. Berlyn Brass (Korea) RGS Motor 6 (Opening cab doors, bonnet & tool box) Bonnet slightly open to aid ventilation. Protototype had a reputation of overheating even while running downhill.
-
Horses were usually transported in horseboxes which were classified as non-passenger coaching stock capable of passenger train speeds rather than goods stock. Horseboxes appear to be mainly pre-amalgamation stock though the GSR built some horseboxes to a GSWR design in the 1920s. Horseboxes usually ran individually in scheduled passenger trains or as specials in connection with the larger race meetings. There is a picture of a train of horseboxes at Newcastle West en-route to the Listowel Races in the early 70s just before the traffic ended in JHB & Barry Carse North Kerry Pictorial Album. Before the setting up of modern meat processing plants in the 60s & 70s a high proportion of cattle sold at fairs in the West were shipped by rail for fattening in the East or exported on the hoof to England & Scotland. The Midland had a limit of 25 wagons including van in the 1890s for cattle specials though loads may have increased as larger locos and longer vacuum fitted wagons were introduced. Traffic from the big fairs in the West were heavy, in 1923 there were paths for 6 livestock specials from Loughrea and 4 from Ballinrobe at close to hourly intervals on the Big Fair days. In the 1960 WTT CIE had paths for shipping specials from the "South & West to the North Wall including paths from, Athy, Nenagh, Fethard, Tullamore, Tipperary, Moate, Mullingar, Mostrim & Roscommon. Following the closure of the SLNCR CIE introduced a scheduled Sligo-Mullingar "Shipper" which connected with the Athlone-North Wall Goods which could be "specially expedited" to ensure shipping at North Wall. The Sligo shipper also carried meat in containers from Dromod. Other fairs would have been served by "Specials" which would have appeared in the "Weekly Traffic Notice"
-
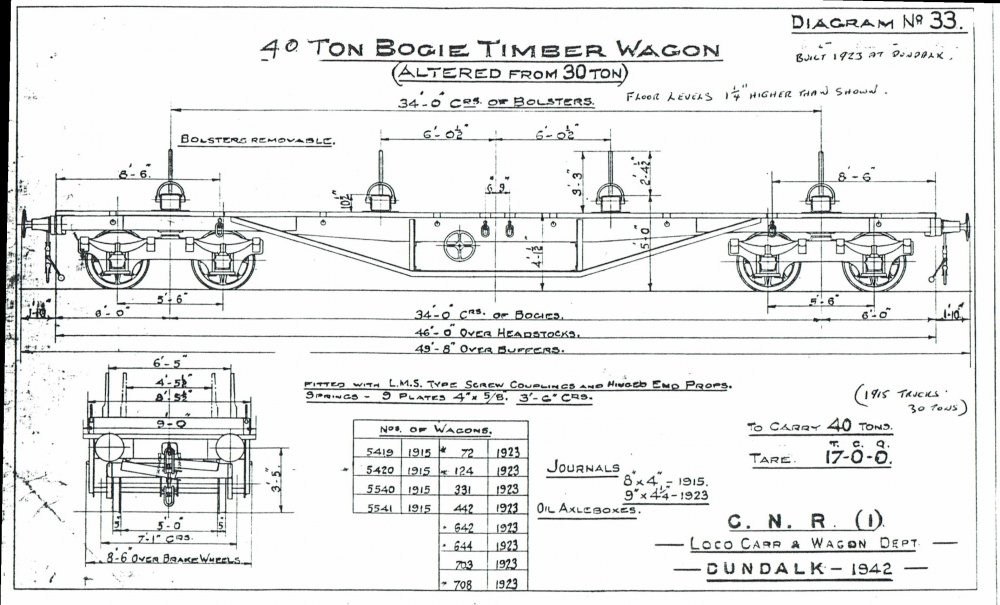
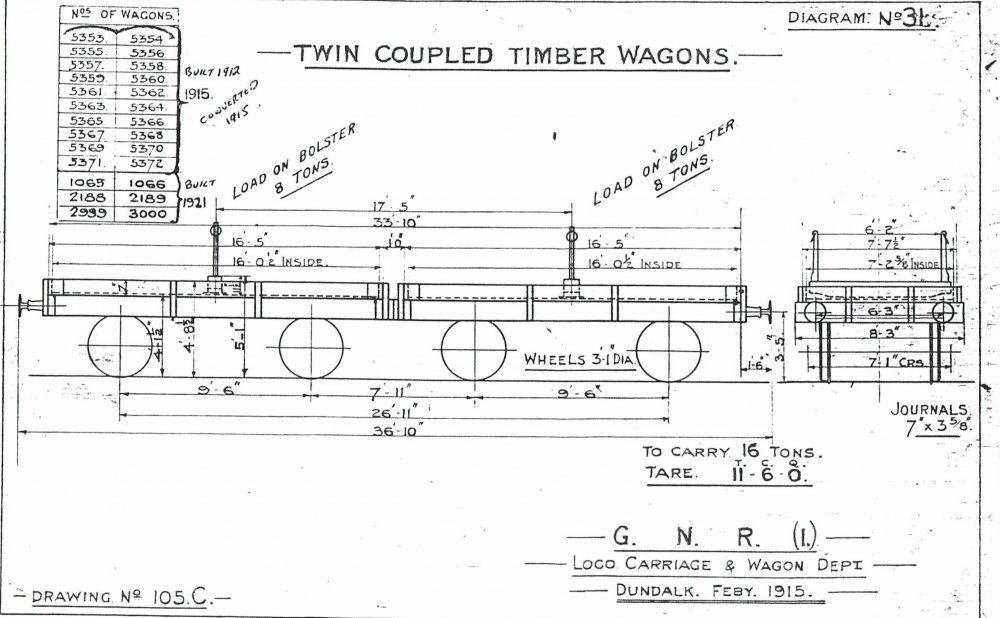
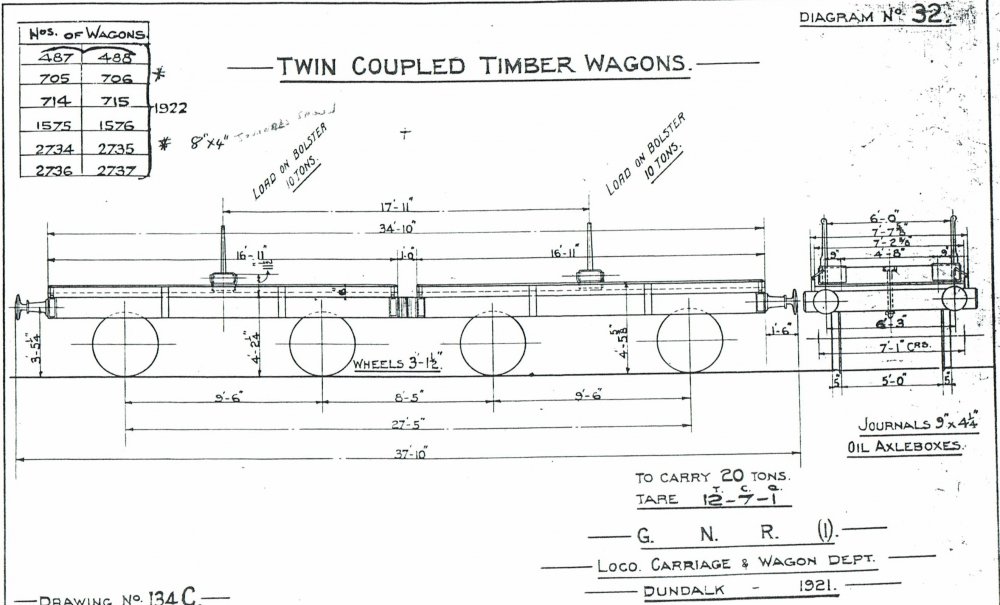
Timber traffic appears to have been important at least up to the 1920s, native hardwood from the large estates going out in individual or twin wagons loads rather than today's plantation forestry There is a story of an emigrant to the UK who used to load timber at Dunsandle in MGWR days, finding work on the Liverpool Docks unloading timber from the same estate in County Galway I remember seeing a lone CIE single bolster wagon possibly the last of its kind in the Point Yard in the early 1980s. The Midland & the Cavan and Leitrim appear to have used single bolster wagons for timber. I would imagine that CIE would have tended to use ex-CBSCR & GS(W)R wagons in West Cork though the odd foreign wagon might have crept in, after all there is a photo of an up goods arriving at Drimoleague Junction with a GNR brake van at the rear.
-
The wagons in the Ratio LNWR P.W. wagon set look reasonably close to dropside ballast & single bolster wagons used by by the GSR and the pre-amalgamation companies. The CIE built a slightly more modern version with a steel underframe and swivel bolster in the 1950s. https://www.ebay.co.uk/p/Ratio-00-Gauge-Layout-Wagons-Plastic-Kit-No-575-Permanent-Way-4-Wagon-Set/1641654330?iid=312114422905&rt=nc The Ratio LMS (LNWR) Traffic & Loco wagon set is another source of "close enough" Irish wagons, the kits includes typical Irish single lever brake gear. https://www.ebay.co.uk/p/Ratio-OO-Gauge-LMS-Traffic-Coal-4-Plank-Wagons-Kit-Okay-Hornby-Bachmann/1851143853?iid=272077805011&rt=nc
-

Irish Layouts at Bala Exhibition in Wales
Mayner replied to Irishrailwayman's topic in Irish Model Layouts
The standard of modelling on the Irish two dioramas appears to be really high. Apart from the Bala Lake Railway a drive along the A4142 from Bala to Trawsfynydd (or as the locals say Traws) is well worth it in itself. The road follows the mountain section of the BR/WR Bala-Festiniog branch line through some of the remotest country in Wales https://www.revolvy.com/page/Cwm-Prysor-Viaduct. Spent much of my mis-spent 30s in North Wales used to stop for a quick pint in Bala on a Friday night or rign through a last drinks order if we were unlikely to reach Portmadoc by closing time.- 13 replies
-
- 1
-

-
- bala mr exhibition wales
- exhibition layouts
- (and 2 more)
-
There is a legend/story that the ex-GNR traffic/motive power people in Dundalk were terribly upset when a J15 appeared unexpectedly in Dundalk having worked the CIE weedkiller train through from Inny Junction. I guess we will never know whether ex-GNR managers in Dundalk were upset with "not being kept in the loop" with a foreigh loco and train appearing un-announced at the heart of the GNR system or Dundalk loco crews resentful at a CIE train crew working through without a pilotman from Cavan North and all that lost overtime.
-
Interesting thread growing up in Dublin in the 60s in our family public transport was looked down on and railways seen as a thing of the past, my first train ride was from Killiney to Tara Street in a compartment coach behind a black diesel. My mother and her sisters we had walked along Vico Road from the bus terminus in Dalkey to Killiney Station and there was no bus back to town. Though I did not expect it I managed to travel on enthusiast specials and service trains on the majority of operational lines in Ireland with the notable exception of Antrim-Waterside and the Portrush Branch. Managed to visit goods only lines to Ballinacourthy, Foynes, Kingscourt, Newross, Mullingar-Athlone, Waterford-Rosslare Harbour, Claremorris-Limerick (in 2 stages), almost kicked myself for not asking my parents if I could do Galway-Athymon jnt-Loughrea during a family holiday in Galway during the early 1970s. It will be interesting whether the Irish railway network has reached a steady state, will contract further or expand. I developed an affinity for disused railways, one Sunday afternoon we had a short walk along the Meath Line near Kileen Castle shortly before the track was lifted, I walked the Southern end of the Welsh Highland from Pont Croesor to Bedgellert before the track was relaid, the most exciting was a drive along the trackbed of the Rio Grande Southern to Trout Lake Trestle in thunder and lightning during a snow storm in June 2016 disappointingly no ghost train appeared on the old railroad that afternoon.
-
The coach in the middle of the train looks like the compartment side of a main line corridor coach dating from the 1920s not unlike the Bachmann/Murphy models flying snail coach. The GSR also built some non-corridor compartment stock for suburban use during the late 1920s that were not unlike the LMS suburban stock of the 1930s https://www.hornby.com/uk-en/shop/wagons-coaches/passenger-coaches/non-corridor-57ft-coaches.html . some of theses coaches were repainted into the black & tan scheme and used on Bray line surban services up to 1972. Coaches built during this era usually had small windows and doors from the individual compartments on one side with a toilet compartment at each end, the corridor side had larger windows and a smaller number of doors than the compartment side You can just about make out the window and door arrangements and raised panelling at 0:45 as the train draws out of the station. The coach is likely to be a composite with 1st & 2nd(3rd) Class accommodation rather than a 2nd.
-
Downloadable version of catalogue 2019 Catalogue.pdf
-
- 2
-

-
Not quite a mobile crane but working mechanical horse and gantry in 2mm
-
There was a yellow one stored out of use for many years at the town end of Mullingar Goods yard.
-

Can anyone help with identifying this item?
Mayner replied to DART8118's question in Questions & Answers
The GSR introduced power signalling on the Amiens St-Dunlaoire section during the 1930s with a elevated signalbox at Westland Row. Signalling was using fullsize & miniature searchlight signals commonly used during the 1930s, pointmotors and signals were possibly supplied by Westinghouse Brake & Signal Company in the UK. http://briansolomon.com/trackingthelight/tag/searchlight-signal/ http://catalogue.nli.ie/Record/vtls000305055 -
It looks like a Coles crane often used in larger railway good yards in the 50s & 60s. CIE Coles cranes seen to have been standard yellow, though GNR & UTA may have painted theirs in company colours. Corgi produced a 1:76 diecast model that seems to come up on e-bay or the second hand market https://www.ebay.co.uk/p/Corgi-Trac kside-DG226001-OO-Scale-Coles-Argus-6-Ton-Crane-British-Rail/1321328048
-
I suddenly realised how bad the smog in Dublin was when I returned home from London for the Christmas holidays during the late 80s early 90s I vaguely remember seeing Bogie Fertiliser wagons laden with briquettes from Littleton in the Holyhead Yard when I was working in the port area during the late 90s, I was more interested in the intermodal operations at the time with the new gantry crane and new bunded storage area for tanked container storage and the daily Liner down the Alexandra Road Tramway to the new Merchant Ferry Terminal. The BNM traffic for the Dublin market arose following the closure of Lullymore and the opening of the new Littleton briquette plant. Great photo of the MK1 flat wagon I have been looking for one for years!
-
The BNM traffic rings a bell arose as a result of clean air legislation introduced to eliminate air pollution from coal fires in the Dublin area during the late 1980s, during winter smog from coal fires was really bad in many of the suburbs before widespread conversion to natural gas heating. Did not realise that a couple of coal trains operated to Cabra Bank though the yard seems to have been used as a staging point for fertiliser trains to and from the south and west. For a long time CIE realised the development potential of Cabra Bank and discontinued the railborne bulk cement traffic to Dublin in order to sell the site, following the opening of the M50 between the N2 & N7 it may have been marginally more profitable for IE to supply the concrete plants in the Dublin area direct by road from Platin than by rail and road through Cabra Bank.
-
Noel Apart from 3-4 short branch lines, steam hauled passenger trains that would run behind a J15 on suburban or secondary main line passenger services in CIE days were more likely to be made up of elderly bogie GSWR coaches than 6 wheelers. You might be better off re-painting some Triang Clerestory coaches http://www.gwr.org.uk/protriang.html for layout train that passes the 2' rule, at a pass the Ratio GWR 4 wheel coaches could pass for ex-WLWR coaches taken over by the GSWR. Years ago Tim Cramer kitbashed GSWR 45' coaches out of Triang Clerestory coaches by replacing the roof with a plasticard low arch roof and fitting whitemetal ventilators and light fittings, he also widened the coach to a scale width 21mm gauge model, by throwing away basically everything apart from the sides and building new floor, ends and partitions out of plasticard but that's another story. The SSM GSWR 6w coaches are supplied as a complete kit including OO gauge wheels and the main components are basically designed to bolt together. The Worsley Works GSWR 6 wheelers are supplied as a sheet of etched parts only without castings or wheels. Ken & Popeye identified some design issues with their threads on Worsley Works 6 wheelers, on the plus side a much wider variety of coaches than the SSM kits.
-
I had a very memorable journey behind an 071 down the DSER with a group of college friends en-route to Paris purportedly to visit construction sites in early January 1980 which turned out to be a very educating experience indeed. I don't remember too much of the train ride too busy playing cards, but between the sound turbo and steam from the generator van the train made a very dramatic entrance to Pearse Station, from what I recall we traveled in a Laminate coach marshaled at the rear of the train behind the usual Cravens and a Park Royal. We crossed an up ballast train behind a 141 at Enniscorthy the driver giving advice to the card school.
-
The MGWR used double slips usually as part of a crossover from a main running line to goods yard or a loop at several main and branch line stations. The arrangement on your layout is not unlike Broadstone or Galway on a slightly smaller scale. You may need to build some Emerald Green or Royal Blue engines to offset the GSWR black of your time period David! There is a Hamilton-Ellis colour print of a train on the Clifden Branch with a MGWR 2-4-0 in the short lived royal blue livery in "The Trains we Loved" (Allen & Unwins version)
-
The two classes could have a bit more in common than meets the eye, both the GWR ordered the 322 Class and the GSWR ordered the 1st of the 101 Class from Beyer Peacock during the 1860s. Beyer Peacock also supplied locos of the same design of the 101 Class to the Dublin and Belfast Junction Railway.
-
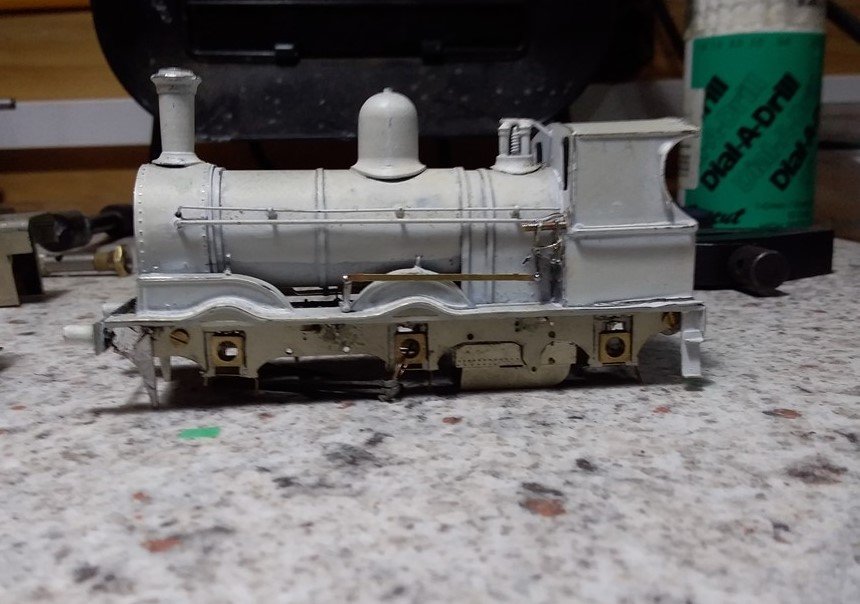
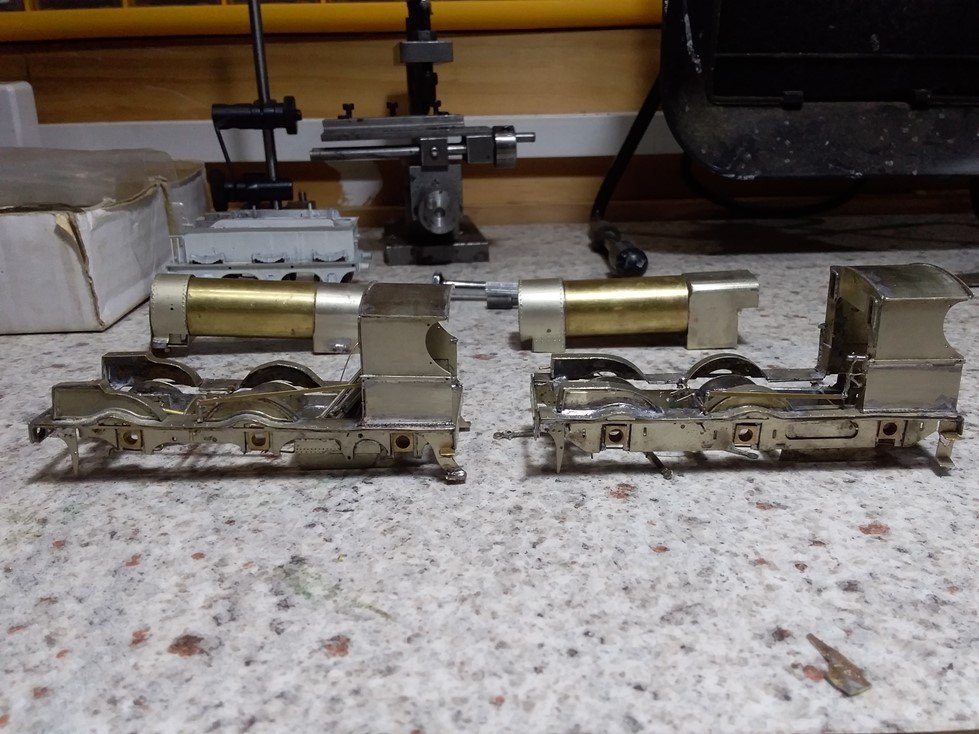
A bit more progress cab and running boards fitted to chassis and reversing levers assembled and fitted.. Boiler fittinges, lamp irons, sandbox operating levers and grabrails to be fitted to new locos before trip to paint shop. McDonnell style linkage reversing level and new frames fitted to the "White Engine". I need to replace the wonky riveted strip at the cab running board joint. Engine personalities becoming more distinct 229 "Coey" J15 with direct reversing lever, raised sandboxes and slightly exposed rear splashers. Apparently these locos were considered sluggish compared to the original design and tended to oscillate at speed. (J O'Neill & D Dondalson a "Decade of Speed" IRRS 197? 1?? Superheated J15 with new deeper frames and original motion with linkage reverser. Like the GNR S Class 4-4-0s a significant number of superheated J15 received new heavier frames during re-building and were practically new locomotives with few original parts remaining. This rebuilding significantly reduced the cost of GSRs goods train operation by cutting coal consumption and maintenance costs at a time the company was struggling with the effects of the Great Depression and The Economic War and probably contributed to the GSRs superior financial performance in terms of goods train operation compared with the GNR(I).
-
The UTA used a similar apparatus to CIE to exchange tokens on the single track sections of the Larne and Derry lines. The snatcher was mounted on a post in the doorway of the guards compartment of an MPD railcar, when the door was open the snatcher could be rotated outwards through the doorway to make the exchange then brought inbound and the door closed. There is a photo of the token exchange operation in "Diesel Dawn"
-
Up to the 1960s mechanical staff exchange on CIE was largely limited to the Dublin-Galway & Mallow Rosslare lines and mechanical staff exchange was later introduced on the Limierick Junction-Waterford and Cherryville Junction-Waterford Lines after the AEC railcars were bumped from the principal main line passenger duties. The guard normally did the staff exchange with the CIE AEC railcars, with a bell signal to the driver that he had collected the correct staff. Staff snatchers were fitted inside the guards compartment on some CIE railcars with a small roller shutter door to allow the snatcher head to swing out to make the exchange. The snatchers and roller shutter doors were removed and plated over after the railcars ceased operating main line passenger services.
.png.c363cdf5c3fb7955cd92a55eb6dbbae0.png)


