Leaderboard


Popular Content
Showing content with the highest reputation since 14/11/25 in Posts
-
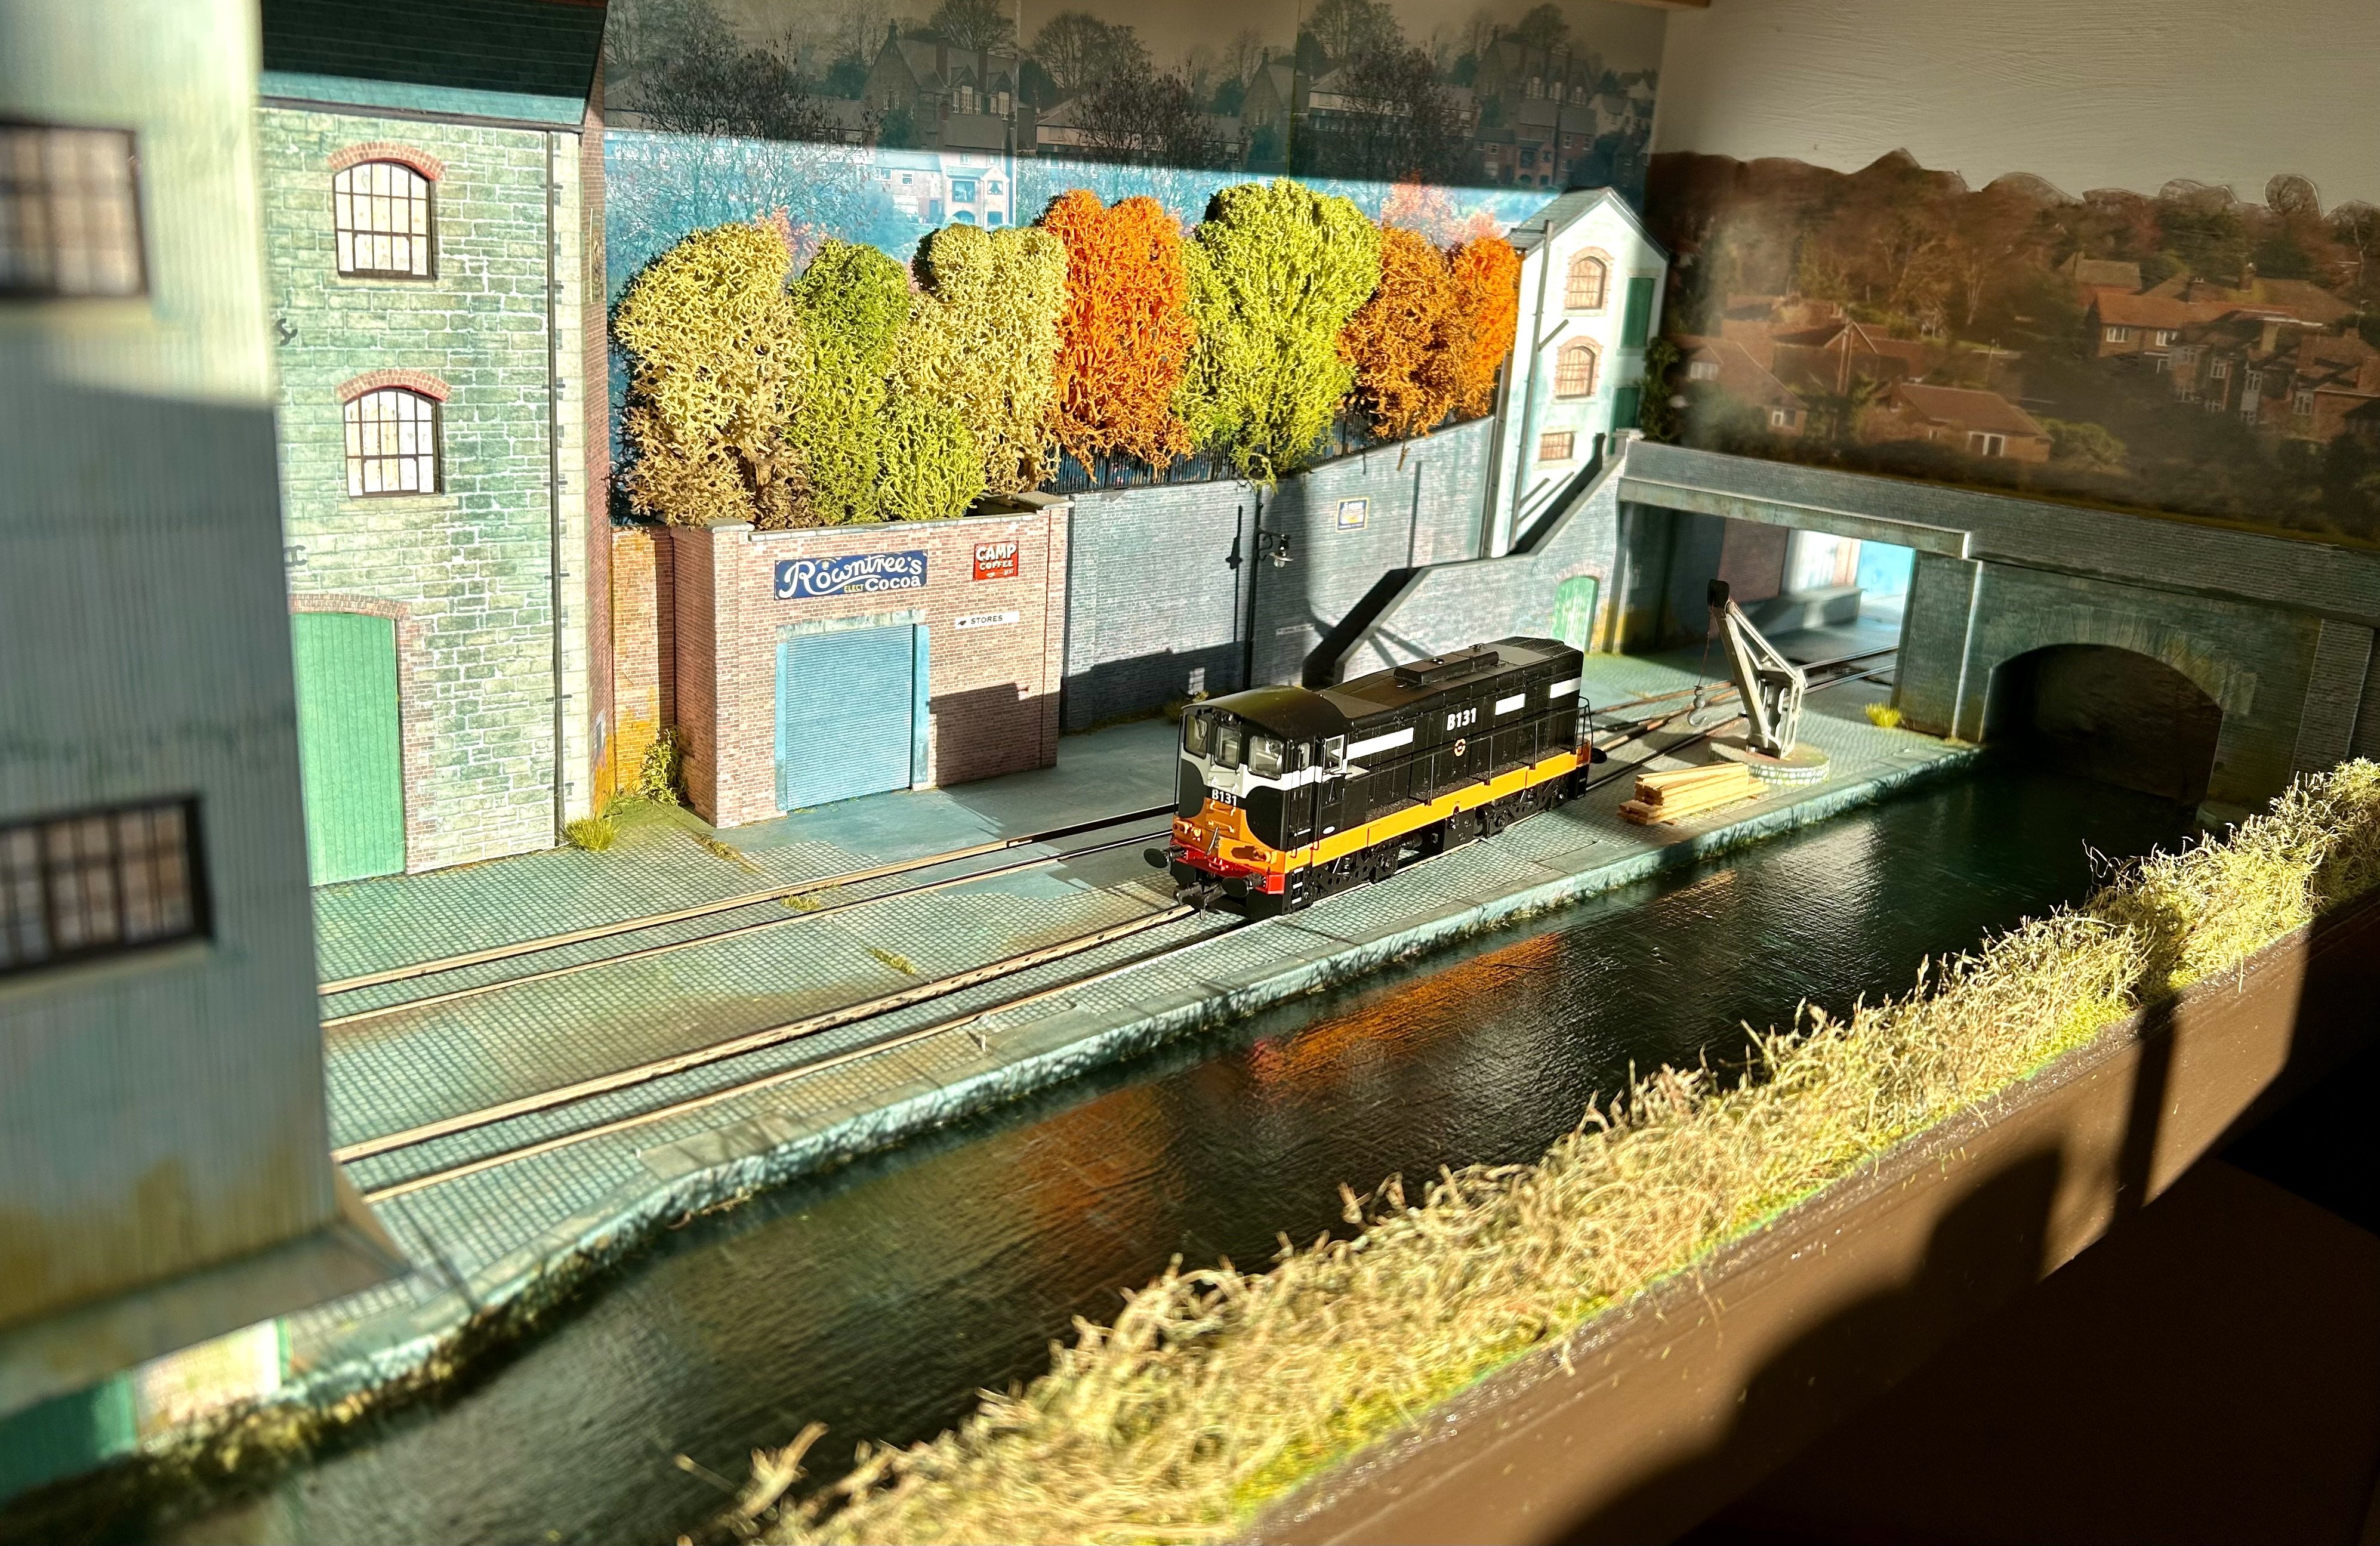
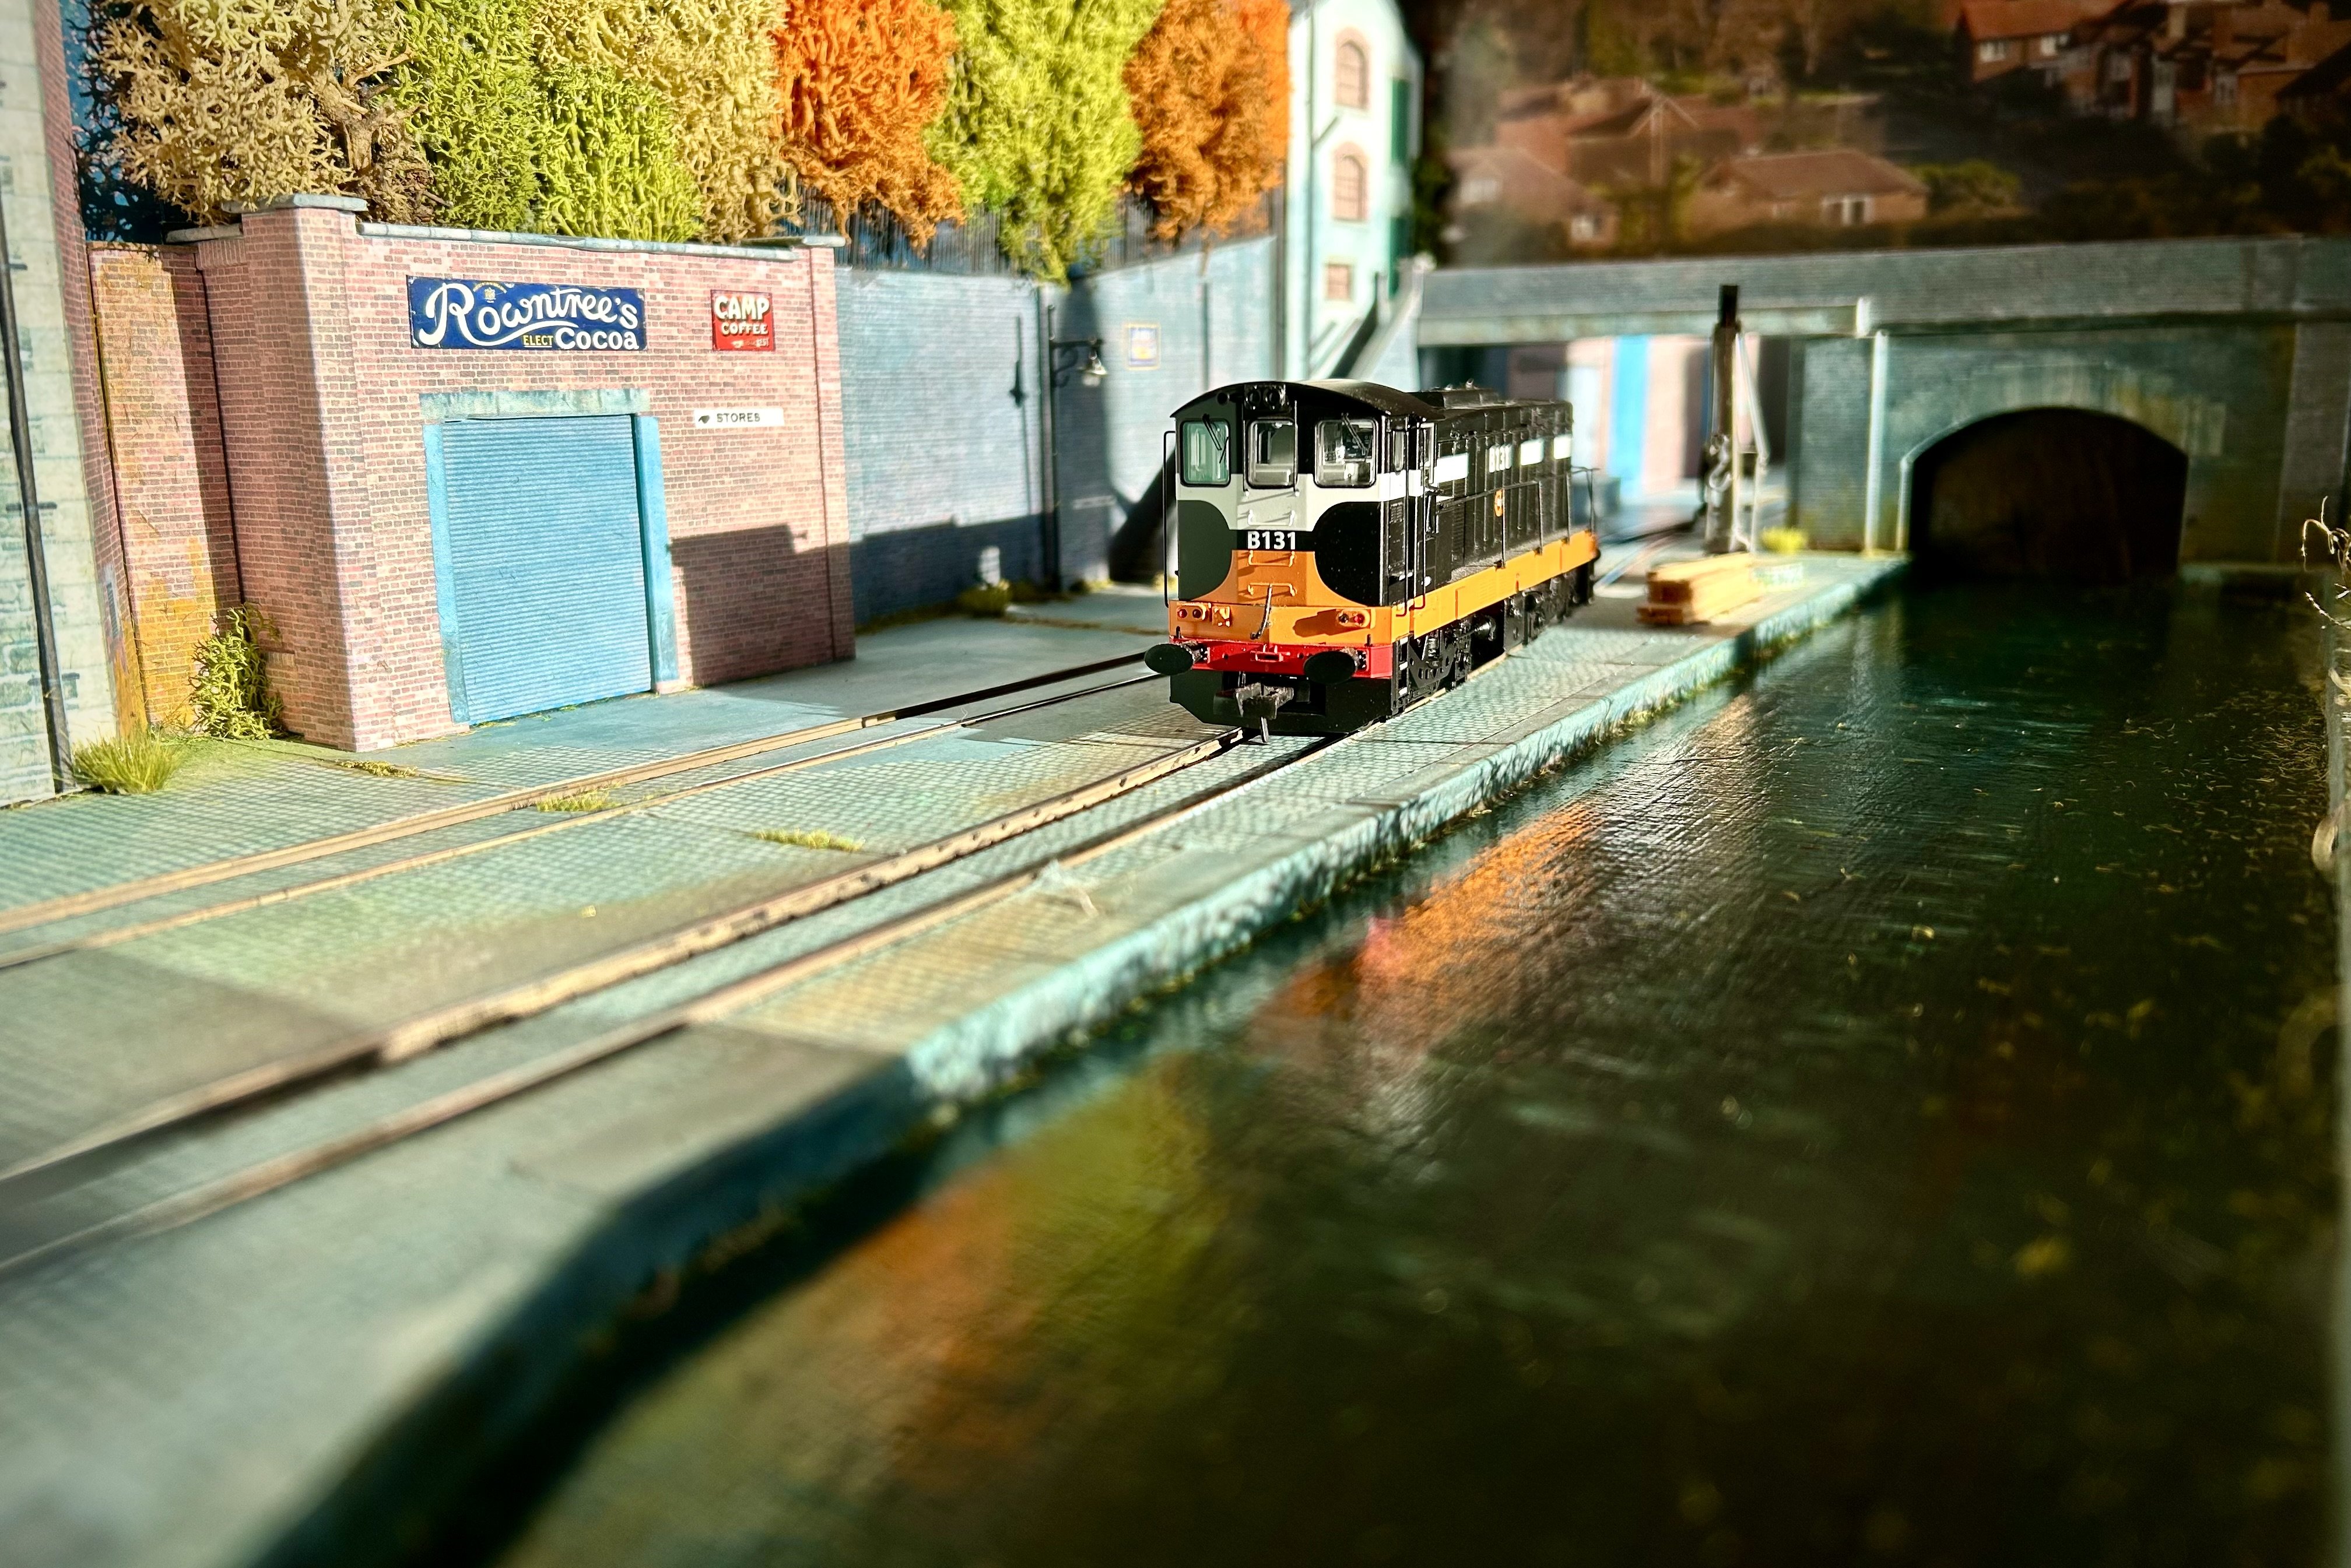
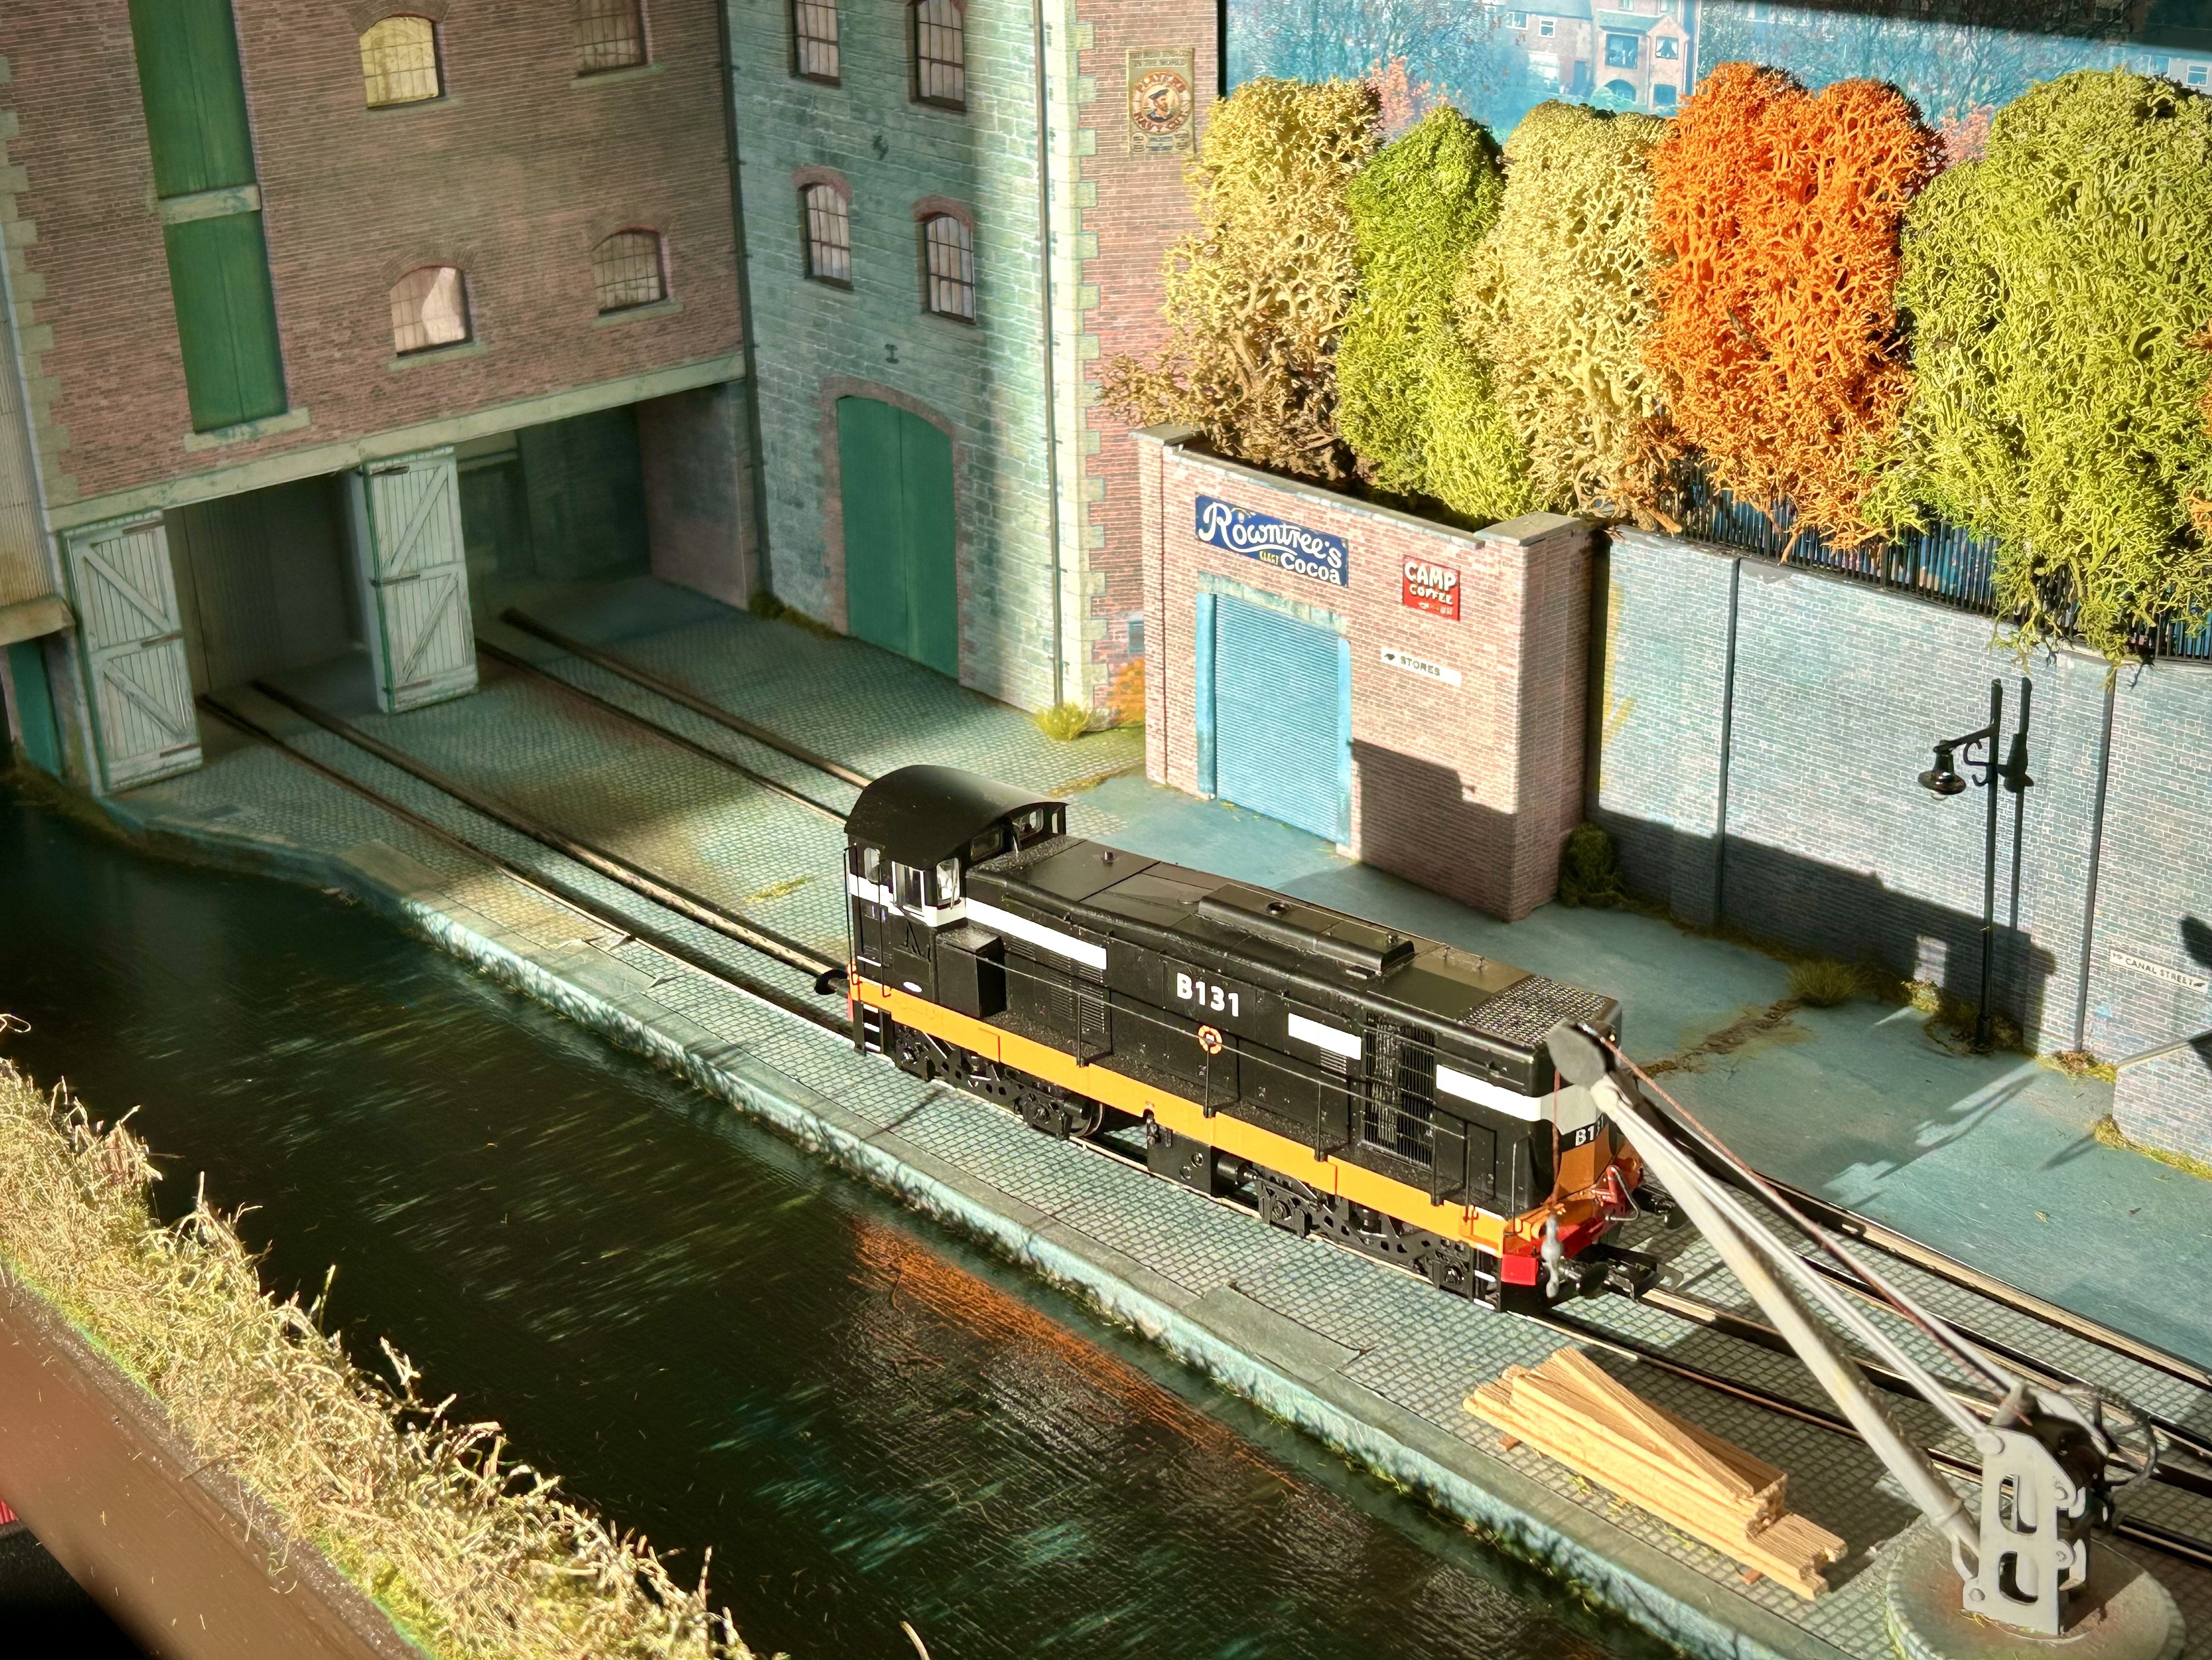
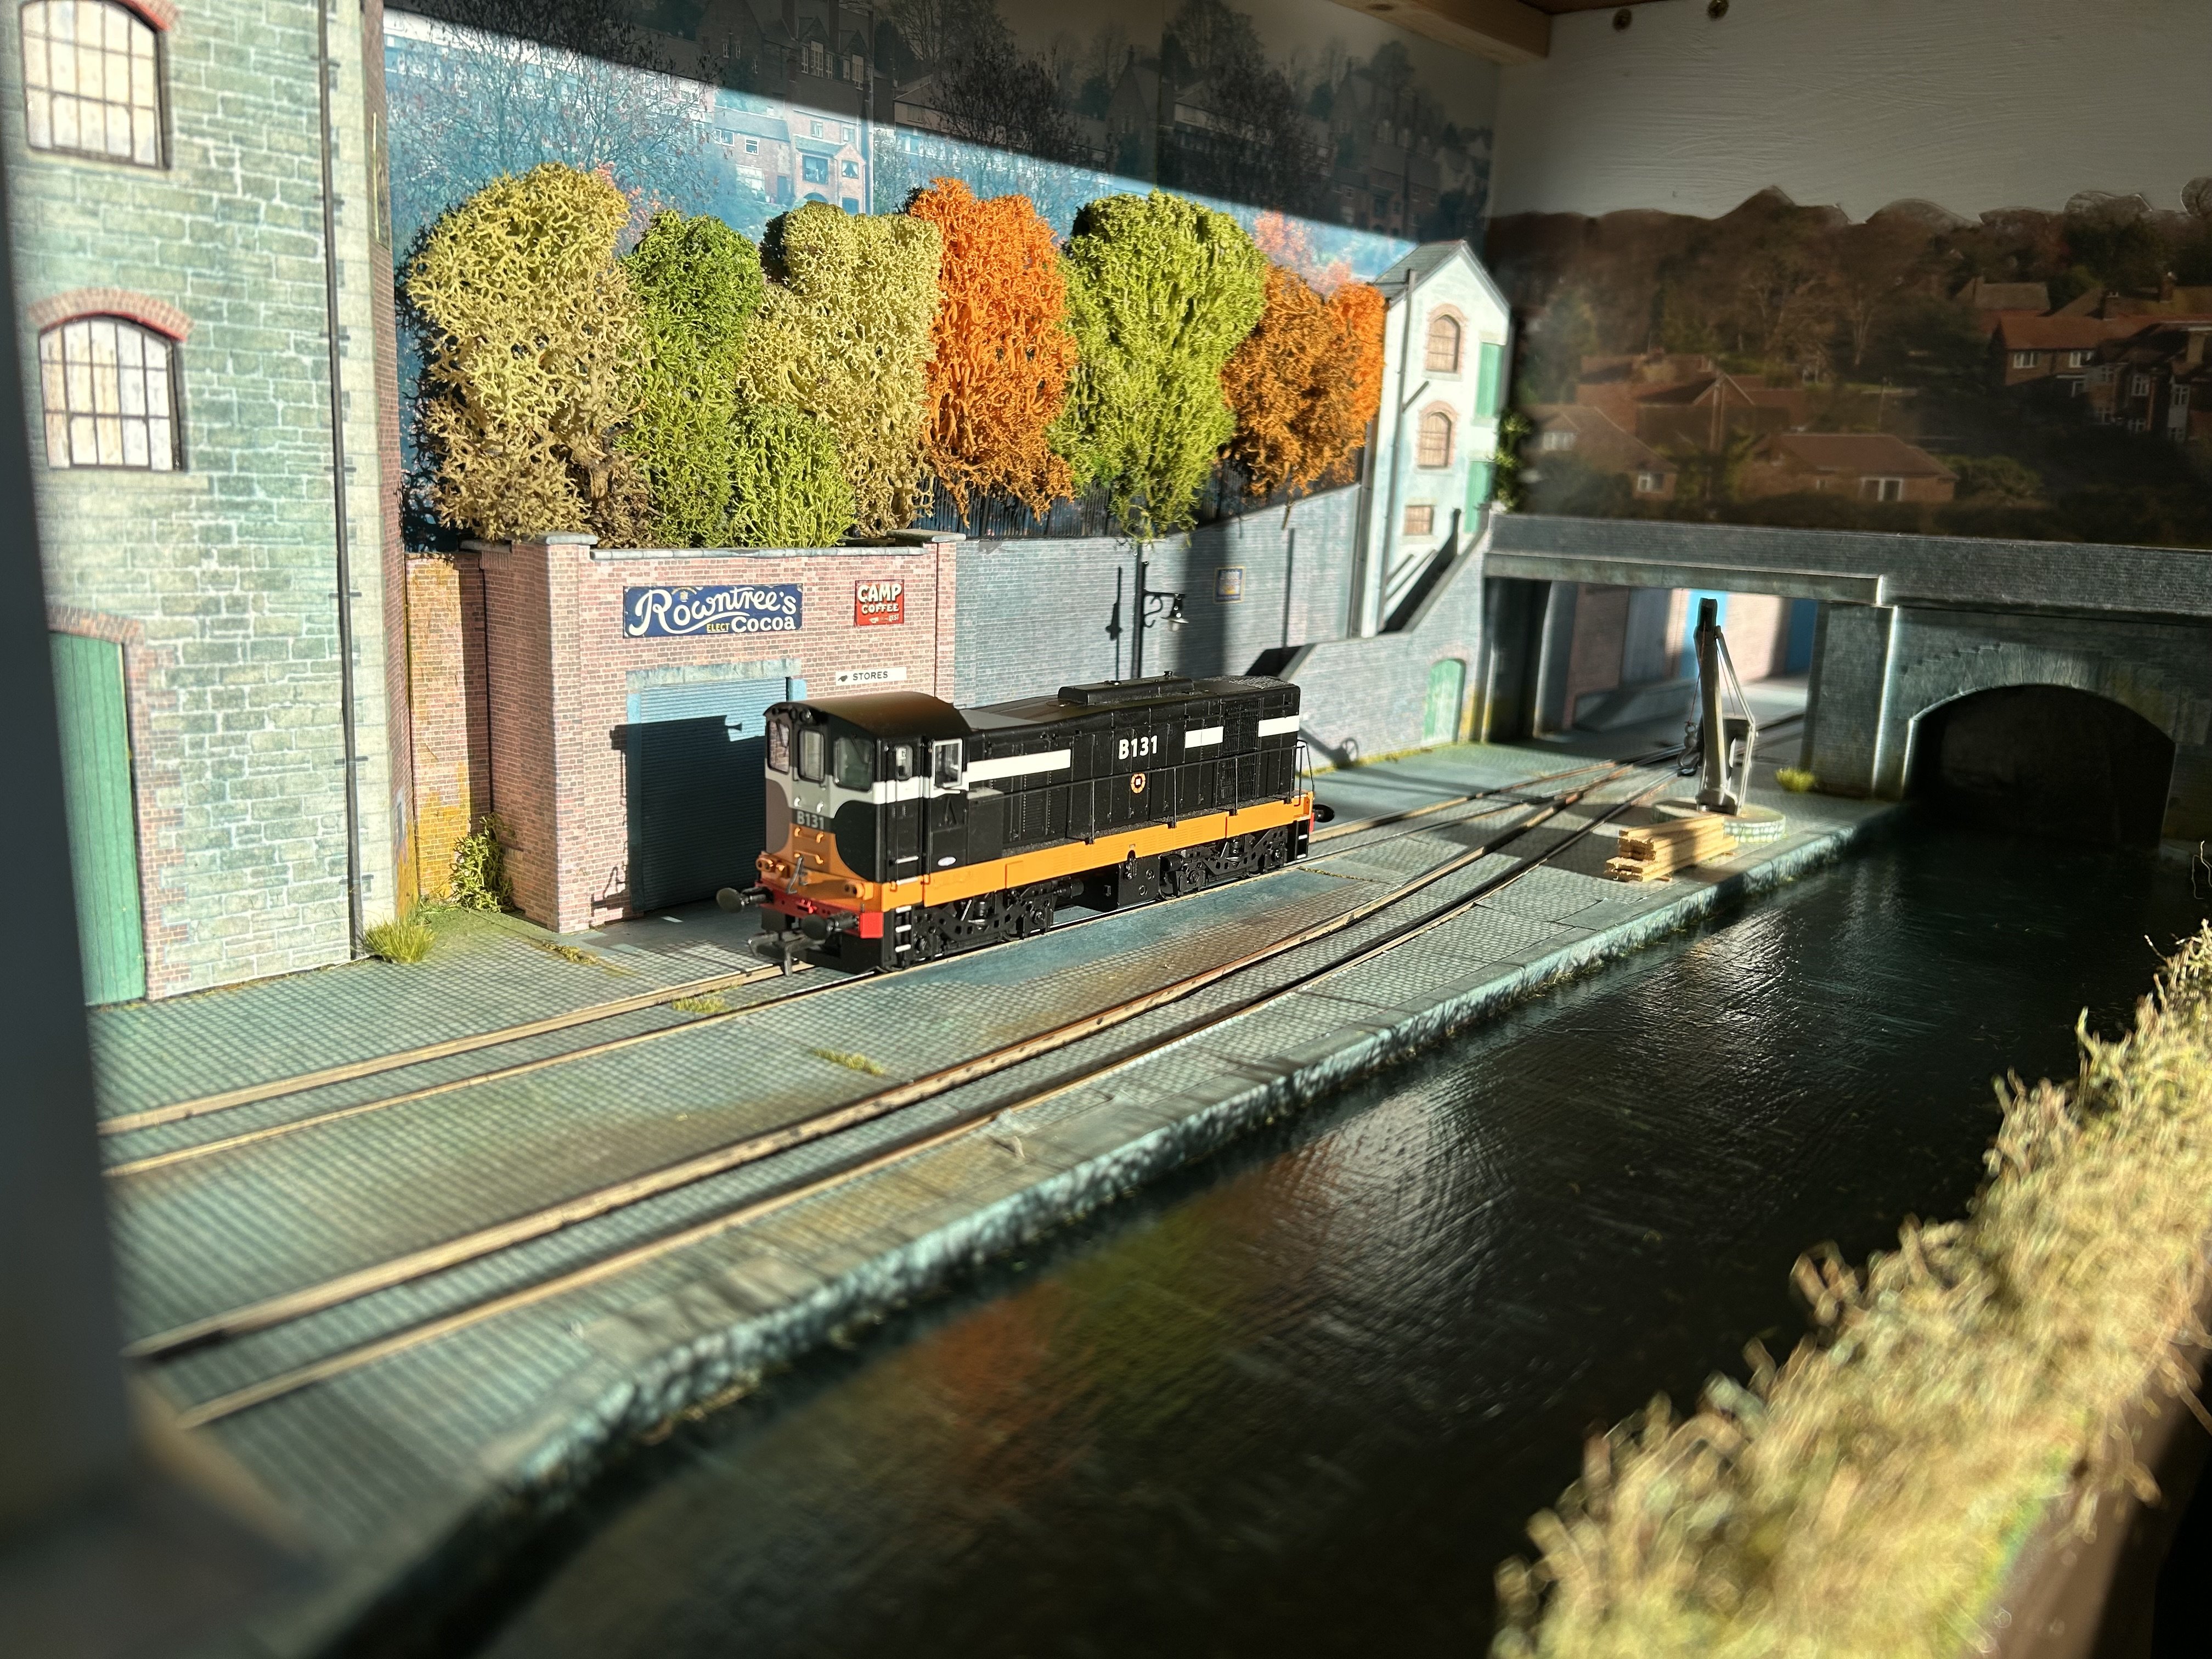
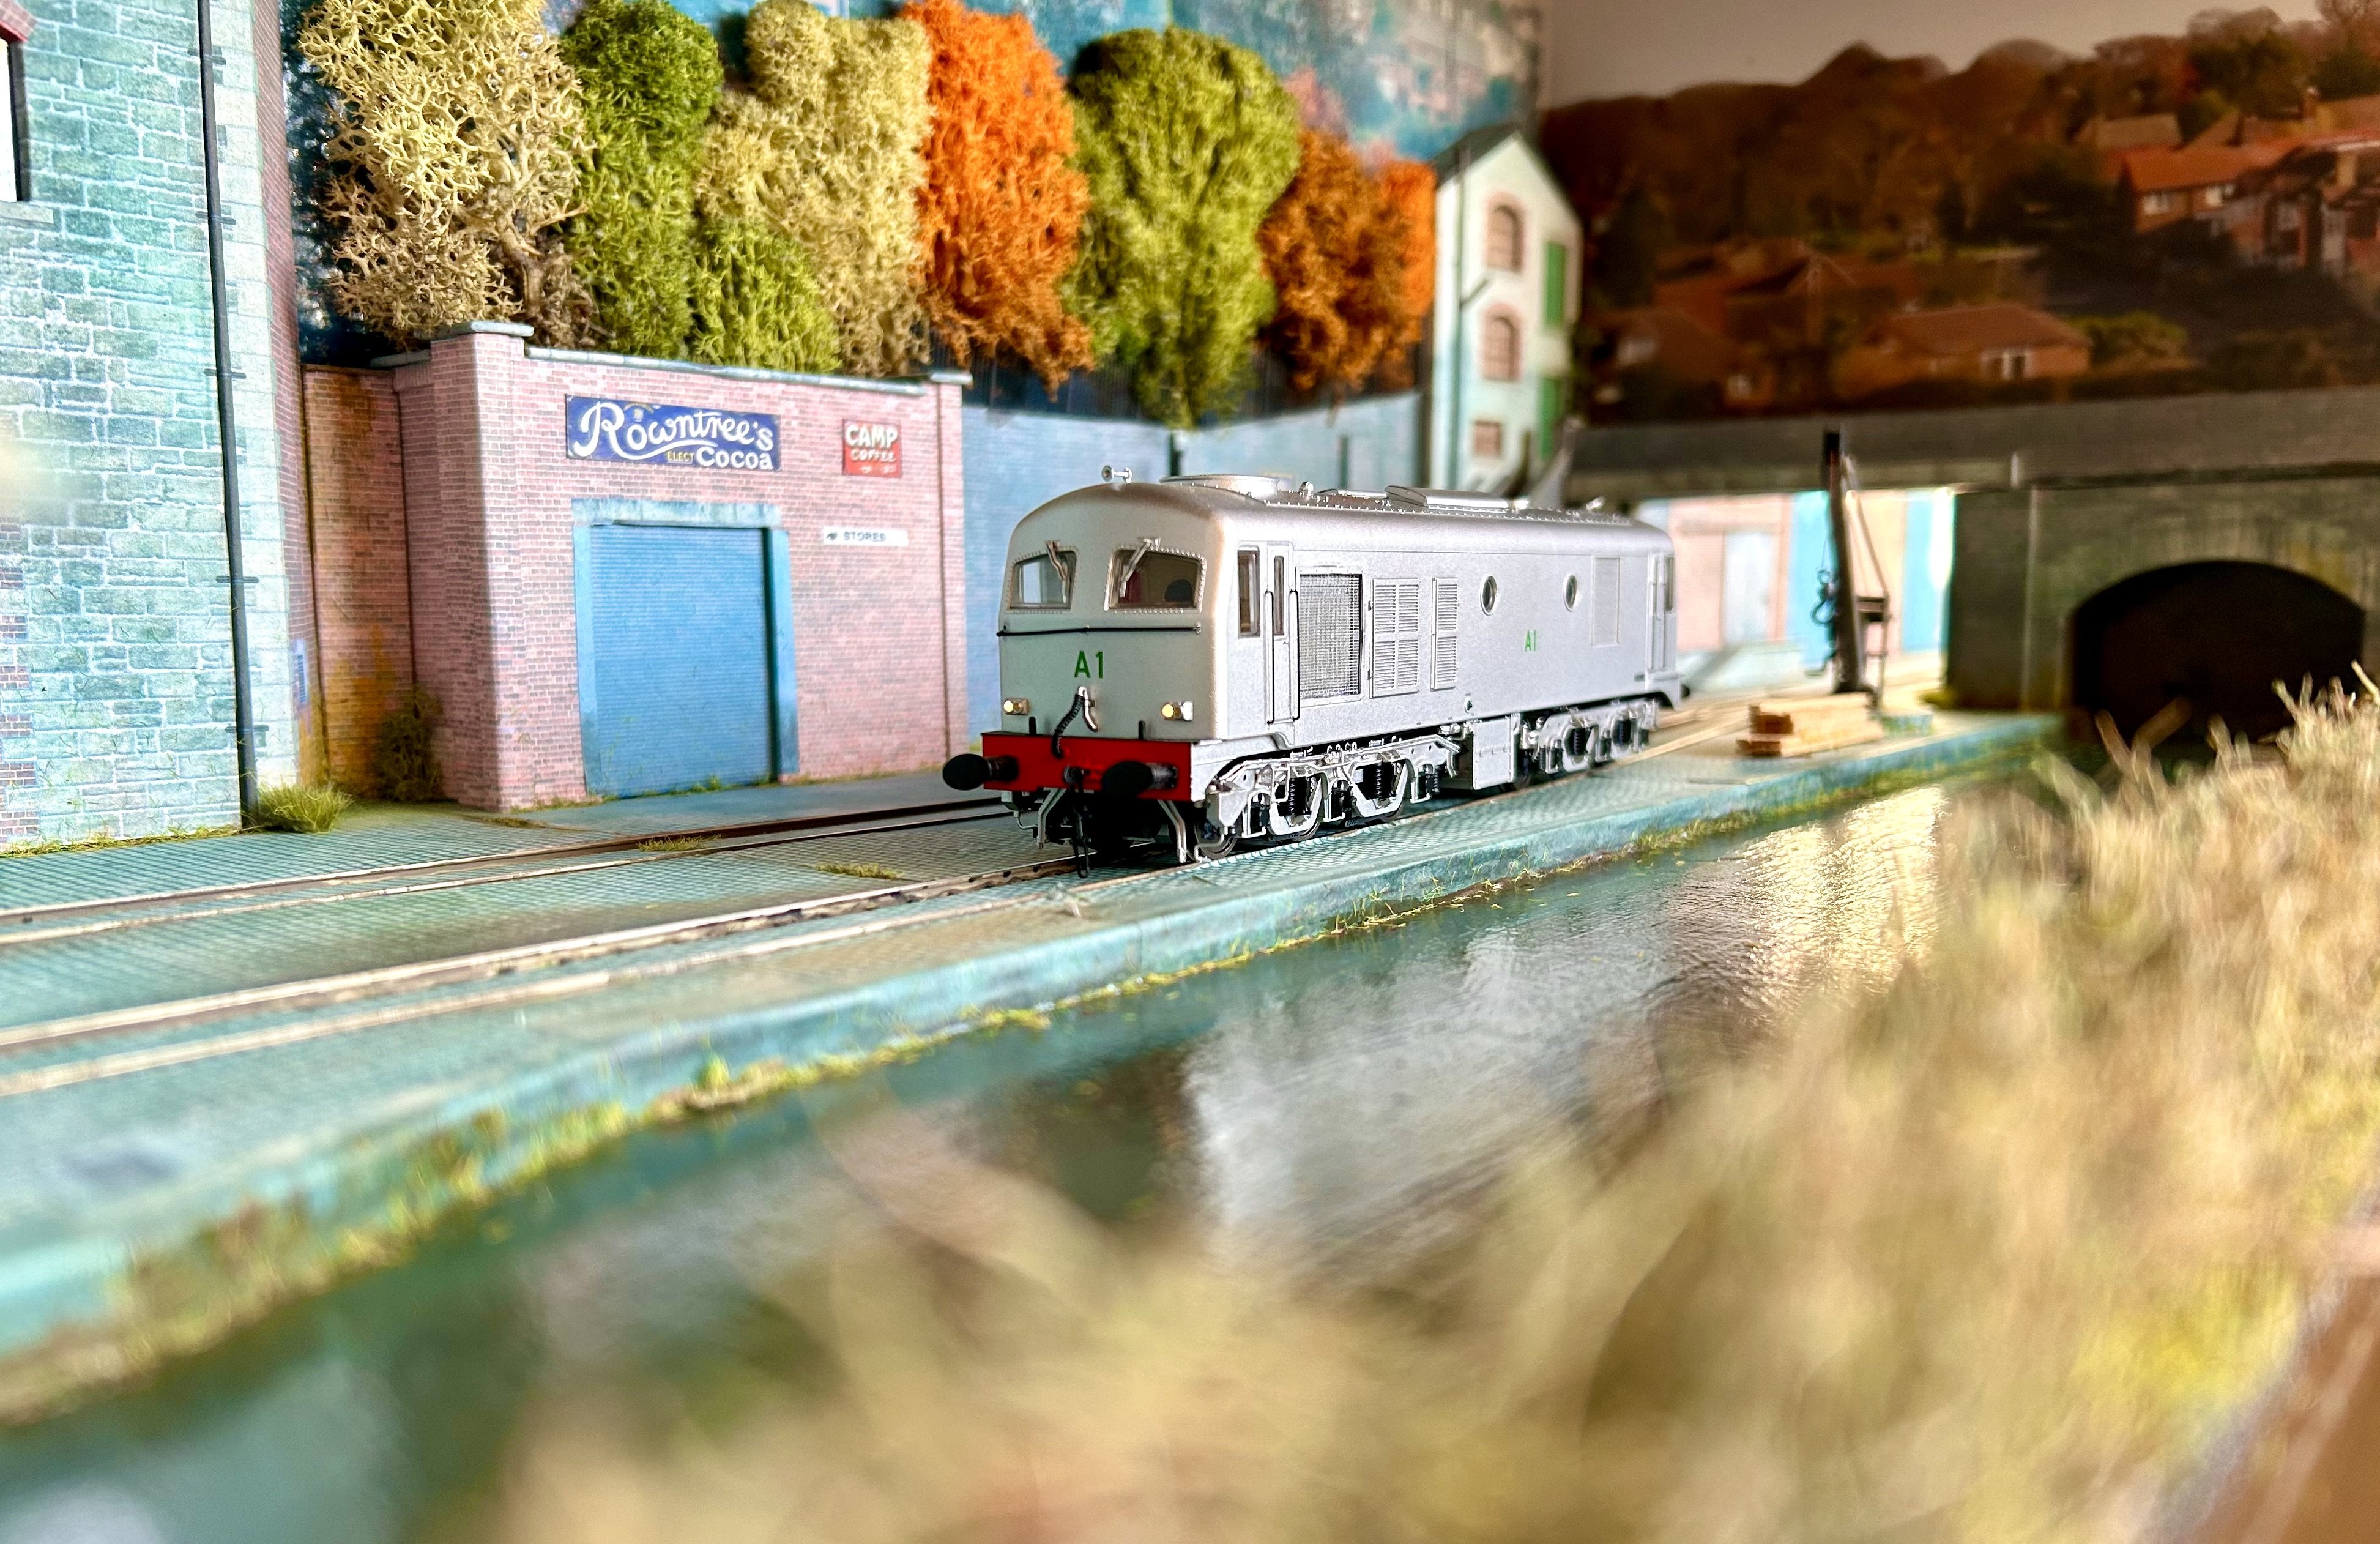
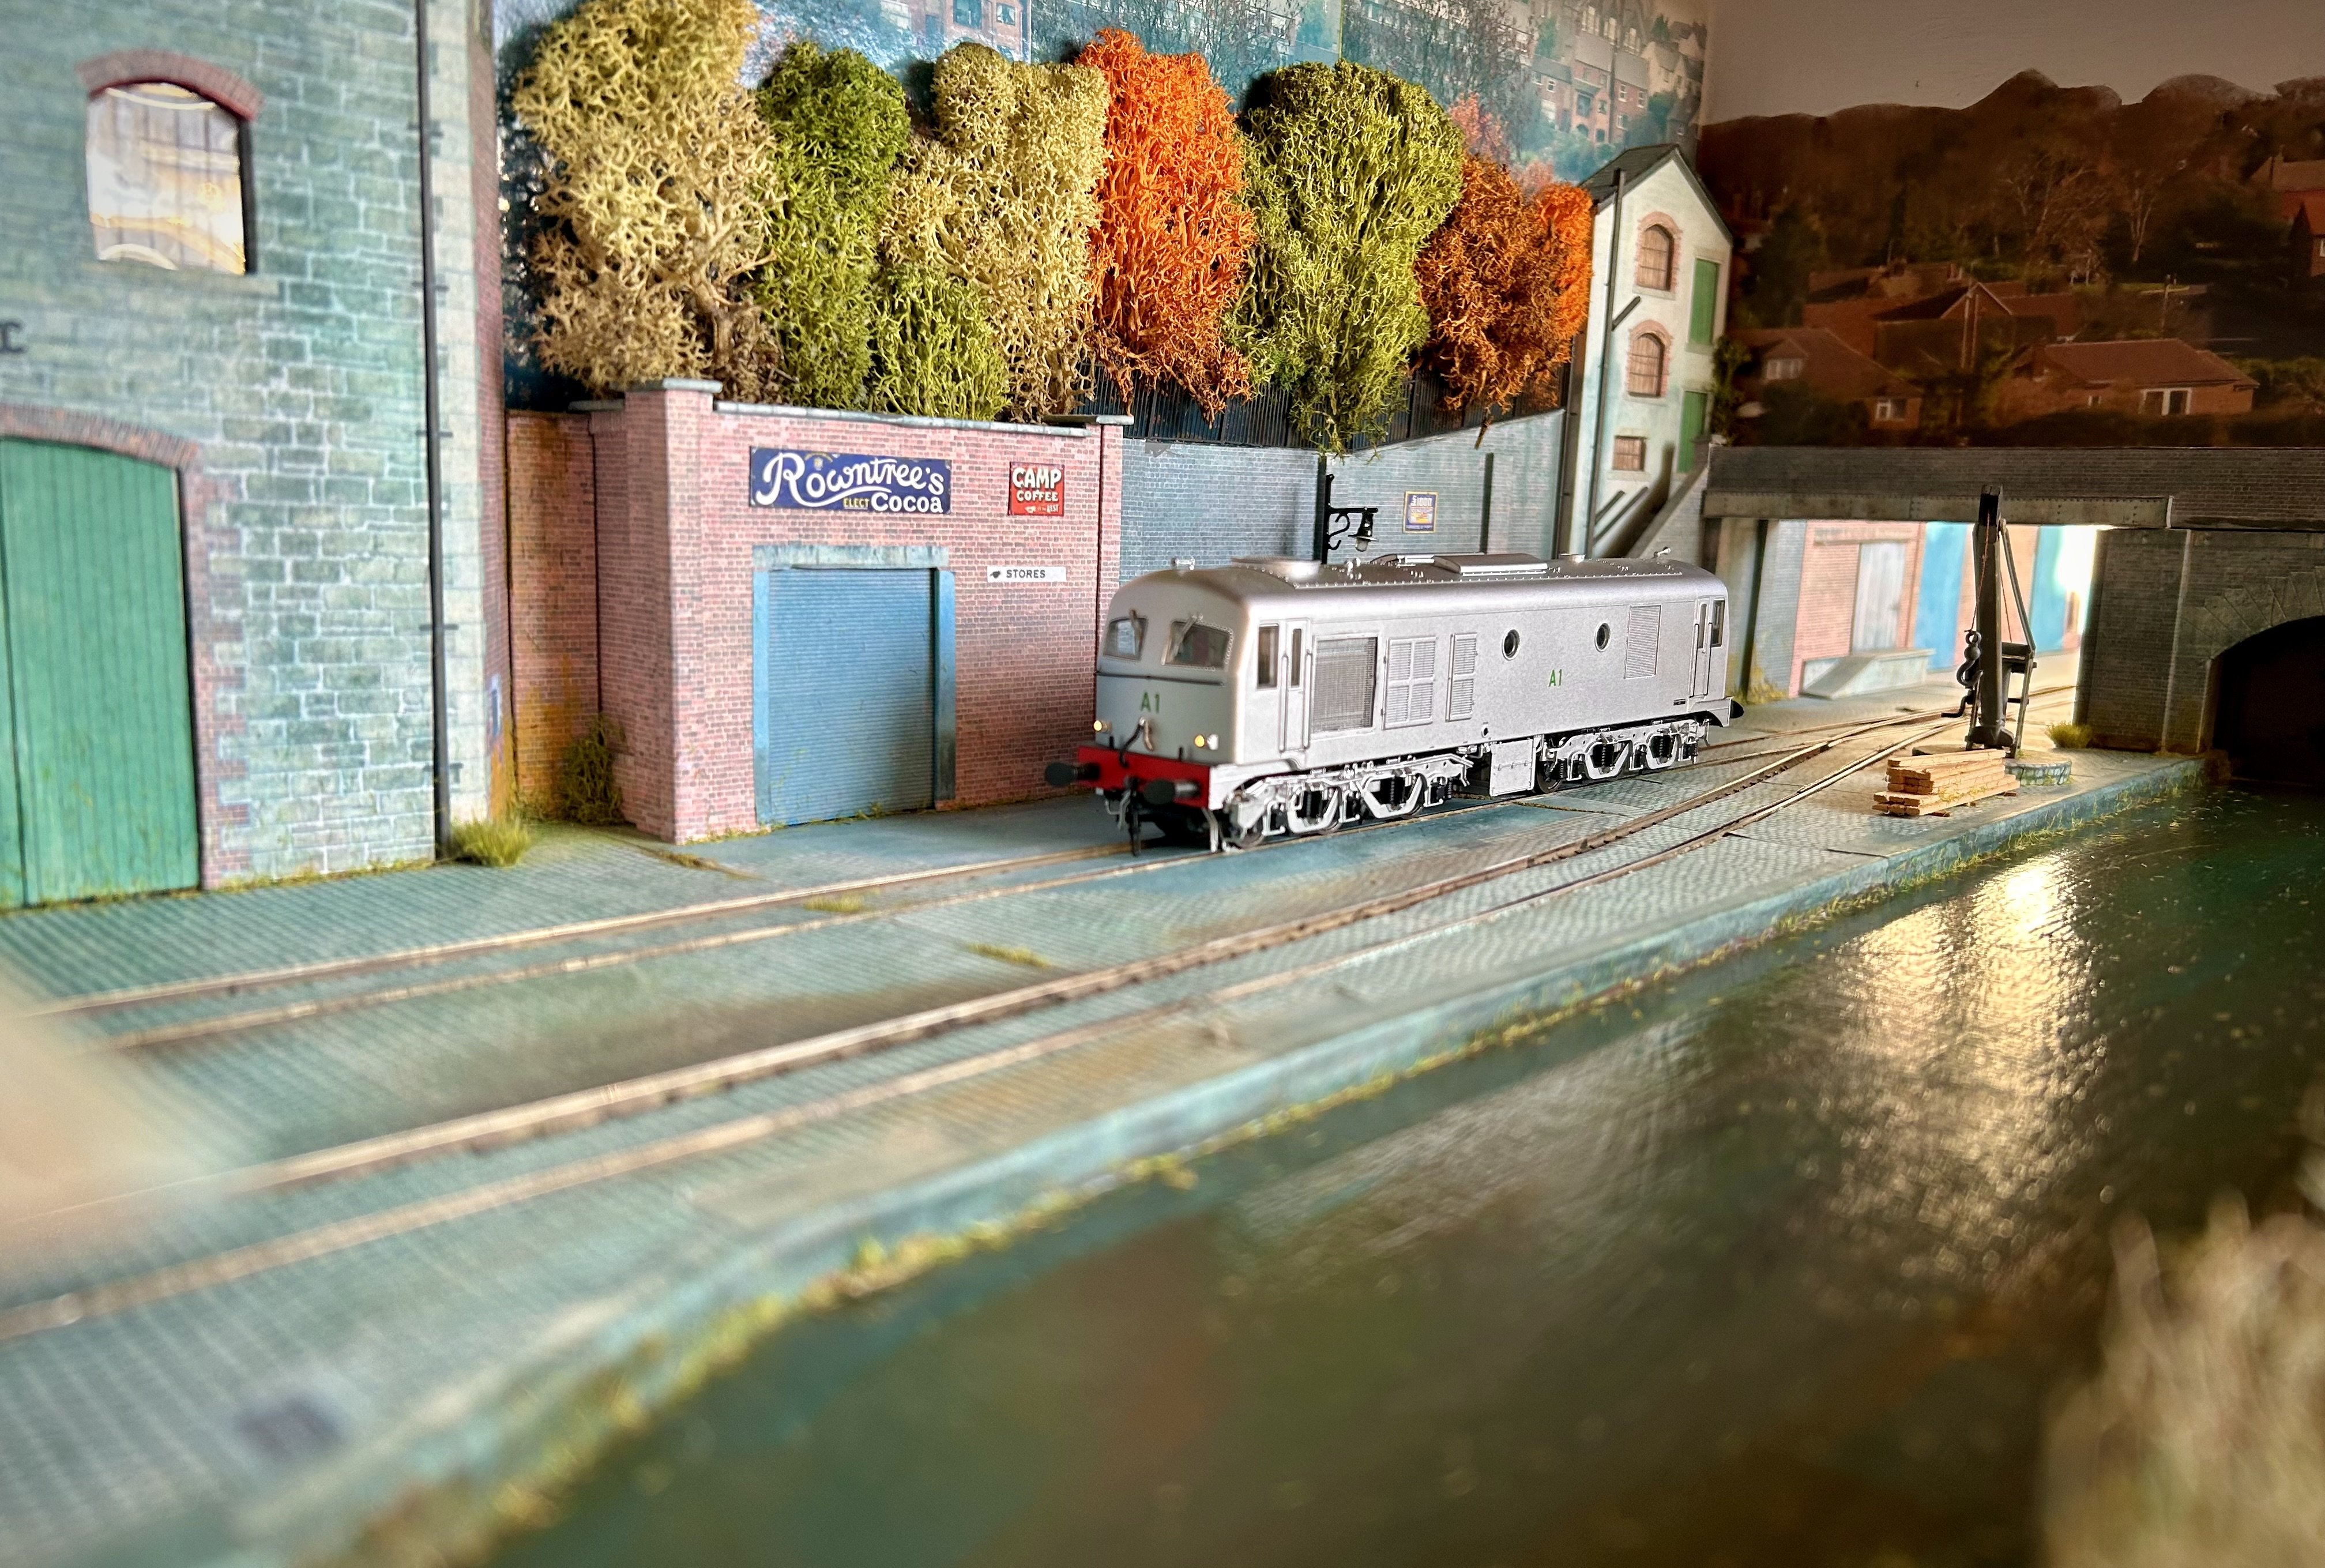
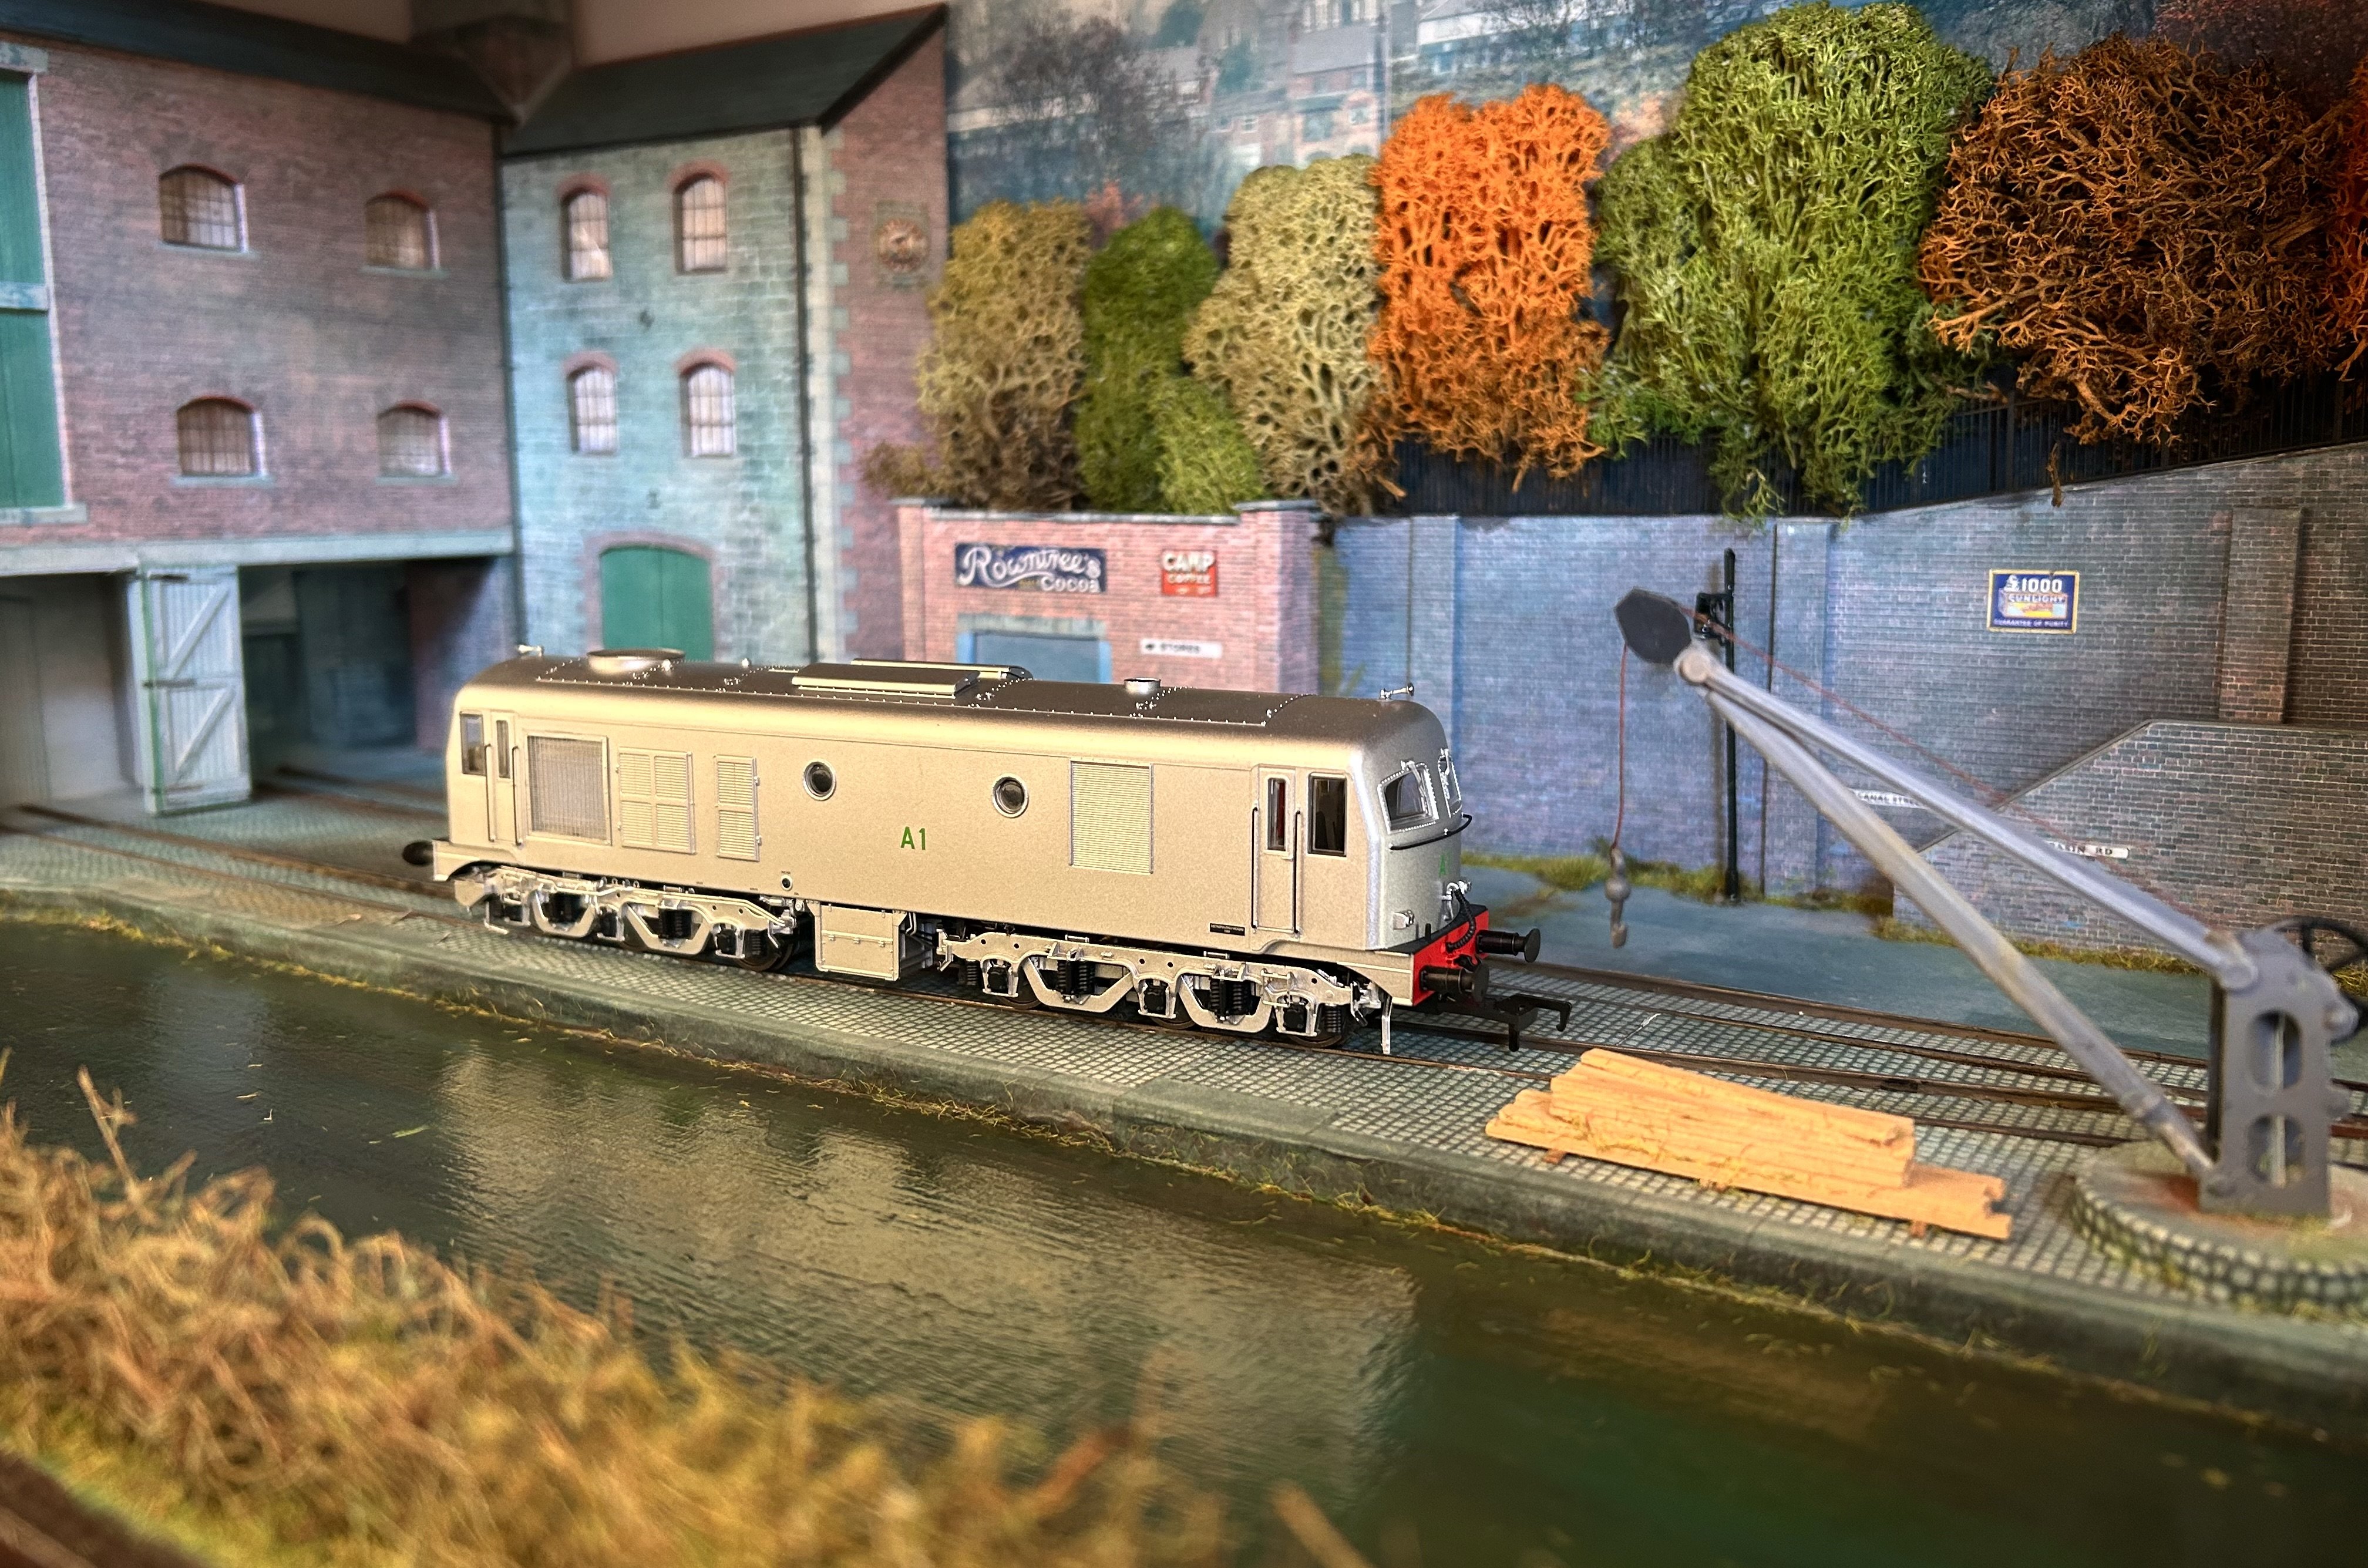
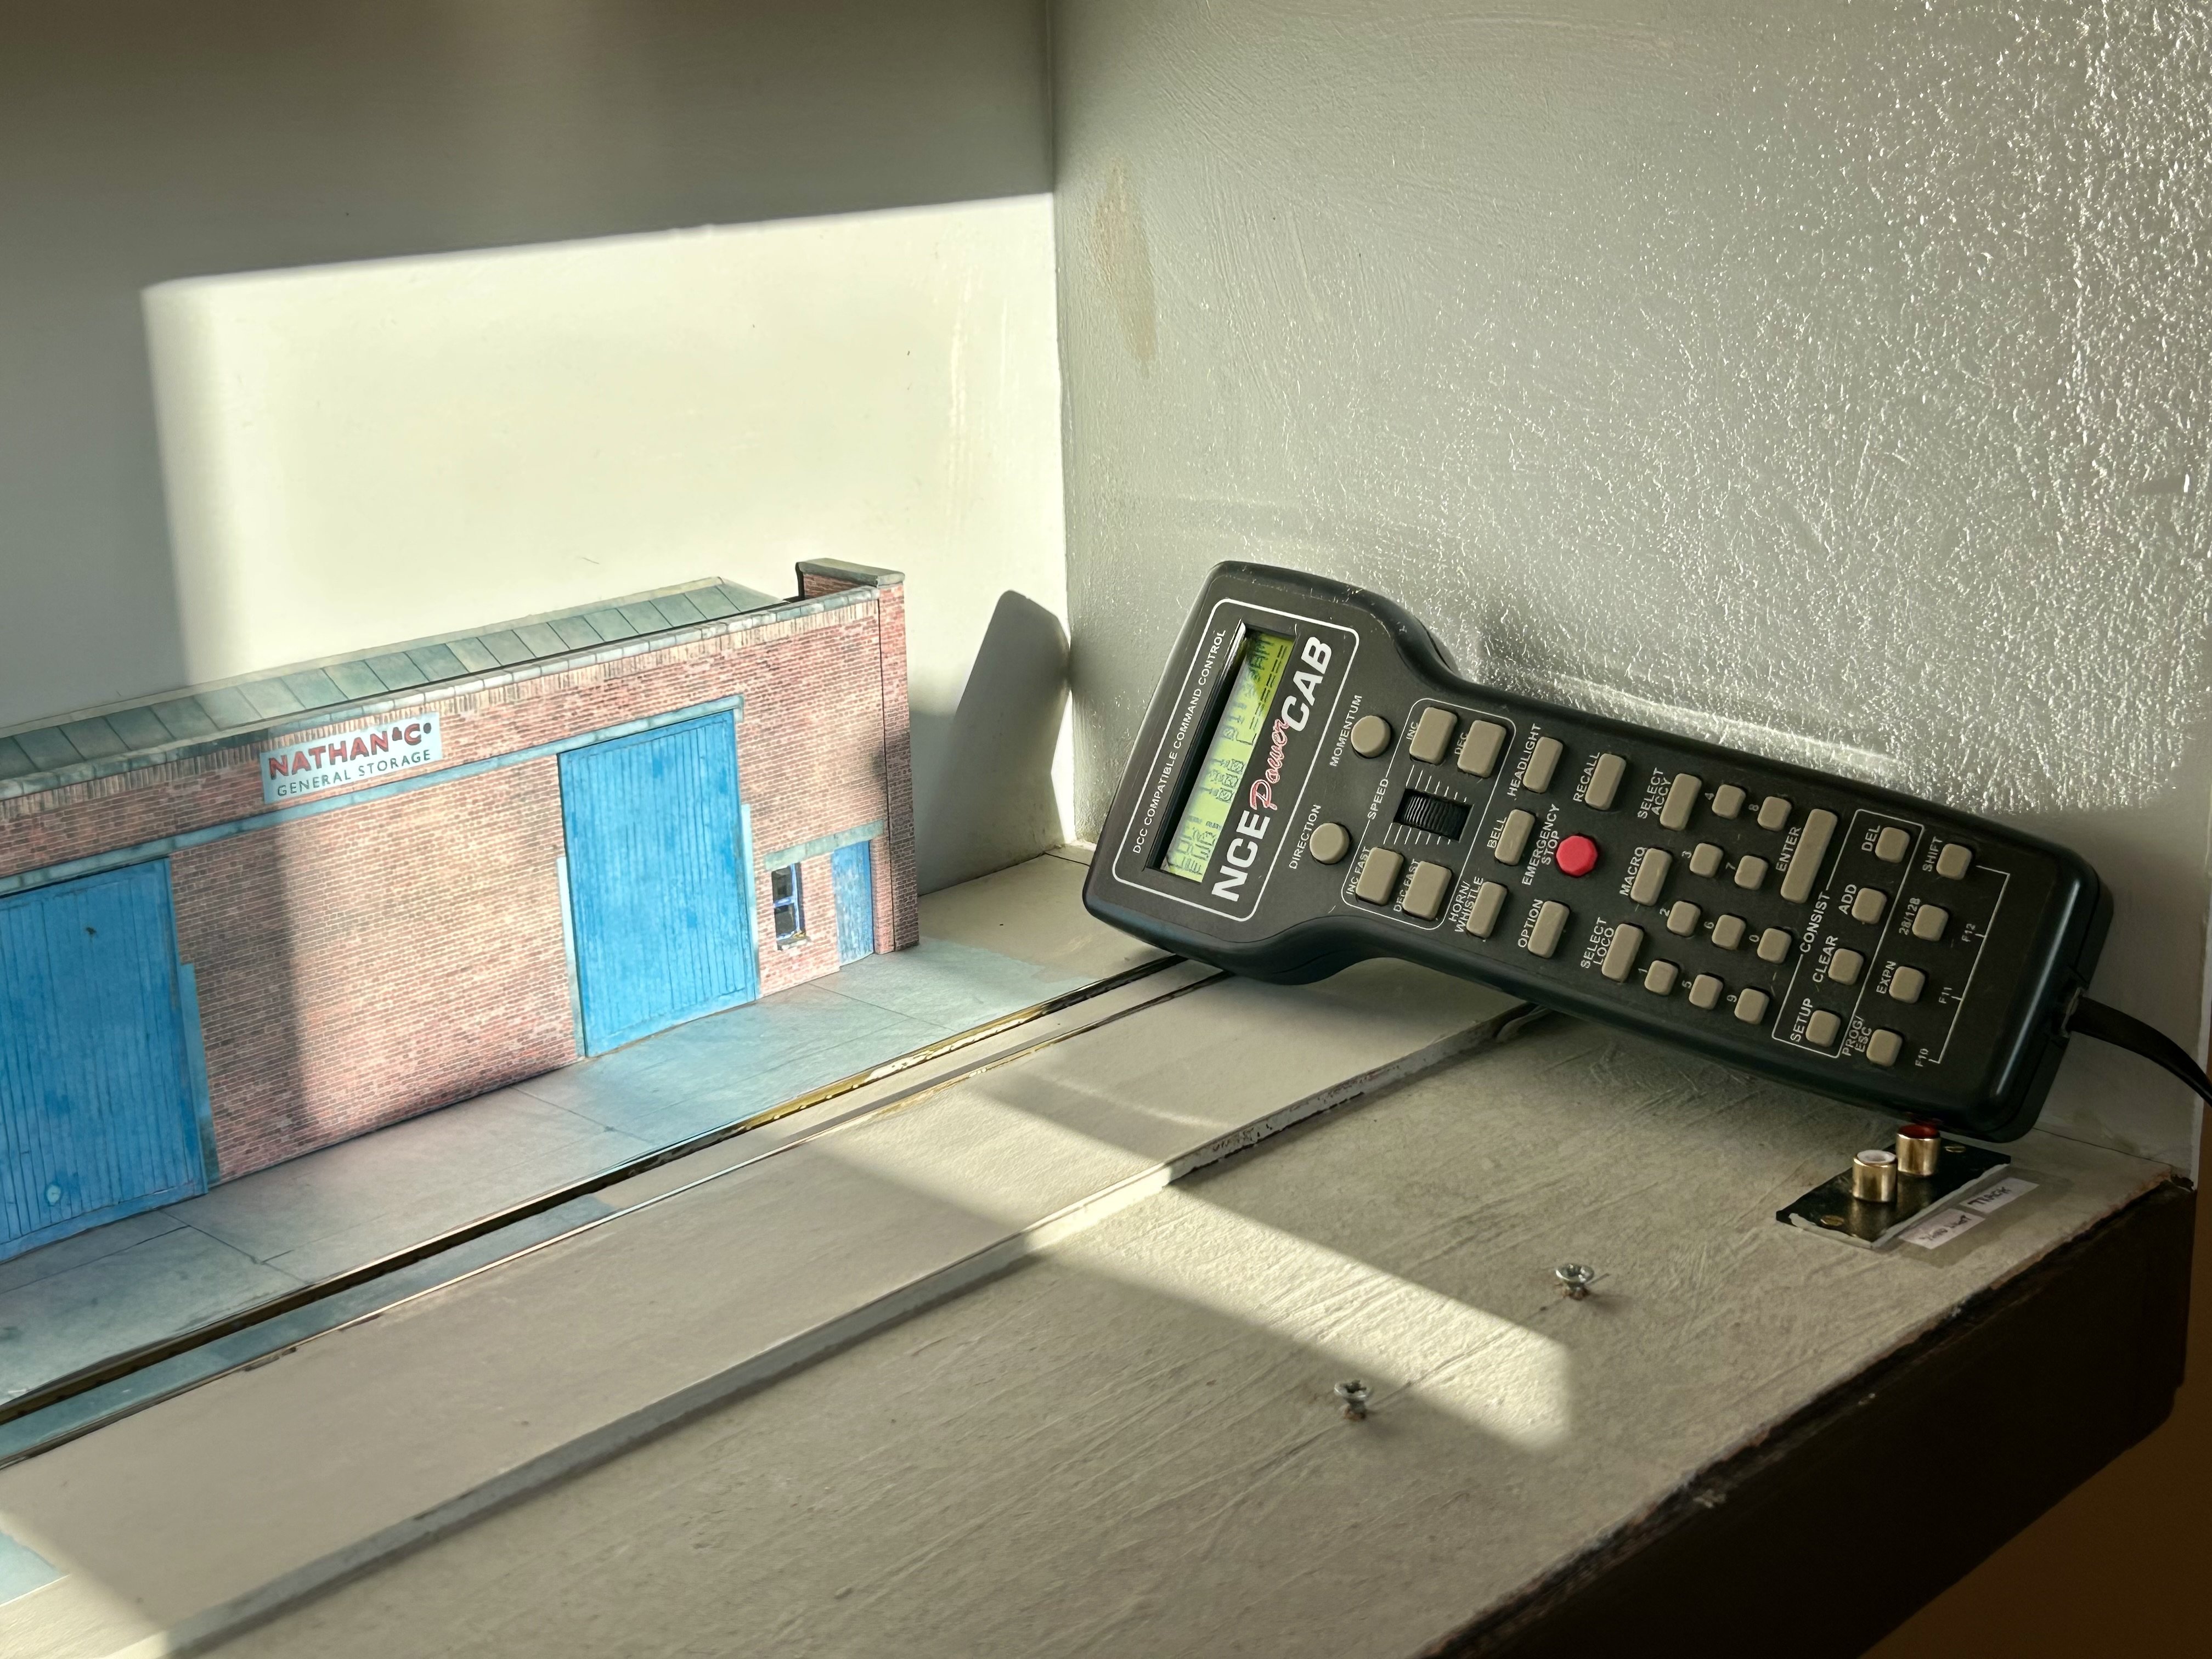
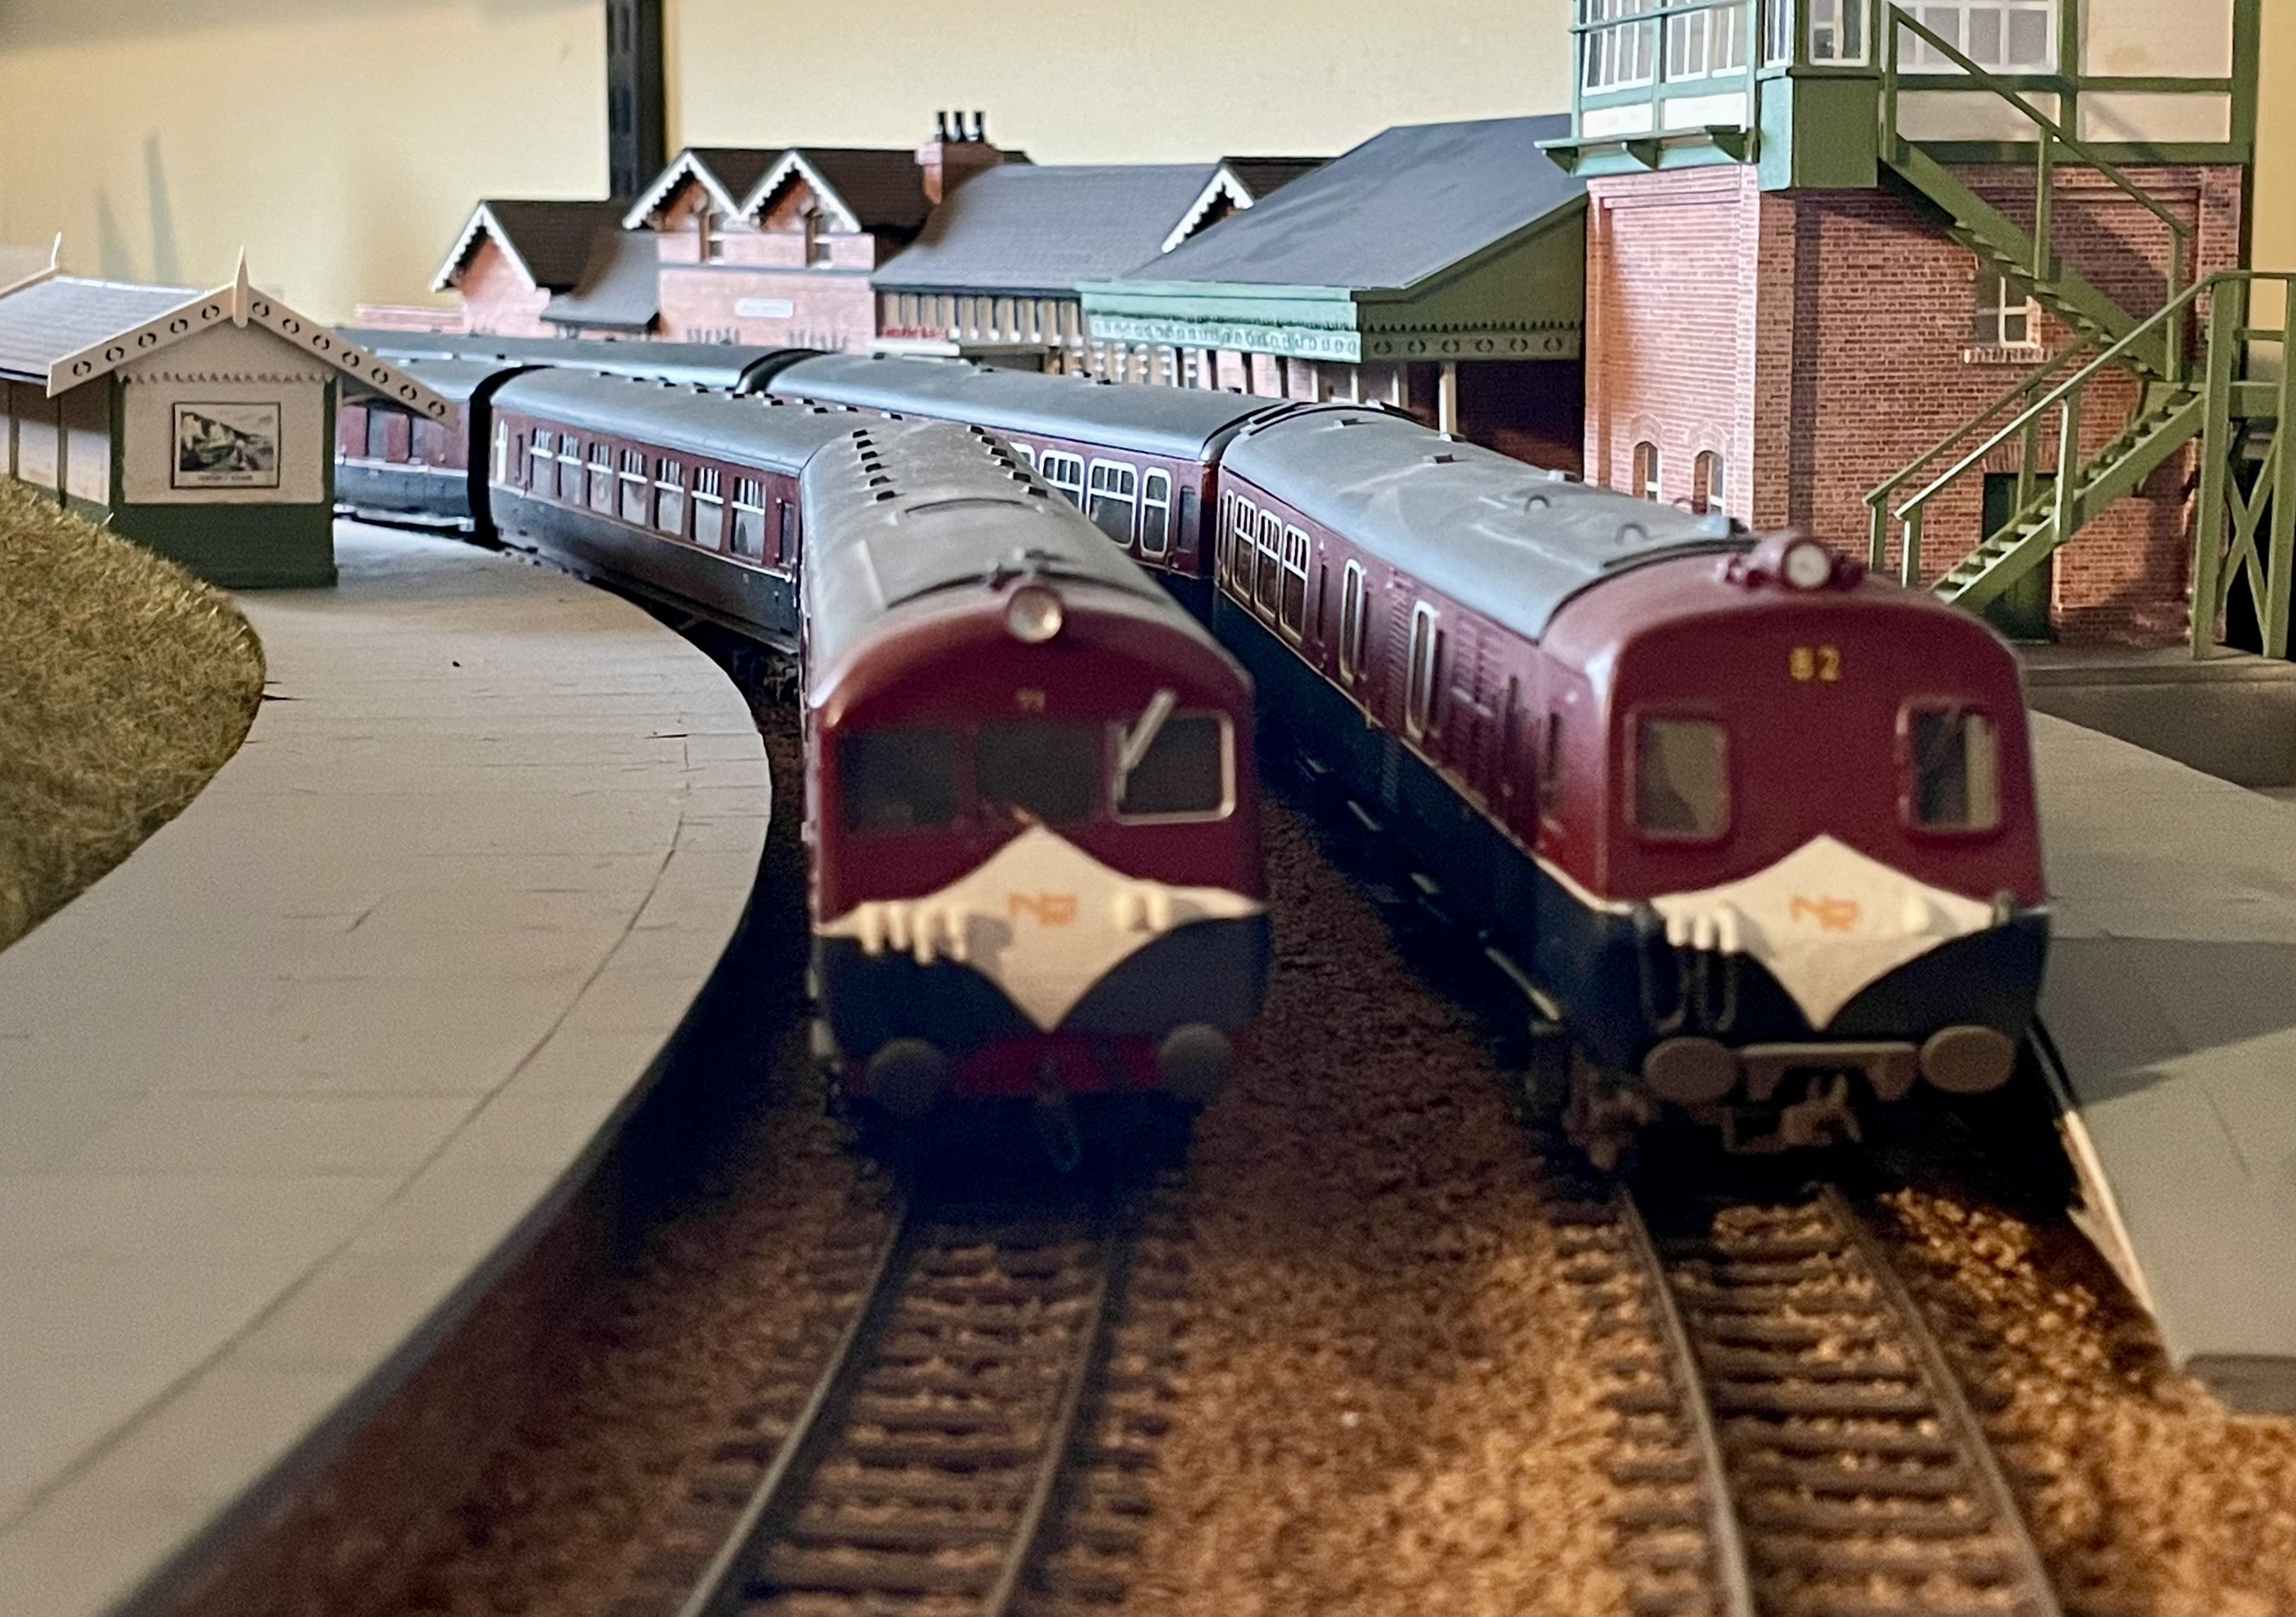
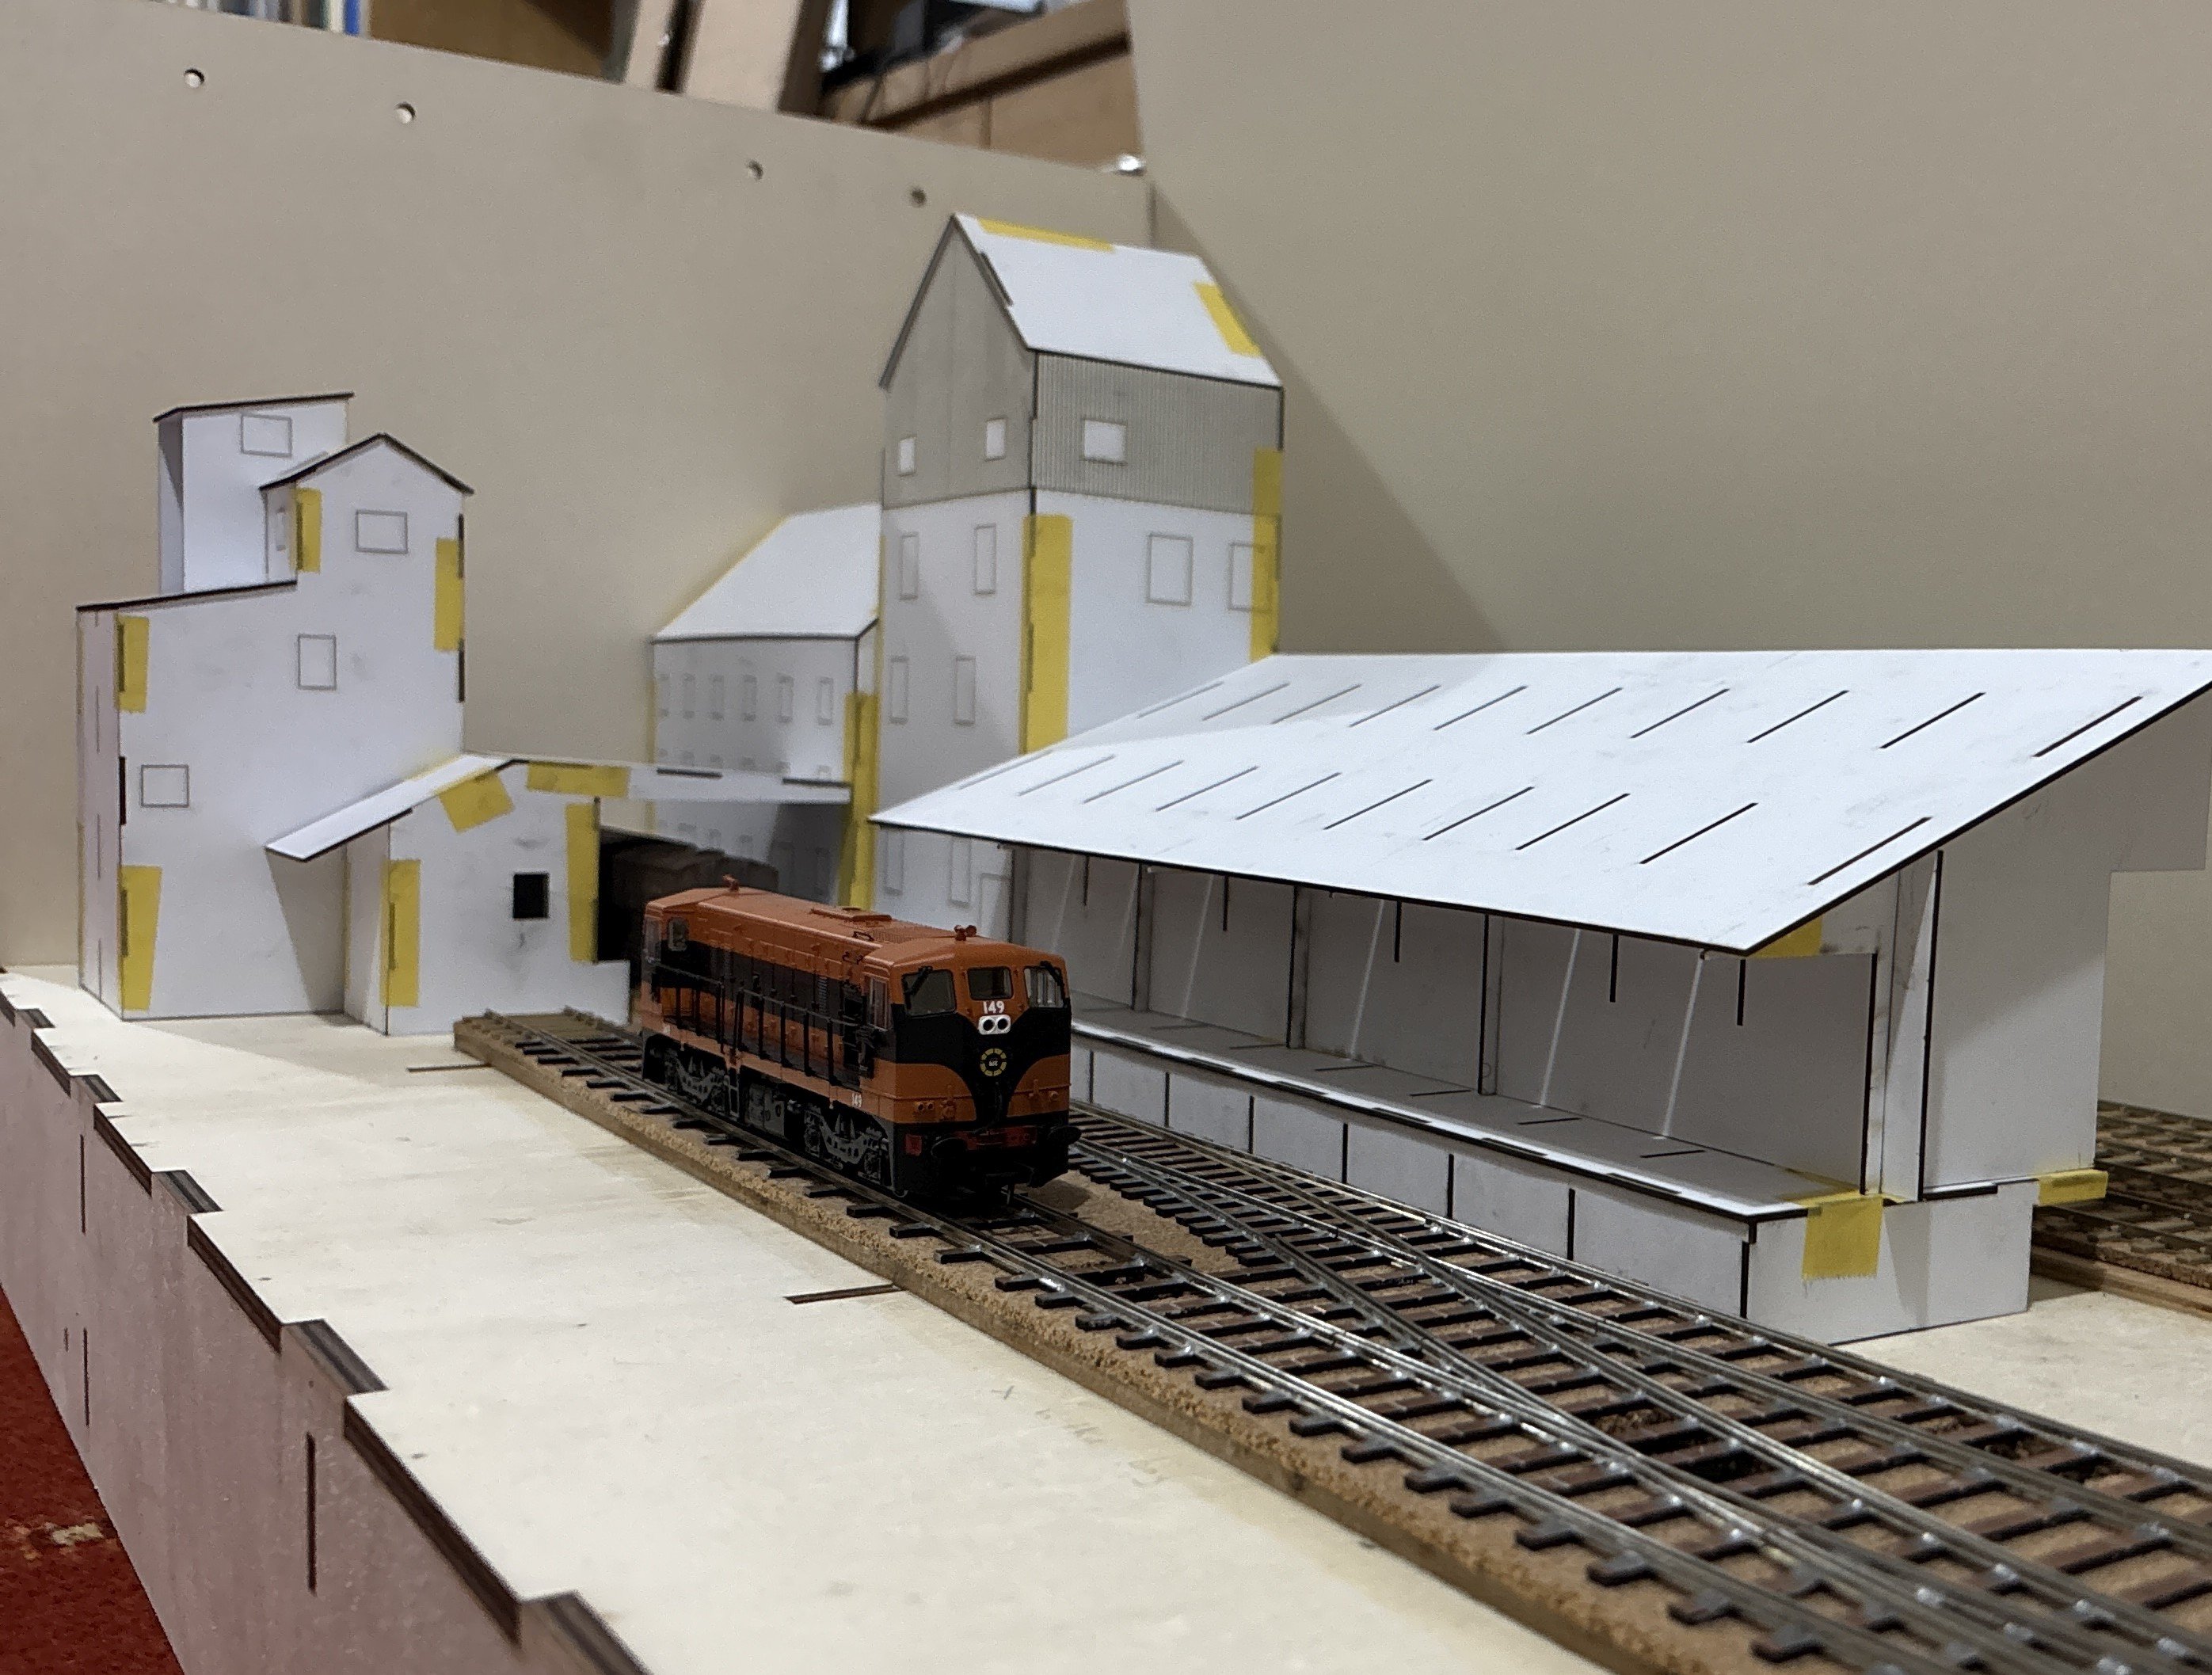
My new adventure in Irish railway modelling has begun with my new micro/shunting layout Ballisodare mill, Set in Co Sligo-(of course)-the era will be 1970s through to the 1990s-to add variety of liveries. Thank you to @irishmail for initially building the diorama,I have plans to extend both ends to have a factory scene at one end, and a small fiddle yard at the other. Power is provided by an NCE power cab control system -which I purchased with a small collection a number of years ago. Once wired up-testing commenced using an A and a 121 class locomotives, Comments are welcome…. A few photos of the micro layout…..taken with natural sunlight shining
 23 points
 -
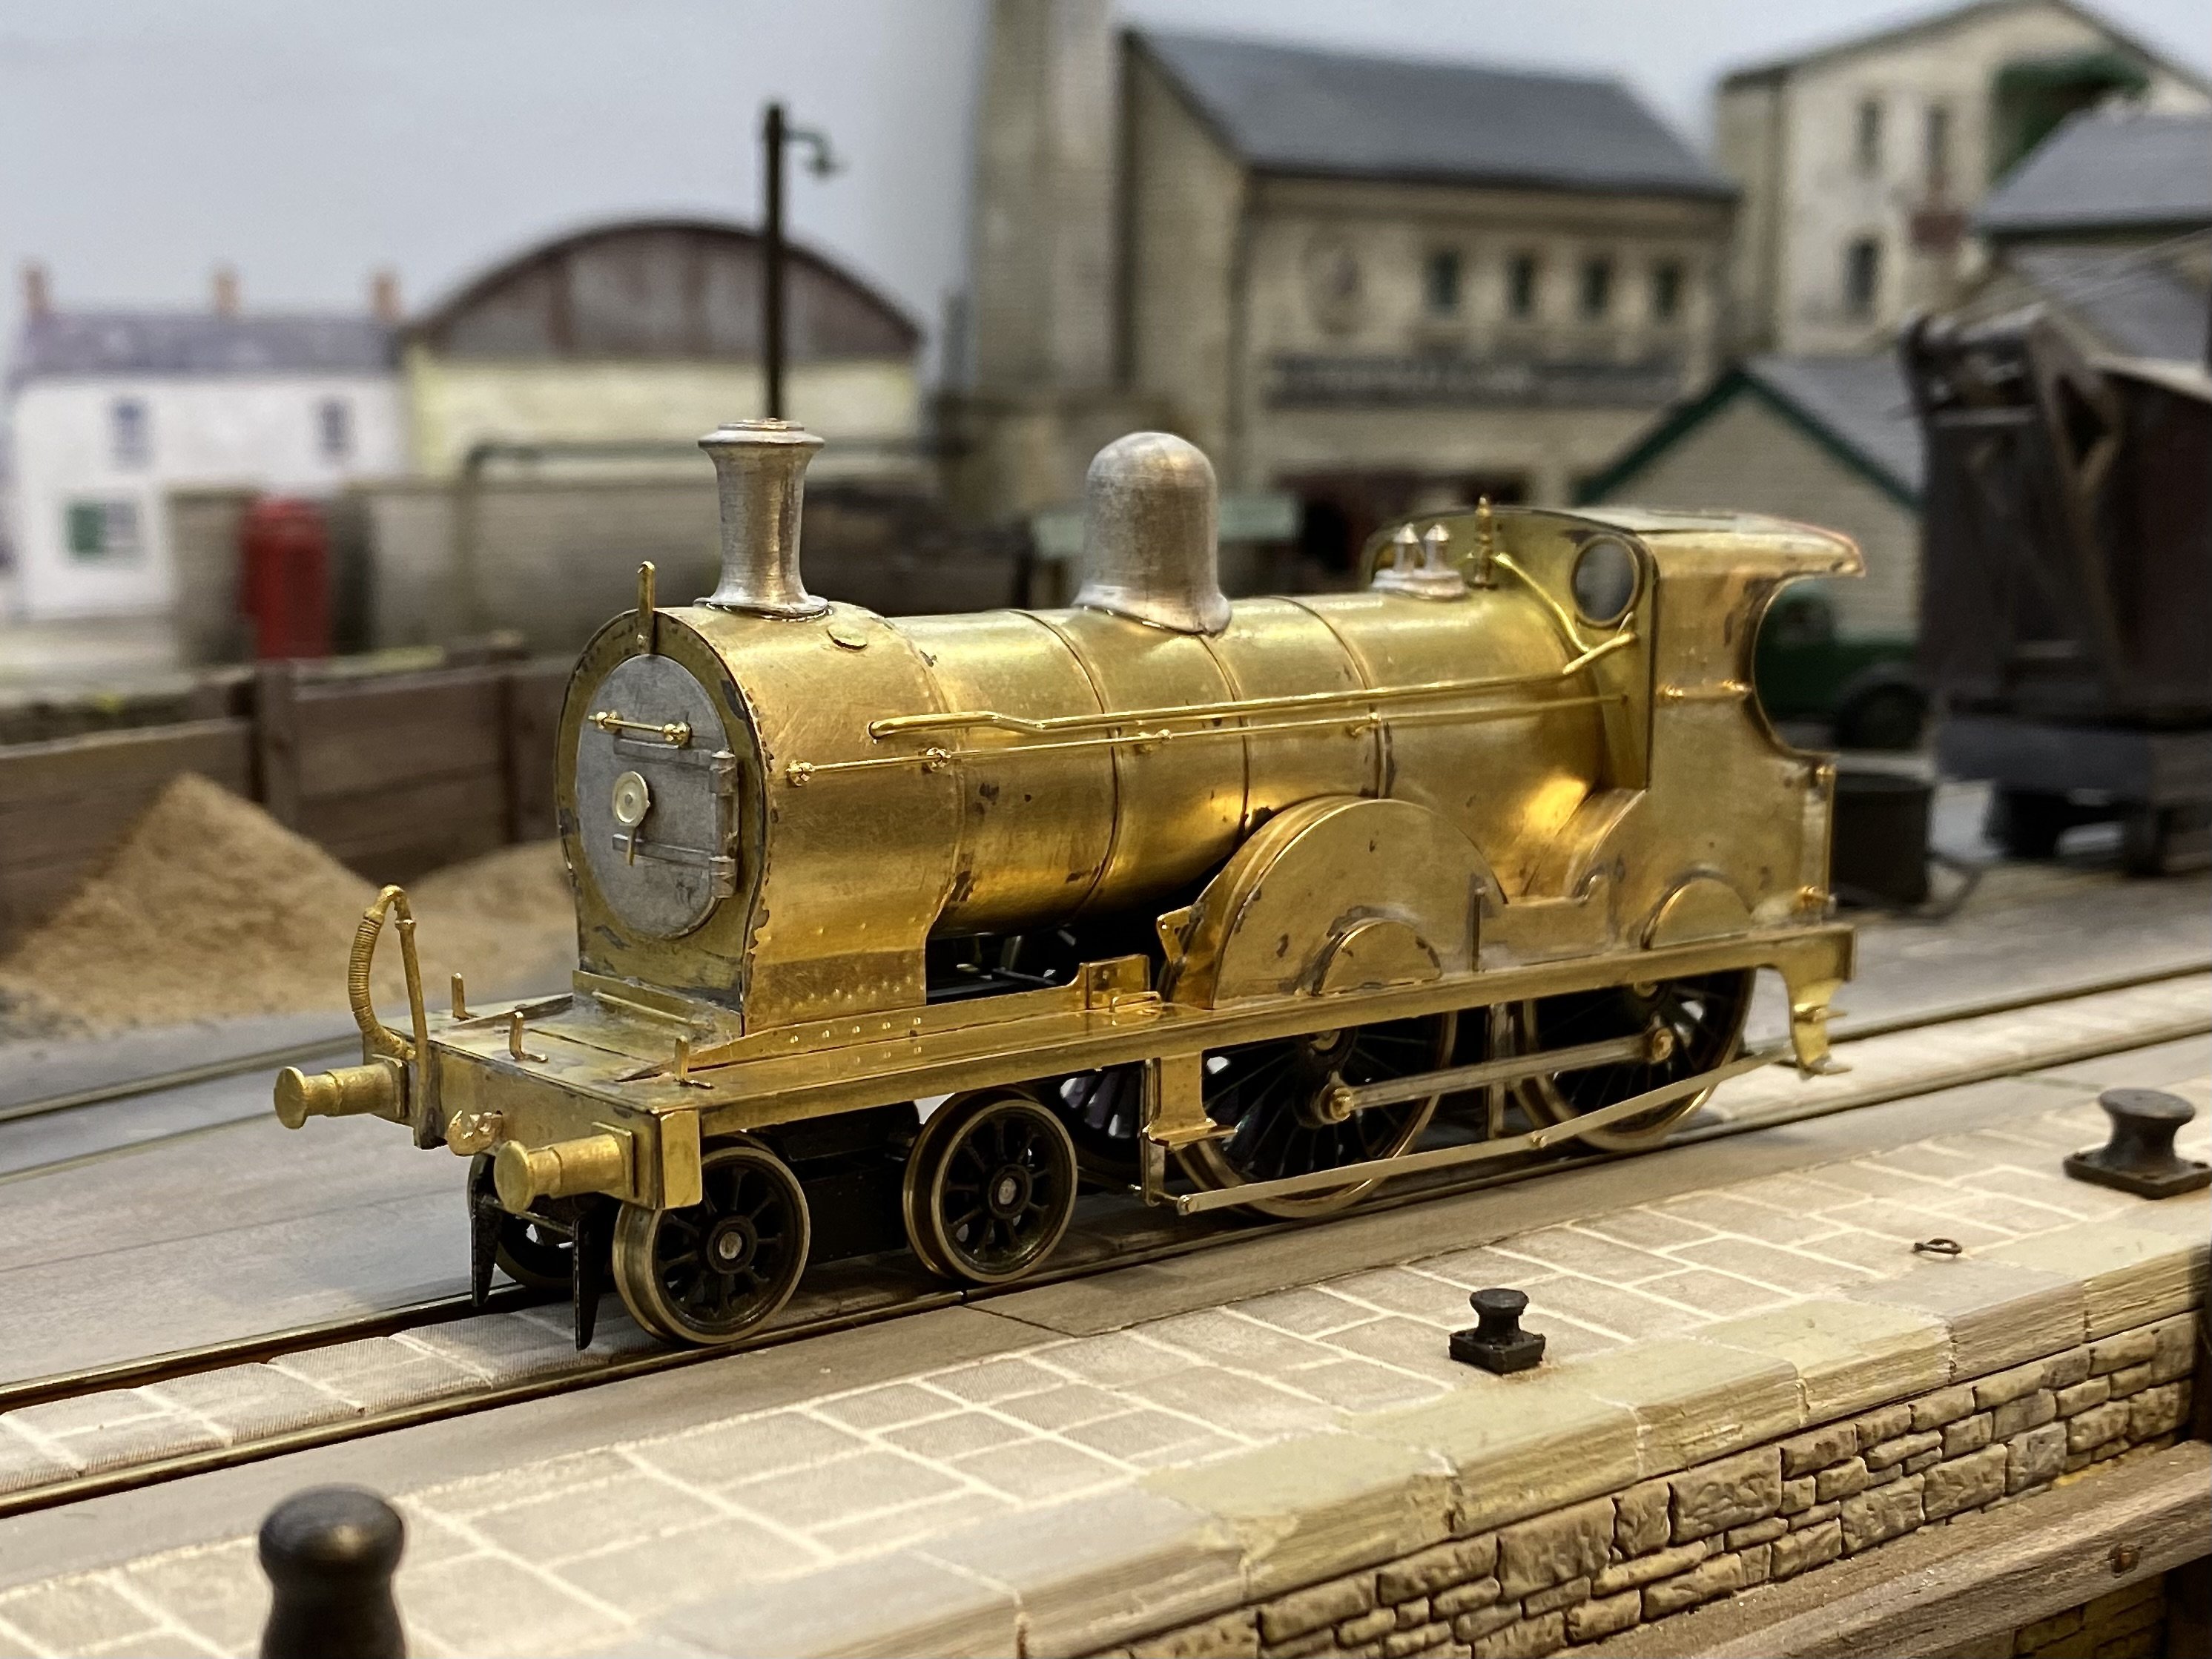
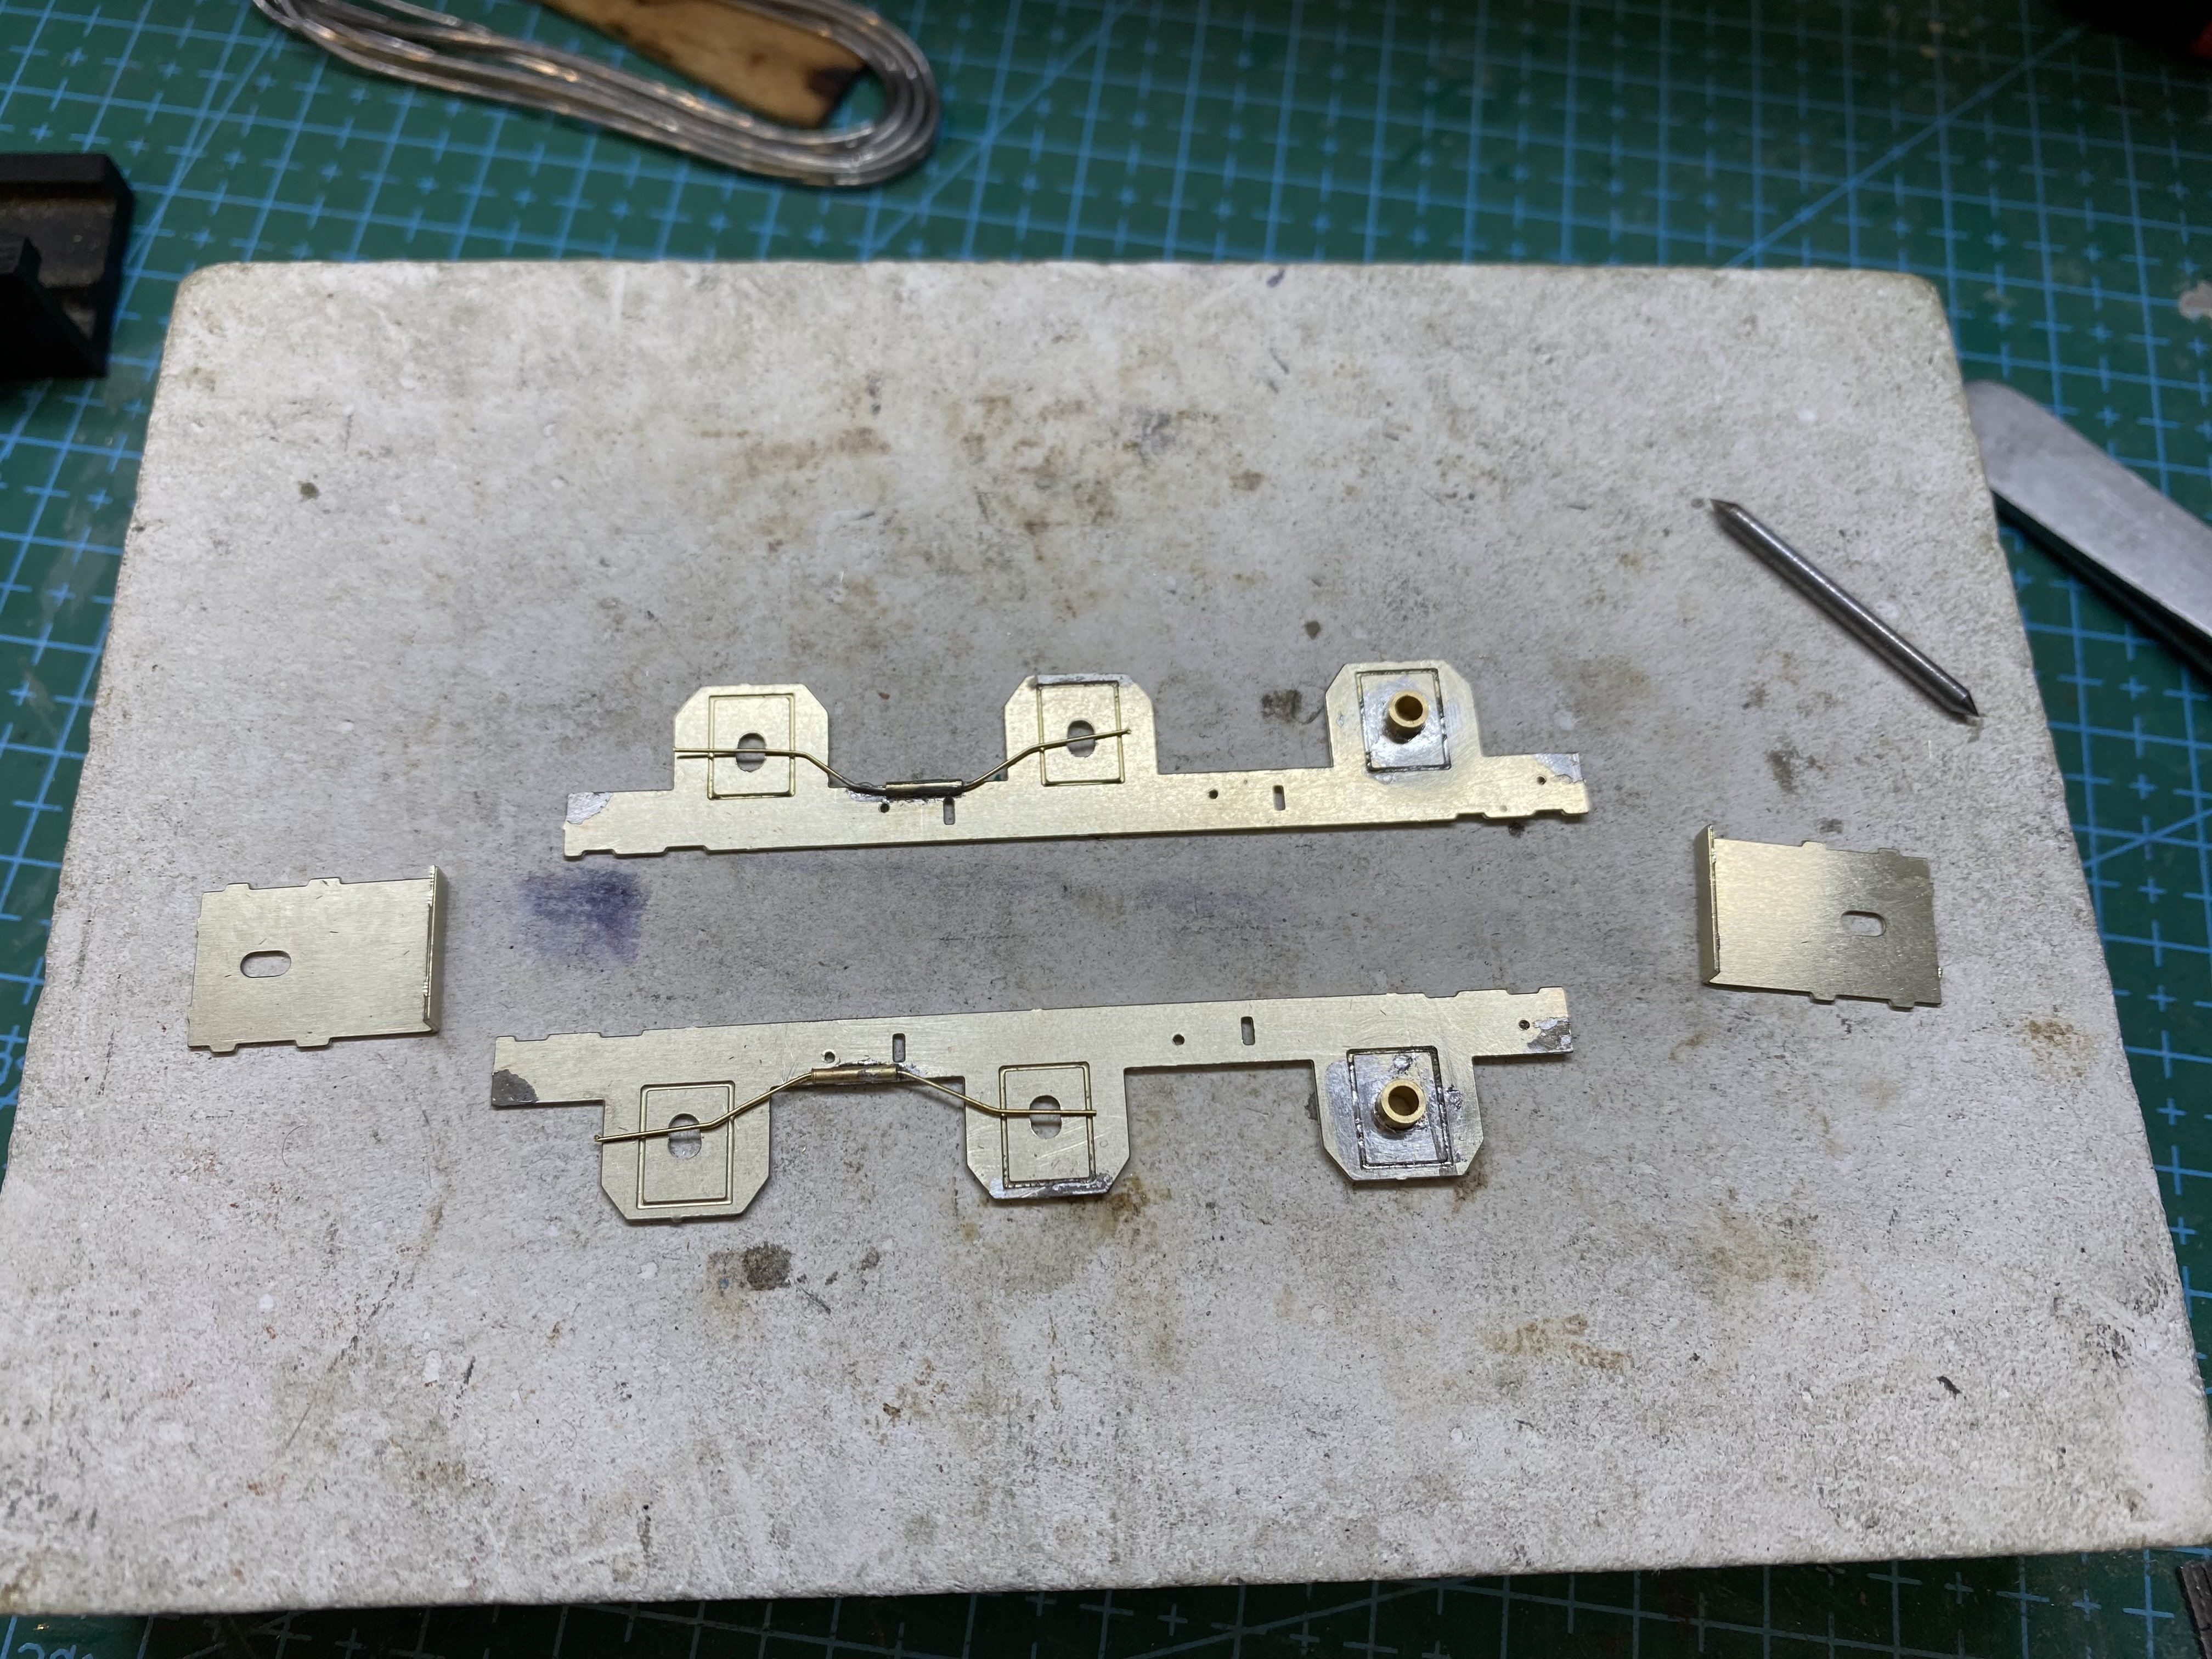
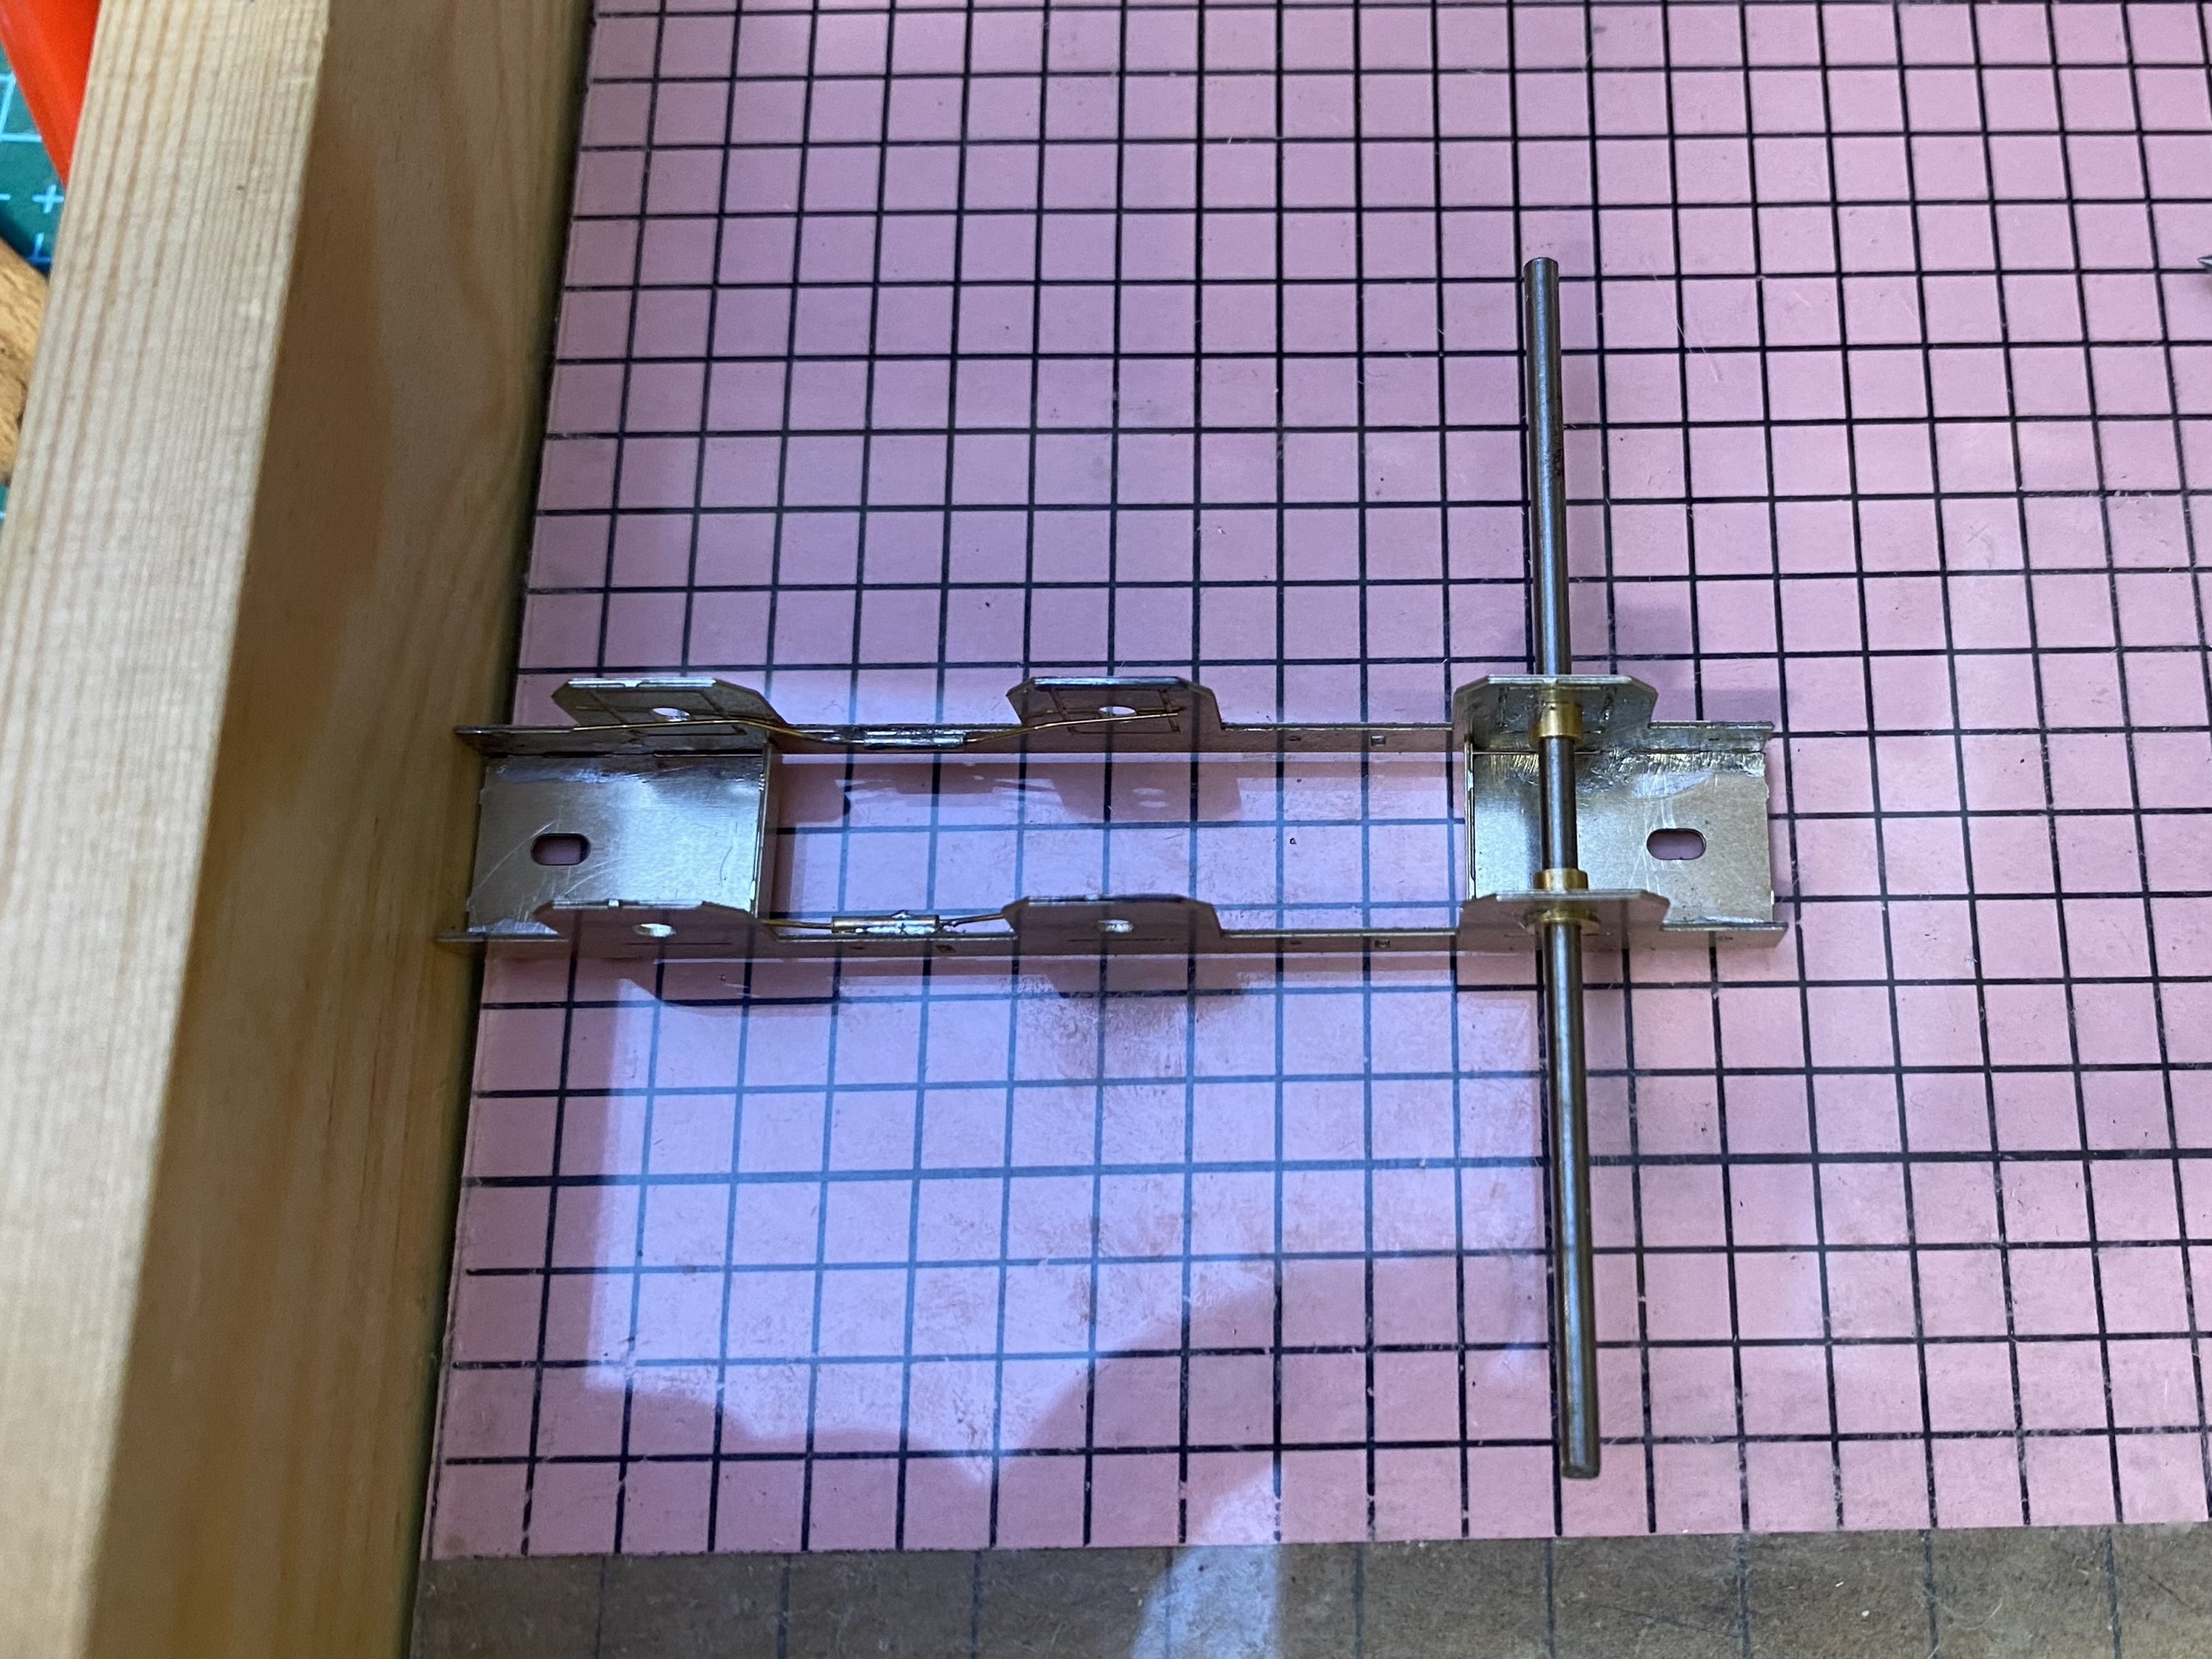
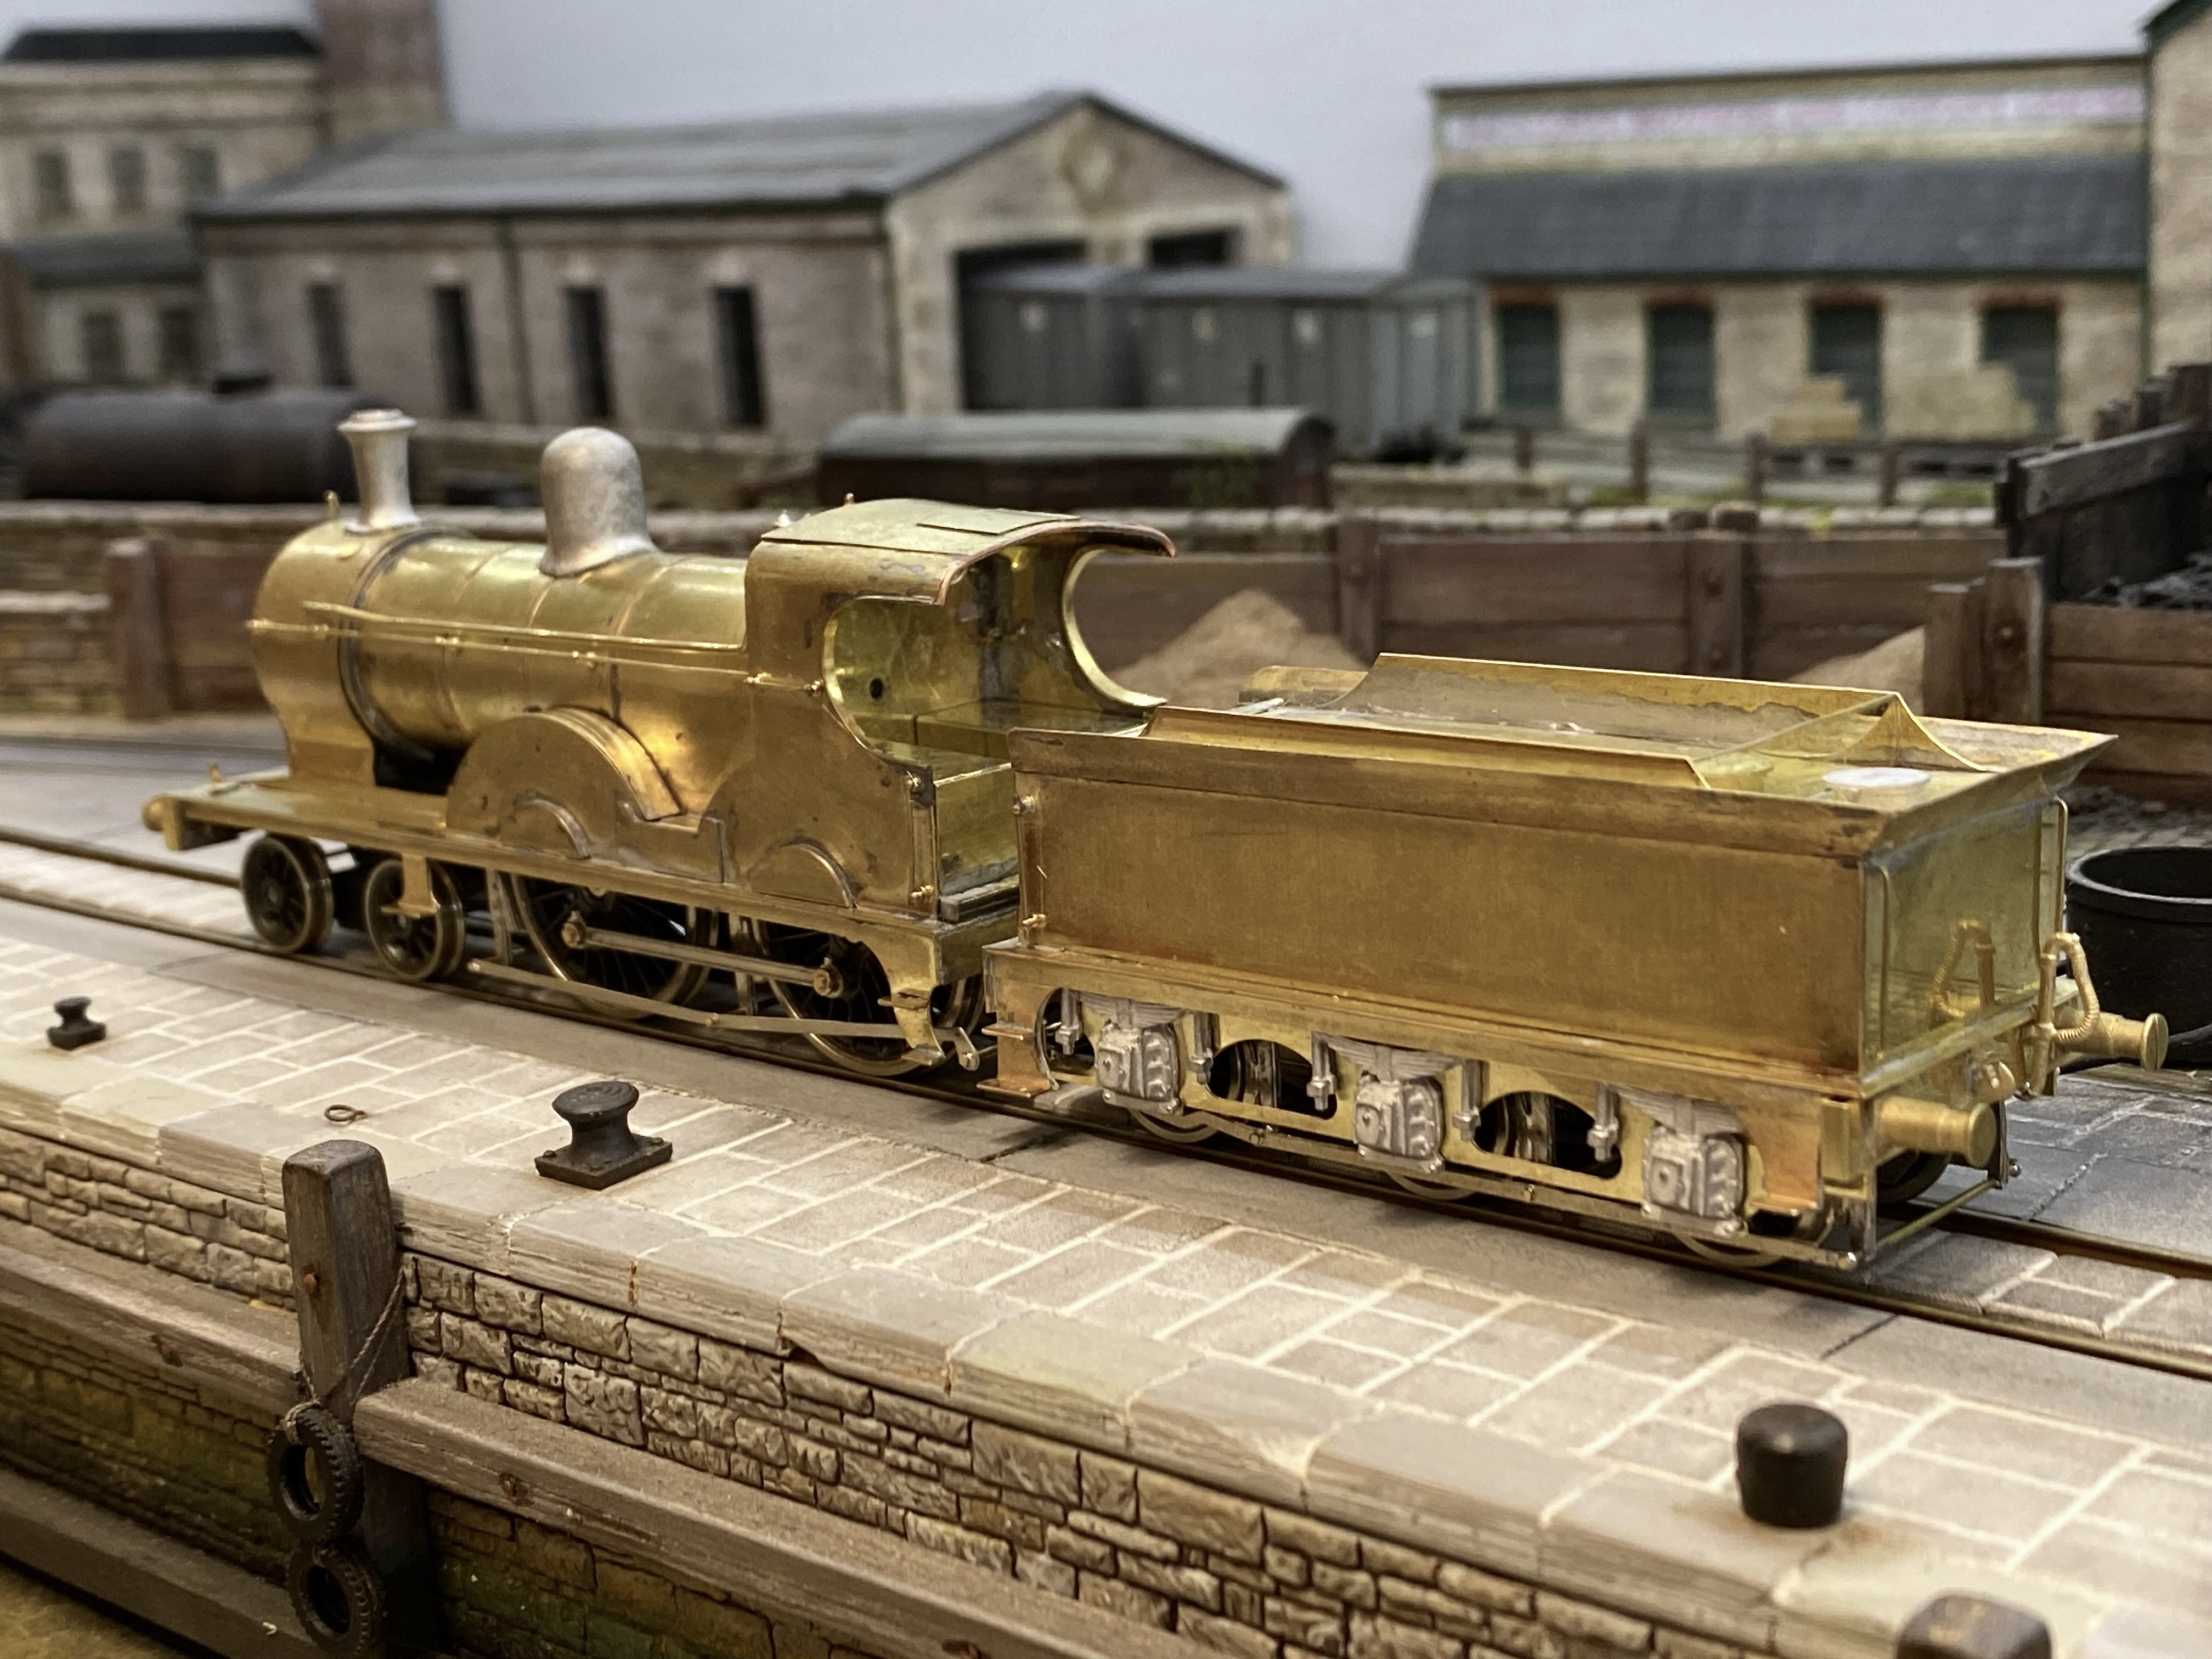
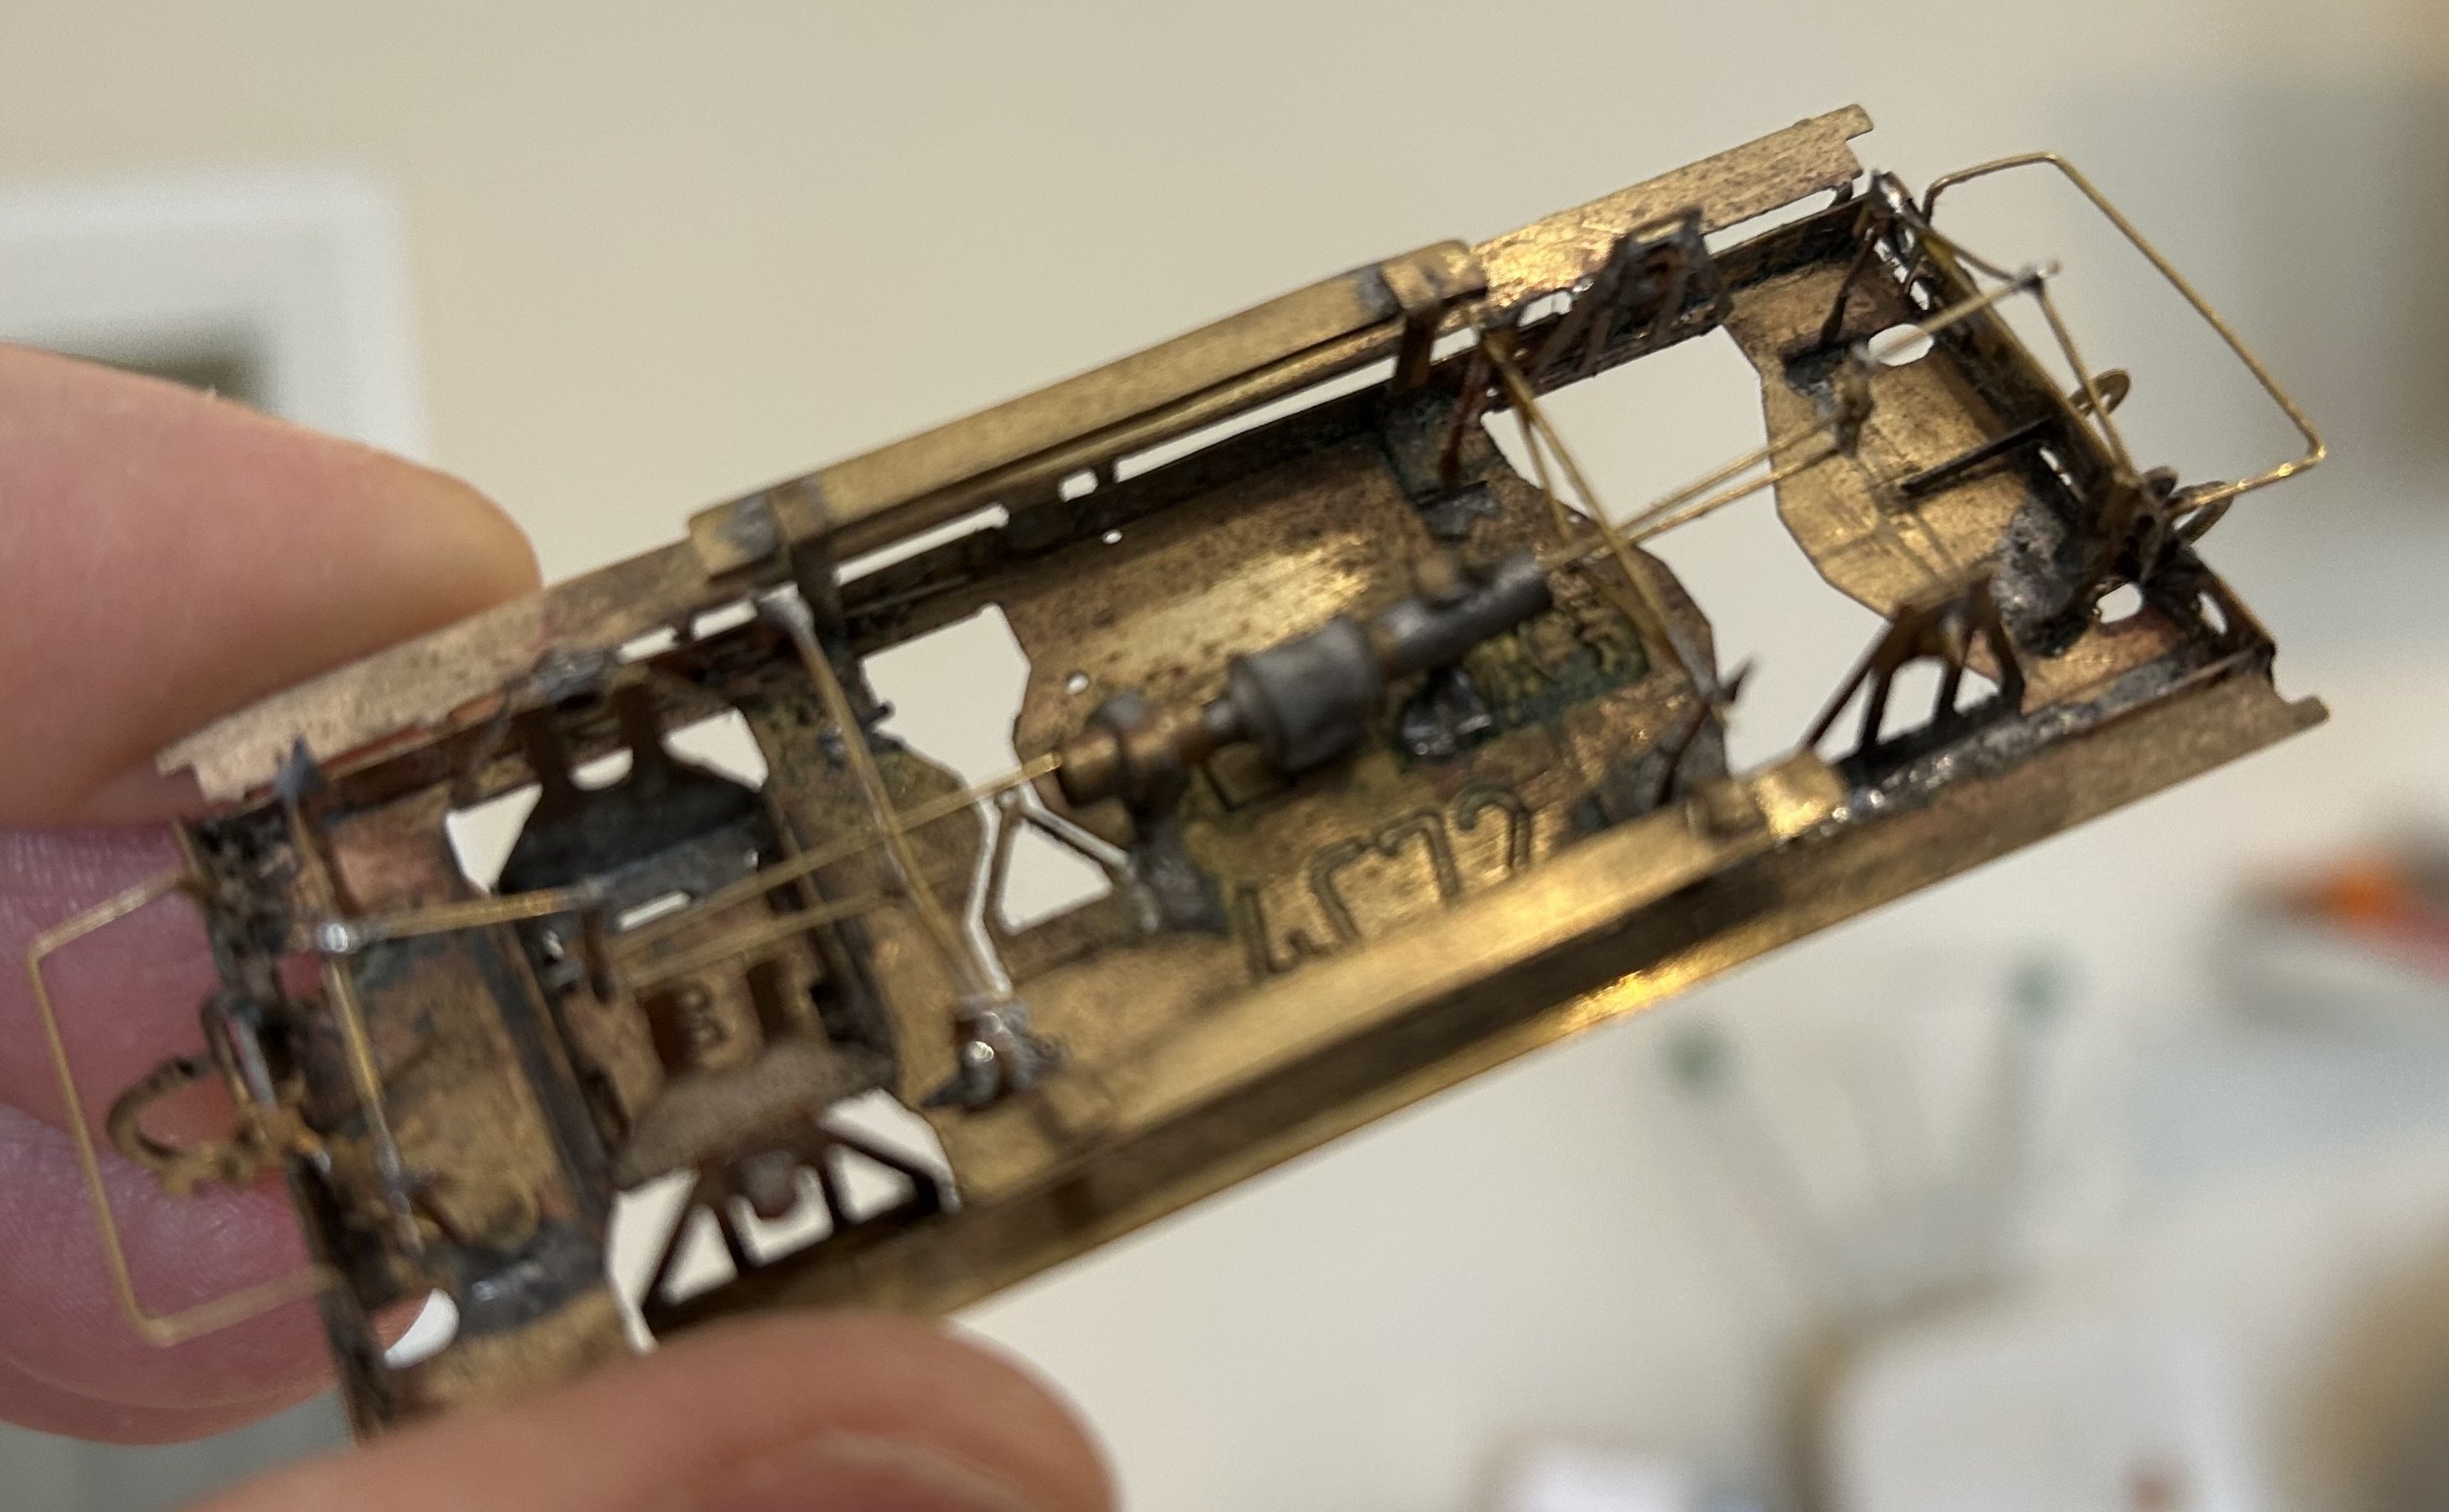
I've been avoiding fitting the brake gear to the PPs chassis up till now though some of the work was already done. Brake hangers using 0.7mm brass rod were soldered in at the time the chassis frames were assembled and the brakes themselves were made up and drilled to fit. Stringing it all together was tricky but slightly easier than I'd been dreading. This loco has brake pull rods on the outside of the wheels. I used these to help line up the brakes and solder them onto the hangers. Cross shafts were then fitted and soldered into holes in the bottom of the brakes. Finally the pull rods were soldered onto the cross shafts which were then trimmed and filed to length. I fitted the outside brake pull rods as far outboard as possible to allow for the wheels to be removed if ever necessary. The superstructure now has most of its details added and is just about finished. I scribed a horizontal line along each side of the boiler to guide drilling the holes for the handrail knobs which were superglued in. The white metal castings were epoxied on. If this was a tank engine we'd be done now but there are the makings of a tender still in the box. Alan
20 points
-
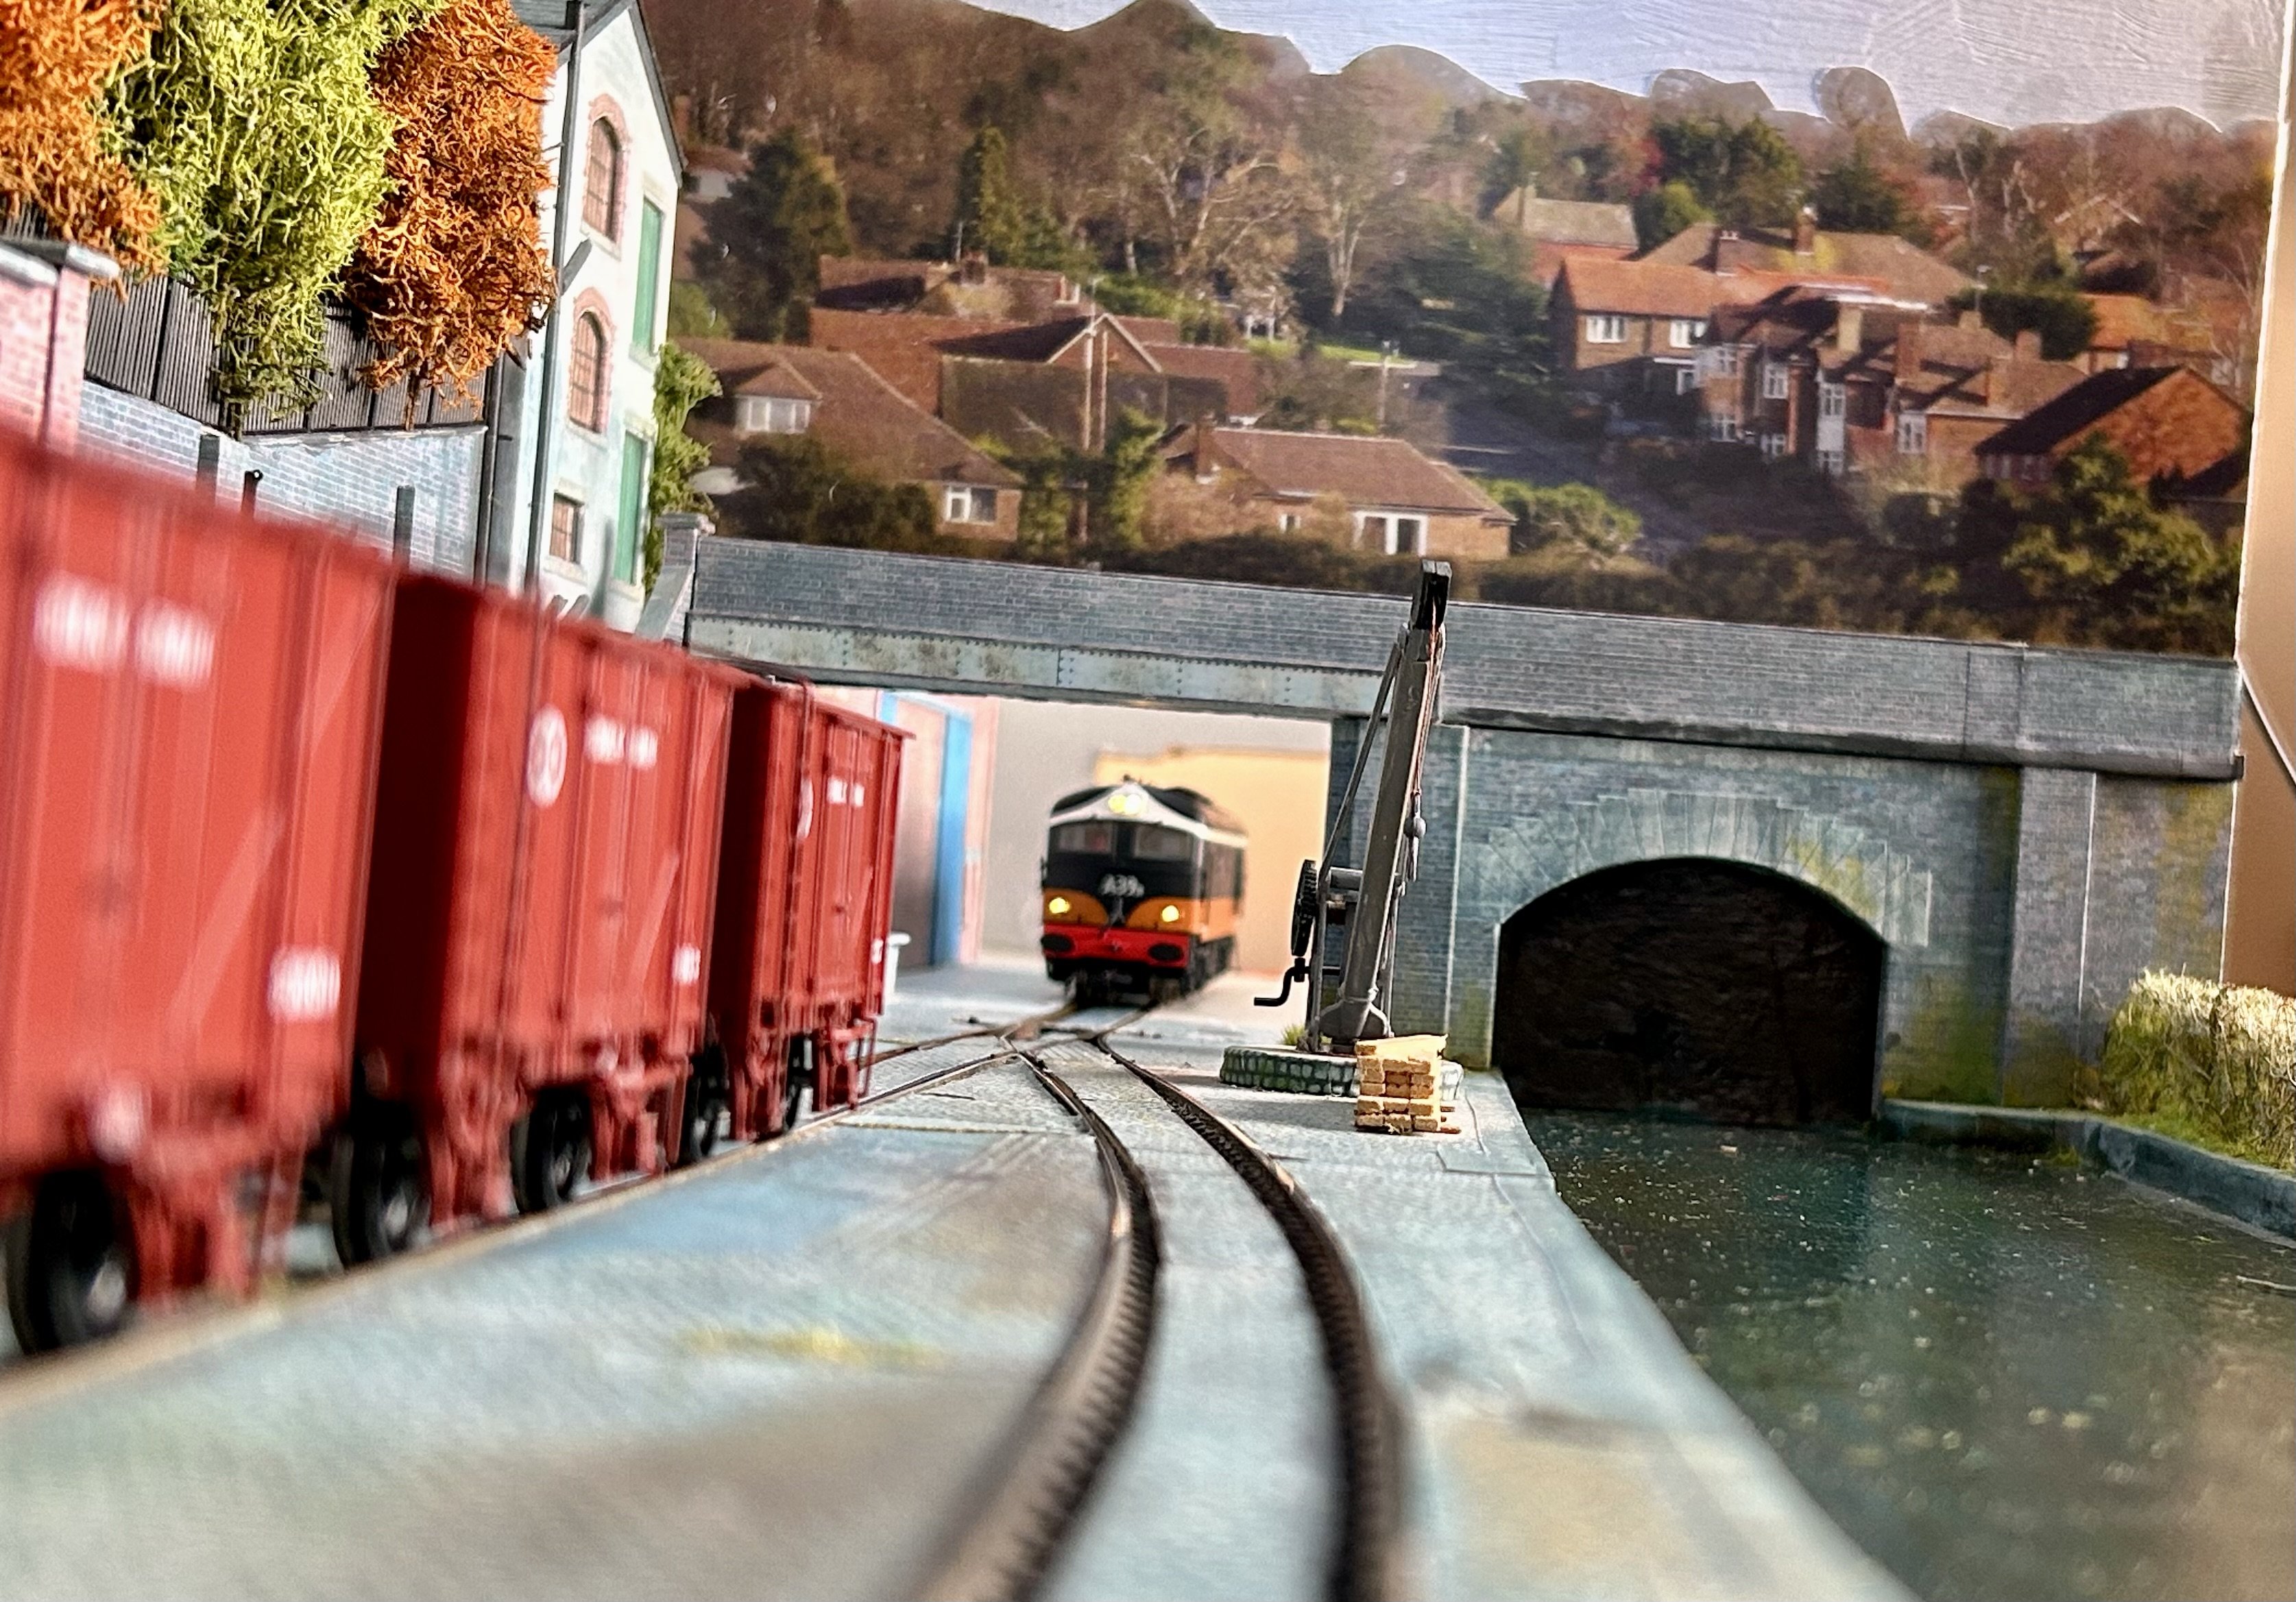
Thanks Gents….having fun…A39 arrives from Sligo loco shed to shunt the empty grain wagons.
18 points
-
…and to the up platform. Cheers Darius18 points
-
More to follow this week, folks….
17 points
-
Please Note! Currently, this is still a work in progress, and some info may be inaccurate; there are still a few locomotives without information, which will hopefully be added over time. Any additional info and/or corrections would be greatly appreciated. 1991 15/08/91: 191 was the first 181 to be withdrawn, having suffered severe damage after a runaway incident from North Wall that ended in Clonsilla on the 15th August. It was then recovered and brought into Inchicore where it was gradually stripped of spares. It was in service for (roughly) 35 years before withdrawal. 1993 05/10/93: 174 was the first 141 to be withdrawn from service, being stopped for a body overhaul, but instead was cannibalised for spares. 1996 May: 161 was withdrawn from service. 1999 22/03/99: 158 sustained a bent frame following a shunting mishap at Limerick and was subsequently withdrawn on the same day. 2002 December: Nine years after its withdrawal, 174 was scrapped at some point during that month. Month unknown: 148 and 155 were both withdrawn sometime in 2002. 2003 May: 150 was stopped. July: 157 was also stopped. November: 188 was (again) stopped. Month unknown: 158 was scrapped in the same year. 2004 November: 150, 157 and 188 were withdrawn. 2005 Month unknown: 183 was scrapped. 2006 September: 148 was scrapped on the 9th, while 186 and 159 were scrapped during the same month. 06/10/06: 172 was withdrawn from service. 2007 January: 181 was withdrawn from service, and 172 was scrapped. June: 168 and 151 were stopped entirely, while 153, 154 and 181 were eventually scrapped. Month unknown: 170 suffered a fire in Limerick and was then moved to Inchicore for repairs. 2008 31/03/08: 154 was withdrawn. April: 149, 166 and 184 were stopped on the 4th, while 151 and 189 were scrapped on the 25th and 29th of the same month. June: 165 was withdrawn completely. 06/08/08: 160 had been scrapped. 13/08/08: A week later, 165 was also scrapped. 29/07/08: 184 was scrapped. 06/08/08: 160 was scrapped. 13/08/08: 165 was scrapped. 19/08/08: 149 was scrapped. 20/08/08: A day later, 170 was scrapped. 25/08/08: 169 was scrapped. 28/08/08: 185 and 173 were stopped. 10/11/08: 192 was scrapped. 13/11/08: 173 was also scrapped, having been withdrawn earlier in the month. 27/11/08: 185 was scrapped just under three months after withdrawal from service. 12/12/08: 163 was both stopped and withdrawn on the same day. 17/12/08: Five days after, 163 was scrapped. 2009 24/02/09: 187 was scrapped. 20/04/09: 167 was withdrawn from service. By the 22nd of April 2009, 141, 142, 144, 146, 147, 152, 162, 171, 175 and 177 were the remaining 141s in service, while 190 was the sole survivor of the 181 Class after 187 was scrapped in February of that year. 27/06/09: 152 and 171 hauled what would be the last passenger train pulled by an IÉ-owned 141, that being an IRRS railtour to Limerick, where the pair hauled a rake of 7 Mark 3s. Unfortunately, on the return leg of the journey, 171 suffered a hot engine at Thurles, and the train was cancelled. 21/08/09: 141 was withdrawn from service. 22/08/09: A day later, 141 was acquired by the RPSI to be preserved, being the first 141 Class locomotive to be bought for preservation. 07/11/09: 190 was the last member of the 181 Class to be withdrawn. Working for exactly 42 years, 10 months and 10 days. Thanks to the efforts of the ITG, 190 was purchased for preservation and subsequently moved to the West Clare Railway for storage. 01/12/09: 142 was also acquired by the RPSI, marking it as the second 141 to be preserved. 2010 February: 142, 144, 146, 147, 162 and 171 would be withdrawn from service, although 162 and 175 were later reinstated as pilot locomotives. 21/02/10: 141 and 142 ran a railtour organised by the RPSI, dubbed the "Diesel Do" railtour, running from Dublin Connolly to Longford and back. This was the first (and only) time a preserved 141 Class ran a railtour. 22/02/10: Having suffered a brake problem at Ballyhaunis, 152 was stopped. It spent the last few months of service operating engineering works trains around the Mayo area. 24/02/10: Two days later, 152 and 175 were withdrawn, though the latter would be later reinstated as a pilot locomotive alongside 162 and 171. 05/03/10: 146 was withdrawn from service. 28/04/10: 142 ran light engine from Dublin to Whitehead Railway Museum, where it currently works as the yard shunter. May: Two months after withdrawal, 146 is the third 141 to be preserved, being the first 141 Class locomotive to be acquired by the ITG. 25/11/10: 152 was purchased by the ITG and moved to the West Clare Railway in Moyasta, where it would be stored alongside A3R, 124 and 190 until June 2025. 27/11/10: 146 was moved to the Downpatrick & County Down Railway, where it resides to this day. 12/12/10: 146 was (successfully) started up for the first time in preservation. Month unknown: 167 would be scrapped sometime in 2010. By the end of 2010, the remaining active 141s were as follows: 162, 171 and 175. 2011 March: While I have no information as to when 162 was withdrawn and stopped, the latest dates of 162's activity go as far as March 2011, when it was used to shunt B113 out of the siding of the Bogie Shop at the Inchicore Works. Photo: https://transportsceneireland.smugmug.com/RailSceneIreland/RSI-March-2011-Kildare/i-s9PCLgZ/A (25/03/11) and video: https://youtu.be/uMInBWUJXao?si=u-RTSOUsYetqslvN&t=77. 24/07/11: 175 was withdrawn from service. November: At the age of 48 years and 11 months old, 171 was finally retired, having been the last of the 141 Class to be in service with Irish Rail. 2012 01/11/2012: 175 was acquired and preserved by the RPSI. 2016 19/07/16: 141 and 175, along with preserved 121 Class number 134, are transferred from Inchicore to Connolly shed for better storage conditions. This move was performed by 071 Class number 071. 2022 13/03/22: 144 was scrapped on this date. After 144 had been scrapped, the remaining withdrawn 141s were as follows: 147, 162, 171 and 177. 2025 01/06/25: 190 was moved by road from Moyasta to Downpatrick & County Down Railway. 07/06/25: 190 was successfully started up for the first time in preservation. 08/06/25: 152 was also moved by road from Moyasta to the Downpatrick & County Down Railway. 10/07/25: 162 was scrapped on this date; 162 was the second last 141 Class locomotive to be used by IÉ, where it was confined to pilot duties alongside 171, which was finally taken out of service in November 2011. As of November 2025, the remaining withdrawn 141s are as follows: 147, 171 and 177. Out of the thirty-seven 141 Class locomotives built, five are currently preserved, those being: 141, 142 and 175 (owned by the RPSI) and 146 & 152 (both owned by the ITG). Out of the twelve 181 Class locomotives built, 190 is the sole surviving example, preserved by the ITG.16 points
-
Cheers Darius
16 points
-
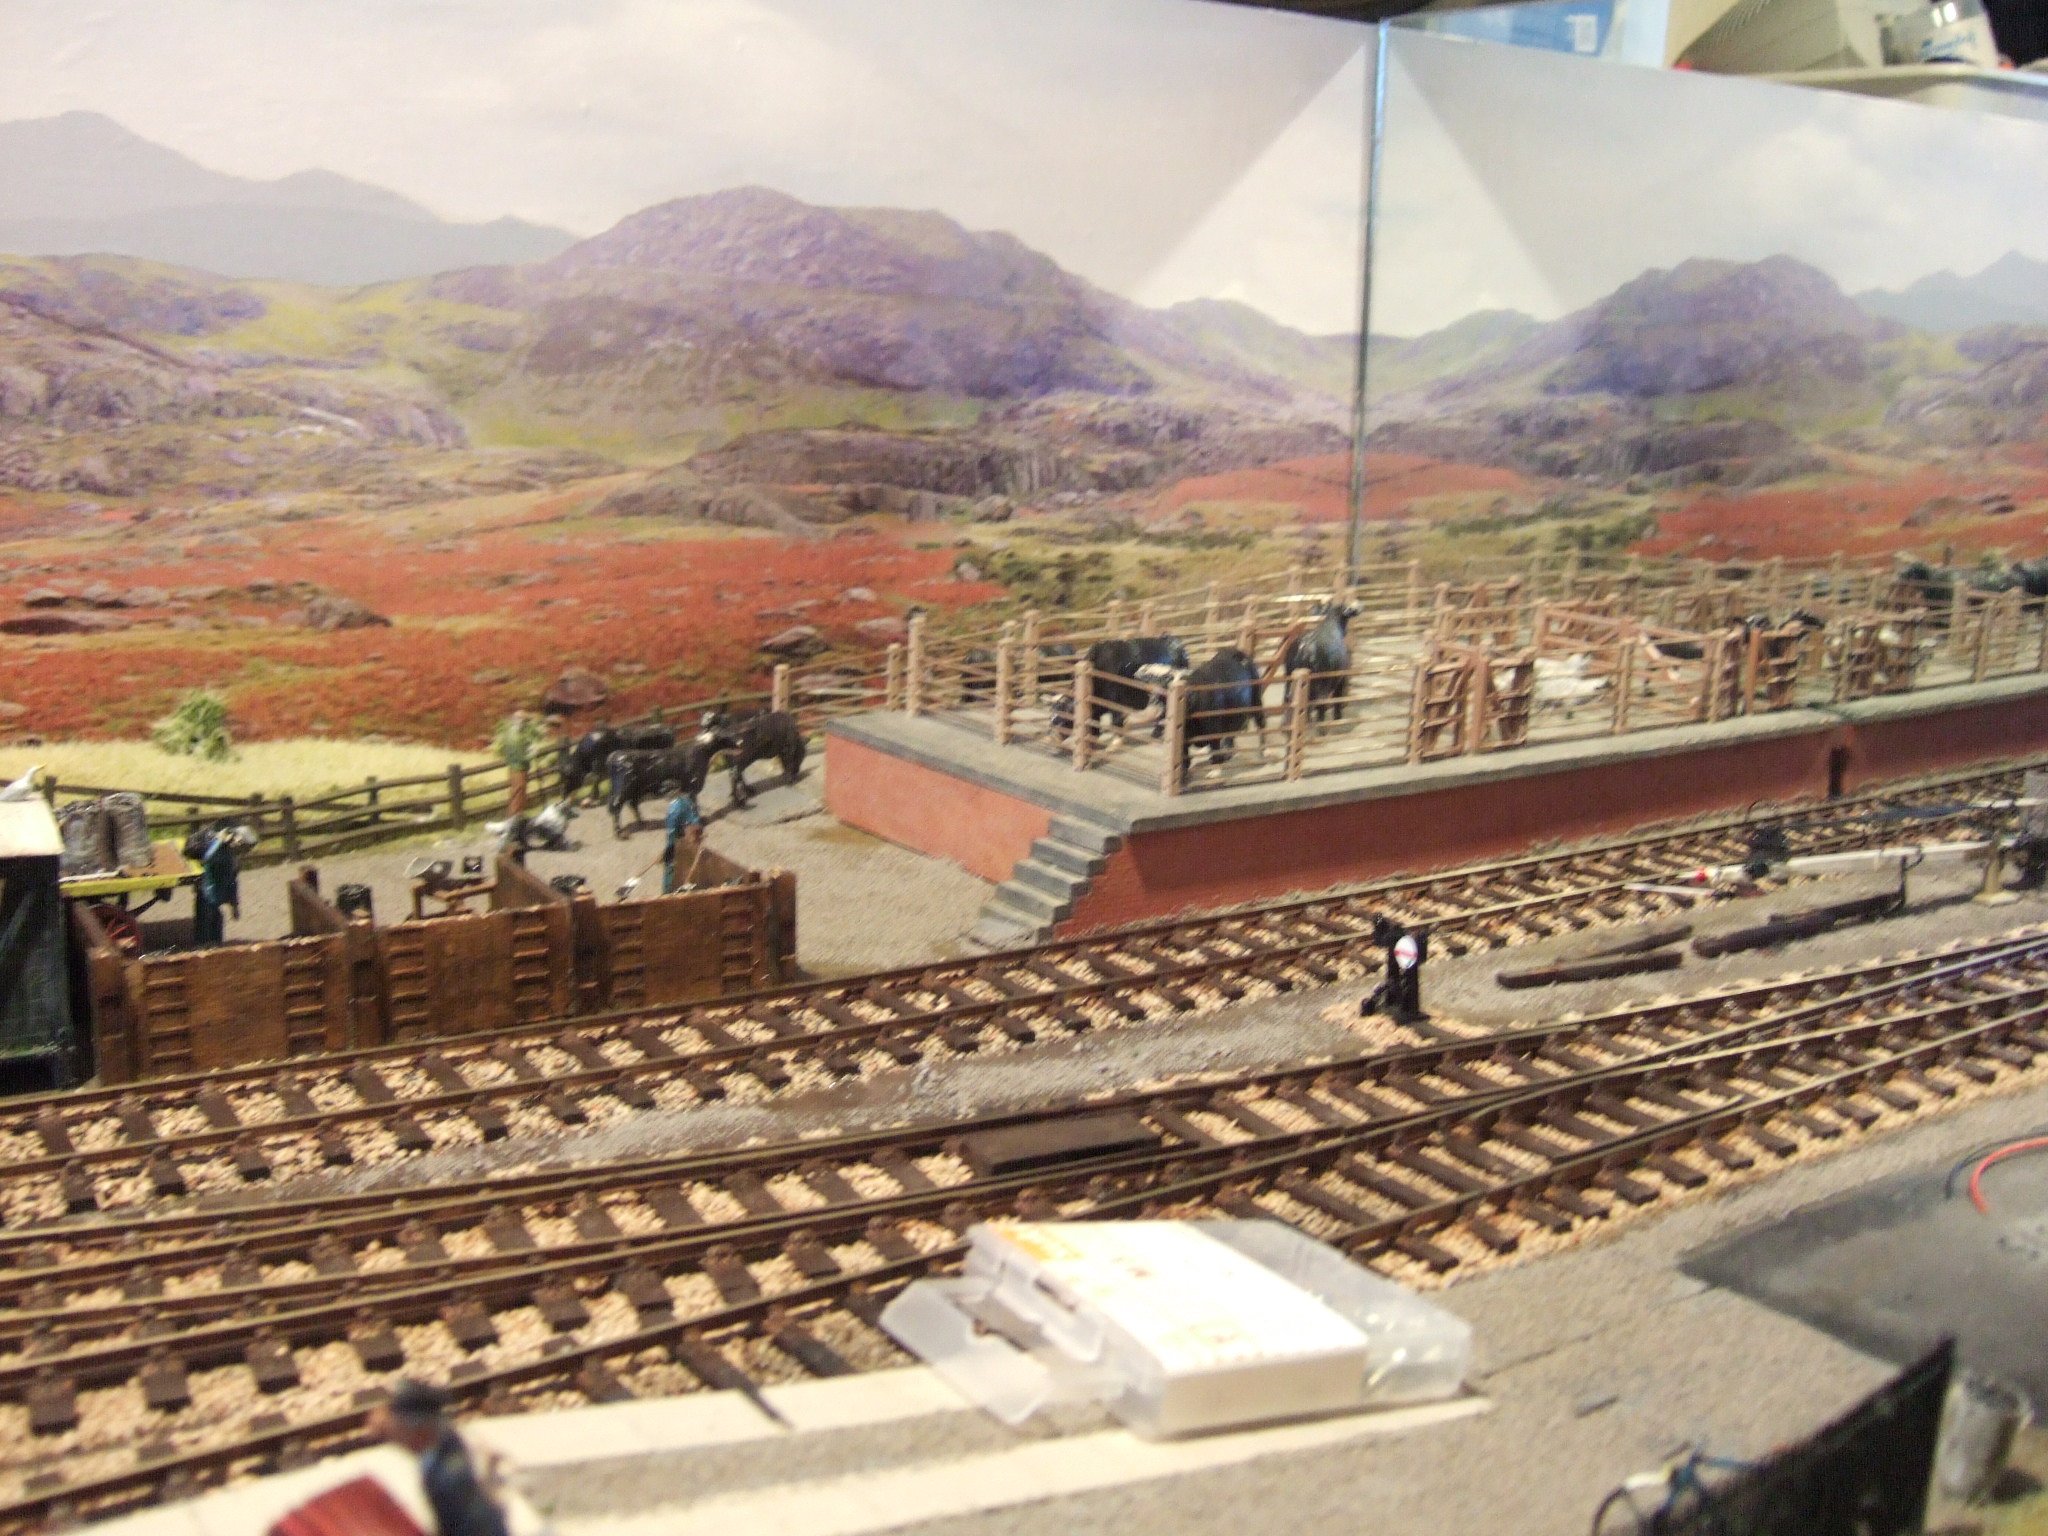
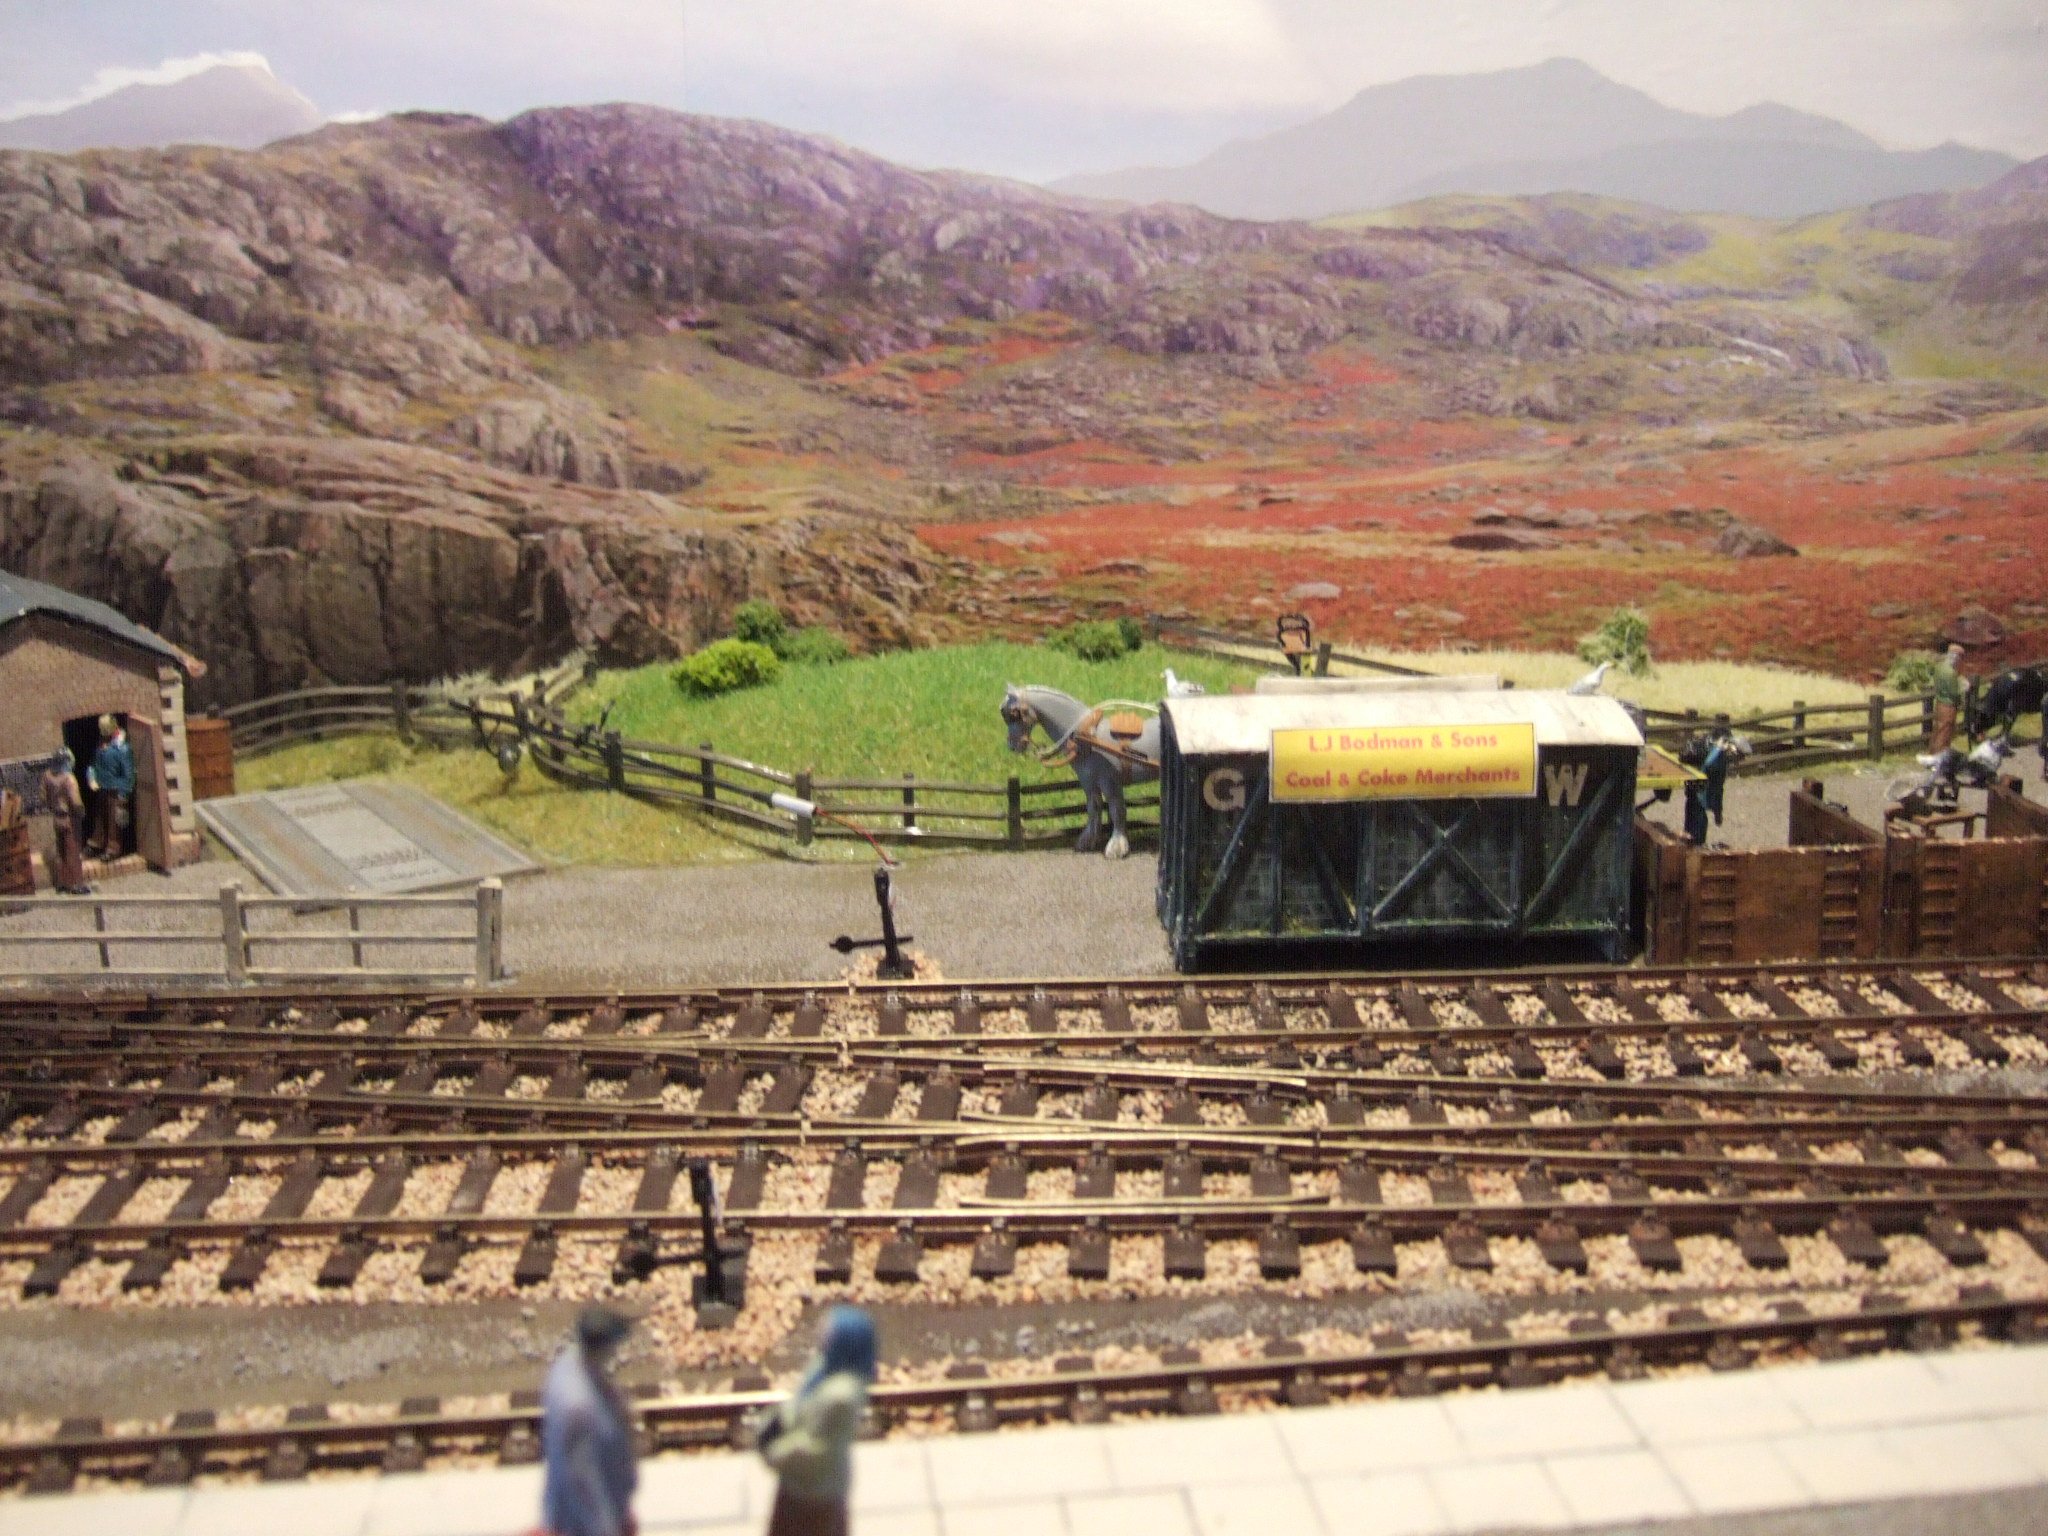
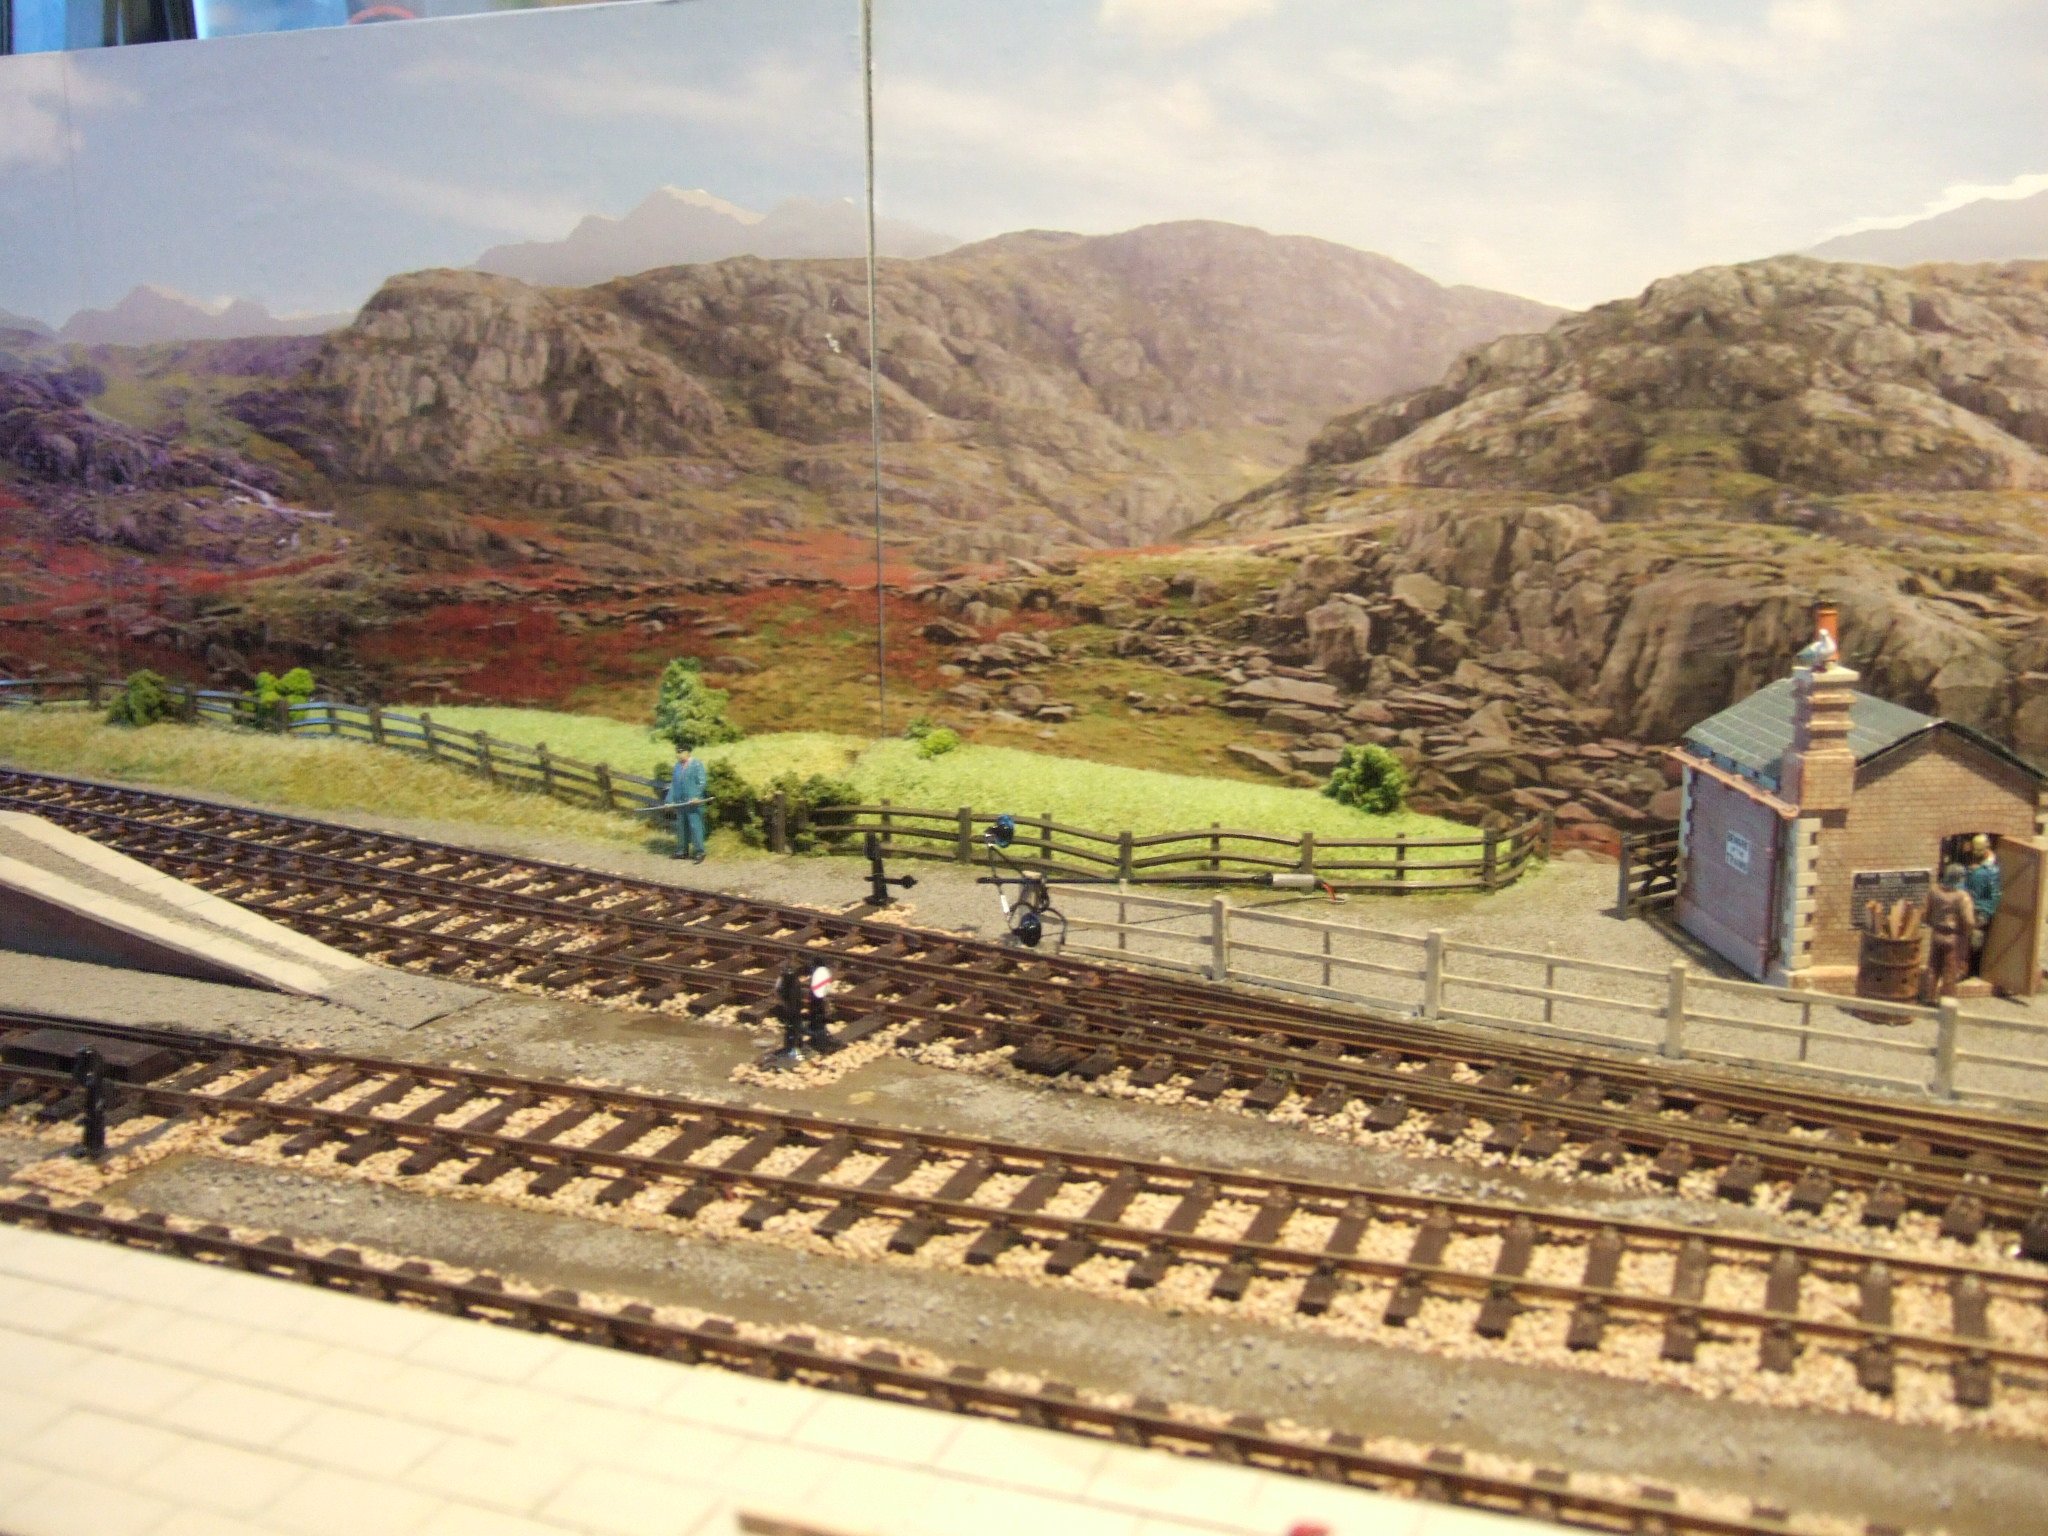
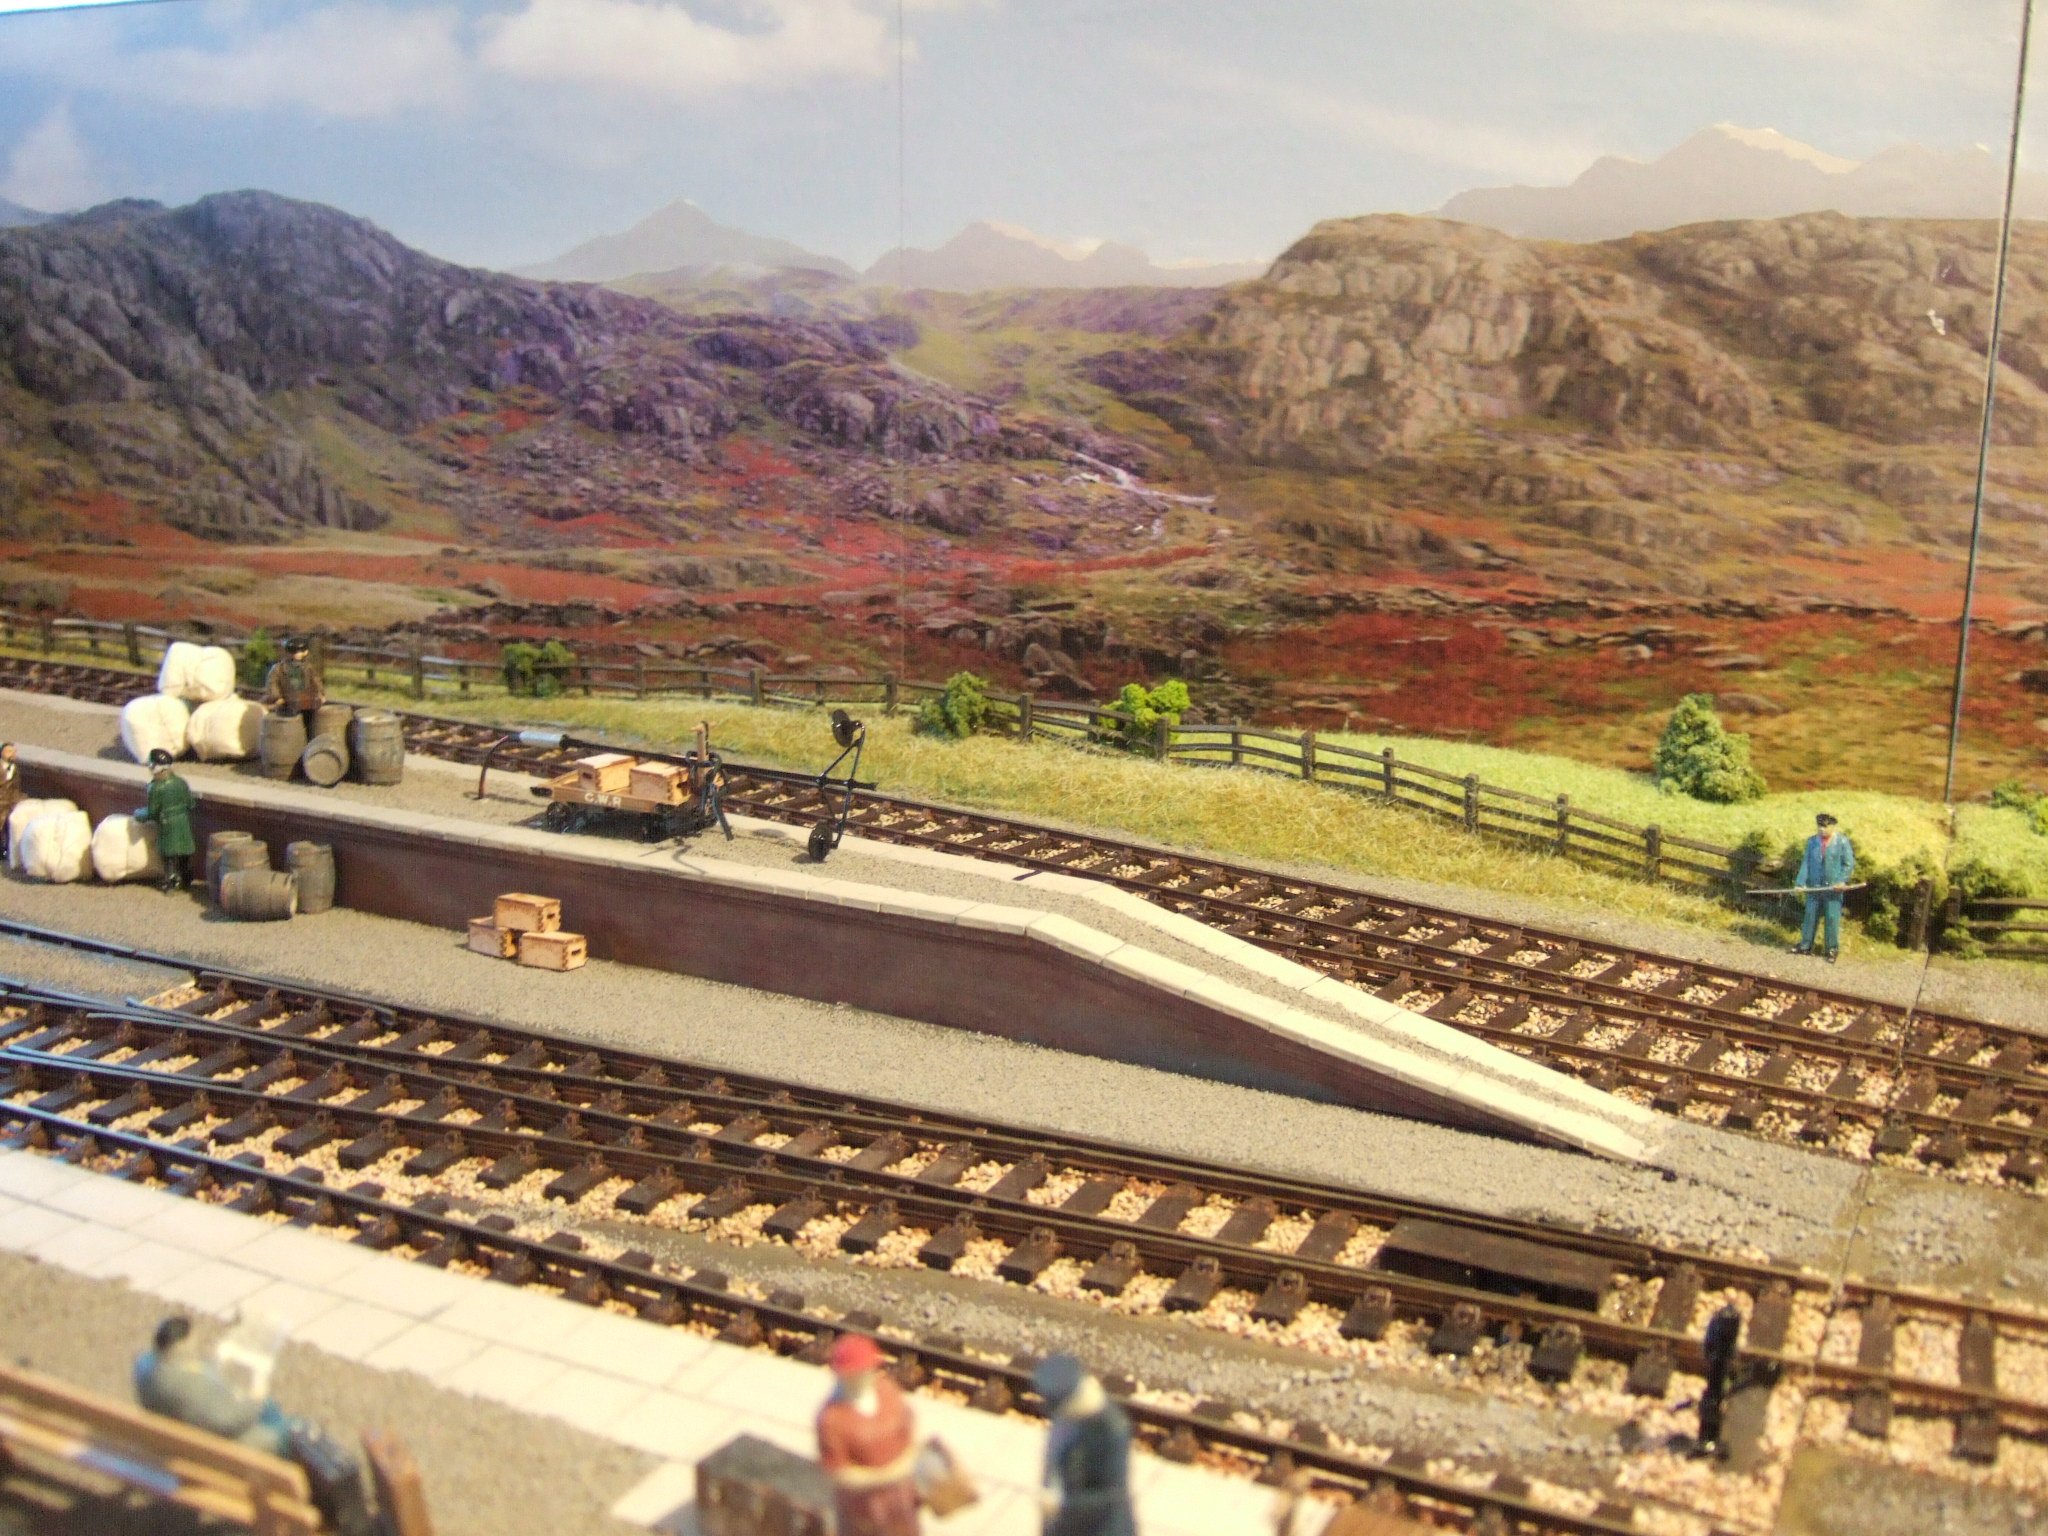
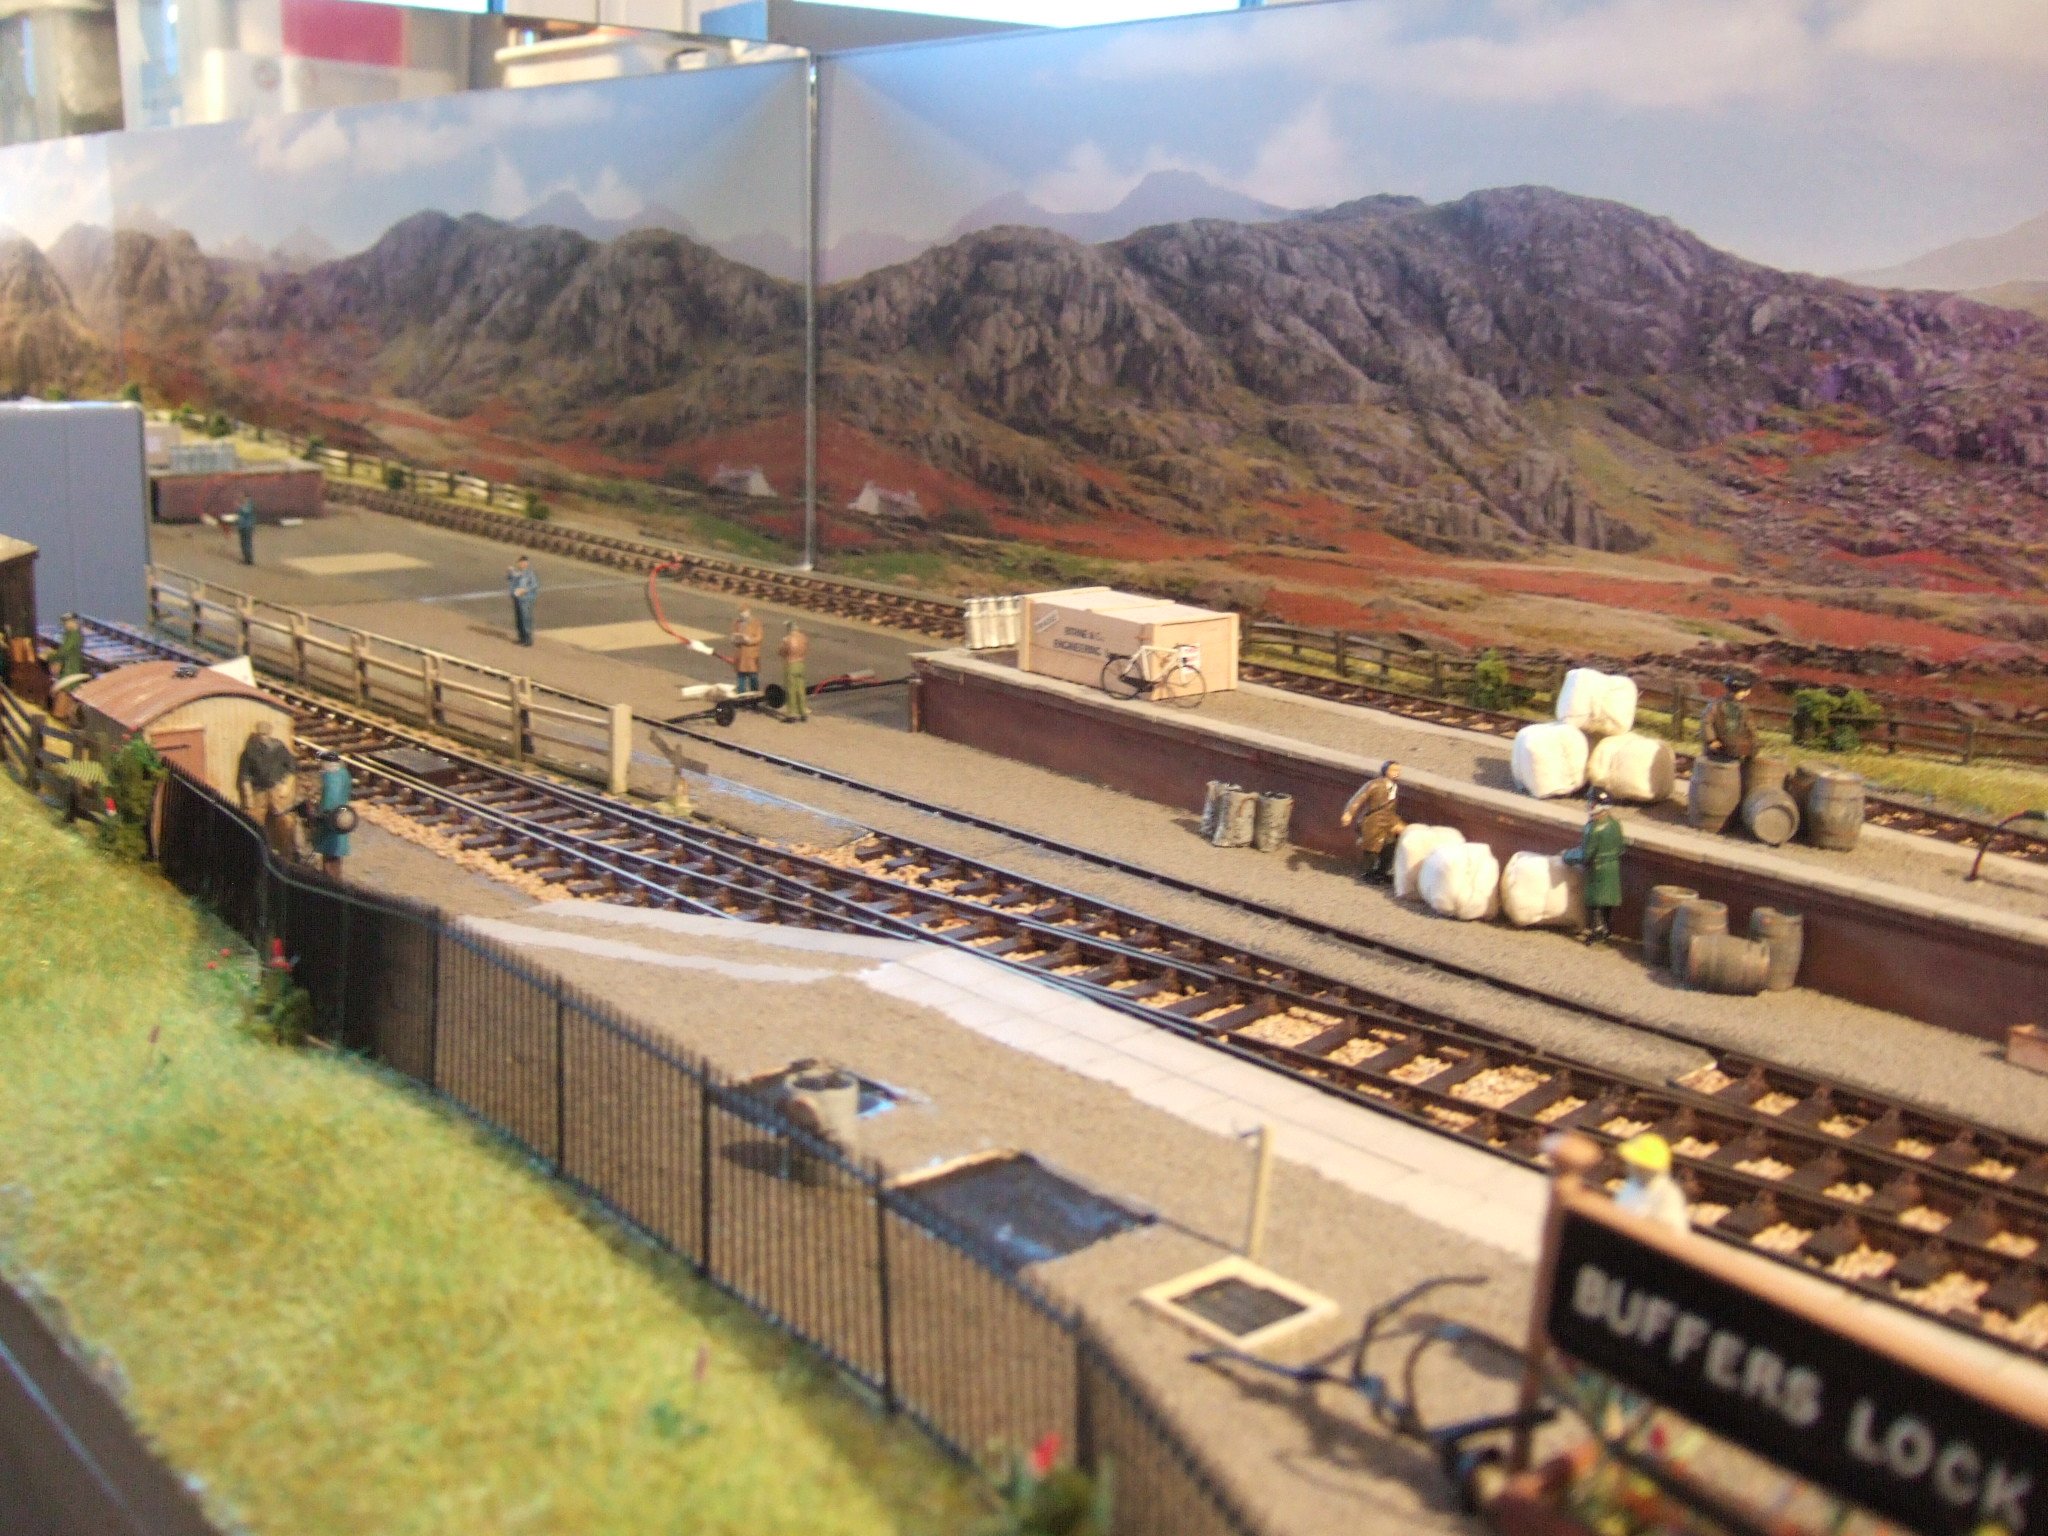
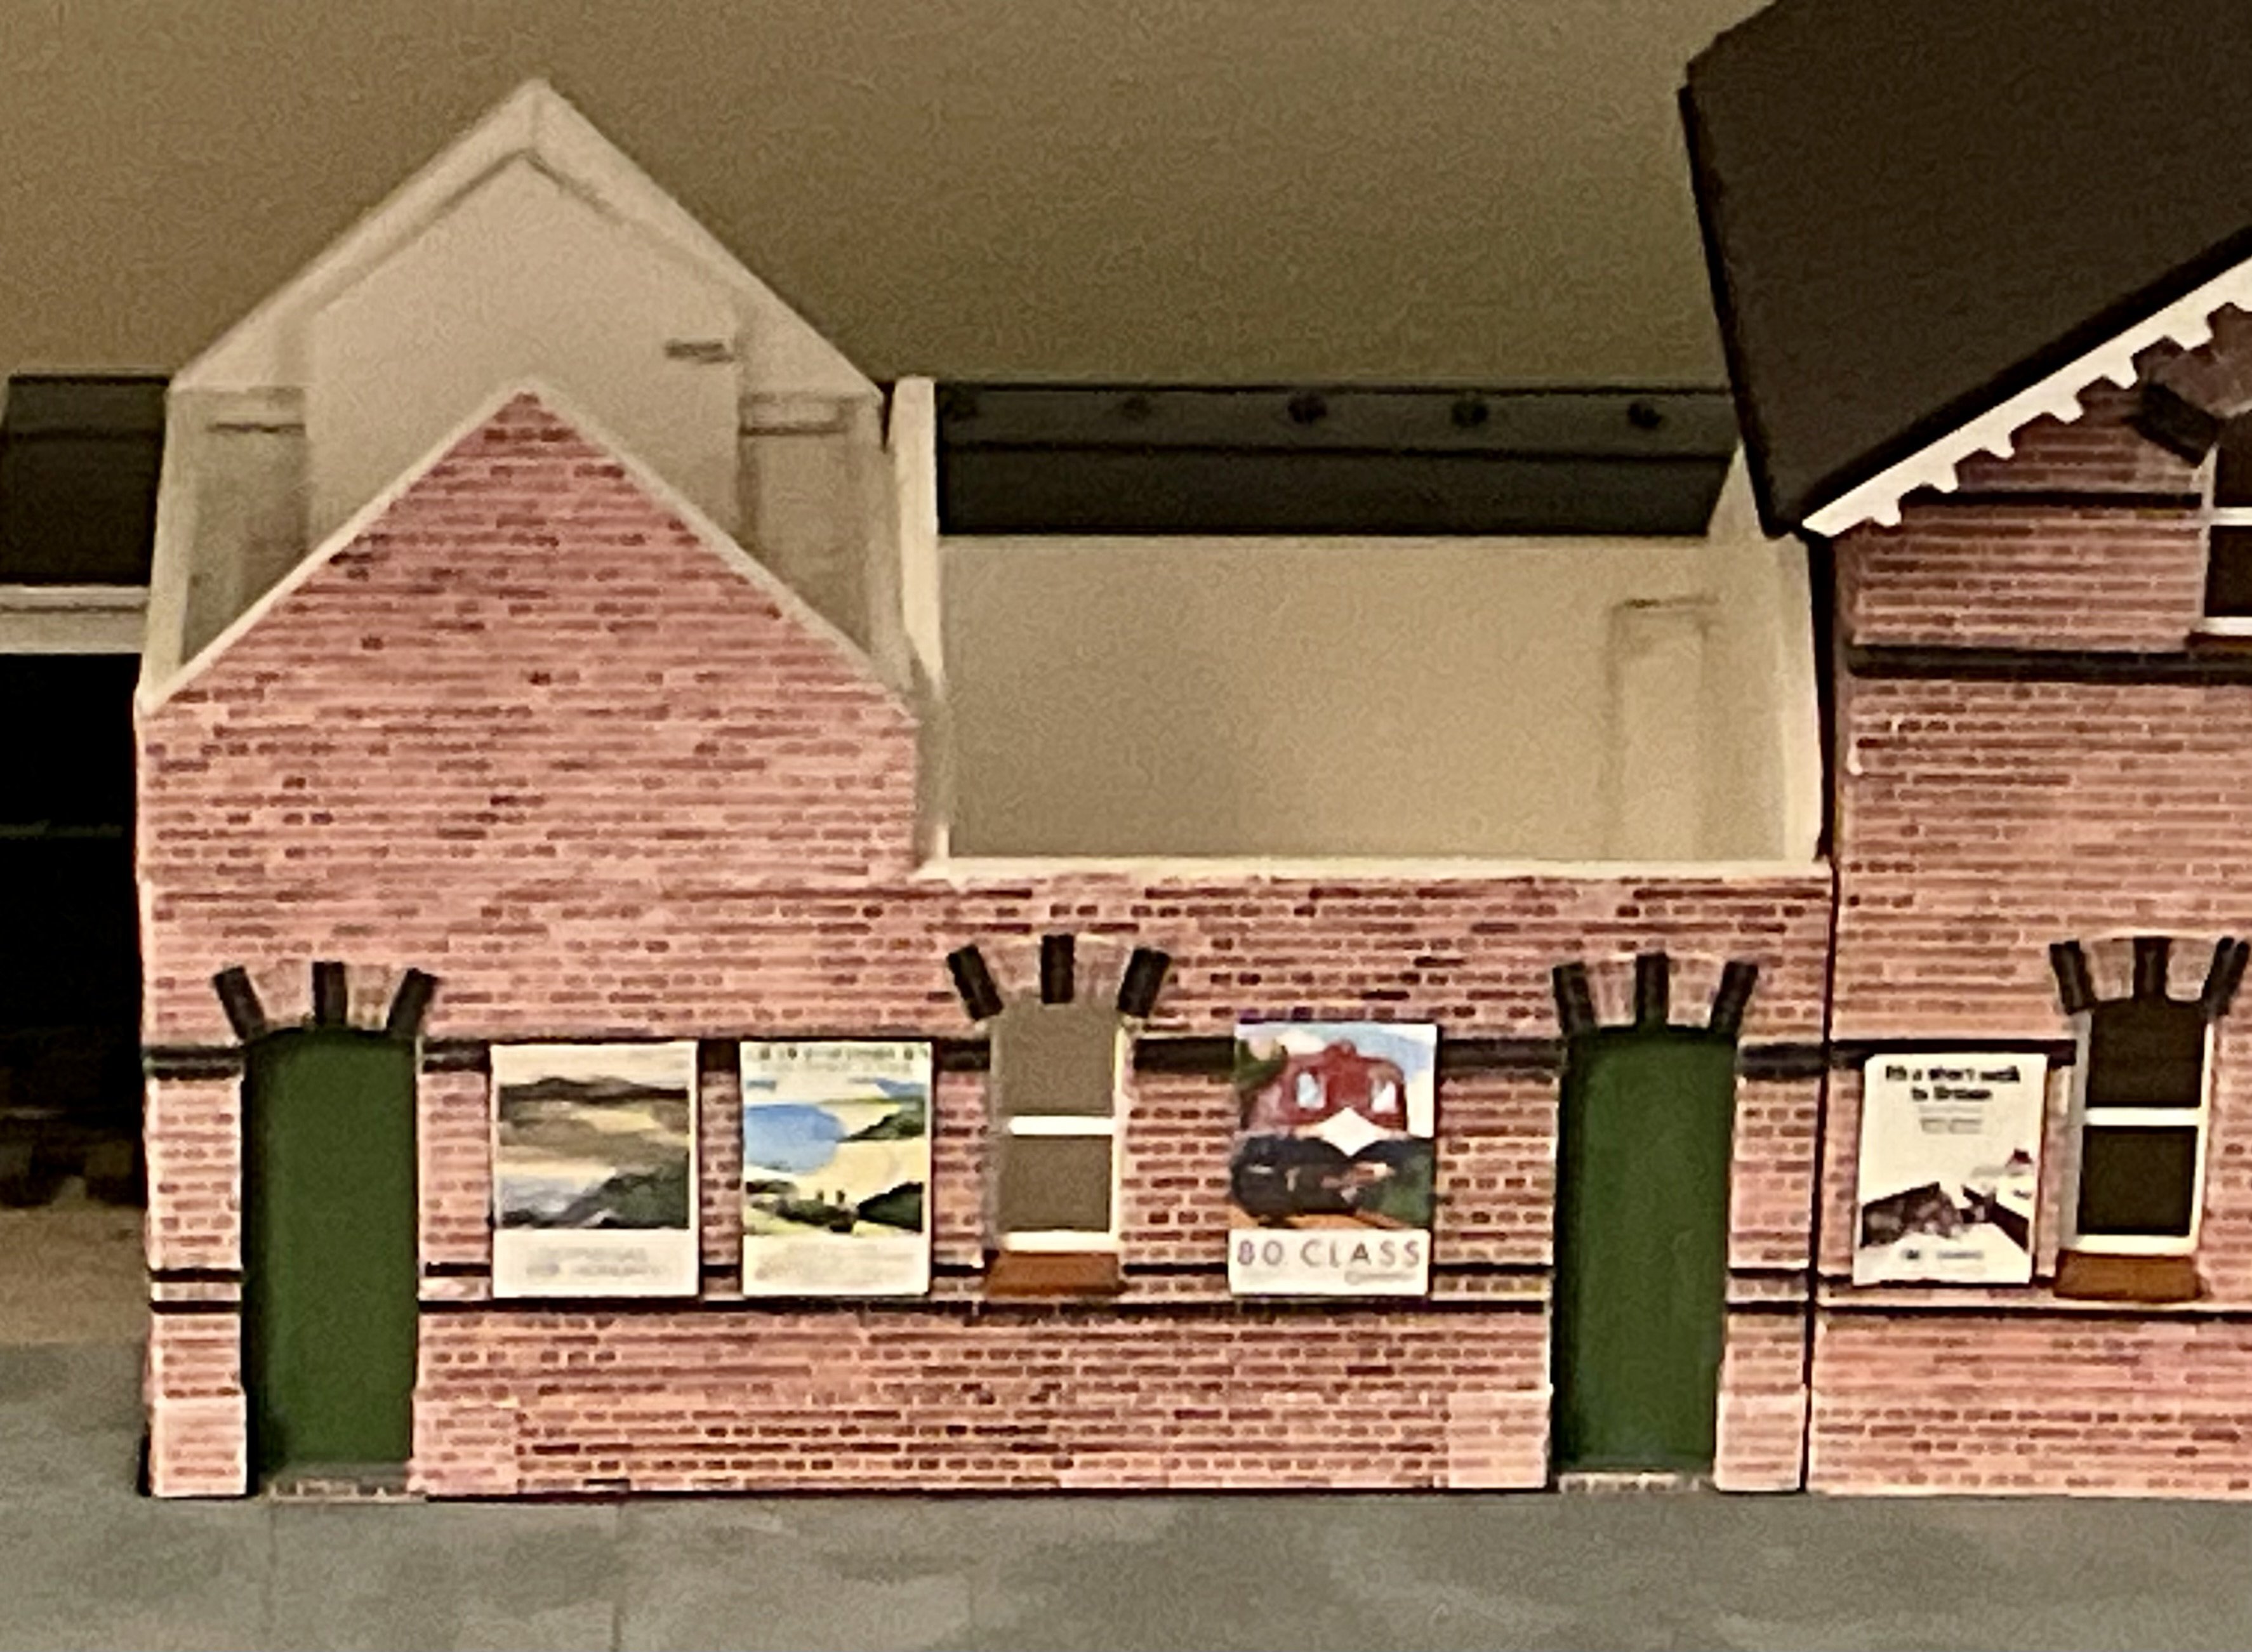
Some of you may know of my GWR UK outline O gauge layout "Buffers Lock". I have detailed the story of it's build and exhibition life elsewhere on irm.com (see: Buffers Lock). Basically, this is a 16.5 feet long exhibition layout with a scenic area of 8.5 feet by 26.5 inches. Two four foot long fiddle-yards (three lines each) feed trains from either end allowing through trains to be run. One fiddle-yard is a traverser and the other is a train turntable. Originally the electrical set up was DCC to run trains and the point motors/semaphore signals. The "brick" outline station building, signal box, goods shed and other fittings are all typical of GWR practice. The backscene is of a UK village in the middle distance (Ross-on-Wye I believe). I have now started a project to develop the layout to allow for alternating use as an Irish outline layout. To accomodate a variety of rolling stock that might become available, I have rewired the layout to be easily changed from DCC to DC use with Double-Pole Double-Throw switches. DCC control will continue to use the Roco/Fleischmann's Z21 system while DC power is now supplied by a Morley Controller Vanguard Zero One unit delivering 2.5 Amps per track. In either mode the signals and point motors will be controlled by DCC. In time, I am working to have suitable alternate buildings developed with a "stone" outline matching actual Irish prototypes. These will fit directly in place of the GWR outline buildings when running in irish outline mode. CK Prints (Enda Byrne) has developed Irish outline brake vans in flying snail grey and roundal brown versions. Enda plans to produce other Irish outline wagons in time including beet and other wagons. Alphagraphix have a range of MGWR outline locomotives and passenger carriages available in metal kits which are worth considering. Once the layout is further developed, I plan to invite other modellers to run their Irish O gauge rolling stock on this layout perhaps attending exhibitions together as a joint venture. The alternate layout has been named "Maam Road" translated in Irish to "Bóthar an Mháma" (which means the road to the mountain pass). Many rural irish railways had stations some distance from the towns they served and so had the "road" designation. My idea is to situate the layout somewhere in the West of Ireland within a wild mountain landscape similar to those the Clifden or Achill lines ran through. There was a station at Maam Cross/An Teach Dóite but my layout is not intended as a copy of that station. I have mounted a suitable backscene on new boards (to alternate with the existing "Buffers Lock" backscene). I attach a few photos to show what the scene looks like without buildings.
15 points
-
Some carriage views from 1955 & 1961 today. GMK068 GNRI 1955-xx Corr 1st 227 Enterprise set. GMK067 GNRI 1955-xx Open 3rd 176 . C197. GMK064 CIE 1961-04-xx Inchicore GSW saloon 47 C403. GMK061 CIE 1961-04-xx Clerestory BCK ex GSWR C114.15 points
-
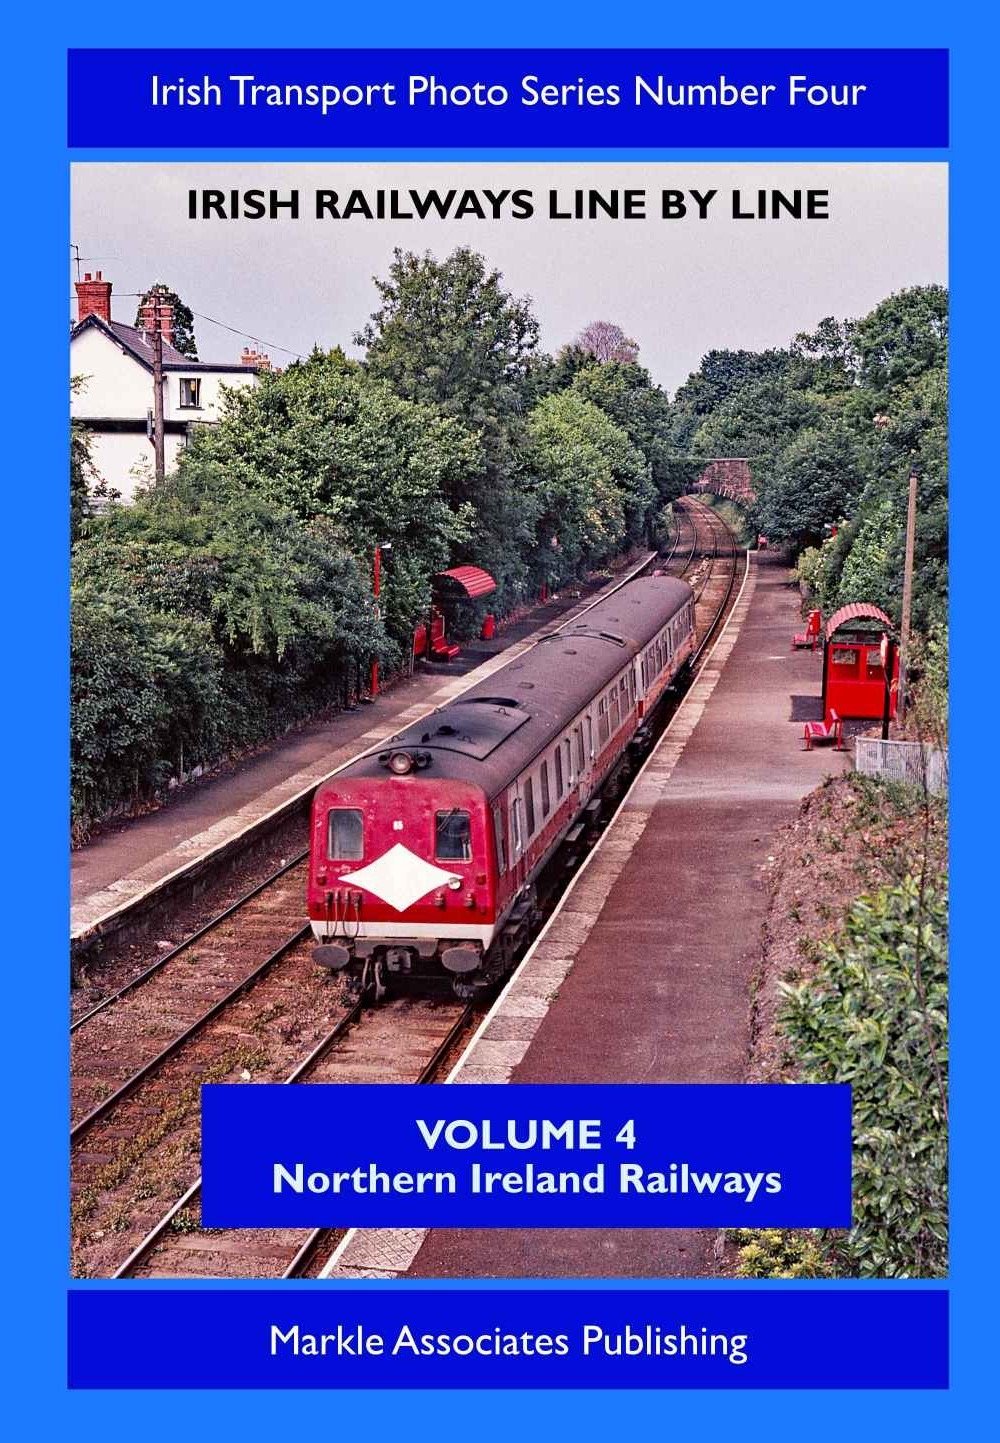
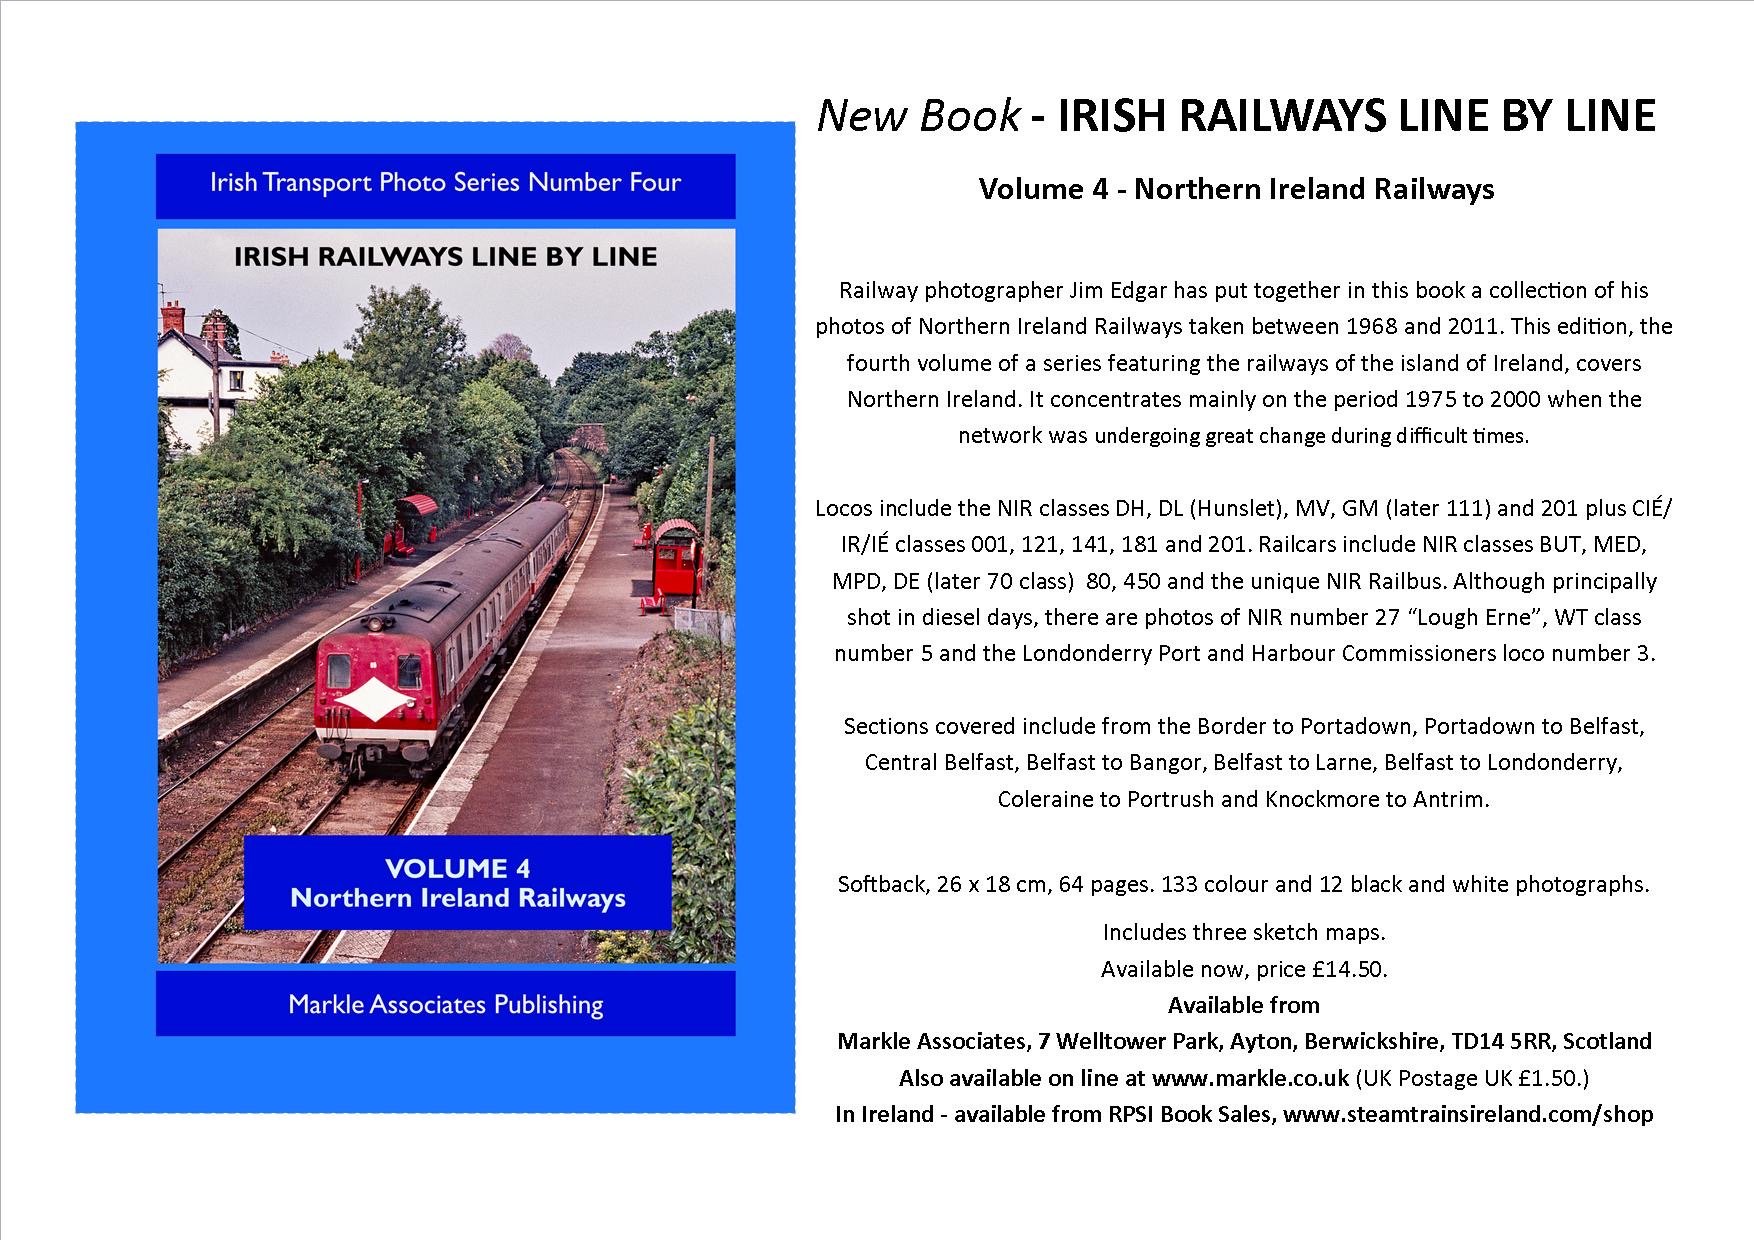
I have just published the latest photobook in the Irish Railways Line by Line series covering Northern Ireland Railways. The details are attached. This is a larger book than previously with 64 pages and 145 photos. It is priced at £14.50. Although it has photos taken between 1968 and 2011, it concentrates mainly on the period 1975 to 2000 when the network was undergoing great change during difficult times. Details are attached. If you are interested it is available direct from Markle Associates (contact marklejim@aol.com). In Ireland it will be available shortly from the RPSI Bookshop via their website (https://www.steamtrainsireland.com/shop). Thank you. Jim Edgar.
15 points
-
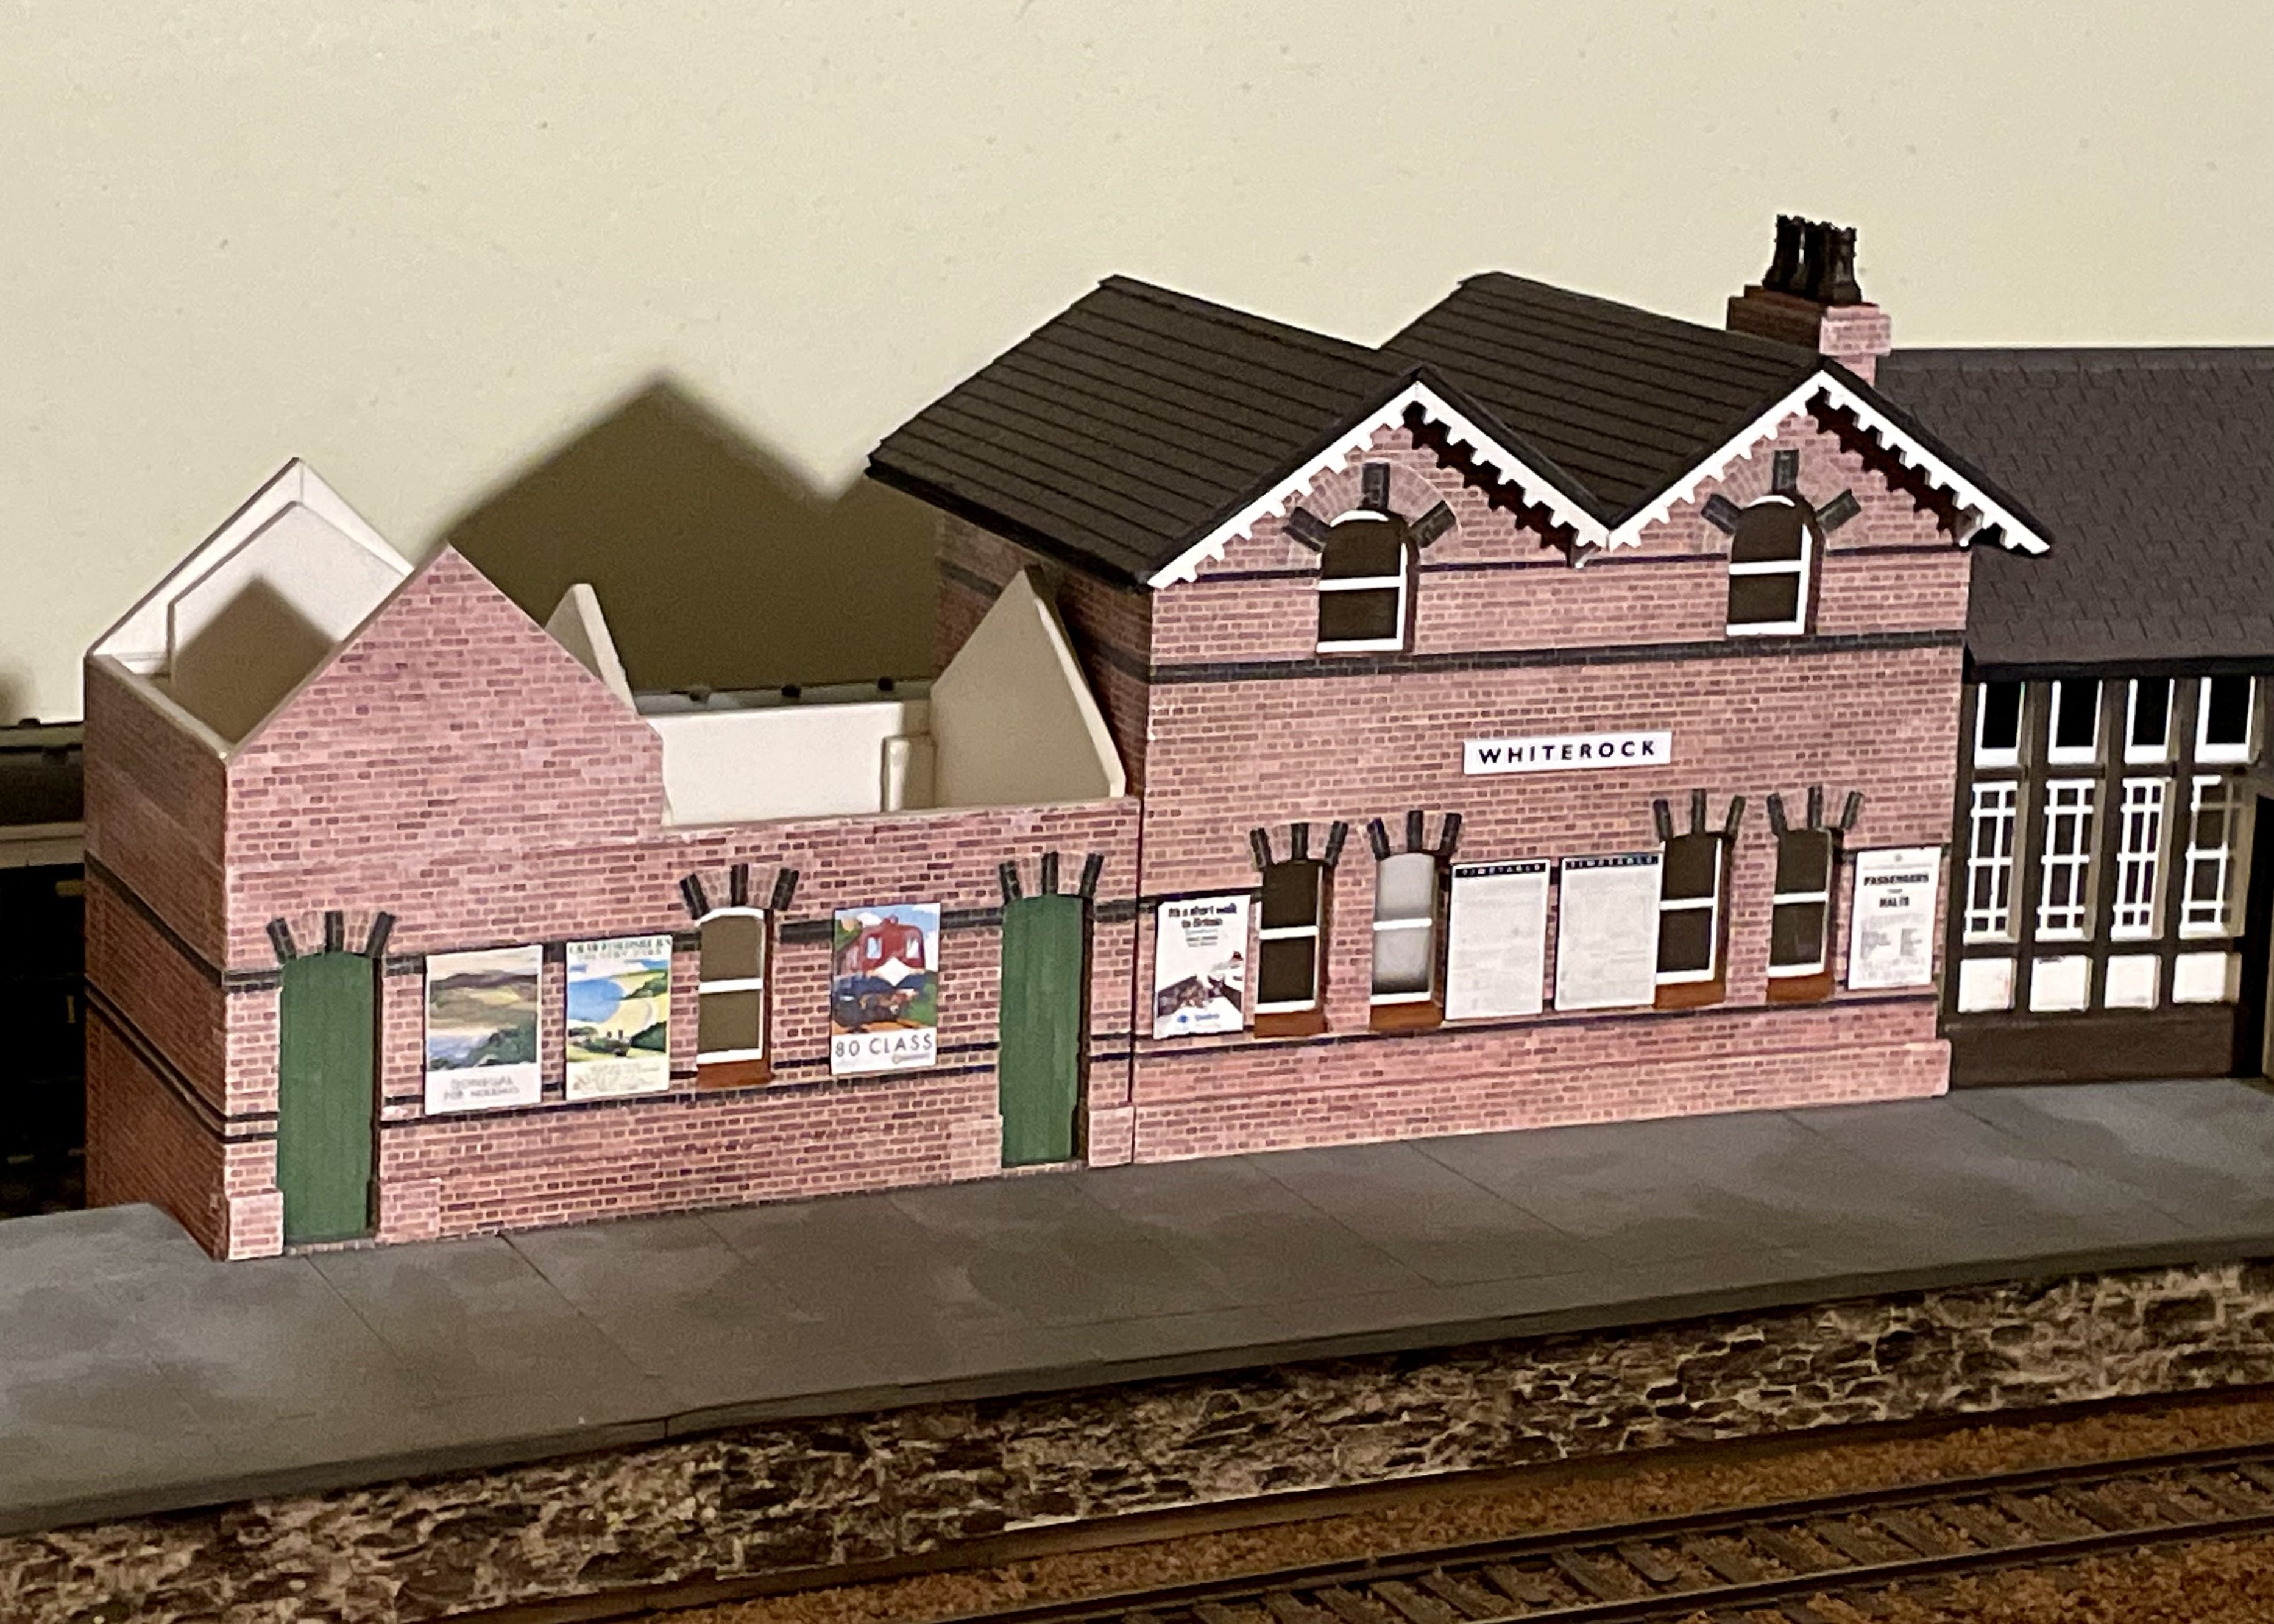
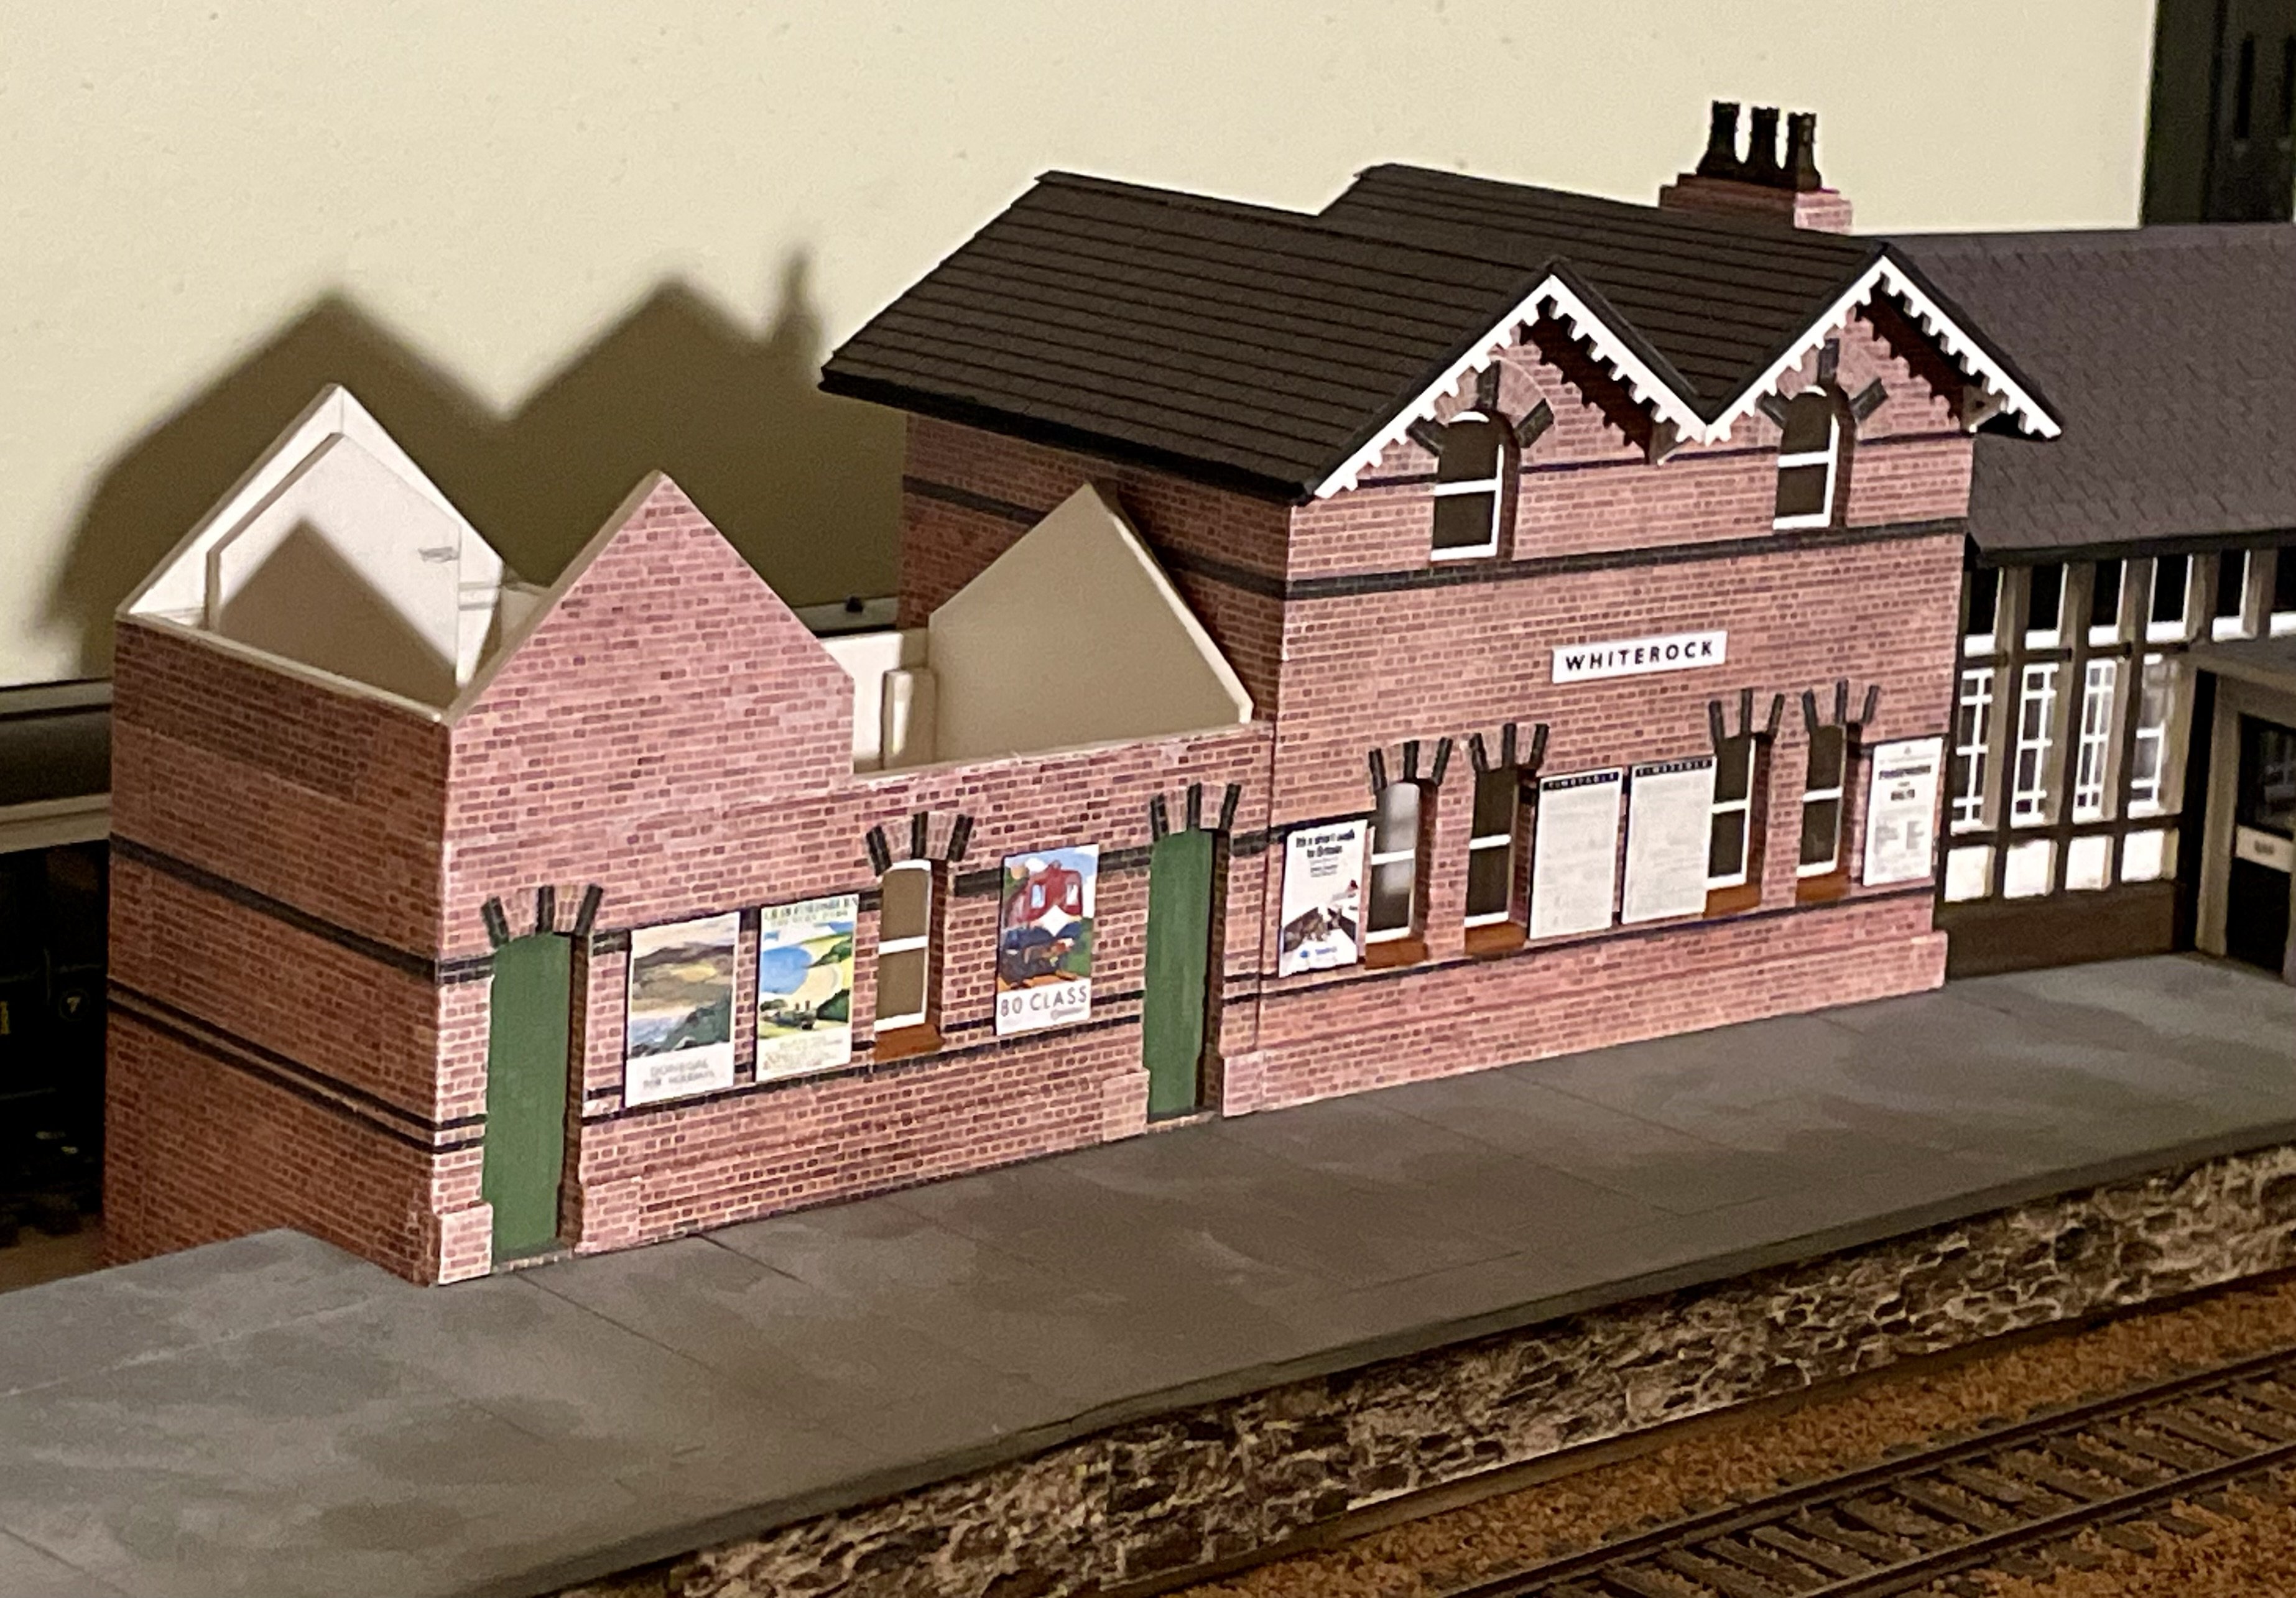
Further progress. Just the last couple of station buildings to make now. Cheers Darius15 points
-
It’s 1963 now. Same connection from the 09:05 ex-Kingsbridge, this time with a spluttery “C”; we’ve 231 today, because C207 died in Killarney yesterday, and C211 isn’t back from Inchicore yet…
15 points
-
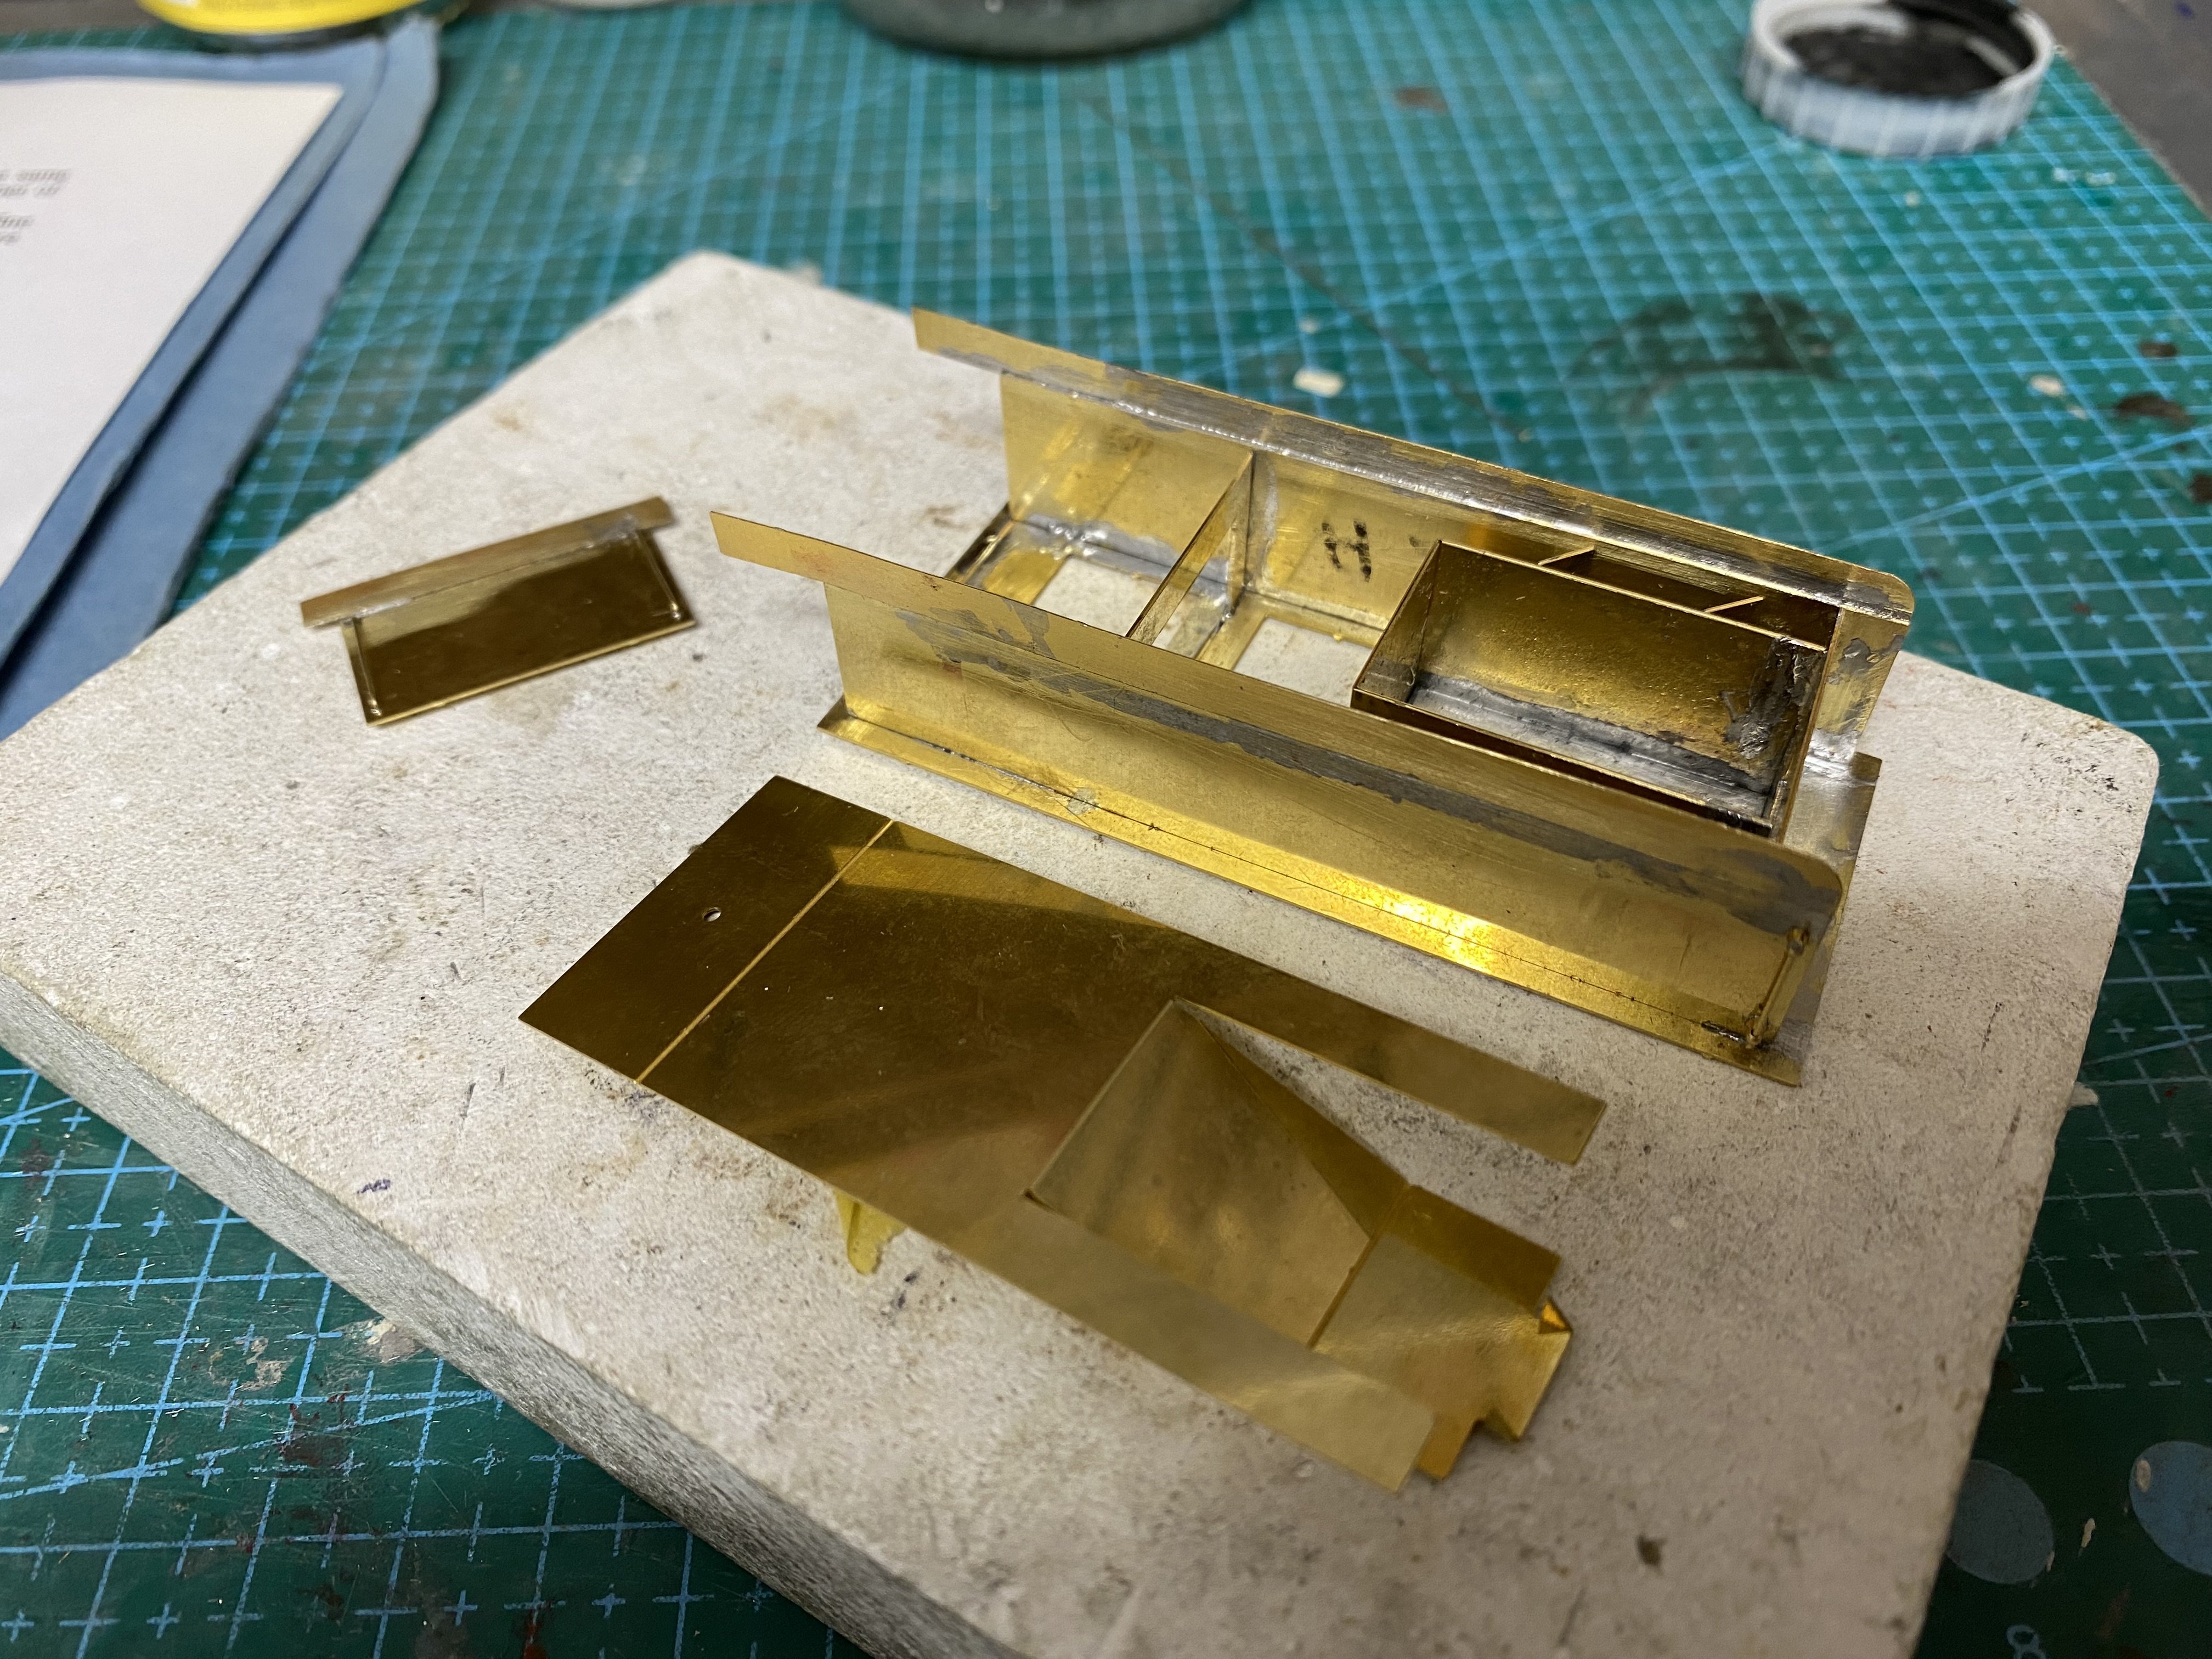
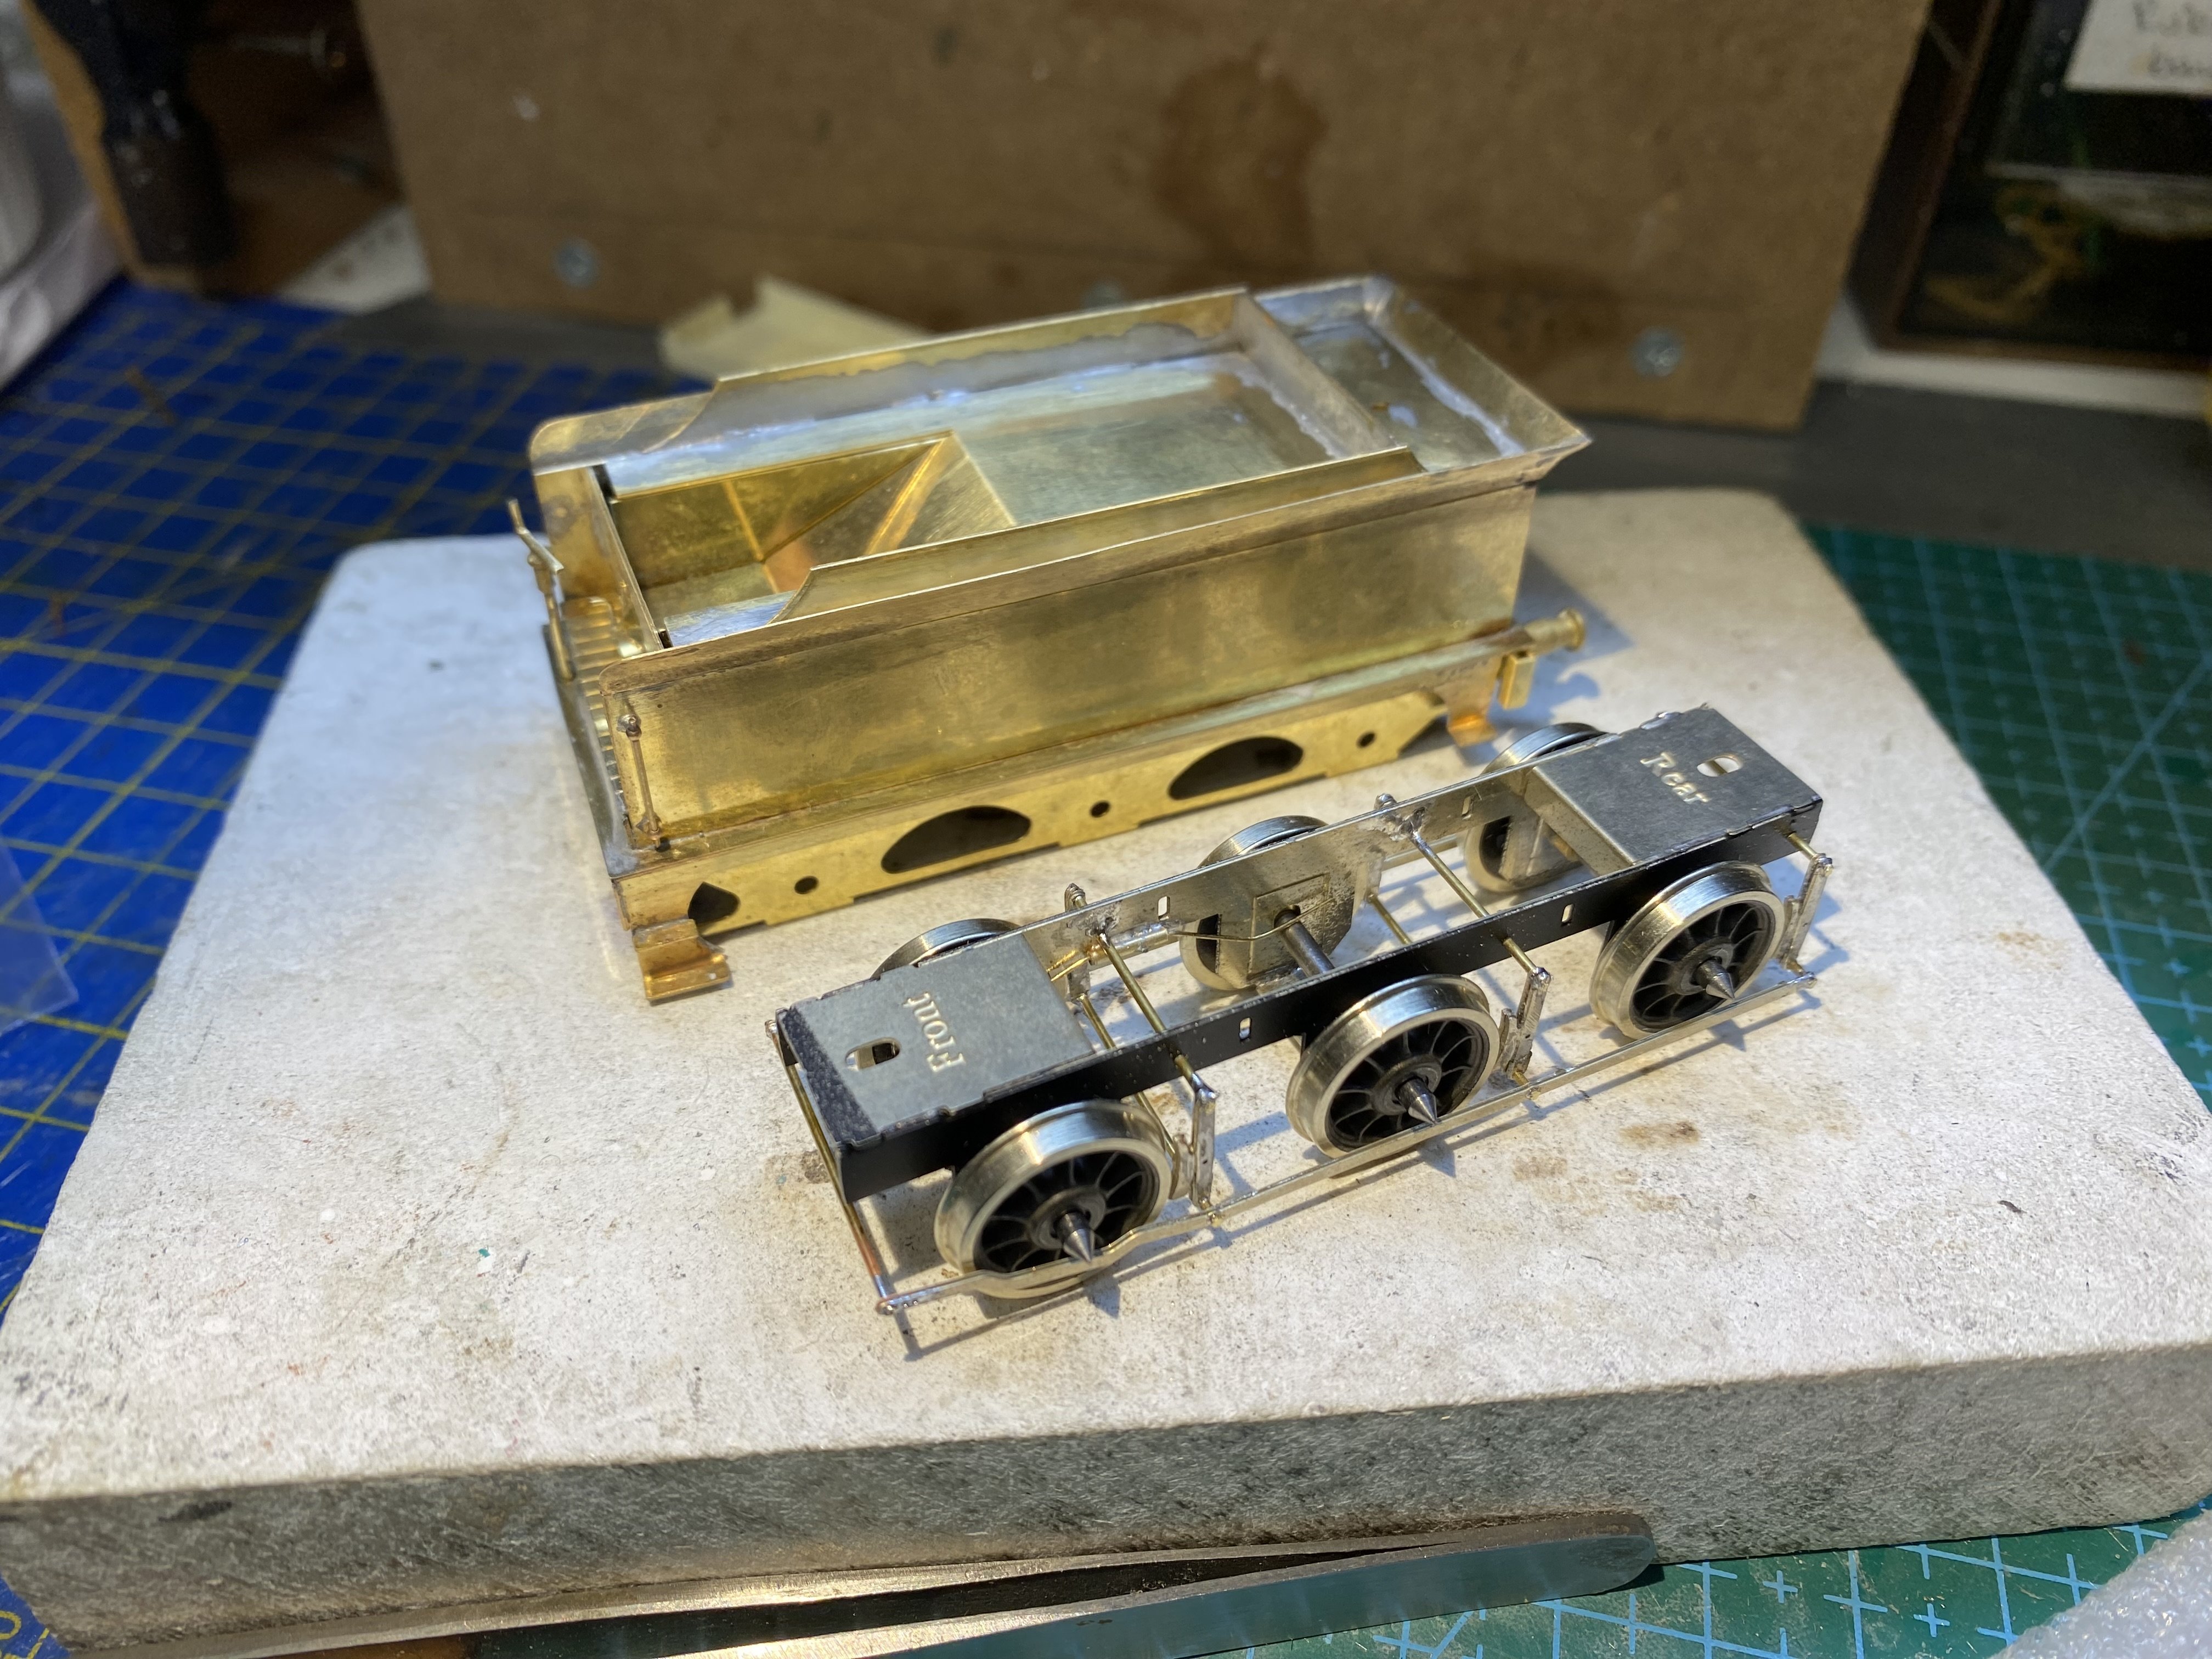
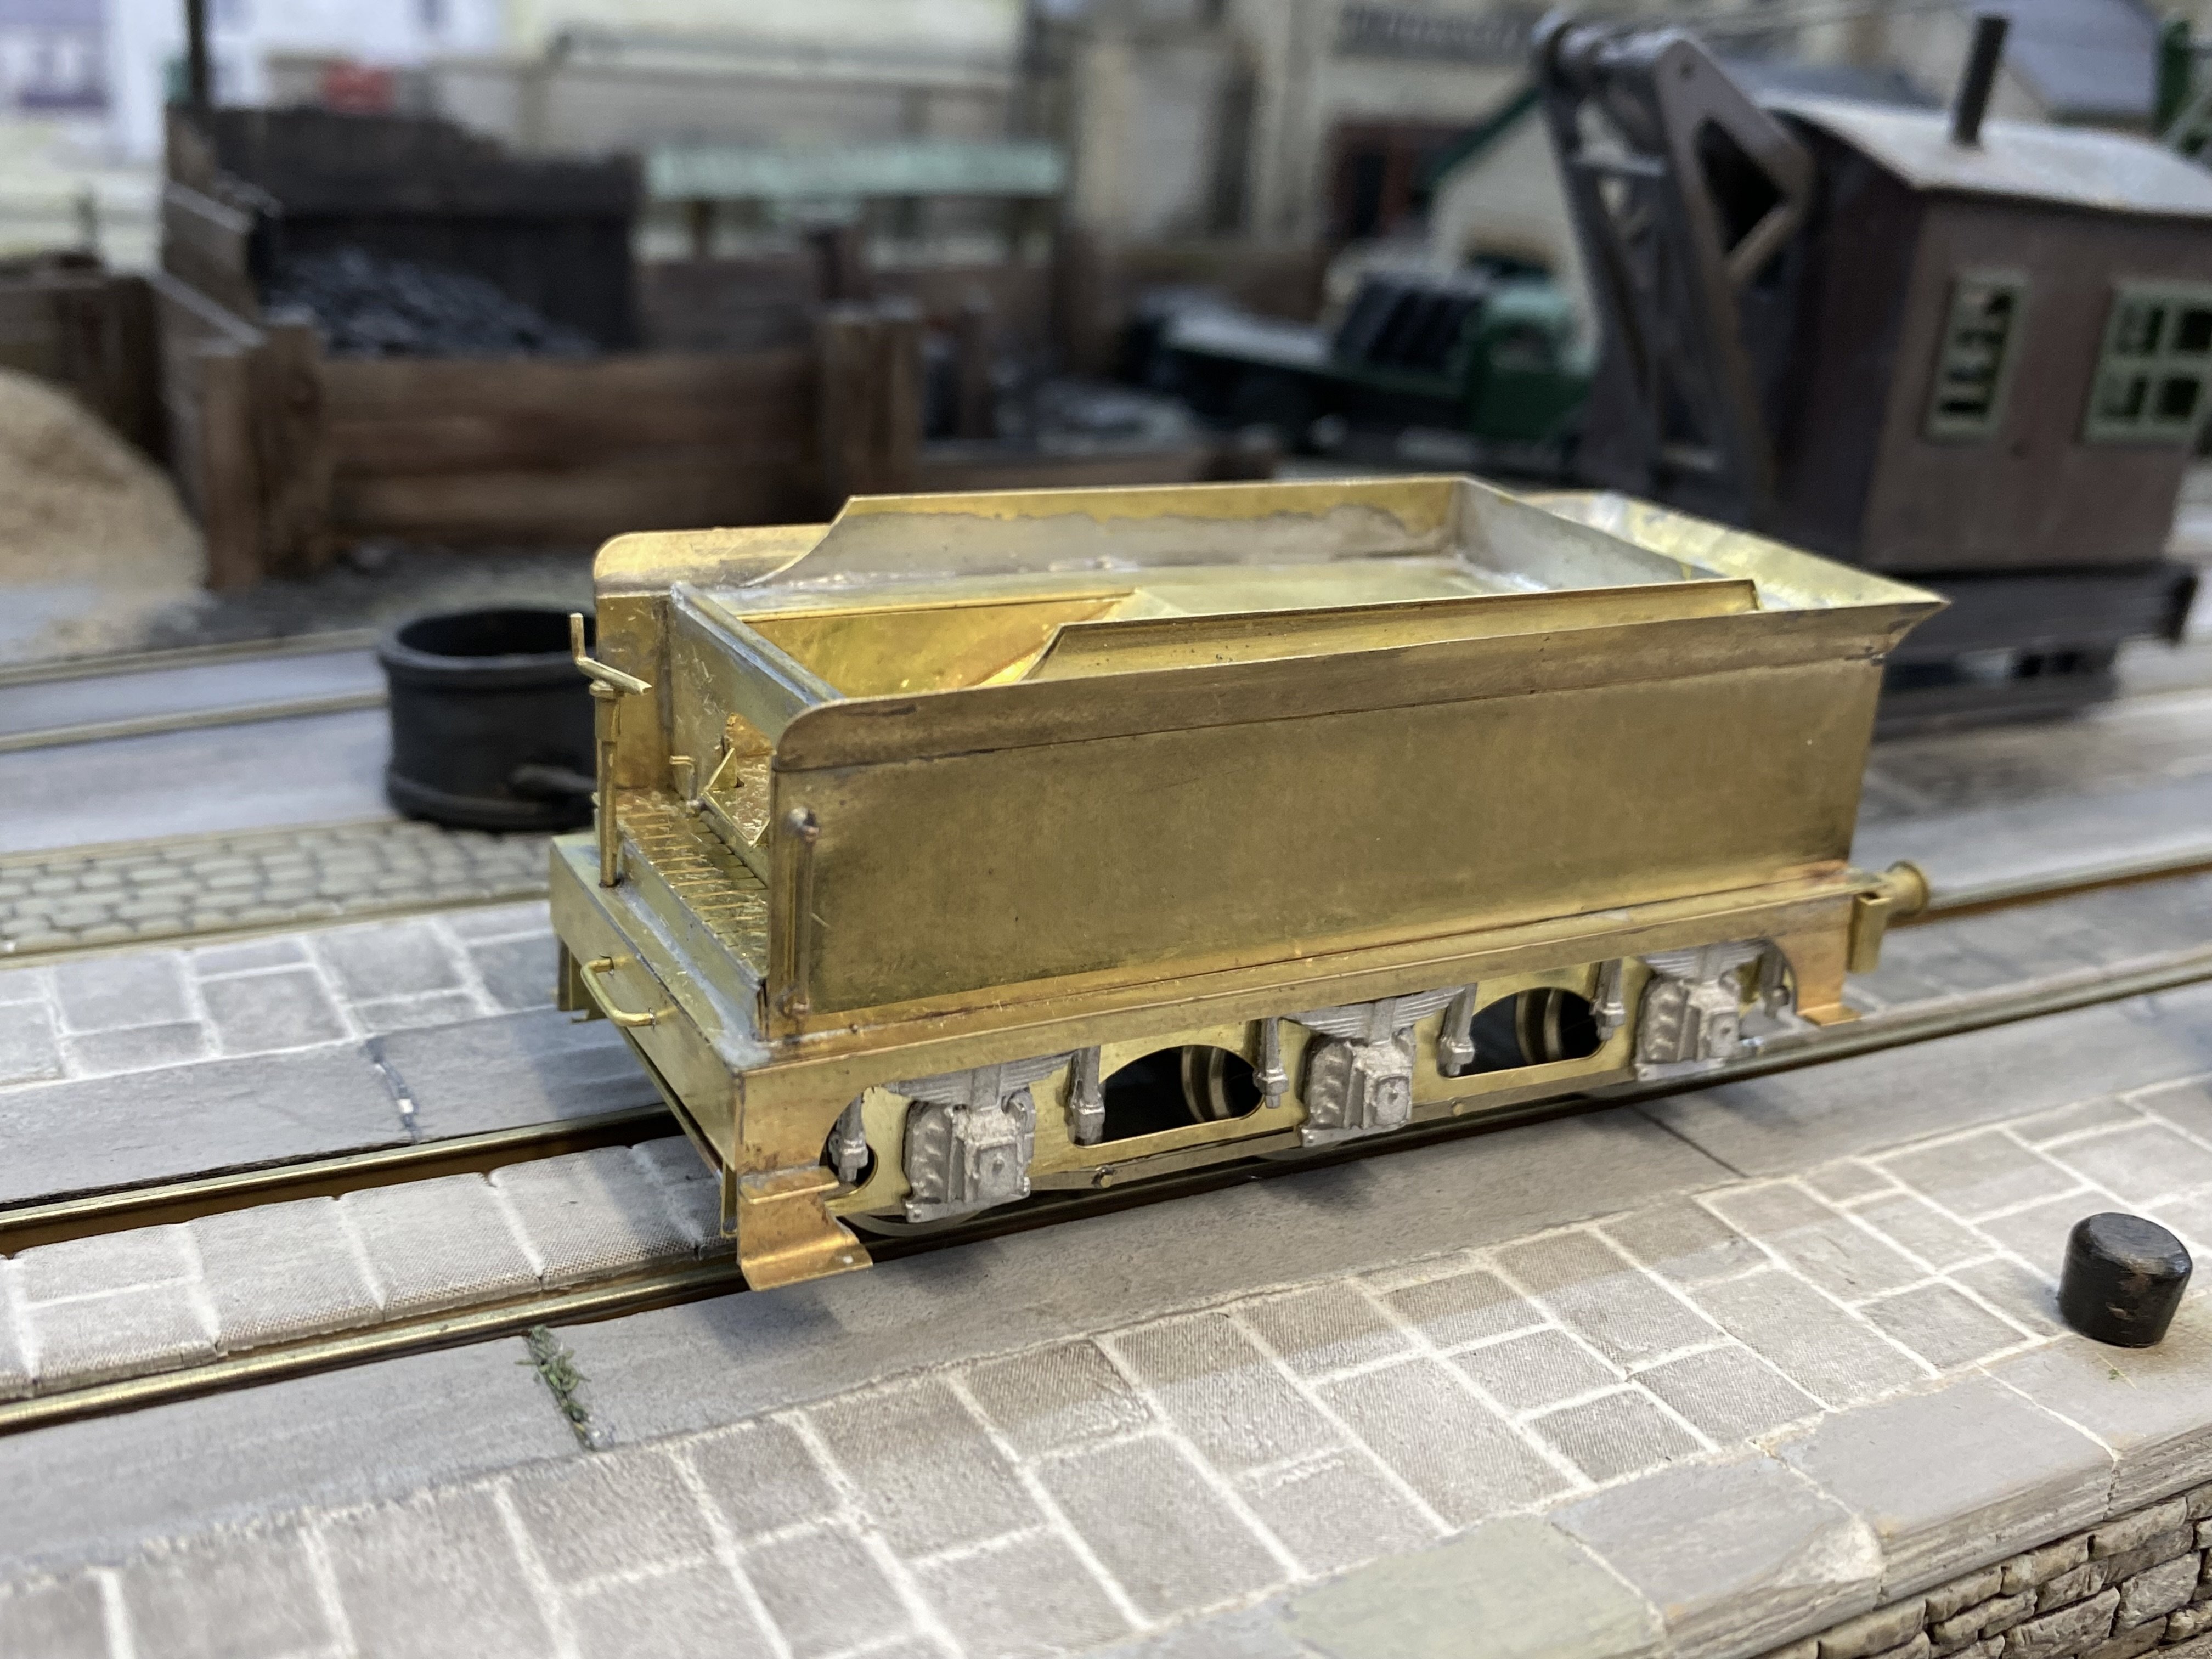
The rest of the PPs kit has now succumbed to my tender mercies. It was a challenging build partly because there are lots of seam joins which are tricky to get at if the aim is to keep as much of the solder as possible out of sight on the inside. Few fingers remained unburned. The etch also had a number of small errors and the instructions were peppered with work-arounds to deal with these. The tender chassis was built with the rear axle in fixed bearings and the other two moving up and down about 1 mm in slots and sprung with 0.33mm brass wire. Brake rigging was put together using much the same approach as for the loco. This small sheet of foam plastic packaging is very useful for keeping things in line while the solder goes in. Not much more to do now - arranging a coupling between loco and tender and fitting pickups to the rear tender wheels. The loco is only picking up on the 4 drivers so a bit of extra help from the tender would be useful. Essential maybe. Alan
14 points
-
Sligo, Leitrim & Northern Counties Railway today. SLNC 1957-09-26 Dromahair, 'Enniskillen' shunting 11.15 S-E goods. PFF037. SLNC 1957-09-26 Collooney lkg West. PFF036. SLNC 1957-09-26 Belcoo 'Enniskillen' 11.15 mixed S - E. PFF048. SLNC 1957-09-26 Glenfarne 11.15 S-E gds shunted to allow 2A to pass. PFF041.14 points
-
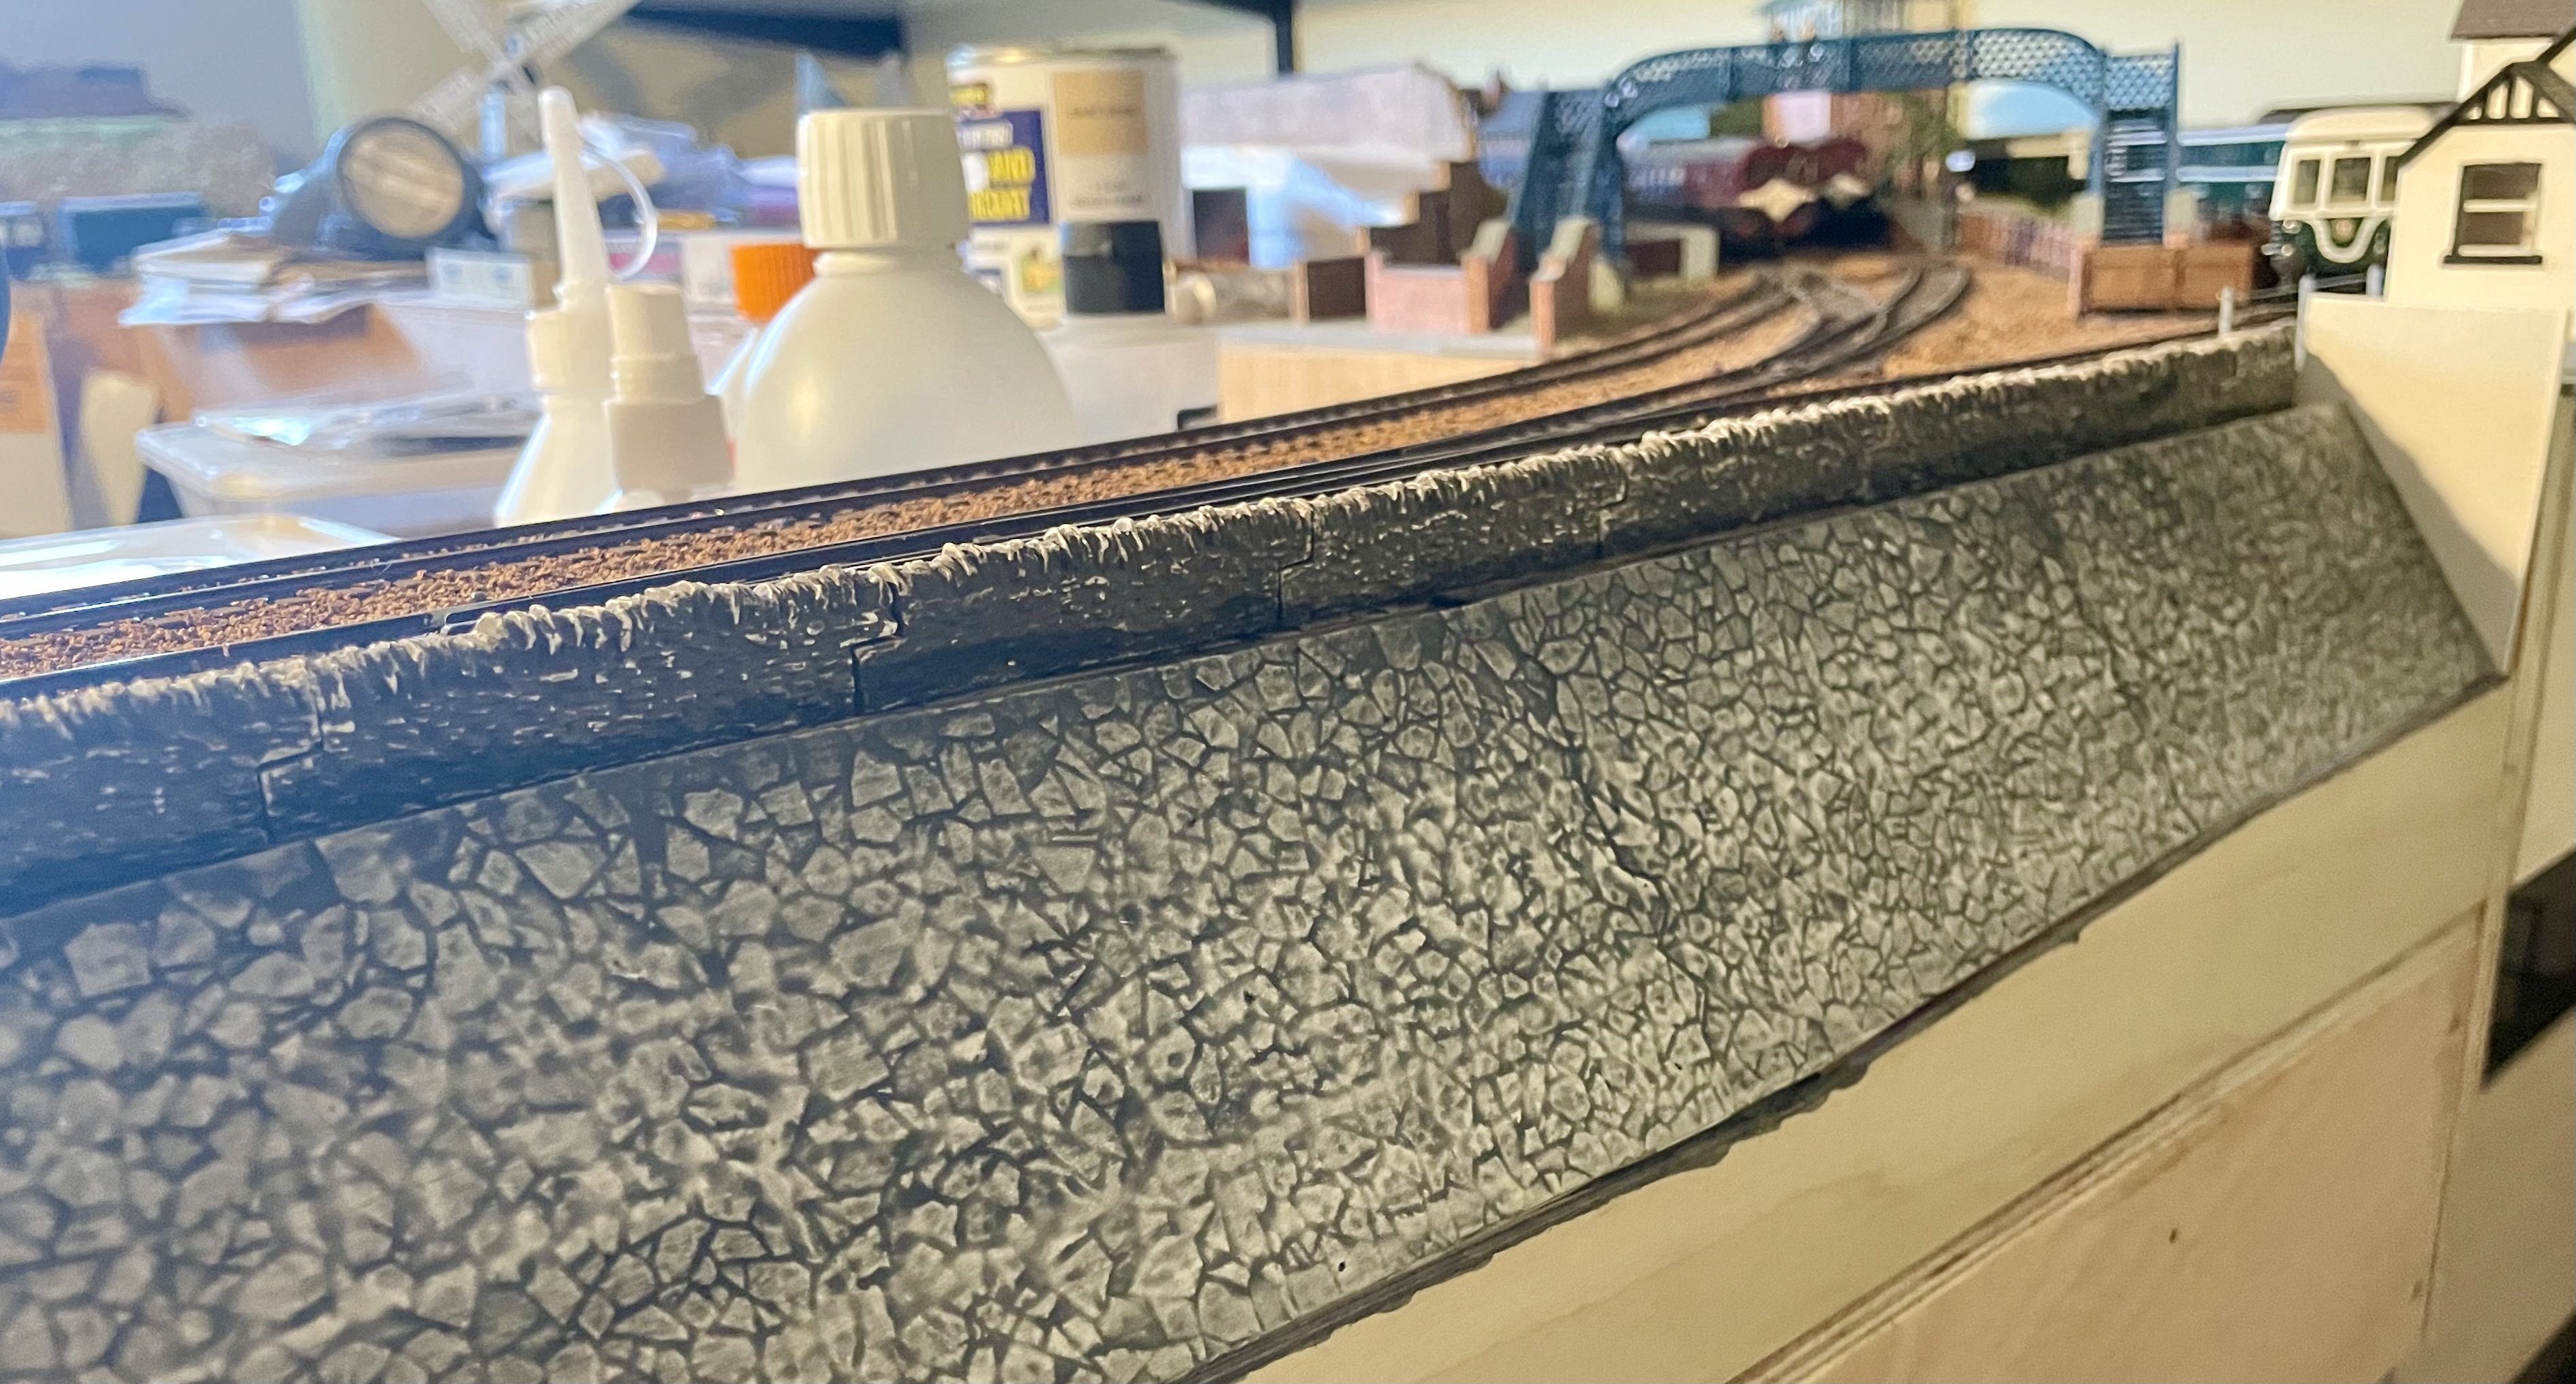
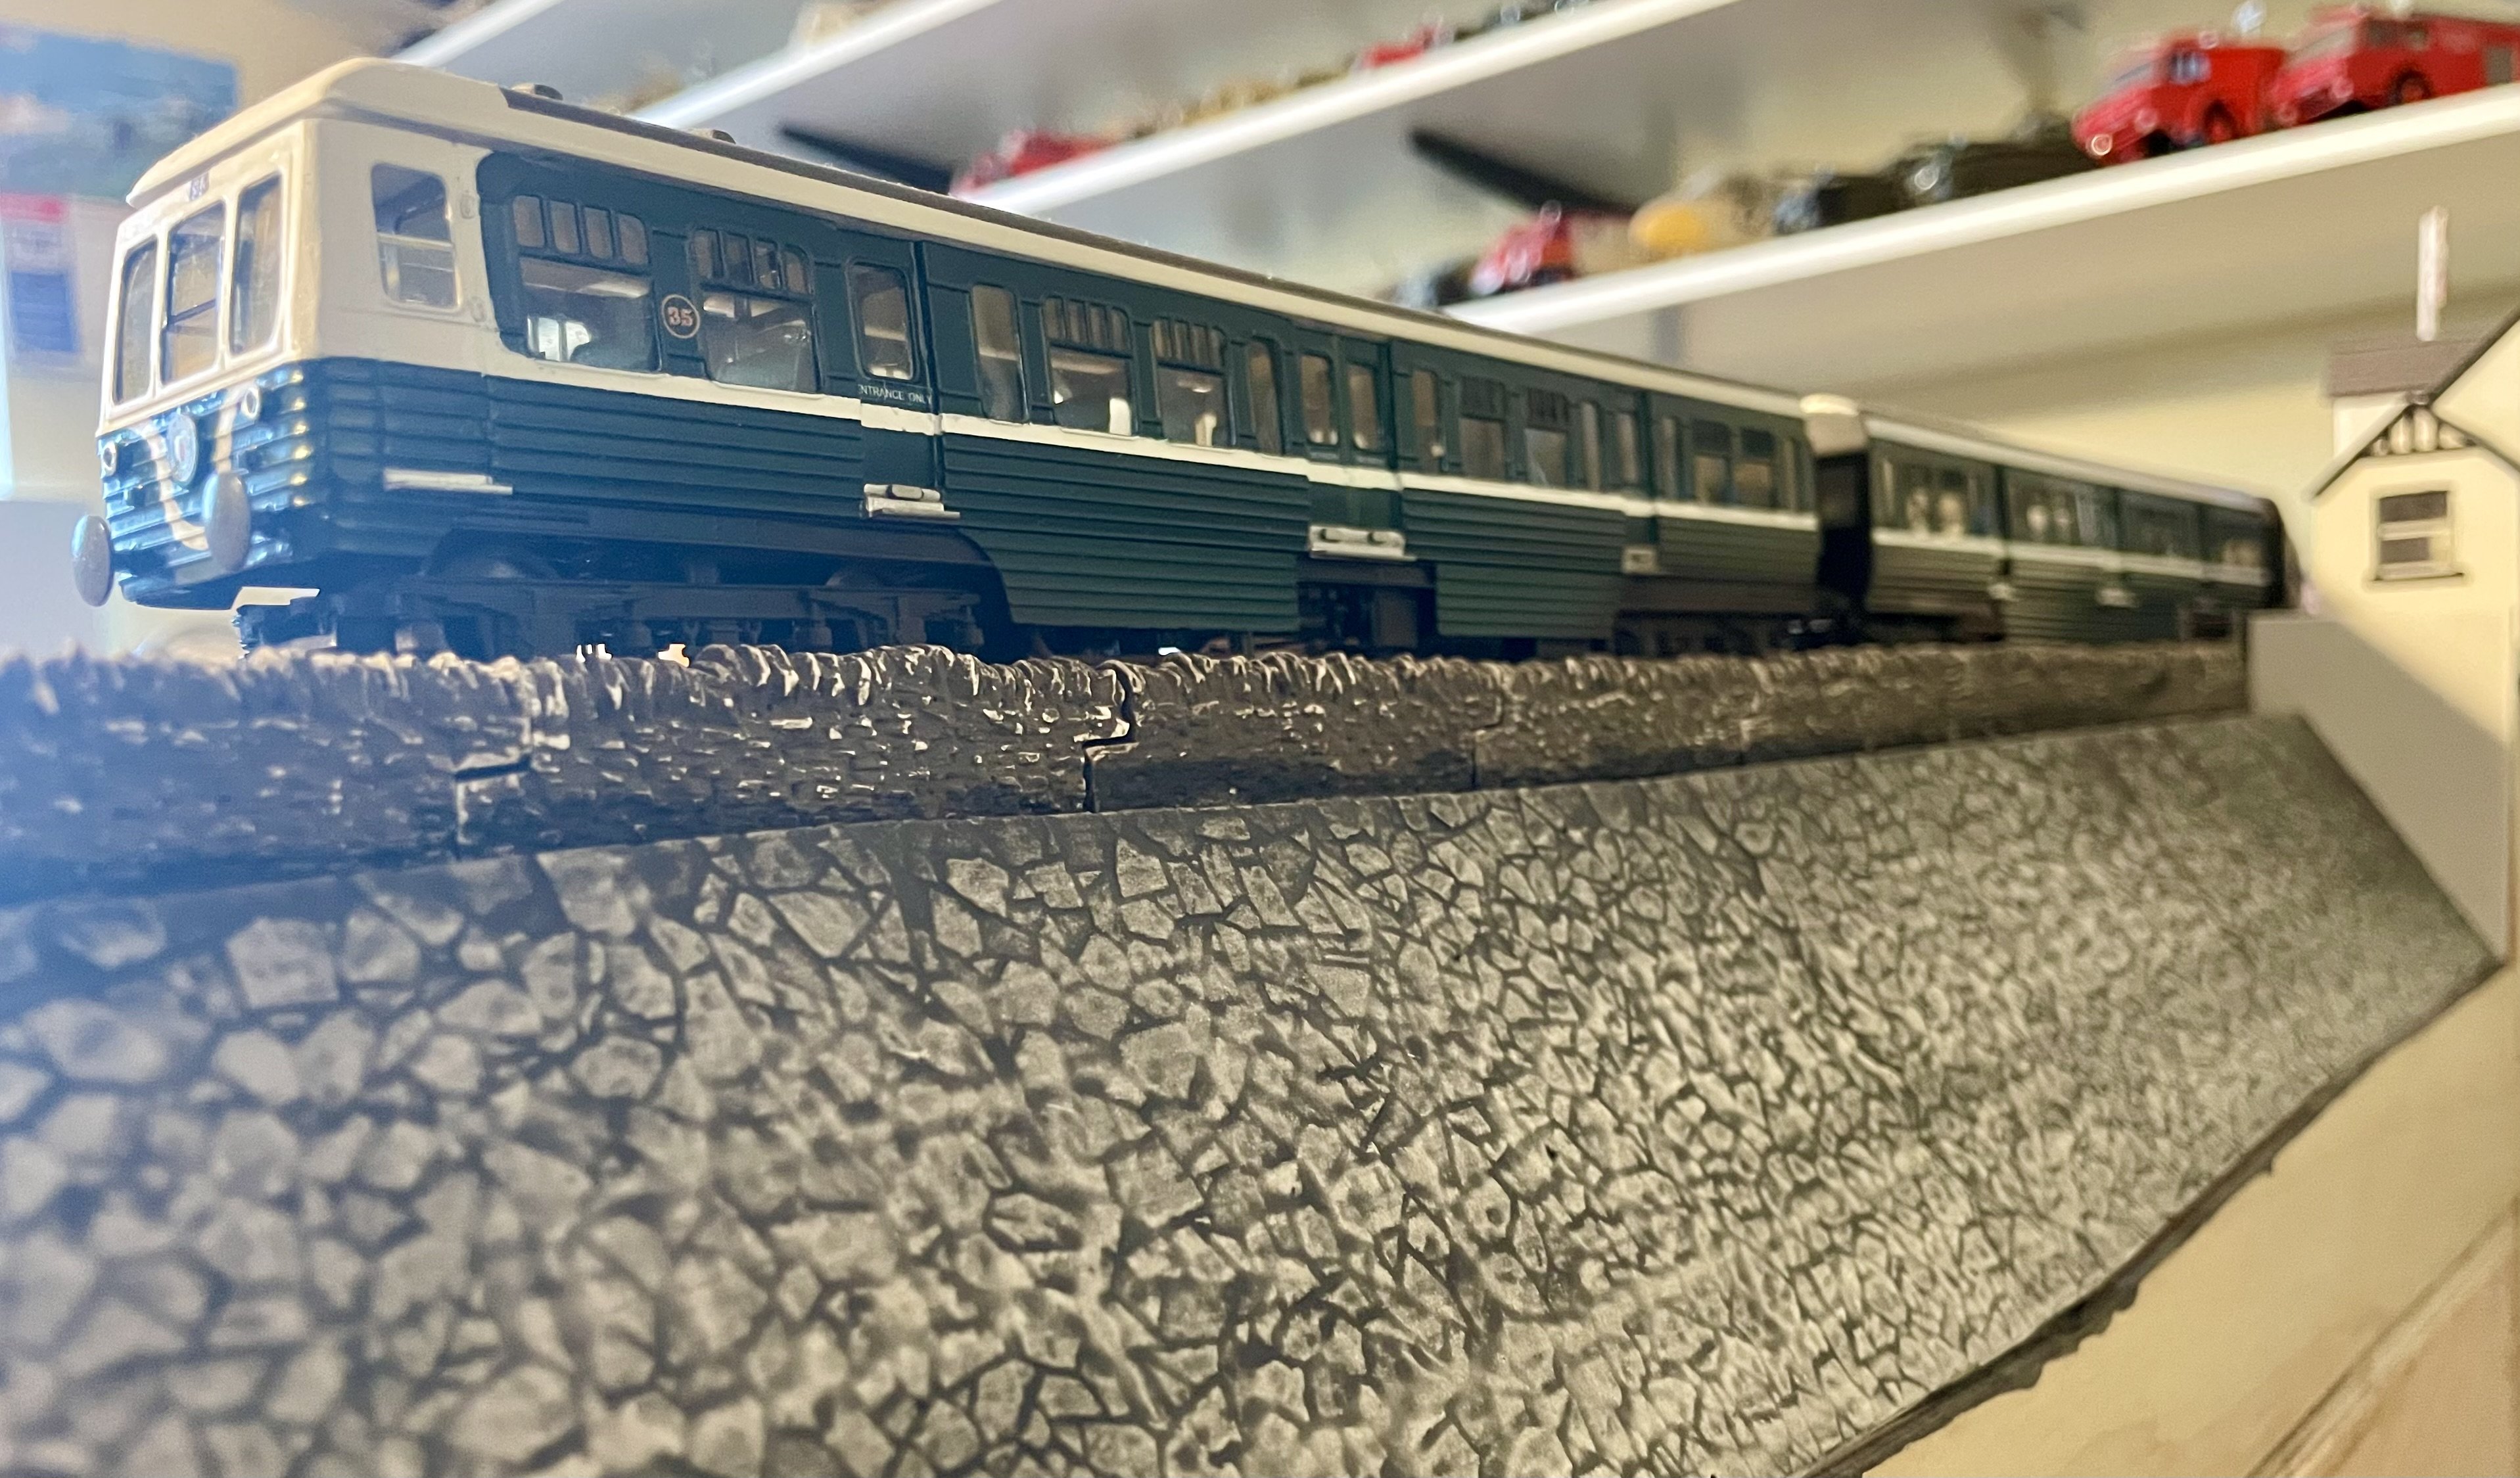
Made a start on the sea wall part of the layout. Cheers Darius
14 points
-
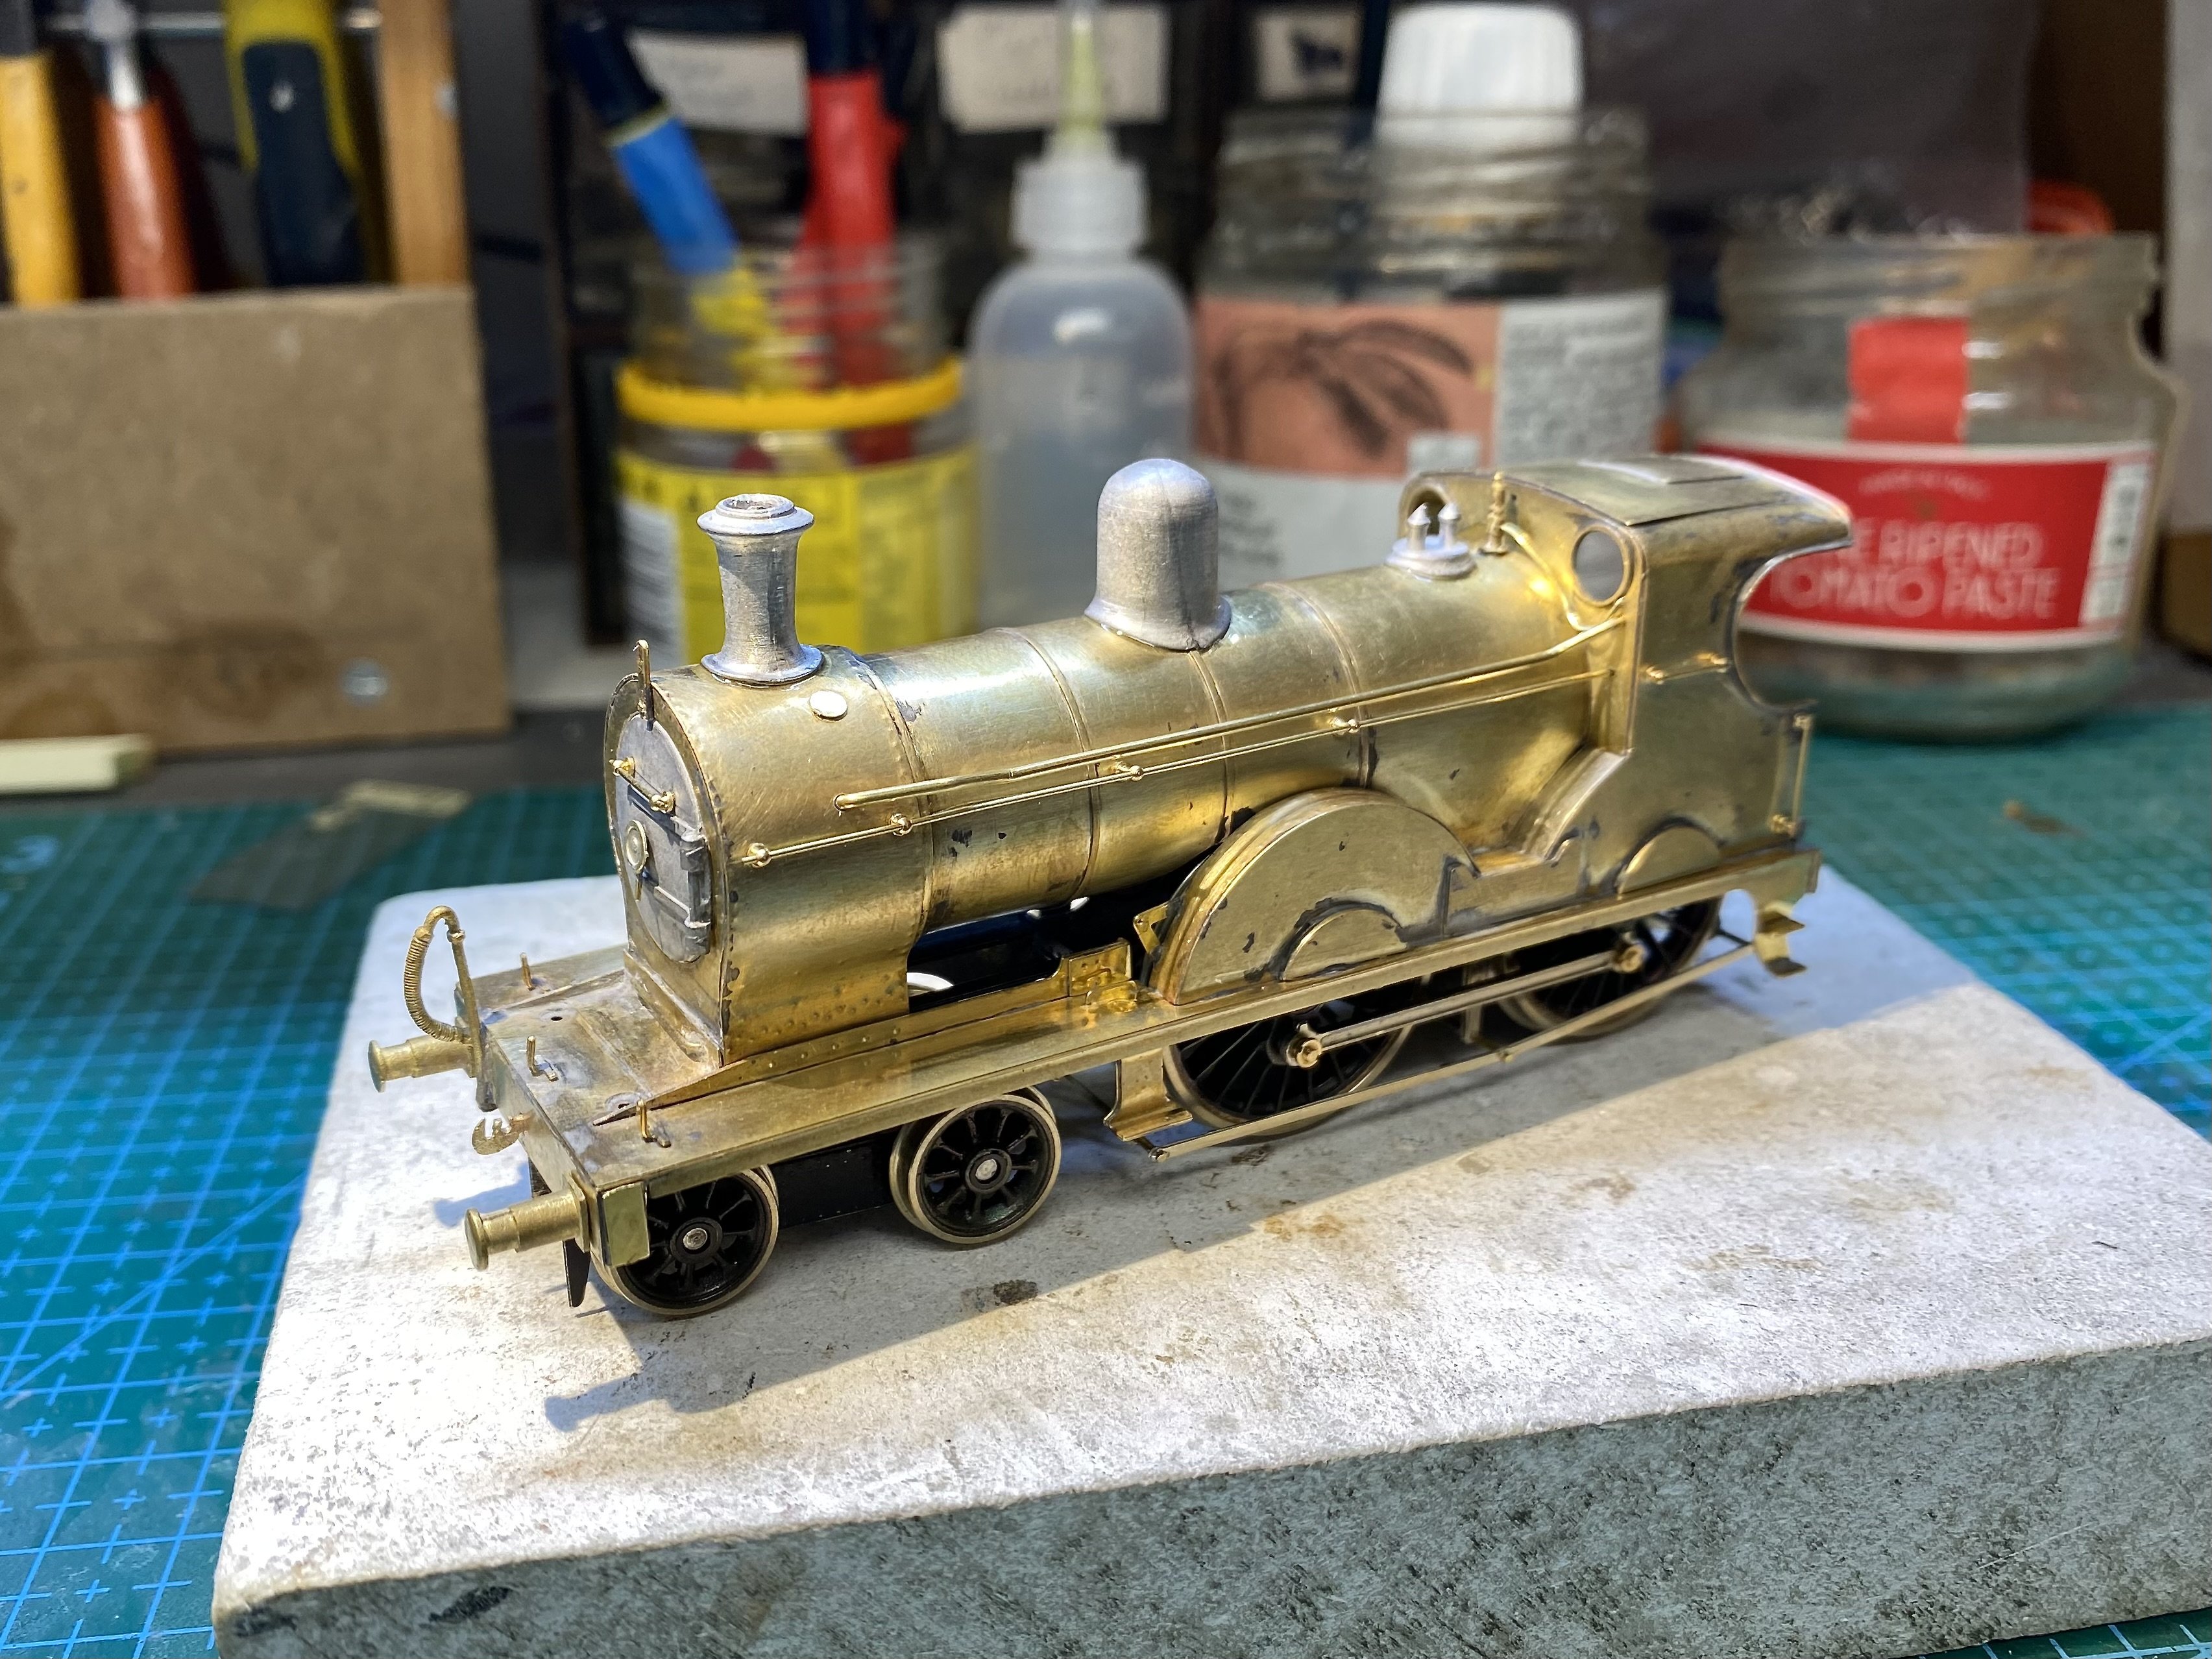
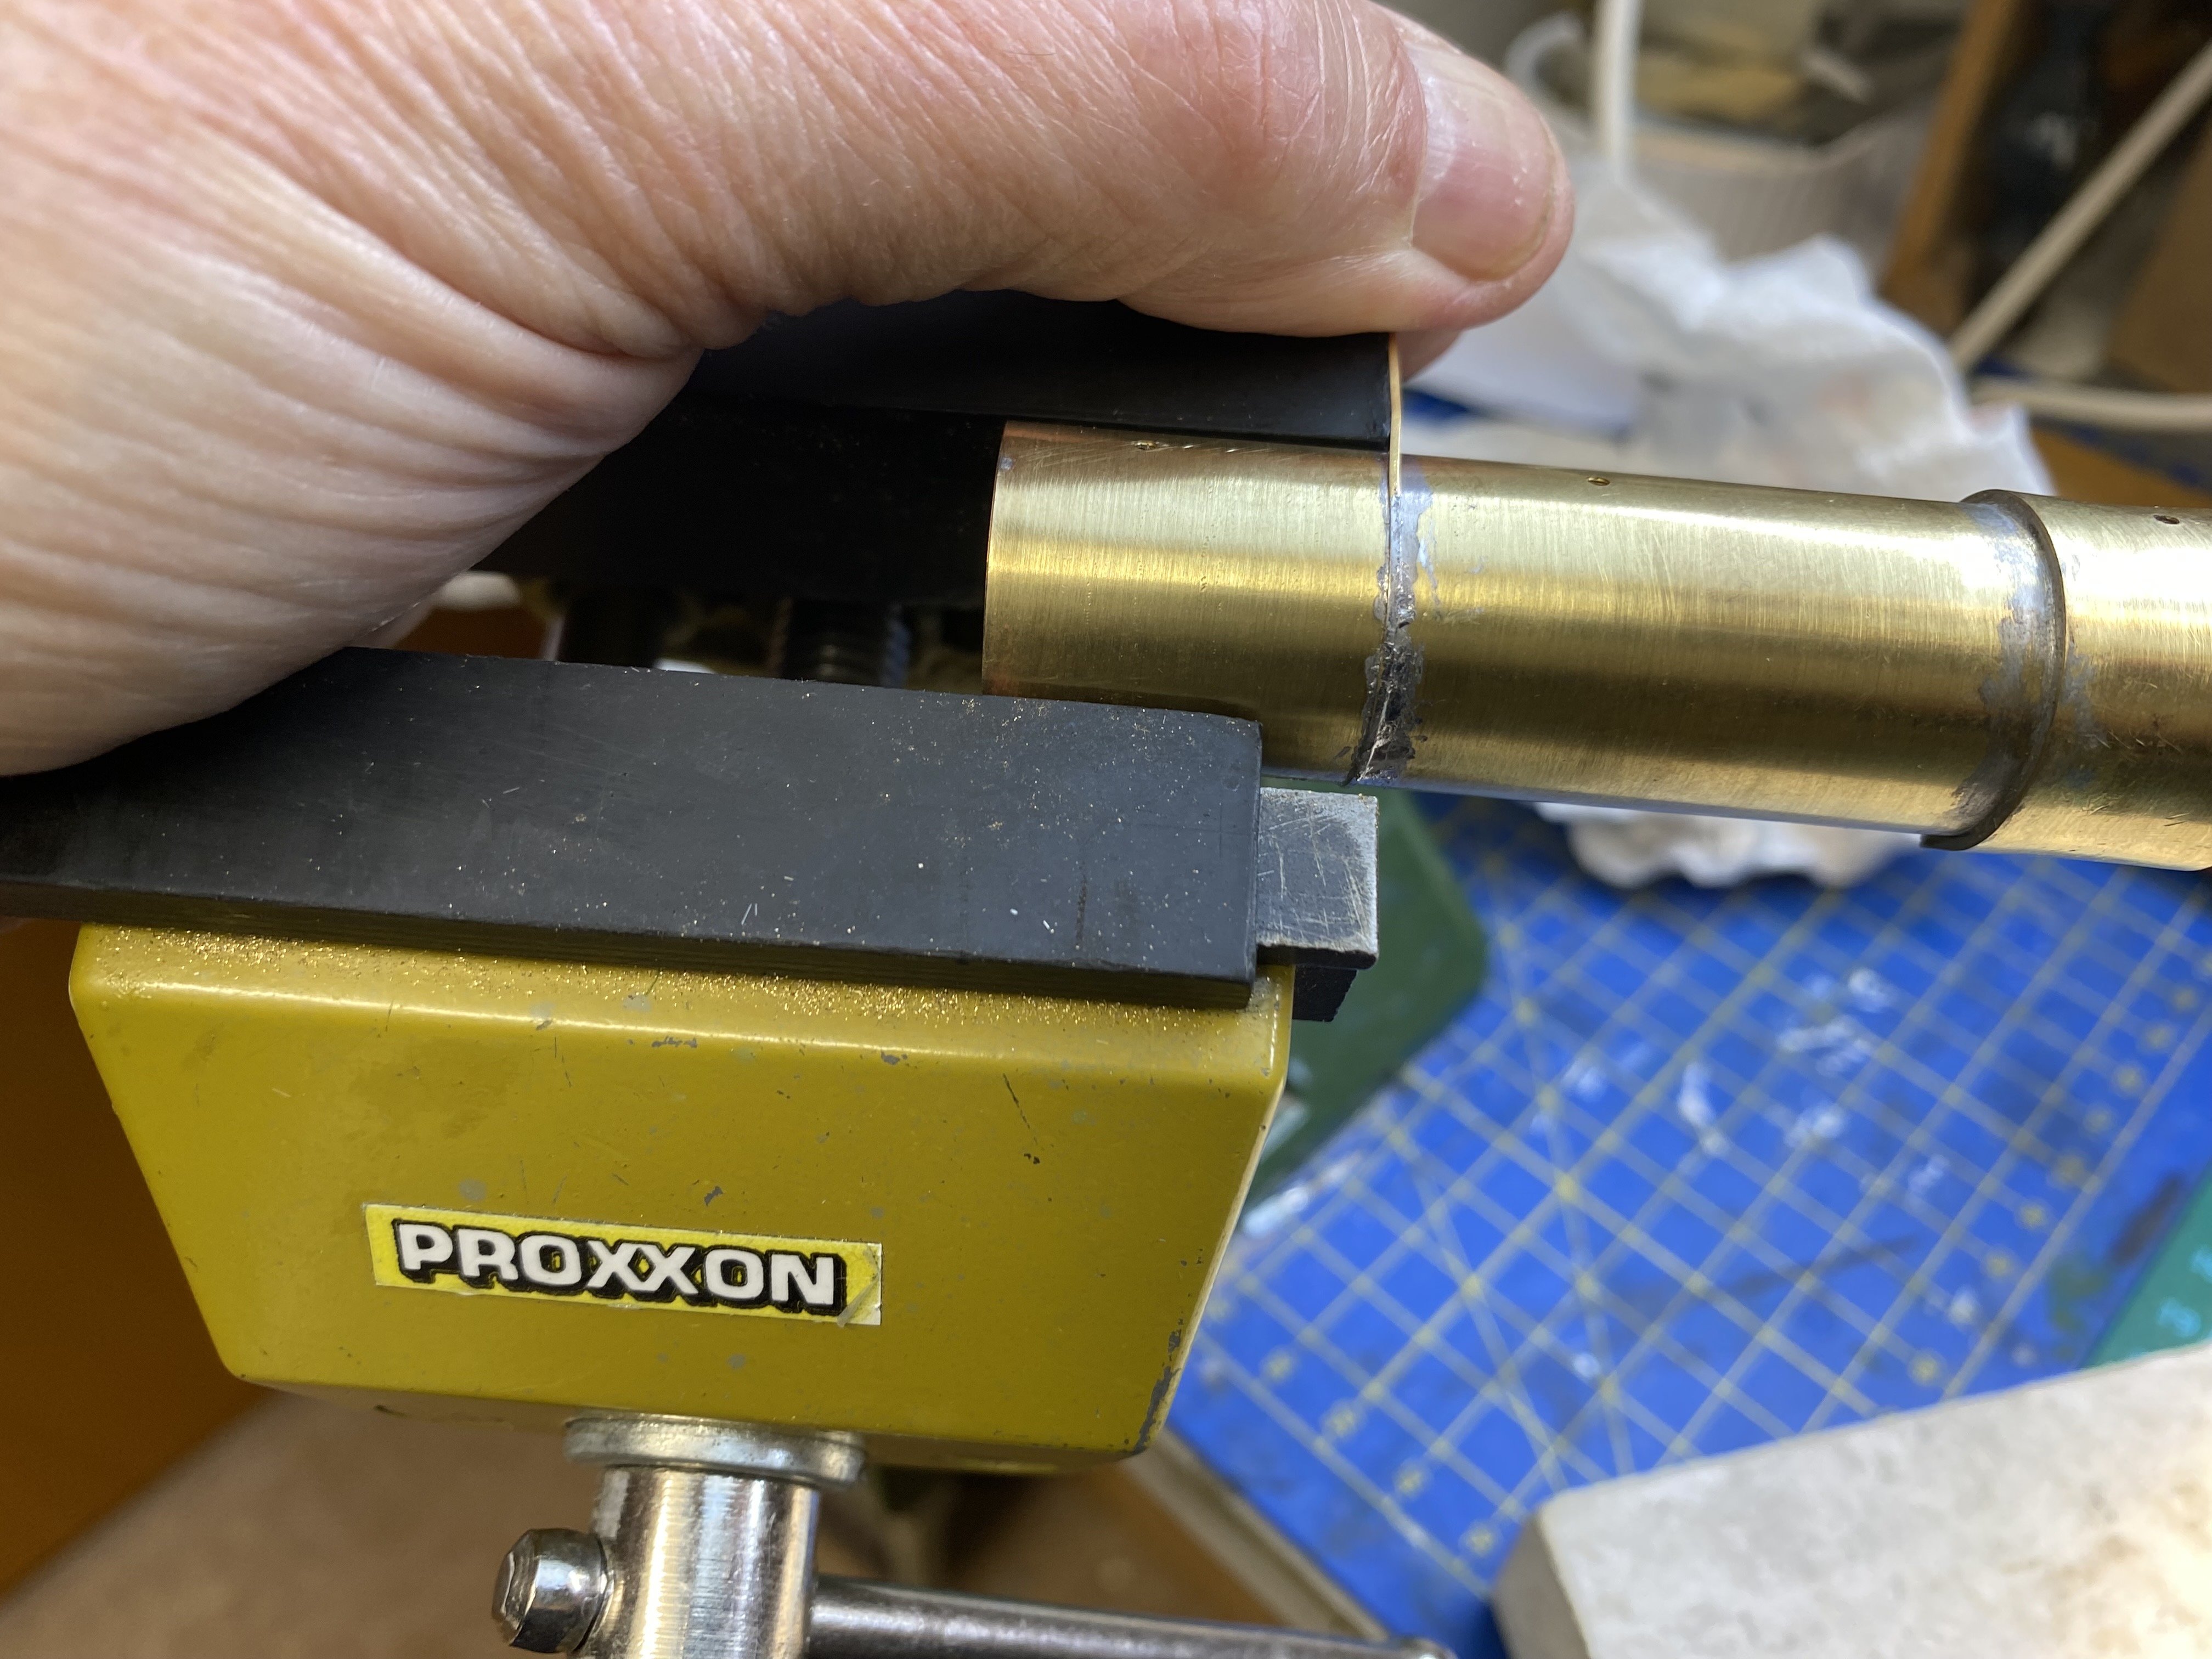
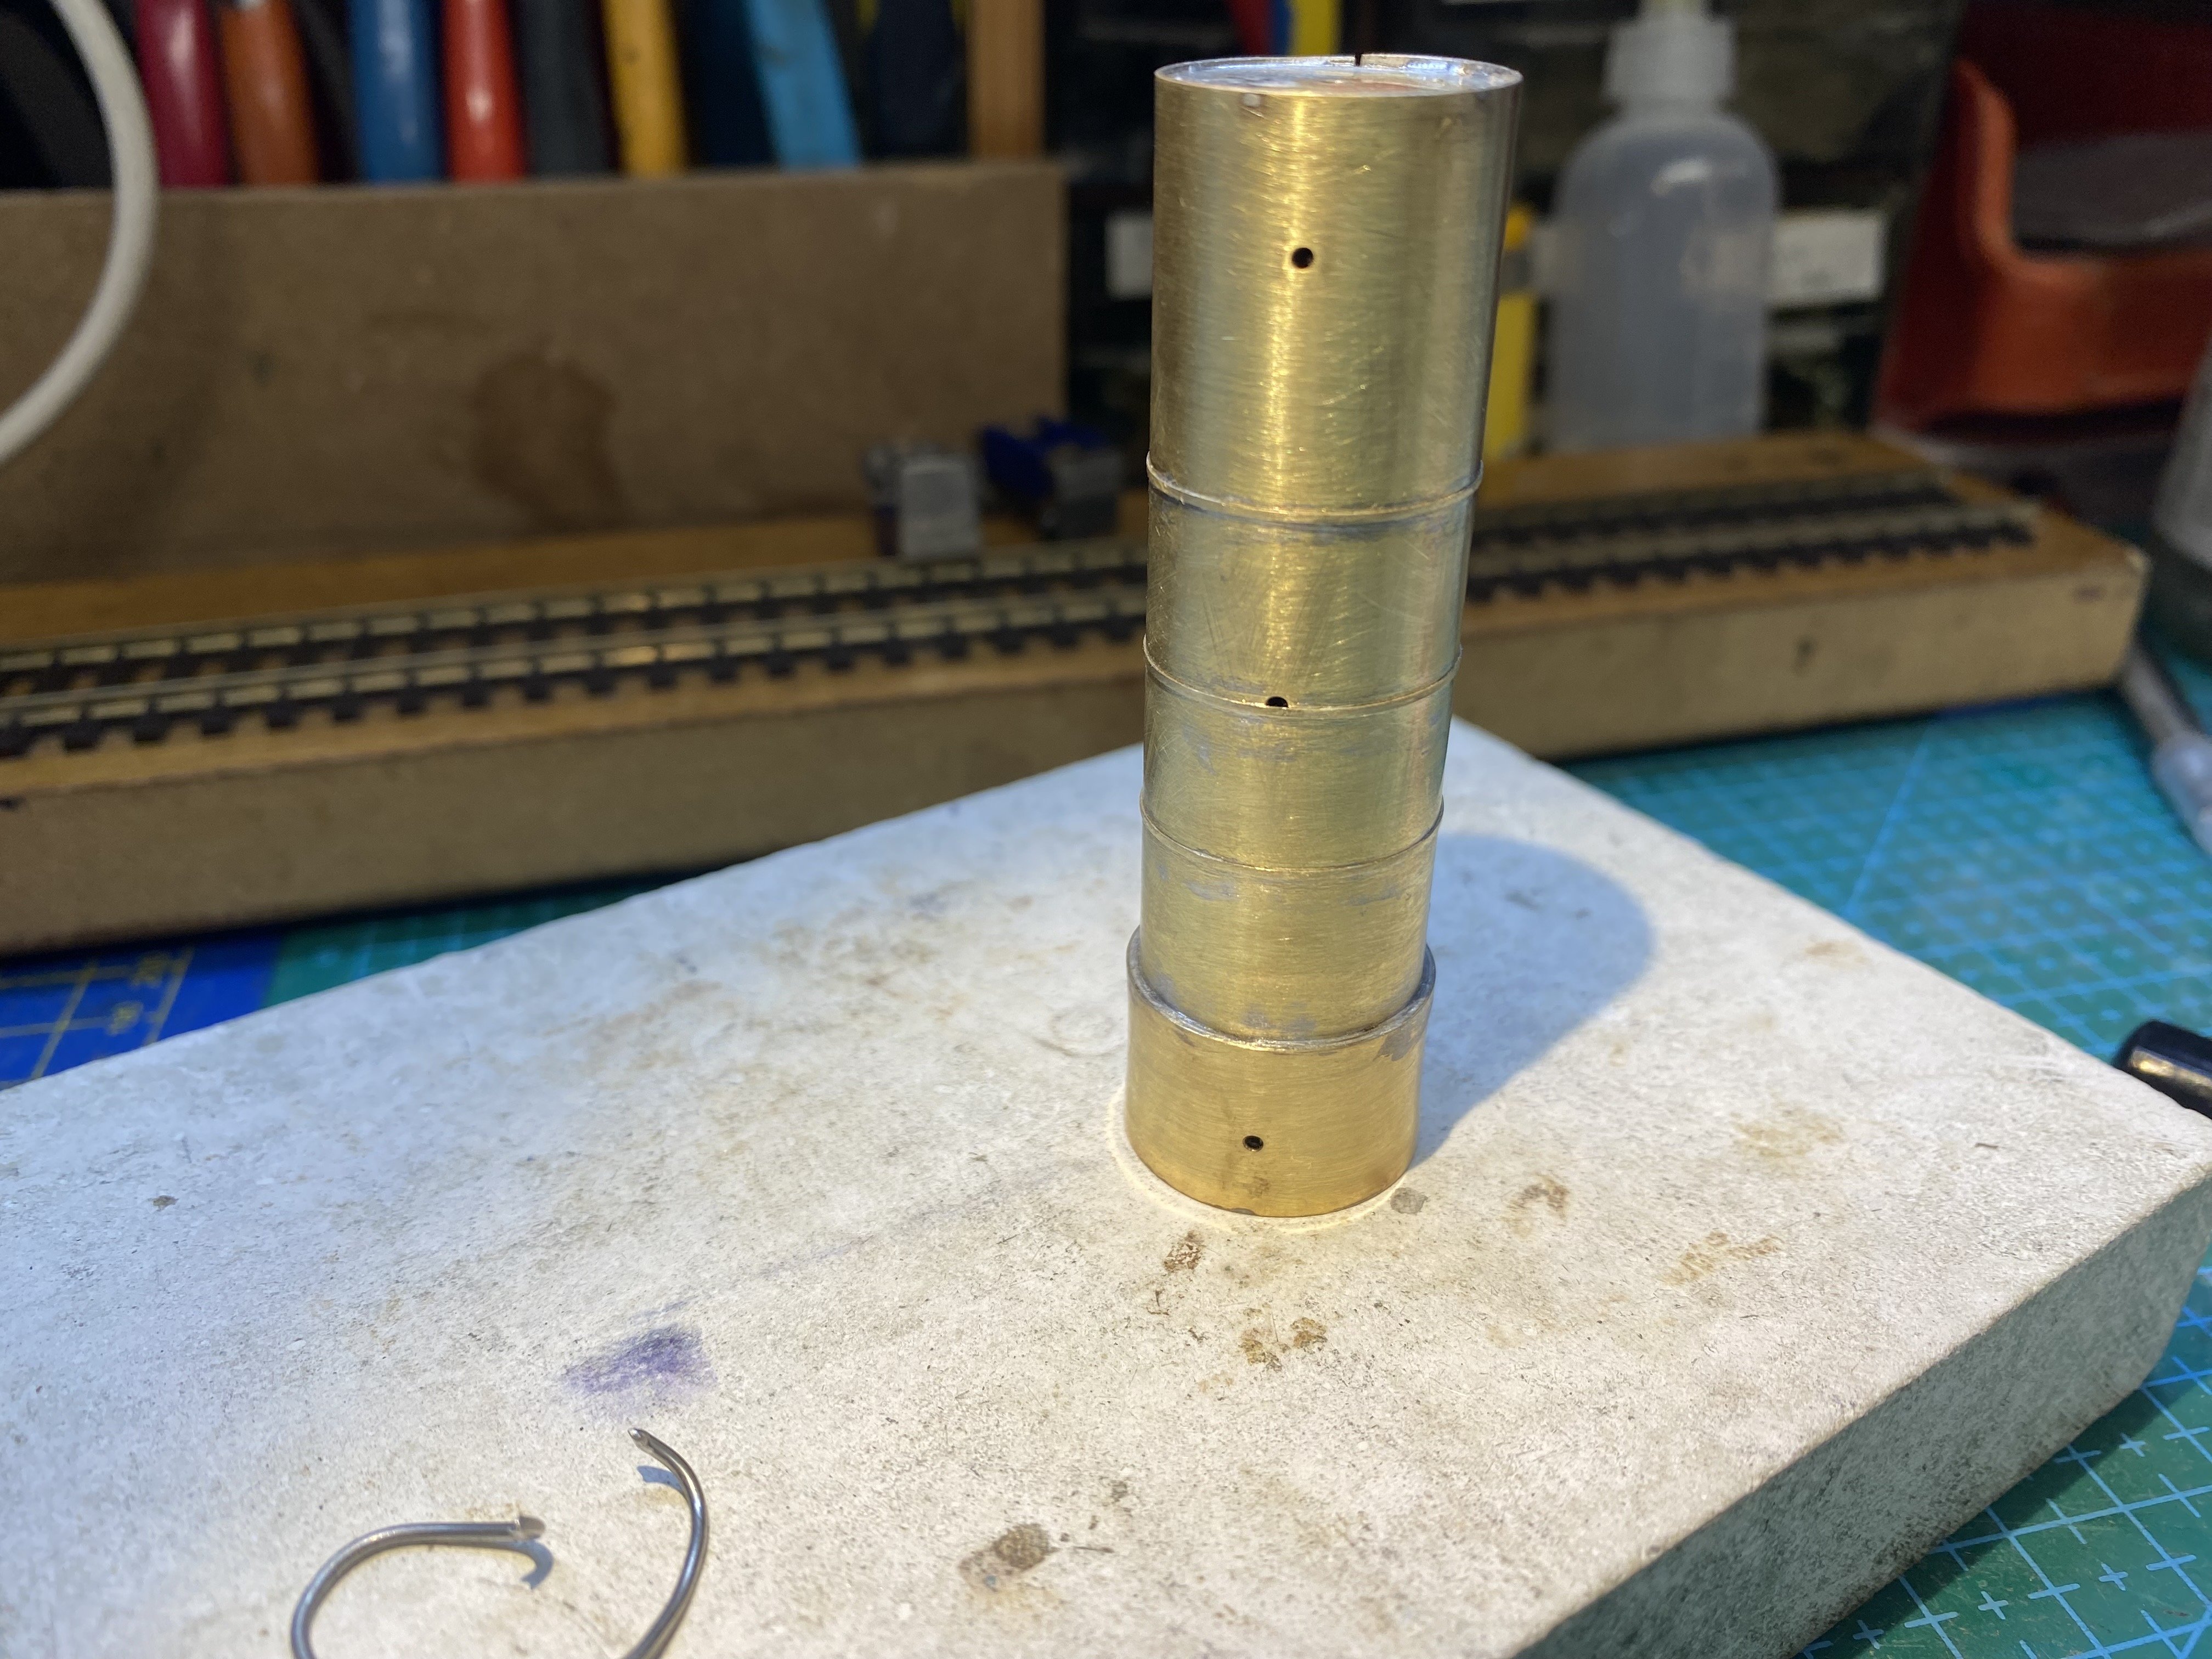
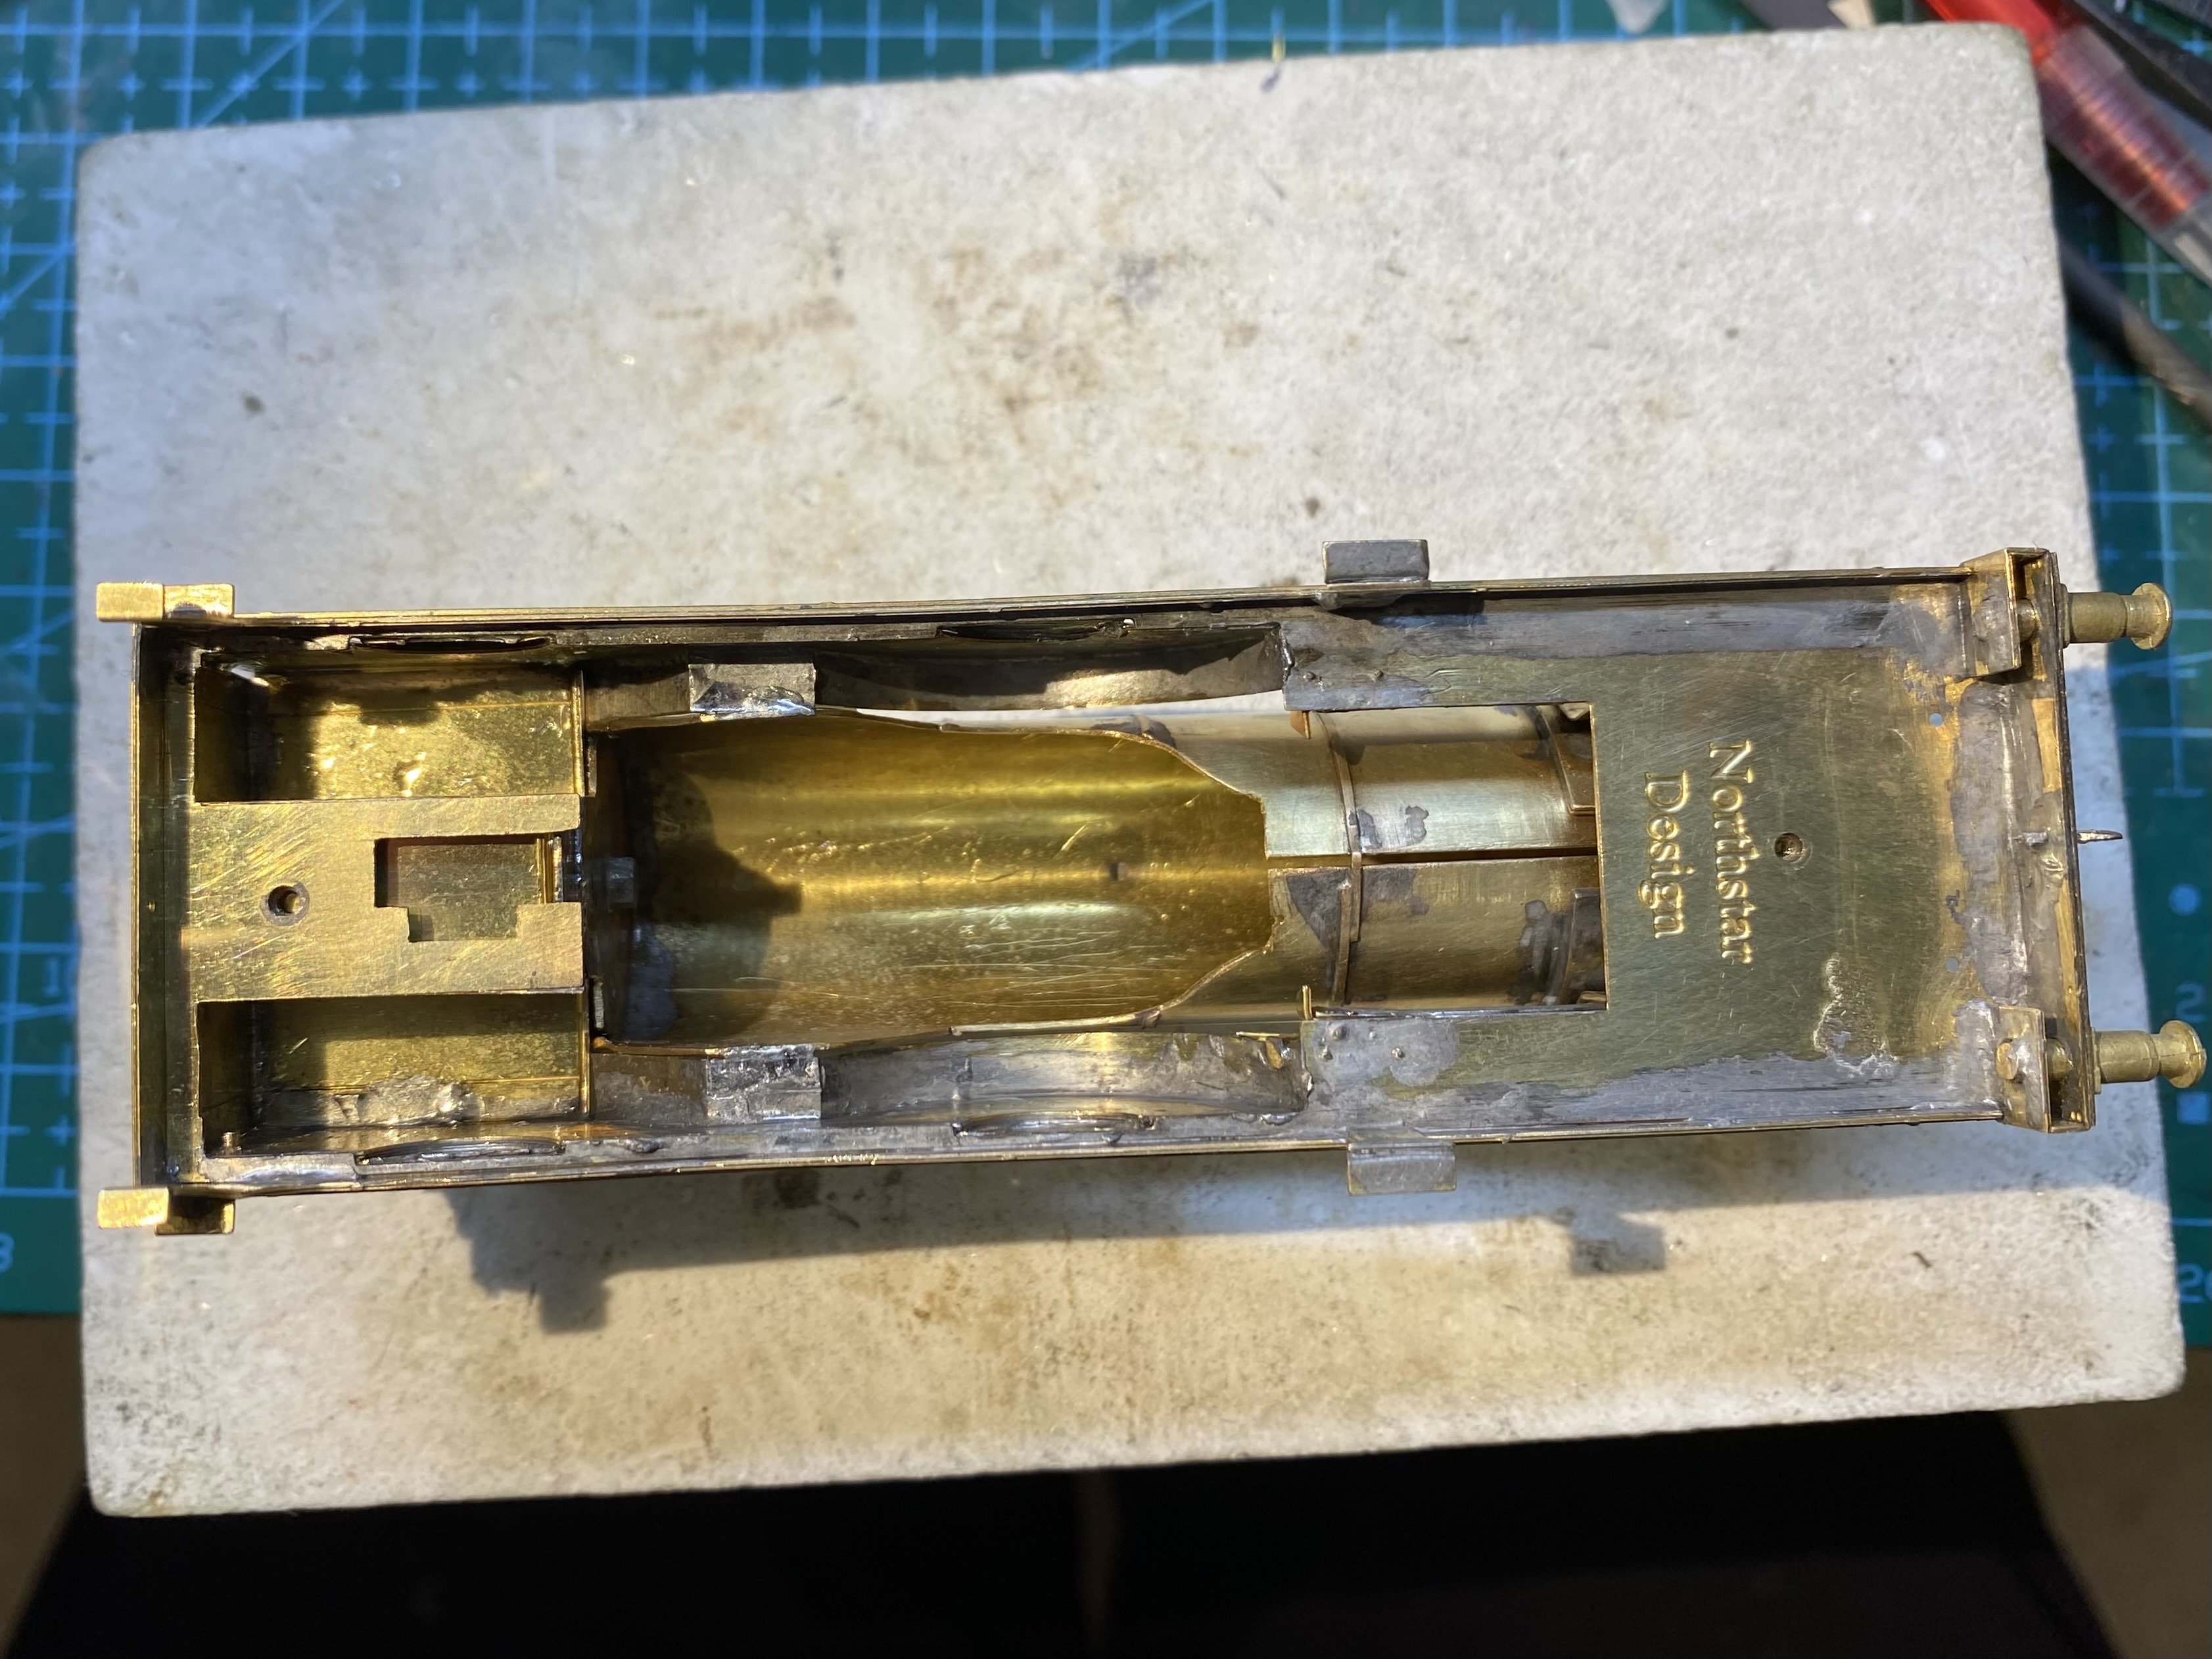
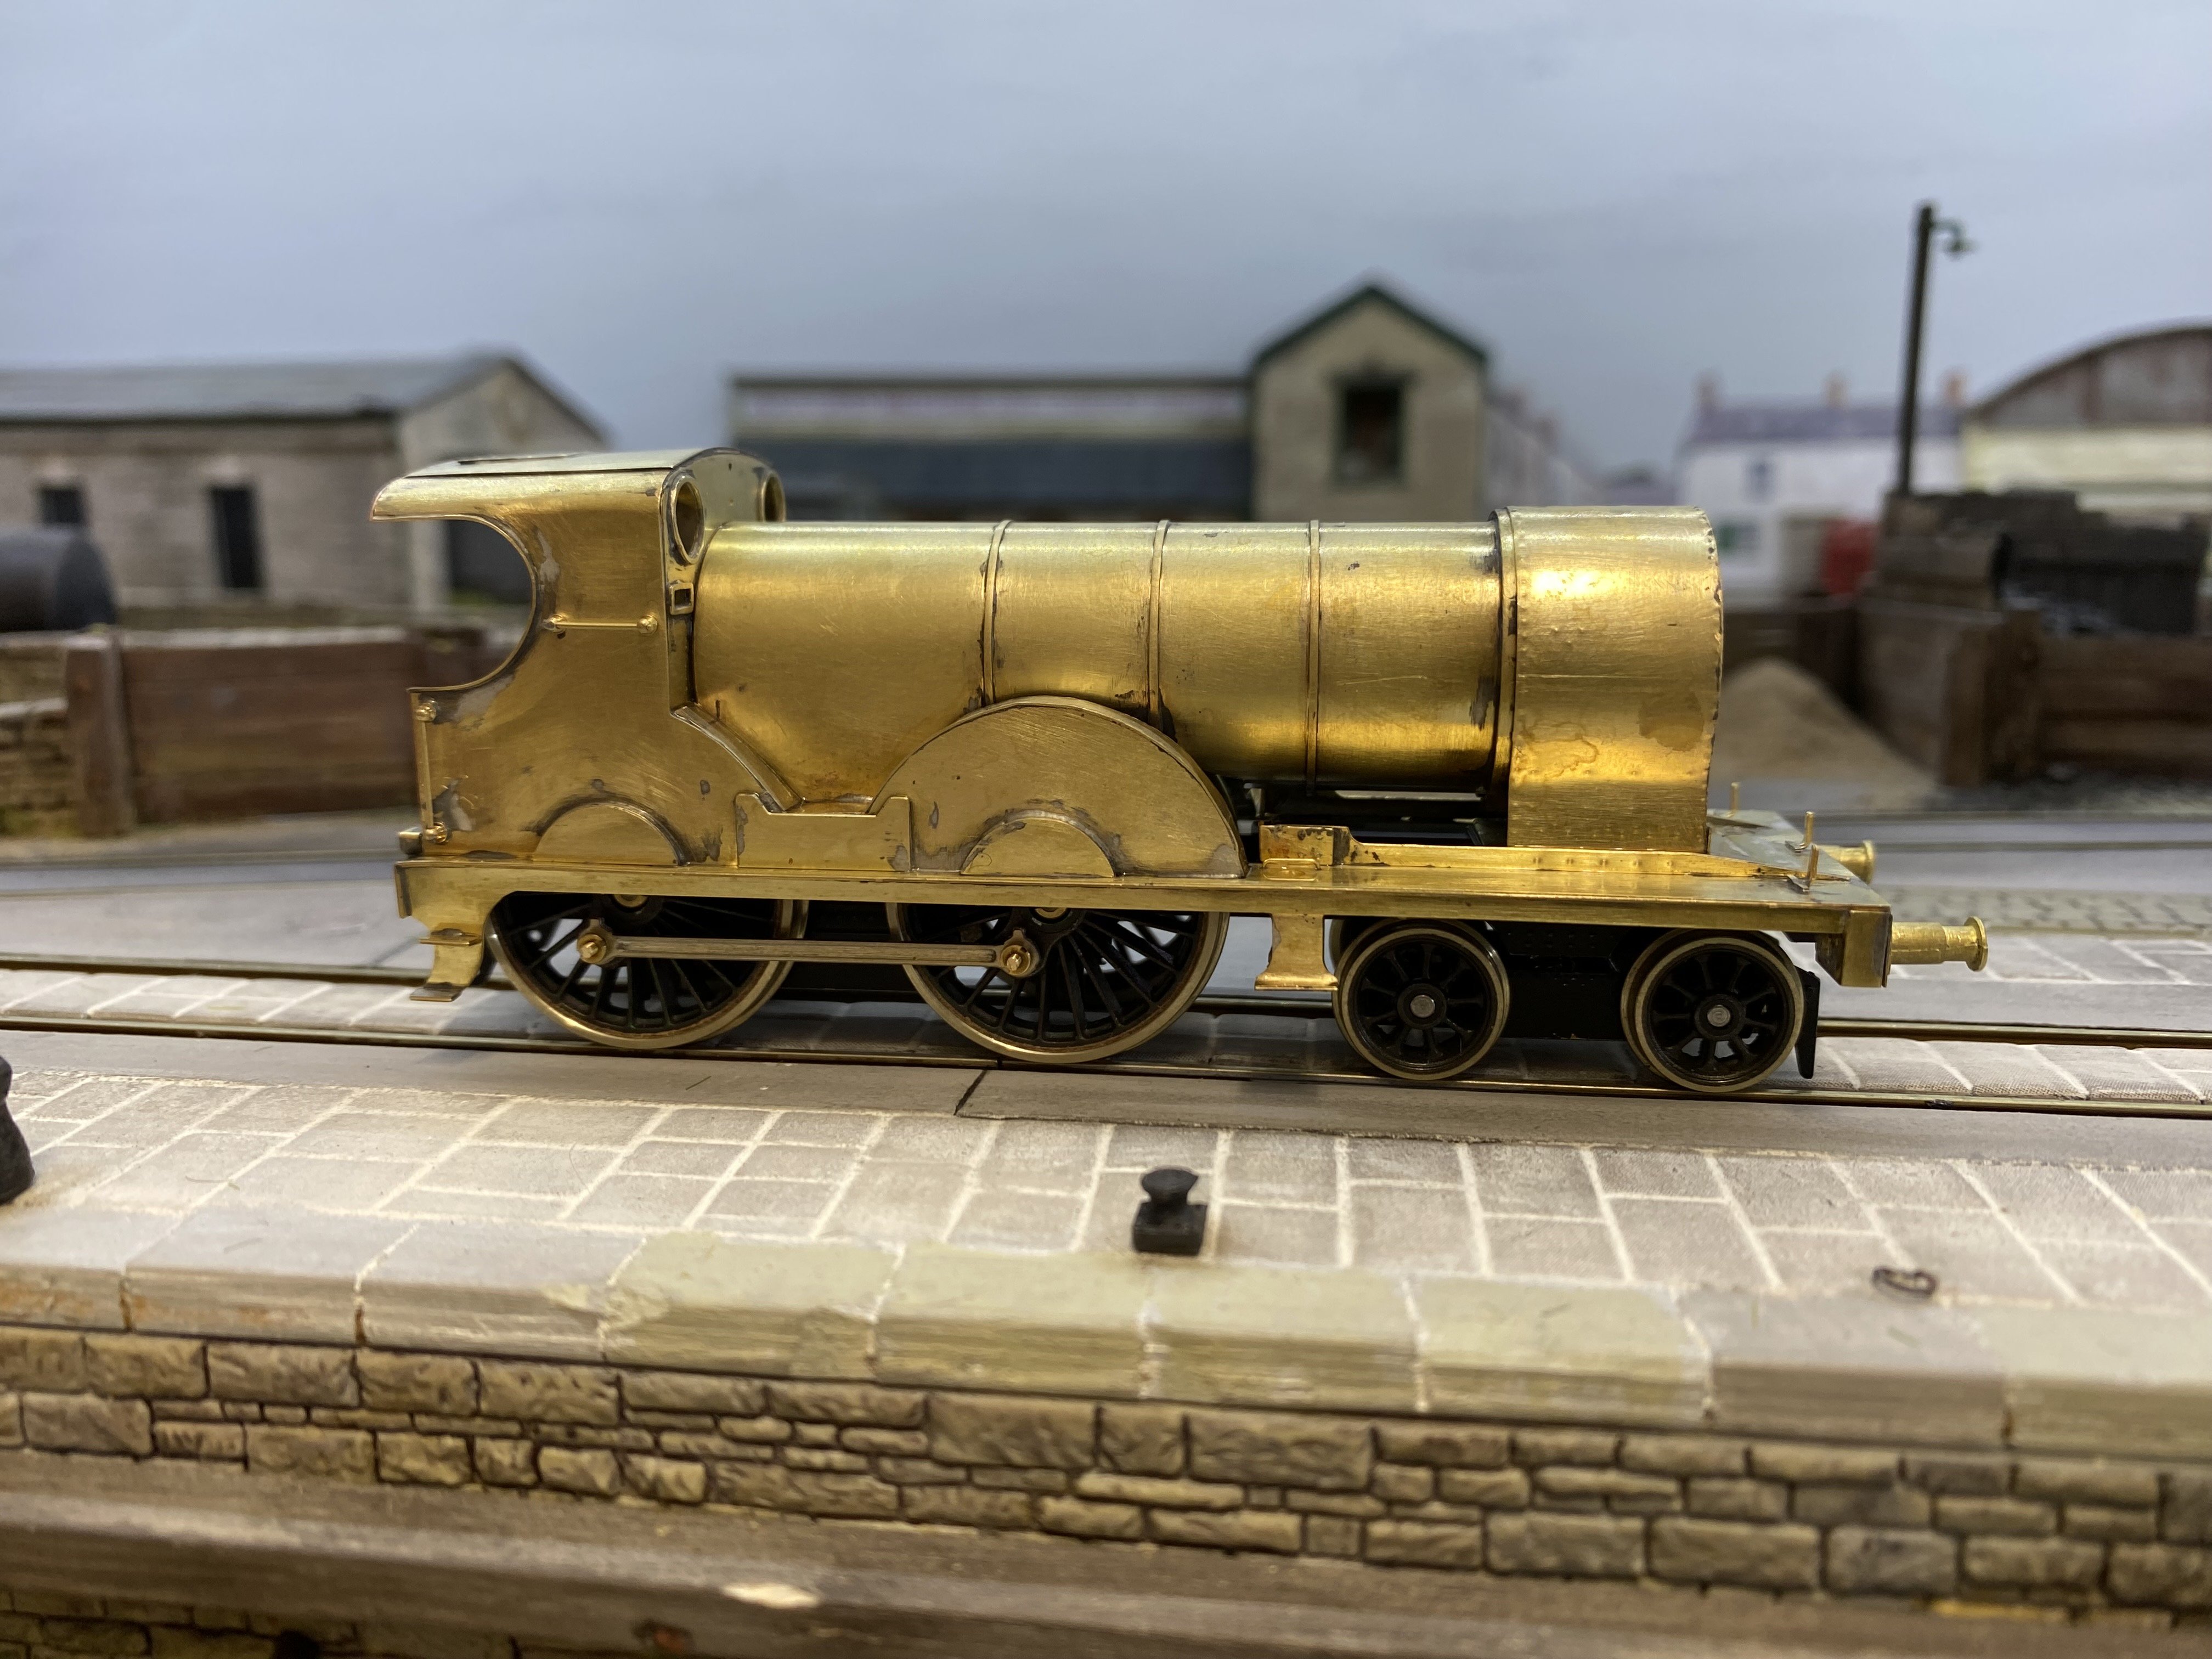
More PPs. The boiler came ready rolled which was a real help. It just needed tightening up a bit on the rolling bars. Boiler bands can be a bit of a struggle to fit. Three cheers for fibreglass pencils to clean up the mess afterwards. The boiler needed quite a bit cut out of it to clear the motor, gearbox and wheels. The danger is always cutting too much away and leaving an unsightly gap somewhere so it's a time consuming exercise - boiler in, mark it up, boiler out, cut a bit, boiler back in again, fit the chassis, check for clearance, repeat until done. The smokebox has three layers and needed a lot of heat to get everything soldered up. I had the temperature controlled iron turned up full and still it was struggling. A trial run at Loughan Quay PPs.mov Time for a tidy up, more fibreglass pencil and a scrub with scouring powder.
14 points
-
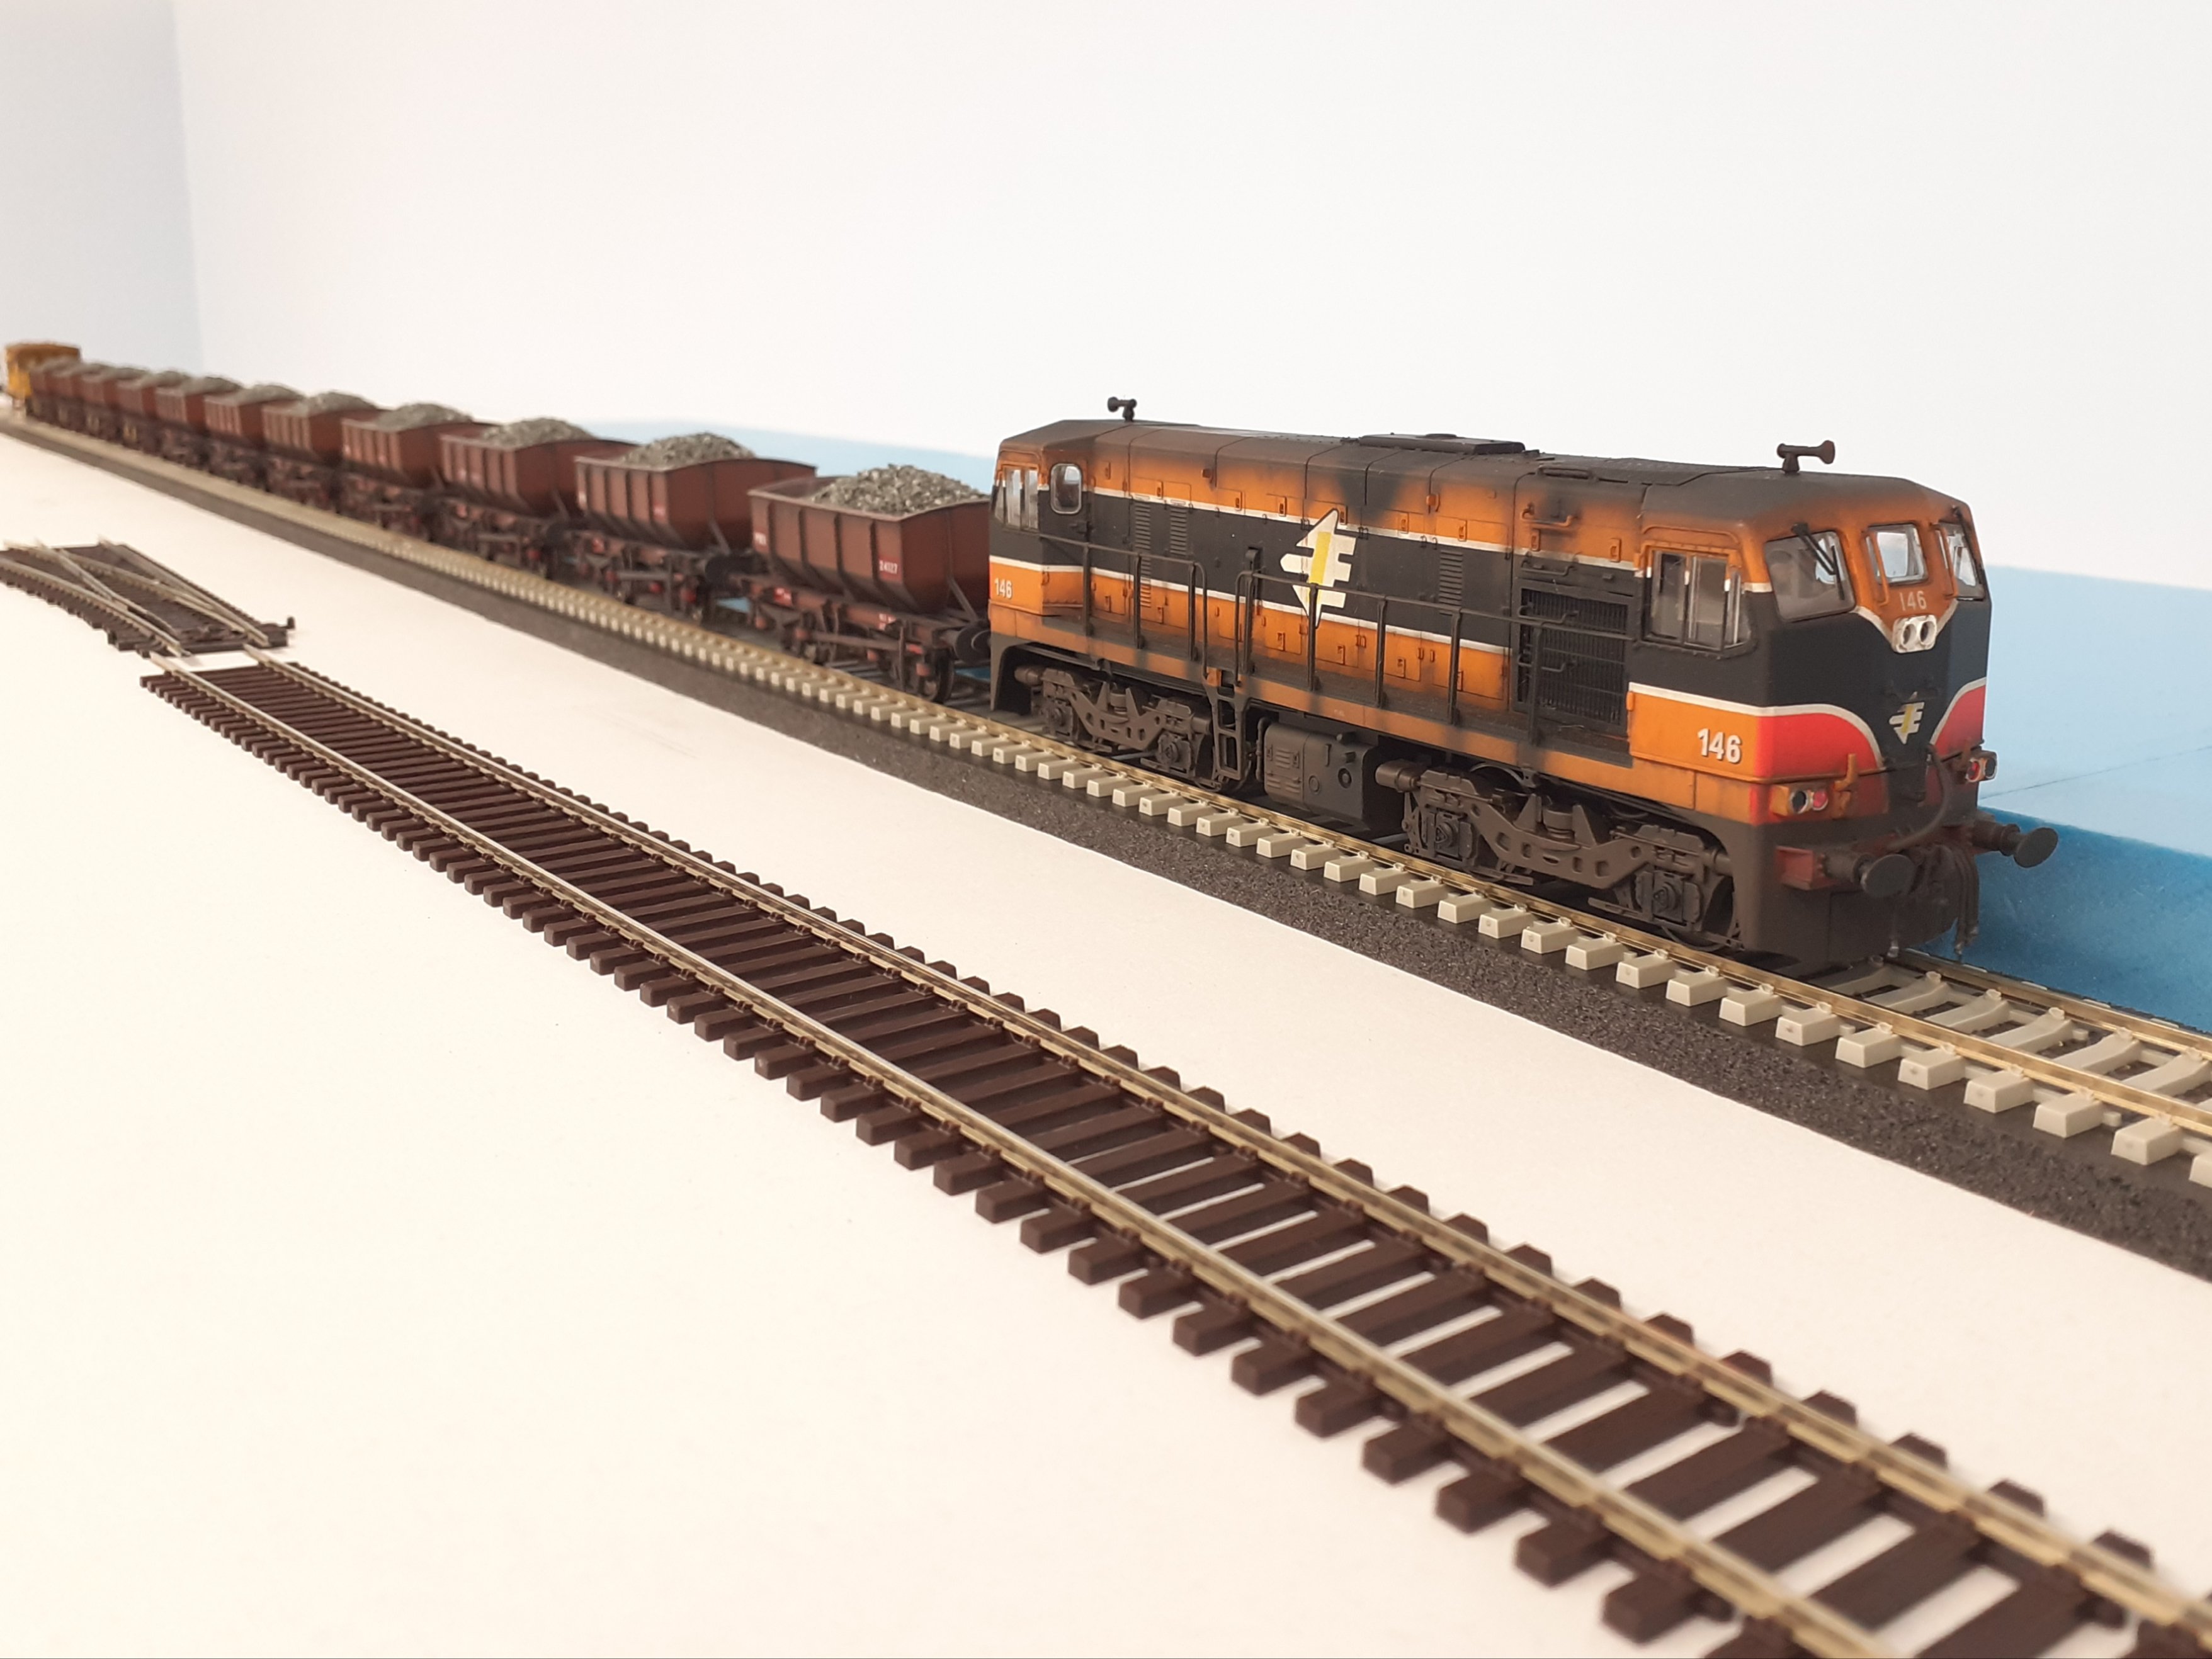
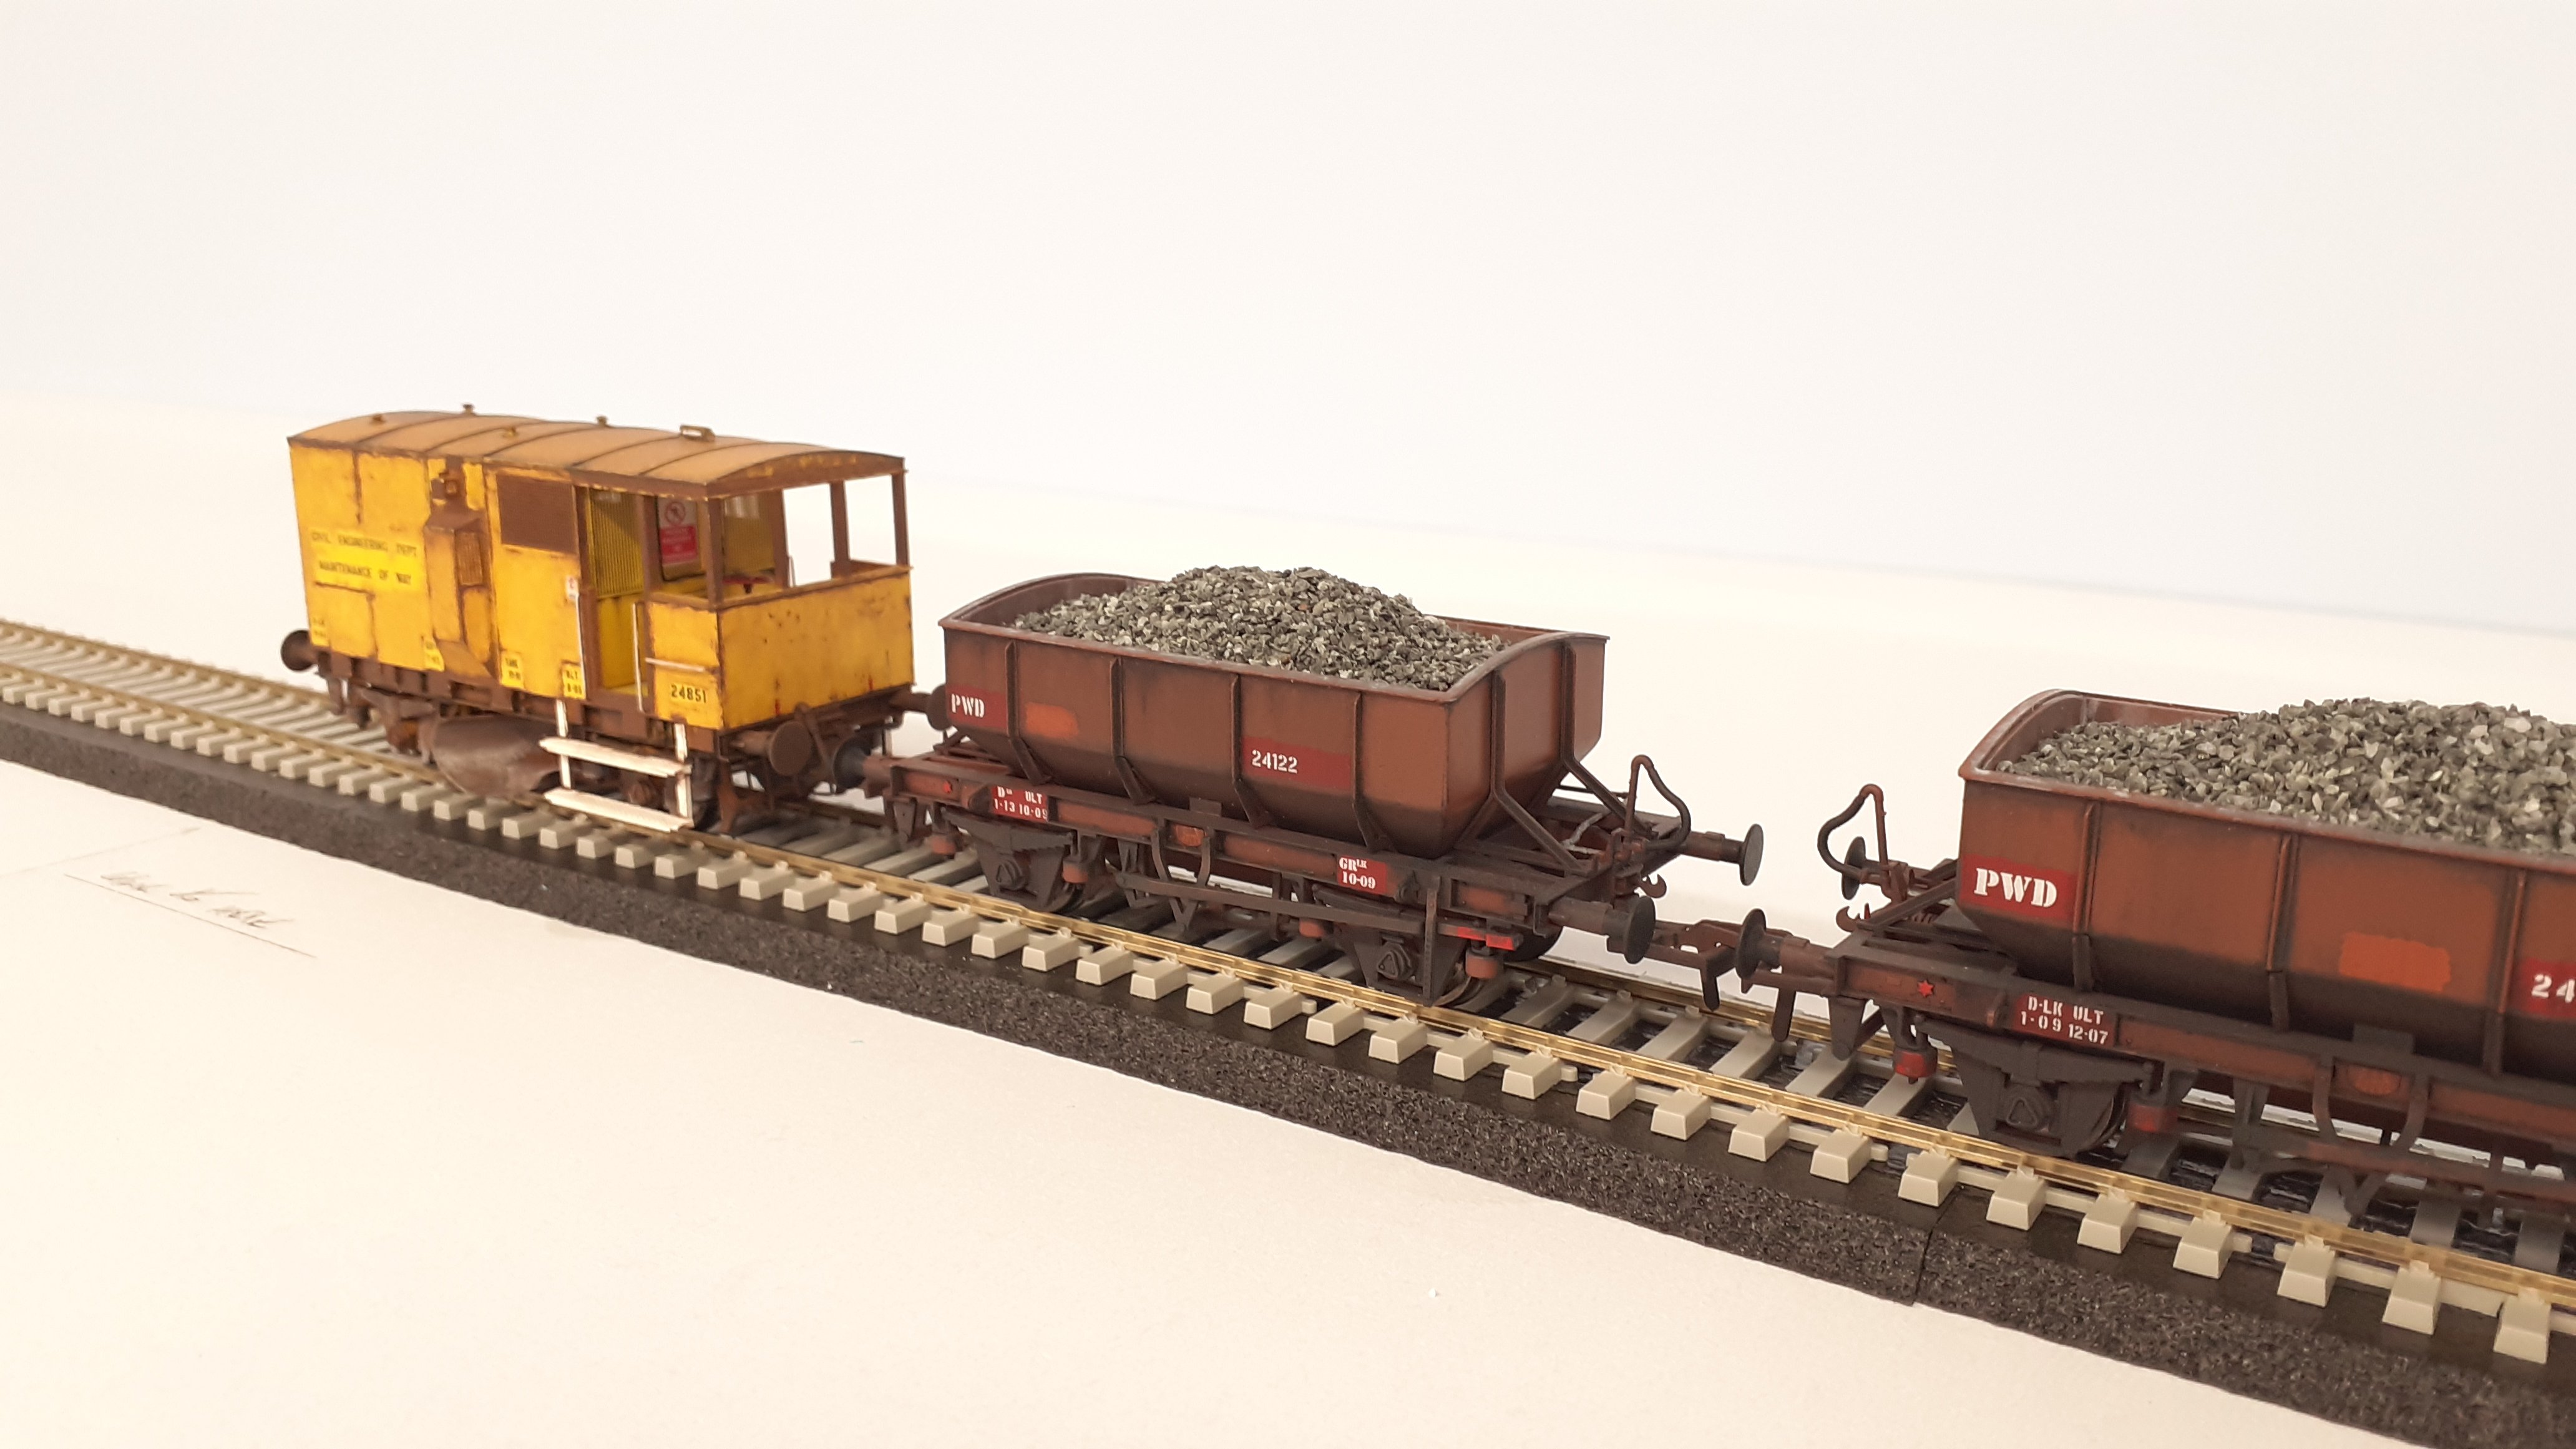
146 seen again. This time on ballast duties.
14 points
-
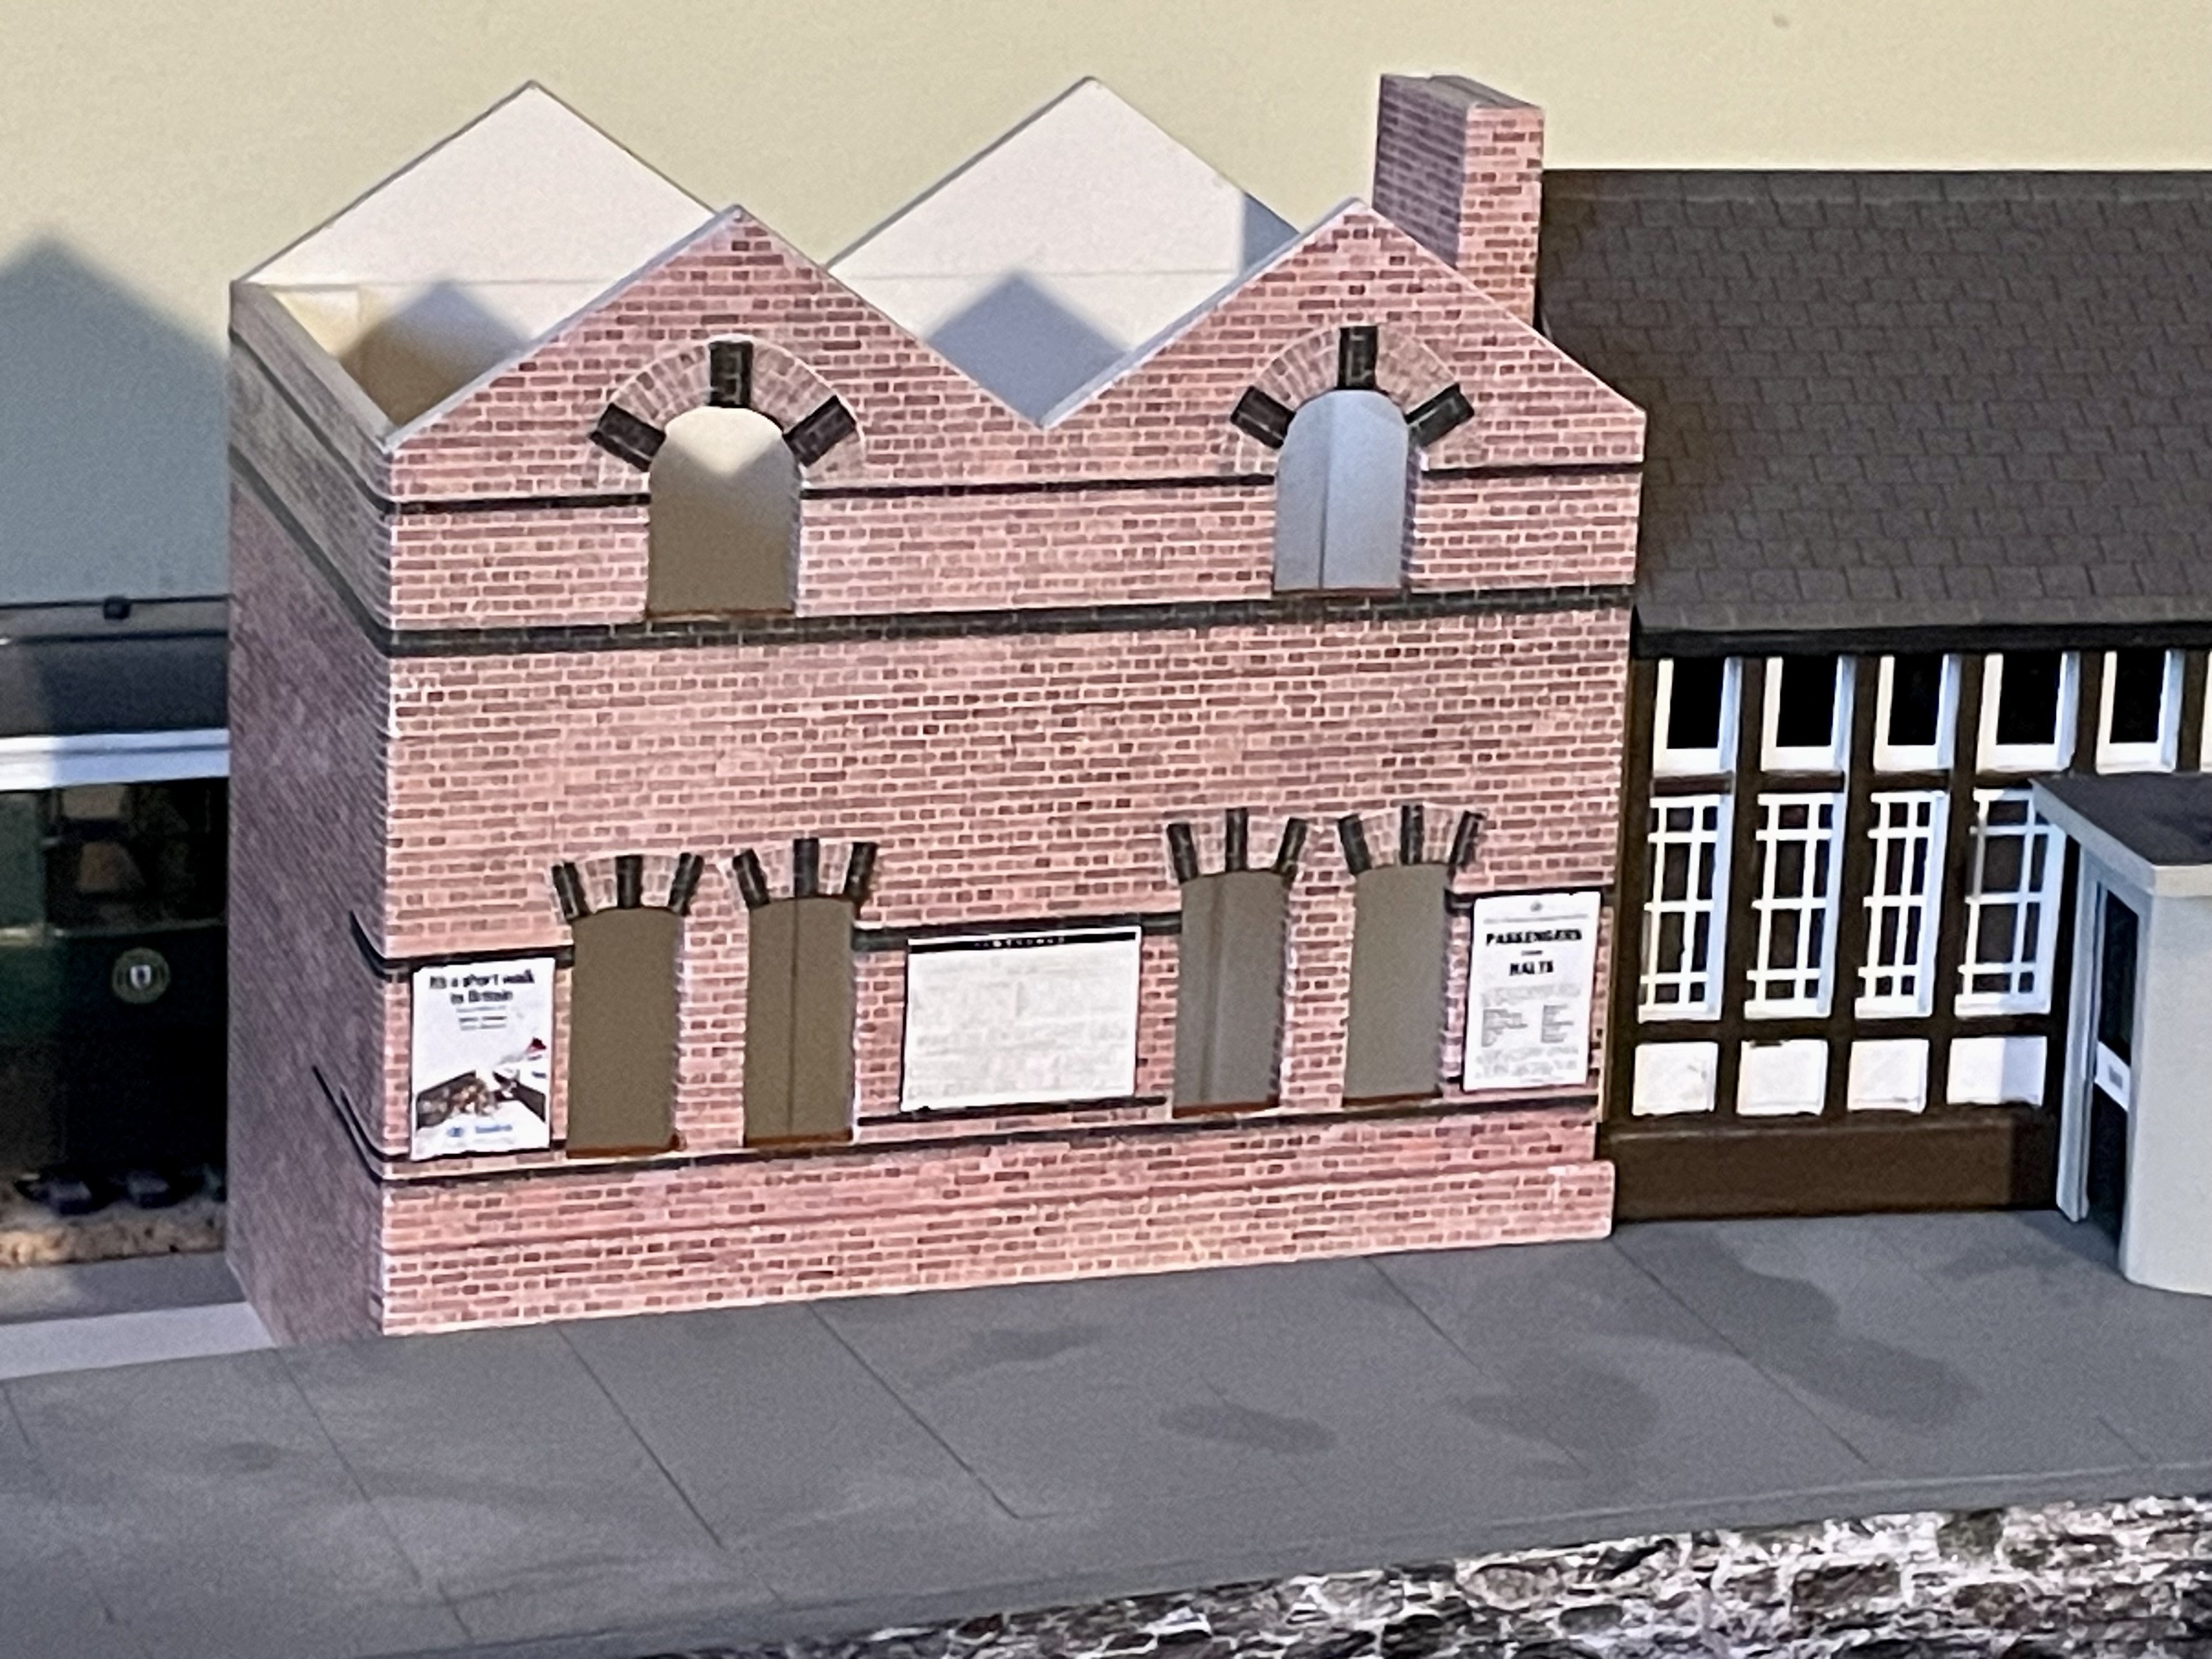
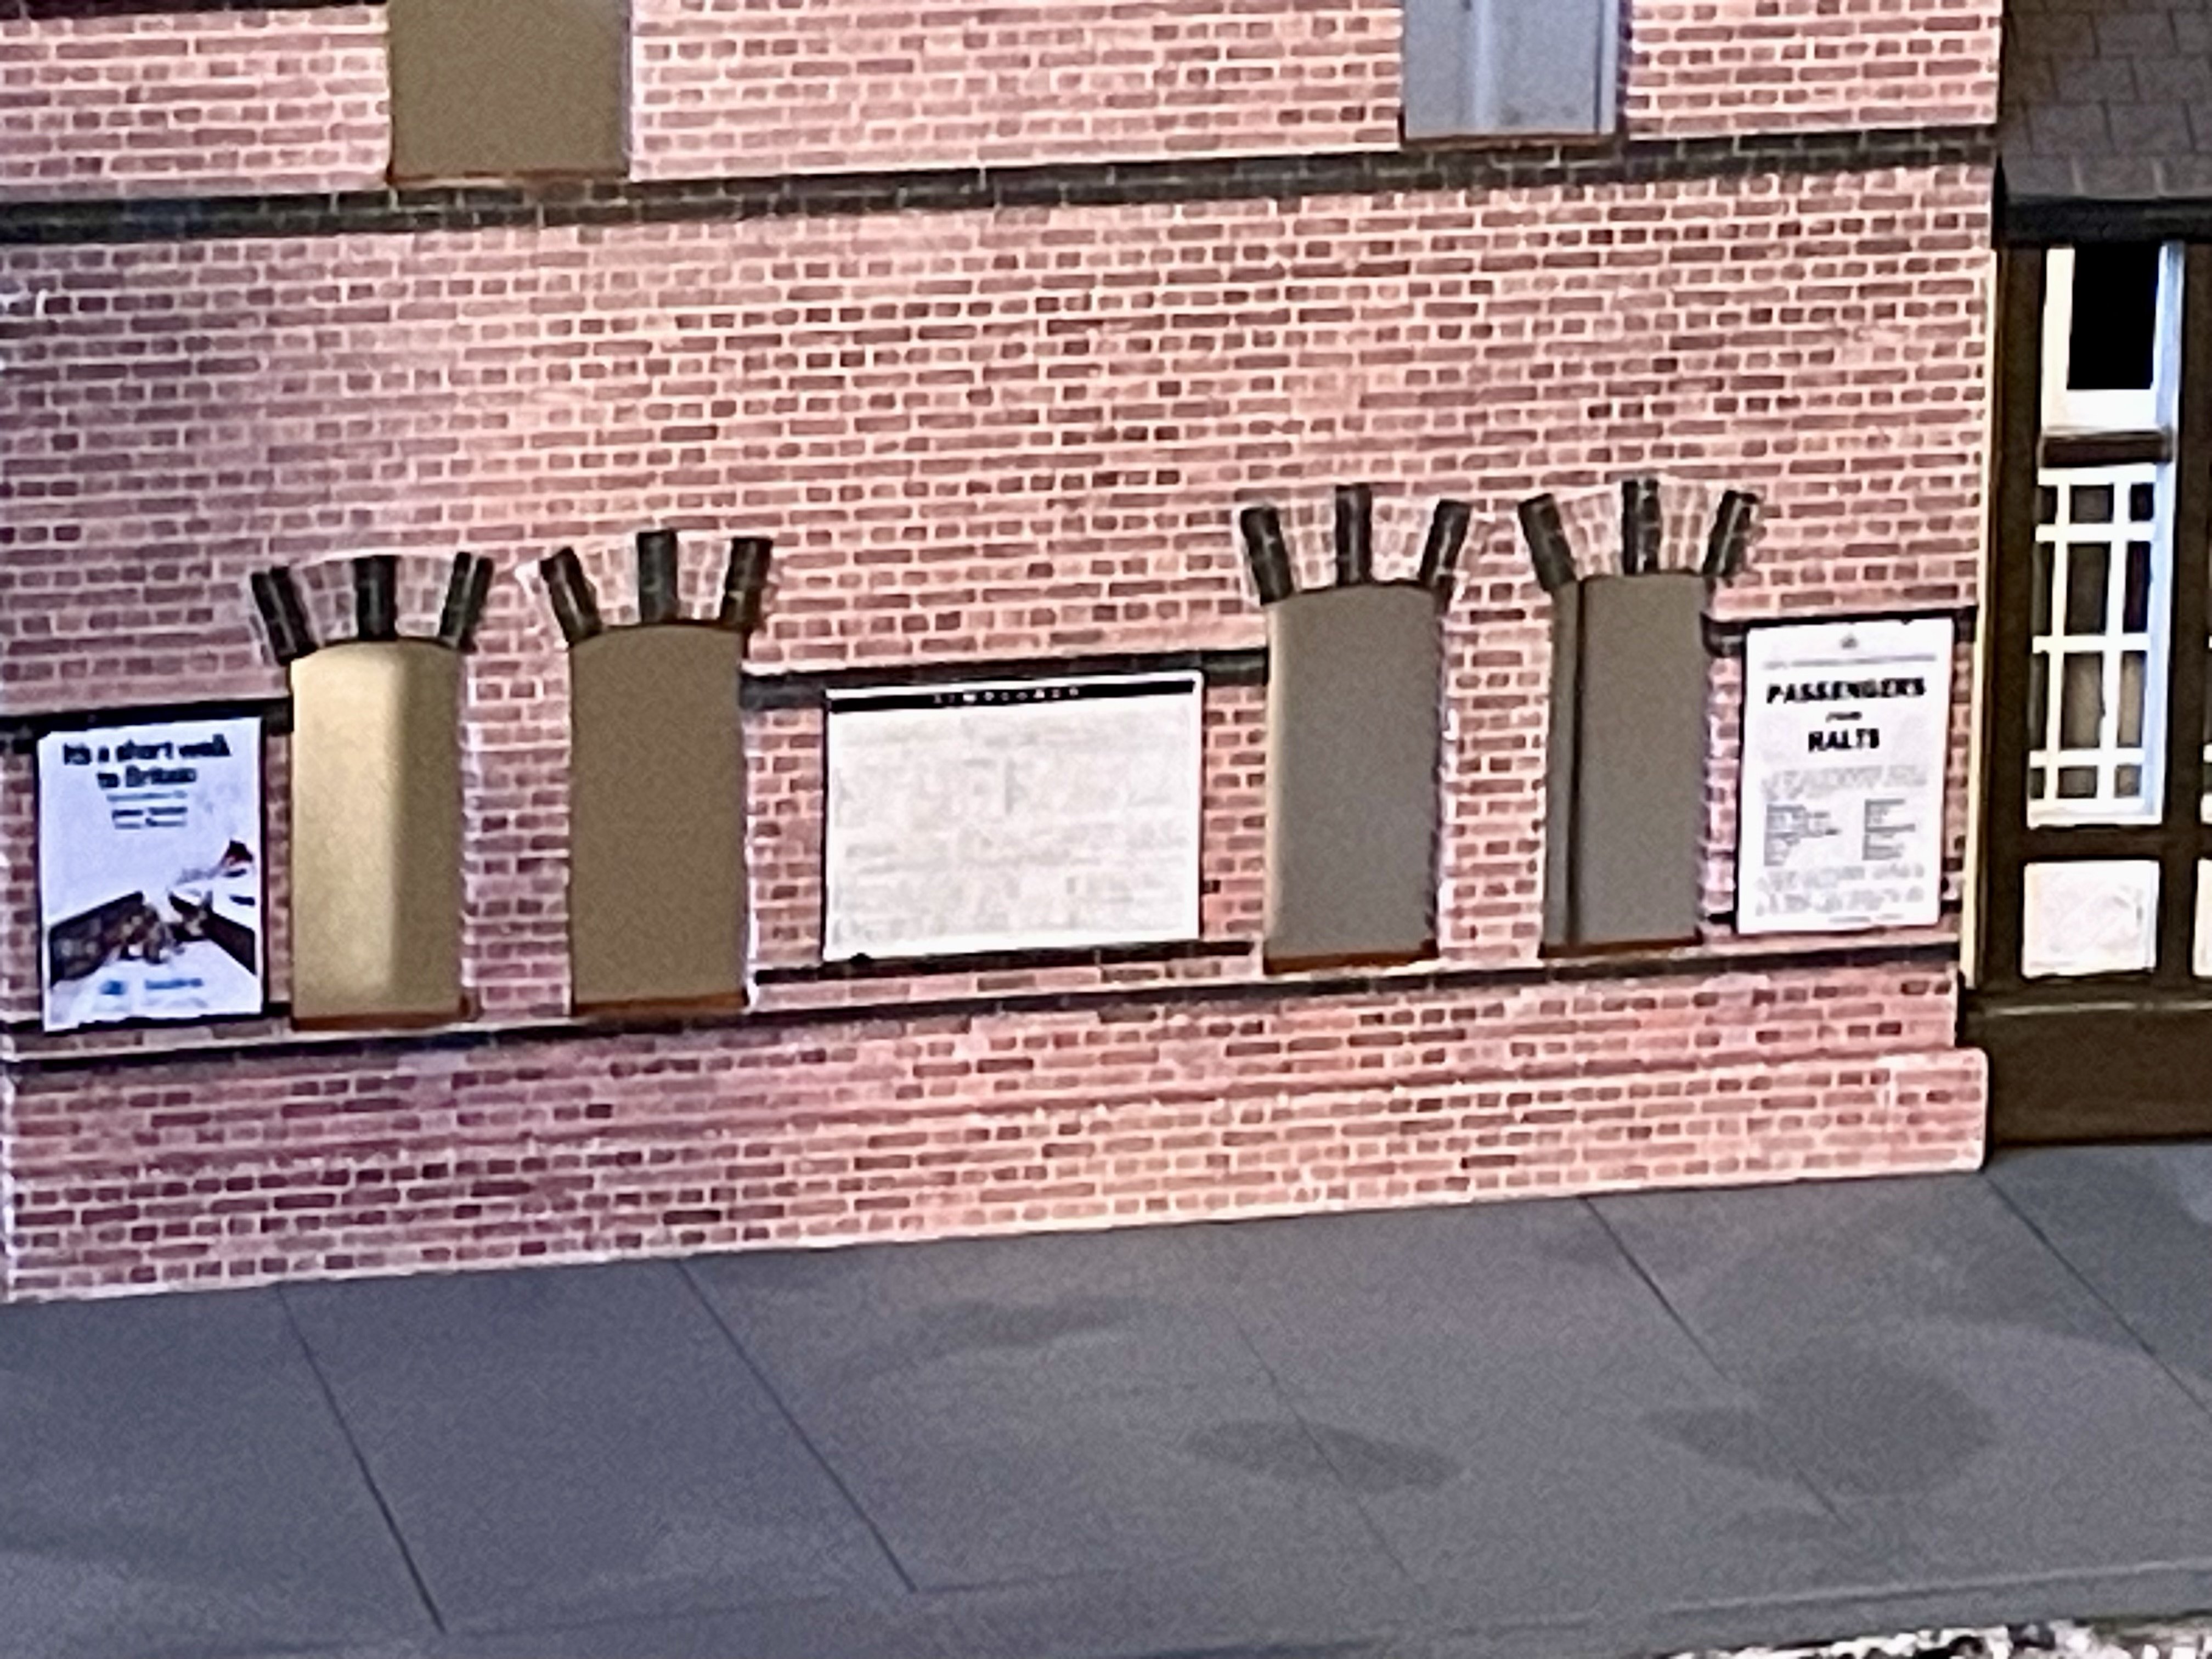
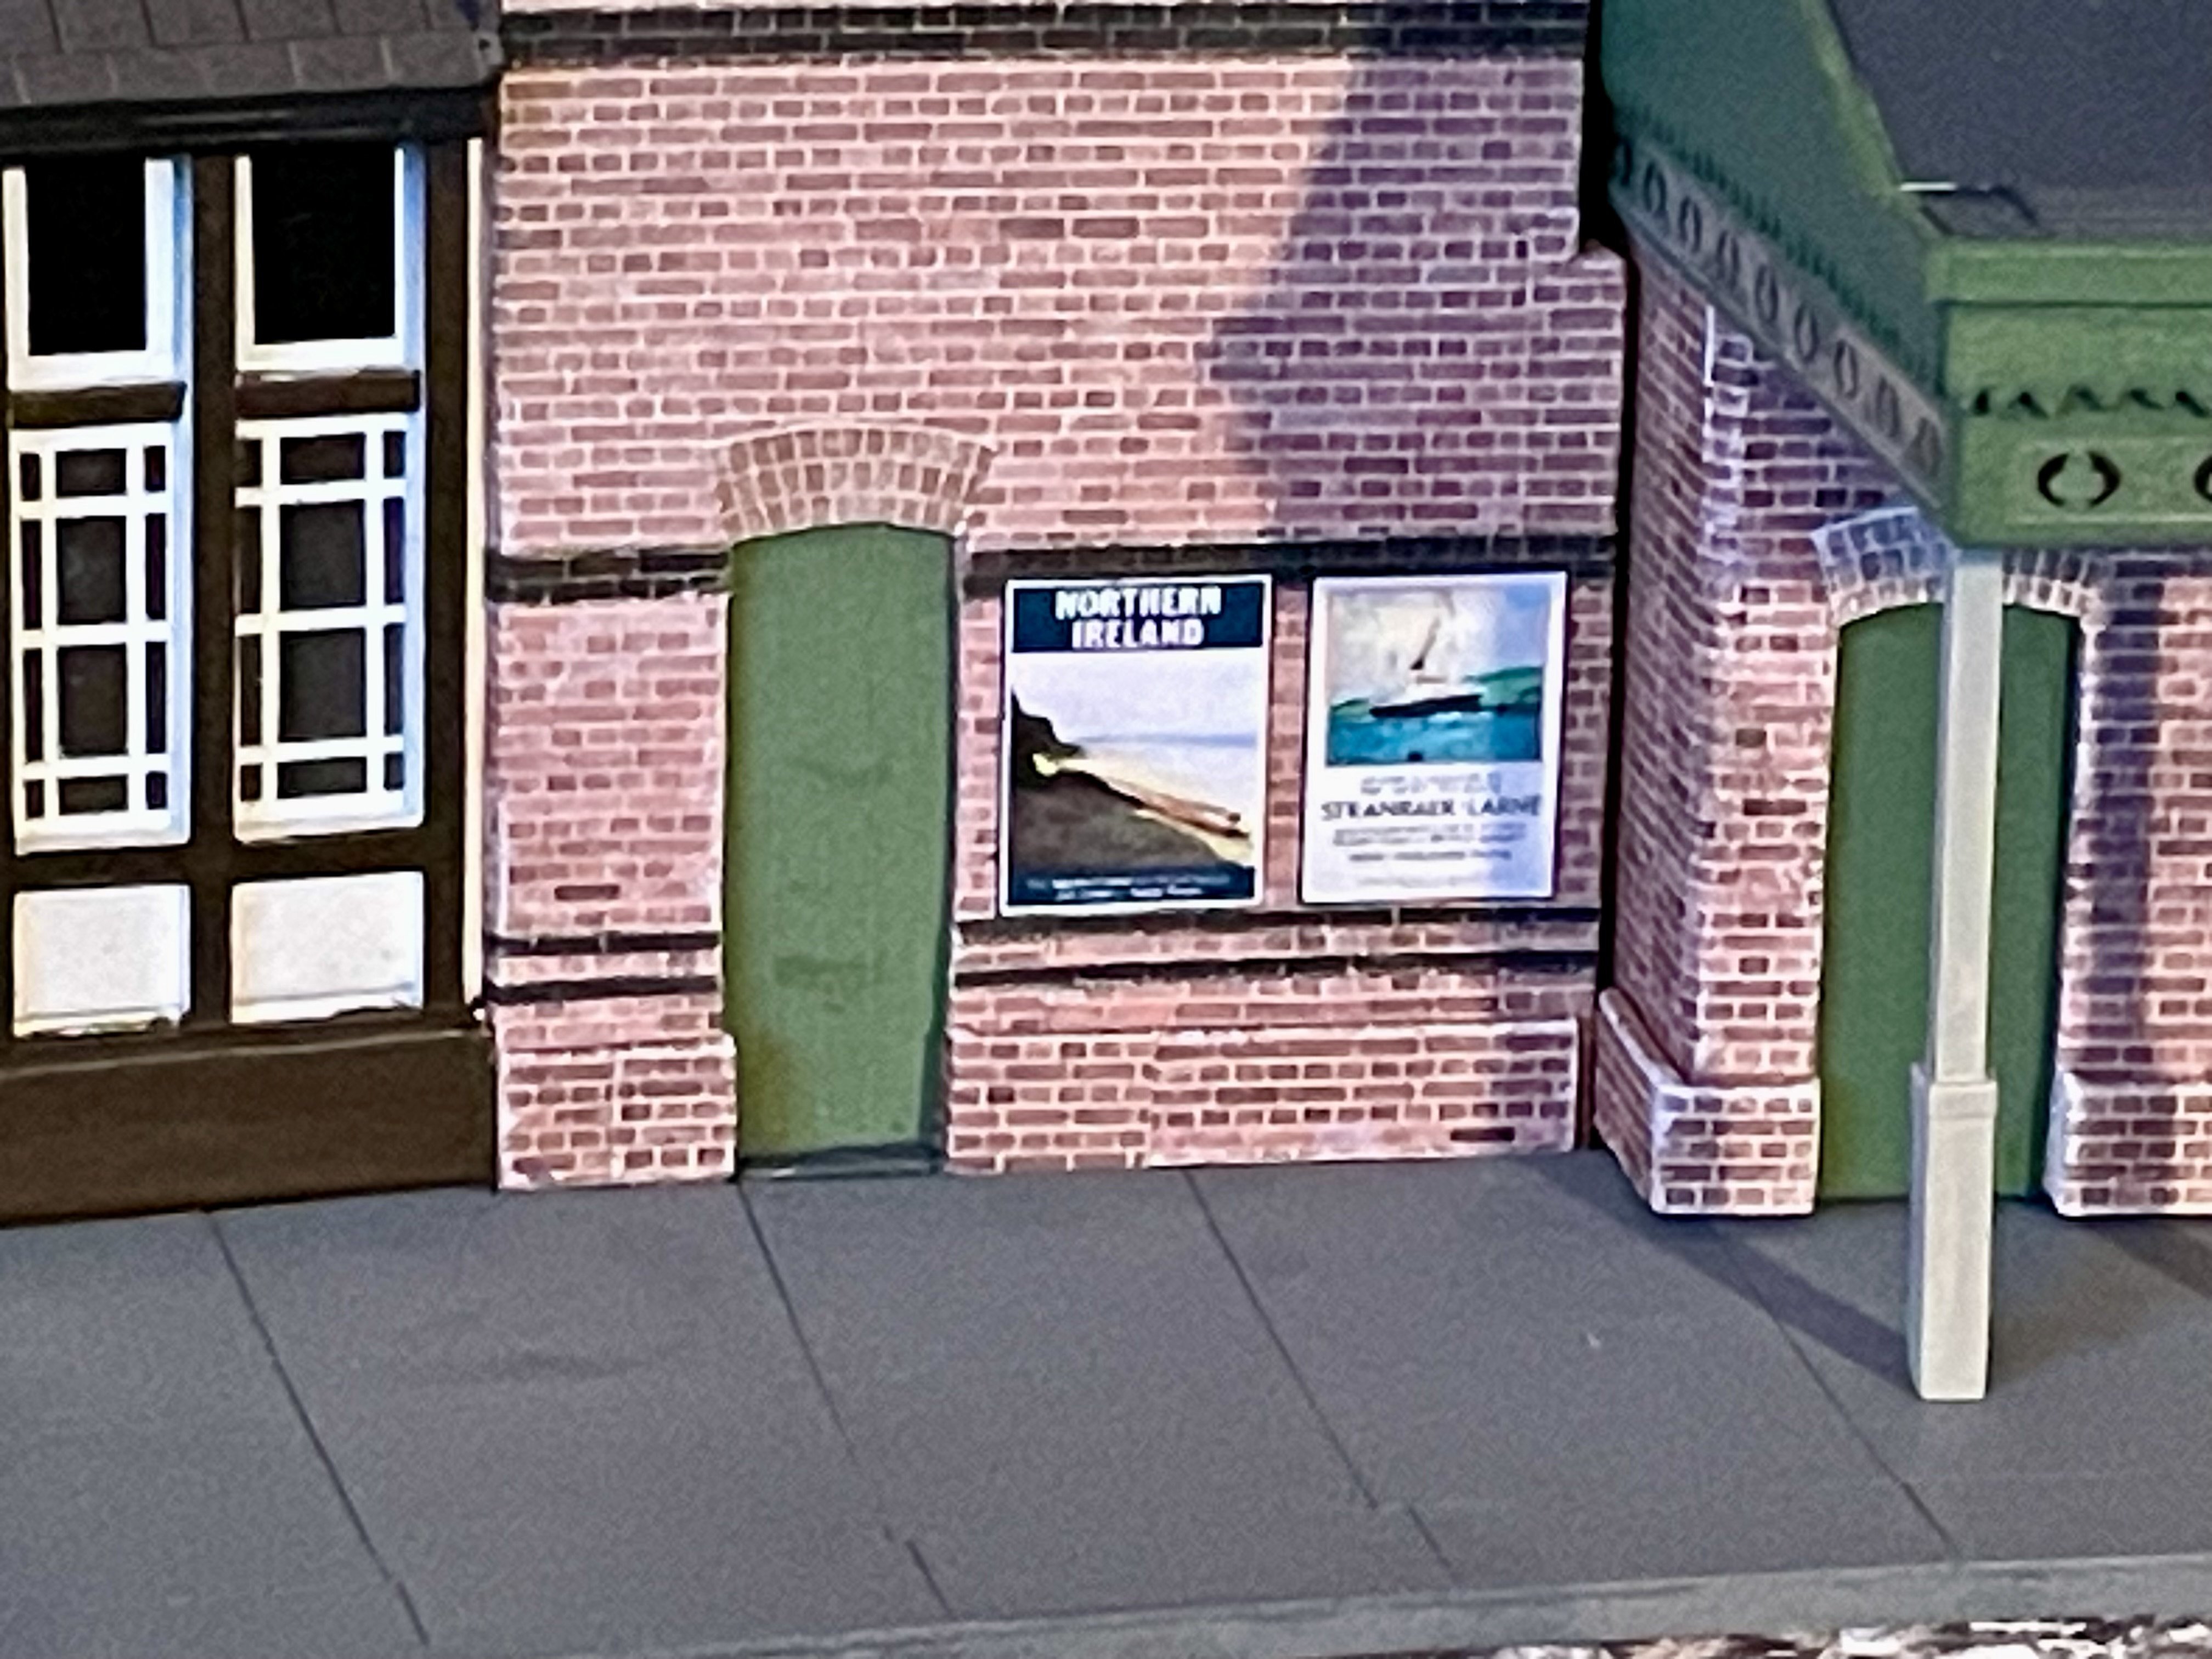
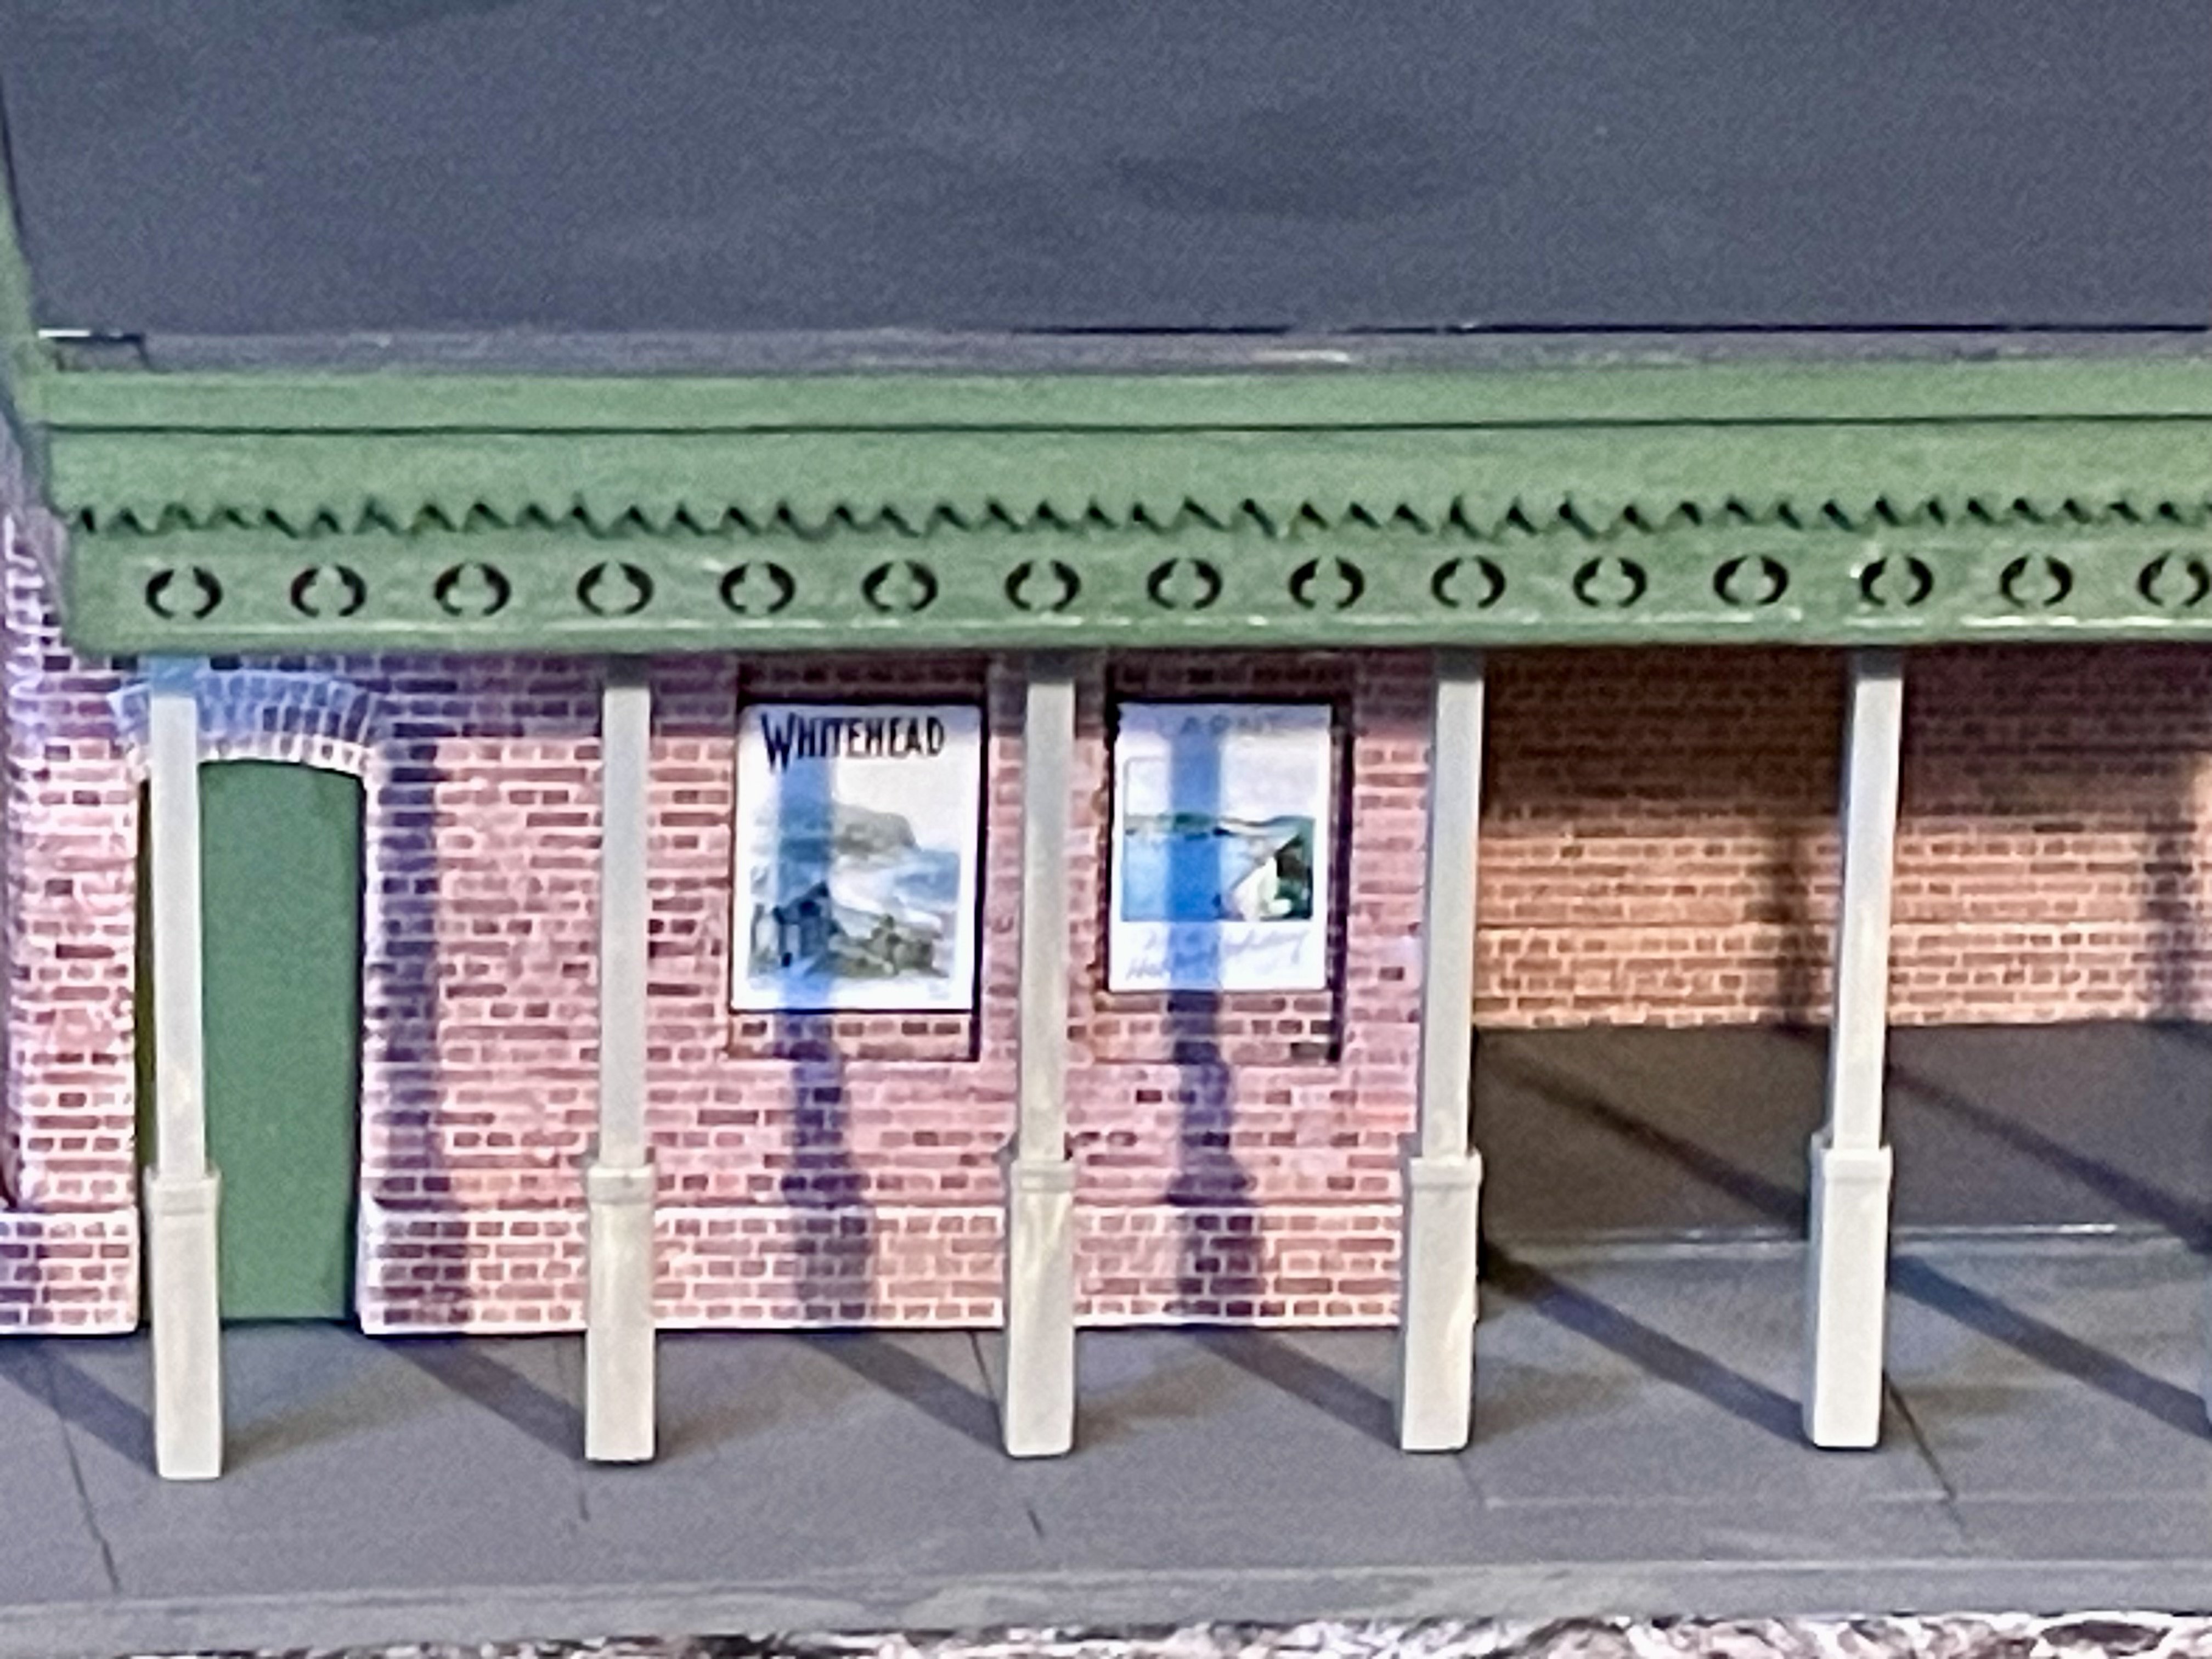
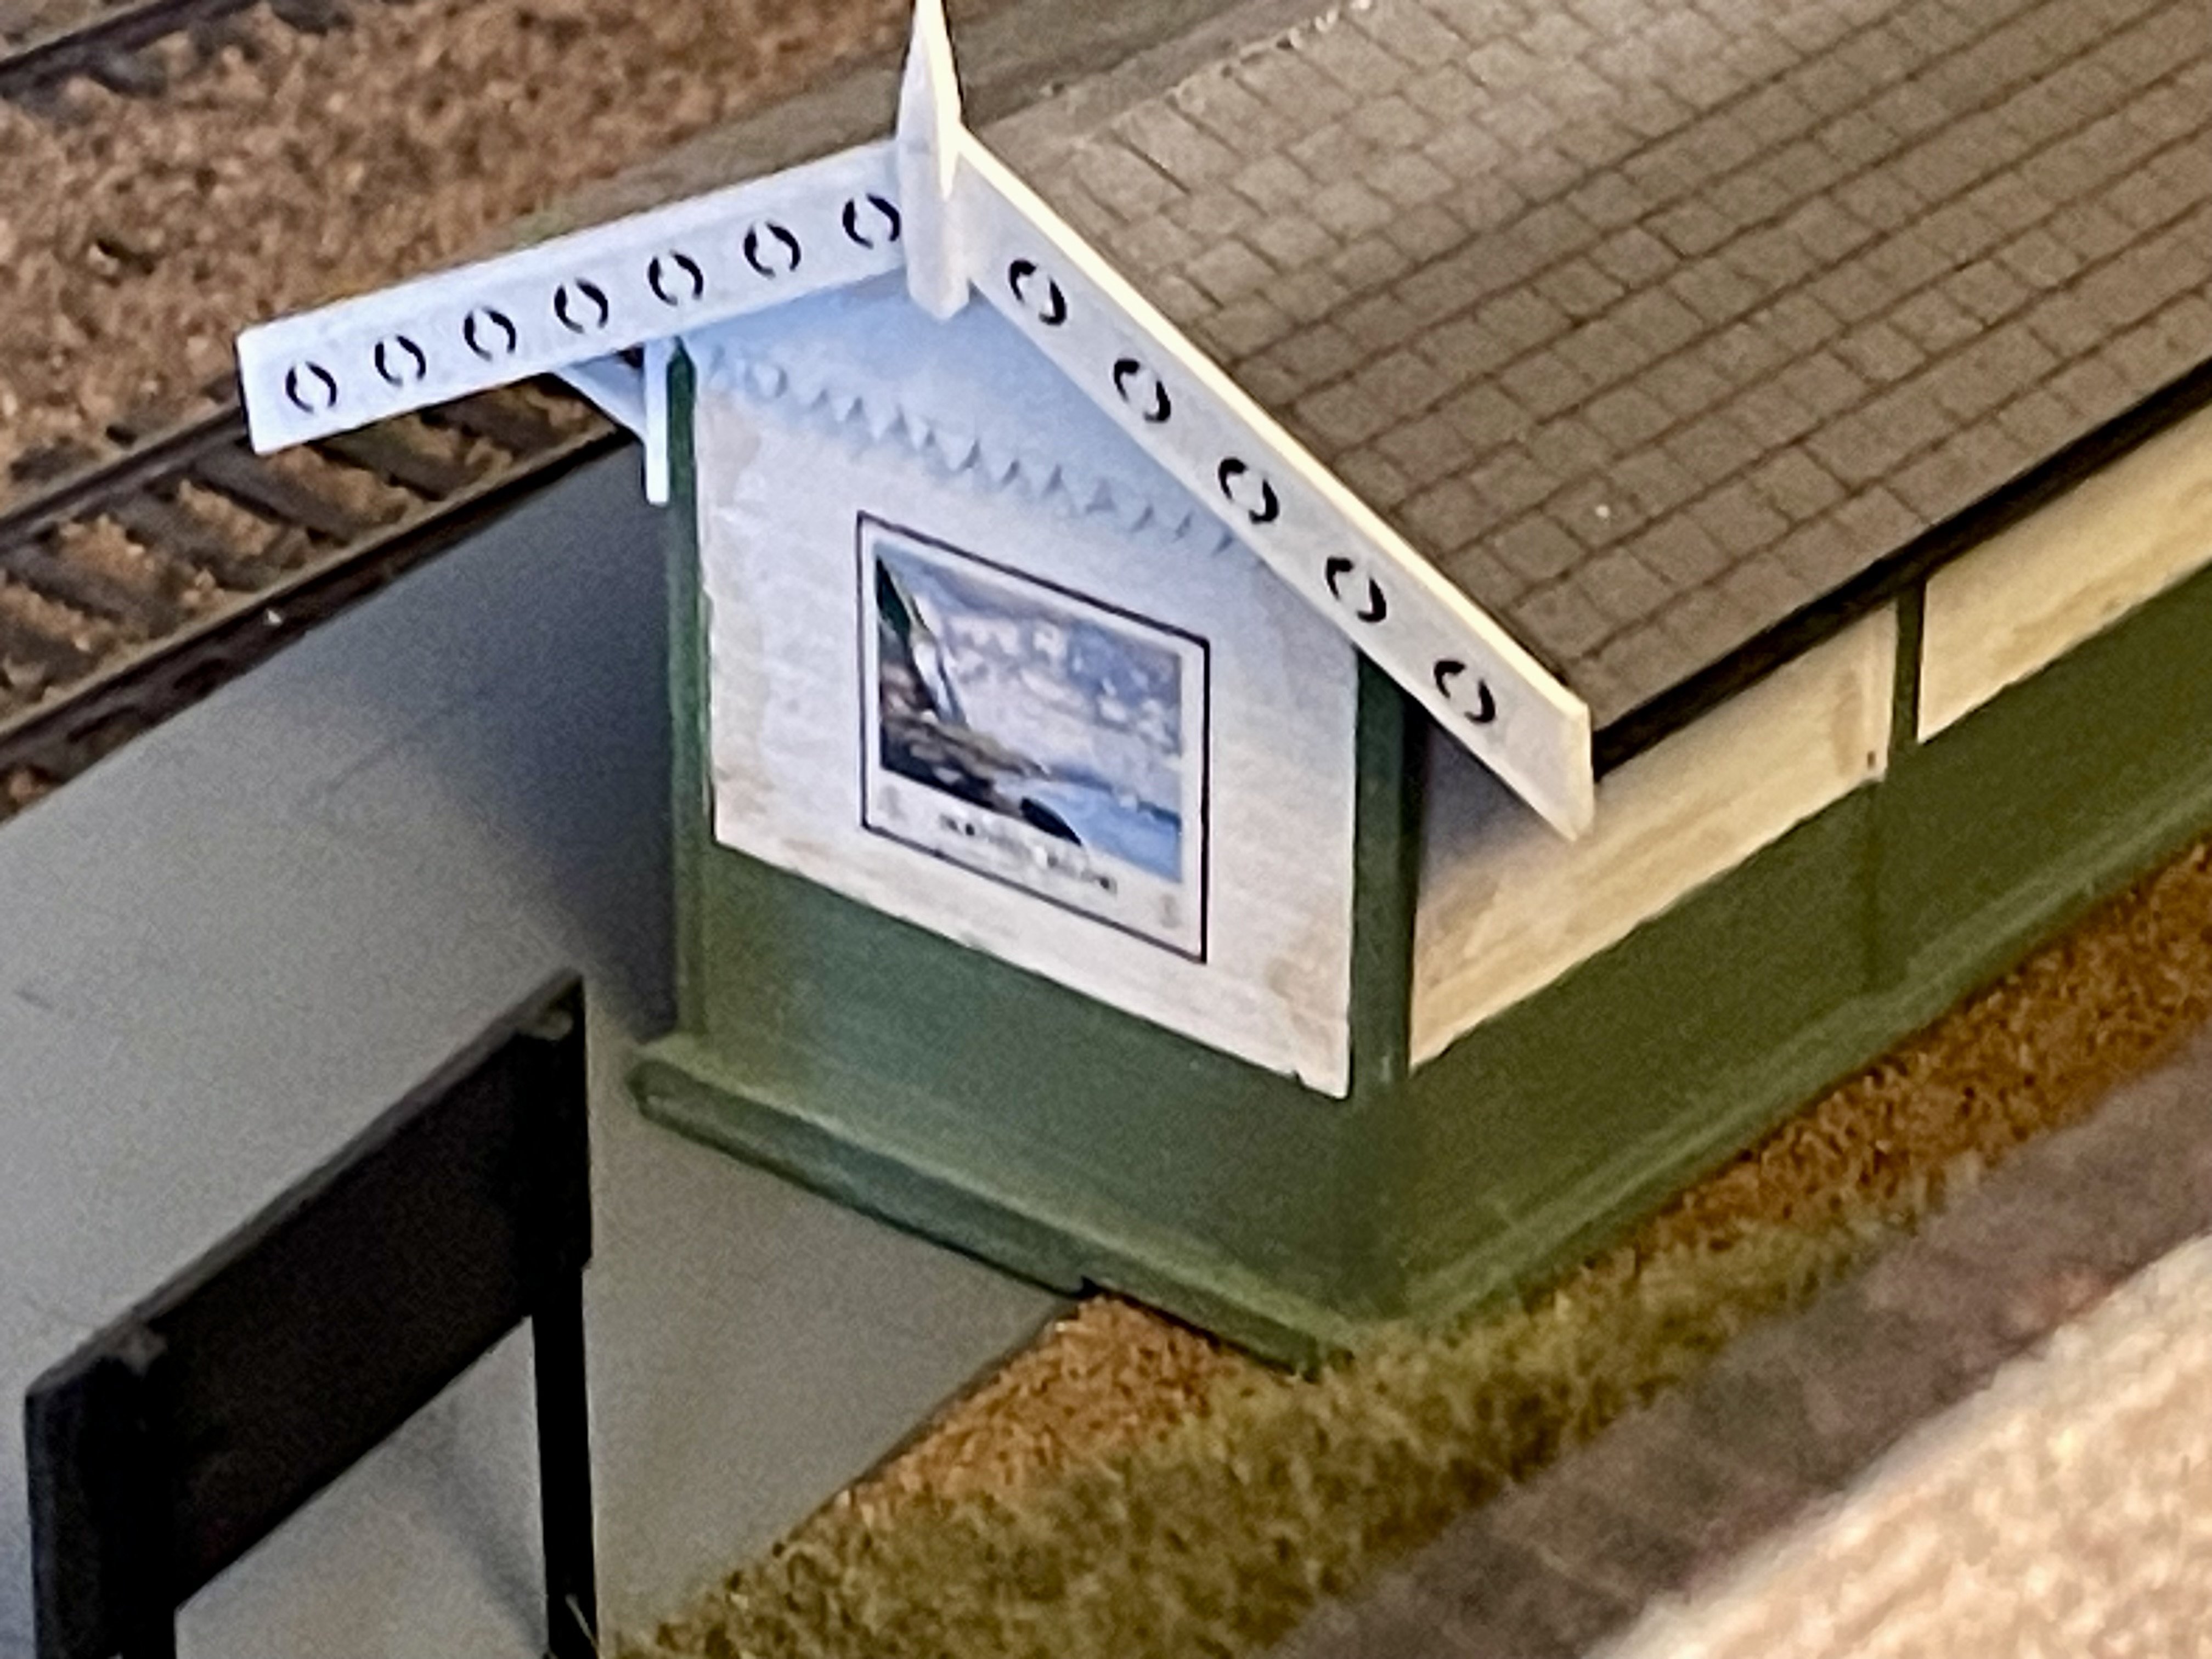
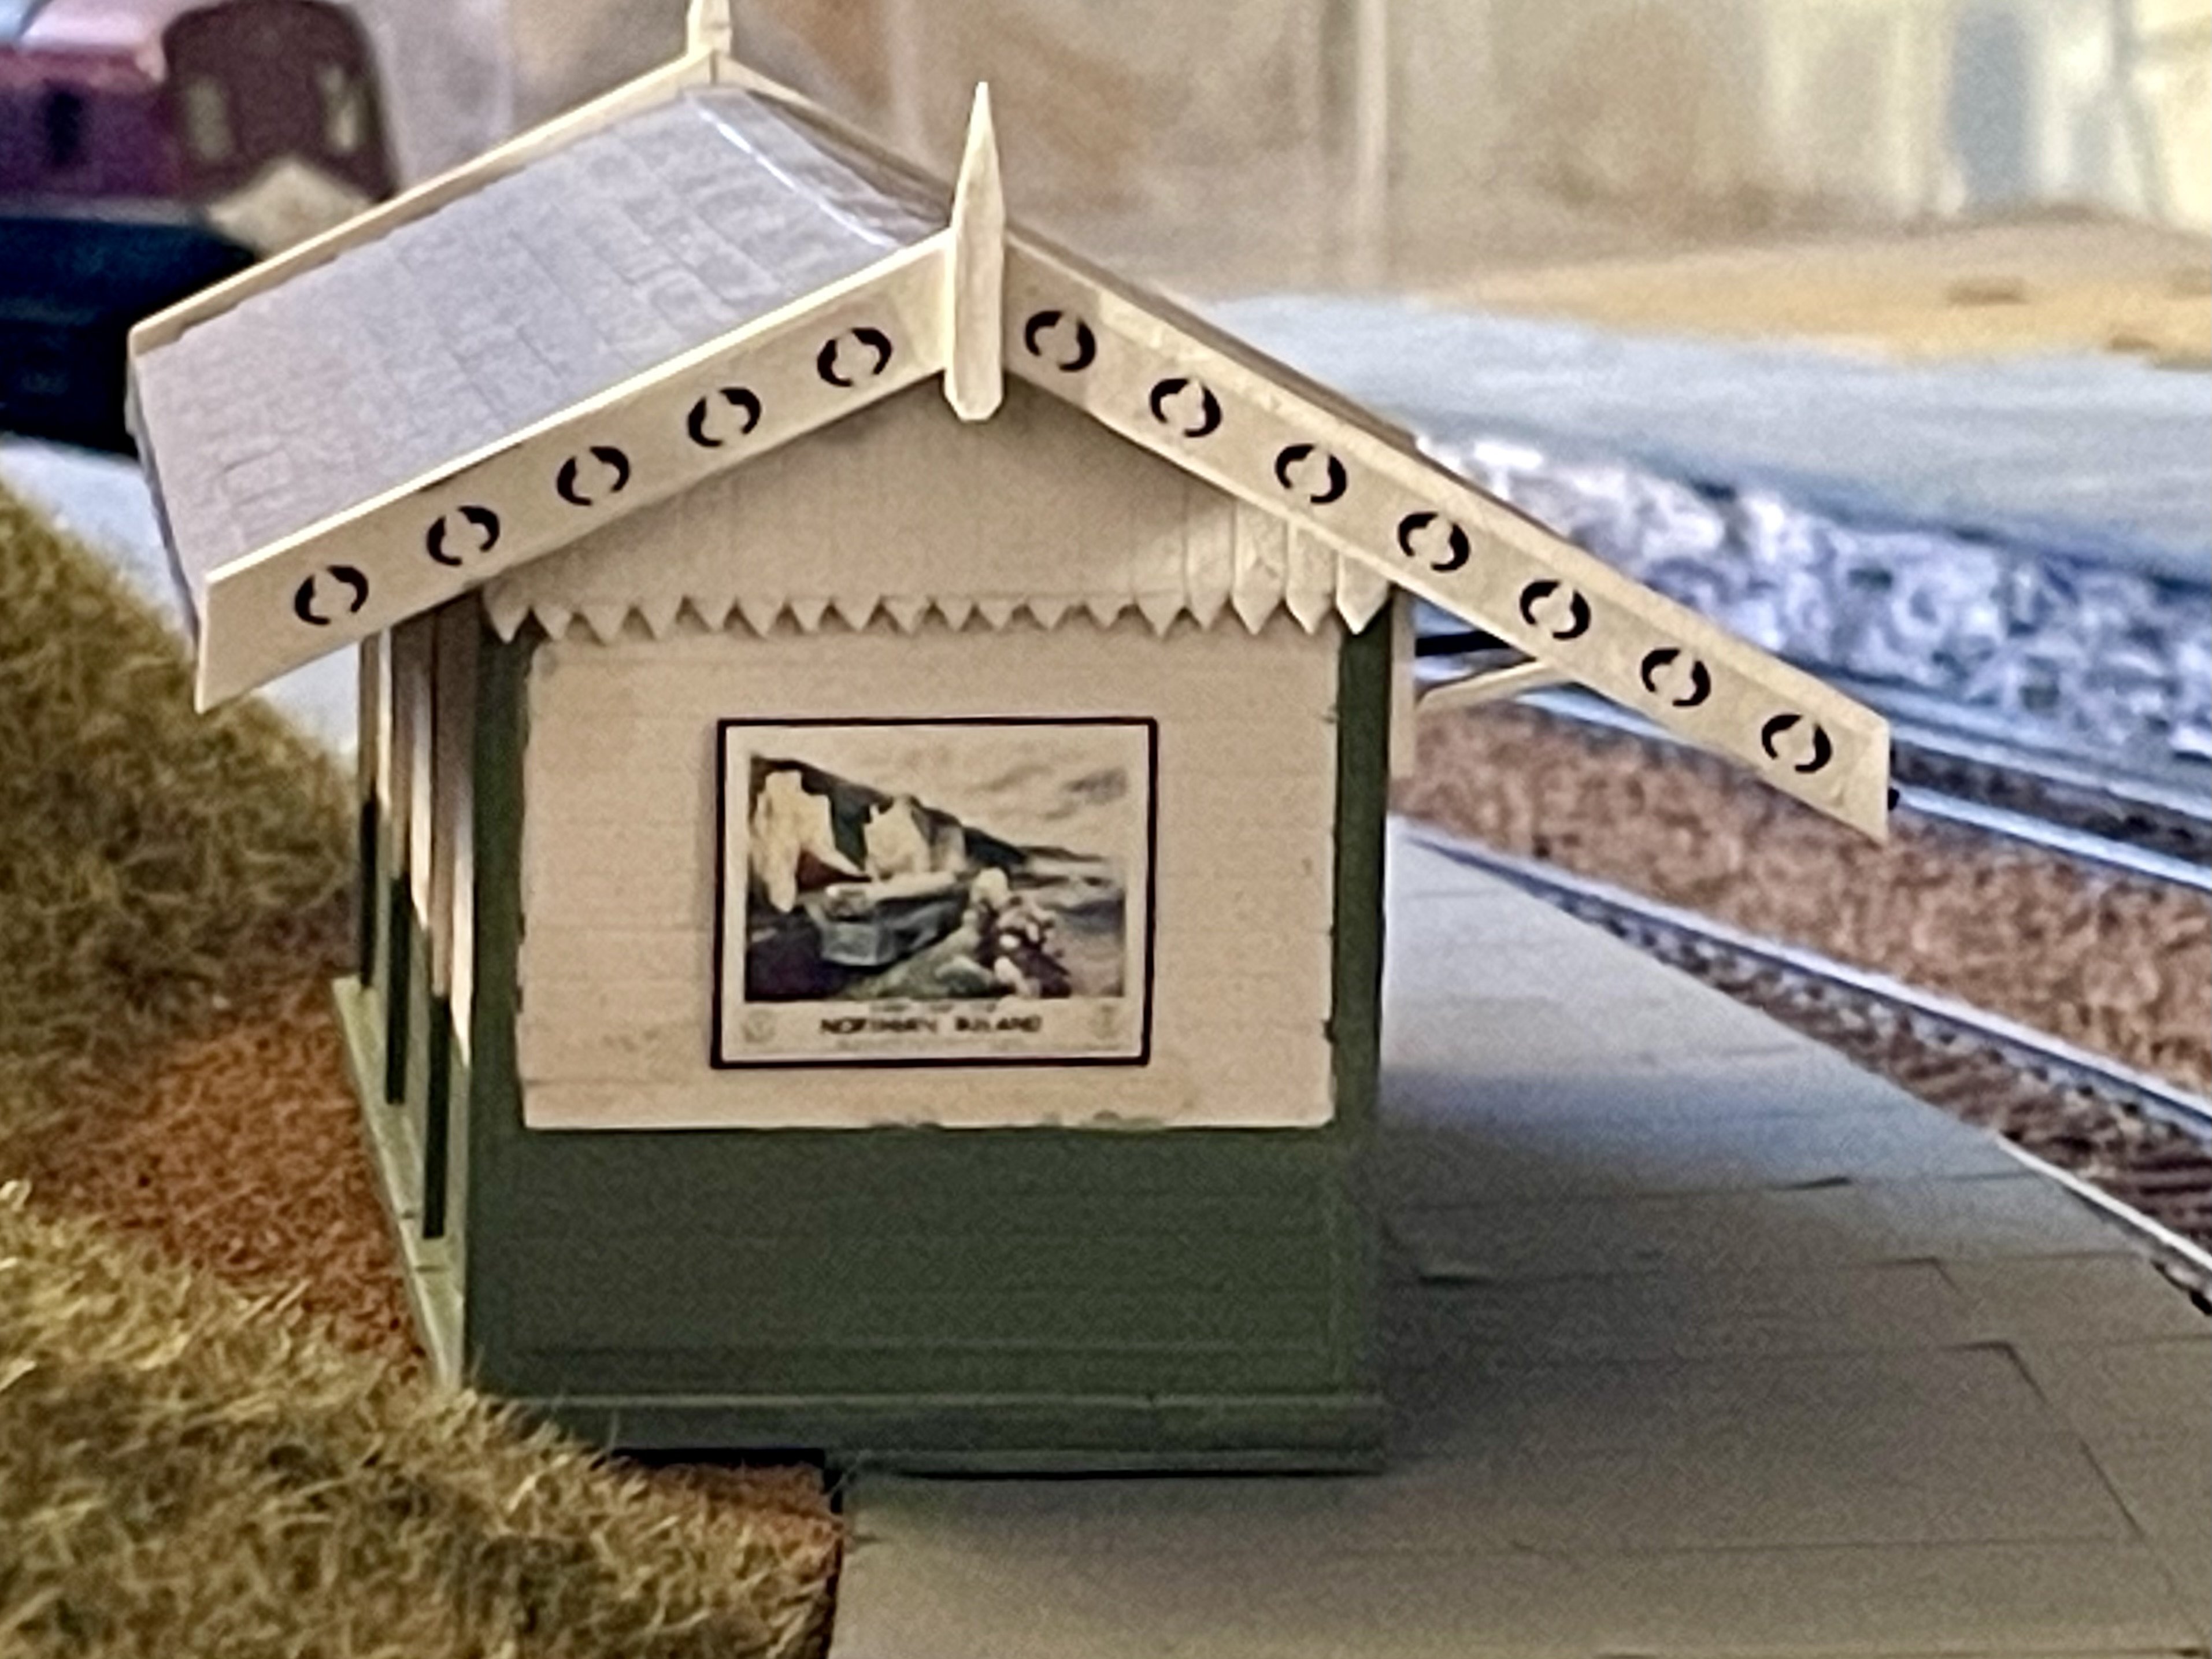
Next building started. Also added some posters. Cheers Darius
14 points
-
1960's today. CIE 1964-06-xx Drogheda A11 yj340. CIE 1961-06-04 Dublin Amiens St 170 yj308. CIE 1960-07-09 Bagnealstown 184 yj307. CIE 1961-05-xx Killarney A33 yj309.13 points
-
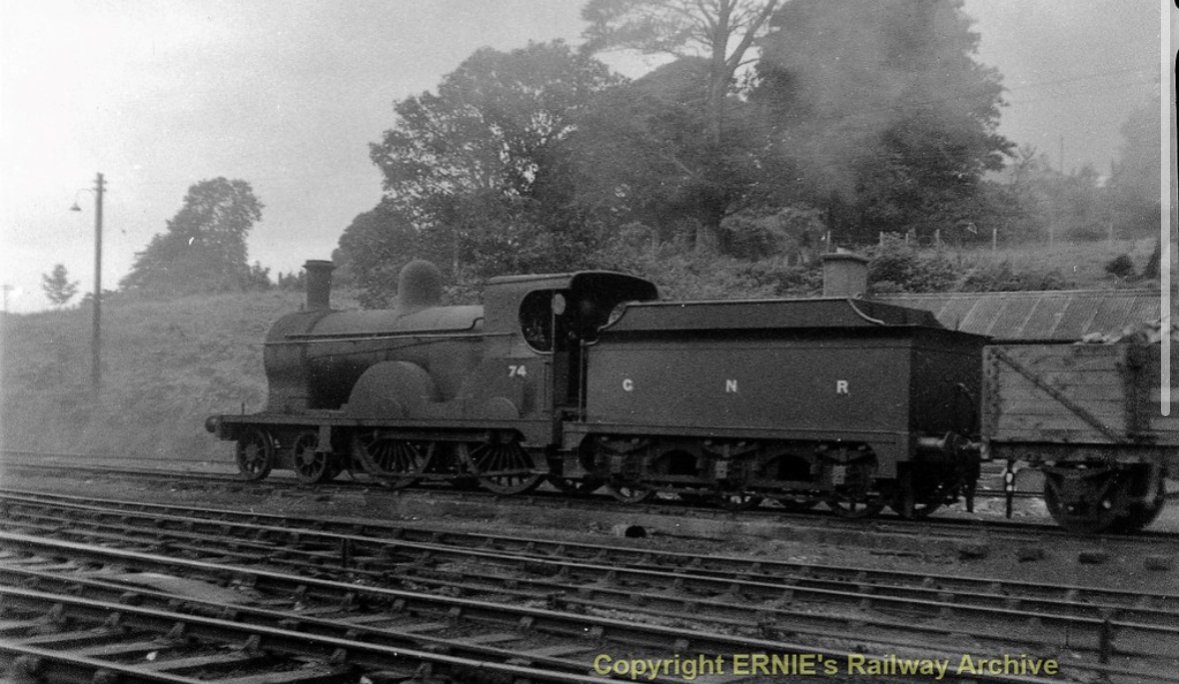
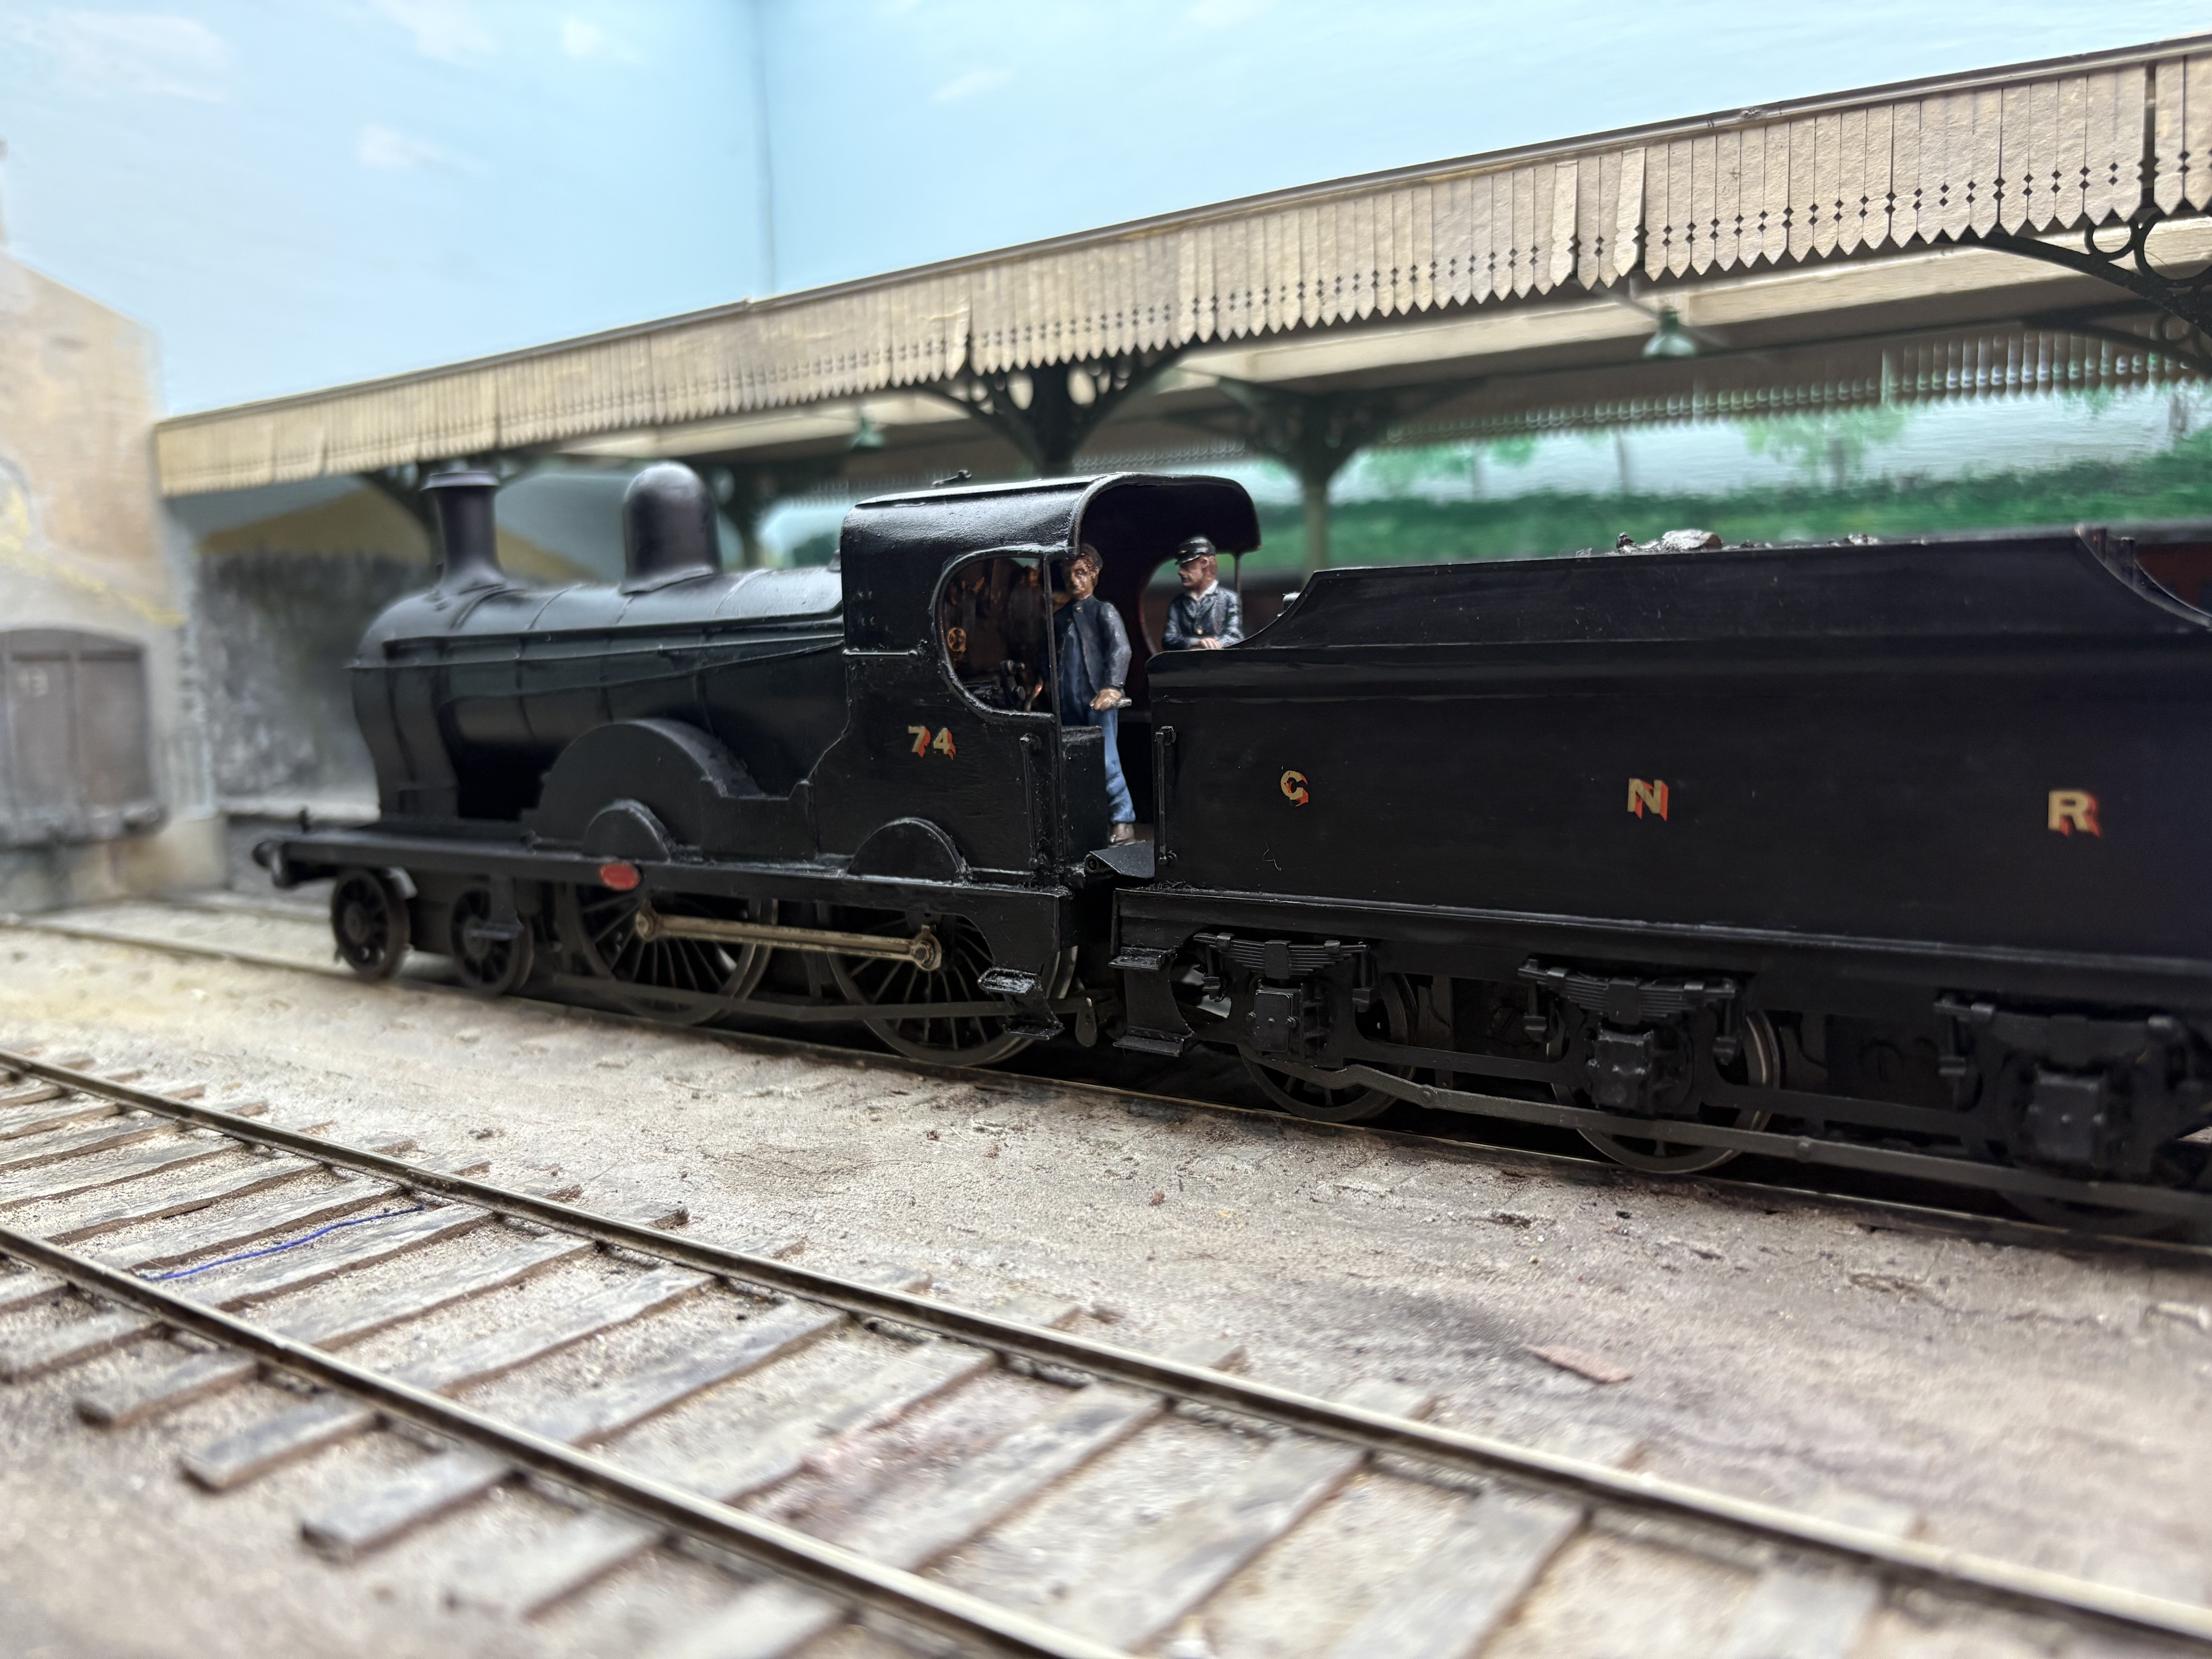
Ernie’s Railway Archive on Flickr. I can do you 74 at Enniskillen in 7mm scale !
13 points
-
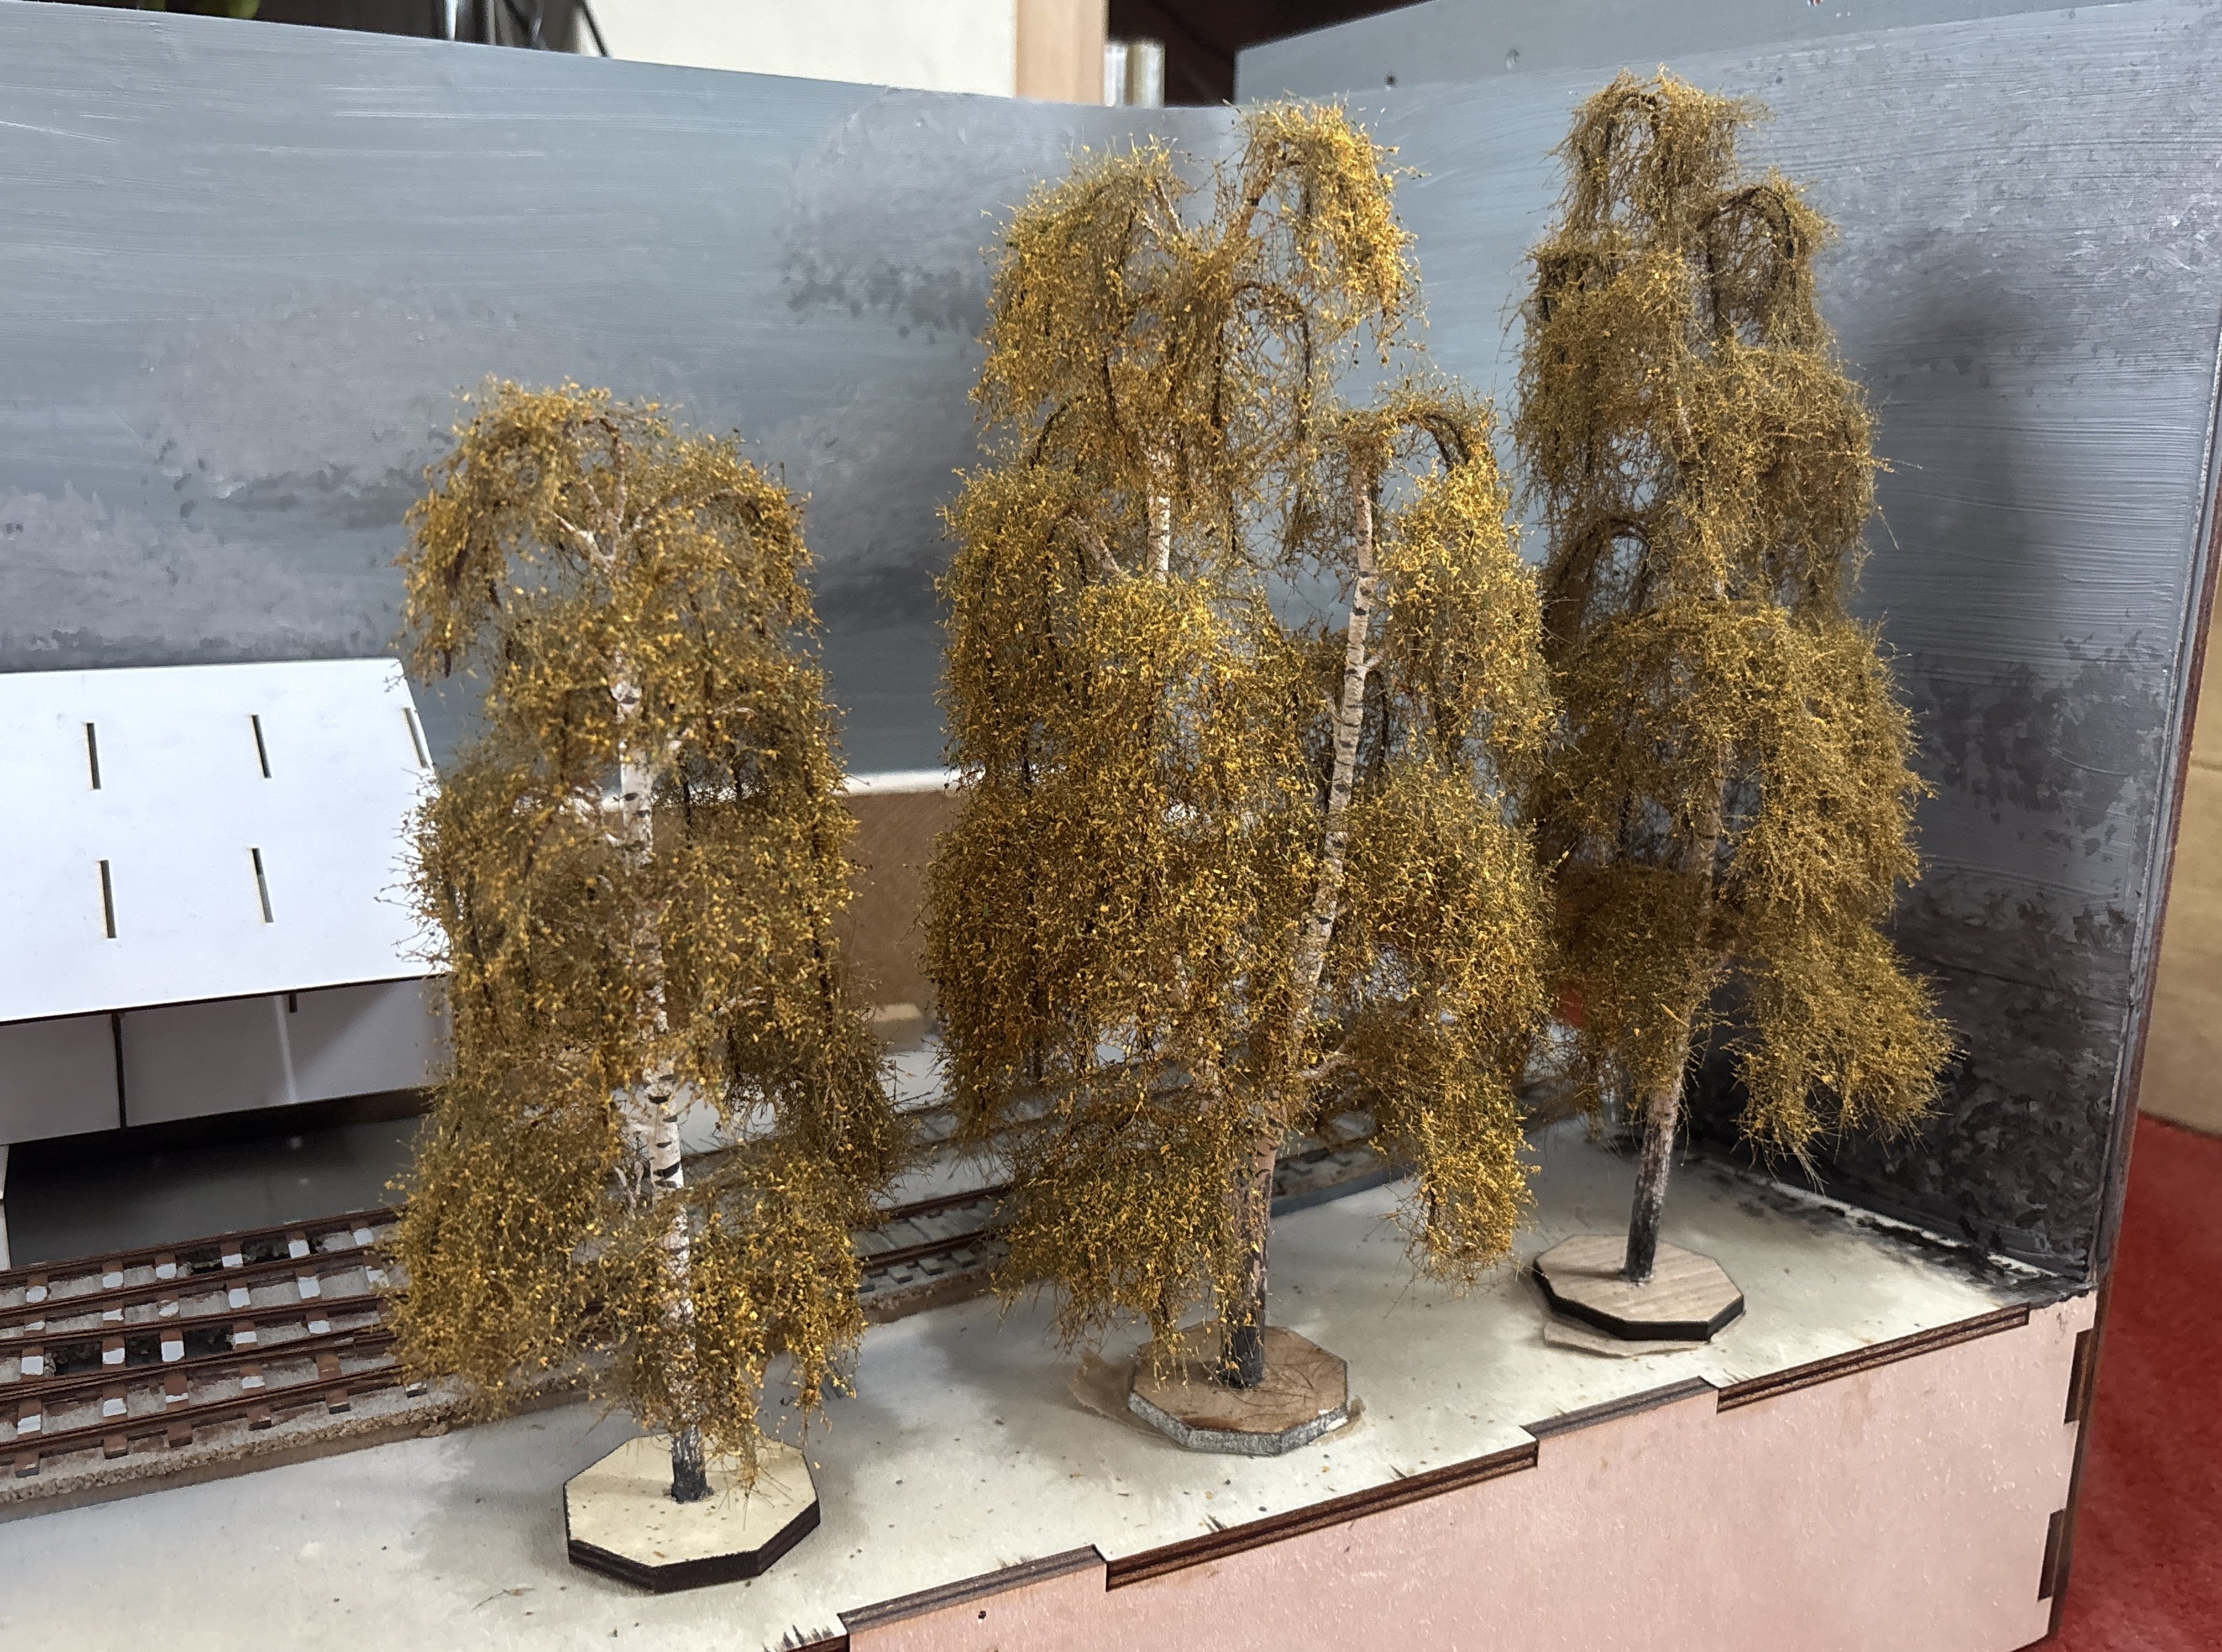
Not much to report, a little more progress on assembling the mill building, and my tree order has arrived. this isn’t the final placing for the trees, indeed I may put one at the other end of the layout These professionally-made ones will be in the foreground, backed by a couple of homemade seamoss trees and then painted ones on the backscene. I’ll try to keep them all in a similar autumn colour palette.
13 points
-
Sea wall painted and temporarily in place. Cheers Darius
13 points
-
CDRJC 1957-09-27 Barnesmore Gap R'Car20 PFF355. CDRJC 1957-09-27 Killybegs Pier. PFF330. CDRJC 1957-09-27 Railcar 20 on the Killybegs turntable. PFF174. CDRJC 1958-06-08 Ballyshannon PFF101.13 points
-
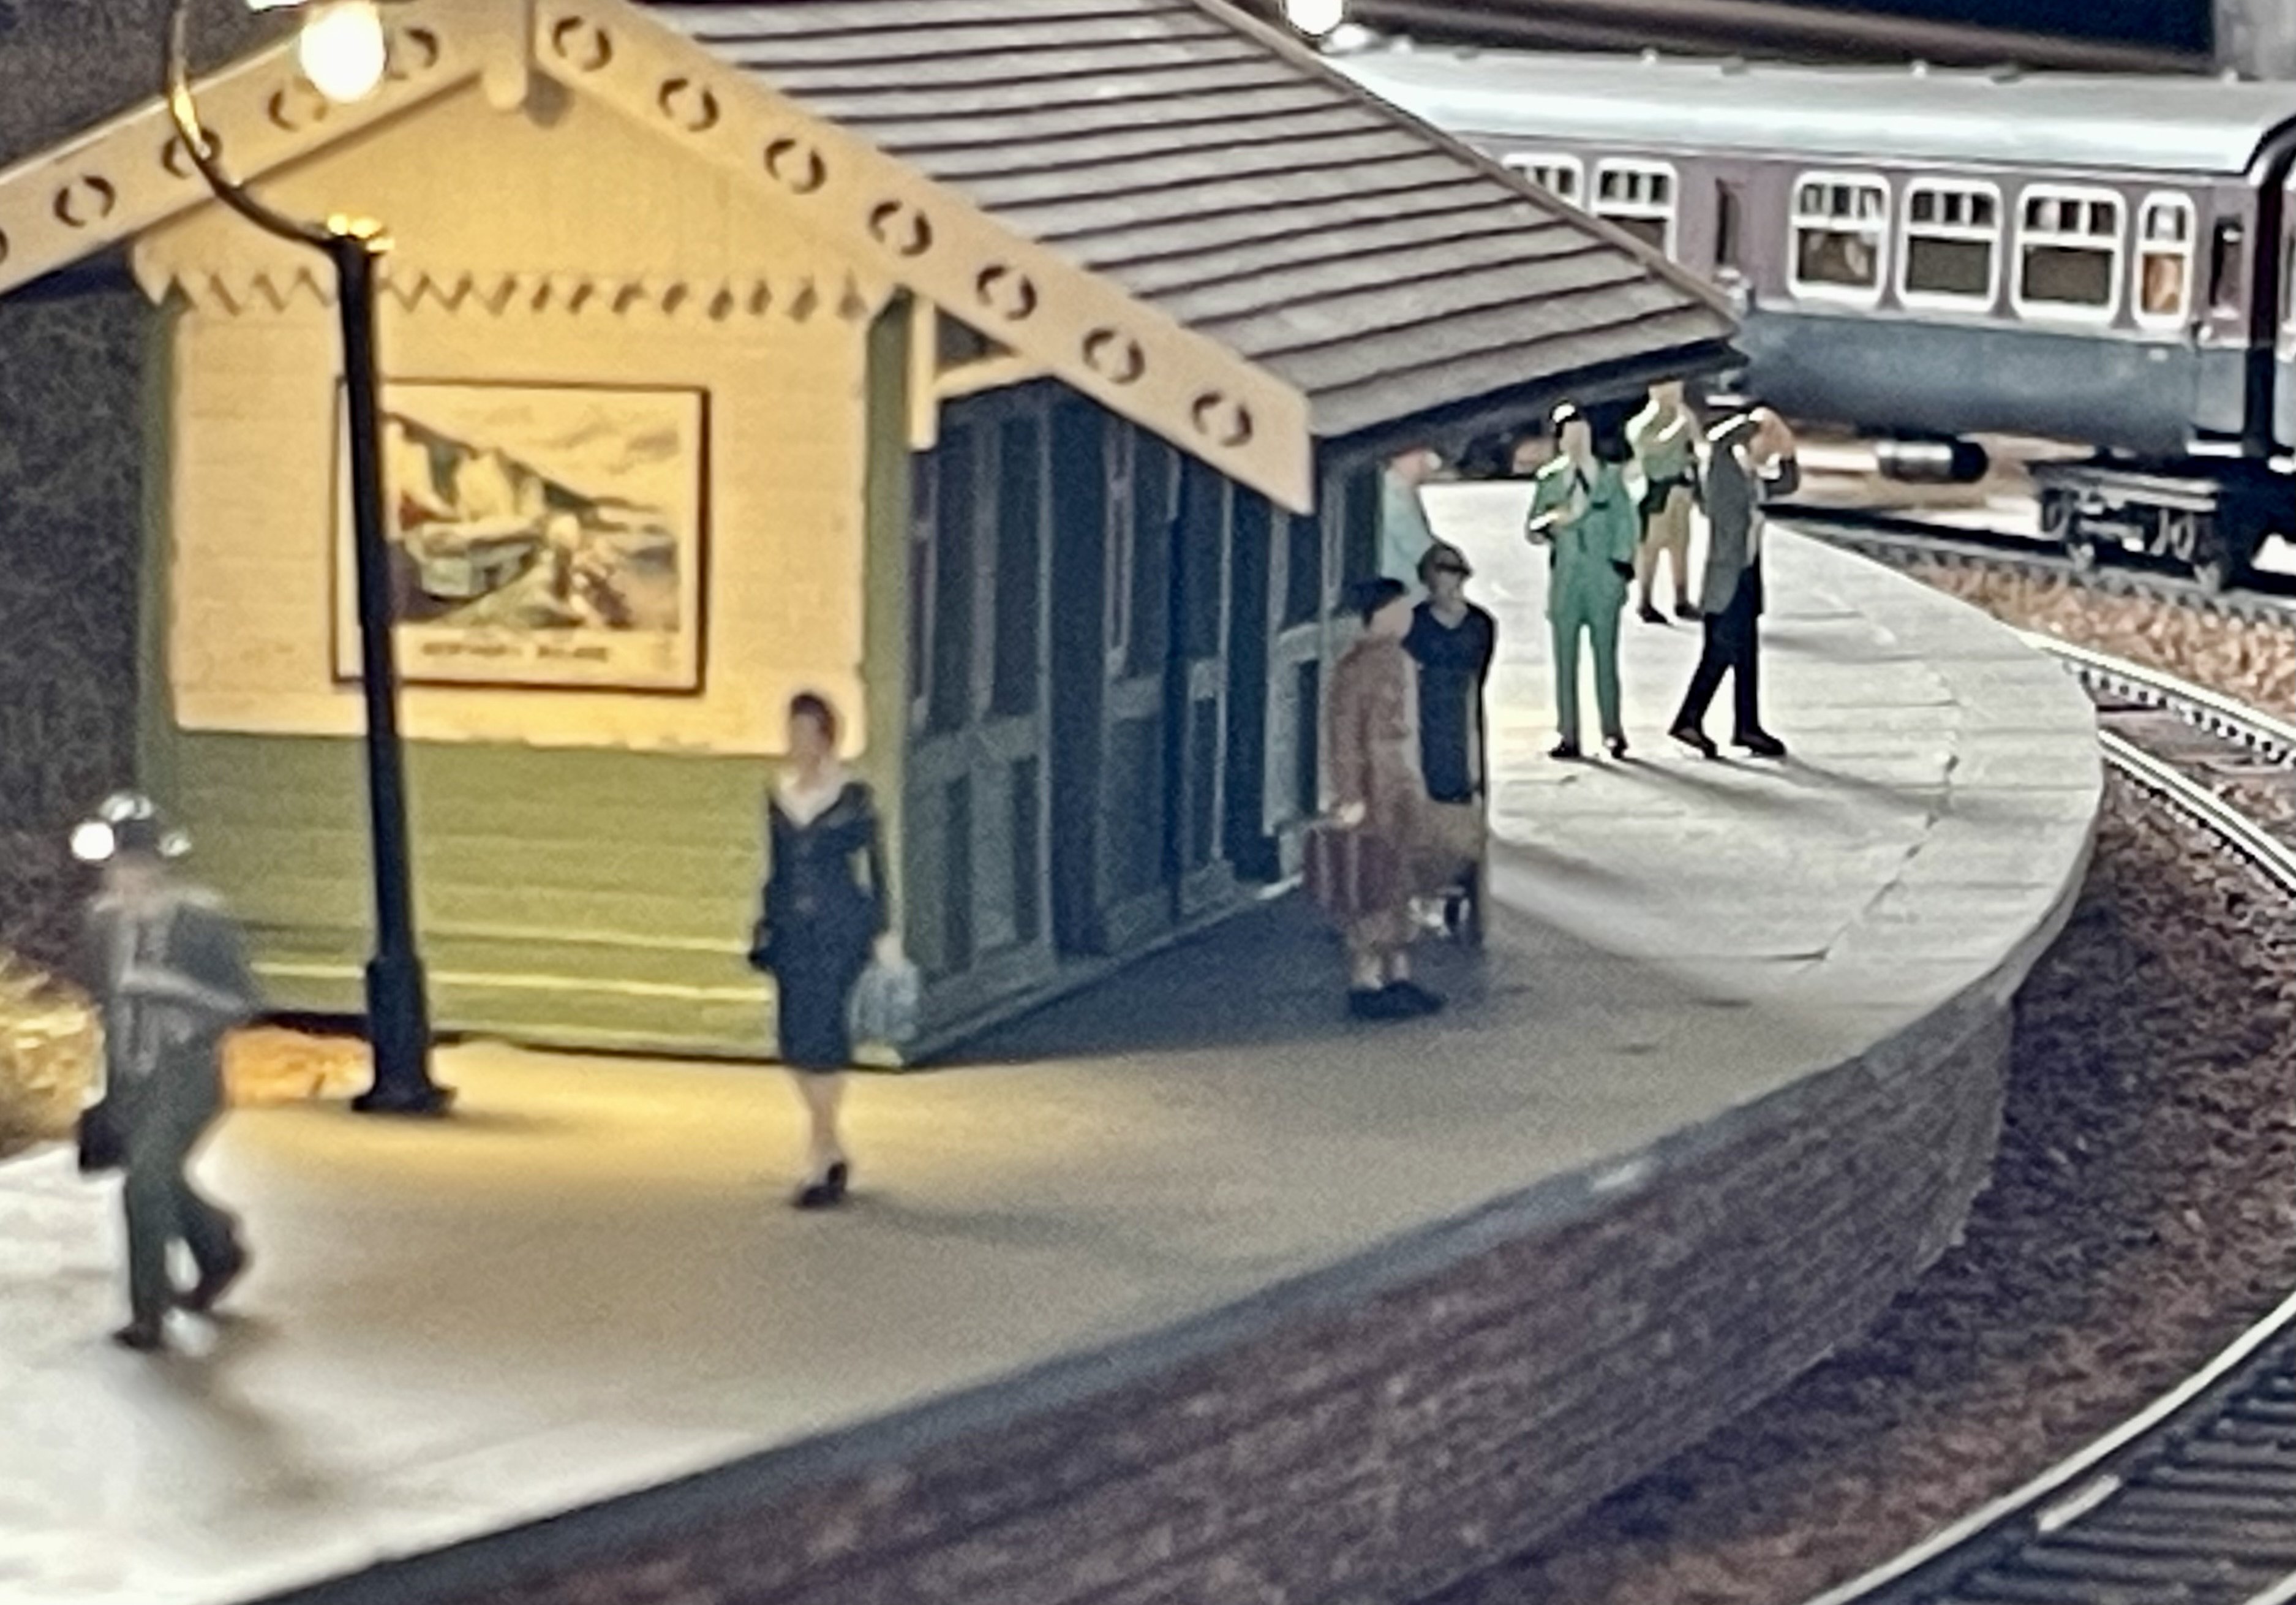
Added lights and peops to the down platform. Cheers Darius
13 points
-
1976-11-xx Ballysodare yj065. CIE 1964-xx CA Waterford shed yj060. IR 1985-04CA Westport yj061. 1976-11ca Bord na Mona where yj062.13 points
-
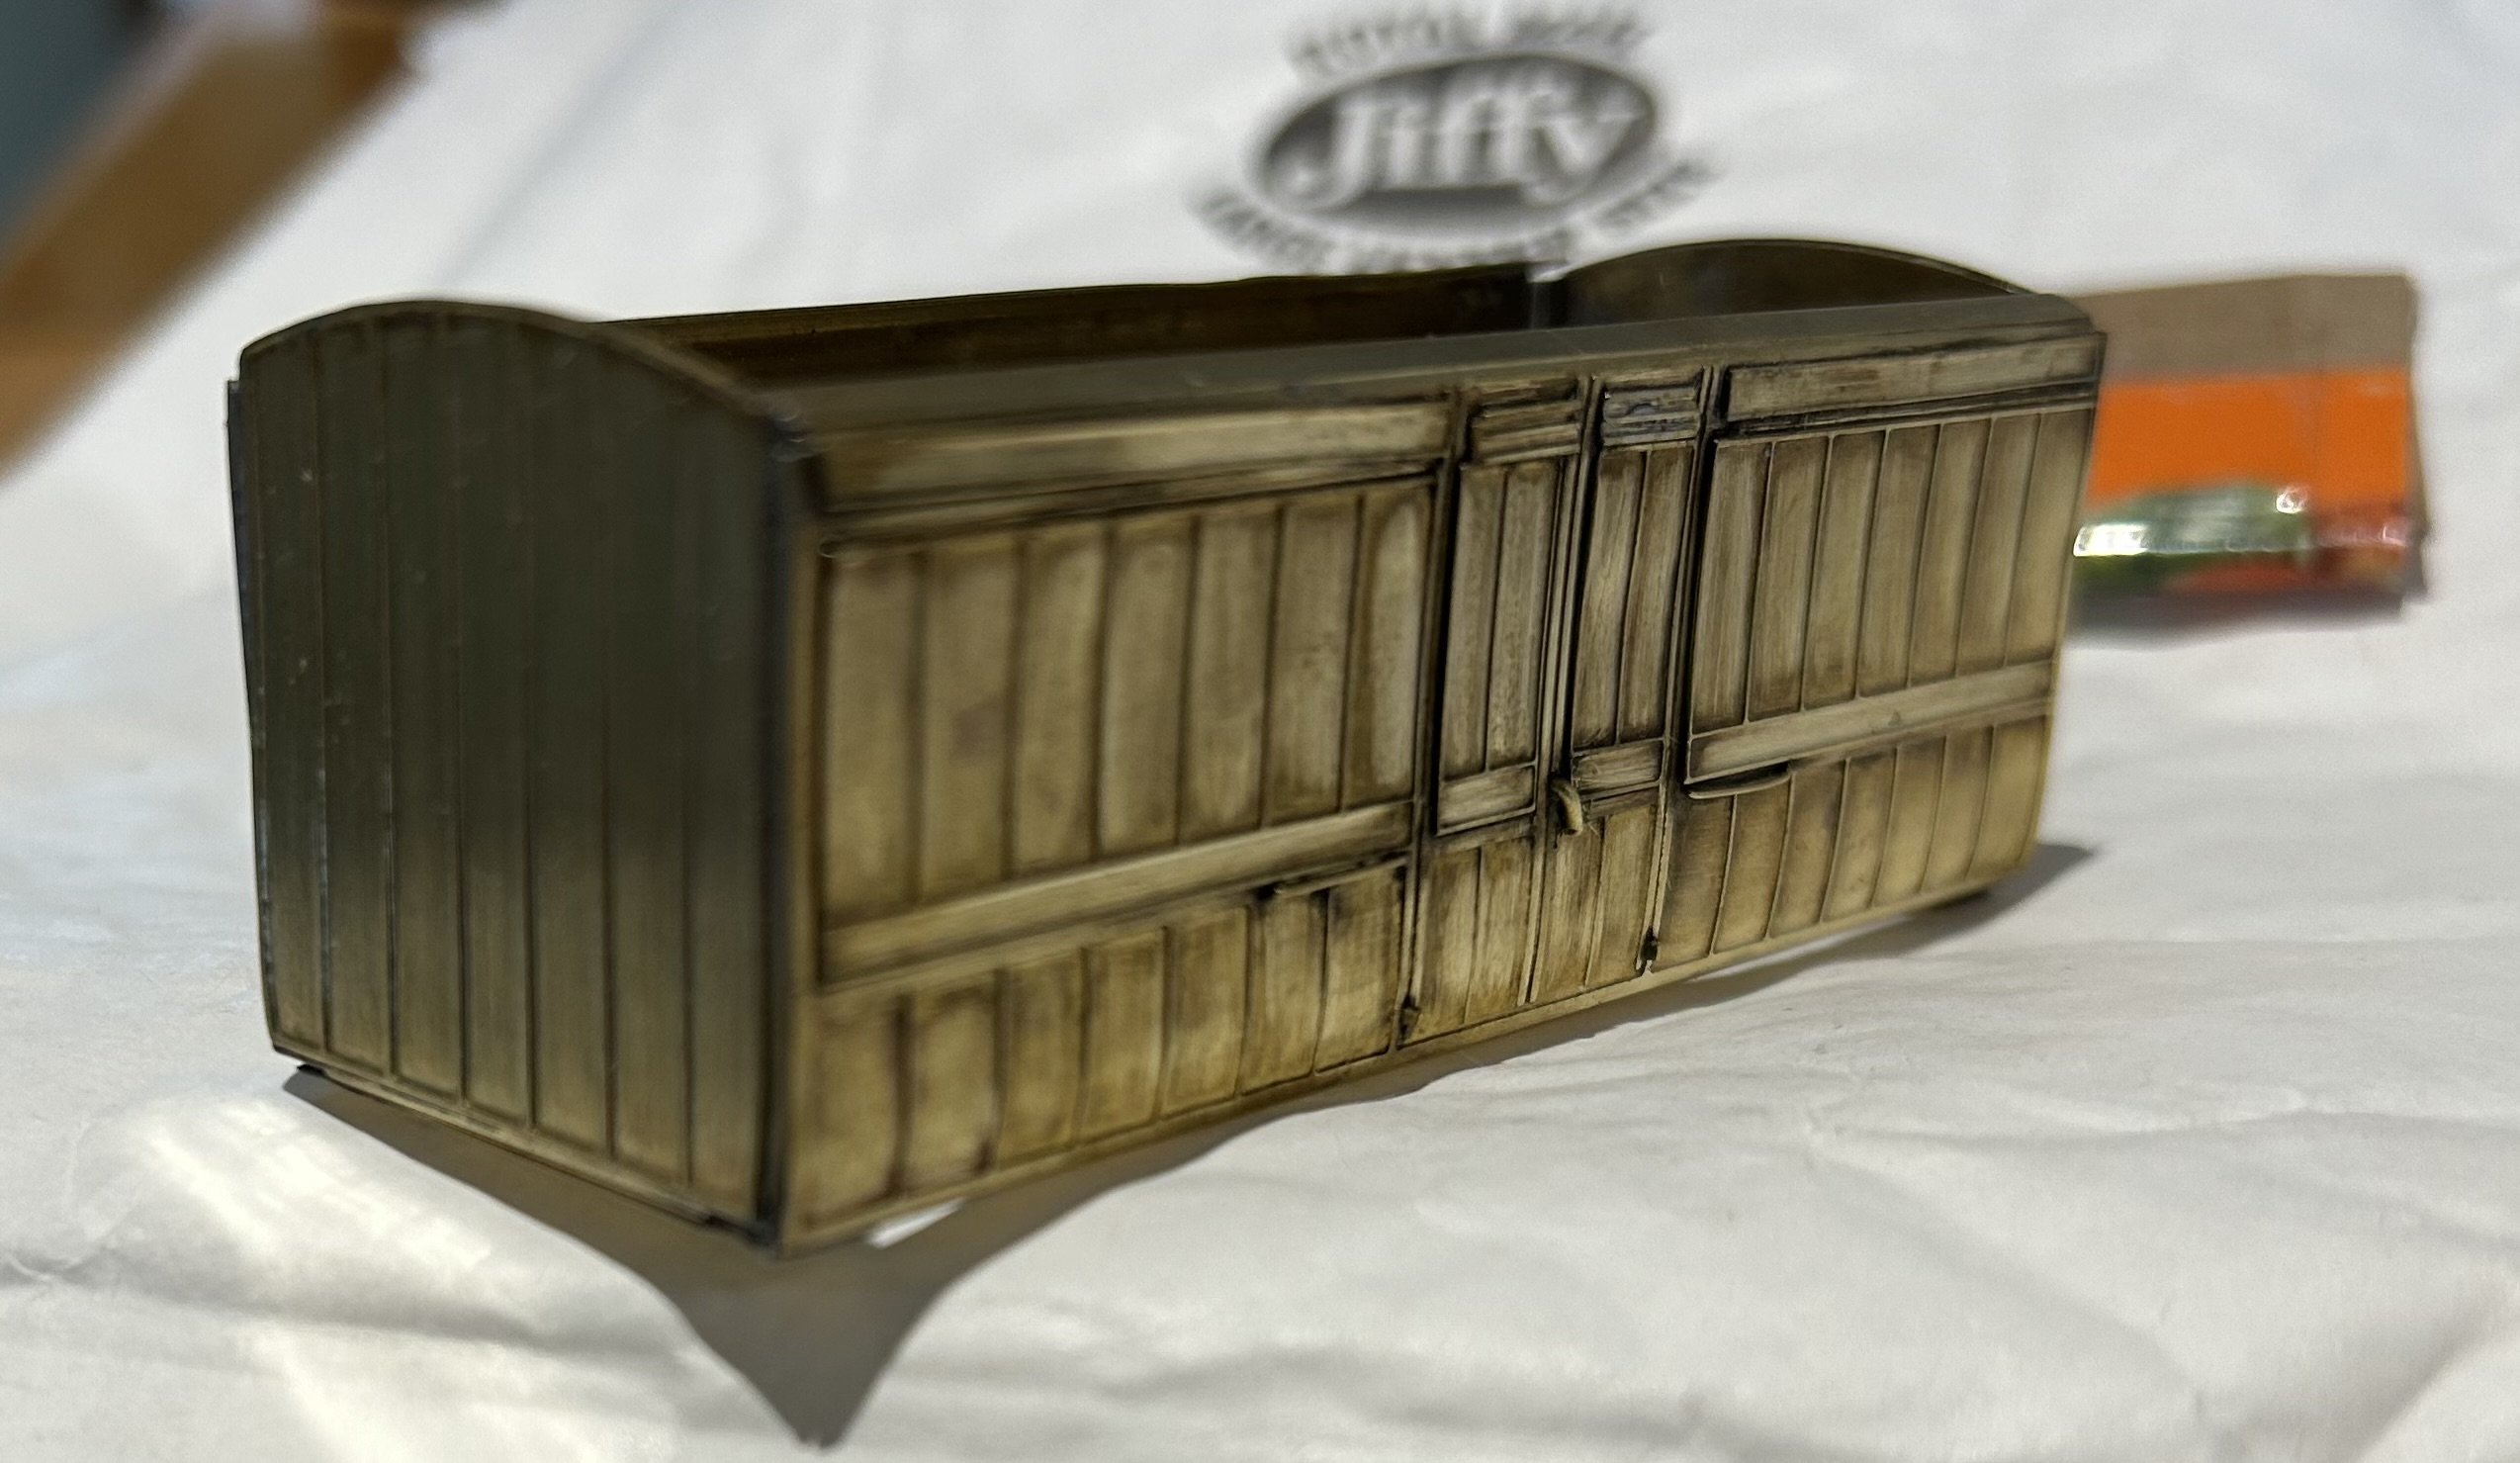
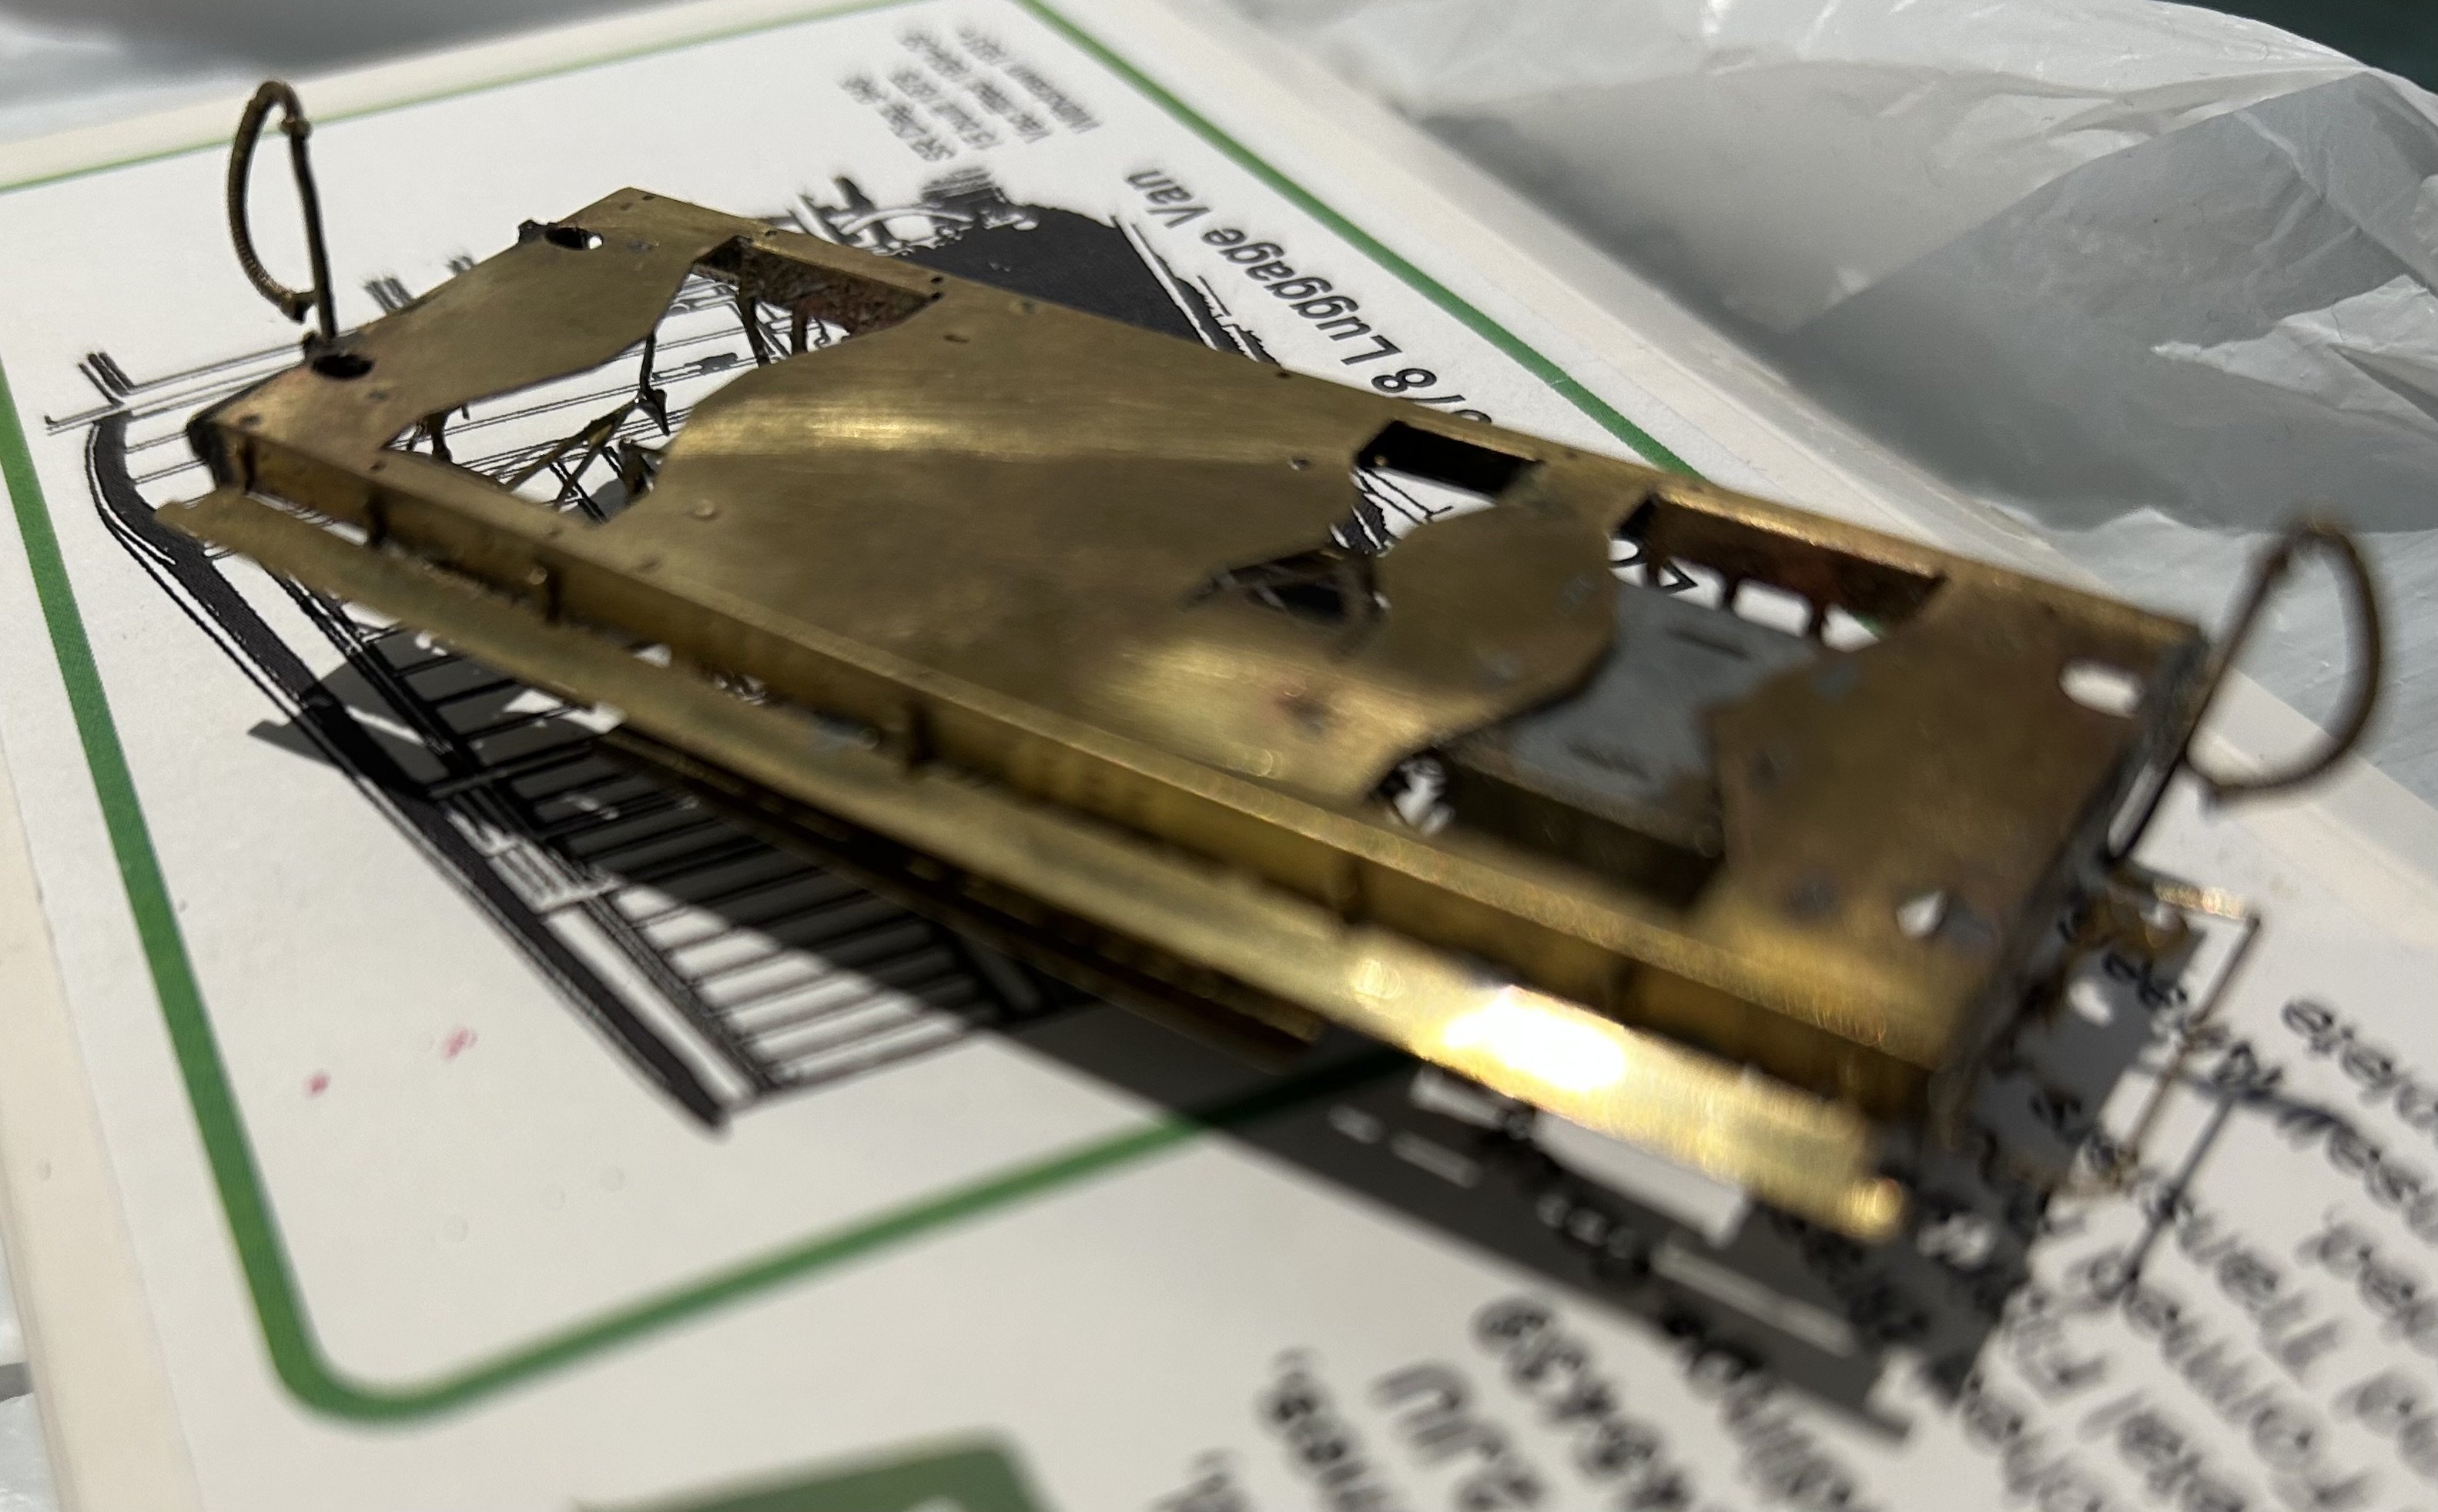
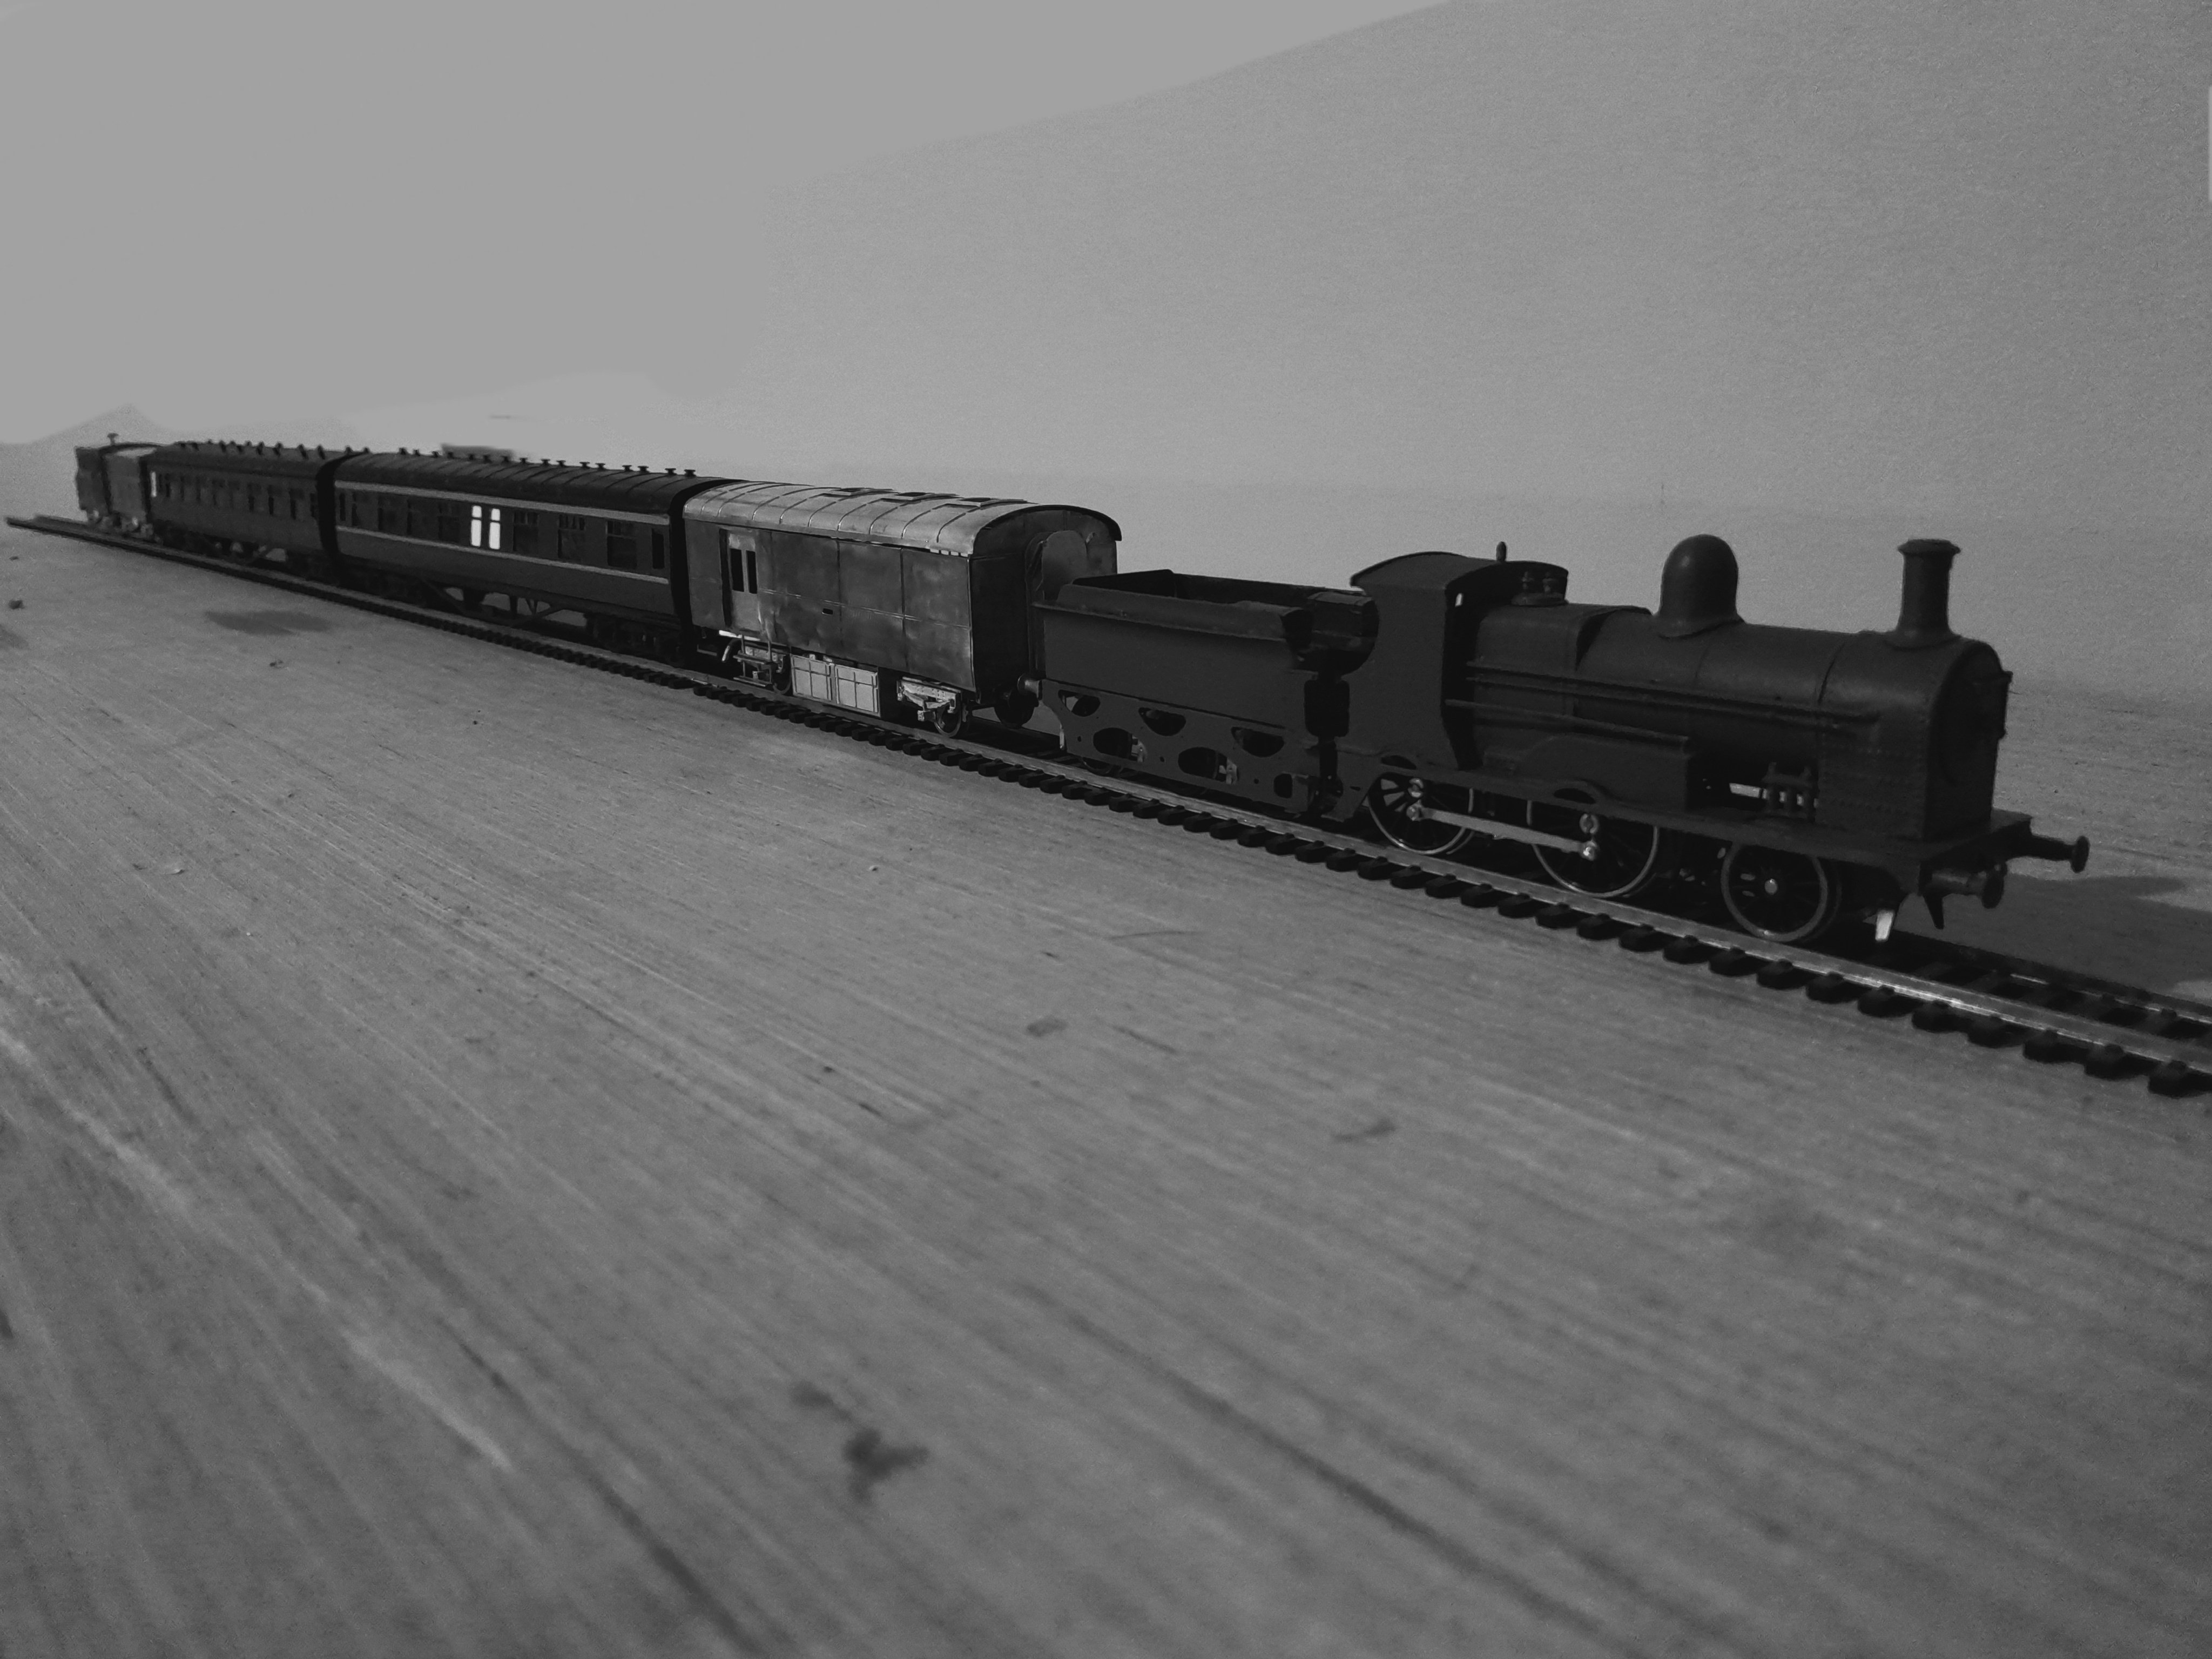
This is a London & South Western Rly. Parcels Van, somewhat similar to several the fewer had in the 1875-1920-ish period. I have been beavering away in terms of learning the dreaded brass kit building skills. It puts many off, but with care is easy enough under the right teacher, which I have! This thing is now ready for cleaning and painting. In my world, one was sent down to Wisht Kerry, boy, though in reality few lasted into CIE times, and only then as little used, little seen, departmental tool vans. I just liked the look of it, and thought that on a fair day at Castletown, a yoke like this mixed in with two unlike 6-wheelers, a Bredin and a few cattle trucks on the back, would very much look the part. Go easy on me if examining detail - it’s only my 2nd attempt at brass! The finish will be CIE green with snail, heavily weathered in the older livery. Next, I'm tackling a Bredin bogie full brake. Wish me luck……!
13 points
-
NCC 1937-06-22 Larne Harbour 78 HCC 13999 Cas25045. West Clare. WC 1934-07-15 Ennistymon station HCC11155 Cas25158. WC 1934-07-15 Kilkee 11C HCC11156 Cas25160. WC 1934-07-15 Kilkee 11C HCC11158 Cas25159.13 points
-
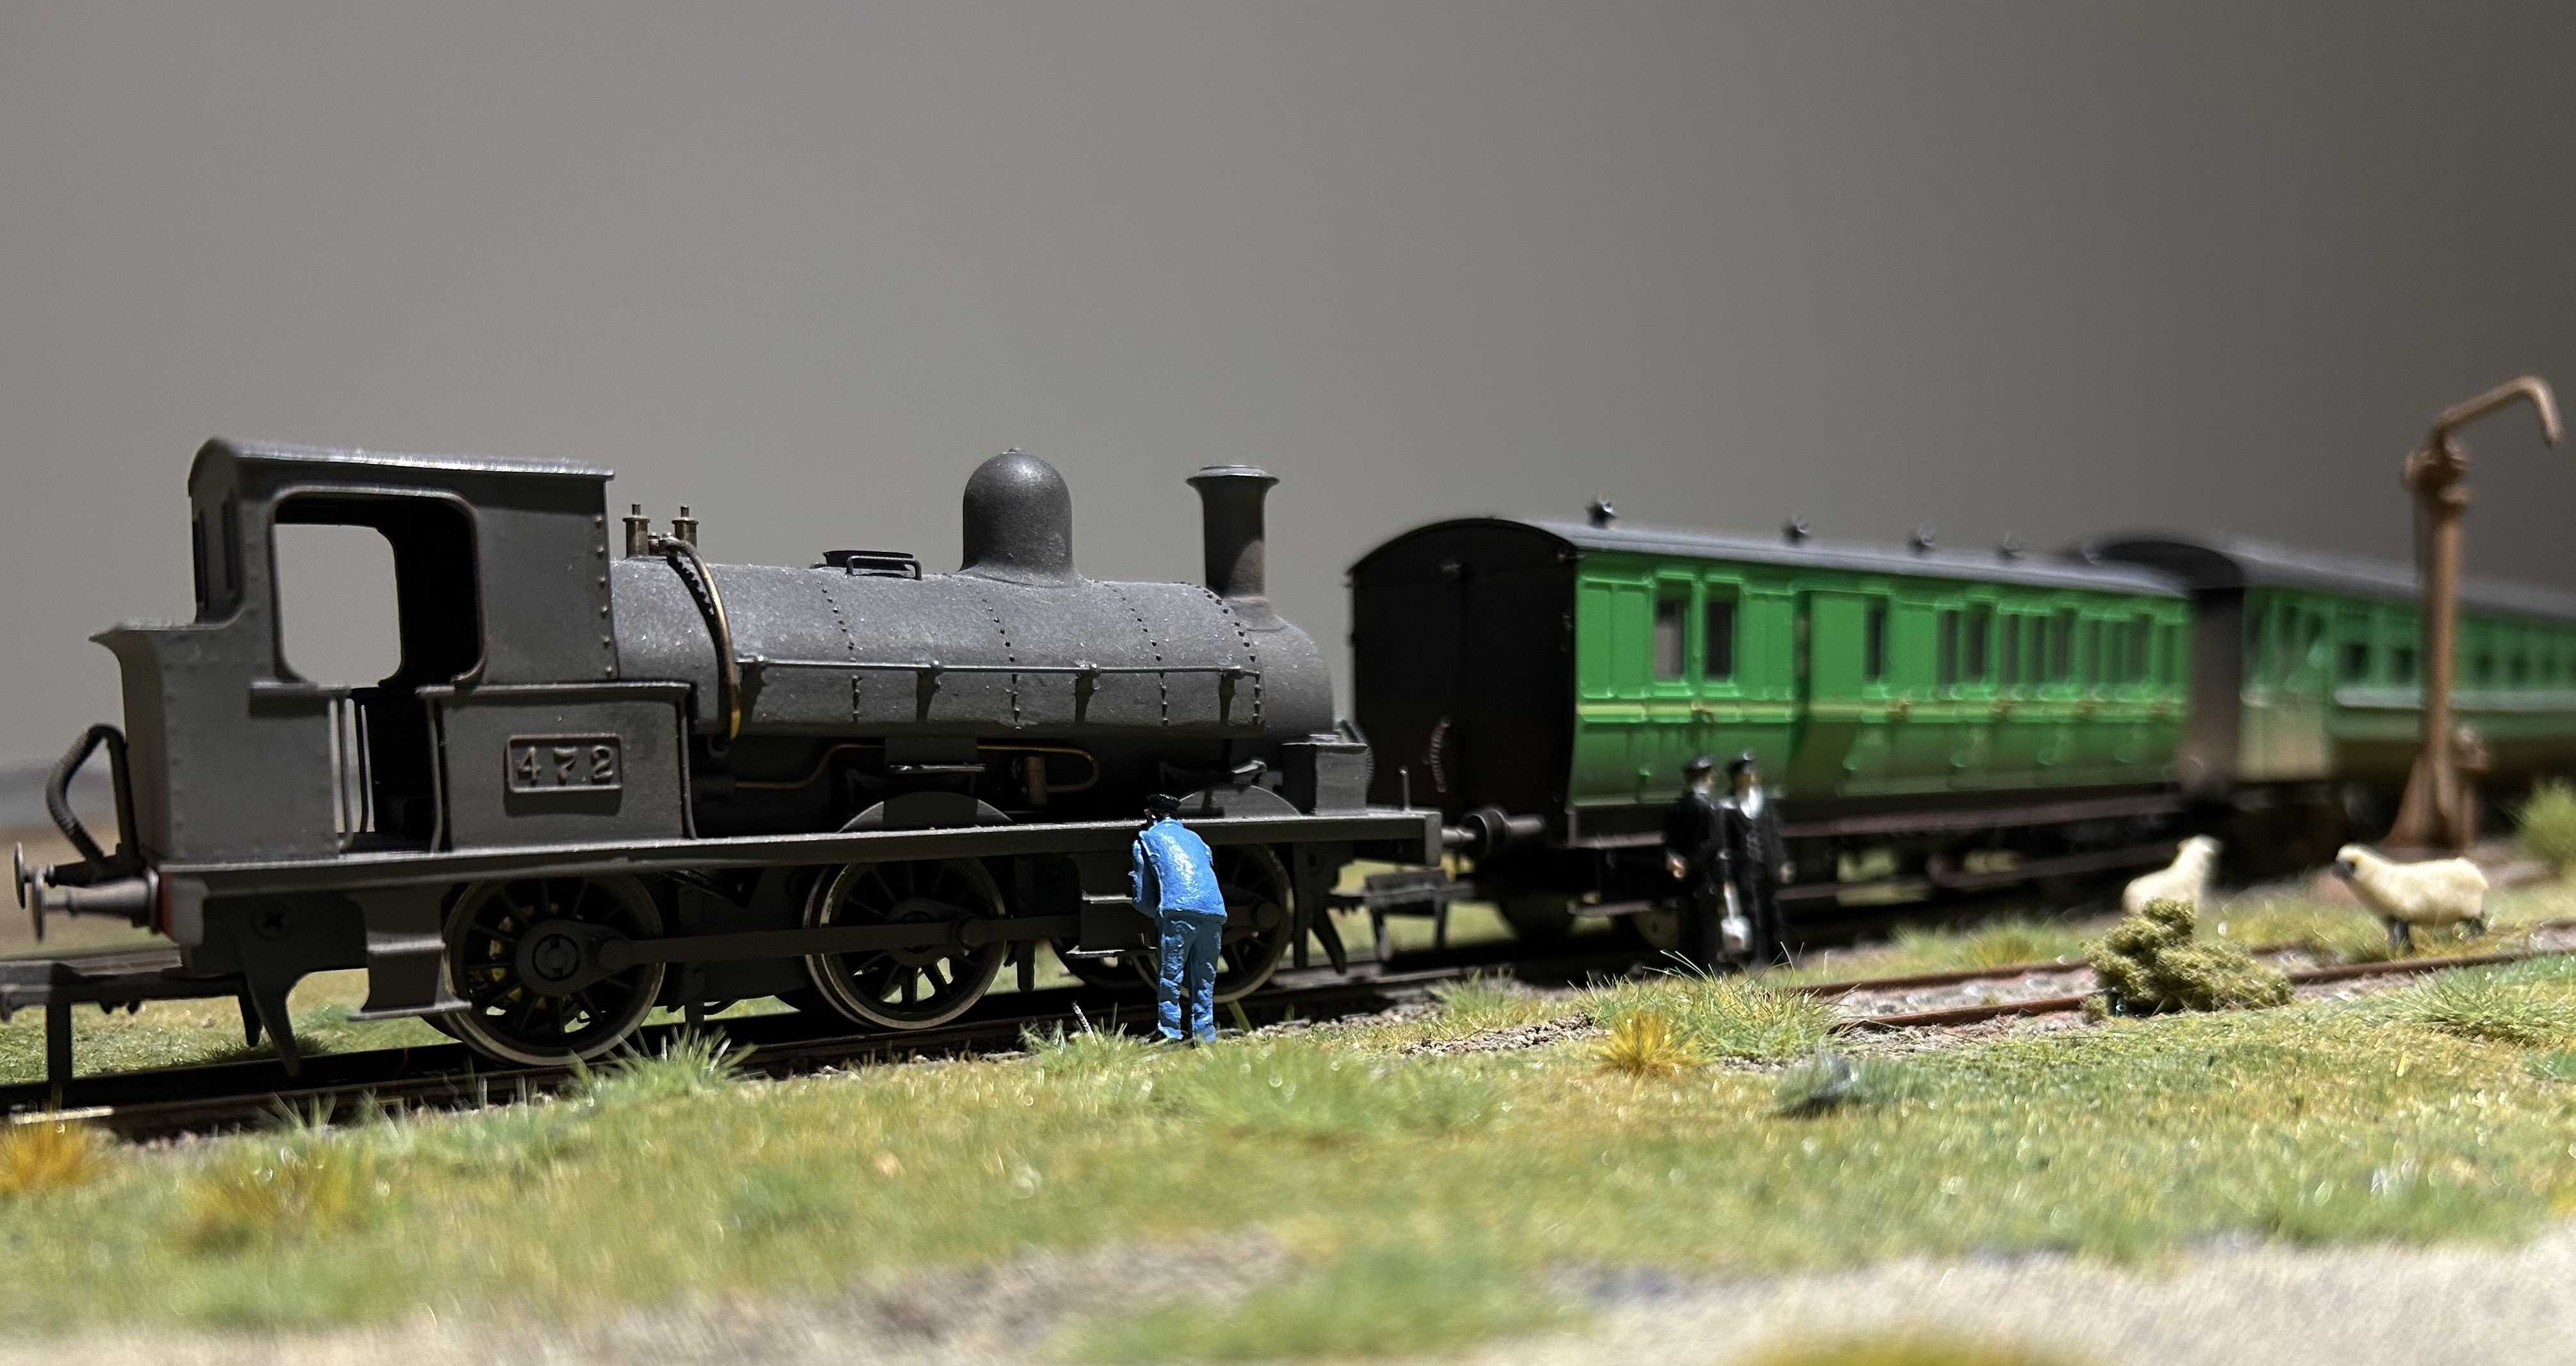
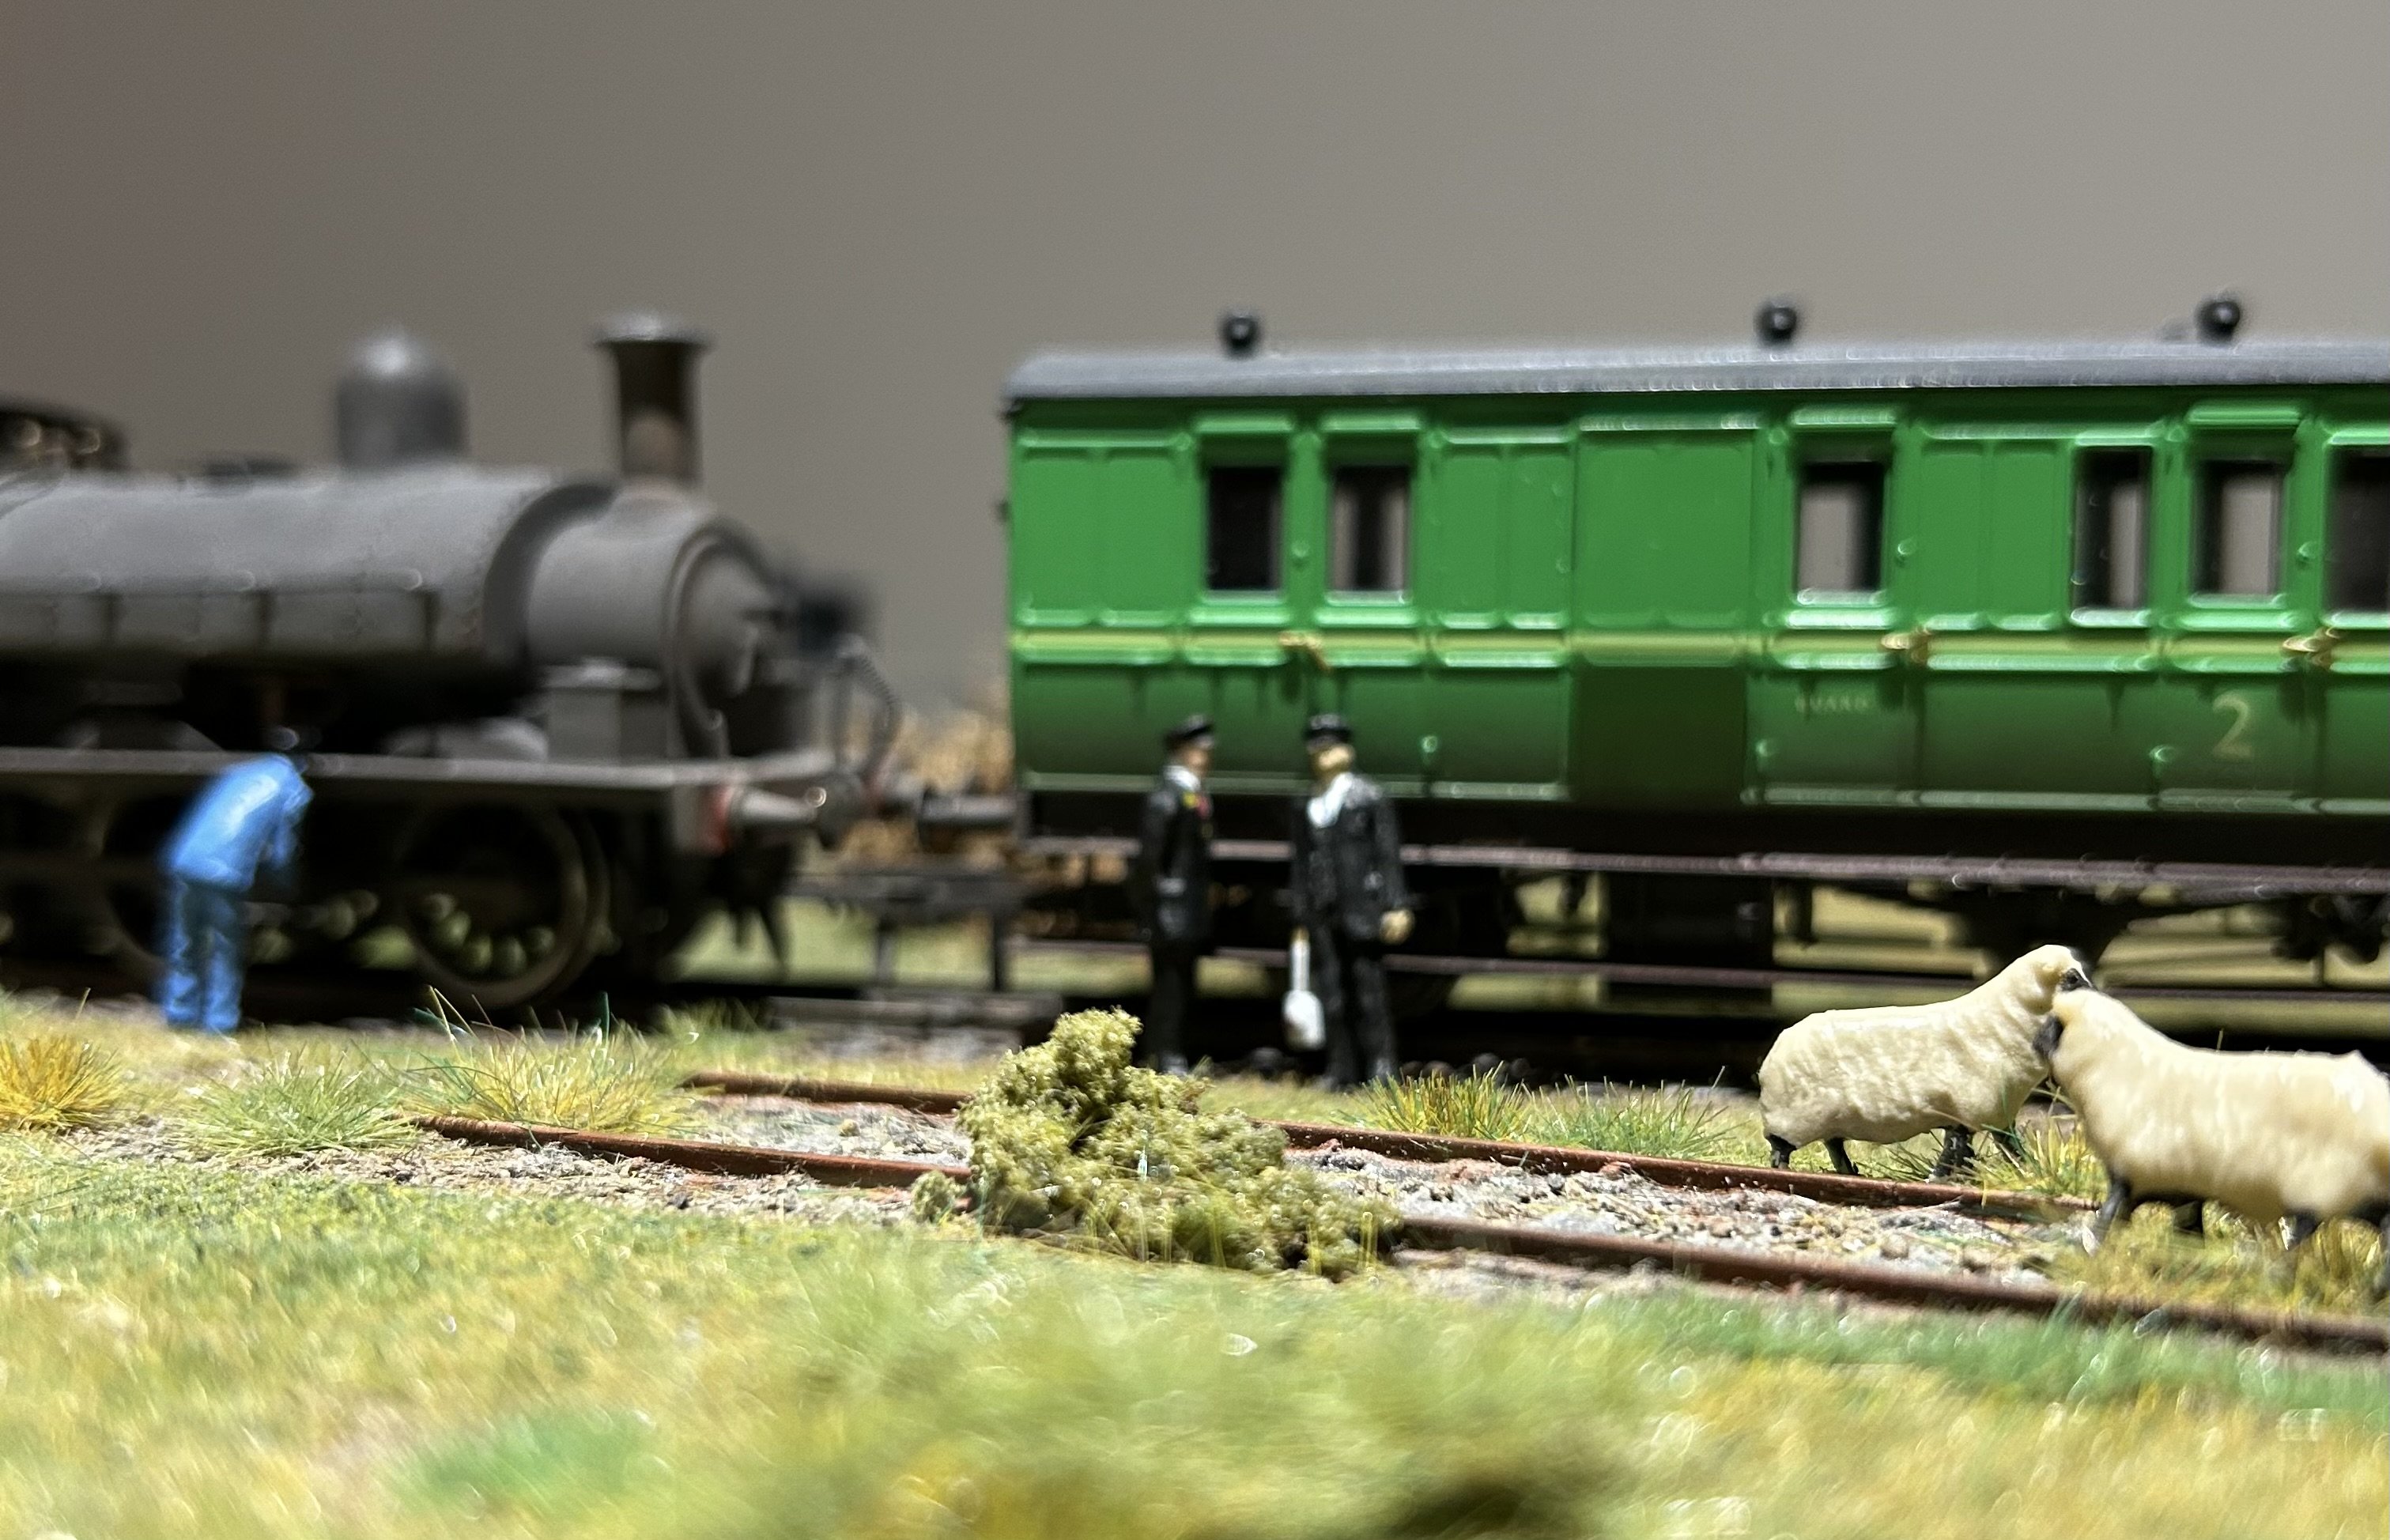
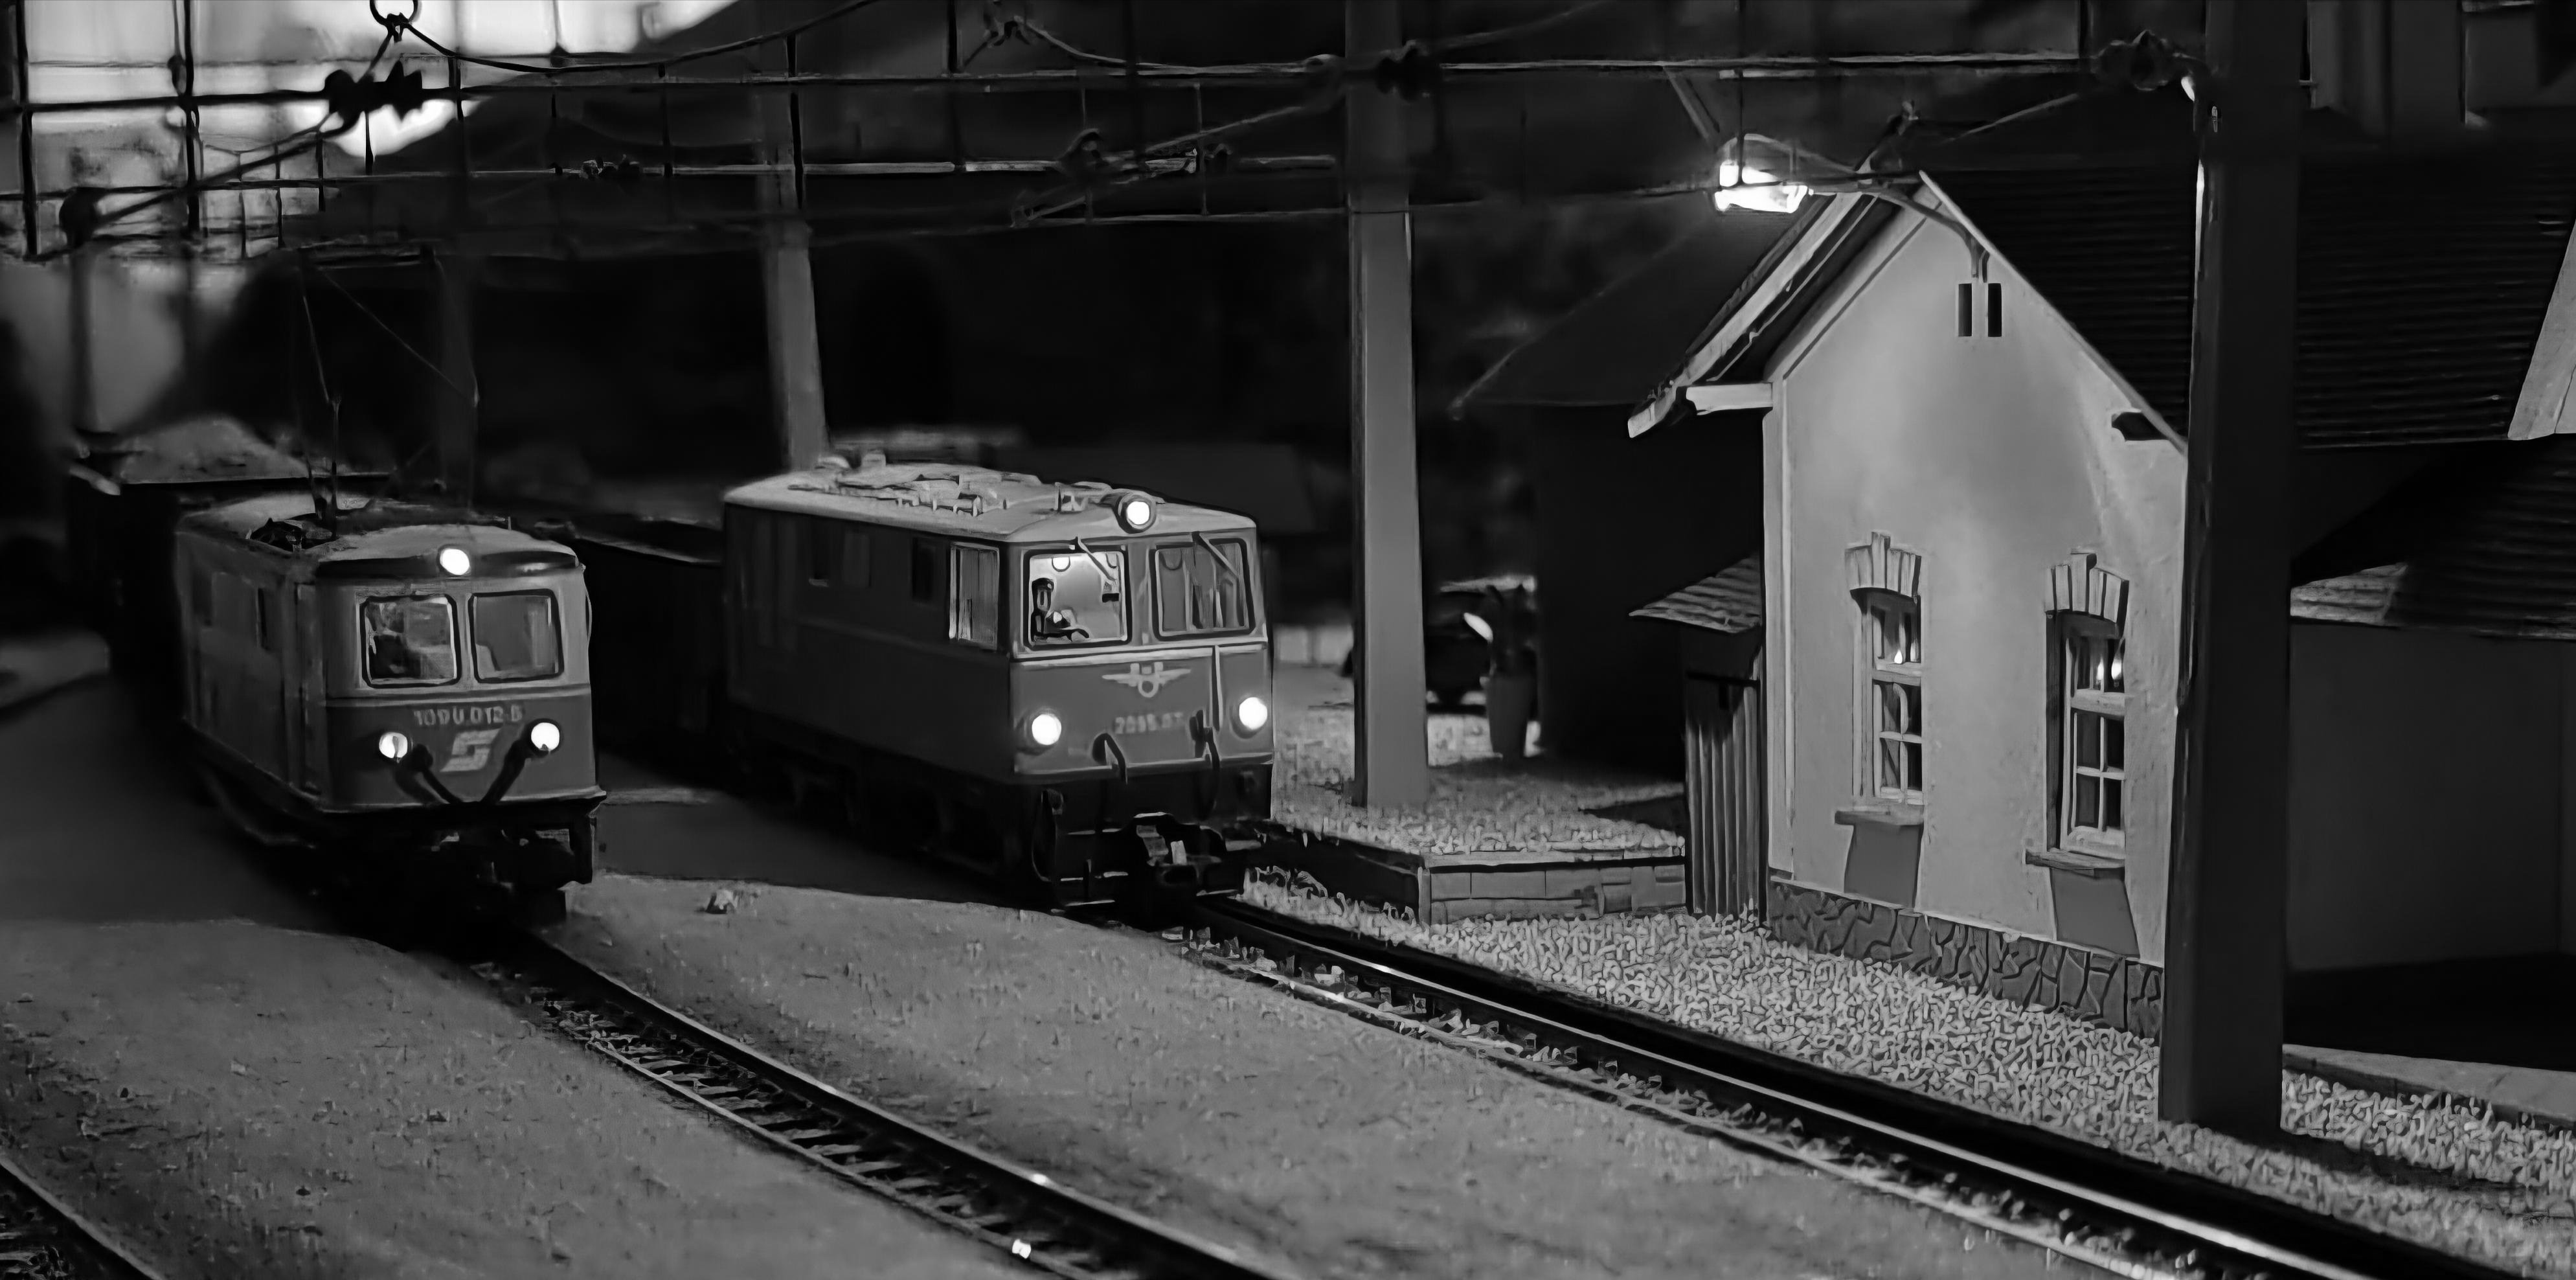
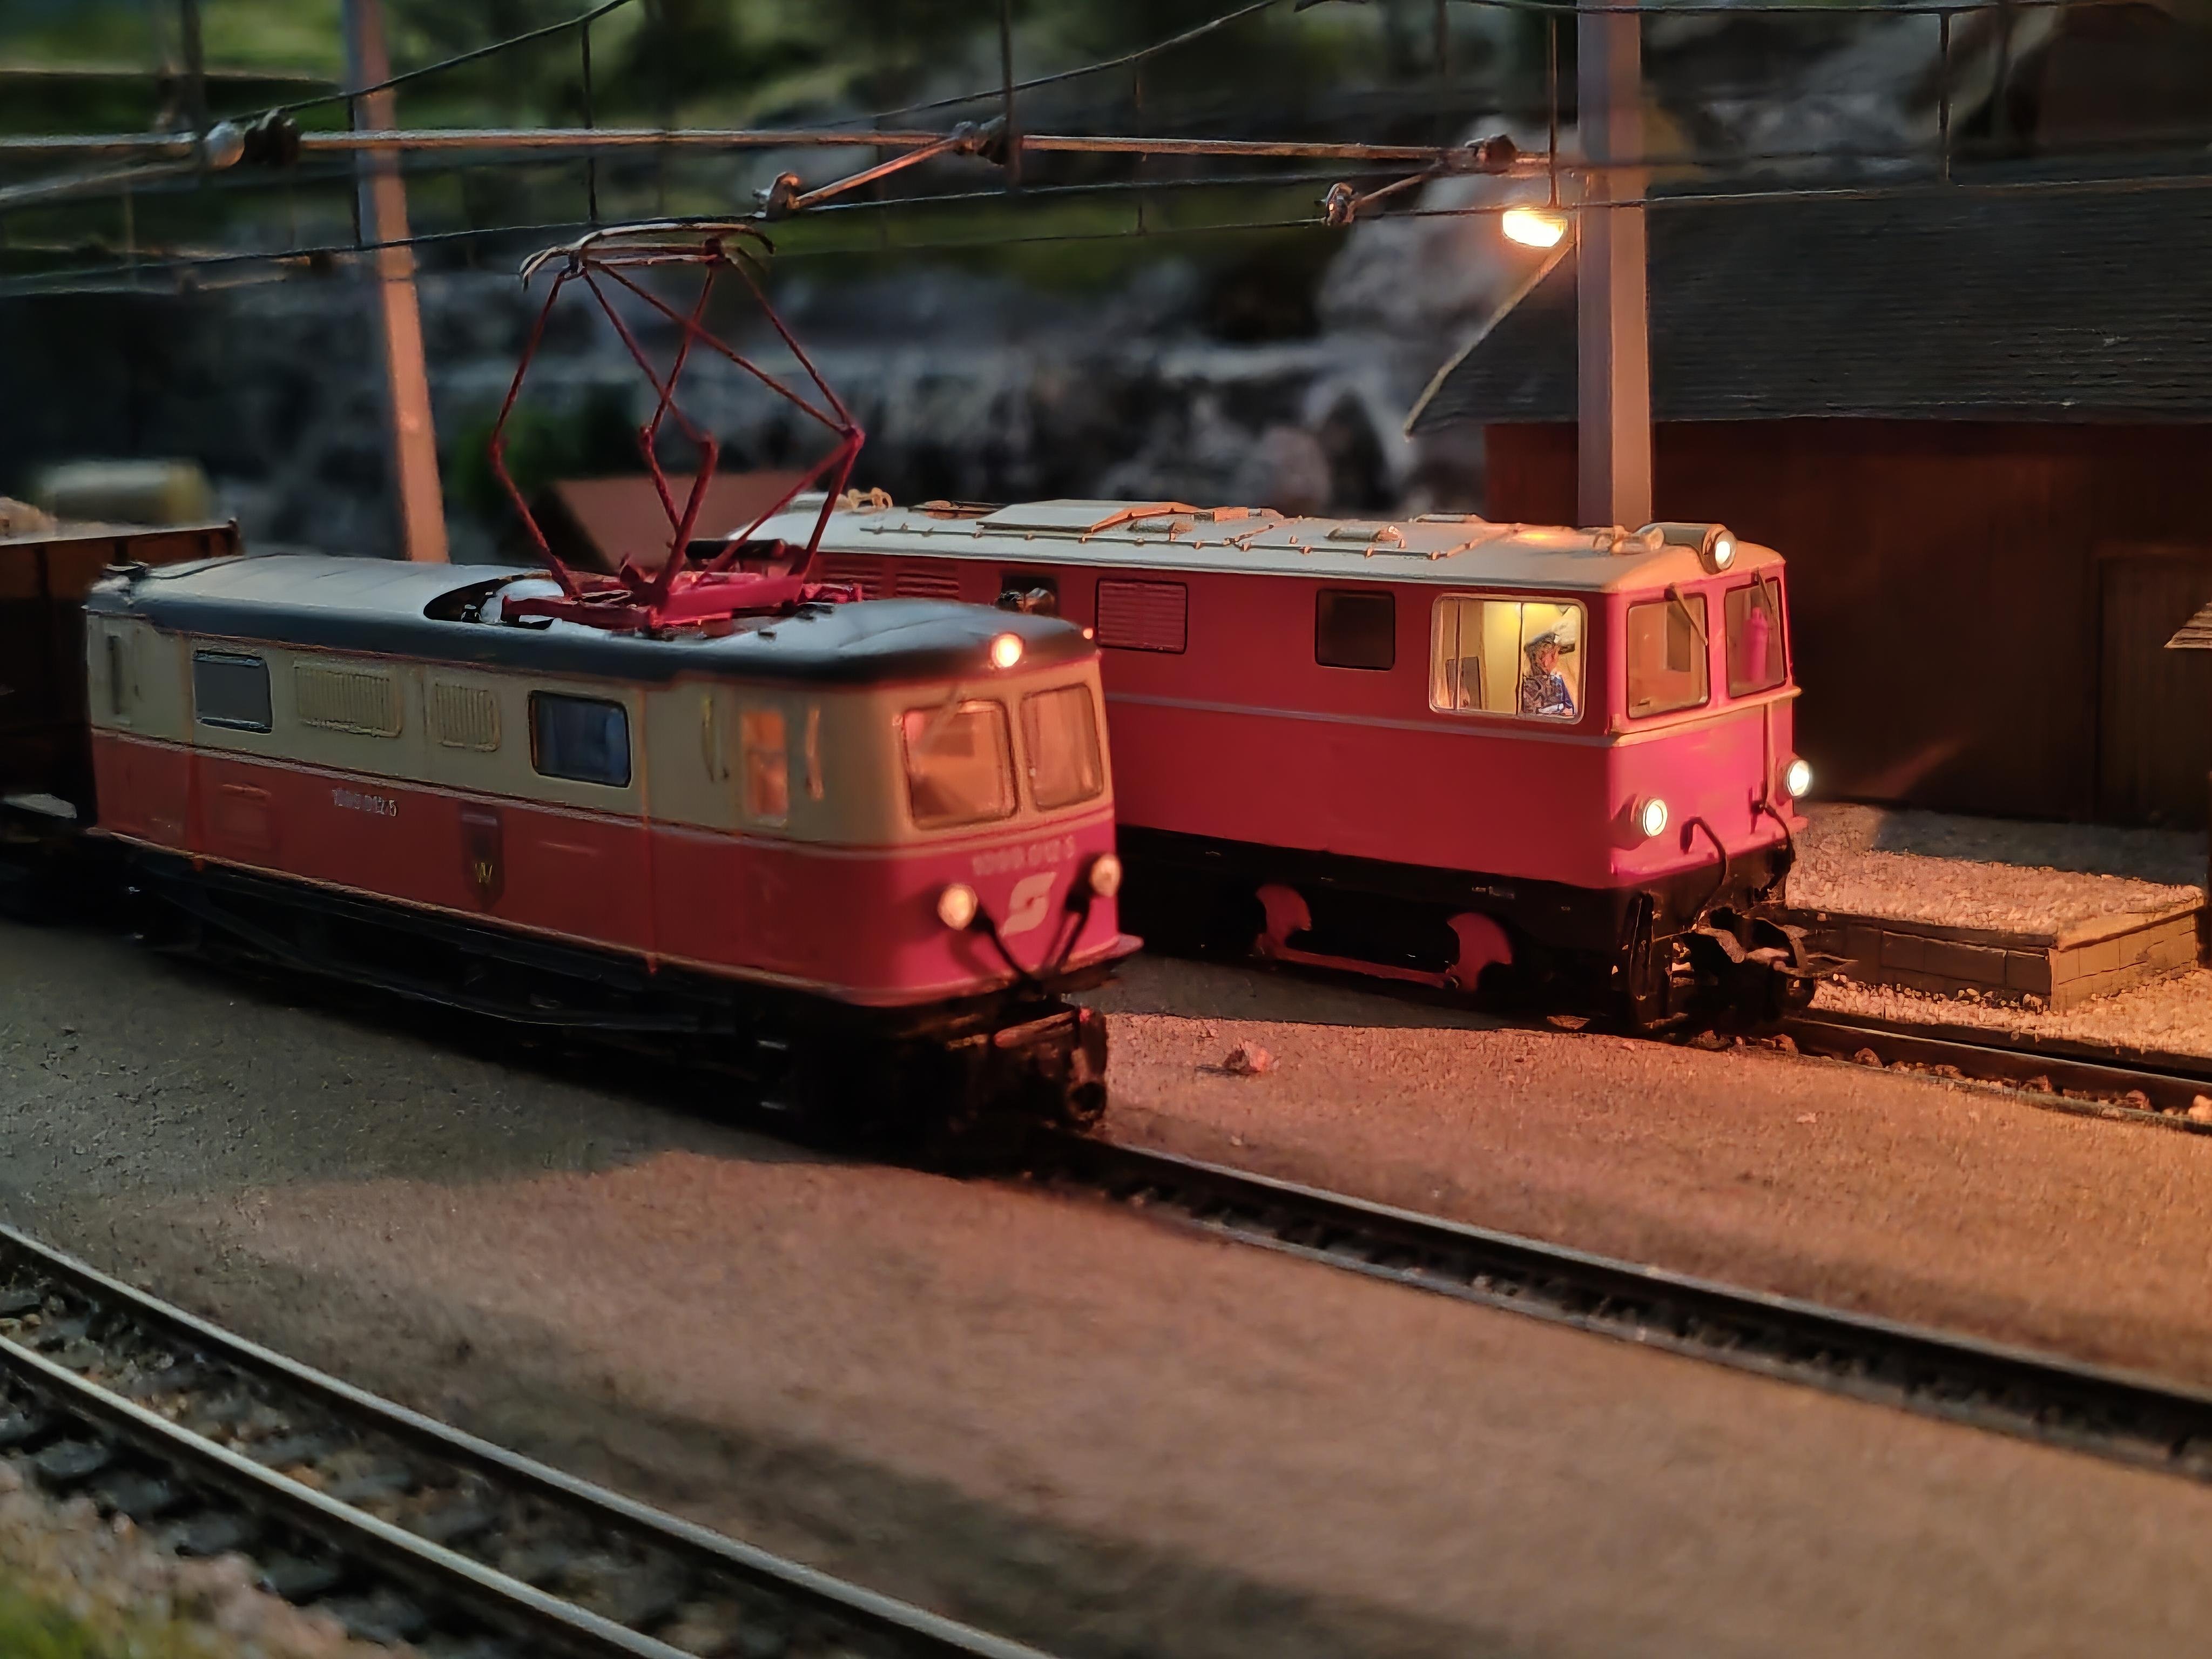
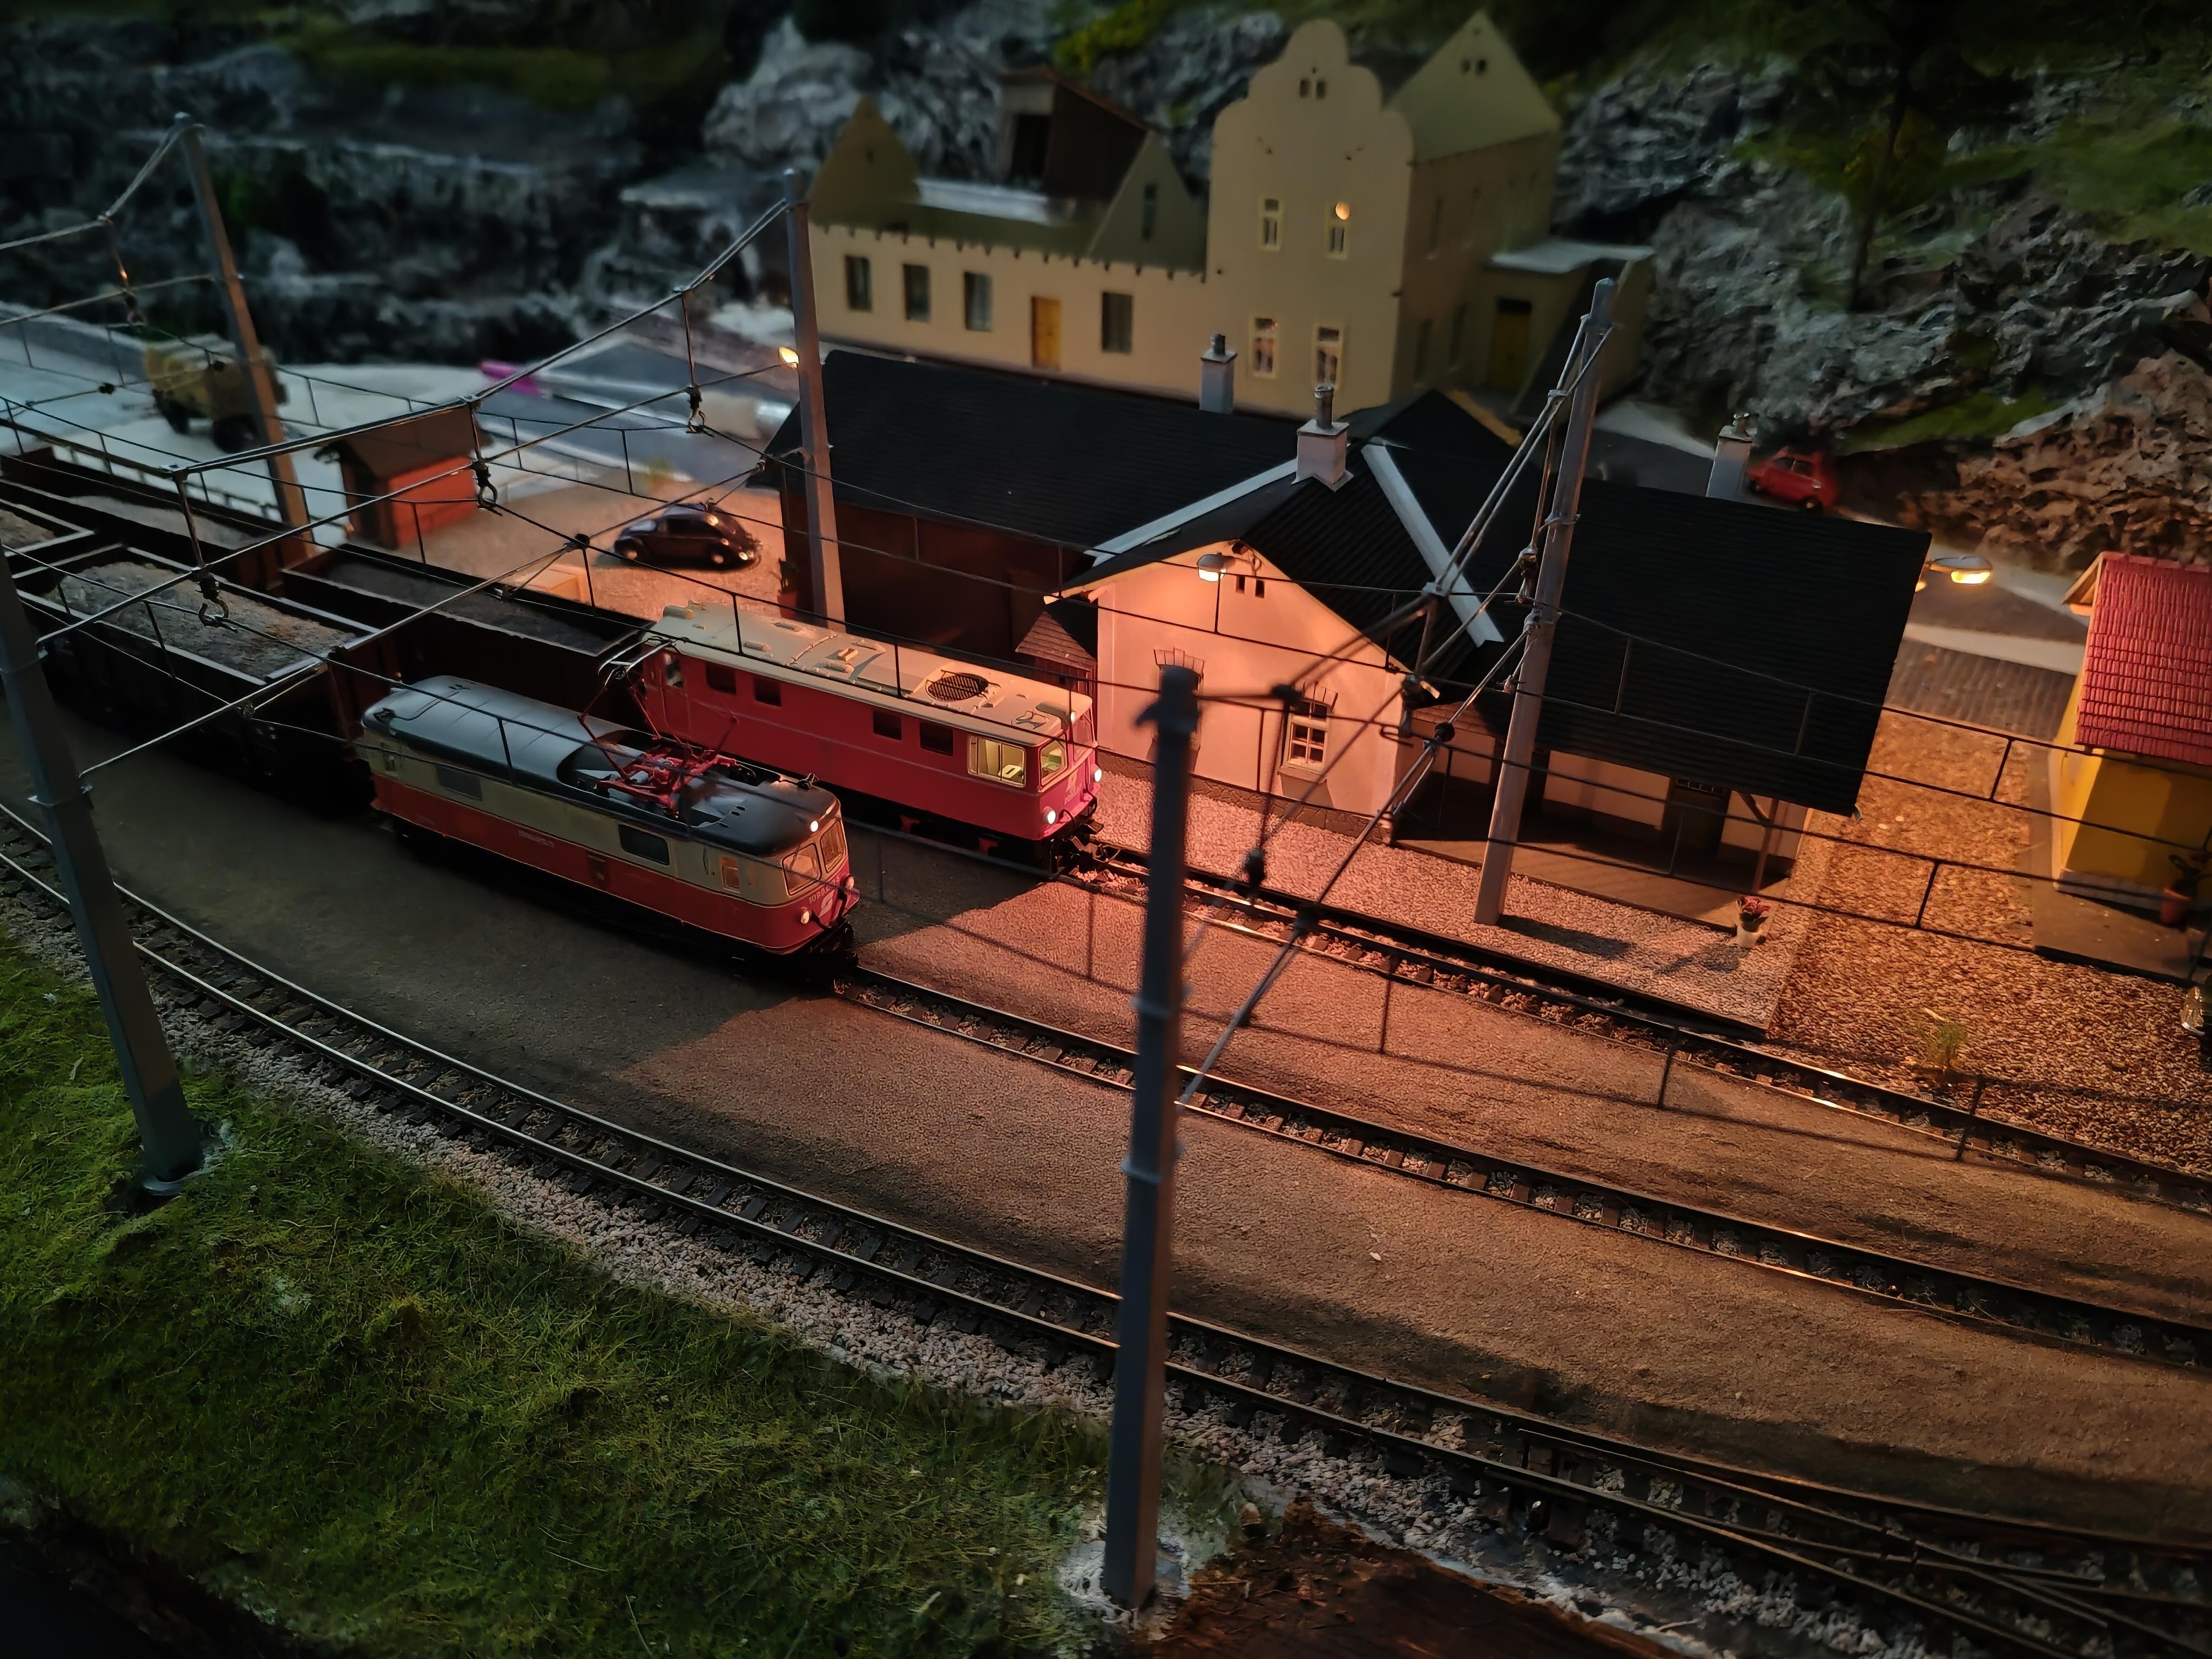
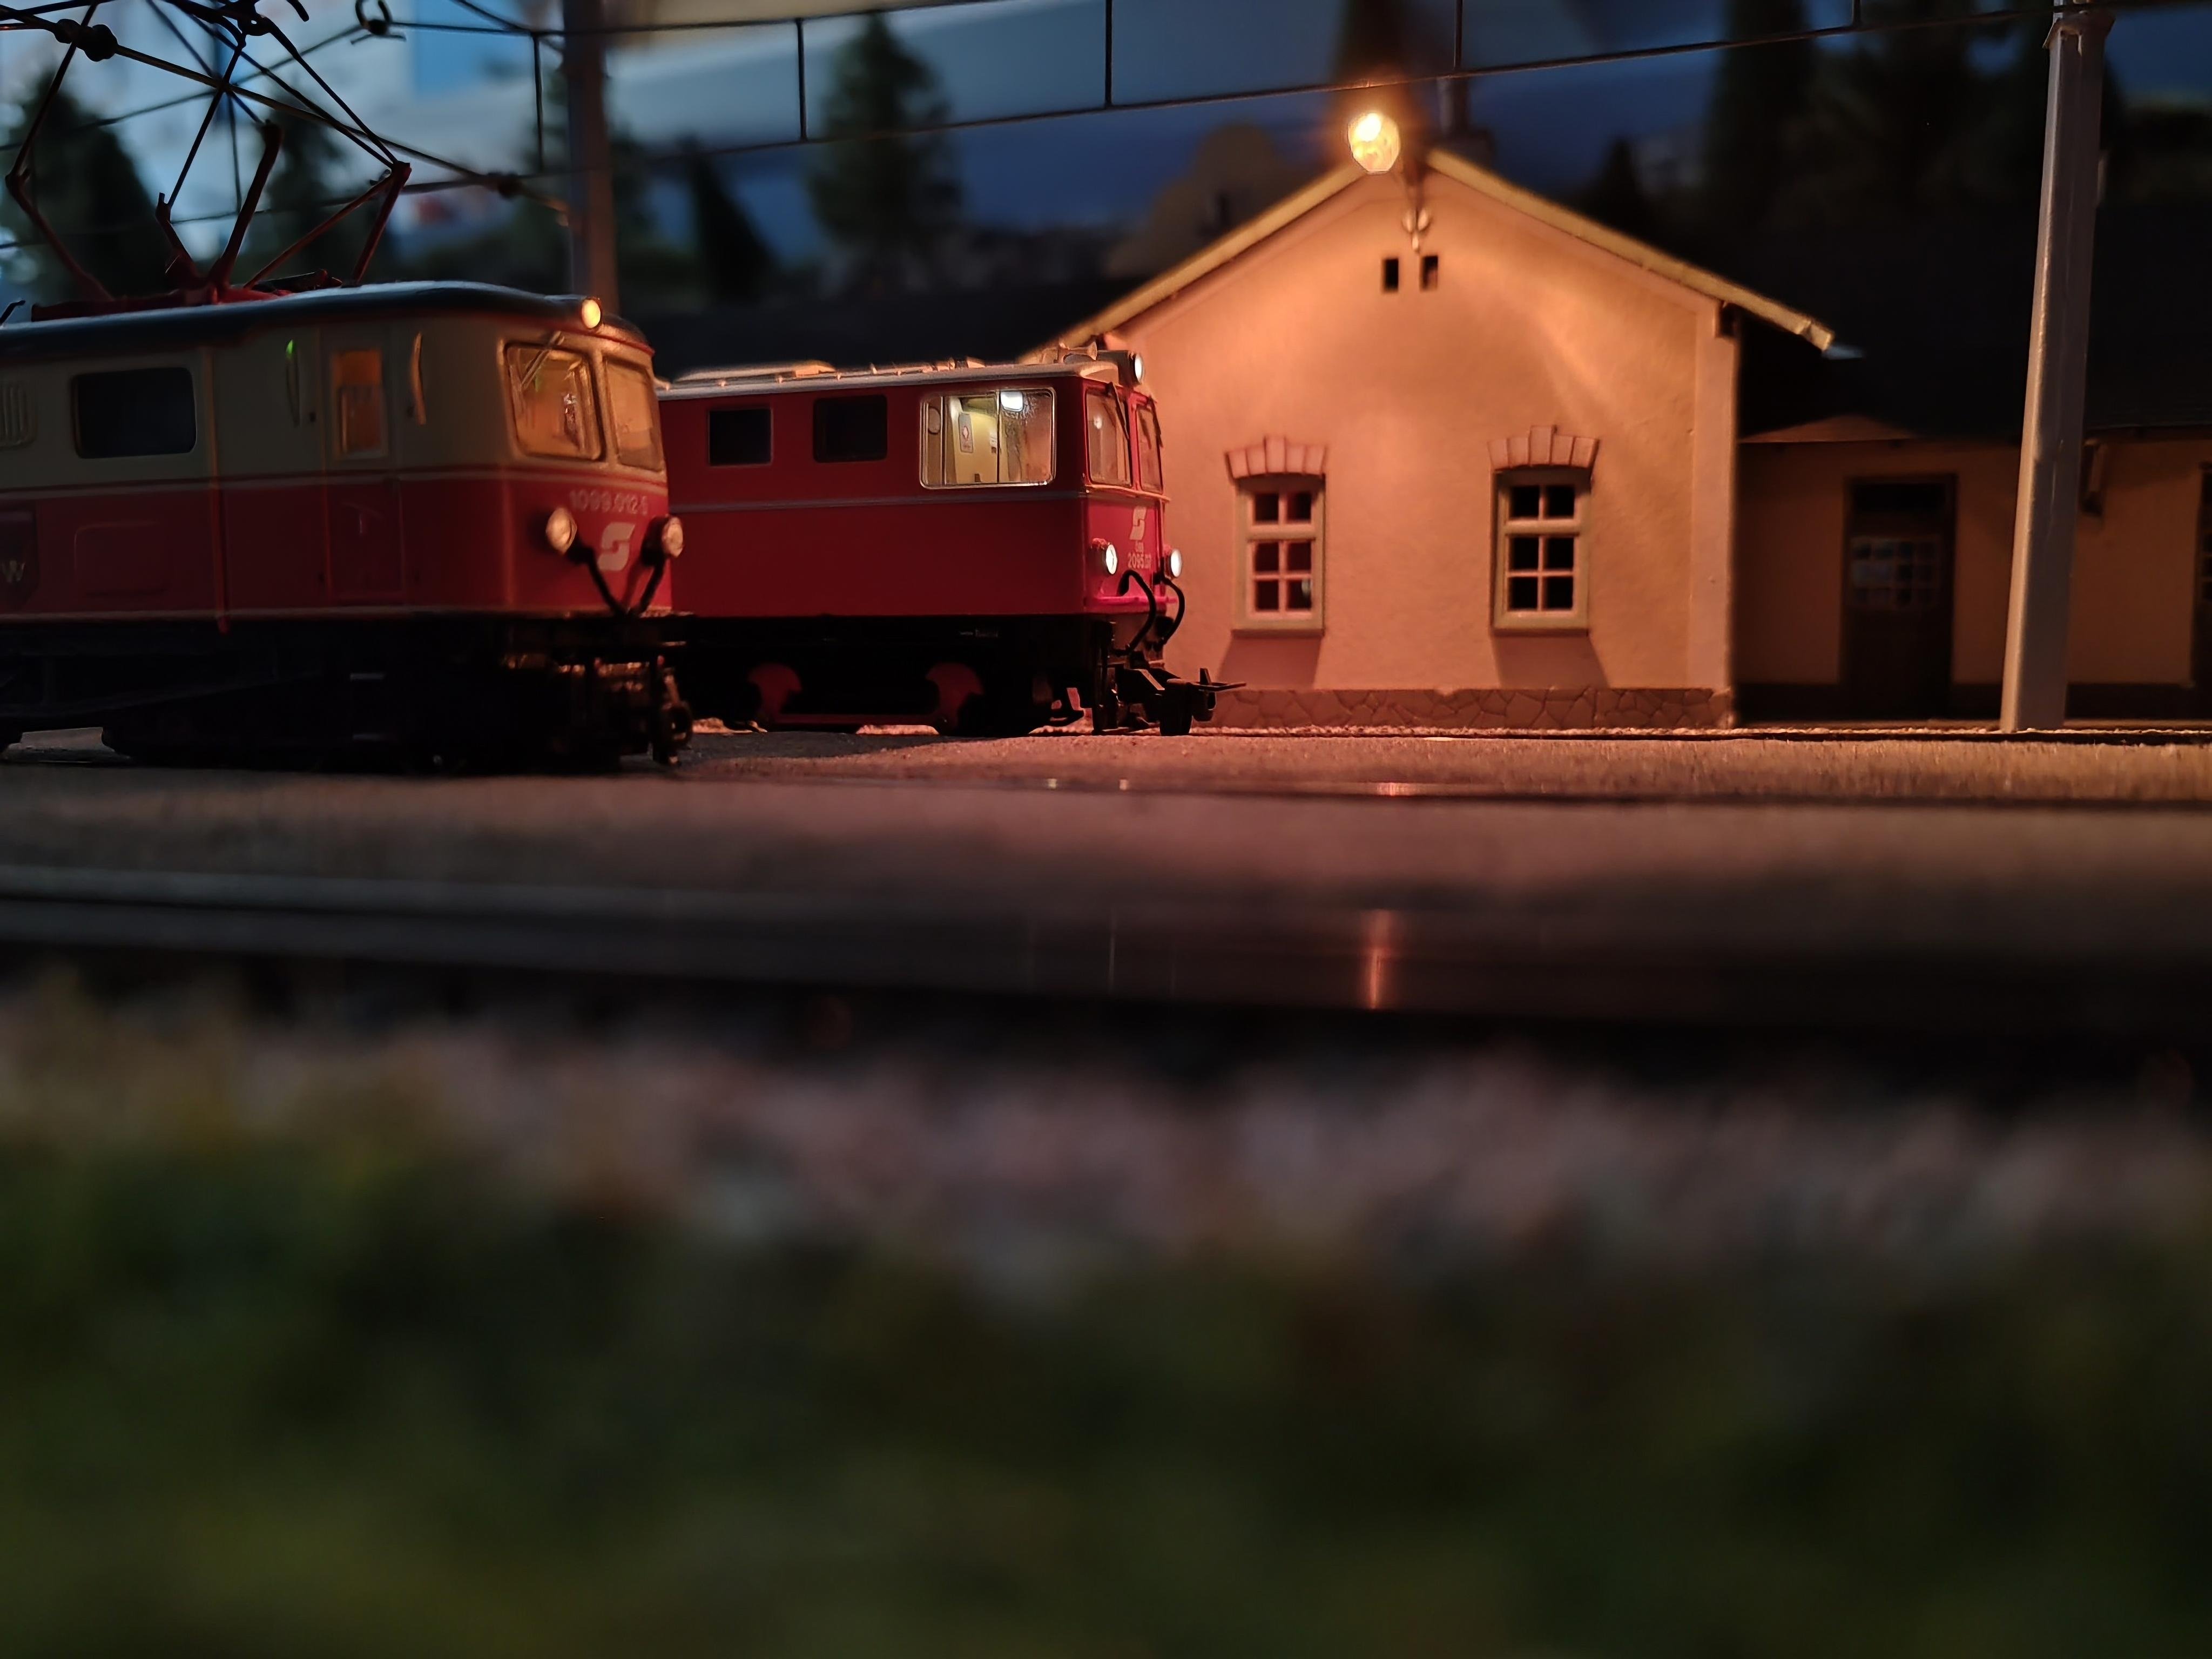
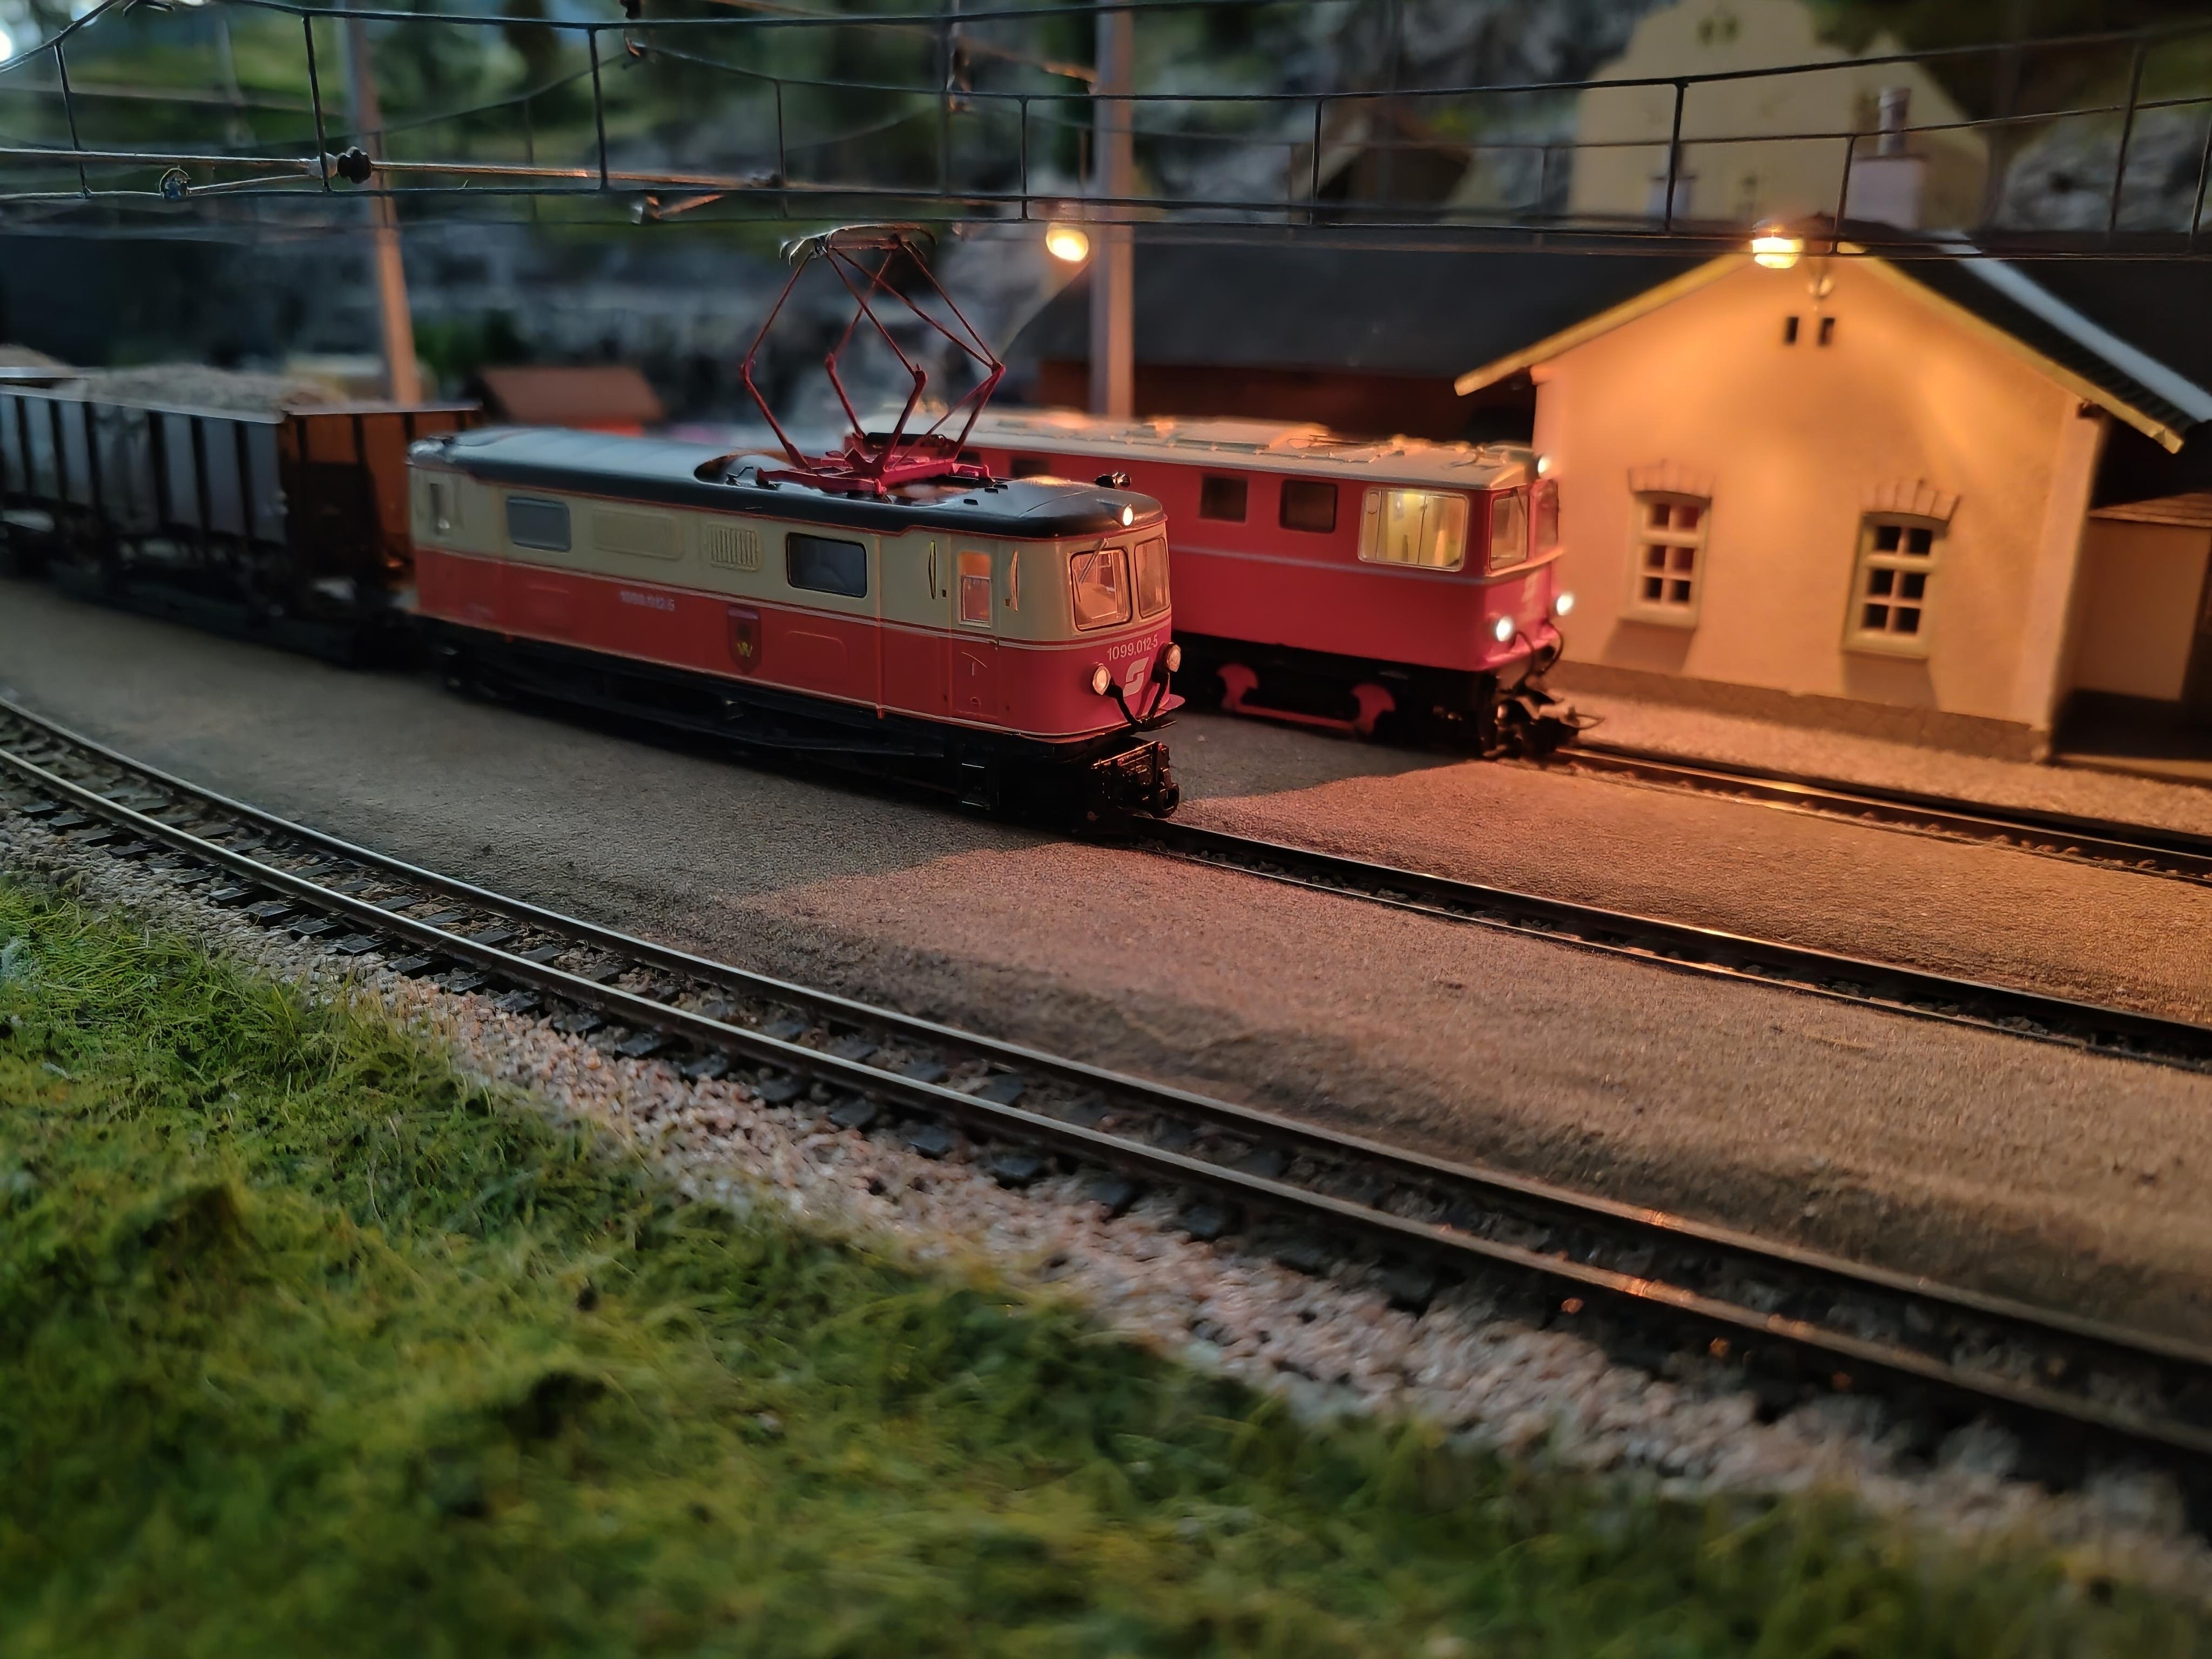
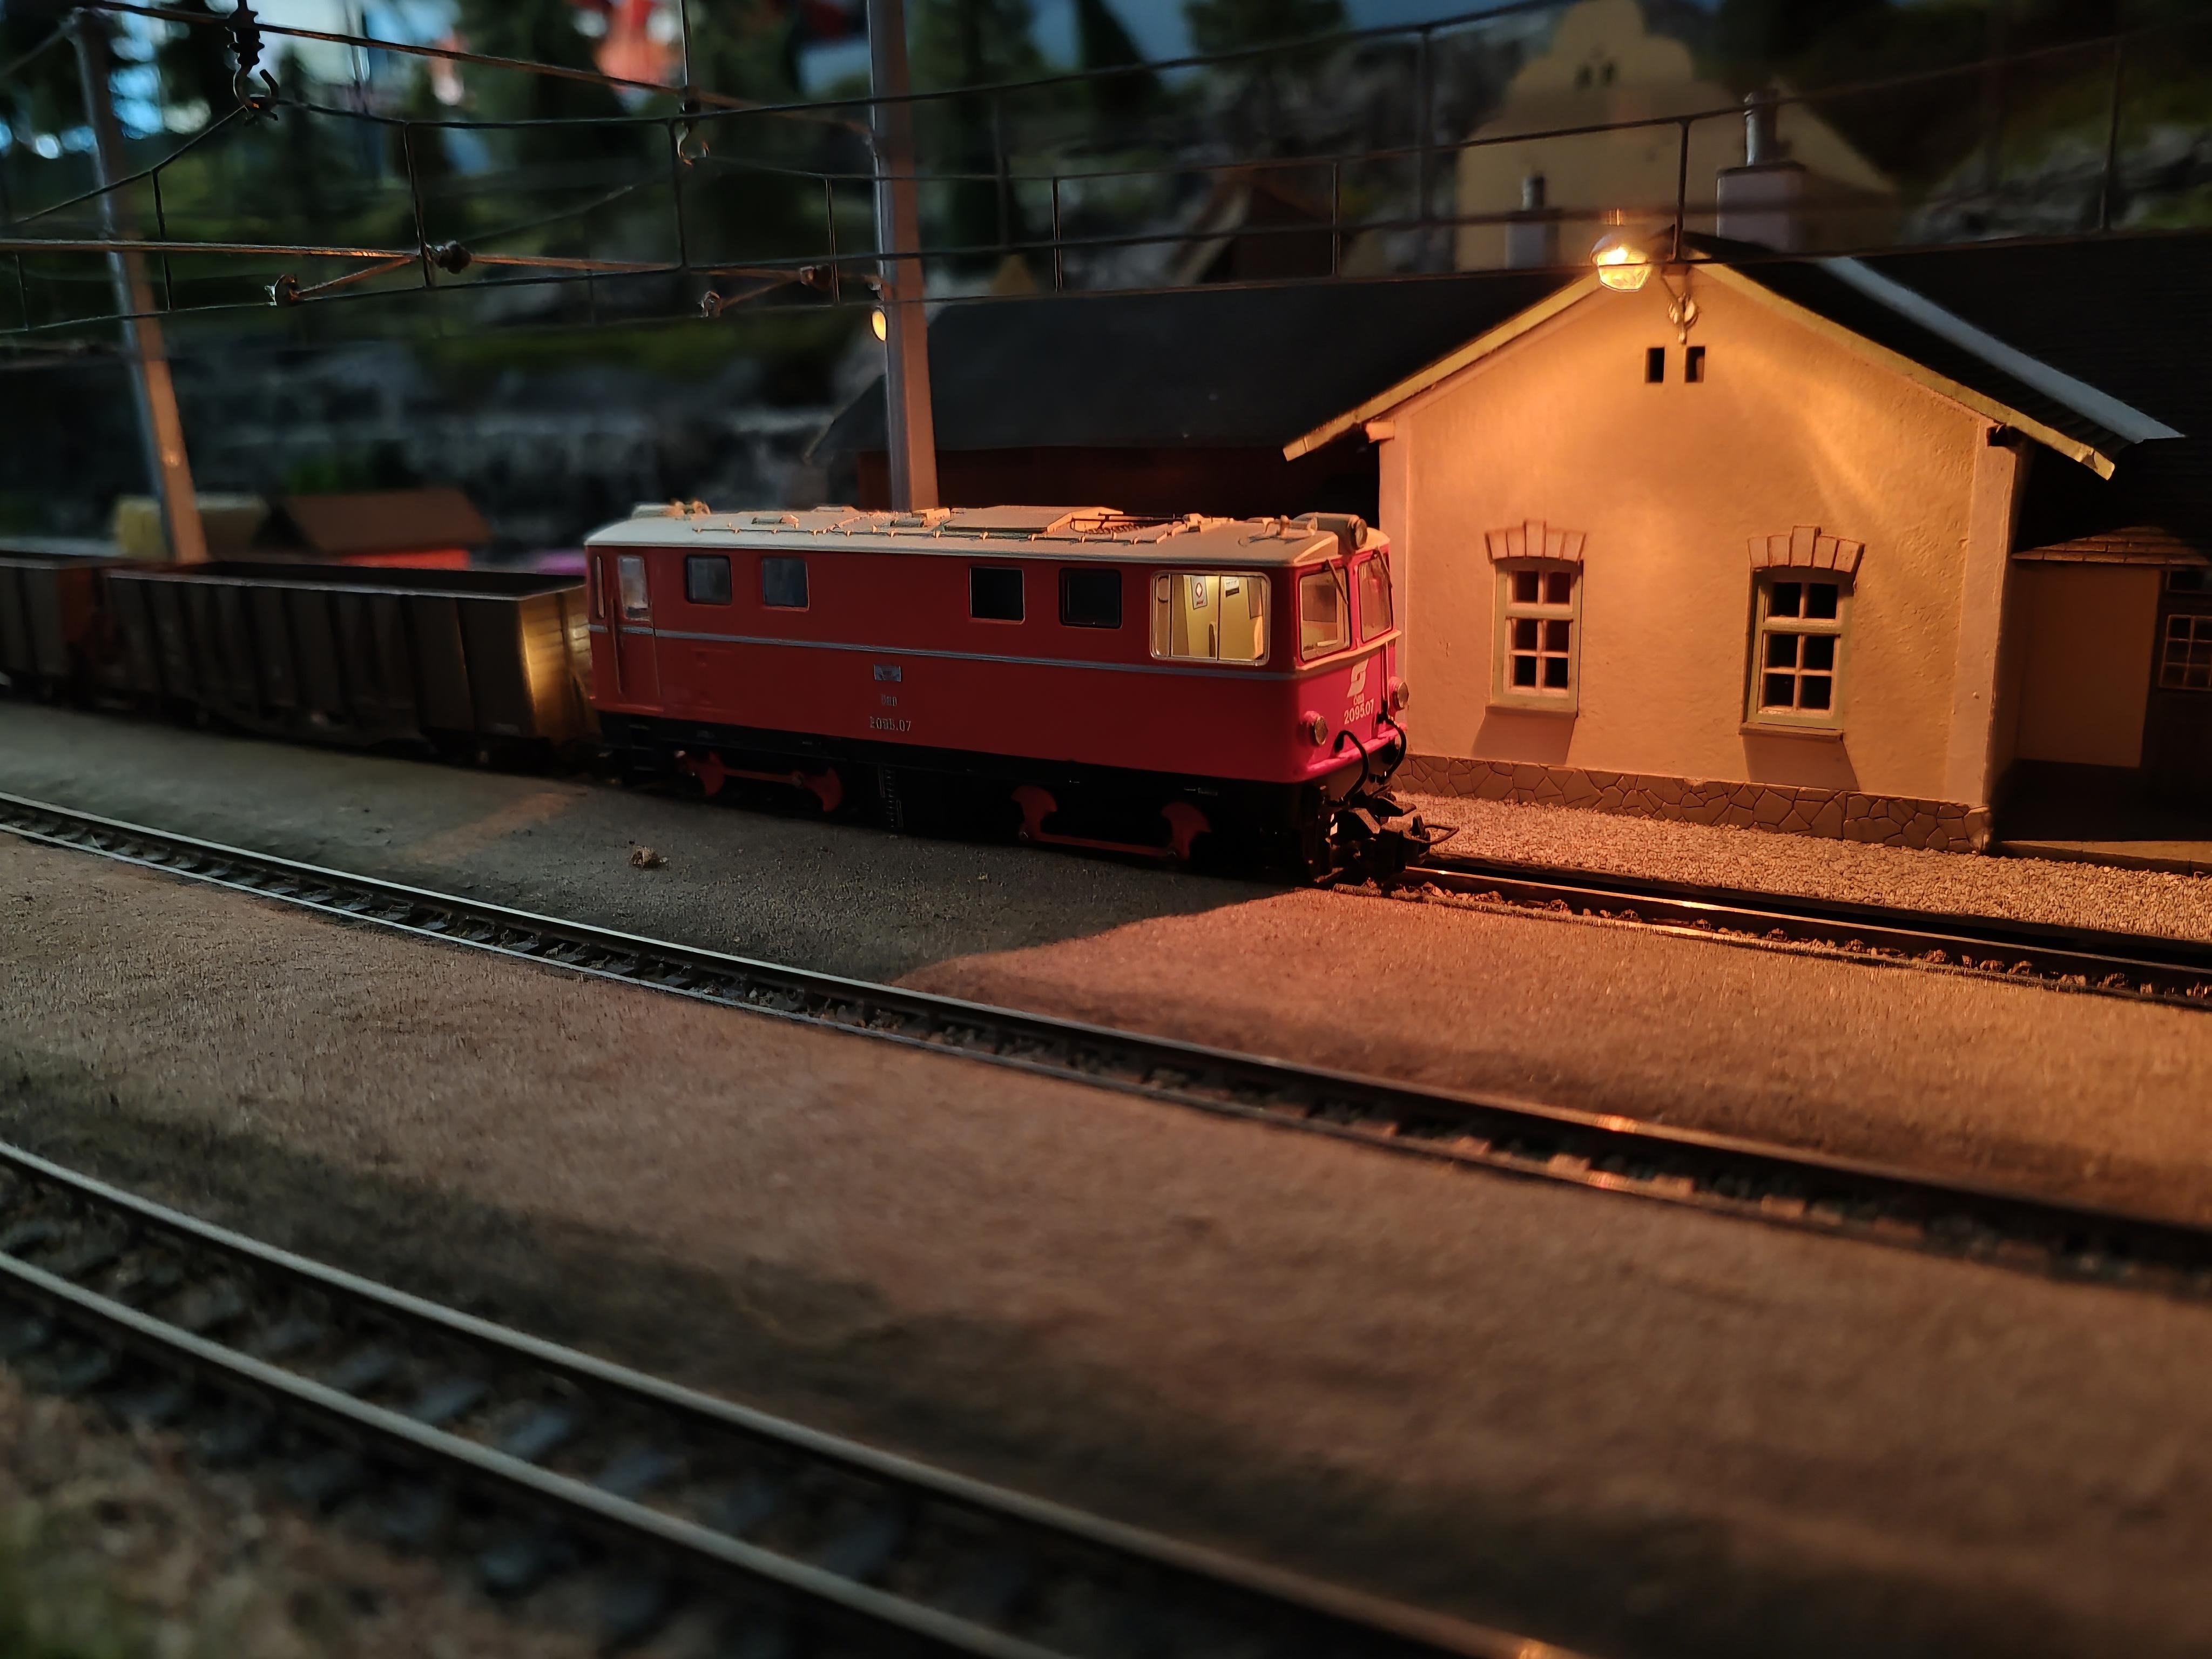
Life in 1961….. “Here’s one for ye. A rabbit walks into a bar an’ asks for a pint’o’porter….” ”Wait, is that Maggie’s damn sheep again!” ”Ah, I’ll tell ye that one later. Best get them chased back into the field….” ”I’ll go an’ get Tom Foley to block up that hole again…when’s the light engine coming in?”
12 points
-
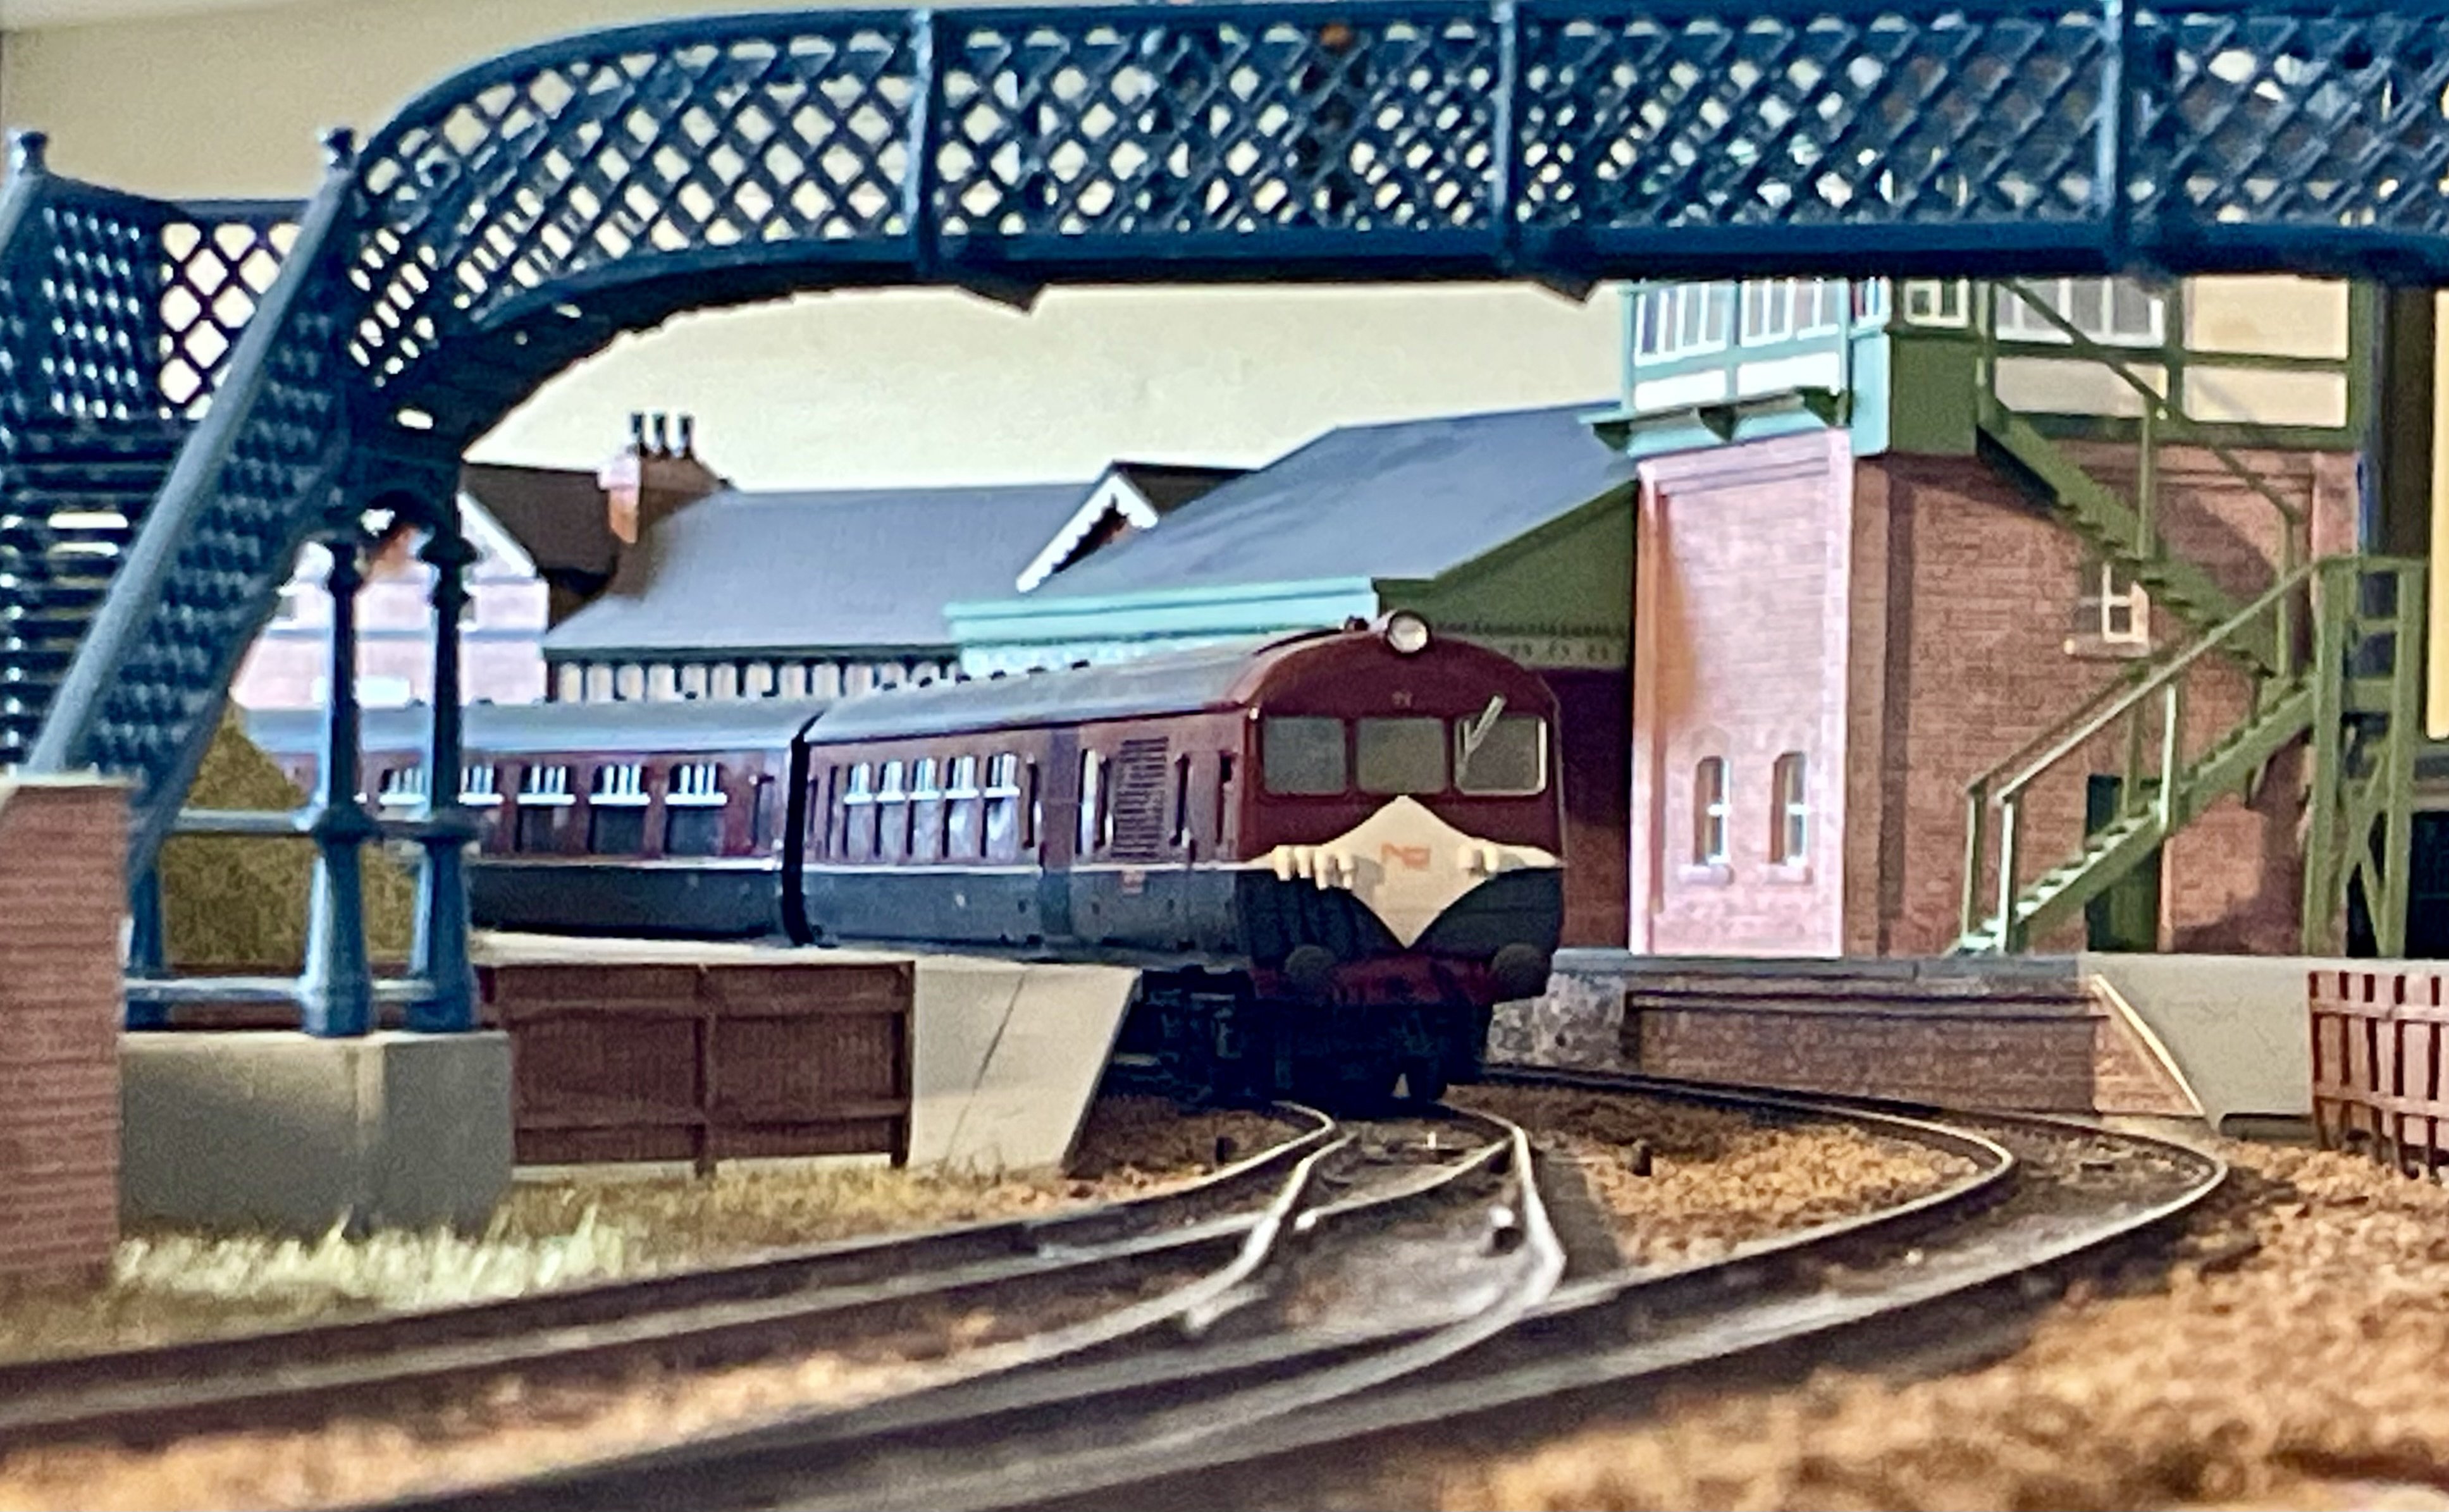
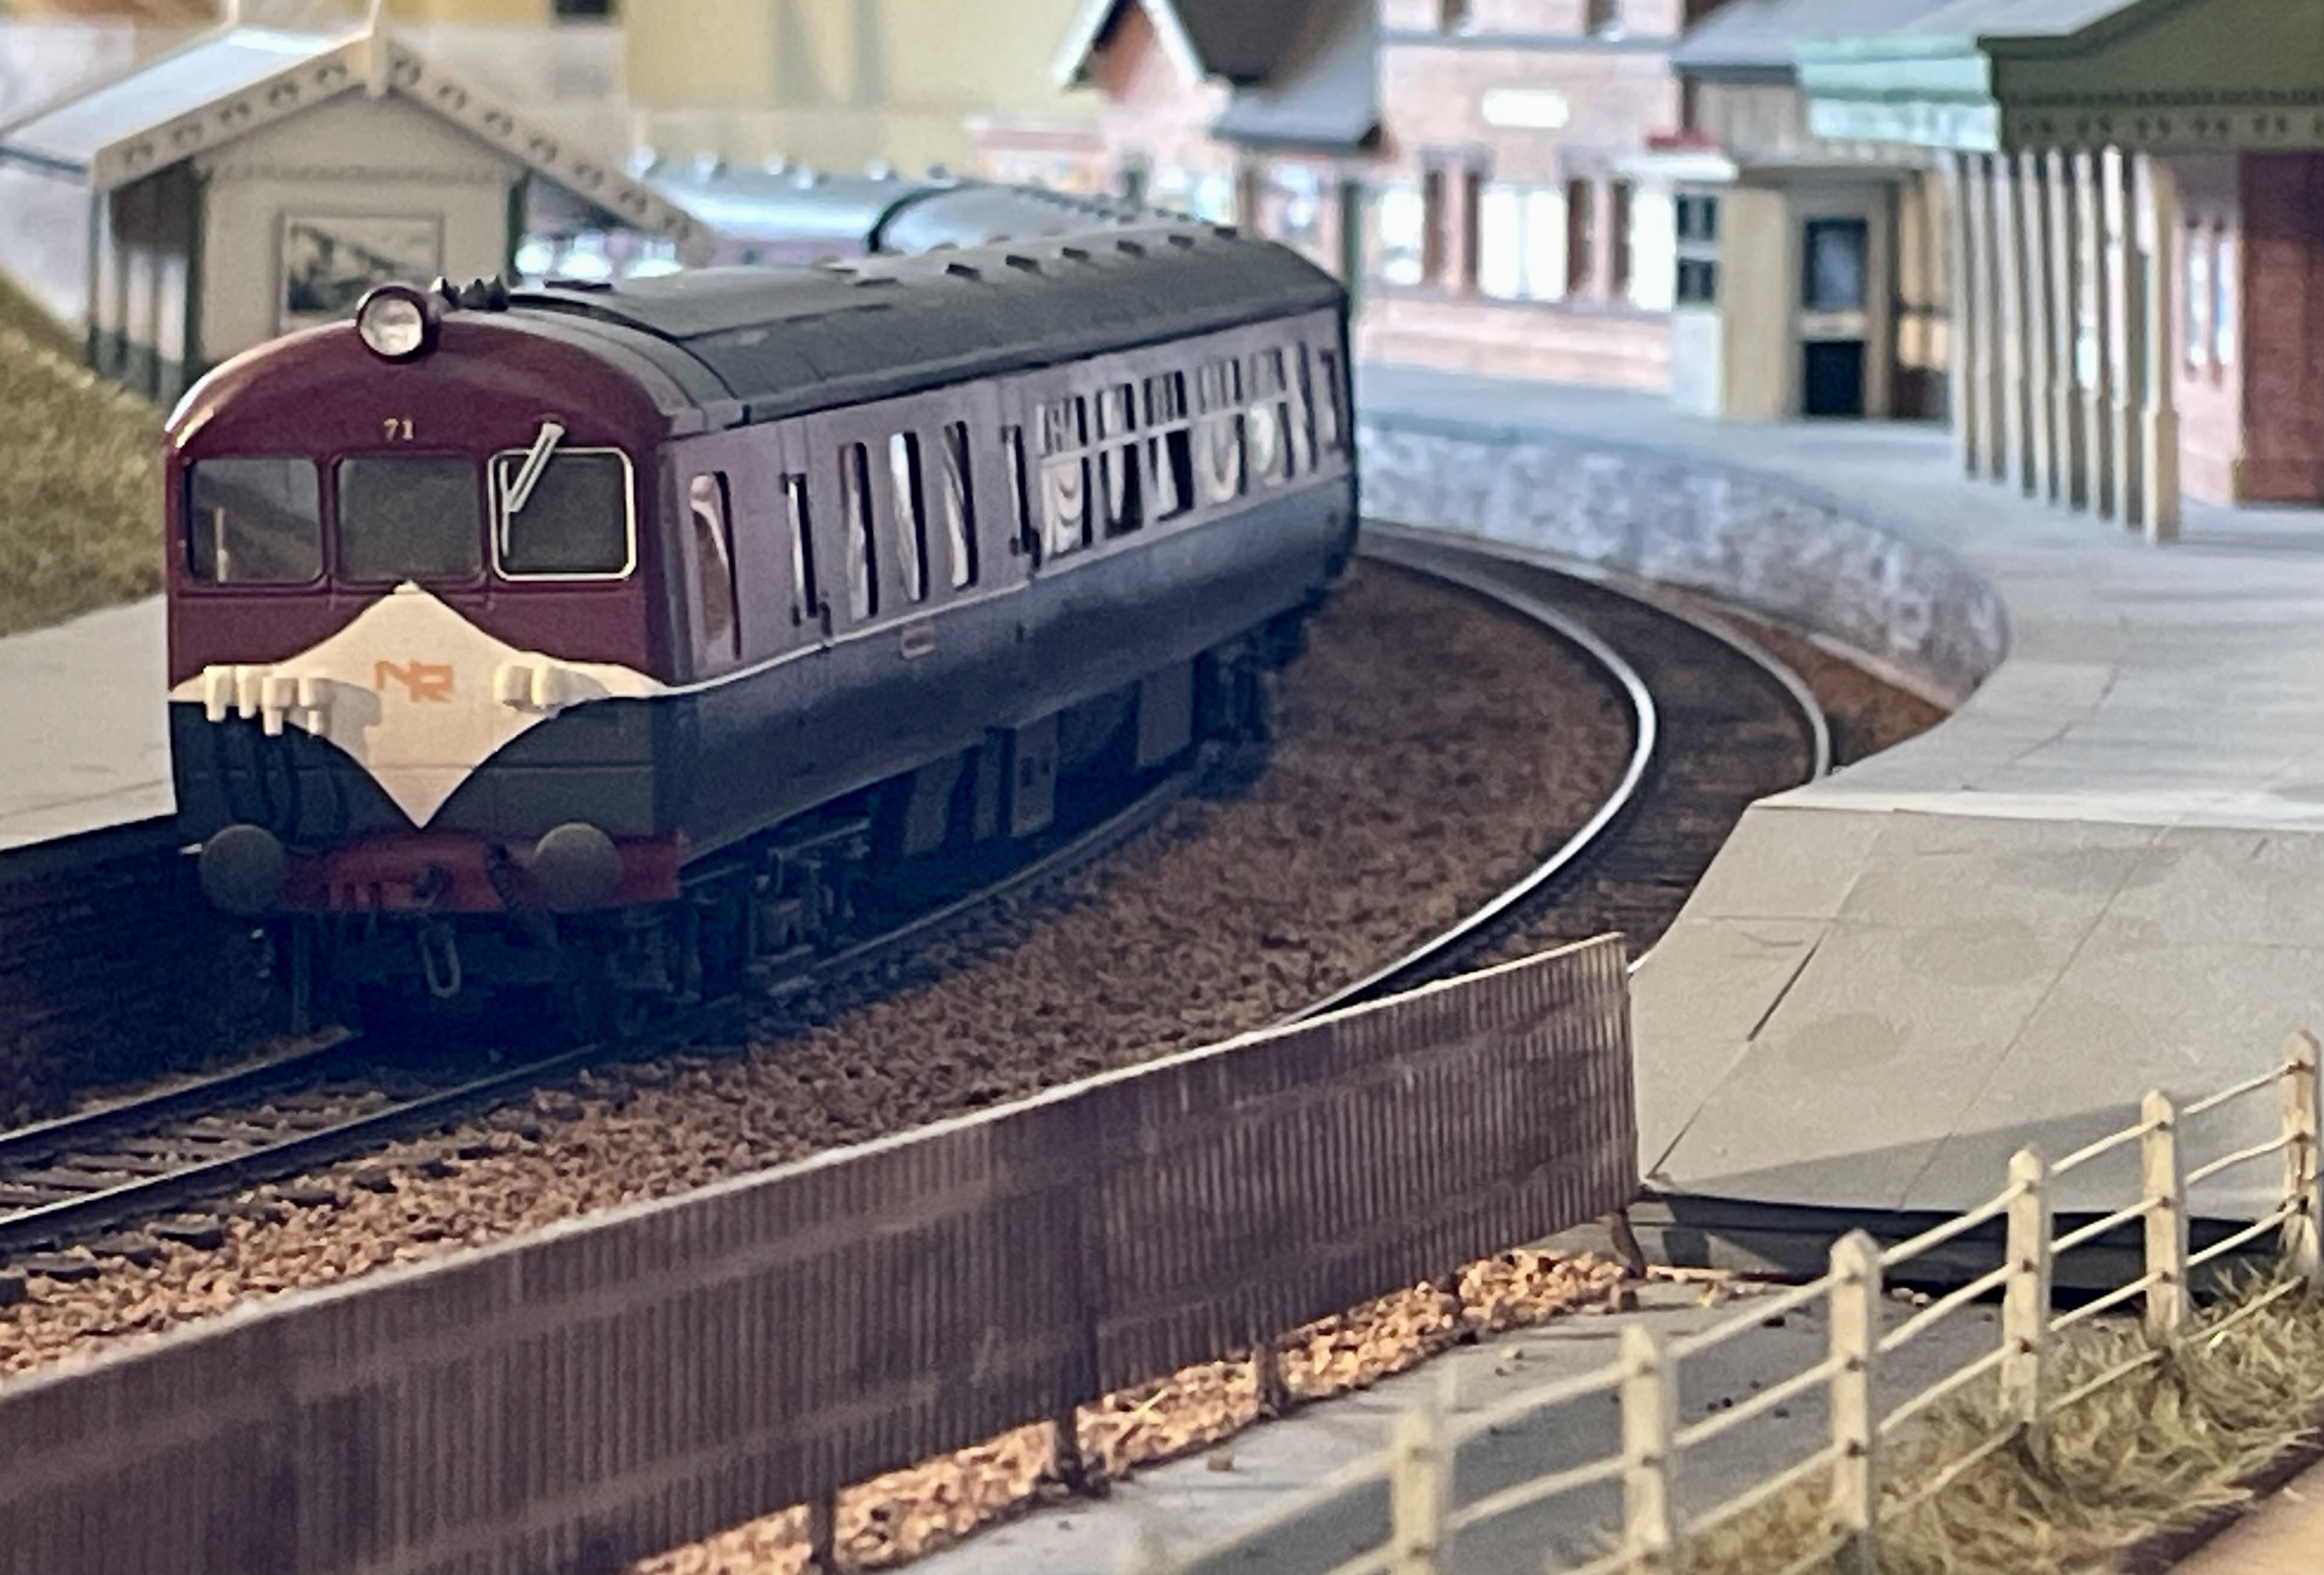
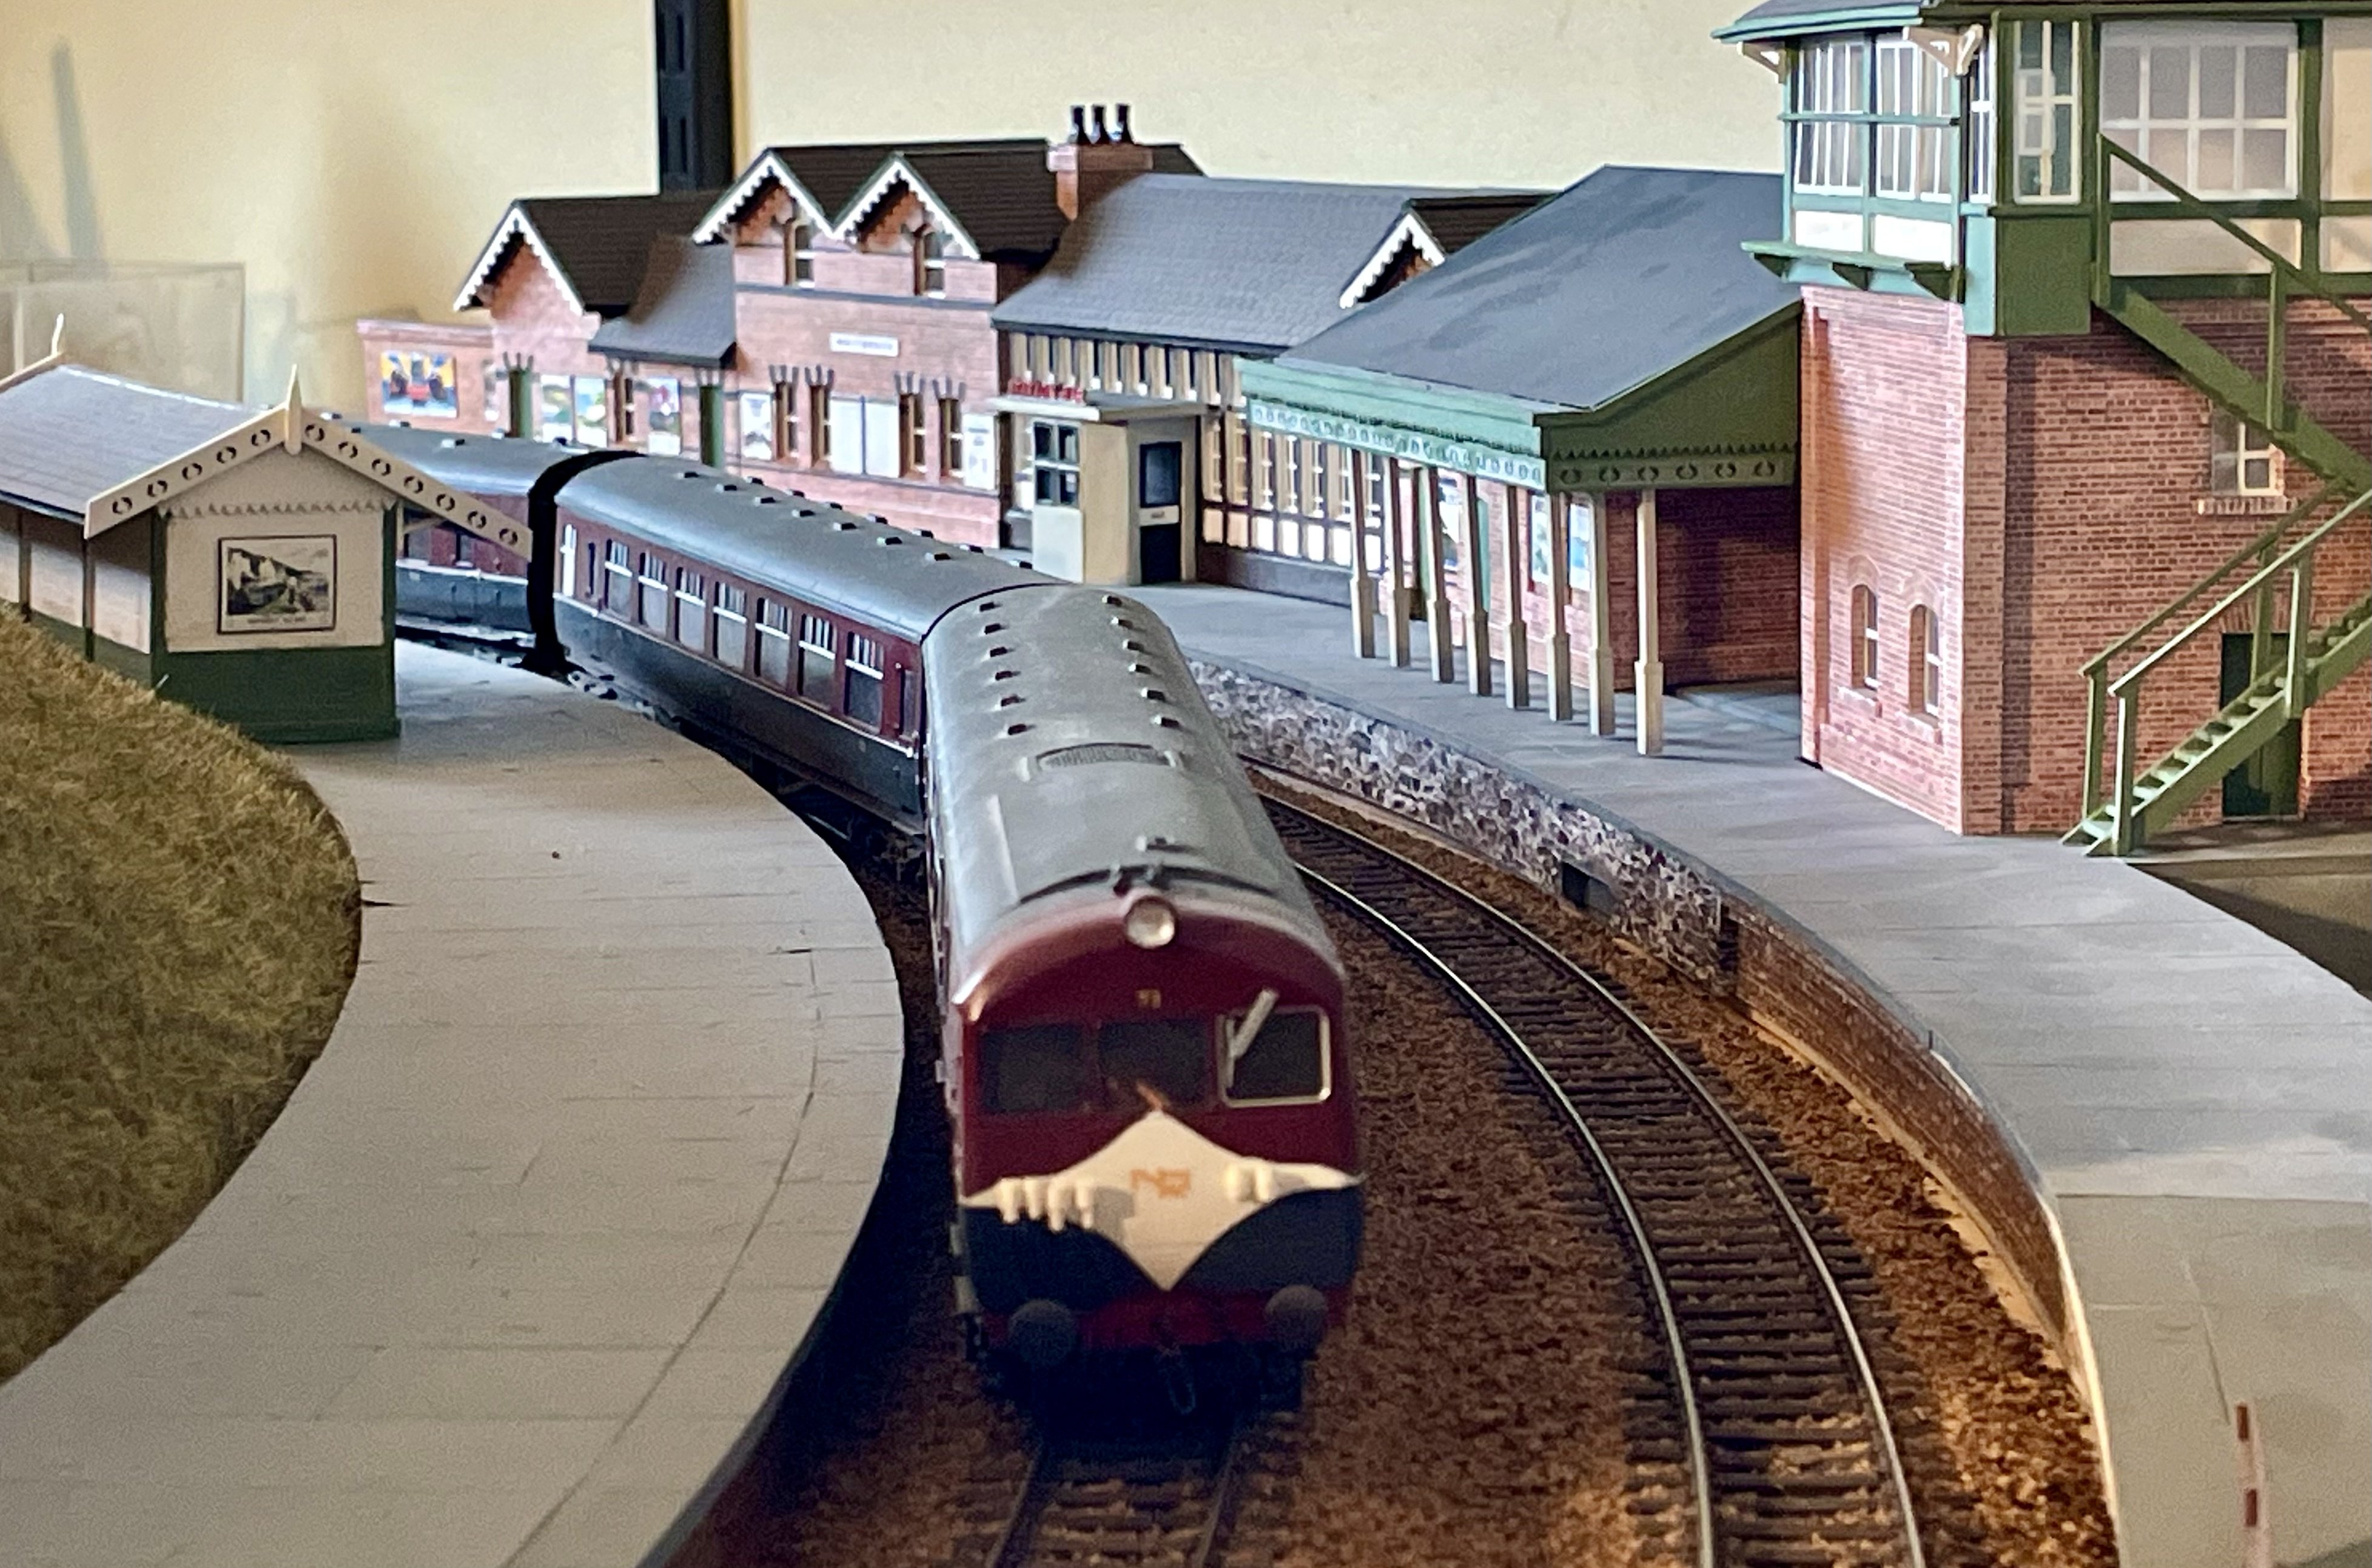
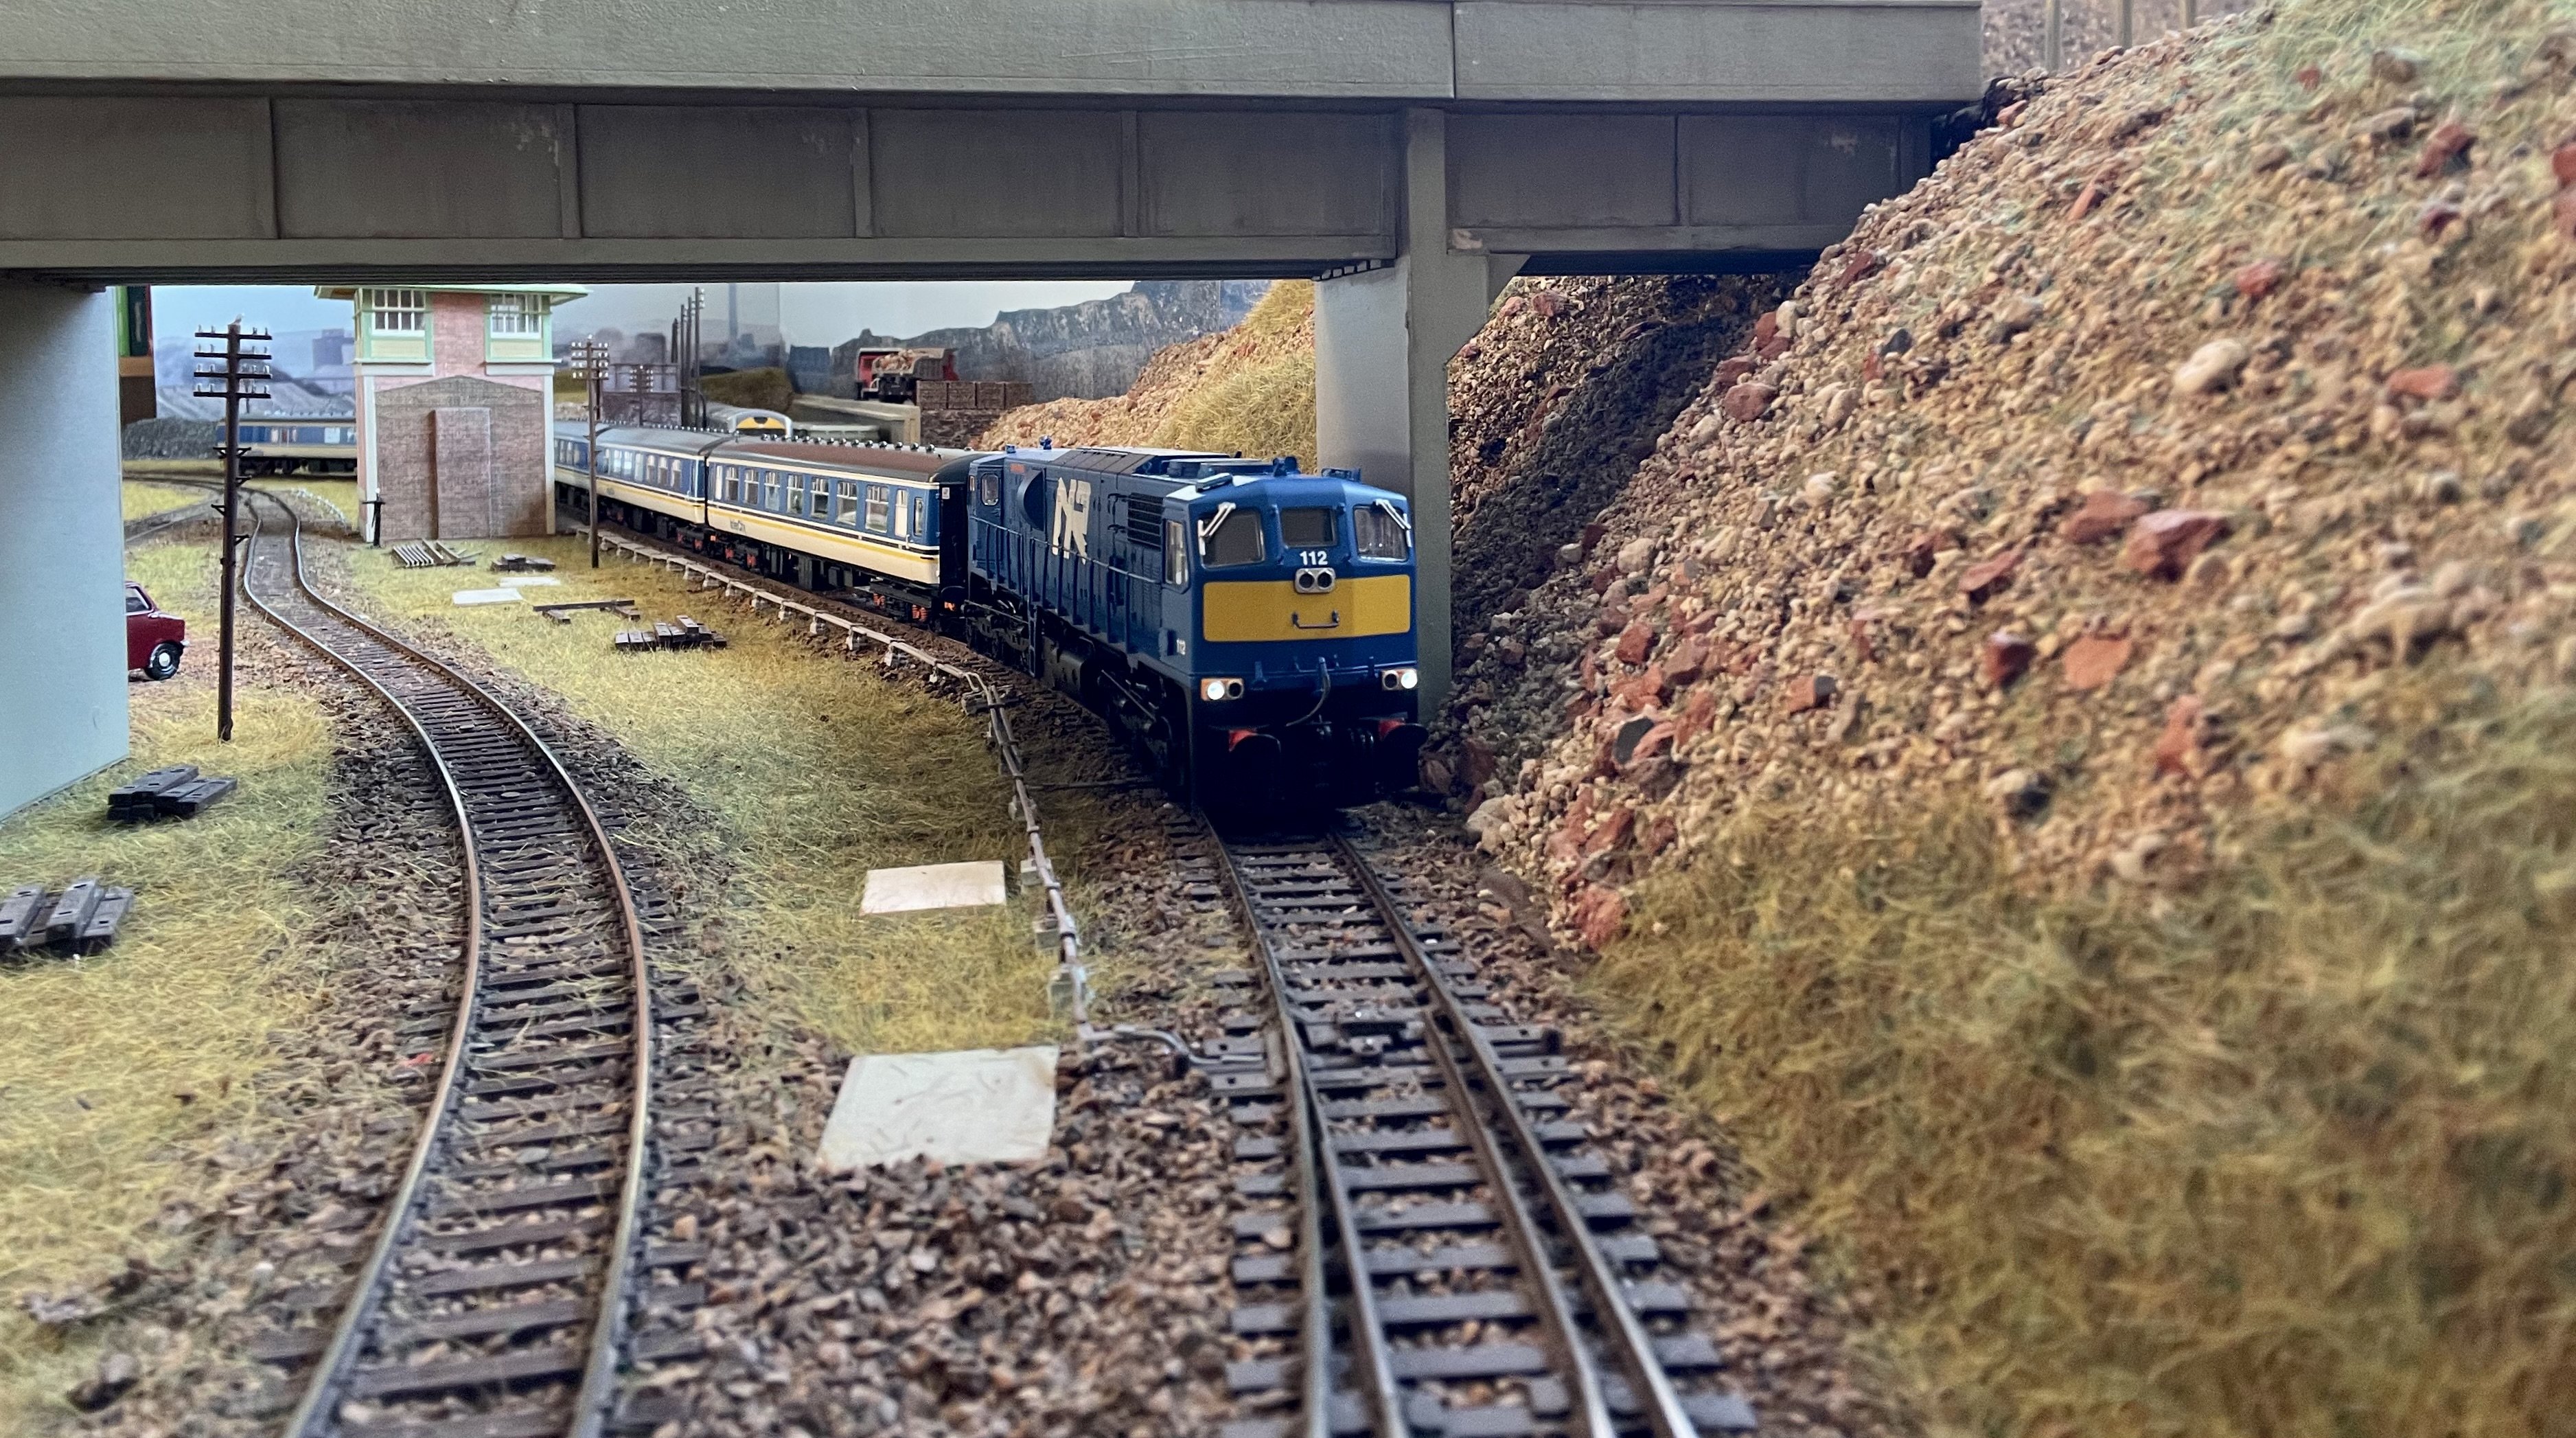
Unboxed Class 110 No.112 “Northern Counties” and gave it an outing. Cheers Darius
11 points
-
Some more work done recently. Acquired a Worsley laminate SO kit. Have another two laminates ordered from Worsley Works, getting orders in before Allen retires! On some dummy bogies, awaiting parts from Dart Castings. Got my order from JM today also. After finding the roof and glueing it onto the dapol body the buffet sides were scribed, tumbleform formed from a thoroughly ag spec jig, and then overlayed. Both now require detailing, roof vents and cabling, glazing, interiors, painting, the list goes on! Some dry fitting on the Bredin Steel side. And the G2 has returned, was receiving some touch ups to paint and a new drawbar. Much to do on her also, weight to be added, the tender needs it's springs and axleboxes along with a dose of weathering, more handrails, step added to cab and the cab interior needs to be built and fitted. The chassis and wheels on both loco and tender also need a repaint into grey! I've also a horsebox, meat van and 2 tin vans to build, so plenty on the workbench!
11 points
-
Missed this one. UTA Larne Harbour. UTA 1961-xx-CA Larne Harbour PFF38711 points
-
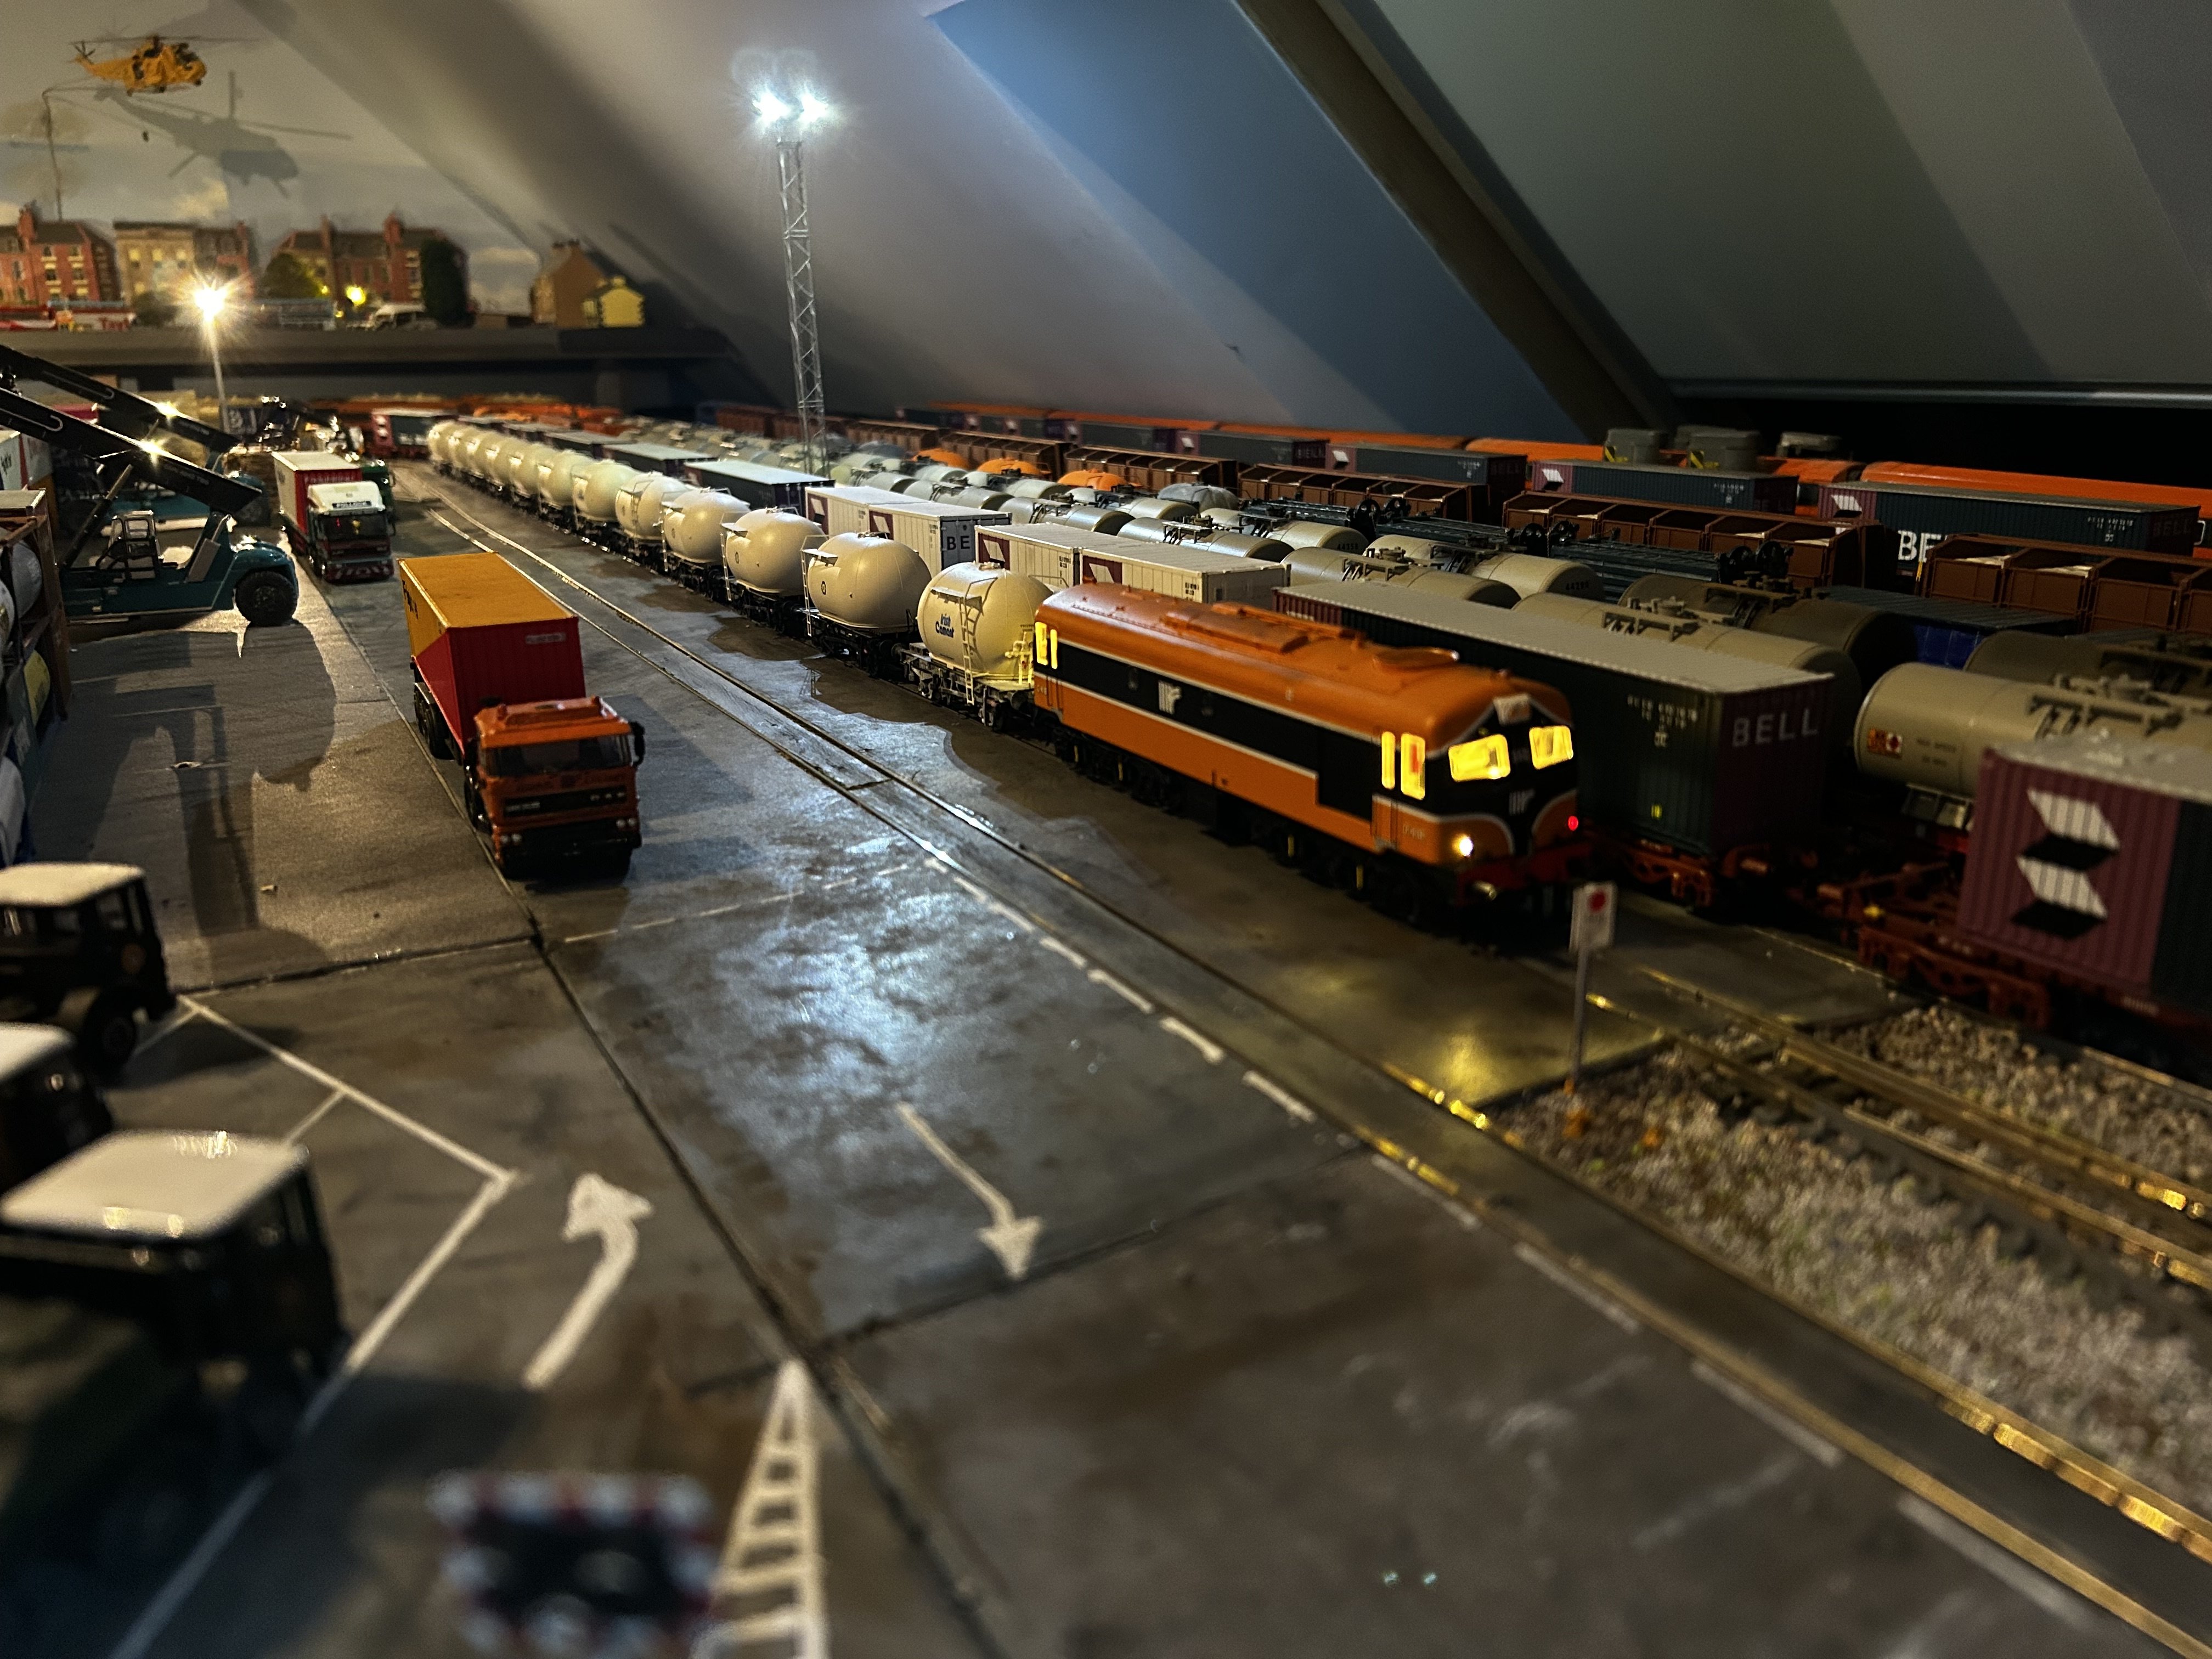
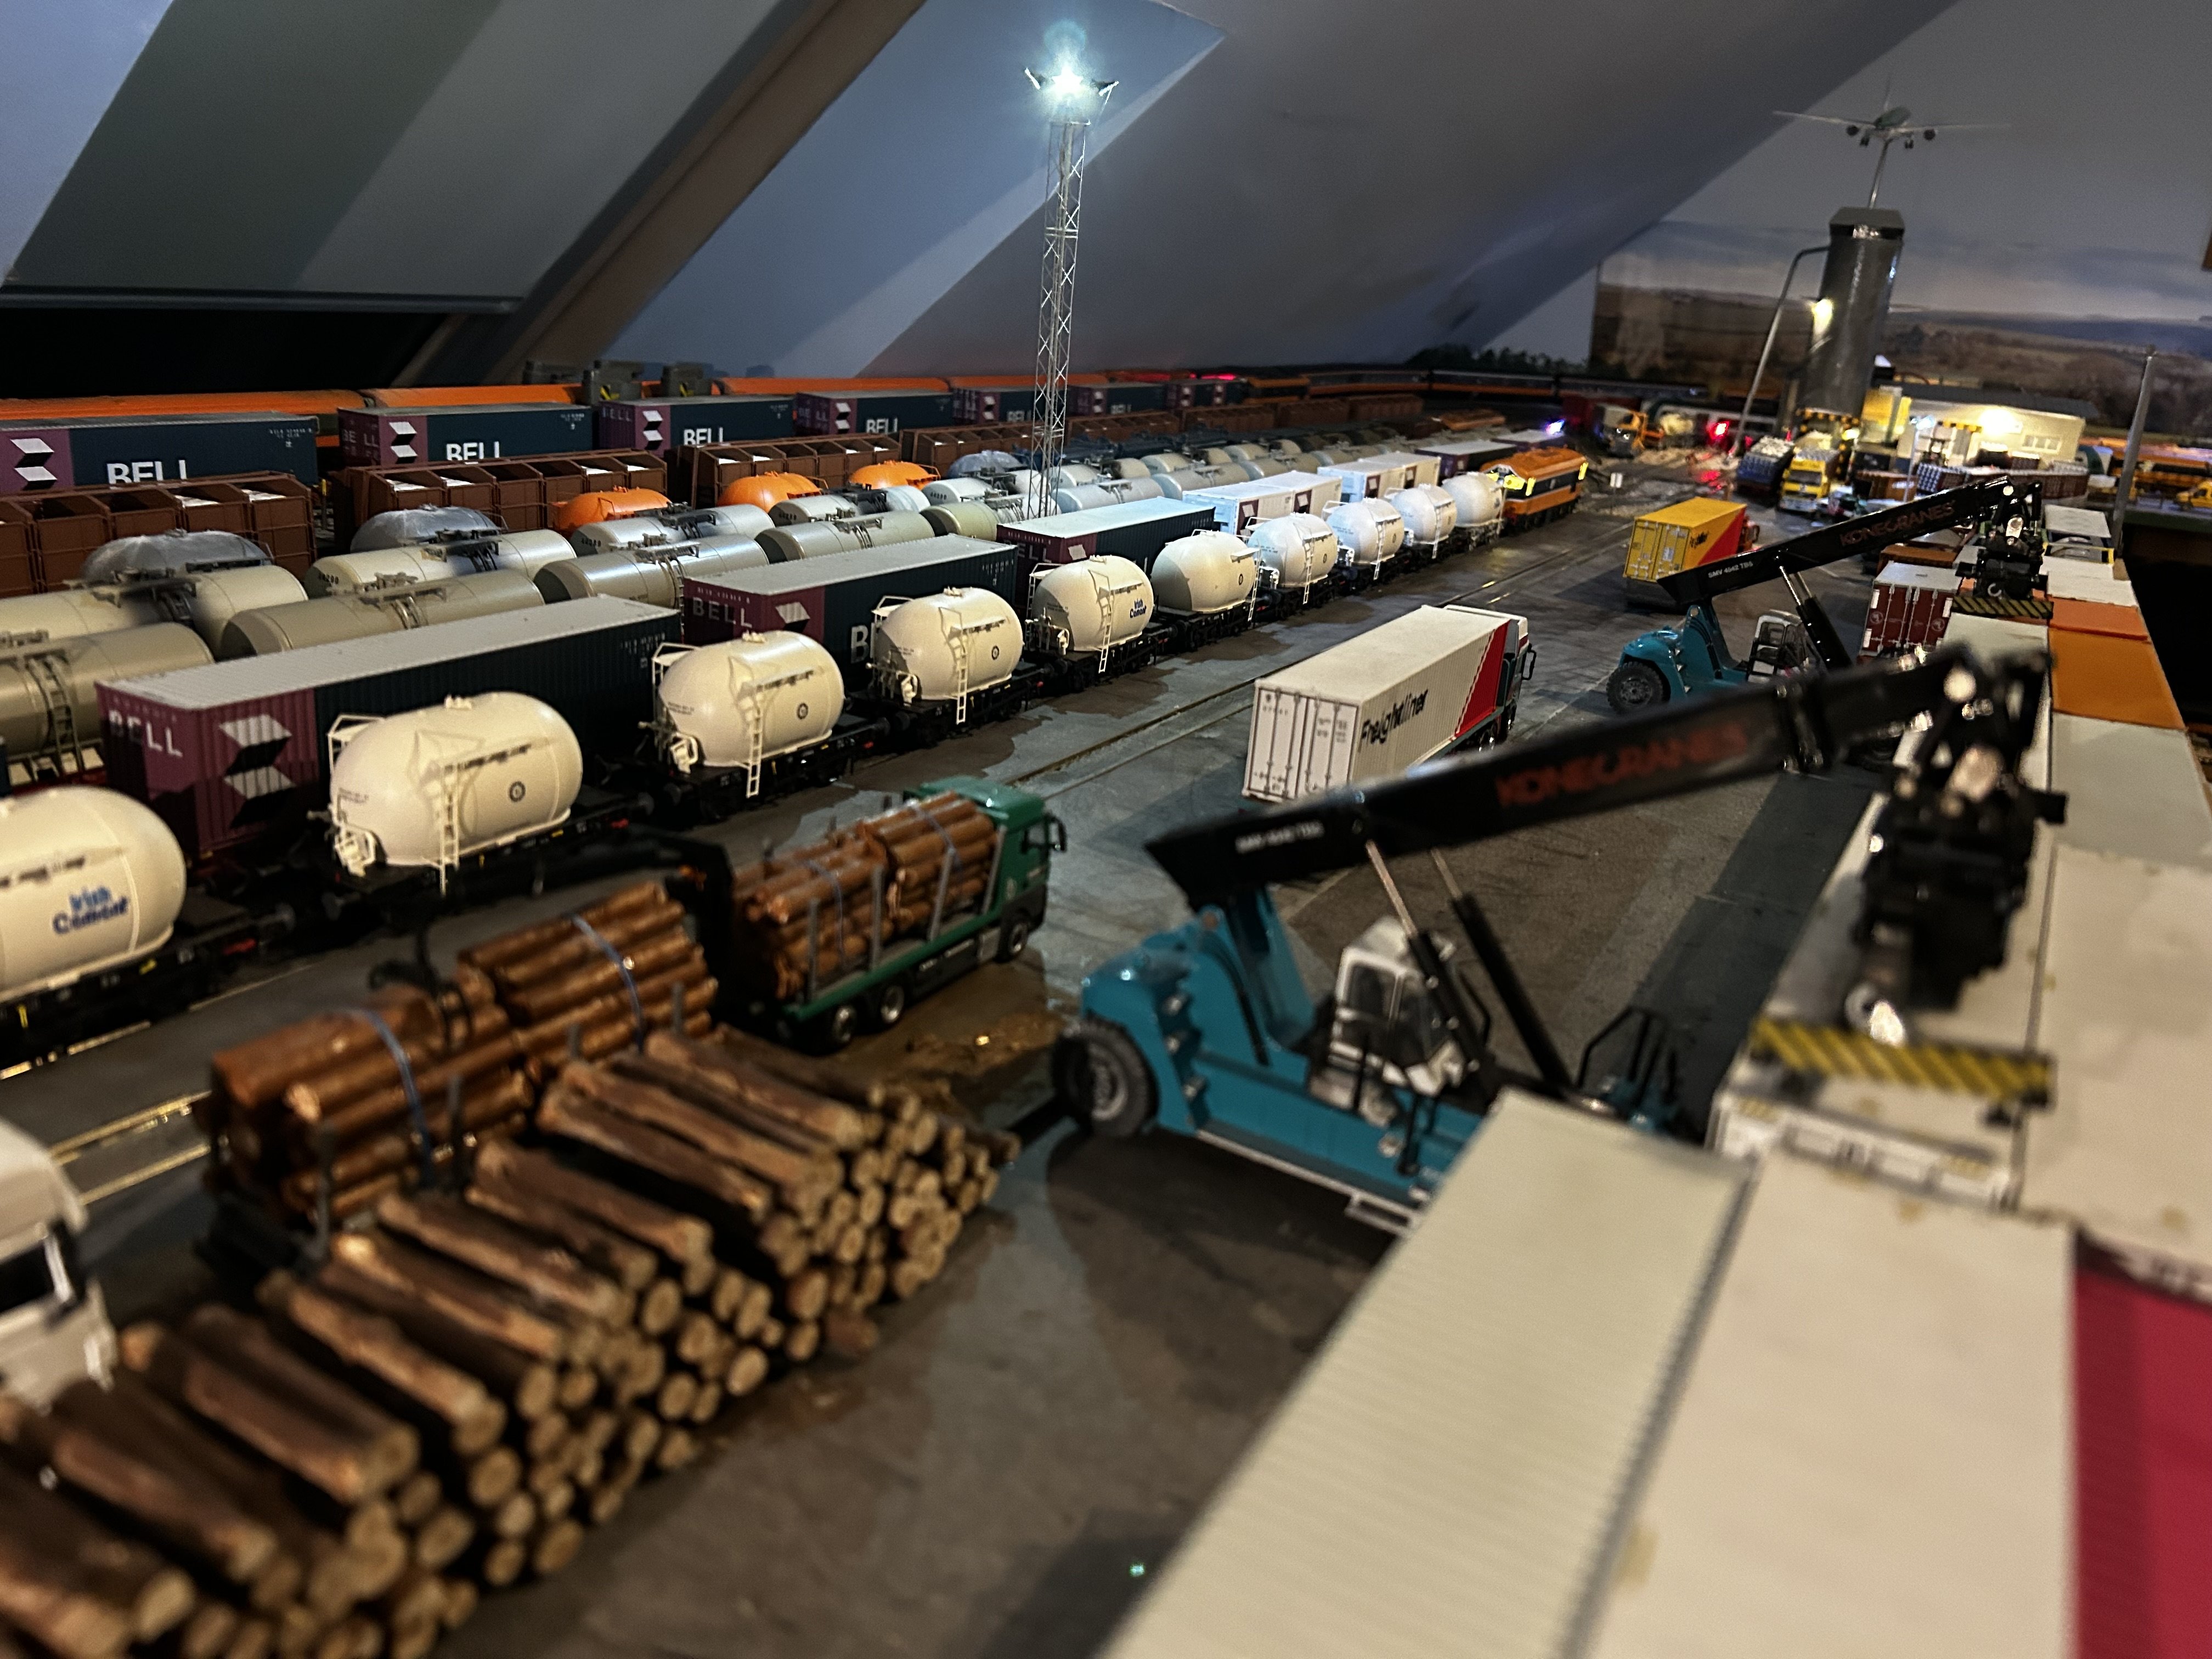
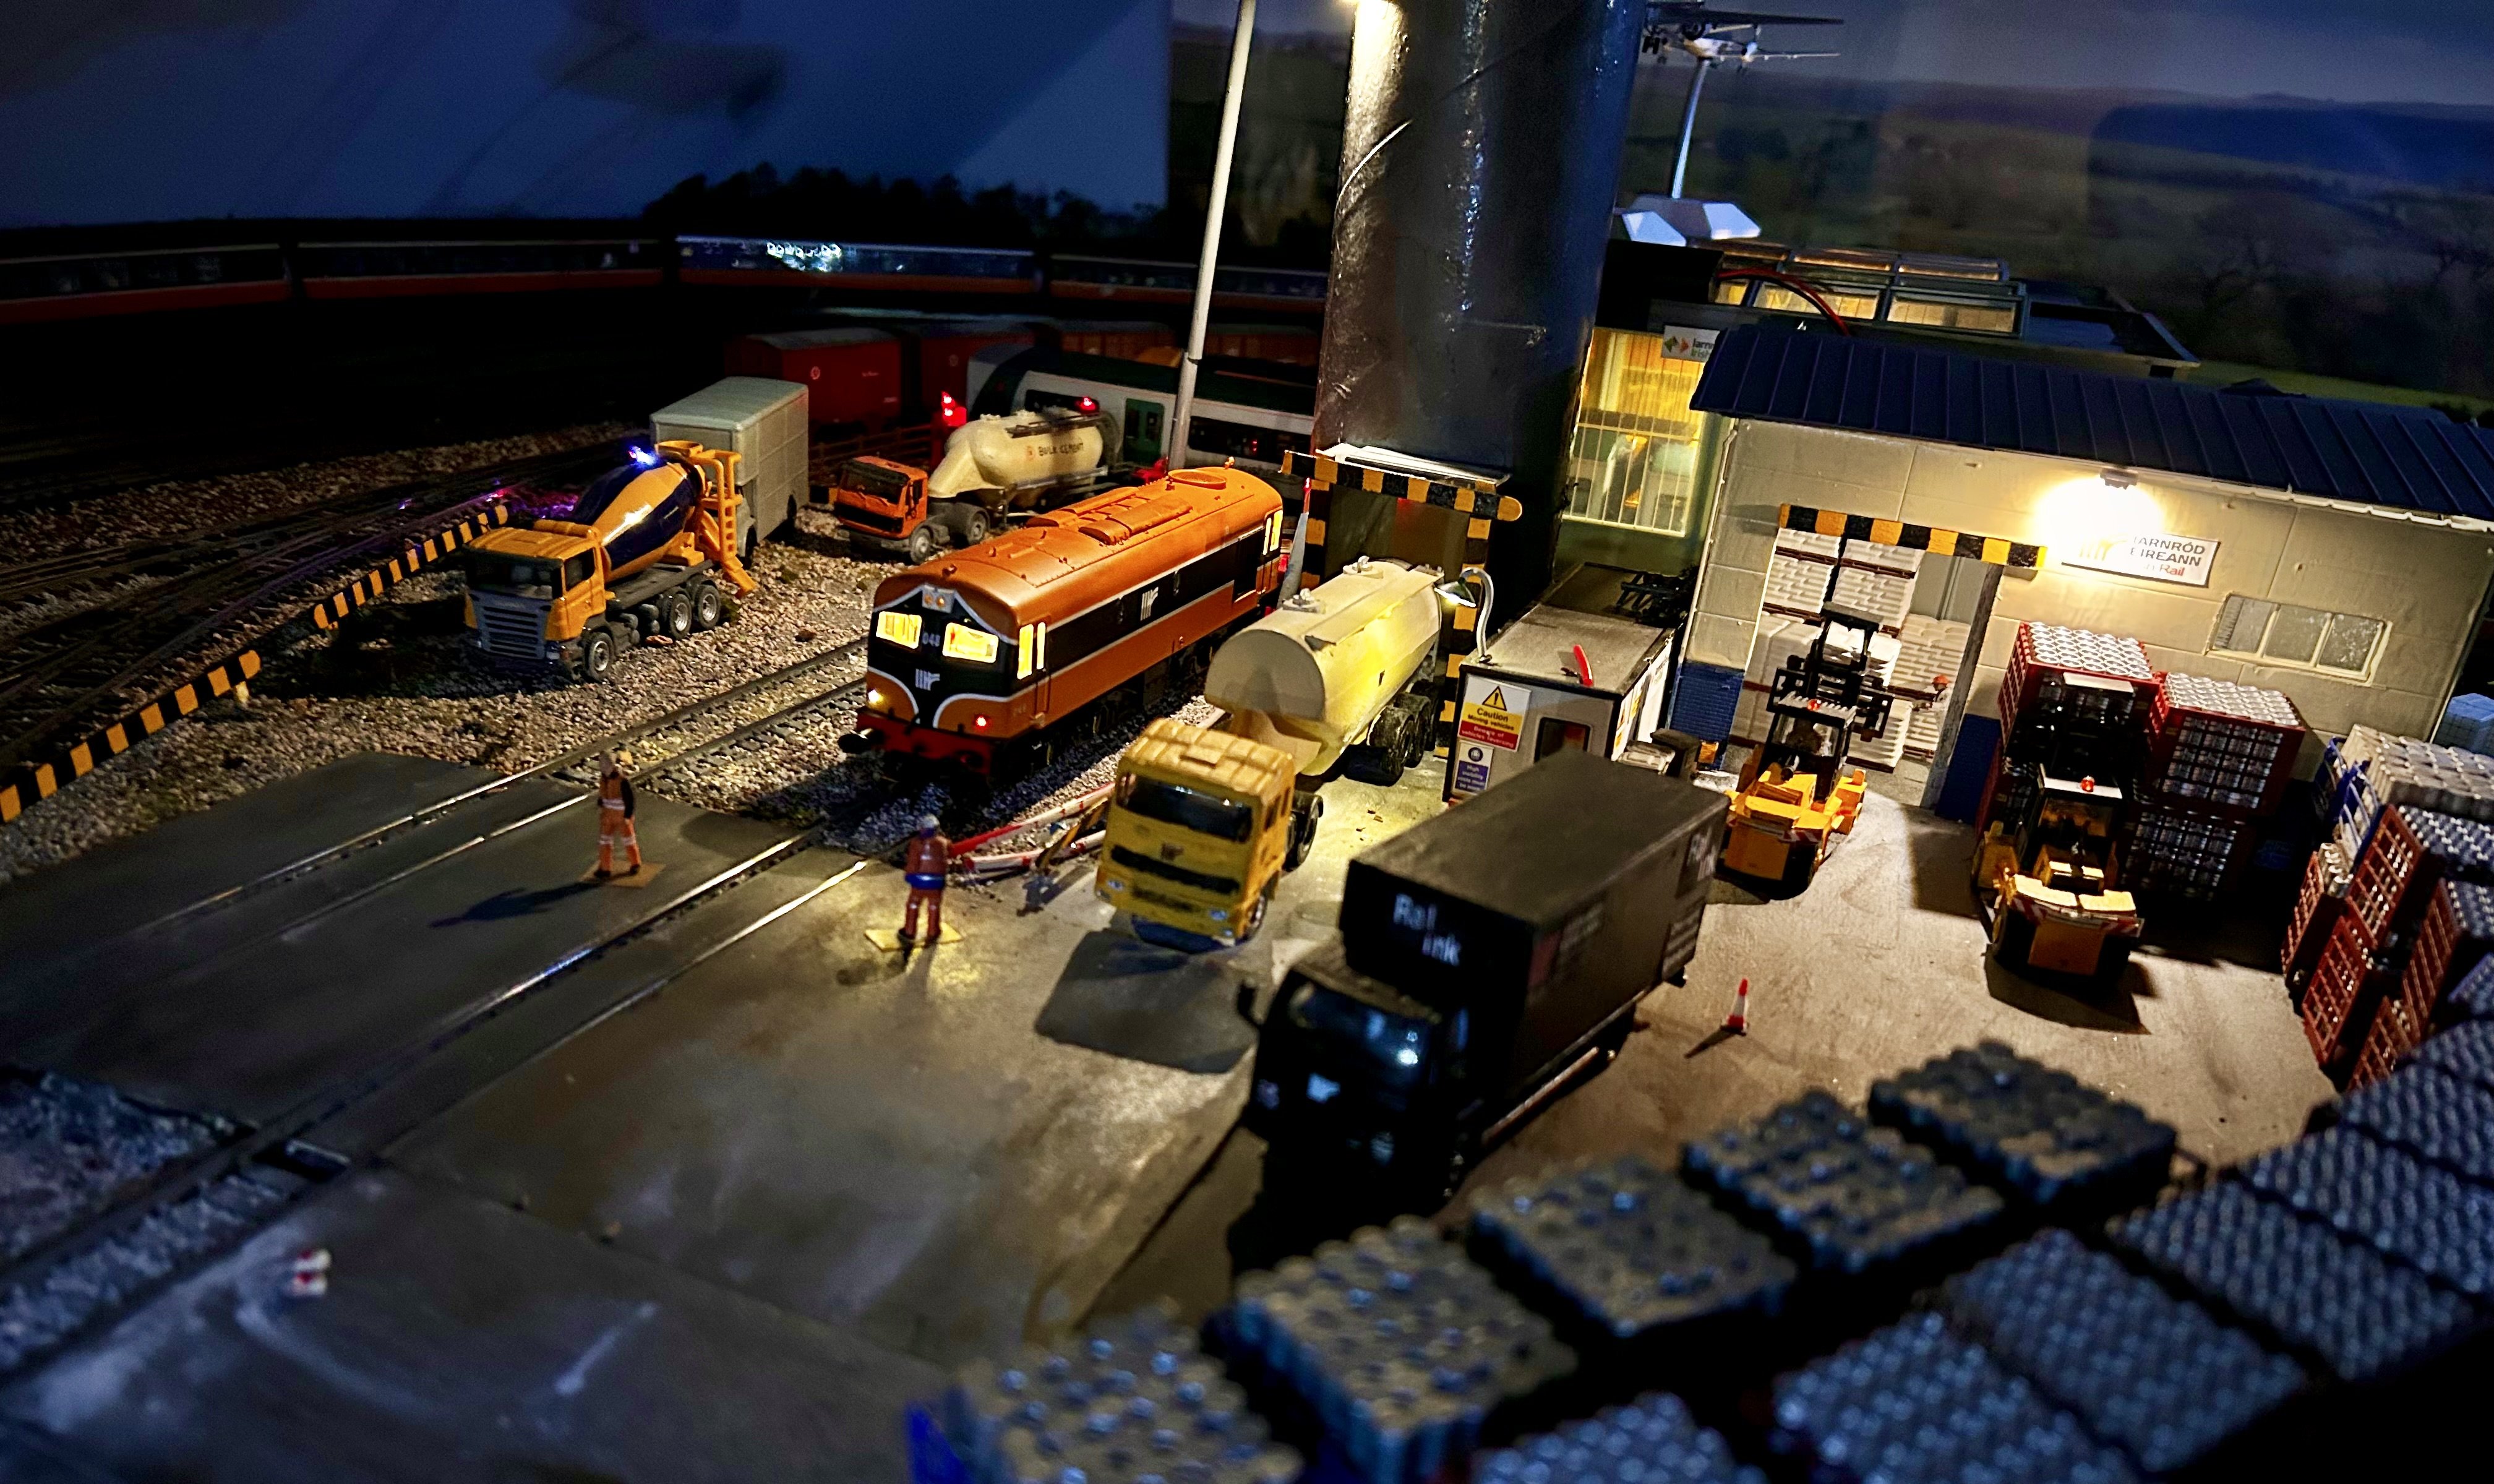
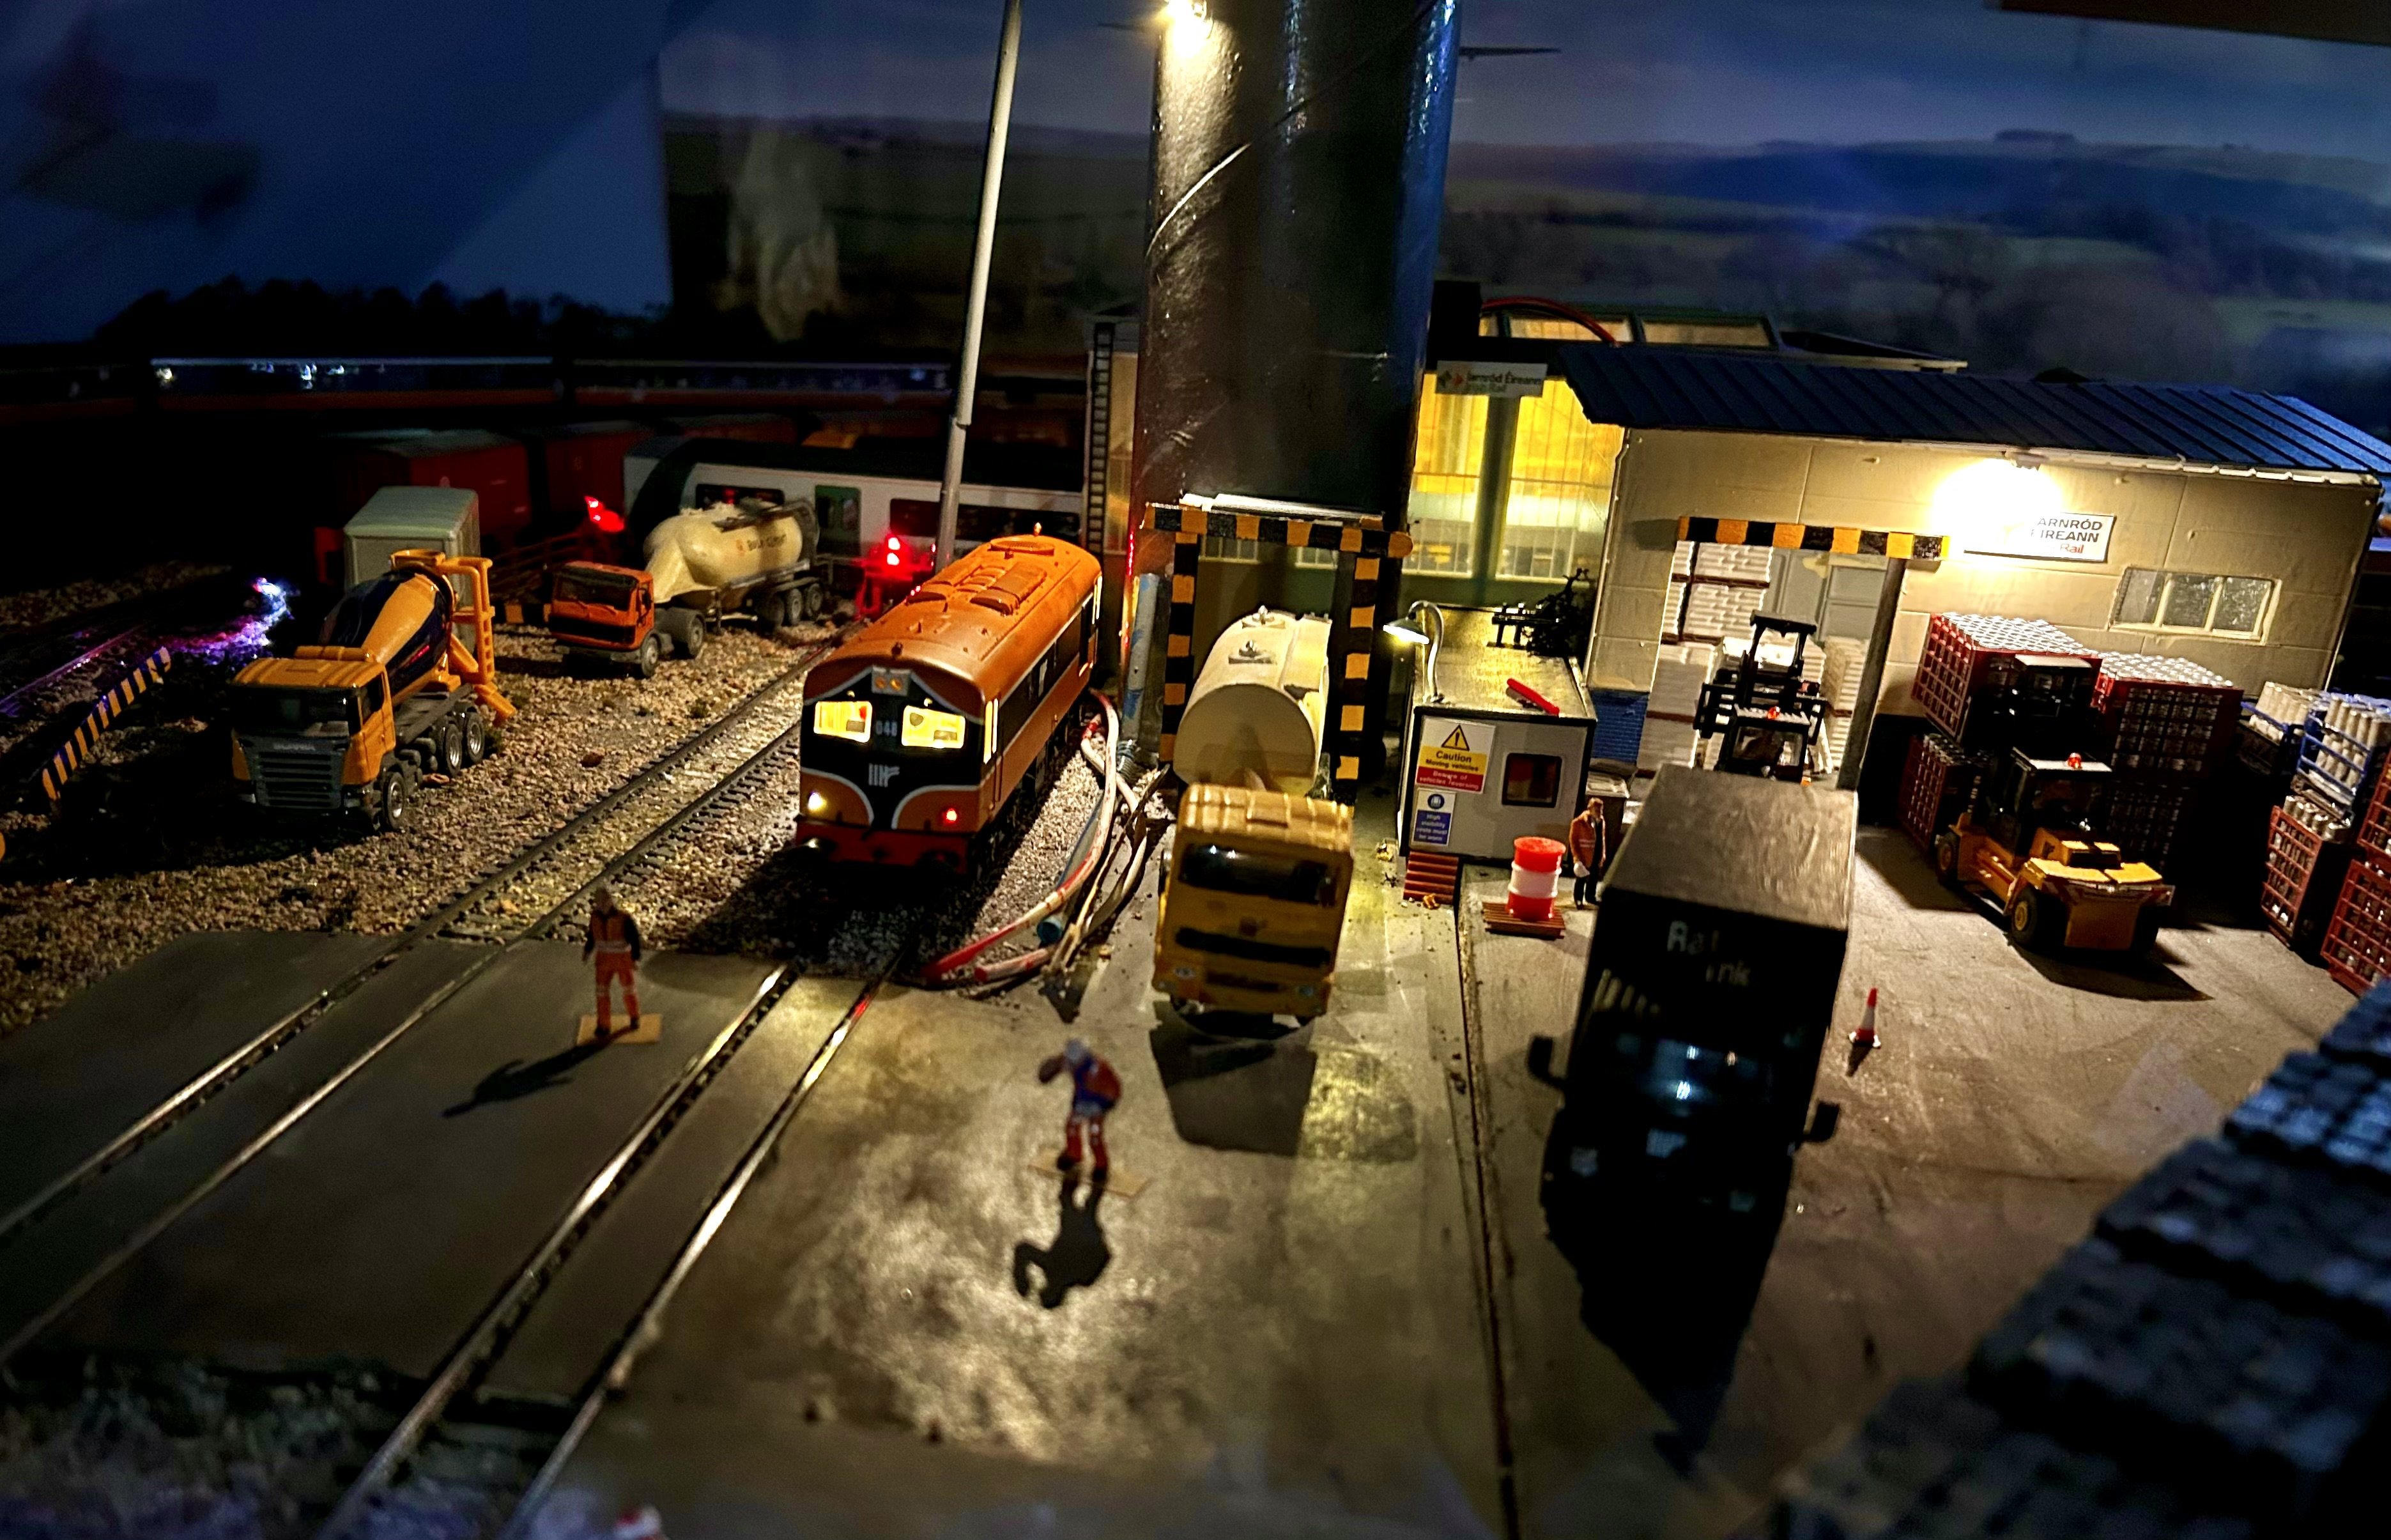
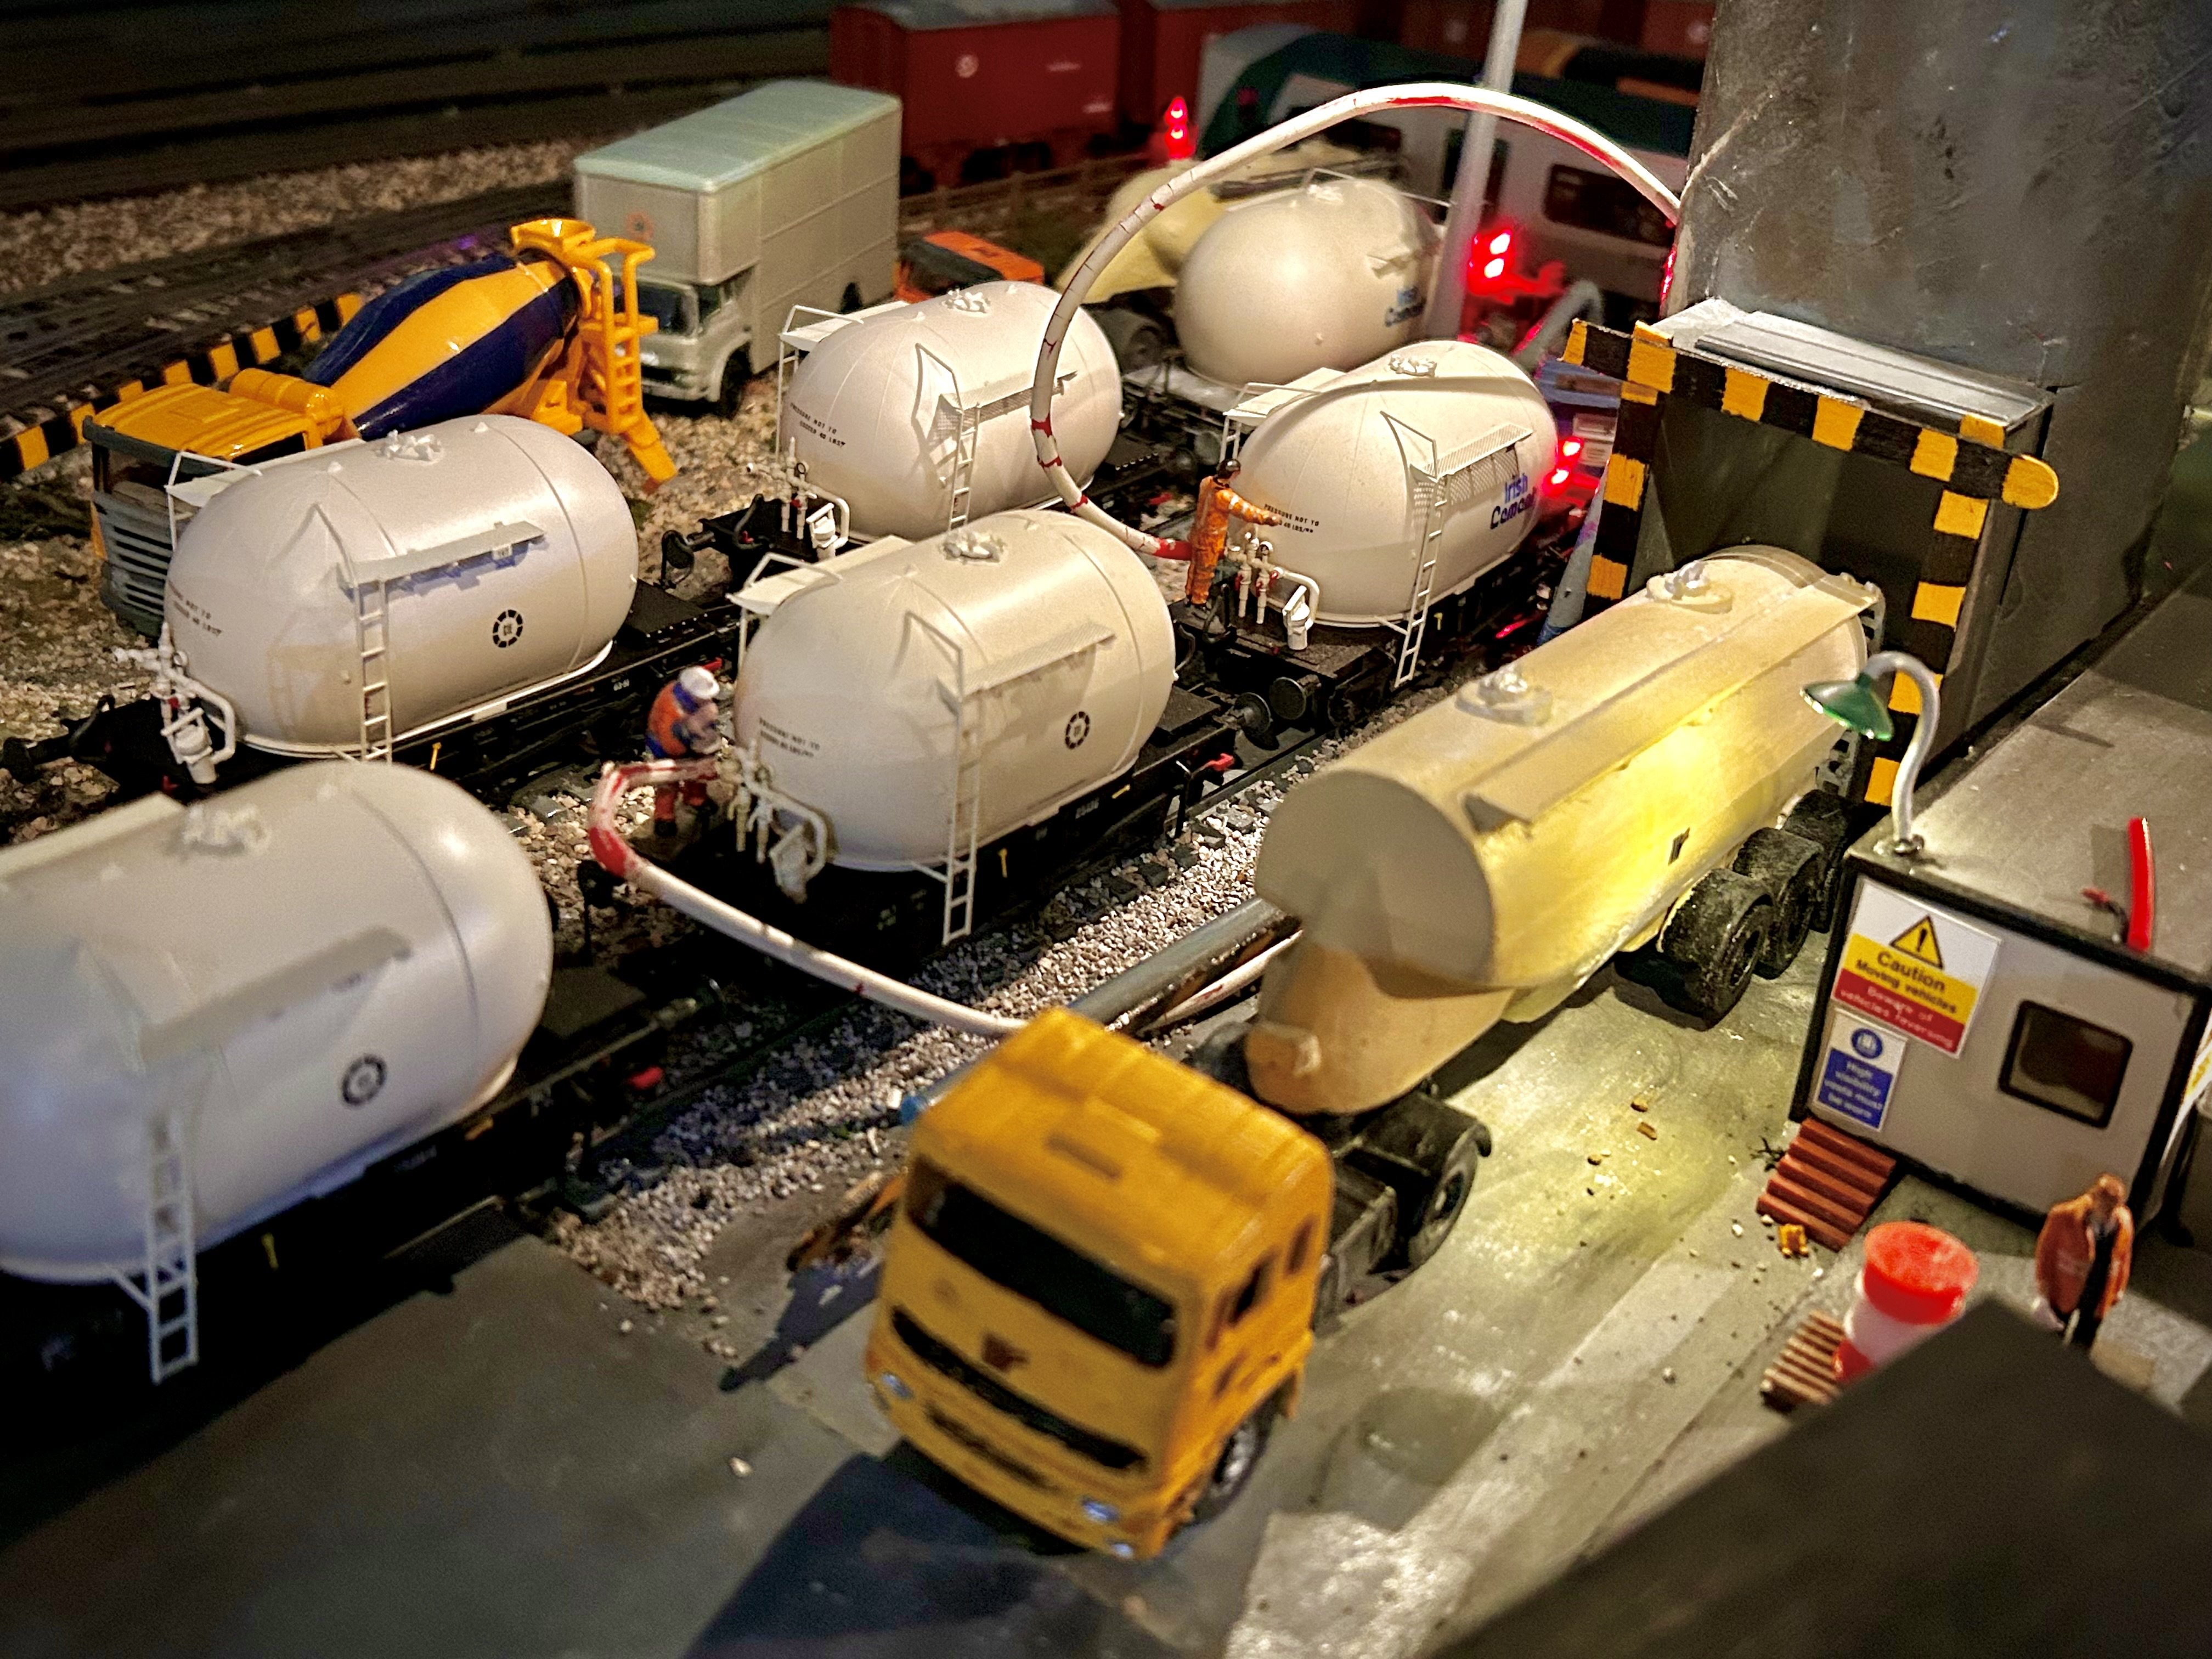
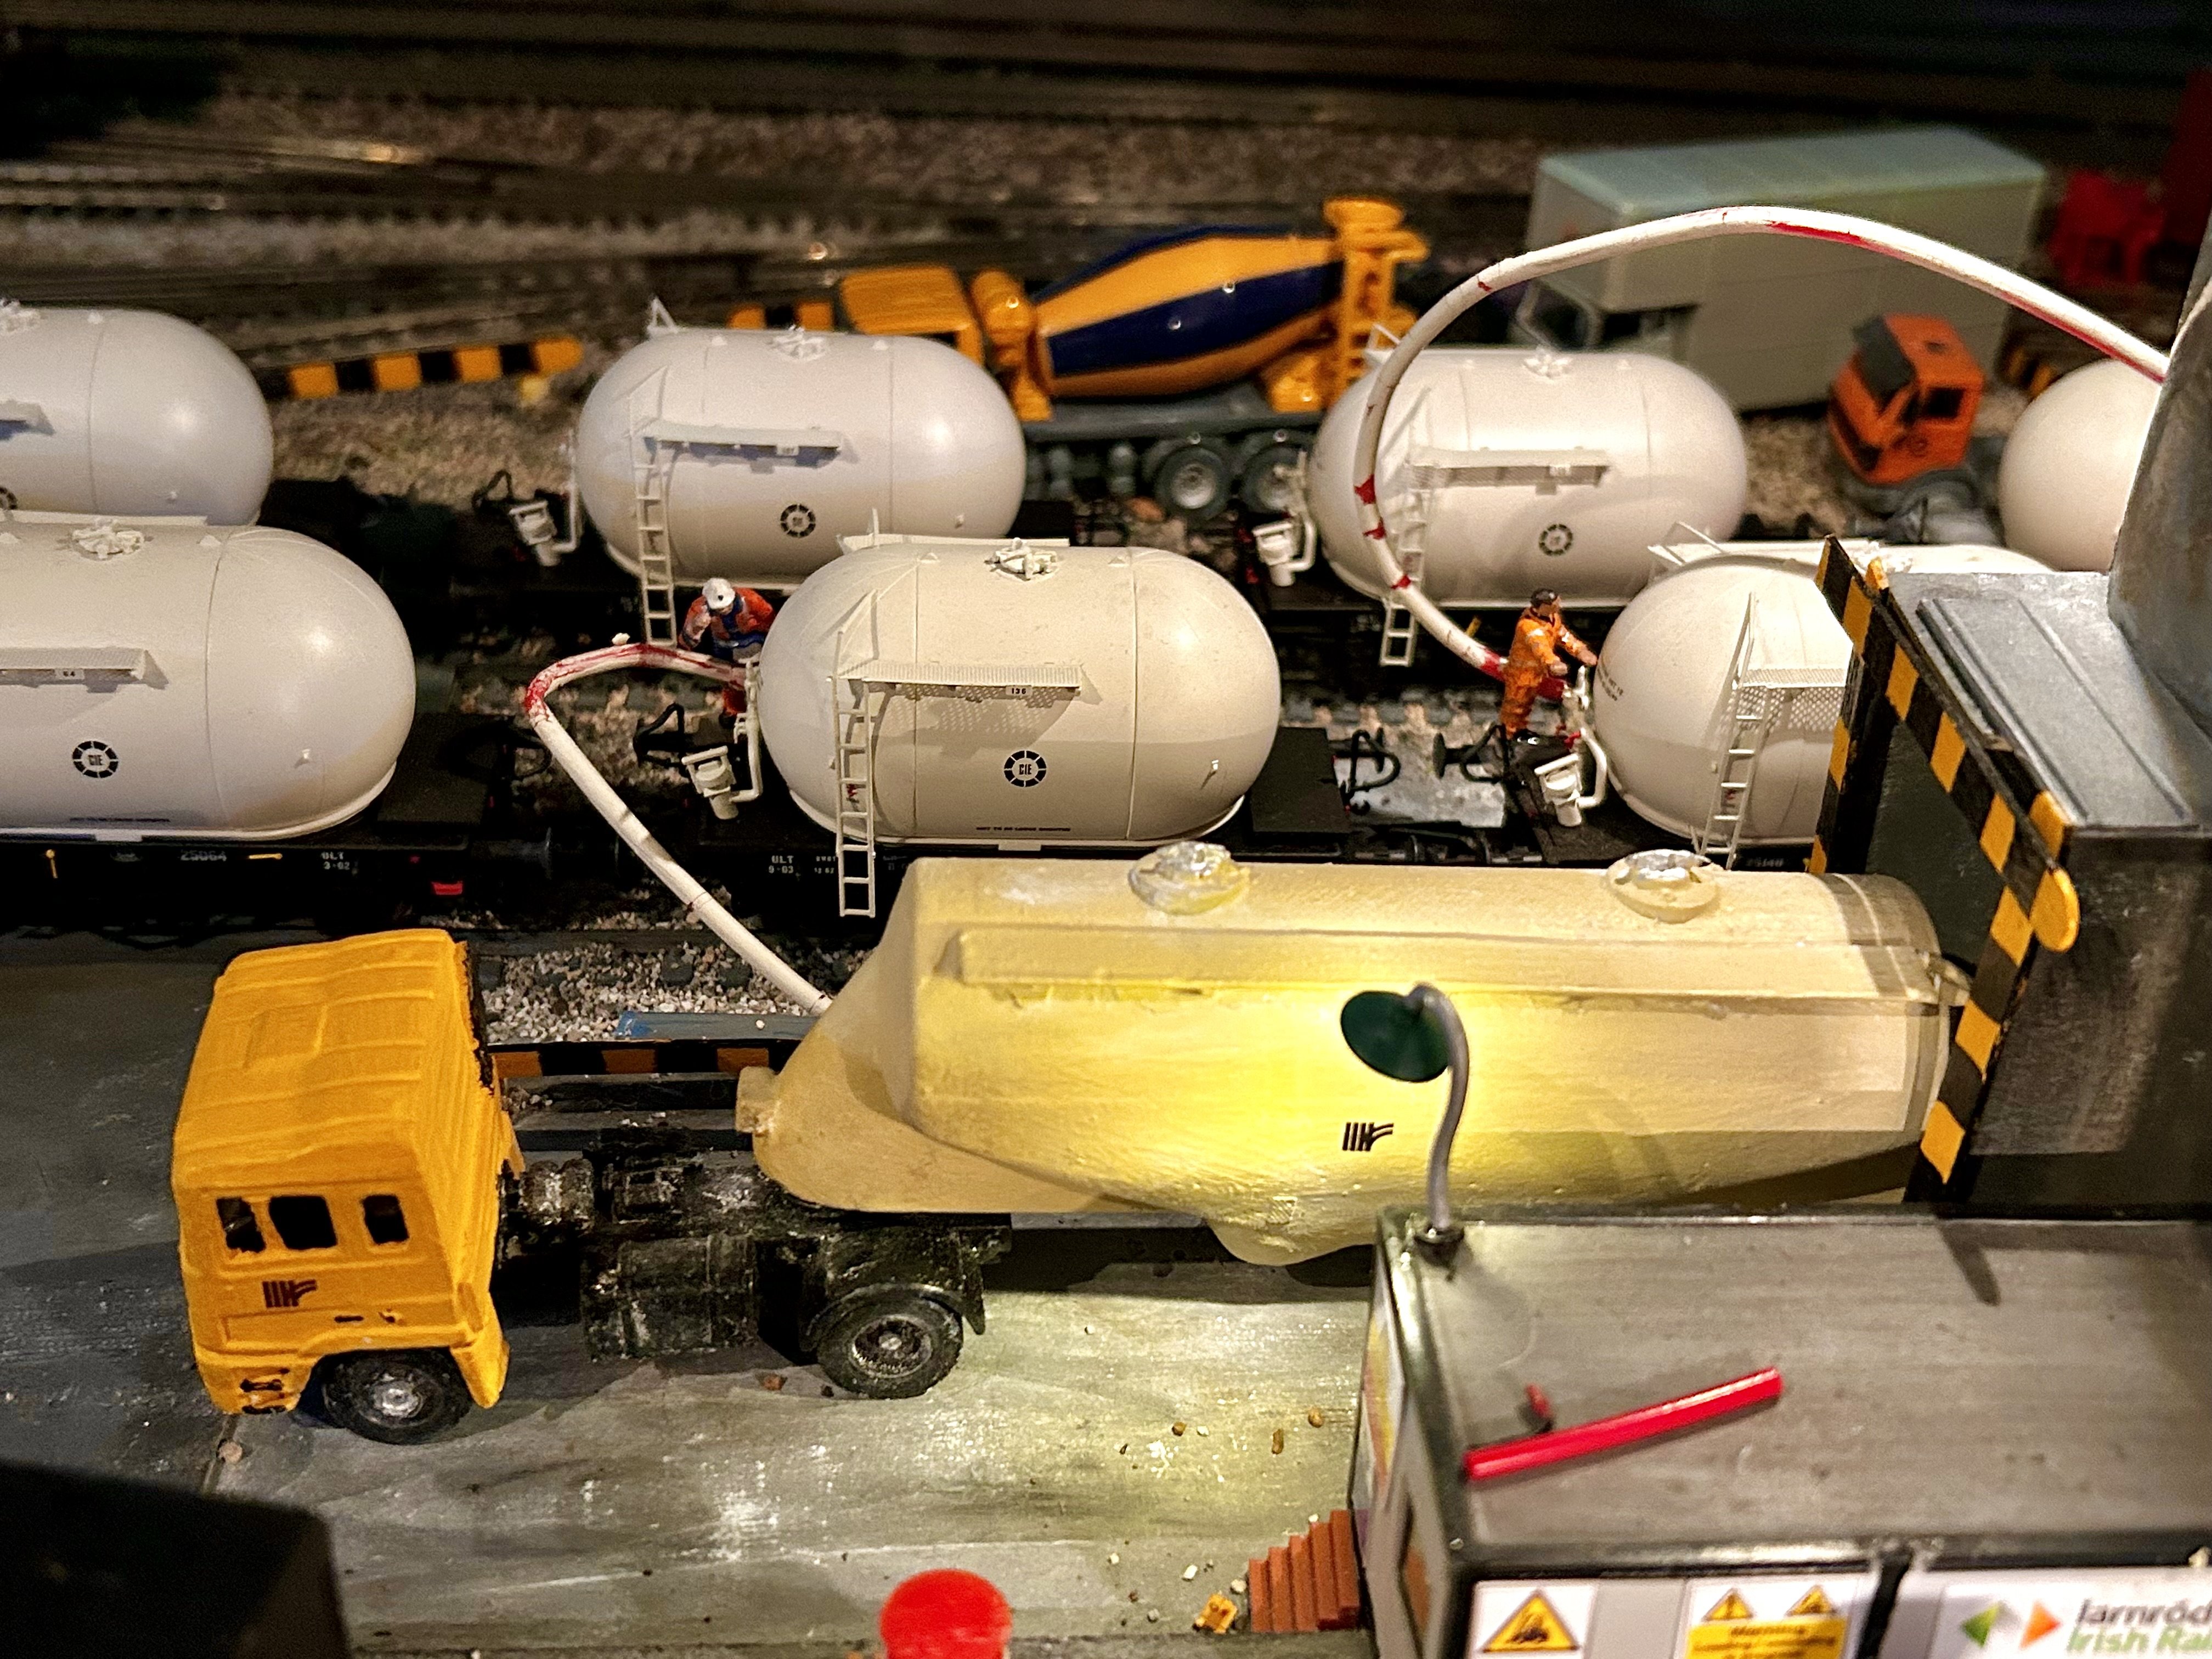
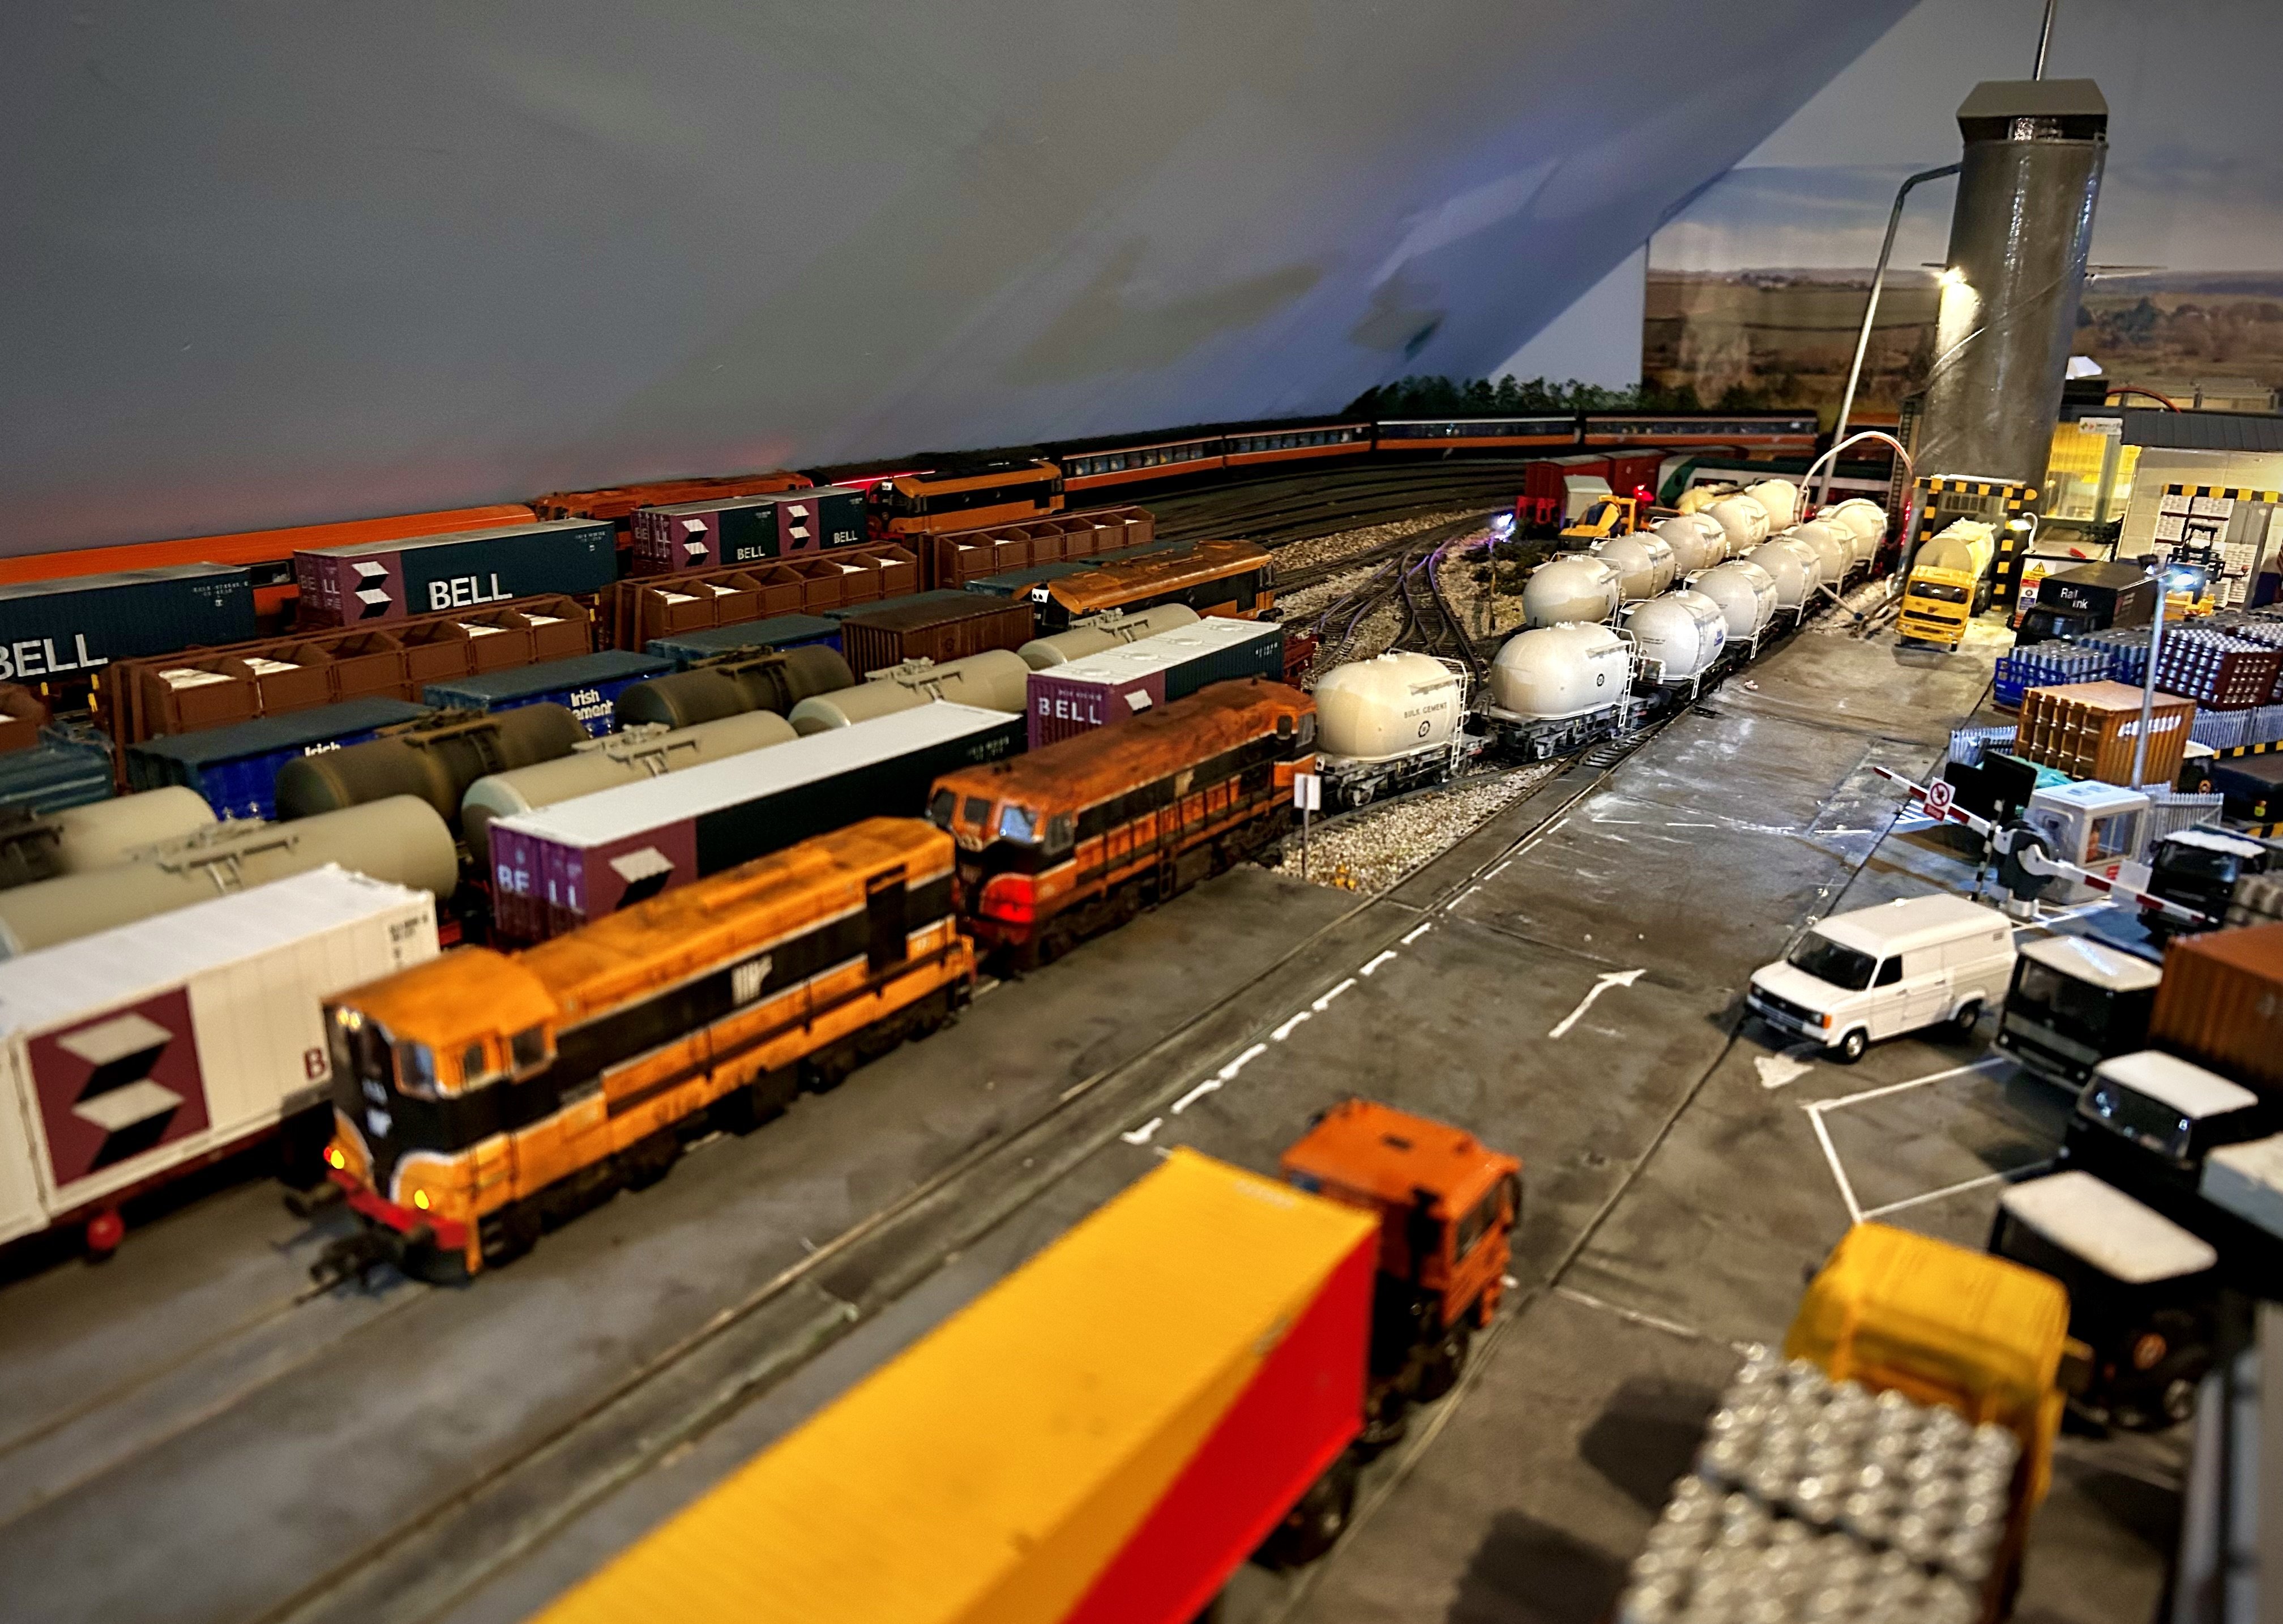
Under the lights at the Lakeview freight yard. 048 arrives at the Lakeview freight yard with the empty two axle bubble cement liner from Athenry, After uncoupling from the train 048 runs around and heads to the MPD for a FOW exam, Meanwhile 133+156 have arrived from the MPD and will work the laden bubbles back to Athenry when loading has been completed.
11 points
-
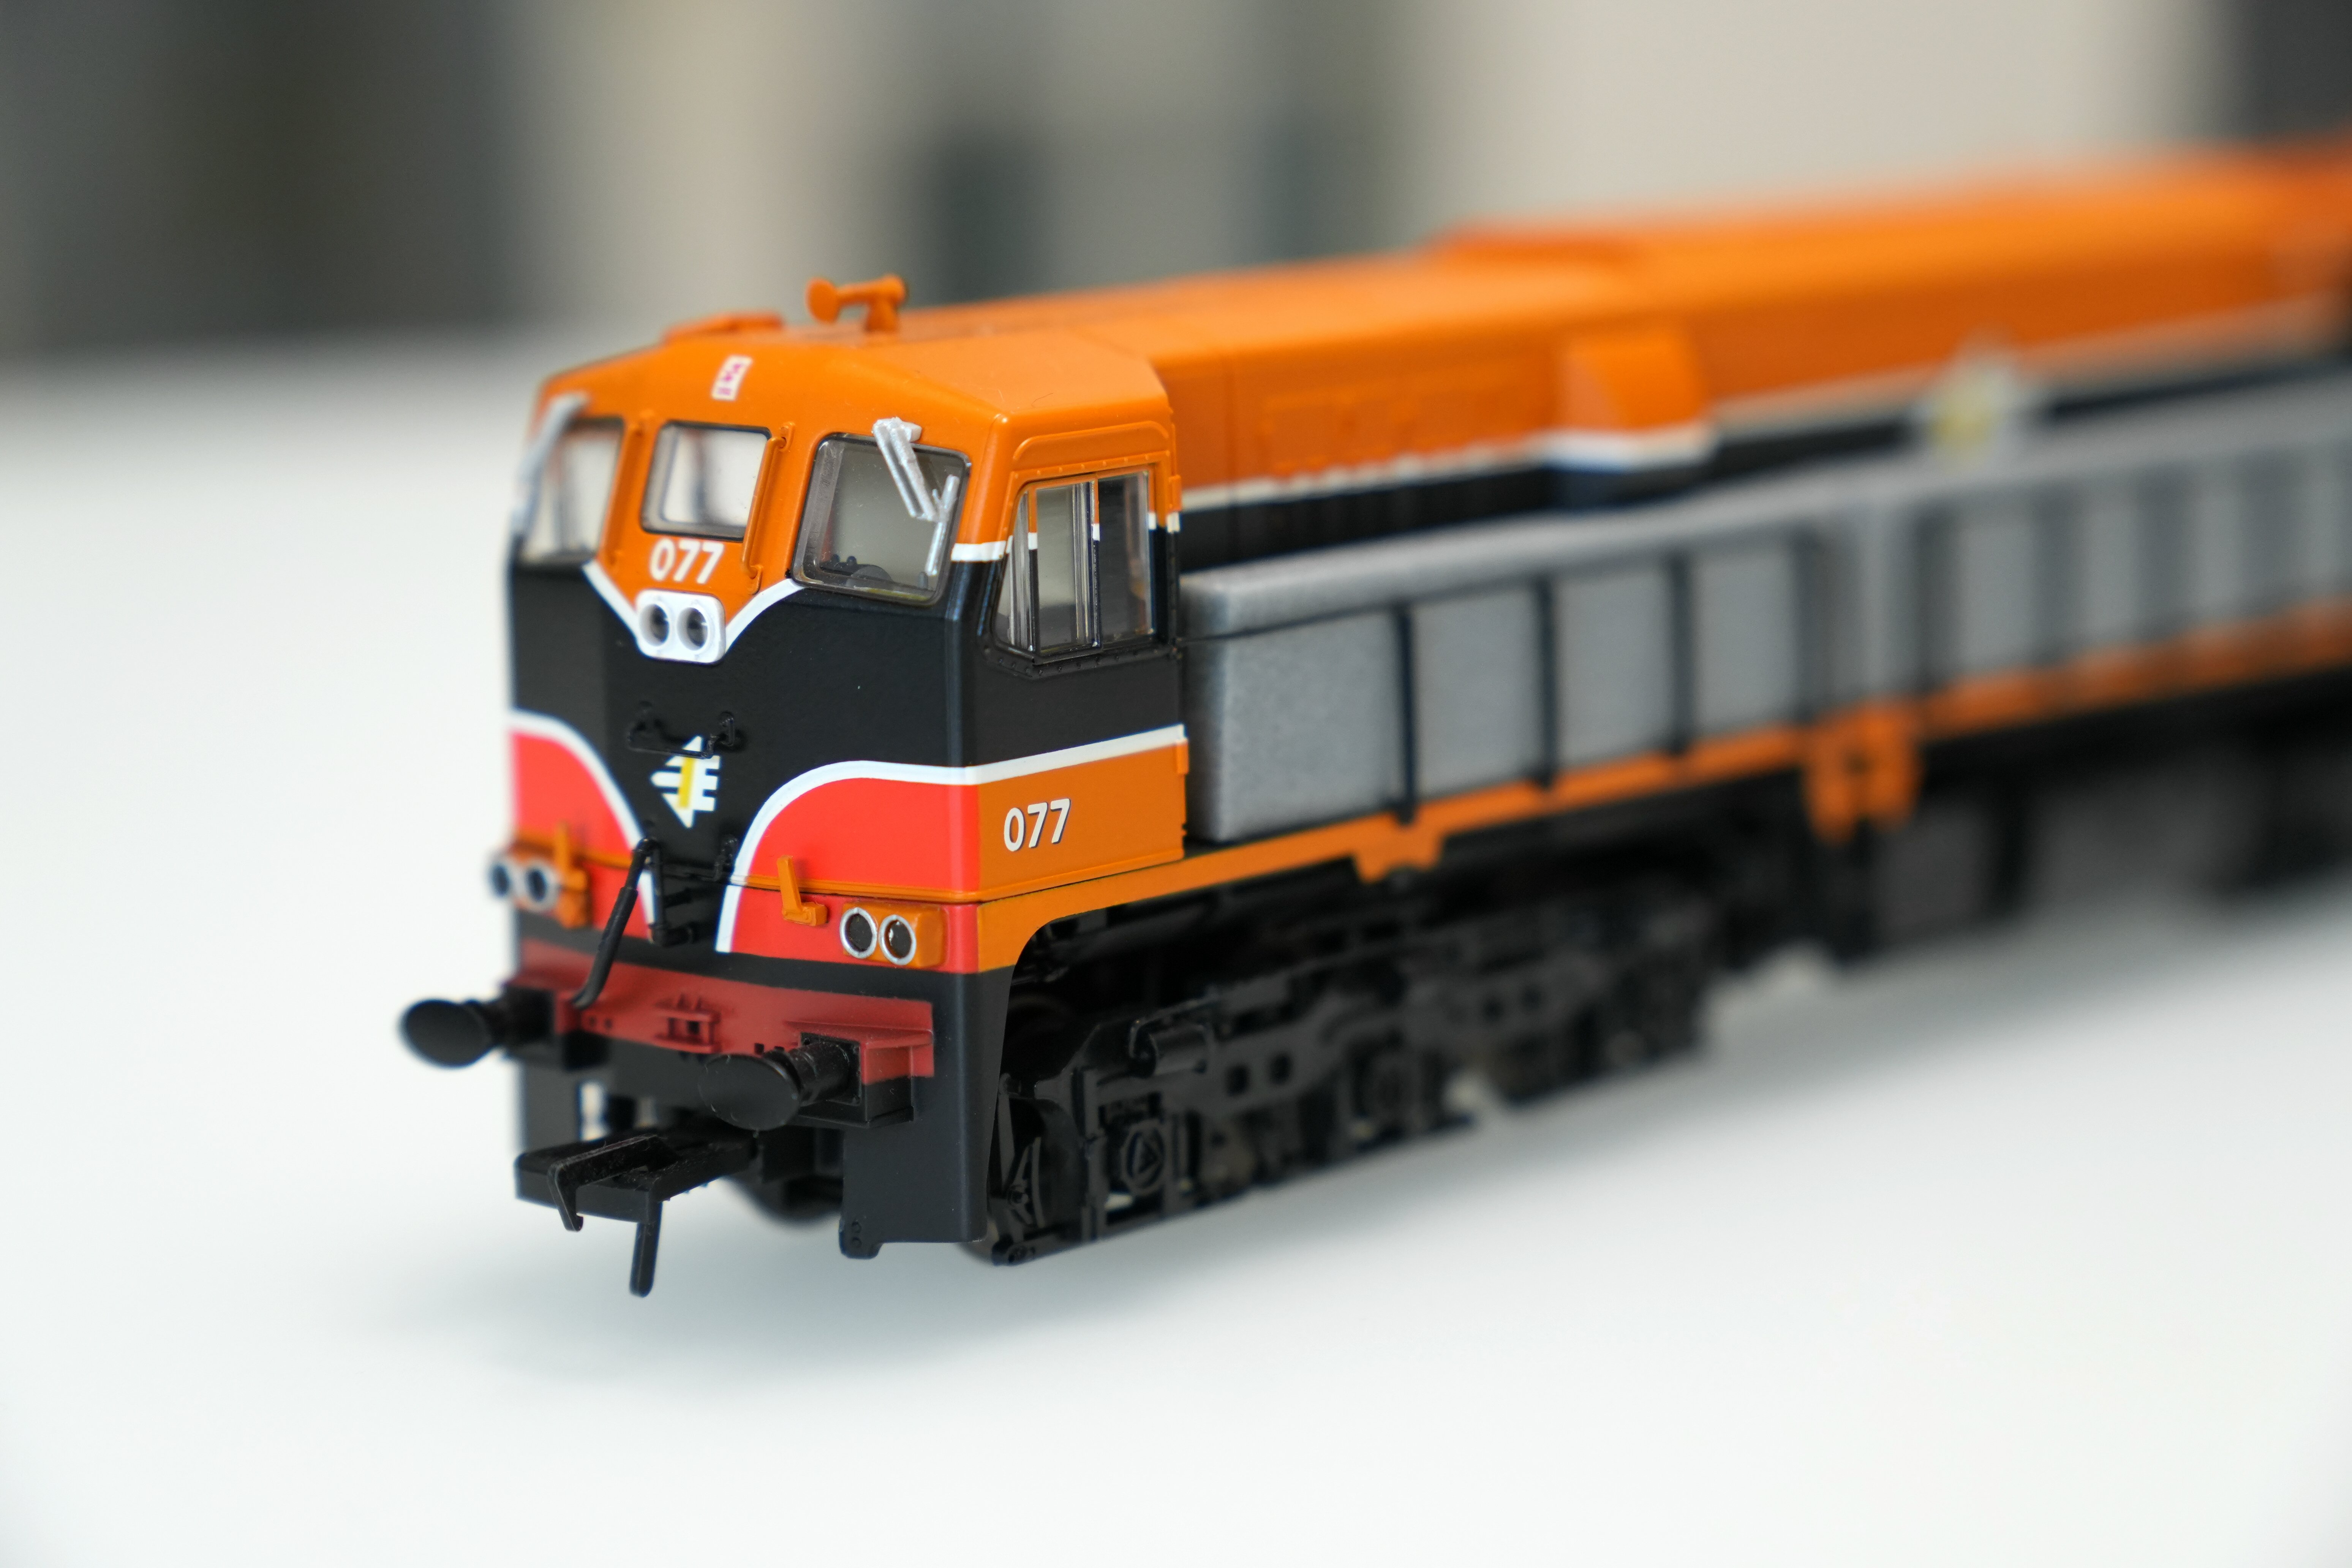
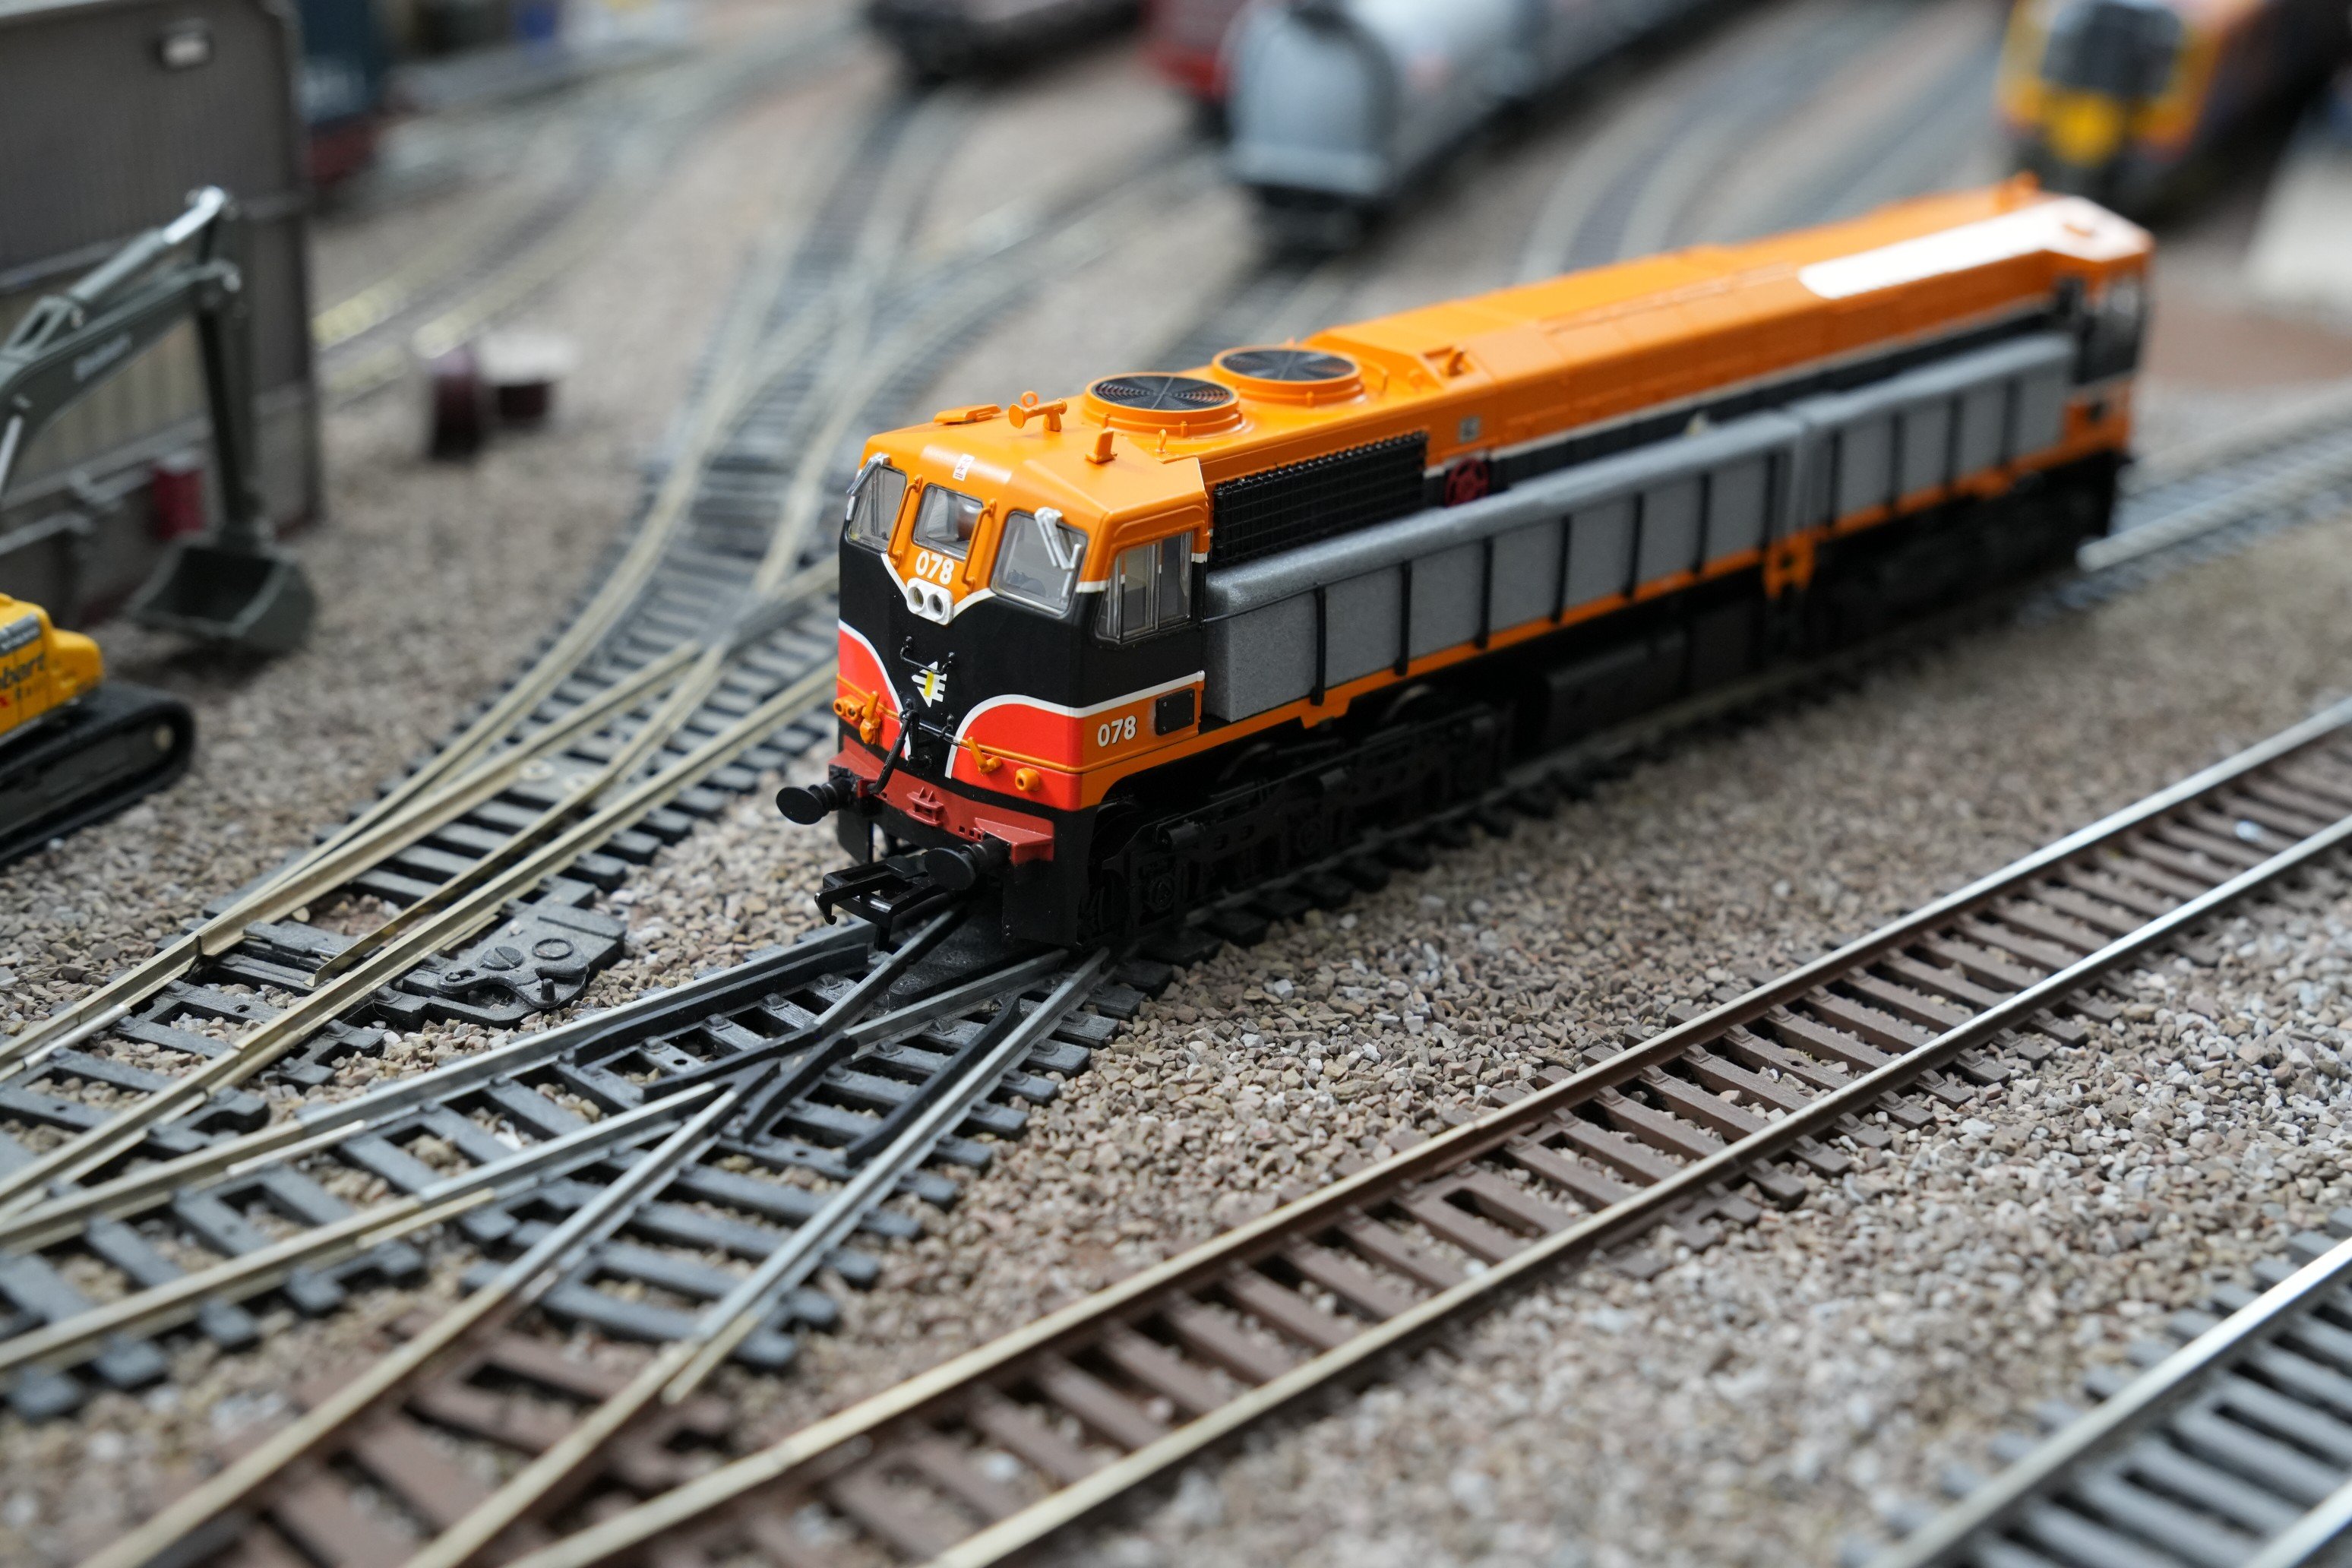
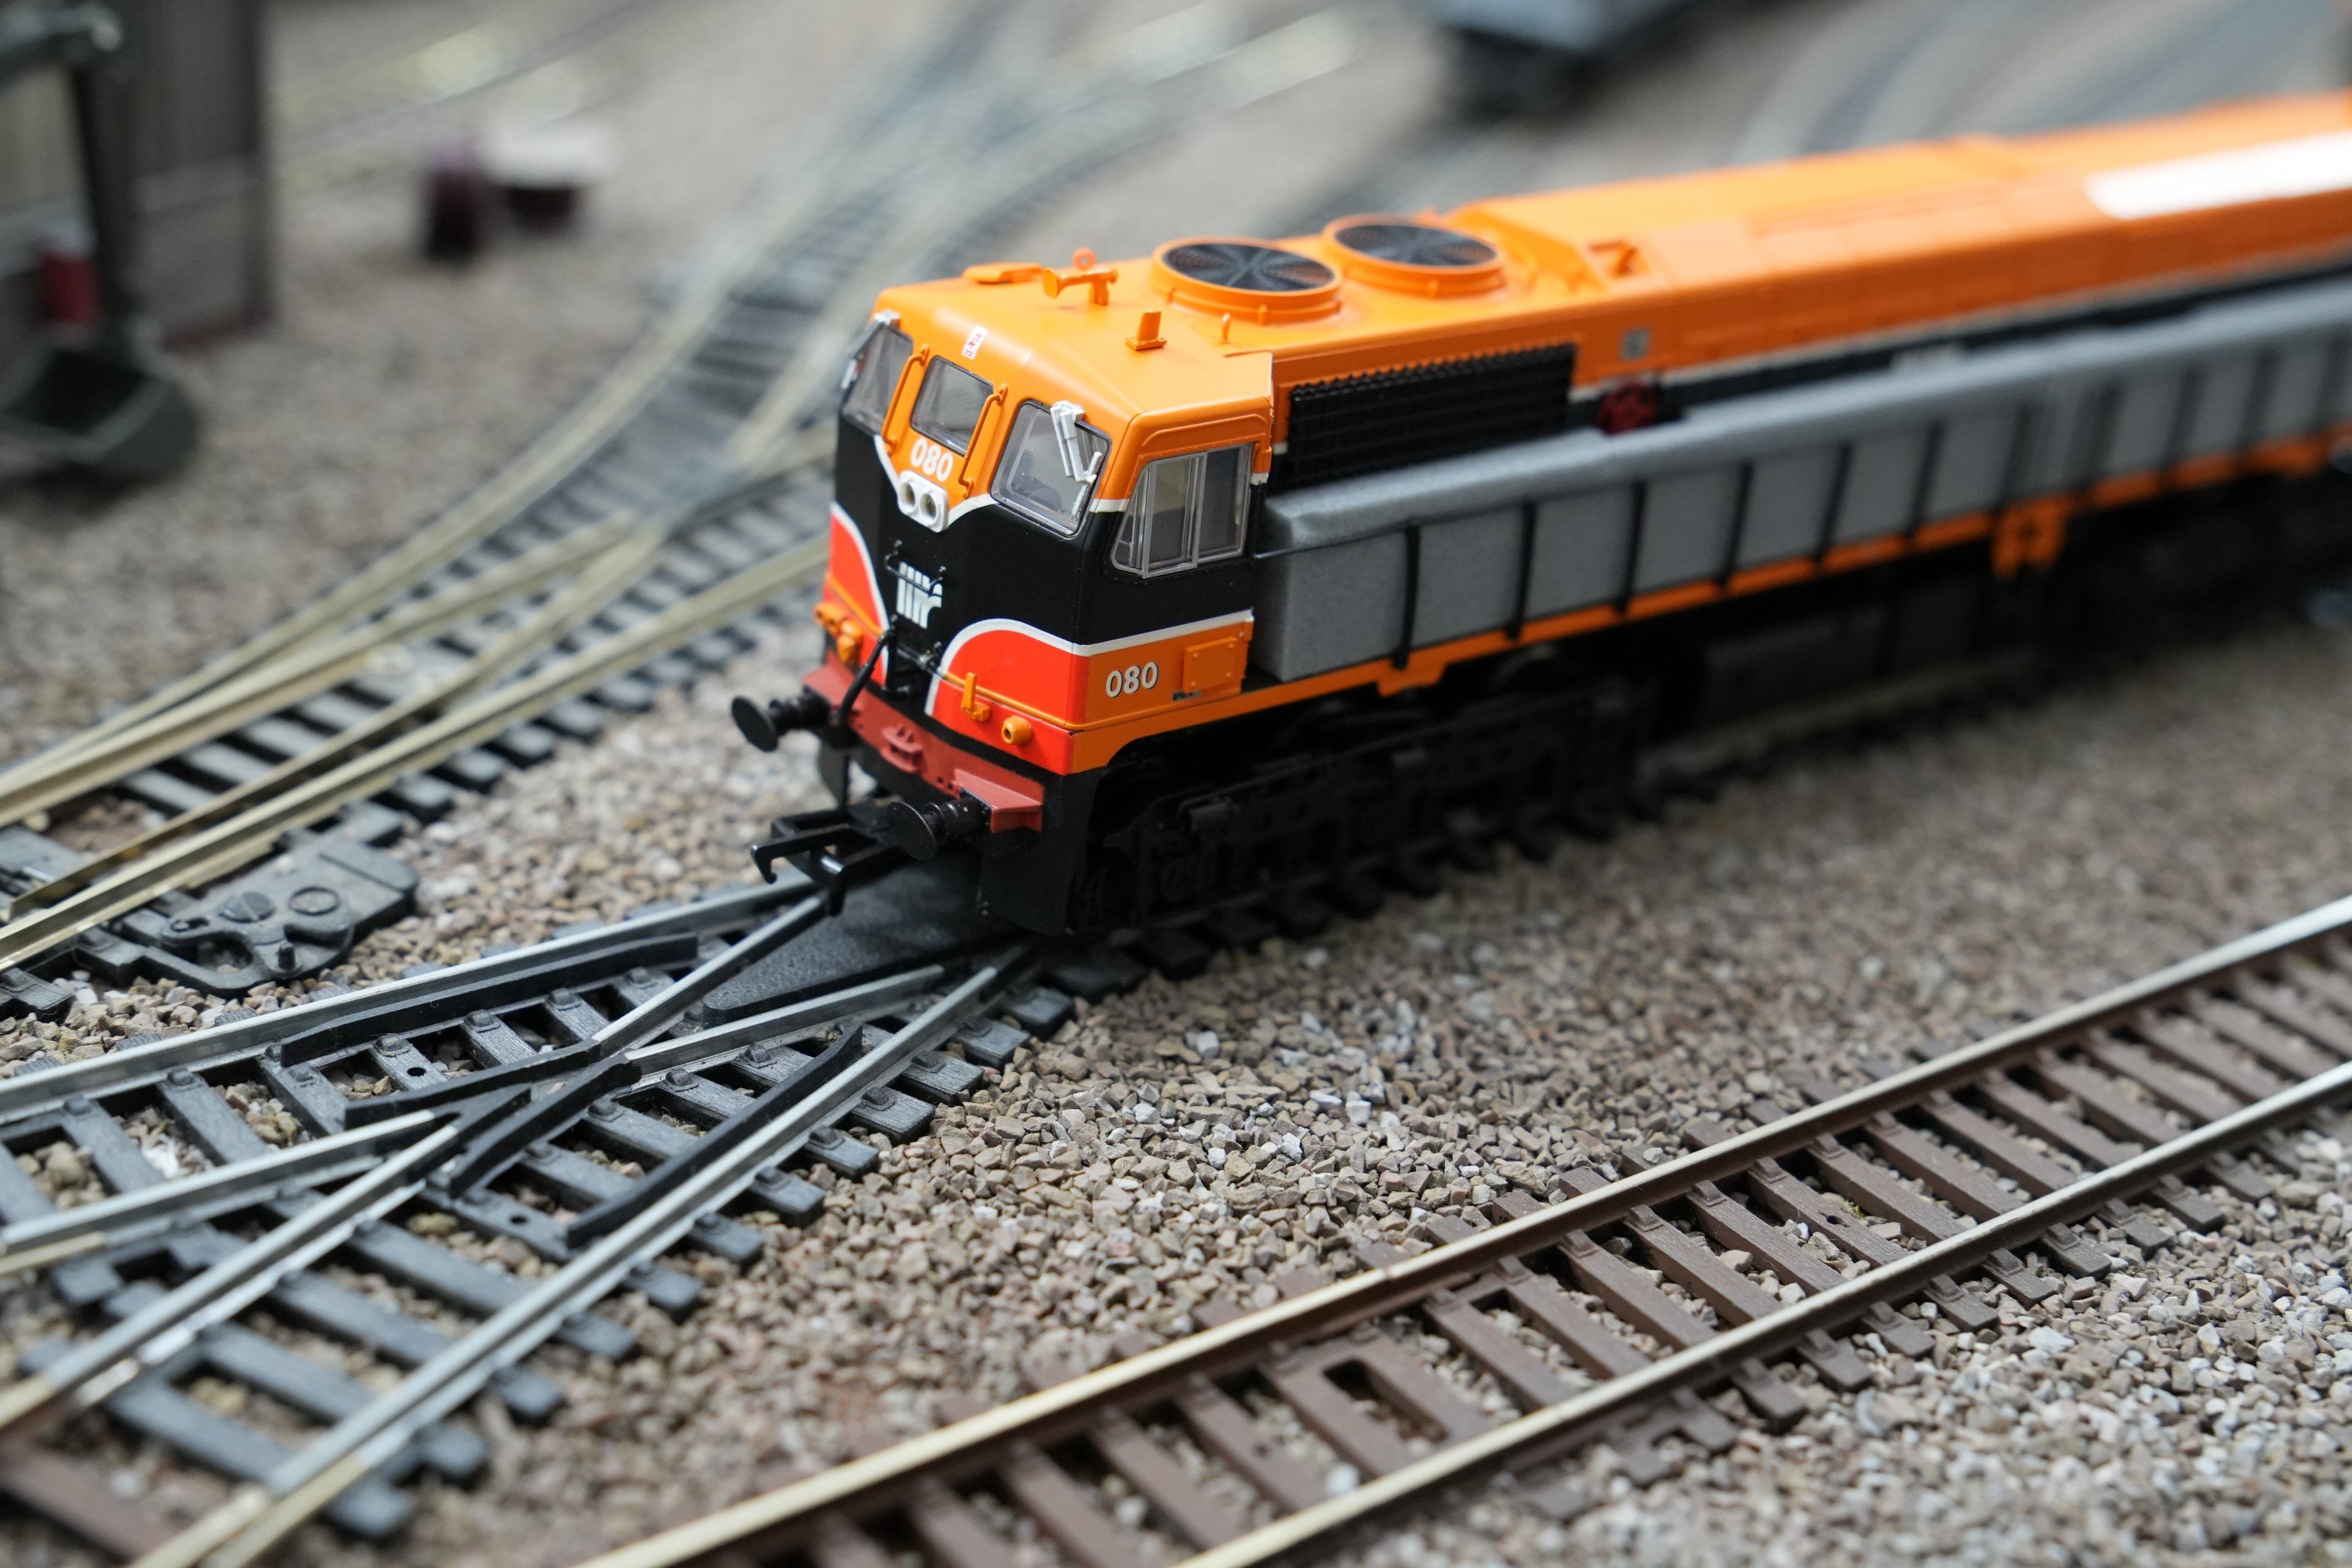
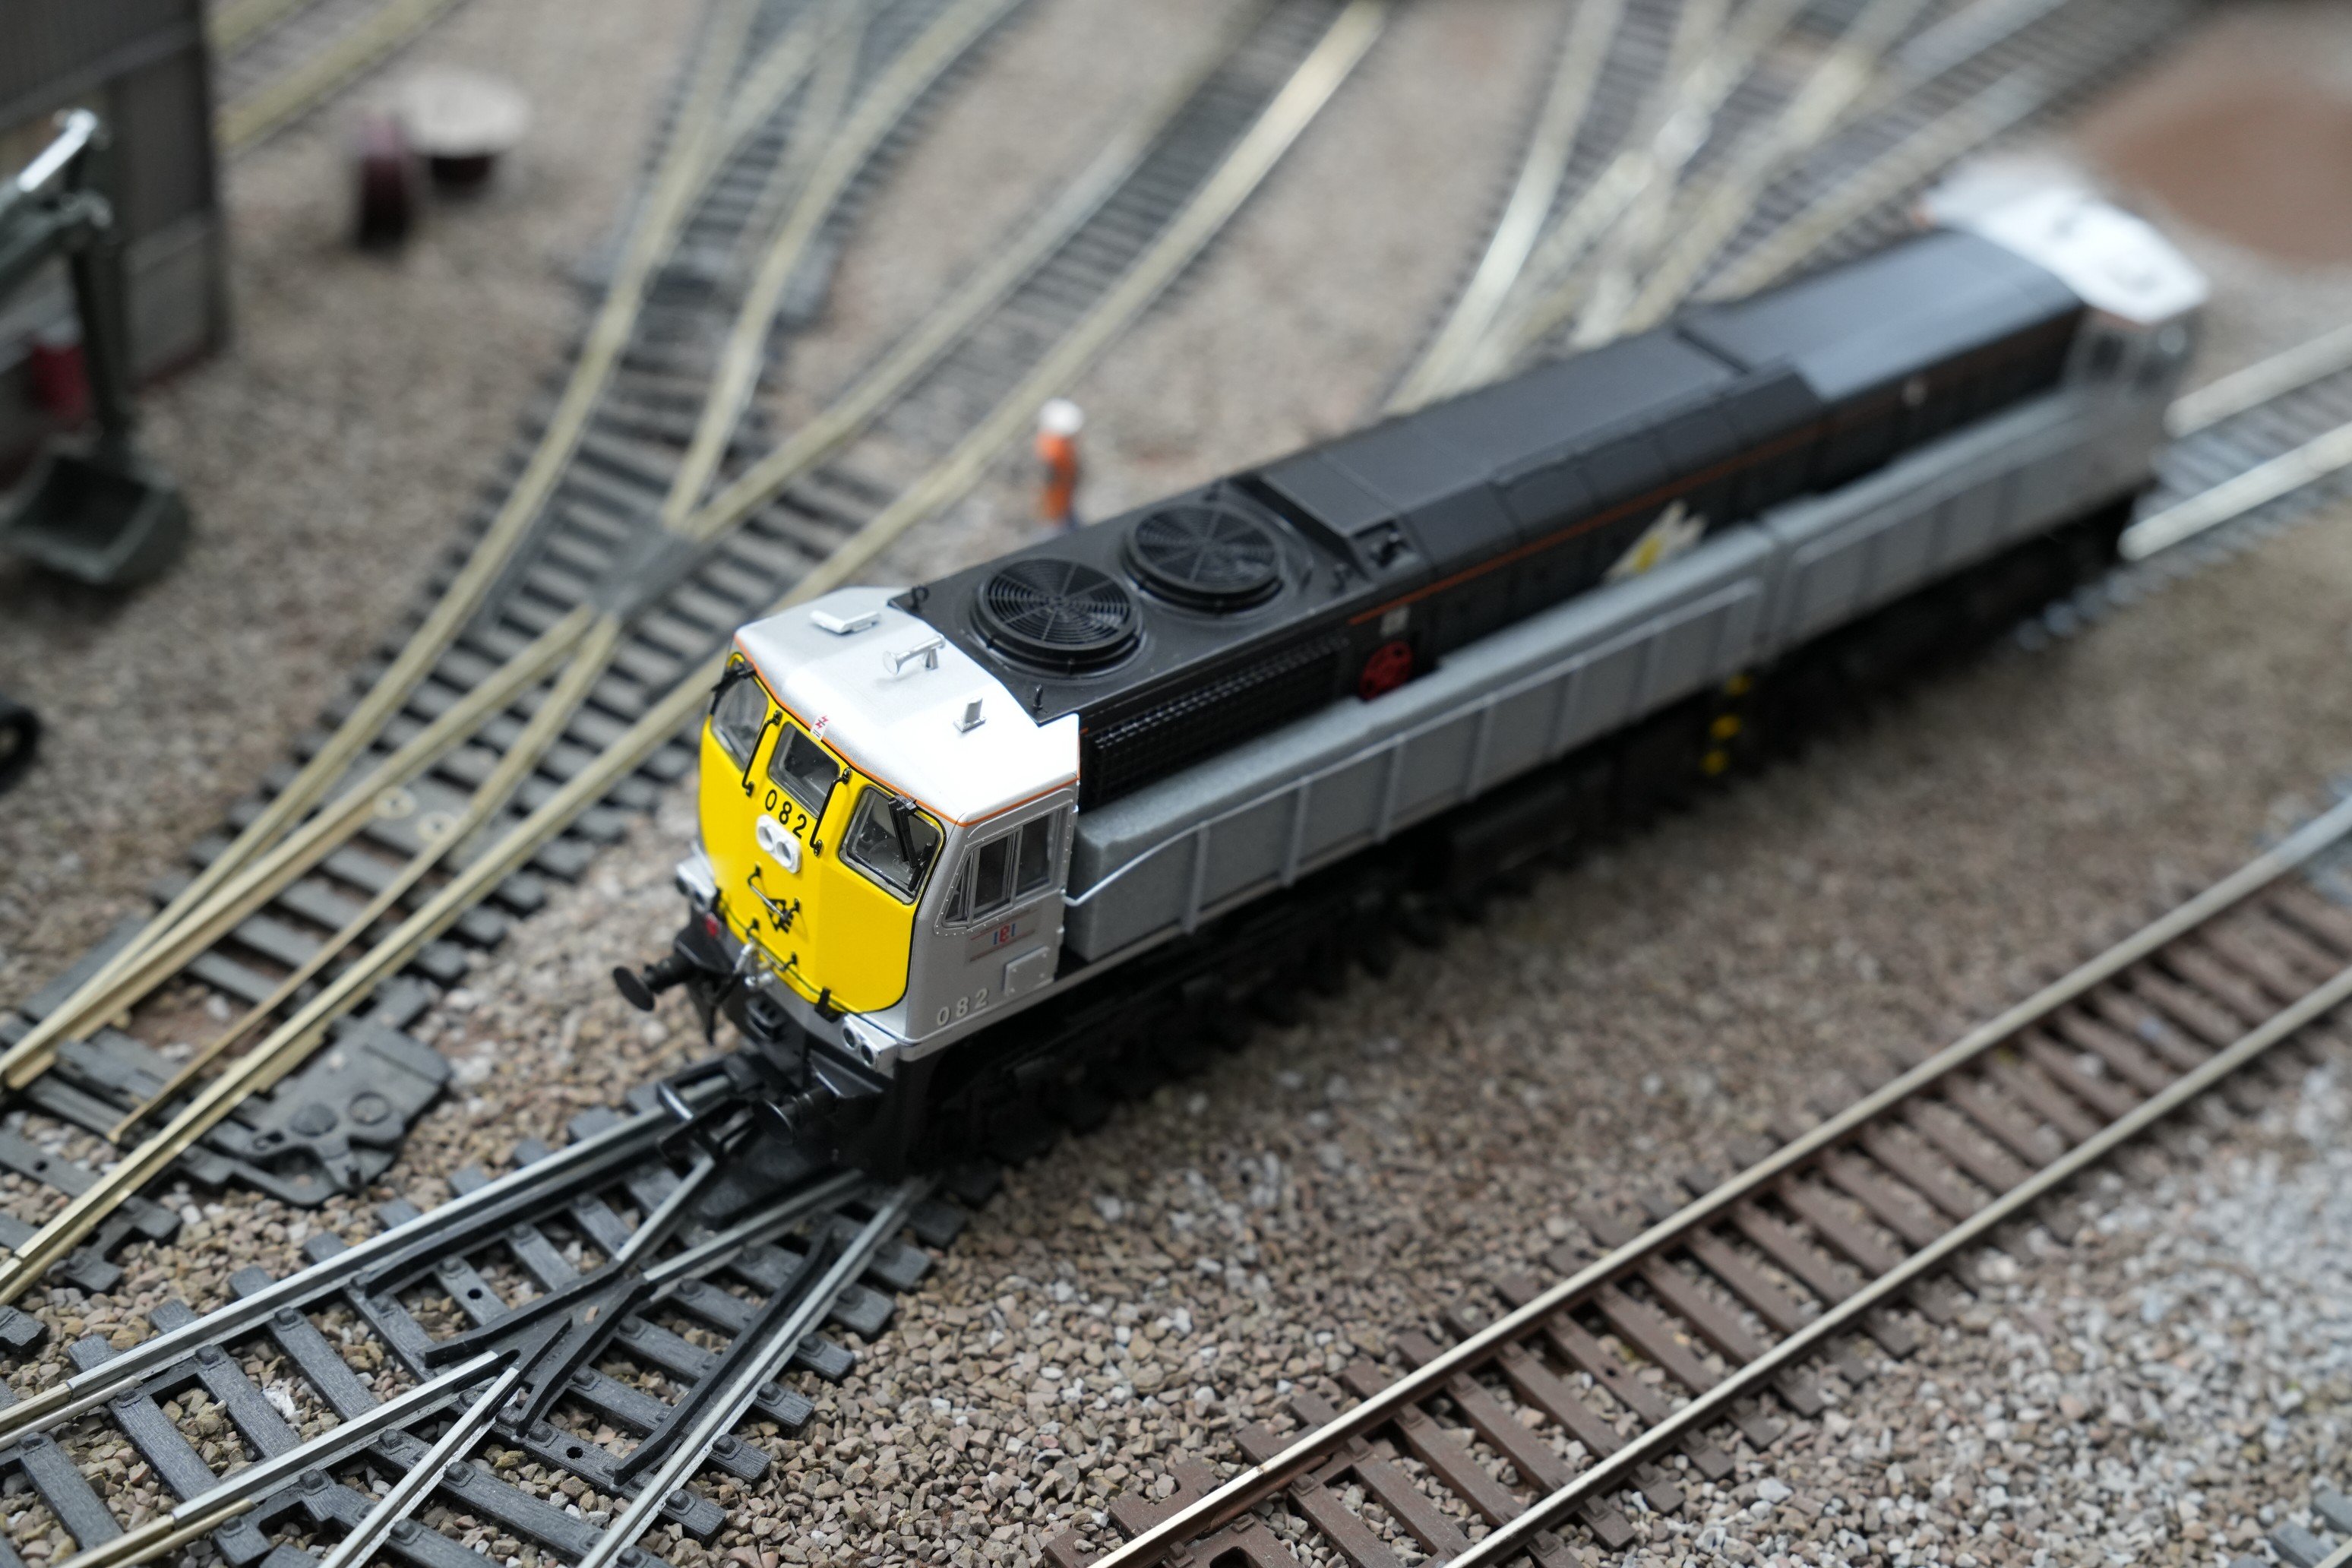
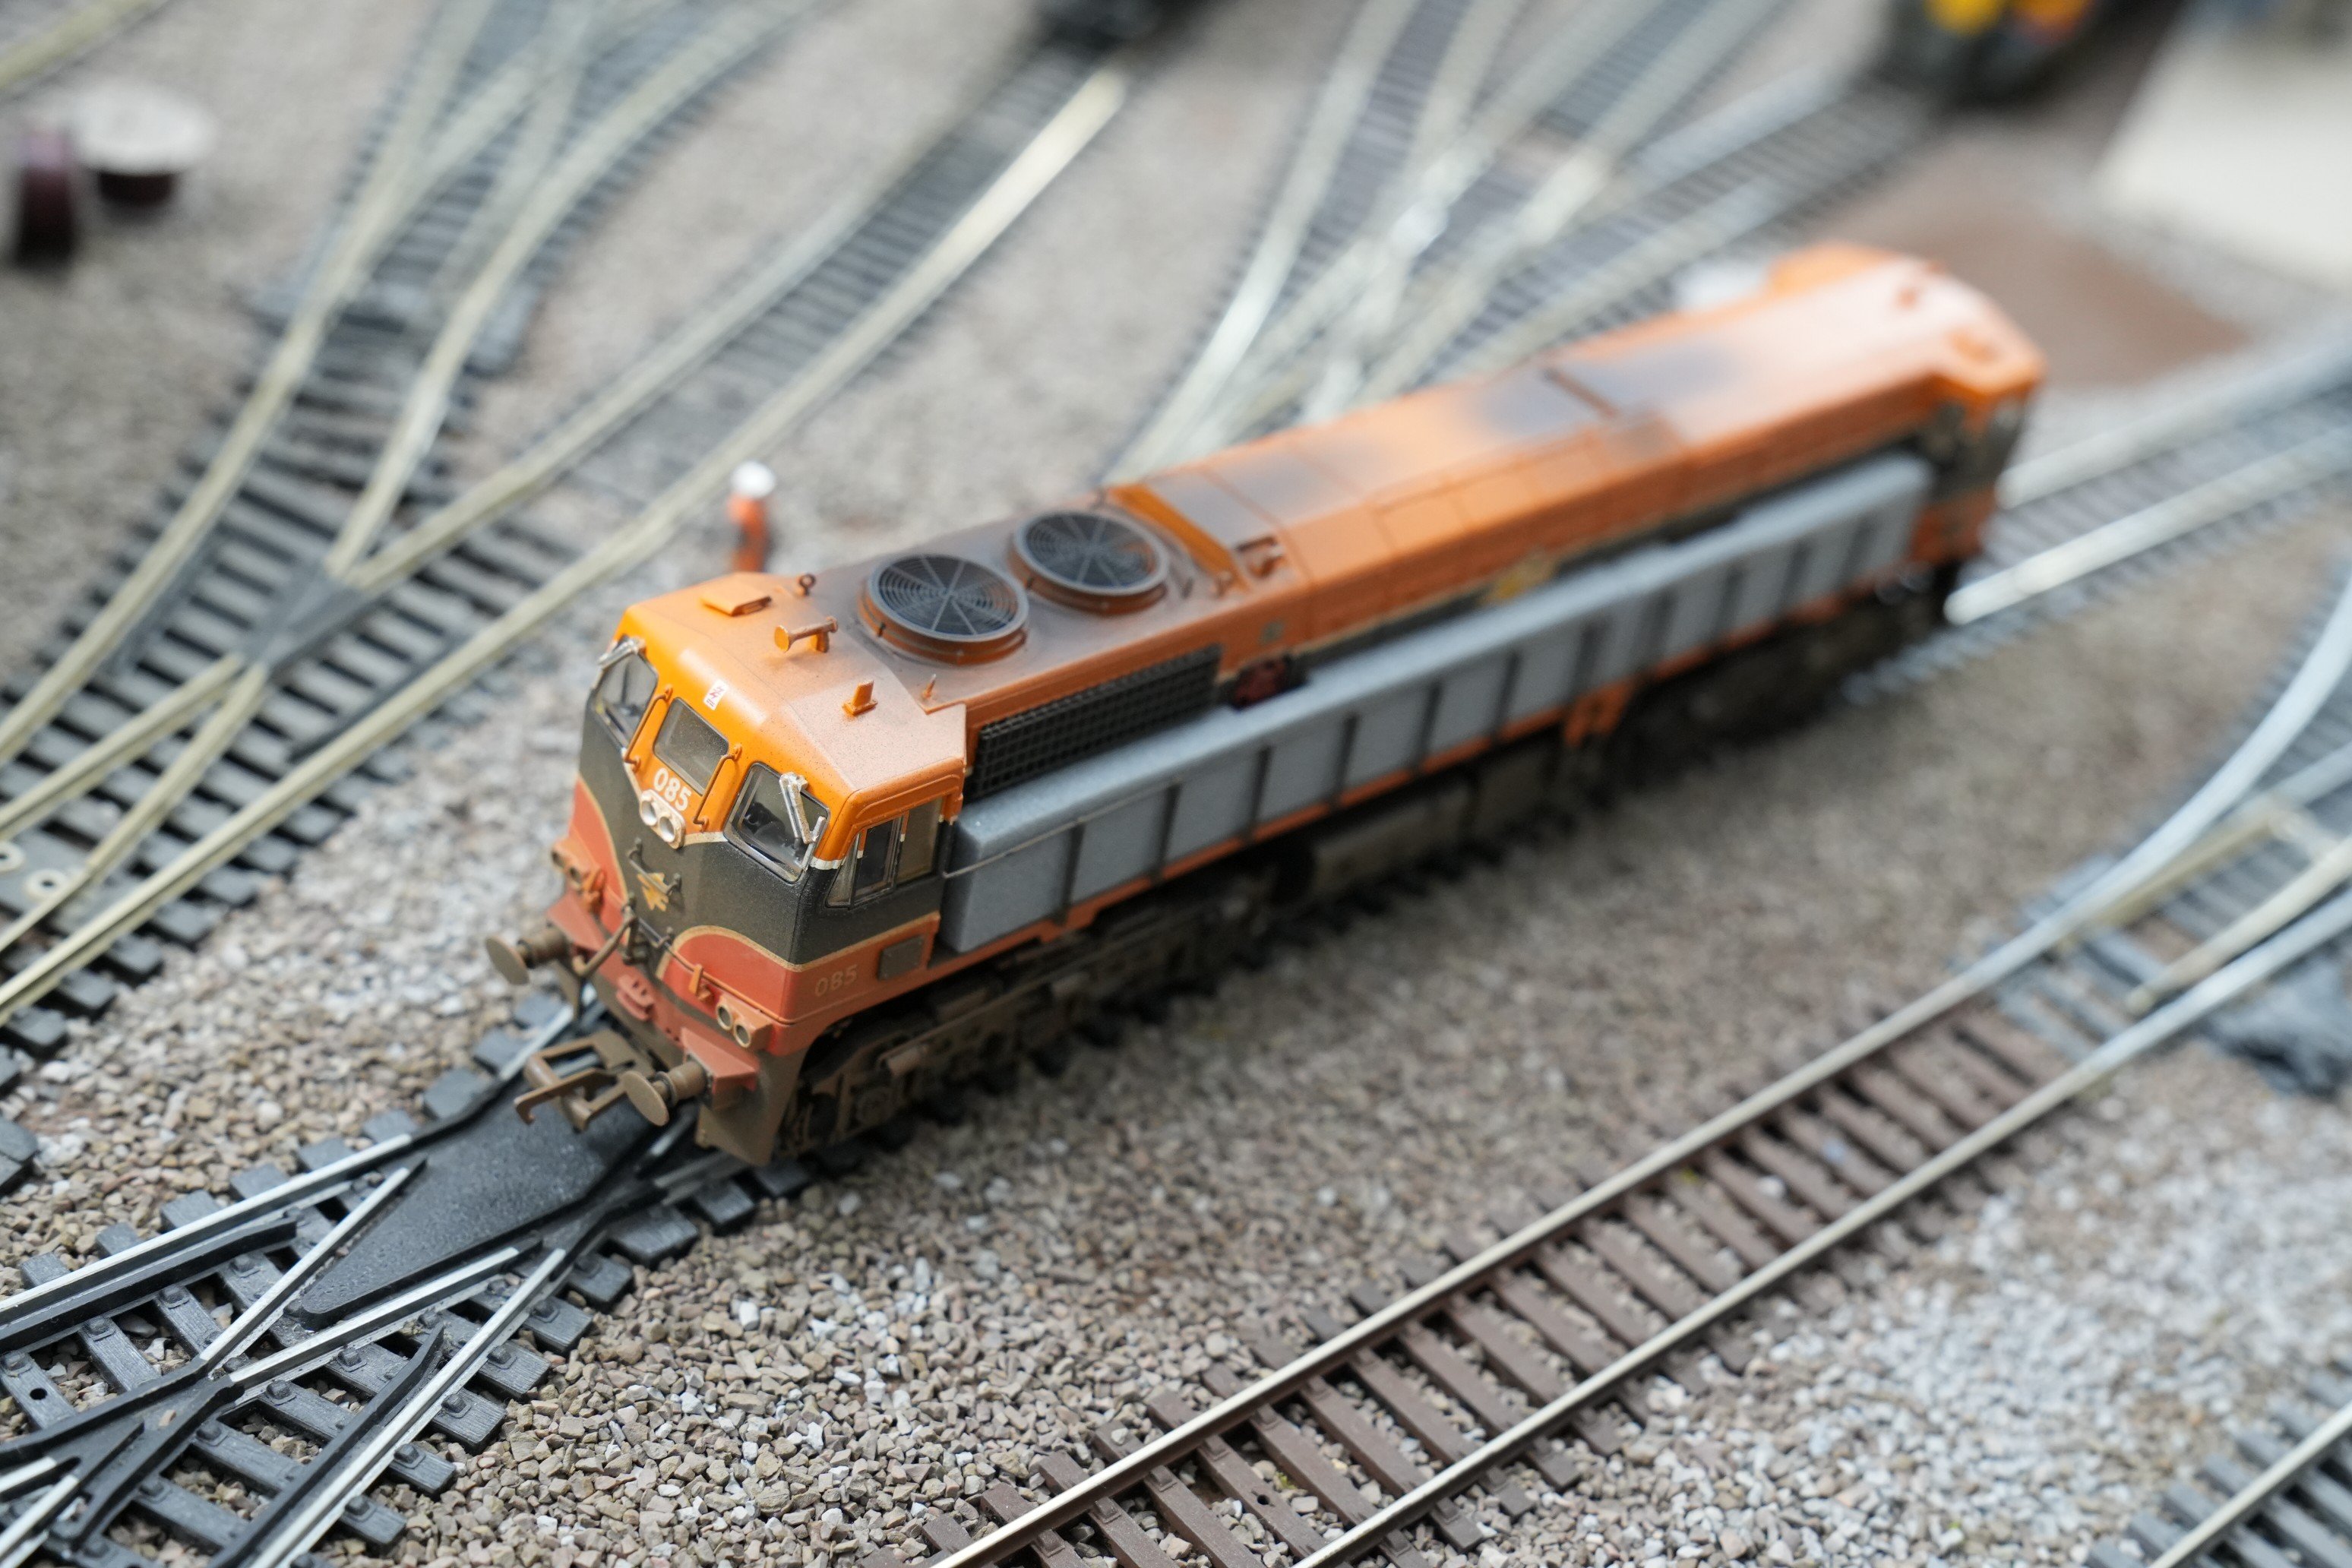
Hi folks, I'm engaging in a long overdue clear out of Irish and UK material. Below are the Irish items. I'll do a separate post for the UK material. All asking prices are in euro and exclude postage. I am based in Galway but I can arrange for items to be collected in Dublin between now and Christmas. Cash on collection or payment via Paypal if posting. Will update below as buyers come forward. Locomotives: MM7078 Class 071 IE Grey 7078 - 300 - Buyer MM0078 Class 071 IE or/blk 078 - 280 - Buyer MM0077 Class 071 IE or/blk 077 - 280 - Buyer MM0082 Class 071 IE Blk/Sil 082 - 250 - Buyer MM0085 Class 071 IE Orange 085 - 250 - Buyer MM0080 Class 071 IR or/blk 080 - 250 - Buyer MM0073 Class 071 IR or/blk 073 - 250 - Buyer MM0088 Class 071 CIE Supertrain 088 - 200 - Buyer All have been test run only and have not been run in. The first 7 are smooth and silent runners. MM0088 is one of two MM0088s I have - both were smooth but relatively noisy runners out of the box - relatively speaking as 071s are very quiet runners in general. I use the 2nd one with DCC Sound so it doesn't bother me and I'm hanging on to that one. Coaches: MM5202 CIE MkII Std - 55 - Buyer MM5224 CIE MkII Std - 55 - Buyer MM5102 CIE MkII 1st - 55 - Buyer MM5152 CIE MkII Comp - 55 - Buyer MM5223 CIE MkII Std - 55 - Buyer MM5201 CIE MkII Std - 55 - Buyer MM5151 CIE MkII Composite - 55 - Buyer MM5101 CIE MkII 1st - 55 - Buyer MM5604 CIE MKII EGV - 65 - Buyer MM5403 CIE MkII Diner - 65 - Buyer All of the above have been little used and half never run at all since they were purchased. A post on the UK material will follow on Wed. I'll be offline most of Tues so apologies if I don't get back on any PMs until Wed.
10 points
-
Some painting, lining and decals today for the Bredin Parcels/Luggage Van and the Corridor. The window frames are a pain in the arse to paint! I'm thinking of painting the other side of these in the later light green to have "more" coaches for little effort!
10 points
-
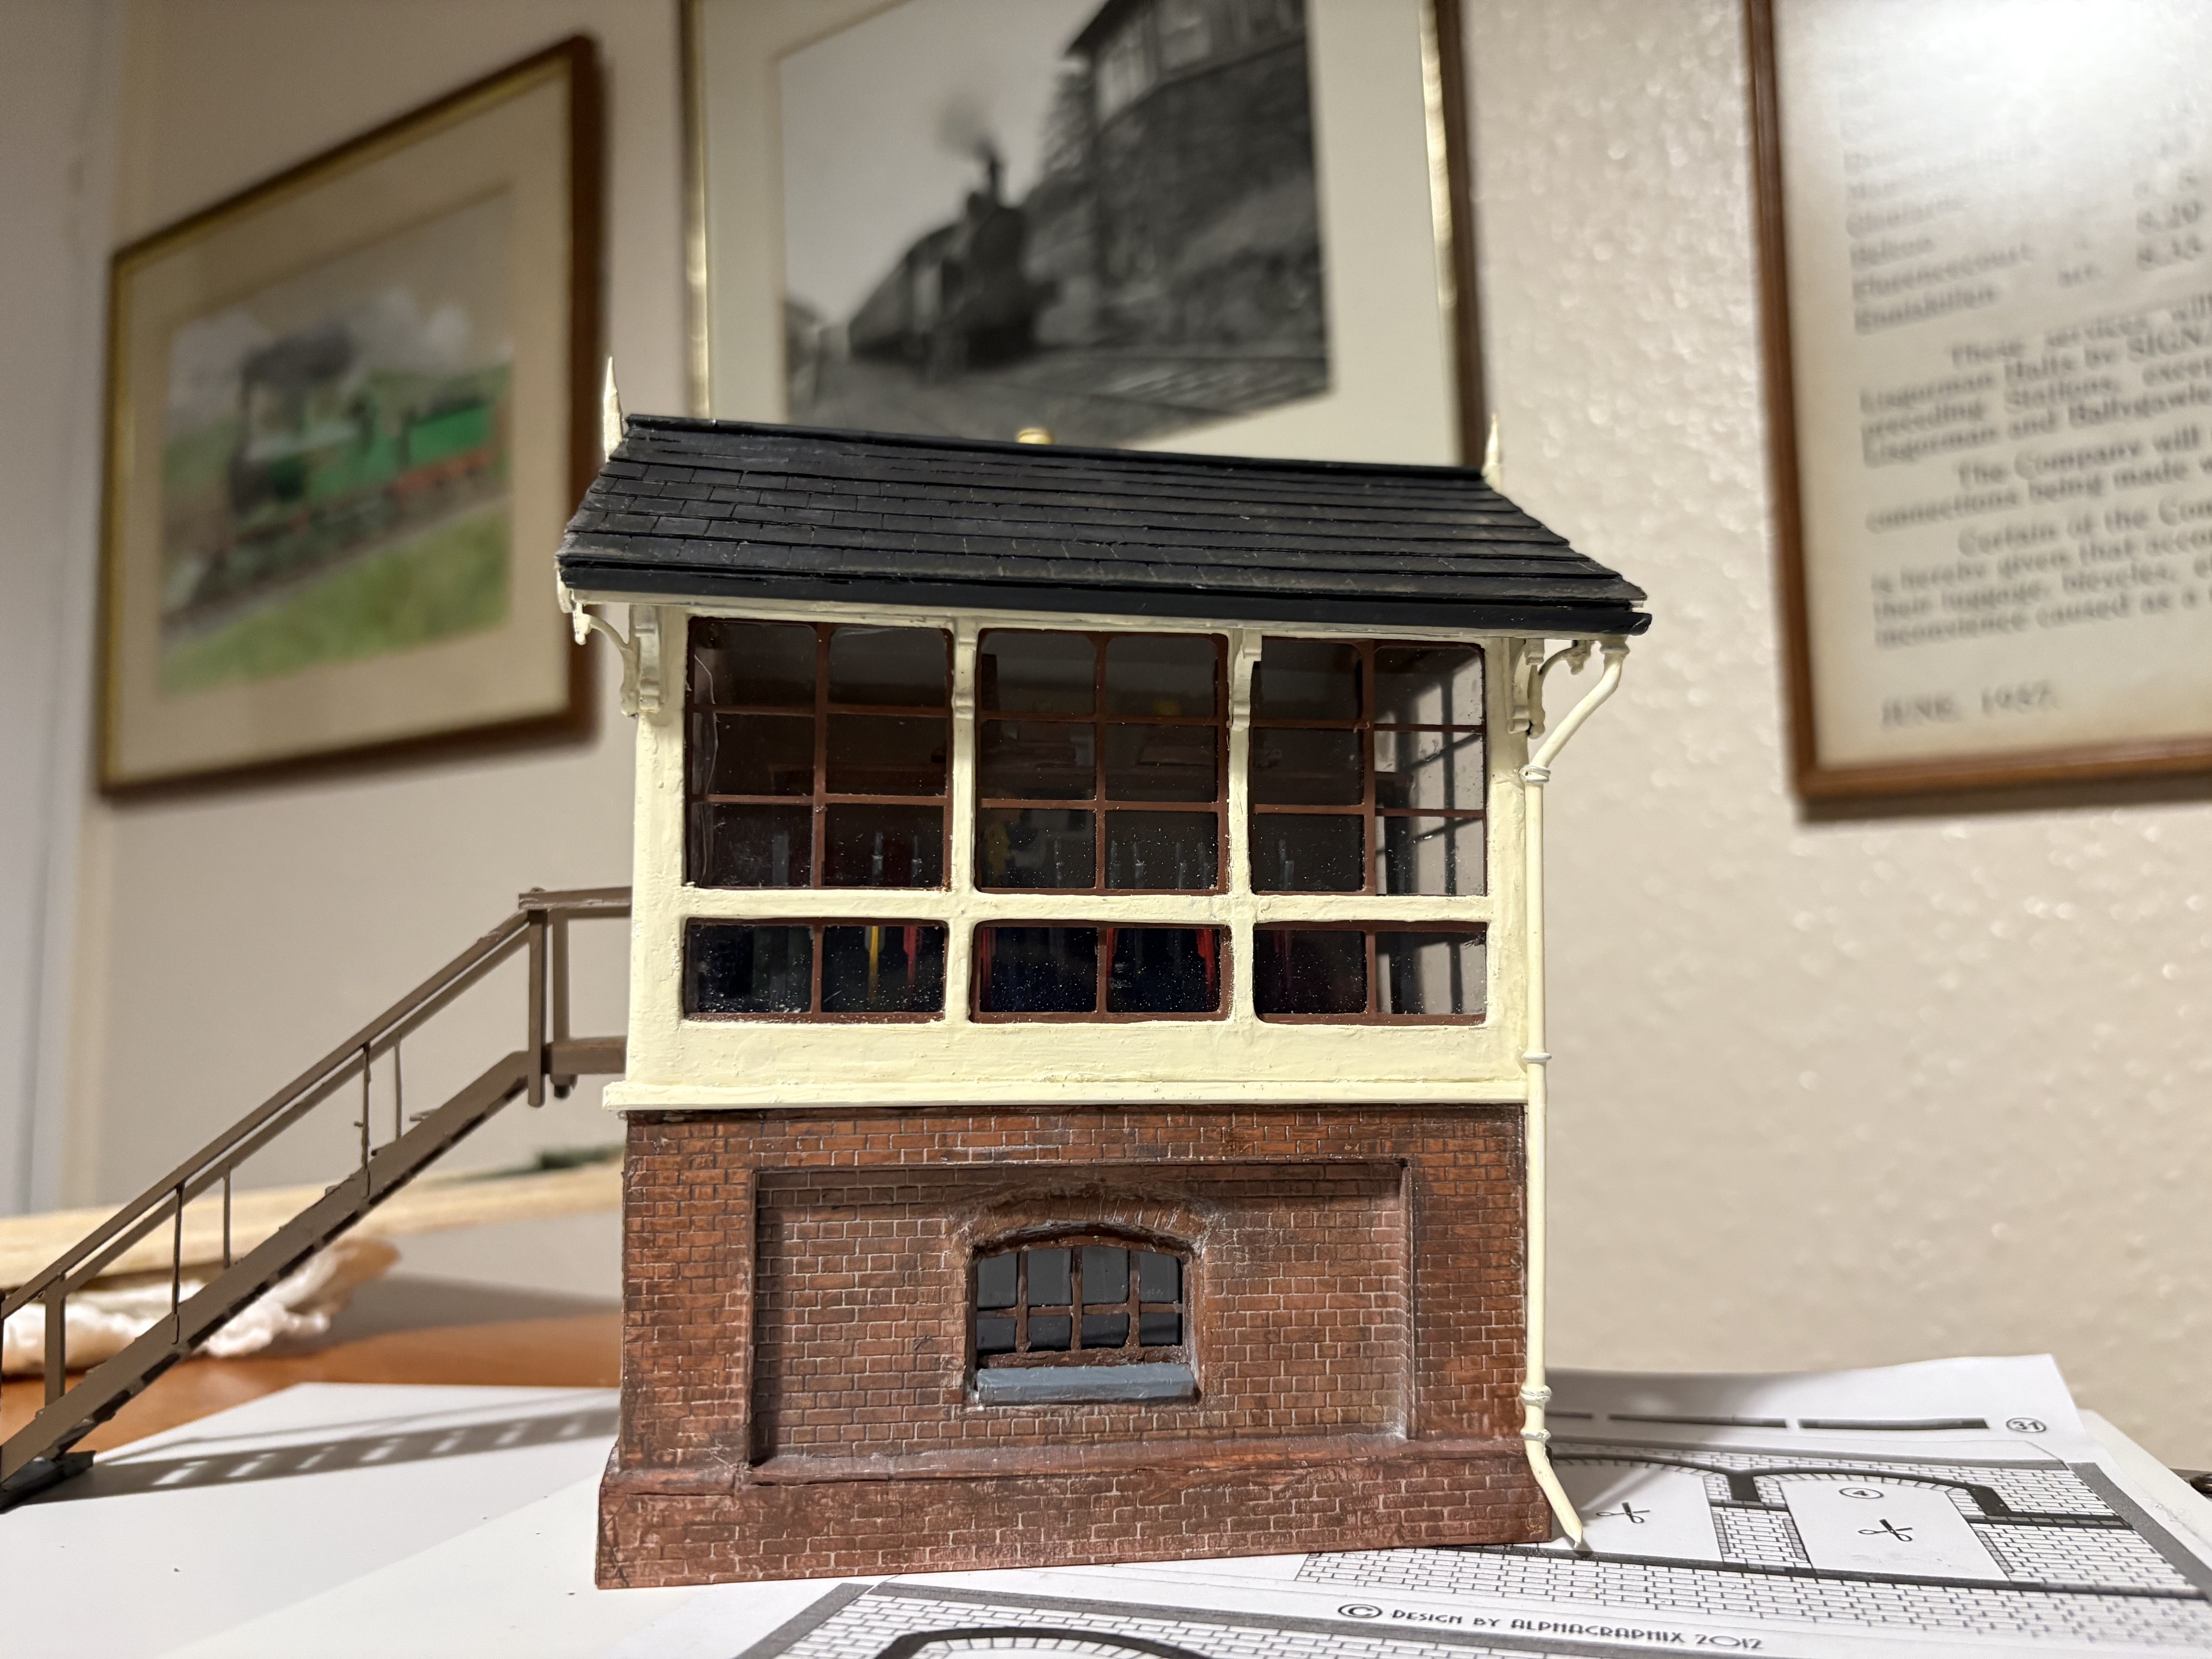
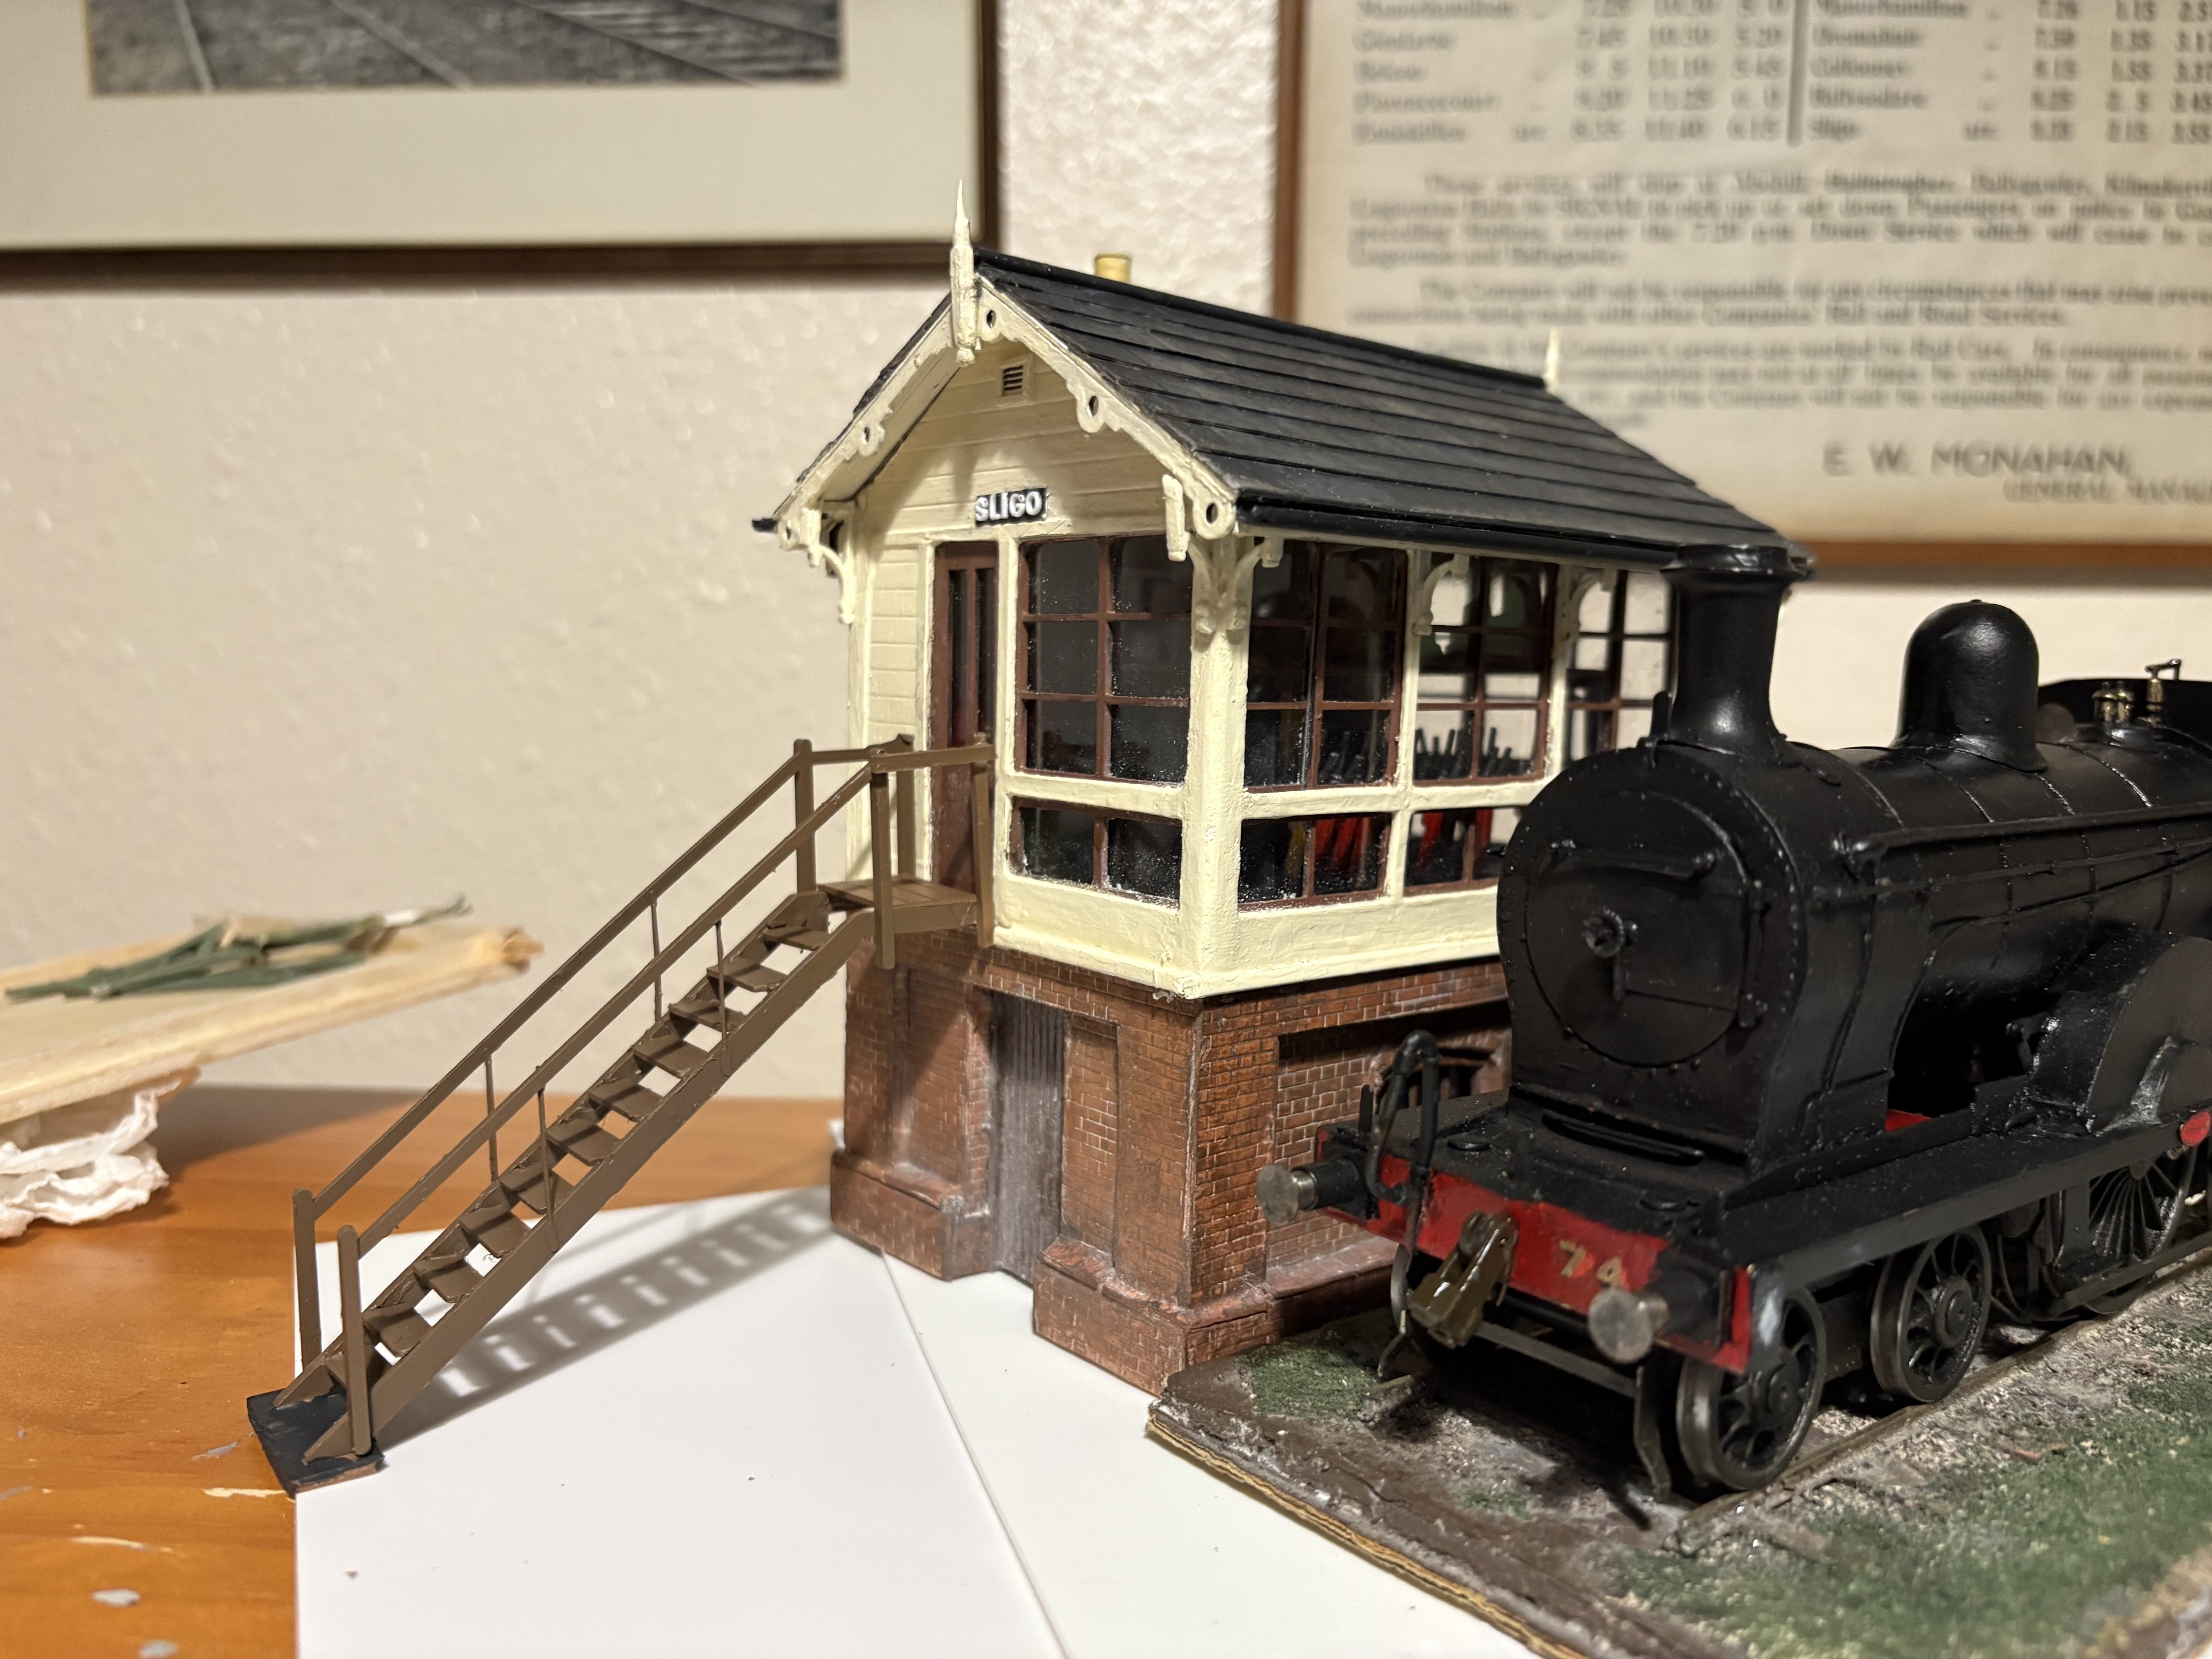
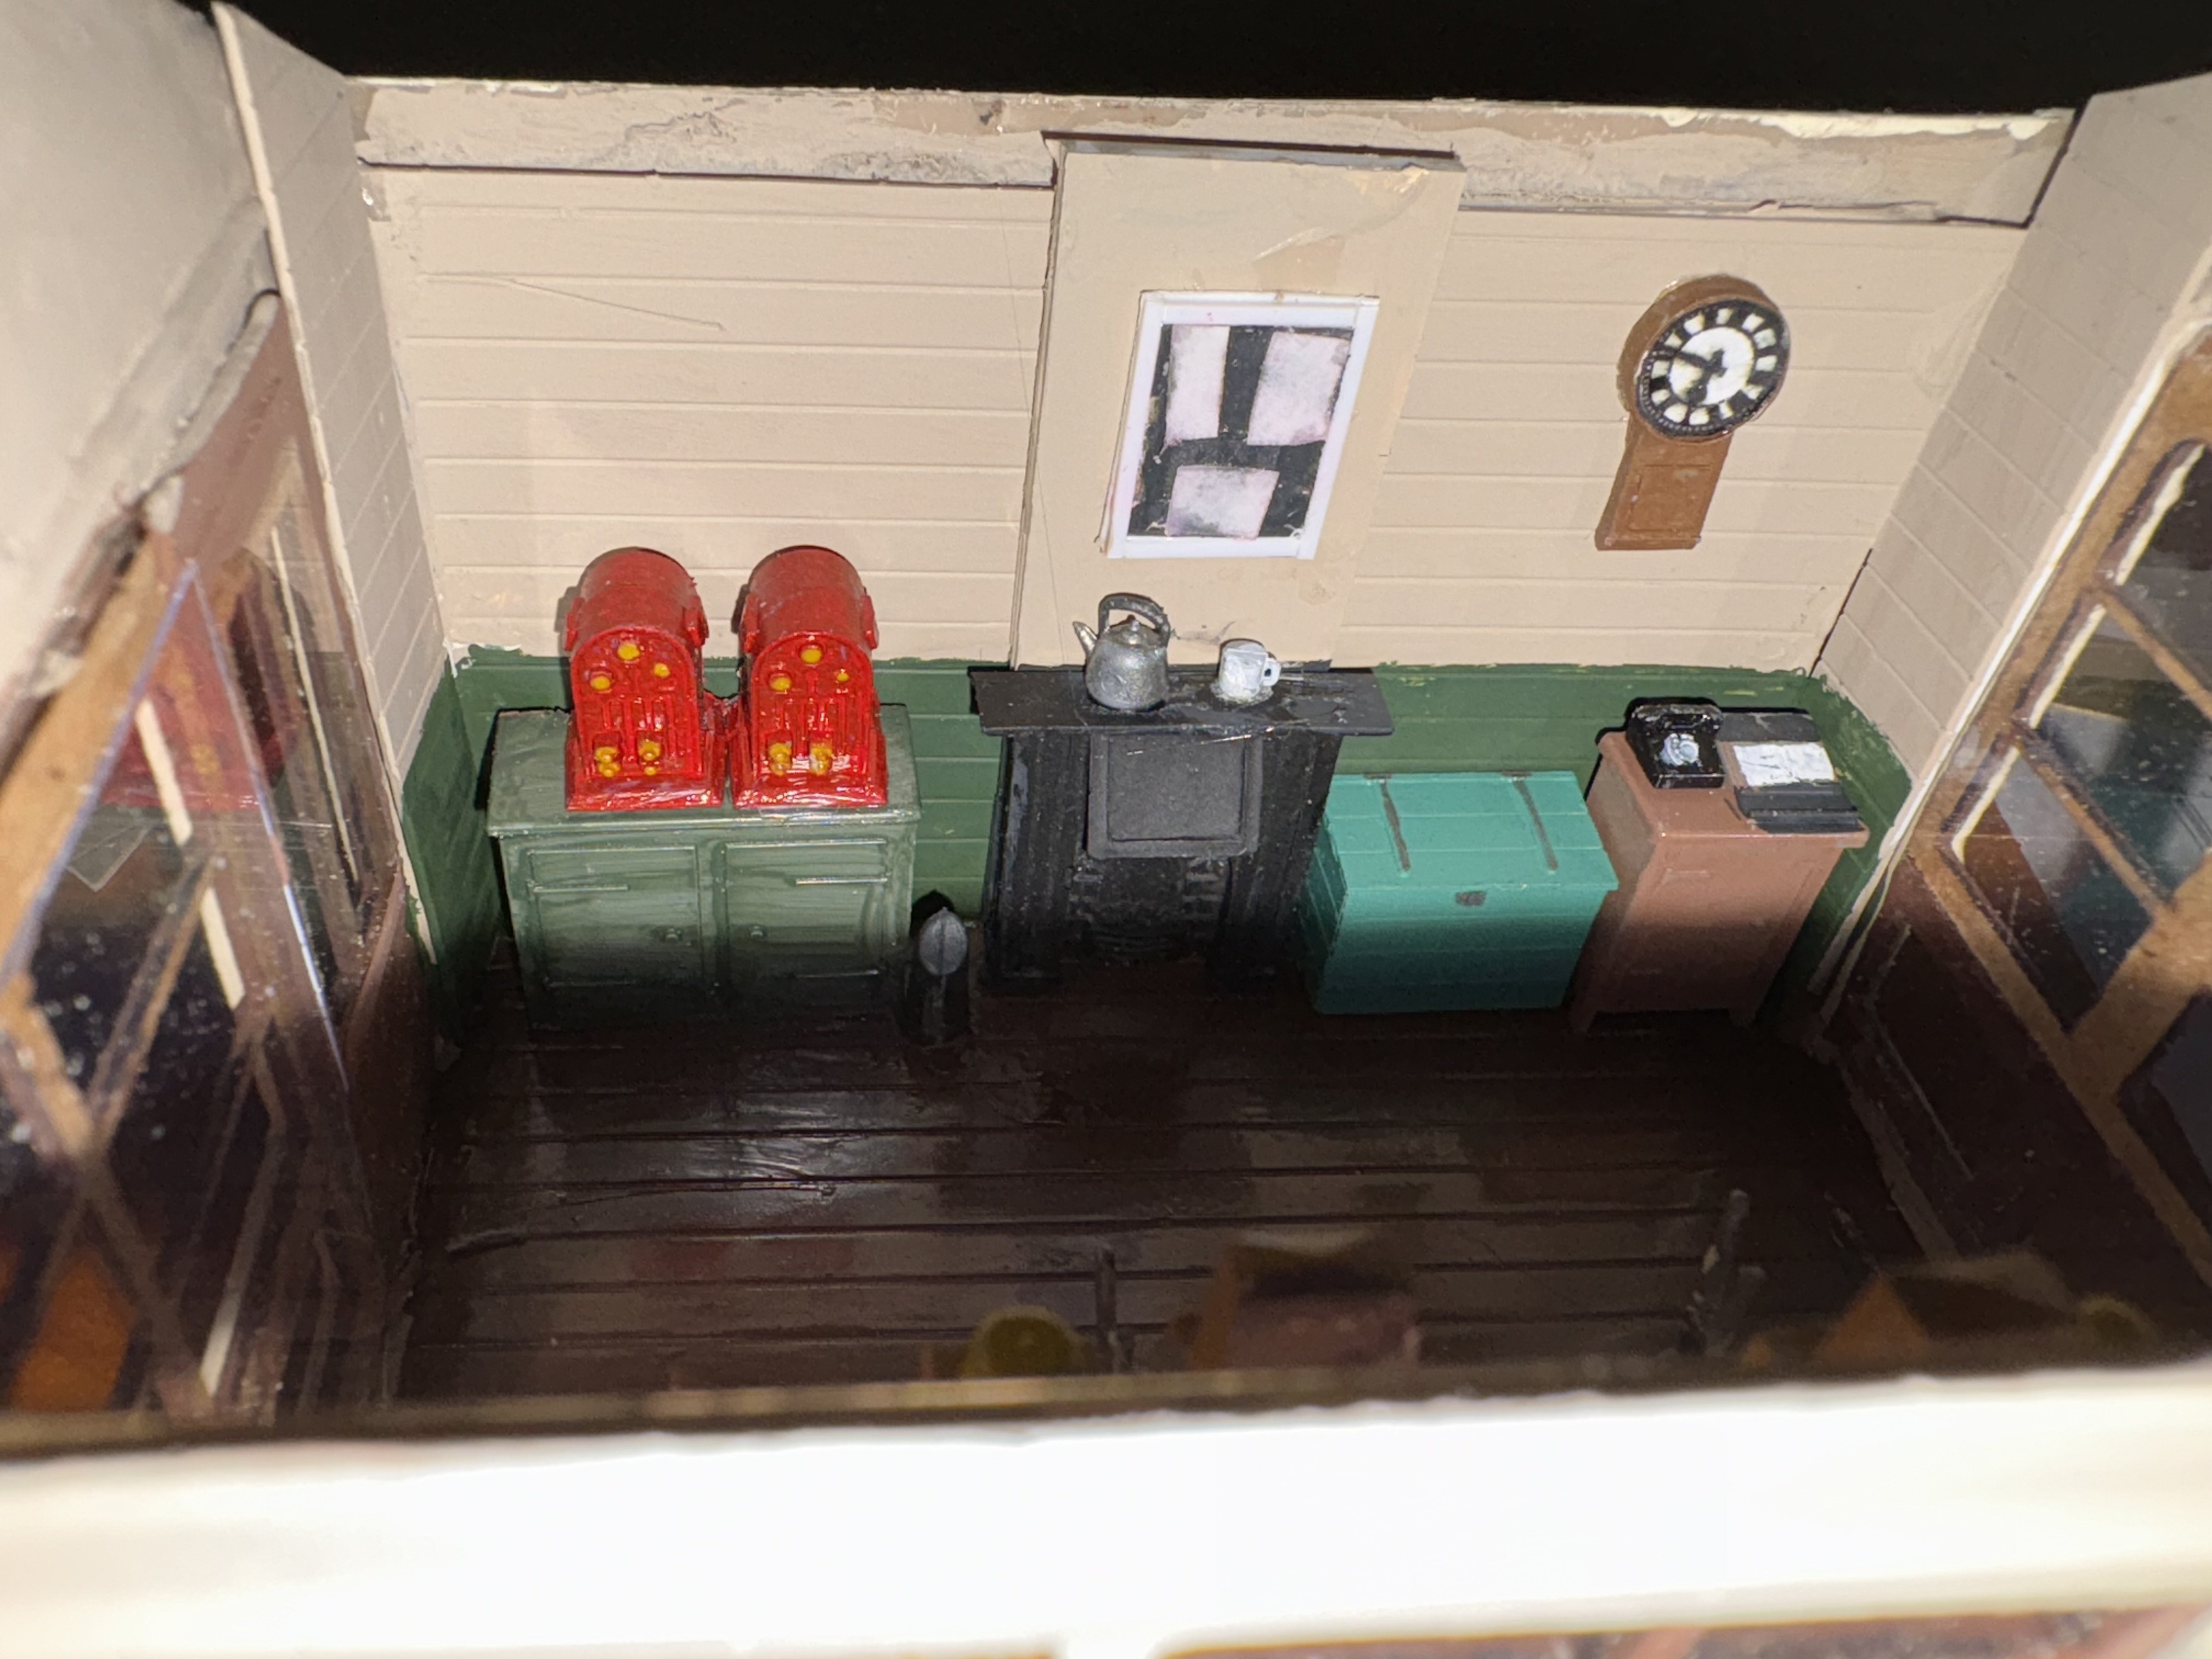
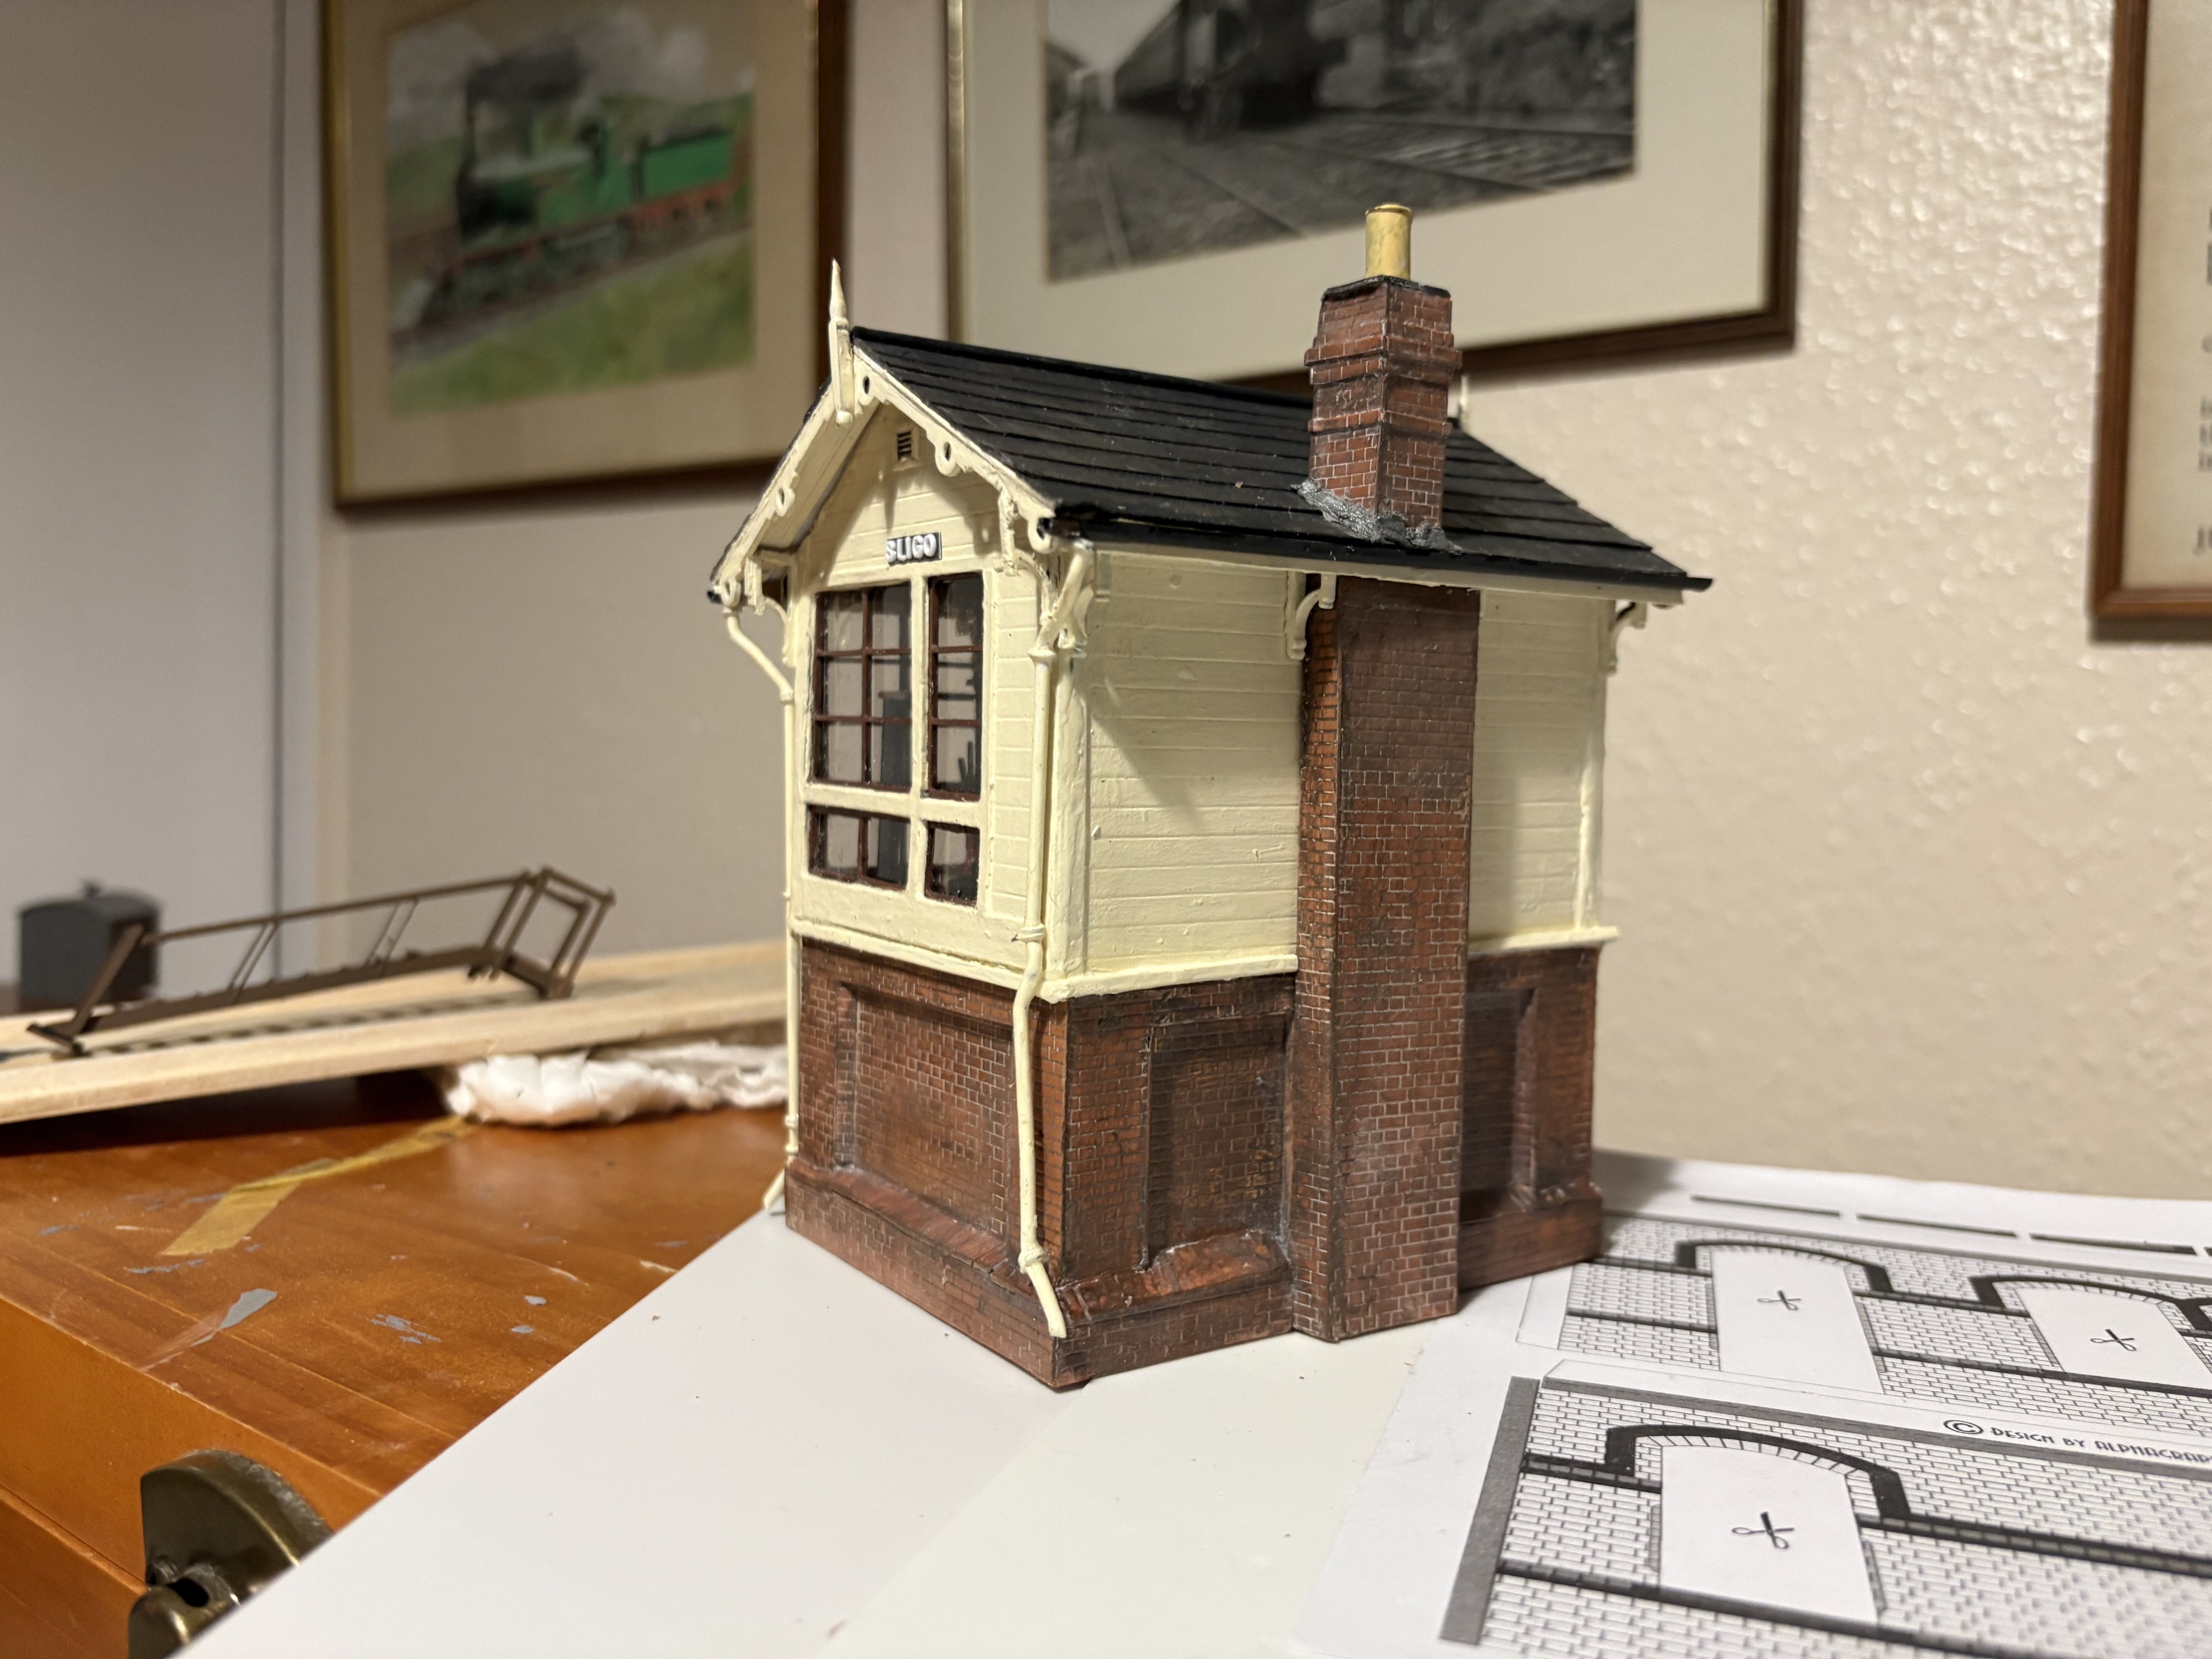
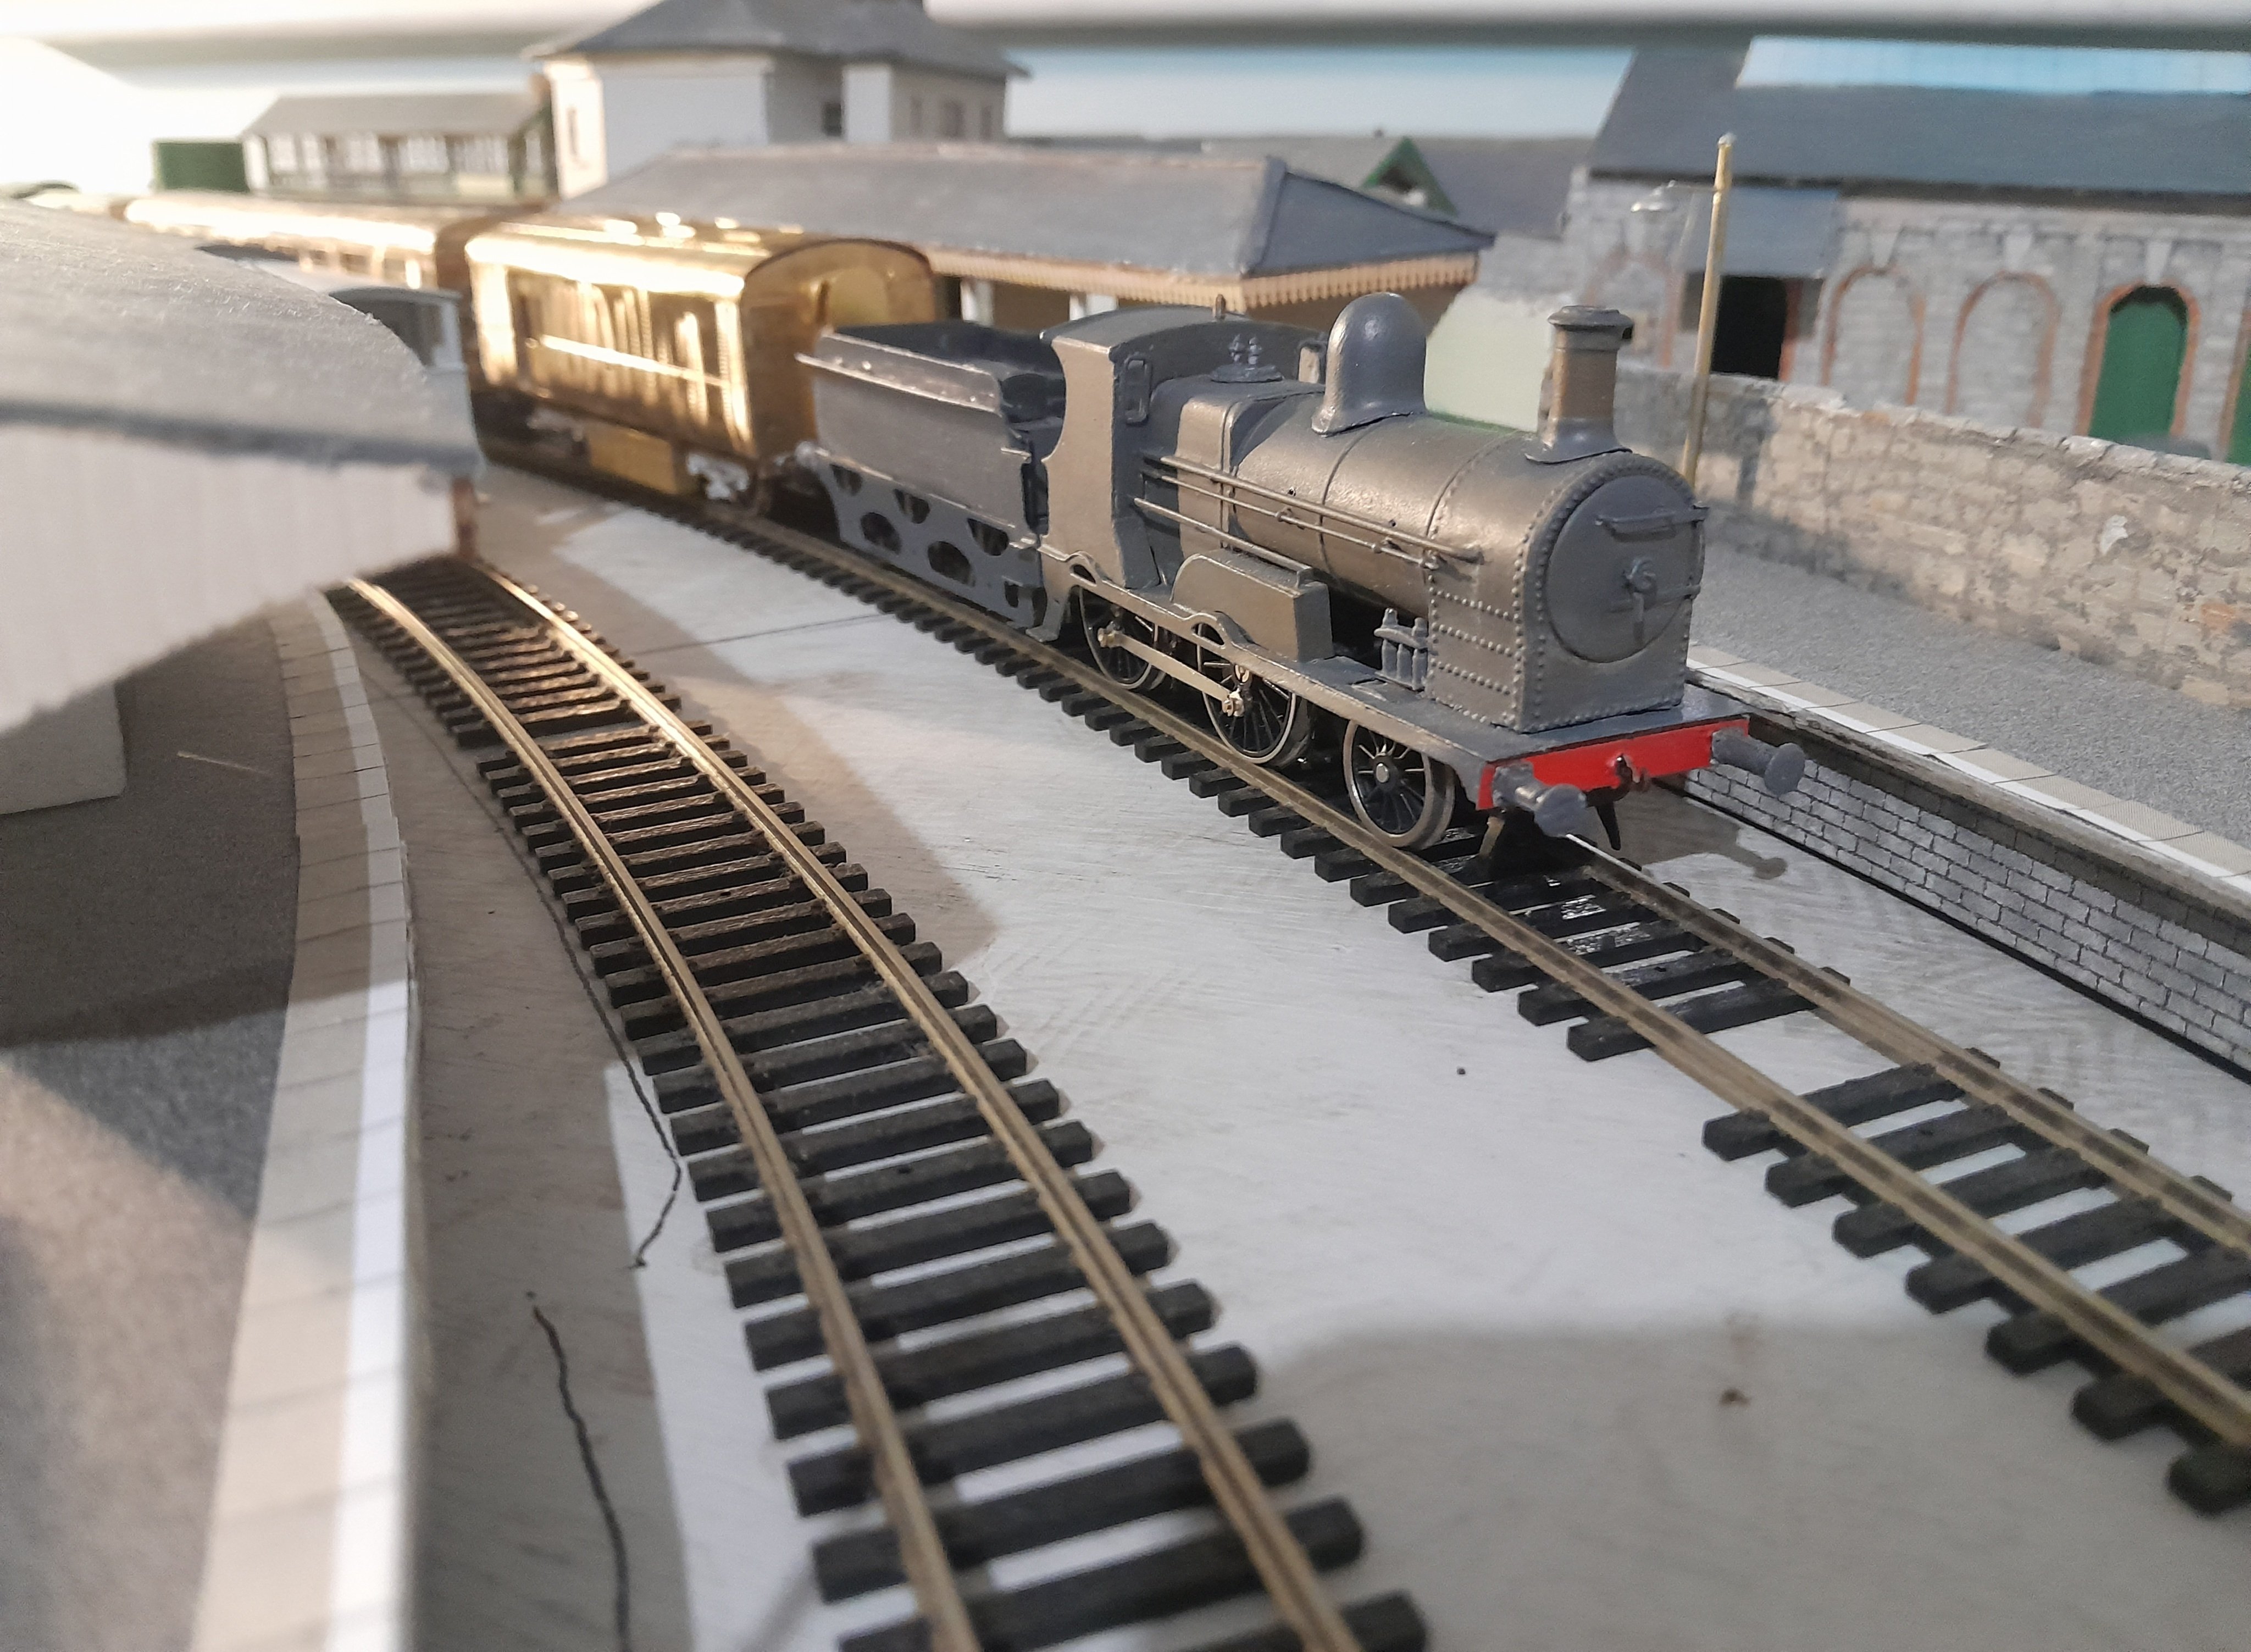
First building made for a new project. GNRI signal box painted in Irish North colours. Huge shout out to @Patrick Davey for advice. Basic design is from Alphagraphix kit, scratchbuilt in plastic card with some special laser cut wooden parts. PP trying it out for size. Lots of annoying errors but falls short of dashing against the wall level. Should pass the 2’ rule….
10 points
-
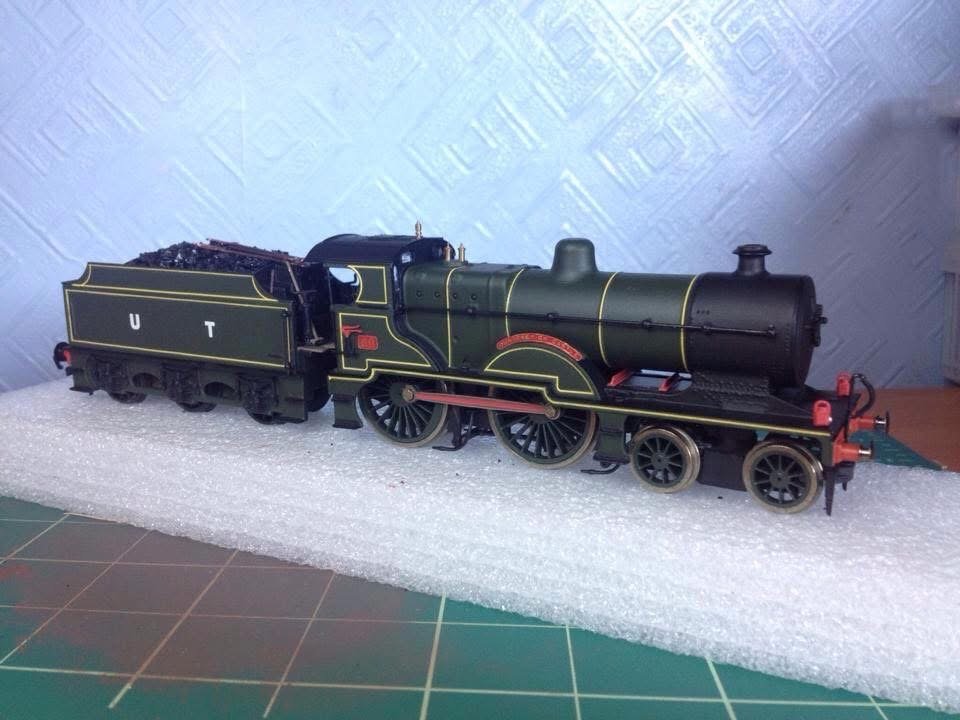
I think a Jeep modelled in the experimental green livery would be very interesting to see. This was my model done a few years ago, with U2 class number 80 “Dunseverick Castle”, in dark olive green.
10 points
-
"...And we've a tender full of round coal the like of I havent seen in ages and the train isnt too heavy.." "...Peter curls up on his box and has a sleep and for once I can fire in real comfort. She's burning next to nothing, the injectors are good, it's on the old tender with the flat tank so you throw down instead of lifting, the night is fine - in fact it's the sort of thing that never happens these days." Excerpt from the IRRS Journal no.203, Clements on the Midland.
10 points
-
And so it was, in 1956 Bob Clements delighted himself in the arrival of no.800 Maedbh hauling the Up Mail on trial on the Midland, having been evicted from her working on the Cork line by the new diesels. Having made her connection with both the Up and Down Galway Mail, G2 no. 664, prepares to depart with her train, with one of the new tin van TPOs, to Sligo. Duly ordered!
10 points
-
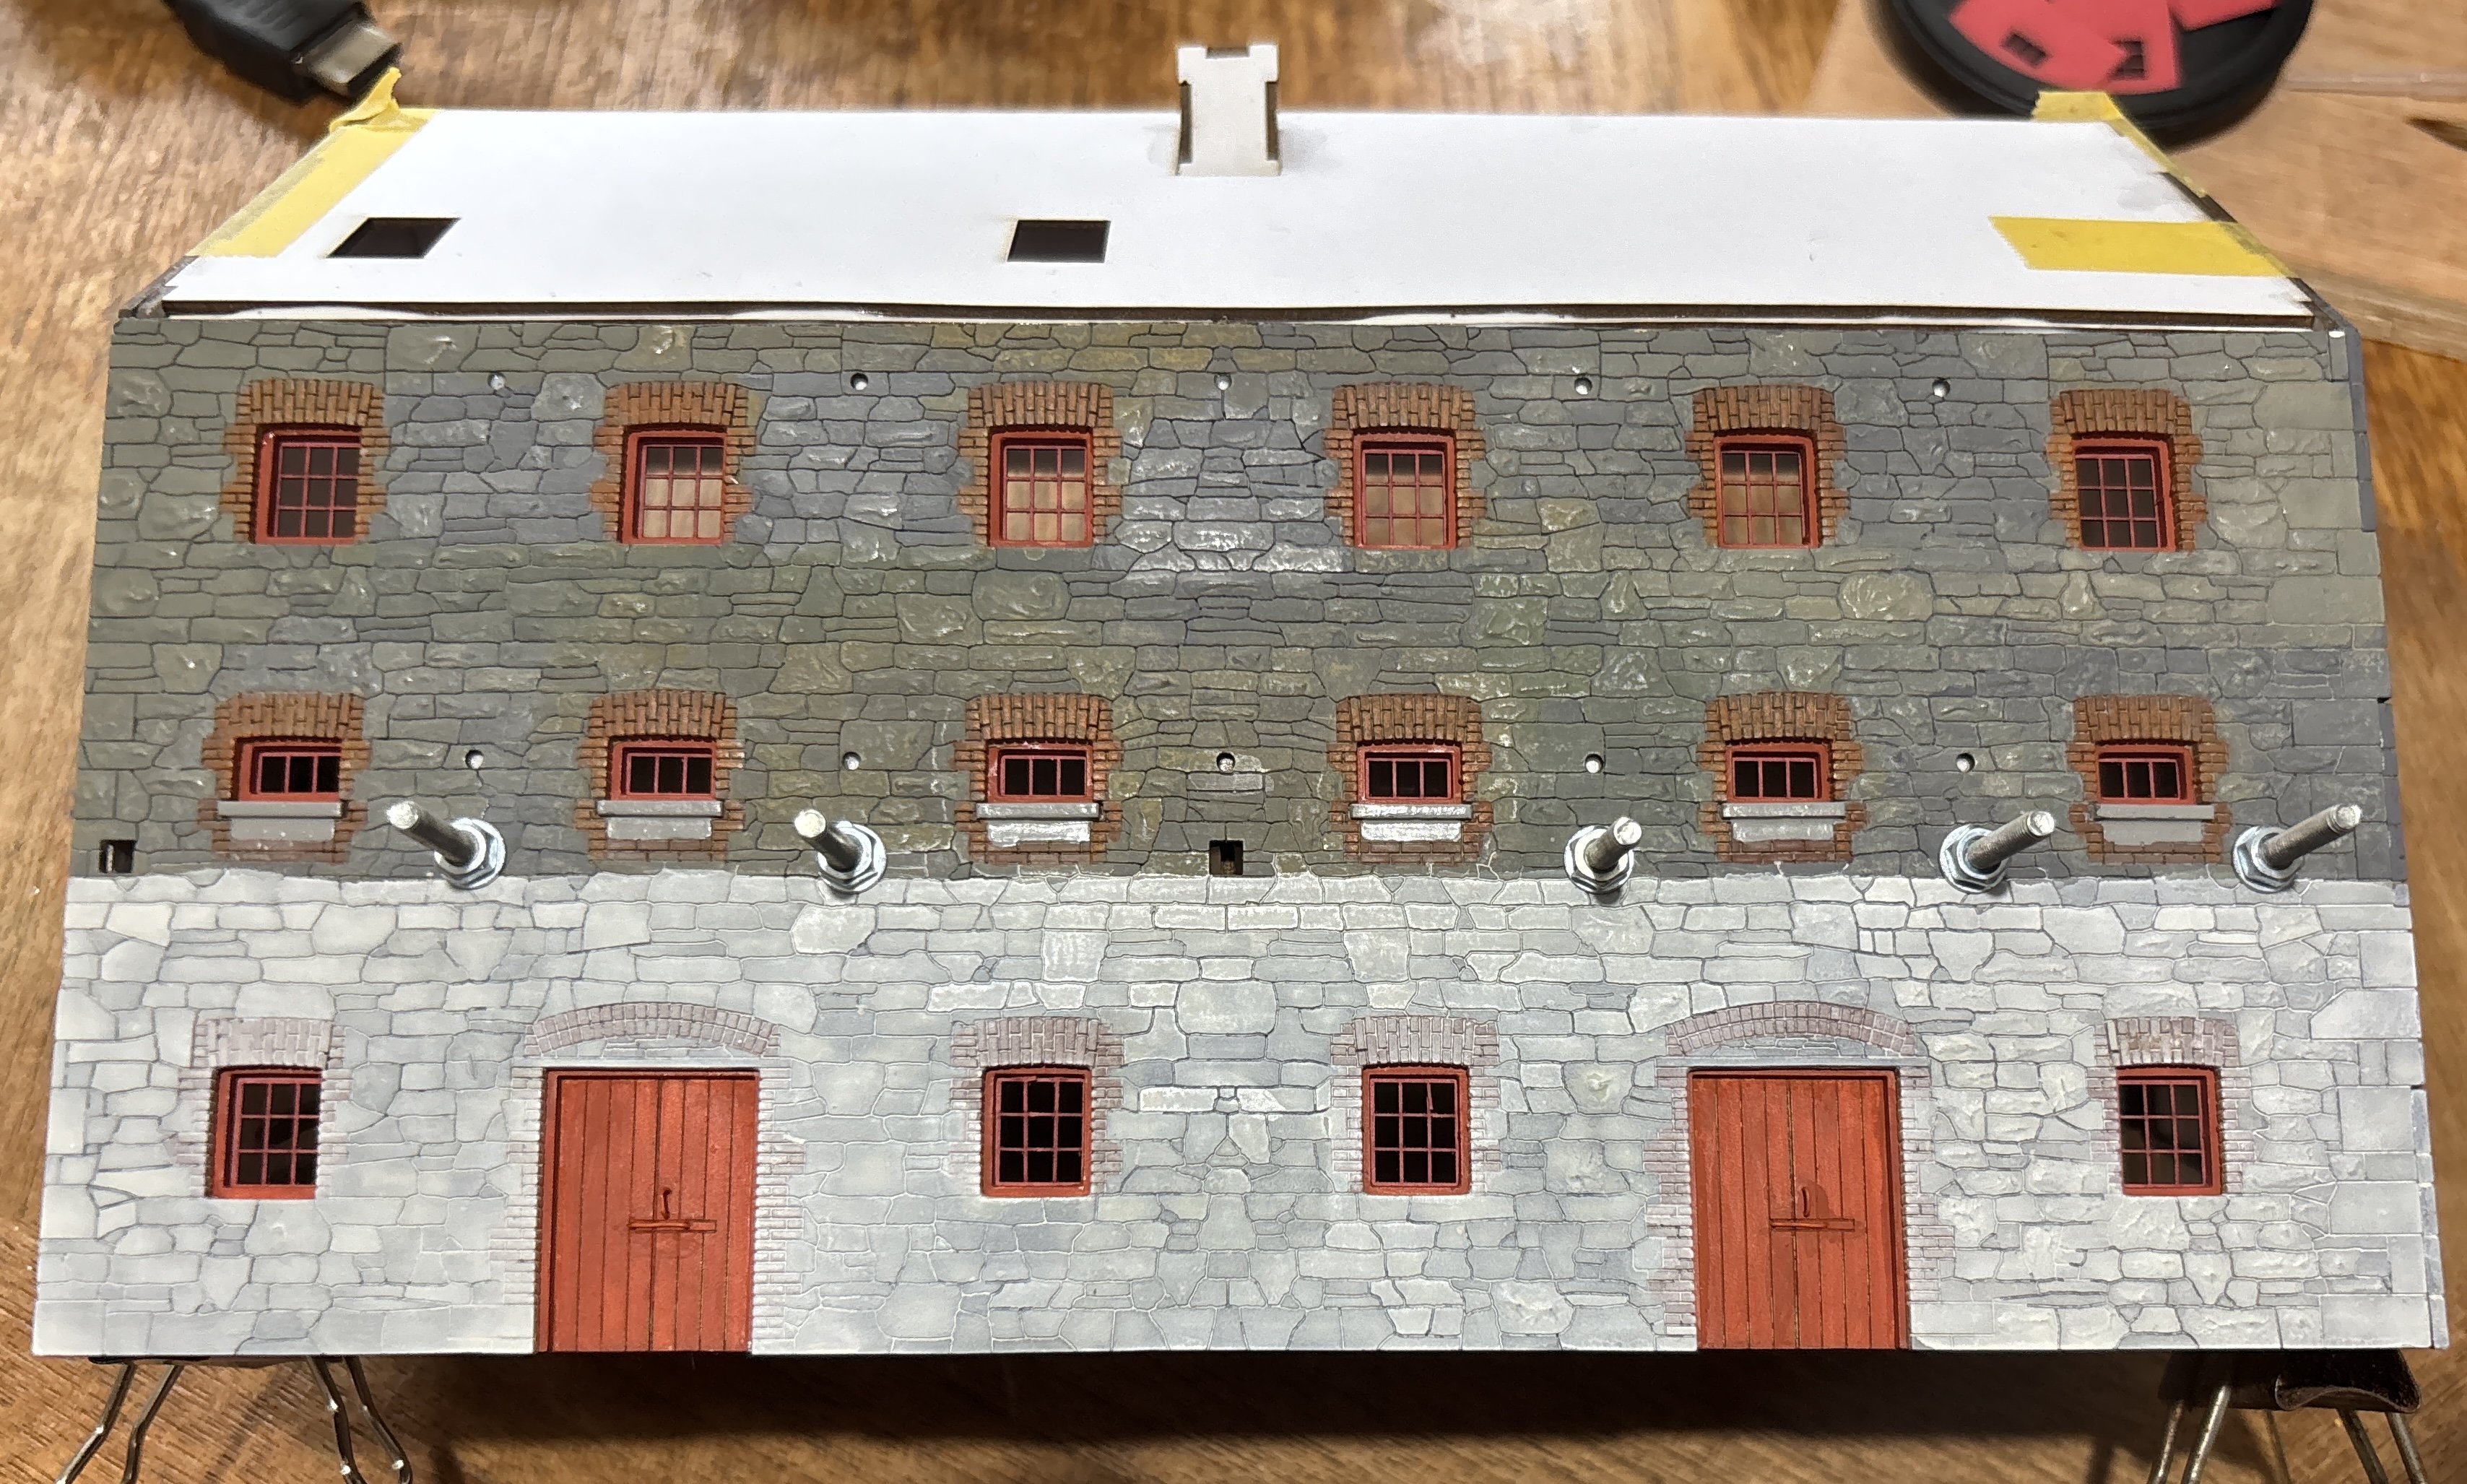
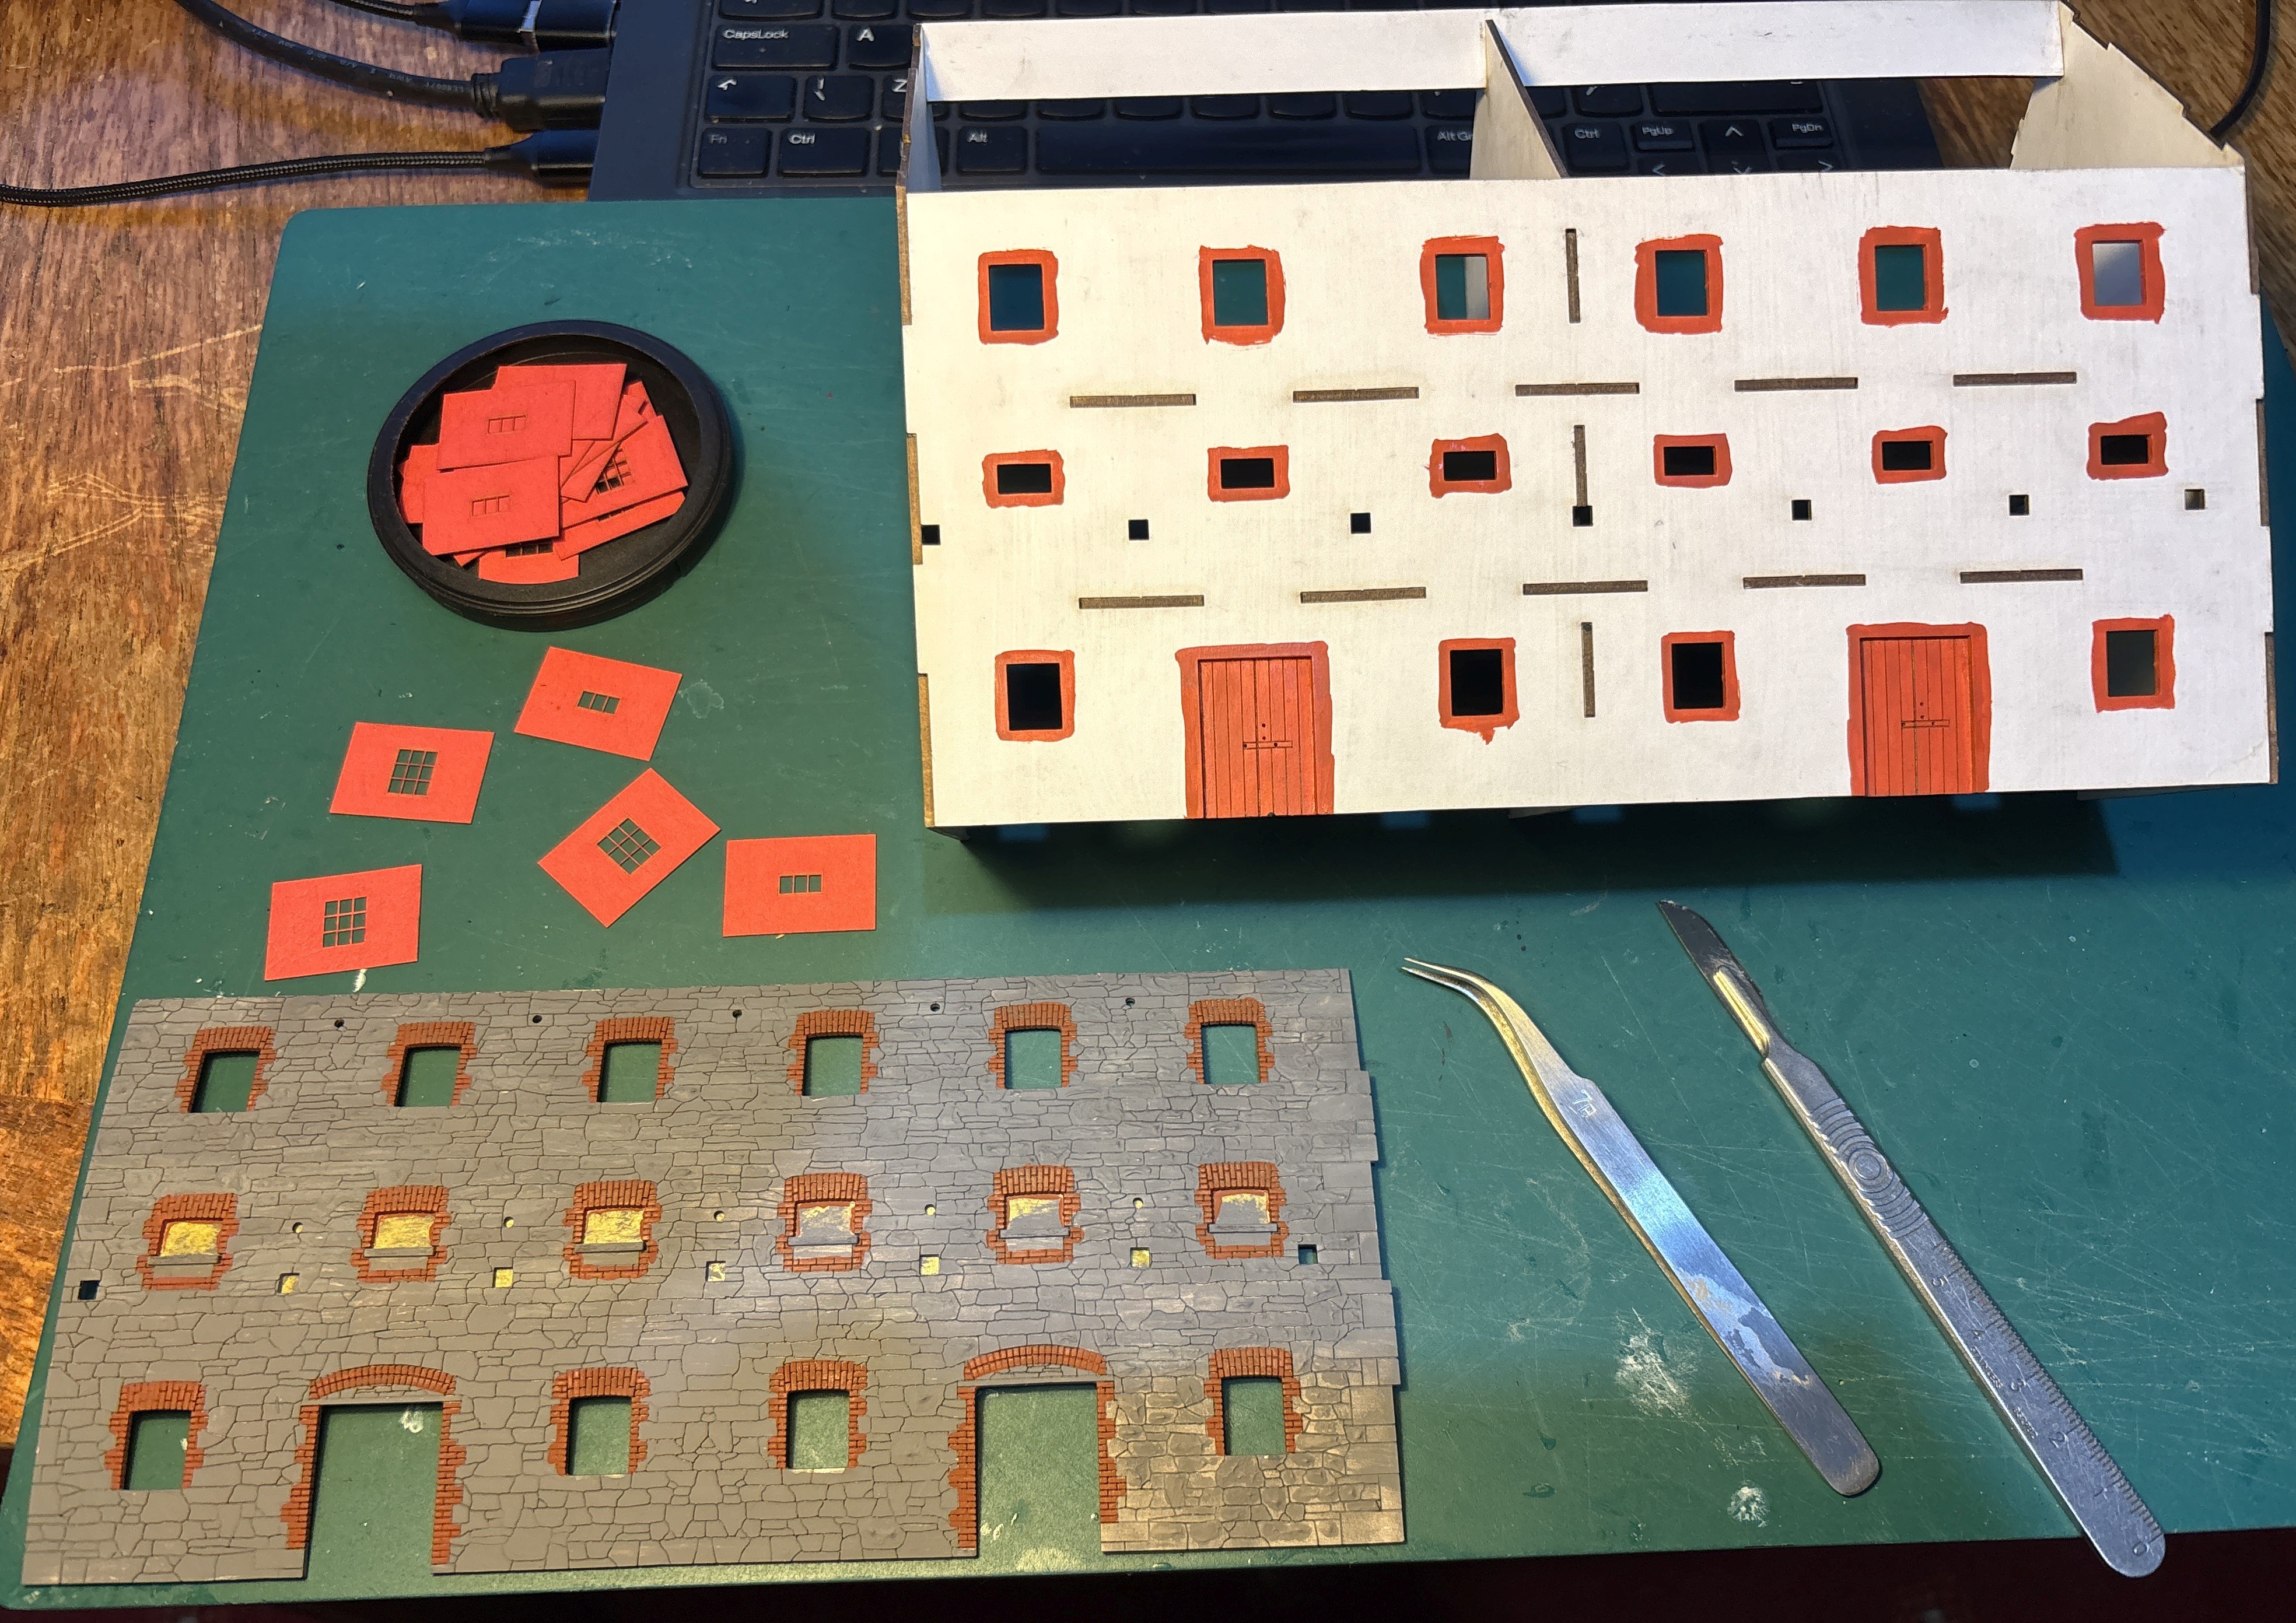
Progress on the old mill. The structural carcass is assembled and I've painted the window frames red. I've used matte medium to add some texture to the front wall, then applied an initial coat of grey on the stonework and bauxite on the brickwork. There's more stages to do on this, but I want these layers to dry properly first. I had some successful experiments with laser-cutting window frames from thick red paper. These are ready to be fitted to the structural carcass. The next stage is to think about the roof and how best to represent the slates. Perhaps more laser-cut paper. But there are some other jobs on the list for this evening (nothing to do with the trainset) and I have quite a busy week ahead at work. So there may be a pause for a few days.
10 points
-
On the 19th January 1966 I first met Mella Shannon in the Dining car of the Dublin to Belfast train. Between then and her retirement I, like so many others travelling between Belfast and Dublin, got to know her and became friends. When she retired in 1990 after 40 years service, she received the honour of BEM for faithful service on the railway during the troubles. Some time after that I heard that she had been ill and I went to visit her. We spoke about her work and experiences in the Dining Car. She was from Omagh and she started work on the Belfast - Derry trains. When the Derry line was closed in 1965, she transferred to the Belfast - Dublin train. She was working on the train from Derry that ran over the men. She went down and was under the Dining car cradling the head of one of the men who was injured. He asked her to tell his wife and children that he loved them. Although she did not know all the men personally she knew their families as they were all from Omagh. I think that she must have been still in her teens when the accident happened. It was a terrible tragedy and affected her very much, although she was always a cheerful chatty person when you met her. There is a picture of her on FACEBOOK when she received her honour of BEM. She was also interviewed by Andy Crockart during a television programme about the Belfast - Dublin Enterprise. DSERetc10 points
-
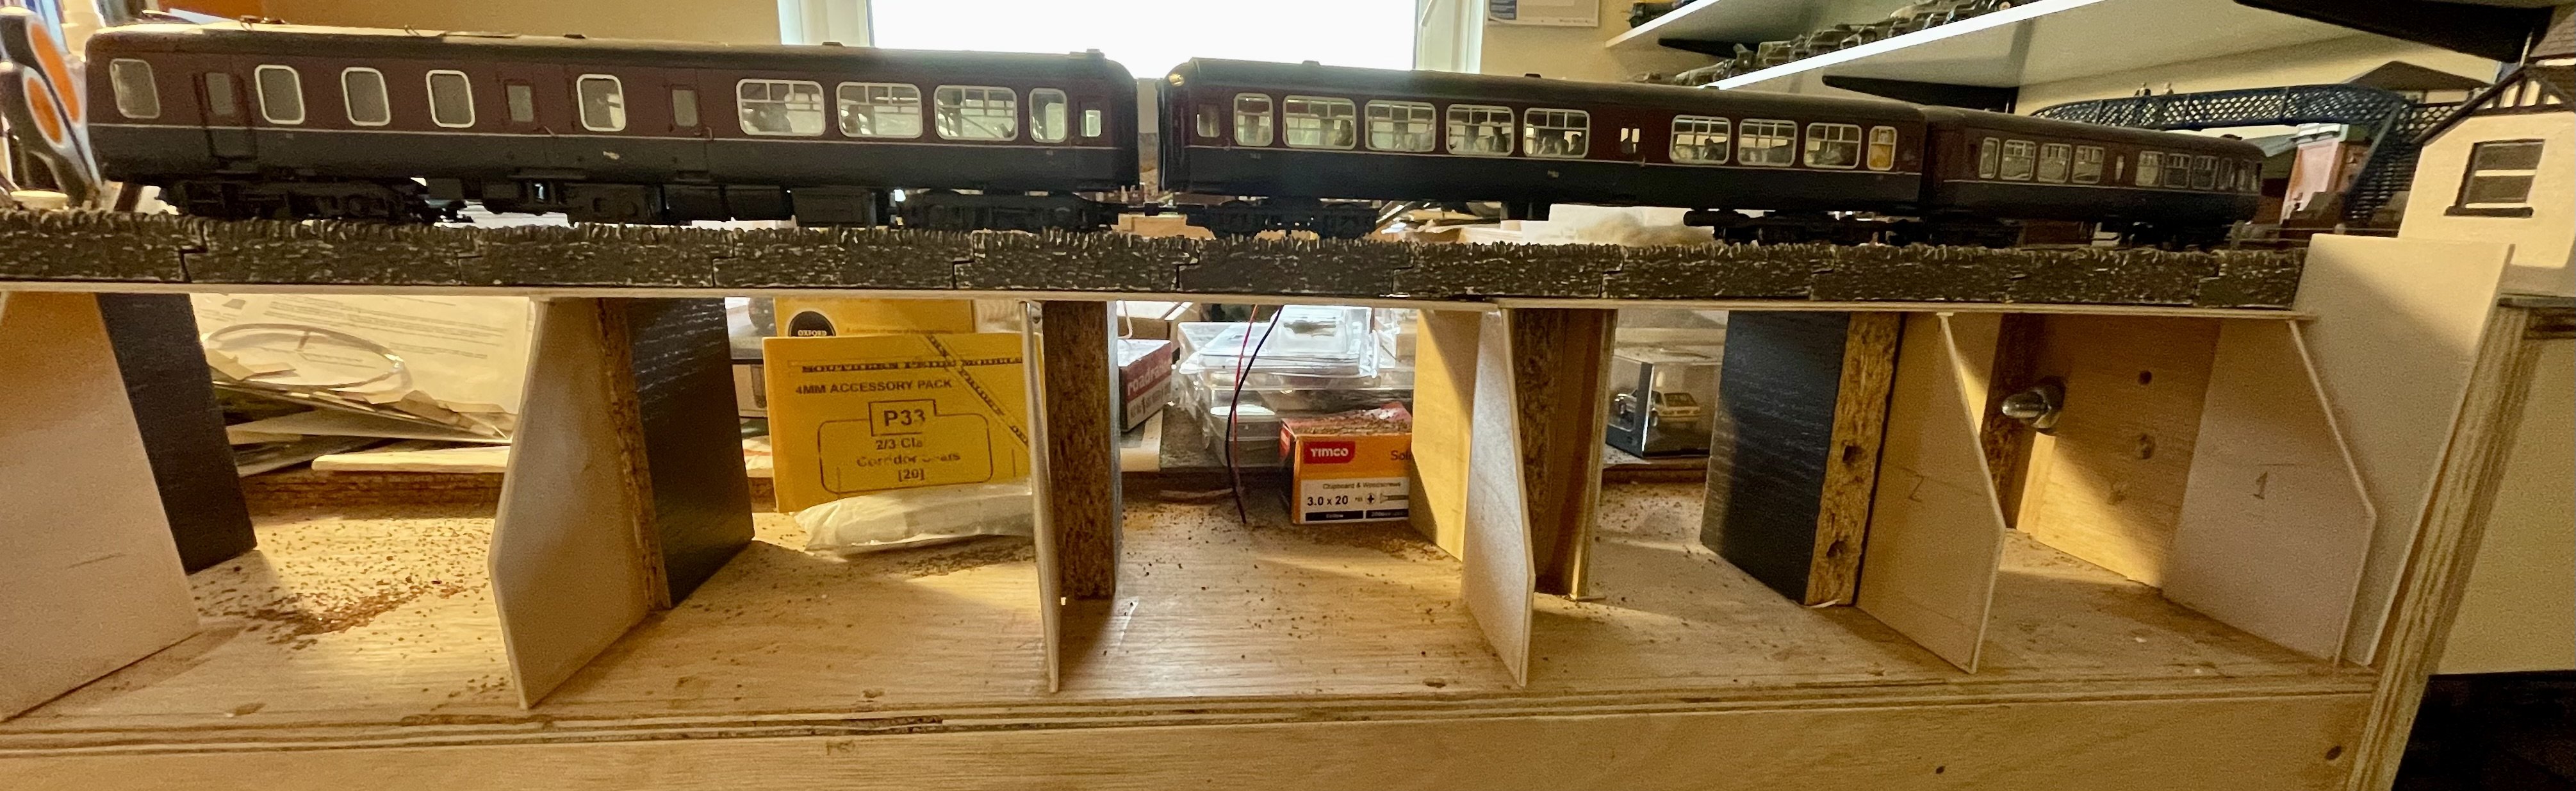
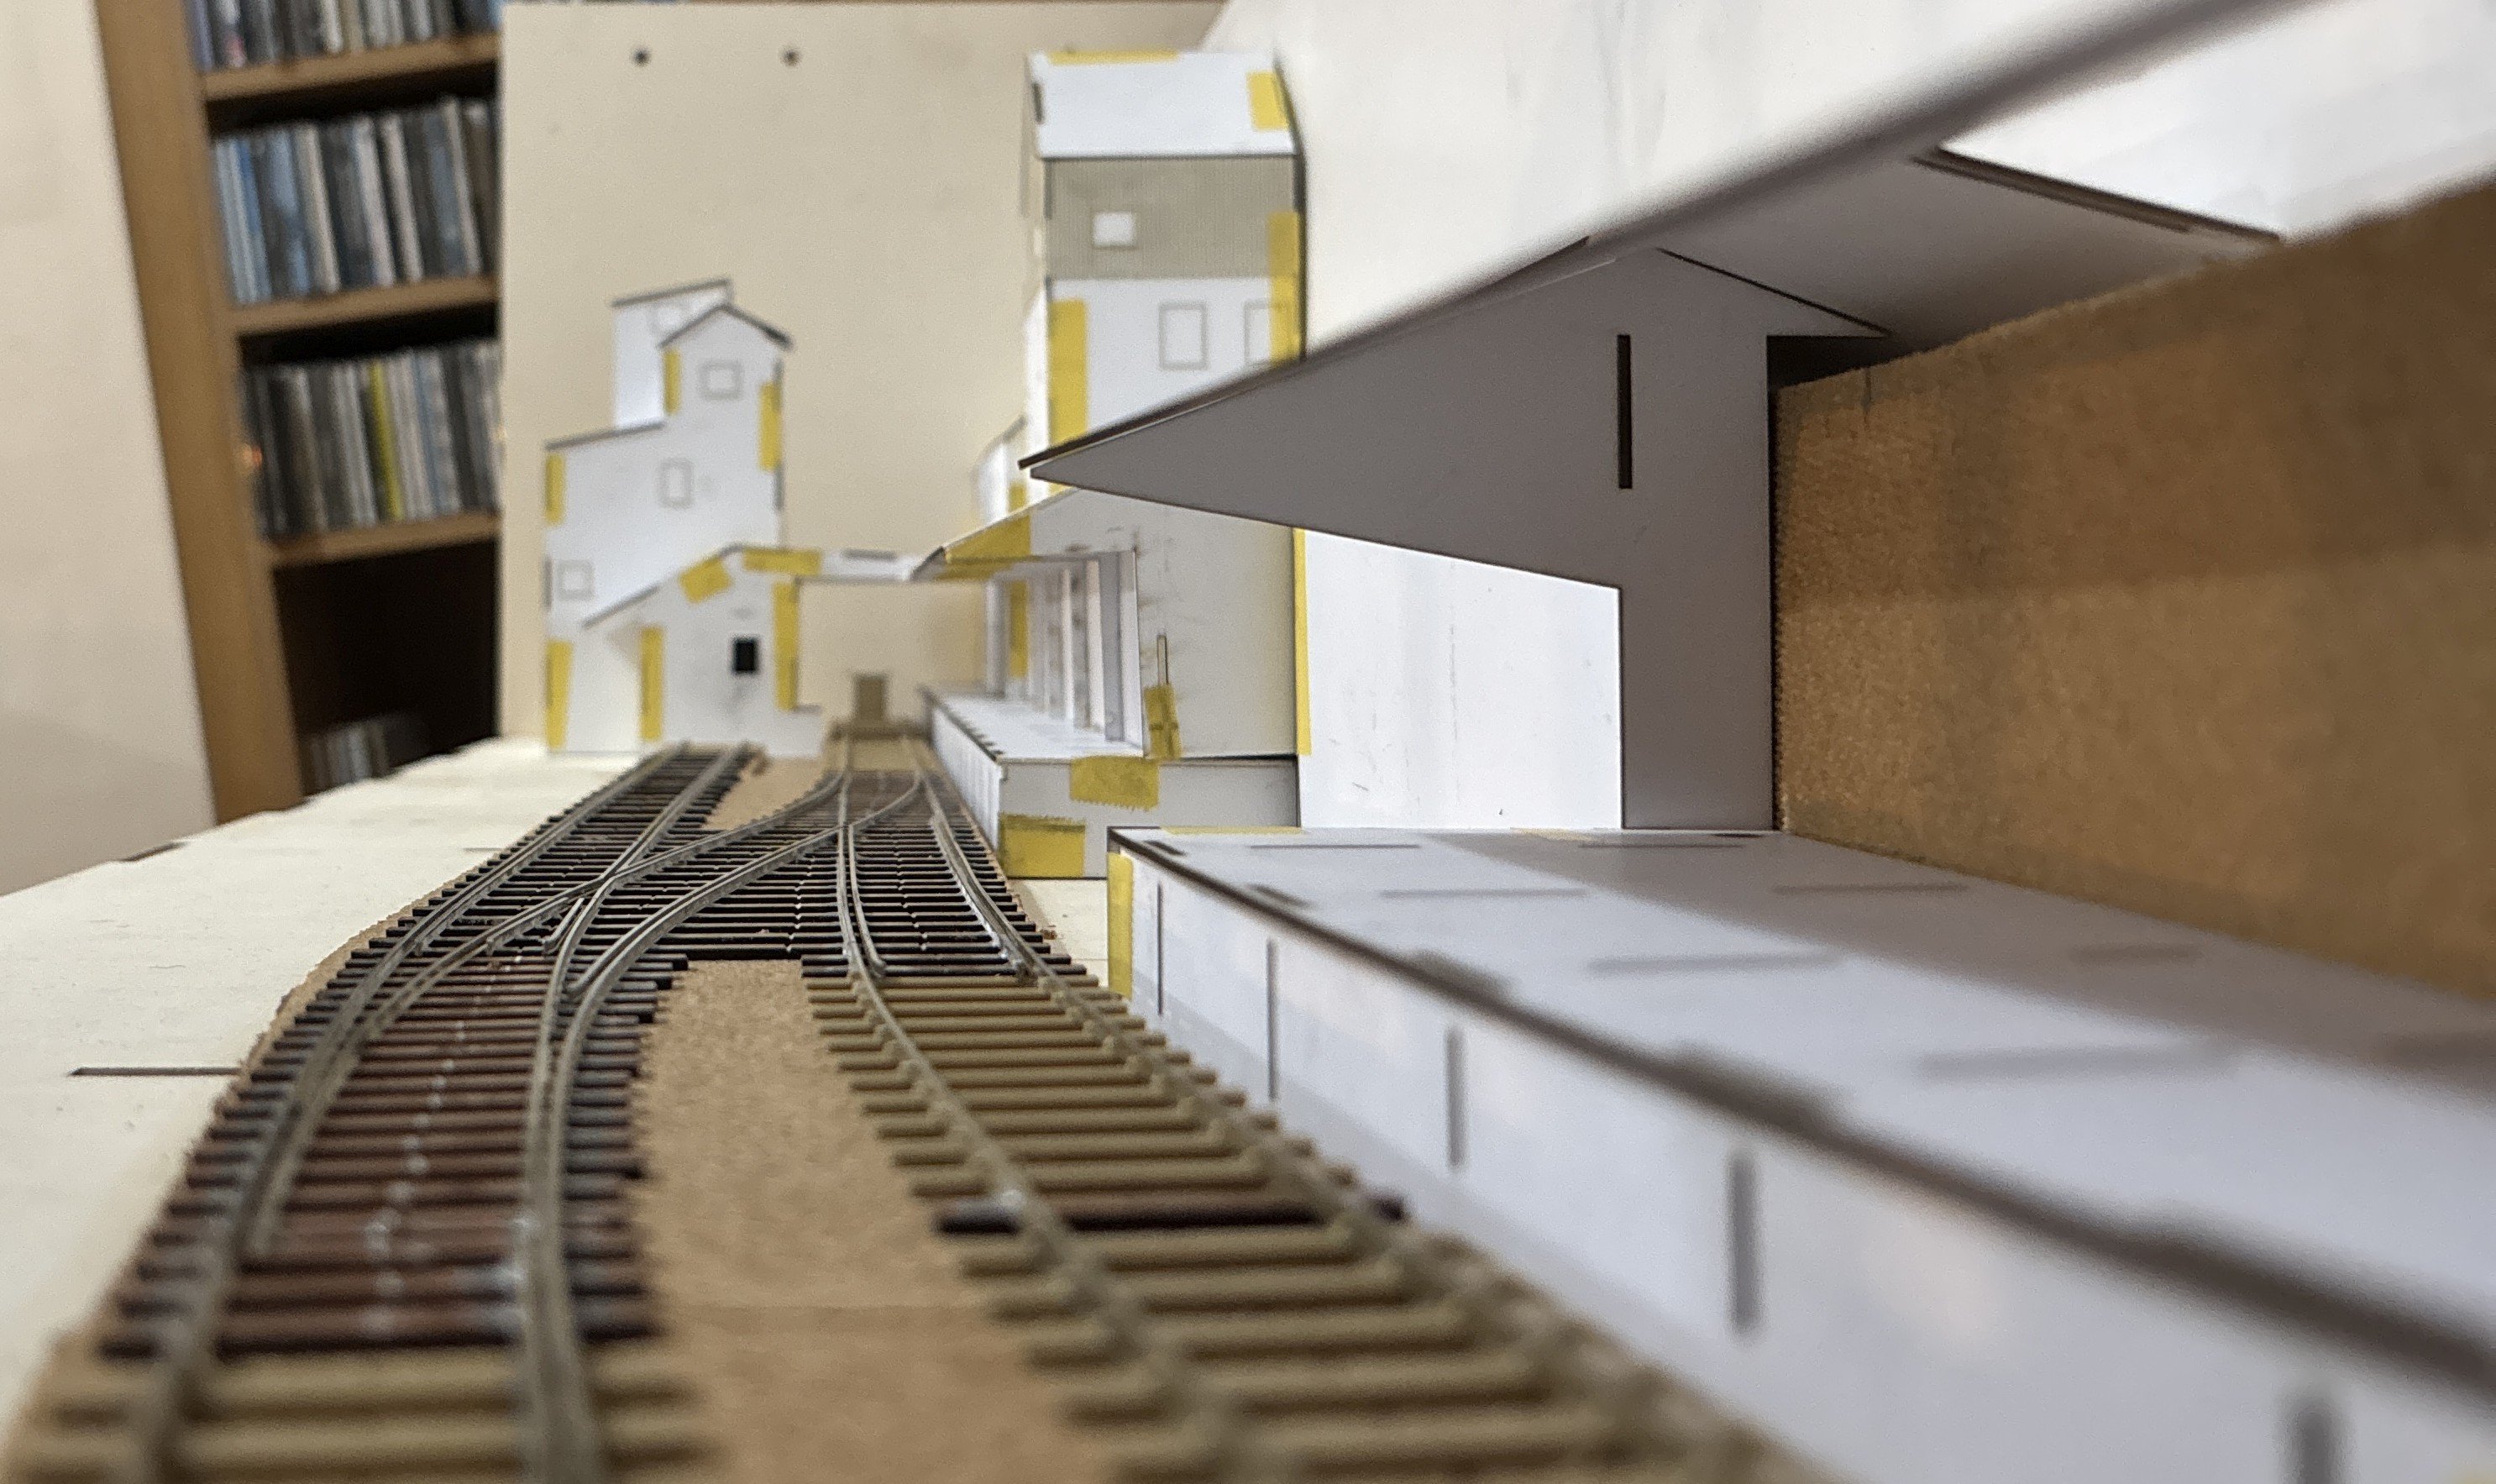
A bit more progress with the backscene and the building mock-ups. I'm getting close to what I want now. Broadside view: Main mill buildings; I've shortened the nearer one by one bay: The loading bay near the exit to the fiddle yard: And a gricer's eye view: Which can be compared to this view of the real thing:
10 points
-
CBSC 1957 - + Clonakilty Junction AEC 2603 on Bantry service. PFF184. CBSC 1957 - + Clonakilty Junction lkg east from road Bridge. PFF182. CBSC 1957 - + Clonakilty Junction lkg east from Hill. PFF183. CBSC 1957 - + Clonakilty Junction AEC railcar towing a cattle wagon on up service. PFF185.10 points
-
Pretty much finished now. Misplaced one of the roof vents, hopefully it'll turn up! A bit of MGWR shunting action at Mullingar!
10 points
-
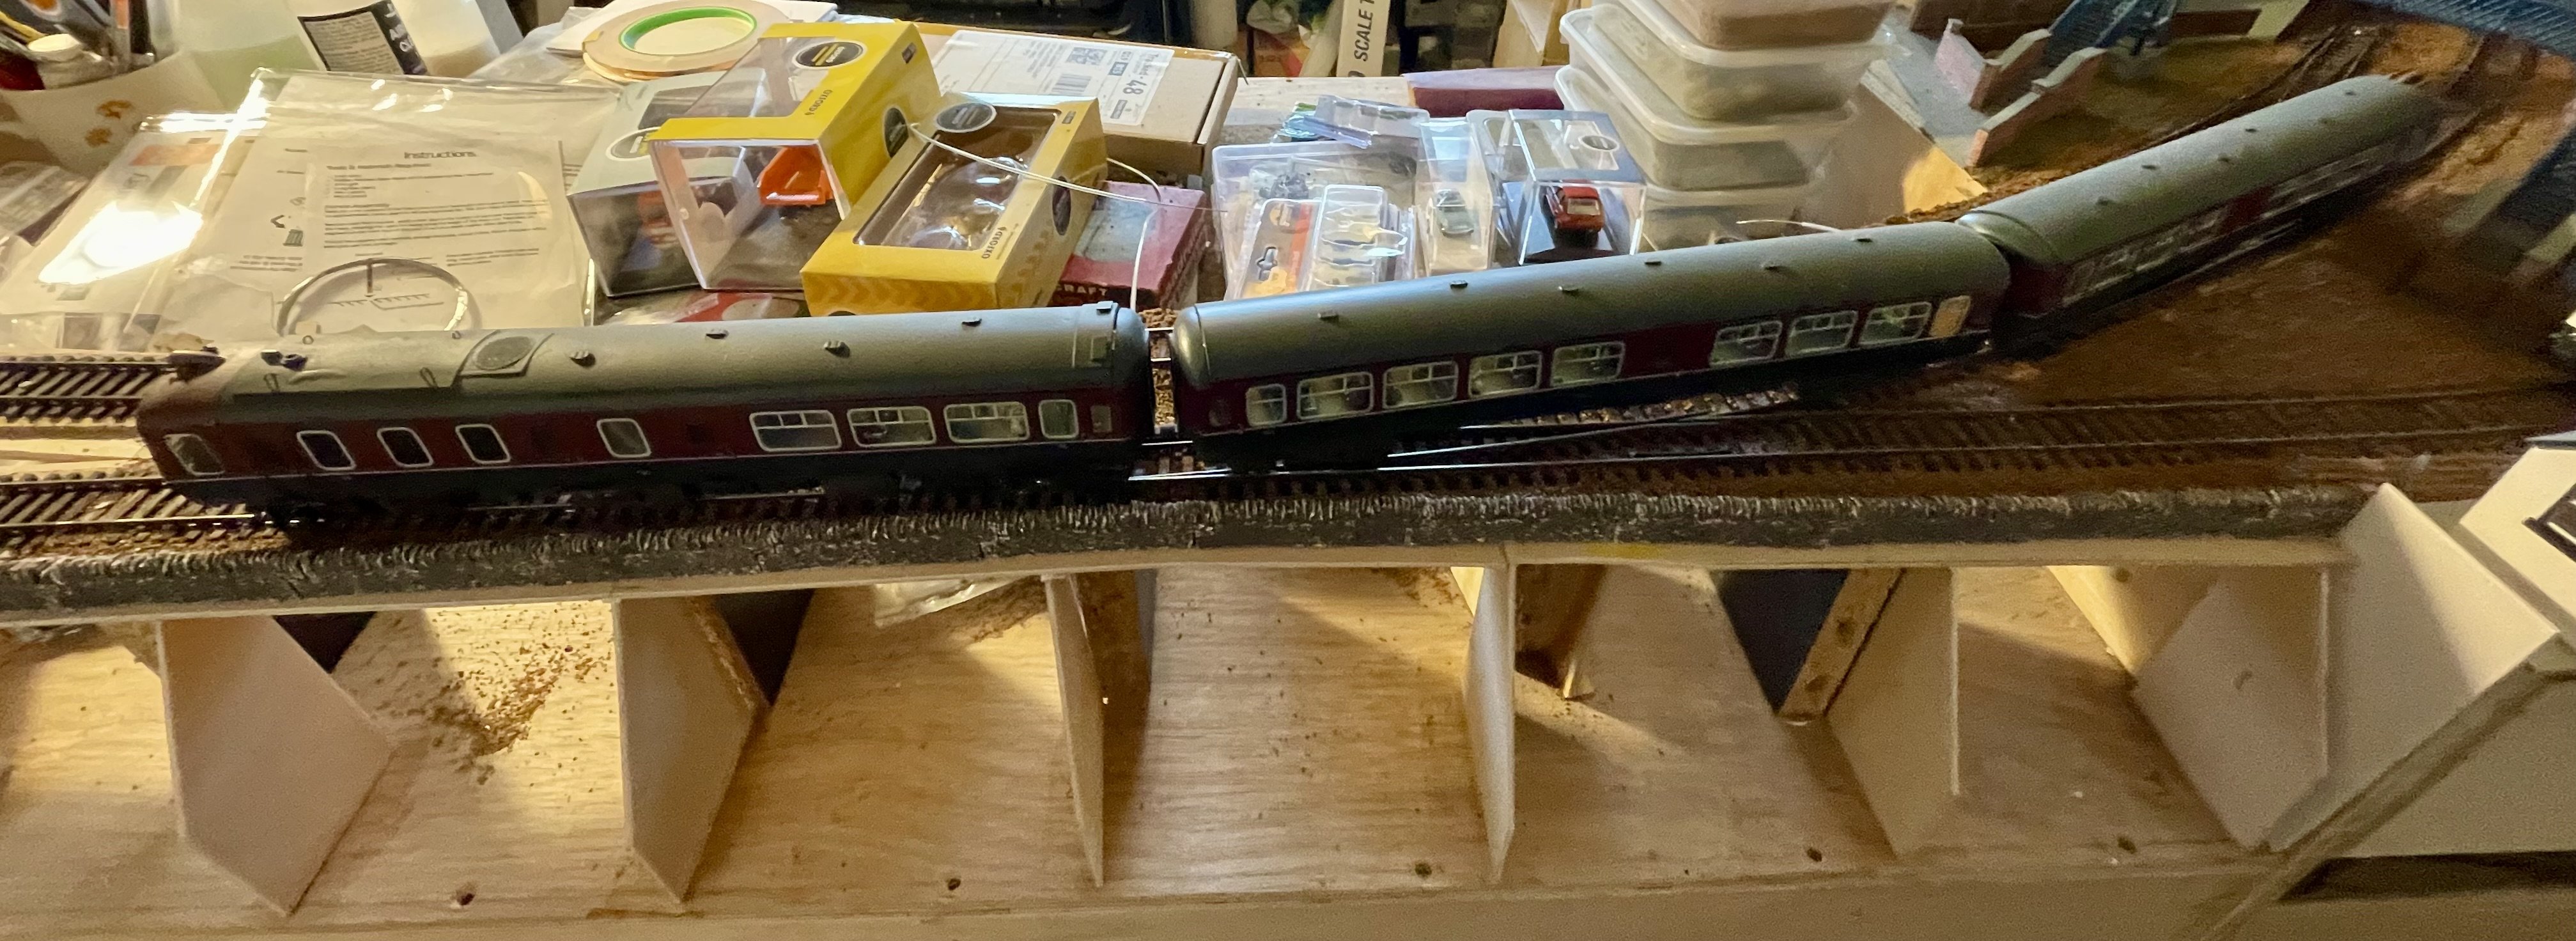
More progress with the mock-up buildings. I'm afraid that even with computer-aided toys, my progress at rough mock-ups is far slower than Darius's construction of complete finished buildings! This is definitely proving a useful exercise. With few absolute dimensions to work with, and photos from a limited range of angles, making the mock-ups helps me to see how the buildings fit together and whether the proportions look anything like the photos of the real thing. I've already identified some dimensional tweaks that are needed, but I feel I'm creating the right atmosphere. The 141 has yet to be re-gauged - it's sitting on the checkrails which are at 17mm gauge.
10 points
-
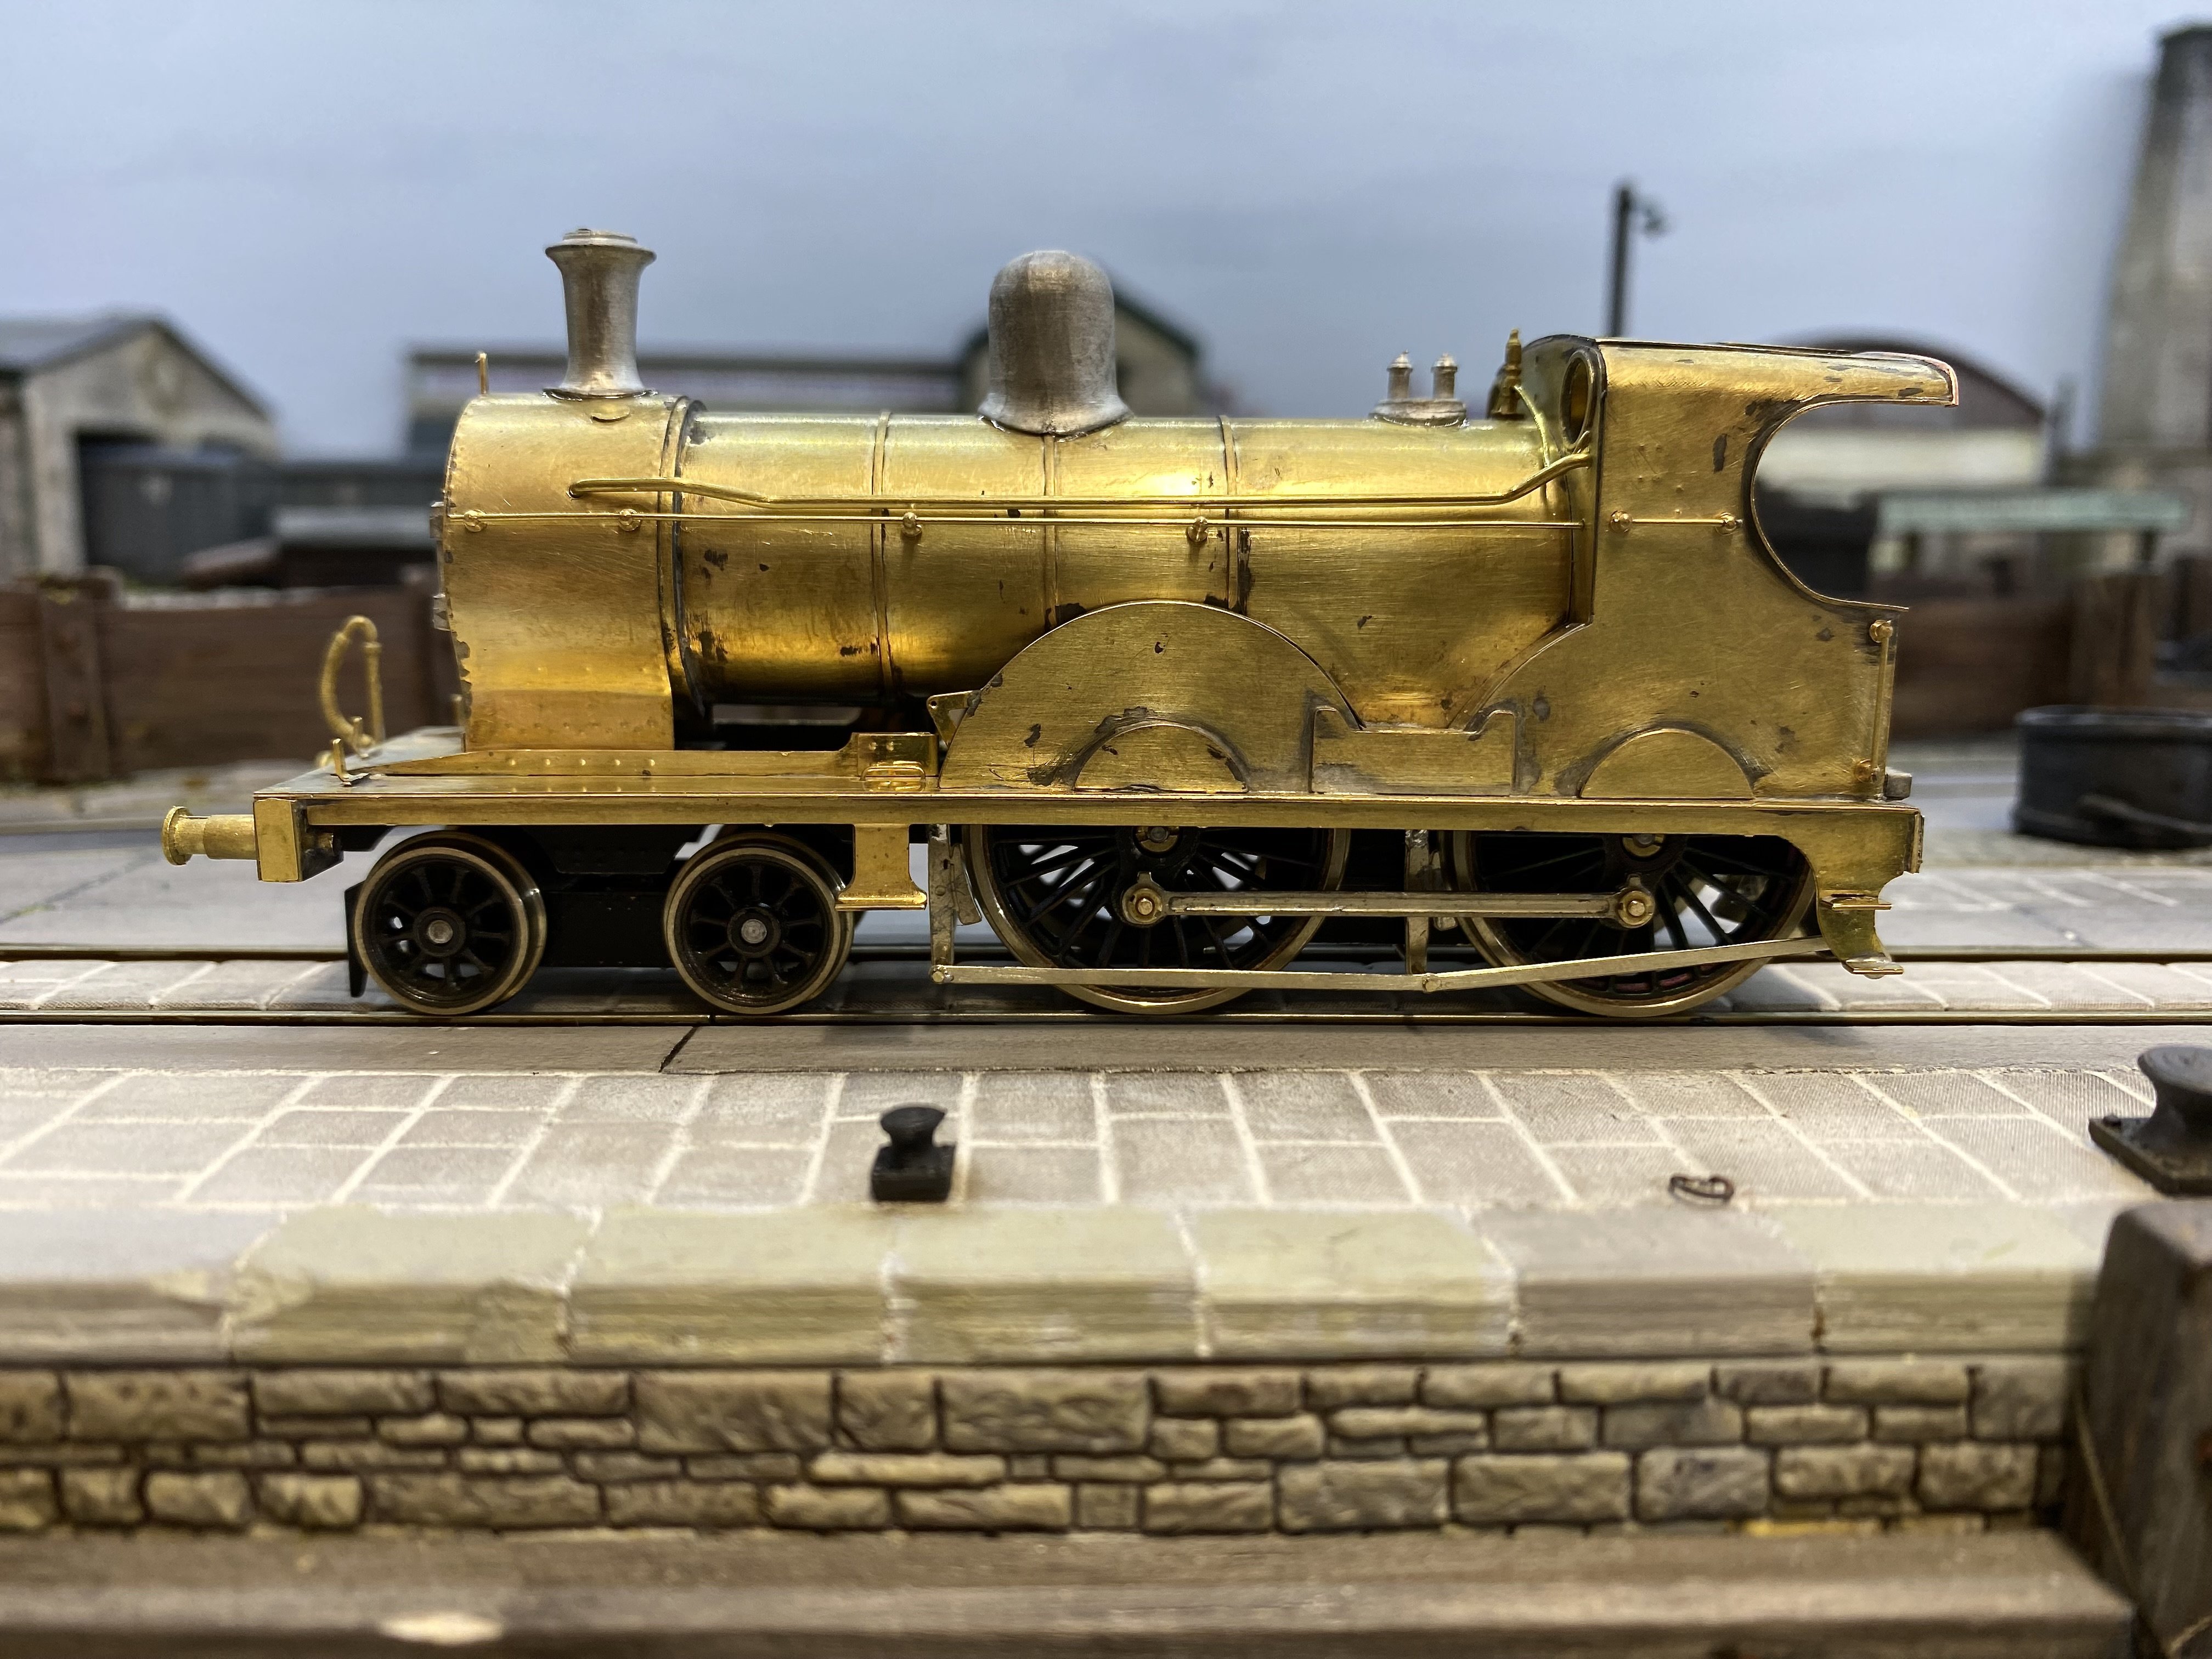
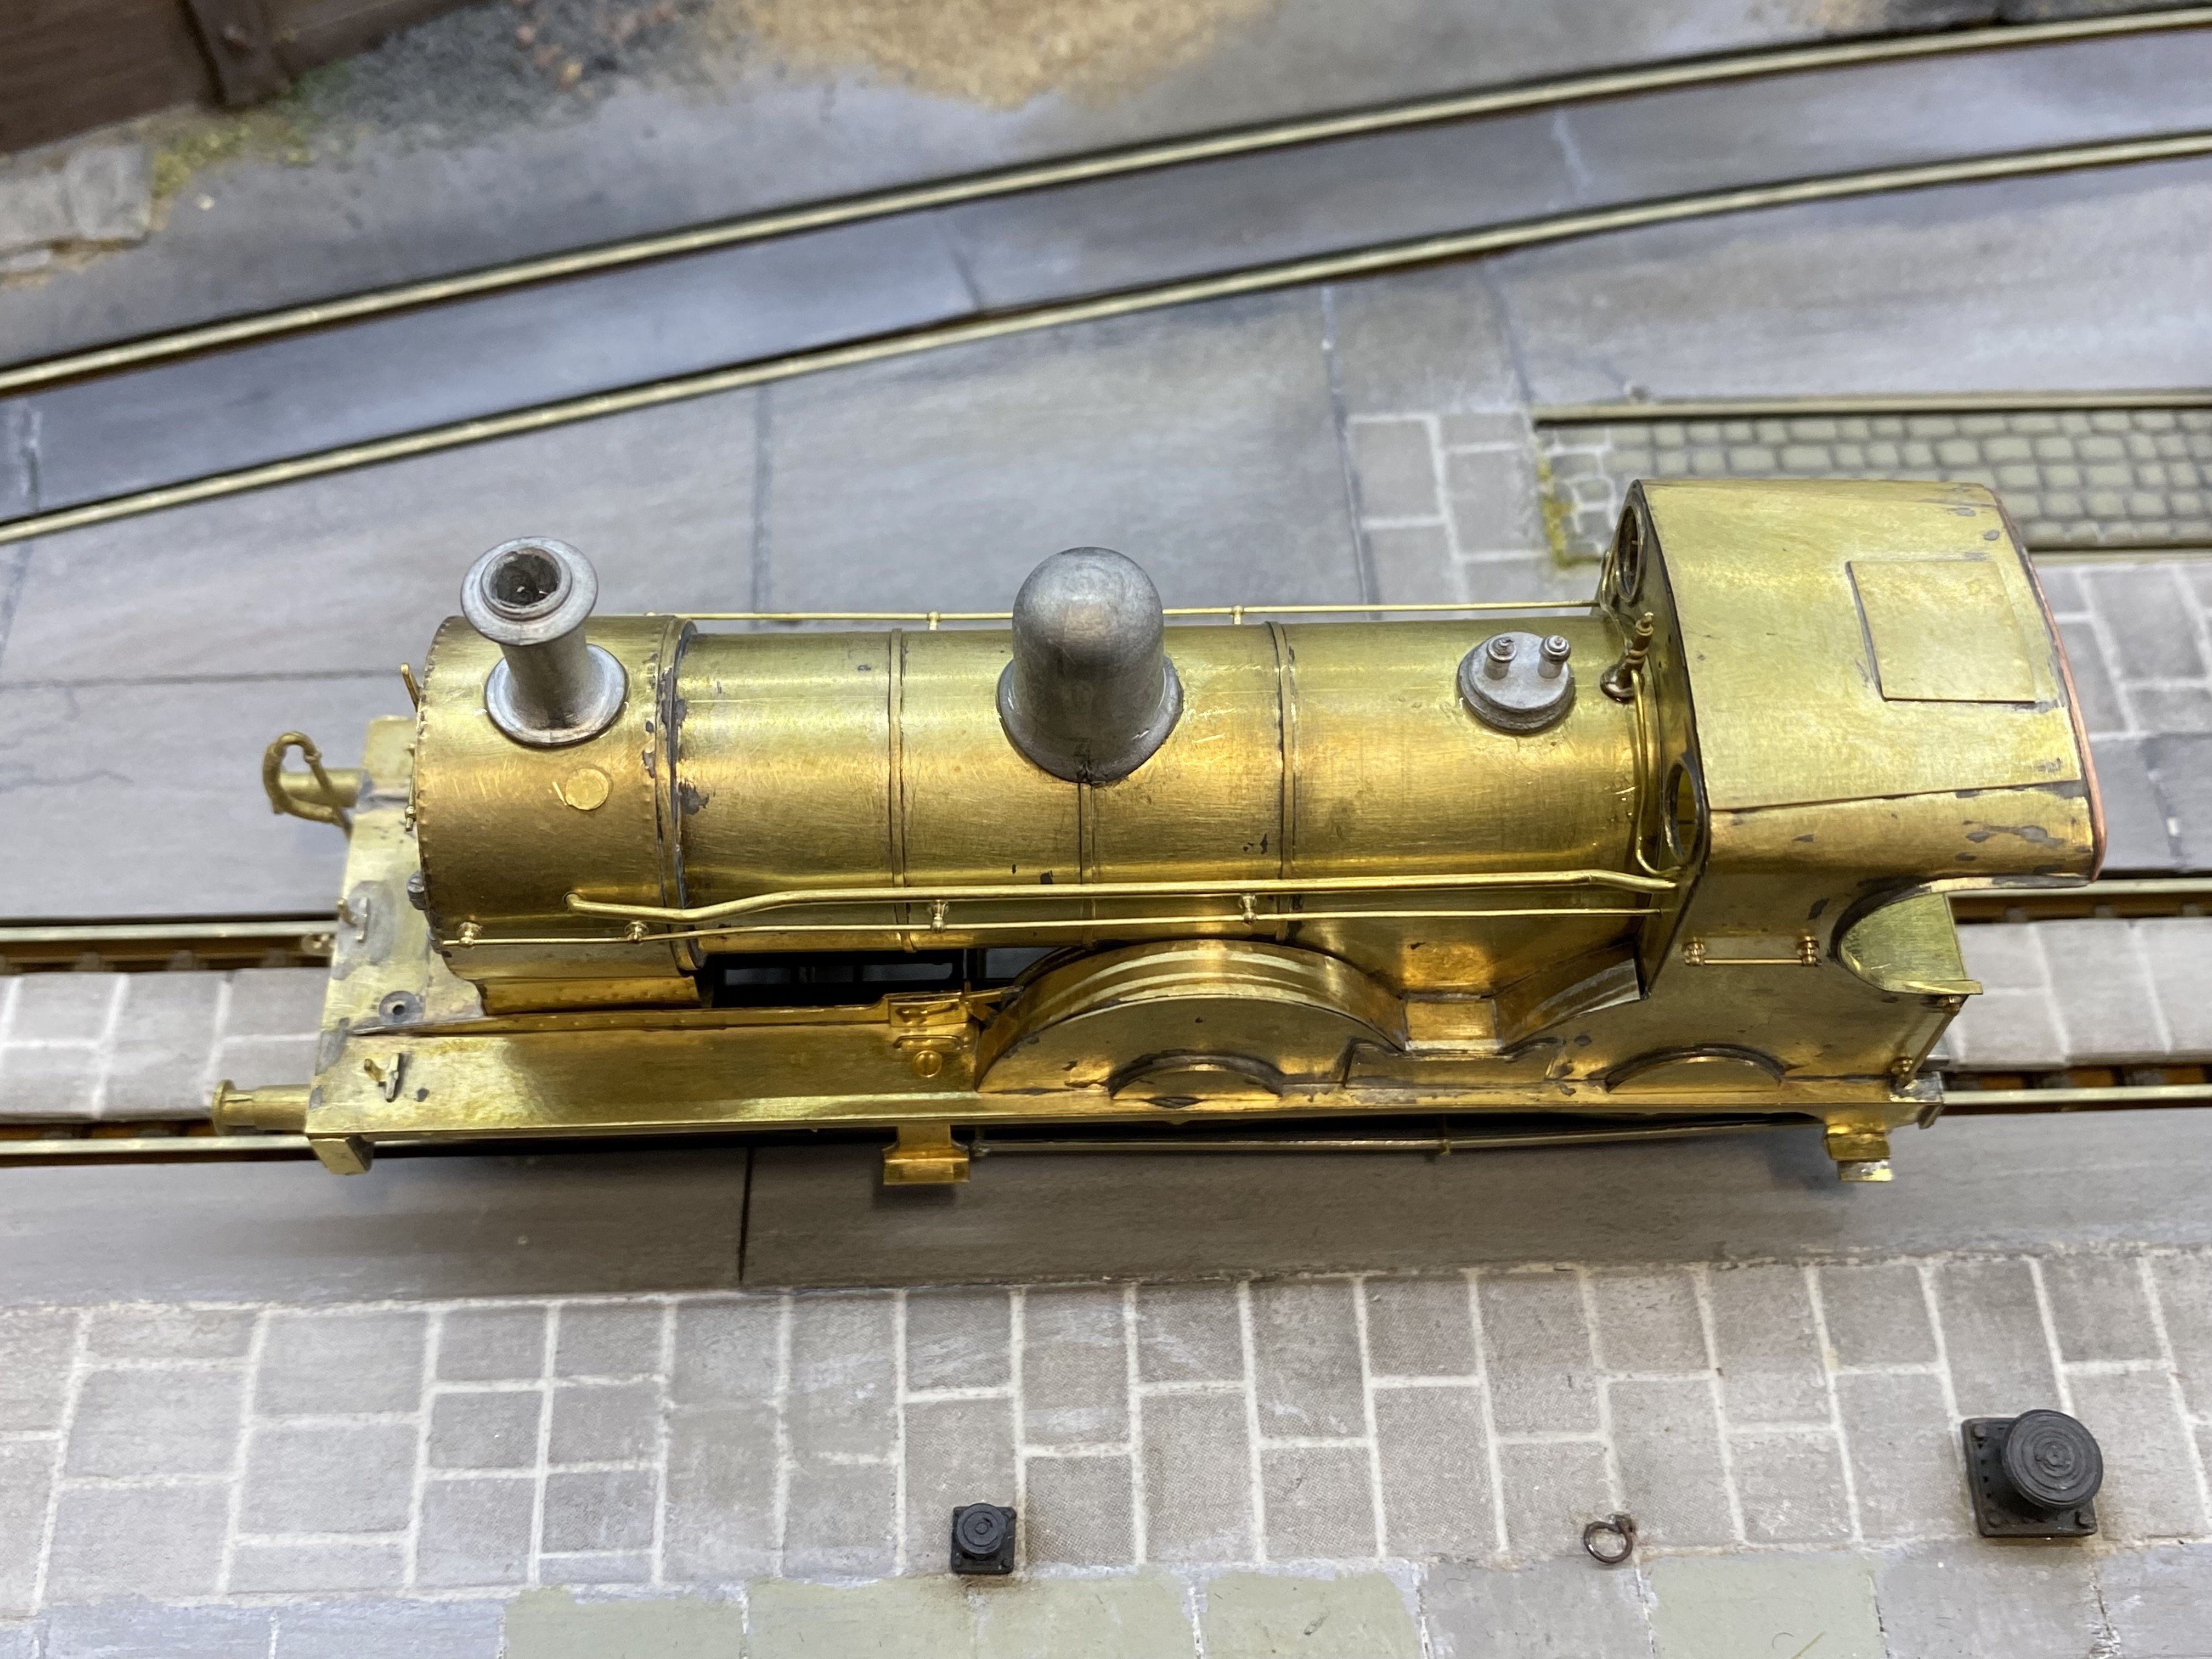
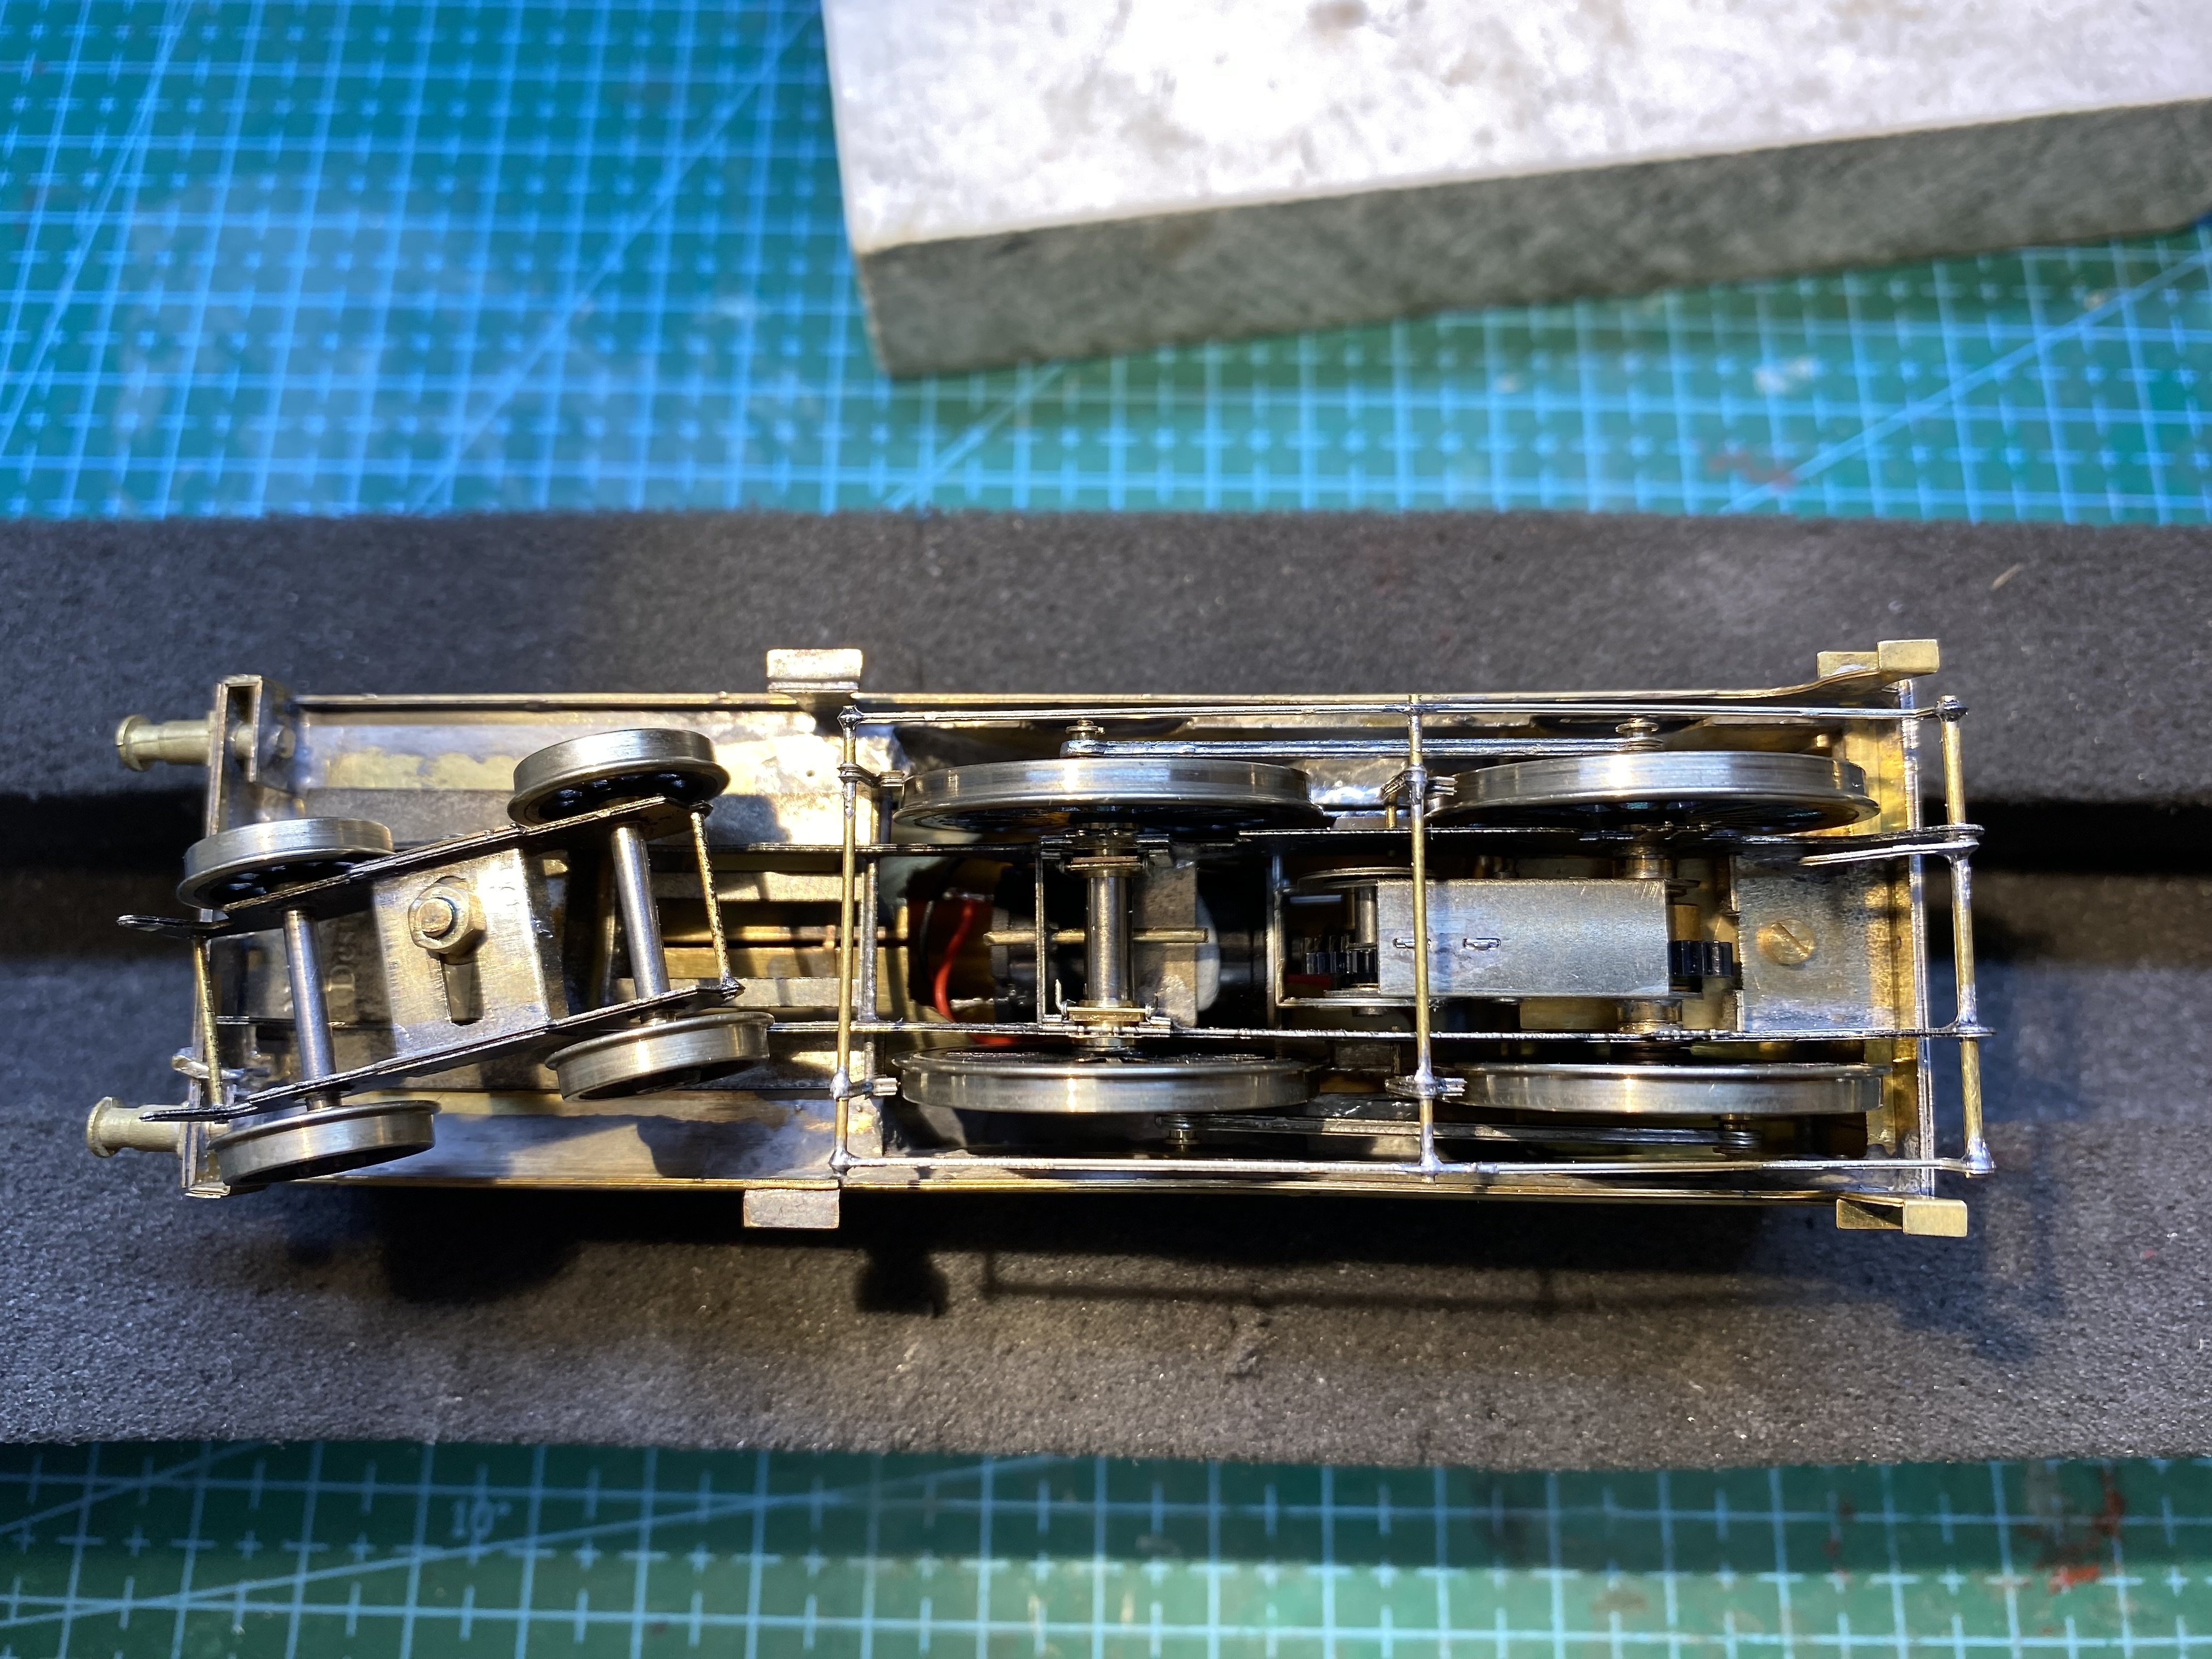
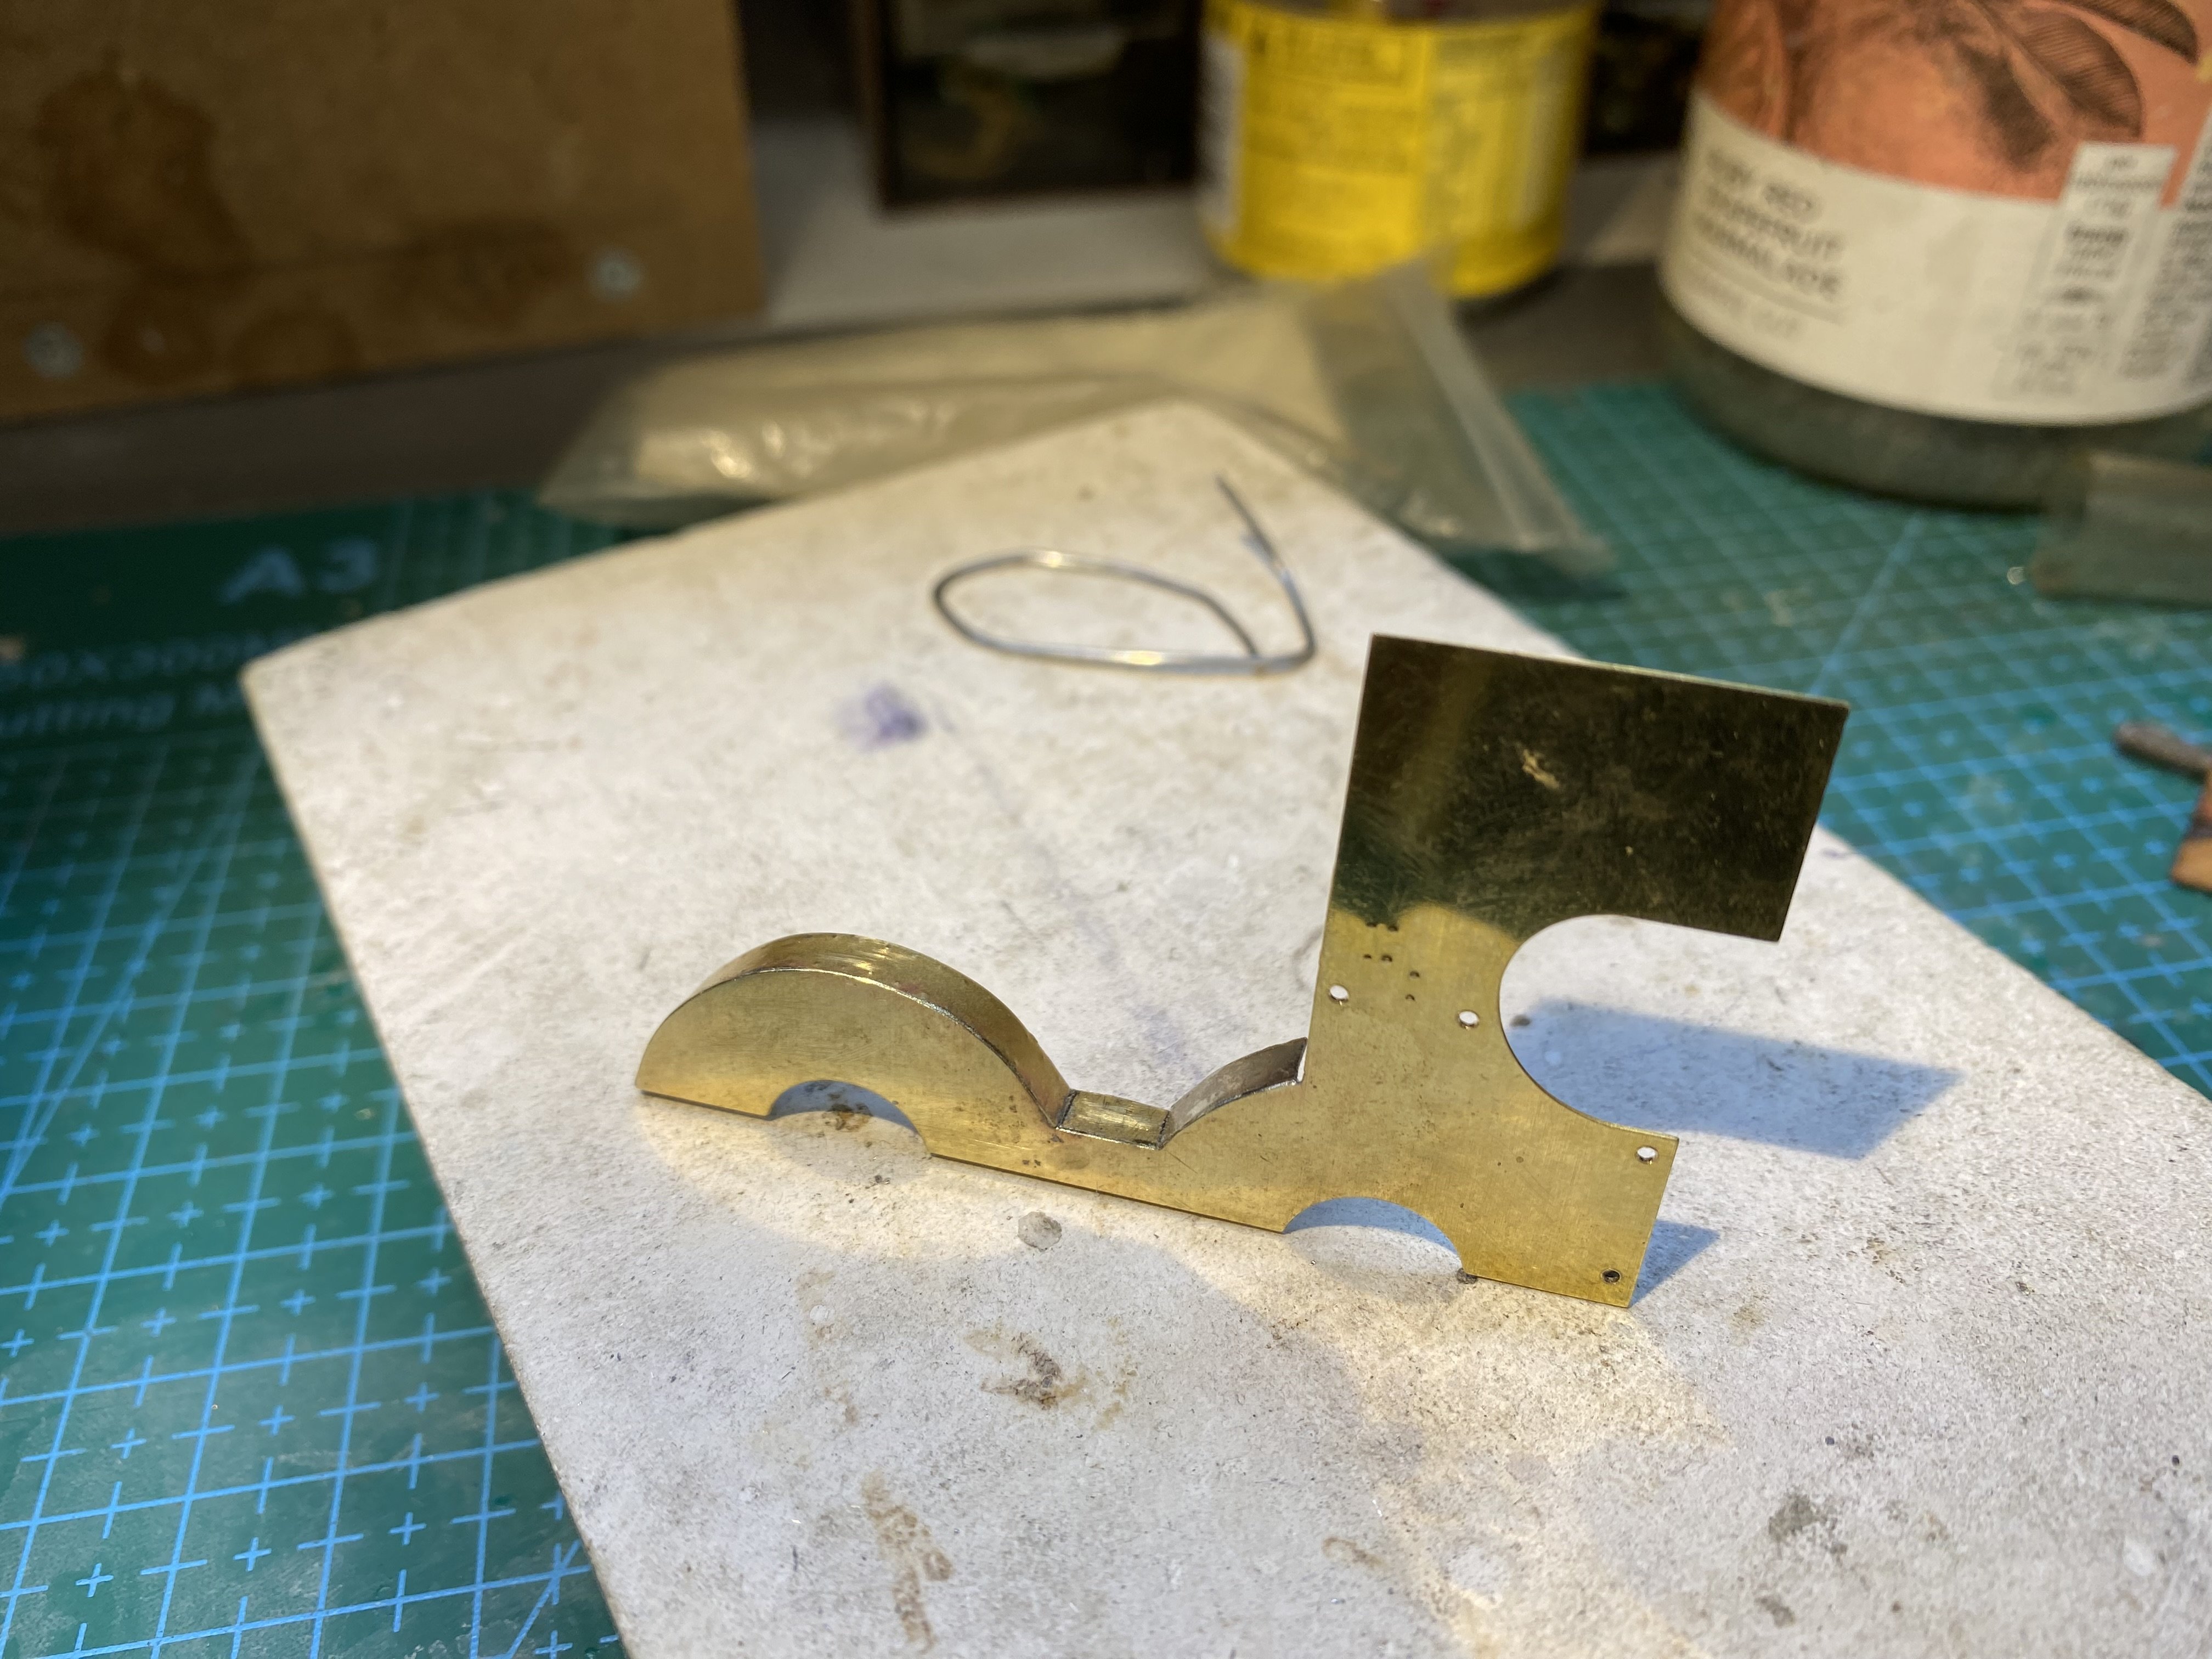
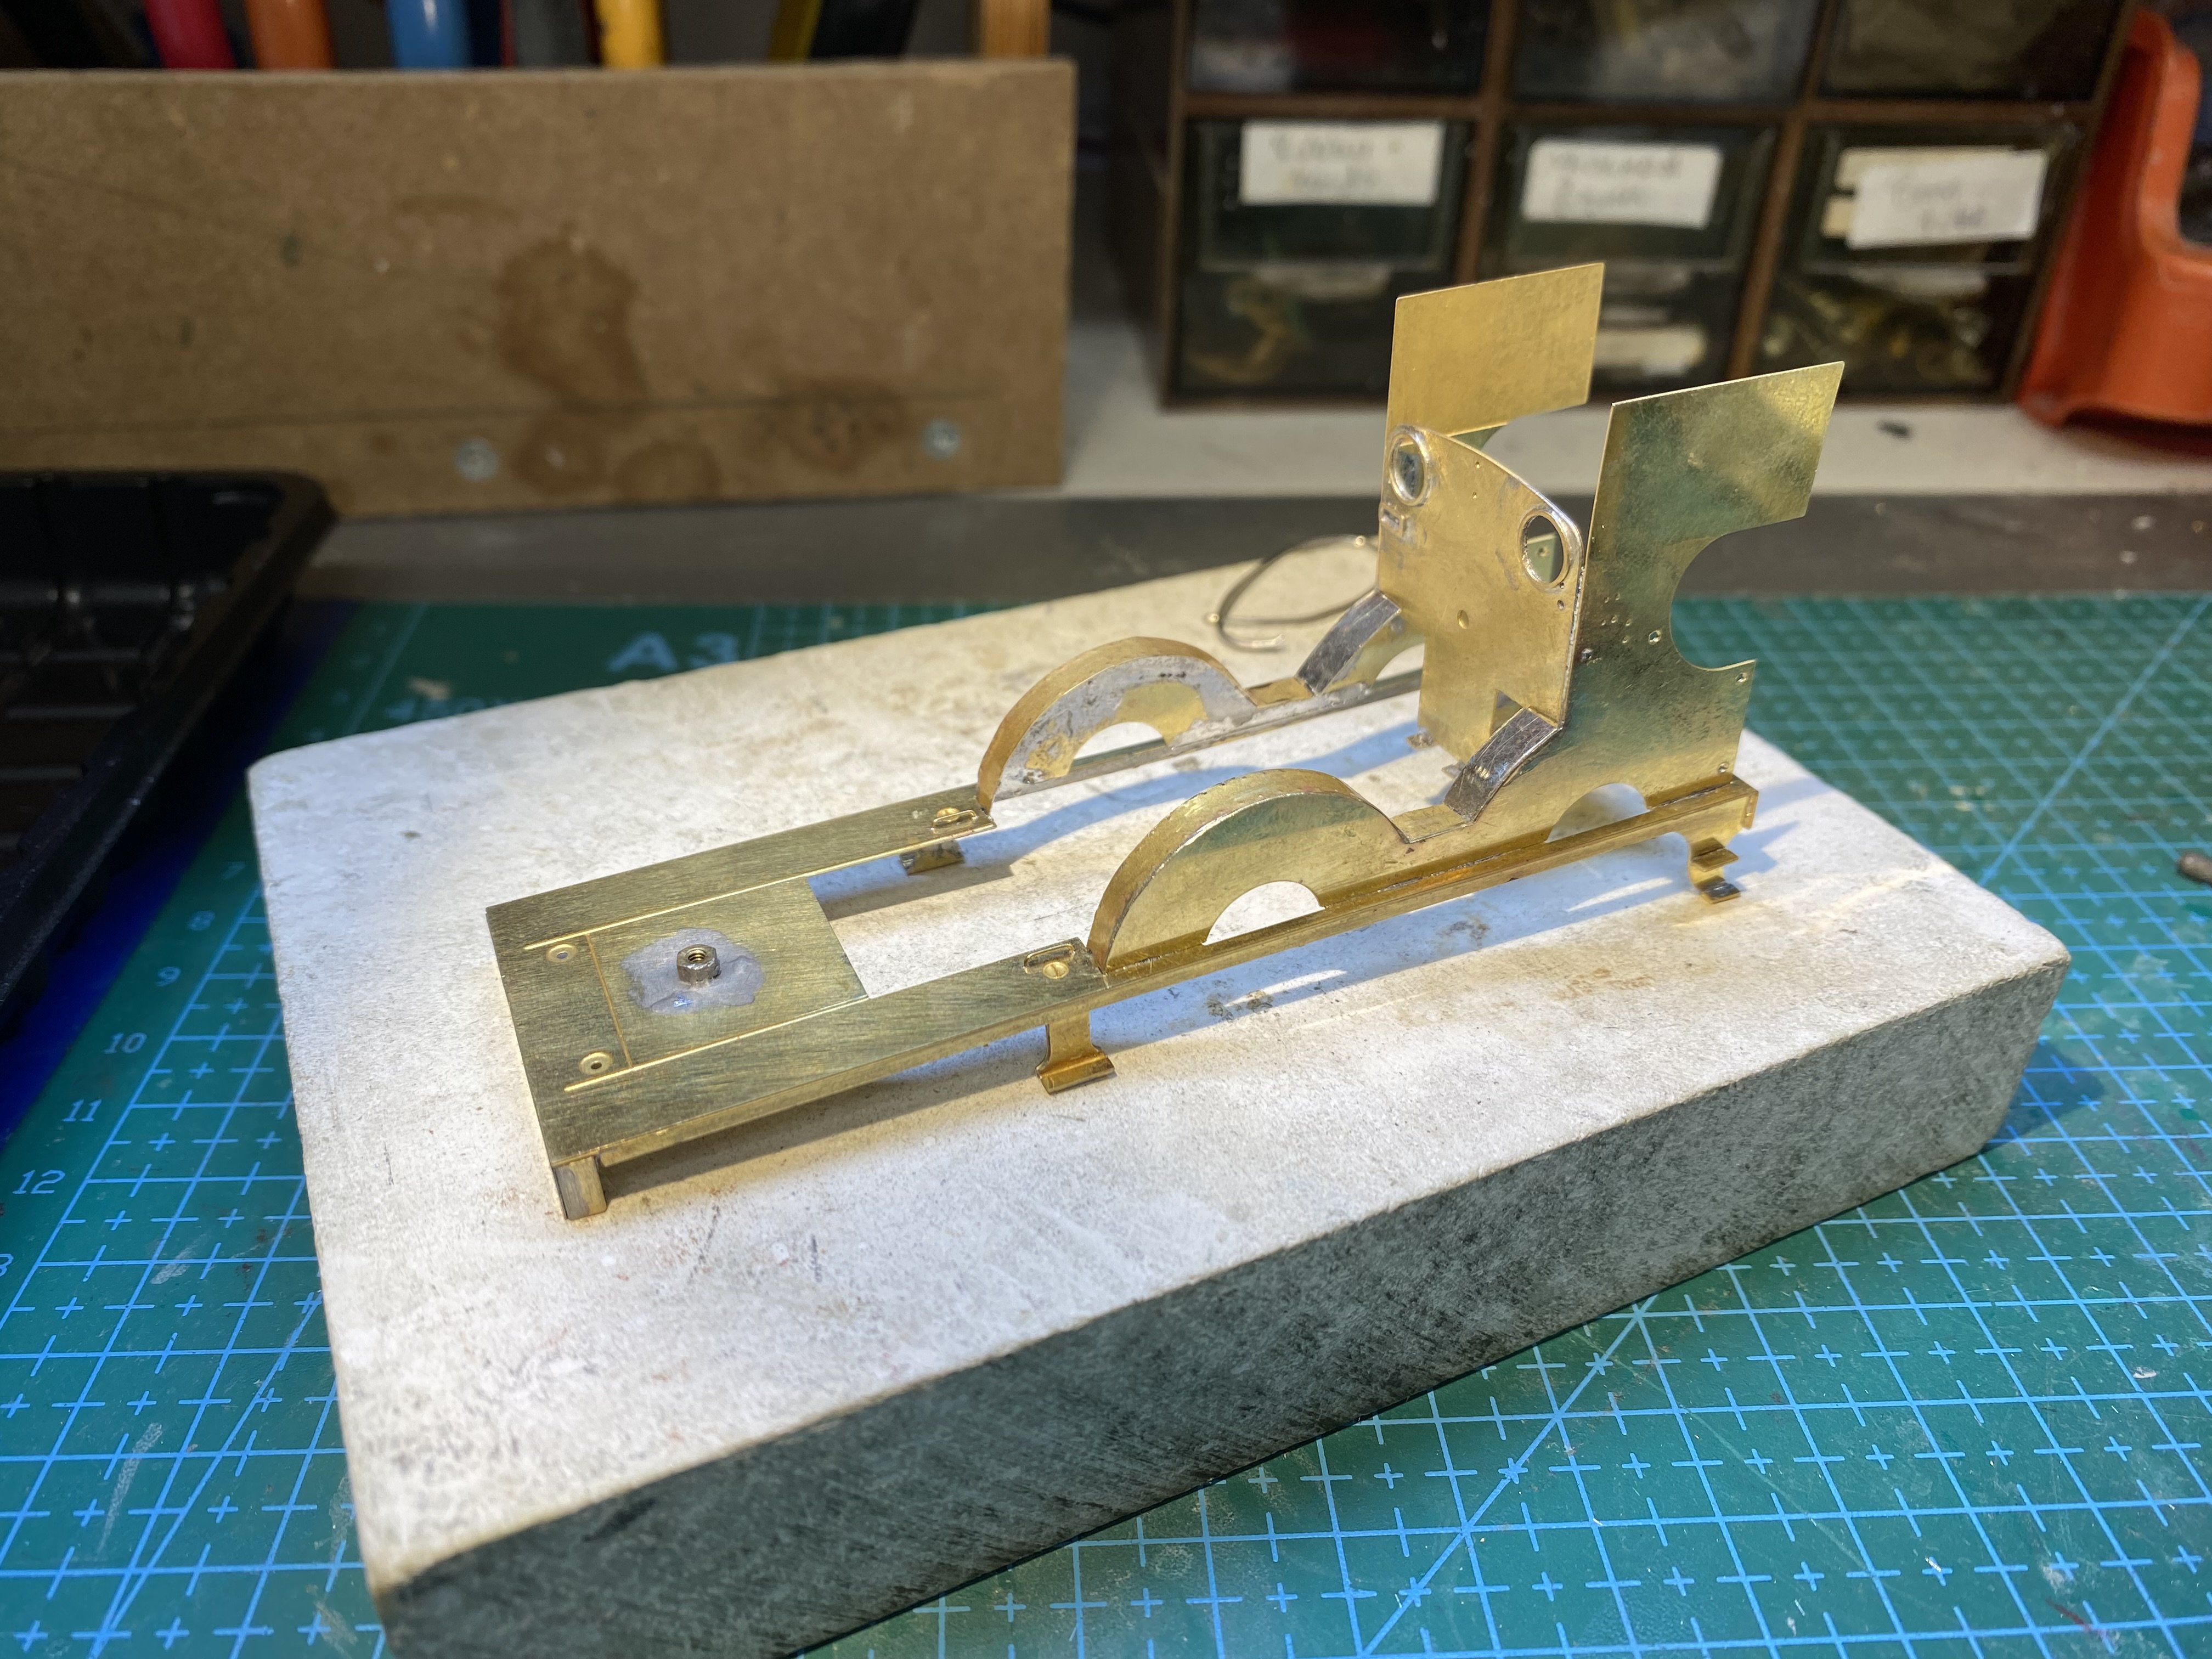
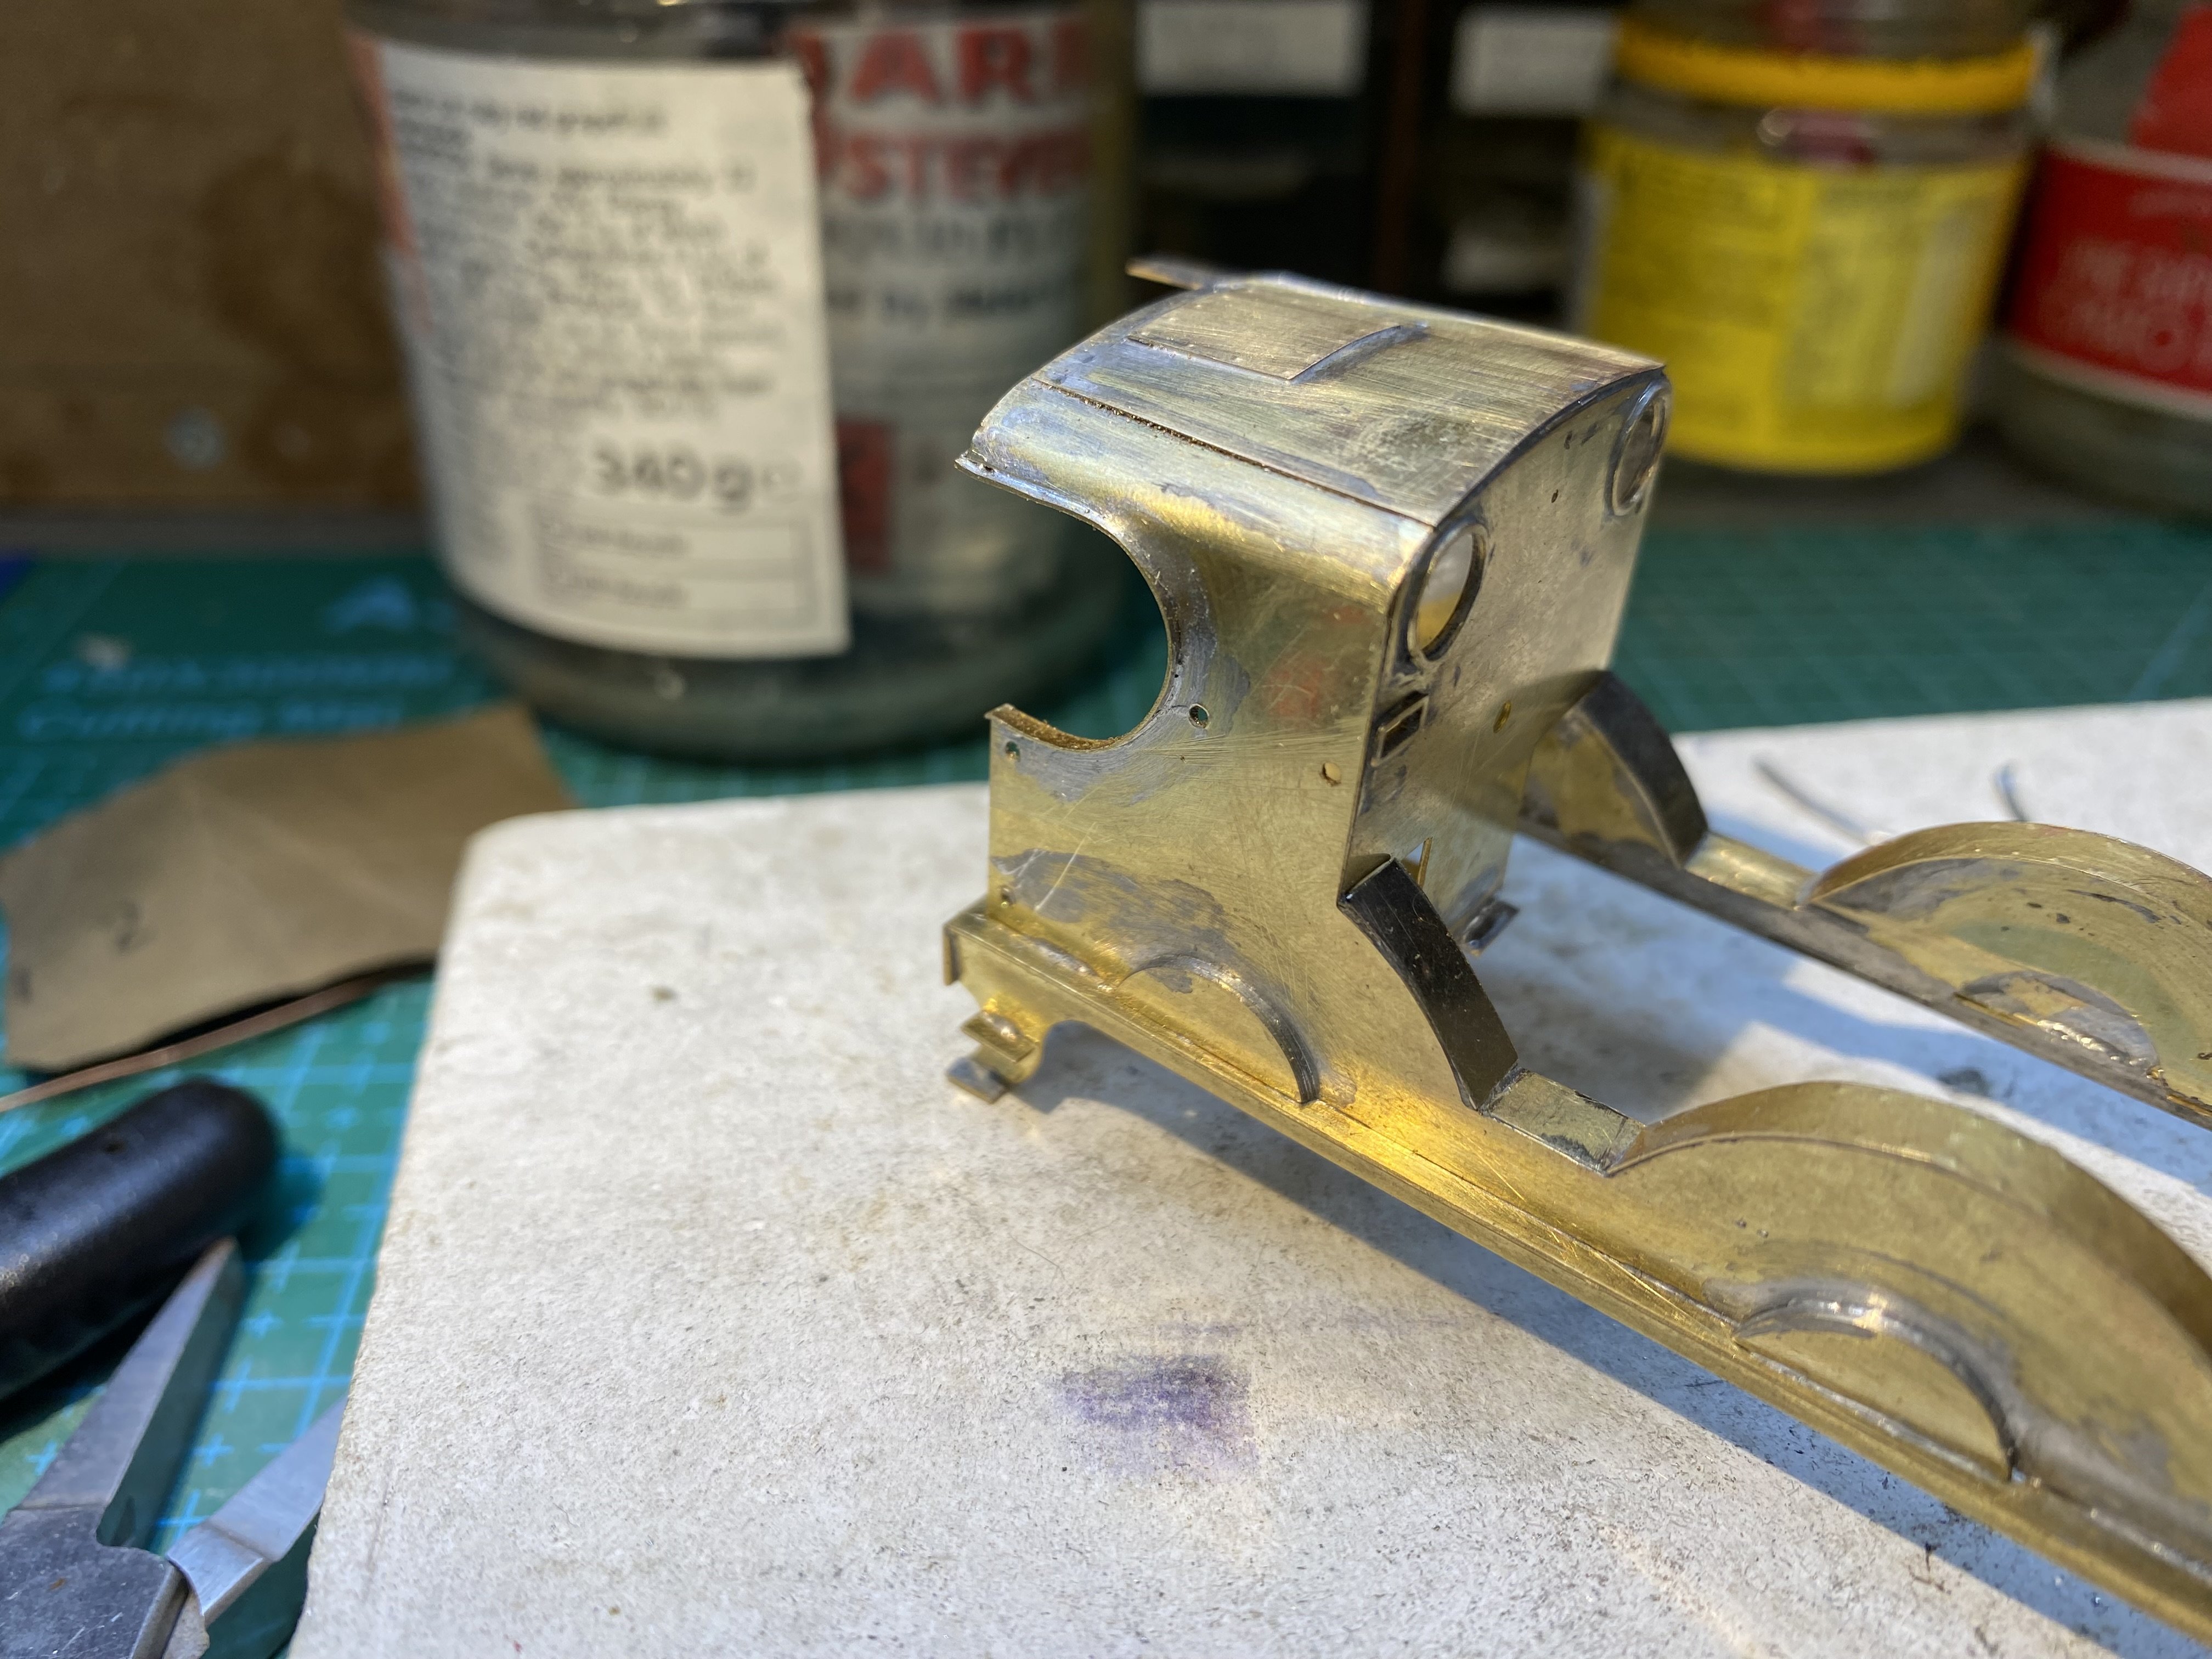
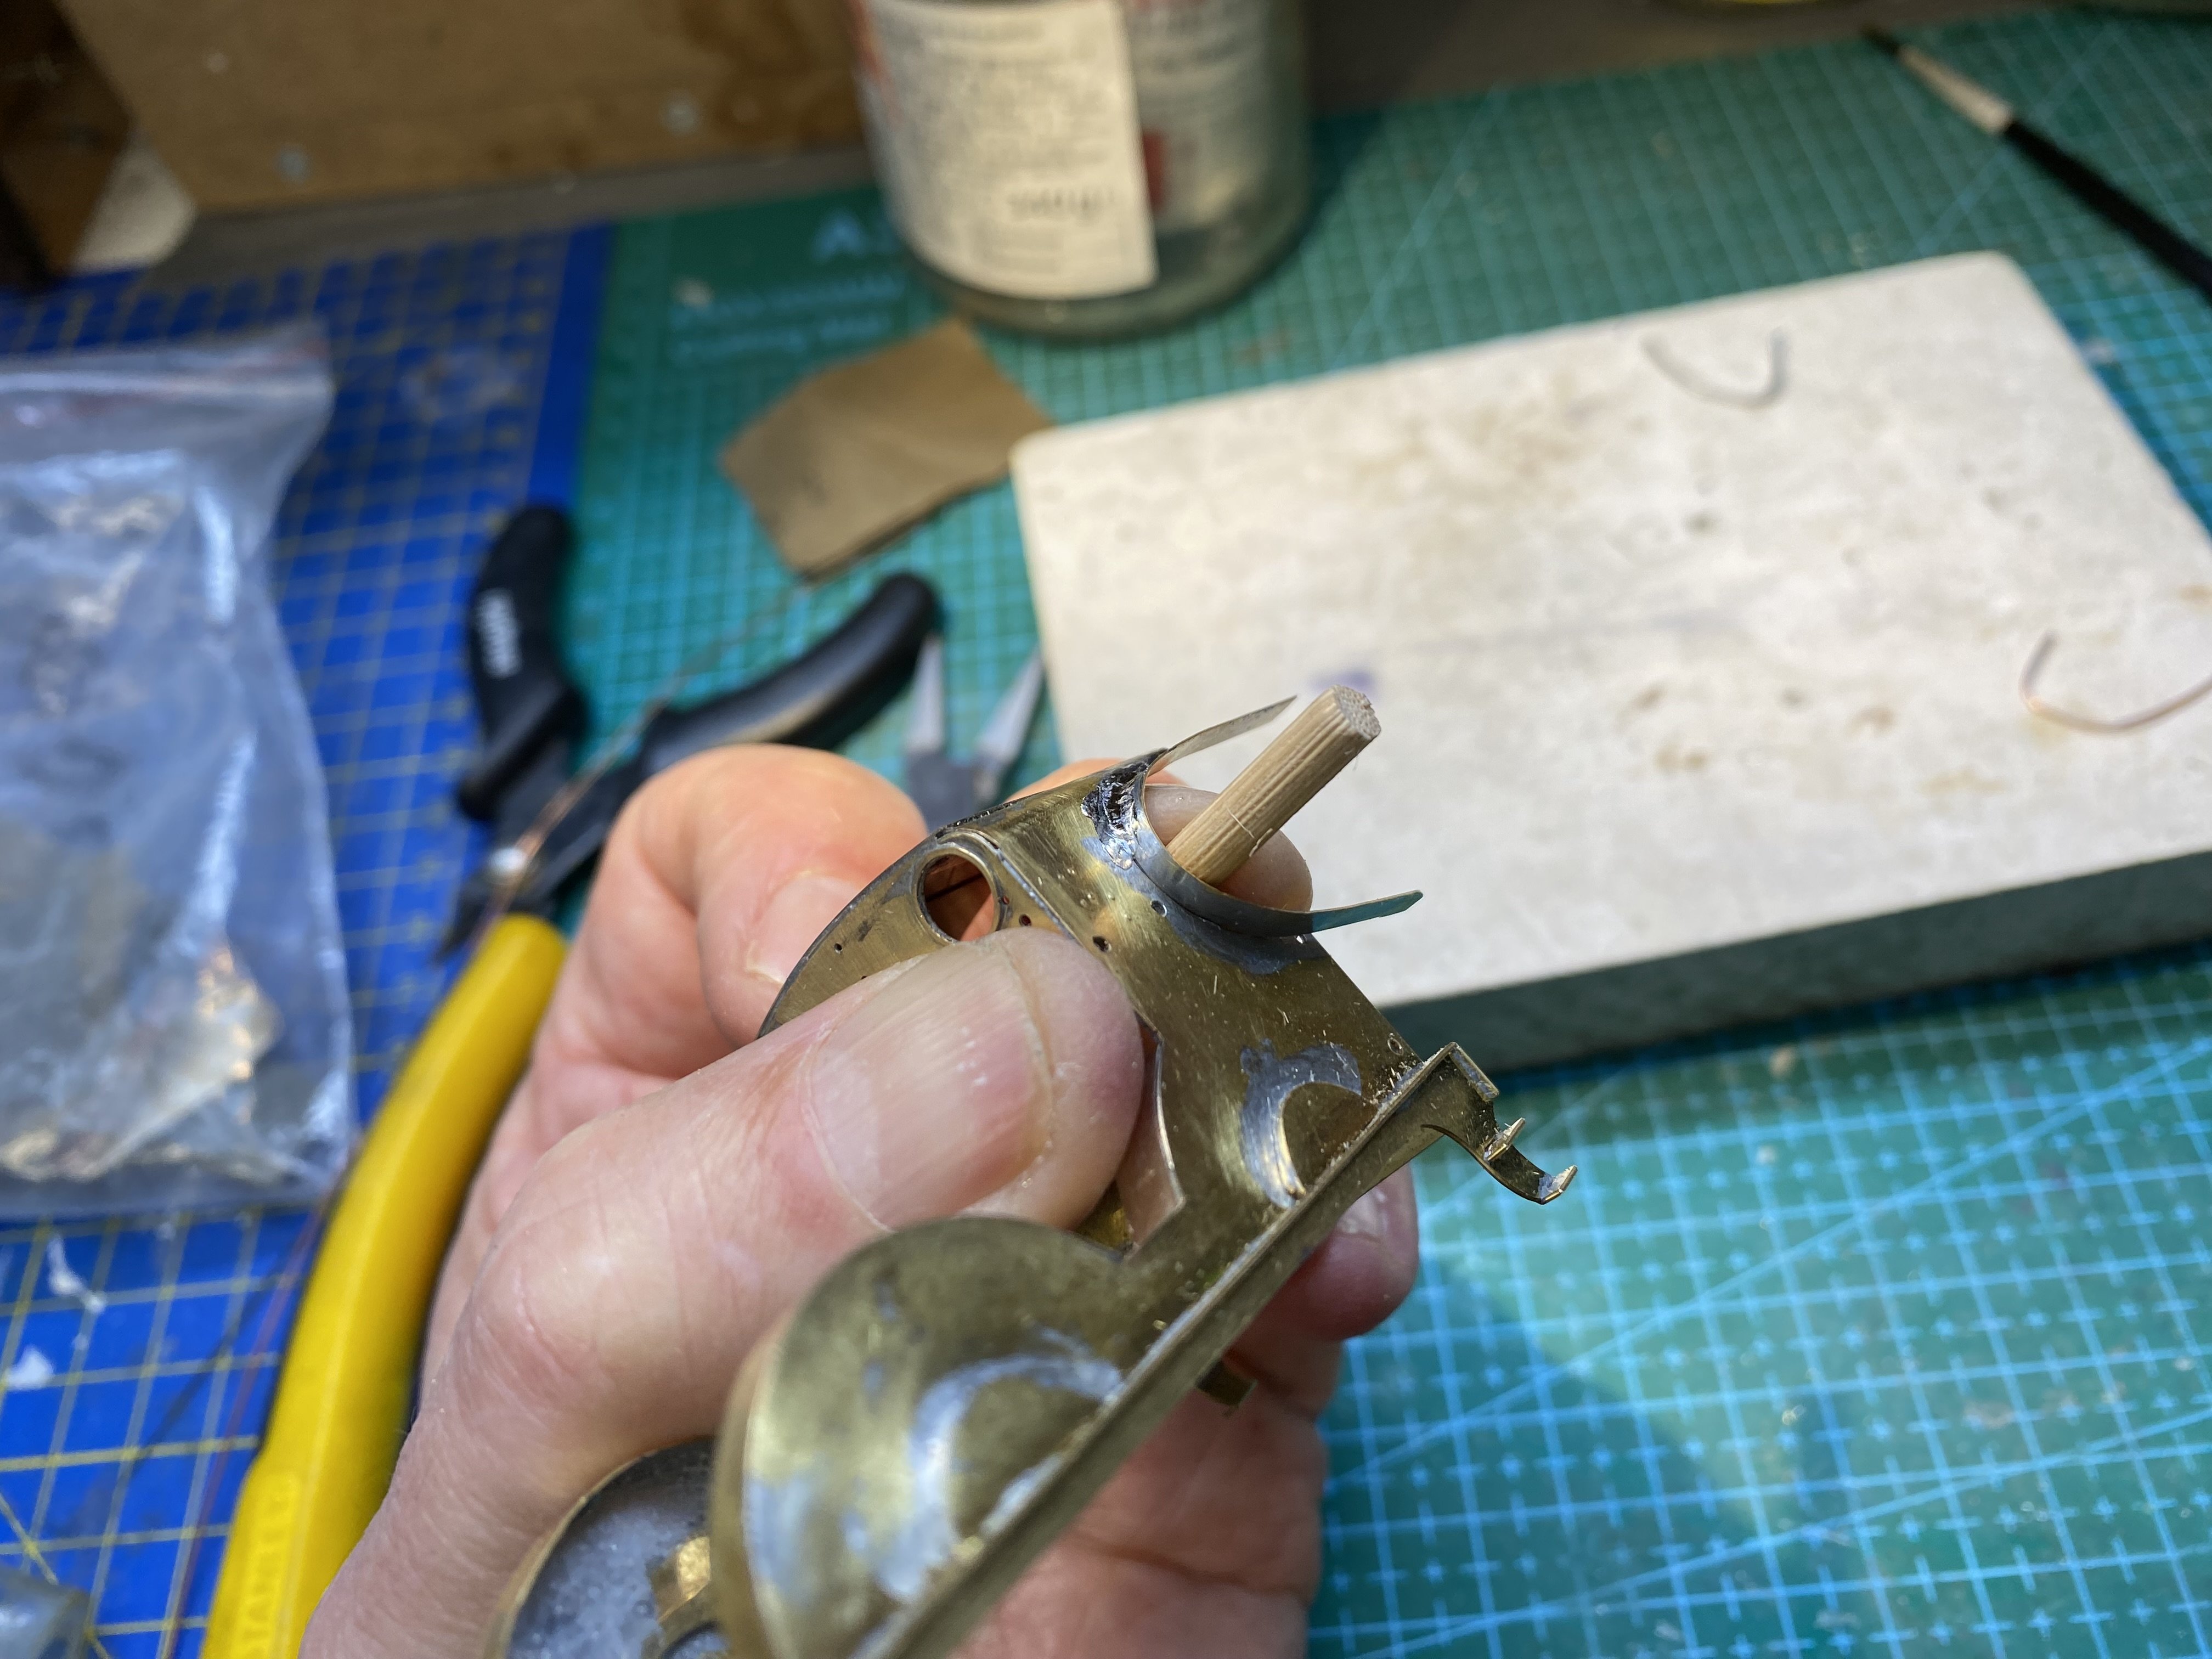
More work on Kieran's GNR(I) PPs. Pickups fitted and shouted at until they worked reliably... IMG_3925.MOV ... then a start made on the superstructure. Tricky stuff this, with a lot of soldering edge-to-edge in two planes. Difficult to keep it both straight and neat. This one will need a bit of filler here and there. The instructions recommend making cab beading from soft copper wire soldered round the edge of the curve, not on the face of the etch. I found this just about impossible to do neatly so resorted to my usual method of using scrap etch strip and filing it back. The little crankpin splashers were a job in themselves, each one laminated from two bits then soldered in place on the main splashers. I spent as much time puzzling over the instructions as I did making them. As is often the case with etched kits, head scratching and soldering require roughly the same amounts of time.
10 points
-
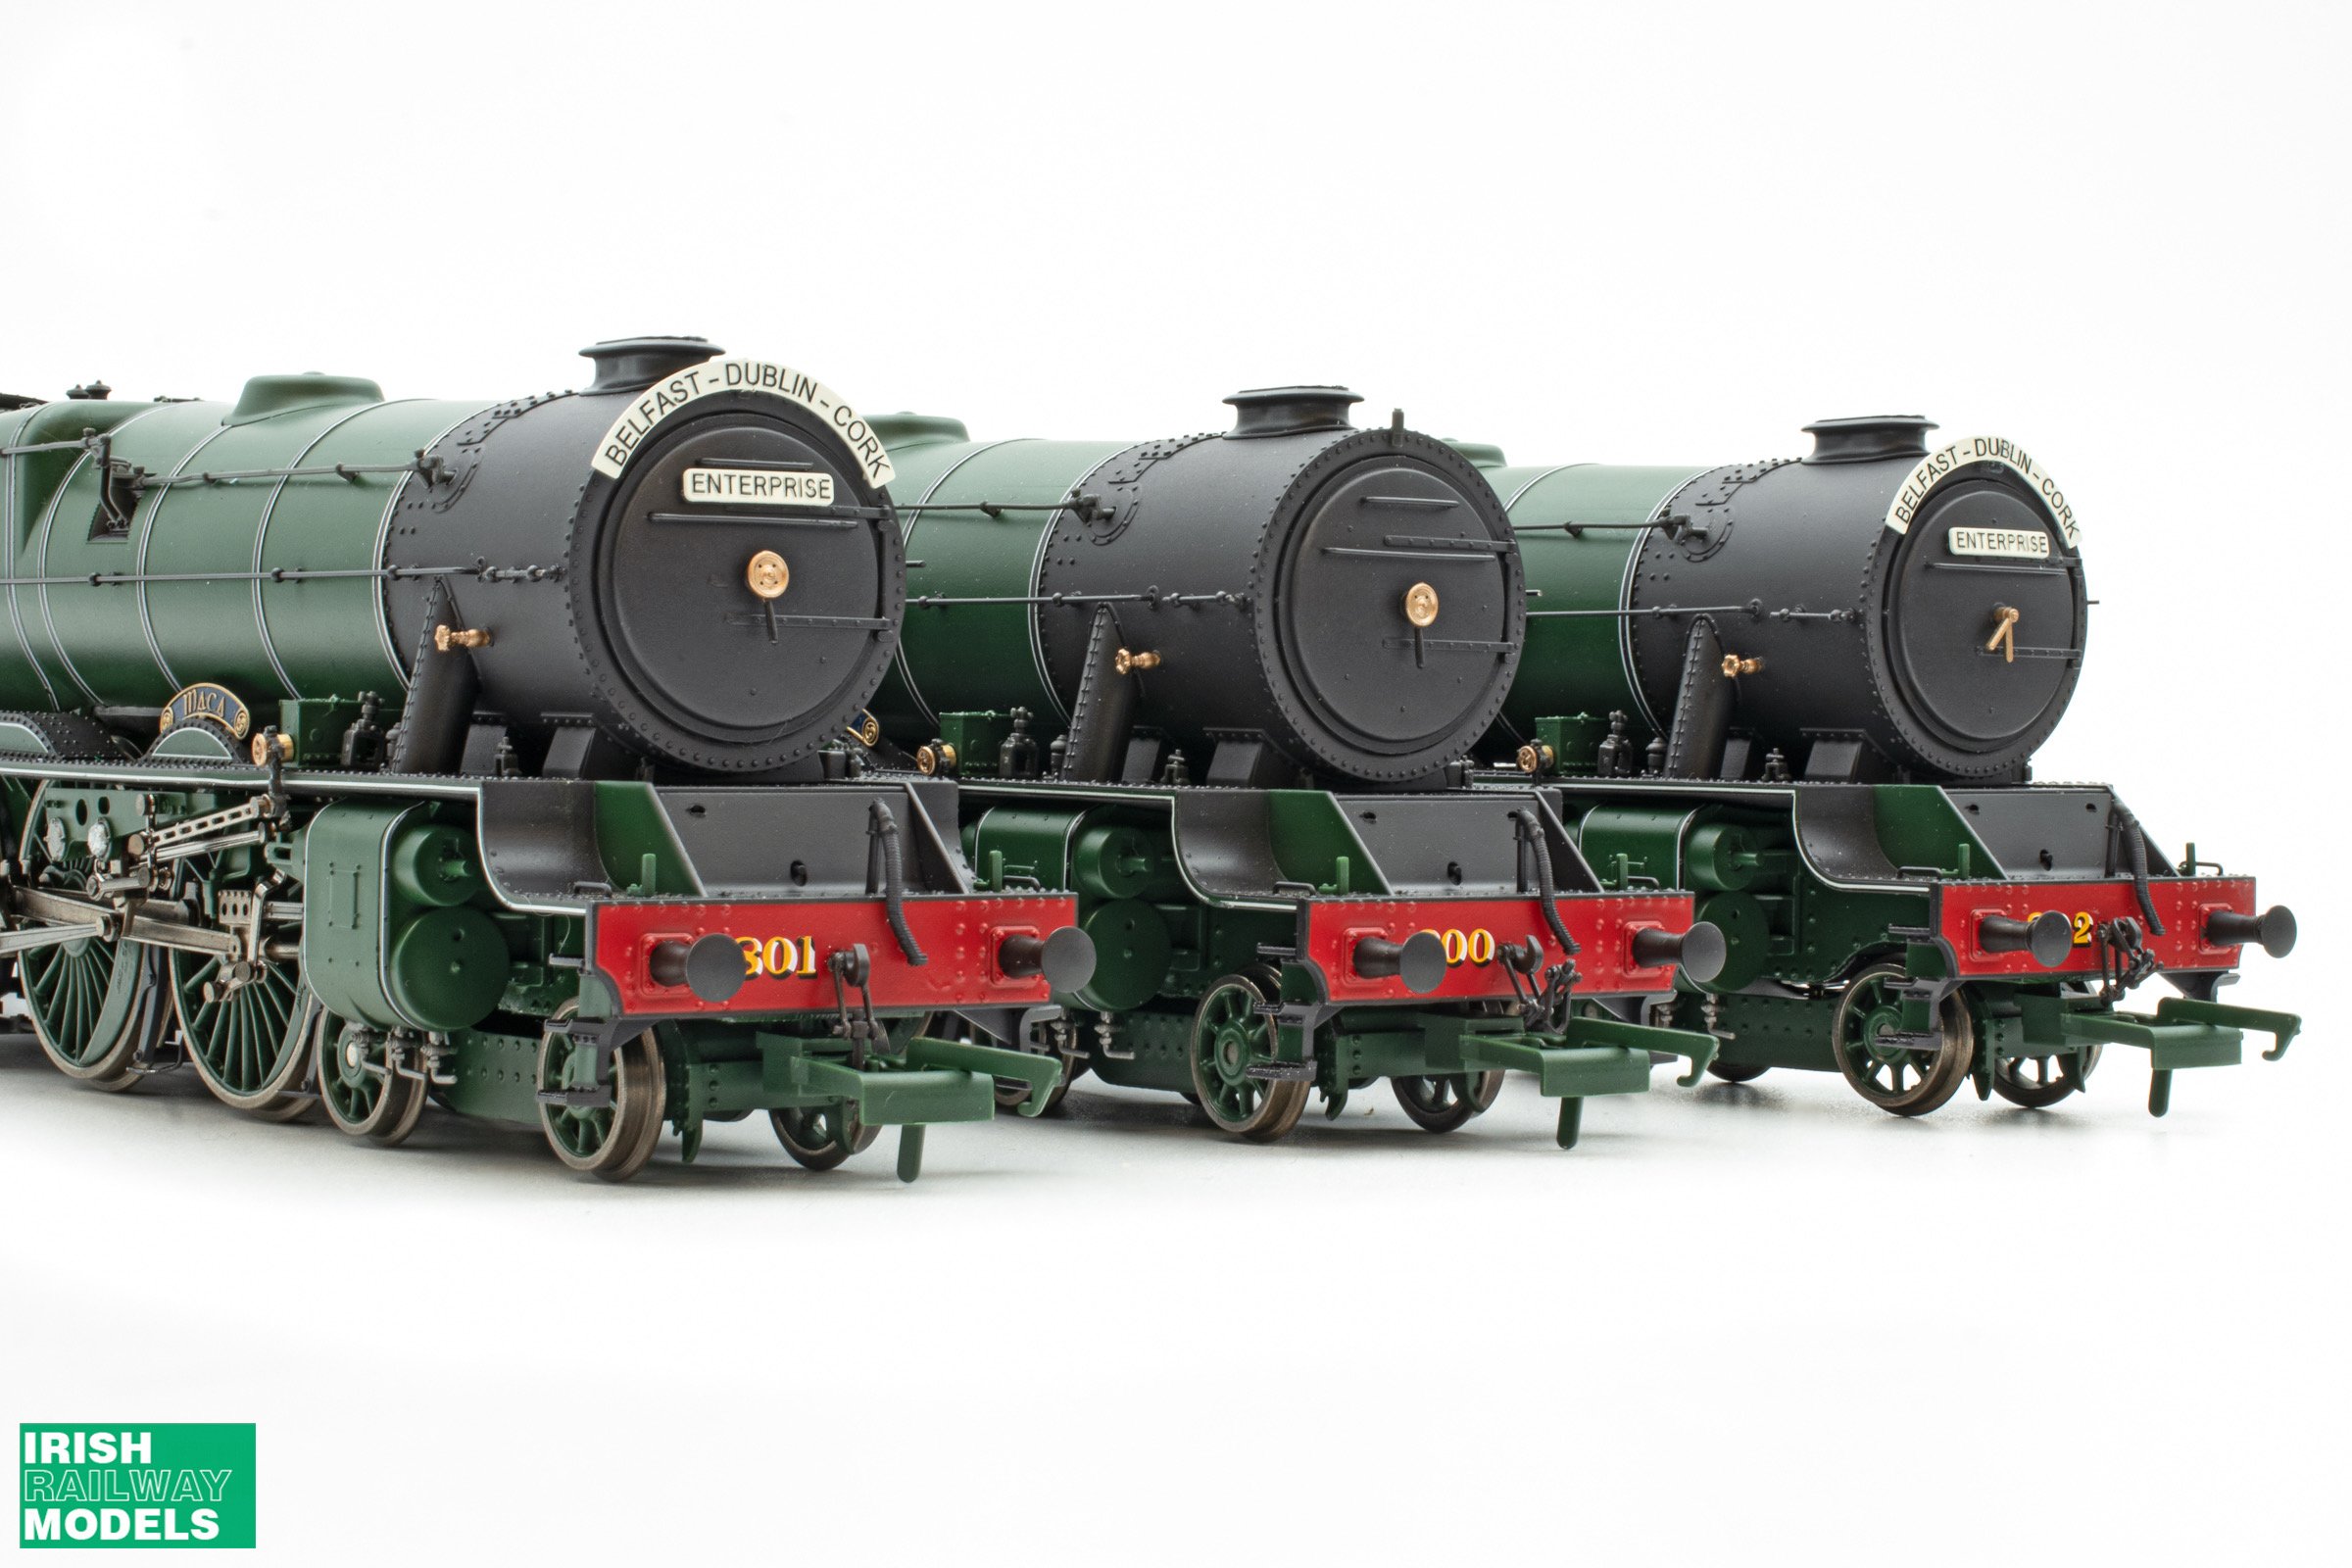
The photos above are at Inchicore as the first D class was being built, hopefully one day the Accuragronk will spawn an Irish variant? https://irishrailwaymodeller.com/topic/1540-d301-class/10 points
-
Roofing tomorrow. Cheers Darius
10 points
-
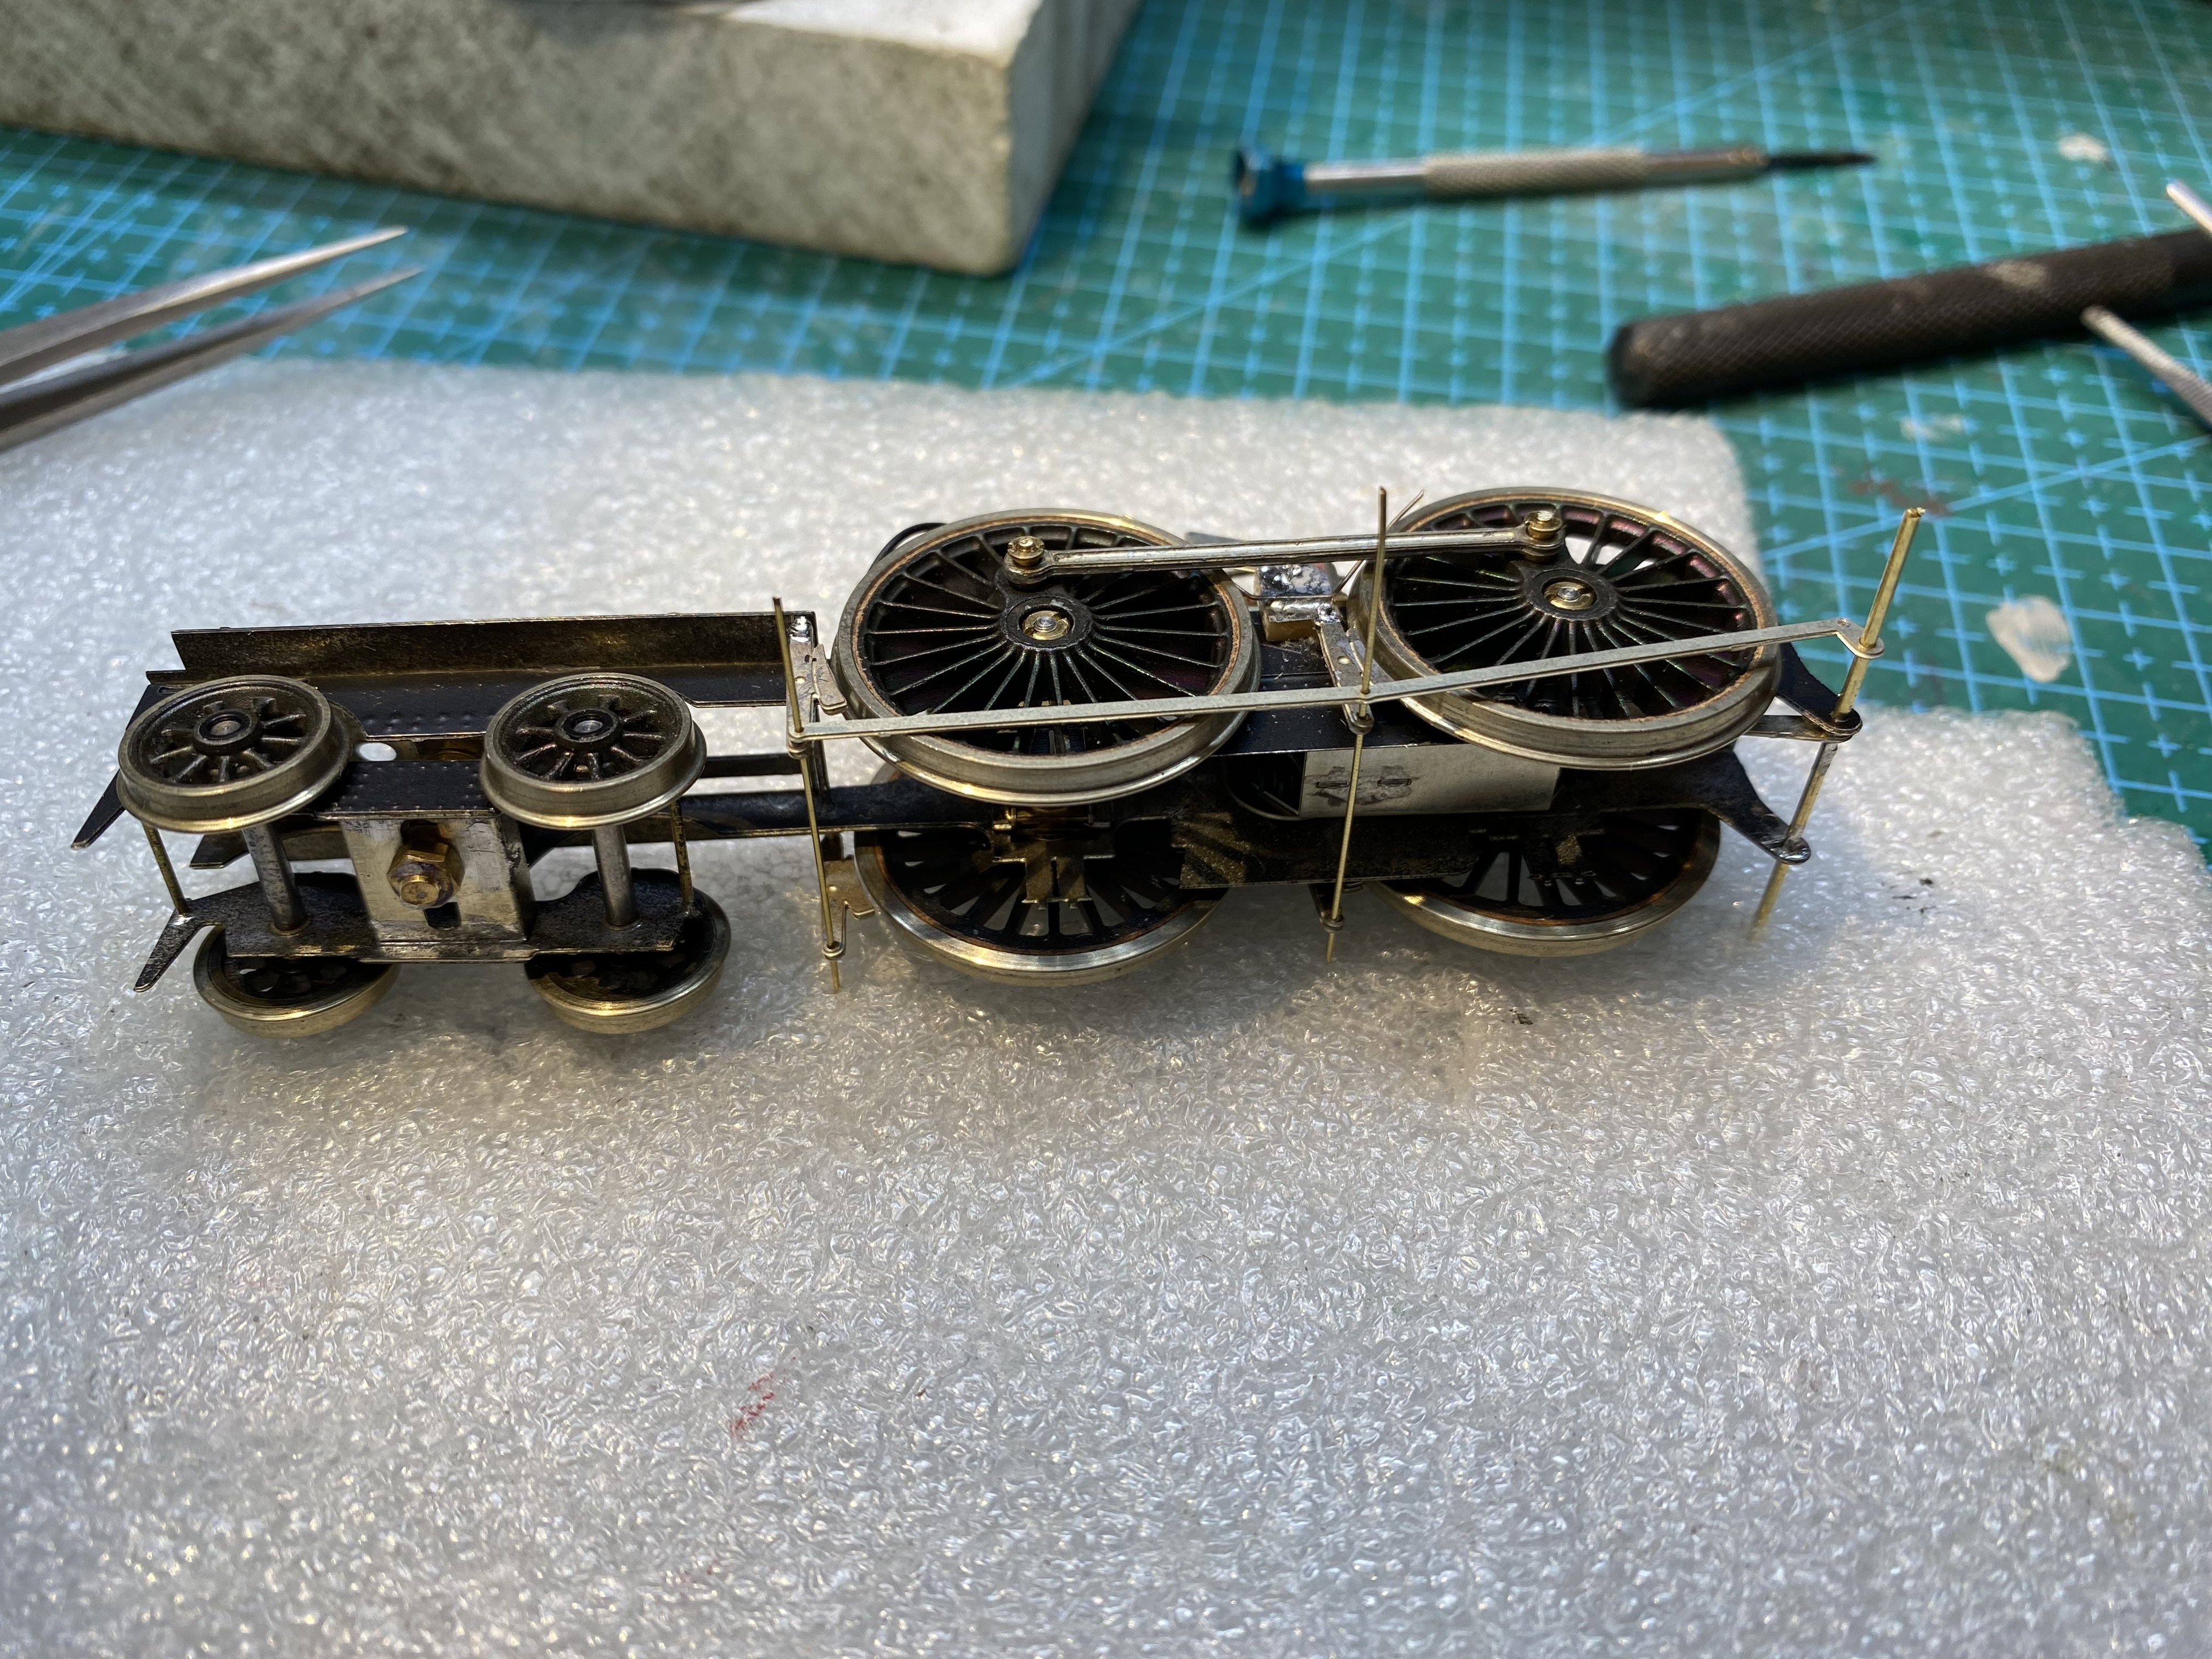
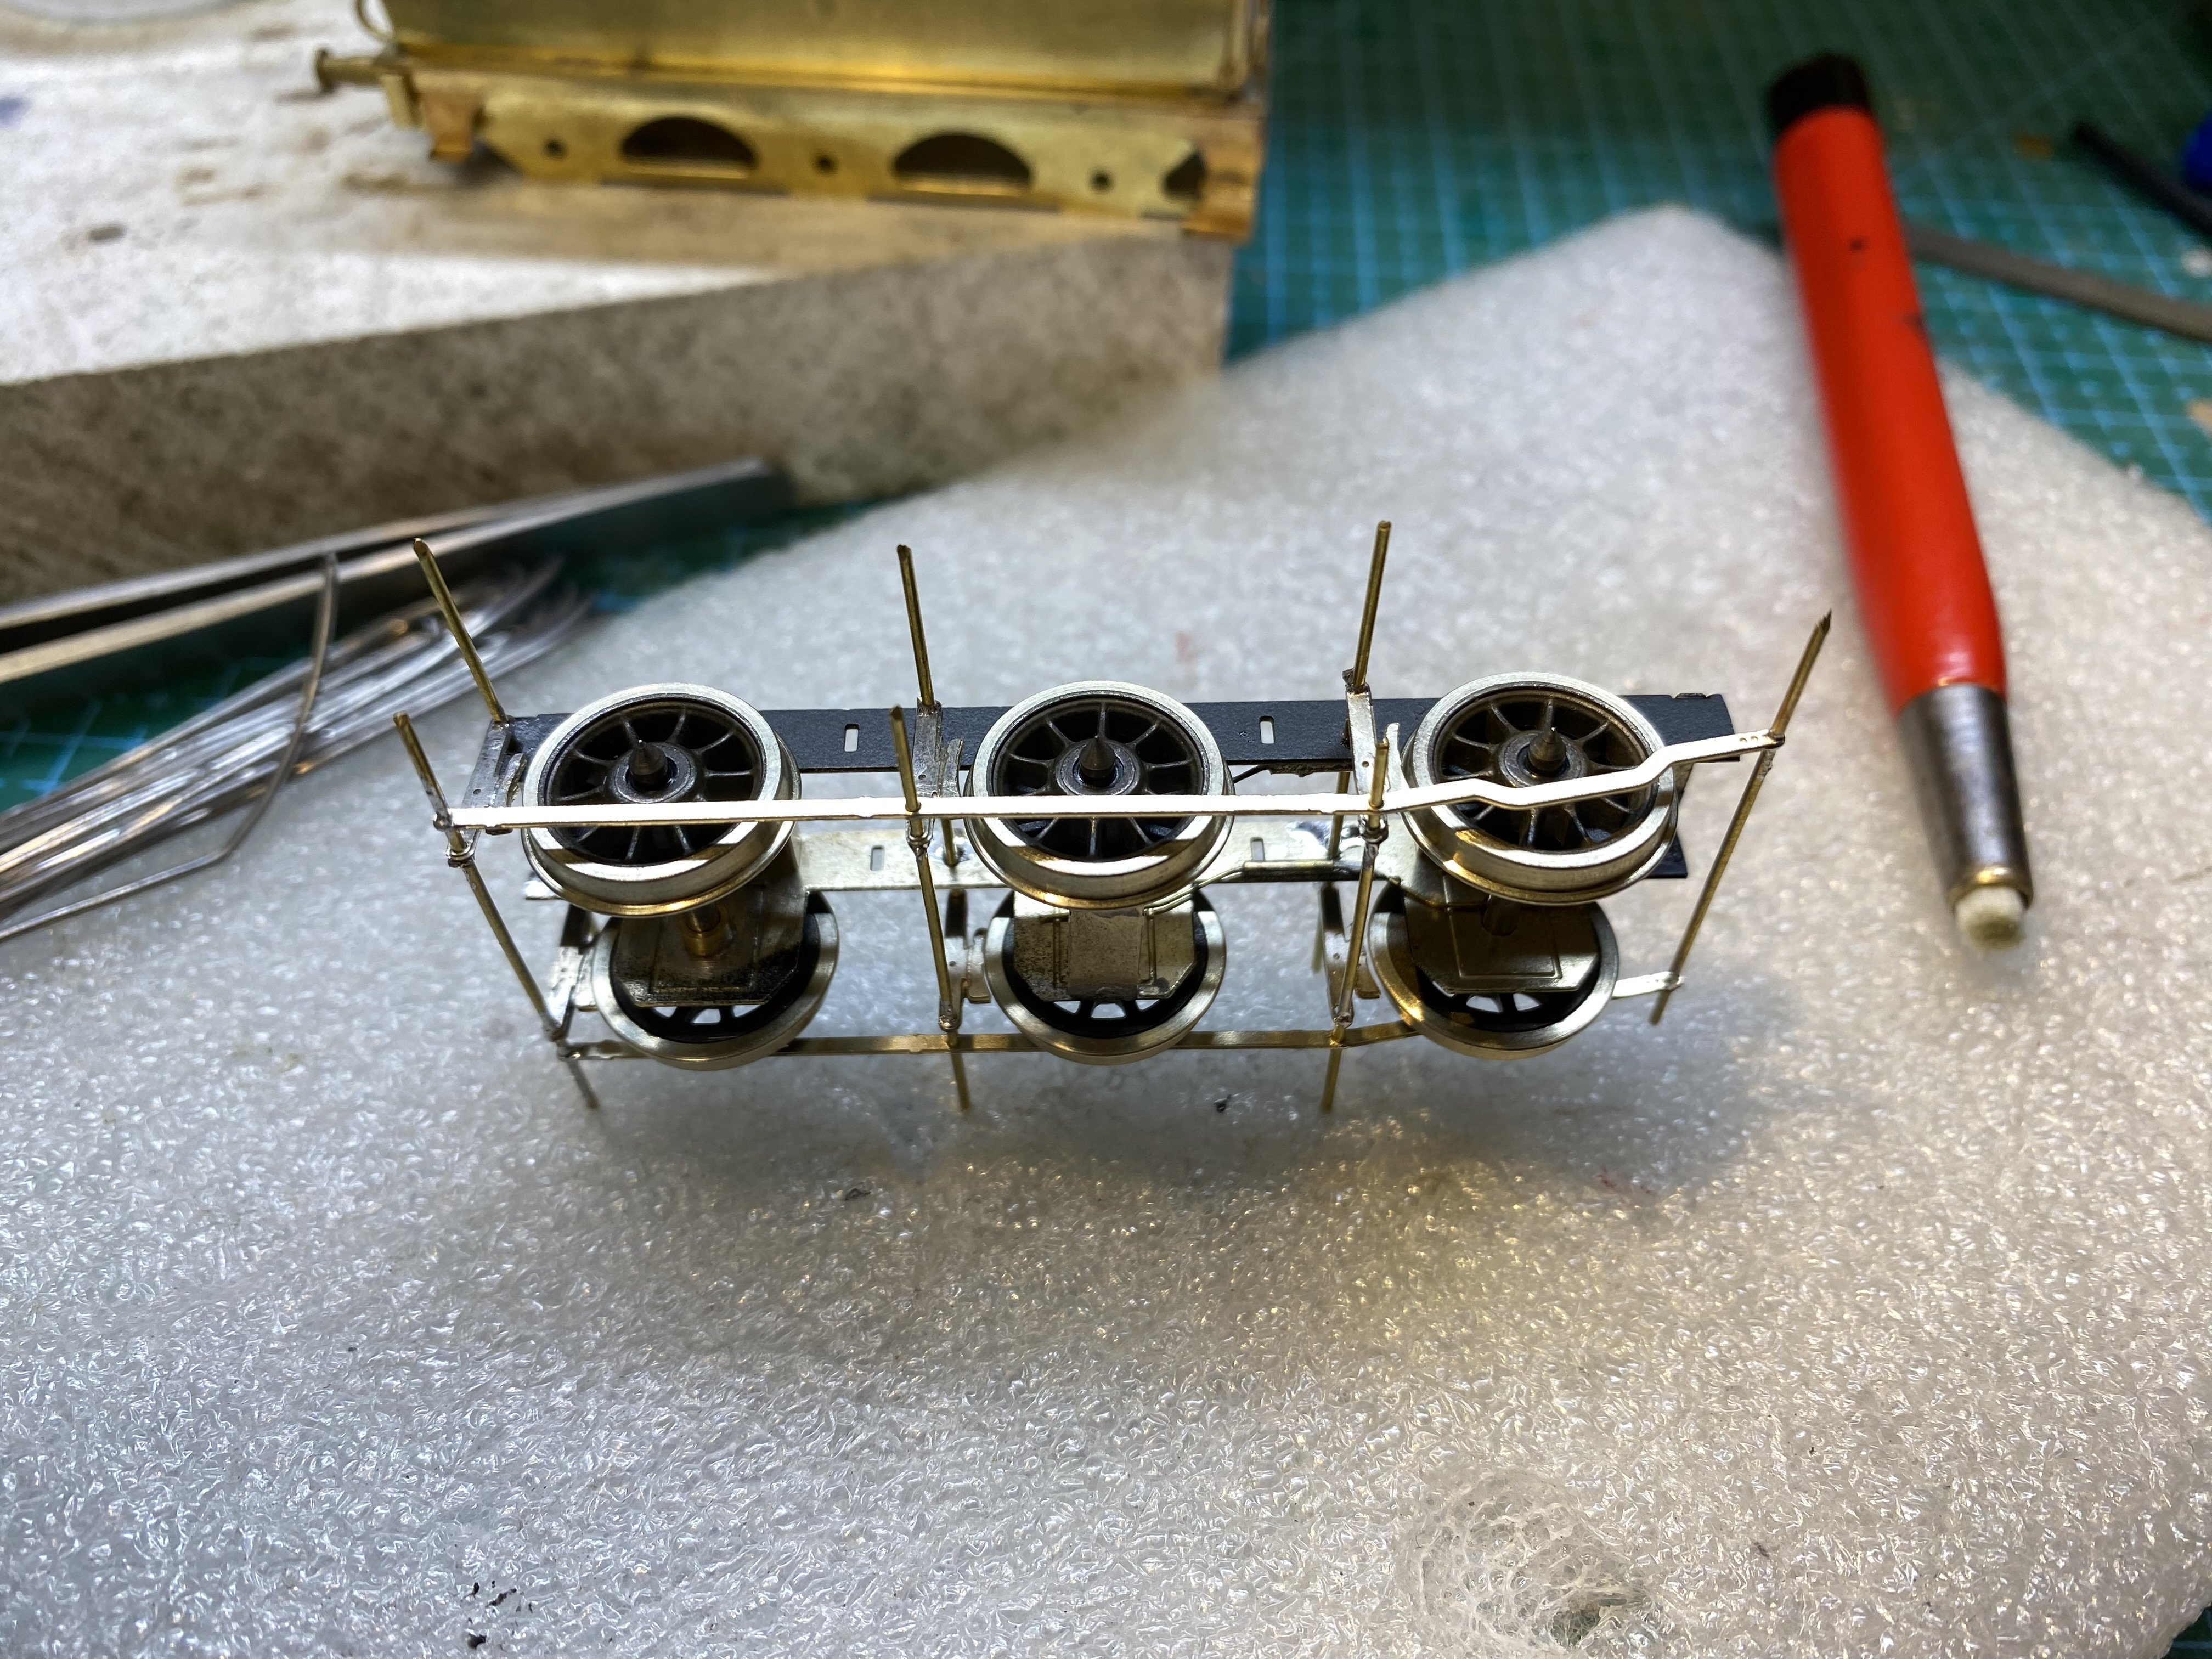
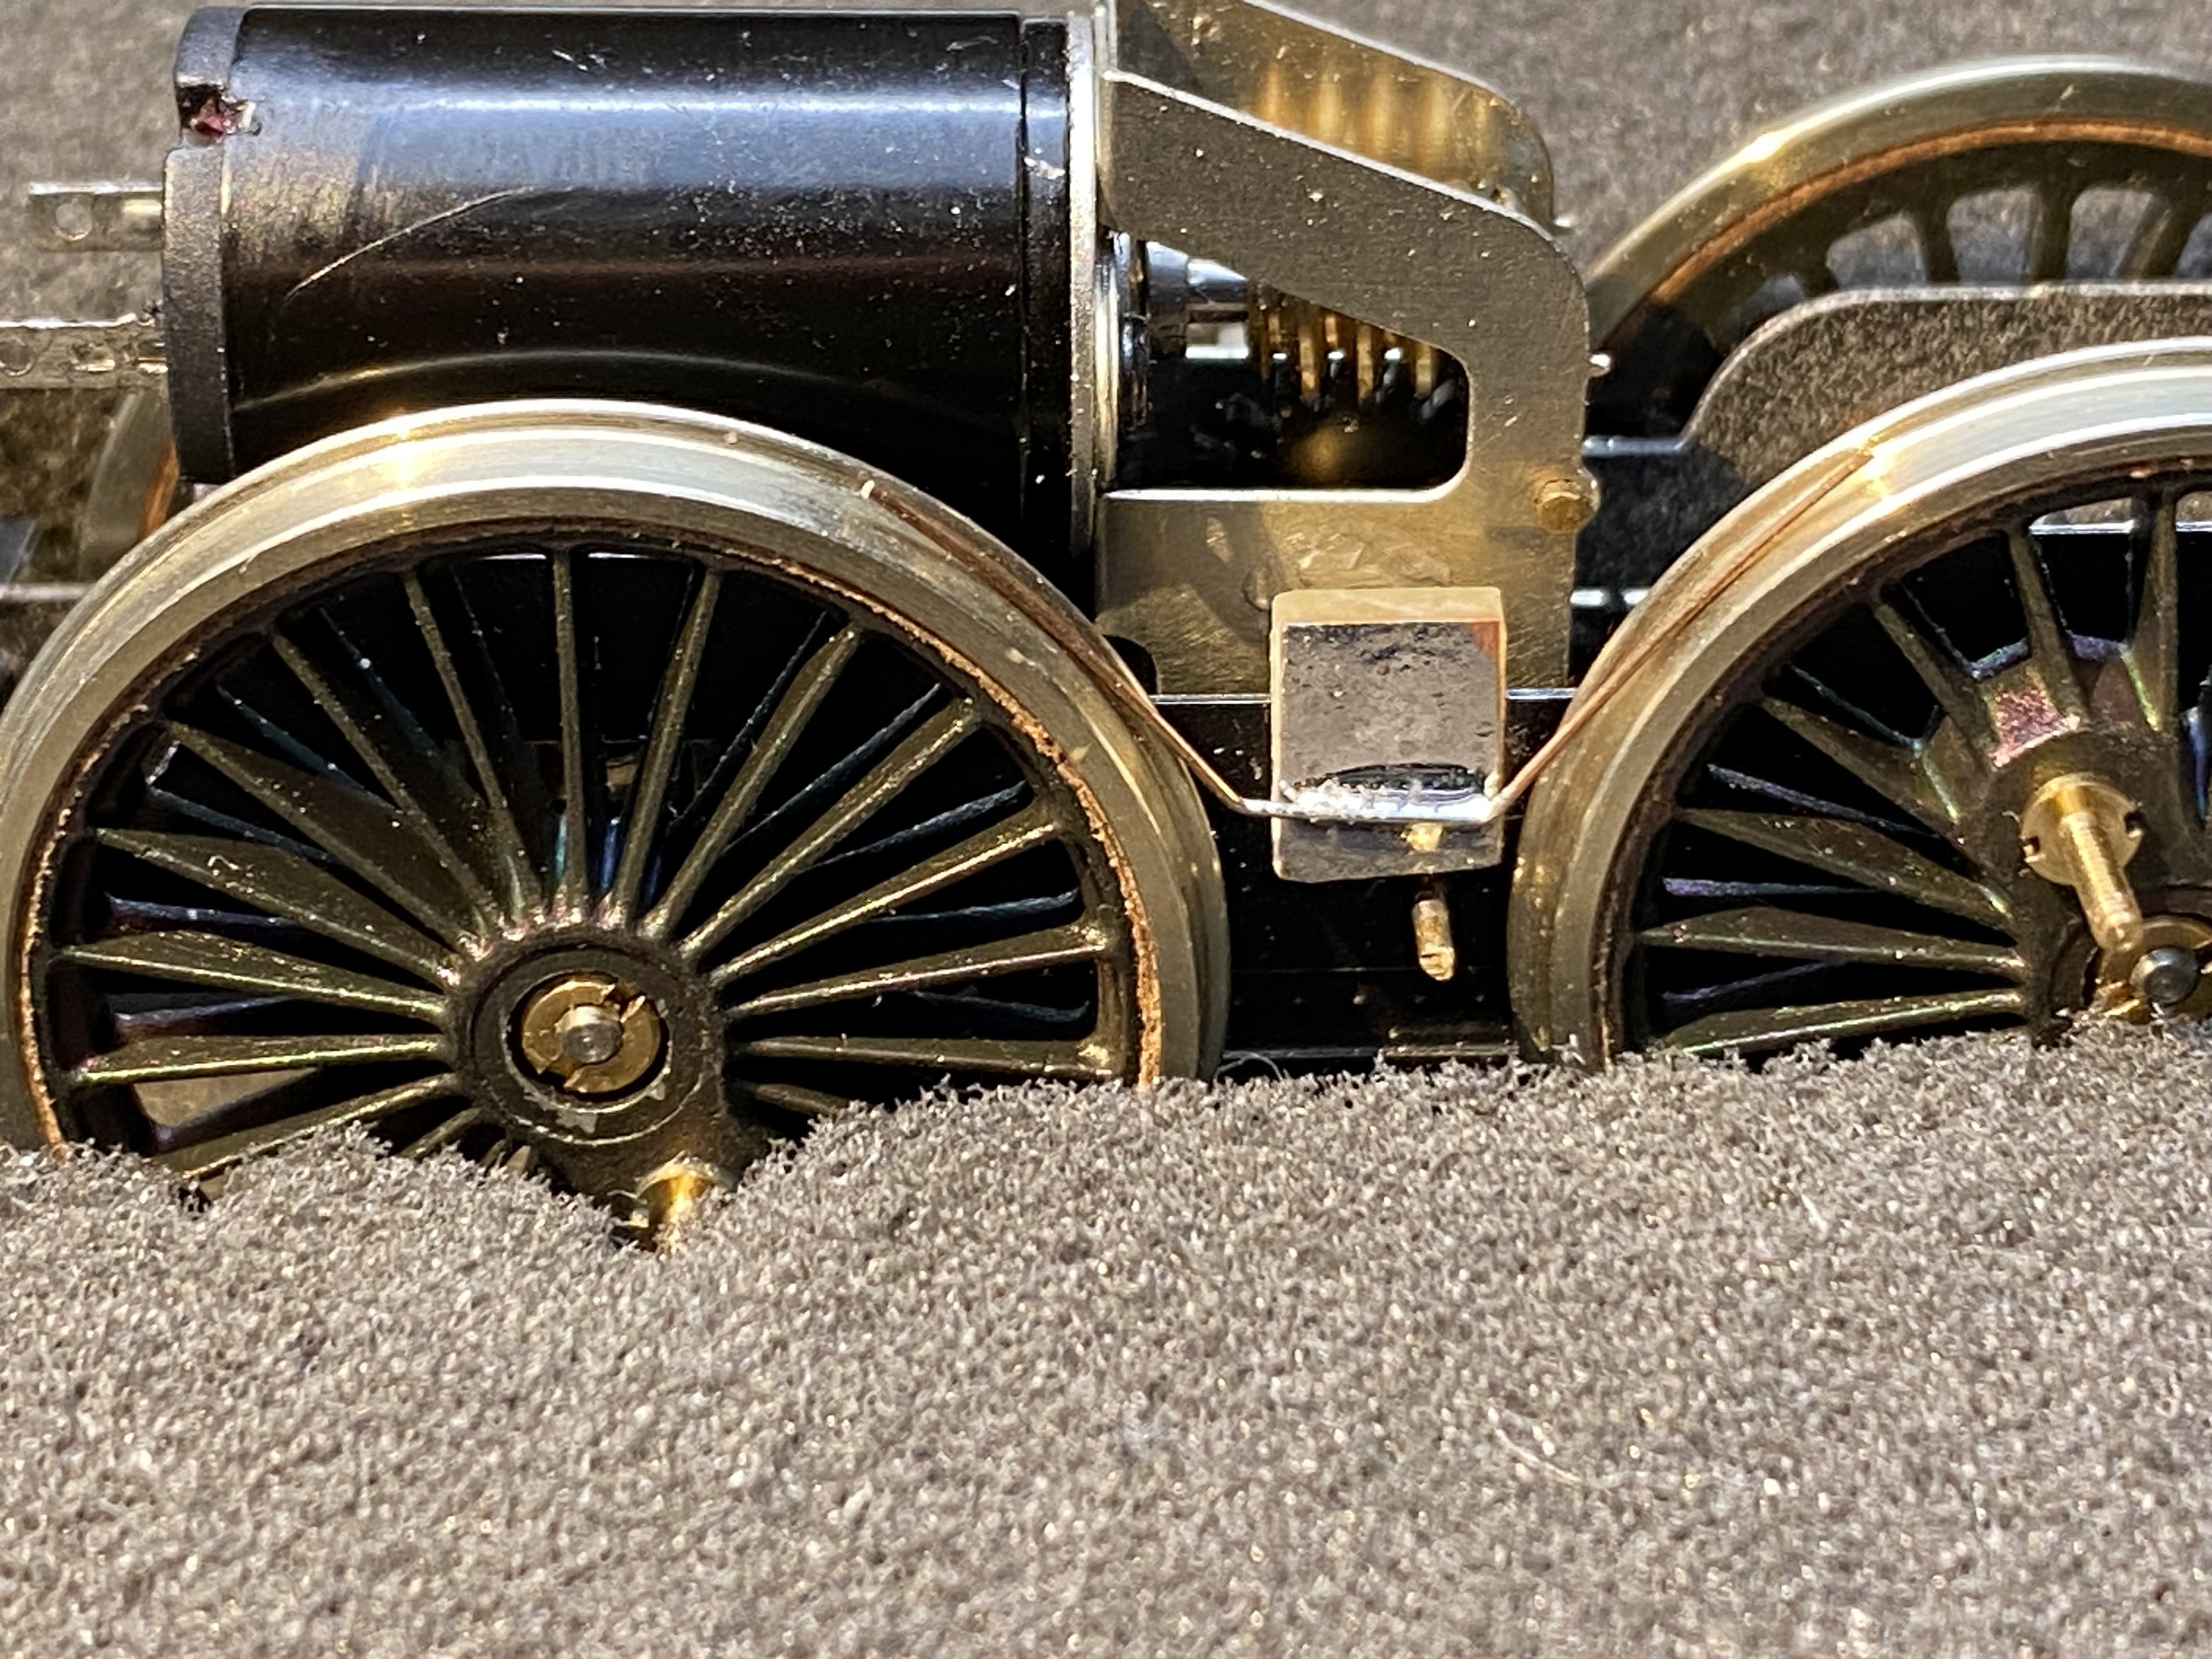
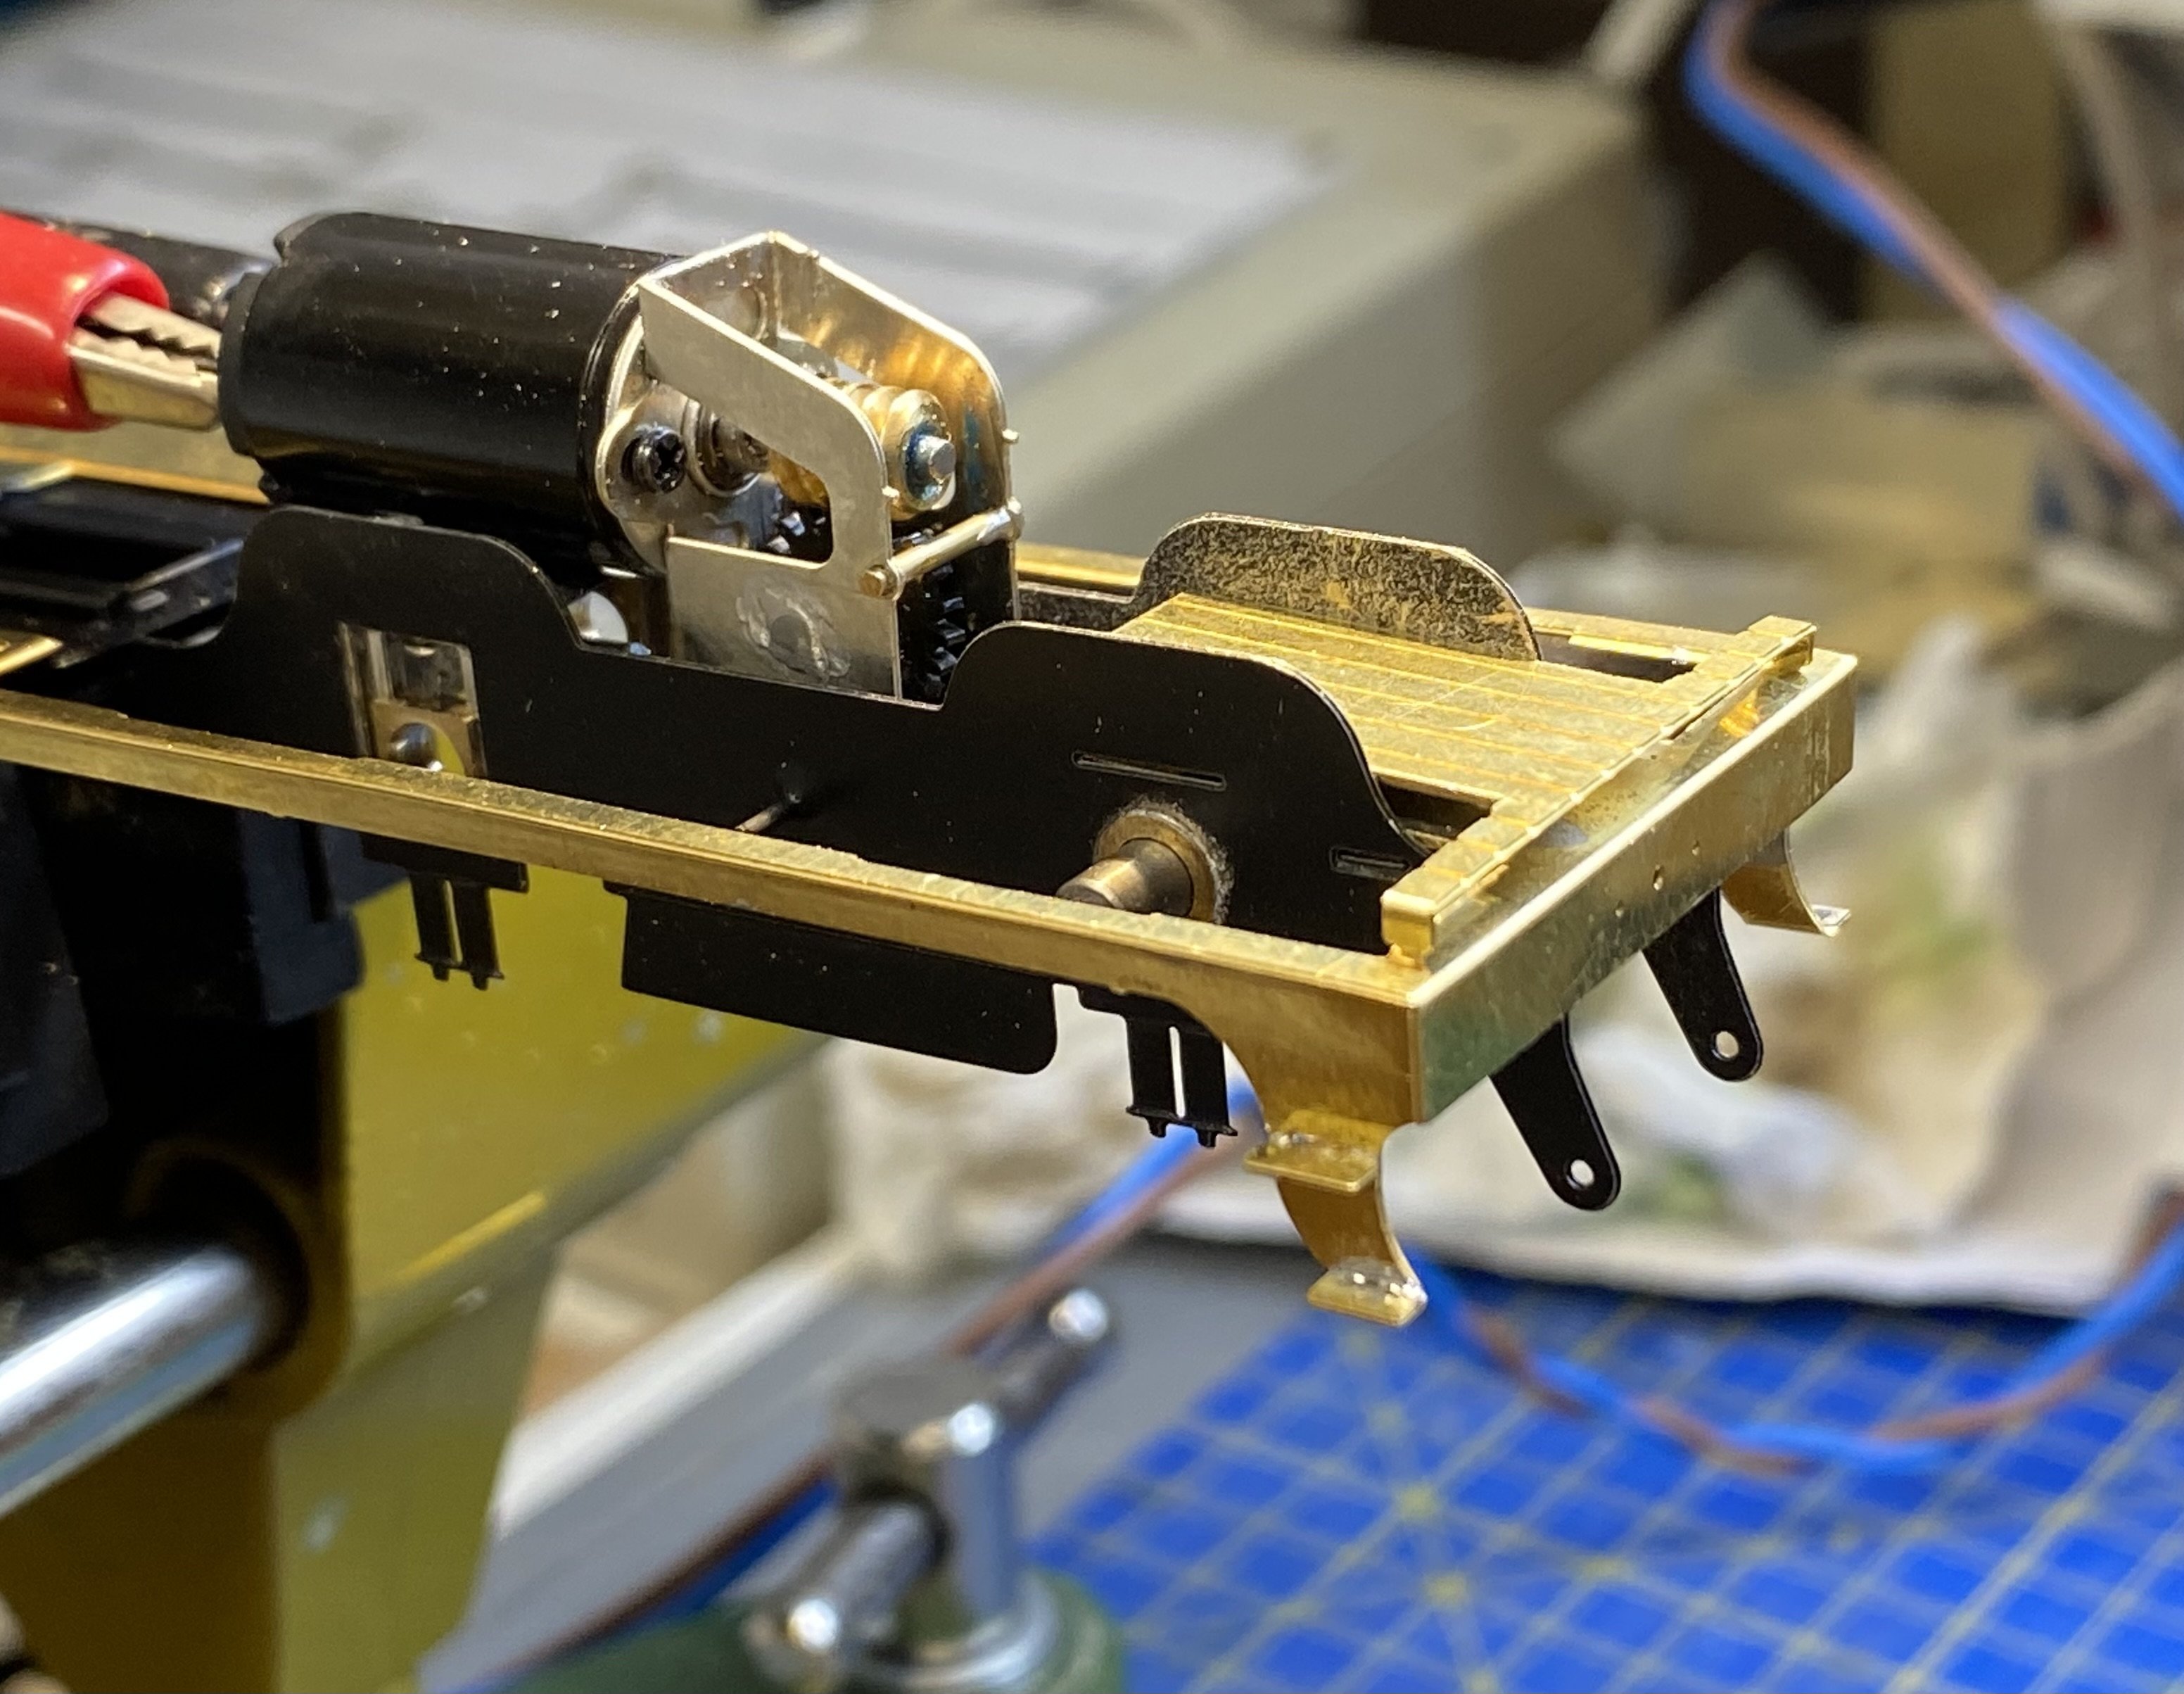
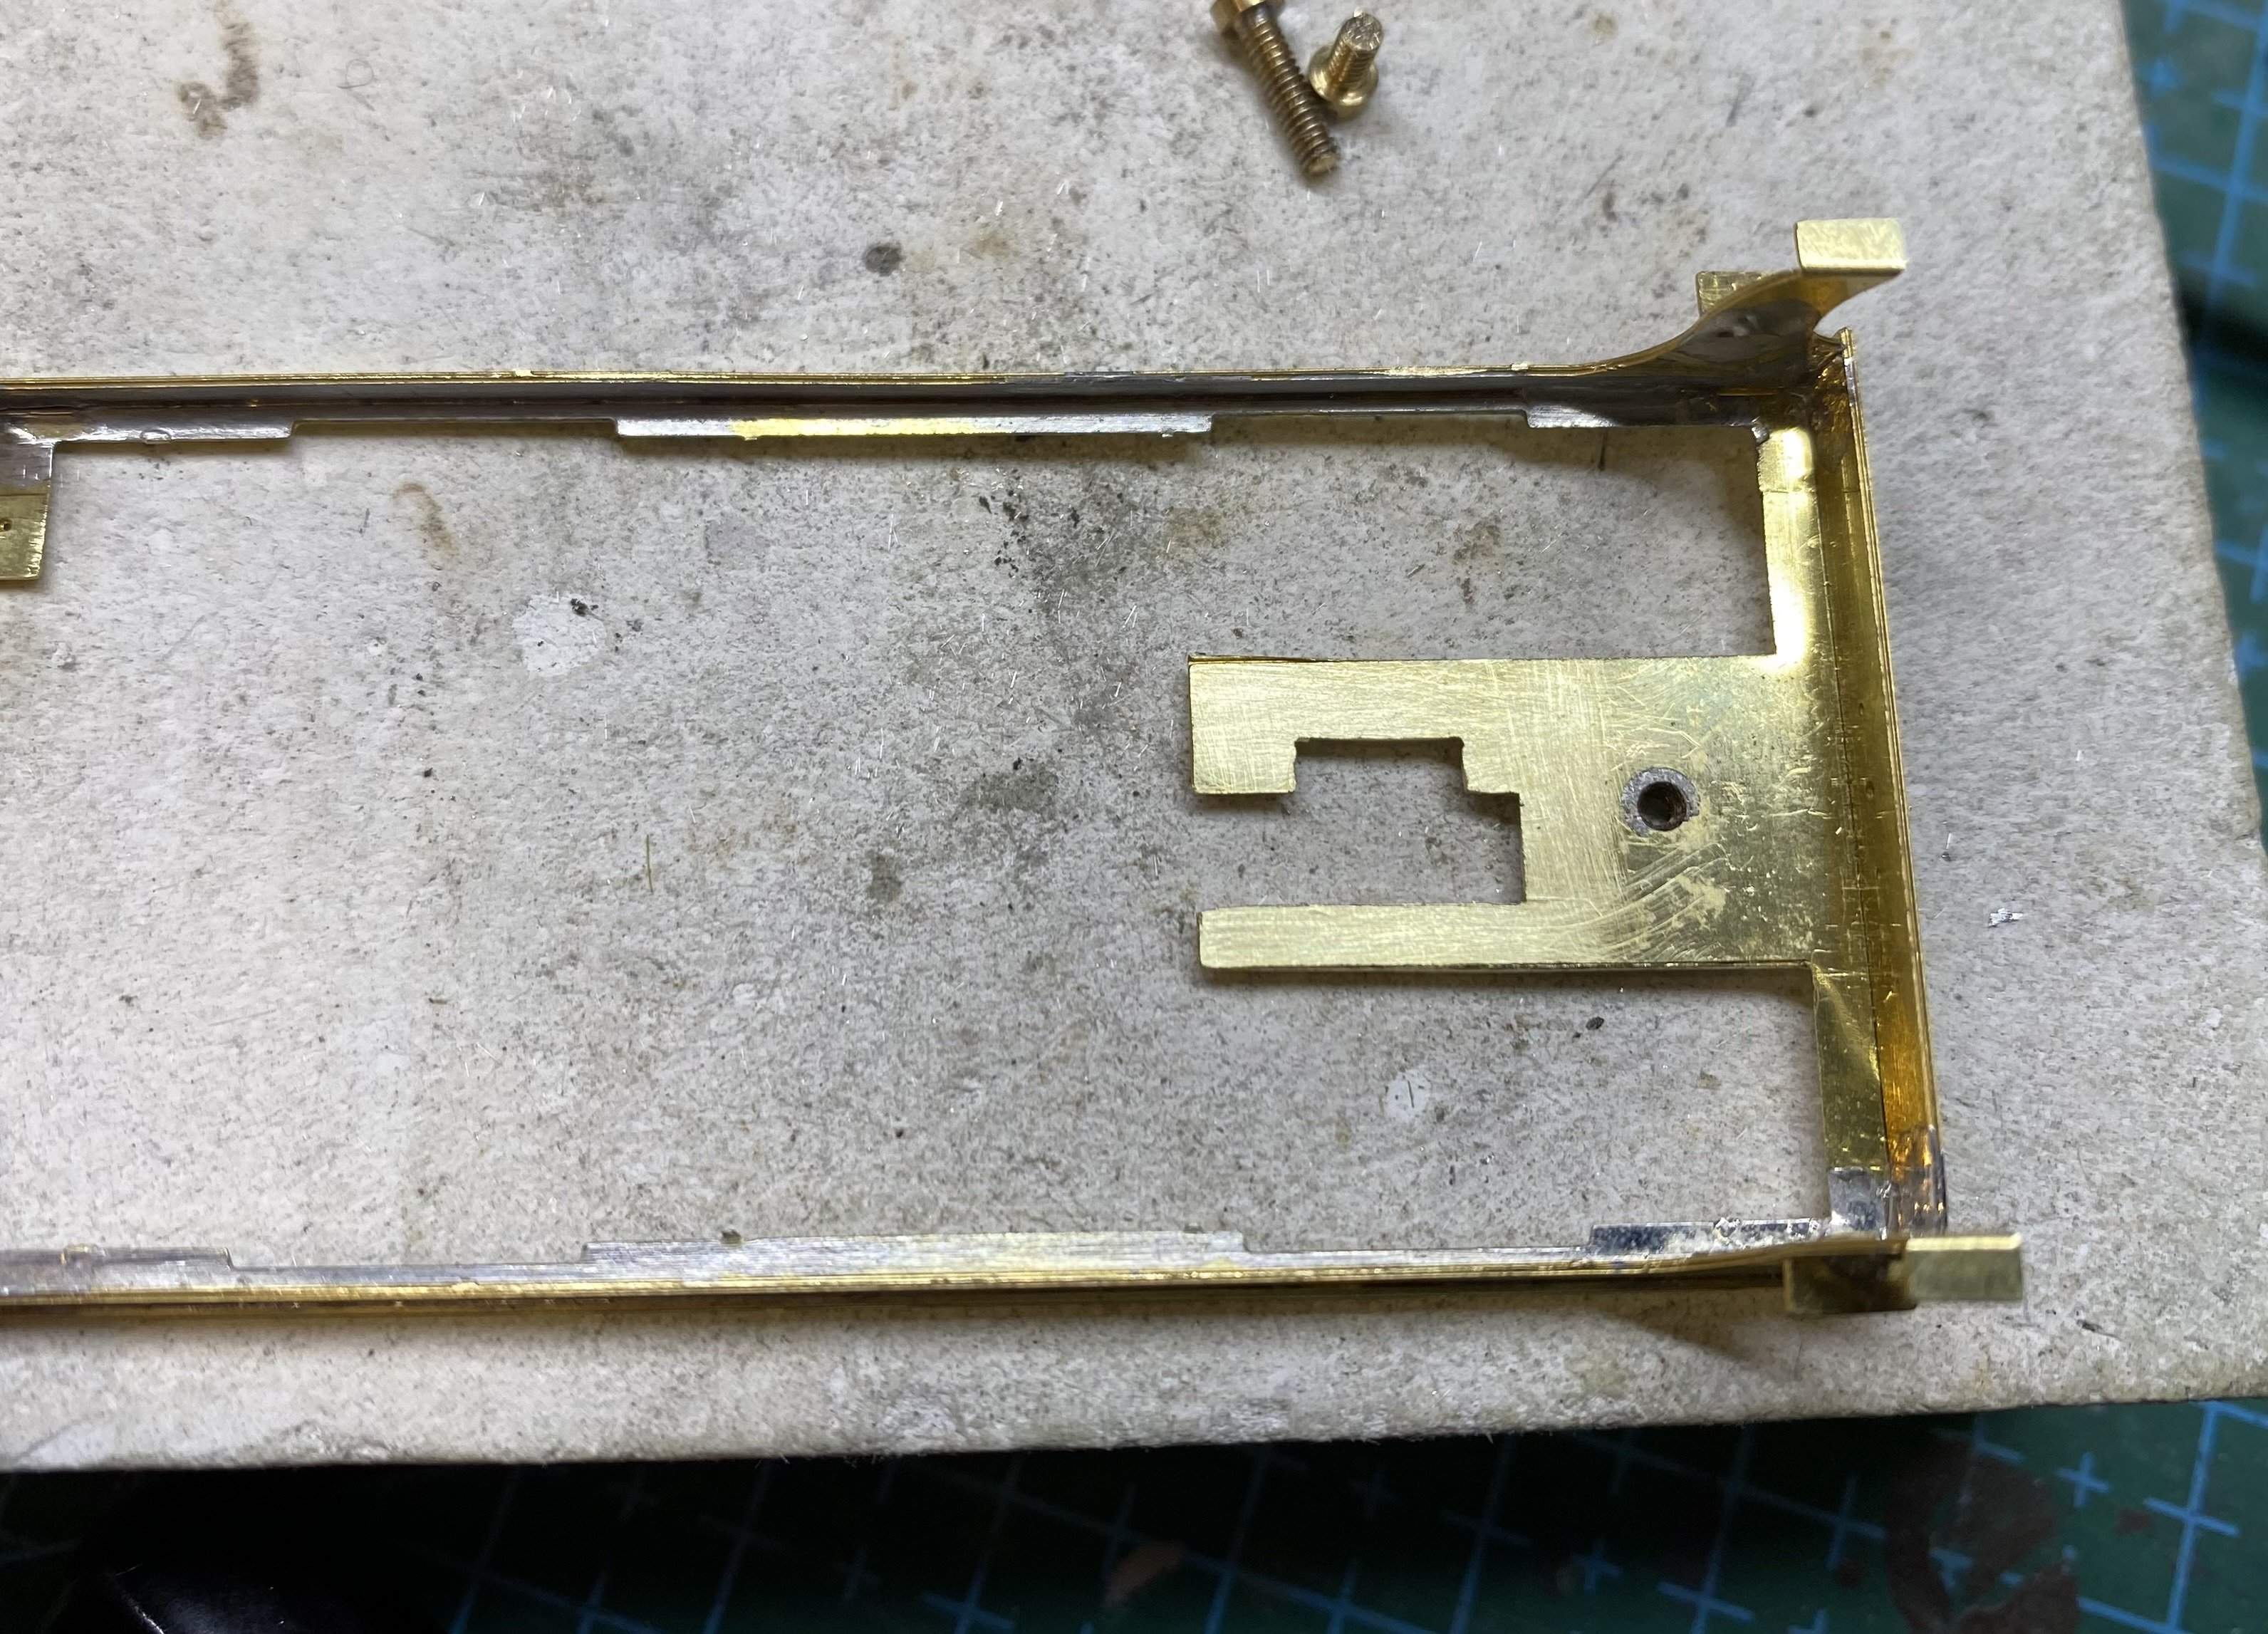
Crankpins fitted to the coupled wheels and thread-locked in. Coupling rods reamed to fit the crankpin bushes. With direct power to the motor, it turns over nicely. IMG_3874.MOV Then a snag reared its ugly head (do snags do that or do they just creep up on you? This one did the latter.) Despite forward planning and adding a drive stretcher to push the motor/gearbox forward and out of the cab (successful), it emerged that the final drive gearwheel on the back axle sits higher than the footplate under the cab, requiring a bit of bodgery. Hooray for piercing saws and Swiss needle files. Thankfully the cab floor is designed to sit proud of the footplate by a couple of mm so it clears the gearwheel and hides it too. Onward and upward to the next challenge - figuring out where and how to fit pickups. I'll have a lie down before I try that. Alan
10 points
-
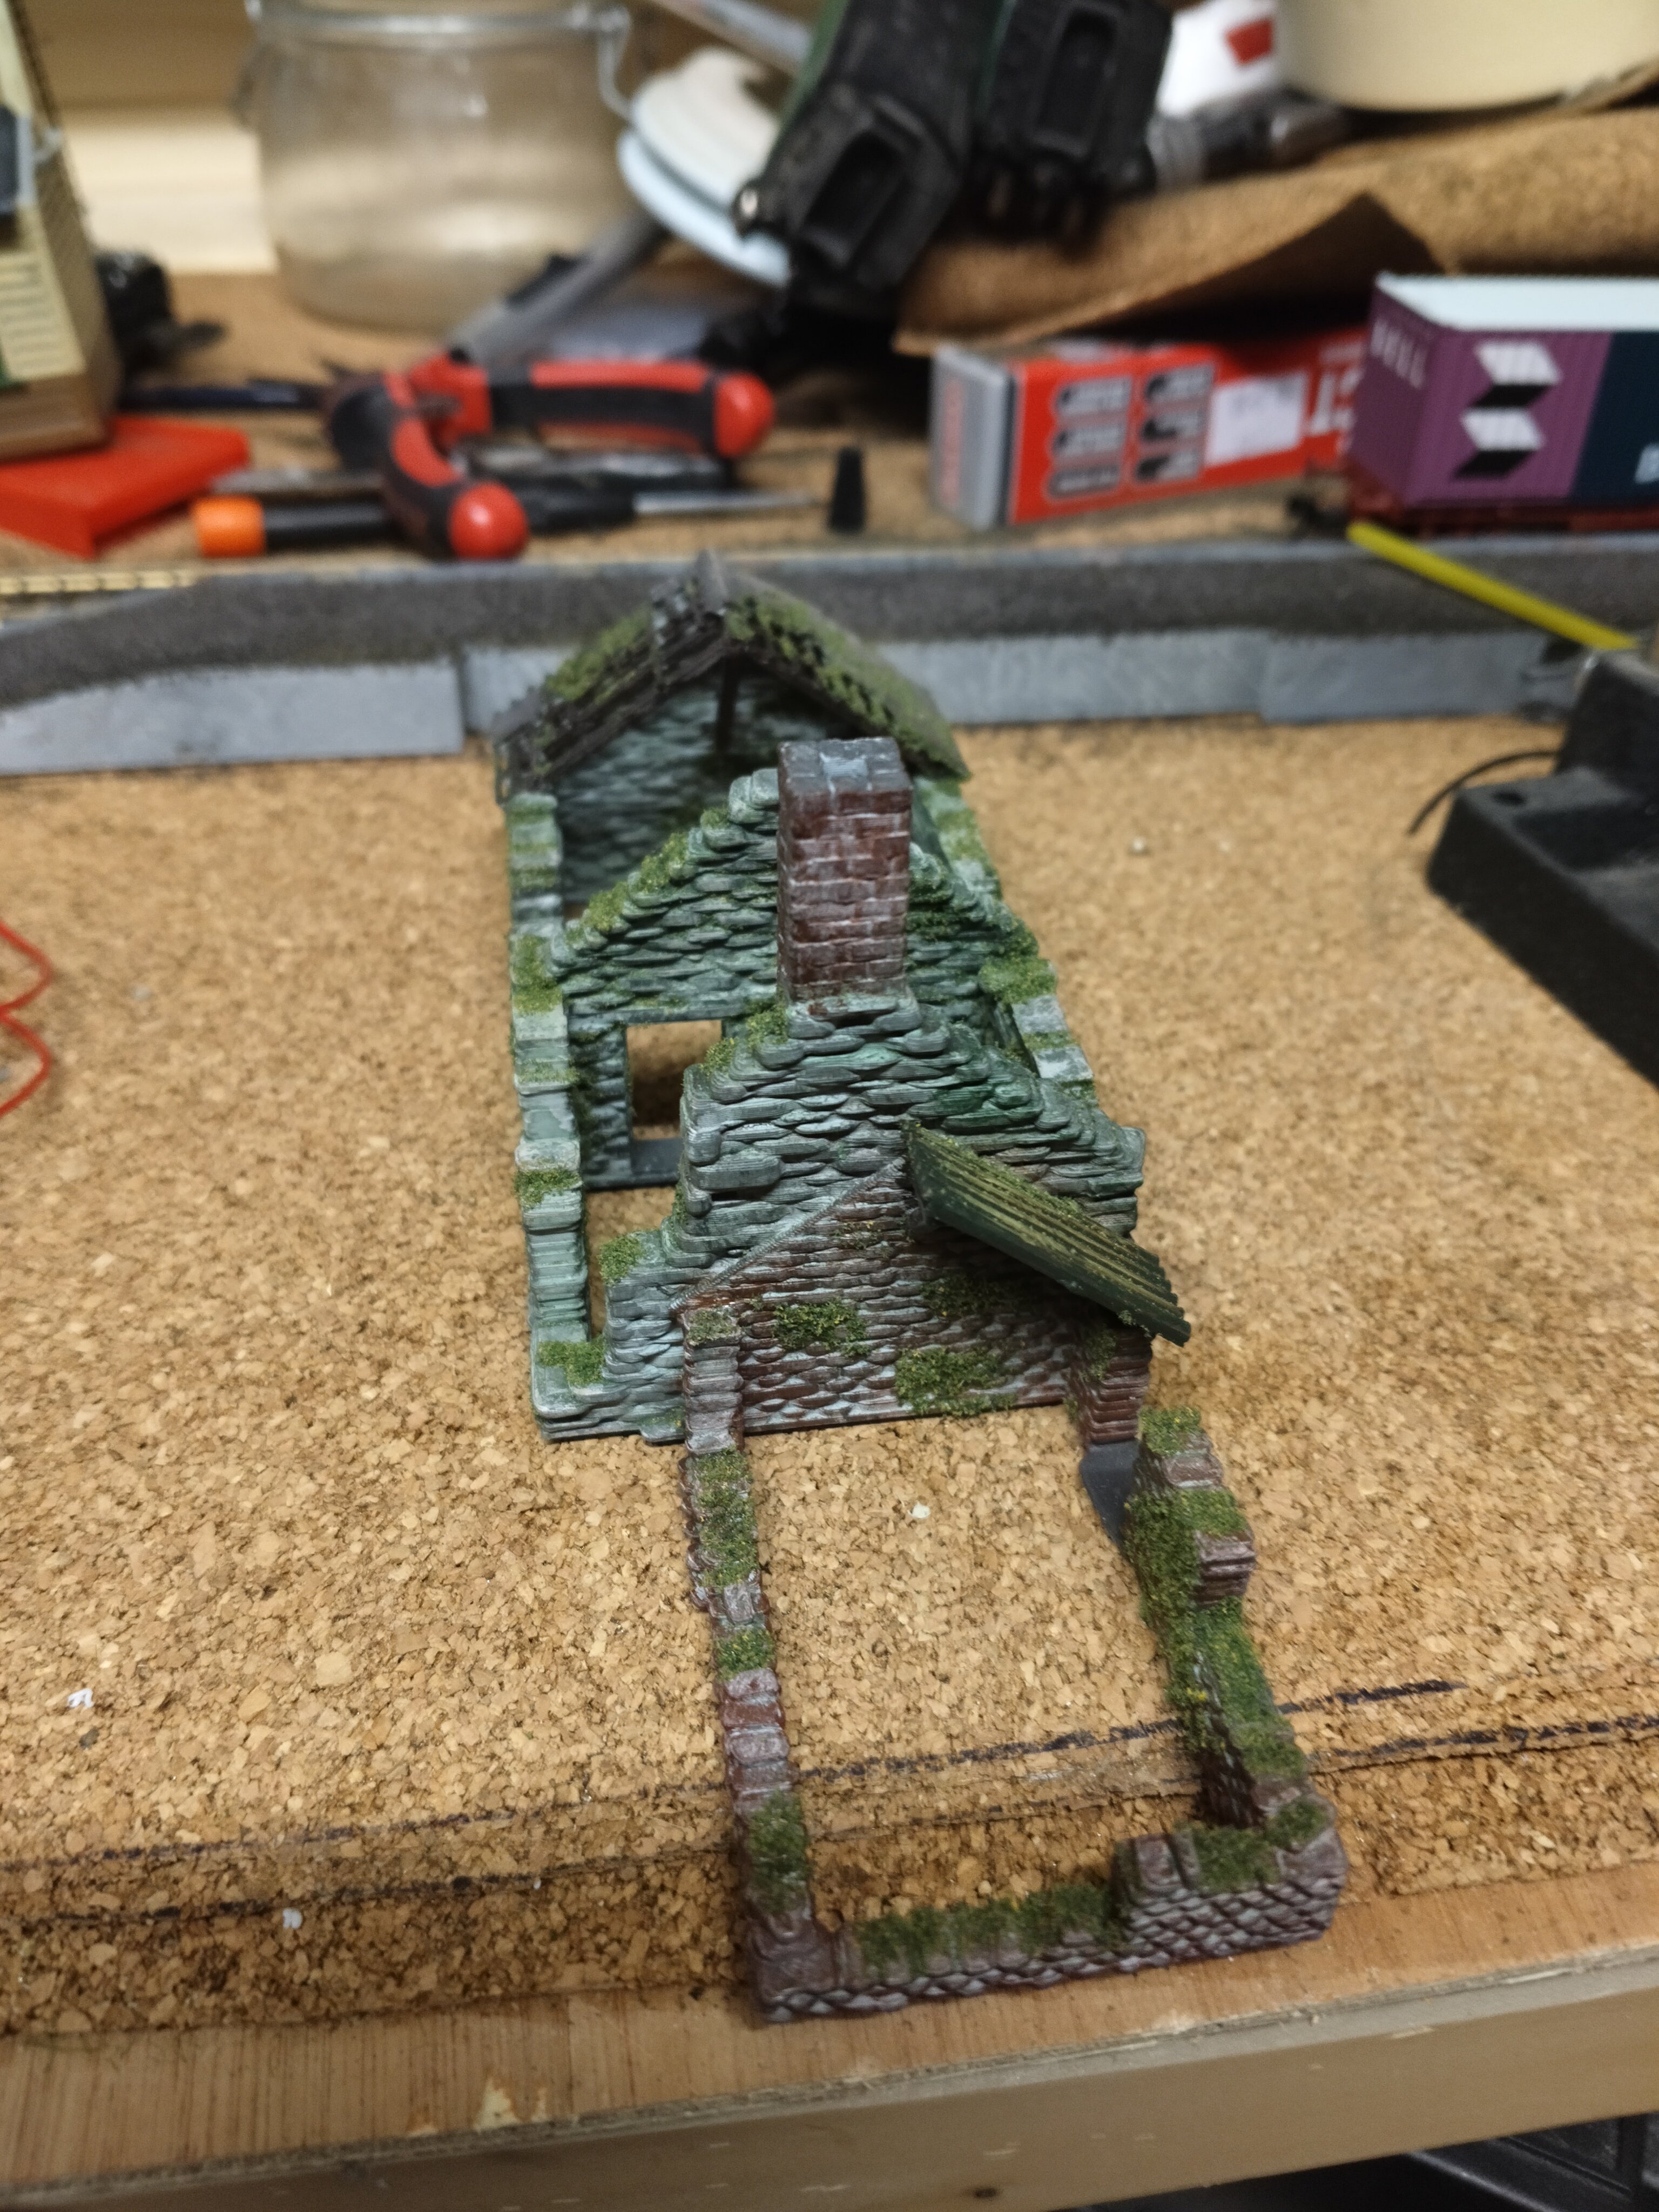
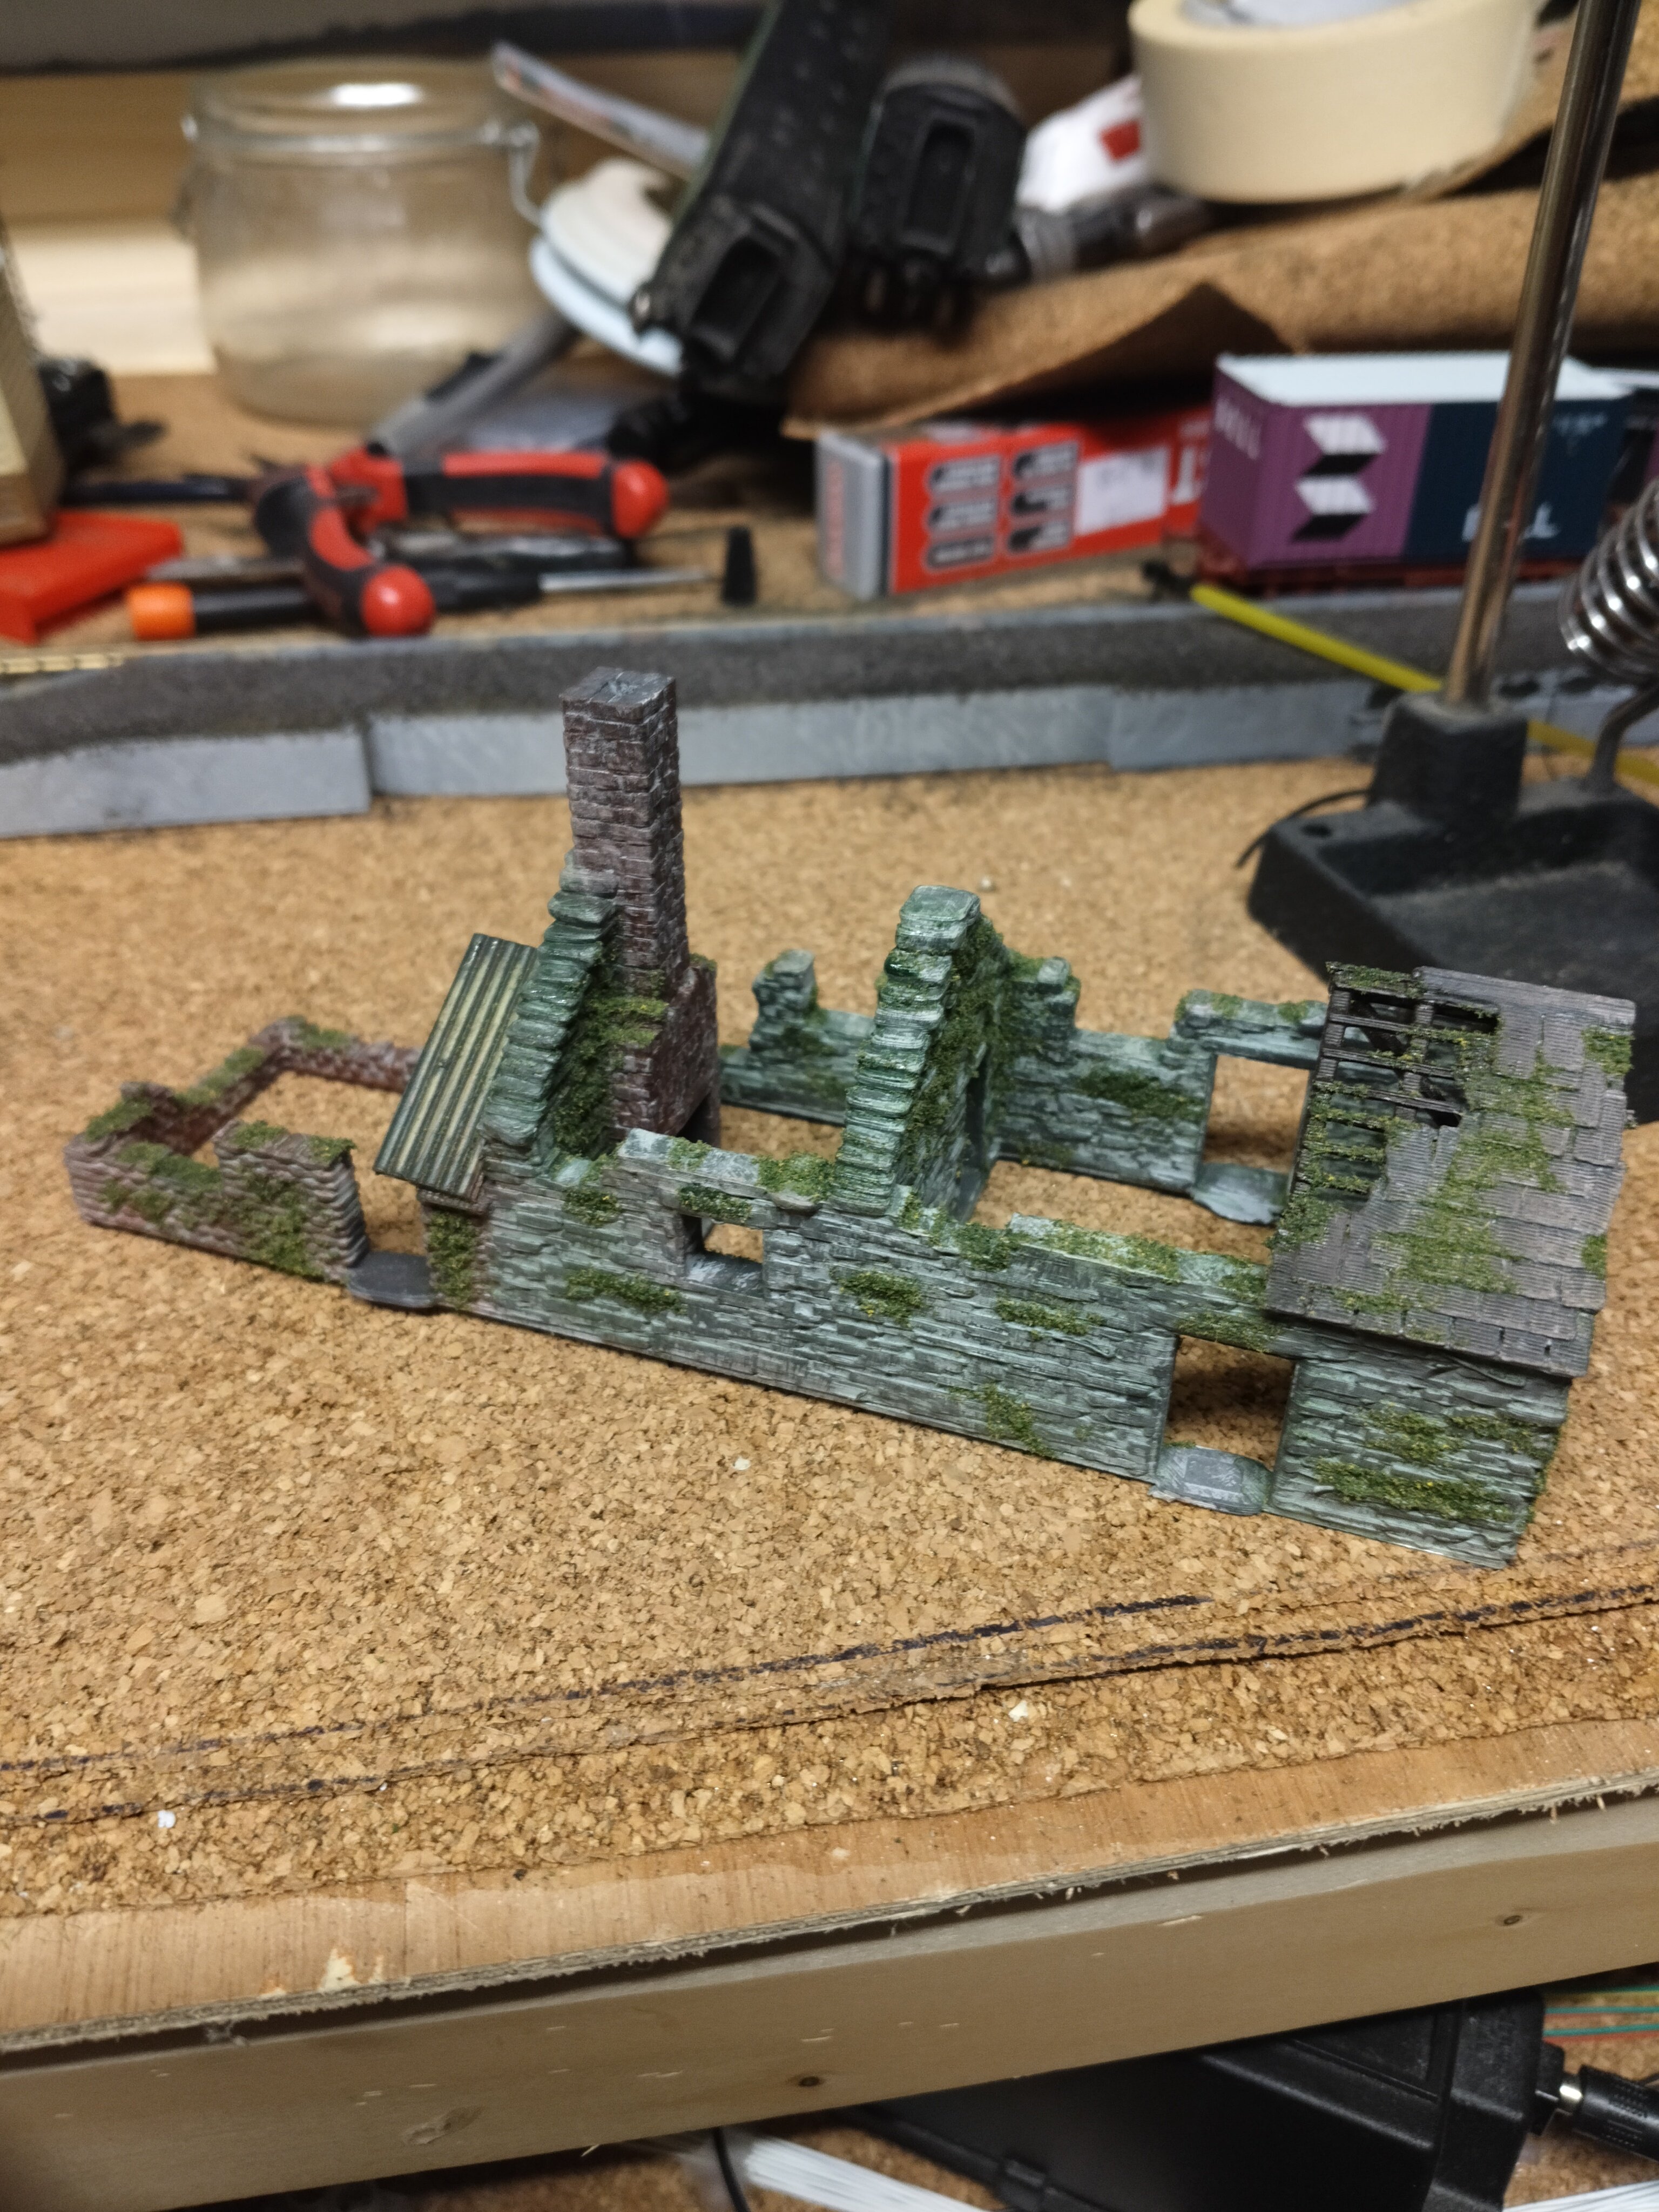
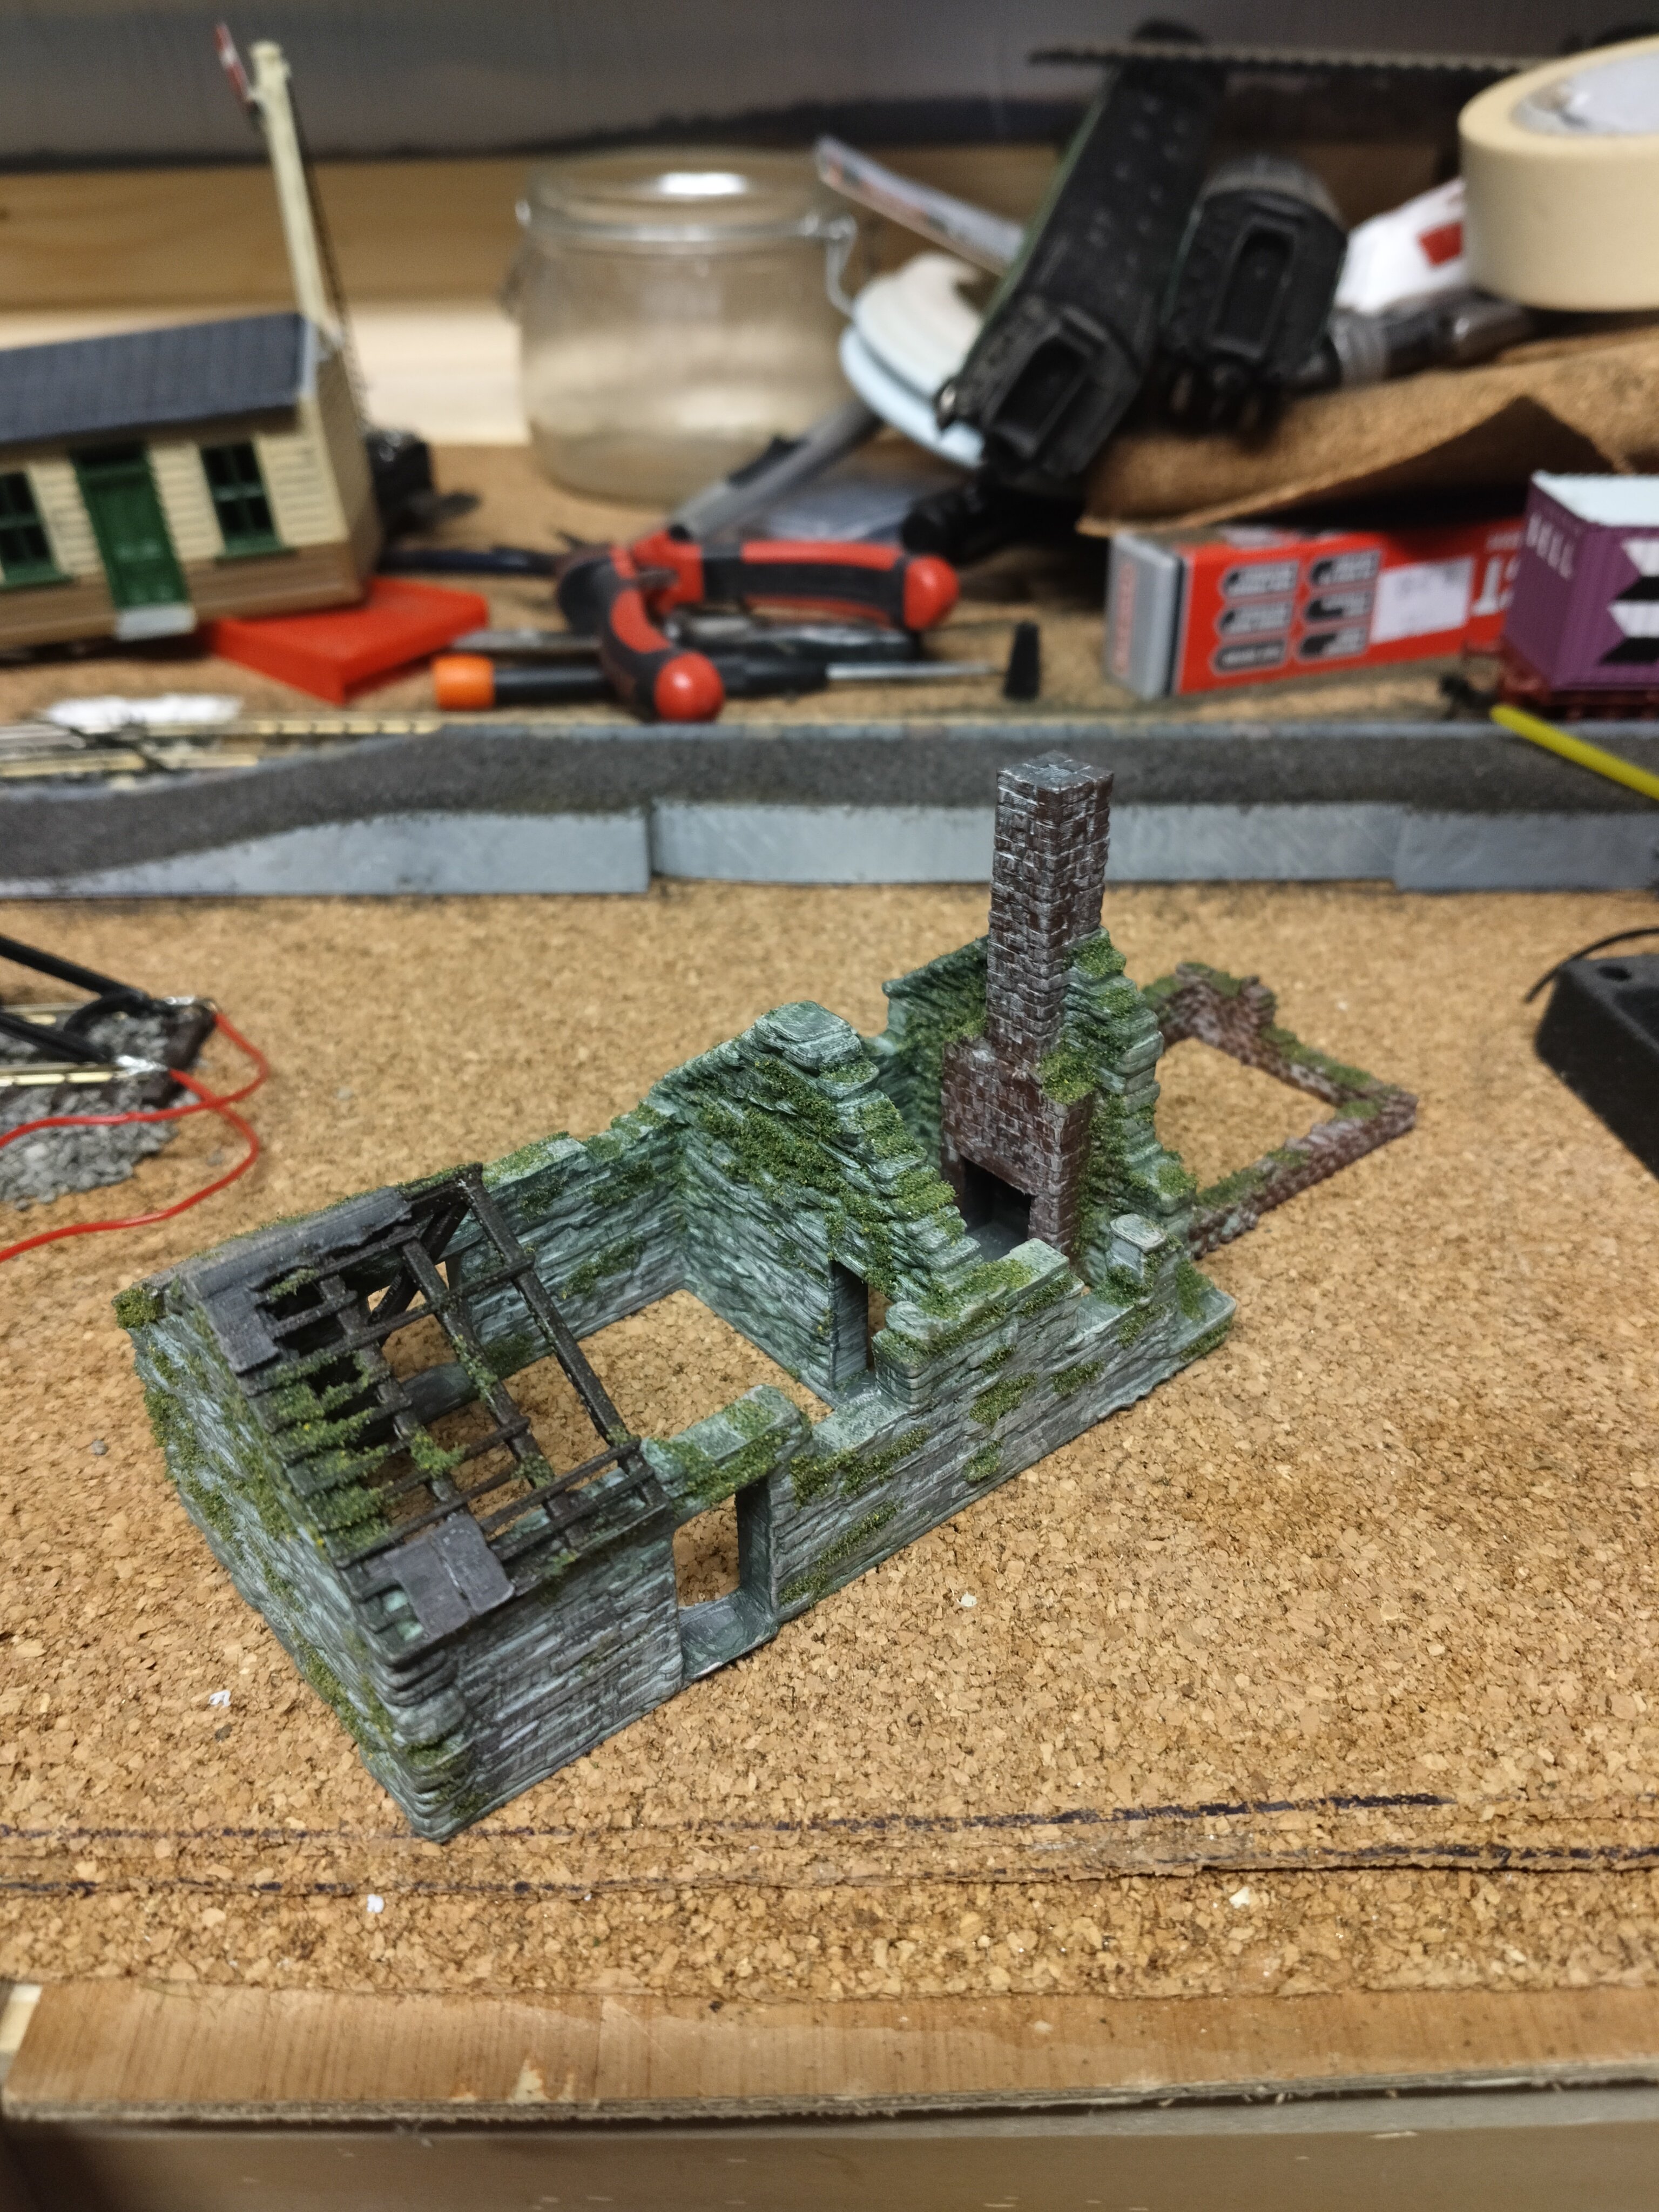
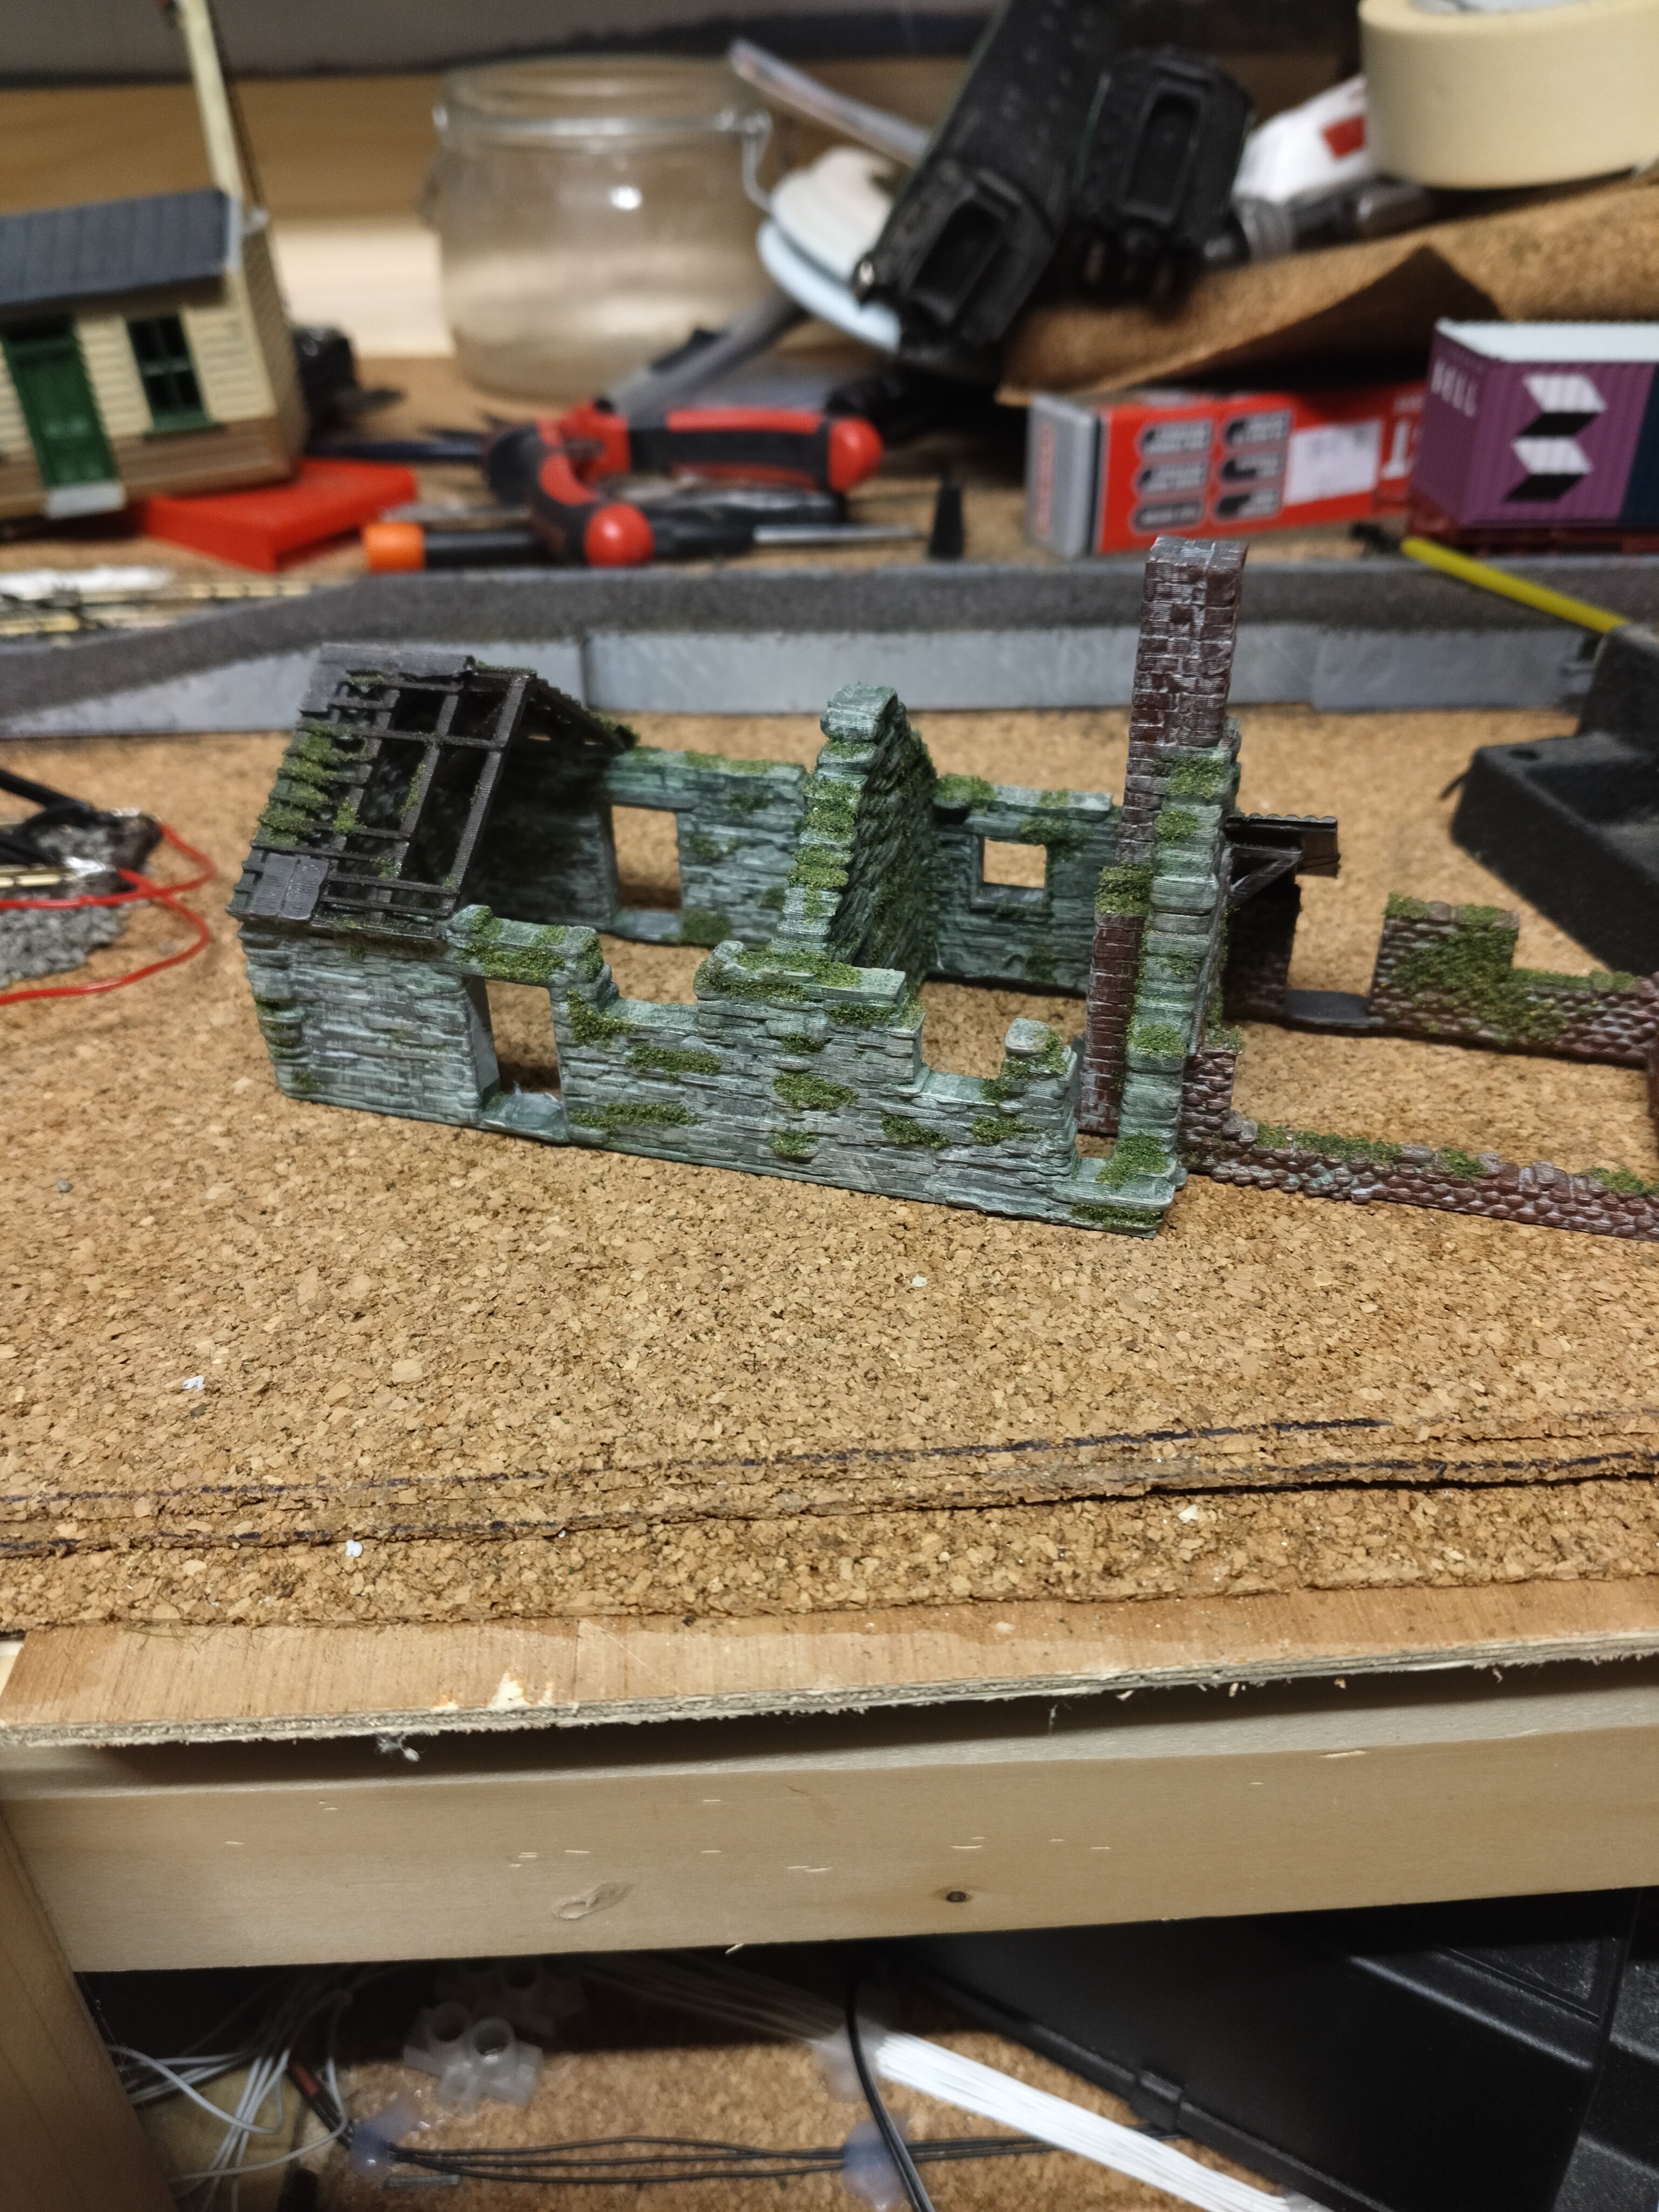
This one is made from a free 3D printer file,if you think you might like one and if you have access to a 3D printer, I will send you on the file, if not drop me a pm and we will get you fixed up.
10 points
-
Added some Walthers HO lights to the station and engine shed. Got these ages ago and they fit right in.
9 points