David Holman
Members-
Posts
4,359 -
Joined
-
Last visited
-
Days Won
117
Content Type
Profiles
Forums
Events
Gallery
Everything posted by David Holman
-
Major seismic disturbance in the far west of Co Mayo!
-
Great to see things made with so much precision.
-
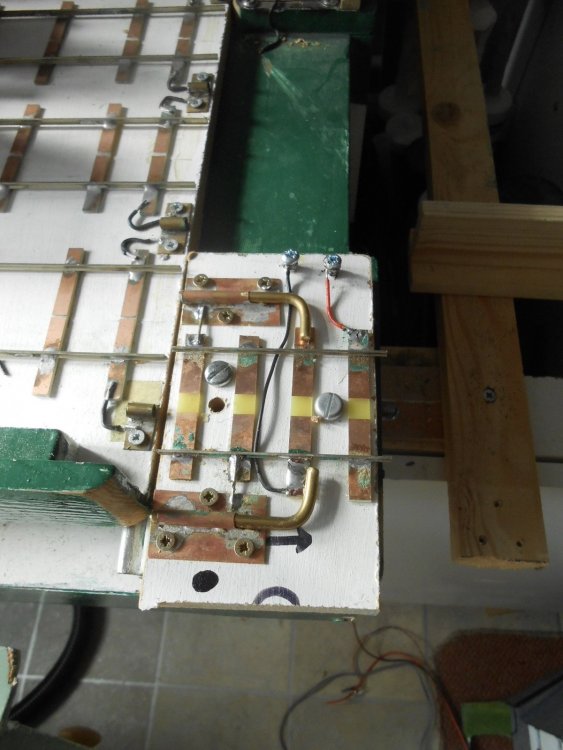
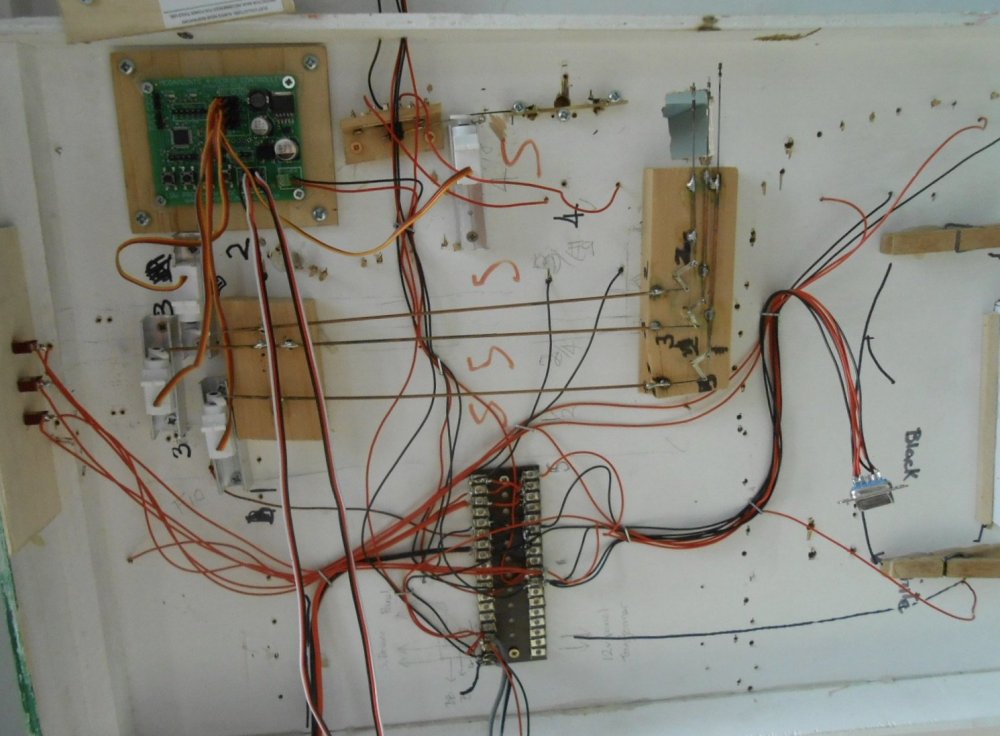
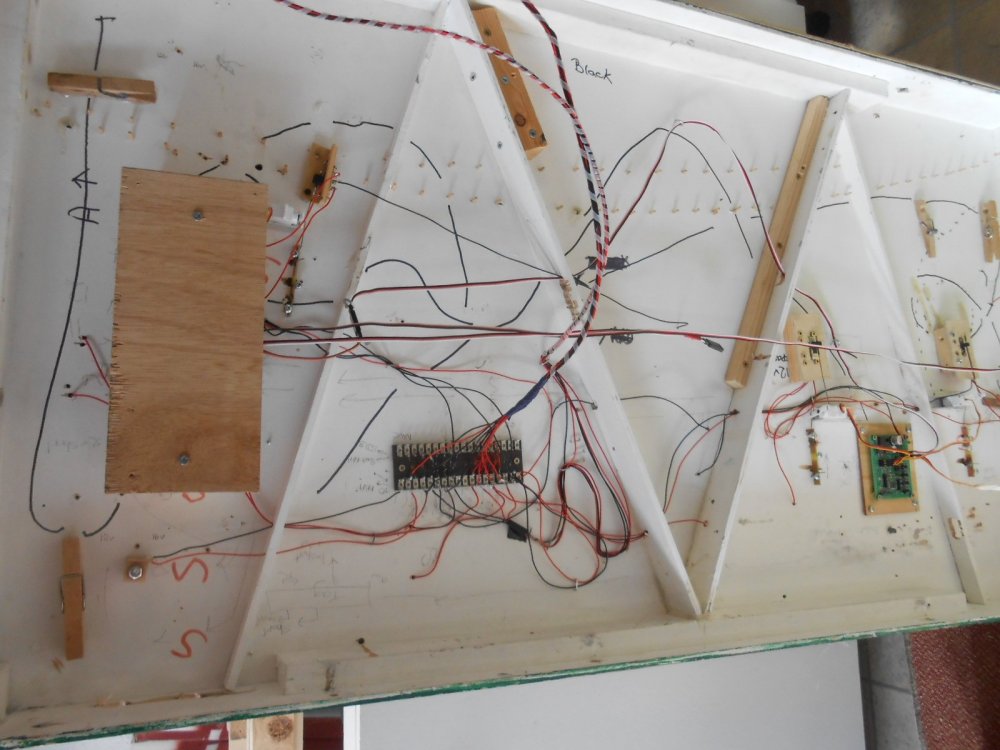
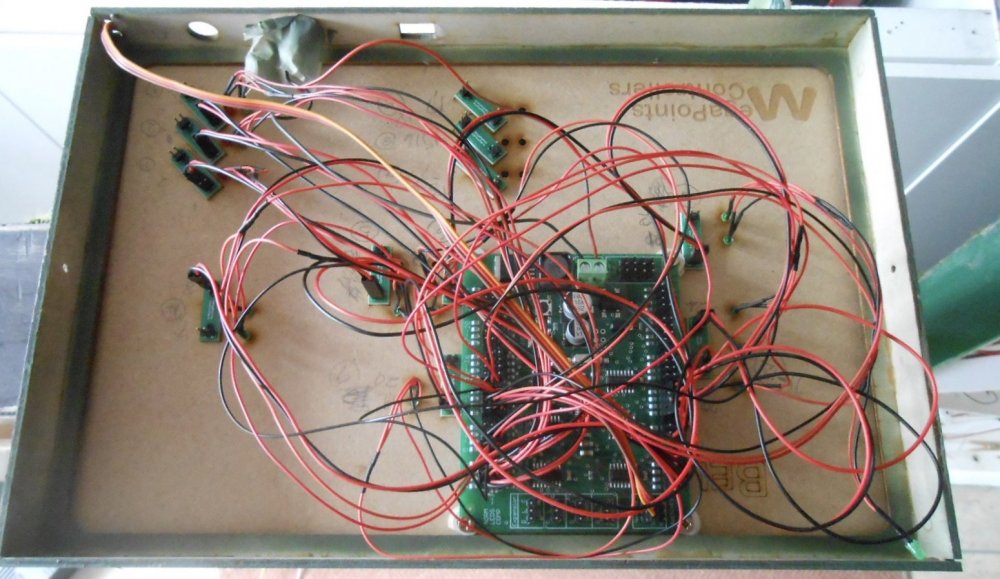
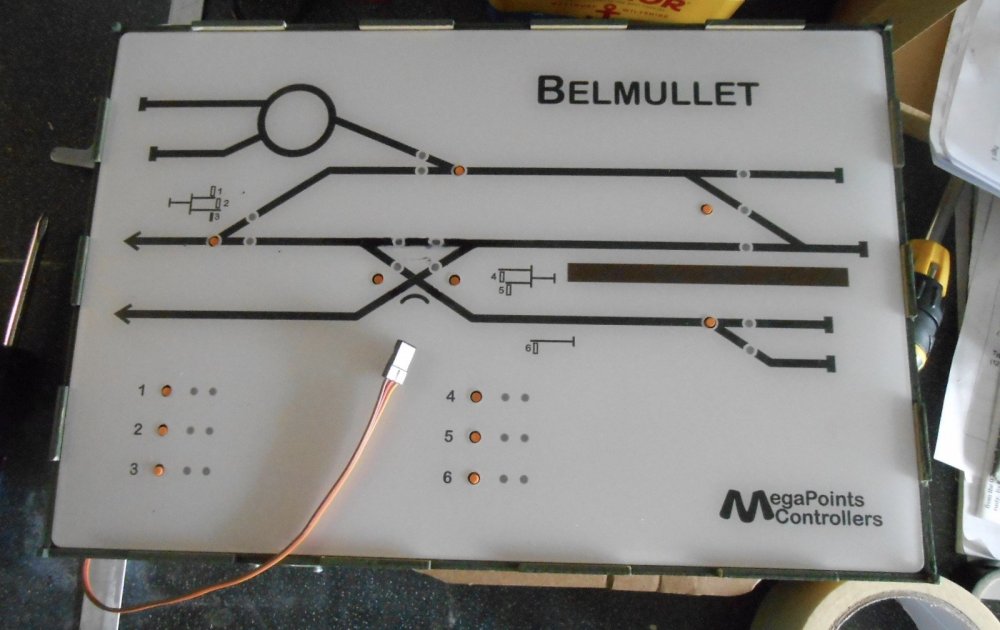
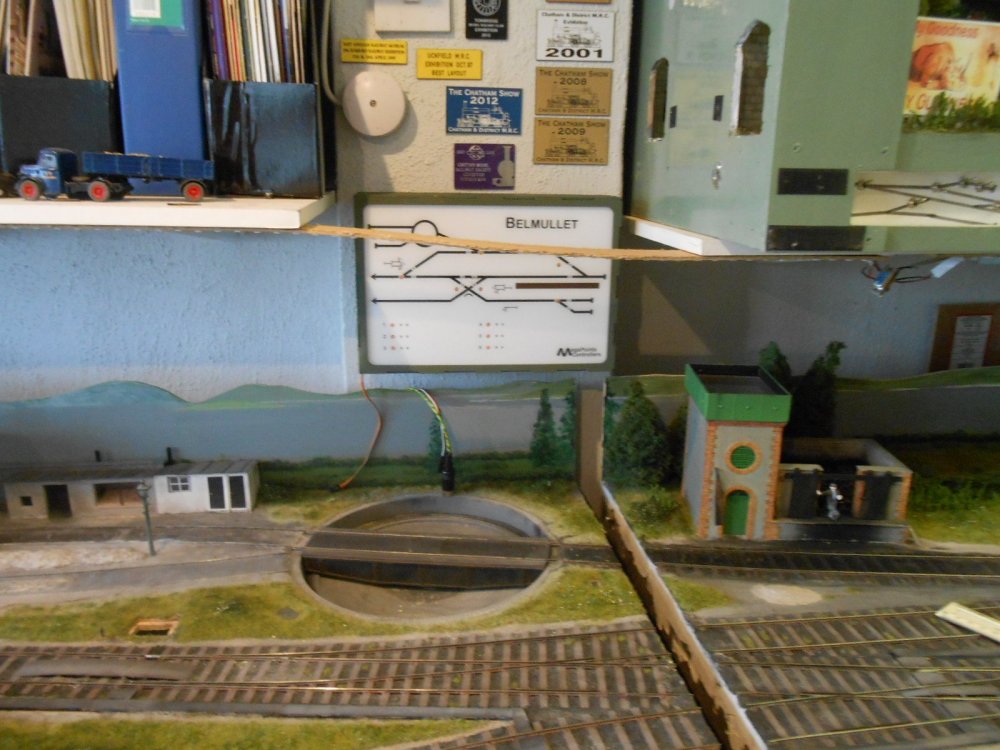
Knitting and stuff No, Belmullet has not gone under the wires like Barrow Street, these are the wires and other stuff, under the baseboards. Must have built at least a dozen layouts over the years, but this side of things still causes me problems. Much of this is no doubt due to an element of ham fistedness - dyspraxia even - for I cannot for the life of me work out anything that is 'handed', while rotation symmetry is a guarantee for rude words. Add in the fact that baseboard wiring requires you to visual both the top and underside of the baseboard and this work has just continued to bite me.Turfing illegitimacy just two terms that spring to mind... Anyway [and cross everything here], I think I just about have it sorted. The first thing that still needed doing was fairly straightforward. The line to the harbour needs to get to the fiddle yard, however, the fact that the sector table also pulls out to turn 180 degrees means that this short section needed to be removable to enable this. A rectangle of 12mm MDF, a short length of track, two home made bolts [to align the tracks] and a couple of M4 bolts to keep the MDF in place was all that was needed. That plus a couple of round headed screws, so that the two wires from the harbour branch could connect to the removable piece with crocodile clips. The major part of the wiring involves power to the track and a Megapoints system to work the signals and points via servos. The latter is a really clever piece of kit, which enables the control panel to connect to all the points and signals via a single three wire servo lead. The brain is a complex bit of circuit board. All the switches and indicator lights on the control panel connect to this with short, plug in leads. No soldering is required and the control panel was wired up in less than half an hour. The panel and servos require a separate power source to the track - indeed with 12 volts also needed to the uncoupling magnets, that makes three power packs in all. The servo lead from the control panel goes to a 'servo controller' circuit board on Baseboard 3 [next to the fiddle yard]. This is also 'plug and play', with no soldering required and controls the first point entering the station, plus the three armed signal. From this first servo controller, a second and third are daisy chained together on Baseboard 2, controlling the other signals [yet to be built] and points. Three of the points are on Baseboard 1, so there are a couple of servo leads crossing between boards two and one. Most of this was done back in the autumn, so when I decided it was time to do some more test running, it was clearly going to be a simple matter to connect things up again. Well, no. As mentioned earlier, the points all needed miniature slide switches adding, to control polarity. Wire in tube operation worked fine on Arigna Town but, strong though these little servos are, a good yank applies much more force, so extra help was required. Of course, I managed to get a couple of sets of wires the wrong was round and what with moving the point tie bars below baseboard, the whole lot have been two weeks of blood, solder burns and tears. Add in the fact that when I did complete it, the control panel did not want to talk to the servo controllers, then you can appreciate the new and complex forms of Anglo-Saxon that resulted... Thankfully a call to the amiable, patient and ever helpful Dave Fenton at Megapoints soon put me right. He's tried to explain the logic of it all, but am afraid my eyes just glaze over! Suffice to say, it all works and the servo control boards have four small buttons on them to enable you to set the amount of travel required and add bounce to the signals too. Just hope that, now it all set up, I don't have to move the baseboards from their mountings or a while as recently they've been up and down more times than, well there's a metaphor I'm sure many of you know! The pictures hopefully show what I've been up to, with the final one showing where the control panel now sits in the workshop, above the baseboards. Pretty it ain't. When the layout is exhibited, it will need a minimum to two operators - one acting as driver/shunter, the other coveringing signalman and fiddle yard. At home, operation can be part of my daily exercise!
-
Mayner is right - mechanised working loaders/unloaders are challenging things to make and run. There are some gems out there, but keeping such things off scene is much simpler! Wagon loads can be made removable, or just have separate rakes as Mayner says. Have used this approach on numerous layouts. On the other hand, effective loaders always draw a crowd at shows, so nothing wrong with having a go.
-
Gilding the lily more like! Must be a bit of light relief after all that catenary though.
-
Try Eileen's Emporium. Presume they are still doing on line sales. Squires another good source of tools and mateeials.
-
Suspect the sides are a bit overscale in thickness, MM, but no matter, you can easily hide that with a tarpaulin. Make mine from masking tape, painted with Humbrol gunmetal, No 57. Looks like the body is card or wood, in which case strapping can be made from strips of thin card, stuck on with PVA. Likewise corner plates. As ever, check prototype photos to see where it all goes. If there are rivets, you can now get transfer sheets for these, the Grandt Line to tiny stick on ones, which are fiddly but very effective. Great to see some scratchbuilding!
-
Looks great, and particularly at home in the Rosses Point setting. What ever shade of 'black' that is, it looks very effective. Halfords 'rattle can' matt black is almost too dense and demands a degree of weathering to soften it a little, but this looks just right. Reminds me that I really must experiment with monochrome photographs too, though that station building oozes atmosphere in colour.
-
Black for me. Guess it the old rule of liking what you grew up with, so make that weathered black. As for the locos - lovely work!
-
Beautifully observed.
-
Seem to remember the track plan mostly evolved around the use of Y points, rather than the usual left or right. In Cyril Freezer's booklet on track plans for small spaces (mine is priced 2/6, which dates me somewhat), at the back are 10 generic plans where he showed how a six foot terminus could be reduced to 4' 6" by using all Y points. The result is contrived to say the least, but Y points can be useful. On Belmullet, the turnout to the goods shed is a Y, but the Marcway version, where the distance from the toe to the clearance point is just 12" on a 6' radius point. A Peco Y in 0 gauge is the same as as left or right hand point, where the distance from toe to clearance is more like me 18". So, used carefully, Y points can be good space savers, likewise slips and three ways, though these were much less common in Ireland where space mostly wasn't a problem.
-
Broadstone Models 7mm GNRI Cattle Wagons
David Holman replied to decauville1126's question in Questions & Answers
Saw Kilbrandon a couple of times and it was great to watch. I if I was starting again, would be very tempted to do S - as the only true imperial scale at 1/64, Irish track gauge works out at 63/64ths of an inch, which for some reason I find rather attractive. Tolerances are pretty fine, trackwise, so stuff runs well. Real scratchbuilders scale though, with minimal commercial support. However, the Society is excellent. -
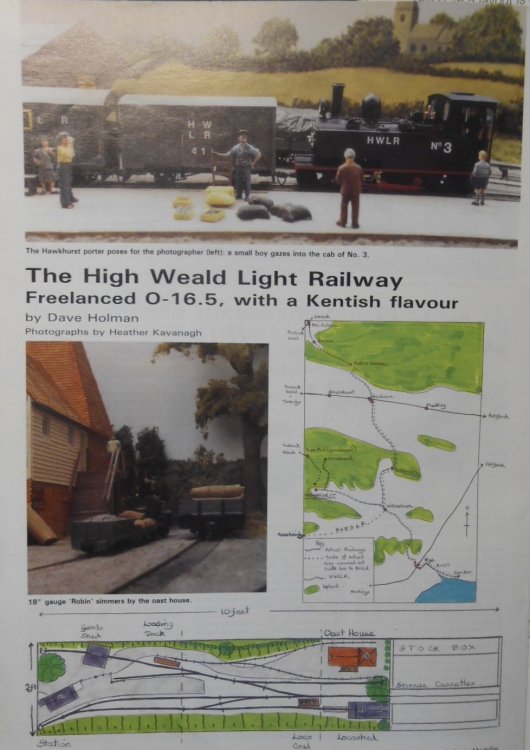
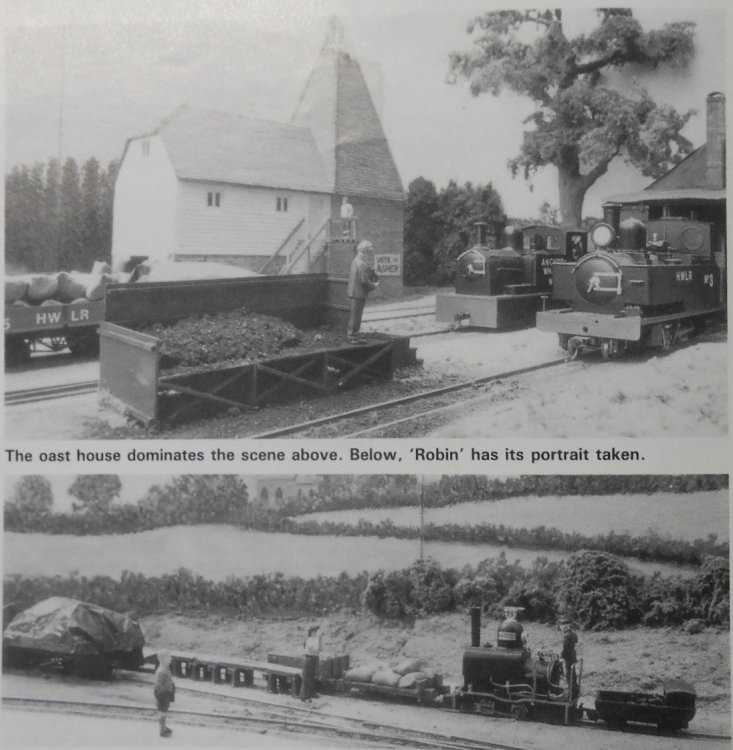
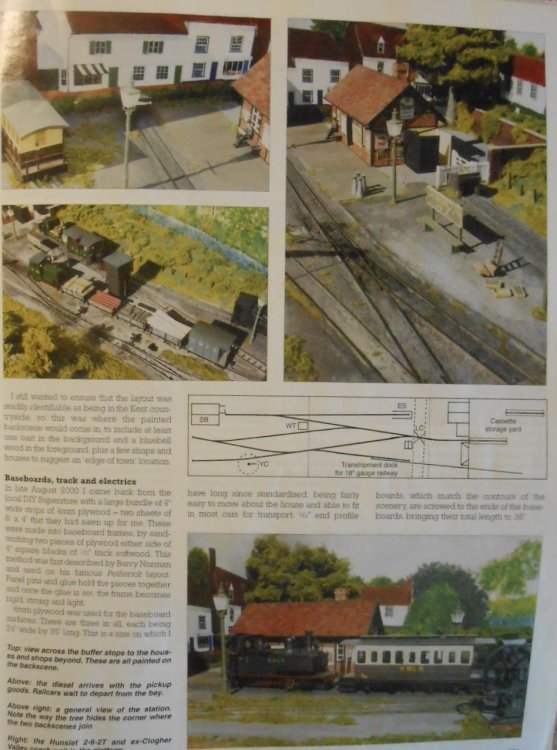
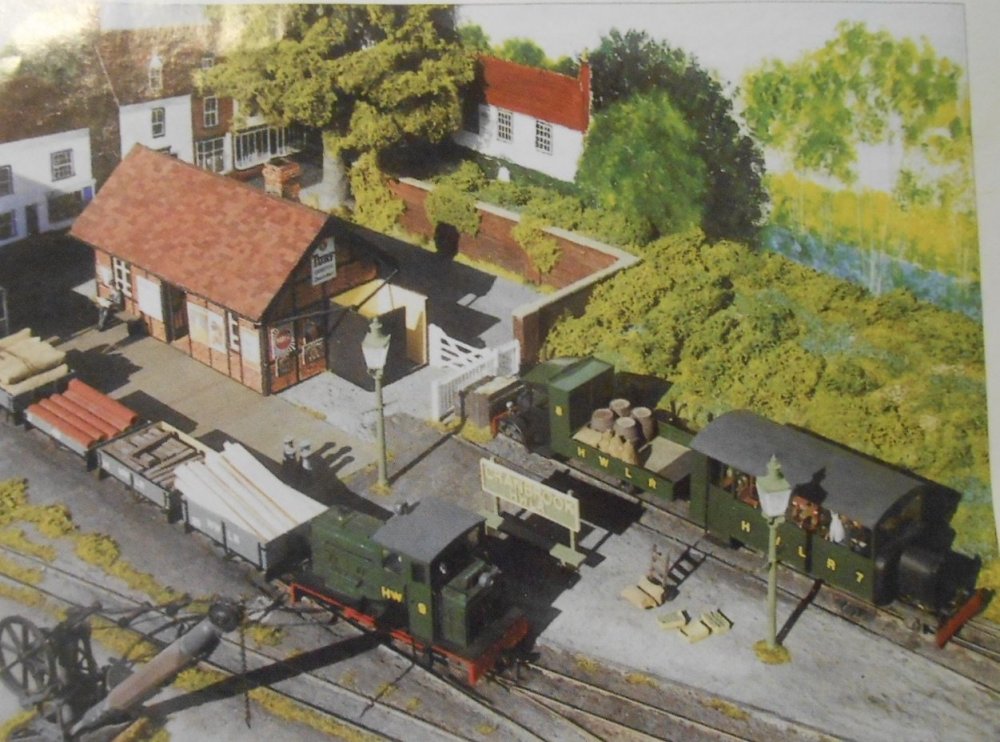
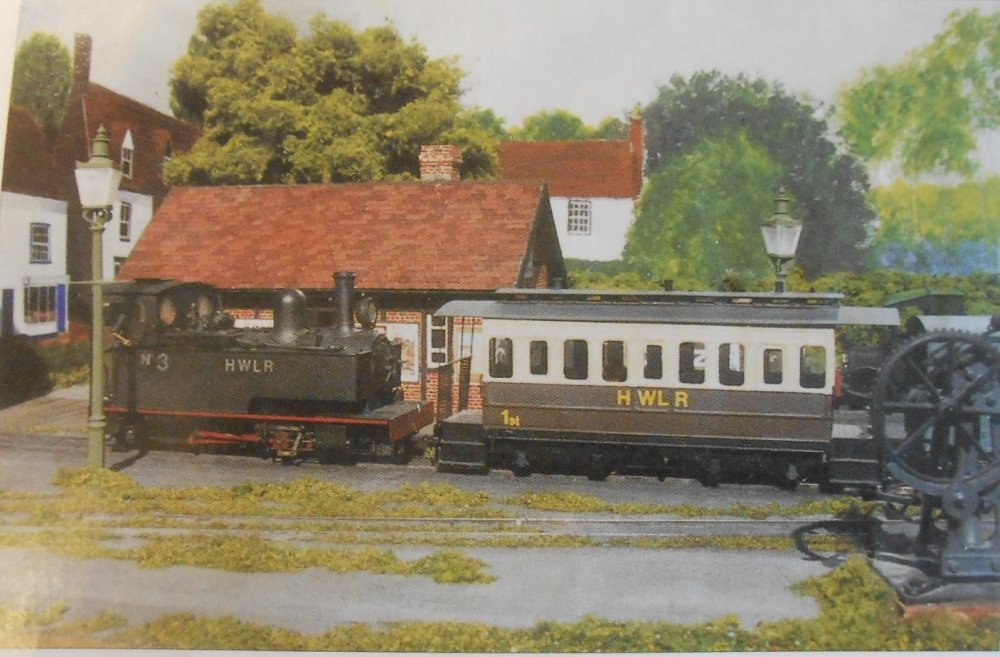
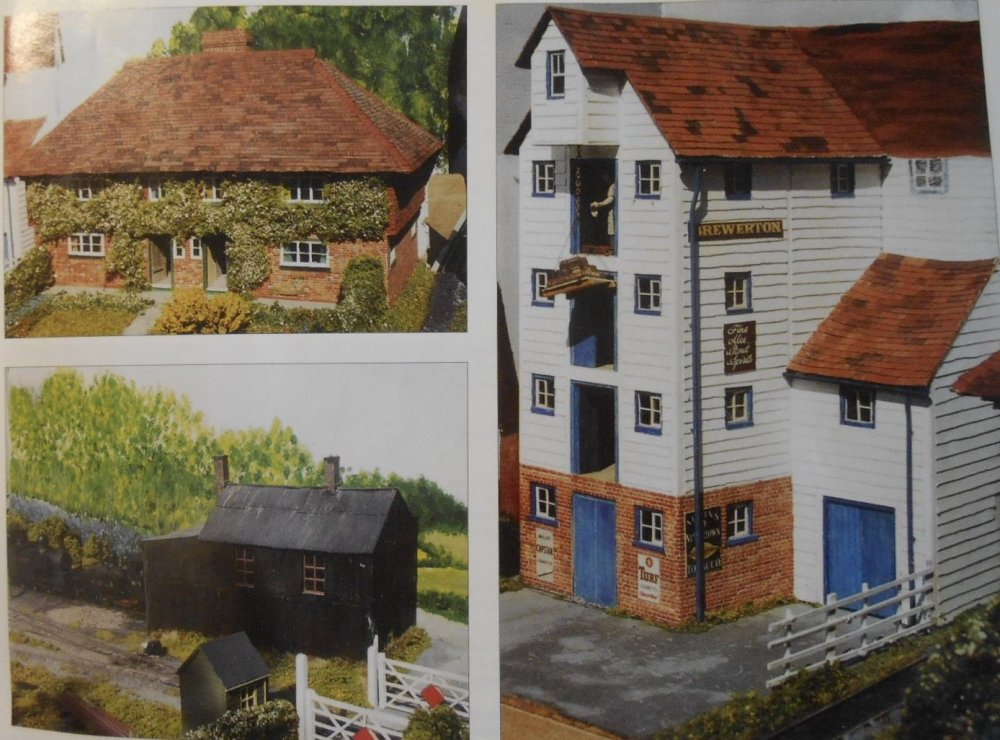
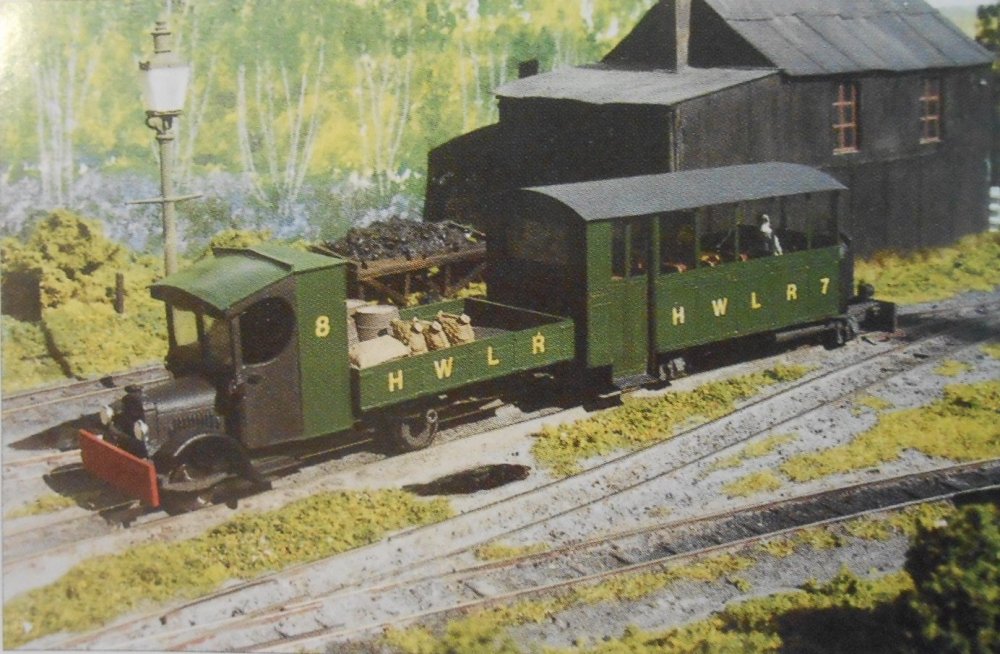
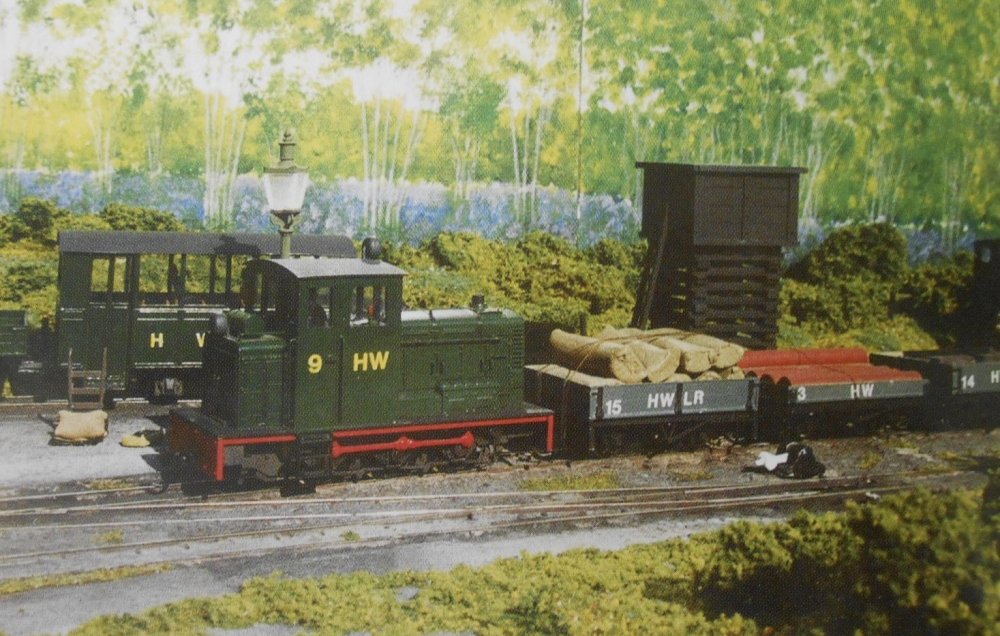
Fintonagh's predecessors Midlandman was asking about these, so I dug out my old RM's to include a few pictures from the articles I had published. Hawkhurst High Weald, was my first ever magazine article & while I've been lucky to have quite a few since, there is still a real thrill to see your work in print - plus you get paid as well! The layout was 0n16.5 using hand made track, but with a short length of 0n9, using N gauge track as a feeder 'twig' to the branch. The High Weald Light Railway was very much a Colonel Stephens inspired system [the surname has much to do with it], replacing the Kent & East Sussex with narrow gauge. It did about a dozen shows in the early 90s, but to be honest, it never ran as well as I would have liked. The baseboards developed a sag and my point building could have been better.. However, I'd become reasonably ok with making buildings and had a lot of fun with the station [based on Hemyock] and, especially, the oast house. The latter is a real Kentish signature building & I went to town on making it as accurate as possible, right down to the thousand odd individual peg tiles on the roof, while the bricks were all painted individually too. Stock was an eclectic mix, to say the least. I made extensive use of 00 chassis, so an outside framed 2-6-0T [freelance] had a plasticard body on a Lima 08 diesel shunter chassis, while the same methods resulted in an 0-6-0T with tramway skirts and an 0-6-2T came from a Lima 2-6-2T chassis. There was 'proper' stuff too - the Vulcan kit of a Sierra Leone 2-6-2T that gave me my first go at outside valve gear and a Wrightlines Baldwin 4-6-0T. Wagons and coaches were all scratch built in plastic on Ratio wagon chassis. Their bogie brick wagon yielded a couple of open wagons, plus a coach chassis, for very little outlay, which is one of the joys of freelancing in 7mmNG. I kept all the buildings, but Hawkhurst went to the recycling centre; the oast was reused on Loose End. However, as I still had all the narrow gauge stock, I decided to build another, small layout, called Cranbrook Town, initially to exhibit, but also with the intention of selling it all on. Cranbrook was a quick build, because I used Peco track. Indeed, see to remember I made the baseboard, laid the track and wired it all up inside a week. Scenics took a lot longer, as I experimented with a detailed back scene, portraying a bluebell wood. Made up of three 3x2 boards, with integral legs, the layout was easy to set up and even quicker to knockdown. The record for being back in the car after a show was 12 minutes! Some new stock was added including the Branchines Clogher Valley bogies coaches. I butchered one of the then brand new Hornby/Dapol 08 shunters into a narrow gauge diesel [which ran beautifully], while one of the MTK El Crappo [yes, really] railcar kits was paired with a lorry trailer made from the Corgi Liptons tea van [as per the real thing on the Selsey Tramway] to make a neat mixed train. Both layouts taught me a lot. I cut my teeth on scratch building both locos and coaches. Being freelance meant there was no need to absolute accuracy, but even then, inspiration came from Irish as well as English prototypes. 7mm NG is certainly a great was of getting into making your own stuff, not least because there are plenty of cheap, second hand chassis out there as starting points. I also explored various elements of layout design, used cassettes in the fiddle yards, Tortoise point motors and even made some track. Any elements which have since appeared in my Irish models are by no means coincidental. The first three pictures are Hawkhurst [RM was still not all colour then], the rest are Cranbrook. What happened to it after I sold it on, I've no idea, but do know that one of my CVR coaches ended up on David Taylor's Bridport, after being rebuilt into a parcels van.
-
Courtmacsherry itself is for me the perfect branch terminus, with the sea at the front, the village street as the backdrop and [depending how far along you go, the loco shed or school to hide the hole in the sky. However, both of these are quite large for a small diorama, so trees may work and there are plenty of good quality ready made versions about if you don't want to make your own. Equally, if the line exits towards the front edge of the baseboard, this can be hidden by a fascia. Also, as a roadside tramway, maybe it could dive behind a nice big advertising hoarding, an idea I stole from Wantage Town, via Iain Rice for Fintonagh.
-
Giles Flavell, the man who builds all those fabulous radio controlled 7mm scale road vehicles, works in London theatre as a set/lighting expert. His layouts use the same techniques, so the fiddle yards are totally unseparated from the scenic area by any sort of barrier, fascia etc. Instead, these areas are painted black and are unlit in that all the spotlights are focussed on the scenic area. And it works! You only notice the lack of demarcation when it is pointed out to you. After that, things appear a bit weird for a while, but the fact is that human vision, though able to see up to 180 degrees (further in my wife's case), when focussing on a particular scene, the brain tends to block out the rest. In effect, we see what we want to see, which is why imagination is an important part of railway modelling, at all levels.
-
So, not just good with brass then! Not surprised... Unlikely I'm ever going to make a Martello tower, but fascinating to see the thought processes behind its construction and an inspiration in terms of always aiming for the highest standards.
-
Yup, plasticard body MM, while the chassis is a combination of various whitemetal castings. Angus' 2mm version is a master class in fine soldering. Check out Murrayec's pages too, he has lots of useful tips and the skill level to very high indeed. Re Loose End, there are photos on the first page of my Fintonagh thread in the layouts section.
-
Gorgeous. On my list to do in 7mm scale. One day...
-
Looking good. Witness coats can be both friend and foe - covering things you don't expect them too and highlighting stuff you hadn't noticed. Worth it though, as better now than when the top coat goes on!
-
Definitely worth a second, third, etc look. Just noticed the bilingual control panel. Class,
-
If/when we have exhibitions again, they attend the larger ones and, for a fee, you can be scanned and have models of yourself 3D printed. In my case it would certainly have children hiding behind the sofa!
-
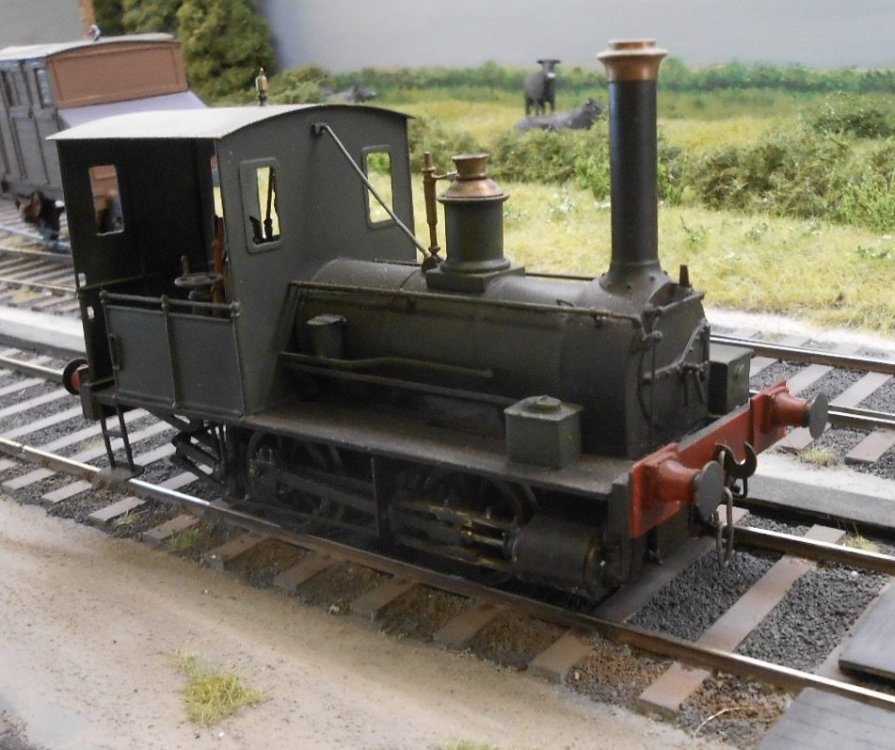
Will see what I can dig out, MM - though they were all in the pre-digital age so will need to take photos of photos to post them here. Have included a picture of Jane/Shannon. She may look at home on my 5'3, but is narrow gauge, of course!
- 309 replies
-
- 6
-

-
- mgwr
- 21mm gauge
-
(and 1 more)
Tagged with:
-
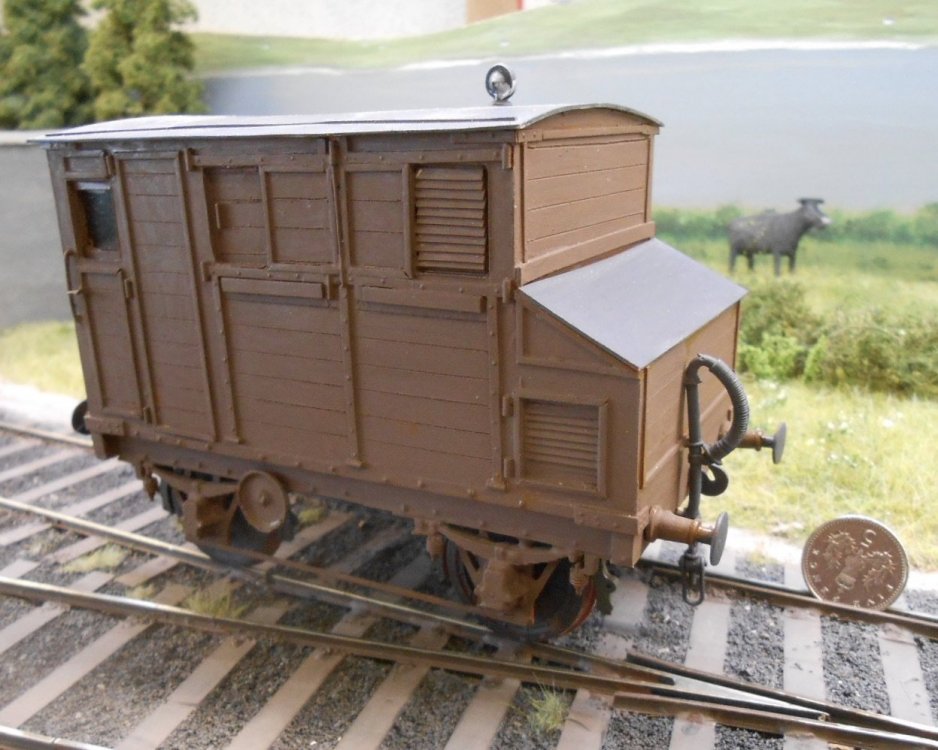
Here's my own version of the MGW horse box. Built it from the photo in Des Coakham's book. However, needs a repaint, as I've decided it will run in my 1950s version of Belmullet. Couldn't resist adding a 5p coin, which only goes to show just how tiny [and splendid] Angus's models are. 7mm scale is clearly 3.5 times bigger than 2mm, but volume wise, that rises to 43x overall...
-
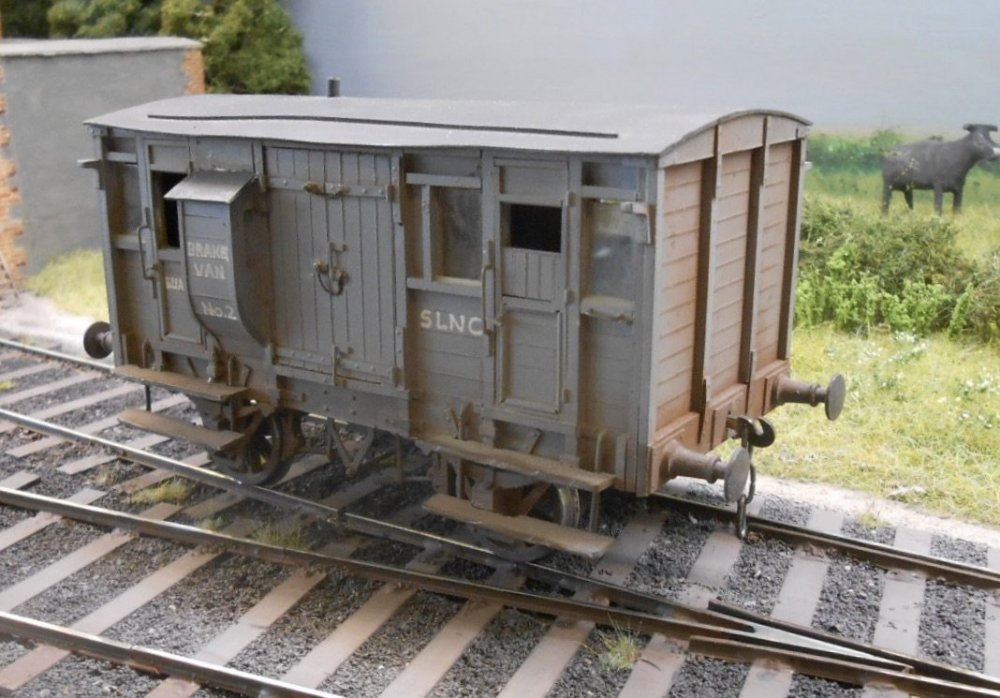
Couldn't resist posting a pic of my 7mm Sligo van. Built in plasticard, using the Alphagraphix card kit as the drawing with their chassis underneath. All that nice, heavy, square strapping made it an ideal candidate for using micro strip.
-
Those wagons look great Mark, so am sure I won't be the only one looking forward to seeing how your project progress.
- 309 replies
-
- 1
-

-
- mgwr
- 21mm gauge
-
(and 1 more)
Tagged with:
.png.c363cdf5c3fb7955cd92a55eb6dbbae0.png)

