David Holman
-
Posts
4,359 -
Joined
-
Last visited
-
Days Won
117
Content Type
Profiles
Forums
Events
Gallery
Everything posted by David Holman
-
Looks like the new project is going to be built on firm foundations!
-
Wonderful stuff, as ever!
-
Looks fine to me. A rather nice train is emeging.
-
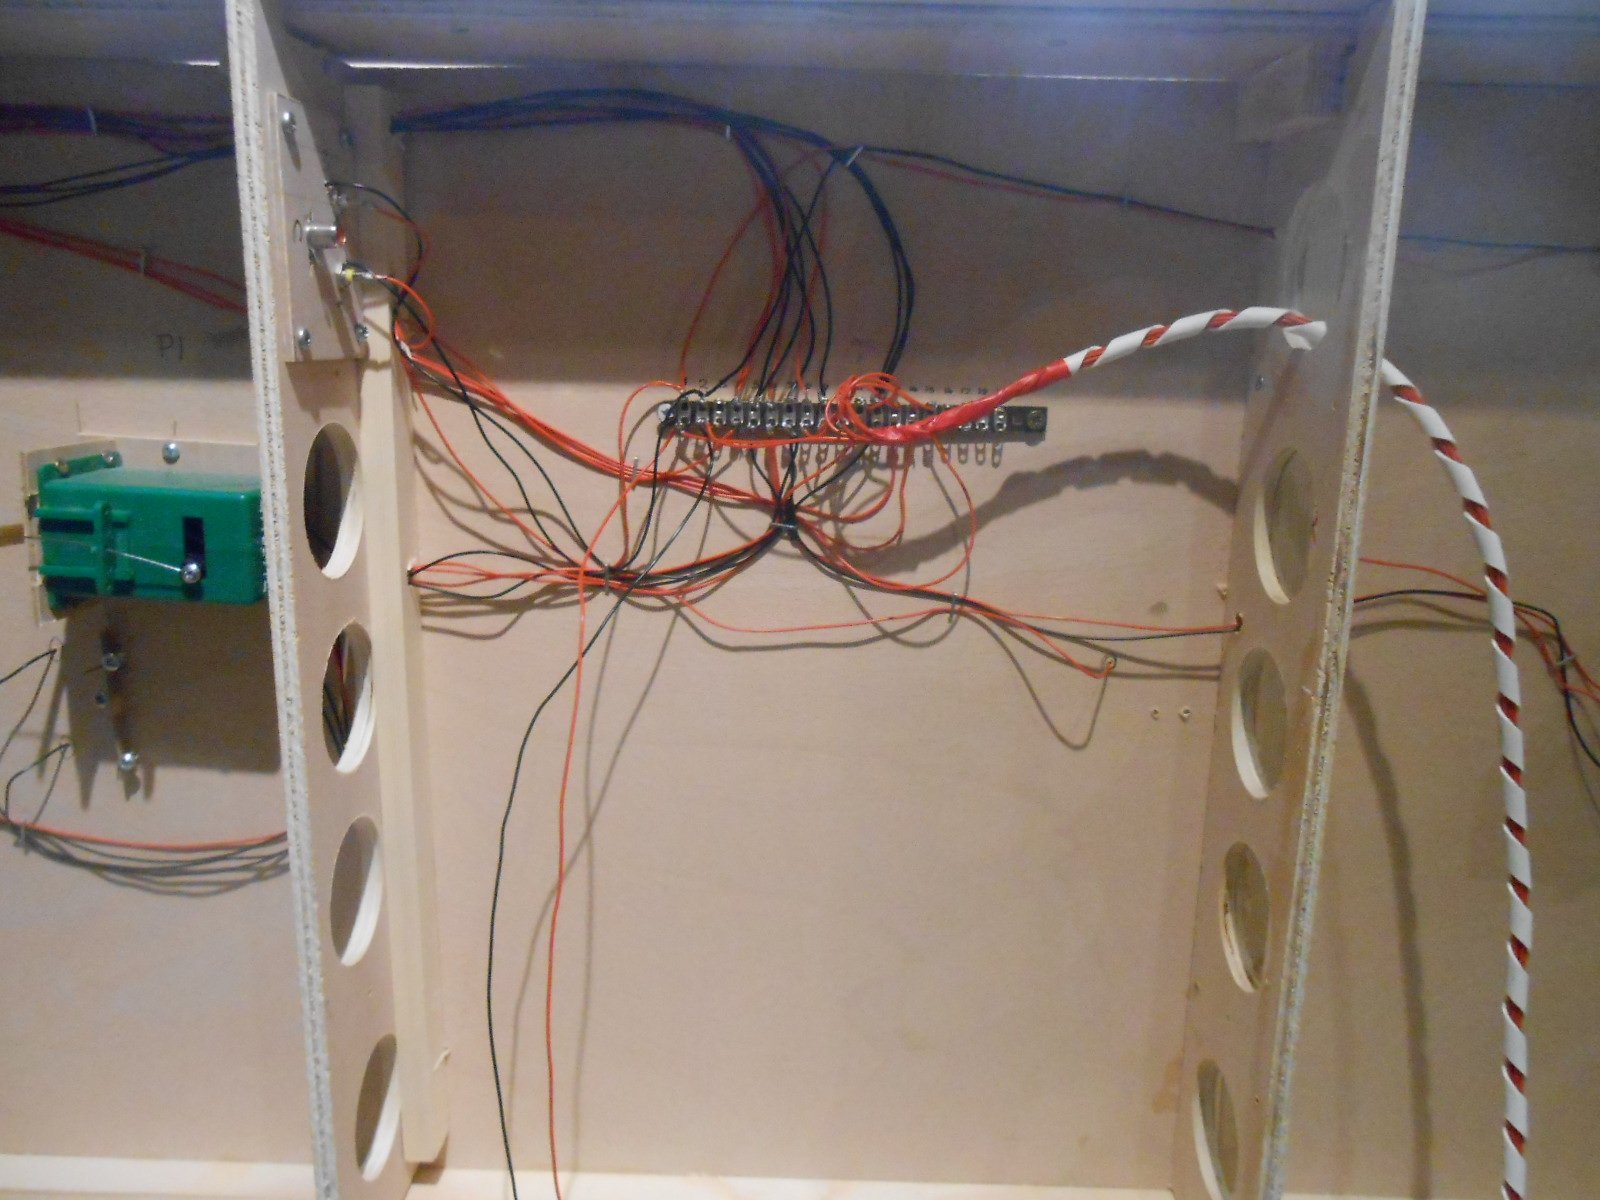
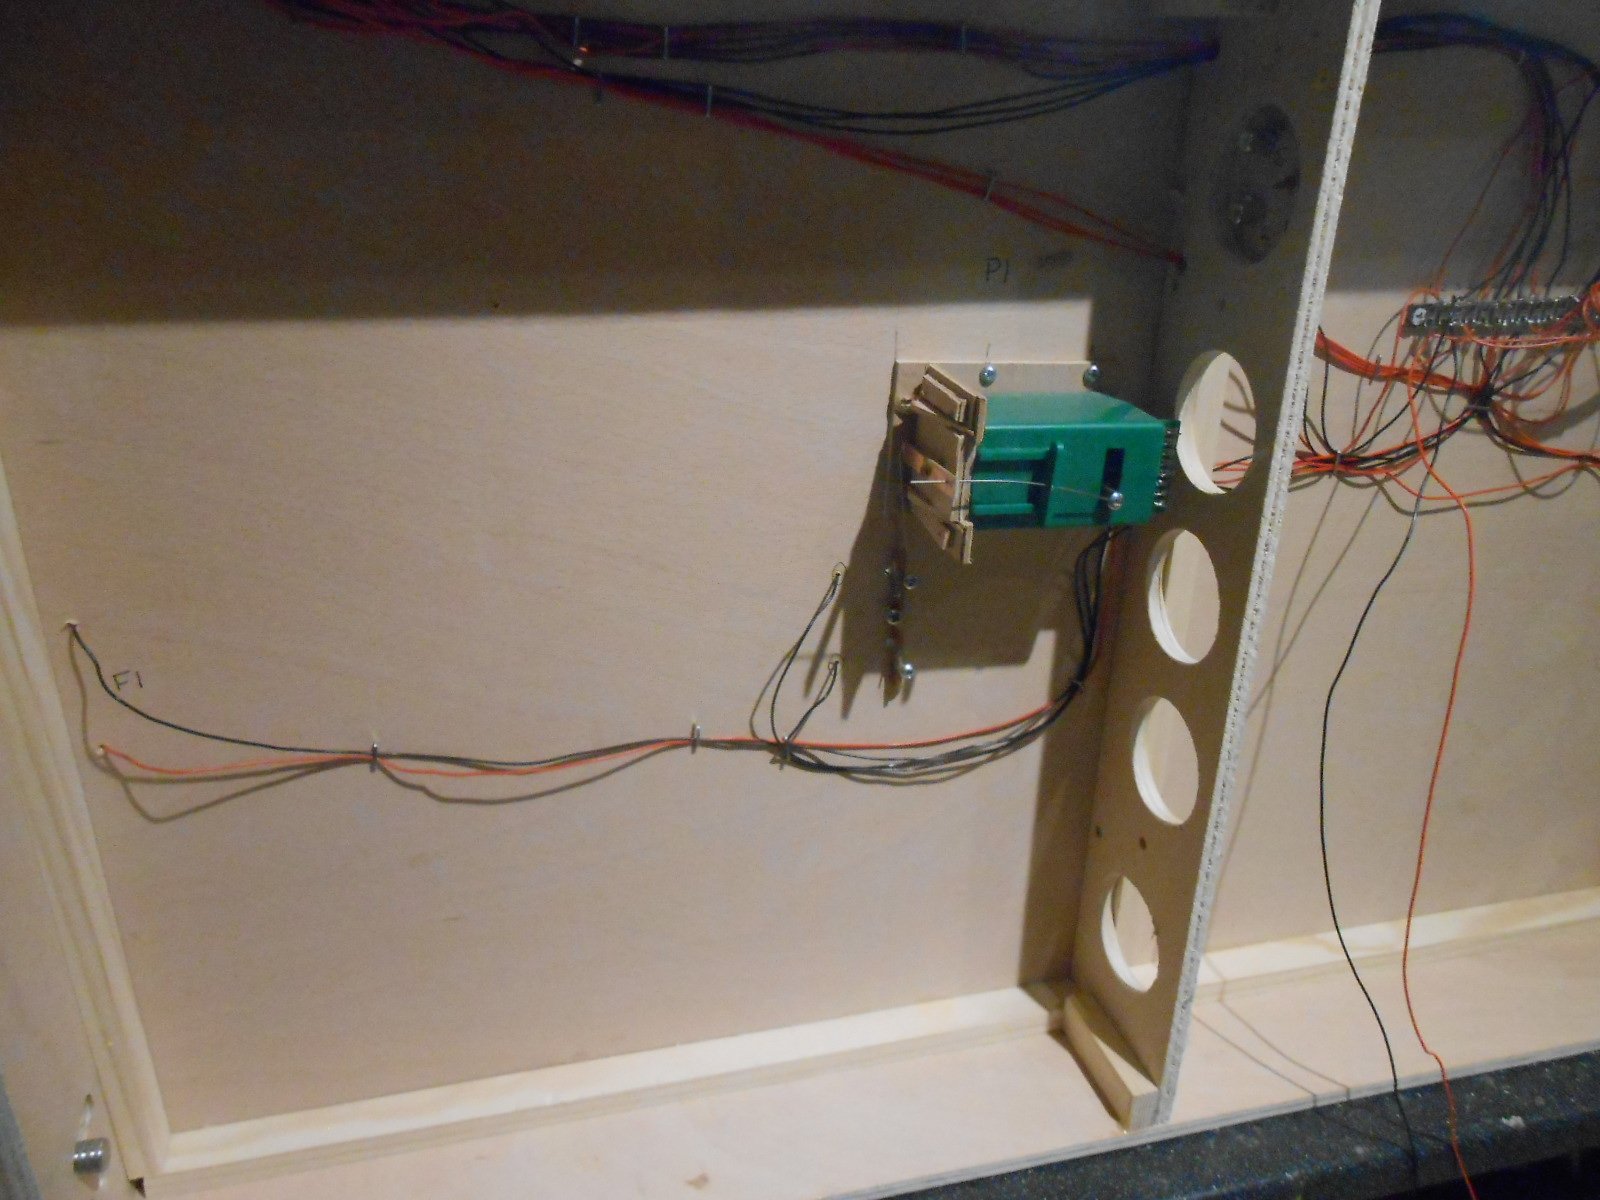
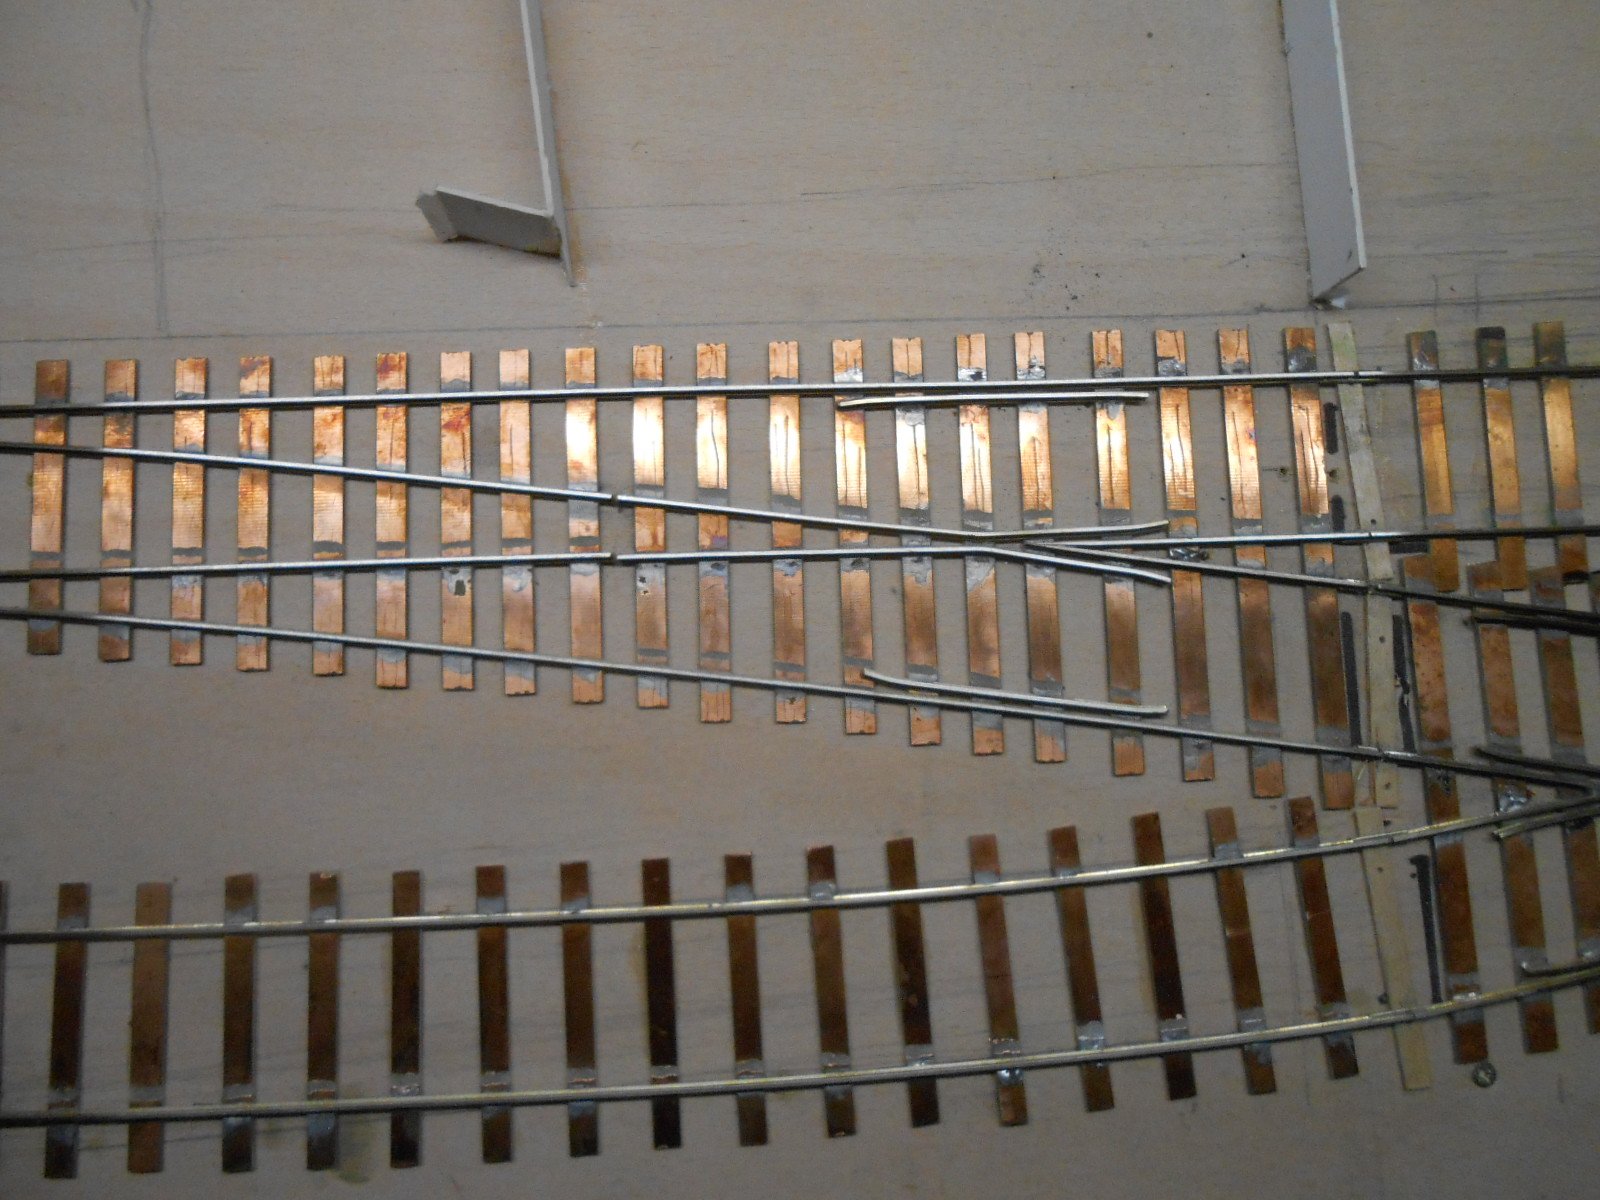
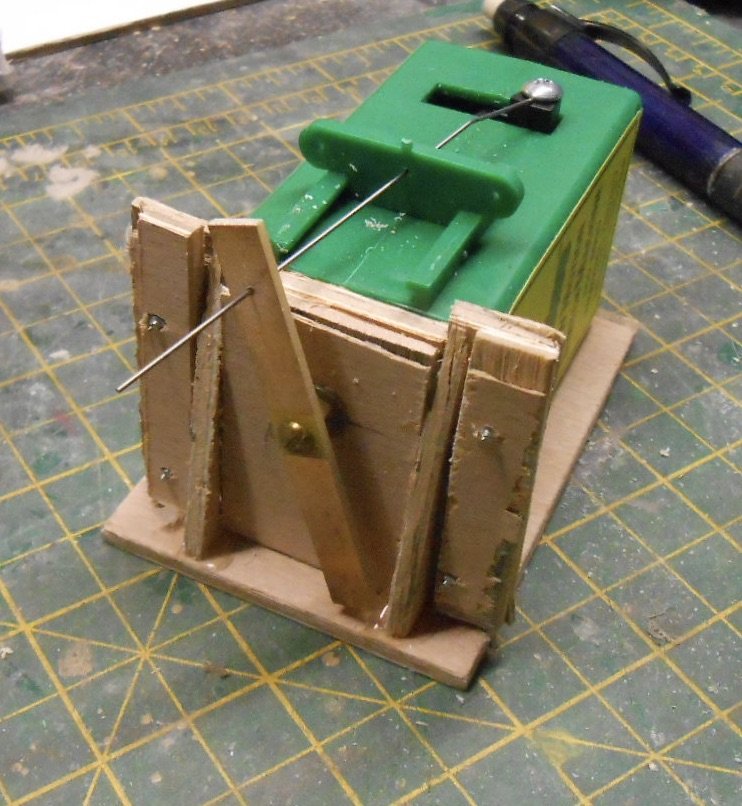
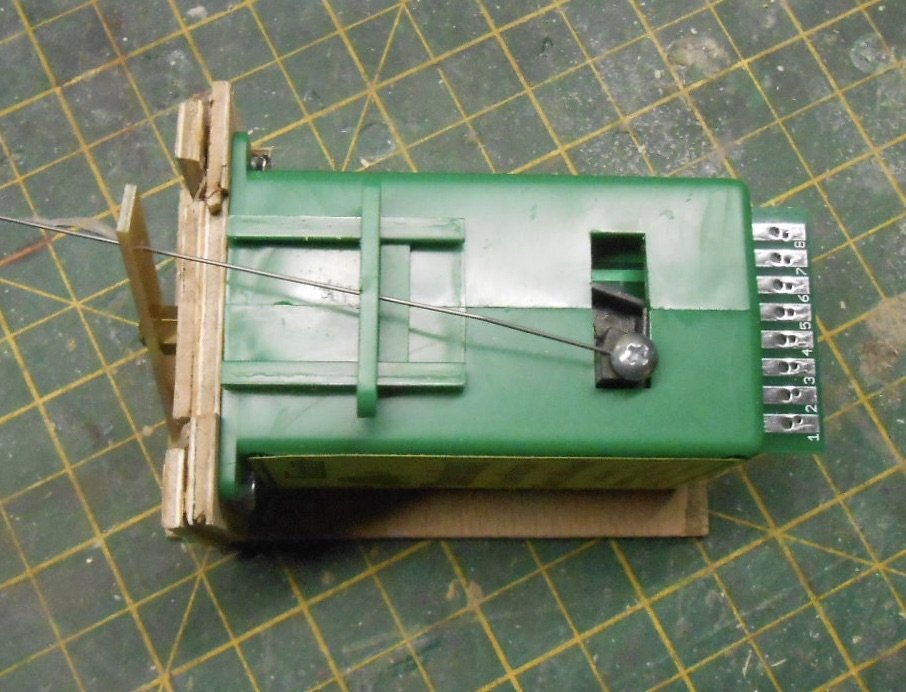
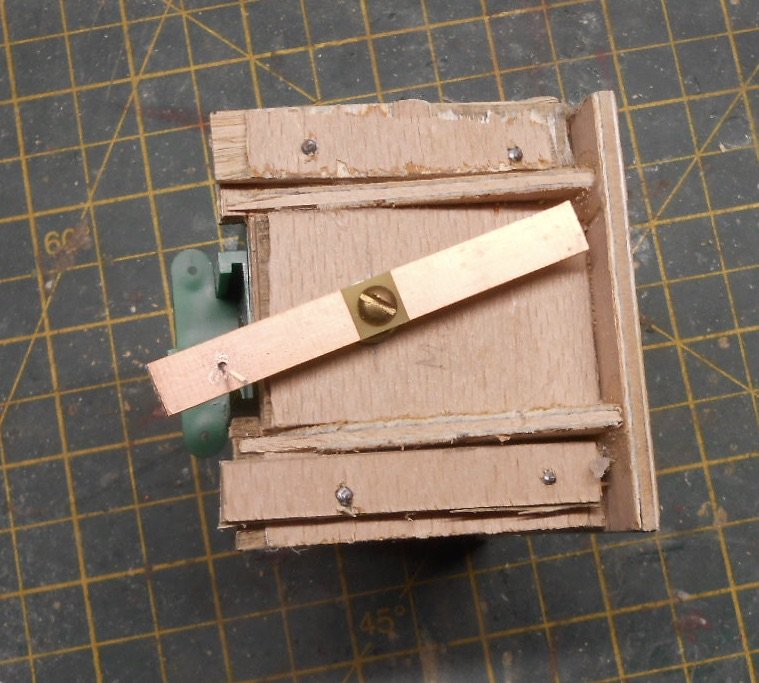
Since Christmas, have been plodding my way through the wiring of Northport Quay. With just four points and three uncoupling magnets, you'd be forgiven for thinking this was a couple of hours work. However, this is handmade track which, along with Tortoise point motors rather complicates things: All the copper clad sleepers need insulation gaps cutting in them The points themselves require both switch rails cutting about three sleepers in front of the vee/frog, with the copper clad sleeper insulation gaps cut to suit. The Tortoise point motors are too deep to fit within my shallow baseboard frames, so have needed home made brackets to turn them on their sides, with a new pivot beam to drive the under baseboard tie bars. Meanwhile the supplied torsion wire on the Tortoise is too weak for 7mm scale and needs replacing with .8mm sprung steel wire, which took a major tidy up of the workshop to track down! Tortoises do come with two built in auxiliary switches, so I always use one set of these to control the polarity of the point, so two wires from the toe end of the point go to the Tortoise, with a third wire going back to the frog. The latter never a bad idea with Peco points, I've found, which rarely prove 100% effective at this. Connection between the two baseboards is via a 15 pin computer D plug and socket. There are actually only 8 wires, but I find it prudent to use alternate pins to minimise stray strands of wire creating a short. Been there, got the T-shirt - several, in fact! At least there are just four track feeds in all, with just two DPDT switches [for the points] and three push to make switches [for the uncoupling magnets] on the mimic control panel set into the lower fascia of the layout. Over numerous layouts in the last 30 years, I've always used tag strips on the underside of each baseboard as 'junctions' for the wiring. I make a basic wiring diagram and then create a wiring plan which lists where wires go to and from each tag strip. With each tag numbered and a simple code [eg P for points, Sw for switches, Skt for sockets and so on], I then only need two colours [red and black for +ve and -ve] for all the wiring and indeed have got away using just one in the past. Knowing where each end of each wire is all you need to trace any faults. So, no wonder it has taken me the best part of a fortnight, but as I've said before in other posts, for whatever reason, I have an inbuilt ability to to put things together back to front at every opportunity, while transposing things from above to below the baseboard only complicates things further. MANY rude words, in new and colourful combinations are inevitable! So, a case of slowly slowly and also carefully plan the best routes for the wires, which I keep in order by using a staple gun. The end product of all this was that around 2.45pm today, my Deutz G class shunter made its way hesitantly around the layout. Stage one successfully completed! However, stage two now involves making sure all my stock will run through the pointwork and unfortunately all is not well in this department. Longer wheelbase locos have shown there to be several tight spots, meaning I need to do some tweaking in one or two areas and probably do a bit of a rebuild on both Y points. If this all seems like a lot of trouble to make four points and a few metres of track, it certainly is, but if you want correct gauge, lightweight track, then there is no alternative, so you just get used to it.

-
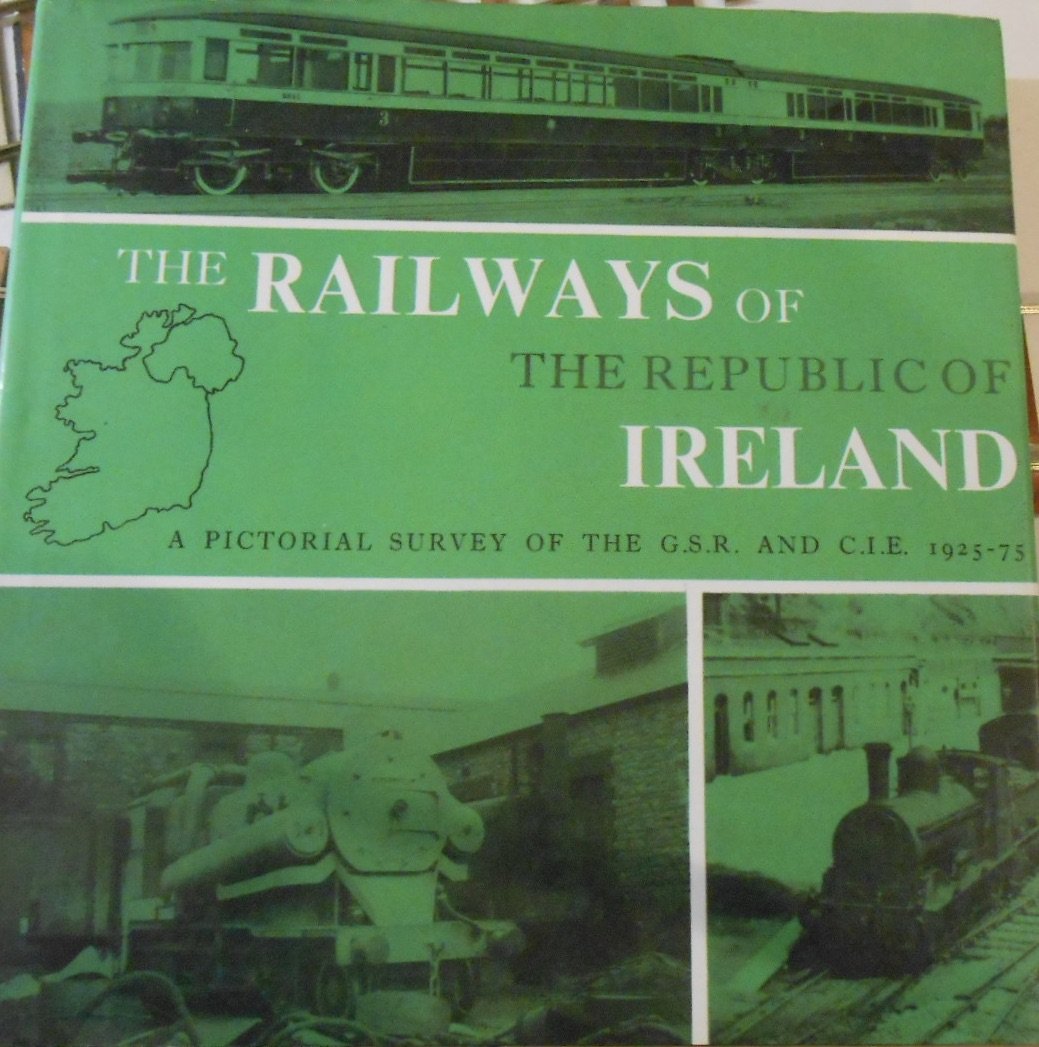
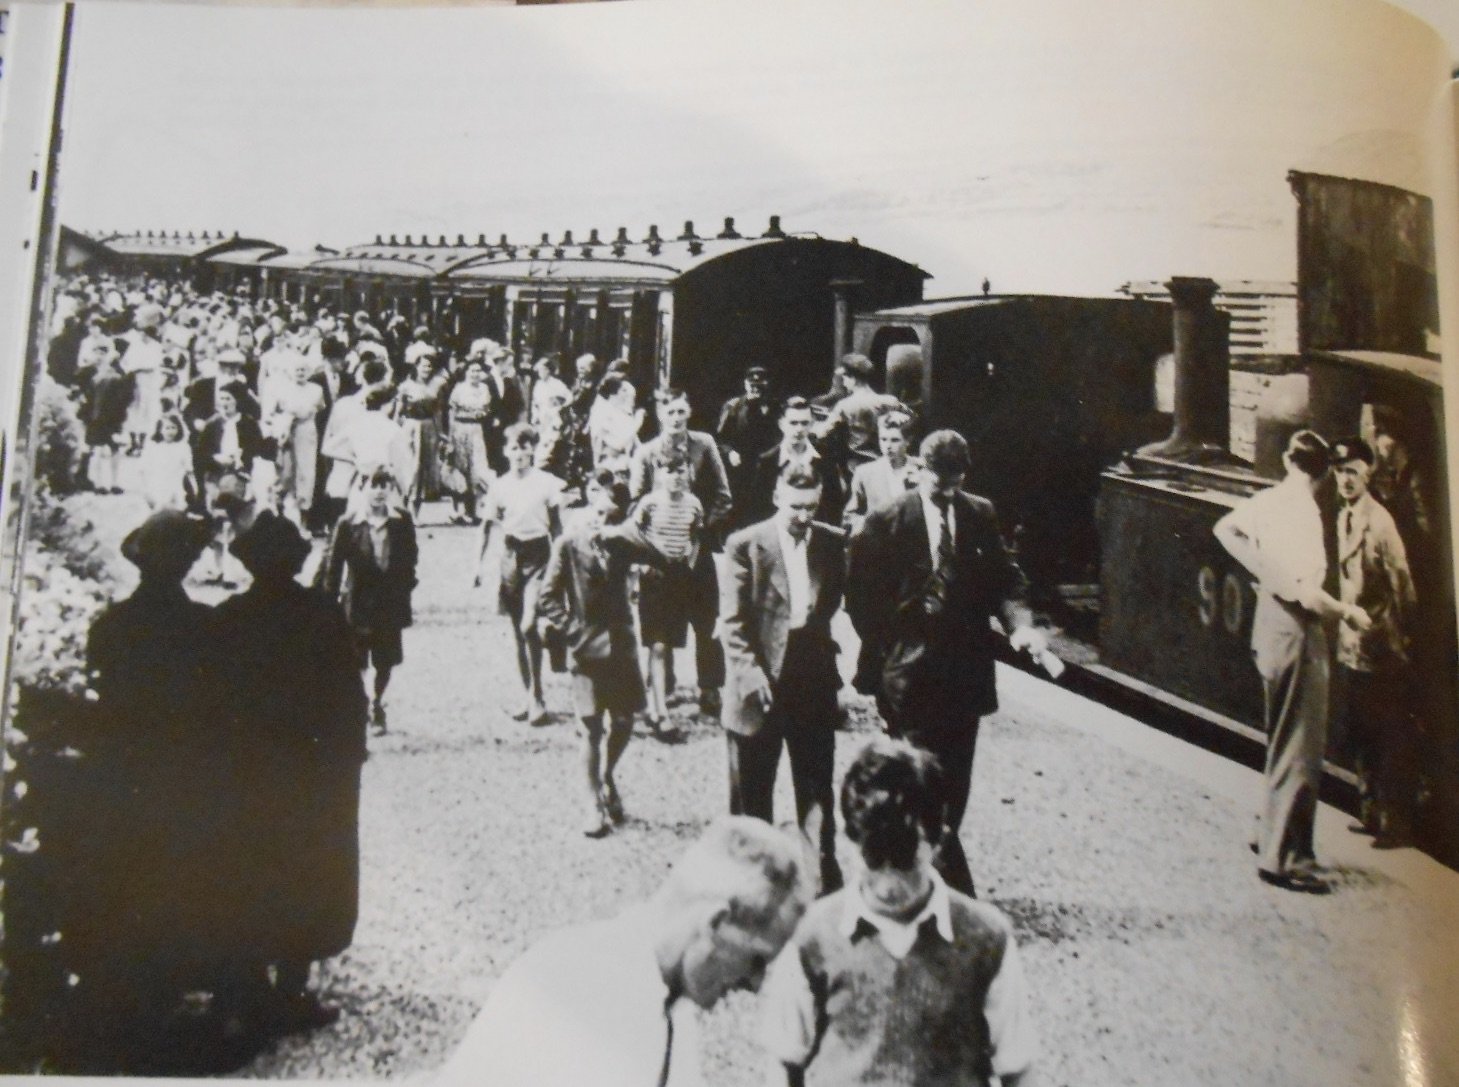
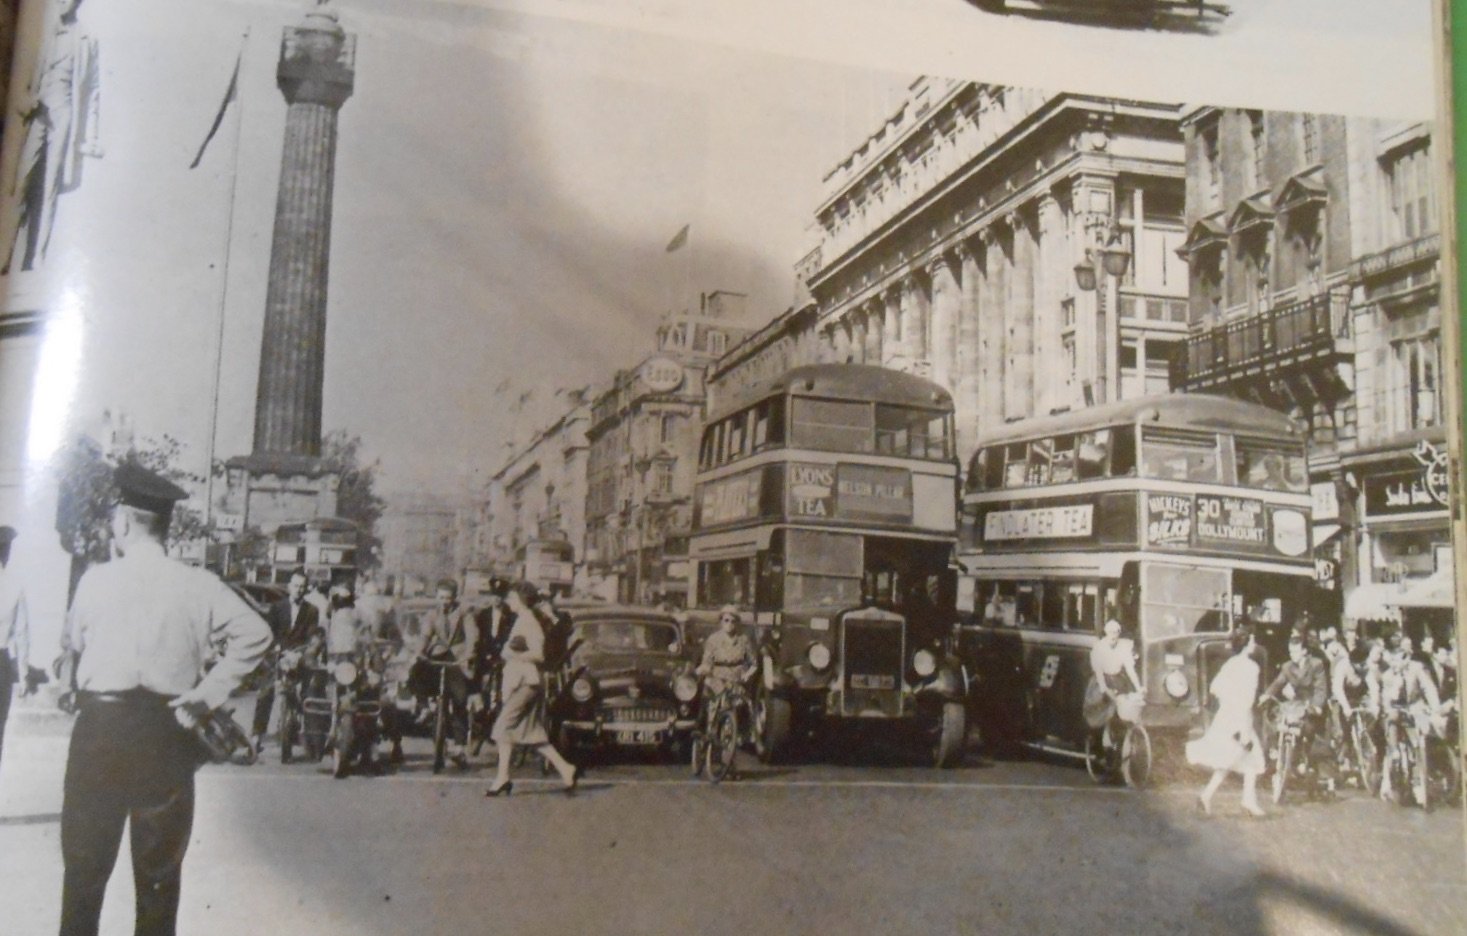
To my delight, found this book in the Club library recently. Some of the picture quality isn't great, but there are nevertheless some real gems, like the excursion to Courtmacsherry [doubt if Andy has anything like enough figures to recreate this!] and the buses on O'Connel Street.
-
England could do with some bad weather in Sydney.
-
Always look forward to a new post, Angus. Button gauges are a new one on me, but then 7mm scale is fairly forgiving and +/-0.25mm not a problem on plain track, though clearly best if it is consistent! The fact that two thou matters sounds a bit scary.... That mini mill looks a neat bit of kit.
-
That looks a very promising design and seems to have all the key elements of an Irish branch terminus
-
All rather splendid - and summer too!
-
Yep, proper job. Got to be pleased with that, Ken.
-
Guess it depends on the sort of testing you want to do, Tony. For me, on my new project, I want to make sure all my stock will run through the points - both locos and rolling stock. The latter can be done by hand, but persuading locos is often a case of trial and error. For example an 0-6-0 will behave differently to a 4-4-0, or anything with bogie or pony wheels. I start off with wagons, singly, then in groups, then likewise coaches, as my hand made track needs careful checking to see if I've built it accurately enough, or if adjustments are needed. Locos need the wiring to be done and I always start with my J26 0-6-0T, which is both a nice simple design and a known good runner. However, as Galteemore says, track and wheels need cleaning first, to limited the variables. If all is well, then I carefully to through all the other locos, noting any problems and then attend to them one by one. Given I know my stock is pretty well run in and reliable, it is more likely to be track, but you just never know! Finally, hopefully, I run the likely full trains I want to exhibit, including any shunting moves, because in an ideal world, I want to know everything works as I want, before any ballasting, painting and scenic work takes place, as this can always cause problems later too.
-
Andy is right, was thinking of DG, not B&B! They work well.
-
Nice one Ken. Full of character and compliments the overall scene really well.
-
Great stuff J-Mo, full of character and am sure simple lining with a little light weathering, will lift it even further.The As for couplings, while choppers are prototypical correct, Kadees are a popular choice, while B&B work really well too.
-
Those C&L scenes really are evocative.
-
Fine posts everyone!
-
The important thing for me is to appeal to and nurture creativity in children. So many toys these days seem to have limited value beyond the first few days, or indeed hours. Even Lego focuses on kits that build just one model, rather than packs that enable multiple things to be built as primers to, in effect, scratchbuilding your own stuff from the bricks and components they offer. Yes, basic Hornby train sets can be expanded and there are loads of second hand bargains out there too, but those push along, wooden train sets and tracks that can be built and rebuilt in endless combinations are what fire the imagination, particularly for a four year old. Spent all my career in primary education, finishing up as a schools advisor and one of my favourite jobs was doing lesson observations and especially in what we call Year R, with the four and five year olds, where the children have lots of opportunities for creative play and those wooden train sets go down a treat. When you think about it, model railways, at any level, are a brilliant way to engage children's minds, not least because they expand into so many other areas, like buildings, scenery, road vehicles and so on. Back in the day, with my Year 6 class, was given a Triang Big Big Train Set. An oval of plastic track and a battery powered engine. This was pre 'national curriculum' but CDT was just becoming popular, so the class project that term became the model railway and showed to kids how to make a simple building from a fold up card 'net' and they all went on to adapt it into houses, shops and so on. With 30 in the class we soon had a whole town, which got lit up with batteries and bulbs and Lord knows what else. Wrote stories, did loads of maths, science, history and geography too - all based on an old plastic train set. So, sorry for the sermon (great question though!) but there really is nothing better than creative play for developing children's minds, while we are all still learning how therapeutic it can be ( for all ages), in these challenging times too.
-
In the latest Model Railway Journal [286] 'Small Suppliers Forum', there is an interesting report on some wagon kits designed by Jonathan Duffett. In a real sign of the times, they are available as a free download to print on your own 3D printer! Currently, there is a growing range of various types of iron ore hoppers, coil carriers and what MRJ quote as 'an amazing Conflat LD whose construction in etched brass or plasticard, would be the stuff of nightmares.' A picture on the website certainly confirms this. The downloads are available from www.thingiverse.com/ironmink/designs. He's done detail items such as buffers and brake gear too. Seems you have to create a Makerbot Account - they are a company that make 3D printers, but as to costs or liabilities I have not pursued this as it not in my current interests. Mr Duffet says he is looking at unusual and less modelled prototypes, for projects that are unlikely to be produced by any large, or even small scale commercial enterprise. Further information can be had by emailing jonnyduffett@icloud.com Whether he would be up to doing Irish prototypes, I have no idea, but thought it was worth sharing here as so many of our favourites appear to fit his criteria. If anyone knows more about the above, perhaps you could let us know?
- 1 reply
-
- 5
-

-

-

-
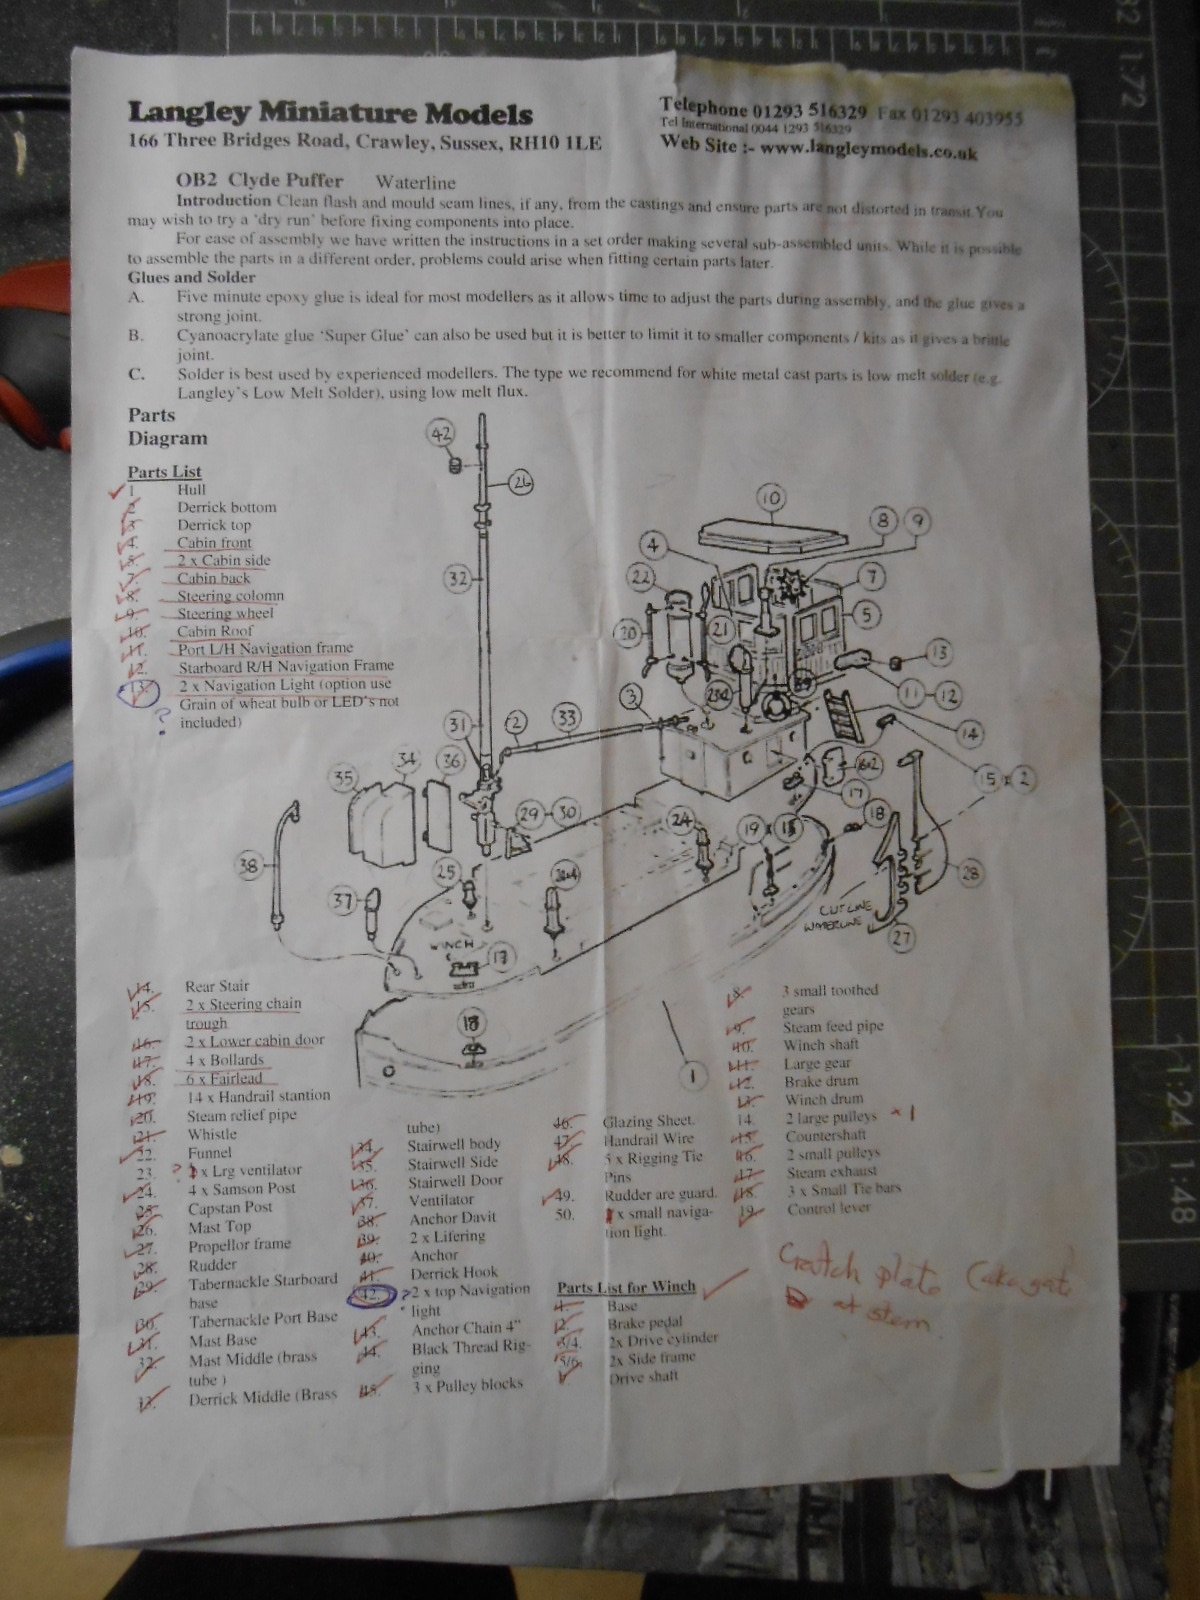
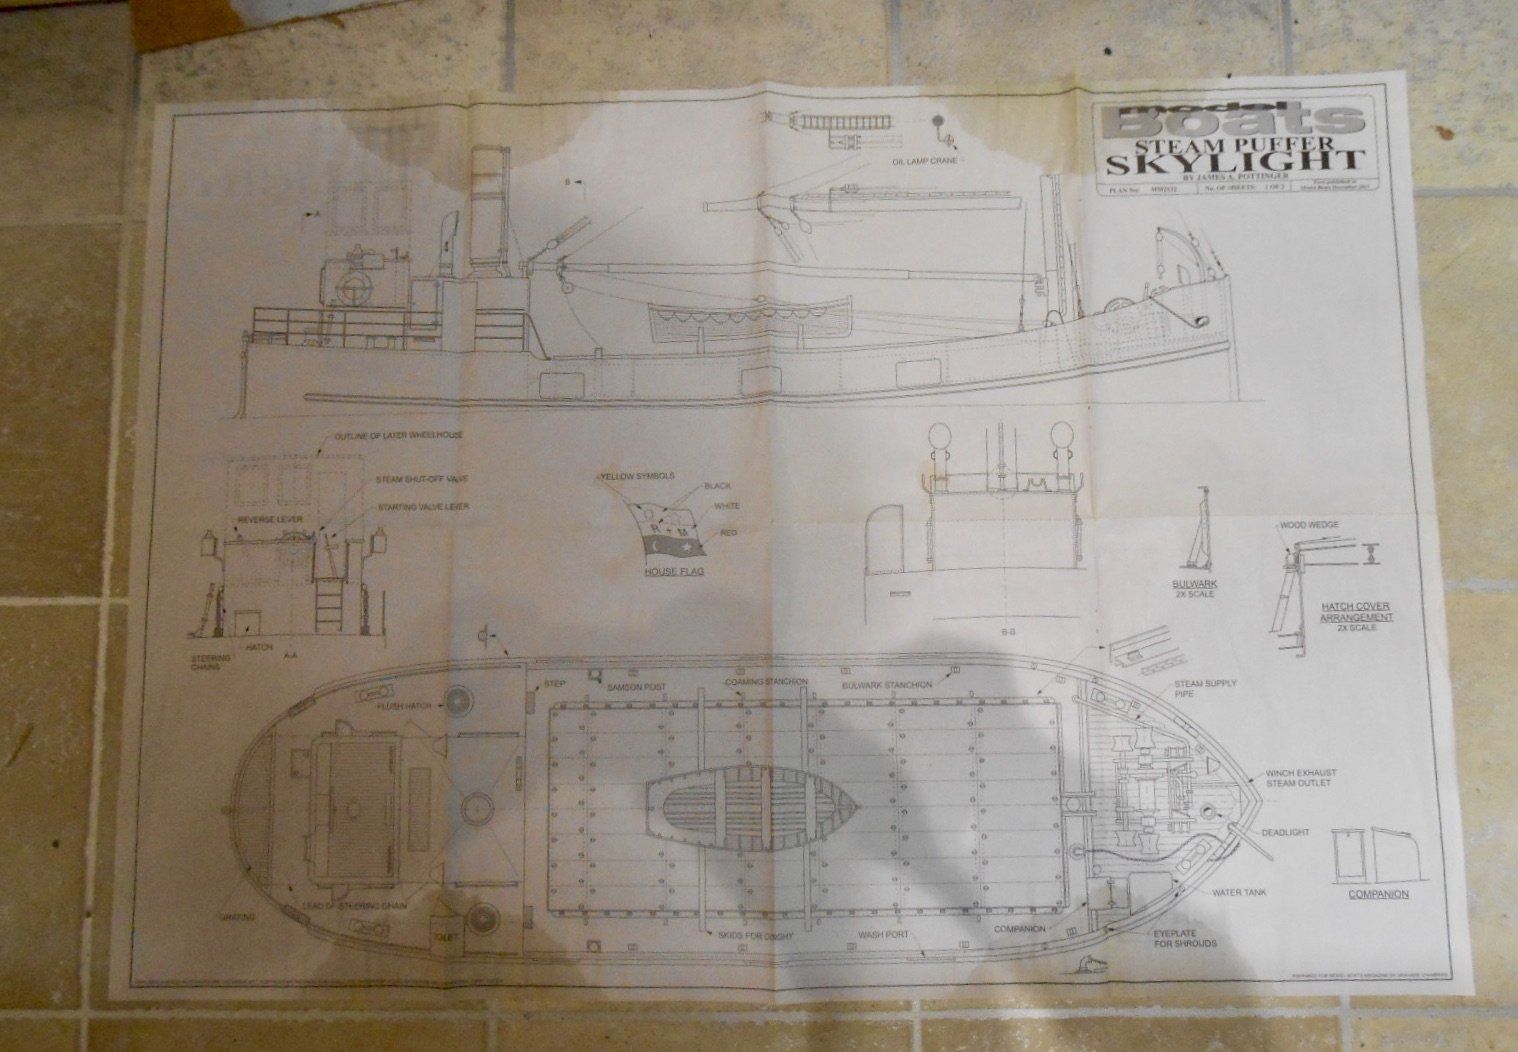
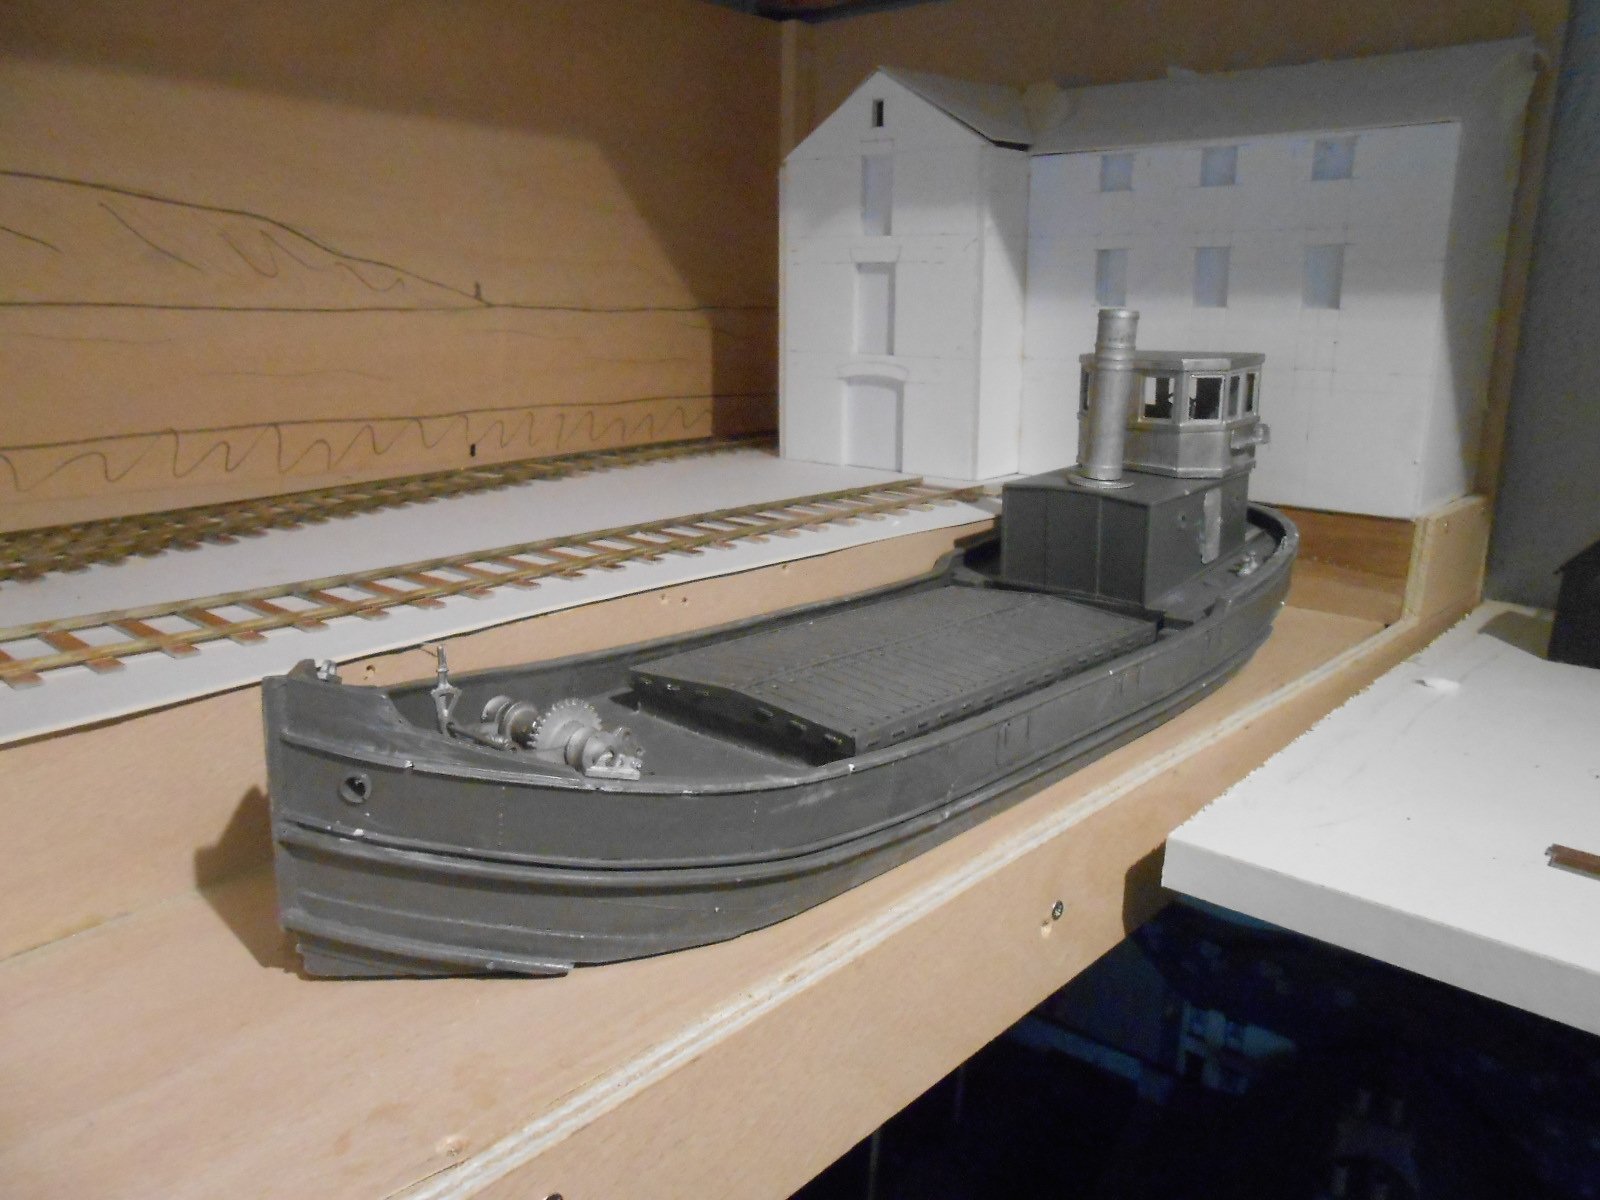
Langley Clyde Puffer While nothing happened in the workshop [or indeed at all on Christmas Day], I am no good at all when it comes to just sitting around watching TV, let alone bad TV. Therefore, over Christmas, I like to have some modelling that can be done on a board, on my knees, sitting on the sofa. Hence the Langley Puffer. Well, I made a start, but it is certainly not proving easy. The large, resin cast hull is ok and the white metal castings too, but the problem is identifying them. The instructions aren't exactly clear and while there is a useful exploded diagram to help identify the numbered parts, being a ship model, rather than a railway one, there are large gaps in my knowledge, so I'm feeling very much like a beginner again. Help has come from fellow Chatham club member, Brian, who not only worked on the Puffers, but has been able to give me a large, detailed scale drawing of one. This has been invaluable in both identifying parts and other important features not included in the kit. So, over Christmas, managed to get the hull cleaned up and air bubble holes filled. The lower cabin [also a resin casting] needed extensive filing to get it to sit properly on the rear deck, while the port holes needed drilling out and the interior braced with some plywood to cure a bit of warping. The upper cabin is made up of substantial white metal castings, but goes together quite well with a bit of tweaking. It is not fixed down though [nor is the funnel], because the interior needs painting first and I can add a couple of control levers not supplied with the kit. I then glued various cleats and bollards to the deck, using cyano or 5 minute epoxy. The other mini project was the forward winch. This is a real bag of bits that another exploded diagram doesn't make entirely clear, while the instructions weren't either - at least to me anyway. One cast gear wheel is missing, but the scrap box should provide something suitable. So there we are for now - enough to show the character of this fascinating model and that it seems to fit in nicely with Northport Quay as a whole, so hopefully will prove a good choice and an interesting challenge too. For now though, it is back to the layout wiring.
-
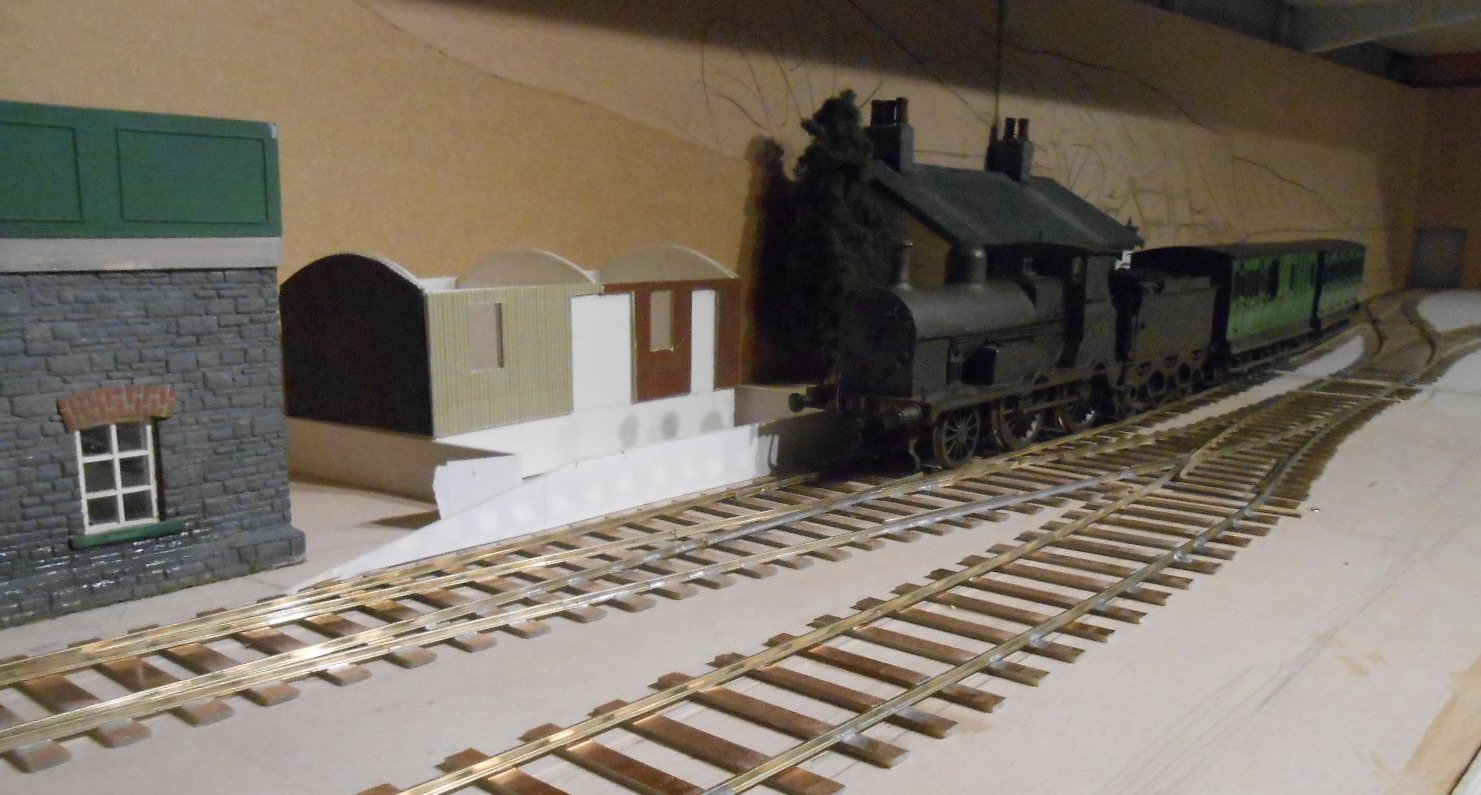
Thanks - I've just had to go and check because I've made a few six wheelers over the years. Some are Alphagraphix/Tyrconnel kits, others are scratchbuilt on Alphagraphix chassis. Both of these are plastic bodies with microscopstrip paneling and whitemetal castings. There are quite a few pictures of branch trains made up of just two six wheelers, so hopefully this will look the part on NPQ.
-
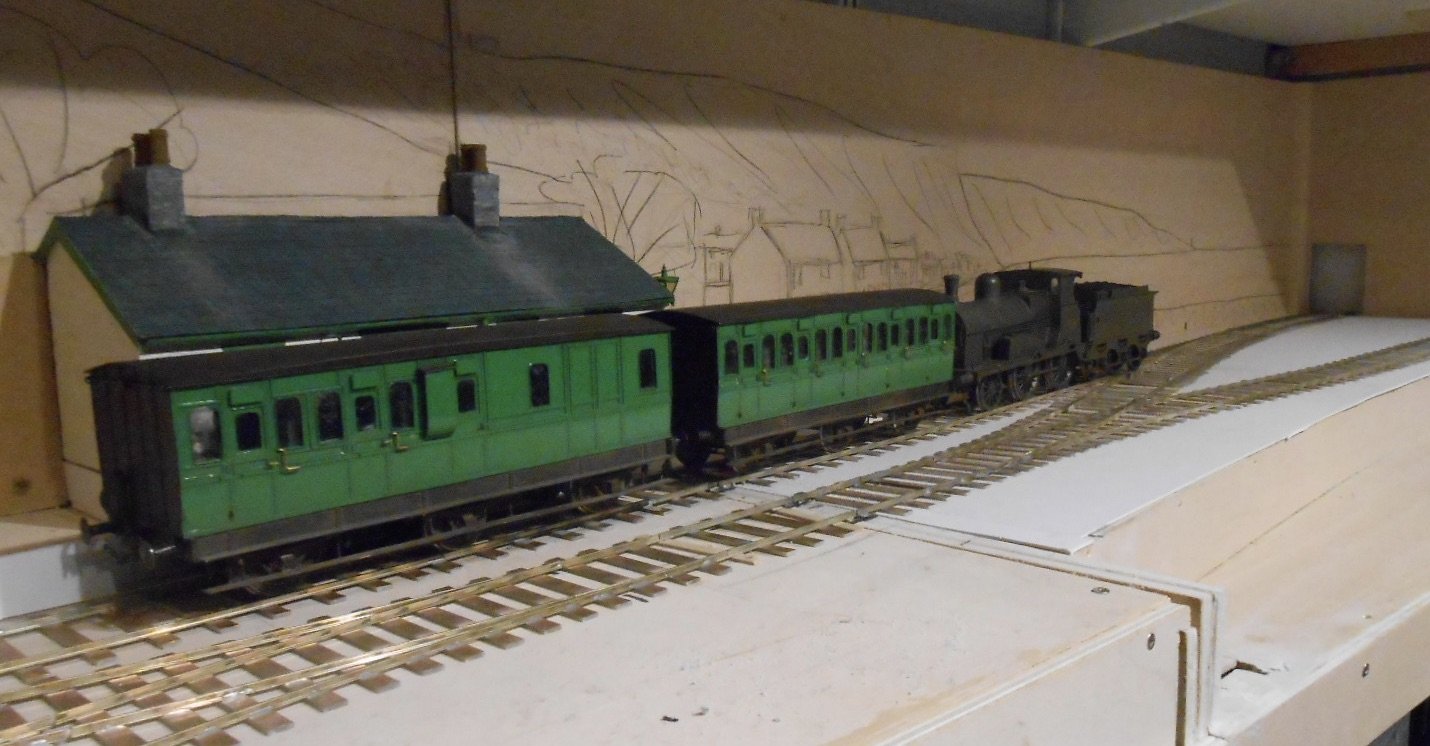
Pre Christmas modelling now drawing to a close. Below is the control panel for Northport Quay - just two switches to work the points as a pair of cross overs. Three push to make switches will be added to work the uncoupling magnets, plus an on/off switch for the shuttle unit on the crane track. Next up the brackets for my tortoise point motors. I've been using these for over 20 years without problems, though there are a couple of issues to bear in mind. Firstly, they are expensive and secondly they need a good 10cm of baseboard framing. Hence these basic cradles, made from 4mm plywood, to turn them on their sides. The original pivot wire now turns a second pivot, which will work the below baseboard tie bars, as per on Belmullet. With track laying completed, couldn't resist posing one of my intended trains, in this case a G2 2-4-0 and two Midland 6w coaches. The workshop now shuts down for Christmas, so very best wishes to you all.
-
Enjoy!
-
For what it's worth, check out photos in my Fintonagh thread JB. I've used a mixture of 3D, low relief, 'flats', view blocker (like trees), plus side wings of the fascia - all to draw the eyes away from what you don't want them to see. On Northport Quay am using a curved backscene (hardboard) at one end to avoid a sharp corner, but the other corner will be hidden by a combination of a warehouse and a crane. For me it is all about studying different scenarios and working out what might work best. Another book well worth having is Cameo Layouts by Iain Rice, which examines the whole concept of creating well balanced scenes from start to finish and builds on some of his earlier work. For example a well balanced scene has either a high feature at each end, with low features in the middle, or vice versa. On a larger layout, there might be several of these. Options for making curved backscene include mounting board, cardboard and mdf. You can get the latter down to 2mm thick (picture framers use it), while DIY stores sell 4mm mdf that has parallel lines milled on one side to enable it to be curved down to about 15cm radius. As for backscenes, I agree with Galteemore. Subtlety is the key and while photographs can look impressive, they can also dominate, not always a good thing when you want the focus to be on the foreground. Indeed if the normal viewing angle is fairly low, then a plain sky is all you need, with maybe a suggestion of low hills on the horizon. Really not difficult to paint - though it is essential to keep colours well muted. The usual advice is to avoid black and primary colours completely, instead using washes of various browns and greens. As for sky, an even pale grey is not the worst, or hardest thing to do. Round here that's all we've had for much of the year!
-
How long before discarded, single use, faceless are forming scenery too?
-
Fine selection of stock there, John. Tend to agree with you regarding crane functions, especially in 4mm scale. Am aiming to make my (7mm) crane trundle back and forth on a short length of track, possibly using a shuttle unit, to provide a bit of movement when there is no train on scene. Back in the day, Chatham Club member Ted McIlroy built two of the Dockyard's cranes in 7mm scale (the prototypes are parked opposite our clubroom), using three RG4 motors and complex pick up arrangements to make them fully operational. Giles Flavell is the man these days - building a plethora of radio controlled road vehicles, including operating cranes that are real crowd pillars at shows.