murrayec
-
Posts
2,775 -
Joined
-
Last visited
-
Days Won
70
Content Type
Profiles
Forums
Events
Gallery
Blogs
Everything posted by murrayec
-
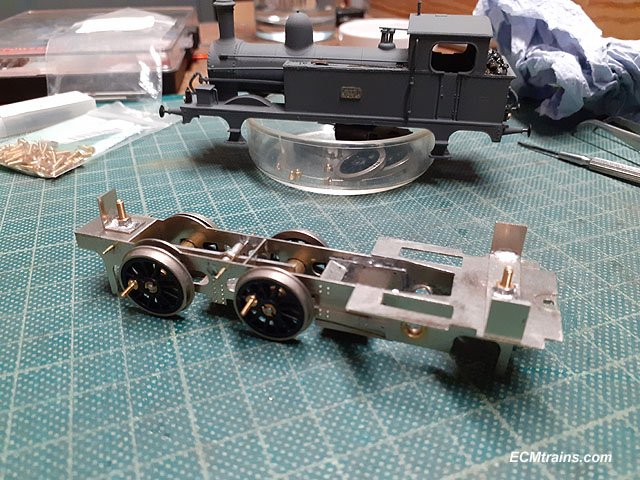
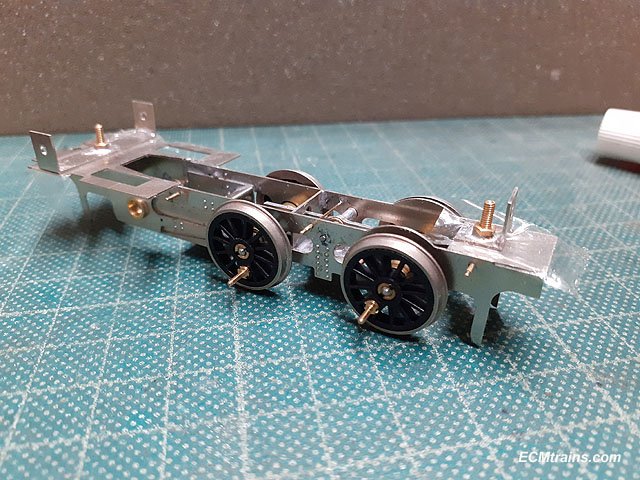
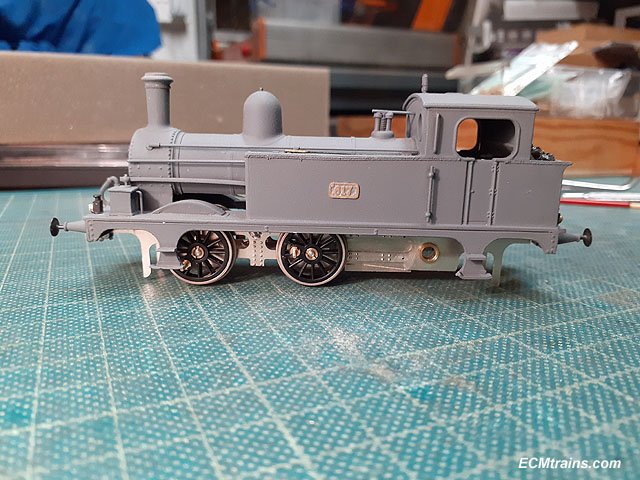
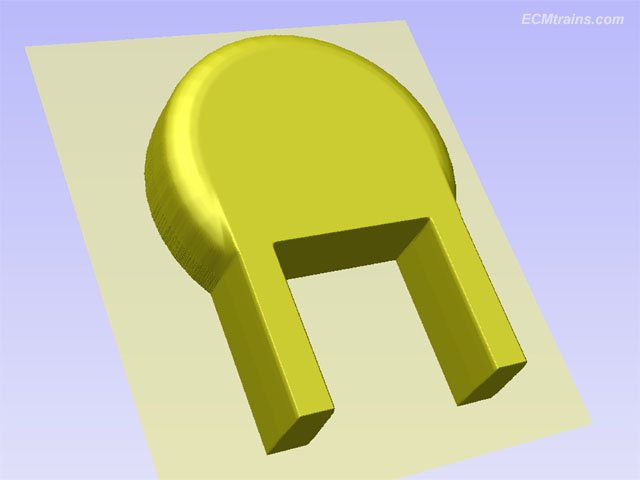
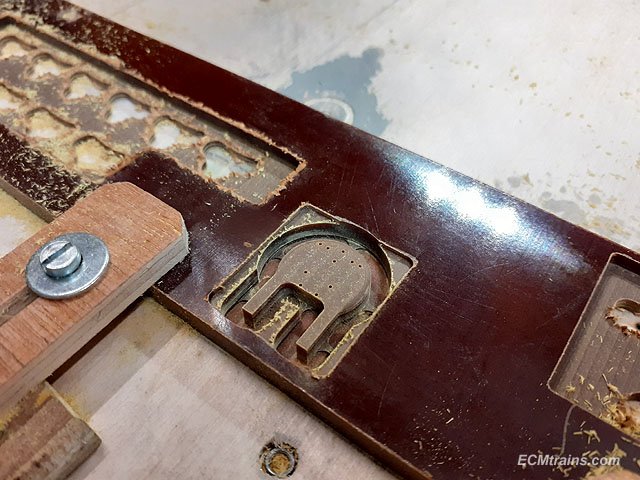
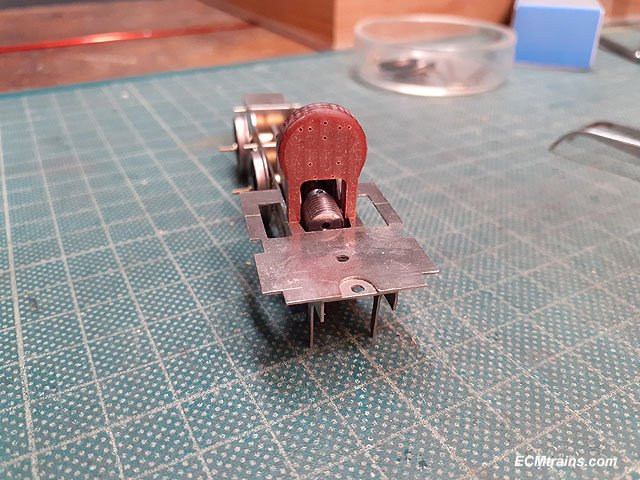
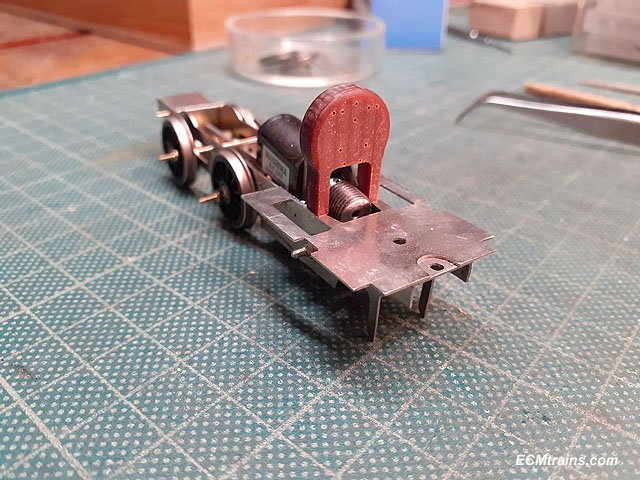
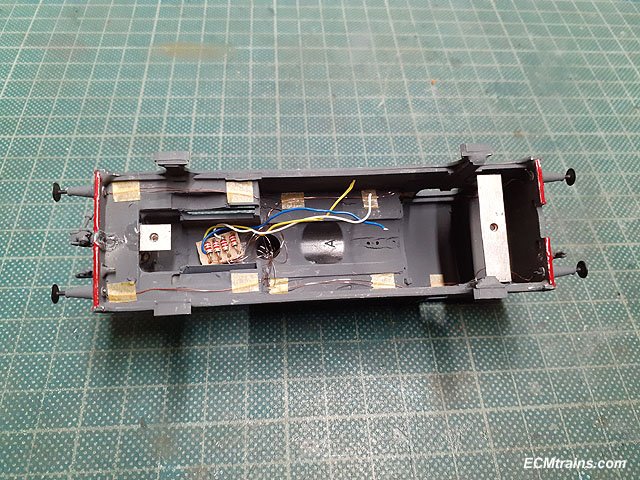
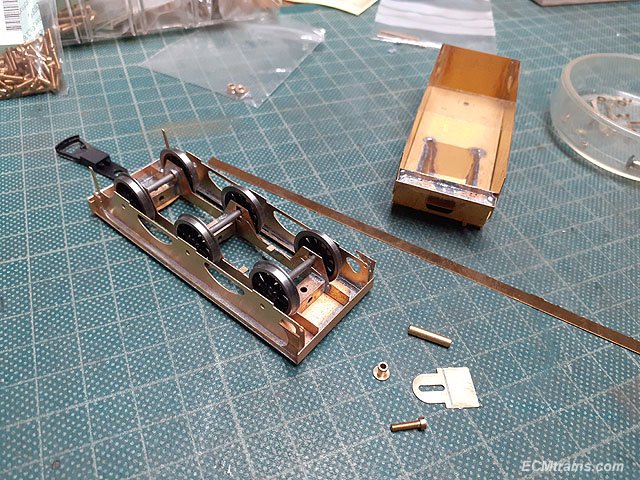
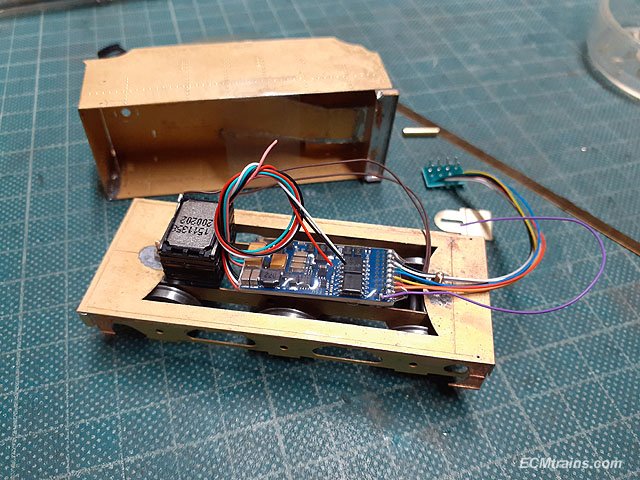
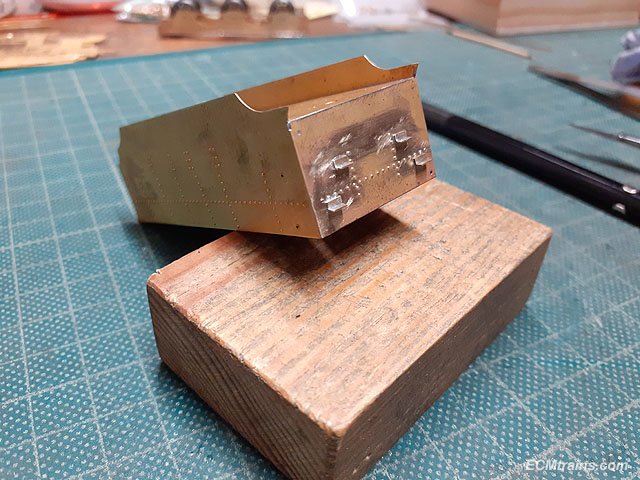
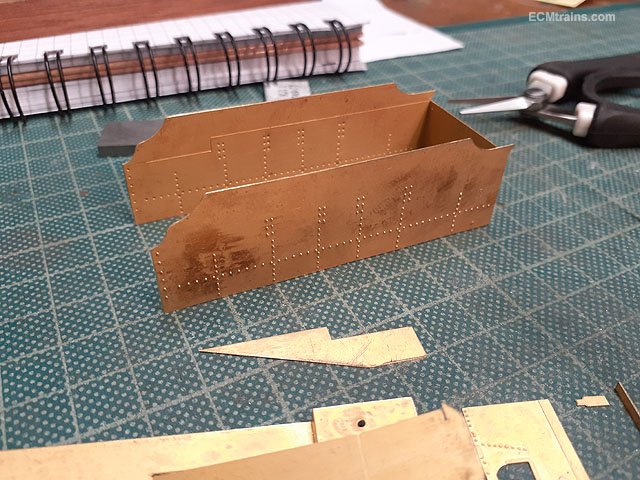
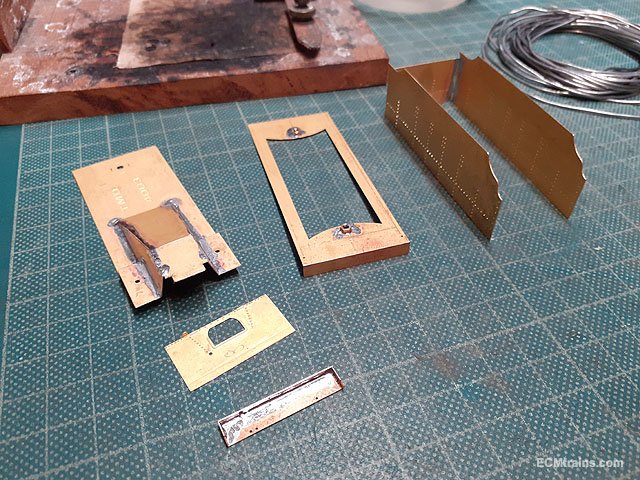
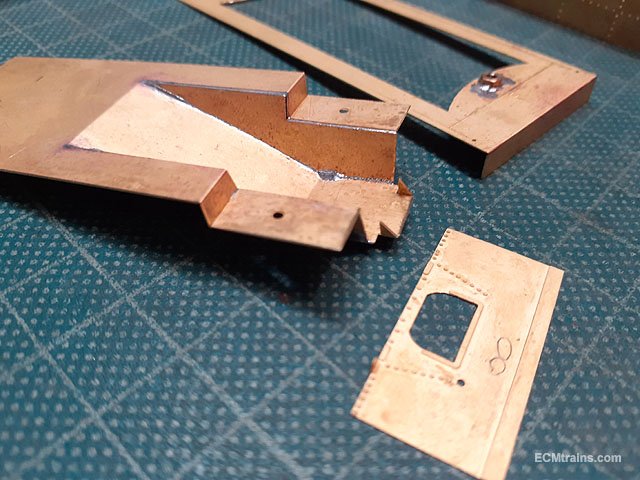
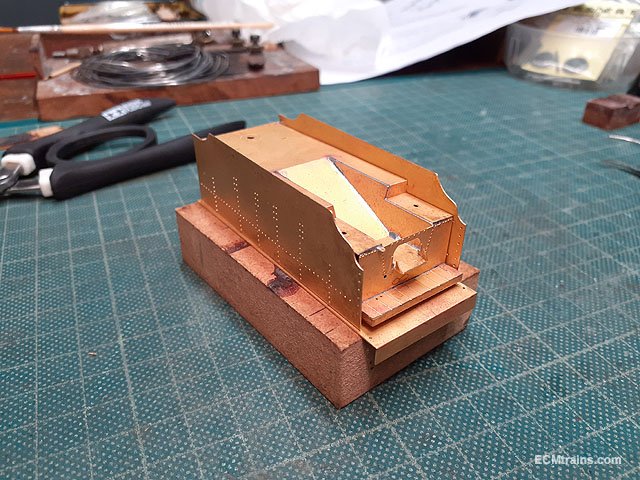
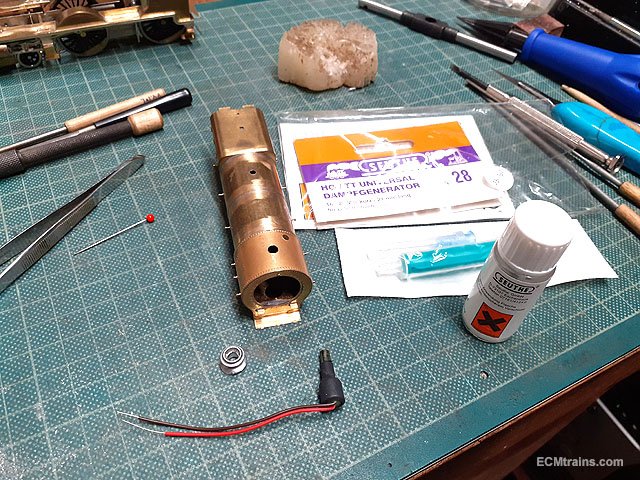
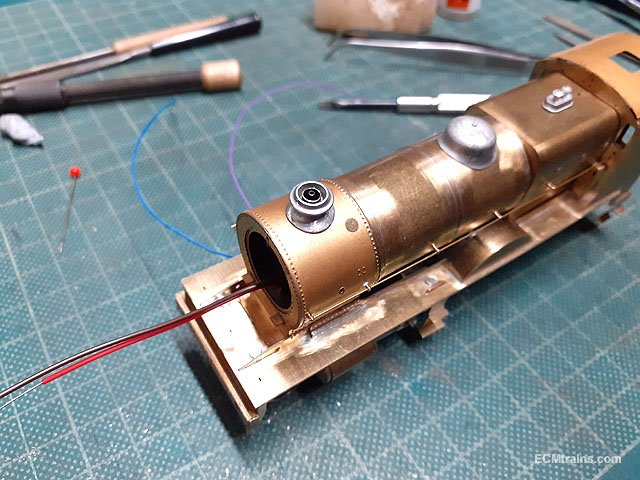
A bit more done on the J10 chassis conversion;- The cab footplate was soldered onto the chassis and the body fixing brackets were folded up and 10BA captive nuts soldered on. Brackets fitted. After scraping the inside of the body where the brackets will be epoxied on I decided to drill holes through the bracket tabs to aid the epoxy gripping the parts. The brackets are fixed to the chassis with some cling film between to stop the chassis getting stuck in the body also! Chassis in place and bracket tabs epoxied to the body. Brackets glued in. Next was to set up some cab details, a cab front plate , a backhead, and the cab side tanks were worked out. This is a screen capture of the backhead model set up for CNC'ing from a sheet of tufnol. The big gap is for the motor gearbox which protrudes into the cab. The backhead cut from a 5mm thick sheet, the part is 4mm thick. Cleaned up and test fitted over the gearbox. Some details will be fitted- these parts are included for, when the front plate and tank parts are being cut. I'm also going to make a mould from this so that the backhead will be cast with white metal, adding weight to the loco...... Eoin.

- 165 replies
-
- 14
-

-
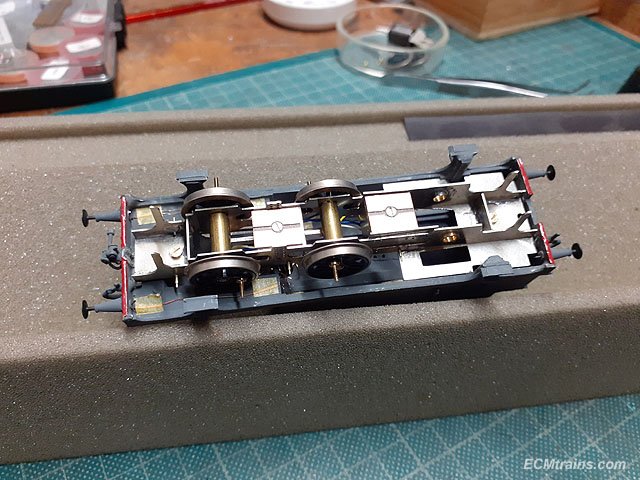
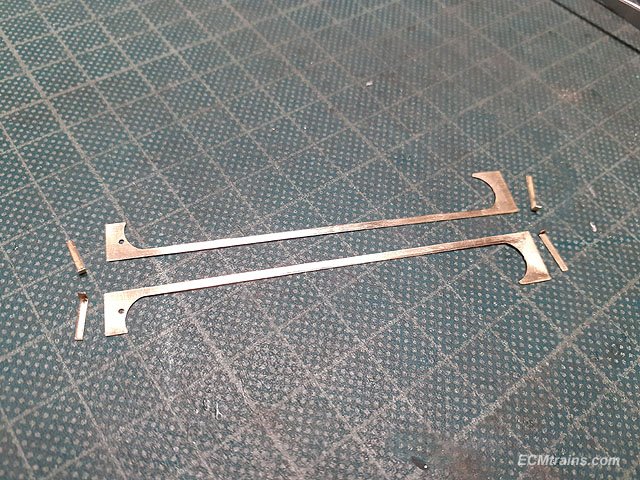
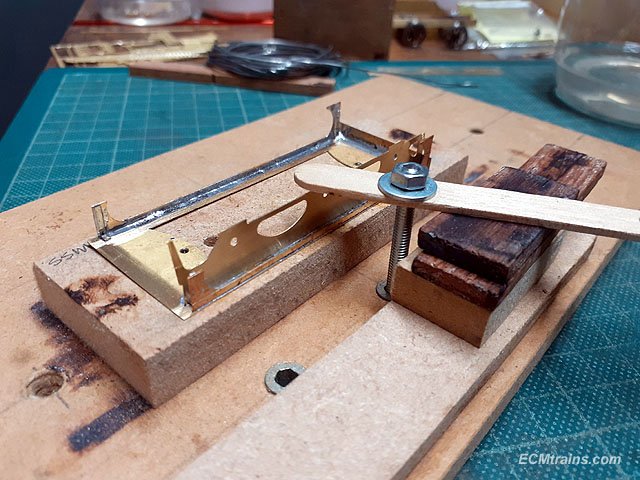
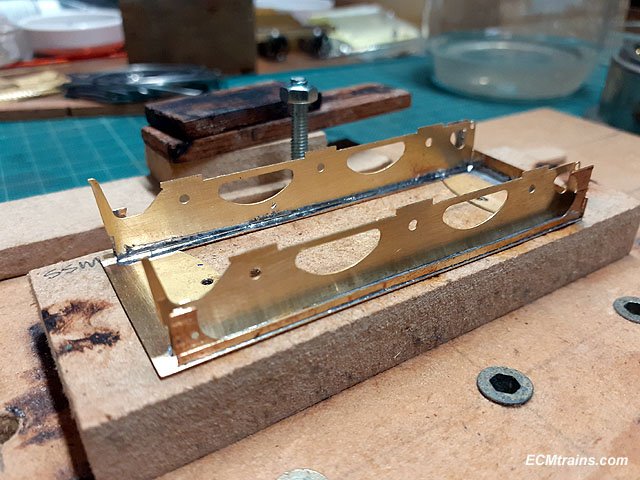
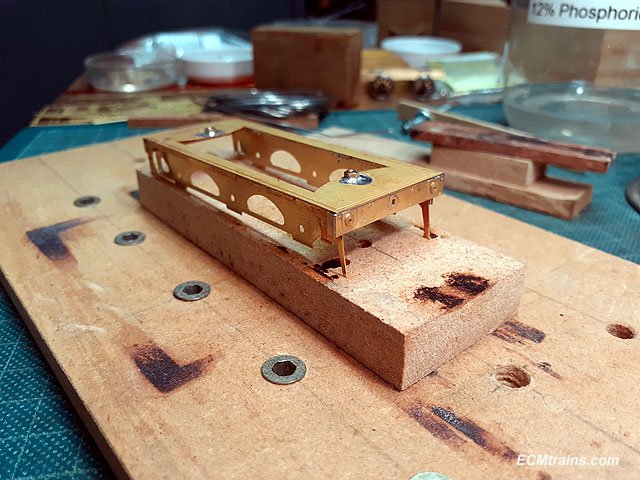
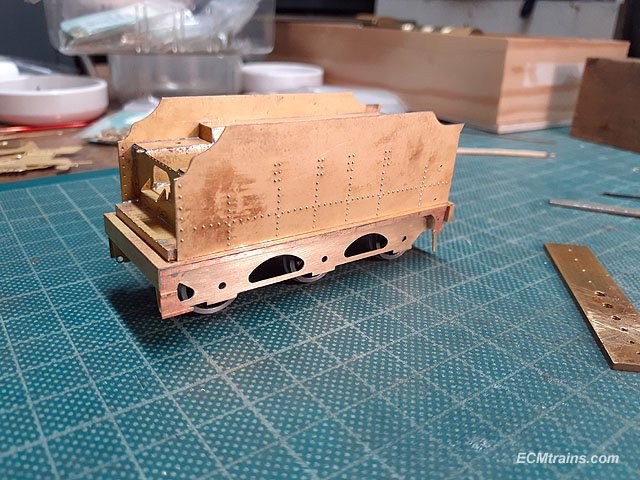
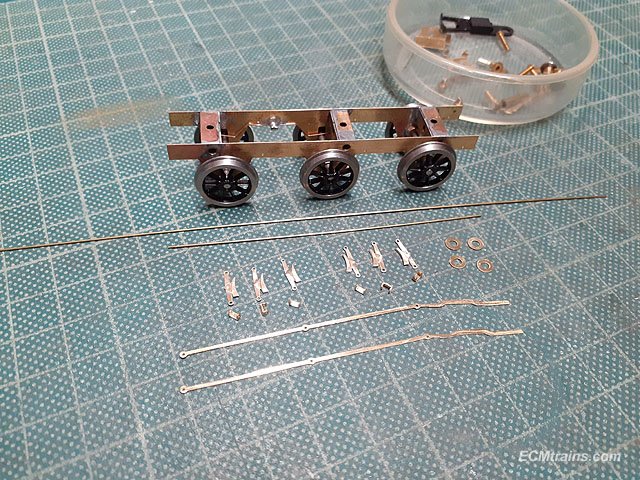
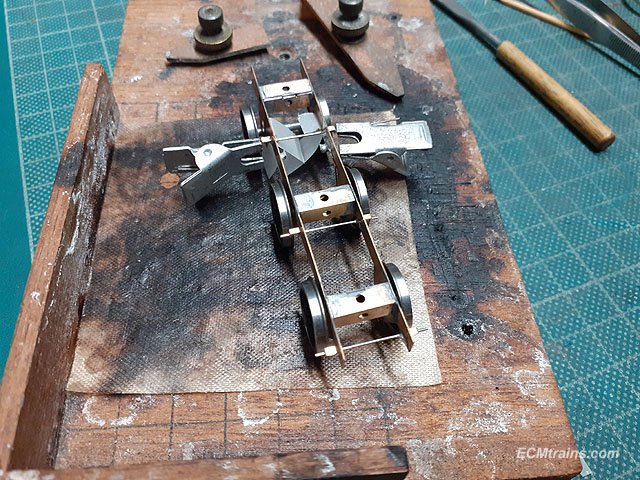
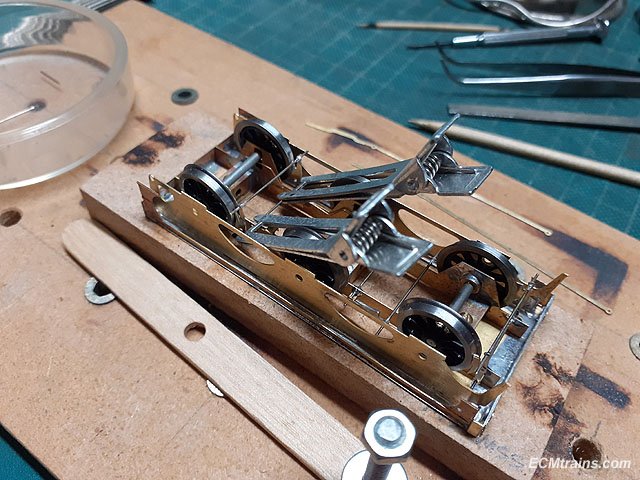
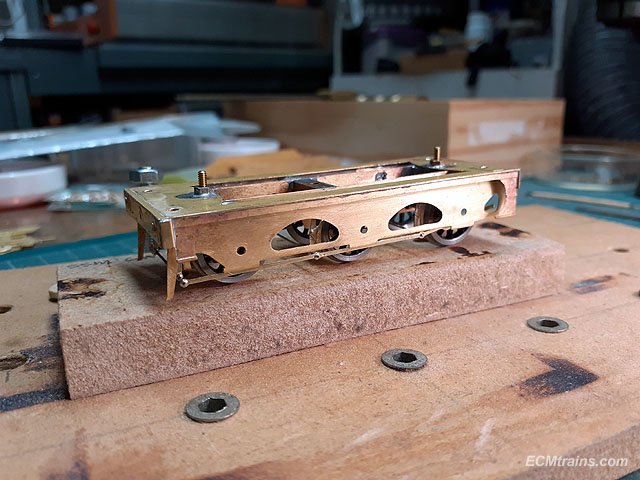
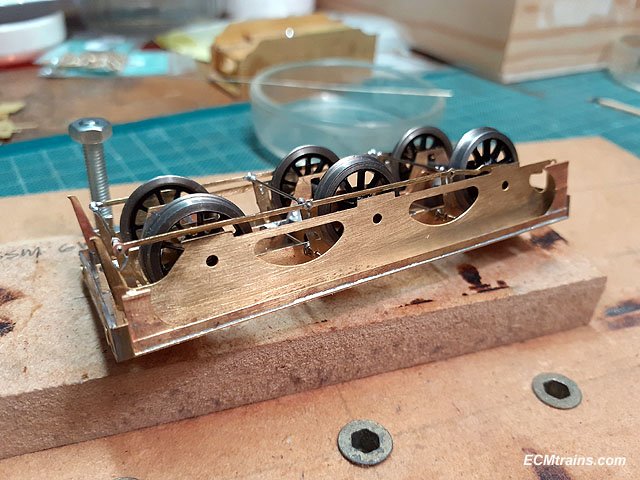
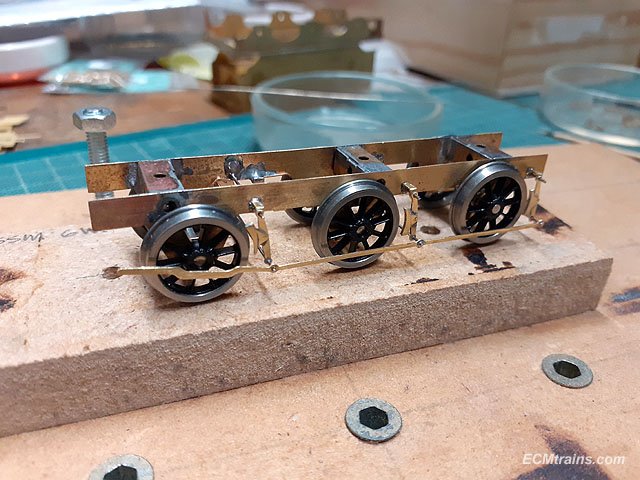
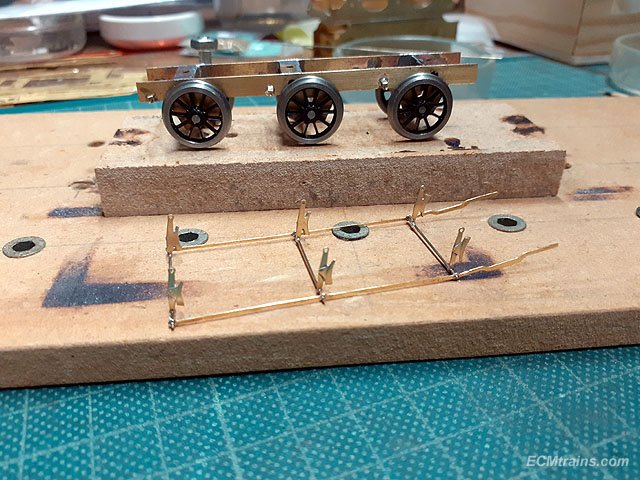
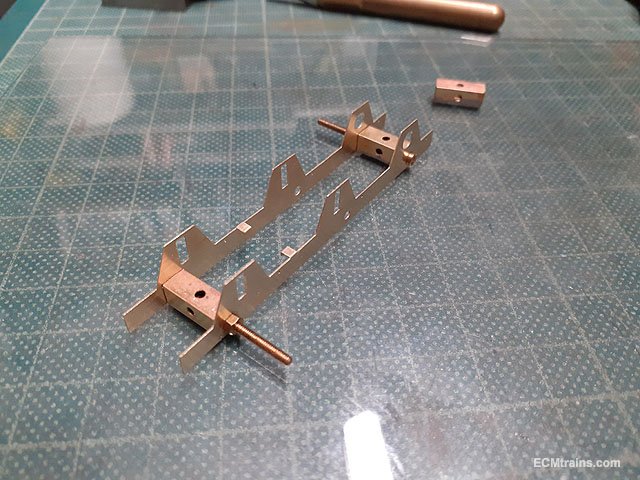
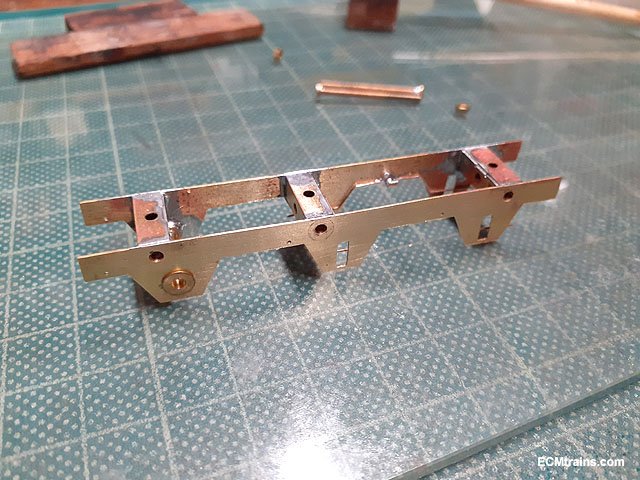
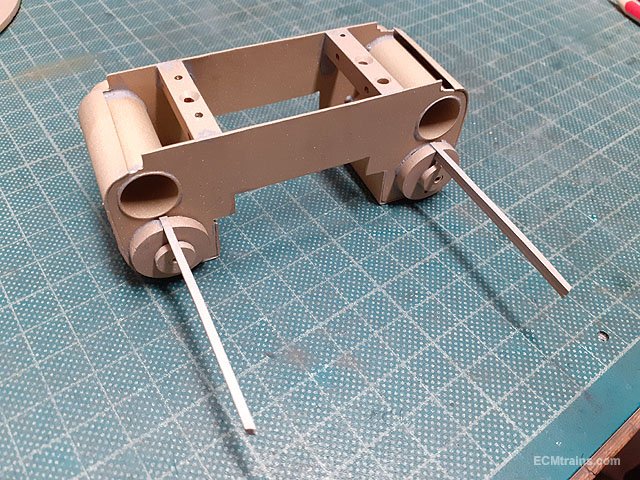
Carrying on with the tender;- Valances, frames, steps, brake parts, buffers and axle springs were cut out and cleaned up. The springs will be fixed on after painting. The valance step parts will be reinforced with a brass strip behind. Buffer shanks had the end bead filed off and the buffer beam holes opened up to take the buffer furls. Buffer test assembled. Valance reinforcing strips and buffer furls soldered on. Soldering the valance to the tender running plate. Inner frames being soldered on. Done. Buffer beam soldered on. Working out the drag bar and tender rear coupler. The instructions and the kit goes a bit wrong here- the instructions reference the draw bar part no. 1, but there is no such part in the kit! There are extra tender parts in the kit and one of these can be used for the drag bar, it's part no. 87, some mods will be needed but it should work. The coupler is a Dapol type, which will need mods also. After that was worked out next was to decide how to mount the DCC chip and speaker, also a plan for access to the chip & speaker in the future. So it was decided that the best solution is the have the upper tender body removable from the running plate. This will need a few holes drilled in the running plate, screws and captive nuts to be installed! The rear captive 10BA nuts installed on a brass strap soldered to the upper body and screw fixed to the running plate. With the rear nuts soldered in the upper deck of the tender is now soldered on. Then after drilling holes in the front of the running plate, position for captive nuts are marked up and nuts soldered on the underside of the tender step. After the 10BA screws are sized the parts were bolted together. All fits nicely after slight adjustment to the screw holes in the running plate. This will also be handy for painting. Next is the tender body rear steps, these were scratch made from fret offcuts as these steps are on the prototype but not in the kit. A soldering position guide was made from the drawing used for the rivet embossing, holes are cut out for the steps. Solder being applied to the back of the steps. The guide was taped to the tender body held in a vice. Soldered. Cleaned up. Next the brakes n rods, brake shoe parts were sweat soldered onto the hangers. All cleaned up and ready to fit. First the .5mm NS chassis cross wires were soldered on, with the hanger spacers on so that the solder wicks through the hole and grabs them too. Bits of tracing paper was installed behind the front axle springs because the cross wire is right on top of the spring and we don't want the springs soldered! Then the hangers and the lower cross wires are fitted, only the lower cross wires are soldered to the bottom of the hangers. The upper hole of the hangers are left dry so that the brake gear can be removed. The pull rods were then installed outside of the wheels. Brakes complete. Running plate removed. Brake assembly removed. Eoin.
-
The Select is not a great controller, I used one for years- it regularly went faulty when selecting a loco and even when using the F keys! Unplugging it from the mains and plugging in again sorted it for a while bet eventually it would go faulty. Other owners reported similar problems. I think later versions worked OK, mine must be over 20 years old! I heard a while back that Hornby can fix this problem, but you should contact them through the website to check if they still do. I eventually decided to change and got the Multimaus Eoin
-
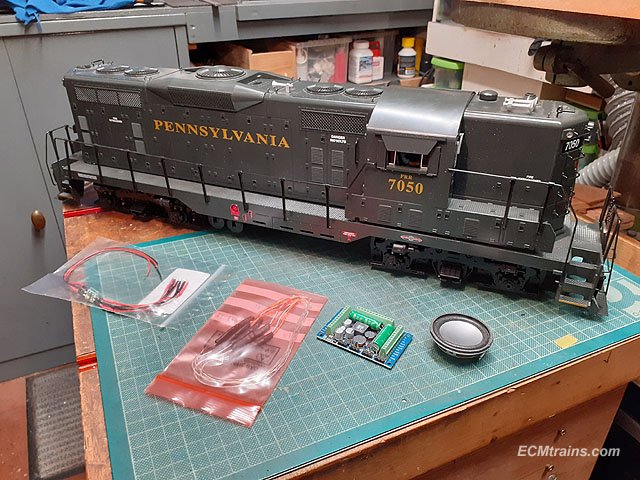
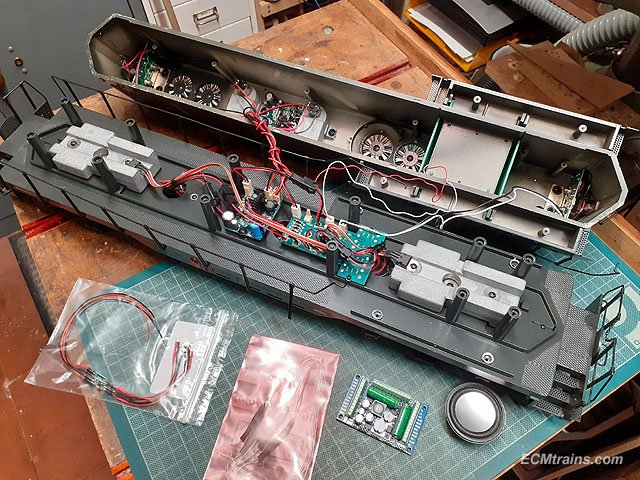
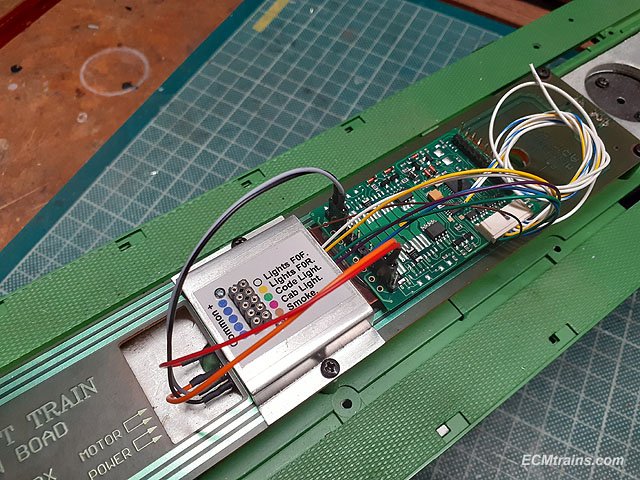
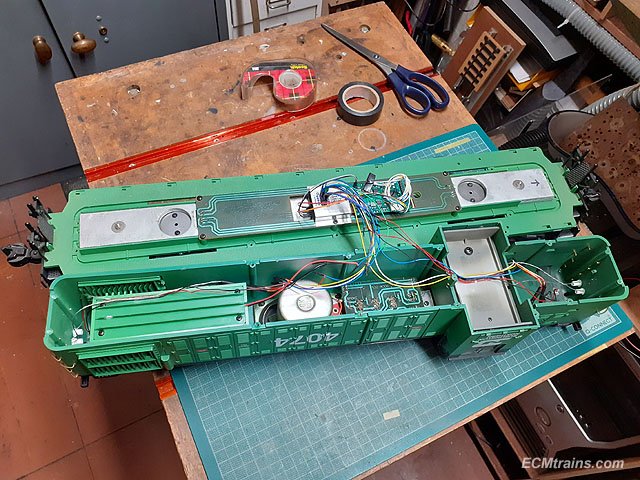
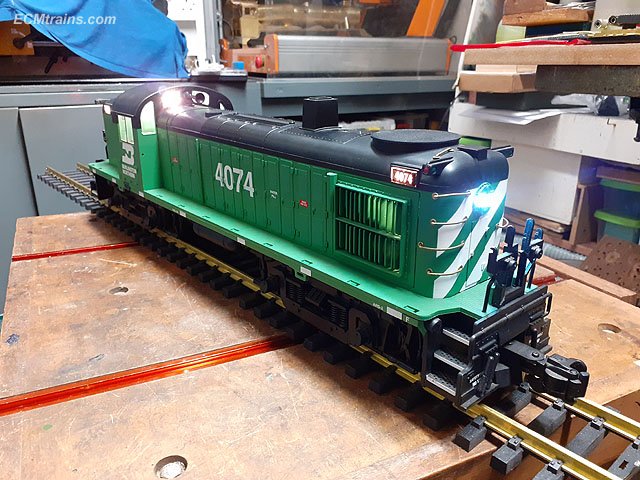
Here is a project on the workbench, a G Scale GP9 being converted to DCC with sound. I'm using a ESU Loksound 5XL board, a 38mm 4 Ohm 3 watt speaker, dual white/red led directional lights, led upgrade lights for running number display and the cab. The loco has two smoke generators. And this is a G Scale RS3 with DCC converted, the chip in this one is a Digitrax non sound, the lights were upgraded to white/red dual leds. This loco also has a smoke generator run from the DCC chip. Work completed but cab light voltage needs to be turned down on the chip! These and one other upgrade has transformed the clients running options, on a single line track he can now run multipal trains and have full control of each loco should difficulties arise......... Eoin
-
@Sean Standard running/function chips are not the same as sound/running/function chips - sound chips cost a lot more than the standard ones, as David says- sound is in the region of £120.00 or so. Good quality speakers are a must to avoid the 'sand paper' vibe I would recommend running your points in old style DC with levers or switches, DCC control of points works out expensive with the addition of points control units which are needed, and it can be quite annoying to select the point on the controller where a lever on a mimic board is much easier, gives a visual of the status and is more prototypical. I use both DC & DCC systems, and have a different view than David on DCC- basic DCC loco set-up is very easy, after working out the standard wiring and the controller menu all one needs to know is how to assign a loco a separate running number and your off. As you know yourself lights are full on, locos can be stopped in sidings with lights on and if one has sound the loco can be left with engine running sound. Most chips have at least 2 extra functions, some have more, so other stuff can be switched on or off- fire box light, cab light, or smoke generator for example. DCC adds a whole new dynamic over DC to running trains. Start simple....... The Z21 can be accessed on your phone and tablet. Eoin.
-
A good starter DCC controller is the Roco MultiMaus available second hand on ebay & Amazon for around €80.00, the handset is compatible with other systems so it can be used on upgrade systems that deliver more power like the Roco Z21 costing around €250.00 There are loads of books available on DCC wiring, converting existing locos & DCC projects- one handy book is 'Digital Command Control for Railway Modellers Crowood.com ISBN 978-1-84797-020-6. An arduino can be used to run DCC but this just adds complexity to converting over to DCC- keep it simple at first and go for the MultiMaus! Go for ESU chips, ESU have great backup on their website and when your ready for sound, they do a lot of sound files that can be downloaded and installed on the chip. One needs the ESU Locprogrammer for this- but that's for a later stage! One takes a risk buying chips second-hand, it's best to buy new as they are guaranteed if they go faulty- as long as they are fitted correctly and the use complies with the warranty. Forget about trying to DIY chips - Google some DCC chip pictures and you will see what I mean..... Eoin
-
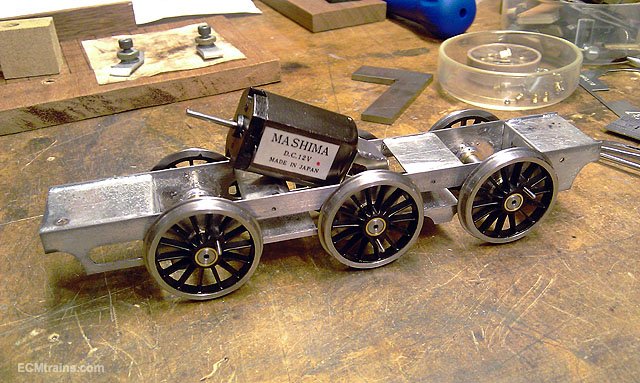
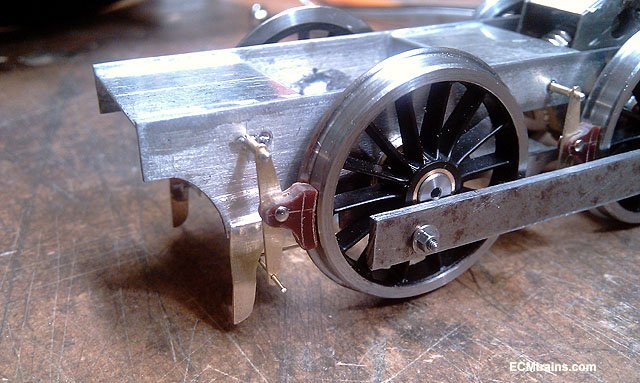
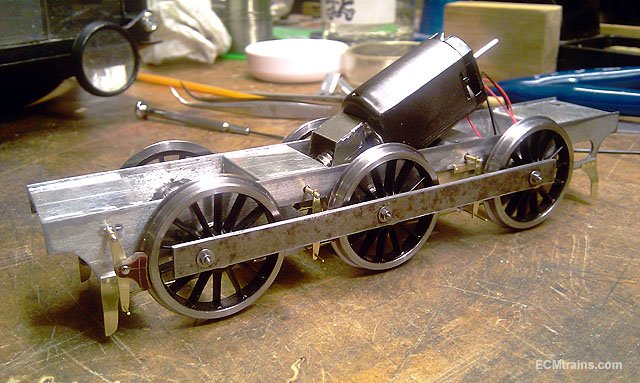
My chassis for one based off a Leinster Kit I must get back to this project...... Eoin
-
If you apply epoxy resin over the superglue in places you can, that will help a lot, and then maybe there will be no back bites!! Eoin
-
Sorry George, but no 3D printing has it's place, and is a great way for producing models and parts at certain scales. But does not compare to brass/metal construction for all scales, especially in the larger scales. Scale thickness, strength and longevity are the brass/metal advantages, and if one is going to invest in a scratch model that could cost €1,000 up to €3,000 say for a large steam loco- one would want it to last! Eoin
-
Panoramic photos are best taken on a level tripod with a camera equipped with a 50mm lens- there are better lenses for this work but most would not have them in their camera bag! Phone lenses can distort the image at the edges, some phones have excellent lenses though. One can assess a phone by taking a few shots of the sea's horizon line to see if it has any distortion. It can be made to any length if you take enough photographs, one also has to compromise as the full scene that one wants may not be photographed because of obstructions. The best plan is to take shots of several scenes and stitch them together on the layout backboards with the transition in a corner, or have a scenic cover in front- like a tree..... Eoin
-
One captures the screen shots in Google Maps and imports them into photoshop, crop them to size and stitch them together into one image like the one shown above. Size matters! - if one knows what length & height the backscene needs to be it can be sized to fit, this is done in a program like Autocad or Corel Draw. If sizing is not done the image can still be printed at 72dpi on large sheet format and then the back board is made to suit. Pre sizing is a better way of doing it! The image above is 4 no screen captures, at 72dpi it measures 1600x140mm. Printing can be done in a print/plotting shop - like Hacketts in Baggot Street. Printing on a roll printer or AO size sheets if possible. Eoin
-
Here is a background scene generated from Google Maps for an idea, its 4 screen captures from road view (R304) brought together in photoshop. The scene is looking over Lough Avally looking onto Castle Demesne Hills in the centre;- Eoin
-
@Peter Yes it's on the back burner, the colour printing was a problem with getting the right shade of orange, while working that problem I took on a whole lot of other work which I'm still working on. I will get back to it Eoin
-
until
-
Next months Fair date;- Please note- the flyers given out at the last fair advertised the February Fair would be on the 20th, due to the hall been double booked on that date we have moved the date to the 27th.
-
All the above is stunning. Eoin
-
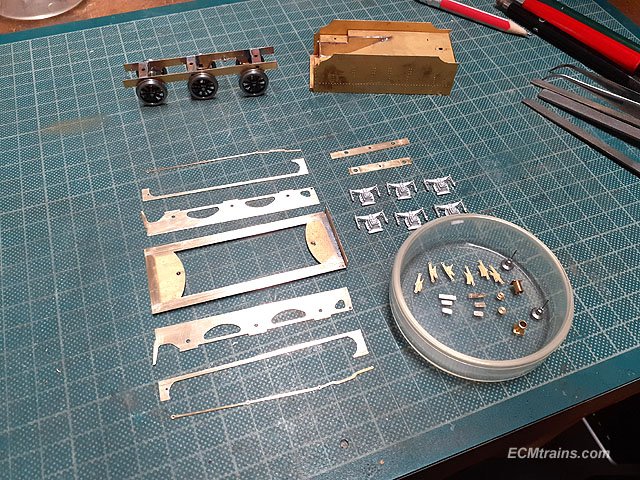
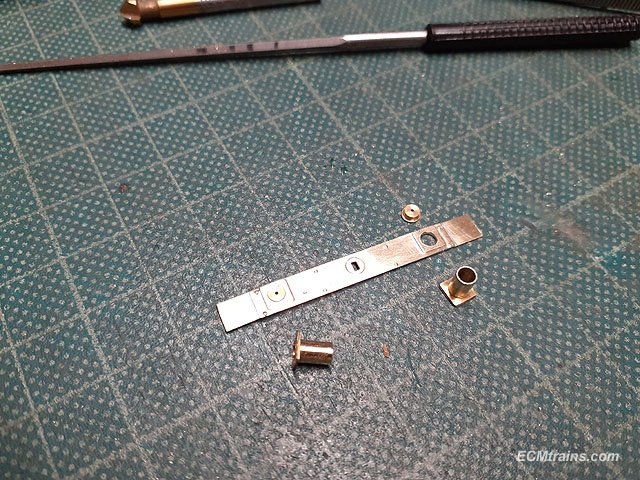
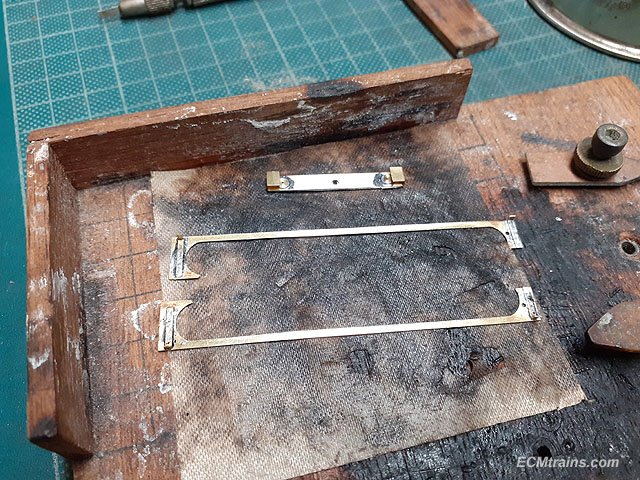
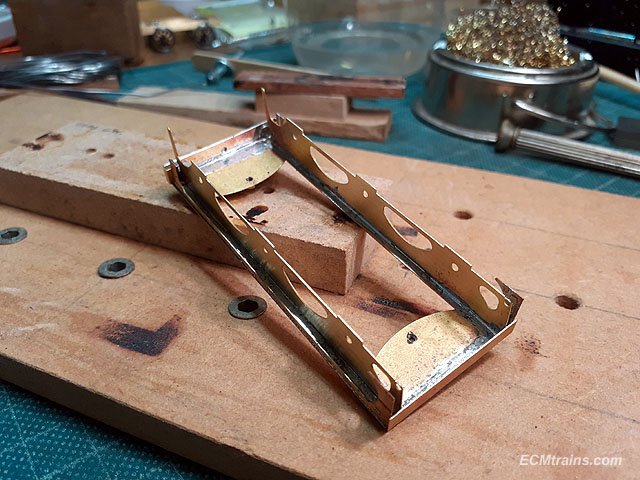
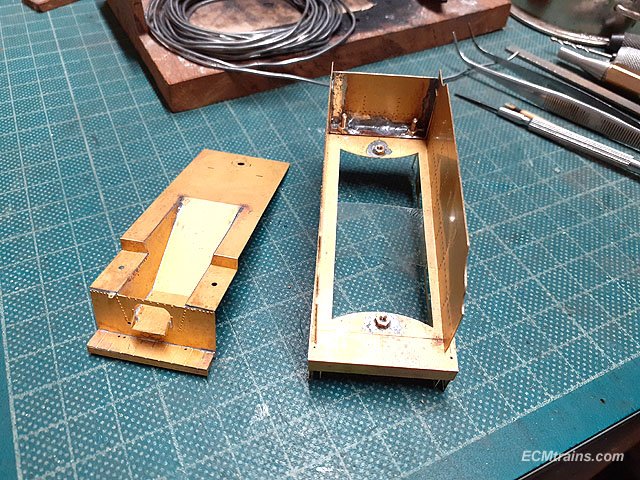
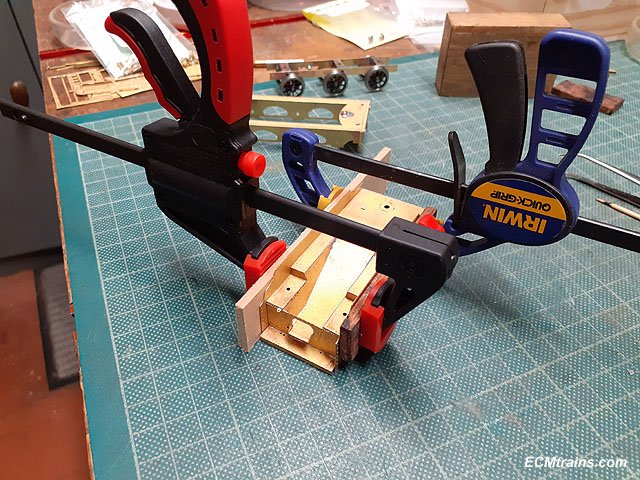
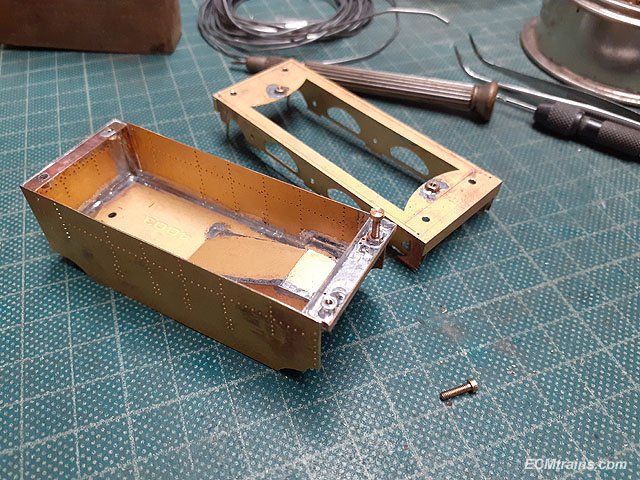
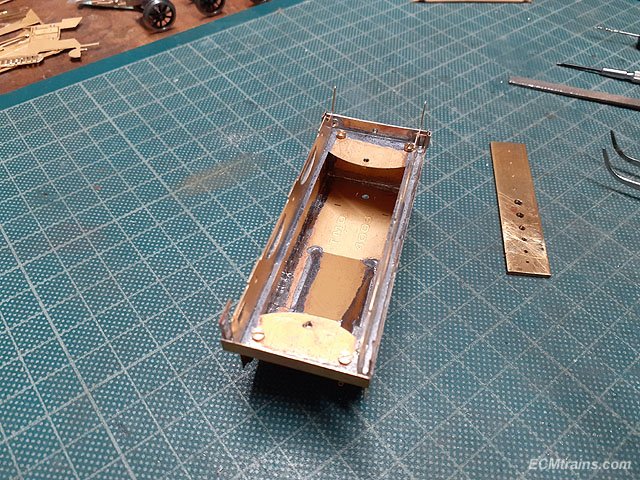
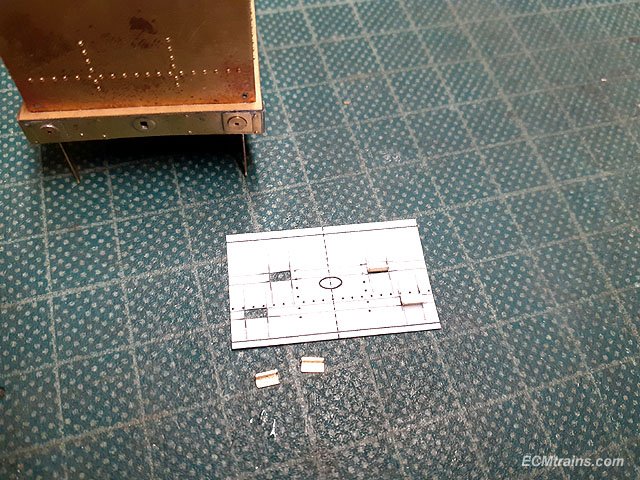
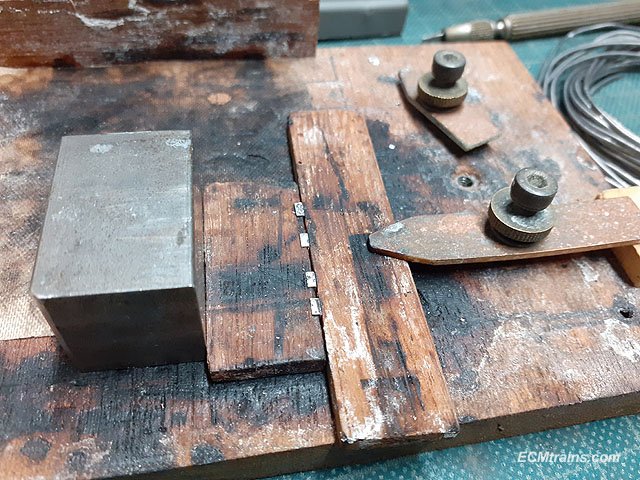
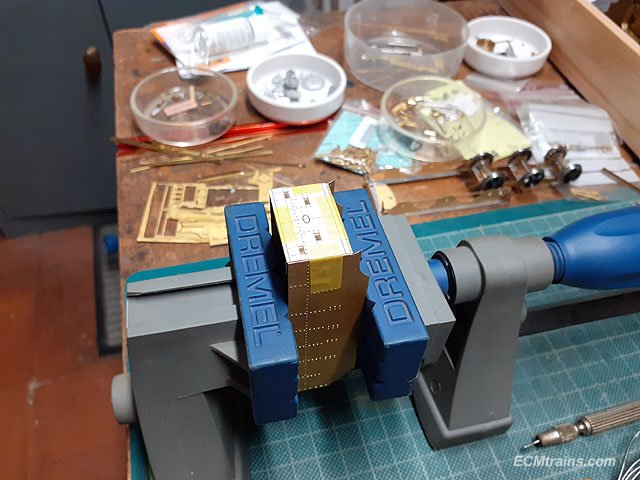
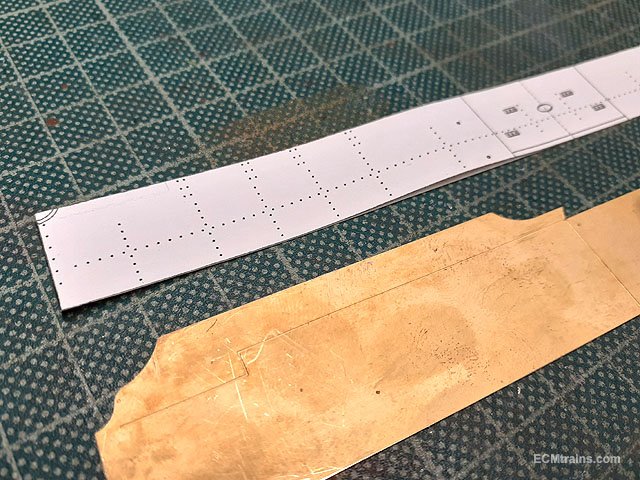
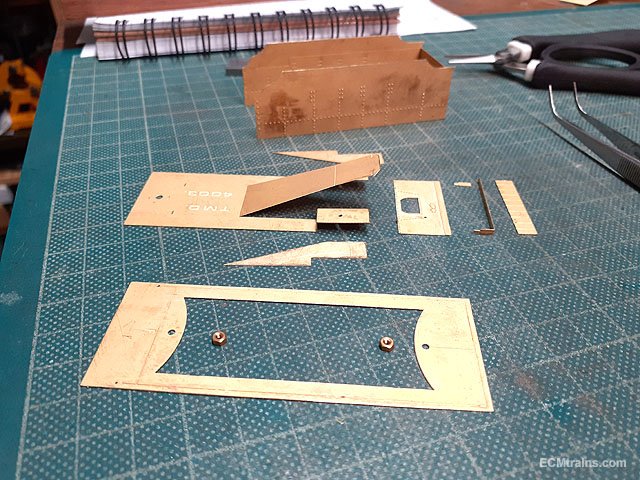
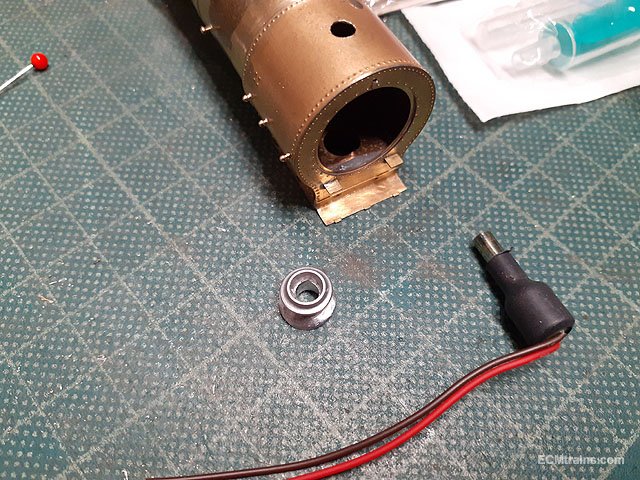
Parts for the tender chassis removed from the fret and cleaned up for soldering. Frame spacers folded and soldered up. Frame spacers being length sized with a file and holes opened up for soldering jig to fit between the frames. Jigged and ready for solder. Soldered. Bending up and soldering the .35mm pb wire for the two front axle suspension. Tender body parts removed from the fret, cleaned up, and a cad template was prepared for doing the rivets. The kit parts do not have the rivets, the rear steps are not provided, and the rear handrails with the kit are the wrong size and fitted to the back face- where the current tender being used has smaller rails fitted on the side rear. The rivet template stuck onto the brass body and rivets being pressed out. Footplate and top parts ready for soldering. Rivets done and part folded up. Soldered up. All main parts being test fitted for working out fitting the tender together so that the body can be removed easily to install and access the DCC sound in the future. Fitting a Seuthe No 28 into the smoke box. The smoke box top hole need opening up and and the chimney casting drilling out. Fitted, but needs some support under and wiring to be worked out. Eoin.
-
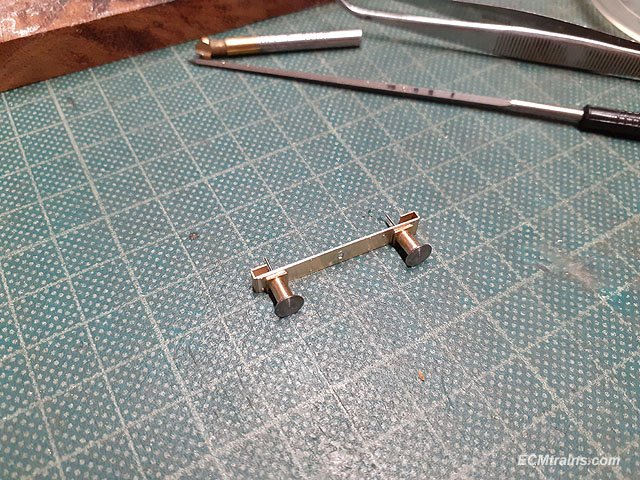
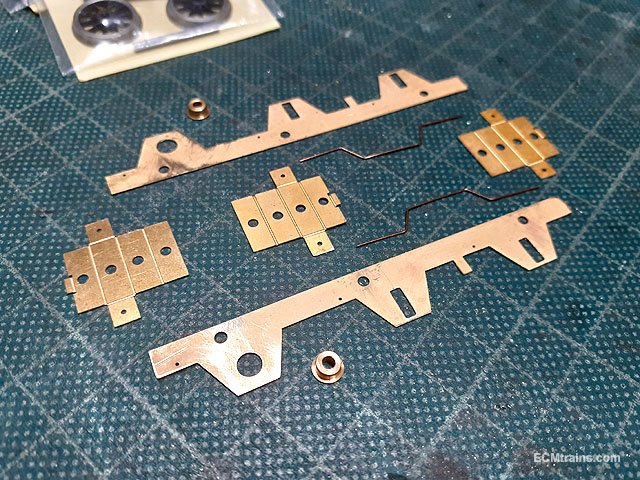
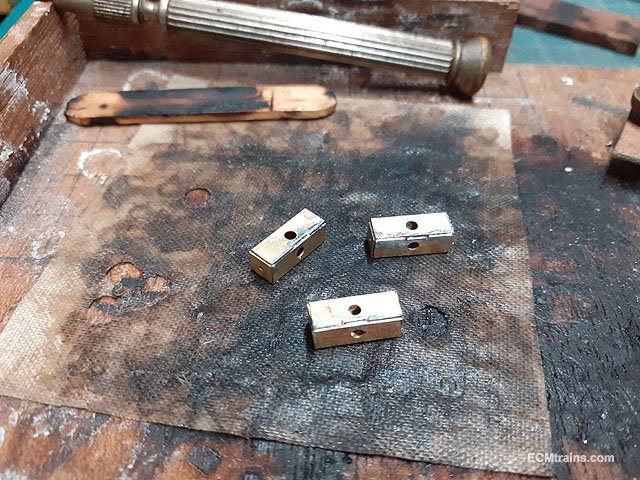
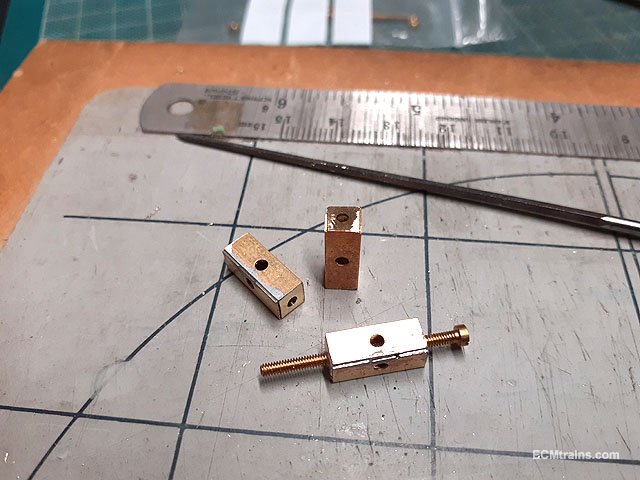
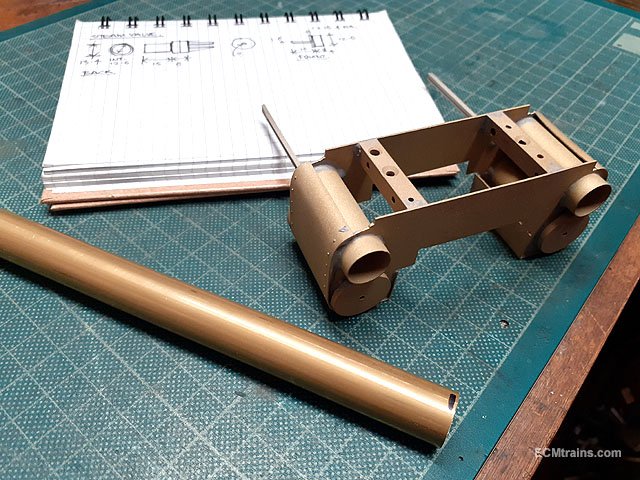
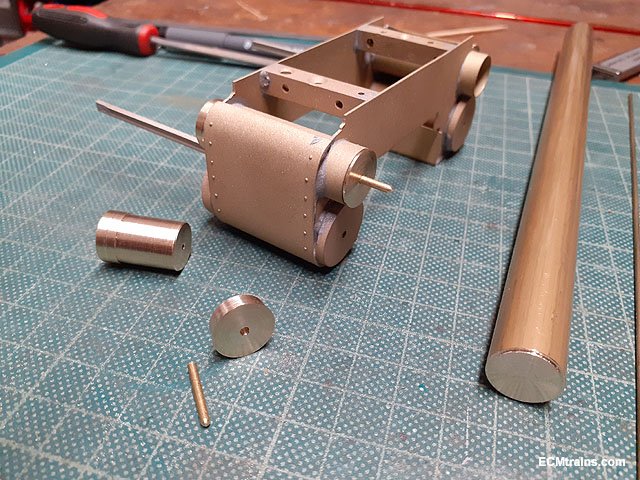
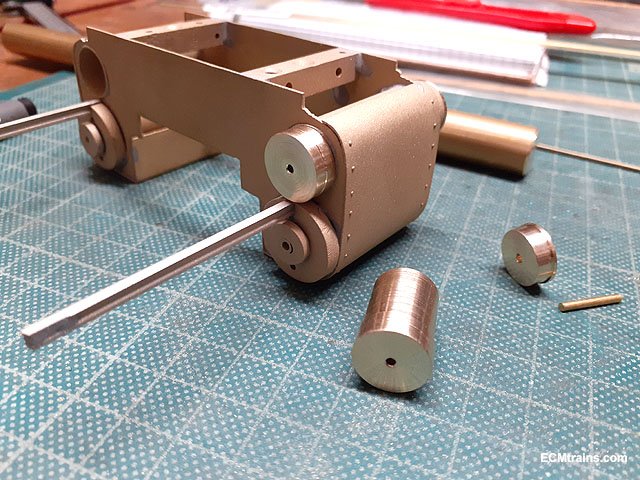
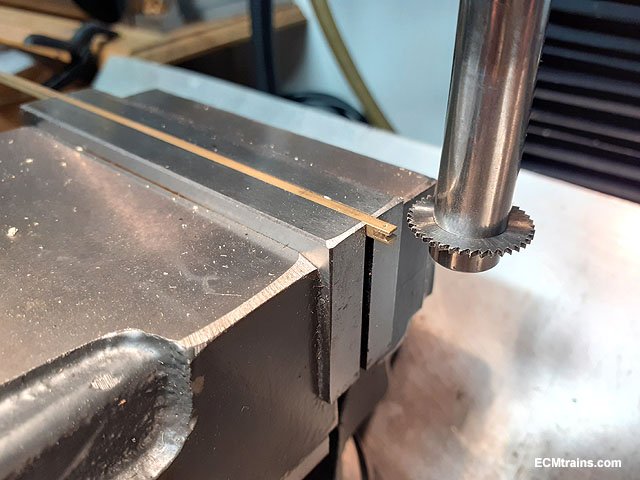
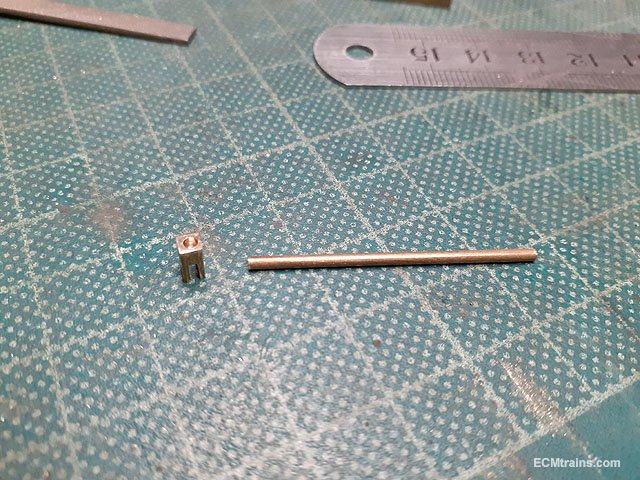
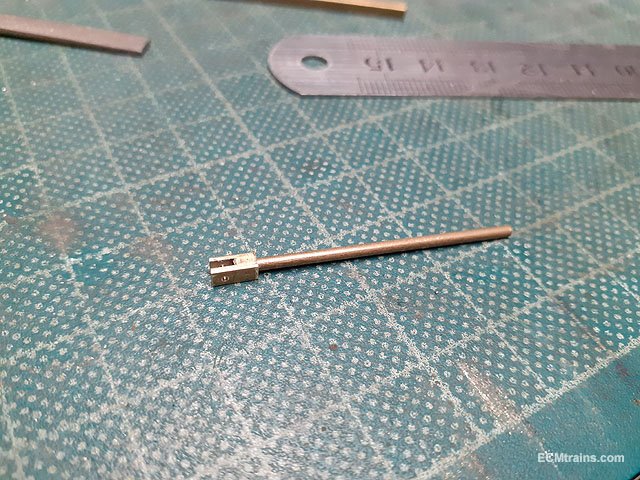
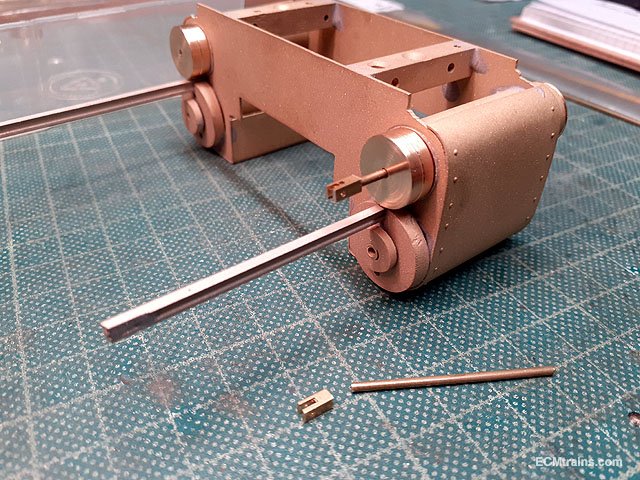
Some cylinder work;- Gave the assembly a clean up of solder and then sandblasted. The steam valve cylinders need front & rear parts, turned up from 15mm dia brass bar. Cutting with a slitting saw the 1mm slot in the clevis part for the ends of the steam valve rods. A .8mm cross hole in the clevis part was drilled before the slot was cut. Clevis part cut from the 2.5mm sq. brass bar, then a 1.6mm hole is drilled in the back for soldering to the 1.6x36mm rod. Test fitting the rods into the cylinder face, the rod guides still need to be added. Eoin.
-
The first of 2022 Fair dates;- Due to the current Covid situation please keep an eye on here for confirmation of the Fair going ahead. This year's flyer is sporting the 'Hibernia' in grey livery, one of the first locos to run on the Dublin & Kingstown Railway in 1834. Happy New Year.
-
 @Georgeconna Hi George, I hope you n family had a good Christmas.... I notice in both your videos- in the first one, when shunting backwards the A's coupler is raising up to the point that the latch is not engaged any-more. In the second video, after the loco uncouples one can see that the latch on the A's coupler is still in the raised position> this may be the problem? I would try to limit the A's coupler movement upwards and free up the latch pivot a bit if one can, so that it pivots freely and falls down on its own.... Eoin
 -
Another idea for a 4 year old- Lidl have a kids toy train set, you know the ones with wooden track that trains can be pushed along on, they bring out accessories all the time, and they also have battery operated engines?? There are sets in some of the stores at the moment but they are more garage, airport and safari type at the moment but the track n bits are the same........ Thomas train sets are a great idea also, with the added value of 'Characters' enhancing the play fun for a 4 year old I have a DART and a few other Irish engines designed for the wooden track, the DART prototype model is almost complete- though usual story, just not enough time........ Eoin
-
@jhb171achill I can recommend a book if you would like to do a bit of research! It's an extensive look at all types of backscene fabrication that one would need;- Creating A Backscene. A Railway Modelling Companion. by Paul Bambrick & John Ellis-Cockell. Ian Allan Publishing. ISBN 978-0-7110-3842-4 Eoin
-
As far as I know the Class A will run on radius 2? but if possible try to stick to radius 3 as the minimum if your layout has the space- this applies to all locos, less curve they run better.... Eoin.