murrayec
-
Posts
2,775 -
Joined
-
Last visited
-
Days Won
70
Content Type
Profiles
Forums
Events
Gallery
Blogs
Everything posted by murrayec
-

Walker Diesel Class F - ECMbuild in 4mm for OOn3
murrayec replied to murrayec's topic in Irish Models
@Colin R The kits are still available, he has;- 1. Backwoods Donegal Class 5 Kit. 2. Backwoods 6 goods wagons made up. 3. Backwoods Donegal Rail Car kit. He's watching this thread so if you express interest he will PM you about details. Eoin- 136 replies
-
- 1
-

-
- class f
- west clare
- (and 1 more)
-
Walker Diesel Class F - ECMbuild in 4mm for OOn3
murrayec replied to murrayec's topic in Irish Models
I'll contact him and come back to you. He took them back to sell them, don't know if he had a buyer? Eoin- 136 replies
-
- 1
-
-
- class f
- west clare
- (and 1 more)
-
Walker Diesel Class F - ECMbuild in 4mm for OOn3
murrayec replied to murrayec's topic in Irish Models
Sorry Colin - they were Backwoods CDR kits, with all the Walkers I stuck in Clare Eoin -
Walker Diesel Class F - ECMbuild in 4mm for OOn3
murrayec replied to murrayec's topic in Irish Models
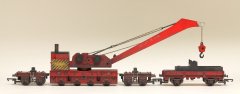
A partly built/converted C&L 4-4-0 tank locomotive also OOn3 requiring some treatment.... .... and two West Clare tank kits went back Eoin
- 136 replies
-
- 4
-

-
- class f
- west clare
- (and 1 more)
-
Walker Diesel Class F - ECMbuild in 4mm for OOn3
murrayec replied to murrayec's topic in Irish Models
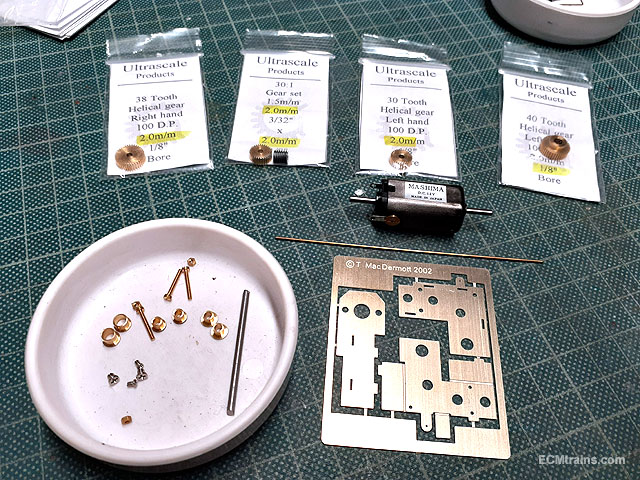
No. 2 sooner than I thought! These parts arrived in at the Train & Model Fair this morning...... ...... here we go again! Eoin
- 136 replies
-
- 4
-
-

-
- class f
- west clare
- (and 1 more)
-
Walker Diesel Class F - ECMbuild in 4mm for OOn3
murrayec replied to murrayec's topic in Irish Models
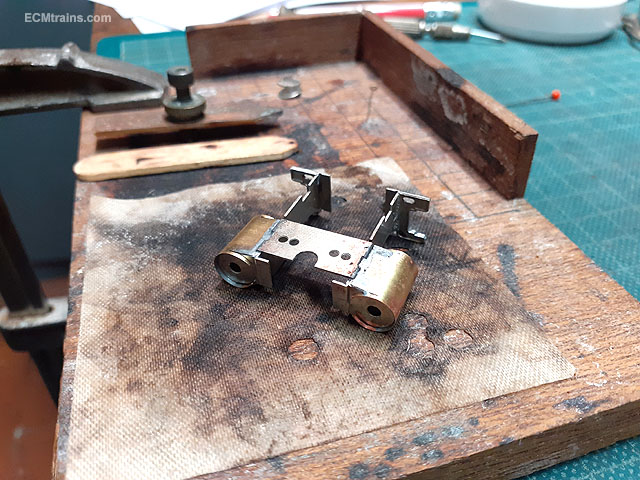
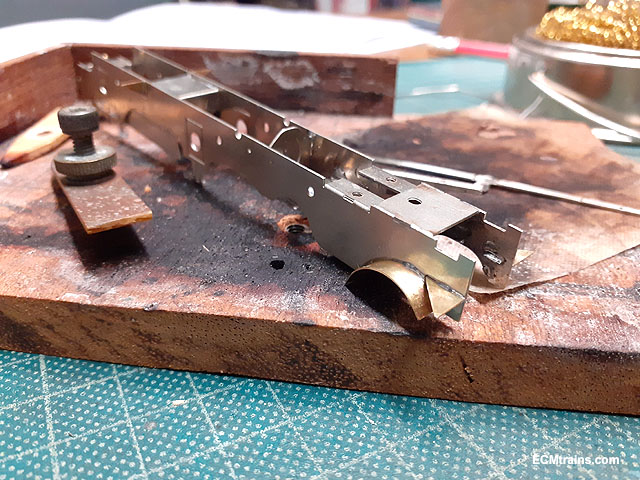
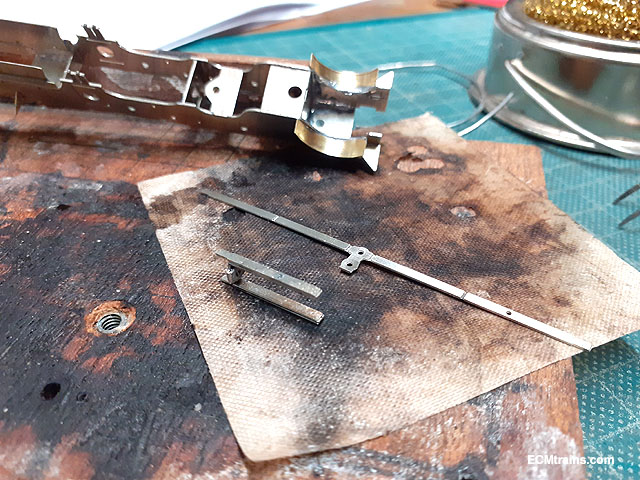
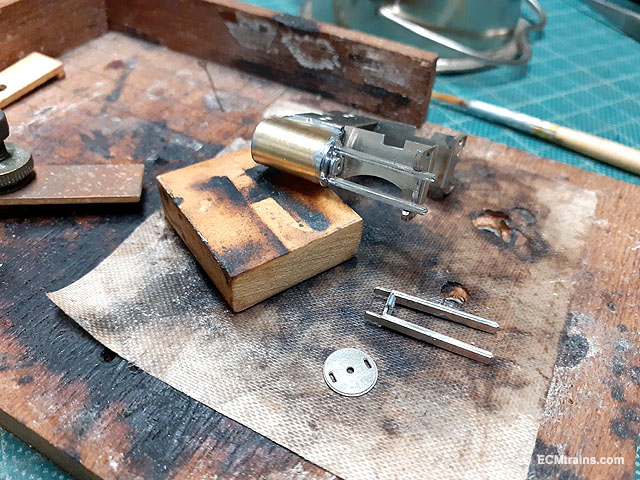
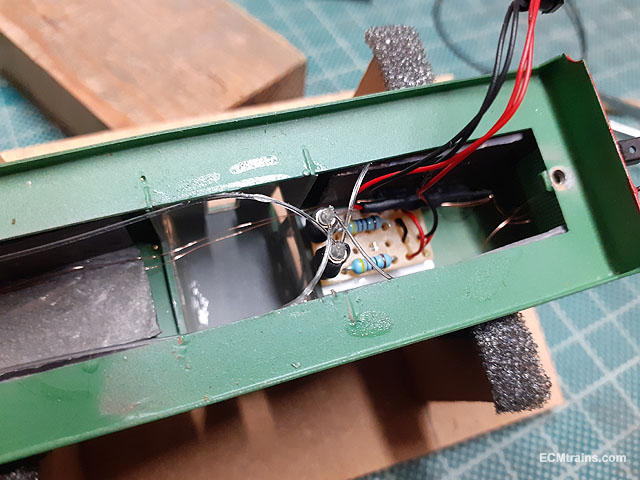
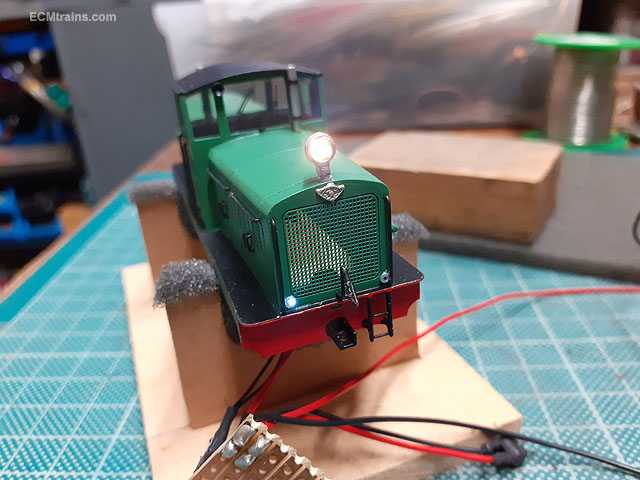
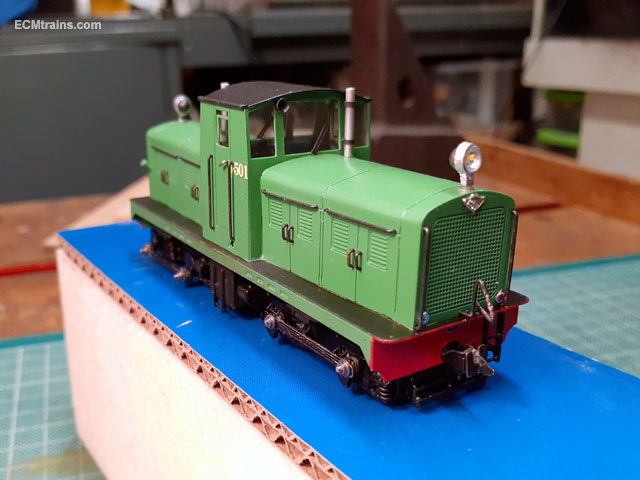
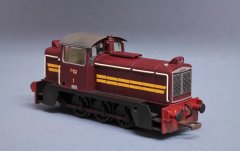
After several hours tweaking and running- the loco started to run OK in both directions, so the final bits were installed- the lights;- Fibre optics for the marker lights and mini led for the headlamps. A bit tight for space in there so the leds were done by soldering the resistors in line and not using a board like the marker light system. The chassis wires take up the remainder of the space! Lights up. The other marker light is the red rear light which has a bit of red painted on the end of the fibre. The loco is complete. And the boxing photo. This project was a very good exercise in building a scratch chassis and scratch motor drive for the smaller scales, a few things I would do differently if I have a go at another one ....... not for a while! Eoin
- 136 replies
-
- 15
-
-

-
- class f
- west clare
- (and 1 more)
-
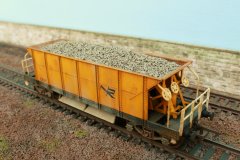
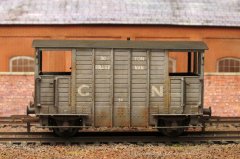
Love the bird shite on the cills Eoin
-
-
-
Sharpened and adjusted
-
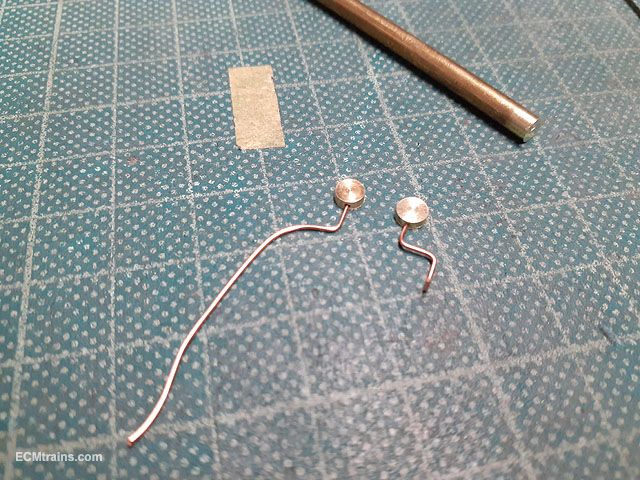
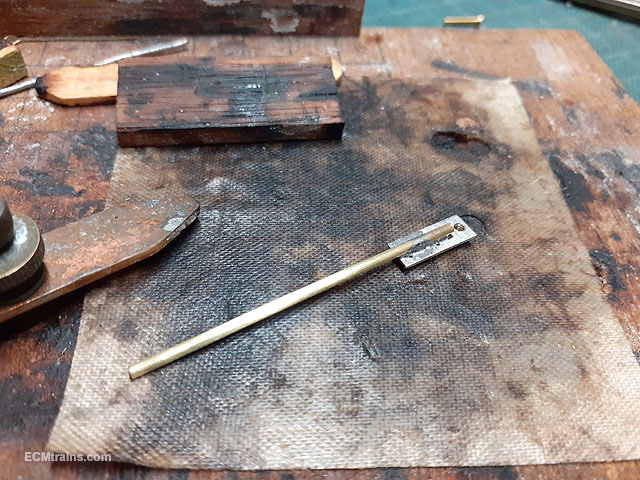
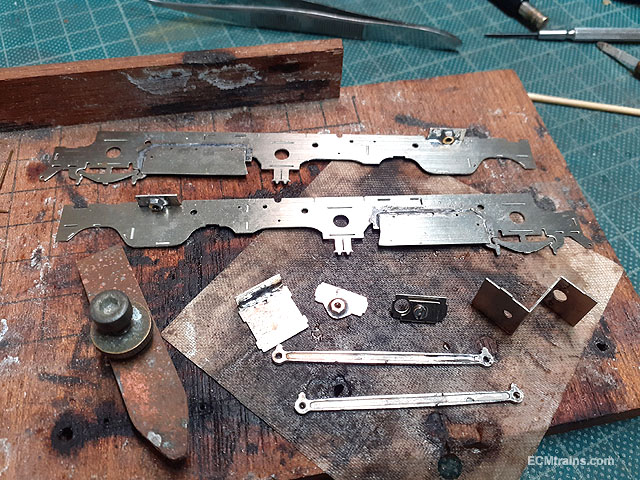
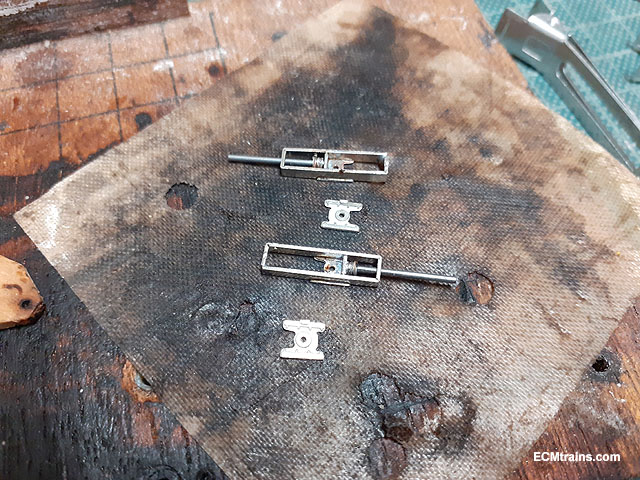
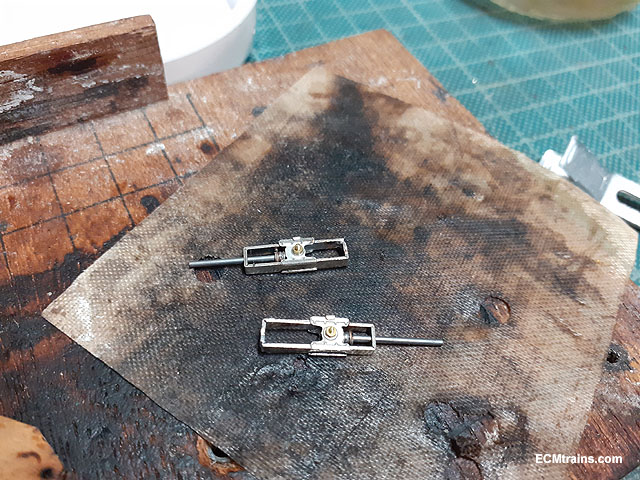
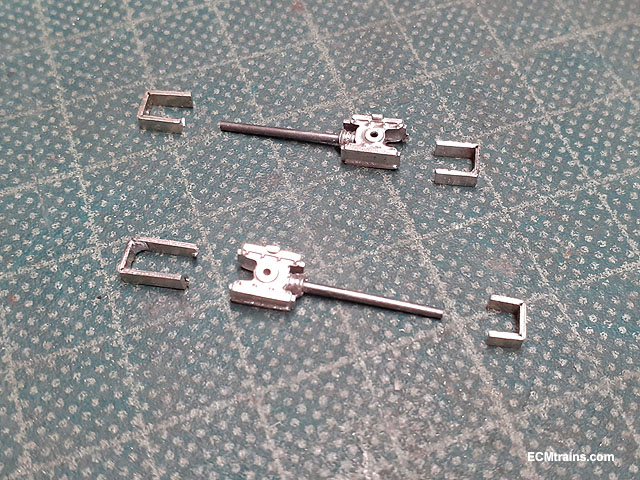
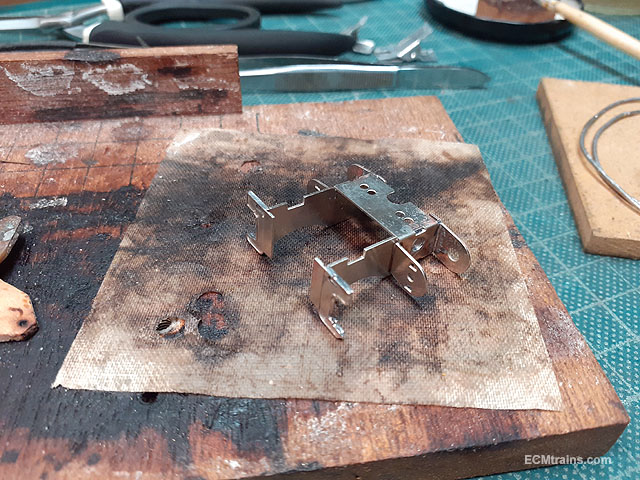
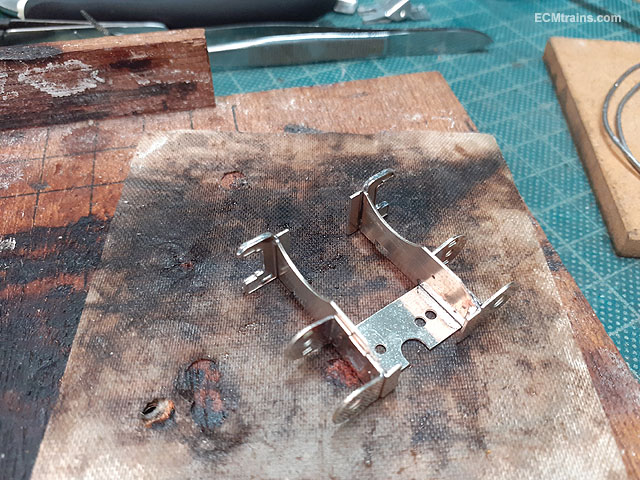
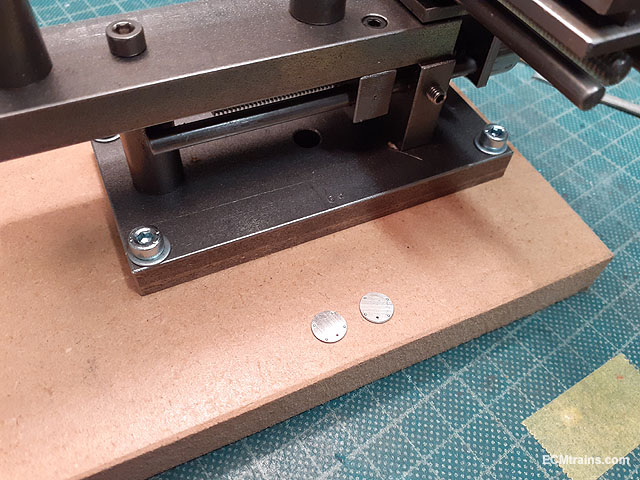
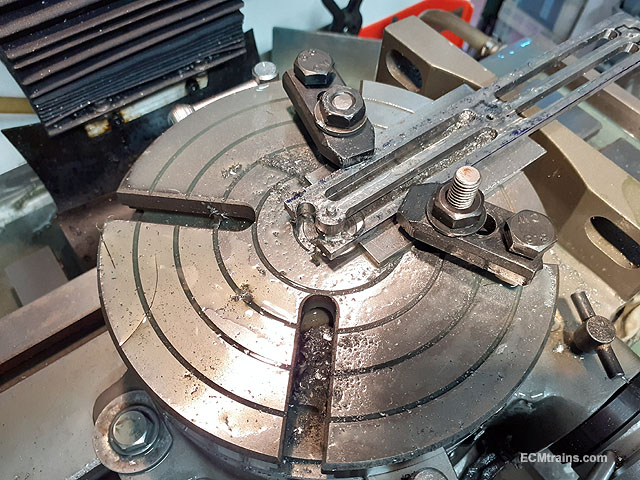
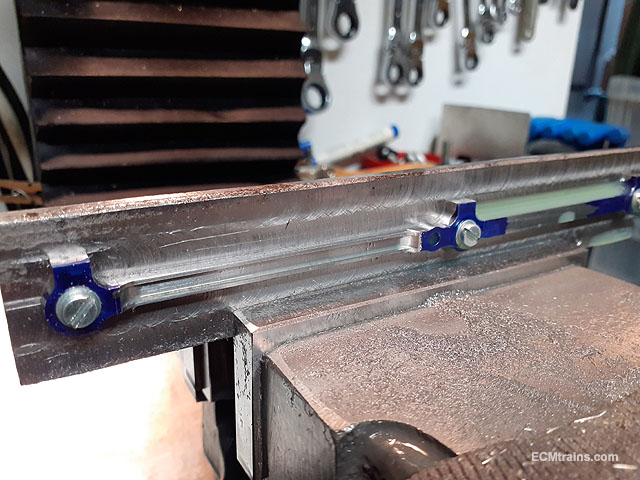
I finally got to the painting stage on this project. Just a few small things to do first;- Loco front guard irons were soldered onto the chassis and bent into shape. The last bit of piping, for the steam gauges, needs to be glued onto the backhead so I turned up 2 gauges from 3.8mm brass rod on the lathe, here the gauges are being drilled to mount the pipes. The gauges are marked off on the bar in the lathe and its then transferred to the drill, always start the drilling with a centre drill- just a dent..... and then finish with a .6mm drill bit. When done the bar goes back on the lathe for parting off the 2 gauges..... Parted off and pipes bent up in .5mm soft copper wire, I'm going to leave the gaugesin brass finish so will be stuck on later, for now their used to position the pipes while gluing the pipes on. All the bits. Now ready for painting, chassis have been sand blasted and wheel tyres masked off and all stuck on sticks! Etch primer done. And these are the gauge faces n water glass, their covered in transpaseal to protect the paper, they will be cut out and stuck on later after painting is done. Eoin
-
Looks like the pumping system could work! Excellent job Eoin
-
The first 2021 Train & Model Fair of 2021 will be on Sunday May 23;- No booking required, do use a mask, we don't expect large numbers but if there is over 10 people in the room please wait outside until someone exits. The traders will direct the situation if needs be....
-
Would you model in 21mm if RTR track and models were readily available?
murrayec replied to BosKonay's topic in Irish Models
I have to agree with that entirely...... could go on with more but I wont Eoin -
1/32 Scale Mountfleet Round Table Minesweeper
murrayec replied to Georgeconna's topic in Aviation & Maritime Modelling
@Georgeconna lovely detail in that winch Eoin -
@Mayner I reckon you right there, I'll wait for SSM to come back on my query and see if they have replacements drivers. Eoin.
-
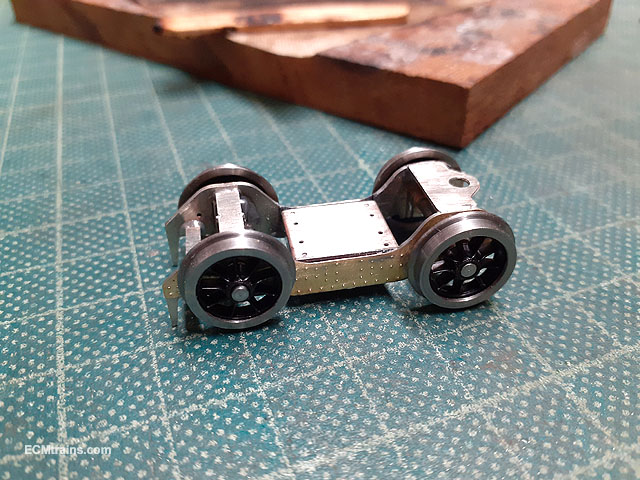
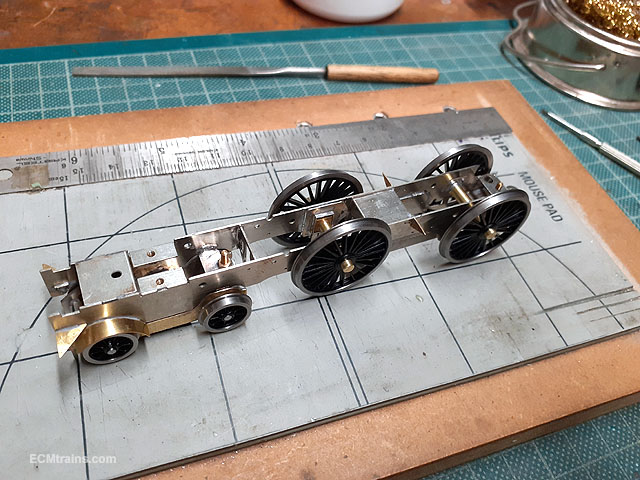
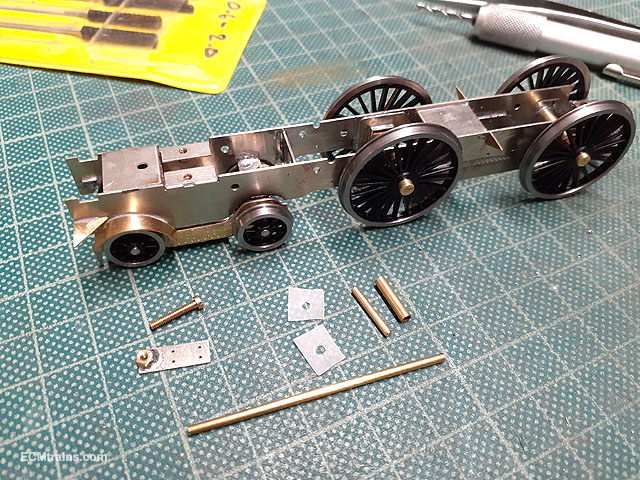
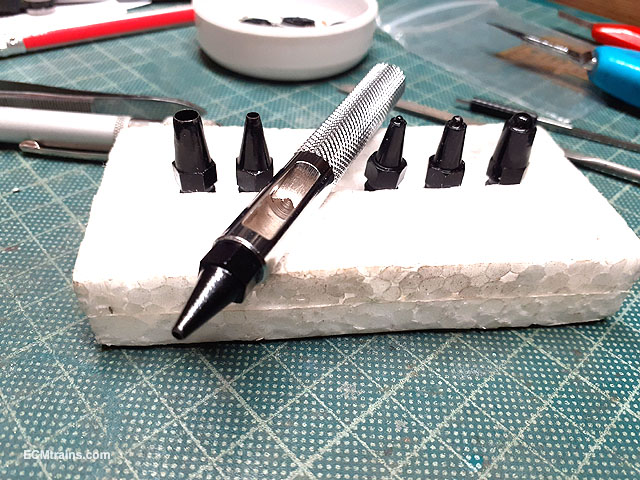
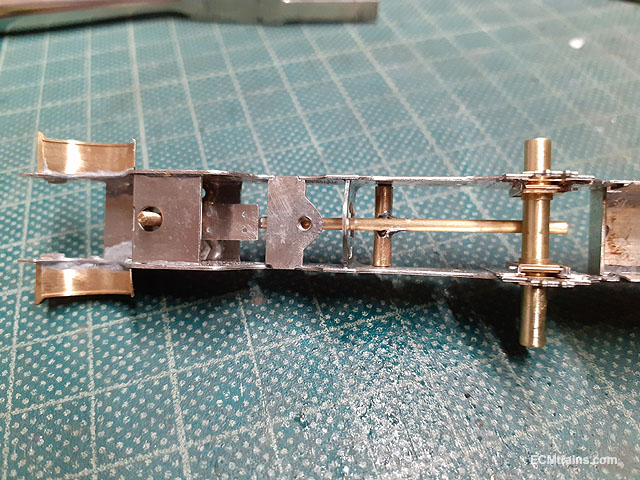
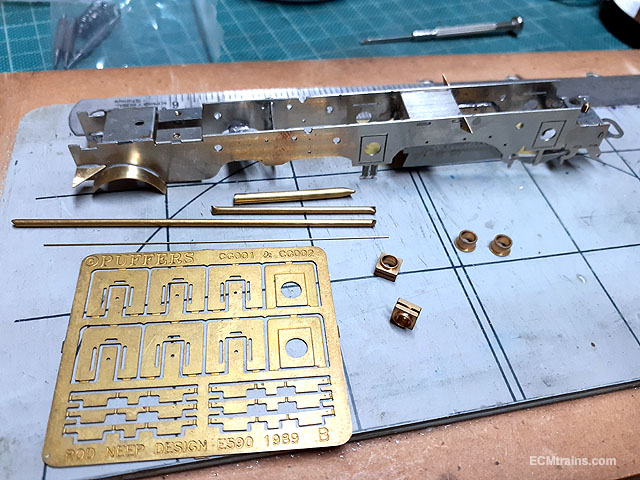
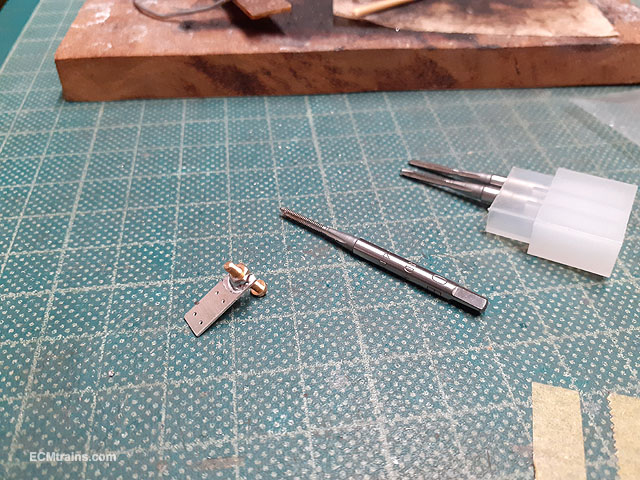
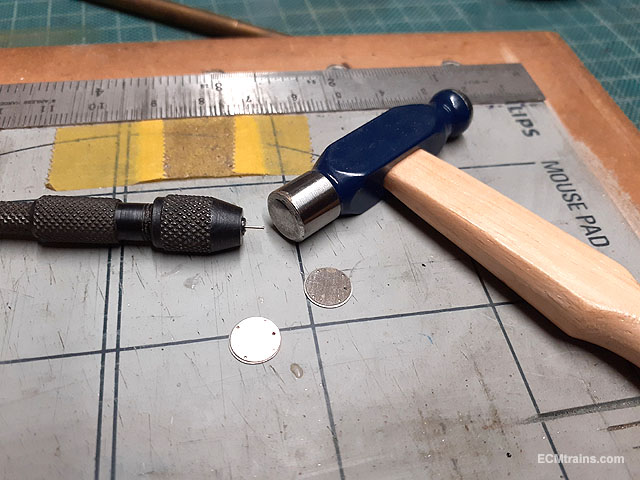
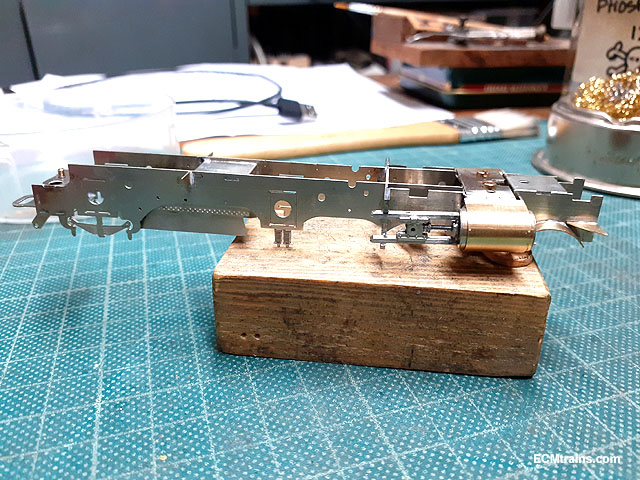
@Galteemore That first photo is pretty handy after a bit of contrast adjustment a lot of cab detail can be seen. Getting ready to do the compensation beam so we need wheels n axles. Alan Gibson wheel sets came with the kit- not my favourite type, with their push on axles. I prefer squared end axles and screw on wheels, easy to put on & off as the build requires, where if one pushes the Gibson wheels all the way on their a devil to get off! But I do have a trick for working with these..... .....the trick is to make up 1/8'' dia brass axles with the ends filed down slightly in the lathe so that the wheels are a slight push fit and then easy to get off again, I estimated the length required- 24mm and made them to this length which can be used to size the final steel axles. As you see in the photos the drivers come with separate crankpin wheel boss! This adds 2.14mm to the axles which will push out the rods by the same- Not sure about this and have an enquiry out to SSM. .45mm NS wire keepers soldered onto the bottom of the hornblocks of the bogie front axle. Axle'd up. Front axle compensation test, the axle pivots on the central bearing downstand from the stretcher. All wheels on. In this photo one can see the 3mm long tube above the rear bogie wheels that the bogie pivots on. Parts for the comp beam- 1.6mm brass wire beam, front screw plate from the kit, 1.6mm brass cross pin, 1.6mm internal dia brass pivot tube, and little bits of tracing paper with holes in, which will be used while soldering in the cross pin to stop solder wicking through into the tube- we want that to pivot! This is a handy tool for punching holes in things, I got it in the Art & Hobby shop- in the paper card section, with heads of 3 hole sizes and 3 dome sizes. Screw plate soldered onto the front of the beam first. Then it has it's 10BA screw fitted and threaded into the chassis, which will only work with the front driver axle removed. The bogie mounting screw also has to be filed down flush with it's corresponding nut, otherwise the end of the screw fowls the beam! The cross pin is soldered on the outside of the frames with the tube threaded on and the paper washers on each end of the tube against the frame. Then the front axle is fitted and the beam soldered under and to the pivot tube, soldering at the top is easiest. One can now see the screw at the beam front protruding through the fame stretcher which will act on the bogie creating a 3 point compensation suspension system with the front drive axle. Wheels back on. The beam front screw is now adjusted to level up the wheels, the front driver axle ends up in mid position on the hornblocks. After running and weight tests a splash of Loctite will go on the screw. Next will be the gear box and motor...... .........in a while! other projects to be getting on with! Eoin.
-
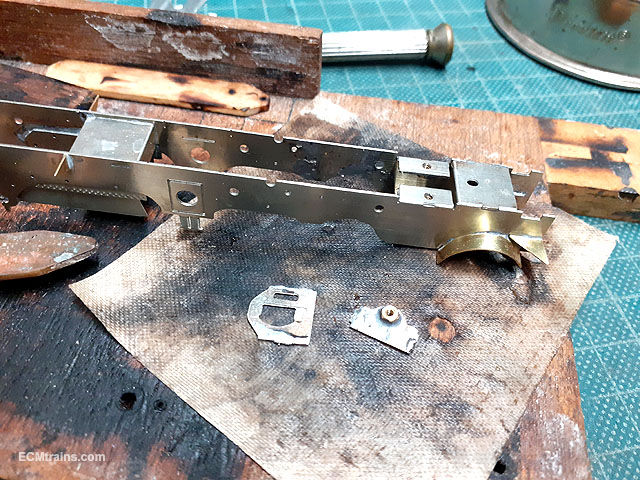
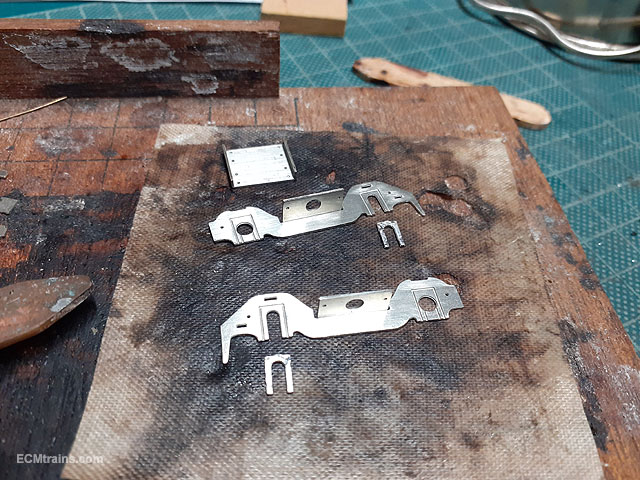
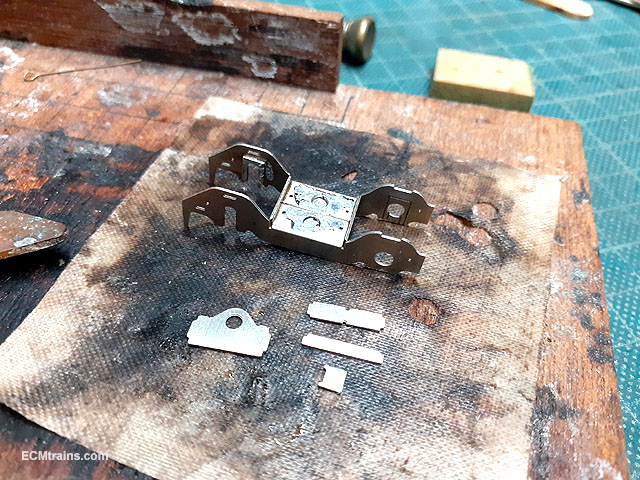
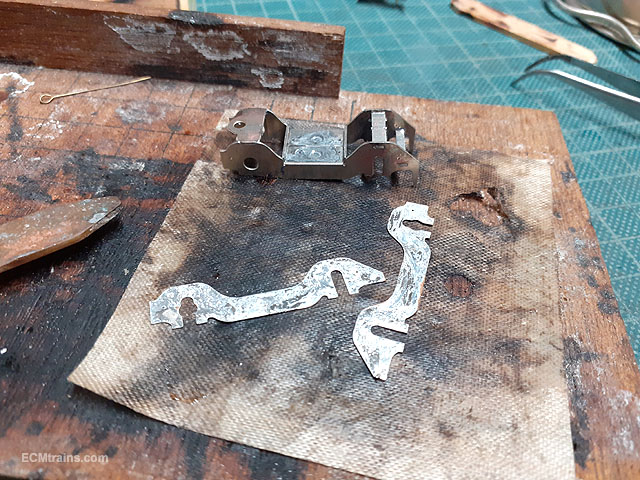
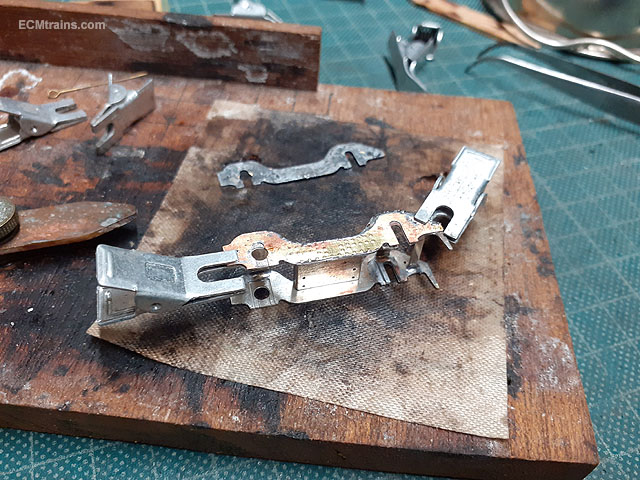
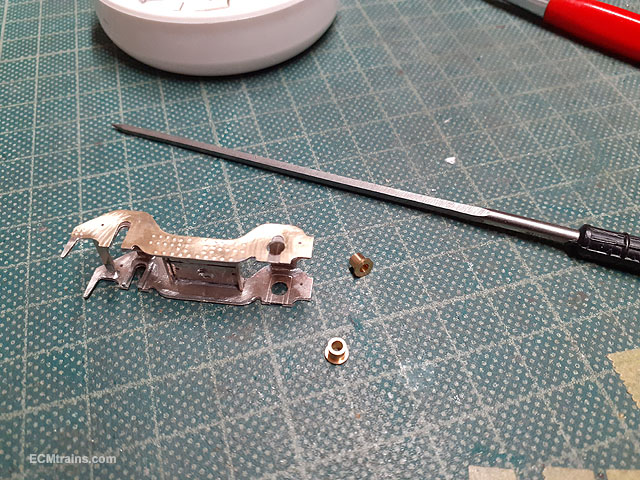
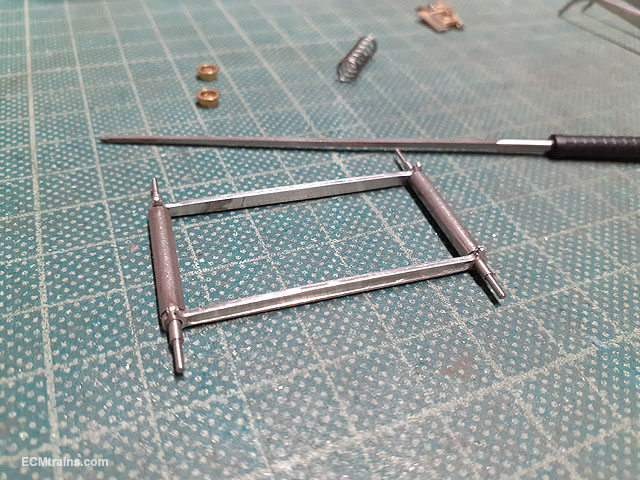
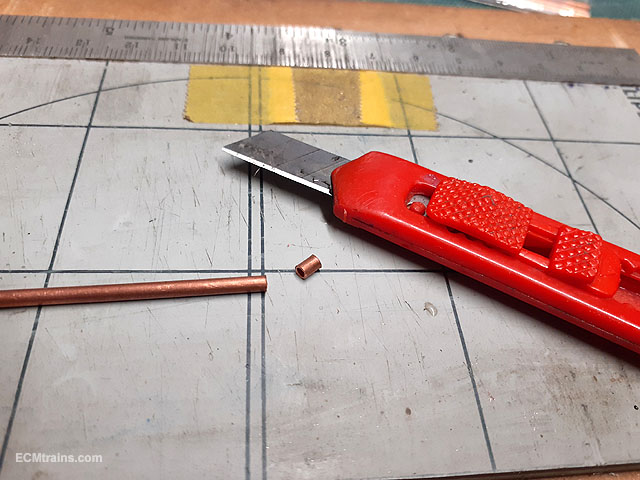
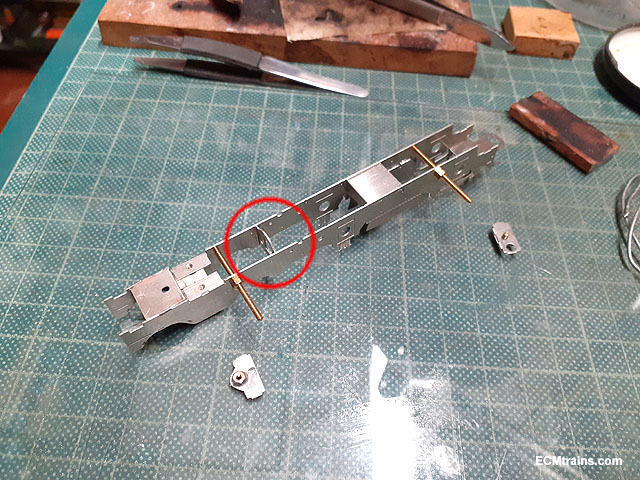
I Fixed up that frame spacer and did a bit more of the build. De-soldered the frame spacer, also the bogie mounting plate to facilitate bending the frames to sneak the spacer out of it's half etched tabs! Now its soldered back in the right way up. Bogie parts prepared for soldering up. Main parts folded and front axle hornblocks prepared with a bit of solder to sweat them onto the frames. Frame soldered and stretcher parts ready to be soldered in- oops! upsidedown parts again- that main stretcher is in the wrong way up and I did not notice until the bogie was complete but it was easy to rectify. Stretchers in and now the outside frame laminates are prepared to sweat solder them on. Soldered on and the iron is run around the edges to fill any gaps. Bogie cleaned up and holes being sized for rear axle bearings to be soldered in. This is the bogie end plate for the compensation beam a 10BA screw is the rubbing pin which is bolted through the plate, this allows adjustment of the beam. After soldering the nut onto the plate a 10BA tap is run through to clean the threads. The bogie pivots on a 3mm long 3/32'' tube fixed with a 10BA bolt to the bogie fixing plate on the chassis, the tube is not supplied in the kit. Thin tube is easy to cut with a craft knife by rolling the tube with the knife blade, after a few goes the tube eventually cuts- light pressure should be used otherwise the tube will deform at the cut. All the bits to fit the bogie to the chassis. Note the bogie main stretcher is now in the right way up! Test fitted. After a good rummage through the spares box I found a 'Puffers' Flexichas Hornblocks and bits, this will do the front driver axle bearings and compensation beam. Chassis holes cut out and hornblocks made up. Coupling rod holes are sized to fit the Alignment Jigs. The rear axle bearings are soldered in and all is jigged in the chassis. The hornblock frames are set at the top of the chassis opening and then soldered in on the inside. Done. Eoin.
-
This is the build of a Studio Scale Models Kit of Merlin, building it to Gauge OO and not decided on suspension type yet!! Main chassis components & coupling rods removed from the fret, edge cusp removed and ready all for soldering. Soldering the frame spacers to alternate frames, the ash pan sides and the coupling rods. The frames are then bolted together with screws supplied in the kit and then all soldered. Note;- **** The Motion Plate frame spacer, Part No. 108 - is in upside down in this sequence of photos. I will show it in the correct orientation in later photos when the error is fixed***** Captive screws and nuts are also fixed into the frame spaces to hold the front bogie and body onto the chassis. Crosshead parts ready for soldering, the long bits are a jig when soldering the parts together with a bit leftover as the sliders! see below. Jigged up and parts being soldered in. Soldering complete. Then the jig ends are cut off to complete the crossheads, a pit of filing and clean up is required. Motion brackets, cylinder wrappers and ends removed from the fret, cusps removed and ready for soldering. Motion brackets jigged up on a piece of MDF for soldering. Bracket folded n soldered. Preparing the relief valves for the cylinder front covers- these small bit of wire have a tendency to float out while soldering the covers on so I put a burr on one end with a hammer, thread the wire through the hole from the inside and solder on the inside, this stops the wire popping out later. Embossing the bolts on the covers. Inner cylinder wrapper bent to shape around a 6mm brass bar and ready to be soldered. Solder applied to inside of the wrapper, then the top is soldered onto the bracket first, then the wrapper is forced around the bracket, held with a strip of wood to save the fingers and the bottom soldered. Soldered. Front cylinder ends soldered on. Bogie front splashers were bent up and soldered to the chassis, gusset plates also done at front and at the firebox. Crosshead slide bars being folded up and soldered. Installing the slide bars into the back of cylinders and the motion bracket. A bit of fettling was required to the crossheads to ensure they could move freely in the slide bars, this was done before soldering the bars in! Outer cylinder wrappers bent up and ready to be soldered as per the inner wrapper method. Wrappers on and whole assembly cleaned up. Eoin.
-
1/32 Scale Mountfleet Round Table Minesweeper
murrayec replied to Georgeconna's topic in Aviation & Maritime Modelling
That sure is a big can
-
It's Gauge 1 - 1:30, or 10mm/foot. Eoin.
-
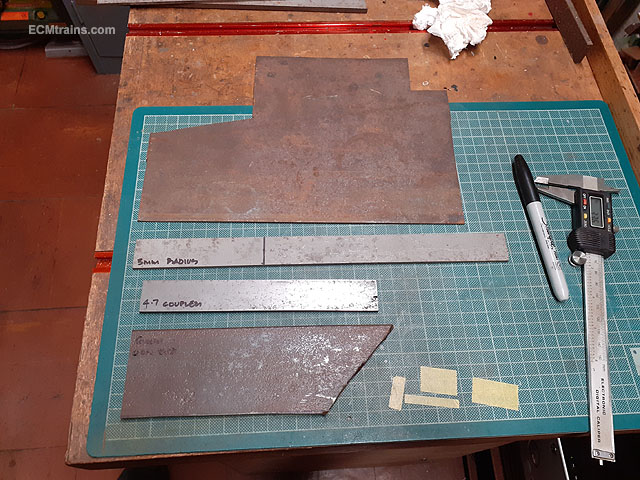
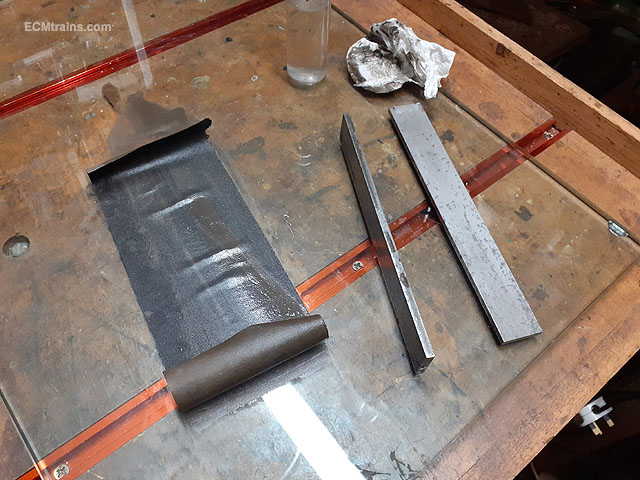
I started on the valve gear for the Gauge 1 800, getting ready to assemble the chassis frames and axles so need the coupler rods first, so into the metal scarp box to see what we have;- Various bits of mild steel were found that would work, 8mm thick bit at bottom for the drive rods, 4.5mm above for the coupler rods, then 5mm for radius rods, and finally 2.5mm sheet for the other bits. Cleaning up the 4.5mm bits for the coupler rods. Blued up for marking up. And marked up, this is for initial guide to set-up a jig to hold the metal parts on the mill machine. First operation done- removing the straight bits along the rods by chain drilling and then milling slots with a 6mm endmill. Next the curvy bits are done on the rotary table with a 6mm endmill. Curvy bits complete, just needing the remainder scrap to be cut off. Here the rods have been mounted on the jig in the vice and recessed face side cut with an 8mm endmill and then the flutes cut with a 3.2mm woodruff mill to 1mm depth. And the completed coupler rods after the oil boxes have been cut back on the front face and 1.2mm dia holes drilled in top for the oil filler plugs. The rods still need a rub down with grades of emery paper to remove the machine marks- but that will be done later. Next up will be the turning of axle jigs from 6.35mm dia aluminium rod, for soldering in the axle bearings in the chassis frames, the coupler rods will be used for this to line it all up..... Eoin.
-
Lovely stuff @popeye


.JPG.6cd4bffd68bfdf76f4ceaa9159e7040c.JPG)