murrayec
-
Posts
2,775 -
Joined
-
Last visited
-
Days Won
70
Content Type
Profiles
Forums
Events
Gallery
Blogs
Everything posted by murrayec
-

GSR & CIE locomotive list for grey, green or black livery
murrayec replied to jhb171achill's question in Questions & Answers
Another option in enamel is Humbrol 27 'Matt Sea Grey' -
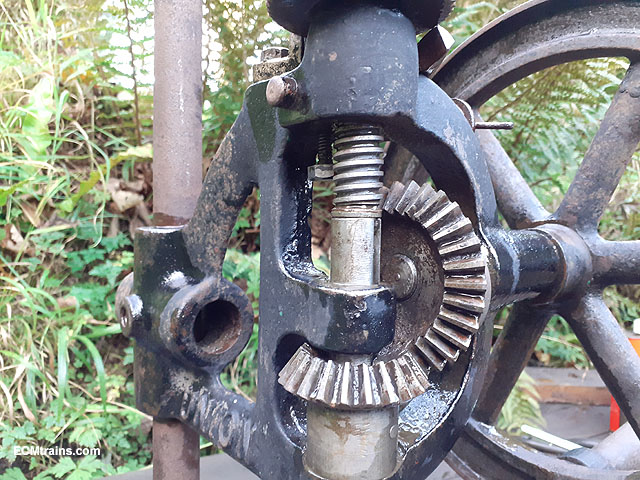
After a good clean down with Gunk and pressure washer things are looking good! There was a good bit of grease on most of the working parts under the dust which preserved most. With a squirt of WD40 and hefty persuasion I got the chuck to turn! The bevel gears are in great condition. There is a ratchet system on the quill which controls the drop of the chuck and an eccentric lobe on the handwheel bevel gear to allow the chuck to be wound back up- one has to slip the lobe follower onto the lobe for this to operate, it's that toothed gear under the top handwheel with the ratchet finger adjacent. The spring to hold the ratchet on the gear is missing and someone installed a bit of grey plastic in its place. All dismantled and ready for a bath! Eoin

-
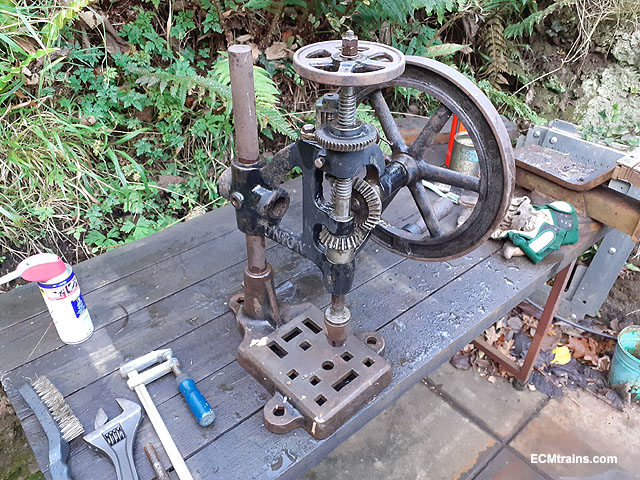
I acquired this Union Drilling Machine for a restoration project and ultimately use it when restored. It's rated at 1PP (Person Power). I used one of these in my silversmith days back in the 70's, it was driven by a belt off the workshop line shaft but one had to turn the handle at the top to drop the drill bit into the work. It's going into a bath of diesel for a few weeks to free the rust up and then restoration. Eoin
-
Money box in the shape of the castle, amazing detail including plants and surrounds. Available exclusively from Blarney Castle. h 10cms, w 7cms, d 7cms. https://store.blarneycastle.ie/products/blarney-castle-money-box
-
Weathering Murphy Models 121 Class Locomotives With Mick Bonwick
murrayec replied to Warbonnet's topic in Tips & Tricks
@jhb171achill Anthony MacDonald (RIP) of the IRRS had related to me some time back the story of the Gray livery 121, unfortunately this cannot be confirmed now, but Anthony was an encyclopaedia of info on the 121 (consulting with Mr Murphy on the development of the 121 model);- '' The manufactures painted the loco in their choice of livery as CIE were hesitant to confirm the livery required! The manufactures made the decision on grey & yellow to stay on program'' Eoin -
Tamiya Air Brush System No.20 With Spray Work Basic
murrayec replied to burnthebox's question in Questions & Answers
It's a single action gun, dual action gun would be better so that one can control the paint flow with the trigger finger! //bartsharpairbrush.co.uk would do a far better starter kit with a dual action gun- for example this compressor & gun kit is £64.00 https://bartsharpairbrush.co.uk/product/bartsharp-airbrush-compressor-kit-tc802/?doing_wp_cron=1605302653.0207669734954833984375 Eoin -
@brassnut Is that not dirt in the frog? I would try and clean it up with track cleaner and a toothbrush, also take a look at your wheels on stock and locos to see if they need a clean... Eoin
-
Try this link
- 1 reply
-
- 2
-

-
This image tells a great tail....
-
@Westcorkrailway If this is the first chassis your going to do I recommend a good read of Ian Rice's 'Locomotive Kit Chassis Construction in 4mm' ISBN 1874103100 Wild Swan Publishing. Every modeller should have this book and some his other works on their reference shelf. Eoin
-
What a crazy image!
-
If your using Hornby points this link may be helpful;- Peco points are better, the air gap in the frog is smaller and the check rail is in a slightly better position, but small wheels can still be a problem! Eoin
-
@burnthebox Yes, the axles are generally 26mm point to point, but there are axles out there that are a different length! 26mm is the standard for OO Gauge. Eoin
-
@burnthebox Their all the same, they have to be to fit OO track! The wheel flanges are all generally made to the same NEM spec- as in thickness. The wheels are set with a 'Back to Back' setting of approx 14.7mm, there are exceptions when working with old wheels that don't comply with the NEM specifications. Hornby used to make pretty thick flanges on their old wheels but they don't do that anymore. Eoin
-
@David Holman But do look at CAD for the future, I use Autocad & TurboCad for 2D drawings in the model building. Here is a link to a few videos introducing the beginner to Autocad;- Eoin
-
@David Holman The Proxxon scroll saws are only for wood or plastic, it's very dangerous to try and cut thin metal on a reciprocating blade machine due to the up lift of the blade- any snag in the work will rip it out of ones fingers and god knows what else it will rip! The band saw blade only goes in one direction- down, against the table. The right tool to do this work. Hanger do a scroll saw for cutting metal but is rather expensive at around £800.00 and it's a scary thing to use! Eoin
-
Stunning model David, That's the first time I've seen it moving! Eoin
-
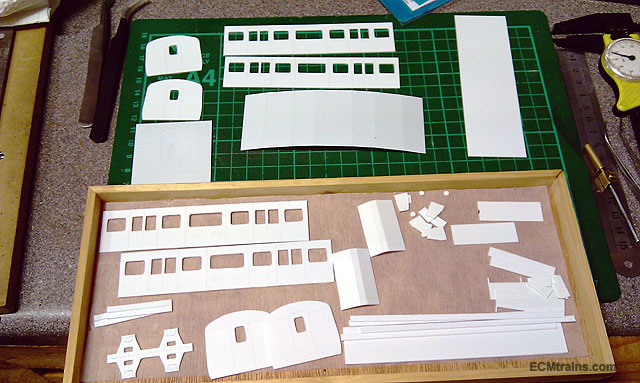
I use a Cameo Silhouette cutter- its great for thin styrene, thick paper and vinyl. It can almost cut through .5mm styrene with multipal cuts. CAD is a requirement also! Tin Van parts cut from .5mm styrene on the cameo, after a bit of cleaning up! Eoin
-
Hi David Learning CAD is the right step, it opens up huge possibilities in this craft. There is a learning curve to most of the programs out there, but after mastering a few of the basic commands the rest will follow and soon you'll be saying I should have done this before now! A table saw is not the tool for cutting brass or NS sheet. If your thinking of a saw you need to look at a band-saw- best example for model building is the Proxxon MBS Micro-Bandsaw, which one can add accessories to like- diamond blade, HSS blades for cutting metal, coolant system. The band-saw can also be used to cut out parts from sheet- like a piercing saw, though takes a bit of practice and constant attention to where your fingers are! A bench guillotine is the other option for cutting sheet down to manageable size. Eoin
-
Just to clarify;- This model is from a kit of parts made by Brendan Kelly, Brendan built 4 of these models a few moons ago from his own patterns for members of the MRSI club. The Model Railway Shop did produce a kit of the GSR Class 800, but that was a different animal! Eoin
-
They are super glued in, and as I said above;- ''Not the easiest job for the faint-hearted! The handrails are a bit fiddly, but the glue will eventually let go with slight lever pressure with a cocktail stick. Super glue remover can be used for softening the glue but it will also soften the paint! All came free for me without breaking'' Eoin
-
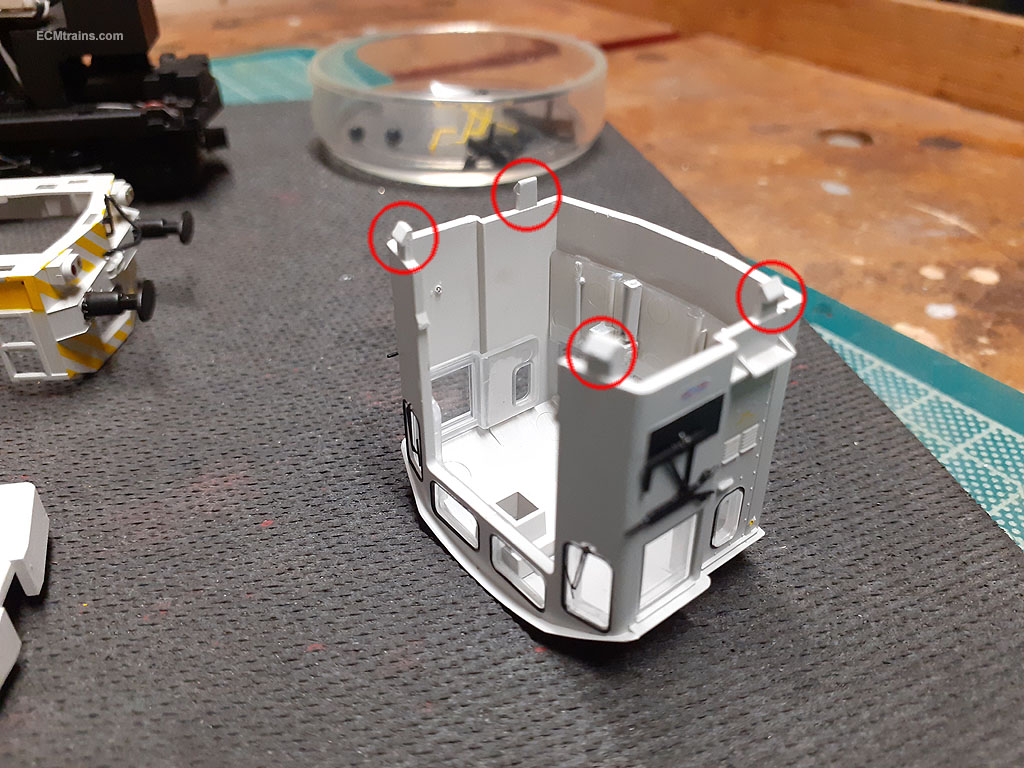
I don't think so! the only way I was able to release the barbs was from underneath after the chassis was removed, also there was the difficulty with the boxes being in the way and I could not have sussed what was going on without removing the chassis. The cab rear barbs do release when the cab body is squeezed on the outside, but the cab front ones needed a cocktail stick prodded in from underneath. Eoin 'Cab rear' - I'm looking at it as bonnet front!
-
The speaker is up front under the board;-
-
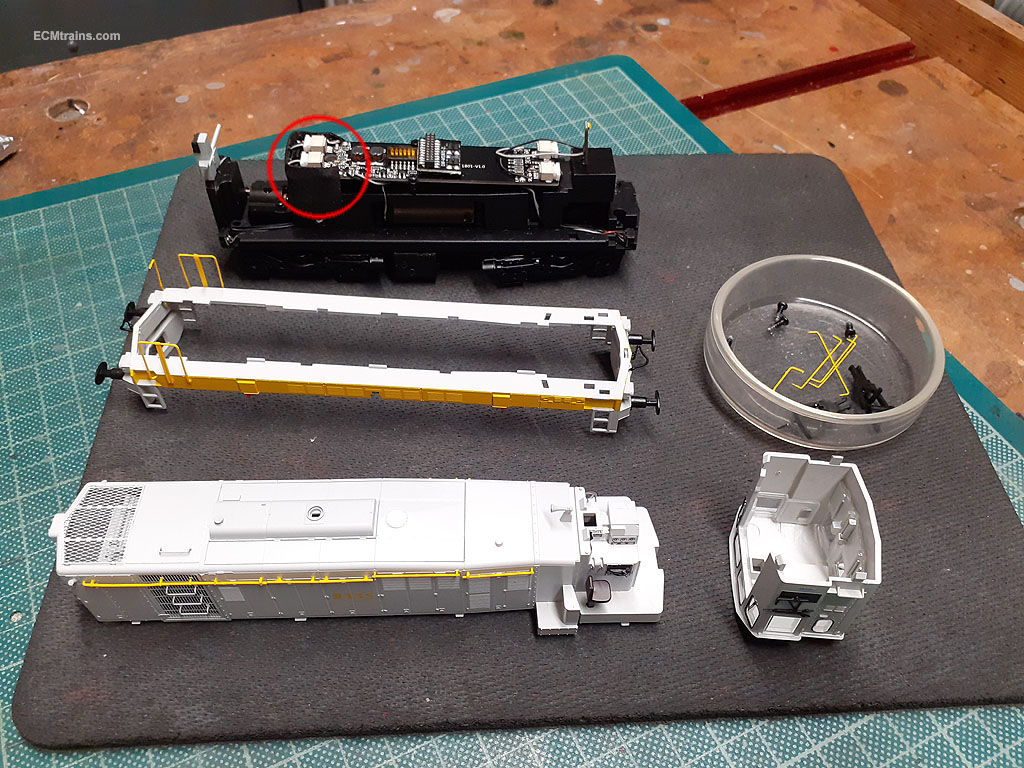
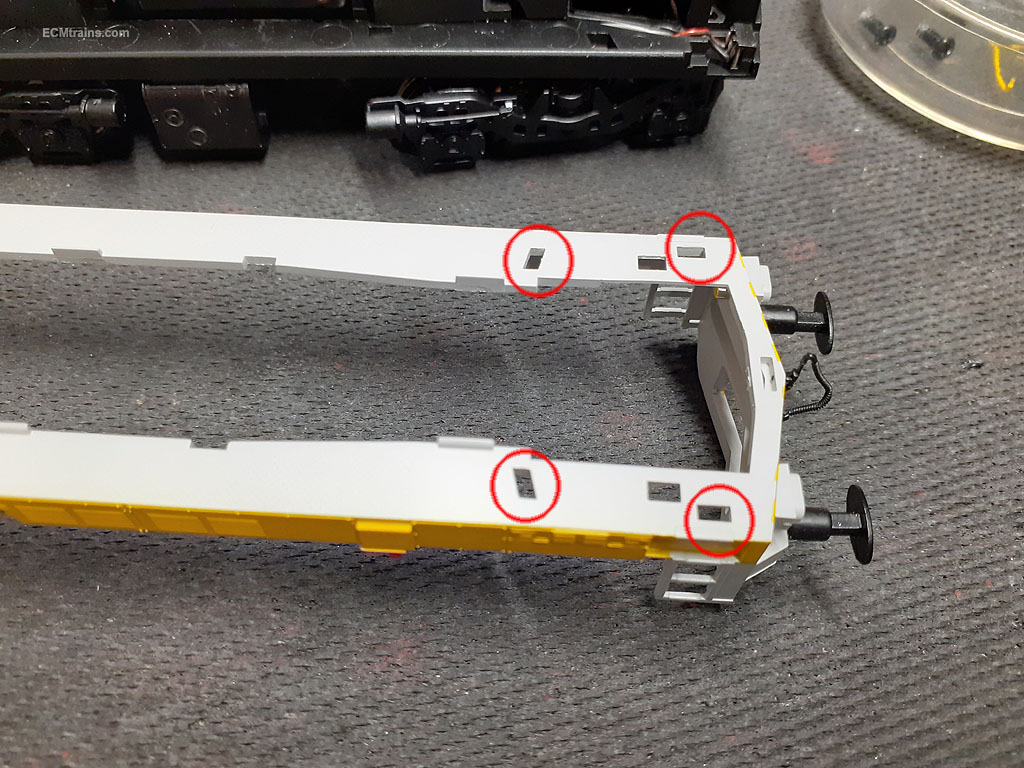
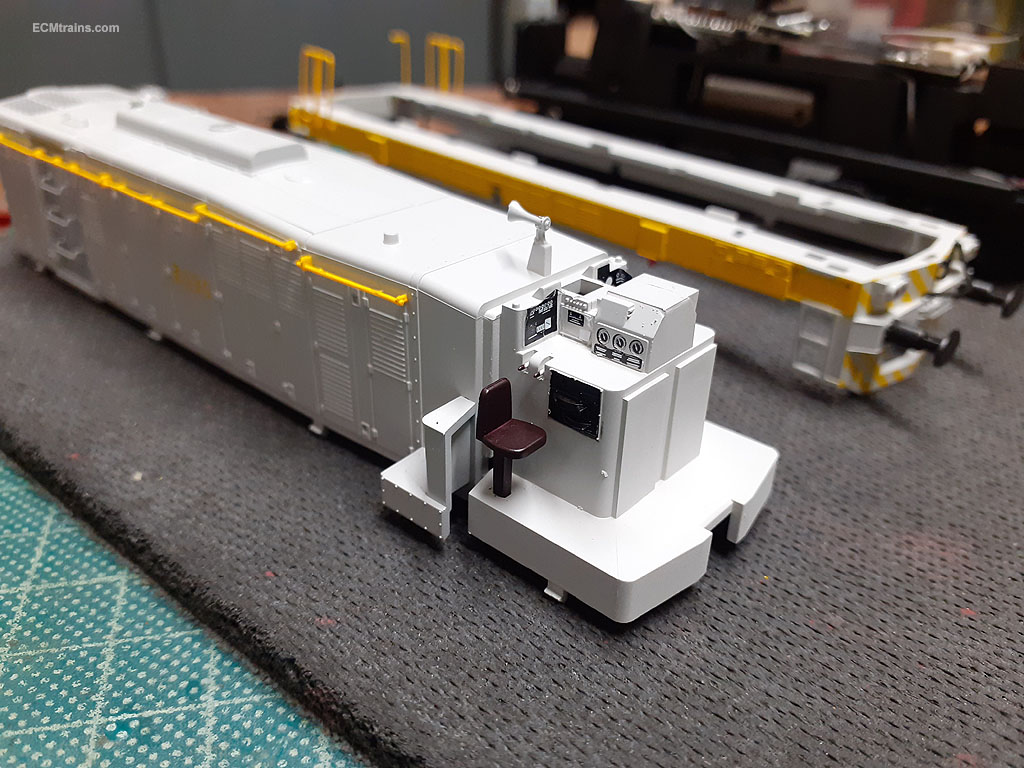
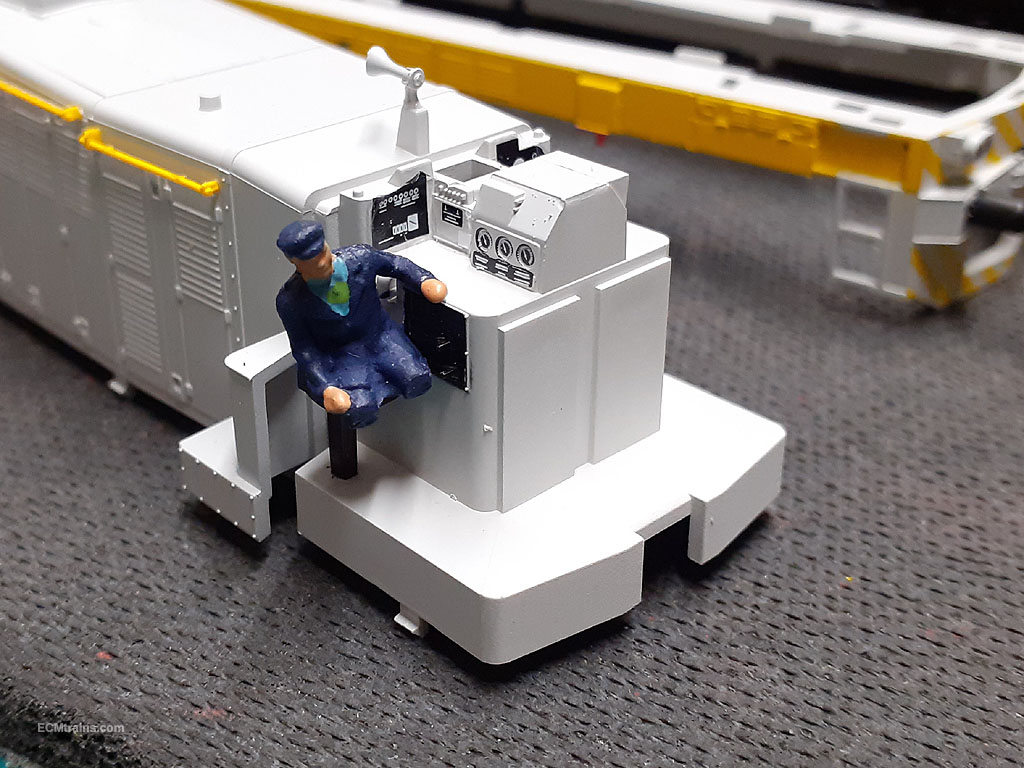
I was asked how to install a driver in the MM 121. Remove the chassis by undoing the 4 screws, 2 in front of each bogie. The cab is designed to slide up off the footplate/body after one removes the door handrails, there are 4 barb catches on the base of the cab which catch into the footplate. On this model the cab refused to slide up as the boxes clued to the body in front of the cab were catching it! I had to remove the footplate which again is held by barb tabs on the body into the footplate. The front handrails also have to be removed for this. I could then flex the parts and slide the cab up. Not the easiest job for the faint-hearted! The handrails are a bit fiddly, but the glue will eventually let go with slight lever pressure with a cocktail stick. Super glue remover can be used for softening the glue but it will also soften the paint! All came free for me without breaking. This is a shot of the OO scale driver I use in the DARTs! He's to big- way to wide, and not fitting into the space. I recommend using a HO scale driver. Eoin
- 18 replies
-
- 11
-

-

-