murrayec
-
Posts
2,765 -
Joined
-
Last visited
-
Days Won
70
Content Type
Profiles
Forums
Events
Gallery
Blogs
Everything posted by murrayec
-
The best solution for this is to use Deluxe 'Tacky-Wax' to hold them on, then they can be easily removed and attached elsewhere..... Eoin
-
The hills and the city lights are in my way Eoin
-
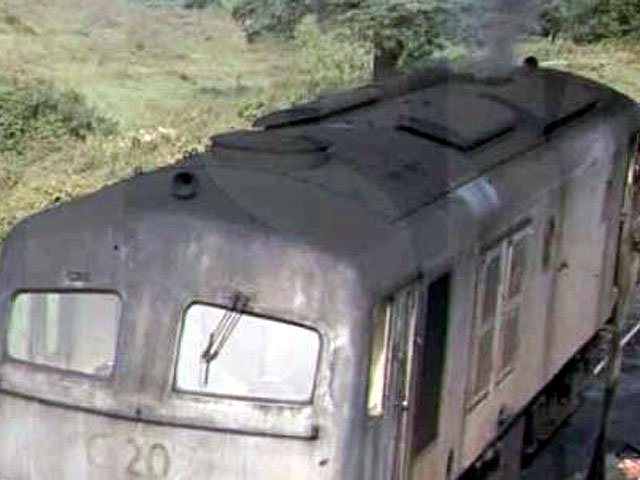
This is the photo of the roof I worked from, hard to see exactly what's there but exhaust smoke is coming out of one of the ports- why at first I amused one port! A chap on fb posted a picture of two ports and confirms this is correct;- The exhaust ports were moved when re-engined, I reckon popeye has it correct Eoin

-
The Roco Multimouse is an economical and very simple entry into DCC controllers, one can then upgrade to the Roco z21 for a bit more punch and can be optioned to be controlled from your mobile phone, the Multimouse can be used with it also and not become redundant. The Multimouse is around €100 but many second-hand are available for less. The z21 is up in the €250 - upward region. Eoin
-
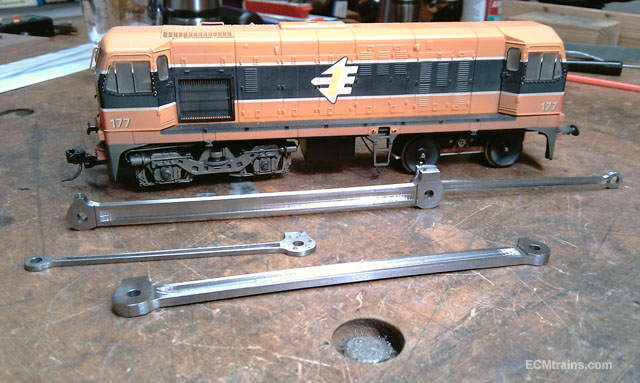
I just cut n pasted the pic from one of my threads, it's the only photo of the 171 I have- their Gauge 1 VS rods.... I did get the parts from Mr Murphy just haven't installed them yet! Eoin
-
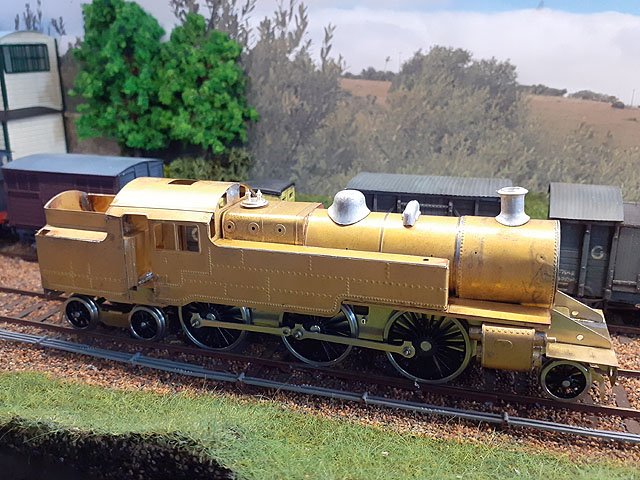
My trusty 171, one of the Marks Models commissions was picked up in a charity shop for €5.00 a few years back- it does need a little bit of work though!!
-
@DiveController The fan is at the other end and it's still in, I'm now considering a smoke generator for the exhaust! the only thing was the colour of the smoke- 'C's' belched out black stuff and the generators do white/grey? Eoin
-
It would all be the same, it's to do with stock hanging out over the rails on the bends and fouling a train doing the same thing on the other track, you may have some leeway with HO stock but if your going to be running OO Irish stick to above 65mm- at that dim Irish Cravens get pretty close! Eoin
-
@mmie353 65mm minimum, Peco recommend 67mm Eoin
-
After an informative comment on the exhaust on fb yesterday- the fact that C's had twin exhaust ports! I decided to modify my single port to a twin. The old styrene hoop was forced out and the hole filled with a 1mm styrene disk. Then 3mm holes were drilled and broached to take 3mm dia thin wall brass tube. A little bit of filling needed around the styrene disk...... Eoin
-
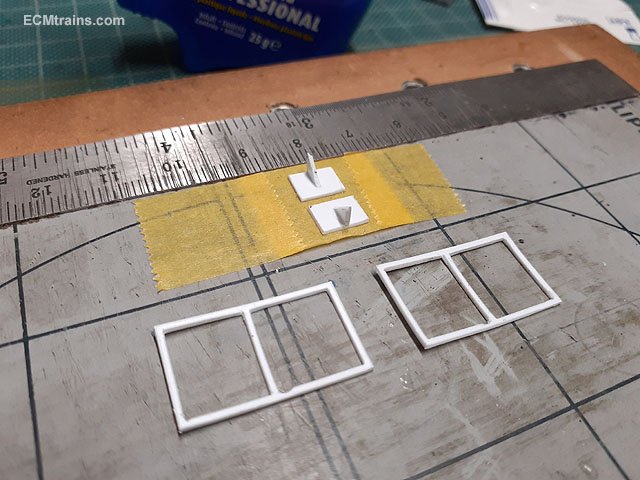
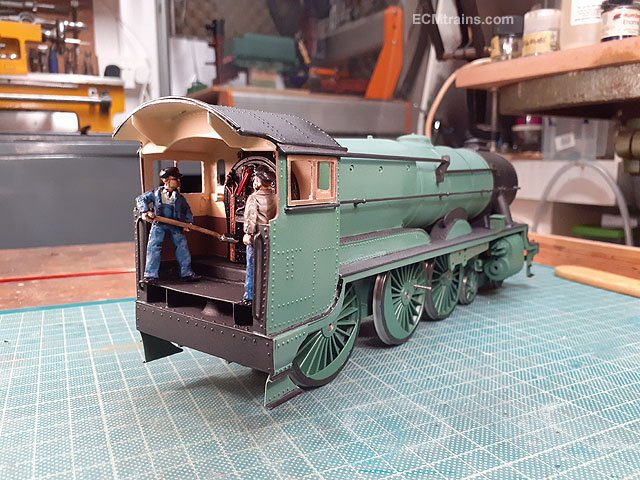
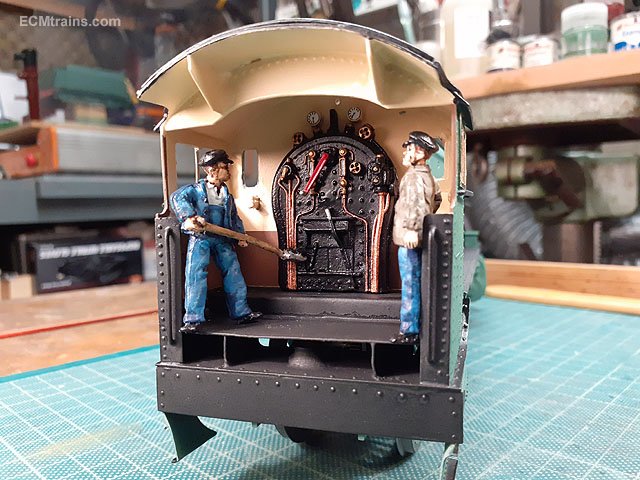
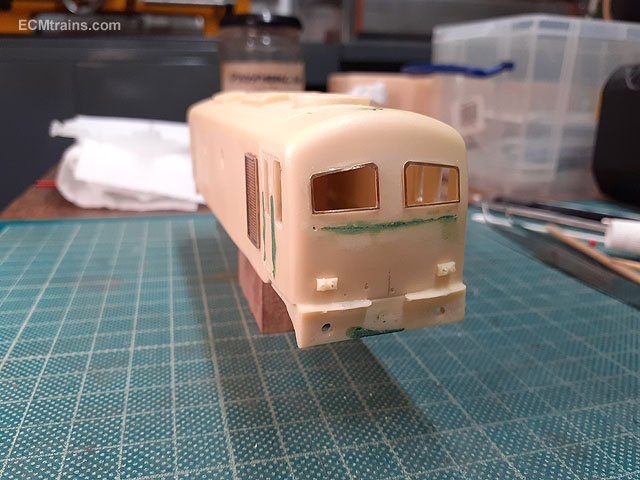
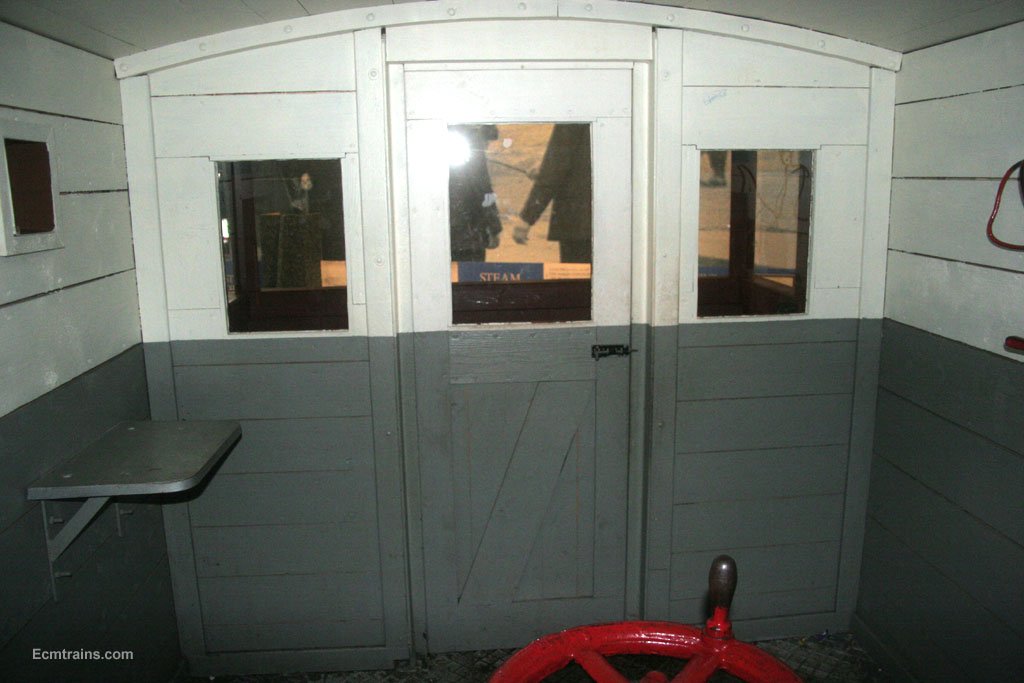
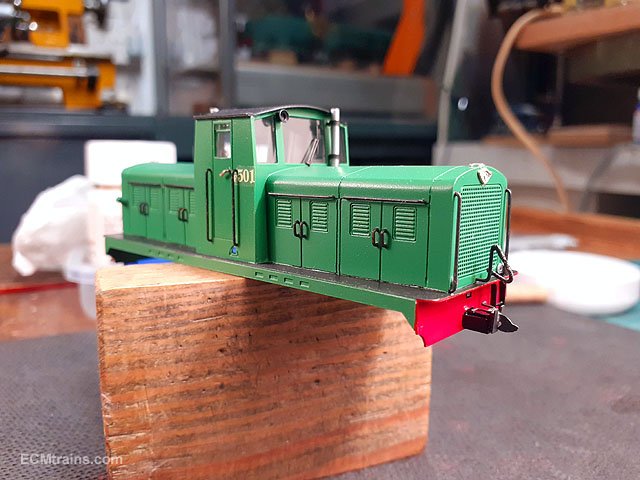
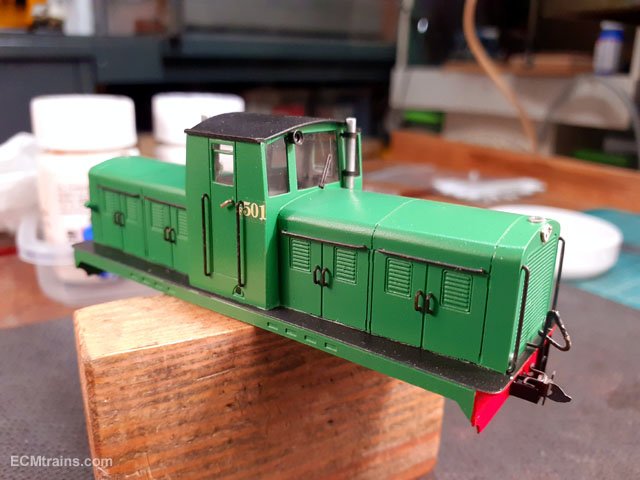
A bit of cab interior stuff being made up now- Internal window frames and seats, cut from .5mm styrene and ready for painting. Paint work touch-ups have been done in readiness for a gloss lacquer for doing the lining. The buffer beams were edge lined in satin black with a bow pen and then touched up with paint brush. The crew turned up in the workshop today on an inspection of the works, the fireman was a little optimistic bringing his shovel loaded with coal! It's a beast, when you got something to scale it to your reminded of it's size! Eoin
-
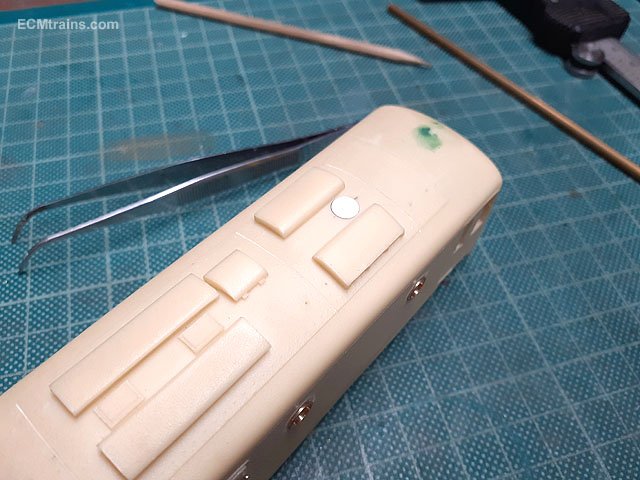
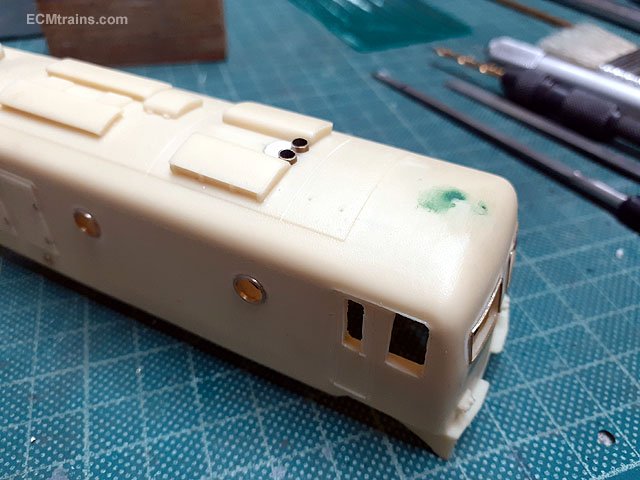
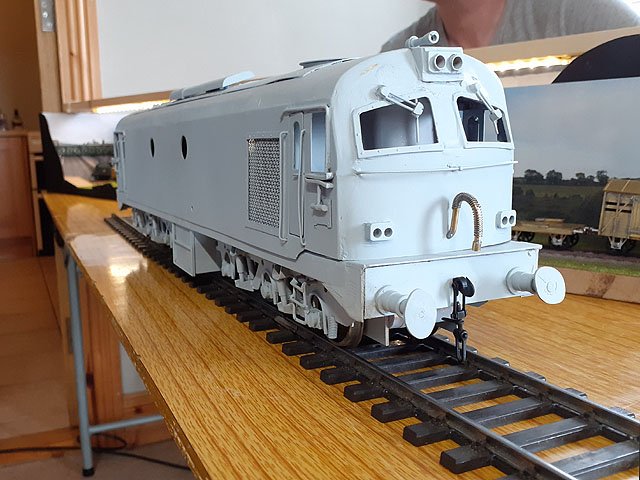
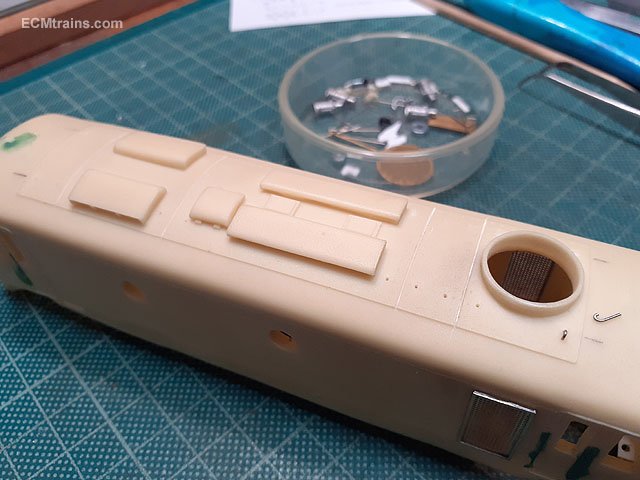
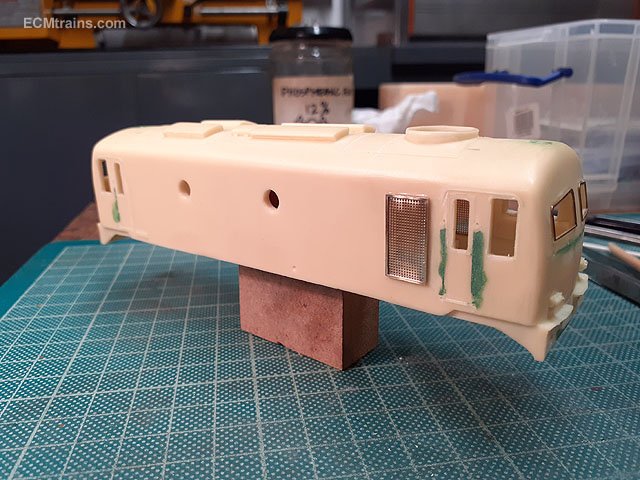
I was reflecting on the roof details of the model today after seeing IRM's A at the Fair yesterday, and decided that I would wipe the rear roof ventilators off and install the exhaust as the SF body is devoid of an exhaust opening! After browsing through my reference photos of the Class I found a silver liveried one with these rear roof ventilators, with the exhaust opening in-between them- a much easier job! Drilled out a 5.7mm hole between the ventilators and cut a hoop from 5.5mm styrene tube to trim and make an up-stand to the exhaust. While browsing the photos I also decided to add a little more detail- door handles to the louvred doors with .3mm brass wire epoxied on and trim detail around the lower body openings below and in front of these doors, the same lower detail was done on the other side also. The lower detail might get a rub of a file when the epoxy fully sets as they look a bit over scale, though a few coats of paint will improve their appearance by not contrasting as much as they do now....... Eoin
-
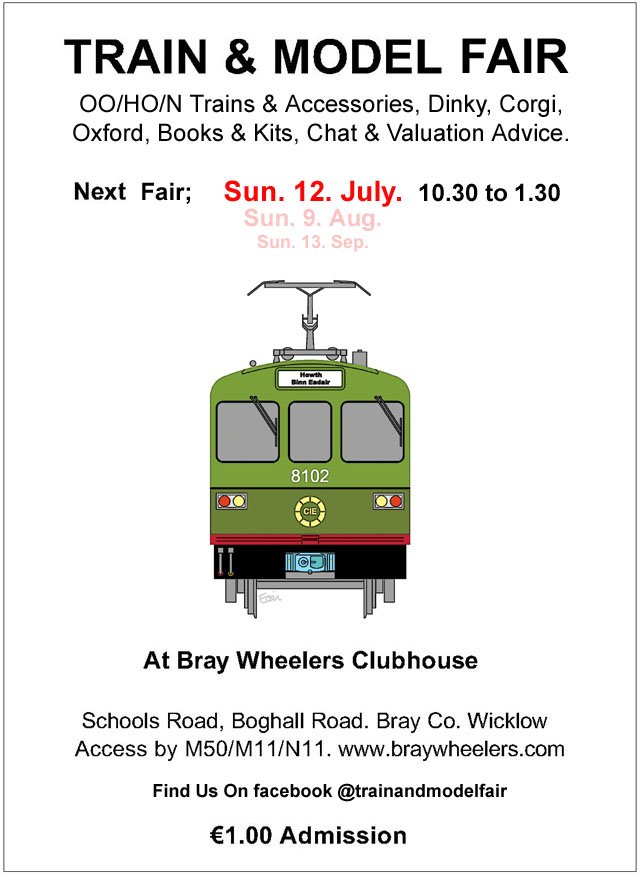
We had an excellent Fair this morning with great attendance and a few brought along current projects;- A Gauge 1 Brendan Kelly Class A. And Fran from IRM dropped in with it's little sister and a few other forthcoming models. And KMCE brought his Wicklow South diorama and his current build project- the 'Jeep' Thanks to everyone that attended and those who brought along goodies for all to drool & talk over- a great start to the new run of the Fair. Eoin
-
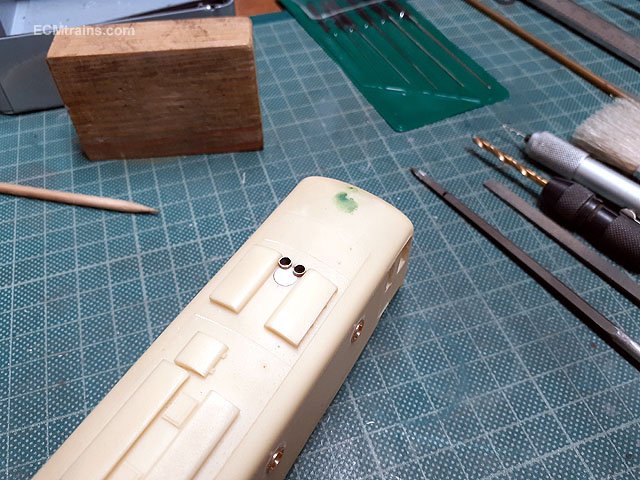
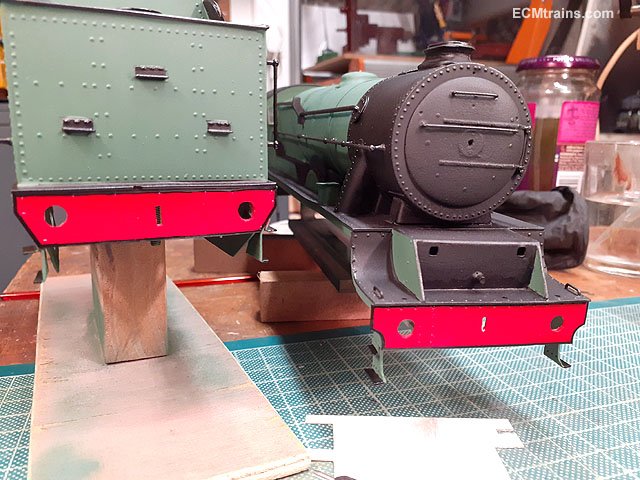
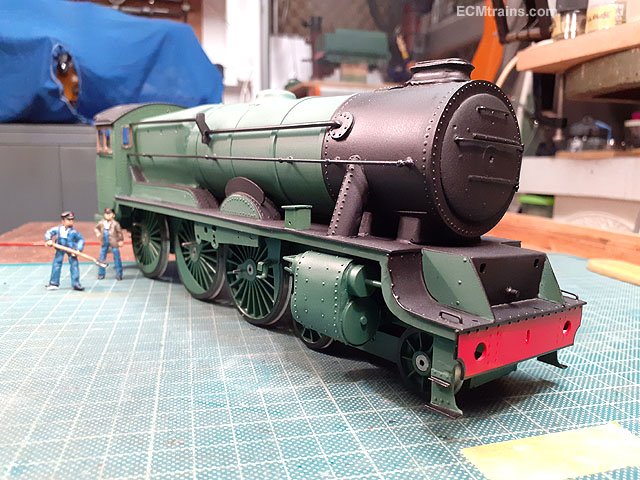
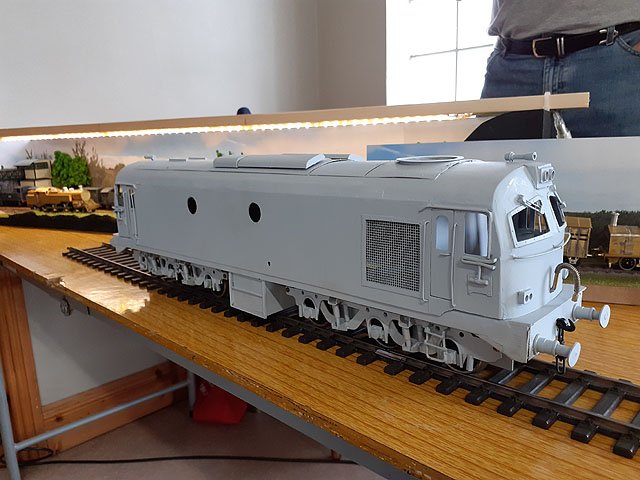
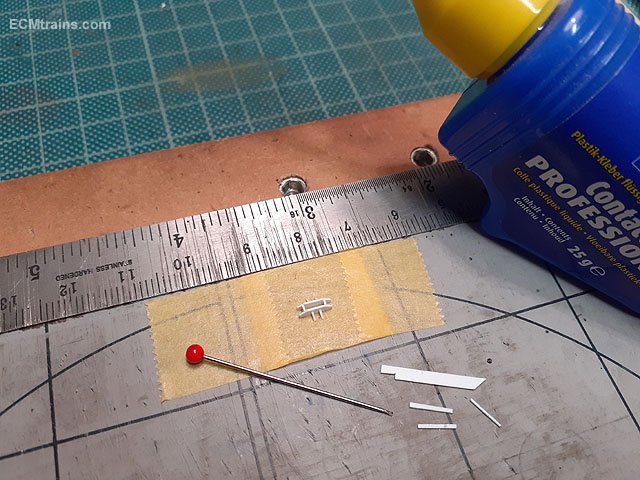
I kept going on the C today;- I turned up a few brass hoops on the lathe for the side window frames. Made up a new buffer beam coupler reinforcing detail from .3mm styrene, the front coupler will be a prototype screw one. Scored out the lift-out panelling on the roof, drilled .5mm holes and made .45 nickel silver lifting hooks which will be metal blackened and installed after the body is painted. One is installed at lower right. Side window frames on and front buffer detail glued on with epoxy. Just a small bit of cleaning up the epoxy in a day or two and then painting can commence... Eoin
-
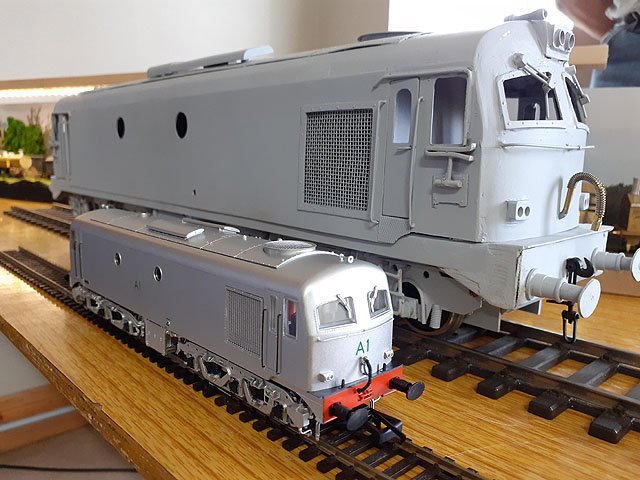
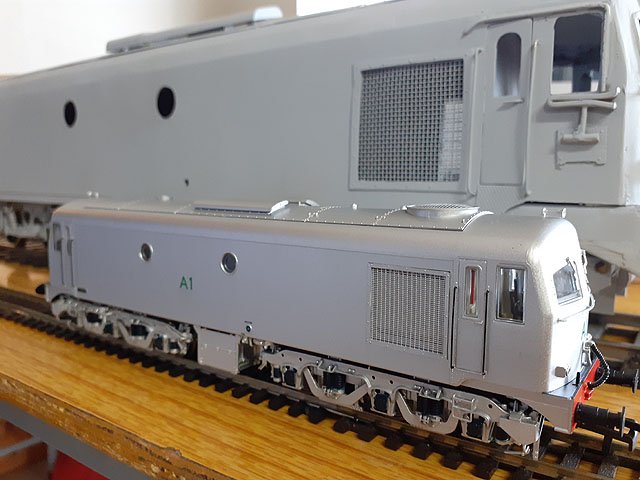
Yes Robert, it's going to be silver, I did the same for the window glazing as the stuff that comes with the kit is a very poor fit. Eoin
-
Train & Model Fair updated flyer with future dates included - the Fair is on tomorrow.
-
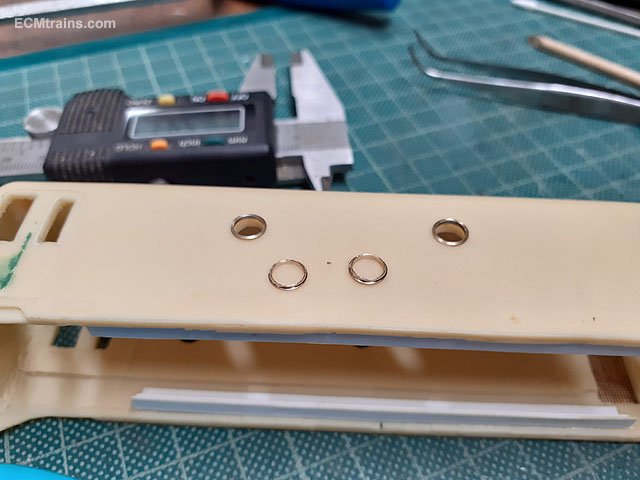
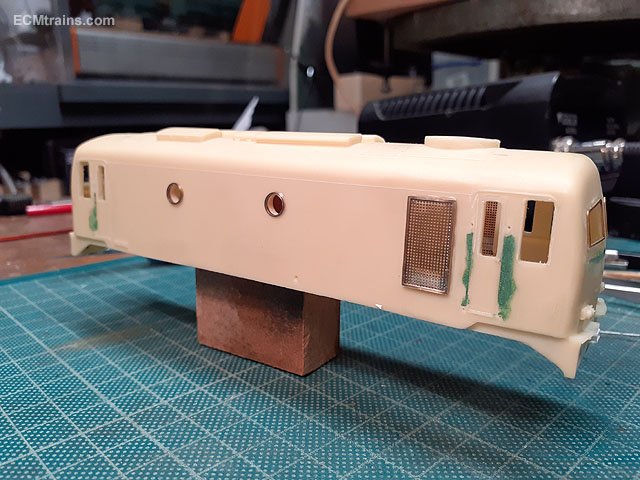
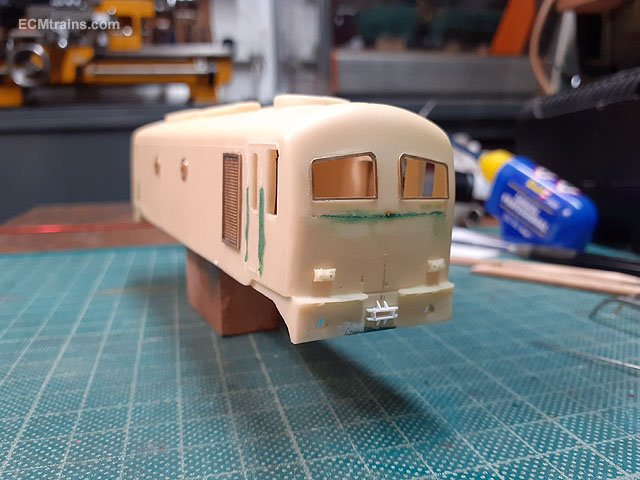
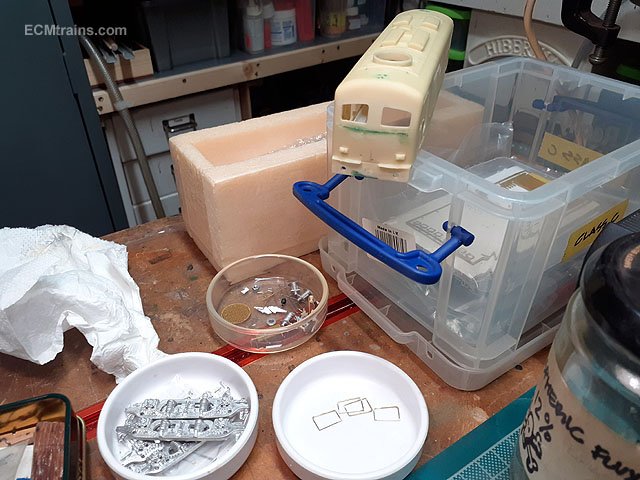
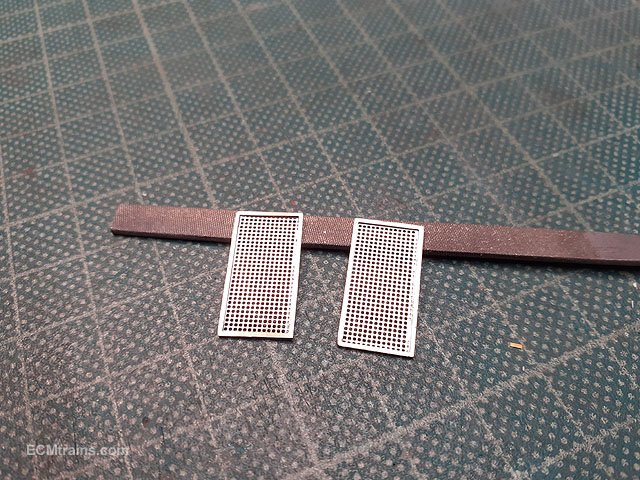
So then, I did a little bit of work on this project this evening, 2017 was the last time work was done so I have made a point of getting back to this project and complete it out!! Preparing the body for painting, first up is the SSM detail kit side grills and window frames, bits removed from the fret and cleaned up. The side grills come with an etch frame overlay with a diagonal brace, this brace I cut out, useing the frame only. The grill part is covered with pencil lead to stop the solder flowing into the grill and blocking the holes. 180 deg solder applied to the parts preparing to sweat solder the frames on. Soldered on. And cleaned up. Sticking on the these parts with epoxy glue. And the window frames. Next up will be brass turned frames for the round side windows........ I have also cast up a few sets of bogie sides and battery boxes so if anyone is interested- pm me. Eoin
-

Walker Diesel Class F - ECMbuild in 4mm for OOn3
murrayec replied to murrayec's topic in Irish Models
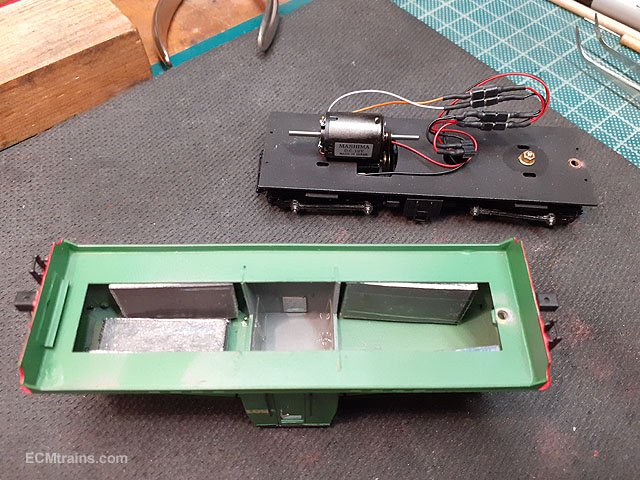
Lead ballast was worked out today, can just about get the right amount over the motor- the addition of the lead has increased the motor sound! thought it was going to be the other way around? And here is a video of it running while testing different positions to the weight Still more to do- it loves running in reverse but it's another story in forward gear!! Eoin Edit;- Something went wrong with the video when I did a spelling edit, will post again!! https://youtu.be/pK-BkS4TsuA
- 136 replies
-
- 5
-

-

-
- class f
- west clare
- (and 1 more)
-
wrennie The second one is more applicable, the first one most kids would have no interest in, maybe when they get older the interest may grow towards older trains but it's current stuff their into. Eoin
-
In my view the only answer to that question is ''yes'', I'm inundated with requests for a DARTs, 22s, the Luas and current stuff by the young folk, or their mums n dads! The kids range from 5 to 12 years and some know about every aspect of the train their interested in, and can tell the difference when mummy buys them a bit of €20.00 junk from the cardboard box under the traders table.... All are very disappointed when I point out the cost of my models and the possible cost of developing a new one! This is why I have turned to the timber toy dart idea (which development of has ground to a halt because of other work), I have designs for 22s and the Luas to be done the same way, and some of the older stuff including 121s, As, and 071s. Surprisingly when I show the toy to senior model collectors it sparks interest in ordering one for that grandchild they have who is nagging to play with ones expensive models- and just not allowed- which crushes the interest. The only problem with a manufactured starter sets is the retail cost- an example is the IR Commuter set which now sells for around €200.00, mummy is just not going to fork out for that....... Eoin
-
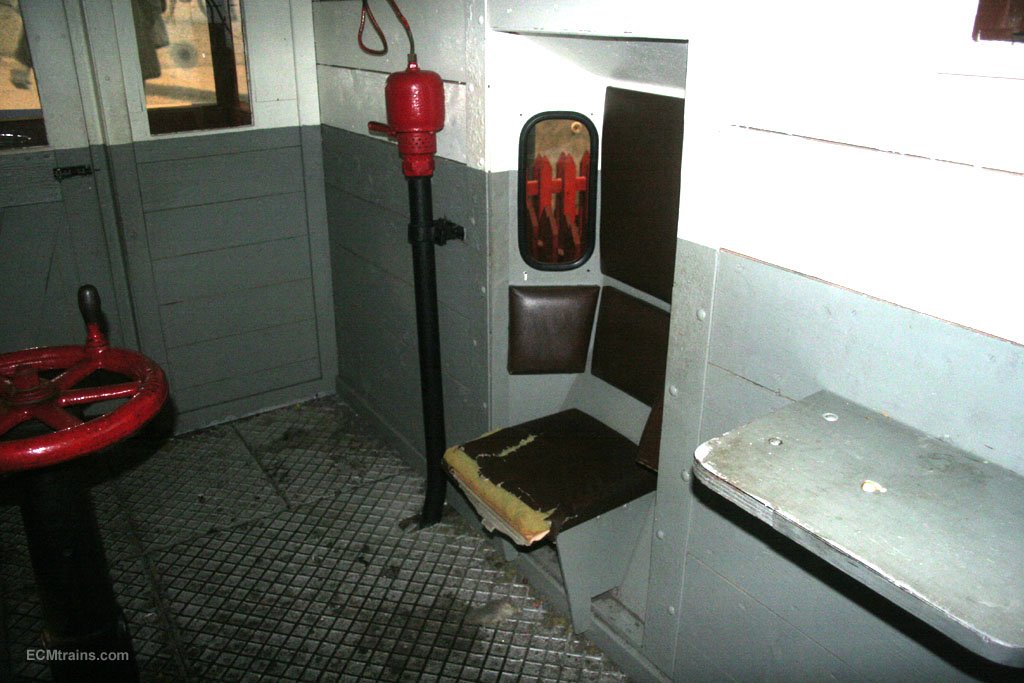
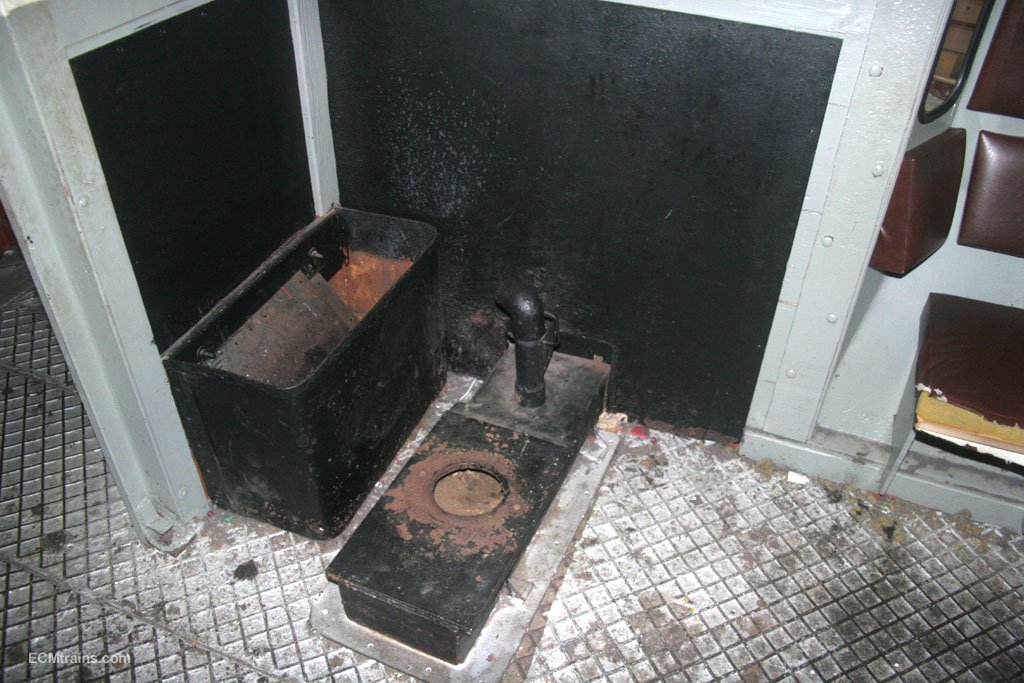
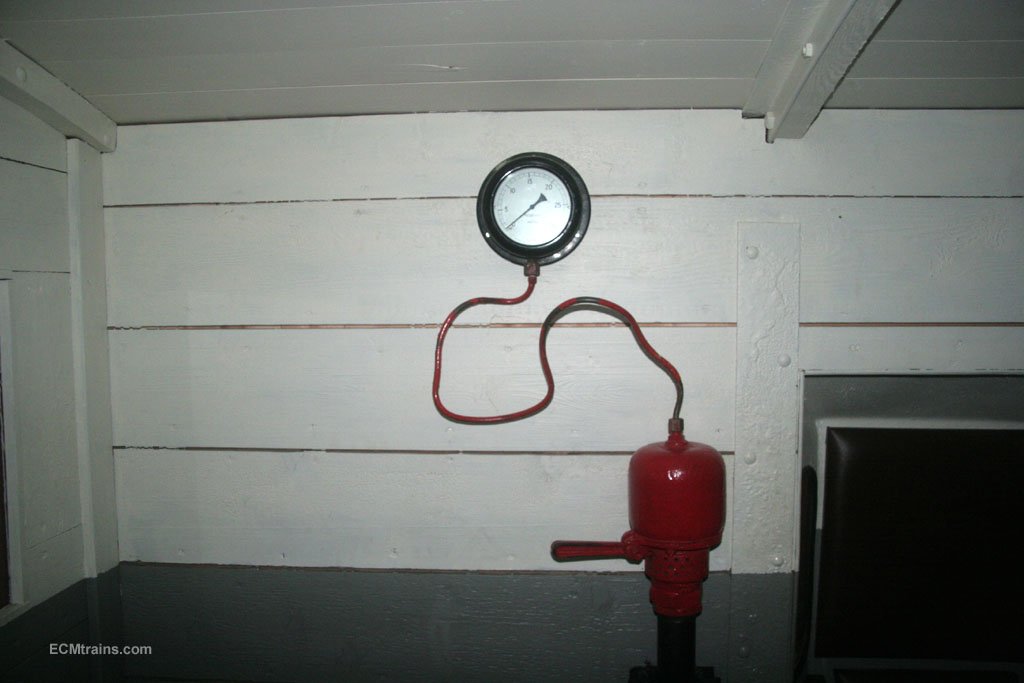
I used one of those in my old workshop, when it was up and running proper one could not stand with in 6ft of it without ones pants catching fire! Eoin
-
@Mayner Here are a few of my photos from Cultra, no stove in it but the ash pan & fuel store is still there;- Eoin
-
Walker Diesel Class F - ECMbuild in 4mm for OOn3
murrayec replied to murrayec's topic in Irish Models
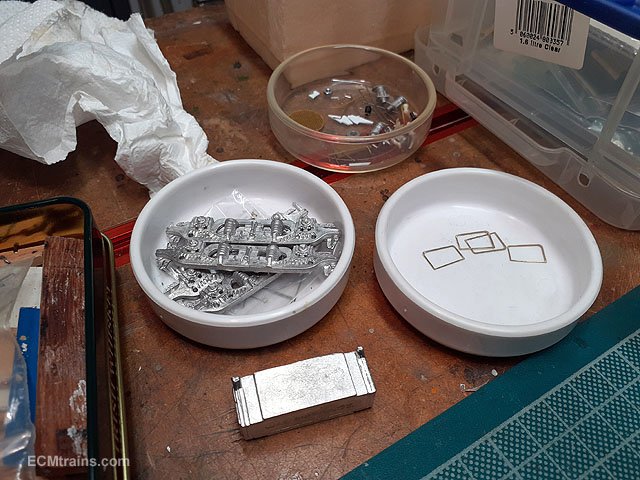
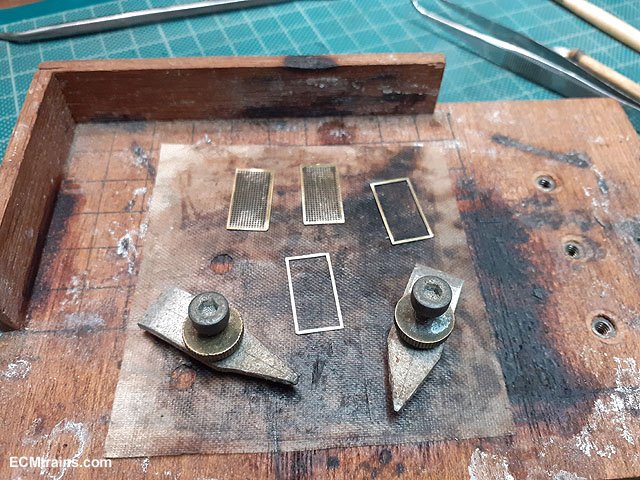
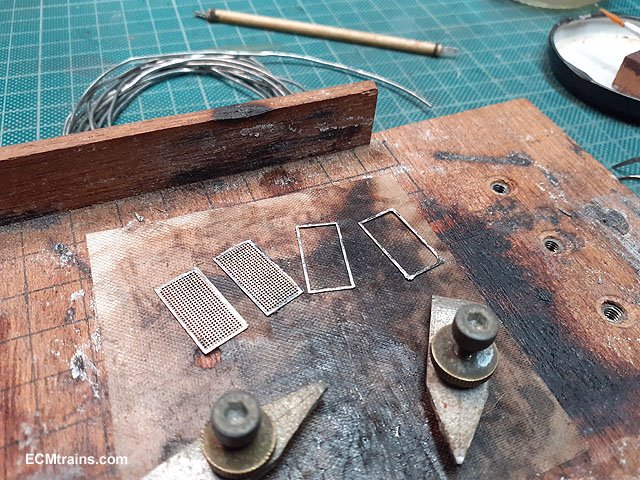
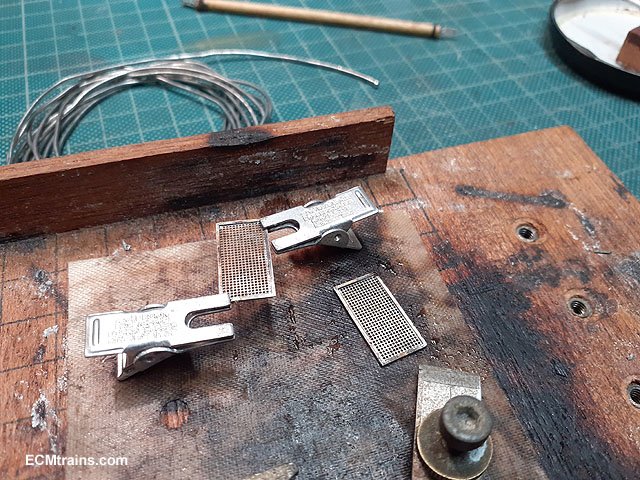
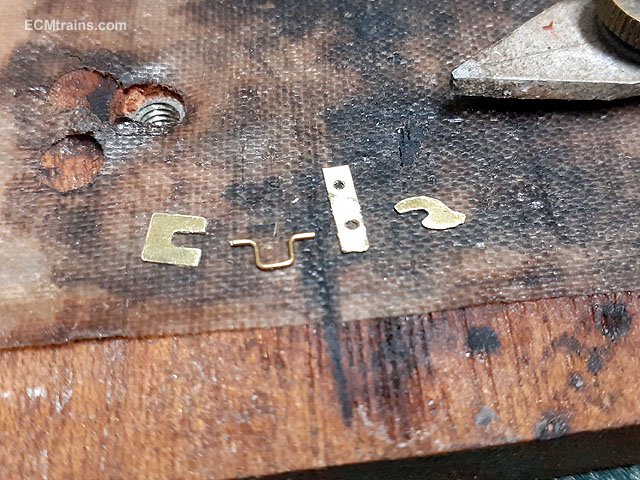
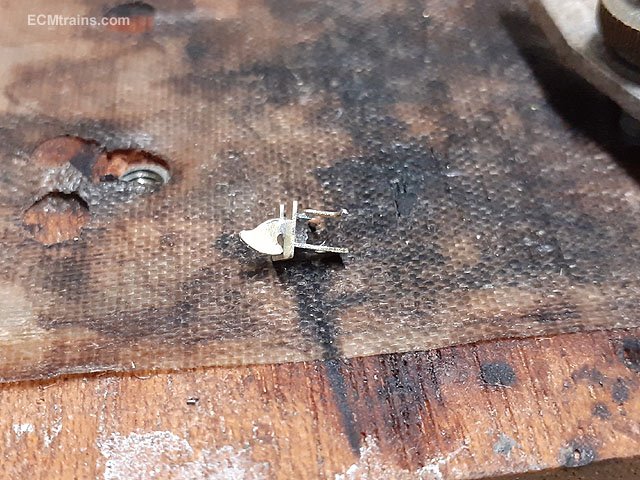
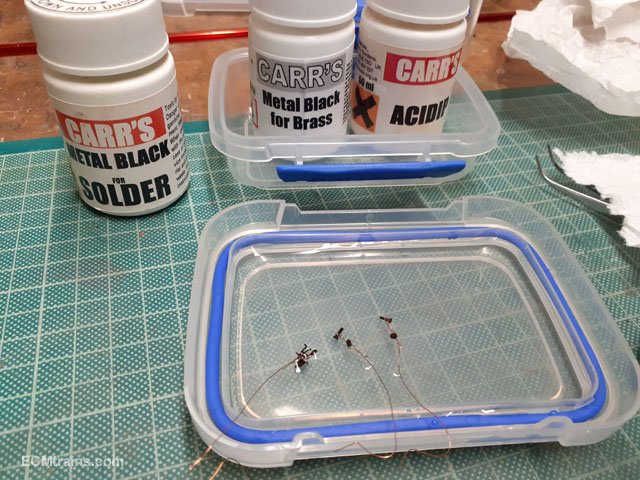
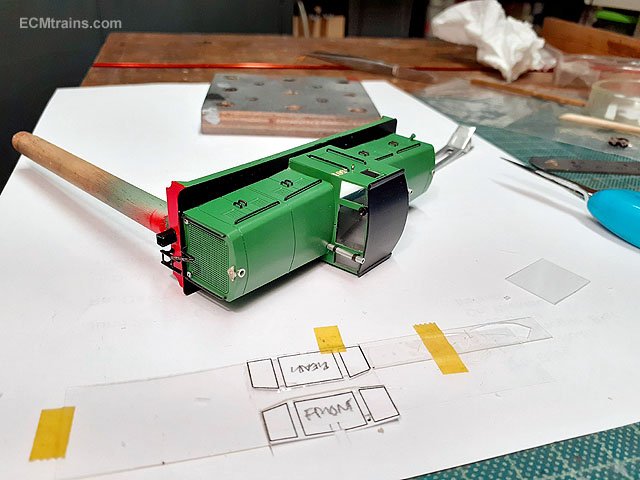
I cut out the parts for a 'chopper' coupler for the front- well my version of one! Parts cut ready for folding and soldering. Soldered. Metal blackening, I also included the 14BA nuts and bolts that will hold the couplers on. Next was installing the glazing, using the paper templates I showed earlier, Scotched taped to the clear styrene and then cut out with holes for the bracket ends of the exhausts and horns. These were then stuck in with Deluxe Glue 'n' Glaze, same for the side windows in the doors. Decal numbers and brass window wipers, also acid blackened, were applied. And the chopper coupler being test fitted- it fits! Only things missing now are the two head lamps. I'm holding off on that until I work out where the weights go, the chassis is up and running but needs quite a bit of weight for traction, there is really nowhere to fit this to the chassis so it has to go into the body somehow...... Eoin
- 136 replies
-
- 6
-
-
-
- class f
- west clare
- (and 1 more)
-
Excellent Ken Shall see you then Eoin