murrayec
-
Posts
2,763 -
Joined
-
Last visited
-
Days Won
70
Content Type
Profiles
Forums
Events
Gallery
Blogs
Community Map
Everything posted by murrayec
-
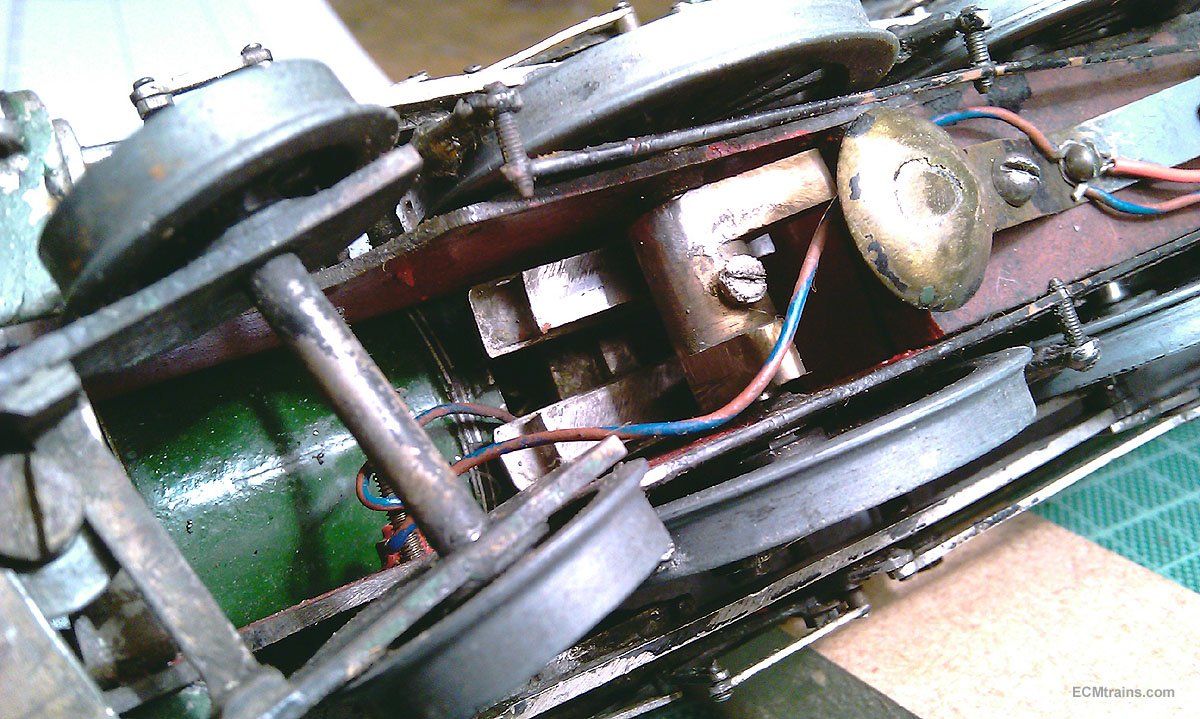
@Midland Man It's not Mr Hanan's 70s model- the Railway Model Constructor article is dated June 1940! Here is the only photo I have of the underside of the model showing the cams on the front drive wheel axles, two cams- one with 2 lobes and the other with 1, the lobes acted on two reed type switches which made the electrical contacts to the smoke generators. I was unable to investigate further as that would have entailed dismantling valve gear and many other things that was outside my brief, unfortunate as it would have been nice to view the whole system! This model was constructed from mild steel as were a number of other Fry locos...... Eoin

-
@jhb171achill I would question whether the above 800 model is by Mr Fry, I'm only going on the photos above which are low rez and lacking detail, but The photo below is the Fry 800 that I conserved and did a few small repairs on, the main thing to note is Mr Fry's maker plate affixed to the frame above the front running board which is not evident in the photo above, also the front of the valve cylinder protrudes further on the Fry model below than in the photo above, and the last boiler band adjacent to the firebox on the Fry model below is about 3mm from the fire box where in the photo above, it would seem to be up against the fire box;- This Fry model has a 3 puff smoke generator, it's run from two cams on the front driving axle to give a Puff,Puff - Puff, for 3 cylinders! Also in the tender there is a relay system to change the power polarity to run the loco in reverse as this model was built prior to the time motors could not go backwards..... Eoin
-
One of my main problems when architecting in other's offices was the difficulty of - hearing the client brief, understanding the brief, finally interpreting and formulating the brief to achieve the correct design solution for what's required! I could not wait to go out on my own and get away from those stupid people..... Eoin
-
@Midland Man Yes there are plenty of issues regarding good running on the museum OO layout, as you say Pendon Model Railway is probably the best example as how to do things, they have over 30 years experience running the system and should have been an example for Malahide museum design team. They had difficulties in the early days and by experience over many years of trial n error they developed a system that's now pretty successful. Some of the guys that set up the models for Pendon spent a lot of time testing, designing specific low ratio gearboxes- as you mentioned, types of couplers, wheels, motors and the rest to achieve long running of the models with the minimum servicing- although the museum is only open to the public for 4 days of the week the remainder is for maintenance and modelling courses. Guy Williams was one of the model builders and his book 'Model Locomotive Construction In 4mm Scale' should be on everyone reference shelf! Yes the overhead track is silly...... I do agree with you and also believe that the engines, stock and Items from the Castle layout should be displayed and run, they are part of our railway model history, they are items that people long remember and still talk about. I know many of the chaps that built these and in my discussions with them I see their disappointment and bewilderment that their model may never been seen again. Its really unfortunate that a Gauge O layout was not seriously considered for the Malahide museum , it's bad form on the part of the Council, the design team and the consultants, I wonder what Mr Gaffney would think now after leaving his money to restore the Castle Layout...... Eoin
-
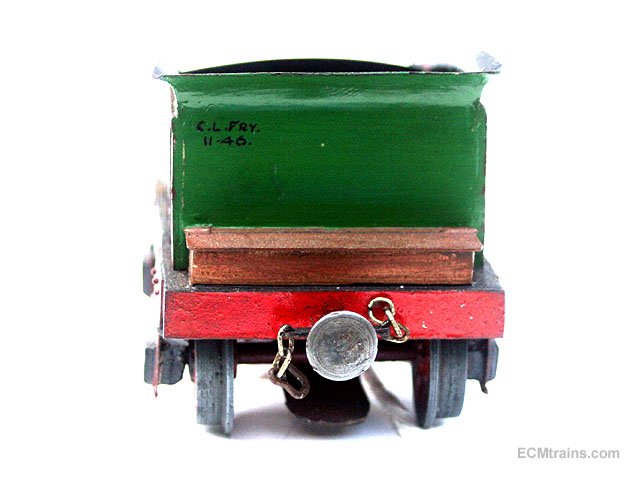
@Midland Man If its Drew your wondering about- he has passed away. Fry signed the locos he built so next time your in Cultra look out for this, generally he signed and dated on the back of the cab or tender;- Eoin
-
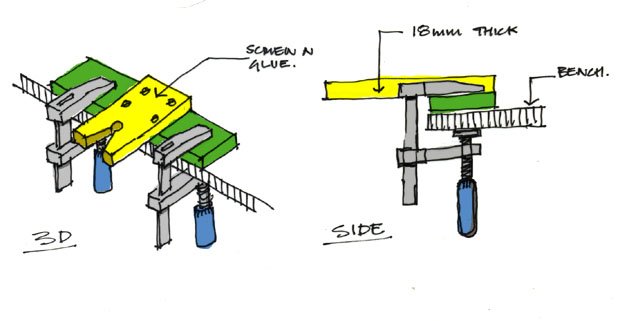
Make up a board to solder on because things are going to get burnt! Have you seen my Soldering Tips thread, I show a small board in that which has clamping edge and clamp screws?? Eoin
-
One can always make one;- 18mm ply, two small sash clamps, screws & glue 18mm ply so that the peg clears the top of the sash clamp head, the ones I have have a 15mm head! One clamp can hold the peg in light conditions. My best tip for piercing if you haven't done it before;- Do not put your hand or fingers in front of the blade while holding the work piece to the peg- if the blade should break, which it will, you will end up stabbing yourself with the broken blade! always hold the work piece with your fingers off to the side of the blade. Eoin
-
JHB There is an interesting detail on the roofs of the 6 wheelers- the gas feed pipe running along the surface feeding into each lamp!! Also the roof grab rails are only on one end!! Eoin
-
I know that J15 and the other locos chosen to run on the overhead I helped to choose them- all are in a poor state, all required works to be done for reliable running- alas my quote for doing this work was not accepted. Eoin
-
It's proposed to do maintenance off site! somewhere!, if those models have to run 7 days a week that's going to be quite regular unless their running systems are upgraded..... Eoin
-
@Colin R I calculated out areas back at the time of the planning process that a Gauge O layout for Irish stock could work with 2m radius curves and in some cases smaller radius where the track is not doing a 180deg curve and still incorporate display area at = 270sqm- that's around 2 times the size of the floor area given to the new OO layout and public circulation around the layout. It would not have been a rectangular board layout but a rambling layout that the public would have had access to 3/4 the way round.The layout was a small Gauge O layout about half the size of the original castle layout now dismantled. This plan also had a workshop facility and a staging area for trains to go out on the layout, I proposed the workshop as part of the museum exhibit. This idea was designed to fit the Casino site with minor modifications to the councils design and an extension into the courtyard at the front of the facility. It would have cost more..... So Colin to answer your question 270sqm Eoin
-
@jhb171achill When I made that comment about a Gauge O layout no way did I envisage someone in their not-so-right mind putting in a 'Gauge O Ceiling Level Track'.... Eoin
-
Yes, I heard similar from two ex councillors that went to see the museum, they said 'delighted to see the Fry Models back out on view' and 'that the layout was pretty good but after watching two trains go round n round it just got boring' they also told me that they would not go back..... Hopefully over time as the layout gets more complete their may be a more interactivity? Eoin
-
Now your talking, that's exactly what should have been done! - see more here and discuss this issue here;- Eoin
-
Now your talking, that's exactly what should have been done! The design of the museum was done completely separate and isolated from any model layout design! the design team only got in a consultant on the model railway layout after the building & the interior was designed- that's why there is not enough space?? Eoin
-
My buying list is endless........ Eoin
-
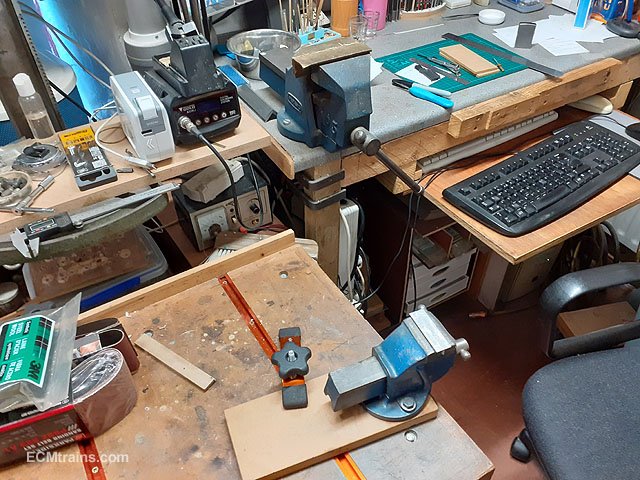
I'd go for a small 2" 'Record' bench vice and two aluminium angles for flat/soft jaws- could be got at https://www.mcquillantools.ie/ RS Components & Woodies (more expensive) do the small Stanly vice, one is swivel and other standard quick close, again use soft jaws with;- https://ie.rs-online.com/web/p/bench-hand-vices/8134350?cm_mmc=IE-PLA-DS3A-_-google-_-PLA_IE_EN_Tools-_-Clamps_And_Vices|Bench_And_Hand_Vices-_-PRODUCT_GROUP&matchtype=&aud-828197004210:pla-394098854818&gclid=CjwKCAjwpqv0BRABEiwA-TySwbuLSotWAyhS5r2sfS2pqx9AE4zoguhNMCBCq__8yln9y3v17-9EmxoCroMQAvD_BwE&gclsrc=aw.ds Photo of two, a 4" mounted on the main bench and a 2" fitted to a piece of MDF for clamping onto the small bench which allows any orientation;- Eoin
-
@Midland Man If a piercing saw is going to be used a good quality blade is essential, a lot of blades sold are muck and one will be frustrated in trying to control these!! Stay away from the 'Delux' modelling tool piercing blades for one..... Here is a link to good quality blades;- https://www.dixequipment.com/products/super-pike-sawblades/ When cutting out thin brass it can be helpful to stick the brass sheet to 2mm ply sheet as a backing which will help to guide the blade and stop the brass deforming, I have used 'Cow Gum' to stick paper and ply to the brass, its relatively easy to remove when cutting is done- I believe this gum is not available any more but one could use '3M Photo Mount' the blue can, the red can is stronger but rather hard to remove small parts from the ply.... Eoin
-
To do the buffers- I use Humbrol Gunmetal loaded up with talc, blob it on the buffer face nice and thick, after about an hour take a bud with a pointed end and polish the buffer from the centre pushing the blob to the edges and polishing the centre. Gunmetal gives a polished metal look and the gunge around the edge looks like grease that's been pushed away by 'scuffing' Eoin
- 13 replies
-
- 1
-

-
- resin kit
- cattle van
- (and 1 more)
-

GSWR/GSR/CIE Six-Wheeled Coaches - ECMbuild in Gauge OO
murrayec replied to murrayec's topic in ECM Model Trains
@leslie10646 It is indeed, it was not great fresh out of it's box! ran it around n around and all it did was spread the dirt evenly along the track, changed the cleaning pads several times but still did the same. I intended to play around with it but at the time I inherited a Centerline Products Proto 2000 Rail Cleaner with no brass rolling wheel! after a bit of Googling I duly made a knurled brass wheel for it and haven't looked back at the Dapol- the Proto 2000 is excellent..... Eoin -
GSWR/GSR/CIE Six-Wheeled Coaches - ECMbuild in Gauge OO
murrayec replied to murrayec's topic in ECM Model Trains
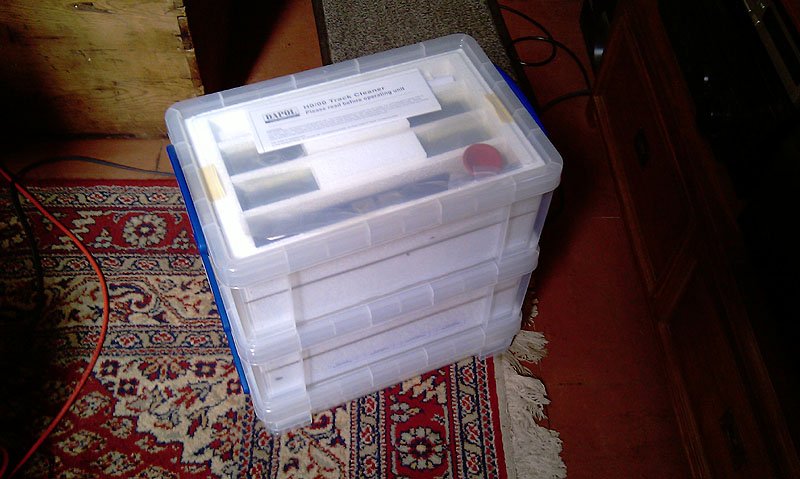
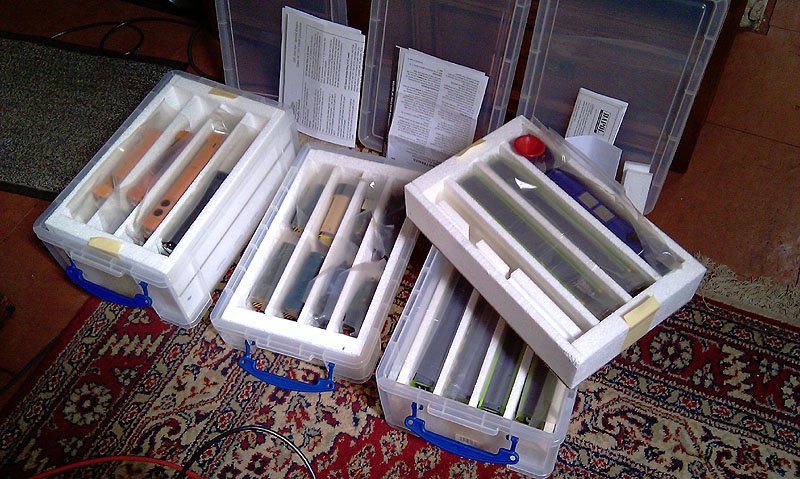
@leslie10646 I also use Really Useful Boxes for storage of trains and modelling equipment, but their sizes are not so convenient to hold model parts on a build their either to small or to large!, so making boxes to suit was the best option. This is a three tier stepped rack for holding the build boxes, each tier is held in place with magnets so they can be lifted off separately or as one unit. The RUB train 9L storage boxes- I make up pocket trays from satyr-foam to fit in the box, each box takes two trays of 4 models. Eoin
-
GSWR/GSR/CIE Six-Wheeled Coaches - ECMbuild in Gauge OO
murrayec replied to murrayec's topic in ECM Model Trains
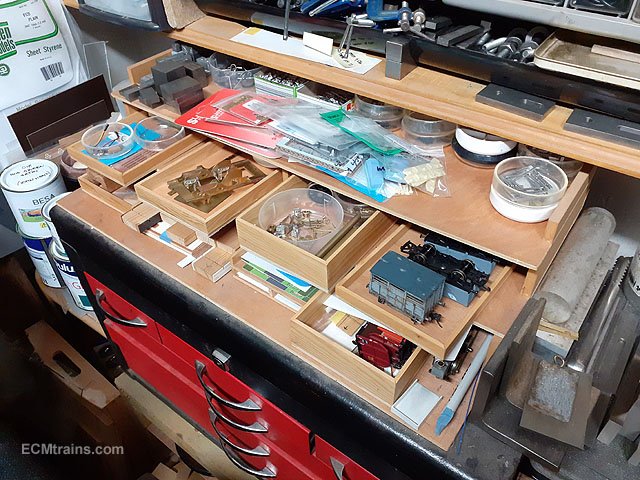
@leslie10646 Thanks, the wooden boxes are home spun- with the amount of projects on the bench at the moment I can't rely on little piles of parts here n there in the workshop, as space is tight one is always moving things around and that's when parts get mixed up between projects- boxes are the solution and so handy. I now have a stack of them and the problem now is where to store them!! Eoin -
@Peter Use a glass-fibre pen to clean up the blades n rails, also use a bit of track cleaning liquid. You could use a surface mounted points motor with a mini switch on the outside of the motor, all you have to do is drills holes through the board to wire it up so you don't have to lift the points, then disguise it with a bit of 'Shrubbery'..... Eoin
-
TV/Media Sensationalism!! Whatever the FBI/prosecutor say is just legal argument! Any driver/conductor/engineer knows a train will not run very far without track, looking at the video images there is some considerable distance from where the train stopped to the ship...... Eoin
-
@jhb171achill Would it be Broadstone? Eoin