murrayec
-
Posts
2,775 -
Joined
-
Last visited
-
Days Won
70
Content Type
Profiles
Forums
Events
Gallery
Blogs
Everything posted by murrayec
-
As Galteemore says better scope for details, maybe use half cut trees as view blocks to the sides, also you could have the trees come out over the front of the baseboard and even wrap around over the edge of the side back-scene board? Looking good Eoin
-

Mountfleet Models 1/24 Clyde Puffer.
murrayec replied to Georgeconna's topic in Aviation & Maritime Modelling
Looking good George, wish your Da a happy birthday from me..... I hope your going boating and have the bottle of Guinn!! ....Murphys for the launch. Eoin -
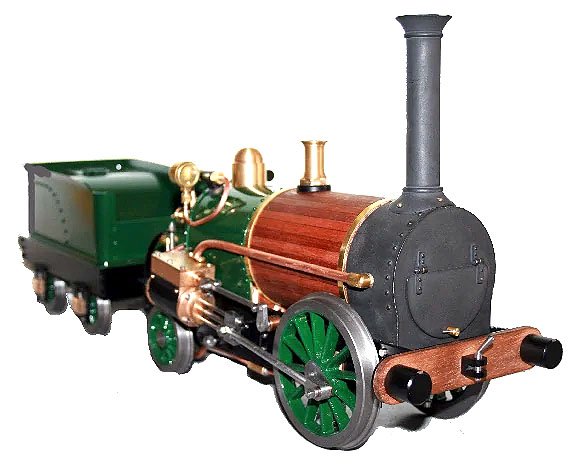
Bing Live Steam Loco Gauge O - Repair & Restoration
murrayec replied to murrayec's topic in ECM Model Trains
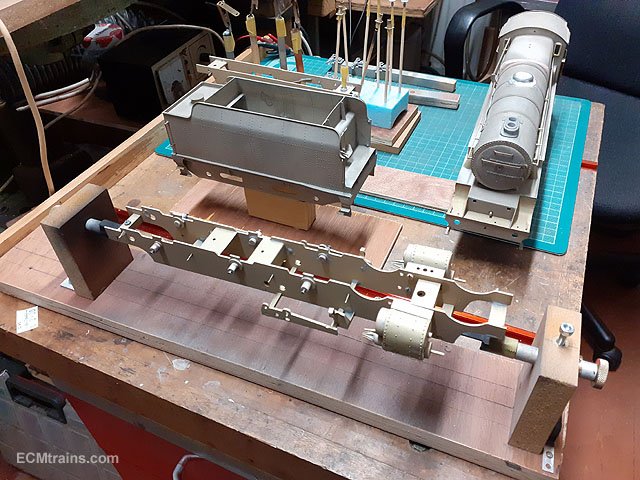
There is a 3.5 inch gauge track up the road from me, It's just lying there idle, over-grown with ivy and slowly deteriorating! I recently got in touch with the owner of the property to view the track and discuss using it. The guy that built it is long gone but some of his live steam locos are held by the local history group, they have had meetings at the track and steamed up one of the locos on a section of cleared track- no running though. Anyway my idea was to run a 3.5'' loco I have in the build mix and another possible repair, the meeting did not go two well- from the section I uncovered of ivy showed the track in reasonable condition but some sections needed total replacement and some of the concrete support structure suffered a tree fall and would have to be rebuilt! The option put to me was do do it all at my expense and to possibly supply an electrical loco and stock for their use, otherwise they wanted to leave the track as is ' as it looks very nice covered in ivy' Needless to say I backed away. Such a pity because in few more years the track will be beyond salvaging! This is the Northumbria Loco kit;- This 3.5'' Royal Scott was to be restored for a client and I was hoping the track could be used to test run it, but alas the restoration deal fell through! Eoin
- 24 replies
-
- 3
-

-
- bing live steam
- bing gauge o
- (and 1 more)
-
Airbrushing - paint cup size
murrayec replied to NIR 450 ‘Castle’ Class's question in Questions & Answers
Hi Go for a airbrush that takes a small cup and a paint jar, also go for a dual action airbrush- they are a lot more controllable of air and paint mix with one's trigger finger. There is a huge range out there and it all depends on how much you want to pay..... Here is a link to guys I have bought stuff from, the link is to bottom feed guns which take a jar;- https://www.air-craft.net/acatalog/Bottom-Feed-Airbrushes.html Eoin -
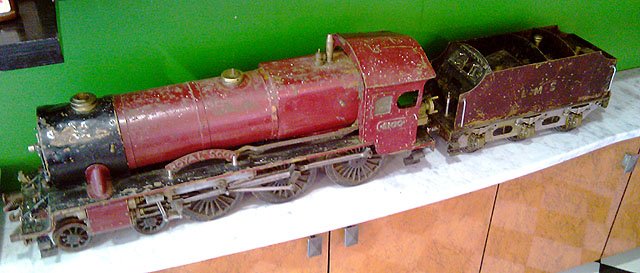
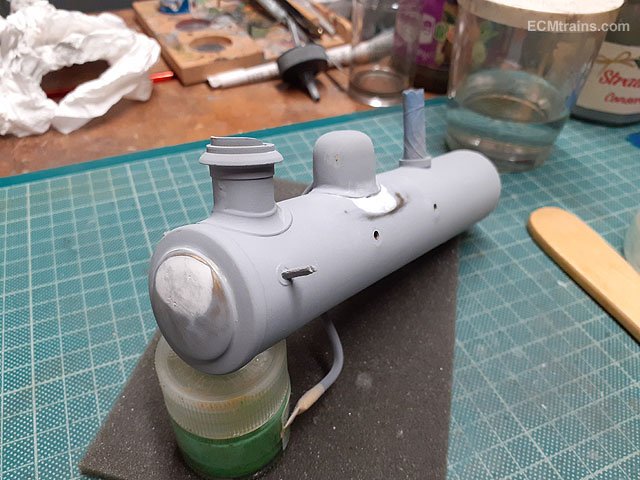
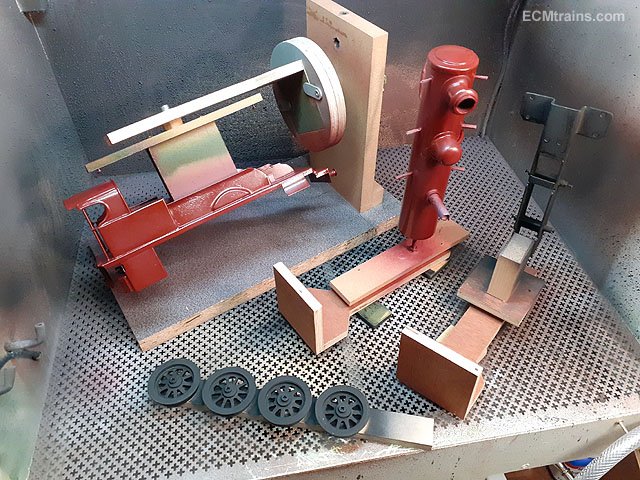
Bing Live Steam Loco Gauge O - Repair & Restoration
murrayec replied to murrayec's topic in ECM Model Trains
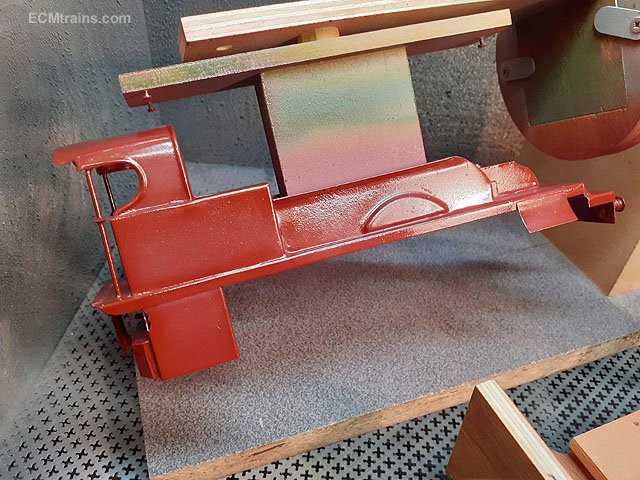
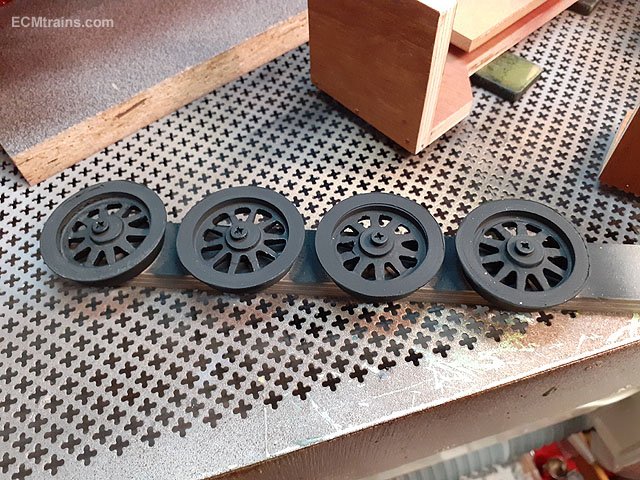
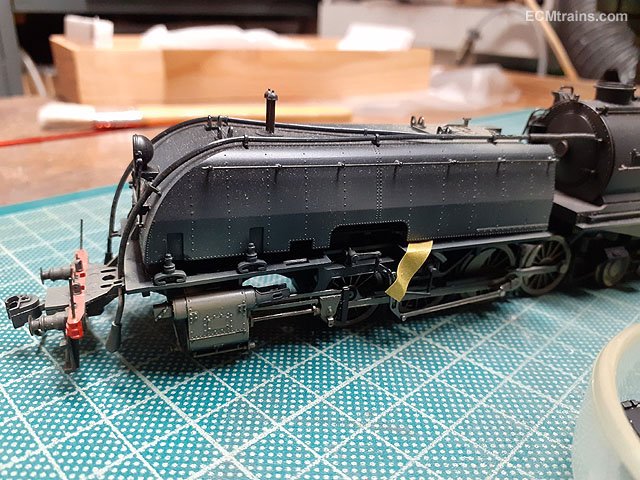
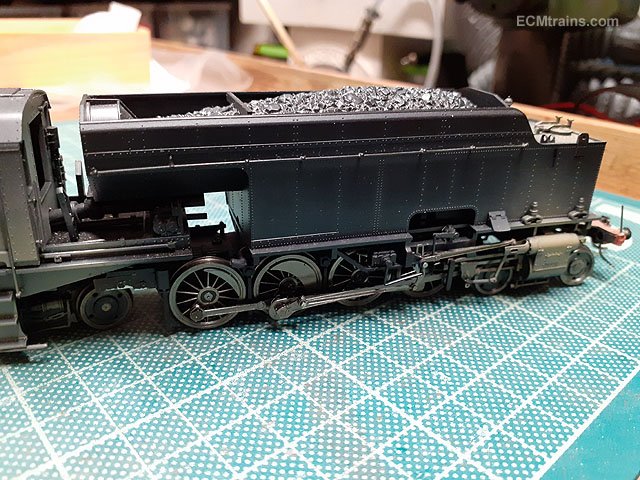
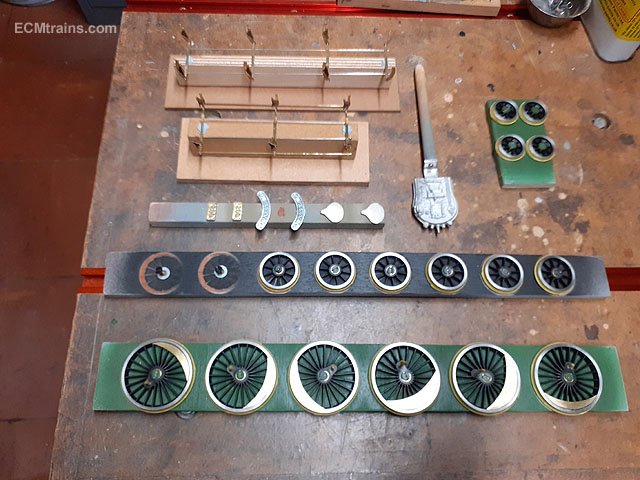
Painting has been proceeding on the Bing;- After undercoating all the parts I spent a bit of time filling around the steam dome repair and that ding in the smokebox door. After that was etch primed in places then undercoated I started on the first top coat on all the bits. The wheels and chassis were given a first topcoat of matt black. The brown is looking a bit red at the moment due to the grey undercoat, next coat of brown should do the trick! Eoin
- 24 replies
-
- 3
-
-

-
- bing live steam
- bing gauge o
- (and 1 more)
-
Well there is no Australian section so decided to post this here;- This is a Eureka Models with DCC sound of an Australian AD60 in the workshop for some repairs. It's a nicely detailed model and has a bit of factory weathering but has been badly handled...... Valve gear on the front unit is missing, sanding boxes missing, handrails badly re-fitted, a few bits on the buffer beams bank n front are missing and it doesn't run! The plan is to replace the missing gear using the surviving gear as patterns for cutting the new stuff, the remaining sand boxes will be removed to make moulds for plastic casting up replacements and then we'll have a go at getting it running. First step was the valve gear, the existing gear for patterns were removed and scanned to set up a drawing to CNC cut replacements from .3mm nickel silver. This is the result- needing a clean up, laminate soldering and fitting. Those holes in the rod ends are .2mm! Eoin
- 4 replies
-
- 6
-
-
-
- beyer garrett ad60
- ad60
- (and 1 more)
-
Walker Diesel Class F - ECMbuild in 4mm for OOn3
murrayec replied to murrayec's topic in Irish Models
Deadly, thanks for that. I did go the whole-hog to cover it up as when I masked off to do the buffer beams I did it rather quick and paid for it when some paint got through where it should not have! Eoin- 136 replies
-
- 1
-
-
- class f
- west clare
- (and 1 more)
-
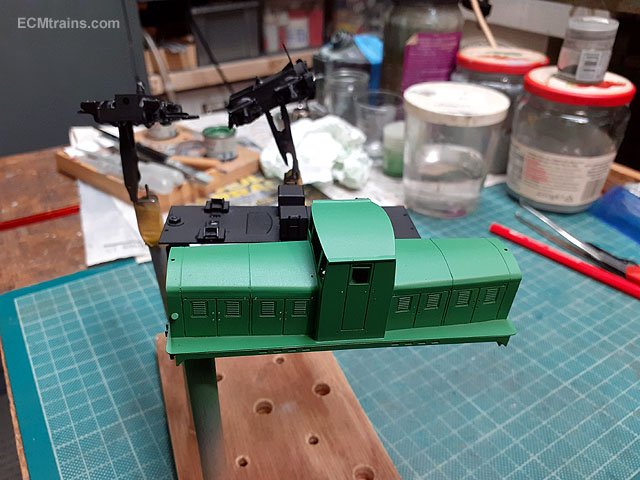
Walker Diesel Class F - ECMbuild in 4mm for OOn3
murrayec replied to murrayec's topic in Irish Models
While starting to fit door handles n rails I realised I still needed to paint the running plate and the roof black! So out with tape and masked it up, this is easier to do before the rails go on. And done in satin black. A few small touch ups are required but I'll wait until the detail parts are fitted and do it all in the one go. Eoin
- 136 replies
-
- 5
-
-
- class f
- west clare
- (and 1 more)
-
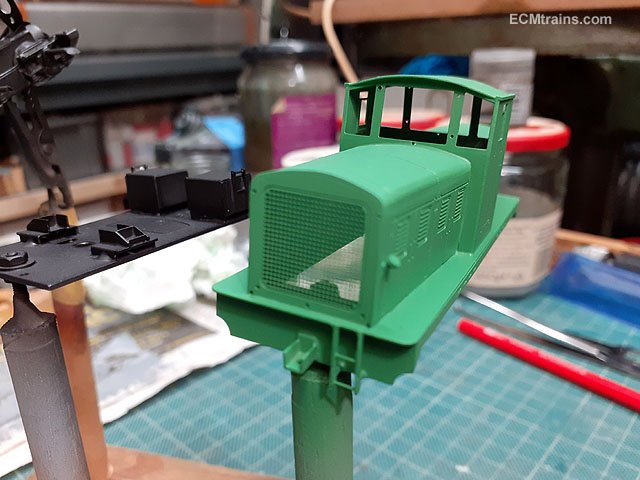
Walker Diesel Class F - ECMbuild in 4mm for OOn3
murrayec replied to murrayec's topic in Irish Models
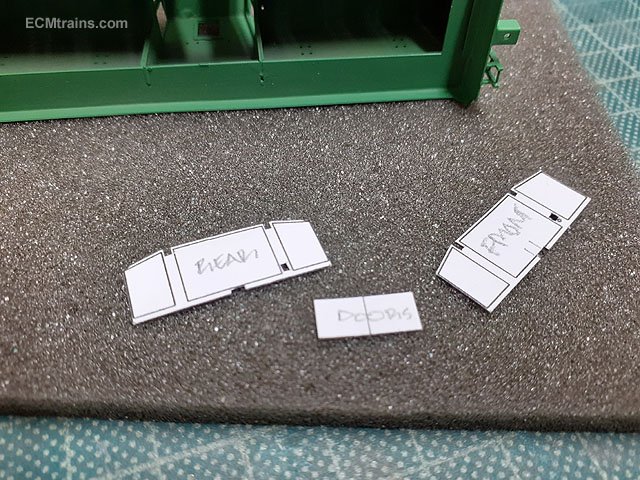
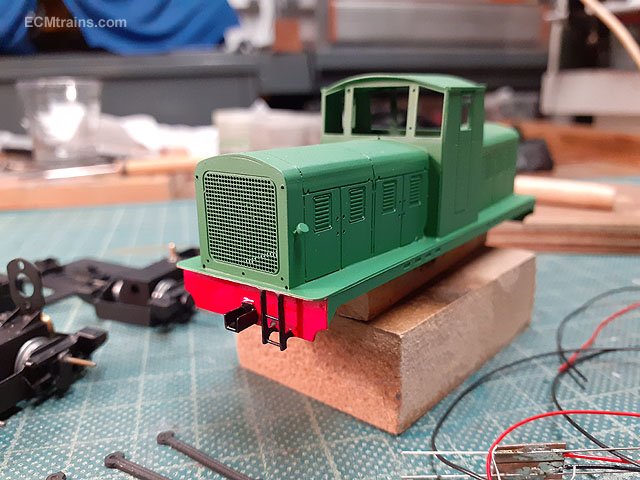
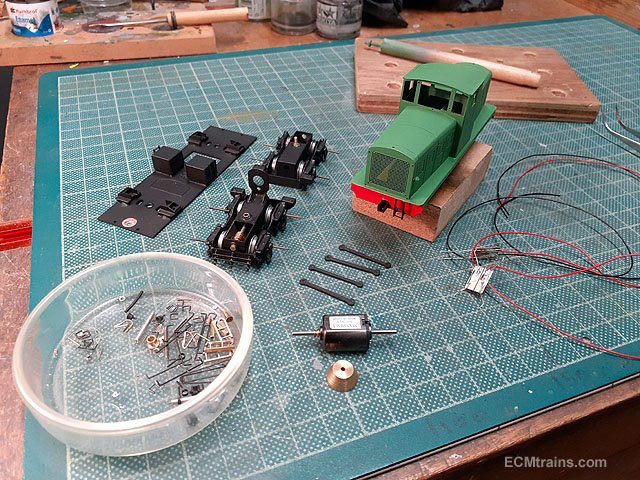
Buffer beam painting on the Walker;- I first set up paper templates for cutting out the glazing, the templates have holes in- taken from the holes in the window frames for the horn & exhaust brackets, this is done because the glass will go in last after the completed body and parts are fixed n lacquered, the glass needs to fit over the ends of the brackets for flush glazing. Body masked up for painting the beams. White on. Red on with satin black brushed on the ladder and coupler bracket. Unmasked and needed a little clean up on the front running board- I forgot to remove the etch cusp along the edge and the white base colour seeped under the masking and along the cusp! Out with the swab n spirit and slowly removed the white line- remove the cusp next time! Getting ready to fit the detail parts- handrails, door handles, exhausts, badges, vac pipes, lights, and decals. The chassis will also be assembled, pick-ups installed and wired up for test running on the track!!...... Eoin
- 136 replies
-
- 12
-
-
-
- class f
- west clare
- (and 1 more)
-
I re-moulded the tanks just a bit smaller than what came with the kit to allow the middle axle better movement, I could not find any photos of an actual 6 wheeler that showed the tanks! Eoin
-
The SSM kit has two tanks mounted thus;- Eoin
-
Mountfleet Models 1/24 Clyde Puffer.
murrayec replied to Georgeconna's topic in Aviation & Maritime Modelling
Looking great George. Eoin -
Lidl did a folding metal one last week Eoin
-
Me to!
-
He is getting good at this- there's not been an upside down one in the whole thread Eoin
-
I was thinking it might be those dark squares on the side. Eoin
-
@Midland Man the same site you got the other picture above has a photo of it, follow this link:- http://gofree.indigo.ie/~nigelo/photographs.htm I think your picture above of the steam loco & trolley is of the model @Mayner mentioned on the other thread? Eoin
-
Hi BTB Yes and long gone now, but Brendan Kelly of the MRSI is keeping up the tradition- he builds all kinds of Gauge O models from Mcgowan kits and parts, also does his own stuff. If you view my manufacturing thread most of the Gauge O models I have done works to are Kelly/McGowan models. This is one on my bench at the moment;- Also check out Wrennie's Lima thread to view more works by Brendan, they just posted up a new project commencing.... Also check out here;- https://irishrailwaymodeller.com/topic/8001-south-dublin-model-railway-exhibition-2019-list-of-exhibitors/?do=findComment&comment=125267 Eoin
-
Just looking at the photos in your first post- it seems to me you have not spread the pva glue throughout! It should be a 'sea' of glue total in the area your working on and not just blobs here and there, also ensure the nail is attached to the sea of glue to complete the circuit...... I read somewhere that their might be difficulty with long static grass and that unit- try some shorter grass maybe. Eoin
-
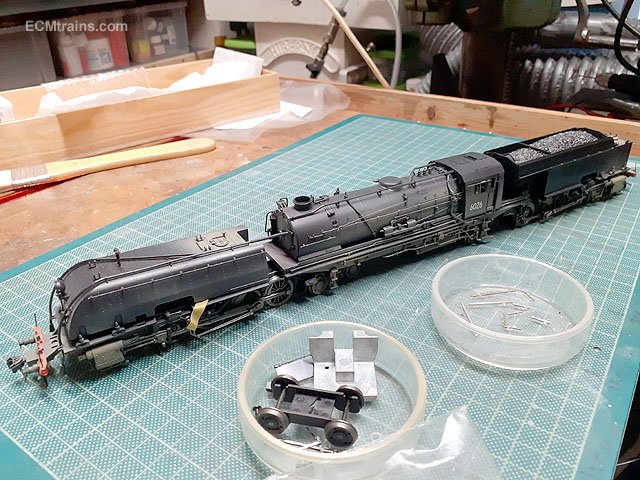
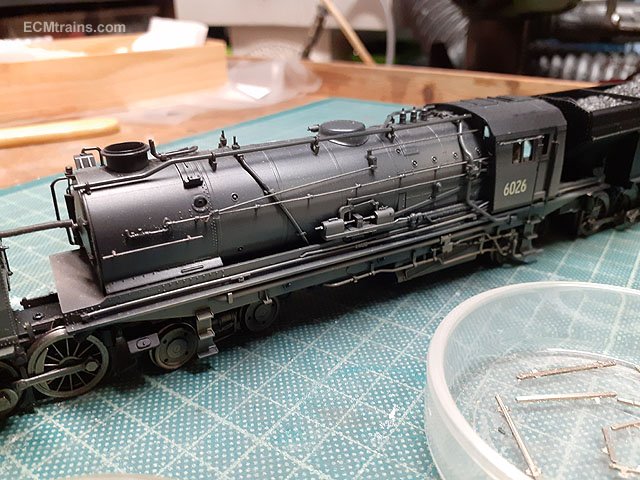
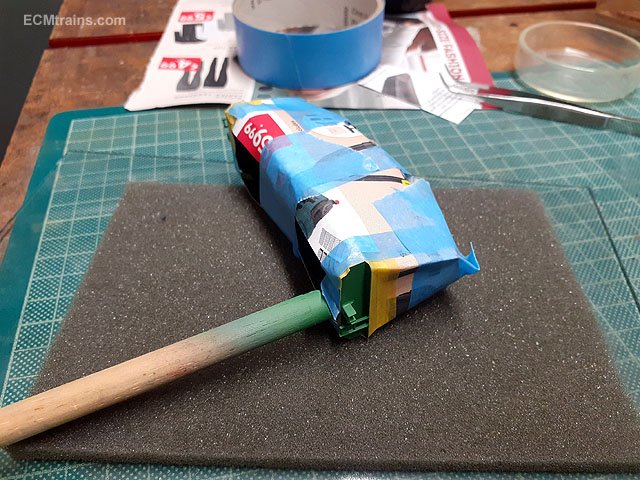
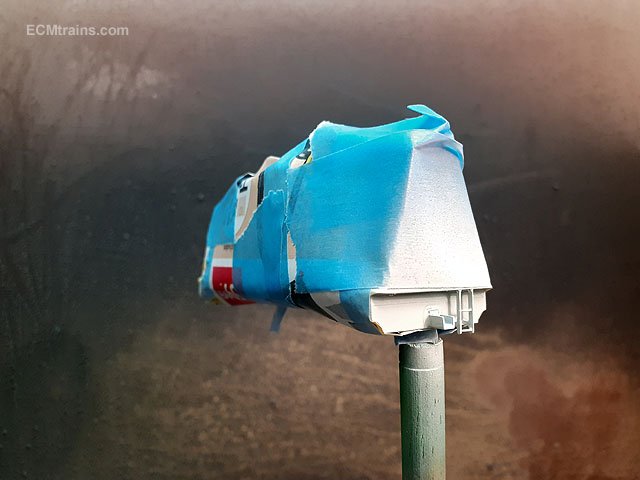
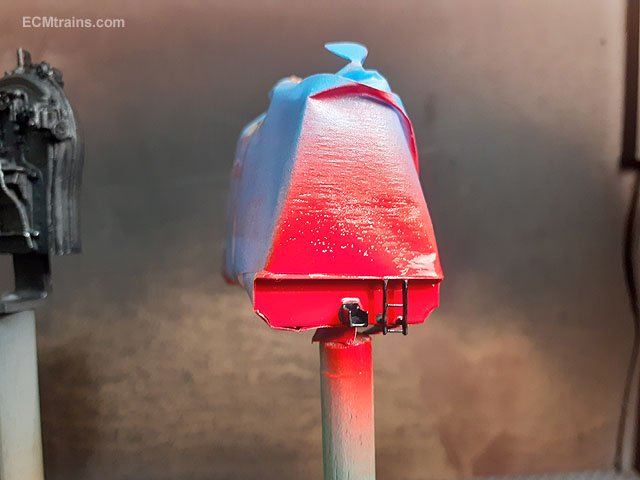
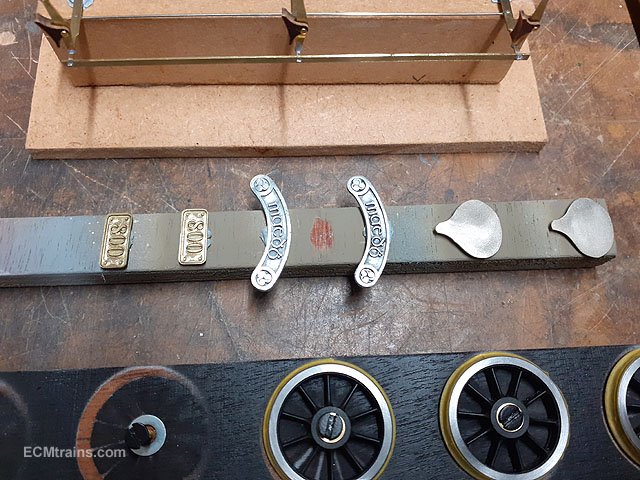
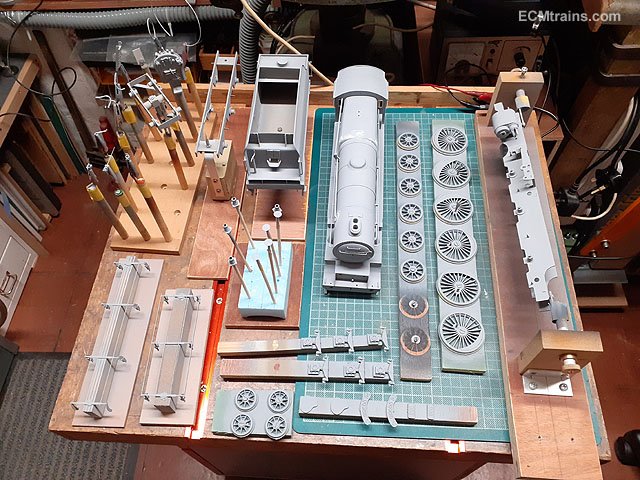
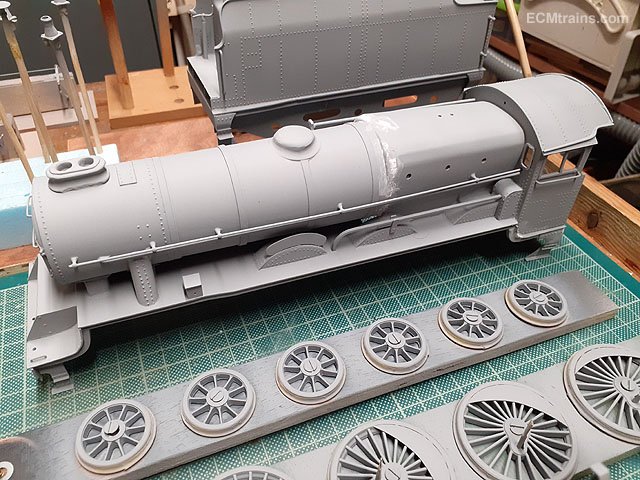
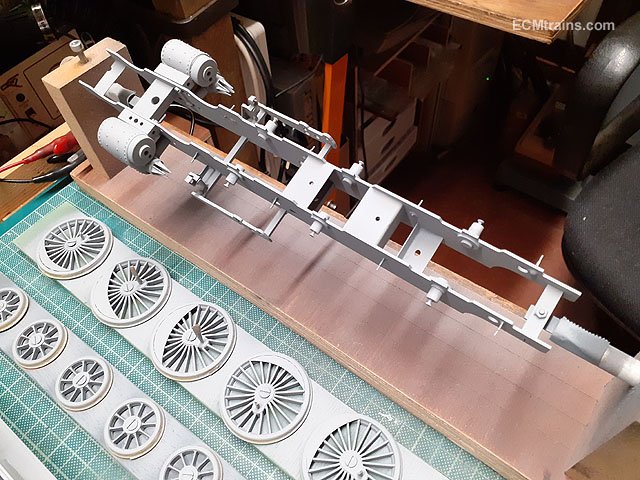
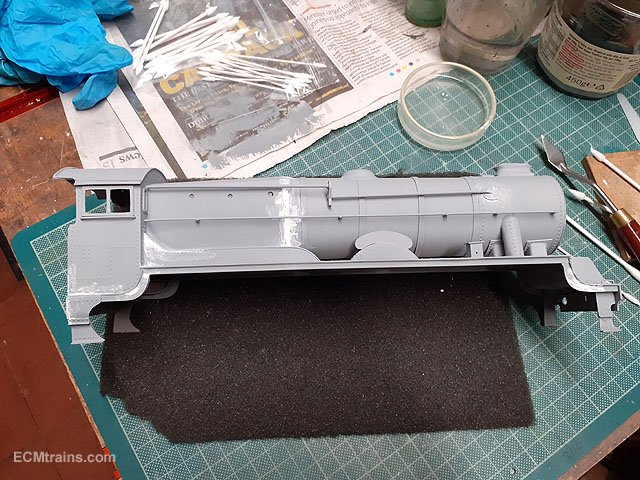
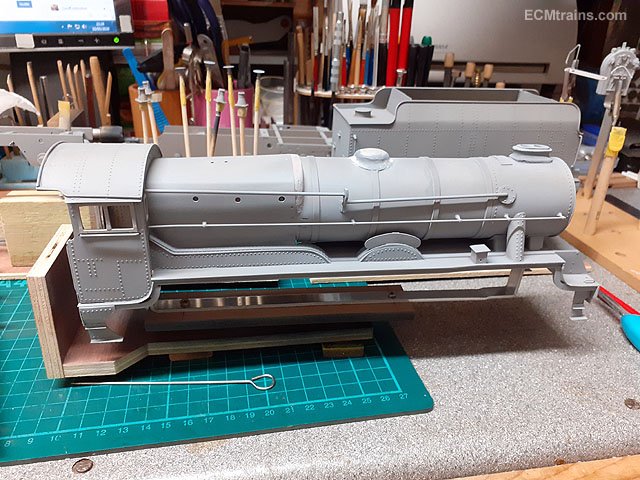
I got back to the Class 800 last week to get ready for some painting;- First I cleaned up the nameplates and filed back those awful edges, that's an incorrect 'a' in there, old Irish script never had an 'a' like that- it was an 'A' like this! Masked off the side window & front brass window frames. And proceeded to mount everything on sticks and things for aholding while apainting. Wheels tyres were masked up and the wheels screw fixed to ply with a washer under, the screw is loose so that the wheels can be rotated. First is the etch primer, a very light coat over everything, but still able to see through to the metal under. Then 3 days later the first coat of enamel primer. Everything. Today was a small bit of filling in readiness for the second primer coat. Some of the smaller parts got a second coat today so next step is a bit of colour...... Eoin
-
The IRRS have this online http://irishrailarchives.ie/index.php/2019/05/03/dublin-blessington-tramway-archive-photo-feature/ MM you should start a new thread and ask the mods to move all this DB tram stuff to it Eoin
-
Walker Diesel Class F - ECMbuild in 4mm for OOn3
murrayec replied to murrayec's topic in Irish Models
@Midland Man It's a mix at 6 to 1 ratio- Humbrol Green 131 satin and Humbrol Blue 89 matt. Eoin- 136 replies
-
- 1
-
-
- class f
- west clare
- (and 1 more)
-
Walker Diesel Class F - ECMbuild in 4mm for OOn3
murrayec replied to murrayec's topic in Irish Models
@popeye Here are two shots taken in the garden, the first is taken in the shade, and the second taken in the 5.30pm sun. The second photo is more in line when viewing the model with the 'naked eye' Eoin
- 136 replies
-
- 2
-
-
- class f
- west clare
- (and 1 more)
-
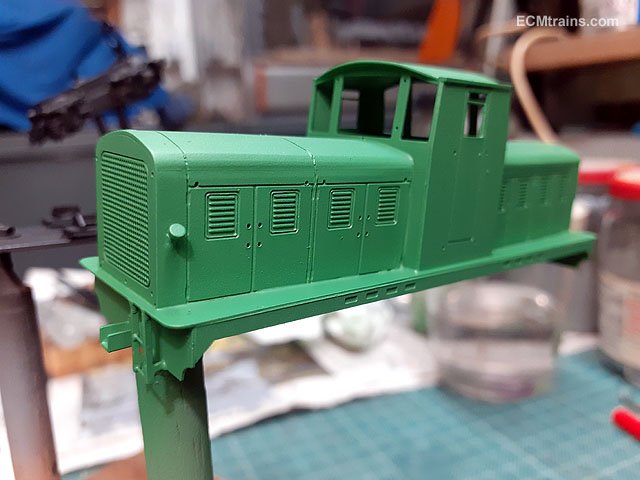
Walker Diesel Class F - ECMbuild in 4mm for OOn3
murrayec replied to murrayec's topic in Irish Models
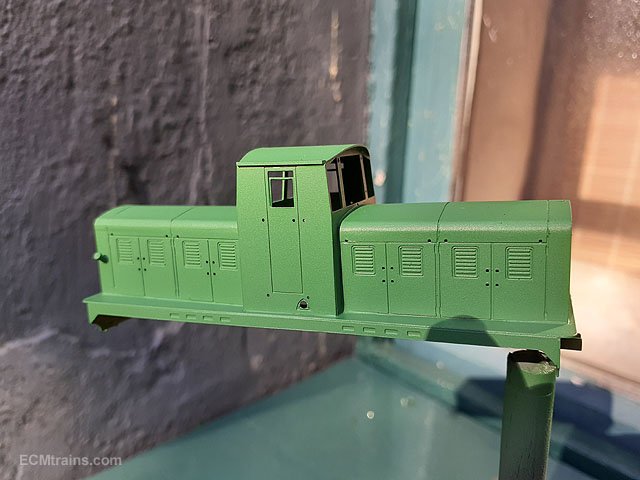
The Walker body colour in the daylight, the photos show more blue in the colour than the eye takes in! I reckon we'll be sticking with this, when the black handrails, n other bits of detail go on then squirted with a lacquer it will be grand;- Eoin
- 136 replies
-
- 4
-
-
- class f
- west clare
- (and 1 more)
-
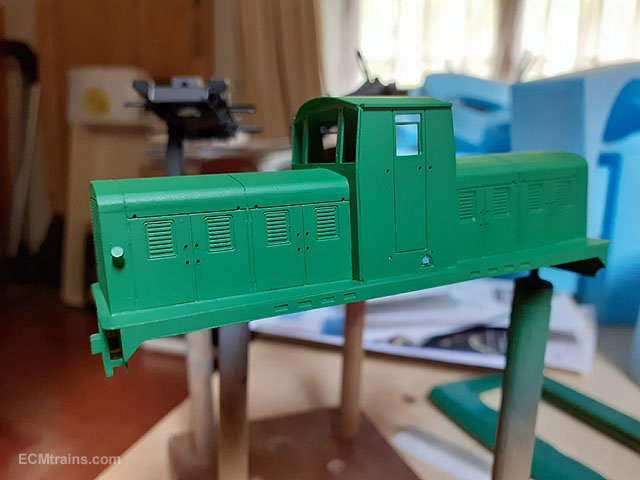
Walker Diesel Class F - ECMbuild in 4mm for OOn3
murrayec replied to murrayec's topic in Irish Models
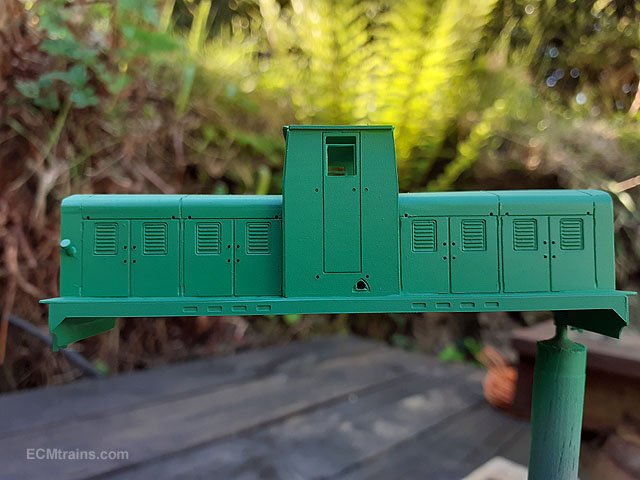
The green is on the Walker, the first coat was a disaster- it was a luminous green on top of the grey primer so I added a bit more green into the mix!! I'll need to take a good look at this in the daylight tomorrow but its growing on me;- At last it's got it's skin on.... Eoin
- 136 replies
-
- 8
-
-
-
- class f
- west clare
- (and 1 more)