murrayec
-
Posts
2,775 -
Joined
-
Last visited
-
Days Won
70
Content Type
Profiles
Forums
Events
Gallery
Blogs
Everything posted by murrayec
-
Hi JB They go by the printed sheets;- 32 Sheet = 4.06 x 3.05 m 160 x 120 in 48 Sheet = 6.10 x 3.05 m 240 x 120 in 64 Sheet = 8.13 x 3.05 m 320 x 120 in 96 Sheet = 12.19 x 3.05 m 480 x 120 in Eoin
-
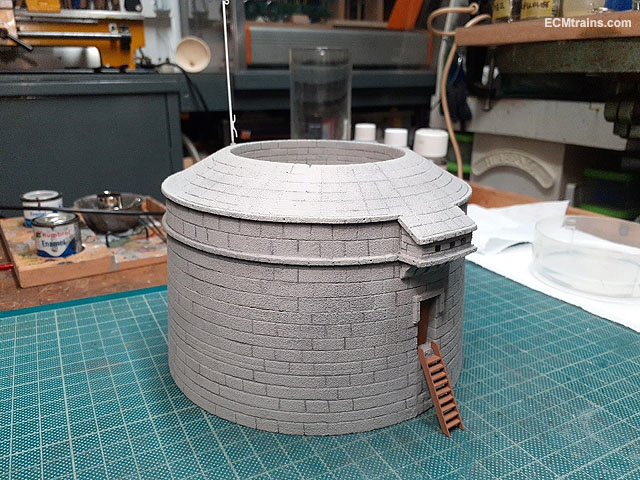
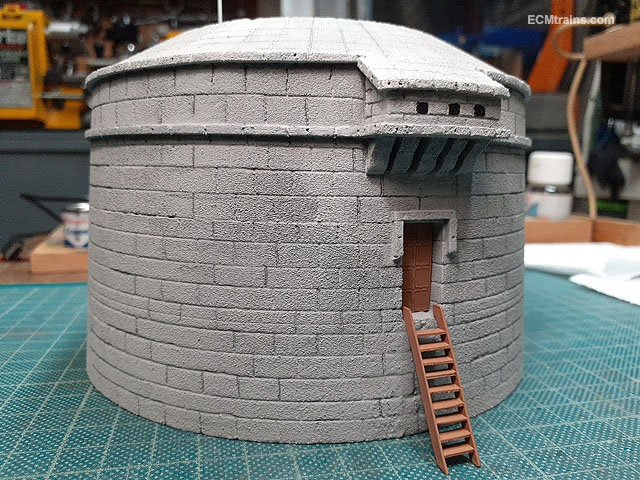
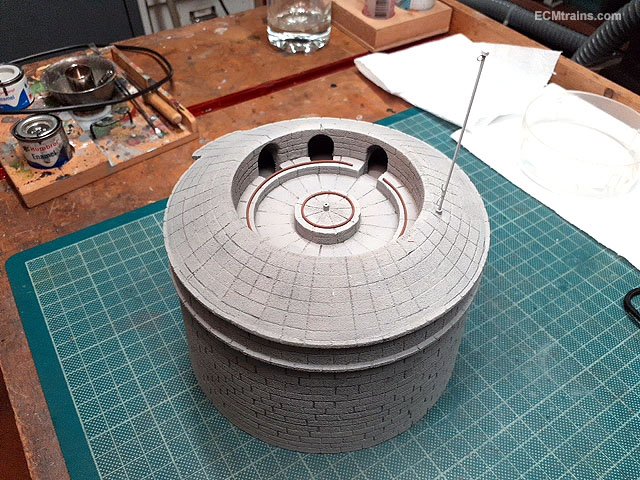
Martello Tower is now complete. After a trial painting a granite type thing and some weathering!- it did not look right so I about faced and painted it grey again, allowing some of the weathering to shine through - it looks better. A sharp HB pencil was used on the stone coursing for a bit of variation. This project has now been added to- the Seapoint plinth, the Railway Ordinance Bridge, bathing shelter, steps and promenade are on the way....... Eoin

- 347 replies
-
- 14
-

-

-

Beyer Garrett AD60 Eureka Model HO ECM Repair
murrayec replied to murrayec's topic in British Outline Modelling
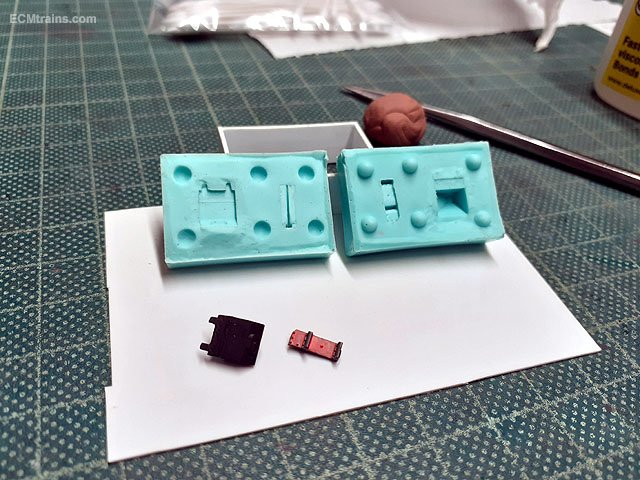
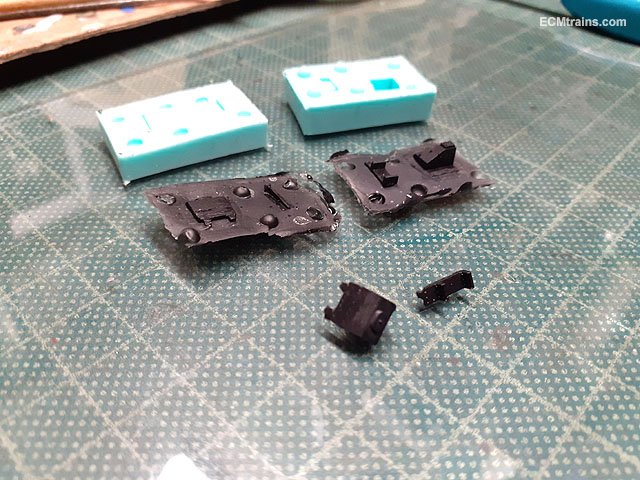
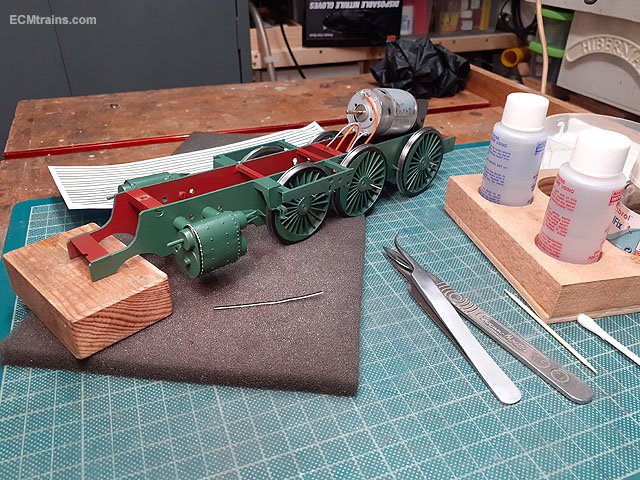
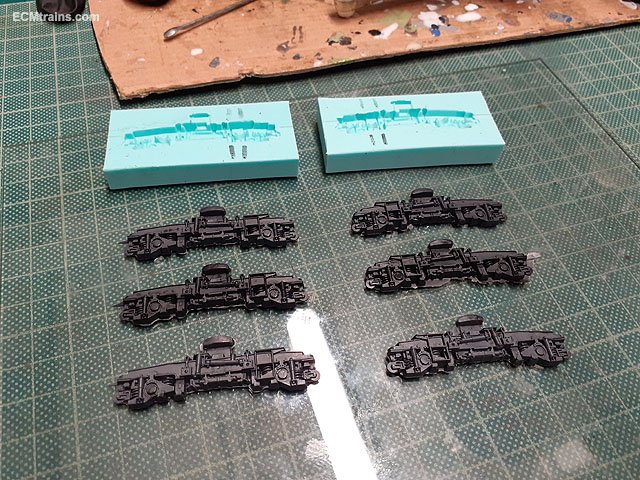
Some more work done on the Aussie Garrett. Moulds set up to make the missing sand box and 3 buffer steps. Existing bits were removed from the model to be the patterns for the missing bits, this is one side of the mould set up and ready for pouring the silicone. Both sides of the mould complete, this is what I call a 'flop mould', one puts the plastic mix into the parts recess while the mould is open, then they are put together with a small weight on top to squeeze the excess plastic out. The parts plastic cast and one set cleaned up. Eoin
- 4 replies
-
- 1
-
-
- beyer garrett ad60
- ad60
- (and 1 more)
-
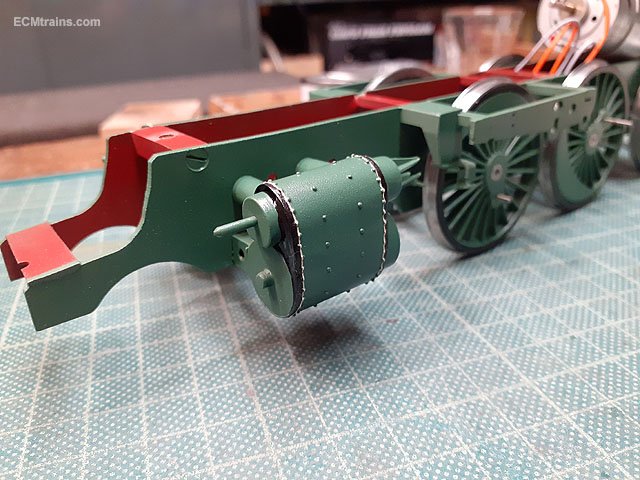
800 lining!! After an attempt to line part of the loco with black & yellow lines by hand I had to give up. The model just wasn't built with lining in mind- rivets and wavy parts just lead to a complete mess. After a clean up I have gone back to the decals that came with the model, unfortunately the decals are black and cream which, is the main reason I went at it by hand. I did set up a hand painted yellow line on one of the decals lines but this would not soften and settle down around the rivets, due to the paint I reckon which doesn't work like decal print? To add to the woes the decals are quite old, cracked and scuffed from handling- they started to fall apart, so I sprayed the sheets with a couple coats of varnish. I cant keep going around in circles on this so crunch time- Black & Cream it is. Here are a few photos of the cylinder lining, there is a line of rivets on the lining edge where there shouldn't be, lots of decal softener and careful dabbing with cotton buds eventually got it to sit down, I'm not looking forward to the tender- rivets everywhere..... Eoin
-
until
-
Next Train & Model Fair date;- Sun 13 Sep.
-
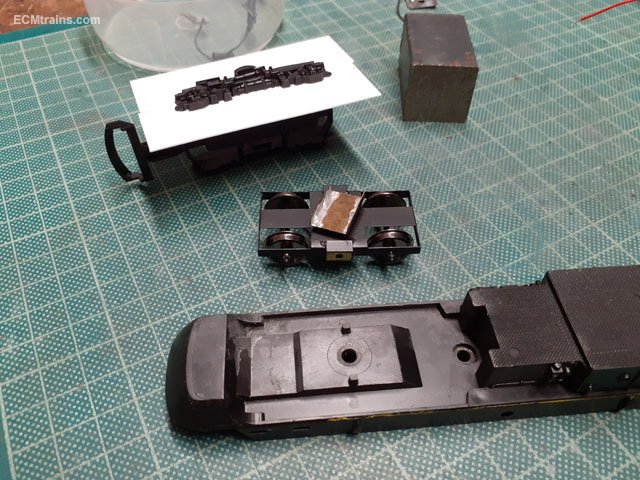
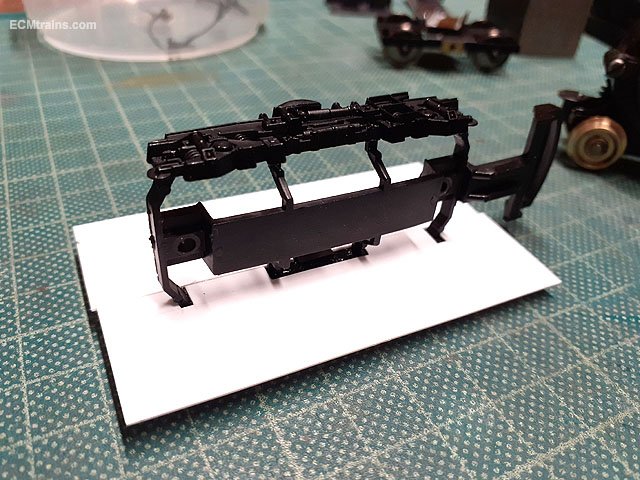
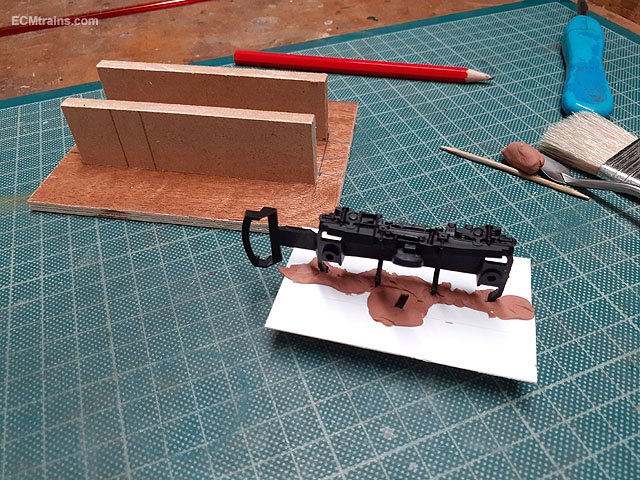
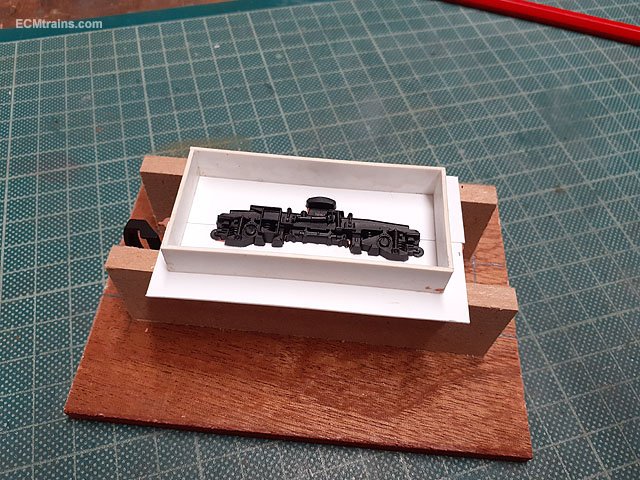
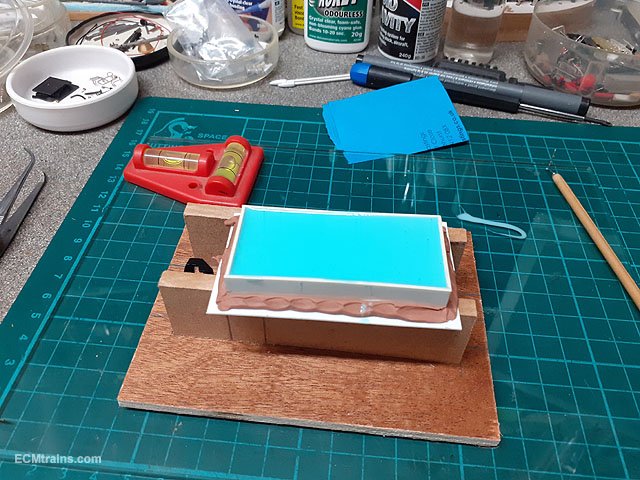
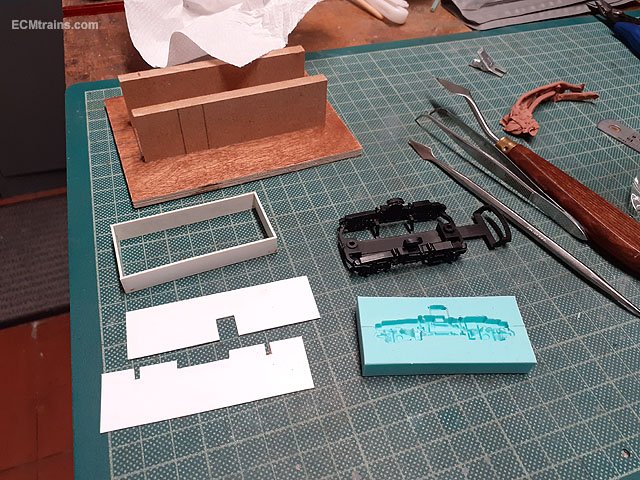
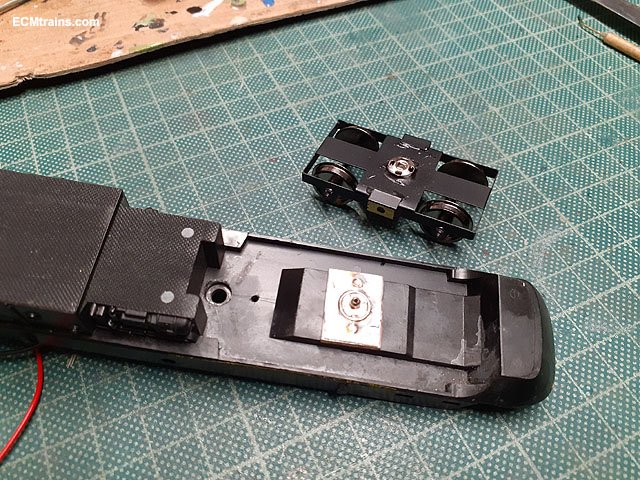
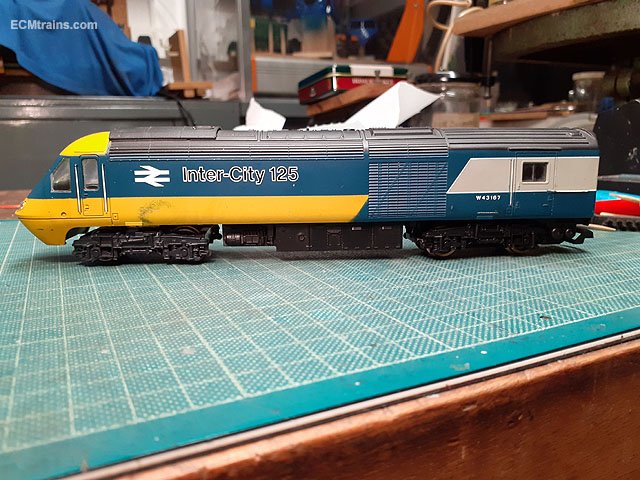
New life for a Lima BR Inter-City 125 missing the front bogie;- This came to the workshop missing the entire front bogie, ''If the motor works can you fit a front bogie'', the motor works so this is the way I did the repair. The rear motor bogie was dissembled so that I could make moulds from the bogie sides, this photo shows the bogie sides being set-up to take a mould from the first side, the new bogie frame in the middle is one of my brass etched DART bogies which will suit the purpose. Two .5mm styrene cards are slotted and fitted to the back of the frame/side, stuck on with 'Sticksall' which seals the join and can be easily removed with white spirit. I have a support stand made from ply n mdf for this kind of job, plasticine is also used to seal the join on the back of the card- just in case! This is how the stand works, with the mould box almost ready to pour the silicone mould, just needs some plasticine around the box frame to seal with the base. Mould poured and set aside to harden, 'Supersil 20' was used. First side done, bits cleaned up and other side to go the same way. Both moulds done and a few plastic casts done 'Fast Cast' chemicals were used with a bit of black dye. The lower castings were the first test and you can see they are more grey than black- not enough dye in the mix! The bogie frame is held on with a snap button so a brass bolster was made, sized to get the loco level which turned out to be 1.5mm thick, which allowed for the bolster to be drilled and threaded M2 to screw fix through the plastic chassis. The outriggers on the bogie frame above was pushing the sides out beyond the loading gauge, so I used one that had no outriggers and epoxied the new sides on. And complete. Electrical pickups were installed on the new bogie and the loco was rewired but this posting is to do with moulding and plastic casting..... Eoin
- 17 replies
-
- 10
-
-
-
Brazil Locomotiva nº 1 - Baronesa This may help with some proportions for the drawing, it's a William Fairbairn design which I suspect 'Victoria' may be based on, also the Grendon works had a connection in supplying a 2-2-2 loco to the London company working in Brazil?? There is a few dimensions here;- http://vfco.brazilia.jor.br/locomotivas/vapor-EFCB-Estrada-de-Ferro-Central-do-Brasil/pagina-01-locomotiva-Fairbairn-Sons-2-2-2-Baronesa-01-Maua.shtml Eoin
-
@burnthebox WMRC = Wexford Model Railway Club.
-
@KMCE looking great, I hope you bring it along to the Fair on Sunday so we can get a good look? Eoin
-
Dublin & Kingstown Railway operated a slip train system into Kingstown Station! Due to the time taken in turning a loco first and then it's tender on the original 10' table at the end of the line in the station, and with the later construction of the Carlisle Pier, the directors decided to pay for a larger table to be constructed at the foot of the pier, one that would turn the loco & tender in the one go, so the engine then would disconnect from the train just before the station and go off to turn around, the train would coast into the station with the tracks inclined aiding the breaking of the train at the platform..... Eoin
-
Freelance Mixed Gauge - Handbuilt Trackwork
murrayec replied to RichL's topic in Irish Model Layouts
@Galteemore yes, the book I referenced covers ply sleepers only, I had seen a copy of your book and wondered what's the difference- I'd say a lot of the info is the same except for the rail to sleeper fixing and finishing the ply.... Eoin -
Freelance Mixed Gauge - Handbuilt Trackwork
murrayec replied to RichL's topic in Irish Model Layouts
I'm not sure I know the book your referring to, but it sounds lake a broad scope book on building a full layout? Whereas the book above only deals with building track the Rice detailed way.... Eoin -
Freelance Mixed Gauge - Handbuilt Trackwork
murrayec replied to RichL's topic in Irish Model Layouts
Building Track / Ian Rice...... You have to have a copy of this;- ISBN 1874103003 Eoin
-
What happened to 'Aussi Phil'? he was building an amazing BNM layout and stock;-
-
This was my favourite Crew Car;- and I have a bit of Ex BNM Stock! A BSA C15T used by the works foremen in the early 60's;- Eoin
-
Do I have to glue the cork underlay to plywood baseboard
murrayec replied to Bill Paddy Andy's question in Questions & Answers
Dependant on the quality of the cork, it can expand and distort when using pva for doing the ballast if not stuck down! If your not worried about the sound I recommend sticking it down.. Eoin -
Stephenson's Rocket Hornby Gauge OO
murrayec replied to murrayec's topic in British Outline Modelling
@Georgeconna I just gave it it's first run and then back into the box, I plan to make a storage/display case for it with the four coaches and when this is done the driver n fireman will be attached. The box and packaging it came in is pretty good, so good at holding the models firm that I can see it getting damaged taking it in and out - A display case I think is the best solution and then I can look at it while stored on the wall Eoin -
With the test track up today working through a few repairs, I took a break to run this fabulous little thing;- Eoin
-
T-Cut can be got in a motor factors, it's a car product for cut restoring & polishing car paint. SSM can be contacted through their website;- http://www.studio-scale-models.com/Index.shtml A very small quantity of T-Cut is required, gently rubbed over the decals with the bud, no force is required and after a few minutes the decal will rub off. The T-Cut should be washed off and the paintwork buffed with a clean cloth to take the new decal. Eoin
-
A dab of T-Cut and cotton bud will remove the existing numbers and SSM do decal numbers for this job. On hacking your own sound chips;- if your not a user of the ESU programmer- buy the MM chip and have an easier and less costly 121 life! The 'Experts' would have you believe it's easy! - capture this, edit that, and learn to program the thingie! 'Don't'...... Eoin
-
until
-
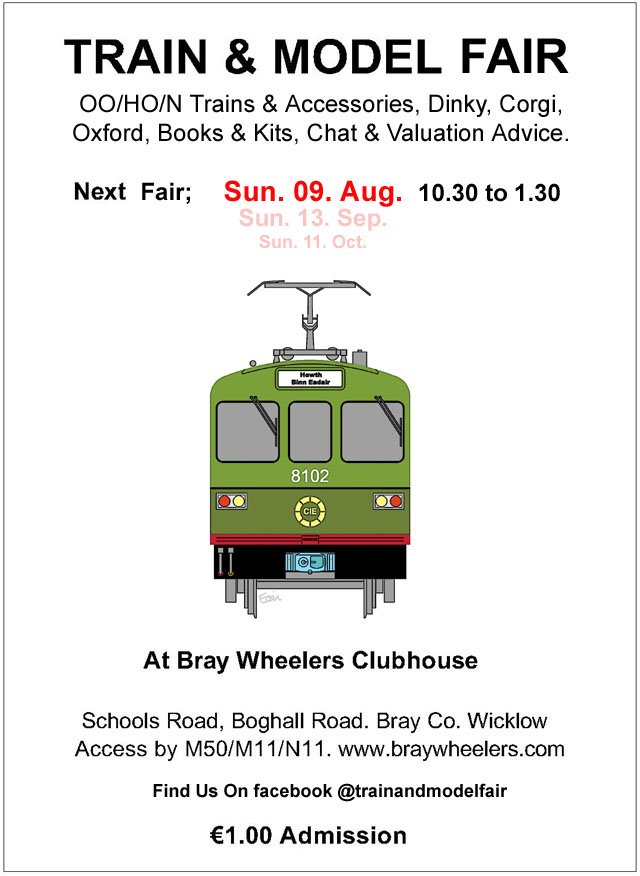
Next Train & Model Fair date- Sun, 09, Aug;-
-
I can hear it, but cant see it? Sounds good Eoin
-
I visited one of the Fair's patron's garden railway layout in the Avoca hills, Co. Wicklow yeasterday;- Eoin
- 753 replies
-
- 10
-
-