murrayec
-
Posts
2,775 -
Joined
-
Last visited
-
Days Won
70
Content Type
Profiles
Forums
Events
Gallery
Blogs
Everything posted by murrayec
-
Train & Model Fair updated flyer with future dates included - the Fair is on tomorrow.

-
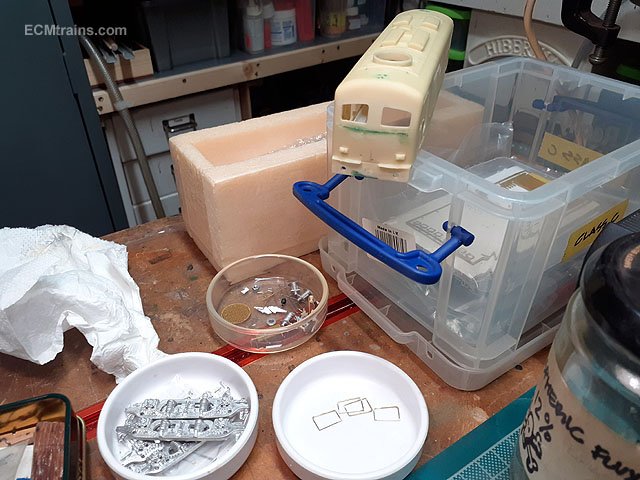
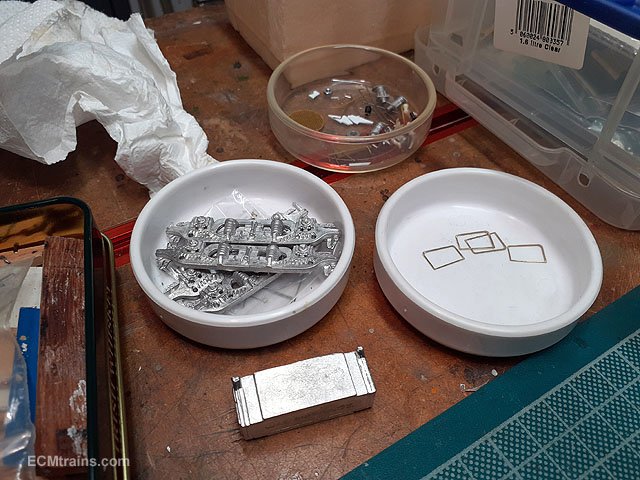
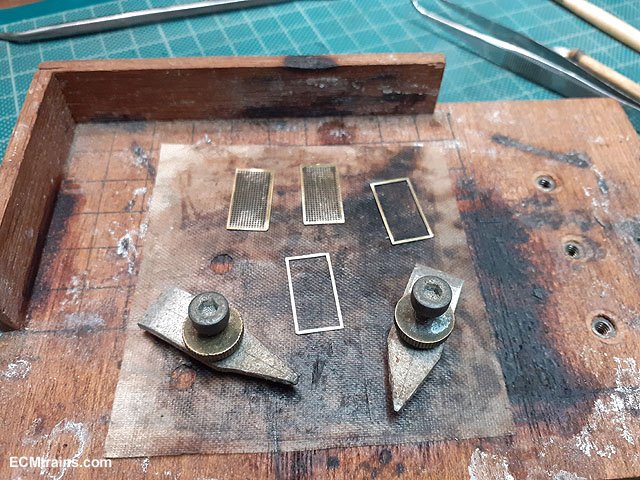
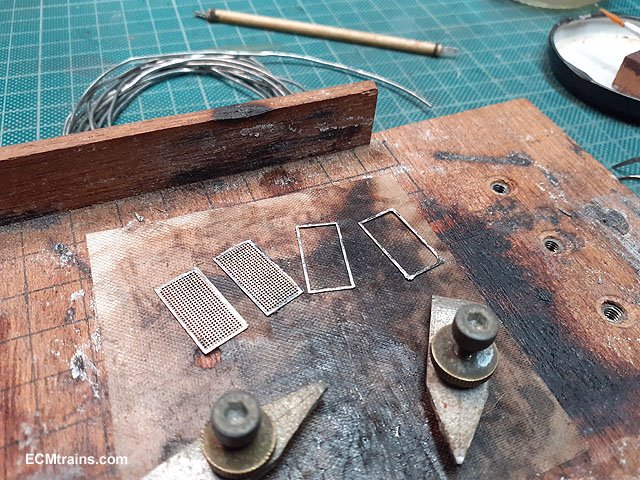
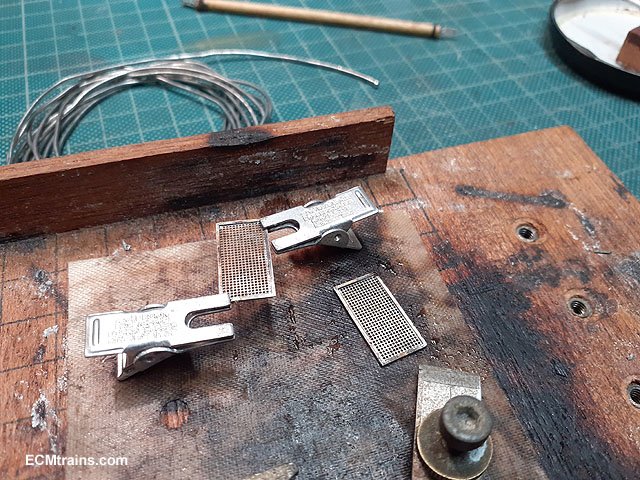
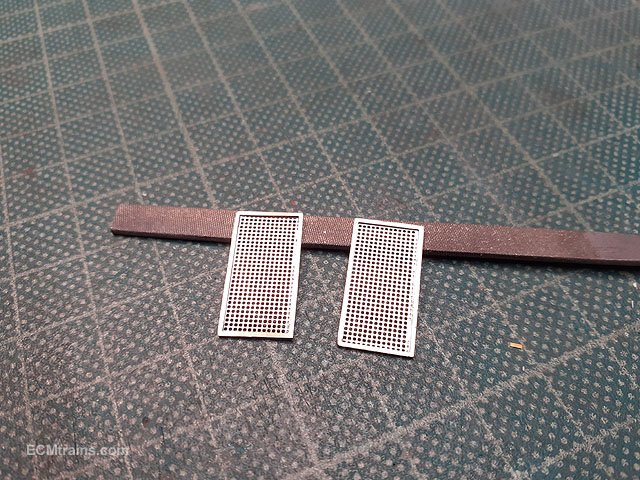
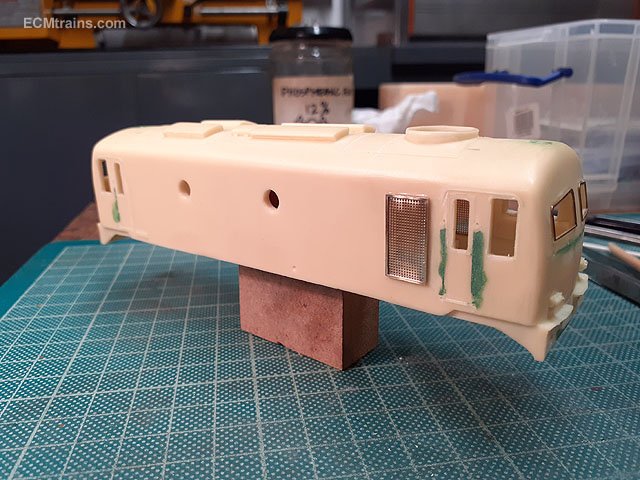
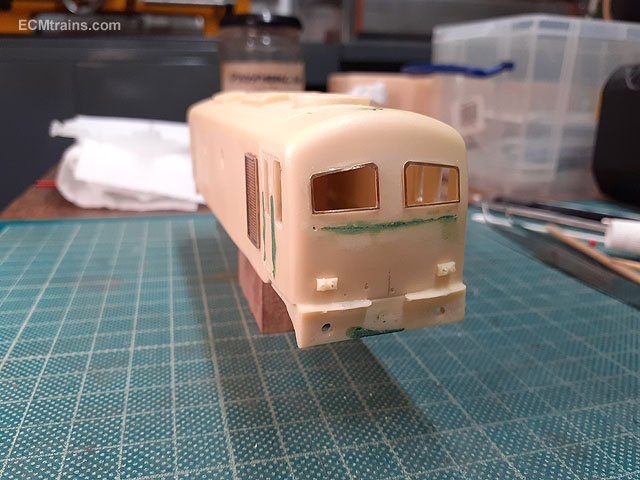
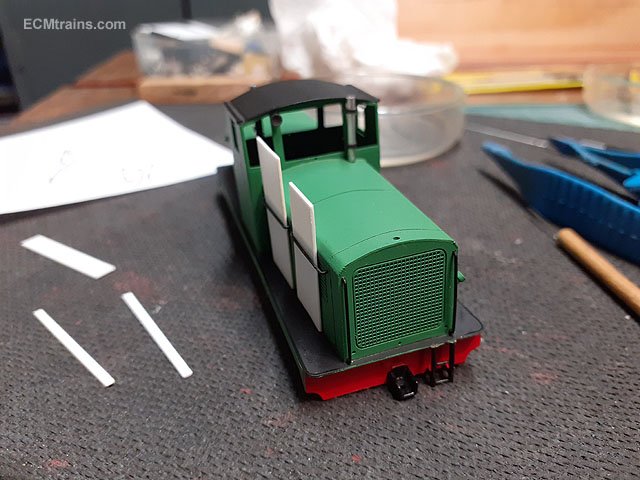
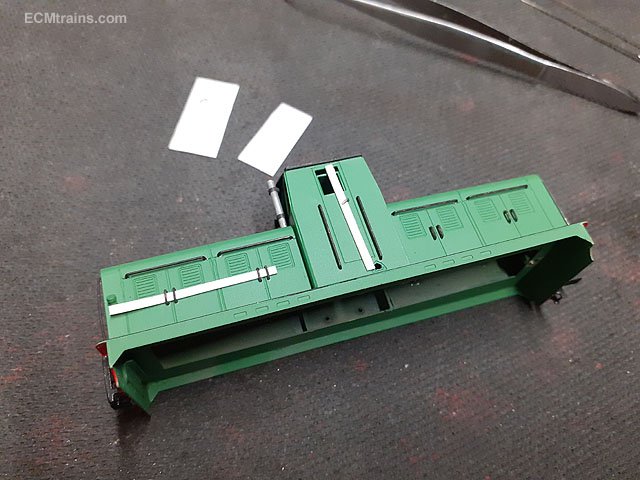
So then, I did a little bit of work on this project this evening, 2017 was the last time work was done so I have made a point of getting back to this project and complete it out!! Preparing the body for painting, first up is the SSM detail kit side grills and window frames, bits removed from the fret and cleaned up. The side grills come with an etch frame overlay with a diagonal brace, this brace I cut out, useing the frame only. The grill part is covered with pencil lead to stop the solder flowing into the grill and blocking the holes. 180 deg solder applied to the parts preparing to sweat solder the frames on. Soldered on. And cleaned up. Sticking on the these parts with epoxy glue. And the window frames. Next up will be brass turned frames for the round side windows........ I have also cast up a few sets of bogie sides and battery boxes so if anyone is interested- pm me. Eoin
-

Walker Diesel Class F - ECMbuild in 4mm for OOn3
murrayec replied to murrayec's topic in Irish Models
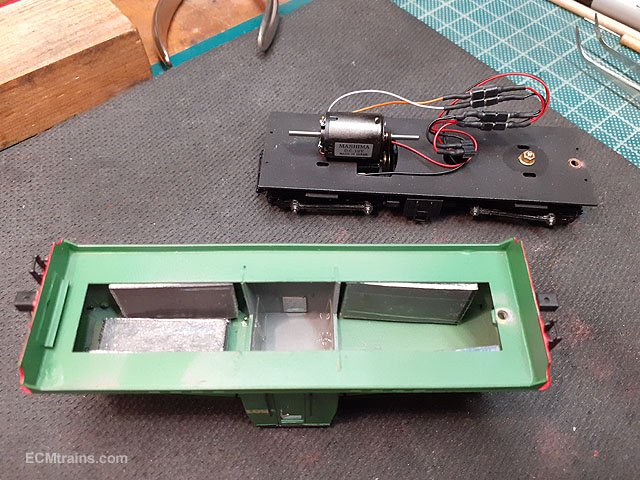
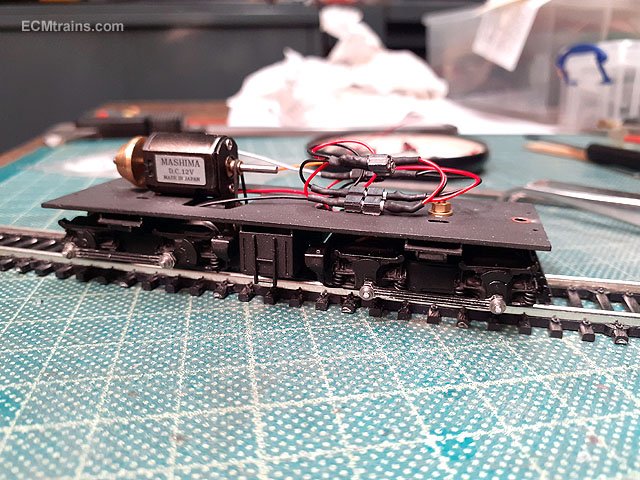
Lead ballast was worked out today, can just about get the right amount over the motor- the addition of the lead has increased the motor sound! thought it was going to be the other way around? And here is a video of it running while testing different positions to the weight Still more to do- it loves running in reverse but it's another story in forward gear!! Eoin Edit;- Something went wrong with the video when I did a spelling edit, will post again!! https://youtu.be/pK-BkS4TsuA
- 136 replies
-
- 5
-

-

-
- class f
- west clare
- (and 1 more)
-
wrennie The second one is more applicable, the first one most kids would have no interest in, maybe when they get older the interest may grow towards older trains but it's current stuff their into. Eoin
-
In my view the only answer to that question is ''yes'', I'm inundated with requests for a DARTs, 22s, the Luas and current stuff by the young folk, or their mums n dads! The kids range from 5 to 12 years and some know about every aspect of the train their interested in, and can tell the difference when mummy buys them a bit of €20.00 junk from the cardboard box under the traders table.... All are very disappointed when I point out the cost of my models and the possible cost of developing a new one! This is why I have turned to the timber toy dart idea (which development of has ground to a halt because of other work), I have designs for 22s and the Luas to be done the same way, and some of the older stuff including 121s, As, and 071s. Surprisingly when I show the toy to senior model collectors it sparks interest in ordering one for that grandchild they have who is nagging to play with ones expensive models- and just not allowed- which crushes the interest. The only problem with a manufactured starter sets is the retail cost- an example is the IR Commuter set which now sells for around €200.00, mummy is just not going to fork out for that....... Eoin
-
I used one of those in my old workshop, when it was up and running proper one could not stand with in 6ft of it without ones pants catching fire! Eoin
-
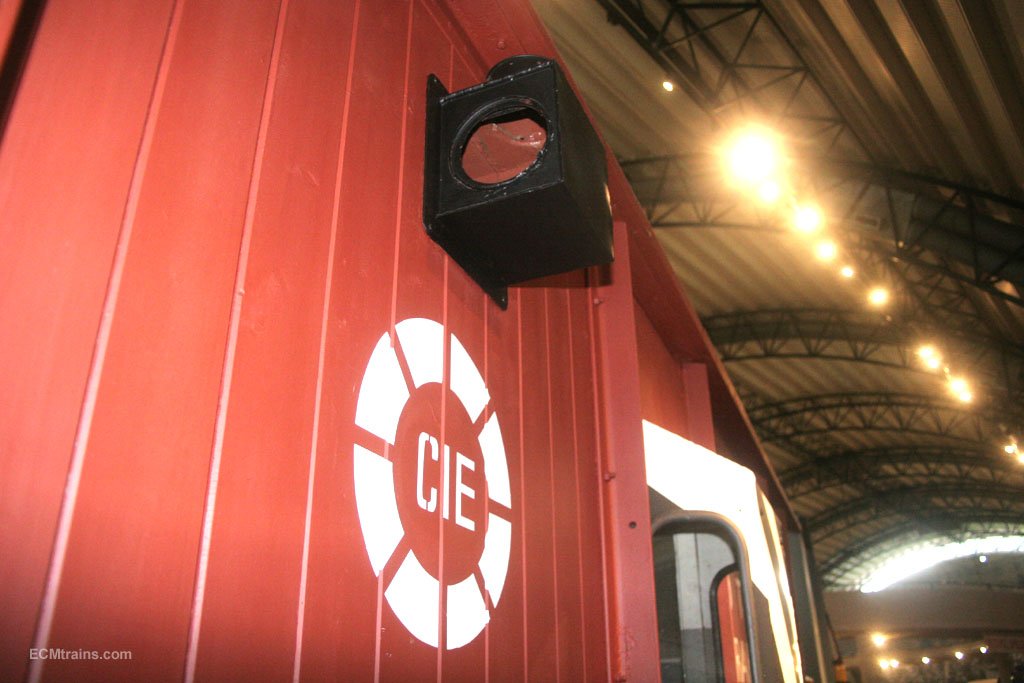
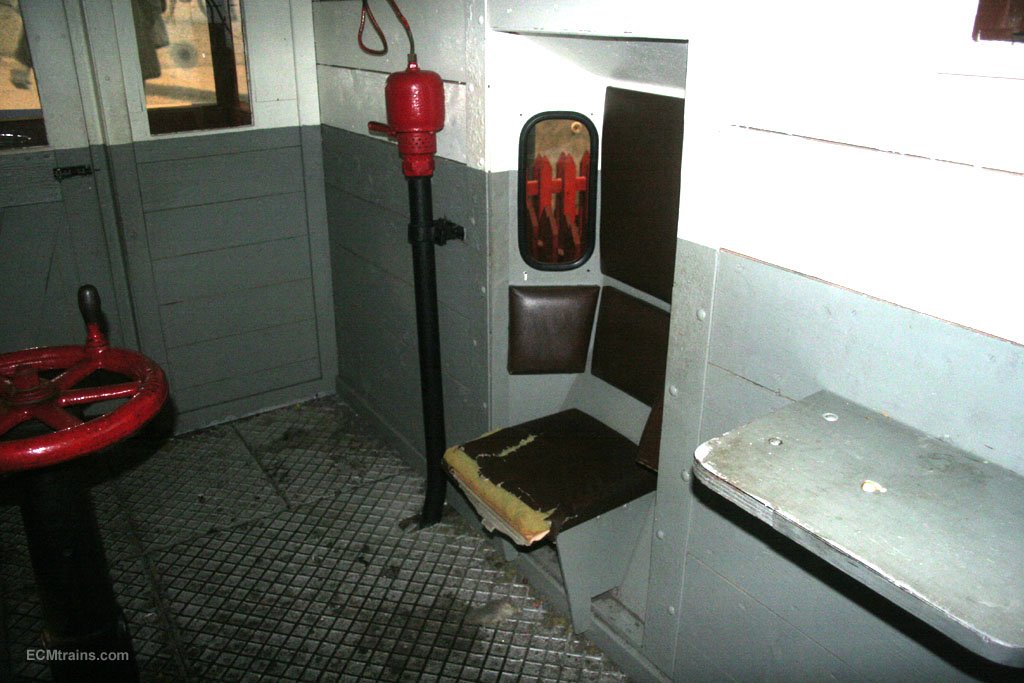
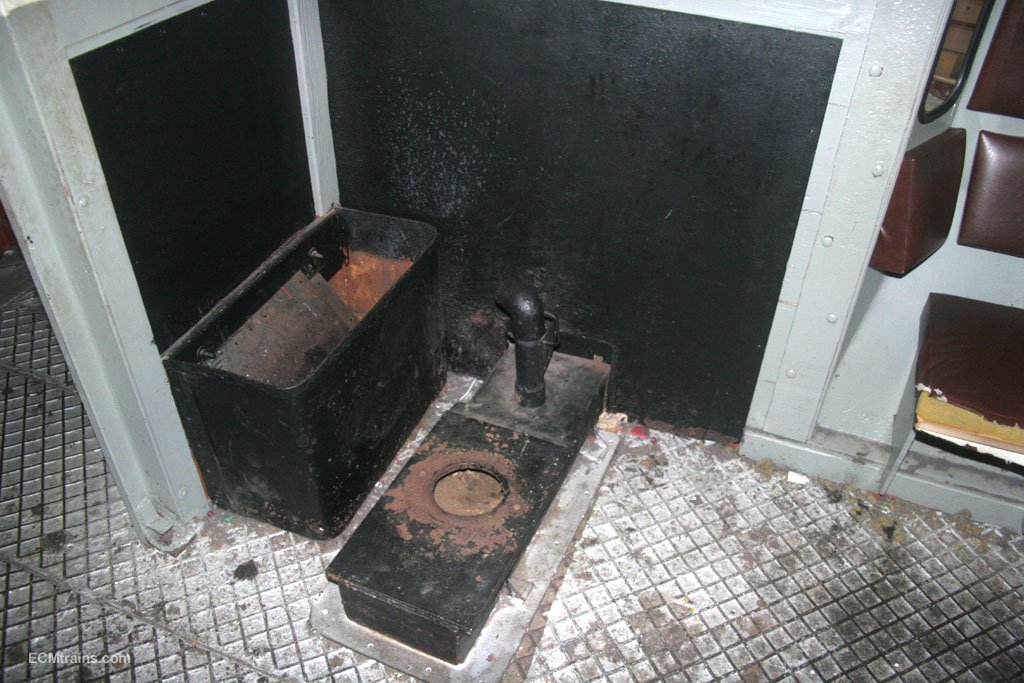
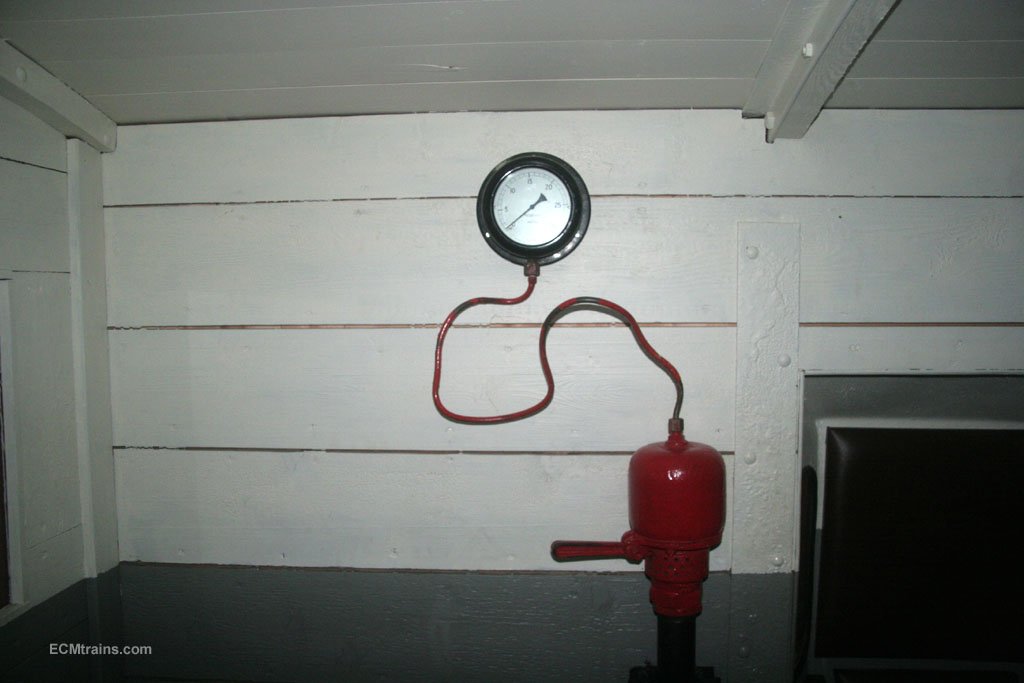
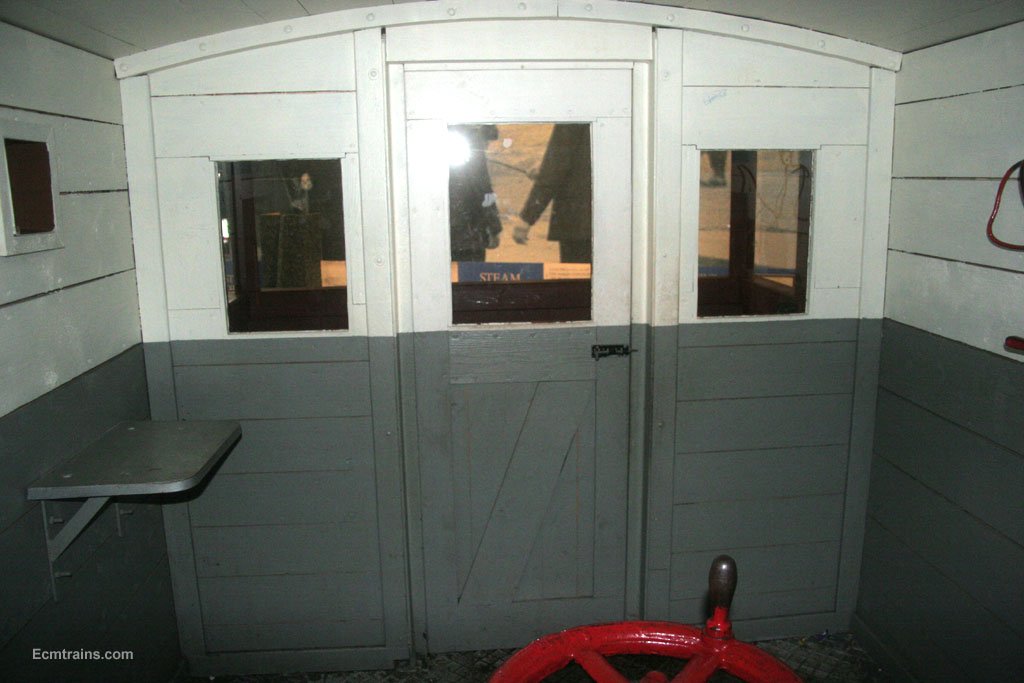
@Mayner Here are a few of my photos from Cultra, no stove in it but the ash pan & fuel store is still there;- Eoin
-
Walker Diesel Class F - ECMbuild in 4mm for OOn3
murrayec replied to murrayec's topic in Irish Models
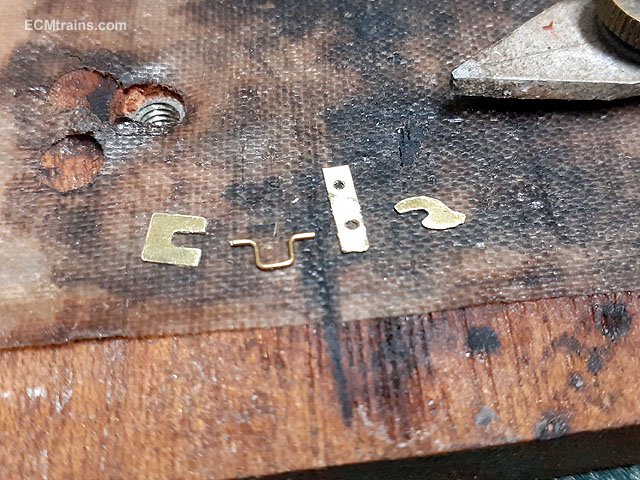
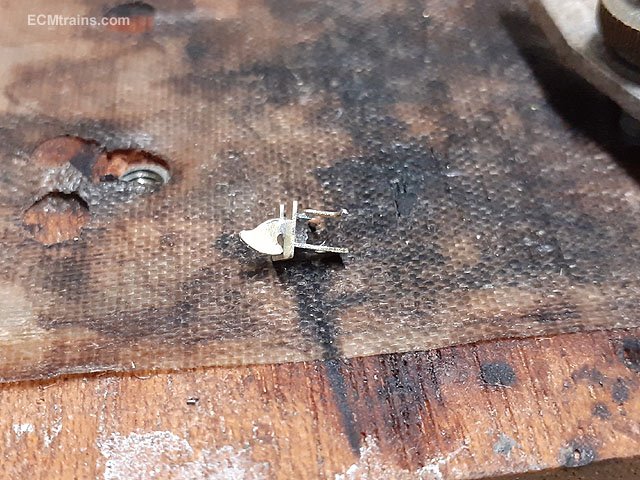
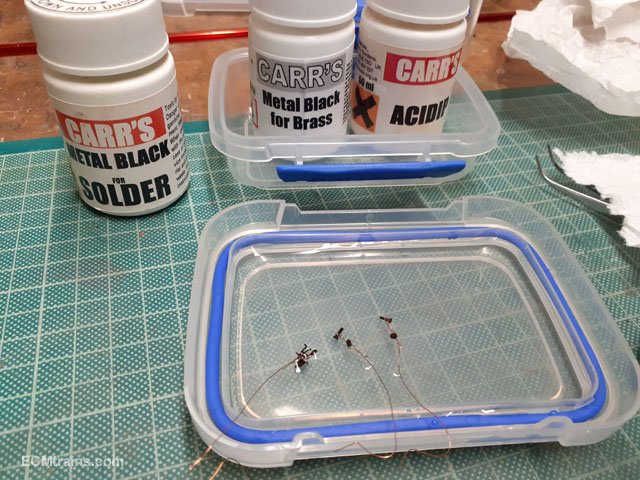
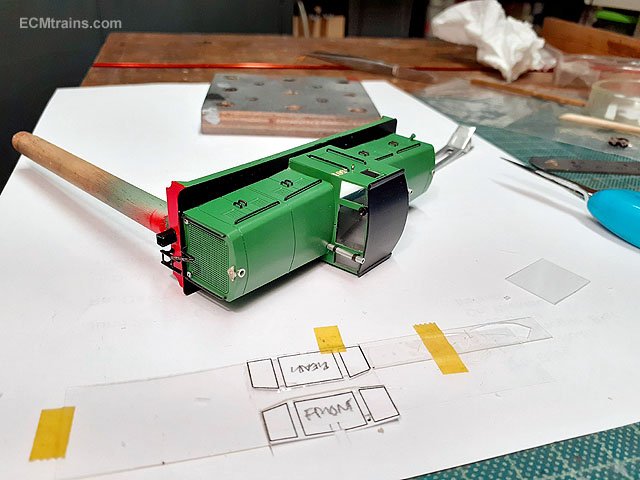
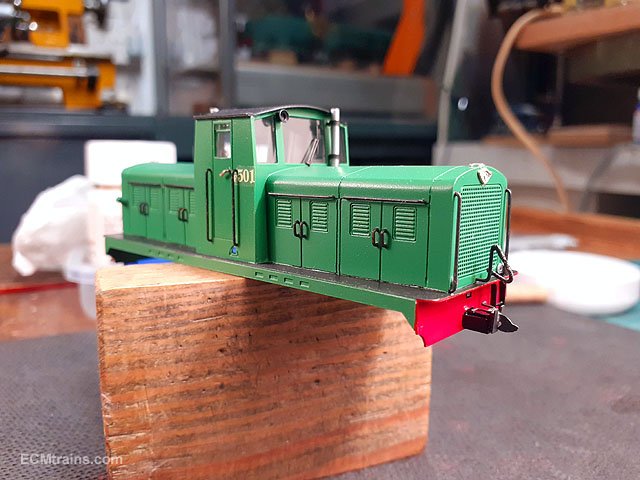
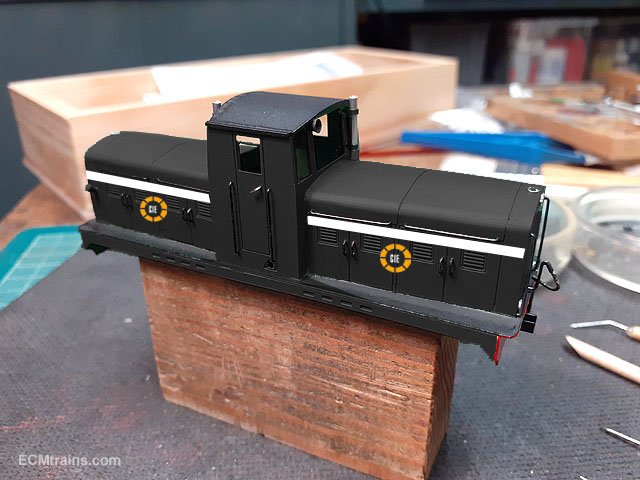
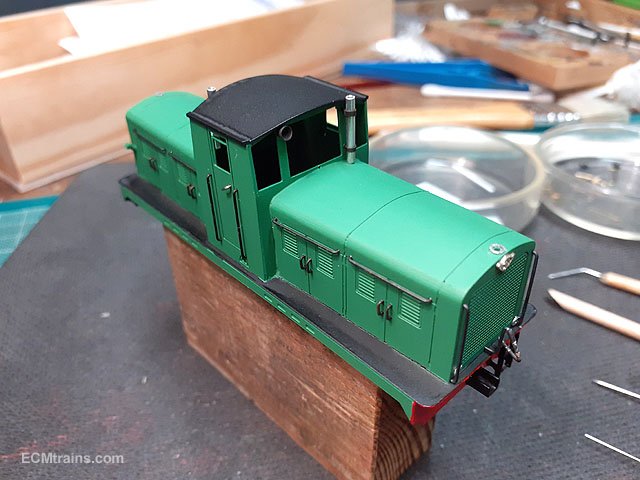
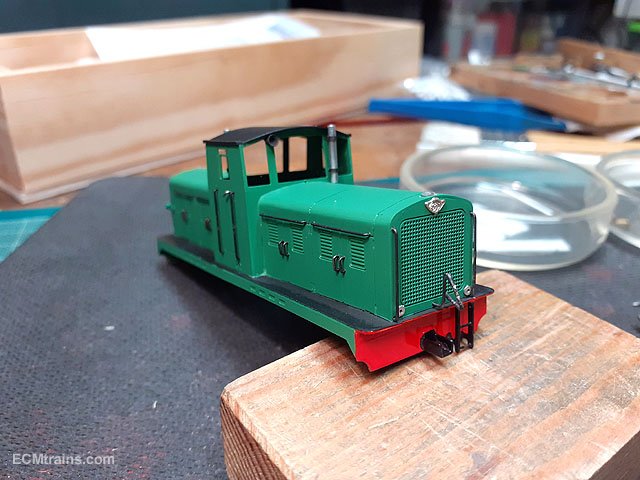
I cut out the parts for a 'chopper' coupler for the front- well my version of one! Parts cut ready for folding and soldering. Soldered. Metal blackening, I also included the 14BA nuts and bolts that will hold the couplers on. Next was installing the glazing, using the paper templates I showed earlier, Scotched taped to the clear styrene and then cut out with holes for the bracket ends of the exhausts and horns. These were then stuck in with Deluxe Glue 'n' Glaze, same for the side windows in the doors. Decal numbers and brass window wipers, also acid blackened, were applied. And the chopper coupler being test fitted- it fits! Only things missing now are the two head lamps. I'm holding off on that until I work out where the weights go, the chassis is up and running but needs quite a bit of weight for traction, there is really nowhere to fit this to the chassis so it has to go into the body somehow...... Eoin
- 136 replies
-
- 6
-
-
-
- class f
- west clare
- (and 1 more)
-
Excellent Ken Shall see you then Eoin
-
The fact that the paint peeled off the entire model would suggest to me that the primer your using is a bit suspect, especially as you say 'I failed to clean off the releasing agent properly' - that you had cleaned it one would expect paint to adhere in some places? Eoin
-
A lot of Fry locos were made from mild steel sheet, akin to a railway companies engineering design prototyping model workshops!.... Eoin
-
Walker Diesel Class F - ECMbuild in 4mm for OOn3
murrayec replied to murrayec's topic in Irish Models
- 136 replies
-
- 3
-

-
- class f
- west clare
- (and 1 more)
-
Hi Noel That's unfortunate the paint coming off, though I would not recommend washing down plastic or resin with IPA! The best course to follow is wash it down with water and a spoonful of washing soda mixed in and thoroughly rinse in clean water, filtered if possible! One should also abrade resin with a soft fibre pen or fine wet n dry paper- resin contains oils and some casting never fully cure, if you get the paint onto a dry abraded surface the paint will seal it in. IPA comes in different strengths and all depending on which one one uses and what plastic the model is it could work or it could be a disaster! A better cleaner is methylated spirits. I use enamel paints and wait at least 3-4 days to allow the paint to dry off before applying tape or another coat, if the next coat is applied to early the under coat will take thinners from the coat one is spraying, the under coat can become soft and loose contact with the under surface - enamel takes 2 to 3 weeks to harden off completely. Eoin
-
Walker Diesel Class F - ECMbuild in 4mm for OOn3
murrayec replied to murrayec's topic in Irish Models
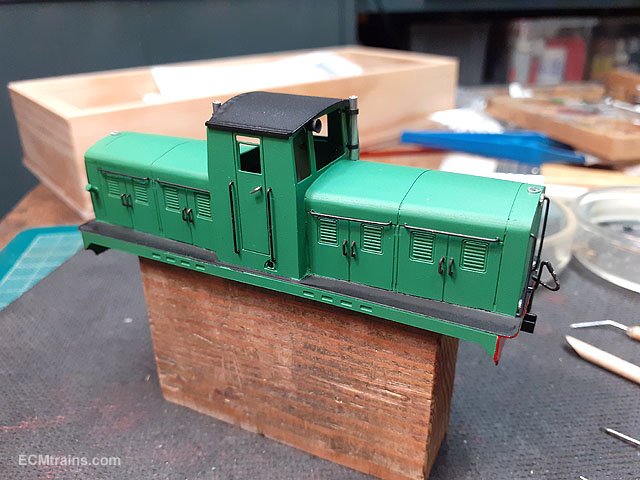
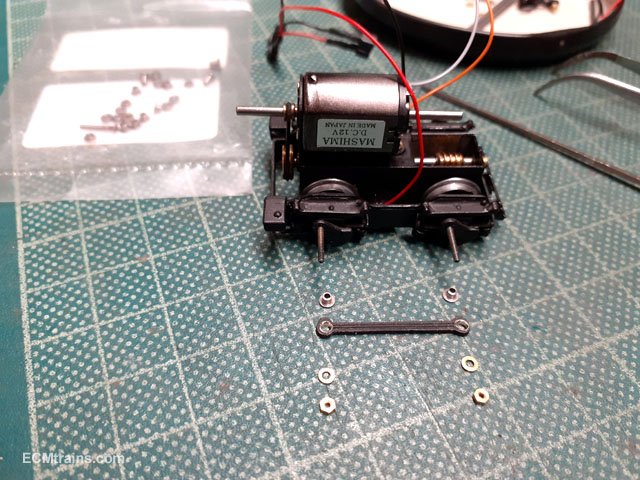
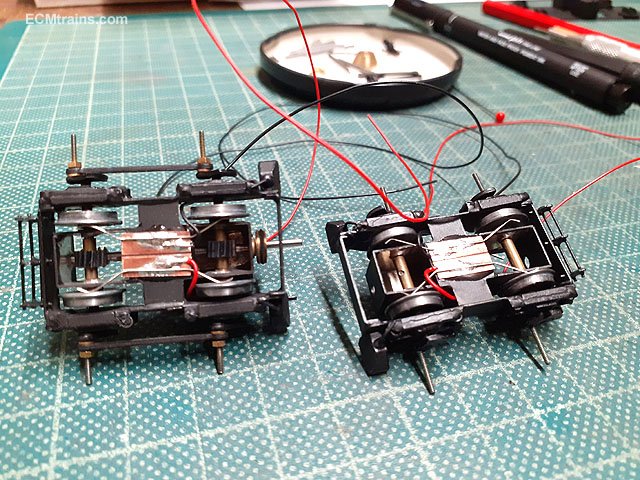
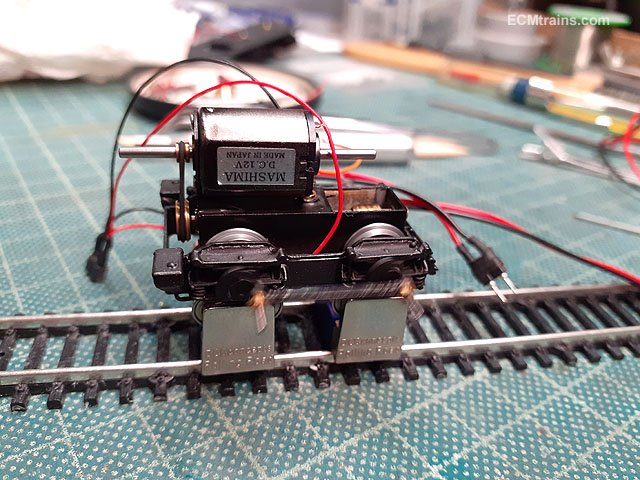
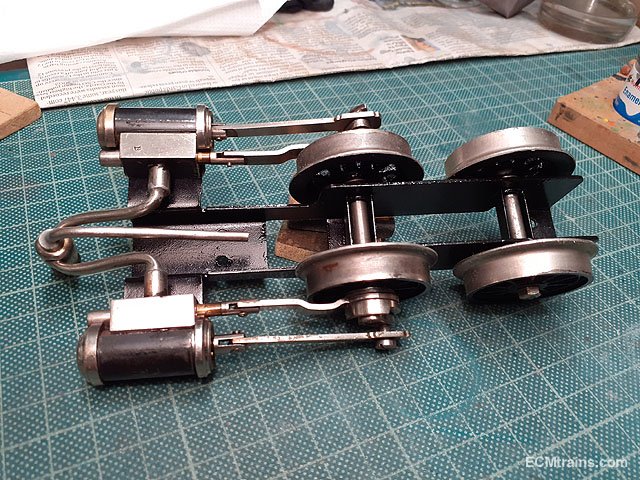
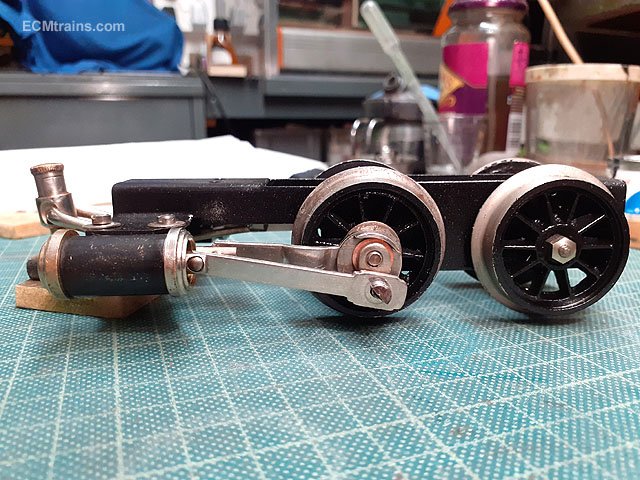
Detail parts going on- the exhaust Pipes, horns, handrails, door handles, vac pipes, marker light surrounds and the badges. Next on the body is cab painting, an overall spray of satin lacquer, and then the decals. This is the pick-ups installed on the underside of the bogies. Experienced a few problems with the threaded crank-pins- the crankpin nuts would lock up on one side and come undone on the other, so had to install a set of Alan Gibson crankpin bearings. Motor bogie up and running. Chassis assembled. Ready to run for testing over the weekend..... Eoin
- 136 replies
-
- 12
-
-
-
- class f
- west clare
- (and 1 more)
-
@Broithe Can you send us a large sample of that Eoin
-
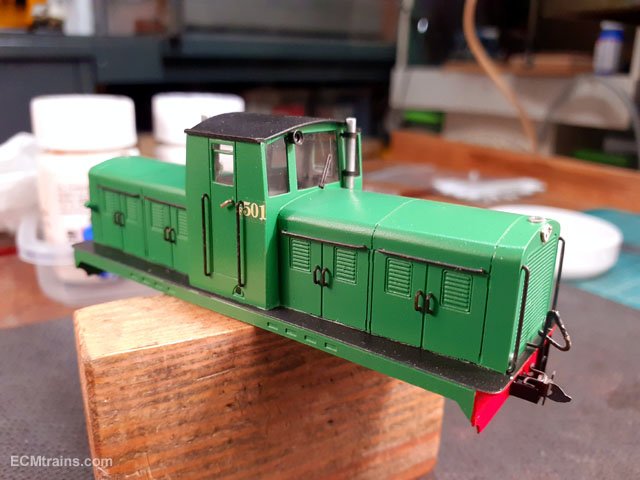
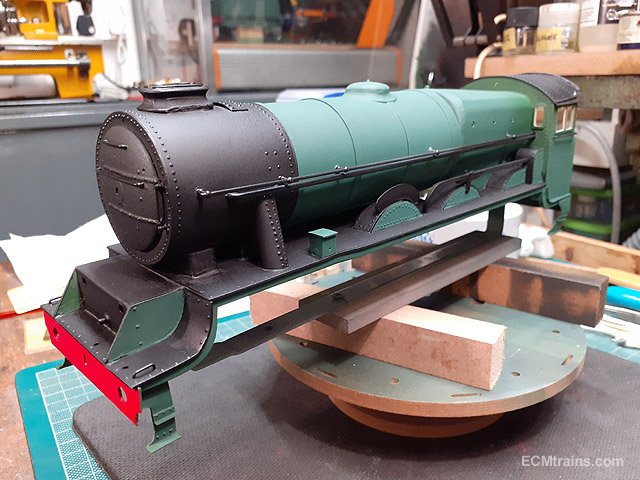
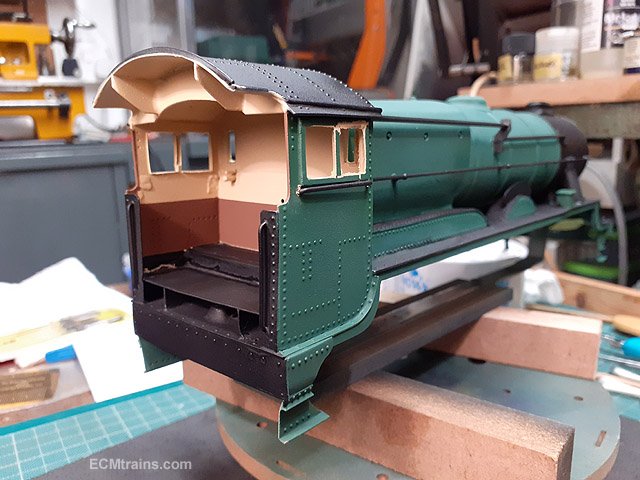
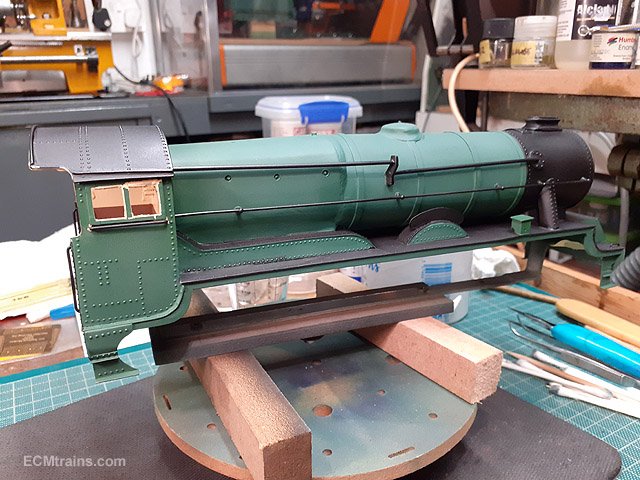
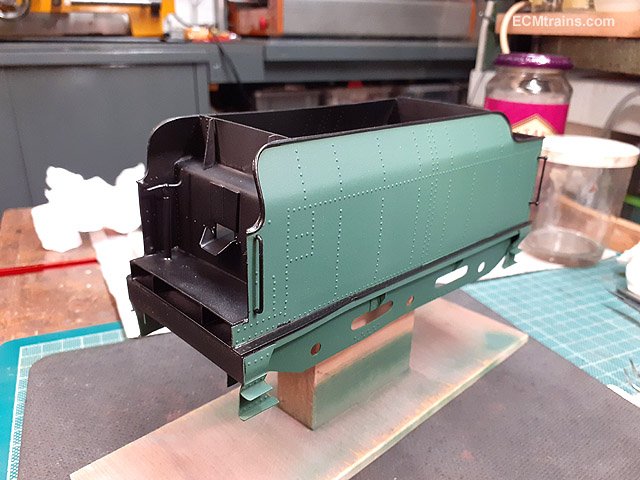
800 Loco body unmasked today after completing the cab painting, a few minor touch-ups are required- mainly the black getting in under the masking at the rivet details, the roof edge also needs attention. The masking is still on the window frames just in case you are wondering! Eoin
-
Hi Ken July 12th is the next Train & Model Fair, welcome to bring the layout and the Jeep 'in build', I'm sure chaps would like to see it's progress...... Eoin
-
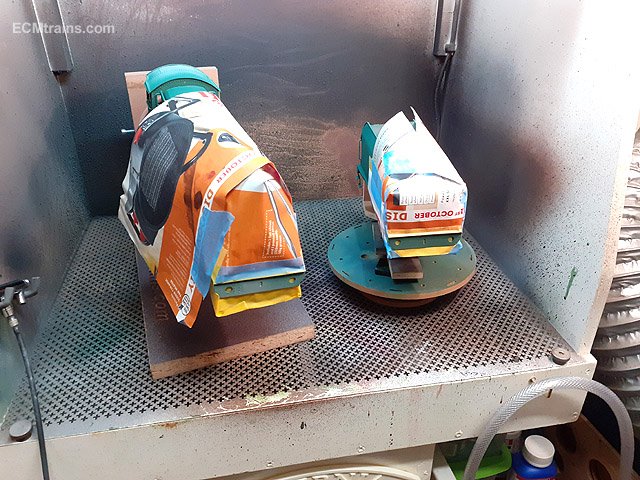
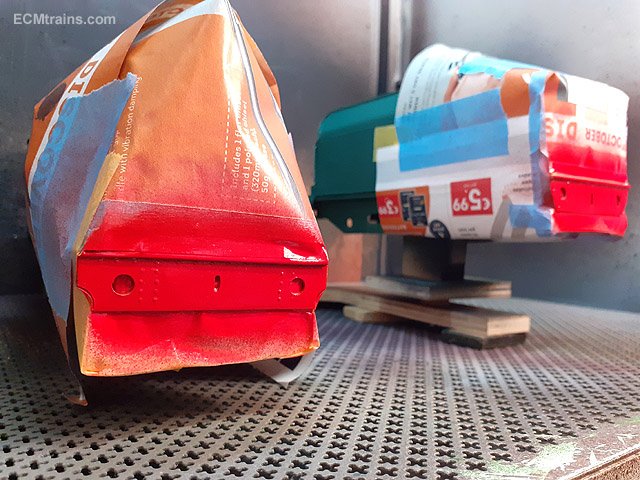
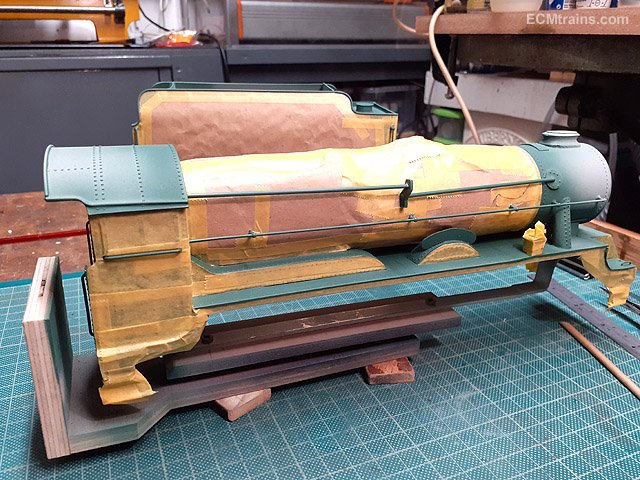
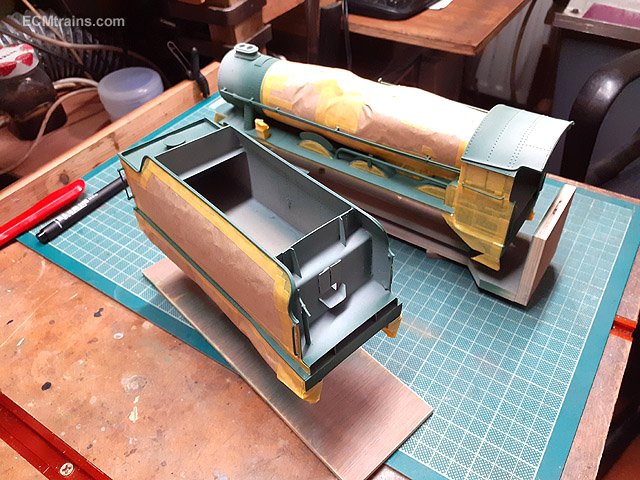
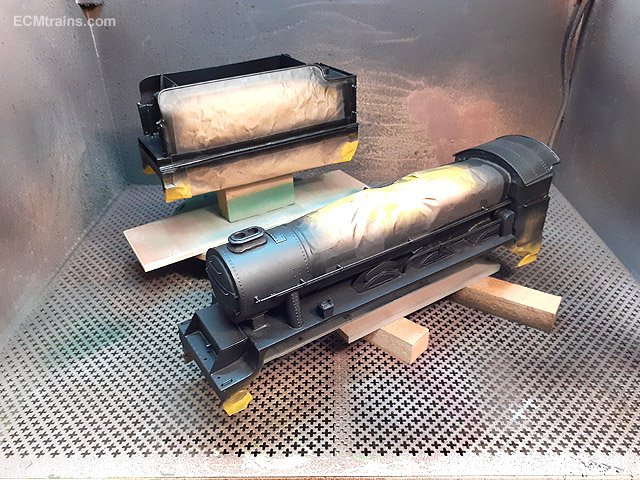
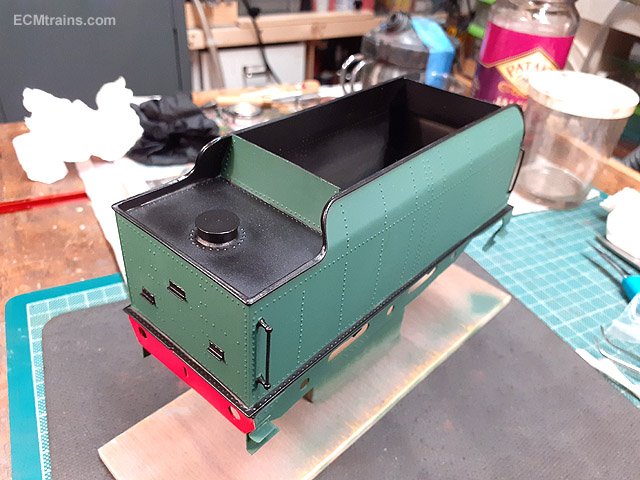
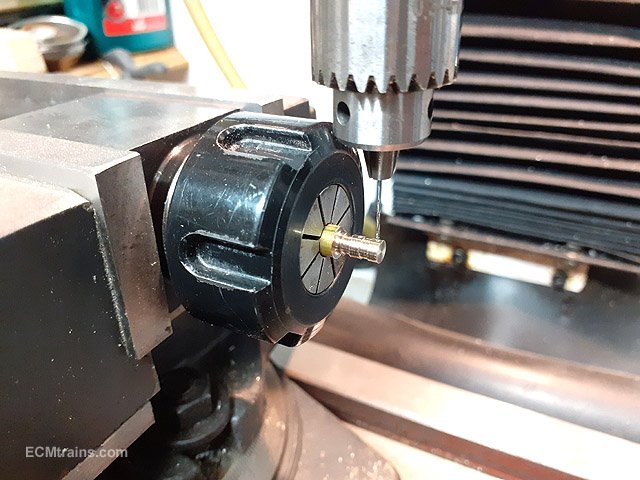
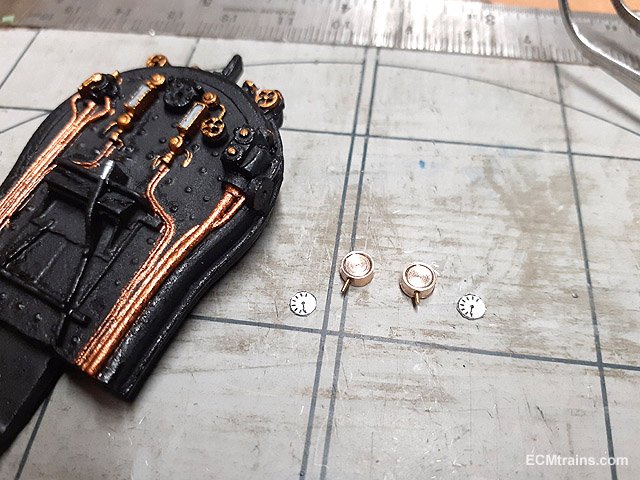
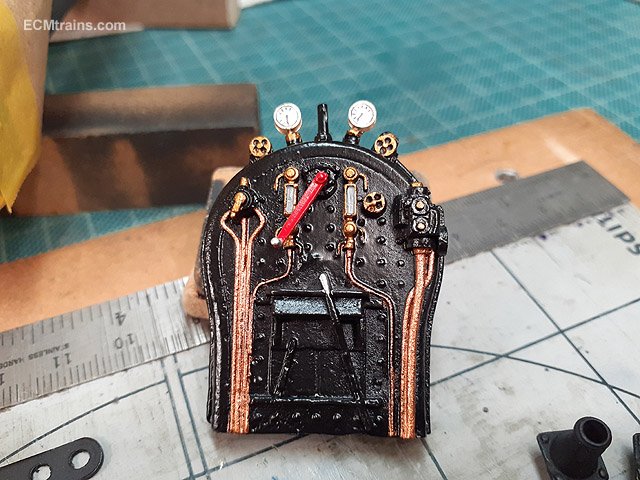
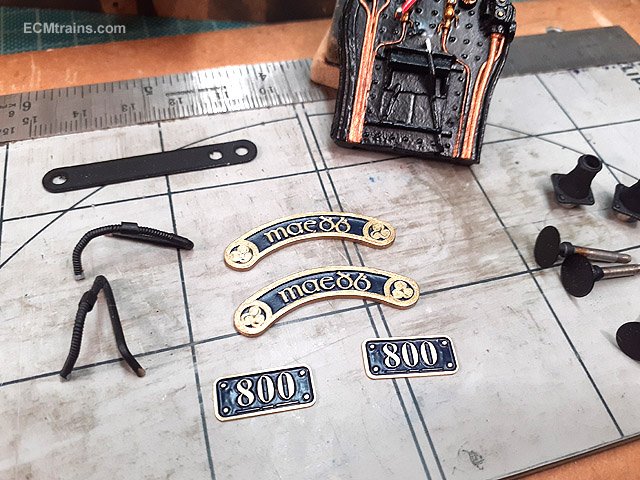
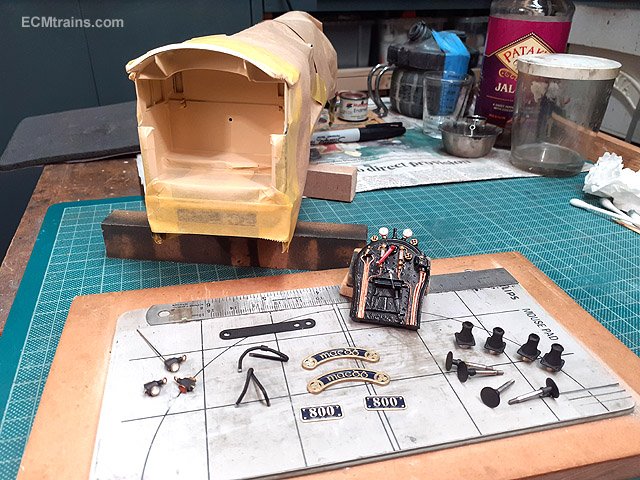
Buffer beams next, I decided to paint these first before the black. Quickly masked up. First a gloss white coat was sprayed on and then the red. Note;- don't use that Lidl paper for masking if using white spirit- the inks in the print dilute and leave marks behind on the model. So masking up for the black paint- Humbrol Satin 85, using brown paper this time! And two coats applied. The tender unwrapped and looking great, a few small fixes done here n there. A coat of lacquer and we're ready for lining! The loco is still masked up for painting the cab. Turning two 4mm dia brass gauges for the backhead, this photo is of drilling the pipe holes after two gauges are marked out on the brass bar. Turning completed with recessed dial faces and .8mm brass wire glued in for the pipes. The dial faces are inkjet prints with transpaseal stuck on to protect. The completed backhead with finish Alclad II Semi-Matte lacquer. The completed name and number plates. The completed lamps and vac pipes, the bezels in the lamps is epoxy resin glue lumped in to give a dome shape. Cab cream paint is complete just needs the brown paint below the windows all round.... ....and it's ready for lining also. Eoin
-
'O no it wont'.....
-
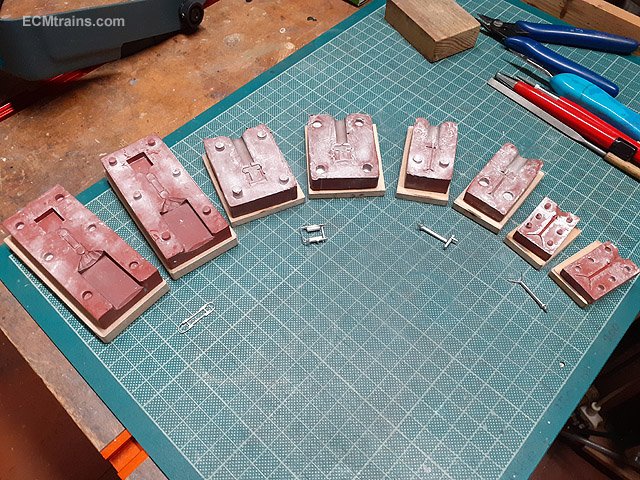
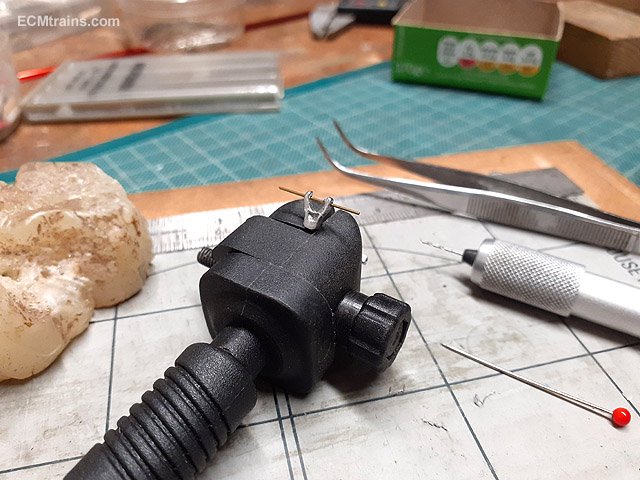
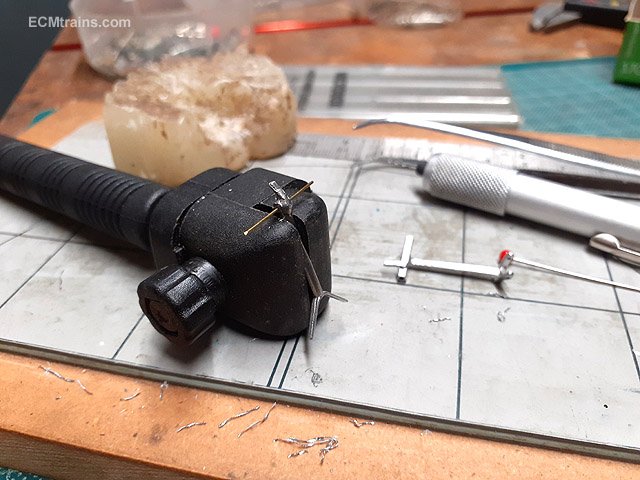
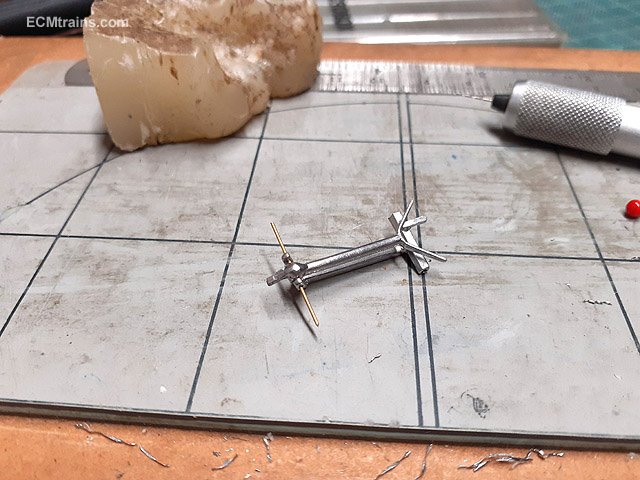
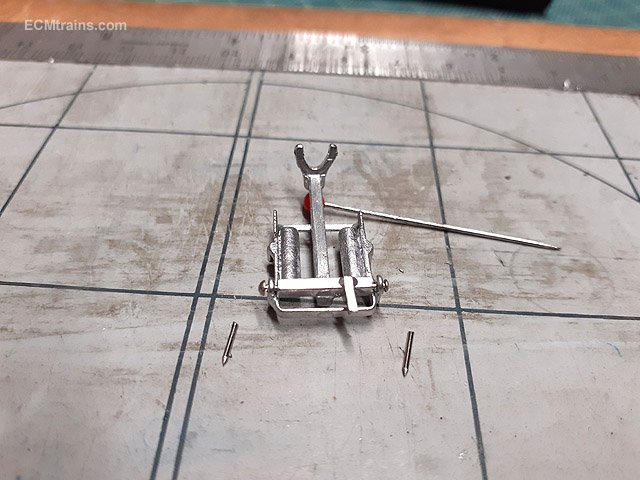
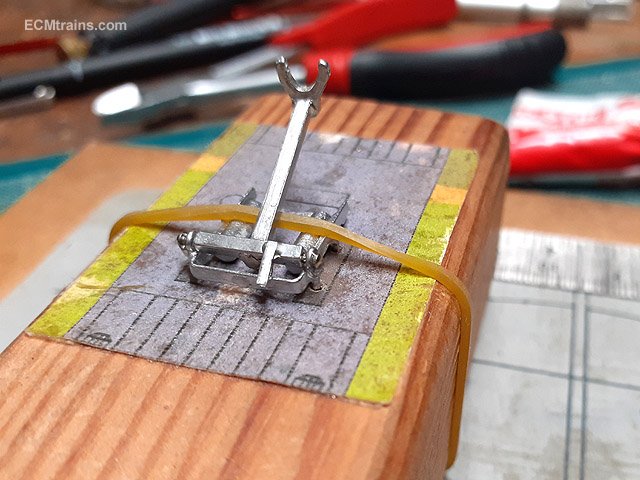
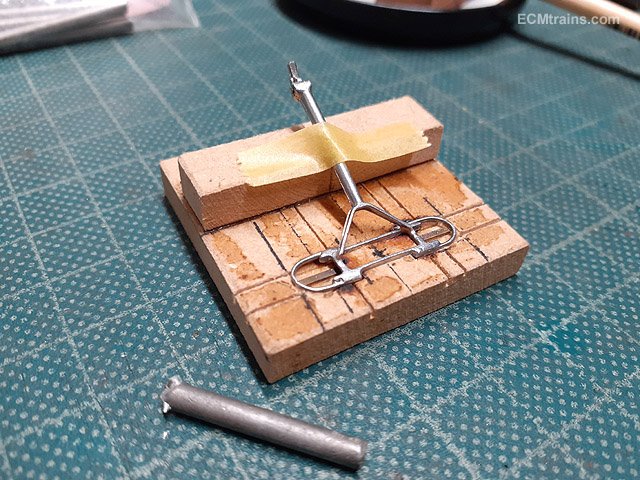
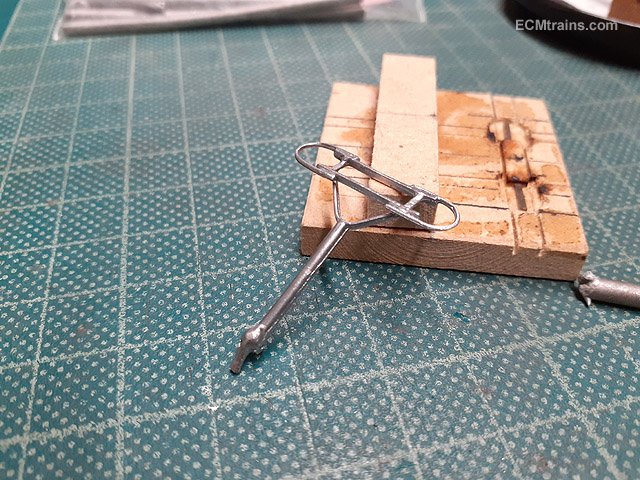
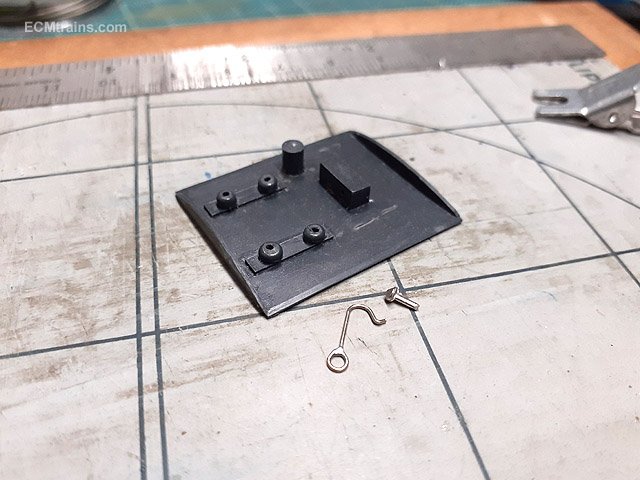
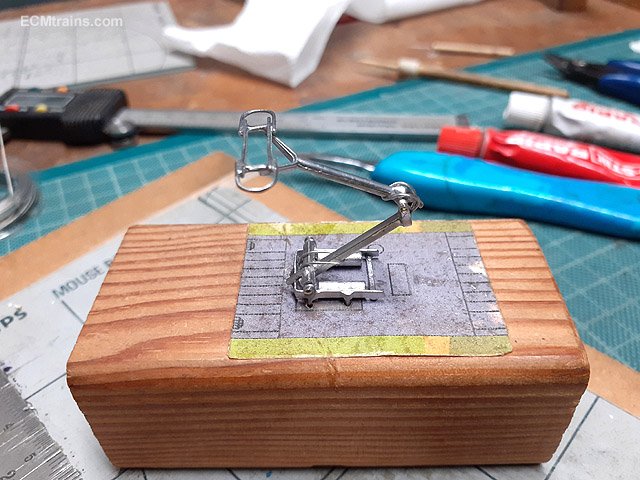
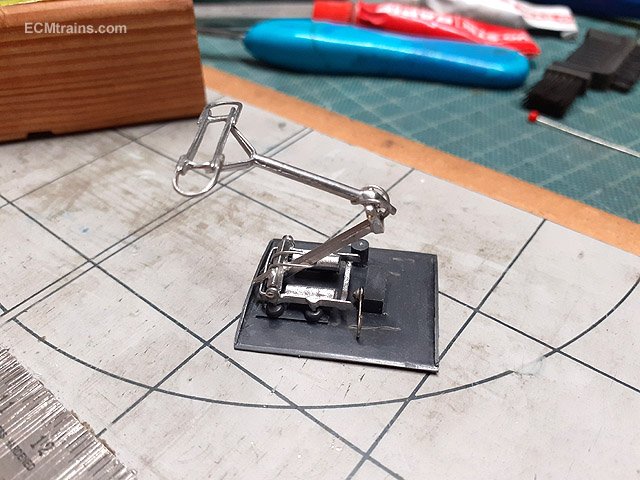
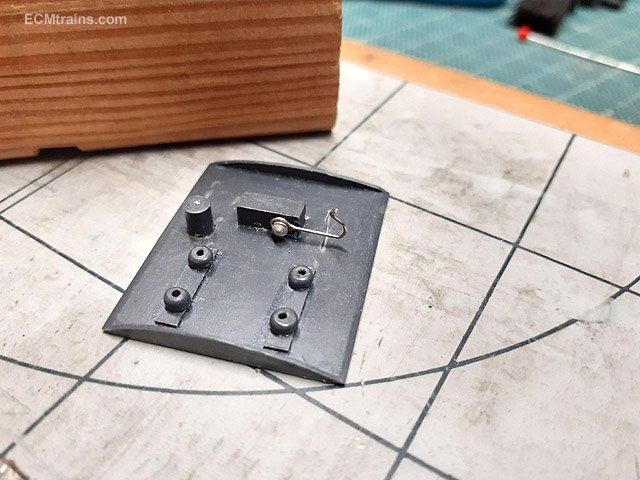
Here is a thing I haven't done in a while- build a DART pantograph;- These are the moulds for casting the four main parts in white metal. After cleaning up the parts the hole drilling starts, this is the lower arm upper pivot being drilled .5mm for brass rod pivot. Lower pivot of the upper arm drilled .5mm and been tested with the brass pin. Testing the two arm assembly pivot fit. The main frame pivot holes being drilled and test fitting the pivot pins- .6mm dress pins. I use paraffin wax to lube the drill bits when doing white metal, that lump in the photo left has been with me since I was 9 or 10!! Cutting the dress pins for the lower arm/main frame pivots, the arm crossbar has been drilled in 4mm both ends to take the pins. All works so now for epoxy gluing, the pin heads are glued to the main frame only, the shafts are then free to allow the arm rotate. Top of panto is soldered to the upper arm with lead 70deg solder in a little mdf jig to get things aligned and leave the two hands free to do the soldering. The springs are made from plastic coated jewellery wire 'Tiger Wire' some call it. The upper spring is bent double and will be epoxy glued in the front end of the lower arm where a .8mm hole has been drilled. The lower spring is bent double with little hooks bent up at each end to catch the back of the main frame for epoxy gluing. Springs on and fixed with glue, the centre arms pivot is glued also only on the outer ends of the brass pivot. Plastic cast roof recess and panto lock down pin set up, the hook is .4mm nickel silver bent up and soldered at the fixing pin end. Lock installed by gluing pin through into drilled hole in the plastic box upstand. And complete. Eoin.
- 442 replies
-
- 15
-
-
-

-
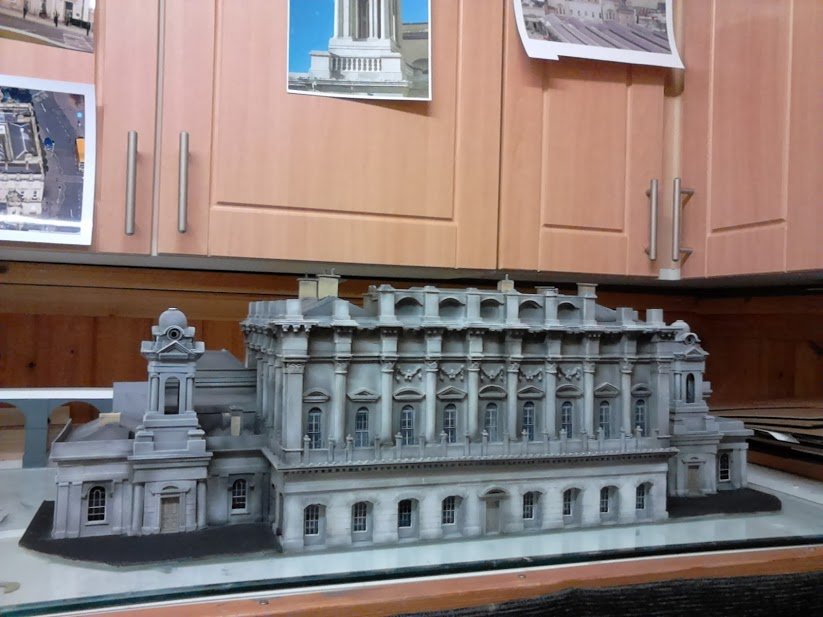
Off the ball today JHB... that's a different 'Brendan' who built Kingsbridge Station. Eoin
-
By the photos it would seem to be missing parts- valve gear and cylinder parts! also other kits from this seller are also missing parts... Eoin
-
Bing Live Steam Loco Gauge O - Repair & Restoration
murrayec replied to murrayec's topic in ECM Model Trains
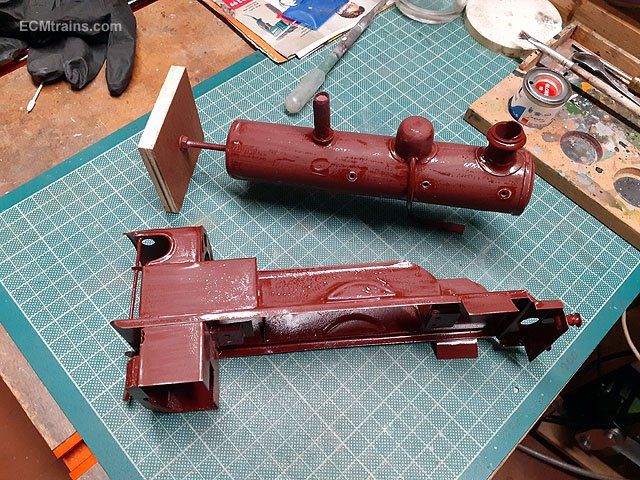
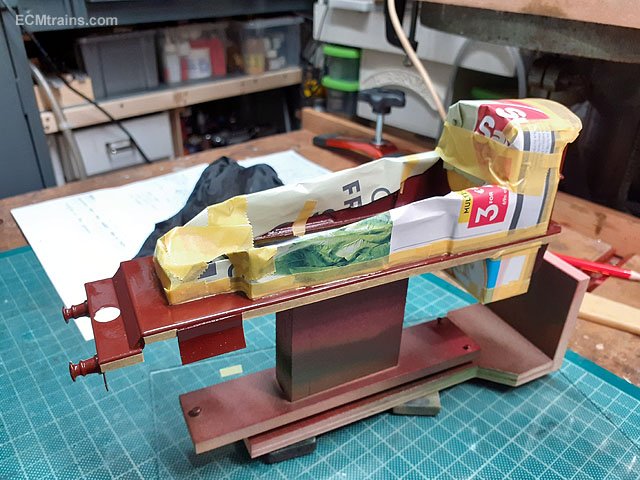
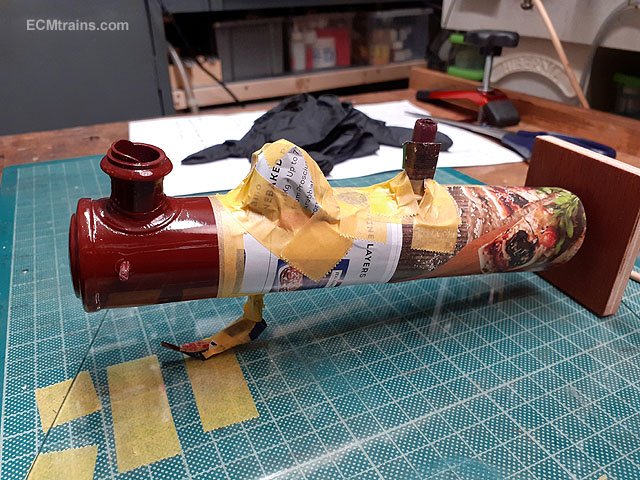
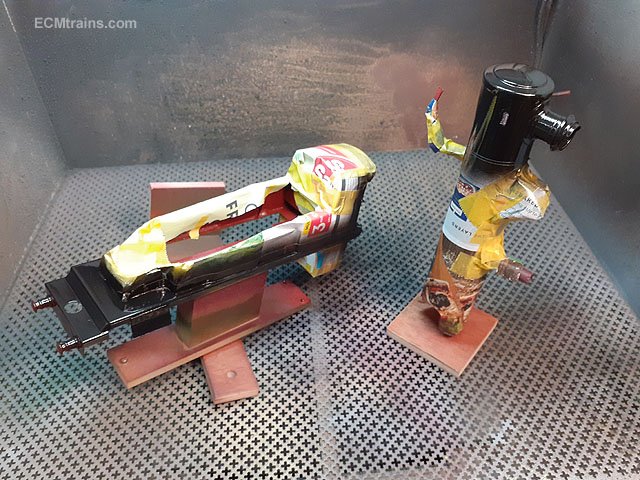
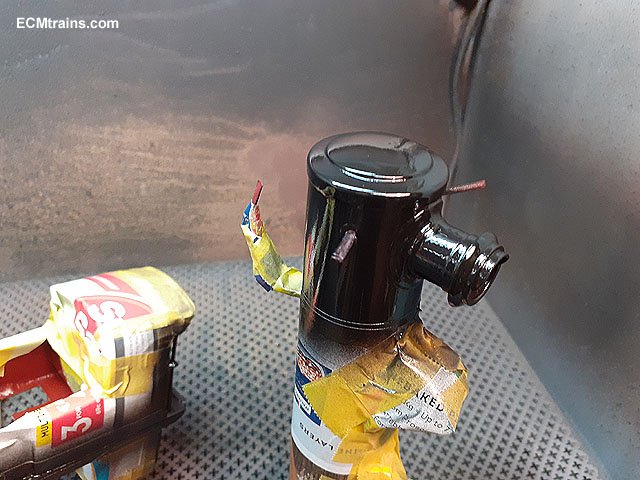
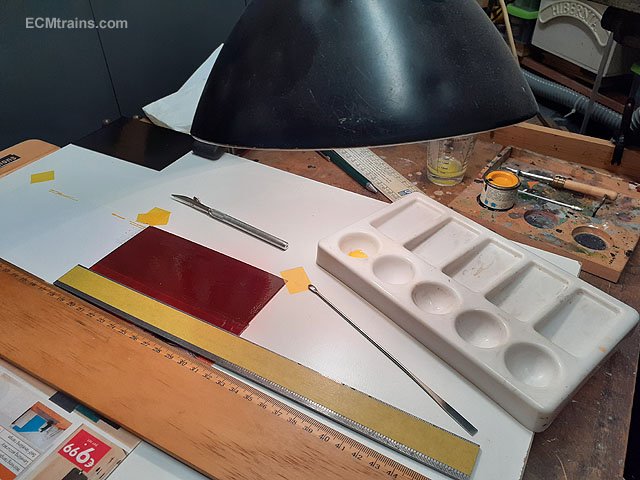
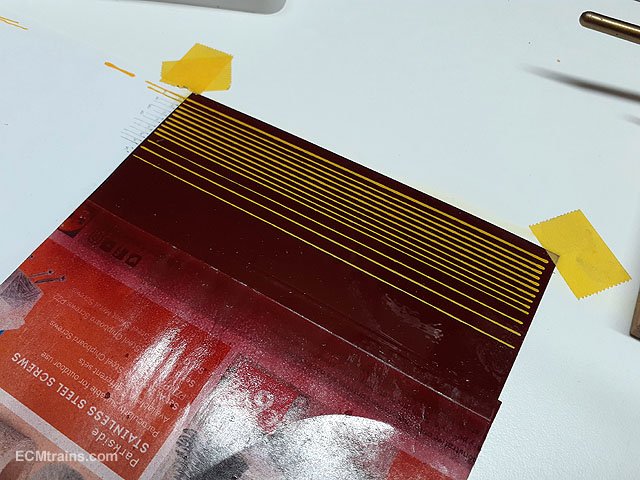
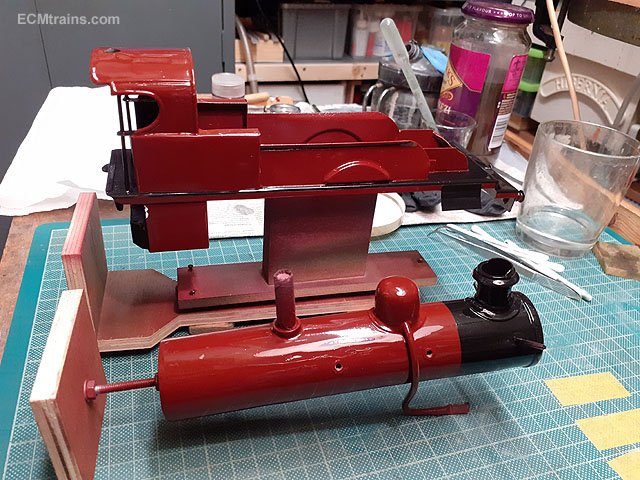
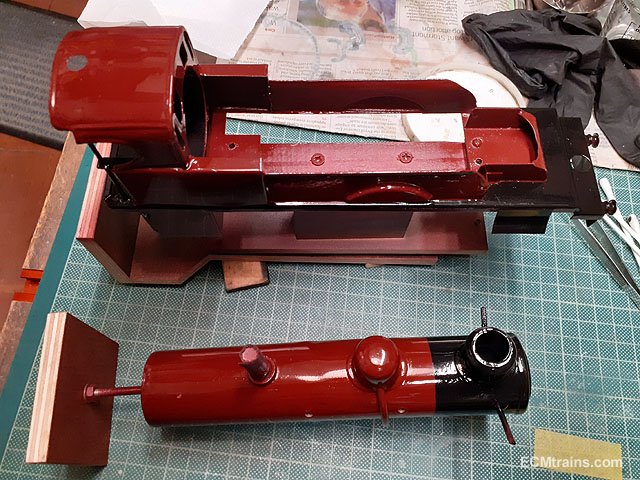
The first coats of brown did not go on to well, the paint just refused to flatten out when drying! so gave it a good week to dry and then out with the wet n dry and rubbed it down all over. The next few coats went on beautifully- flattened out n all shiny. Next was the masking up for the black paint on the running boards, cab floor, and the smokebox on the boiler. Black on. I got a good wet coat on after spraying a light tacky coat and leaving it for 45mins before applying the wet coat. And unmasked. I set up a decal sheet for doing the boiler bands and some of the lining, I sprayed a base coat of the brown colour onto Testors transparent decal sheet but the paint did not take to it very well, finger prints and greasy areas caused the paint to run away! When that coat dried I washed it down with white spirit and sprayed it again, I ended up with a very poor surface for running a bow pen on which is what I'm going to use to do the lining. I decided that this was going to be a practice sheet and would order new and better paper, so in the mean time I had a go... I strapped the decal sheet to a bit of white board, using a T-Square and a heavy ruler with masking tape stuck to the underside so the ruler stood off the sheet. I did a few yellow test lines using a guide sheet there on the left with the line positions marked out in pencil, as suspected there was to much undulation in the base paint the lines came out different thickness over the length. Not happy with this so will wait for the new paper. I did the black paint between a few of the top yellow lines for the boiler bands but it was disastrous and not going to show you! Chassis and wheel painting is complete and the chassis is now back together. So nearly there...... Eoin
- 24 replies
-
- 6
-
-
- bing live steam
- bing gauge o
- (and 1 more)