Galteemore Posted September 2, 2025 Author Posted September 2, 2025 Thanks everyone. The gloss paint and lighting does make the roof look worse than it is, but some AK filler (have been using Humbrol which is not very fine) will help. Lessons learned for next - and final - coach: am awaiting a J4 from Worsley. 3
Mayner Posted September 3, 2025 Posted September 3, 2025 23 hours ago, Northroader said: My only bogie coach was done with a hardwood roof and the coach weighs far more than it should. Balsa sounds a sensible approach, would it have helped to face it with a few layers of paper to get a smooth run? Anyways up, the sides look good, and the paint job is lovely. Glad to hear the bogies contributed to the success. Me, I’m sticking to four and six wheelers. Glider tissue and model aircraft dope https://www.hobbies.co.uk/model-aircraft/aircraft-dope?srsltid=AfmBOorHFZXg02LqSNCGSOu6Y_sXSZZFPp3wtERYhPc1NJKBbtEUGQd9 worked out well for finishing balsa roofs on a pair of Worsley Works AEC railcars. 2 1
murrayec Posted September 3, 2025 Posted September 3, 2025 10 minutes ago, Mayner said: Glider tissue and model aircraft dope https://www.hobbies.co.uk/model-aircraft/aircraft-dope?srsltid=AfmBOorHFZXg02LqSNCGSOu6Y_sXSZZFPp3wtERYhPc1NJKBbtEUGQd9 worked out well for finishing balsa roofs on a pair of Worsley Works AEC railcars. Model airplane stuff! I have used model airplane construction method in polystyrene to build coach roofs;- This was for a Tin Van. It would also work with balsa wood. Eoin 10 1
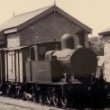
Patrick Davey Posted September 3, 2025 Posted September 3, 2025 Mega work David - how have I missed this! No. 74 is a favourite of mine, as she seems to have been caught by the photographers of the time on a good few occasions. She looks great with the crew! 1
Mayner Posted September 5, 2025 Posted September 5, 2025 On 3/9/2025 at 11:26 PM, murrayec said: Model airplane stuff! I have used model airplane construction method in polystyrene to build coach roofs;- This was for a Tin Van. It would also work with balsa wood. Eoin Less sophisticated that Eoin railcar roof formed from a balsawood block carved and sanded to shap then covered in aircraft tissue then coated in dope, roof panel joints formed with HMRS lining strip. Roof is grimy from 15+ years storage in a display case! 7
Galteemore Posted September 5, 2025 Author Posted September 5, 2025 That’s great John. Looks very well and has lasted ! What’s your method @murrayec? Remedial work has taken place on my coach and it looks much better now ! 2
murrayec Posted September 5, 2025 Posted September 5, 2025 5 hours ago, Galteemore said: ....... What’s your method @murrayec?......... @Galteemore my method;- The polystyrene .5mm ribs are cut out on the Silhouette Cameo cutting machine from a cad drawing, the two outer spars are quadrant shape to give the curve edge on the roof. These are the parts for two vans, cut out and cleaned up. The spars n ribs are glued up- like building a model wing, the ribs are notched to take the spars, and the ribs have a down-stand that notches inside of the coach sides to fix the roof on- one can see this on the bottom photo. The roof covering sheet is cut from .3mm styrene sheet, which is also scored to give the ribbing trim detail on the roof. The roof sheet is stuck down to the central spar first and left to fully dry. Then the edges are turned down over the quadrant, clamped in place and glued. One has to be careful not to use too much glue, too much will melt the styrene roof sheet- it happened on my first attempt! Thats basically it. I built 4 of these tin vans for a client, unfortunately these are the only photos I have of the build, I reckon this was around the time my phone died, followed by the computer back in 2017!! I did make two for myself but never finished them- as John Mayne did another run of his lovely kits, which I bought 2 of- yet to be built...... Eoin 8
Galteemore Posted September 5, 2025 Author Posted September 5, 2025 2 minutes ago, murrayec said: @Galteemore my method;- The polystyrene .5mm ribs are cut out on the Silhouette Cameo cutting machine from a cad drawing, the two outer spars are quadrant shape to give the curve edge on the roof. These are the parts for two vans, cut out and cleaned up. The spars n ribs are glued up- like building a model wing, the ribs are notched to take the spars, and the ribs have a down-stand that notches inside of the coach sides to fix the roof on- one can see this on the bottom photo. The roof covering sheet is cut from .3mm styrene sheet, which is also scored to give the ribbing trim detail on the roof. The roof sheet is stuck down to the central spar first and left to fully dry. Then the edges are turned down over the quadrant, clamped in place and glued. One has to be careful not to use too much glue, too much will melt the styrene roof sheet- it happened on my first attempt! Thats basically it. I built 4 of these tin vans for a client, unfortunately these are the only photos I have of the build, I reckon this was around the time my phone died, followed by the computer back in 2017!! I did make two for myself but never finished them- as John Mayne did another run of his lovely kits, which I bought 2 of- yet to be built...... Eoin Thanks Eoin - that’s brilliant. Perhaps I can try to copy the method even without a cameo cutter! 3
leslie10646 Posted September 5, 2025 Posted September 5, 2025 On 1/9/2025 at 9:10 PM, Galteemore said: That’s my biggest ever piece of rolling stock more or less done. Thanks to @Paul 34Ffor significant information input, and @Northroader for the correct bogie sides, which I have squeezed out to 36.75. Very unusual coach, with both compartments and open sections. As with all my models, I’m quite disappointed with it in many ways but nor is it a complete failure, I suppose. Roof looks better in real life and a little more filler some weathering will smooth things out. The roof was horrible to do - a high arch - so ended up making a balsa layer structure and then sanding to shape. Corridor connections are temporary until I can get the correct ones sorted. Should look ok with the PP….shout out to @Mol_PMB and @Maynerfor construction advice. Wonderful coach, David and especially impressed with the passengers. However (and this is a wind-up) ....... The "timer", clearer holding a stopwatch and standing as timers did in the First Class corridor, would have stood a bit further down the corridor to get a clearer view of the mileposts as they whizzed by. Mind you he might have been avoiding the temptation to chat up the attractive lass standing a bi further along? 1 1
Galteemore Posted September 6, 2025 Author Posted September 6, 2025 (edited) 9 hours ago, leslie10646 said: Wonderful coach, David and especially impressed with the passengers. However (and this is a wind-up) ....... The "timer", clearer holding a stopwatch and standing as timers did in the First Class corridor, would have stood a bit further down the corridor to get a clearer view of the mileposts as they whizzed by. Mind you he might have been avoiding the temptation to chat up the attractive lass standing a bi further along? I thought he was queuing for the 1st class WC after too many pints in the buffet car! In reality the corridor passengers are in place to distract attention from some glazing glue that went the wrong way ! Edited September 6, 2025 by Galteemore 1 3
Galteemore Posted October 8, 2025 Author Posted October 8, 2025 (edited) My first SL wagon in many years. Scratch build from 1920s Manorhamilton drawings. Tiny compared to an H van ! Bit more weathering due when the enamels on the metalwork set. This one hasn’t too many miles left in it I think, and will soon be destined for the wagon scrapyard at Manorhamilton. Edited October 8, 2025 by Galteemore 12
Flying Snail Posted October 8, 2025 Posted October 8, 2025 Very nice indeed ... there's something about convertibles: rugged, utilitarian but totally charming! 3 1
Galteemore Posted December 6, 2025 Author Posted December 6, 2025 (edited) First building made for a new project. GNRI signal box painted in Irish North colours. Huge shout out to @Patrick Davey for advice. Basic design is from Alphagraphix kit, scratchbuilt in plastic card with some special laser cut wooden parts. PP trying it out for size. Lots of annoying errors but falls short of dashing against the wall level. Should pass the 2’ rule…. Edited December 6, 2025 by Galteemore 5 6
Tullygrainey Posted December 6, 2025 Posted December 6, 2025 That's got real charm David. Love it. Love the interior detail too. That signalman is really putting his back into it! 1 1
Paul 34F Posted December 6, 2025 Posted December 6, 2025 2 hours ago, Tullygrainey said: That's got real charm David. Love it. Love the interior detail too. That signalman is really putting his back into it! A very Facing Point Lock, judging by the lever colour. Very nice Paul 1
Patrick Davey Posted December 6, 2025 Posted December 6, 2025 Oh that has turned out vvvvery nicely indeed!!!! 1
Mol_PMB Posted December 7, 2025 Posted December 7, 2025 Superb - I love the detailing especially the interior. 1
Galteemore Posted April 3 Author Posted April 3 (edited) I promised in a post to @Warbonnet to show my next loco this week. So here we are. Some years ago I was so struck by @Colonel’s Wolf Dog MGW 4-4-0 at a show that I decided to build a small 4-4-0 of my own. I picked a GNRI J class, as sold to the SLNCR in 1921 - Glencar and Black Lion (yes spelled as two words). Now eventually finished after almost 5 years of intermittent activity. Although it has run, I have decided to take the (very pricey) motor and gearbox out and keep it as a static model for various reasons, not least the fact that it’s out of my chosen period. I also made various silly mistakes in its construction which are now coming back to bite me. One was putting the hornblocks at the back axle - another was trying to copy the original’s frame profile rather than simplifying with flat frame tops. These have caused a few snags that would probably be best resolved with a new chassis. I just can’t be bothered with that right now! So into a display case it will go. It’s a significant model despite its many flaws. For one thing I think it’s the only model in existence of a J class, which was the ancestor of every other GNR 4-4-0. For another, it’s a unique blend of Irish loco kit designers. The smokebox and boiler are altered Alphagraphix JT etches. The cab and splashers are Worsley - perhaps his last ever Irish design. Tender body scratch, as are both loco and tender chassis. Massive thanks to @Paul 34F whose drawings helped immensely. For some reason this old thing reminds me of an illustration in the Sammy the Shunter books…… Edited April 3 by Galteemore 6 6
Tullygrainey Posted April 3 Posted April 3 (edited) I've been pouring over your photos for ages now David. You've made a lovely job of that. Shame it won't be stretching its legs but it'll be a worthy addition to the display cabinet. Edited April 3 by Tullygrainey typo 1 1
Colonel Posted April 4 Posted April 4 That looks splendid - well done. As Alan says, shame it won't be running, but will definitely pose nicely! Great addition to the 7mm scale SLNCR list. 1 1
Galteemore Posted April 4 Author Posted April 4 Thanks everyone. I may try and get her running some day but at least I have another 4-4-0 which scratches the itch. And am working on another ….. 2
Paul 34F Posted April 4 Posted April 4 David, Black Lion certainly looks the part. I’m sure one day, you will get her running. Glad to have been of assistance with the drawings. Kind regards Paul 1
Galteemore Posted April 8 Author Posted April 8 (edited) Quick and simple project - create an SLNC lorry out of an old Solido Citroen. Everything stripped and repainted. Converted to RH drive too! No photos survive of SL lorry fleet that I have seen but here’s an interpretation based on their bus livery. Little bit of tidying up to do but almost there. Edited April 8 by Galteemore 13
Colonel Posted April 9 Posted April 9 Yep, that is very nice indeed. Always worth filing a small flat on the tyres, which makes any vehicle 'sit' - as though it has real weight. 2 1
Galteemore Posted April 11 Author Posted April 11 (edited) Enlisting in @Tullygrainey @Horsetanand @Mol_PMB’s J26 club. The excitement of opening an Alphagraphix package and enjoying what’s inside. Also got the research books out / and a very useful article by Tim Cramer which will help with the bunker extension needed for my little beastie which will be 558 the Sligo pilot…..even though it means l’ll have to ditch the lovely etched plates Roger has provided as she had painted numbers in my era. Prototype pic (when she retired to Dublin) from Ernie. Edited April 11 by Galteemore 10 1
Tullygrainey Posted April 11 Posted April 11 (edited) Good luck with this one David. I'll enjoy seeing it go together. I'd love to have a go at one of those Tyrconnel kits but it would have to sit a shelf if I ever did, there being no suitable track hereabouts. Yet Edited April 11 by Tullygrainey 1
Galteemore Posted April 14 Author Posted April 14 (edited) Some progress. Interrupted the recommended route of construction to focus on the chassis to make sure it fits before progressing any further - esp to 5’3 clearances. Thankfully it all seems to roll ok. Am building 558 which had numerous changes to the norm - including no handrails on tank sides, or staff holders. This meant 6 holes to be filled in on tank sides alone….and you can just see on back of bunker where marking out is going on for the rear steps that 558 had, but few others. Edited April 14 by Galteemore 10
Colonel Posted April 15 Posted April 15 Great stuff - it is a very nice kit and remember that when I built my first one over ten years ago, it went together really well, especially the simple, fold up chassis. However, might have to hide behind the sofa as recent projects on these locos make me think my model will now be generic at best! 1 2
Galteemore Posted April 15 Author Posted April 15 (edited) 1 hour ago, Colonel said: Great stuff - it is a very nice kit and remember that when I built my first one over ten years ago, it went together really well, especially the simple, fold up chassis. However, might have to hide behind the sofa as recent projects on these locos make me think my model will now be generic at best! Yours definitely looks the part David and is poster boy for Alphagraphix box art! The engines changed so much over their lives that yours actually did look exactly like that in real life at some point! Edited April 15 by Galteemore 1 1 1
Galteemore Posted May 4 Author Posted May 4 (edited) Achingly slow progress on 558 - awaiting the right buffers. Did manage a trial fit of some parts tonight ….note such 558 unique features as the brace across the tanks near the dome, the extended bunker, and the extra rail on the smokebox door. Edited May 4 by Galteemore 12 1
Recommended Posts
Create an account or sign in to comment
You need to be a member in order to leave a comment
Create an account
Sign up for a new account in our community. It's easy!
Register a new accountSign in
Already have an account? Sign in here.
Sign In Now