WaYSidE
Members-
Posts
277 -
Joined
-
Last visited
Content Type
Profiles
Forums
Events
Gallery
Everything posted by WaYSidE
-
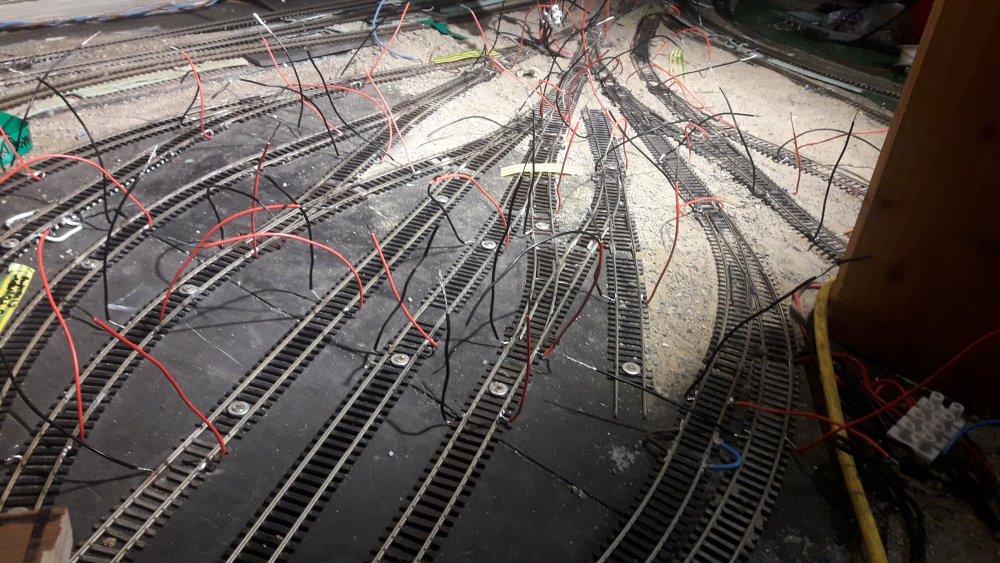
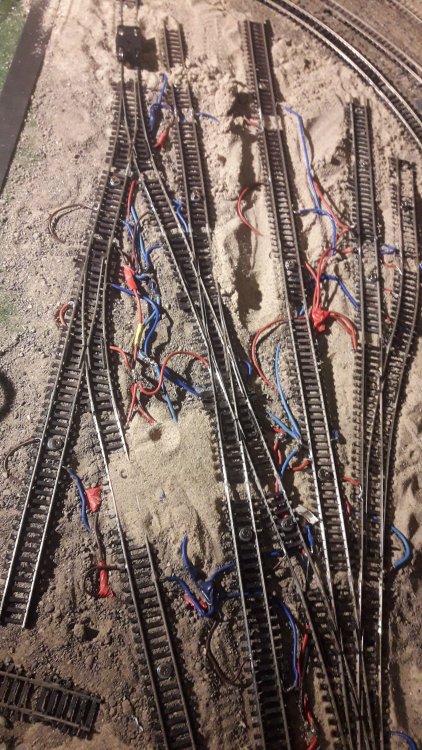
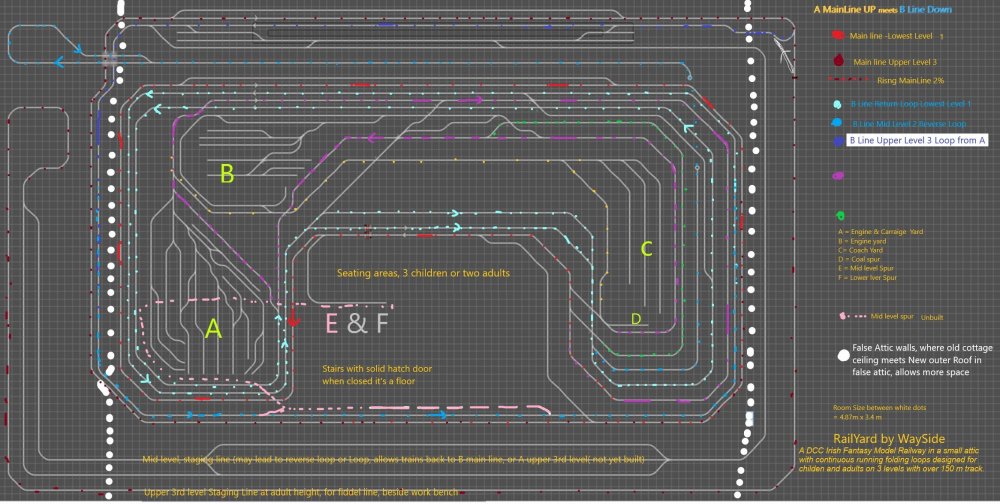
More, wiring the engine shed, the feeders go under the sand on top of base board. I really got going in Winter 2017, the design took two years to test and quite a bit of time Scarm railroad track planning which when i laid it out just didnt suit or run well, so i put heaps of time into laying the track freehand and abandoned the track plan. Knowing absolutely nothing about model rail, I had to imagine how the trains will travel, how they will operate, how many trains I want to have running at the same time without having to worry about crashes, especially over crossings. As the track was over an uneven surface, i started using sand to level the tracks. The design for children is based on the requirement for Not handling the models, so continuous running and having all trains on the track at all time so the kids would not lift the models of the rails, Next was the bus, once i got that sorted to a point, i stopped on the bus and plan to tidy it up only after all locos, all carriages and wagons are tested, just in case i have to tare stuff up again. On an American web site I read about what not to do, and some stuff you can do, including selective compression, say compressing 200 miles of the same scenery into 2 or three feet of landscape, says i 'why not selective compressed time'' ? events over time for different eras, as long as they are small, different parts of the layout can be different eras allowing me to run just about anything I decided that creating cameos of Irish landscapes and train history would be far more fun for the family than a fixed theme and as I had no modelling experience i didn't have the confidence to model a particular era or trainscape in the first place. My trains may run around Killiney bay in one corner, over Eskers in another, through Castlecomer coal yards, a bauxite mine somewhere else, and more ideas are developing. Personally I think having vignettes of the Sallins bridge train robbery and the ammonia train crash would be fun, any interesting small scene found through out Ireland and down through history that will fit in a small section of the layout, such as the Harcourt street crash, well at least a steam loco sticking out of the wall at the end of one station! There are heaps of wee cameos that this family can model. So far, Its taken two winters to get the layout running, so as yet we are not concerned about scenery. Anyway there's not much room as we decided to go against the grain and fill much of the space with track. Above the largest engine yard, much of this will be hidden by roof and an over head spur, marked in pink on the layout map. What not to do! Overcoming bad design issues: As well as not dropping feeders, or using conventional track underlay, my Benchwork is too wide, cos there's no crawl space to get under it, so I have designed layout to allow me to crawl over it hence the sand for stability, I can easily reach every corner to clean the tracks, jes, cleaning track takes time, but when I finish the build I suspect it will greatly improve the time spent cleaning track, without damaging the track. above, sand is spread, the wires are then pushed into the sand, below the finished ballast level. then diluted PVA at various strengths is poured. No workspace! well limited work space, but I read somewhere to have no dust = keep the work space separate, so its downstairs Limited operator space, the seating well, easily fits 3, and the staircase has a door over top so that the operators main space = 4, we had 5 people when I had 6 trains run with lots of carriages for the first time, theres not much space to move around each other Not enough room for scenery, correct, but as kids and derailments meant climbing over stuff scenery will all be on the outer tracks and walls or if on layout will be mostly movable, anyway scenery will be last thing and we have a crazy plan to put handles on larger pieces, 'just lift the whole scene off' Duplicate routes serving the same purpose, this was listed as a common error on many web sites, but my duplicate route serve as runarounds, passing sidings and storage yards for long trains.
- 22 replies
-
- surface mounted
- attic
-
(and 3 more)
Tagged with:
-
the brickwork on window suggests, window is an after thought, no cill may mean the upper window was made well after building was 1st built the bricks on the arch look older, and wouldhave been used to form arches and key stone V brick piller dont match, so it was added much later, when the rest was knocked. the stone mason was Joe Brady and his sister like raw onion sangers on rye, with home made pickle.
-
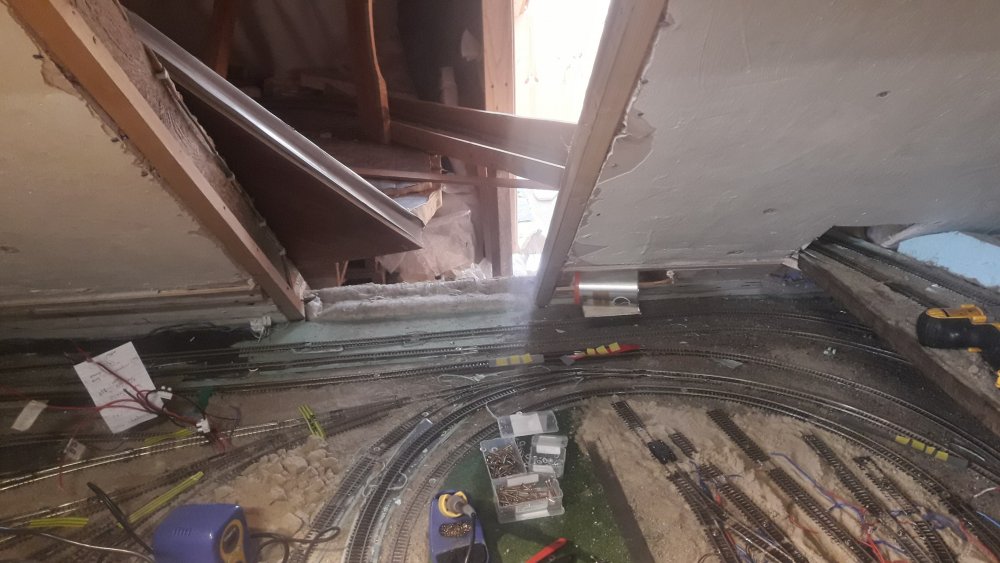
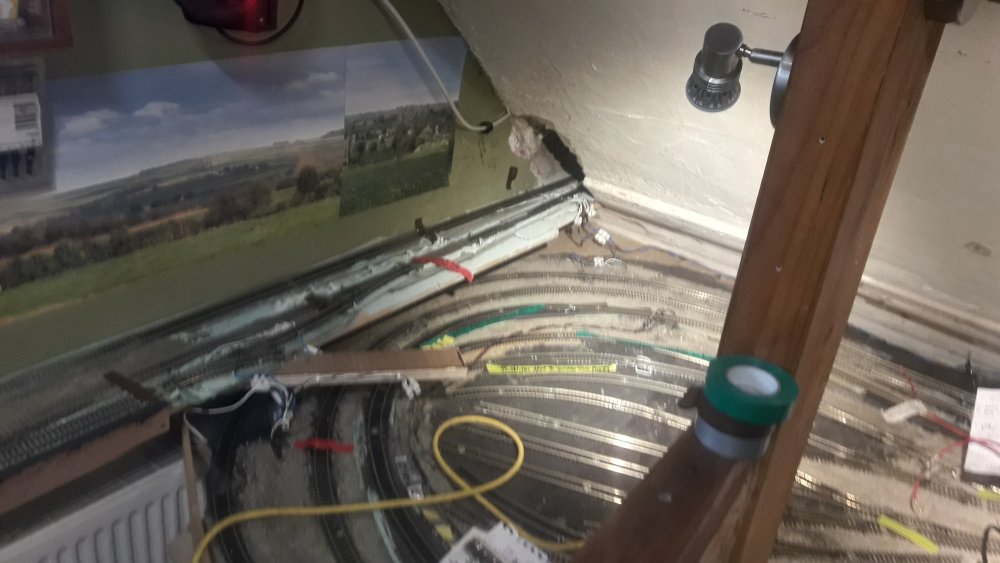
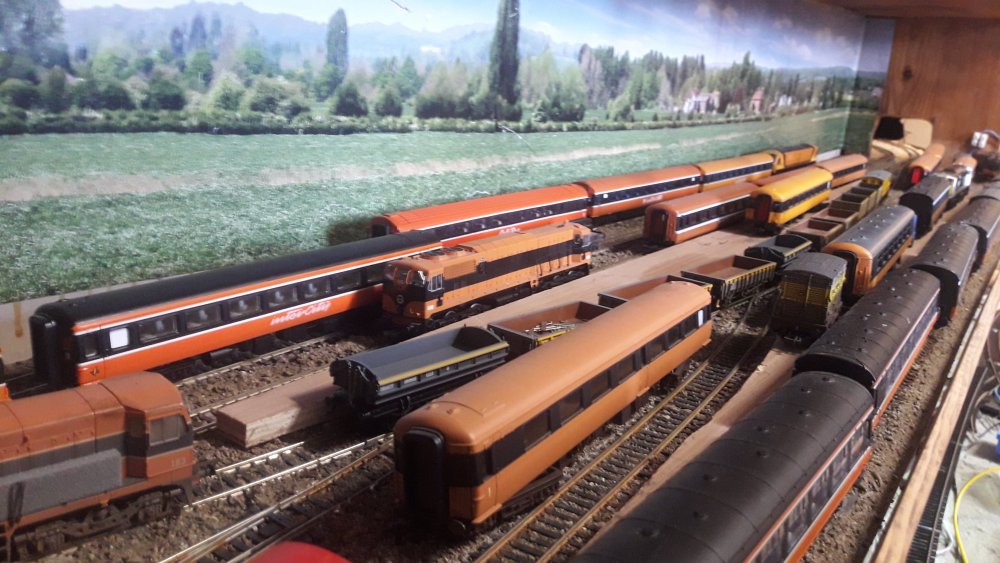
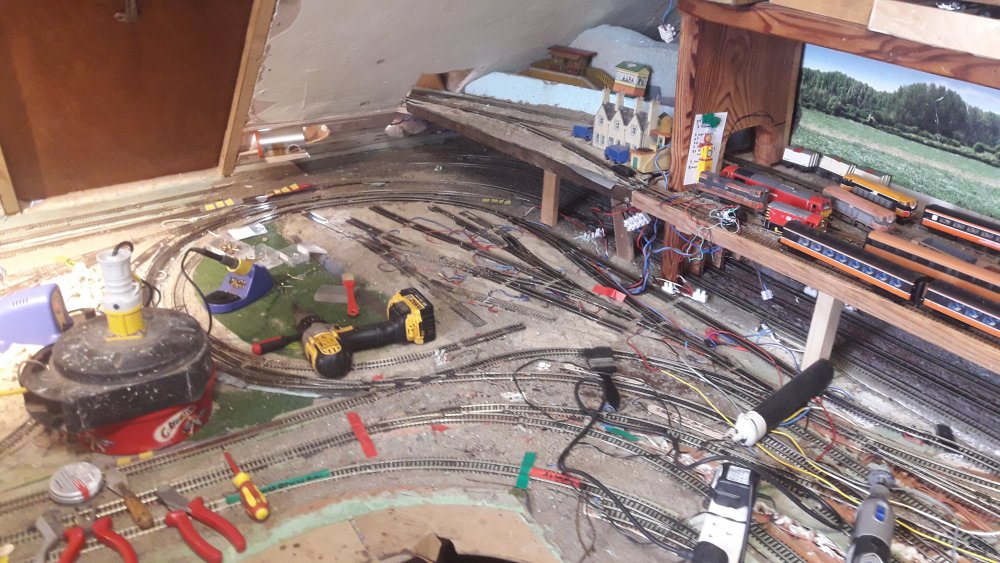
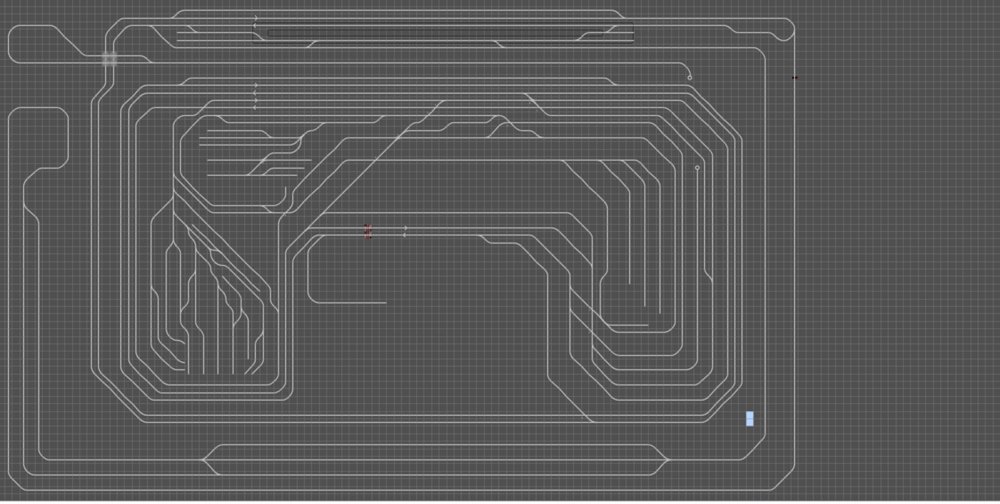
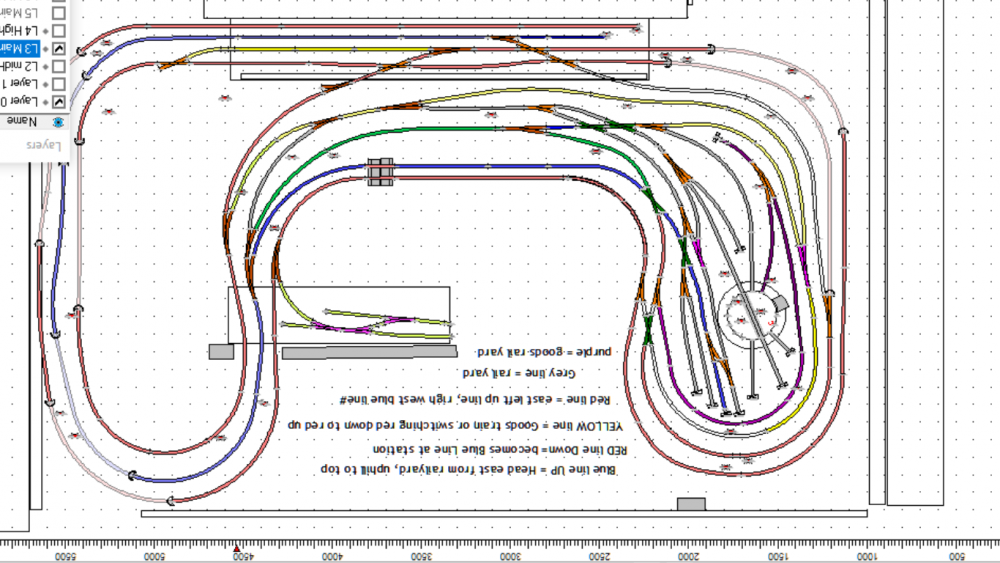
Musing of a newbe, I choose the name WaySide cos i new I had to approach my layout in a very unconventional way to get an unconventional track plan to work for young children in a tight space, i had to learn about all the rules of modelling then break some rules and no doubt upset experienced modellers. but hell, i build a successful business breaking every rule in the book, so what the heck and if and when i retire, i will have a huge work space up the garden to fill with trains if i still into it in ten years. indeed its on the same level as this room, so the train can run from here up to the shed, if I win the lotto!. Ignore the end off cut pic on wall, it will be covered by trees at the mouth of a tunnel, going into the false or hidden attic The hidden attic where the first and second level tracks have extra room to rise at 2% in a wide gentle arc. Yip i have to crawl over the layout to get in to build and clean track, done it so many times, that i have made it so I don't interfere with track. The landscape (pathway to hidden attic) is the green carpet under the soldering iron, thats where i have to crawl over. (suppose that will never get permanent modelling built on that section). I designed it so there is just three straight tracks near the doorway, as that its not going to get damaged if i do hit it, or have to walk on it. I also avoided having turnout bang smack in the middle of the walkway. there placed to both sides. The coffee jar on its side marks the 2nd level reverse loop, where its broken through the old ceiling. could be a long time before thats built as i only have winter to work, being a farmer and contractor. Its not that the attic gets hot in summer, , as the inner room is well insulated, the outter roof and sky light will get hot, so i took measures to insulate it and vent it as I plan to store my longest rakes in there on the track. Its easy to say, I should have done this, or do this or do that, but working in confined spaces in an small attic is not an easy job, This section on the 3rd level, will be a station, its one of the few places where the feeder wires are go through and under the baseboard its great for storing the different types of stock required for testing track while i work in other places on the layout, usually Lima models, strangely it a subject thats never discussed in online advice given to newbes, ie, when building in confined spaces, under eves and tight corners, its great to have cheap stock ready n close by to test tracks. When all is done, then i give the Murphy Models a run, way at the far end is the other side attic, the hidden track is 7 m loop at present. the track plan in the two hidden attics is not to scale so it fits on my laptop screen. another real problem when your sprawled out over the base board under those low ceilings in tight corners is accessing tools, they have to be around you within reach, so i built the track, starting with the furthest away corners, started with the A mainline up, and B main down, started close to the outer walls, and worked inwards. theres two loop sections on the track plan that are now redundant lines, as i needed them for testing tracks as i build the layout, but dont need them now, I suppose they are disused lines, very prototypical ! I was going to tare them up, but decided against it and will use them as sidings and storage tracks. and they will serve the kids well as that will keep their models to the lowest levels all within reach.
- 22 replies
-
- 1
-

-
- surface mounted
- attic
-
(and 3 more)
Tagged with:
-
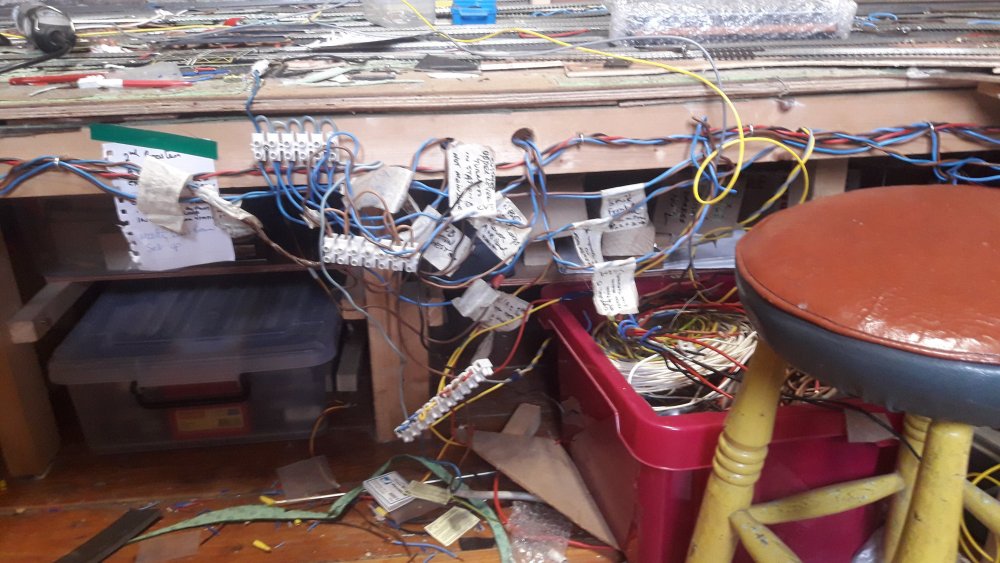
Track plan march 2019 After months of research, design, planning, testing, and Scarm track planner, I decided to ignore certain 'must dos' recommended in the model rail world as the attic space i have has a low apex ceiling and required an alternative to the standard height for base boards and dropper wiring. If my layout was to fit, my lowest level baseboard would have to be 50cm off the floor. I had no intention of crawling under base boards to wire the 250 different pieces of track all of which have wires attached. And just as well, for i discovered something that newbees will be very interested to hear, above the board wiring is far more flexible and forgiving as you build, especially in difficult to reach places. For when I wired my mid and upper levels, i used tradition feeders dropping through the base board, which meant no room for mistakes, they were unforgiving and newbees make lots of mistakes. after building the track i then used Itrain for the layout below. Railyard is a twice runaround folded dogbone continuous loop on 3 levels with lapped and passing siding type features that also act as storage and branch lines. There's two main stations and one branch and a spur to a rocket launcher for the 8 years old. To-date, 70% of track is laid. I added extra crossovers to insure trains just cant be run at the same speed all the time, so the children will need to drive them to avoid crashing. I also enjoyed driving over dodgy laid tracks, such as a bord na mona bog train would, so some of the layout (5%) needs very careful driving skills, Kaydee couplers wont work well on my layout, due to the bumps, Baseboards, 9x5, 9x5.5 connected in middle with 4 x 6 = basic shape |_| ad a mainline track on the outside. Built for children and adults in a small attic space of 16'x10' (4.87m x 3.4m), excluding a few breakouts through the low ceilings into sub attic space, RailYard has well over 100 metres of code 100 track. The layout has a one continuous outer main line, that folds back on itself: out/up and down/back, mainly as as two lanes with the end a folding section creating four lanes in some parts, The upper levels when built will have the more prototypical one main line and siding. The layout has an inner goods line, a few small spurs, 2 engine yards and 1 small short yard for coach rakes and a continuous hidden long track for 'first in first out' storage, Grades include 1cm and 2cm per 1m In time I plan to build a 3 lane fiddle yard and a viaduct. The aim with designing for young children is that there is enough track that no loco or carriage needs to be lifted off the track, to reduce handling, therefore once a rake is constructed it will not be deconstructed unless its Lima models, which are more robust.
- 22 replies
-
- surface mounted
- attic
-
(and 3 more)
Tagged with:
-
just googled all the alternatives, in that case, you have only one choice, I suggest... Start teaching them about the intricacies of model rail, Personally i would start with the difference tween insuf' and electrofrog, quickly move to what you consider the best method of block detection and occupancy, do an hour of which cab is best?, a few hours on what the best ballast should interest them, but the killer blow that will send them all to sleep is the seemingly age old soapbox rant on invoking which is best, end to end or loops, when the poor critters are bamboozled introduce them to weathering, then kit bashing and to nail the coffin with whats live on the disused prototype, if that dont work, read them train time tables, and before you say it, or read them my posts on IRM, thers always leaving lead a lead based solder again the soldering iron and closed the windows seal the vents and there dead in moments, do you know professionals can smoke them out with nasty firework type slow burning chemicals, there used in glasshouses to destroy all life, you could return about a week later, the smell the smoke the products leave is cruel, lasts about two weeks.
-
Kieran , Gone or not from IRM, i hope you reconsider, your wonderful layout has inspired me, especially the greenery, it made you layout typically Irish in the Western European Flora sense, you achieved have that 'lush' look with ground cover, hedges and tall trees, I had pondered for months if i would use all the moss and twigs I had been collecting, having just visited this thread for the first time and seen your amazing layout and also your amazing weathering develop over all the years, it has inspired me to go green and cover the entire layout with foliage and then start weathering my stock , if ever I get the time. Gone or not THANK YOU.
-
enjoyed this thread
-
more please. love your brass models,
-
Scahalane your comment on Silverfish made me think, Not that I have them in house yet, too many spiders, *o* me thinks if i added borax to the PVA, it would probably keep them from eating it.
-
Ernies Massive Irish 1930's to 2005 Photo Archive
WaYSidE replied to Glenderg's topic in Photos & Videos of the Prototype
something i can model,, it looks very like my layout after the kids .... -
Can we see the sample v the final approved, in same pic Will you raffle the sample off to us lot ? what about awarding it to best model railway layout or kit build on IRM what that? "duck down WaySide incoming"........at least this time i can say I deserved the Ire of IRM's angry mark
-
Lesson learned - touchscreen v physical cab for throttle
WaYSidE replied to Noel's question in DCC, Electrics and Electronics
Noel i only address a loco or five as i test track and layout, wont be doing any of the good models so i not up there yet, but i re-address a working loco on 123 nd 124, worked fine suggestions, just reboot the Z21, with those address deleted and re-prog , or download the newer app, -
track occupation, need advice
WaYSidE replied to WaYSidE's question in DCC, Electrics and Electronics
might as well talk to my self this was on Noels topic, wrong place, so i moved it here there are heaps of cheap secondhand android phones with good batteries available, get two, have one plugged in n turned off for fast charge, use the other. there is lots of DCC control systems , each will suit different users requirements , my techie son tells me the technology is 20 years old, watch out for amps 3 v 5 v 8amp, it seems in many cases the boosters need to be same amps as controller, some controllers have built in booster, others dont i reckon that in a few years all new locos will be battery operated, so for newbees voltage may not be an issue. nor wiring, even household electrical items such as wall switches and lights etc have chips in them these days. they use tech similar to DCC signal . ifs its any consolation, i am stuck on track occupancy , having wired the main layout bus in power blocks , then to find for the occupancy blocks the bus - power blocks need to be broken down into many sub blocks, which are different to the usual circuit blocks for preventing turnout shorting, so this newbes advice for any uninvested newbe is do not wire the entire layout on every track, just get the power flowing to each main block and then when everything is right about the track,drive trains and see where you will need the detectors and occupancy blocks ,, then start adding track occupancy blocks, in-advance of buying them, as there is so much to consider and so much choice, in some systems its gaps on one rail for others two rails are gapped, in other sysems the detectors aint track dependent although they send dcc signals to controllers to control lights, track sections, turnout and signals and more, as my layout grew i started gapping every turnout on all rails, using 6 insulated joiners, 8 for cross overs, why, cos it a pain lifting everything again and since track 'occult-paction' is expensive you may only do a wee bit at a time, so the price of a few rail joiners dosent hurt, and you can paint the insulated joiners to hide them if they upset you, or melt them to have one one rail re-gapped by soldering the tracks at that point, surprisingly the hornby black rail joiners are very strong and work best for me. the only hornby product i recommend not that a recommendation from this newbe is worth ballast. ah Ballast, i now use washed dried play sand under all my tracks not underlay, as all my wires are above board, unlike my self', this allows the wires flexibility, Long live DCC until battery operated locos rule on un-wired tracks with blue tooth enabled infra red detectors..- 7 replies
-
- loss of hair
- rake of questions
-
(and 3 more)
Tagged with:
-
Lesson learned - touchscreen v physical cab for throttle
WaYSidE replied to Noel's question in DCC, Electrics and Electronics
there are heaps of cheap secondhand android phones with good batteries available, get two, have one plugged in n turned off for fast charge, use the other. there is lots of DCC control systems , each will suit different users requirements , my techie son tells me the technology is 20 years old, watch out for amps 3 v 5 v 8amp, it seems in many cases the boosters need to be same amps as controller, some controllers have built in booster, others dont i reckon that in a few years all new locos will be battery operated, so for newbees voltage may not be an issue. nor wiring, even household electrical items such as wall switches and lights etc have chips in them these days. they use tech similar to DCC signal . ifs its any consolation, i am stuck on track occupancy , having wired the main layout bus in power blocks , then to find for the occupancy blocks the bus - power blocks need to be broken down into many sub blocks, which are different to the usual circuit blocks for preventing turnout shorting, so this newbes advice for any uninvested newbe is do not wire the entire layout on every track, just get the power flowing to each main block and then when everything is right about the track,drive trains and see where you will need the detectors and occupancy blocks ,, then start adding track occupancy blocks, in-advance of buying them, as there is so much to consider and so much choice, in some systems its gaps on one rail for others two rails are gapped, in other sysems the detectors aint track dependent although they send dcc signals to controllers to control lights, track sections, turnout and signals and more, as my layout grew i started gapping every turnout on all rails, using 6 insulated joiners, 8 for cross overs, why, cos it a pain lifting everything again and since track 'occult-paction' is expensive you may only do a wee bit at a time, so the price of a few rail joiners dosent hurt, and you can paint the insulated joiners to hide them if they upset you, or melt them to have one one rail re-gapped by soldering the tracks at that point, surprisingly the hornby black rail joiners are very strong and work best for me. the only hornby product i recommend not that a recommendation from this newbe is worth ballast. ah Ballast, i now use washed dried play sand under all my tracks not underlay, as all my wires are above board, unlike my self', this allows the wires flexibility, Long live DCC until battery operated locos rule on un-wired tracks with blue tooth enabled infra red detectors.. sorry Noel, i copied this and moved it to my DCC thread, probably outta place here -
no need, spray it then remove it, much tastier
-
last of the summer Whiners between ya all, ye should write a comedy, youd have thousands new train geeks, on the site , following yar every move. what a side splitting post, oulfellas standing at a deserted station, nothing to do with yourselves, watching pigeons and aliens but ye break me shxyxt laughing . its far better than ' last of the summer Whiners. love and best wishes, to ye all. thank dog..its in Laois, for only here would we understand...
-
The end of another Line, Google is shutting down Google+ for consumer (personal) accounts on 2 April 2019, many train photo archives will no longer be available, download those pics now On 2 April, 2019 Google+ accounts and any Google+ pages that you've created will be shut down and google will begin deleting content from consumer Google+ accounts. Photos and videos from Google+ in your album archive and on your Google+ pages will also be deleted. You can download and save your content. Just make sure that you do this before April. Please note that photos and videos backed up in Google Photos will not be deleted. https://support.google.com/plus/answer/9195133?hl=en-GB
-
the 23rd leaf on the right hand tree, is it outta place, love the gable end weathering me thinks 200 pigeons on a white stained roof would fit perfect then i asks me self would he dare graffiti the walls?
-
Lesson learned - touchscreen v physical cab for throttle
WaYSidE replied to Noel's question in DCC, Electrics and Electronics
Hi, after my Select packed in within short time of getting it, , i spent along time , researching what next, and ended up with Z21, since I wasnt used to any other controler, i love it, esp with MM engines on slow, but i not yet doing kadee couplers, i learnt fast to have very clean screen on mobile, I also got new multimas, but since it arrived with damaged screen it took 12 months to get replaced, and still in box as i doing major works trying to get layout working, so no controlling since before December. There are at least two downloadable apps for Z21, and I use both, as we have 4 cabs, 3 phones 1 laptop, the older app has pic of red train on icon, the new app just black, its better on laptop, not so good on mobile. far less responsive on older androids also the Z21 is reported not so good as accessory driver, or at least its not a nmra compliant accessory software as it requires plus4 to cv address, so youtubers are using dr5000 with it, to bridge the problem and avoide shorts on expensive z21, as i havent laid any accessory's yet i dont know, nor its also not ideal for hornby as loco address are +4, ( hornby address cv 7 = cv11 on Z21) which sorta explained how every time we got a short, the hornby steam loco from santa, would take off at high speed, on re-addressing it , it sorta solved the issue, partially, noel, someday , with Z21 you will be able to log onto my layout and drive my trains with Z21 all from your place where ever you are, With the Z21 and a camera train in any country such as USA , i should be able to join USA club and drive a train on their layout - all the way from Ireland, -
why not sell beer, by the reaction you got from everyone so far, you could sell day tickets (as already suggested/requested) to visit your layout, and charge extra for d beer, if you rent out a net to catch silver fish as well, Beer, trains and fishing, .. Cork would never be so good
-
Scahalane, when I got home tonight, I had a look at all 5 pages, of your layout on a better screen n faster upload, i read every comment going back since u started, like everyone else i am totally gobsmacked n amazed not only at your skills, the layout design, it's build, more so the atmosphere you have created, thank you for sharing, then I realised my photo joke may be taken in bad taste, I didn't know you had used photos, I didn't mean that at all at all at all, ,, please forgive. You started with H' Select controller, admitted you needed to fast track learn Dcc, wiring took ages, n then got side tracked running trains,,, that gives me so much hope. Thanks I love what you done, the pic with the steps tween the houses perfectly describes your attic layout, Stairway to heaven.
-
Have you no consideration, as to how most of the rest of us are feeling right now, All I see are old prototype photos placed under someones attic. Wheres the model layout you promised? You even went to the trouble of having jars of scenics on a shelf to make us believe its a model. garage is sublime
-
anything but orange, you have convinced me to seriously consider this livery. love the grime of second pic.
.png.c363cdf5c3fb7955cd92a55eb6dbbae0.png)
