David Holman
-
Posts
4,359 -
Joined
-
Last visited
-
Days Won
117
Content Type
Profiles
Forums
Events
Gallery
Blogs
Everything posted by David Holman
-
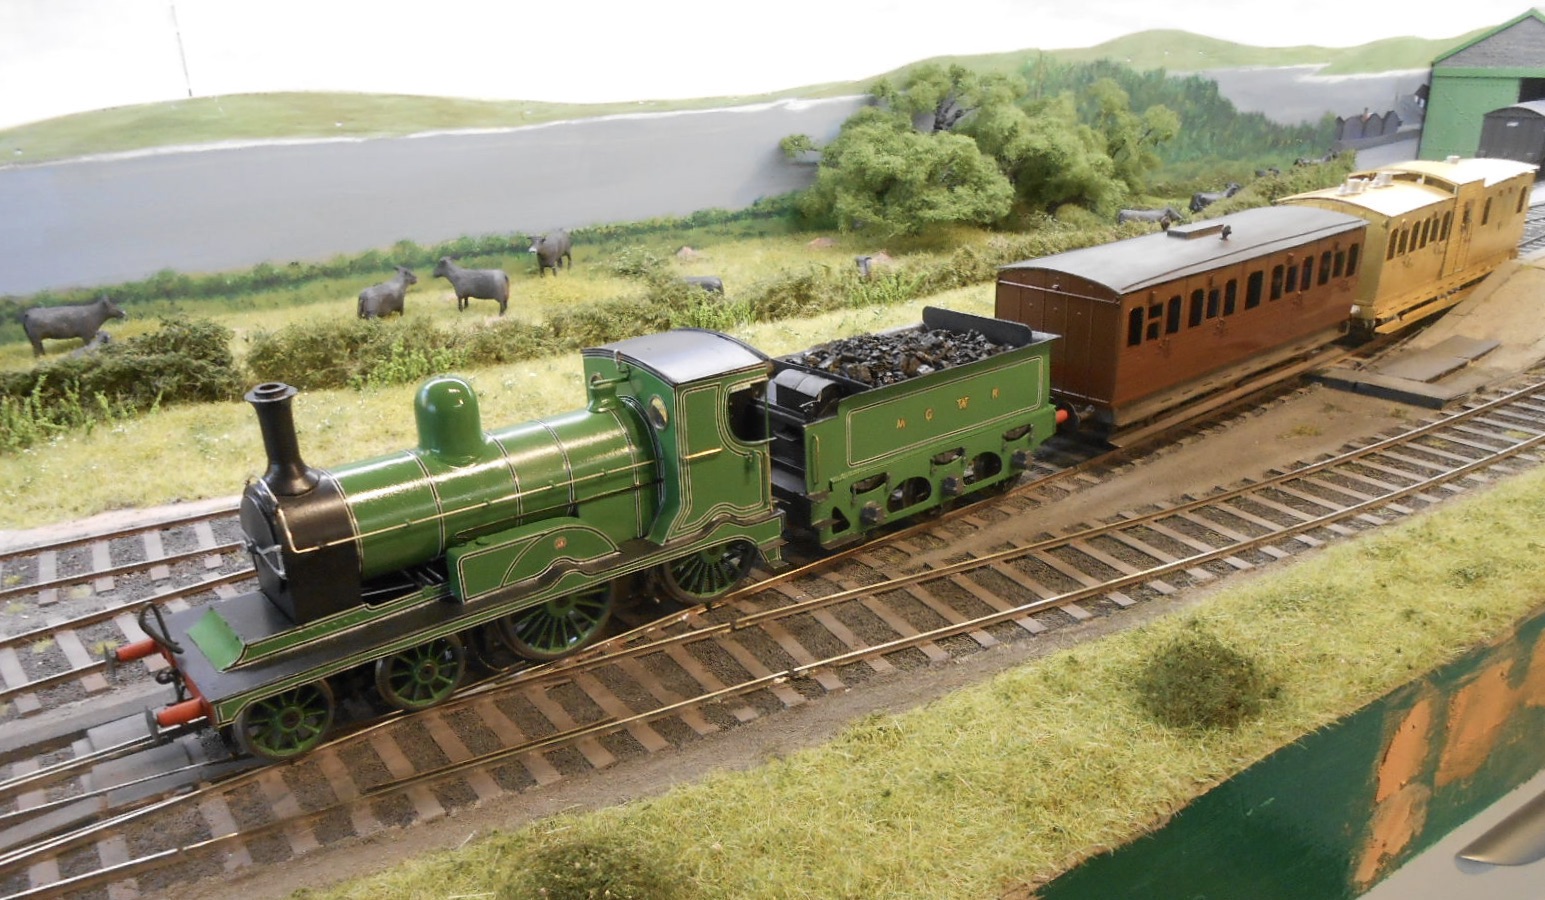
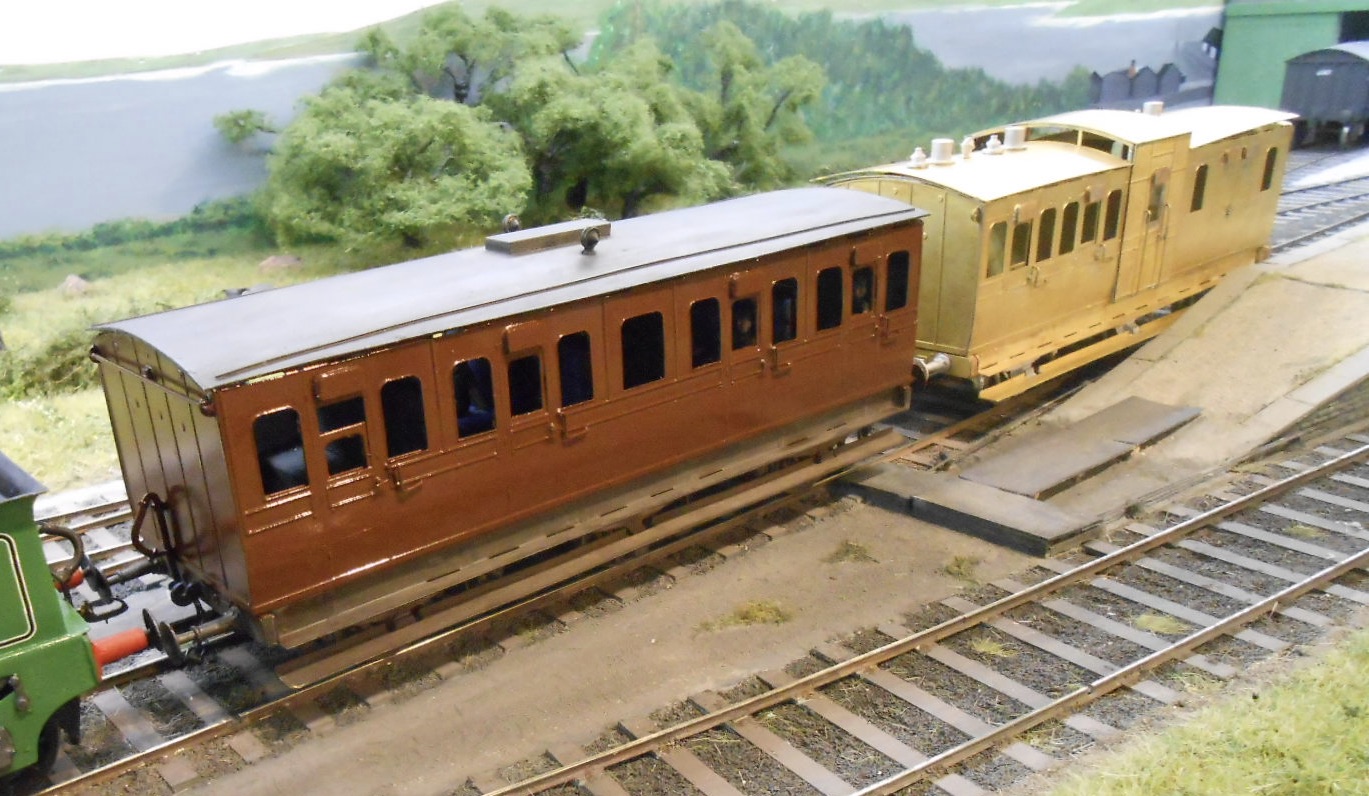
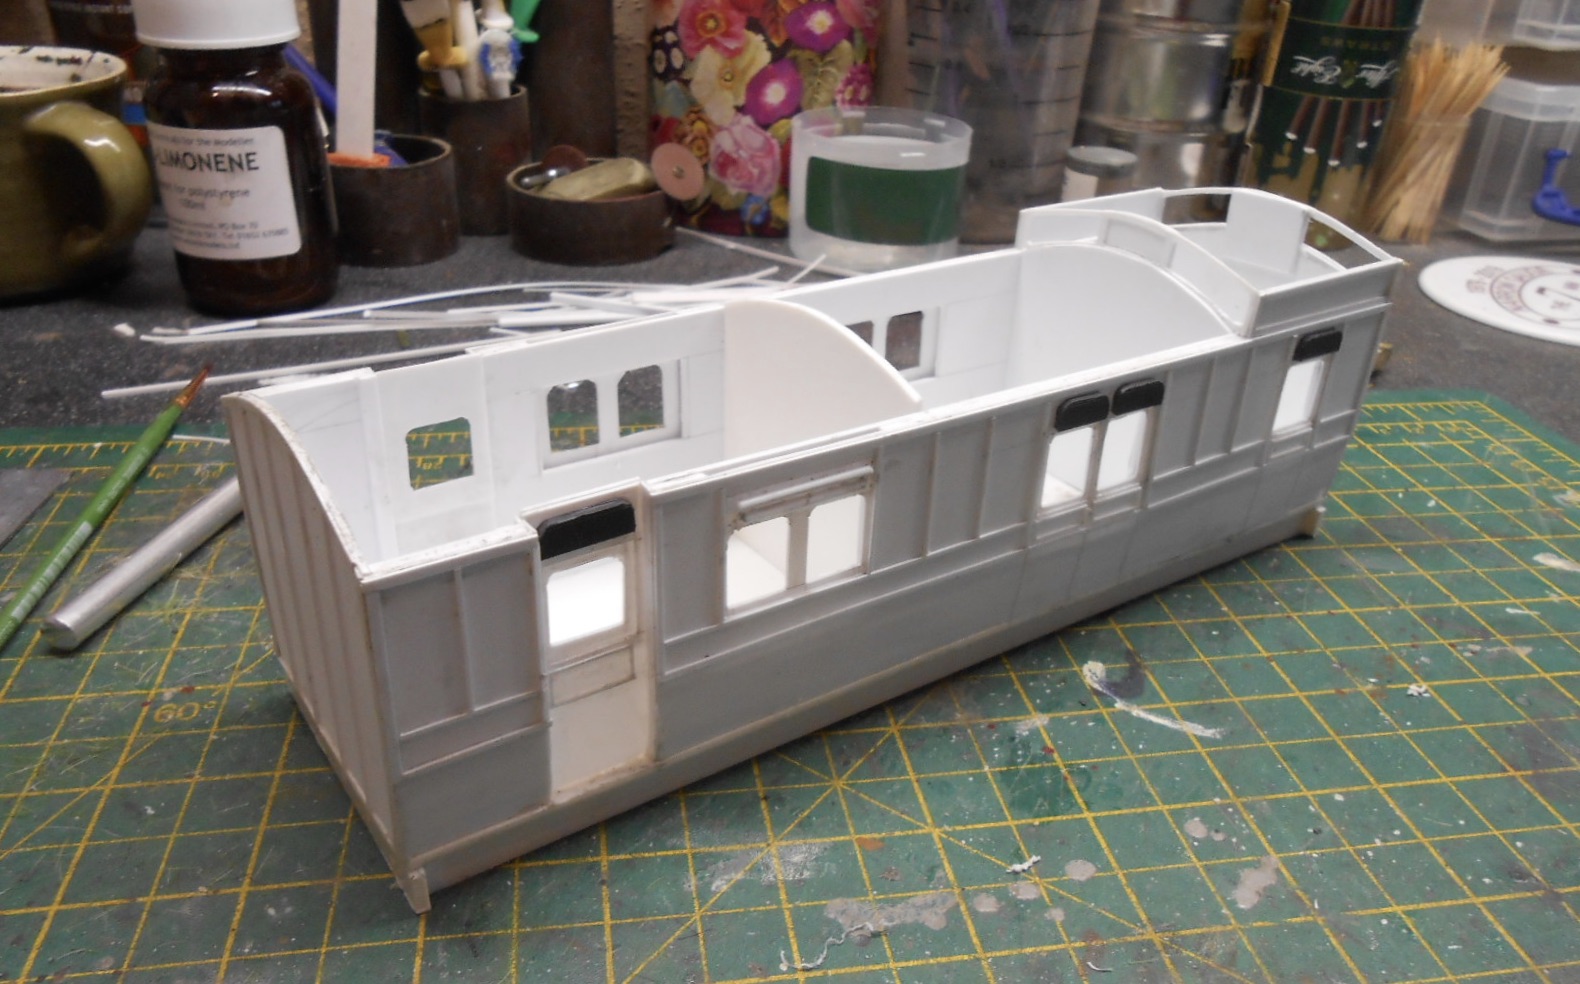
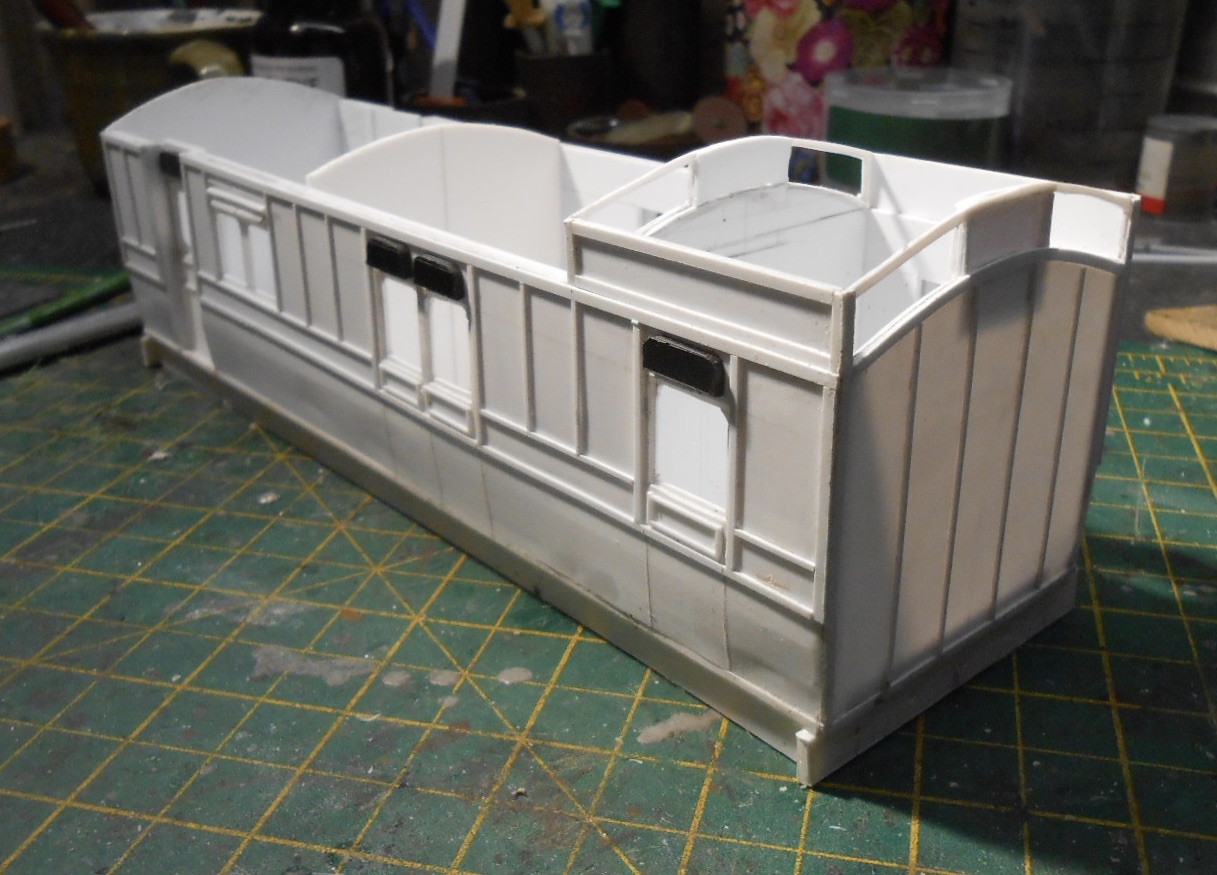
A slight change of plan with the make up of the mail train - I'd been seriously considering making it an all parcels train, but in the end decided to go on the 'traditional' route, with a 1st/2nd composite, an all third and a passenger luggage brake van. This means the centre birdcage brake third is probably going to end up working in my 1950s period. So, what I've done is to repaint my 1950s composite in what I hope is a reasonable representation of MGWR brown - and await, with baited breath as to whether it passes muster! It is a Hycote Ford Russet Brown, by the way. Being back dated, the coach roof needs altering to include the lamp tops and the glazing still needs to be put back, but couldn't resist posing it with the D16. Meanwhile, have made a start on the 'passenger luggage brake van'. This is a scratchbuilt, plastikard body, which will eventually go on a standard Alphagraphix chassis. The vehicle itself is No 80, which has a birdcage roof on one end, rather than the centre and am using IRRS drawing No 43 which shows it had a mail compartment at the other end, with luggage in the middle. Not sure whether this means it had equipment for picking up/dropping off mail bags on the move, so would be grateful for any info on this, please. It certainly appears so, as the mail door is both inset and inward opening. However, I certainly won't be disappointed if I don't have to make the gear! The prototype seems ideal for my Belmullet line, with the train as a whole able to cater for all passenger classes, mails and a fair amount of luggage space. Construction has followed my usual practice of a 20thou outer skin, over a 40 thou inner, with strips of 40 thou at waist and cantrail level to enable the lower tumblehome. Microstrip deals with the panelling.

- 124 replies
-
- 11
-

-

-
Seems that the only source of 7mm whitemetal castings are JPL Models in Manchester.
-
Correct! Another preservation opportunity gone missing - if only.
-
Have been trying to get hold of some whitemetal W-iron/axlebox/spring castings and discovered that Graham Jones of Northants Model Railway Supplies succumbed to the dreaded Covid at the end of January. NMRS produce a fine range of whitemetal castings, including stuff like buffers and cab fittings and Graham was always friendly and helpful, so we can only hope his business will be taken on by someone else. Another sad loss.
-
LARNE CABIN'S GNR(I) P2 Parcel Van Workbench
David Holman replied to LARNE CABIN's topic in Workbench
Looking great, but never underestimate how long it takes to build a coach - a bogie like this could take nearly as long as a loco. Looks worth it though! -
Has there been any OO/HO model trains produced with operational doors?
David Holman replied to ShaneC's question in Questions & Answers
That's the one! -
Has there been any OO/HO model trains produced with operational doors?
David Holman replied to ShaneC's question in Questions & Answers
Remember seeing a Dutch or Belgian layout which not only featured opening doors, but passengers getting on and off too! It was a sort of puppet theatre type layout - small/narrow, but deep. The 'train' was a single railcar, which shuttled back and forth. At the front it was large scale (hence the opening doors/animation), then it disappeared off scene, reappearing as a smaller scale model going the other way, repeating several times until it must have been N or Z at the back. The scenery complimented the gradual reduction in scales. It was wonderful to watch, being set at eye level, while hidden underneath was a plethora of electronics of course! -
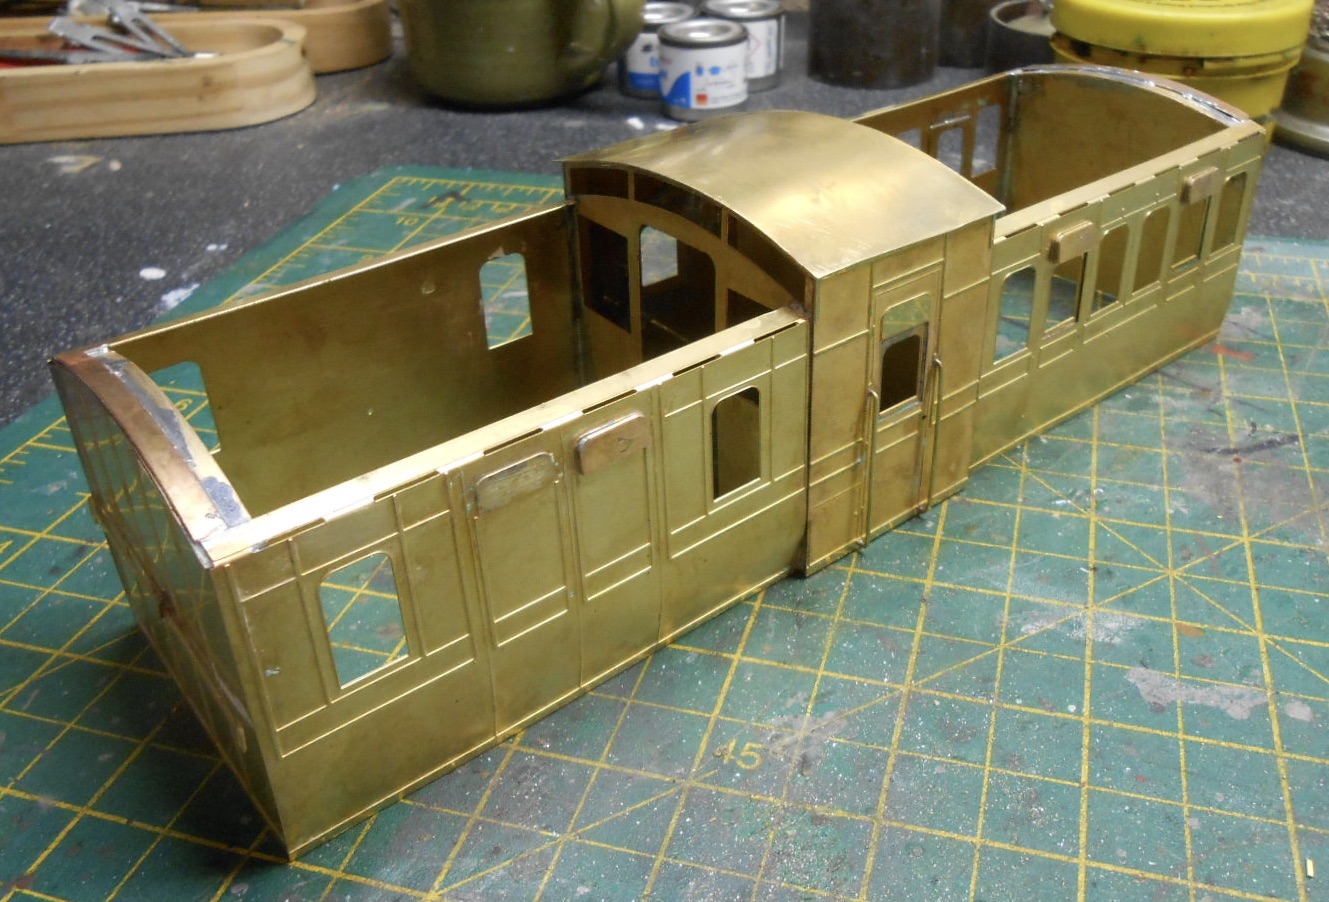
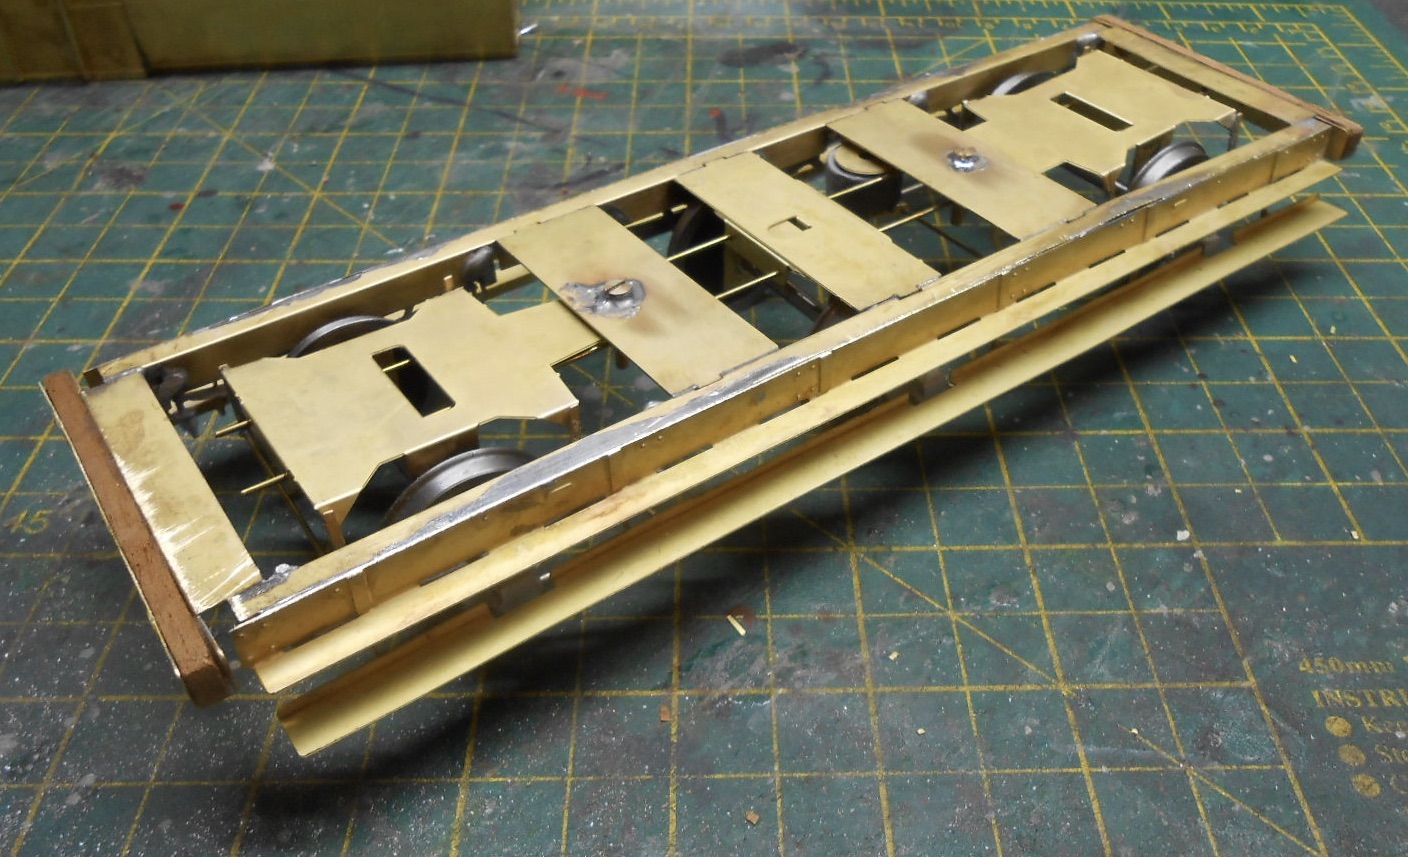
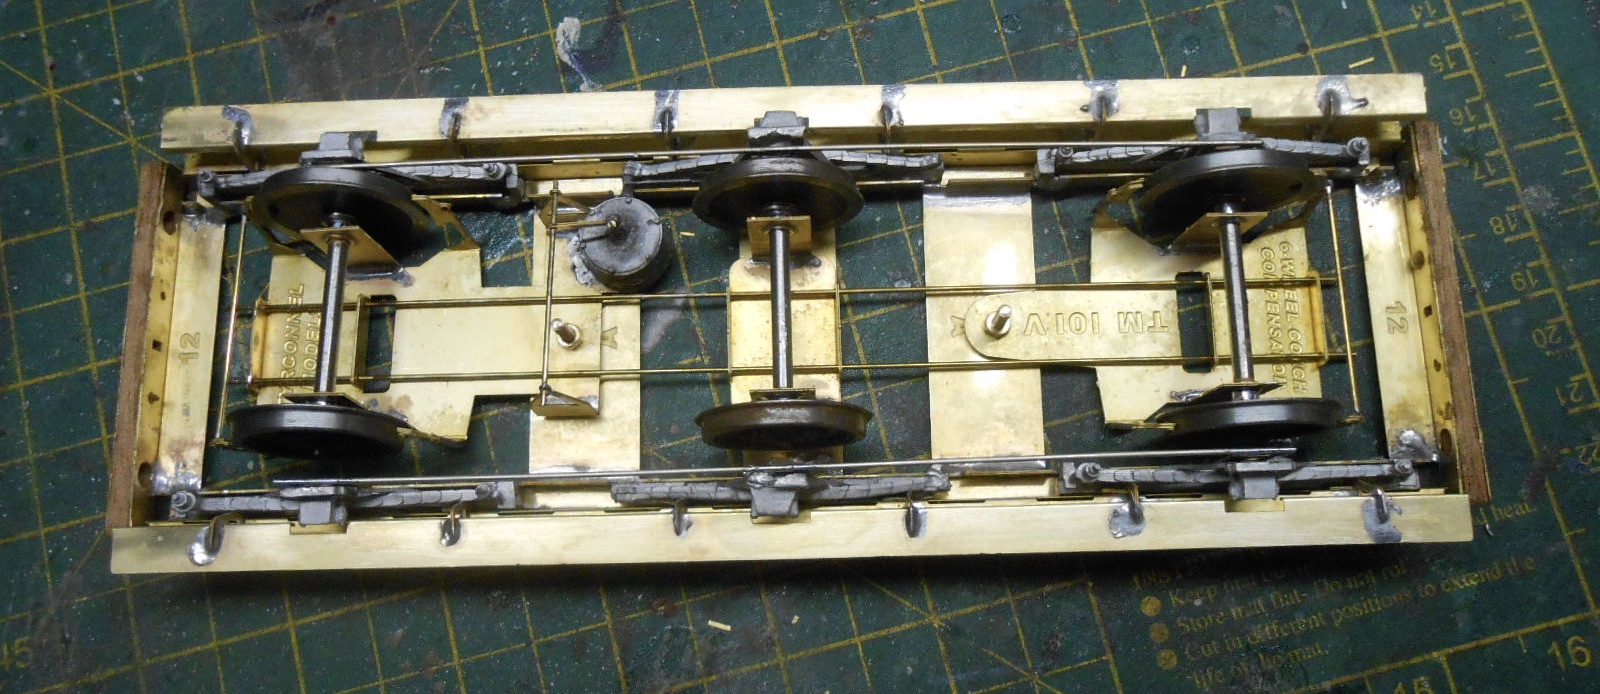
After the [mostly] enjoyable marathon that has been the construction of Wolf Dog, the loco has been put to one side, until the number and name plates arrive. There are a couple of finishing off jobs still to do, but I'm saving them for now. So, on to the train! By and large, I do not have drawers full of unmade kits, but I did buy two Alphagraphix/Tyrconnel six wheelers for this project, along with a couple of six wheel chassis kits from the same source. One coach kit is a birdcage brake third, the other is an all third. At the moment, I may not use the latter, as I've always liked the idea of 'non-passenger' coaching stock. In addition, the Tyrconnel six wheelers are quite heavy and though my G2 2-4-0 will pull three of them, it is a bit of a struggle and I fancy it will be the same for Wolf Dog. Hence am going to leave the all third for now and scratch build a full brake and a TPO, using plastikard bodies, which will hopefully be a bit lighter. One of the reasons for the proposed line[s] to Belmullet, was the idea of Canadian Pacific Mail Steamers calling there, with parcels and letters then being hurried forward by rail, probably gaining at least a day over the sea route. Maybe passengers might have wanted to do the same, but I suspect that would require some first class accommodation, so instead this is very much just a mail train, with just two compartments [seating up to 24] in the brake third. So it was this that I started on first and in the space of four afternoons, or about 10 hours modelling, the kit is largely complete. The model is far from finished though, because coach kits required a lot of detailing and this is no exception. I mostly just followed the instructions which in typical Alphagraphix fashion are not always conventional, but certainly work - a tribute to Roger Cromblehome's clever thinking. The first thing to me made is the birdcage compartment, after which the passenger and guard's compartments are tacked on either side. At first sight, it seems like a recipe for nothing to line up straight, but everything does, as long as it is assembled on a nice plate surface. The same goes for the chassis, where, rather than using a solid piece of brass or plastic as a floor to build the sole bars on to, instead, you make up a sort of ladder from, and then everything hangs from that. The only downside I've found is that this frame is a scale foot too short for the body, probably because this coach is 31ft long over the headstocks, as opposed to the standard 30 ft of most other Midland six wheelers. Easily sorted with a small fillet in each corner. The final part of the kit is the 'Cleminson' type chassis, which uses two lengths of 0.9mm brass wire to enable the three axle units to flex. So far, so good and it seems to roll well enough.
-
Thanks John. Kicking myself now, because was at all the Chatham Shows in the Dockyard, right from the start, yet have no memory of this fabulous layout. Trawl the archives folks, it would be great to learn more of this master builder and his work. A reminder too of Brian Monaghan's fantastic photography.
-
Just been talking to Gordon Gravett who tells me that Dave Walker died recently. Only met him once, at the St Albans show a few years back, but he was a very talented modeller who had a spell doing Irish broad gauge in the period when it was Richard Chown, Tony Miles and not many others. He subsequently moved on to other railways, but feel sure there will be folk here who will know of his work and fill in some details.
-
Nice one. Will certainly look forward to seeing it in situ.
-
Would you buy a book (or series of books) on Irish Railway Wagons?
David Holman replied to Bumble_Bee's question in Questions & Answers
Fantastic, sounds great! -
LARNE CABIN'S GNR(I) P2 Parcel Van Workbench
David Holman replied to LARNE CABIN's topic in Workbench
Great start and an interesting prototype. One to watch. -
A little gem. Continues to amaze me how plain, ugly even, buildings can make such attractive models.
-
Would you buy a book (or series of books) on Irish Railway Wagons?
David Holman replied to Bumble_Bee's question in Questions & Answers
Yes, absolutely! On this side of the water, there are specific wagon books for almost any railway you could choose. Not sure there is a single book of any sort simply devoted to Irish wagons. For me, there are two possible threads - modern wagons, that are increasingly well served by rtr models and the mostly four wheel types that go back to the birth of the railways. For any modeller of the 1950s or earlier, the latter would be really valuable, especially if there were portrait type photos, rather than trying to peer into the background of the usual three quarters view of trains going by. Side and end view drawings would be the icing on the cake, while adding numbering and livery details would be the cherry on top. As for what to include, much as unusual types can be interesting, the standard types from each of the main companies would be the most useful and valuable. I would definitely buy such a book. -
Fine looking train in a fine looking setting!
-
The crest is from a Fox Transfer sheet of South Eastern and Chatham coach insignia.
-
A friend of mine at the Chatham Club does his own kits and is steadily broadening his portfolio. Recently asked him about the cost of producing a kit and have copied his comments below: " If I was to do a run of 20 kits to sell to whoever and was sure I could sell 20, the price per kit would be around £275 - £300. If it was more like a dozen would sell, the price would have to go up to nearer £400 and if only five, more like £700. This would be a complete kit with all but couplings included. The etchers and casters are all running way behind at the moment and quoting times like 3 to 6 months for a new etch to be processed and samples produced. It helps if there was another loco that used similar parts, or shared the tender, this is often a good way to make something viable as 2 kits can be produced with only 1 1/2 times the work. " So, the moral of the story seems to be the more you sell, the cheaper it becomes, while to risk to small volume producers can be considerable unless they are sure they can sell what they produce. Quote
-
A fine compliment to that well laid track!
-
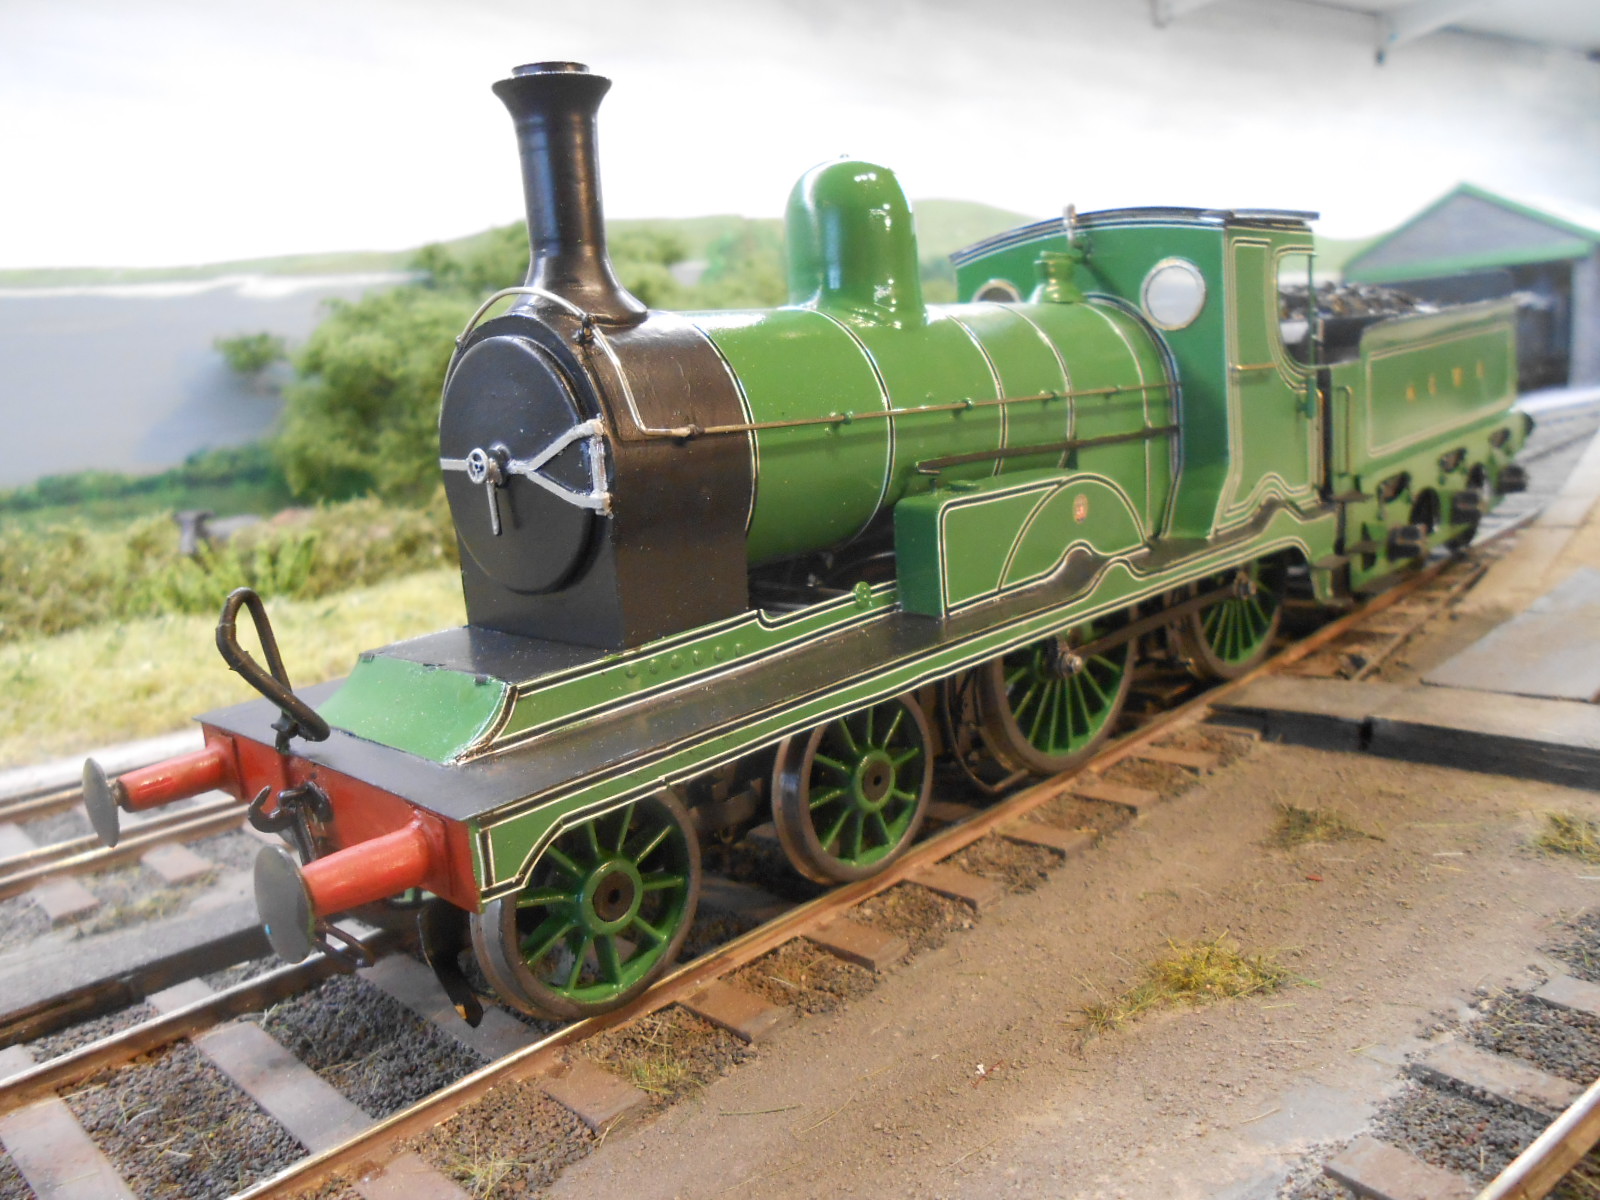
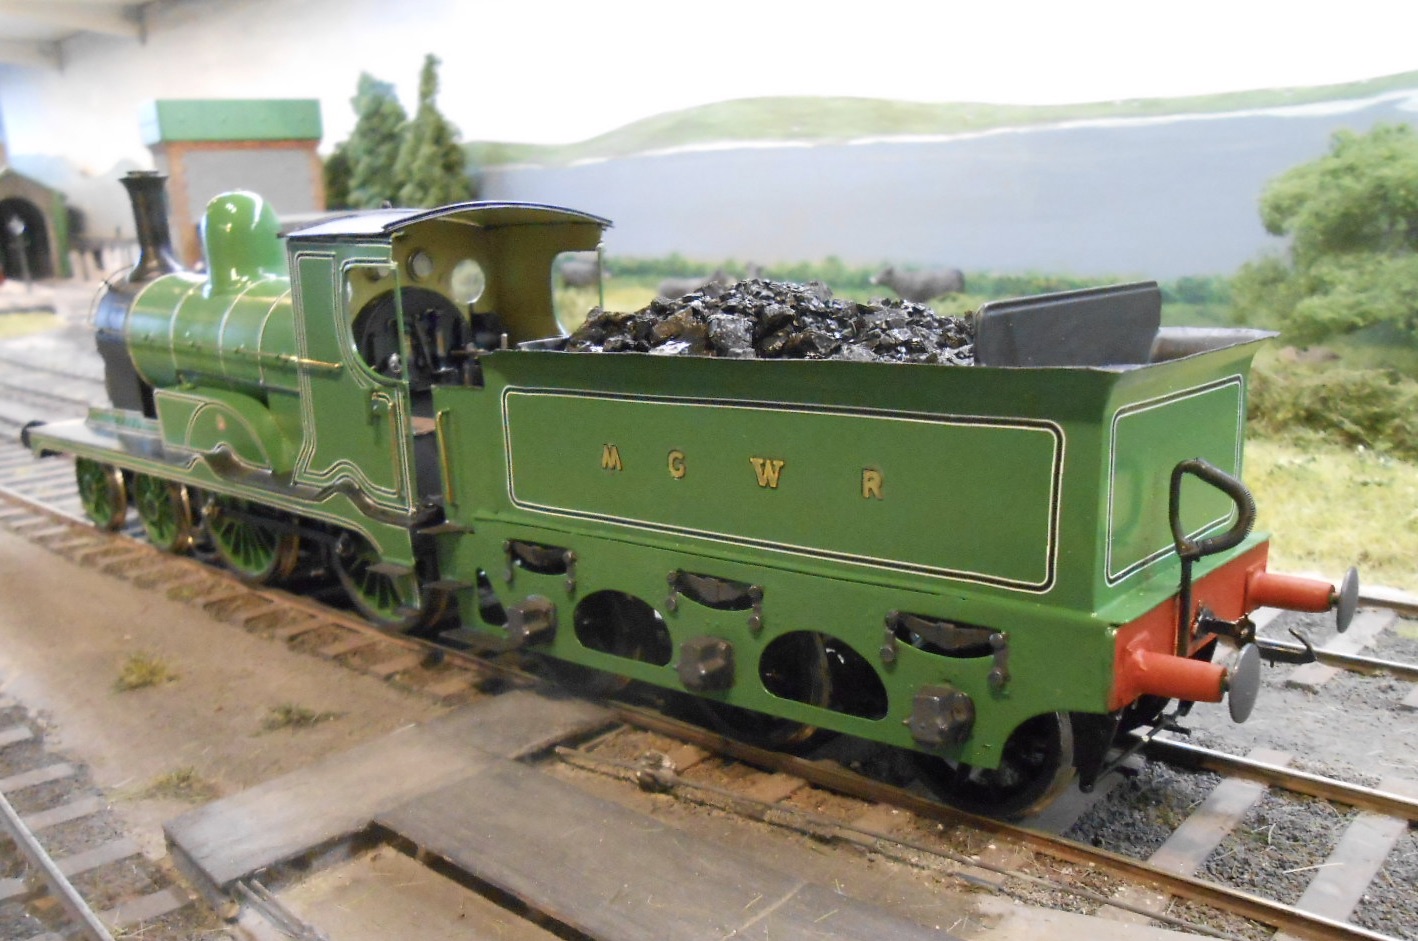
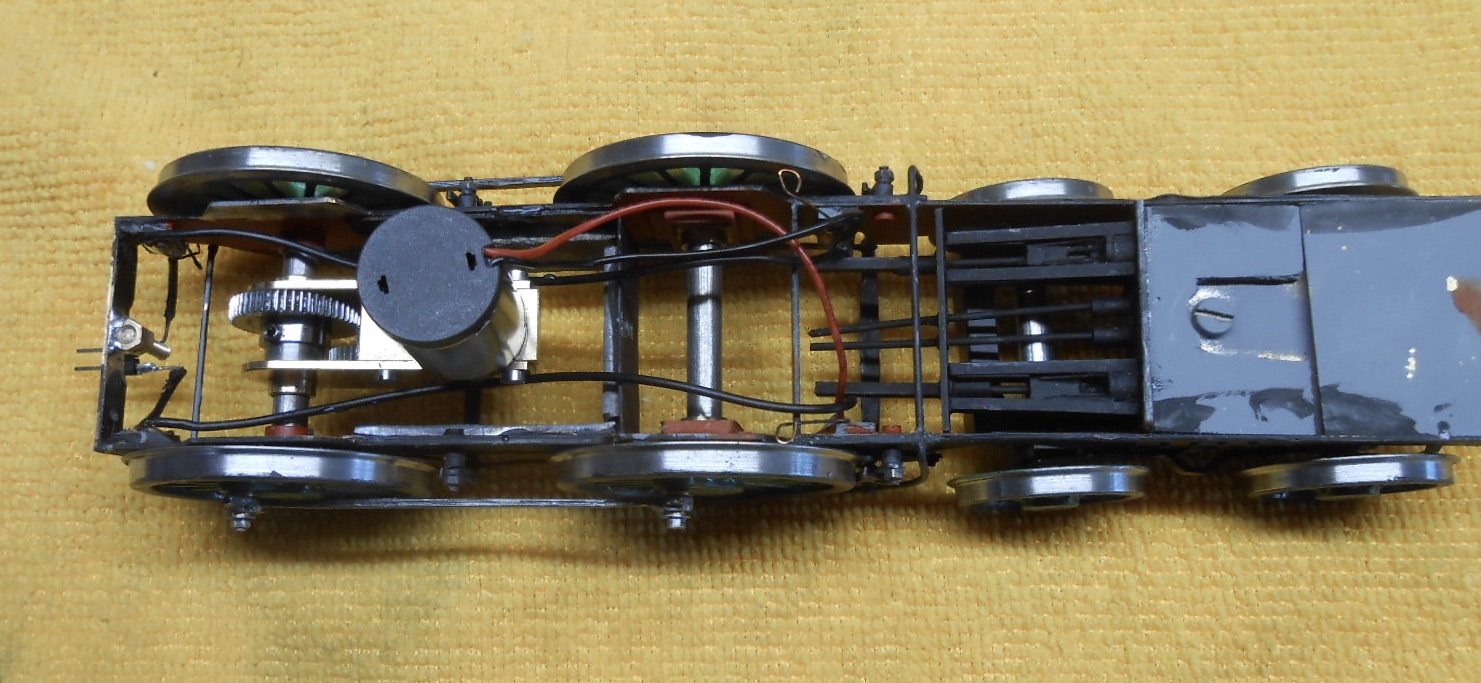
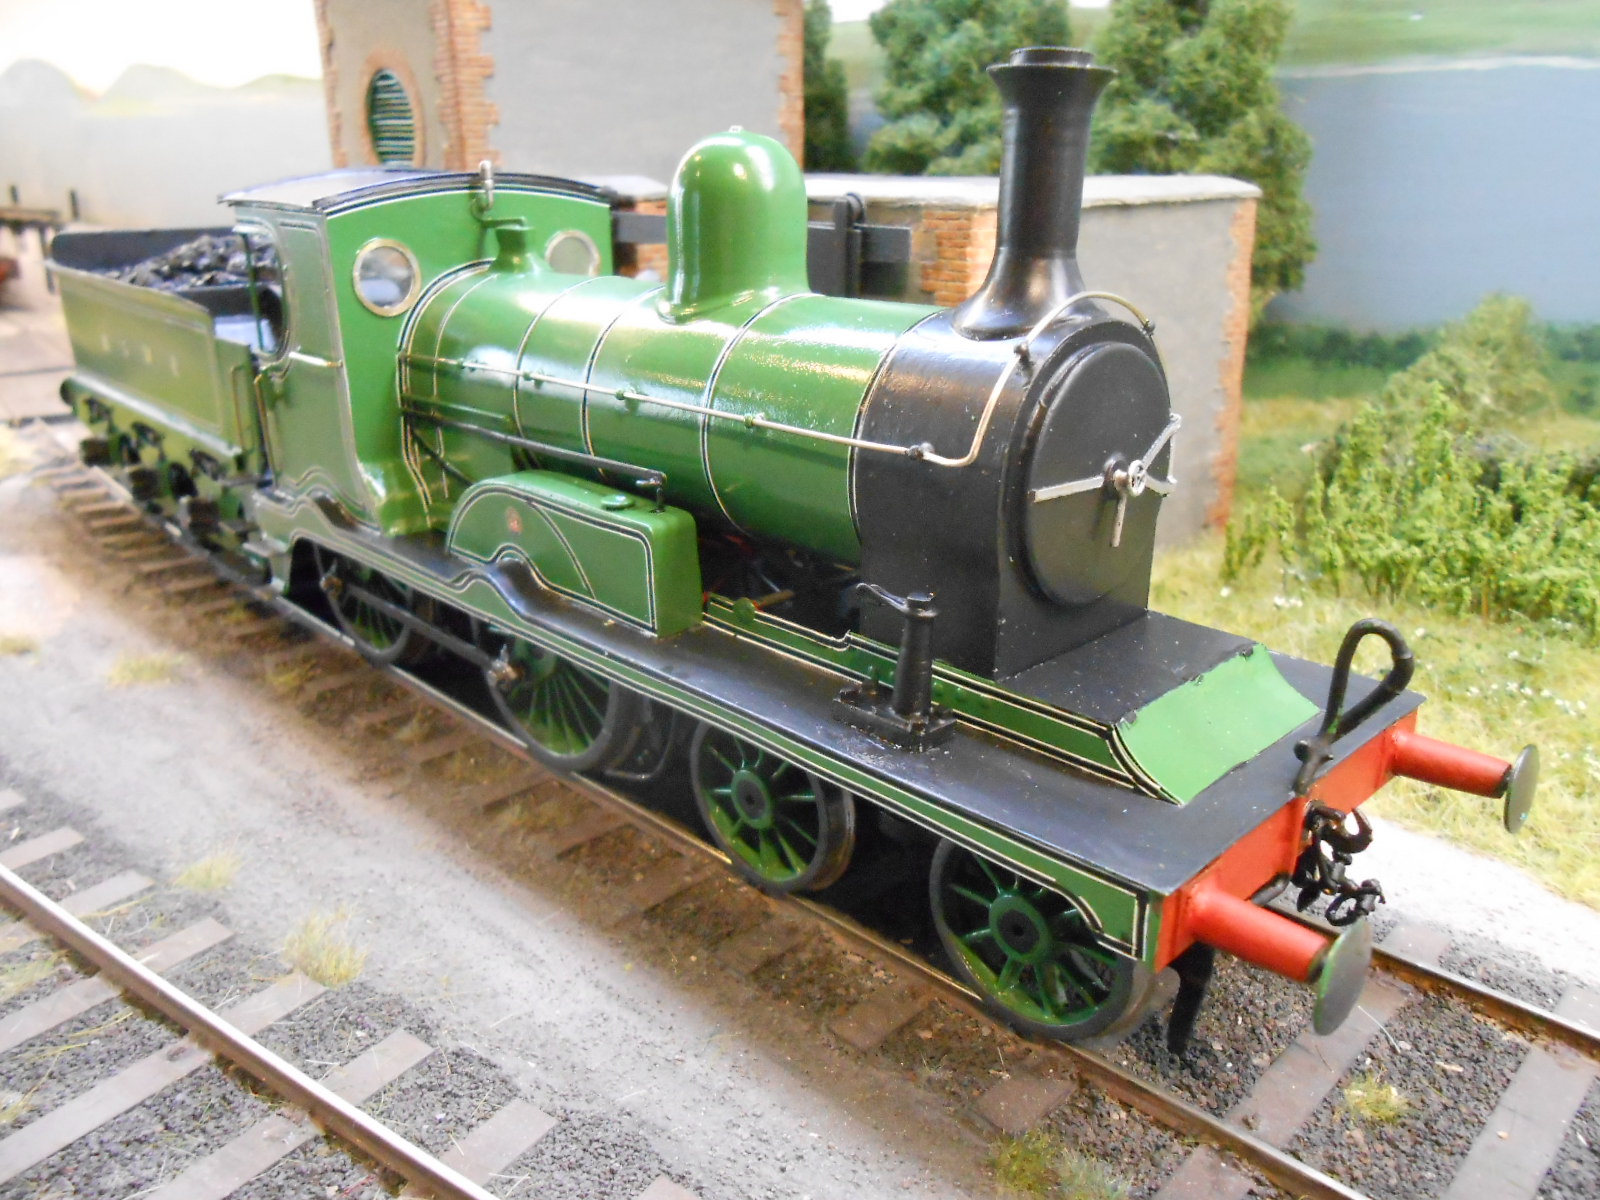
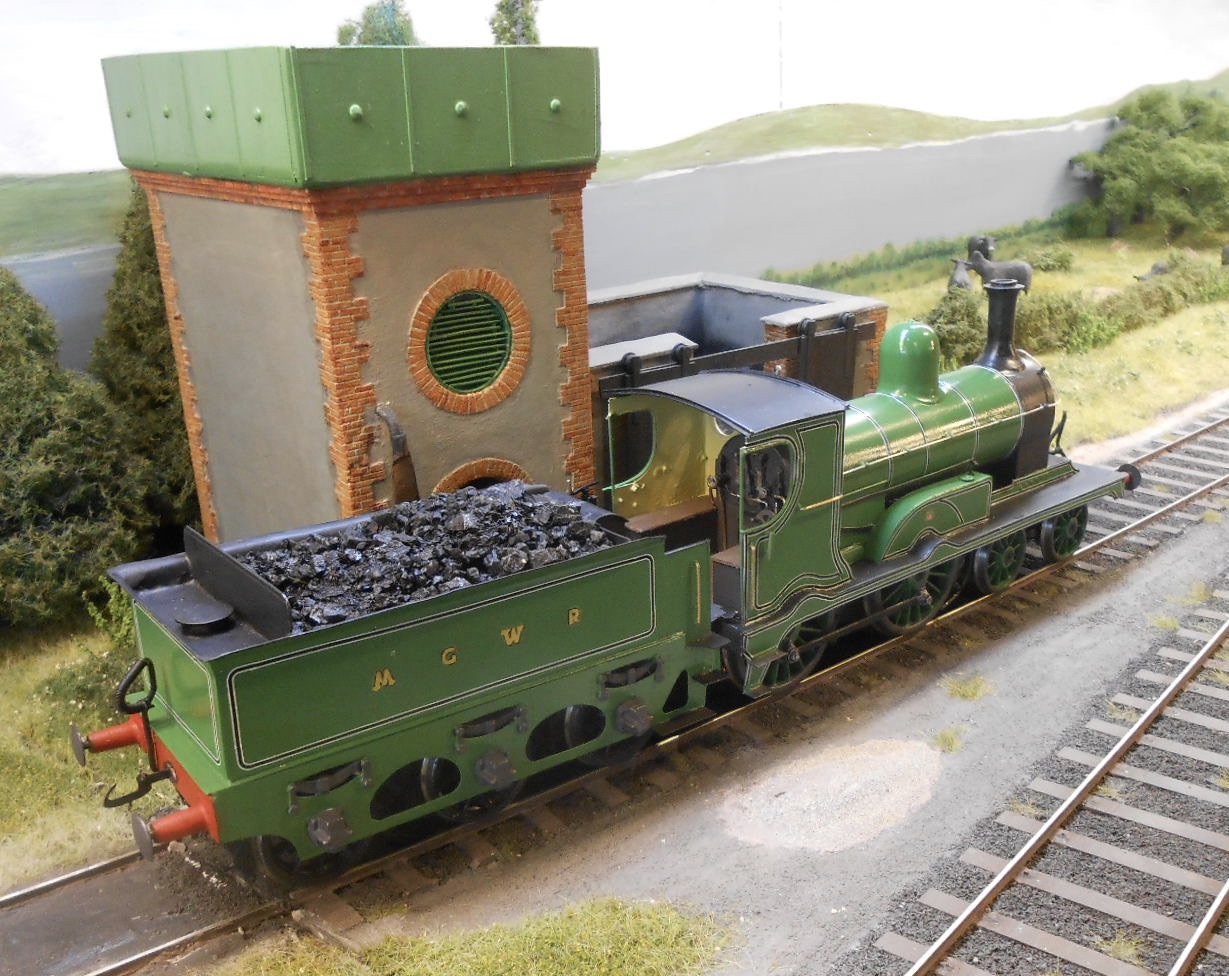
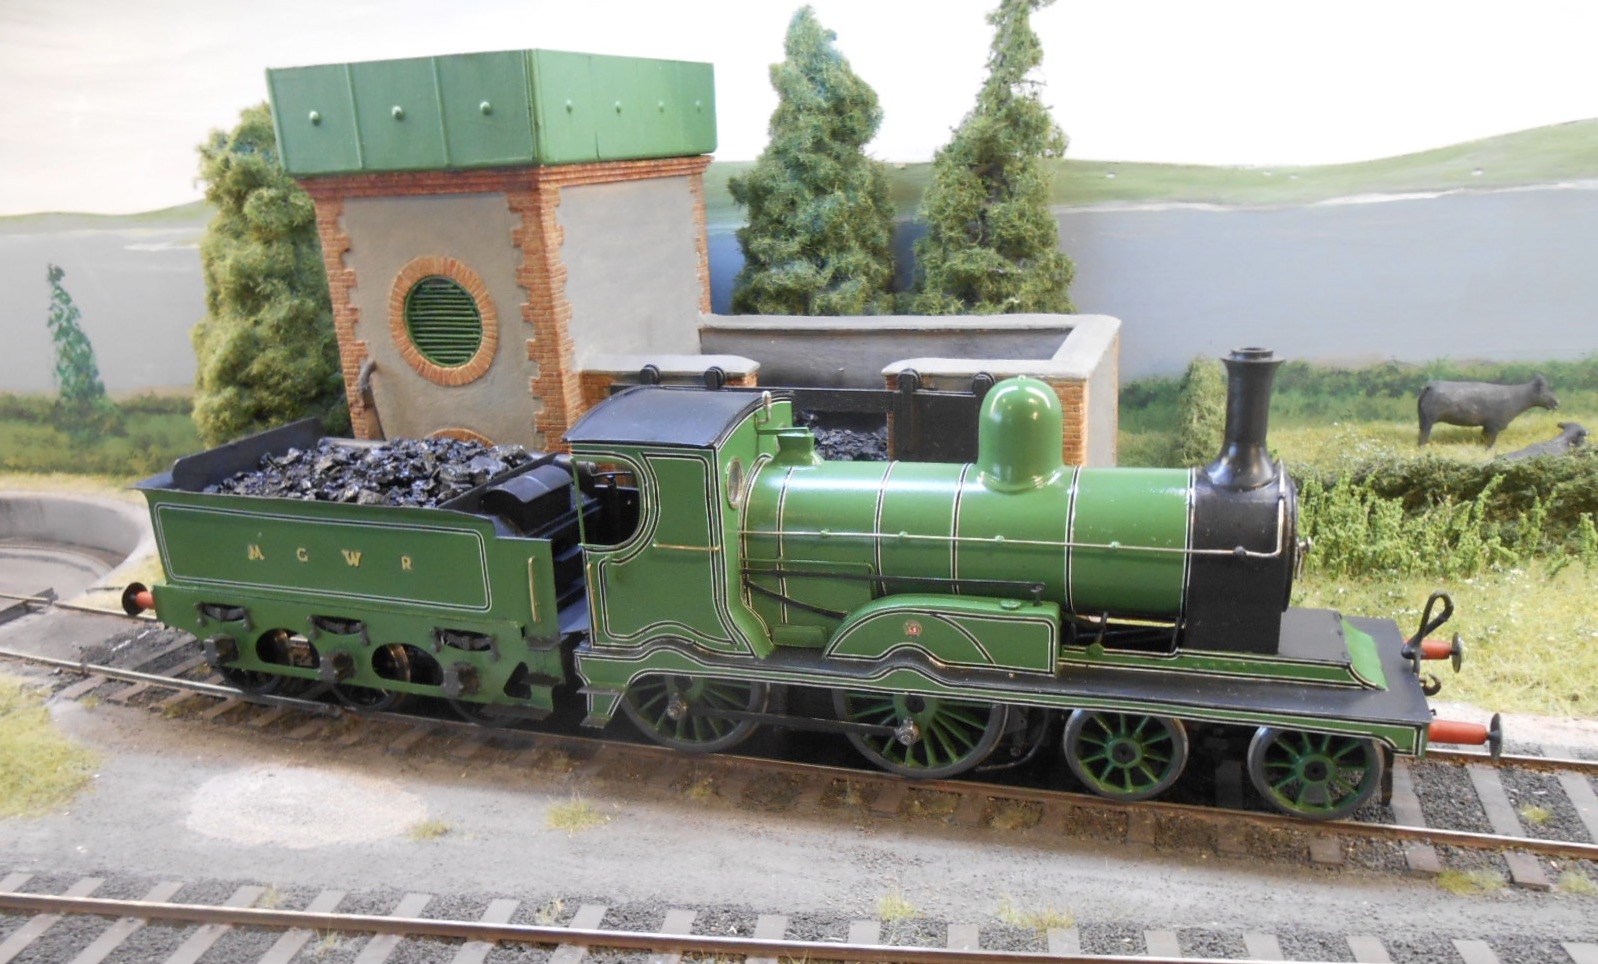
Nearly there The last week has been spent addressing a list of 30 odd items, that to begin with actually got longer, despite ticking things off. Many were fairly short and simple, like touching up paint work, or scraping paint off handrails. Some were an hour or so, like fitting the couplings, or adding lead sheet to the insides of the ash pan, while the rest of the lining took the best part of three days. Then there was coal for the tender and wiring the tender to the loco, adding the handrails, lettering and so on and so on. The MGWR crest on the leading splasher is actually SE&CR from a Fox Transfer sheet and is passable enough from normal viewing distances. At last it was time to reassemble the loco and do some test running. At first, all was well, but when I hooked on the tender, the loco was at first unable to pull it. Wolf Dog will need to haul at least three six wheel coaches, so this was a little worrying! A bit of investigation showed that the draw bar was fouling the bottom of the frames on the loco and the fall plate was also conspiring to lift the rear drivers off the track. After some fettling, things have improved enough for the model to find its way around Belmullet, safely negotiating the points and single slip. However, I fancy it will yet need some more lead sheet over and around the drivers to increase its haulage capacity further. One of the last jobs was to make up the jack which sits on the footplate - a simple enough task now I have my little lathe. Just awaiting the name and number plates now, plus there are the three six wheelers to build of course. Such are the joys of railway modelling: always something else to do!
- 124 replies
-
- 14
-
-
-
There's a lot to be said for smaller projects that can be completed in a fairly short space of time. You learn, gain experience, enjoy seeing something finished and have fun.
-
Just like Mullingar, all very believable, and very attractive.
-
Yup. Atmosphere - that certain something that somehow creates the believable.
-
Wow - love the internal detail. You're going to tell us it is 4mm scale too, I suppose? Fantastic work.
-
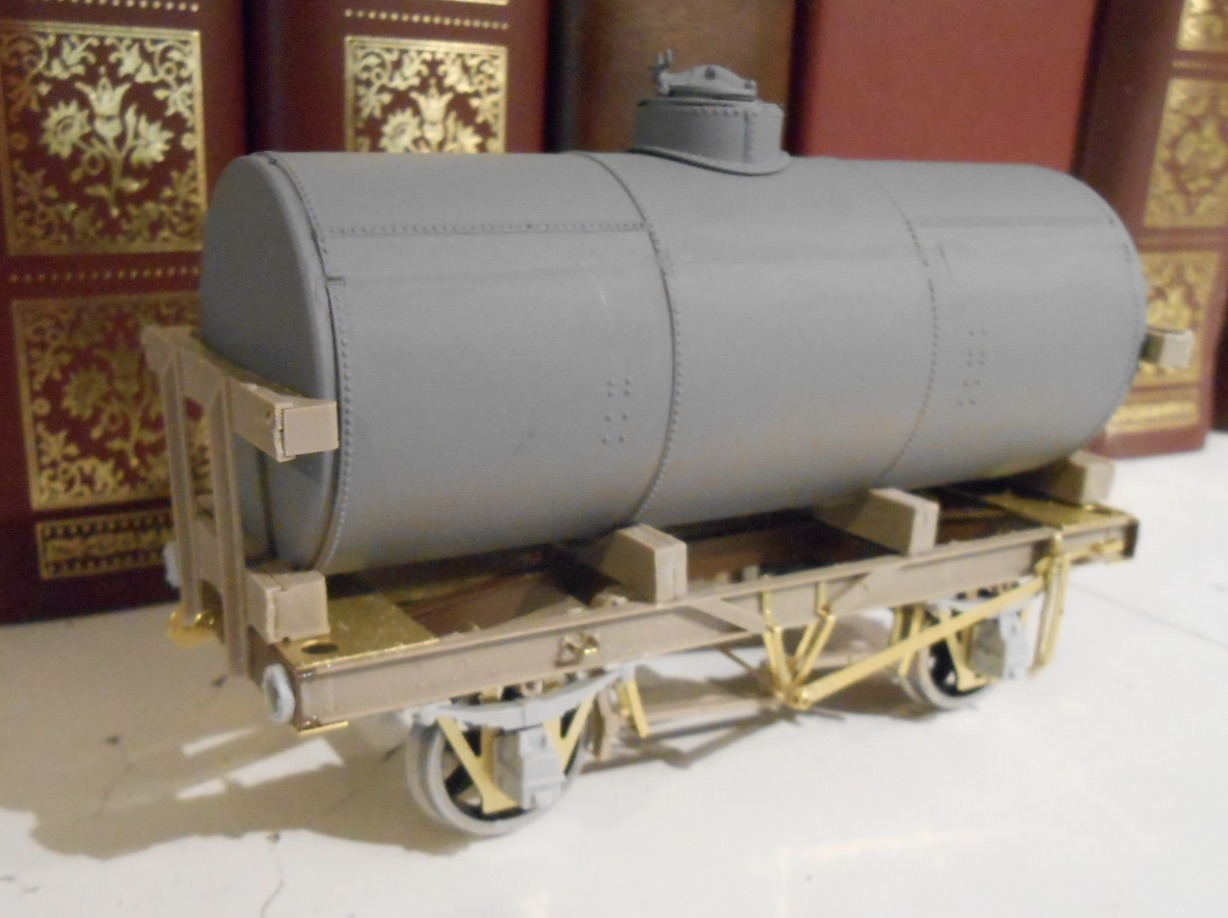
The Slater's tank wagon continues to provide a bit of light [ish] relief from the D16. With the chassis largely complete, attention turns to the tank body. This is a finely moulded affair, but far from being user friendly as the tank is split three ways longitudinally, plus the two circular ends. As a result, a lot of care is needed, both when joining the pieces together and filing the surfaces smooth - because there is a lot of rivet detail that you don't want to damage. Work still needed here. There is also a lot of exterior strapping, but that will have to wait, as the next step is to paint and letter the tank - 'Irish Shell' - which is going to be easier before it is fitted in place. If anyone knows of suitable 7mm scale transfers, please let me know, as otherwise it is going to be done by hand.