Metrovik Posted December 16, 2023 Posted December 16, 2023 This new layout, which will hopefully get further than the last one I started on this Forum, Is as the title suggests a quite branch terminus shunting layout set at the tail end of CIE steam or as some people may say "the best era". All going well it will feature a small station building, goods shed and other lineside structures (any suggestions?) The operation of passenger services will depend on whether push pull trains operated in this period using steam traction? The station shell roof (supports are temporary) started off as a goods shed but seems to have turned itself into a W&T Tramore station style structure. All suggestions are welcome and wish me luck. (Excuse the mess) 10
Tullygrainey Posted December 16, 2023 Posted December 16, 2023 Great start. Looking forward to seeing this develop. Keep posting! 1 1
derek Posted December 16, 2023 Posted December 16, 2023 Best of luck with this Metrovik. One thing that strikes me immediately is the position of the station/platform. Would it not be better to have track in front so as to allow easier access and not to block the view of trains in the yard/station?. Just my opinion........... 1 1
Westcorkrailway Posted December 16, 2023 Posted December 16, 2023 29 minutes ago, Metrovik said: This new layout, which will hopefully get further than the last one I started on this Forum, Is as the title suggests a quite branch terminus shunting layout set at the tail end of CIE steam or as some people may say "the best era". All going well it will feature a small station building, goods shed and other lineside structures (any suggestions?) The operation of passenger services will depend on whether push pull trains operated in this period using steam traction? The station shell roof (supports are temporary) started off as a goods shed but seems to have turned itself into a W&T Tramore station style structure. All suggestions are welcome and wish me luck. (Excuse the mess) I think the NCC had a push pull? but even so it was probobly well gone by then You could always install a turntable. Even a small one for a tank engine.
jhb171achill Posted December 16, 2023 Posted December 16, 2023 14 minutes ago, Westcorkrailway said: I think the NCC had a push pull? but even so it was probobly well gone by then You could always install a turntable. Even a small one for a tank engine. There were a few experimants with push-pull early in the 20th century but none were successful. Certainly by the end of the "grey'n'green" era, nothing like that. However, you can emulate something like the Foynes once-a-day mixed in its last days - a loco and a single six-wheeled brake compo. I think it had two third class compartments and one first, plus the brake van part. Use one of Hattons Genesis brake thirds, painting a small "1" on one of the compartment's doors. A compleye passenger train in one 6-wheeled vehicle - or, in model terms, just 12 cm of length plus couplings. Closer to your neck'o'the woods, the Clon branch passenger train was often also just a single brake vehicle. 2
Gabhal Luimnigh Posted December 16, 2023 Posted December 16, 2023 Good start, I would also put the platform behind the lines as Derek said, just an opinion though! Do whatever you want and have fun. 1 1
jhb171achill Posted December 16, 2023 Posted December 16, 2023 Very nice little project, Metrovik. I think small outfits like that have great potential, and they're simple to get going. You had asked for suggestions - your run-round loop is necessarily short, I can see, so trains must of course be short. If you use the West Cork Clonakilty brach, the Foynes branch, or the sort of trains that would have operated at one time into Fenit, Castleisland and several other places like that - little backwaters - a single six-wheel passenger brake coach will suffice as a passenger train. The forthcoming Hattons one is perfect, and will be available in livery suitable to the era you are depicting. I am thinking that you'd get one of these plus at least one, maybe two wagons, into that loop and you could still run a loco round it. Another possibility is to have a modern laminate type of coach, like the brake composites (1904 & 1910) used on the Loughrea branch. The first of these arrived in green, which is appropriate to your era, of course. You'd need to have a "tin van" if you're using any diesels. Silverfox do them, but need to be told to use a correct livery, as their CIE green livery is pure fantasy. So, passenger coachyes dealt with, what about locos? A "C" class, or if after steam has ended, a 141; or in the case of steam, an 00 Works J15. Another possibility for steam is one of those (British) North Eastern Rly. 0.6.0T tank engines, which bear more than a passing resemblance to an ex-MGWR "J26". Just slap an overall coat of very dark grey over it and away ye go. A dozen or so Provincial Wagons, mostly goods vans, but maybe a couple of cattle and opens for variety, plus one of Provincial's GSWR goods brake vans and you've more than enough for a thing like that. I like the overall roof idea, though I would echo the comments about it hiding the train a bit much......... Could be fiddly, too, if something's off the rails under it. 2 1 1
Metrovik Posted December 16, 2023 Author Posted December 16, 2023 @derek @Gabhal Luimnigh I was thinking it might be better that way too, (honestly I was ) so ive moved it and it instantly opens it up and looks so much better. Keep the tips comin' lads! Also apologies for the bad camera, I'm working on it. 4 1
jhb171achill Posted December 16, 2023 Posted December 16, 2023 And that's the very tank engine I'm referring to!
derek Posted December 17, 2023 Posted December 17, 2023 16 hours ago, jhb171achill said: Very nice little project, Metrovik. I think small outfits like that have great potential, and they're simple to get going. You had asked for suggestions - your run-round loop is necessarily short, I can see, so trains must of course be short. If you use the West Cork Clonakilty brach, the Foynes branch, or the sort of trains that would have operated at one time into Fenit, Castleisland and several other places like that - little backwaters - a single six-wheel passenger brake coach will suffice as a passenger train. The forthcoming Hattons one is perfect, and will be available in livery suitable to the era you are depicting. I am thinking that you'd get one of these plus at least one, maybe two wagons, into that loop and you could still run a loco round it. Another possibility is to have a modern laminate type of coach, like the brake composites (1904 & 1910) used on the Loughrea branch. The first of these arrived in green, which is appropriate to your era, of course. You'd need to have a "tin van" if you're using any diesels. Silverfox do them, but need to be told to use a correct livery, as their CIE green livery is pure fantasy. So, passenger coachyes dealt with, what about locos? A "C" class, or if after steam has ended, a 141; or in the case of steam, an 00 Works J15. Another possibility for steam is one of those (British) North Eastern Rly. 0.6.0T tank engines, which bear more than a passing resemblance to an ex-MGWR "J26". Just slap an overall coat of very dark grey over it and away ye go. A dozen or so Provincial Wagons, mostly goods vans, but maybe a couple of cattle and opens for variety, plus one of Provincial's GSWR goods brake vans and you've more than enough for a thing like that. I like the overall roof idea, though I would echo the comments about it hiding the train a bit much......... Could be fiddly, too, if something's off the rails under it. A mine of information- as usual 2
Westcorkrailway Posted December 17, 2023 Posted December 17, 2023 (edited) 17 hours ago, jhb171achill said: - your run-round loop is necessarily short, I can see, so trains must of course be short. If you use the West Cork Clonakilty brach. as JHB in the rest of what he said. To start I’d get a few cheap planked wagons and paint them Grey. Vans are the same (see some of the threads on those topics) Leslie’s wagons are only 17:50 a pop but I once was able to make pretty convincing Irish cattle wagons for €10 each using paint and flying snail transfers. for cosches you could buy a £33 hattons 6 wheeler. Another cheap option is taking a Hornby coach and painting it green. have a quick peek through my own workbench. While I never made a layout I’m fairly happy with the amount of stock I’ve managed to gather for a future one (of course that does not mean that time will come) shameless thread plug Edited December 17, 2023 by Westcorkrailway 1
Patrick Davey Posted December 17, 2023 Posted December 17, 2023 A good start for sure, keep the pics coming and enjoy the trip!
Metrovik Posted December 18, 2023 Author Posted December 18, 2023 Currently awaiting the chance to pick up some new construction materials but in the meantime I said I'd plan the turntable design for the branch as all RTR ones seem too large, basically the plan was to use a lazy Susan type design with a bearing underneath the....... stage? ( I don't know what the revolving part the loco sits on is called.) May be motorised if possible but the main focus will be getting current back into the track once it's revolved so may require the hand of god, at least for a while. Also I was considering purchasing point motors (yes I really am on a budget) and was just wondering if they require a lot of electronic knowhow to get up and running or if a newbie would be able to install a set that was reasonably reliable. No pictures at the moment as I am yet to put pen to paper with these plans but I just said I'd post them here in case anyone with a bit of experience had any advice on the topic. 1
David Holman Posted December 18, 2023 Posted December 18, 2023 Turntables are tricky beasts, but by far the cheapest is the old Airfix, now Dapol plastic kit which is still less than a tenner. Frizinghall Models in Leeds do a Meccano based hand cranked kit for about twenty quid, but there is still the problem of getting power to the track on the deck. The Peco turntable does this for you for about thirty quid or so and may be worth investing in because of that. Next up comes South Eastern Finecast, whose TT is a development of the Airfix one, while the best I've come across are Kitwood Hill Models who do laser cut ply kits for around £75. These need little extra effort and are pretty much complete, whereas all the others require some ingenuity to work properly. Another option for mounting a TT is to use a standard stereo jackplug and socket as the spindle - you can get the wiring to the track through this. Well worth doing an internet search for other ideas, while my Workshop and layout threads (Arigna Town, Belmullet and Fintonagh) contain posts of my various turntables over the last few years. As for point motors, the cheapest way is to use servos at less than two quid each, though again, they need a mounting and some way to control them. MERG, the Model Railway Electronic Group have lots of cheap ideas on this. Alternatively, use wire in tube for simplicity. 1 1
Broithe Posted December 19, 2023 Posted December 19, 2023 1 hour ago, David Holman said: Turntables are tricky beasts, but by far the cheapest is the old Airfix, now Dapol plastic kit which is still less than a tenner. Frizinghall Models in Leeds do a Meccano based hand cranked kit for about twenty quid, but there is still the problem of getting power to the track on the deck. The Peco turntable does this for you for about thirty quid or so and may be worth investing in because of that. Next up comes South Eastern Finecast, whose TT is a development of the Airfix one, while the best I've come across are Kitwood Hill Models who do laser cut ply kits for around £75. These need little extra effort and are pretty much complete, whereas all the others require some ingenuity to work properly. Another option for mounting a TT is to use a standard stereo jackplug and socket as the spindle - you can get the wiring to the track through this. Well worth doing an internet search for other ideas, while my Workshop and layout threads (Arigna Town, Belmullet and Fintonagh) contain posts of my various turntables over the last few years. As for point motors, the cheapest way is to use servos at less than two quid each, though again, they need a mounting and some way to control them. MERG, the Model Railway Electronic Group have lots of cheap ideas on this. Alternatively, use wire in tube for simplicity. The hardest thing is getting the squeak right, I hear. 2
jhb171achill Posted December 19, 2023 Posted December 19, 2023 2 hours ago, David Holman said: Turntables are tricky beasts, but by far the cheapest is the old Airfix, now Dapol plastic kit which is still less than a tenner. Frizinghall Models in Leeds do a Meccano based hand cranked kit for about twenty quid, but there is still the problem of getting power to the track on the deck. The Peco turntable does this for you for about thirty quid or so and may be worth investing in because of that. Next up comes South Eastern Finecast, whose TT is a development of the Airfix one, while the best I've come across are Kitwood Hill Models who do laser cut ply kits for around £75. These need little extra effort and are pretty much complete, whereas all the others require some ingenuity to work properly. Another option for mounting a TT is to use a standard stereo jackplug and socket as the spindle - you can get the wiring to the track through this. Well worth doing an internet search for other ideas, while my Workshop and layout threads (Arigna Town, Belmullet and Fintonagh) contain posts of my various turntables over the last few years. As for point motors, the cheapest way is to use servos at less than two quid each, though again, they need a mounting and some way to control them. MERG, the Model Railway Electronic Group have lots of cheap ideas on this. Alternatively, use wire in tube for simplicity. Do many of these represent the almost standard length of about 45 feet used on most Irish lines? Seems from observation most model TTs are the scale equivalent of something you’d turn a British 9F on. They may be fairly standard for British lines but look completely out of place on an Irish layout - far too long.
David Holman Posted December 19, 2023 Posted December 19, 2023 (edited) You are right, JB. The Airfix is 65 feet diameter, same for SE Finecast. They work out at about 40 feet in 7mm scale... Kitwood Hill do a variety of sizes. They are American in outline, but easy to adapt and a joy to make. The smallest is a 5 inch 0n2, which works out at about 32 feet in 4mm scale. There is a nine inch one, which will equate to about 55 feet. Peco do a HOn3 TT which works out at about 50 feet. All that is needed is to make the deck wider, which is simple enough. They cost over £60 though... Edited December 19, 2023 by David Holman
Mayner Posted December 19, 2023 Posted December 19, 2023 (edited) The Peco or Dapol OO Gauge turntable kits are probably the cheapest and most straightforward options for installing a turntable, a number of specialist manufacturers including London Road Models produce 45-50' tables but they are expensive and not really suitable for an in-experienced modeller https://www.rmweb.co.uk/blogs/entry/17974-building-a-london-road-models-50-turntable/ Although a CIE 121 Class Diesel Loco will just about fit on the Peco HOn3 turntable, I would recommend 50' as a minimum if you are planning to run tender locomotives! Not sure if the Peco N or HOn3 turntables would be up to it for regularly turning heavier OO gauge locos (both N & HOn3 tables shareb a common well and pivot arrangement. Probably the most important point to consider is that a turntable takes up a lot of space on a baseboard, the Peco and Dapol turntables are over 300mm in diameter. The Peco HOm turntable on my narrow gauge layout takes up most of the space between the running line and the baseboard edge. If you are building a table from a kit or scratch considerable care is required in the set up of the turntable pivot point and rails on the deck, pivot point has to be positioned in the centre of the pit and deck and the rails/track set up so that everything is symetrical if the turntable is to operate correctly. My turntable is operated mechanically using Mecano parts based on a diagram in a very old (1960) C J Freezer book on model railways, table is aligned by eye. Some modellers use electric motor drive with quite sophisticated solenoid operated indexing arrangements, others use stepper motors. I also have a pair of turntables on a G Gauge garden railway, purely functional turntable decks/trackbases are simply strips of wood pivoted on galvanised coach bolts, track is aligned by eye with a locating pin arrangement soldered to the rail web 100% reliable in over 10 years use. Edited December 19, 2023 by Mayner 8
Tullygrainey Posted December 19, 2023 Posted December 19, 2023 18 hours ago, Metrovik said: Also I was considering purchasing point motors (yes I really am on a budget) and was just wondering if they require a lot of electronic knowhow to get up and running or if a newbie would be able to install a set that was reasonably reliable. The traditional bog standard point motor was/is the Peco PL10 which slots into the bottom of the point with a rod fitting into the hole in the tie bar. it has 2 coils which when given a quick burst of power, move the rod and throw the point. It needs an AC power supply of around 16 volts. Many analogue controllers have an 'accessories' outlet which will do that job. Each points motor needs 3 wires, one feed to each coil (the red and black wires in the pic above) and one common return (the green). The common return can usually be a single wire which daisy chains round the layout from one motor to the next. In the diagram above, each 2-way centre off switch can also be replaced with 2 momentary push buttons - the idea is that the coils just need a brief squirt of power to activate them. Continuous power would burn them out. I find a quick jab on a simple push switch works the best and is fairly intuitive. Thought the blurb above says you need a capacitor discharge unit, you could probably manage without one unless you're trying to throw more than one point at the same time. Advantages: Relatively cheap and cheerful. Peco can supply wire harnesses which slip onto the terminals thus avoiding the need to solder the wires on. Disadvantages: Each motor needs wired back to the control panel where you've sited your operating switches. However, your layout is small so that shouldn't be a big problem. The action is sudden, rapid and noisy, not slow and progressive like when using servos or similar. If using electrofrog points, a switch needs to be added to change the frog polarity as the point change over. (You're using insulfrog points so not a problem) Good luck with your build! Alan 4 1
Metrovik Posted December 19, 2023 Author Posted December 19, 2023 Thanks for all the help and suggestions everybody, just a quick query in relation to the accessories outlet for my controller, is this always active or does the dial have to be turned up in order for it to supply power, the controller in question is a gaugemaster combi. Sorry about all the Questions, but we all have to learn Sometime..... Regards MV 2
Galteemore Posted December 19, 2023 Posted December 19, 2023 1 hour ago, Metrovik said: Thanks for all the help and suggestions everybody, just a quick query in relation to the accessories outlet for my controller, is this always active or does the dial have to be turned up in order for it to supply power, the controller in question is a gaugemaster combi. Sorry about all the Questions, but we all have to learn Sometime..... Regards MV Questions are great. We have all asked them. An accessory output will deliver a constant voltage separate from controller output 1 1 1
Tullygrainey Posted December 19, 2023 Posted December 19, 2023 The accessory output on your Gaugemaster Combi is perfect for driving solenoid points motors. 1
David Holman Posted December 20, 2023 Posted December 20, 2023 12 hours ago, Metrovik said: Thanks for all the help and suggestions everybody, just a quick query in relation to the accessories outlet for my controller, is this always active or does the dial have to be turned up in order for it to supply power, the controller in question is a gaugemaster combi. Sorry about all the Questions, but we all have to learn Sometime..... Regards MV One of the many joys of this forum is how helpful, encouraging and knowledgeable folk are. 1 3
Mike 84C Posted December 20, 2023 Posted December 20, 2023 I regauged a Peco N gauge turn table for our club Bantry layout it takes our tank engines ok and will just take a J15. As i was being a bit of a skinflint with funds ( did'nt have any!) I used bike spokes to operate the points with a US made " Blue Point" switch to change polarity. I think there are details/photos on the Bantry lead on this forum. Non of it is rocket science but it makes you think! I also wanted to make it easy to operate and trouble shoot. 1 1
Metrovik Posted February 2, 2024 Author Posted February 2, 2024 Believe it or not, this project isn't dead in the water, and despite distractions some progress has been made with the station, albeit very recent. The station has been moved out so that now it covers 2 tracks and the issue of visibility has been addressed by the addition of Skylights. (Inspired by hueston station in the great train robbery). The station has overtime morphed into a heavily-inspired by but not accurate representation of Tramore station, for example, the skylights as far as I can tell were never present there. What is in Tramore is a small wooden toilet which I've tried to represent here. I'm assuming this would've been dark Gsr green? Finally, on the rolling stock front, Spurred on by the impulse of not being able to get them ever again, I've pre-ordered 2 hattons genesis coaches, Now I know its a shock I bought something new, let alone something I have to pay import tax on, but desperate times call for desperate measures. The skylights will be lined and filled in with clear plastics, similar to Metcalfe kits, which are what I used to cover the roof supports. The little Jack's...... The distraction...... As usual, all suggestions are not only welcome, but encouraged. 6
jhb171achill Posted February 2, 2024 Posted February 2, 2024 Yes, in GSR times and CIE up to about 1960, stations were painted what might be called a dark brunswick green and cream. The green often ended up badly faded, giving an impression of a lighter shade at worst. 2
Metrovik Posted February 16, 2024 Author Posted February 16, 2024 Finished roofing the station today.(Finally!) Needs to be weathered to hell and back though. Far too shiny. Quite happy with how the galvanised sheeting turned out. However the joins along the top will need disguising on this side. As I said, it needs serious weathering, not only because it's Cie and this is far to clean but because I don't like going blind whenever it catches the light! 9
Patrick Davey Posted February 16, 2024 Posted February 16, 2024 Looking well - keep the updates coming! 2 1
Metrovik Posted March 27, 2024 Author Posted March 27, 2024 Well, time for a small, Monthly progress report. Not surprisingly the station roof has hit a standstill, Anyone know if it would look prototypical for this to stay unpainted but weathered to hell and back. Small bit of landscaping, not sure if it really fits in though, might scrap it. The Station is finally more than just a roof. Albeit not much more, detail for this to follow. Station still needs alot of work to look presentable, but I'm getting there. See you next month (all going well), MV 12
jhb171achill Posted March 27, 2024 Posted March 27, 2024 3 minutes ago, Metrovik said: Well, time for a small, Monthly progress report. Not surprisingly the station roof has hit a standstill, Anyone know if it would look prototypical for this to stay unpainted but weathered to hell and back. Small bit of landscaping, not sure if it really fits in though, might scrap it. The Station is finally more than just a roof. Albeit not much more, detail for this to follow. Station still needs alot of work to look presentable, but I'm getting there. See you next month (all going well), MV This is looking like a very nice little set-up! 1 3
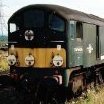
Tullygrainey Posted March 27, 2024 Posted March 27, 2024 This is shaping up well. Glad to see your new tank loco has found a home! Regarding the station roof, there's a thread on the 'Narrow Gauge Railway Modelling Online' website devoted to photos of weathered corrugated iron. Plenty of ideas there for what a weathered station roof might look like. The link below may not work if you're not a subscriber to the forum but like this one, it's free to sign up. Worth a look. Alan https://ngrm-online.com/index.php?/forums/topic/1257-corrugated-iron-photos-please-add-yours/ 2 2
Metrovik Posted April 28, 2024 Author Posted April 28, 2024 No progress to report, (surprise surprise) but I do have a question, Cork, how necessary is it for track underlay or is it sacrilegious to lay the track directly onto the board? Also I've been toying with the idea of making a real signal box for points and signals with the wire and tube method. Thoughts? 1
Gabhal Luimnigh Posted April 28, 2024 Posted April 28, 2024 (edited) No more sacrilegious than an actual track at ground level I reckon, you have trains running at road level in some of our own cities, as for the signal box idea, I like it. Edited April 28, 2024 by Gabhal Luimnigh Brain freeze 1
Recommended Posts
Create an account or sign in to comment
You need to be a member in order to leave a comment
Create an account
Sign up for a new account in our community. It's easy!
Register a new accountSign in
Already have an account? Sign in here.
Sign In Now