David Holman
-
Posts
4,359 -
Joined
-
Last visited
-
Days Won
117
Content Type
Profiles
Forums
Events
Gallery
Everything posted by David Holman
-
If you can get that far with some thin brass sheet, then you are already well on the way to scratchbuilding!
-
That is stunning. What a fabulous restoration. Astonishing price too - over here you could probably add a zero to it in some parts of the country! We're it mine however, not sure I'd want to share it with paying guests, while Mrs H is not keen on some of the dark wallpaper(!) The floors are stunning though, as is the preservation of all the original features. So, where would there railway room go...?
-
And very good it was too, though having taken the trouble to go to the Barber's Shop, it was a shame the SLNCR didn't get a proper mention.
-
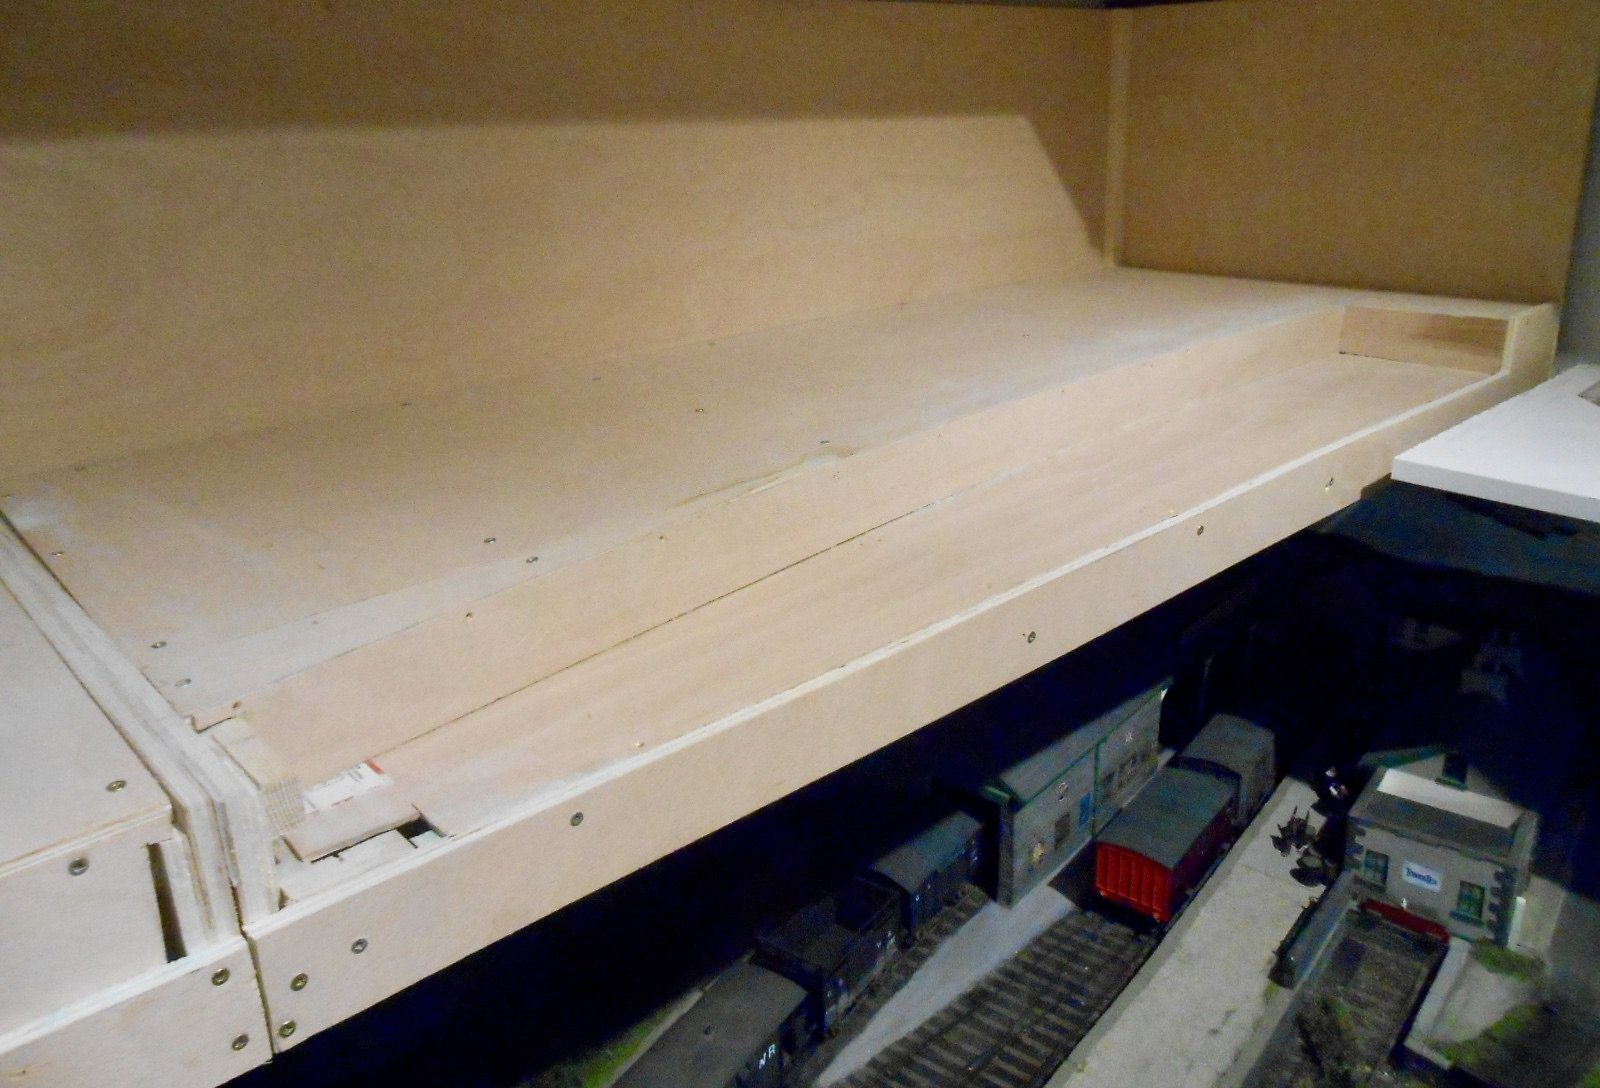
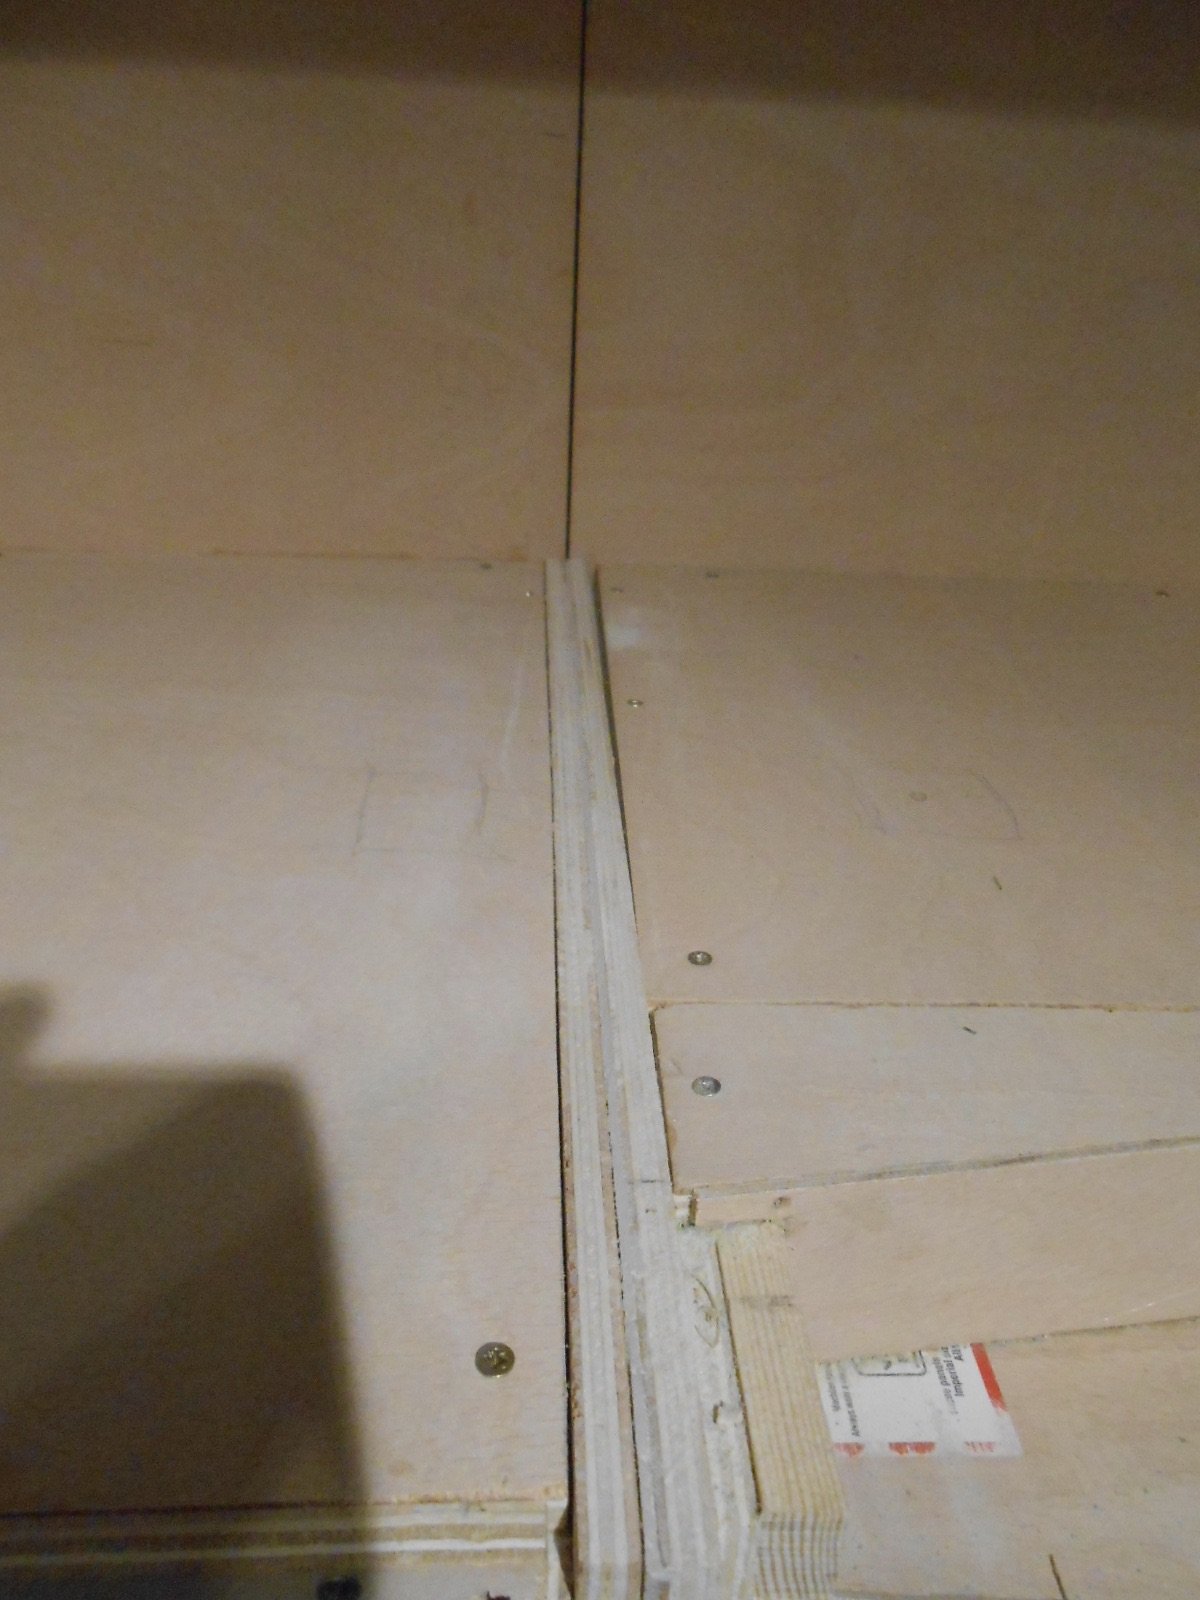
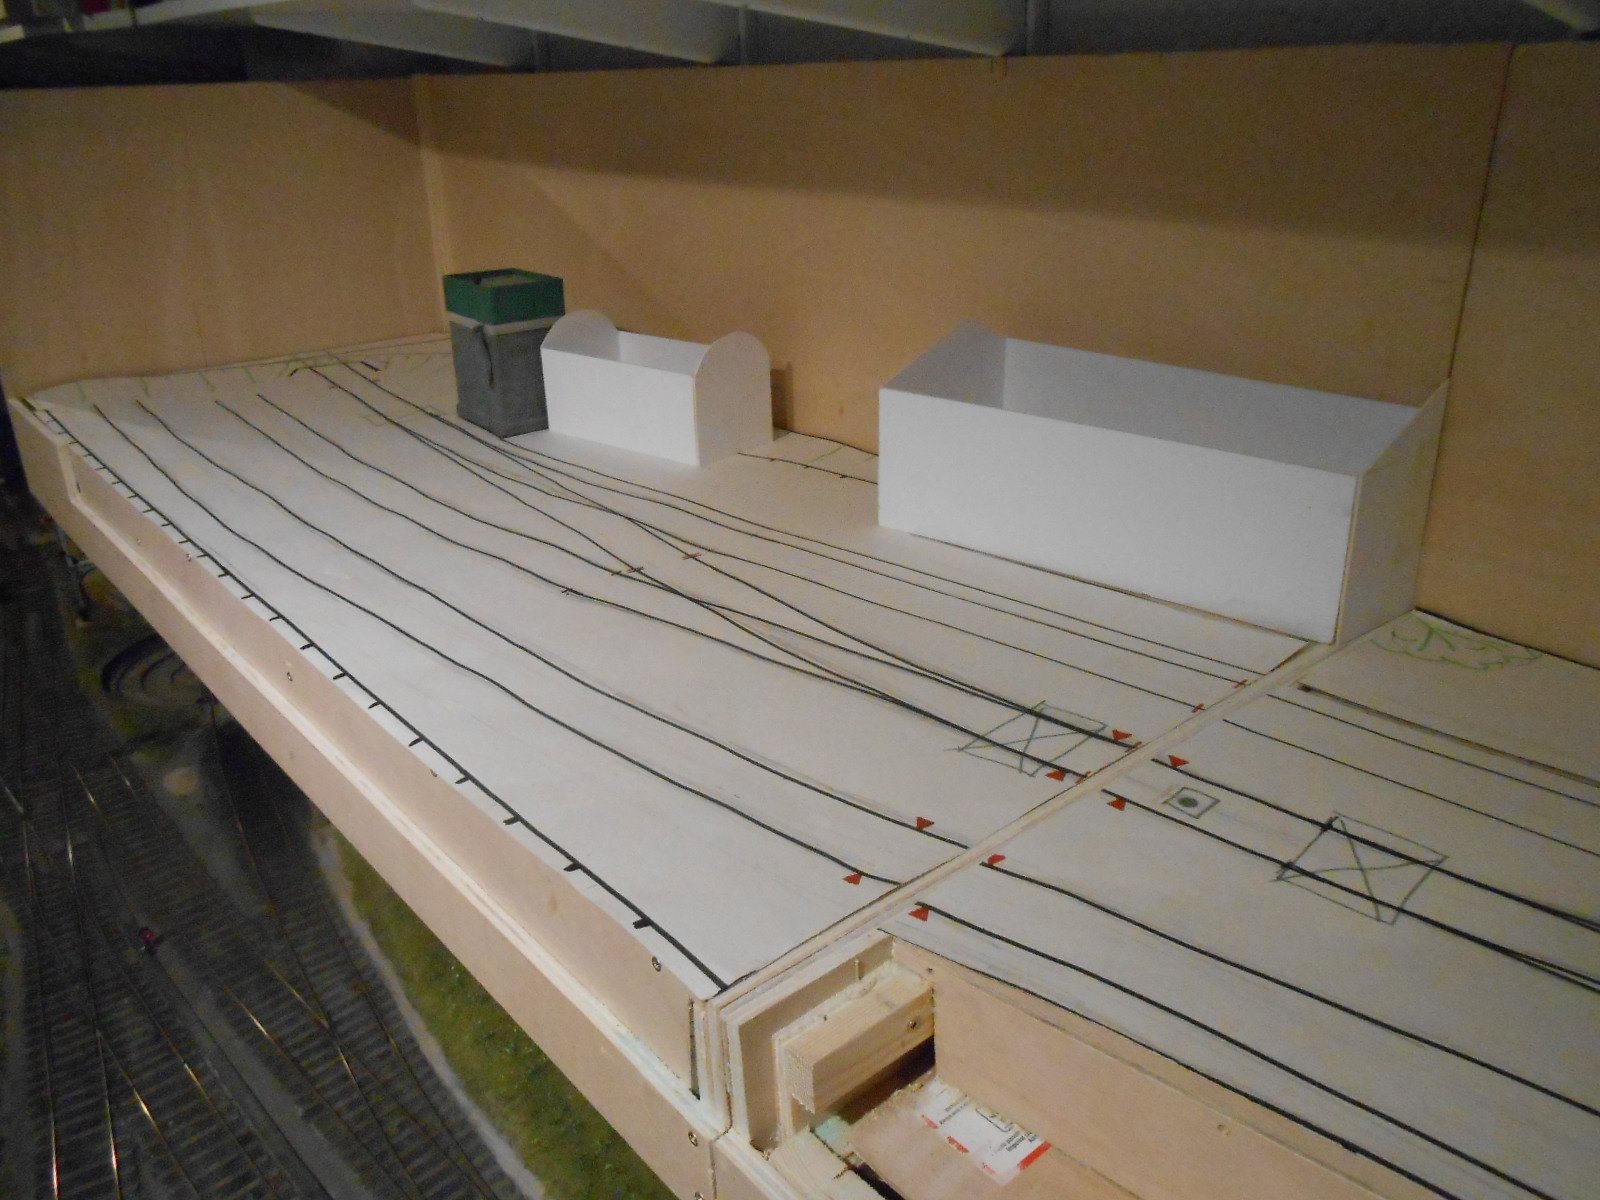
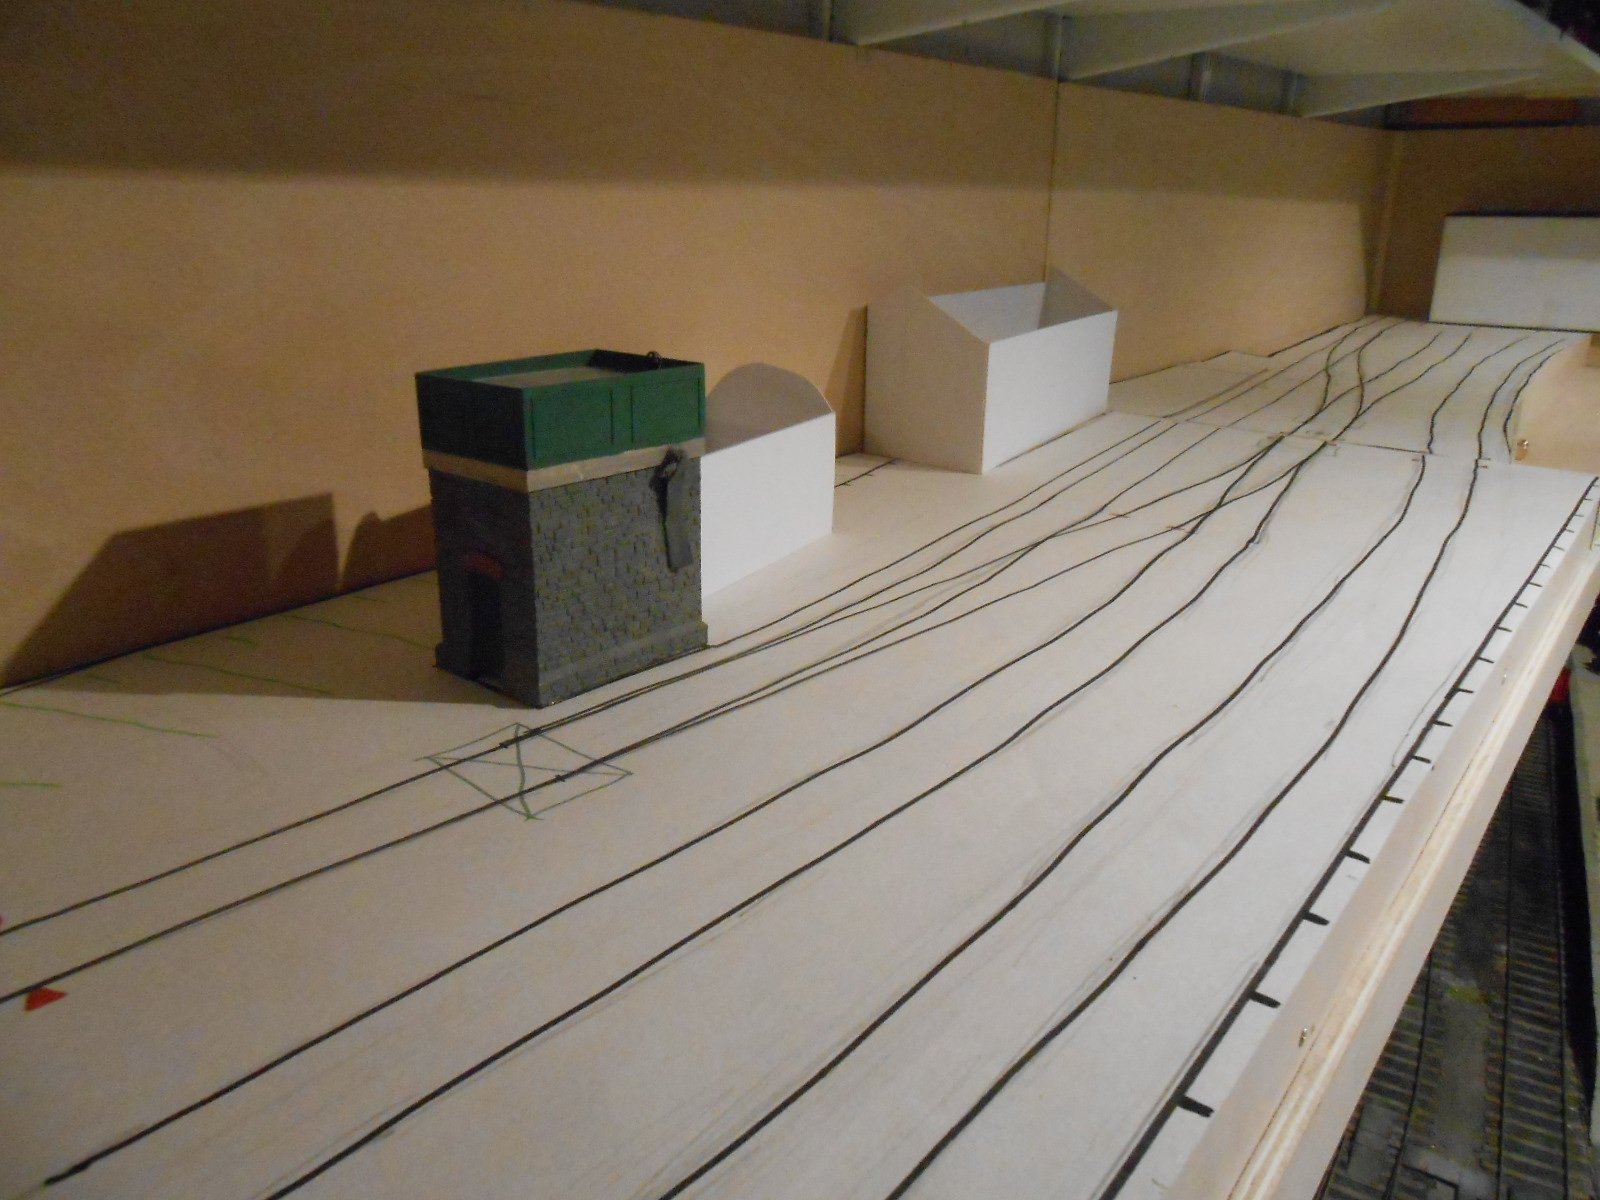
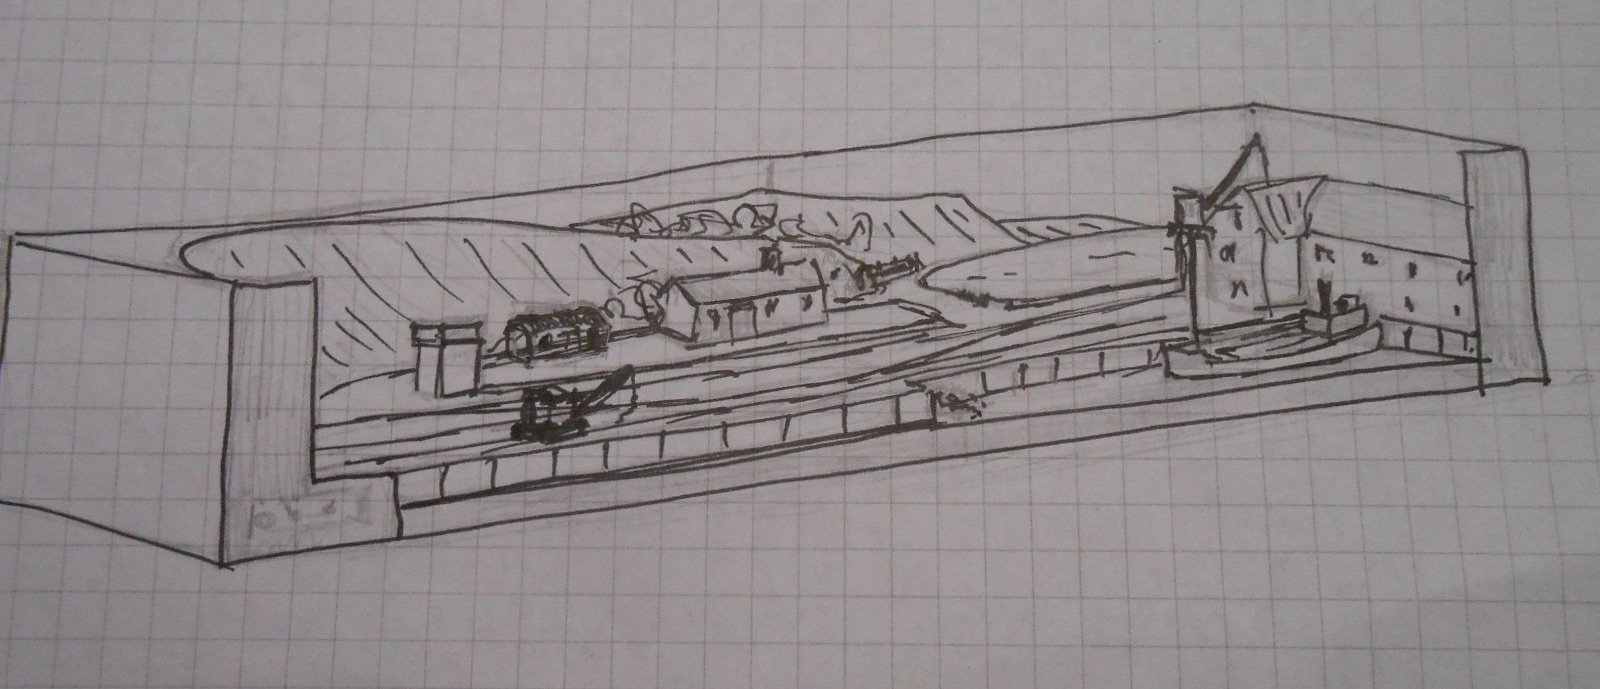
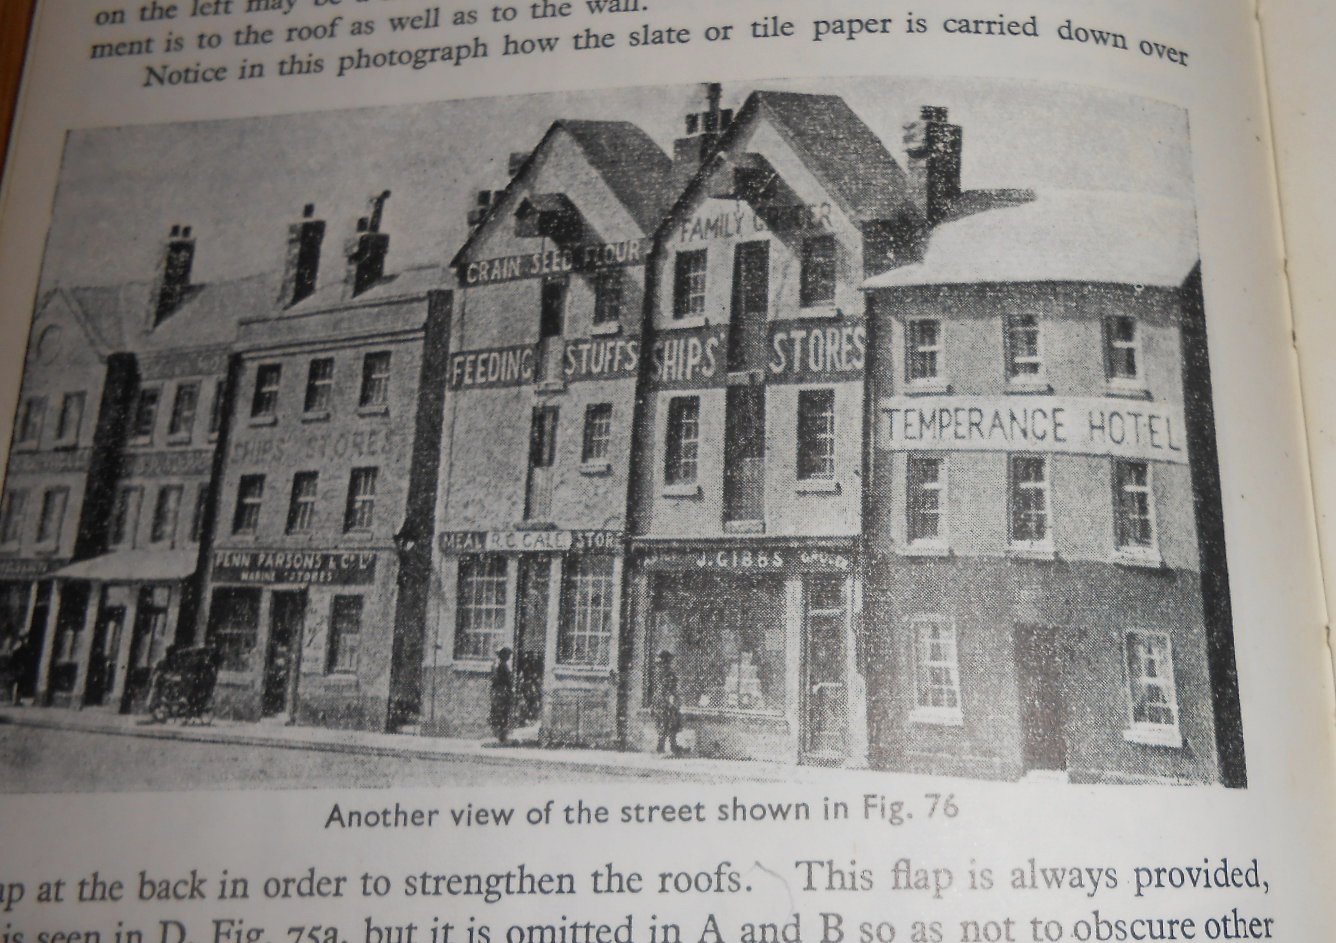
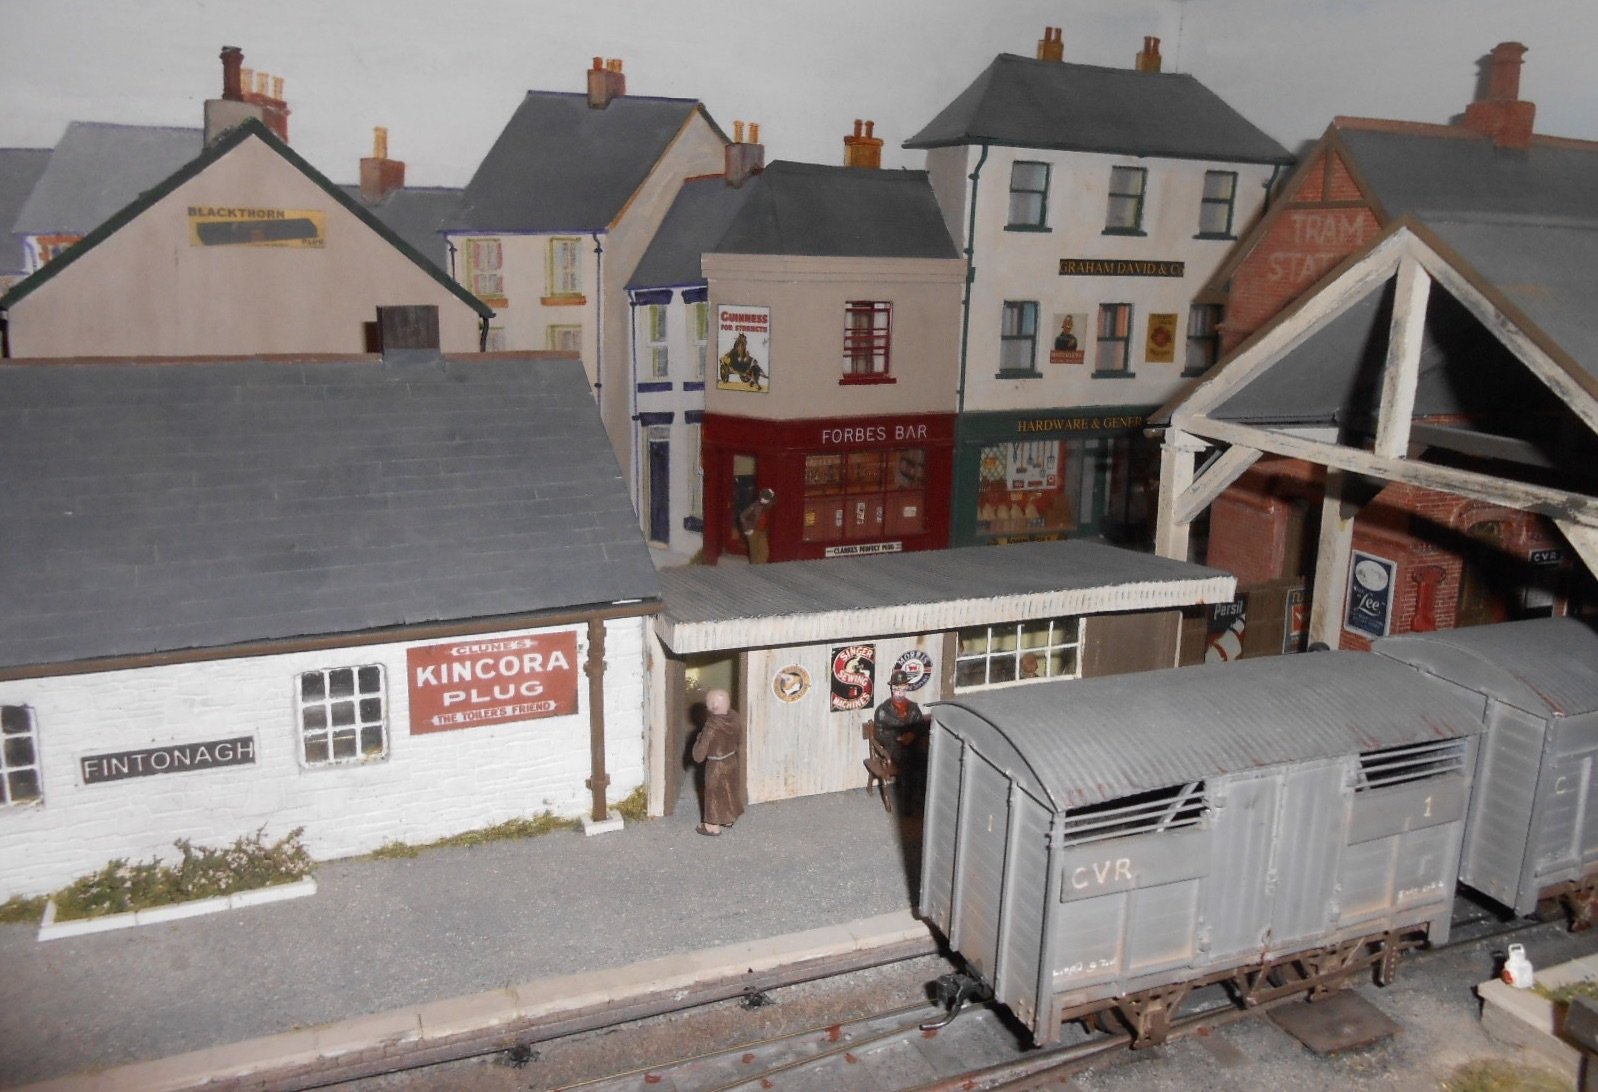
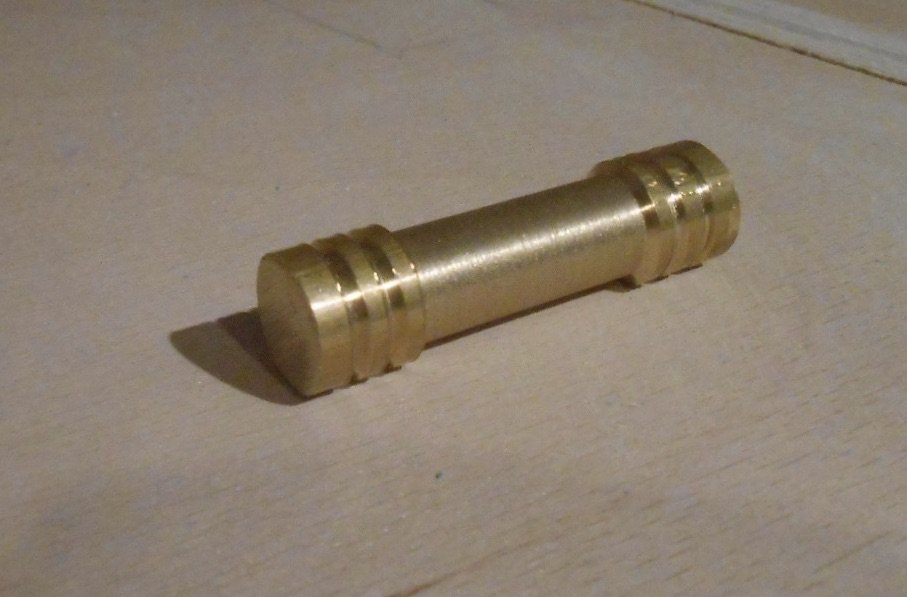
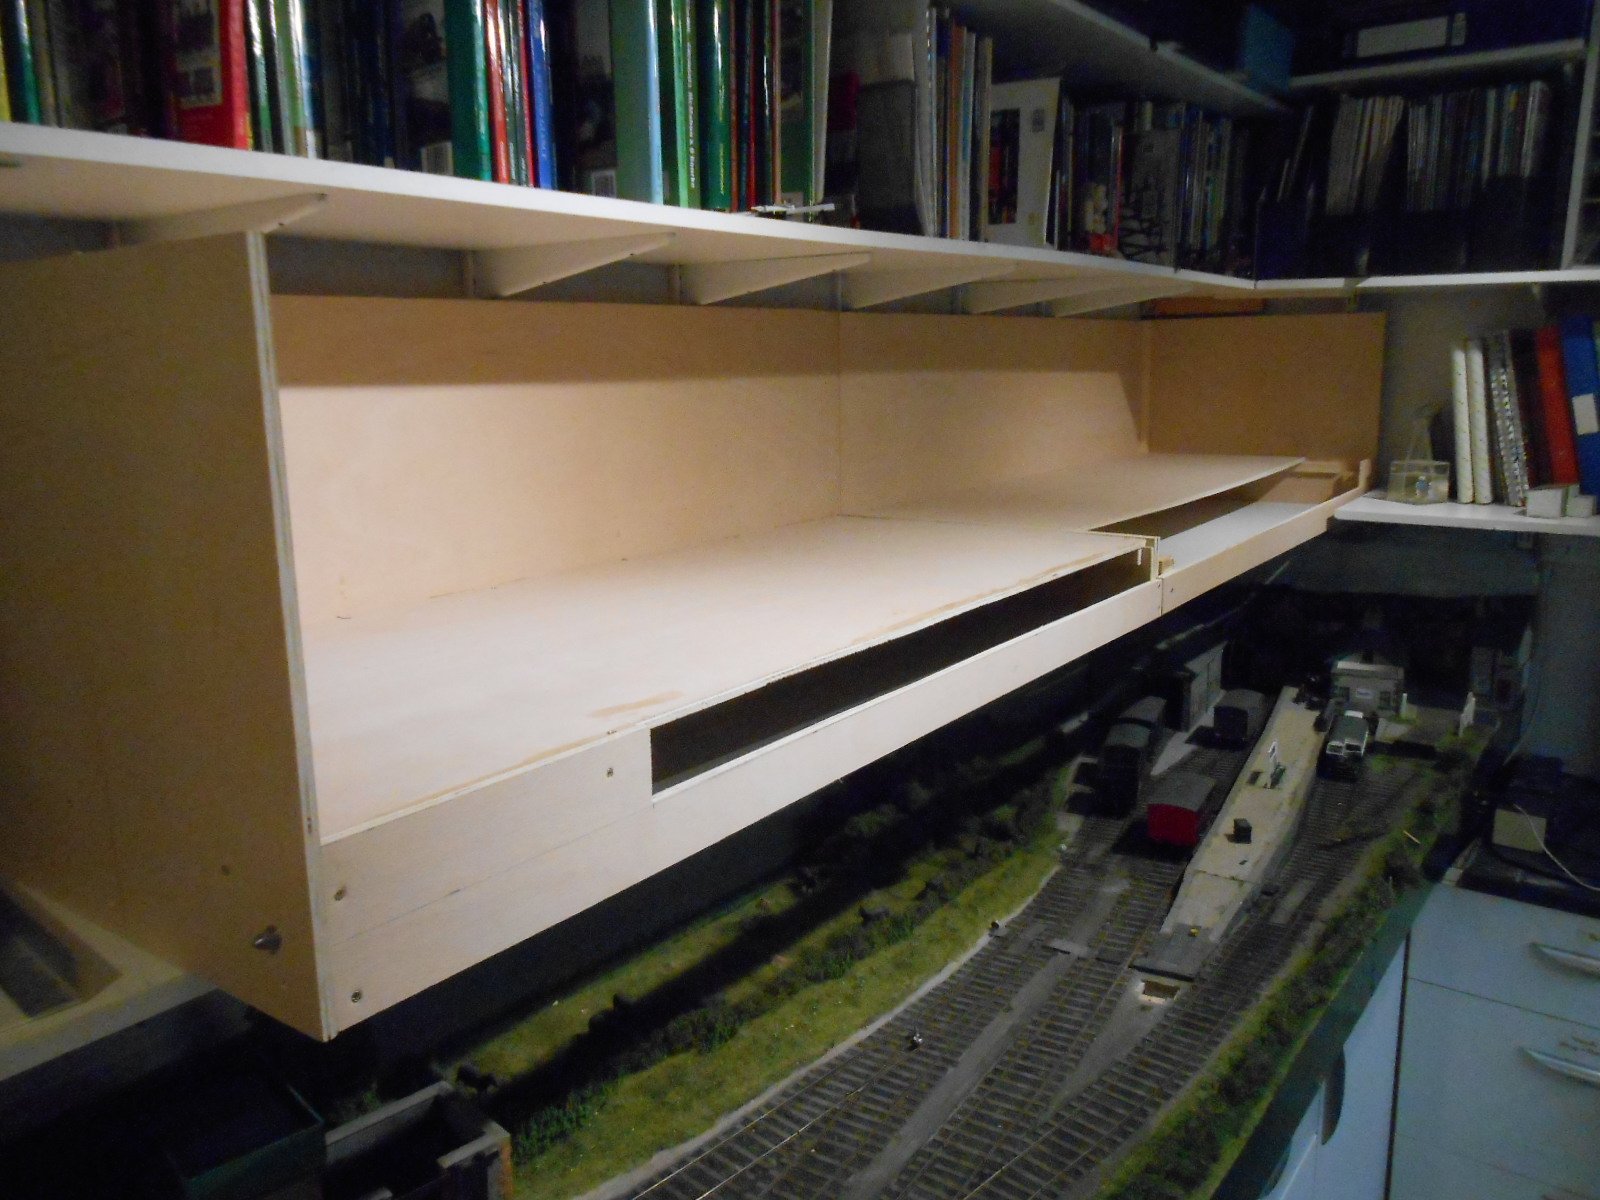
Have spent a fair bit of time filling in various gaps in the baseboards. I've always had a bit of thing about avoiding earthquake cracks and lines in the sky - easy enough on a permanent layout, but far less so with an exhibition layout, which has to break down into short sections for transport. Fortunately, Northport Quay [or NPQ for short], only has one baseboard join to worry about, so that leaves little in the way of excuses in terms of trying to hide, or at least minimise its impact. The main aspects are as follows: Entry to/from the fiddle yard is easy, it will be hidden by a short tunnel. In addition, a curved back scene will hide the corner in the frames The right hand corner will be hidden by a combination of a warehouse and a crane. Current thinking is to adapt the Dapol/Airfix dock crane, the jib of which should hide the corner That leaves the central joint. Sod's Law meant that, while I got the backboards to line up nice and tight, subsequently discovered the baseboard surface had a 1mm wide crack. However, there is a fairly simple trick to sort this, that I learned from ace modeller, Gordon Gravett. Basically, you use some clingfilm one one face of the joint and smear car body filler on the other, then tighten the bolts and leave to set. As a result, I now have a near invisible join, that will eventually be furtherdisguised with removable 'jigsaw' pieces, to break up any idea of a straight line. Mind you, now need to file back the body filler a bit, as a line in the back board has now returned... The next stage has been to mock up the main buildings, to start to visualise the overall scene. Enter another of my pet hates - undisguised low relief buildings. Basically, I don't like to see thin slices of buildings that just end in the sky and try to hide them as best I can. On Fintonagh, careful angling of some buildings has helped disguise the fact some are only one or two cm deep. I want to do the same on NPQ, but envisage far fewer structures, so it will be a case of experimentation. The most obvious problem is the station building, which is semi-relief at one end. That will certainly need disguising somehow. Had hoped I might used the round roofed goods store on the platform of Wesport Quay to hide this, but while I may yet include it, it won't cover this problem. A tree is one possibility. Pictures from John Ahern's book on Model Railway Buildings [first published nearly 70 years ago] show both how and how not to tackle the problem! Finally, with Code 100FB rail and copper clad strip ordered, I've turned myself a roller gauge on the mini lathe, in the hope of starting some track making when the stuff arrives.

- 242 replies
-
- 10
-

-
Definitely worth it.
-
Splendid prototype and that chimney certainly is a statement! Having built Enniskillen, shouldn't think there is anything too scary on this loco and with at least 1000 less rivets to do, less tedious too. So satisfying to have a rolling chassis - the rest is just cosmetic now (!). Will definitely look forward to seeing the model develop and seem to remember the Sligo also had a couple of GNRI 0-6-0s too, not to mention the Garrett that never was...
-
Sorry to progress again, but that footage of East Lynn shows what a fabulous layout it is. S scale, EVERYTHING is scratchbuilt. Not only that, but the locos all have working inside valve gear, while the signalling all works and with proper interlocking. All that is, except for the harbour, which has local hand levers, as per prototype AND also features chain shunting, using bollards and capstans. Have had the immense privilege of operating it twice and it is every bit as good as it looks. Now back to the coaches!
-
If I wasn't modelling the Irish scene, then the Midland & Great Northern would be very tempting! Fortunately, Trevor Nunn's East Lynn is a tour de force in S scale. Indeed so many pre grouping companies either side of the water are very much worthy of attention. Smaller trains, beautiful deliveries - so much to like!
-
They were 4-4-2 tank engines built by the London and South Western Railway for commuter trains in the 1880s. They soon became overtaken by the need for heavier trains, but three survived beyond WW2, two on the Lyme Regis branch, where their flexible wheelbase proved ideal for its tortuous curves and one on the East Kent Light Railway. The latter eventually joined its two sisters, working until the early 1960s. Their elegant lines gave them celebrity status in latter years until they were replaced by modern 2-6-2Ts and then DMUs, before the branch closed in the mid 1960s. Fortunately, one is preserved on the Bluebell Railway, though is no longer in working order and last I heard, not likely to be now, which is a real shame.
-
Great fun, as ever and a splendid model too.
-
Couldn't agree more about the first two sentences, but not the third. It was Henry Ford who said ' If you think you can, or you think you can't, you are right'. Of course nobody gets to be a loco scratchbuilder overnight, but start with small, simple projects like a building or a wagon and you might just surprise yourself. It doesn't have to be perfect, but making something that is yours alone is immensely satisfying.
-
Mine arrived yesterday, though after the briefest check it was whisked away by the missus until Christmas day. As far as price is concerned, the book is probably at the upper end, but compared to mainland Europe still very reasonable. Specialist tomes there can often be double what we pay here.
-
Absolute gems! A lot of care and skill needed on tiny models like these. Origins?
-
Self propelled cranes and small coasters
David Holman replied to David Holman's question in Questions & Answers
Definitely want one of each! Those early deliveries are just glorious. -
Indeed, I have an electric jigsaw, but find it near impossible to cut straight lines and right angle edges with it. Hence all the ply was cut with with an ordinary rip saw on my 40+ year old Workmate.
-
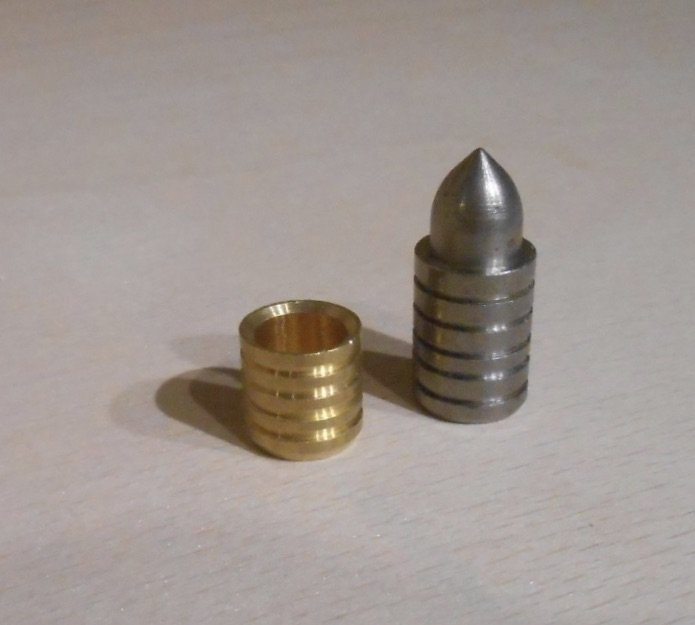
A sharp reminder this weekend about how much timber prices have increased since I last bought any. Couldn't source any 6mm birch ply, so decided to compromise with 9mm hardwood ply, which at least has five layers unlike the rubbish you get in 5mm, three ply. However the real shock was a 2.4m length of 25 x 15mm softwood, which cost more than a sheet of ply. Oh well... Anyway, much work with saw, drill and screwdriver has got the two basic baseboard shells complete, though they still need more bracing. One thing I am happy with at the moment is the two boards join nice and snugly, both at the baseboard surface and the vertical back scene. Bought some 'bullet type' baseboard joiners from Station Road Baseboards, which are simpler to fit that proper pattern makers dowels and seem just as effective.
- 242 replies
-
- 11
-
-
Fab.
-
If fine tolerances are causing problems, is there any way of introducing simple springing or compensation to the bogies? Have no knowledge of MM diesels, but if it is an unpowered axle causing the problem, then maybe introducing some vertical movement by gently opening out the axles boxes or bearings, along with a piece of wire bearing down lightly on the centre line of the axle, should be enough to keeps things on the track. Probably only talking about one millimetre of movement in total, but if possible, it is surprising what a difference that makes.
-
Rachelstown and St Stephens Green
David Holman replied to The Derry Road's topic in Irish Model Layouts
As dens go, that really is splendid. -
The magnets I use are for Dingham couplings, Tony and as a 'hook and latch' type (basic solenoid), should be fine for Dapols, though have no experience of them myself.
-
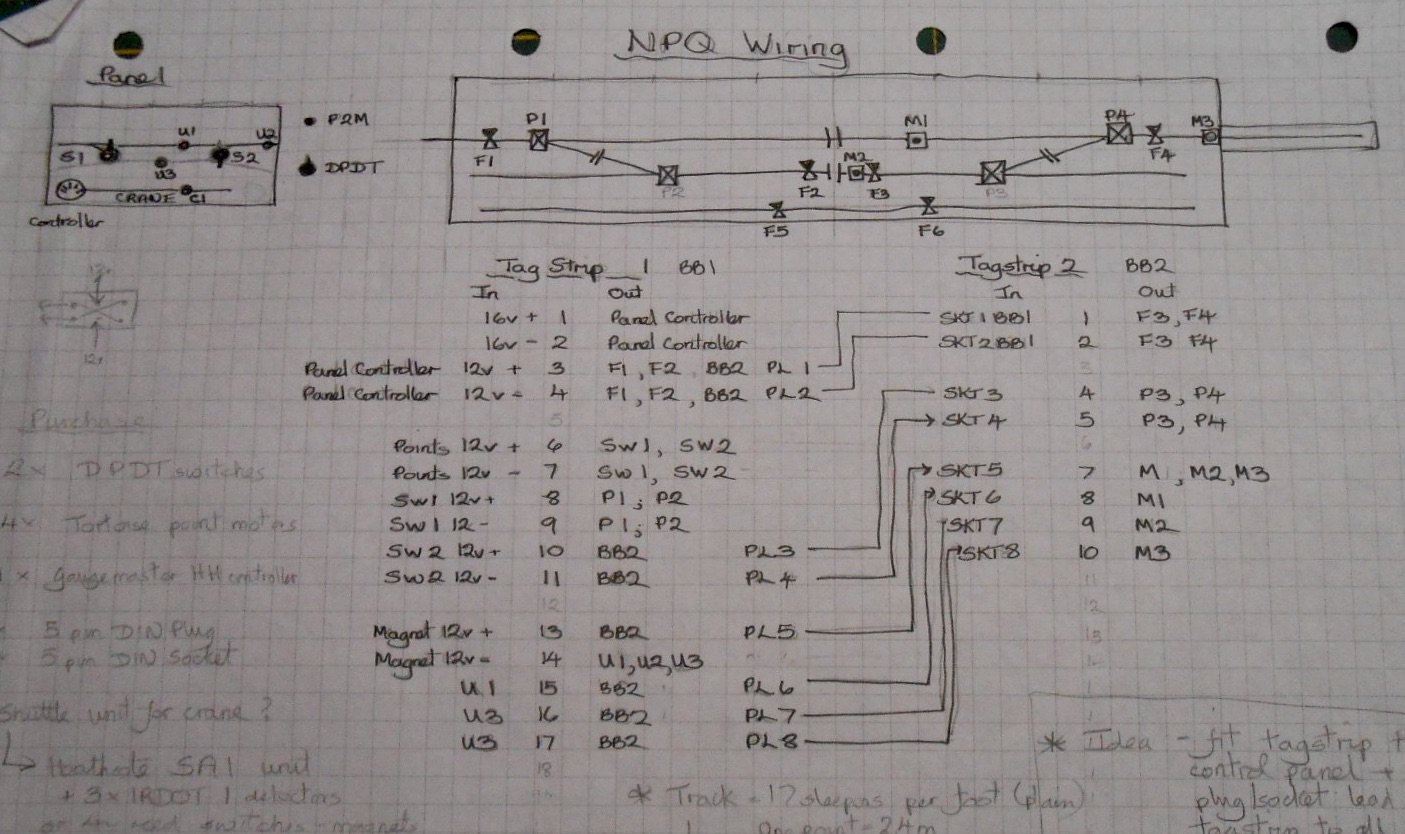
Just realised I'd got a draft I did over the weekend, so here you are. Hopefully self explanatory. F = Feed Sw = switch PL = plug SKT = socket M = Magnet P = point
-
I have always used tag strips and computer lead 'D' plug and sockets. Wires go to the tag strips from point motors, 12v feeds, track etch and where anything goes across a baseboard joint, you run wires from the tag strips to the plug/socket connector. A wiring diagram means you don't need to worry about different coloured wires, just which tag goes to which feed, plug etc. Have been working on one for Northport Quay, so will post over the weekend.
-
The latest edition of Railway Modeller sees an article on Ardglass, by Colm Flanaghan, along with one by Paul Greene, who also posts here. Paul's is Blakey Rigg (NER) in S scale, though many will remember his Kilbrandon in the same scale. Two fine articles.
-
Way back in the day, I built a K's Adams Radial for my first EM layout. Crude beyond belief by today's standards, at my first ever show, a visitor commented that one of my locos appeared to be on fire!! Not quite, but it was certainly smoking from a major short circuit. Never a great runner, this didn't improve matters and am fairly sure it never turned a wheel again.
-
Part of me thinks it is sacrilegious to abuse something as splendid as an Adam's Radial. The rest just says 'why not?'. There are plenty of Radial models and certainly not enough County Down ones. Go for it!