

murrayec
-
Posts
2,731 -
Joined
-
Last visited
-
Days Won
70
Content Type
Profiles
Forums
Events
Gallery
Everything posted by murrayec
-
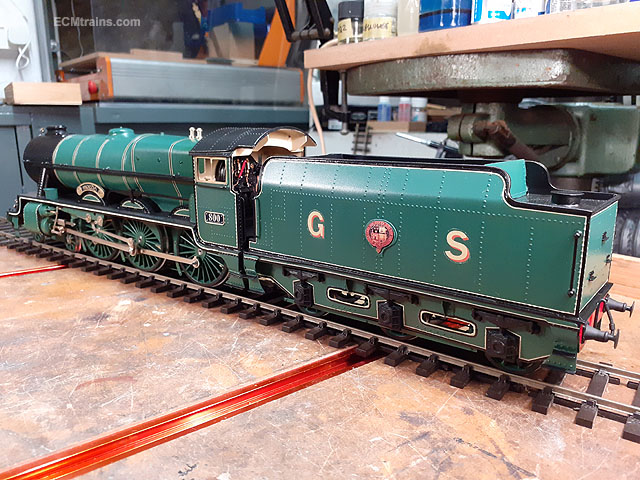
Just to clarify;- This model is from a kit of parts made by Brendan Kelly, Brendan built 4 of these models a few moons ago from his own patterns for members of the MRSI club. The Model Railway Shop did produce a kit of the GSR Class 800, but that was a different animal! Eoin
-
They are super glued in, and as I said above;- ''Not the easiest job for the faint-hearted! The handrails are a bit fiddly, but the glue will eventually let go with slight lever pressure with a cocktail stick. Super glue remover can be used for softening the glue but it will also soften the paint! All came free for me without breaking'' Eoin
-
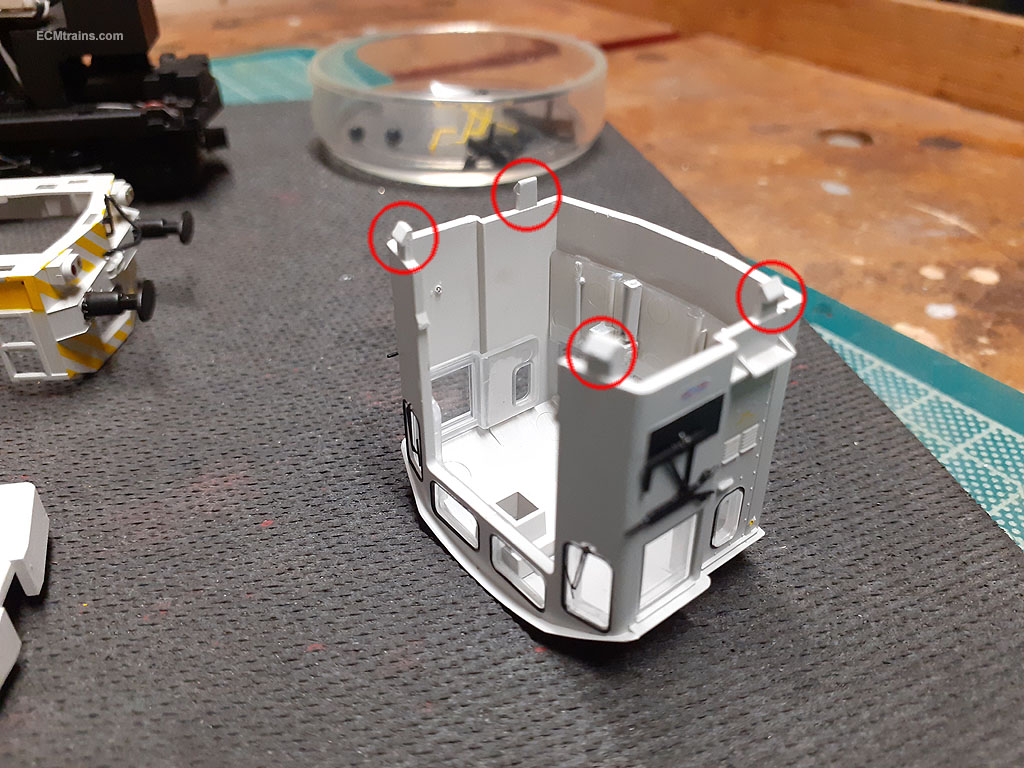
I don't think so! the only way I was able to release the barbs was from underneath after the chassis was removed, also there was the difficulty with the boxes being in the way and I could not have sussed what was going on without removing the chassis. The cab rear barbs do release when the cab body is squeezed on the outside, but the cab front ones needed a cocktail stick prodded in from underneath. Eoin 'Cab rear' - I'm looking at it as bonnet front!
-
The speaker is up front under the board;-

-
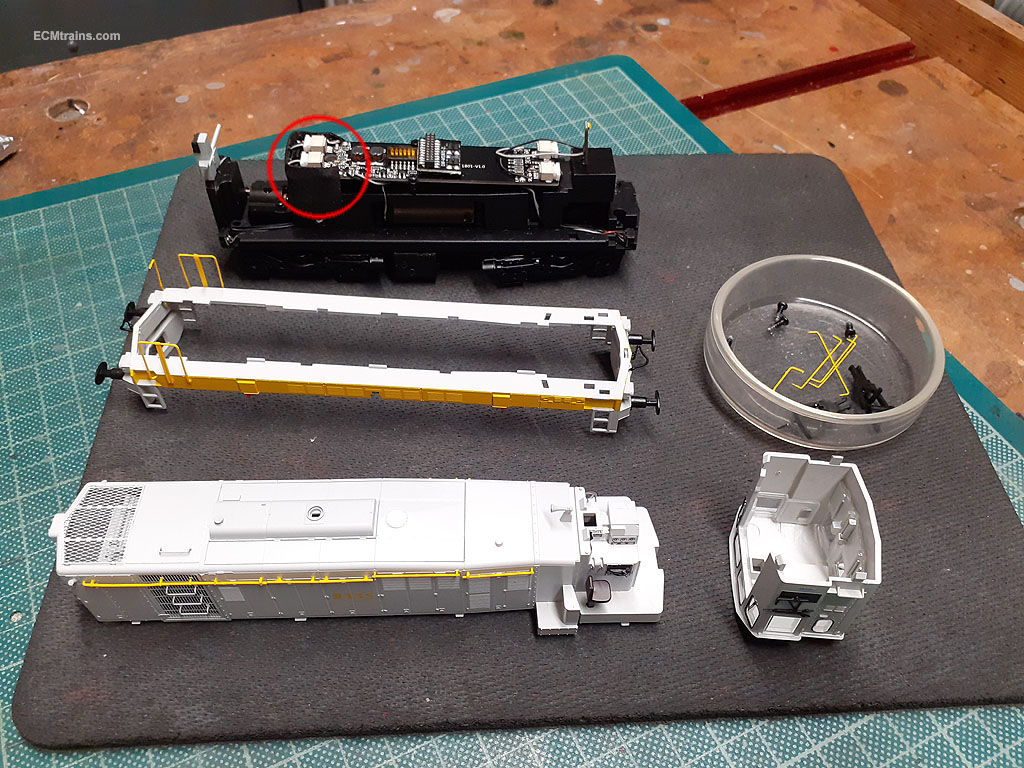
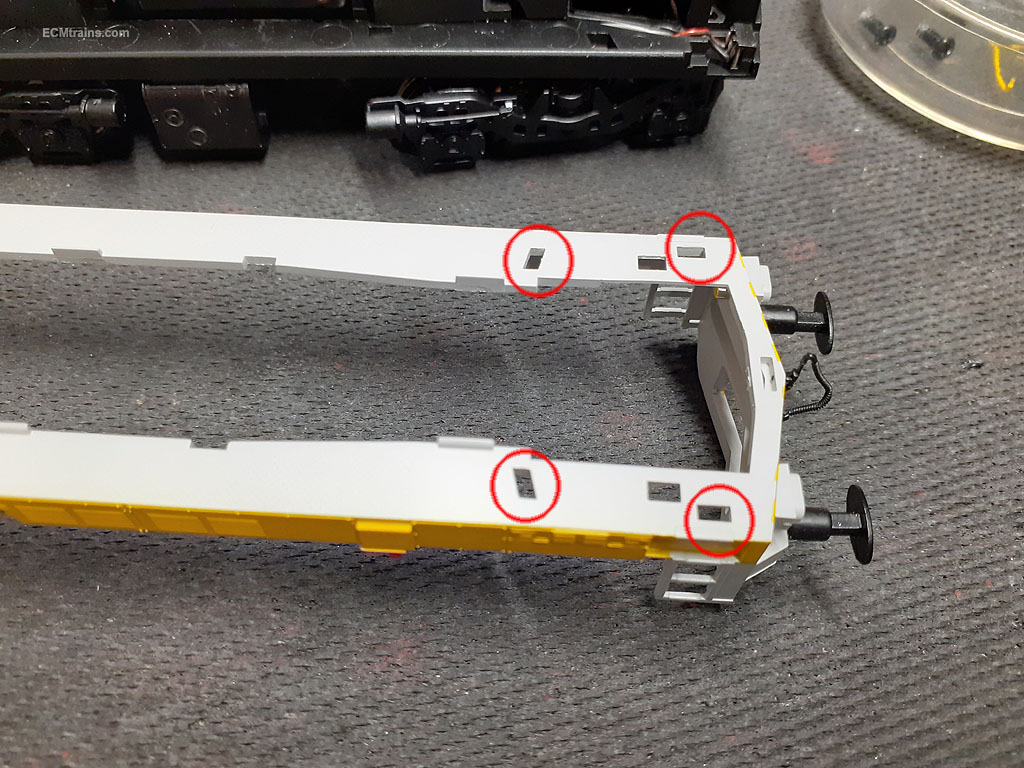
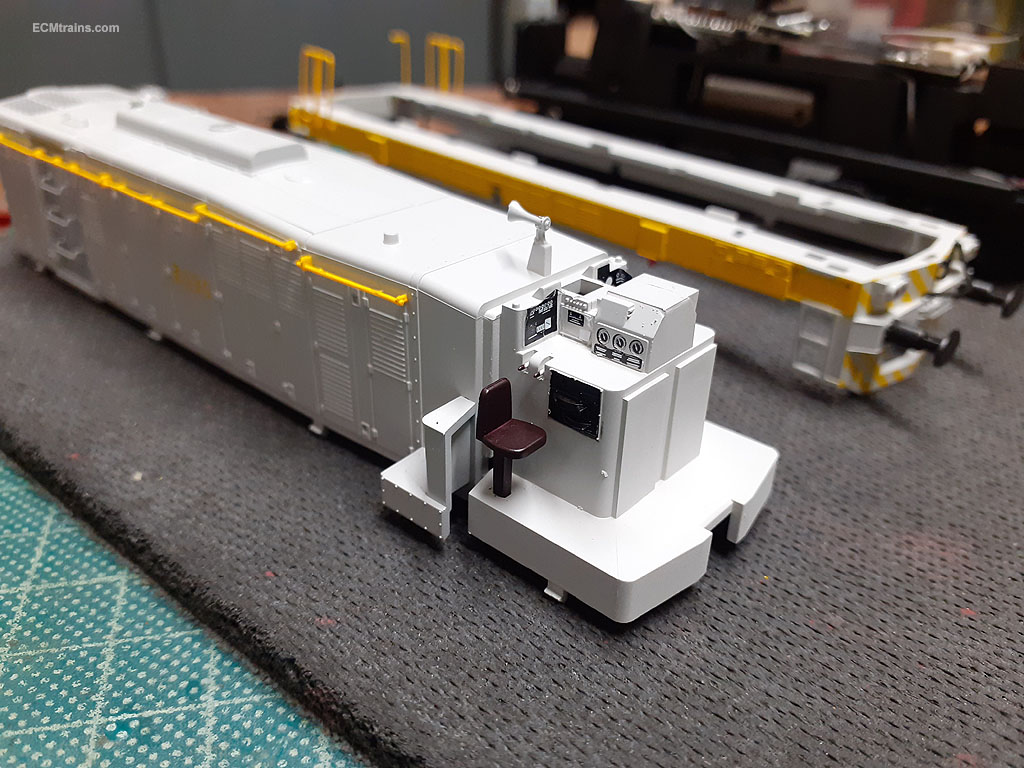
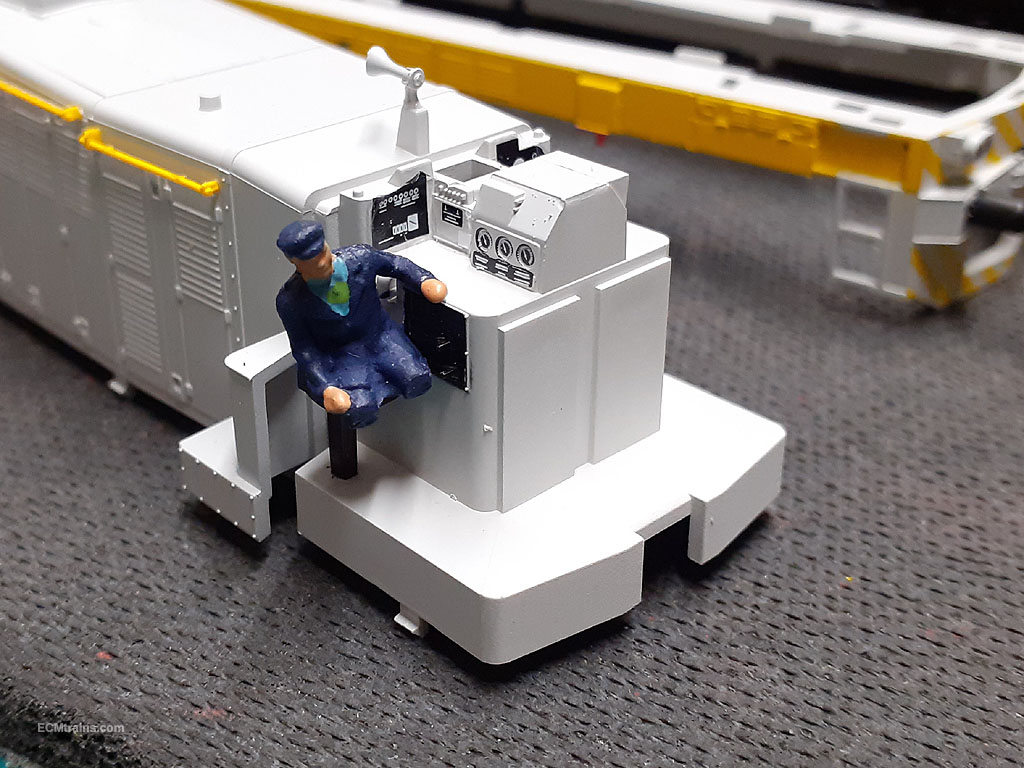
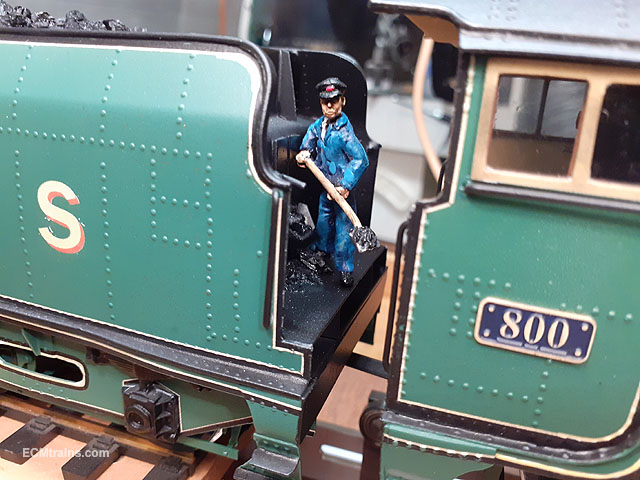
I was asked how to install a driver in the MM 121. Remove the chassis by undoing the 4 screws, 2 in front of each bogie. The cab is designed to slide up off the footplate/body after one removes the door handrails, there are 4 barb catches on the base of the cab which catch into the footplate. On this model the cab refused to slide up as the boxes clued to the body in front of the cab were catching it! I had to remove the footplate which again is held by barb tabs on the body into the footplate. The front handrails also have to be removed for this. I could then flex the parts and slide the cab up. Not the easiest job for the faint-hearted! The handrails are a bit fiddly, but the glue will eventually let go with slight lever pressure with a cocktail stick. Super glue remover can be used for softening the glue but it will also soften the paint! All came free for me without breaking. This is a shot of the OO scale driver I use in the DARTs! He's to big- way to wide, and not fitting into the space. I recommend using a HO scale driver. Eoin
- 18 replies
-
- 11
-

-

-

-
-
Due to the present situation this Sunday's Fair has been cancelled;- Keep an eye on this thread for update
-
And some live action
-
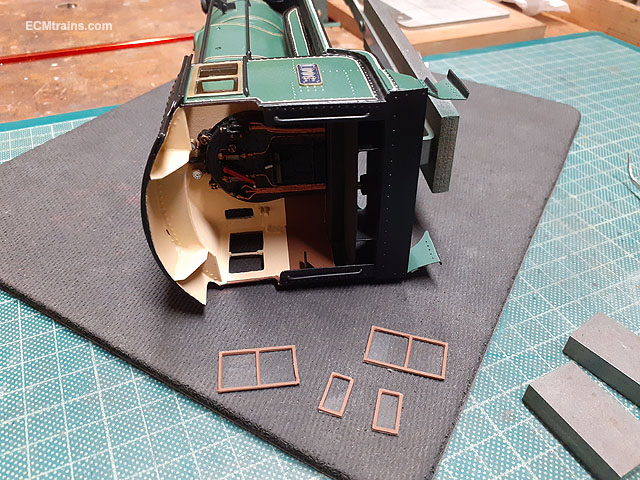
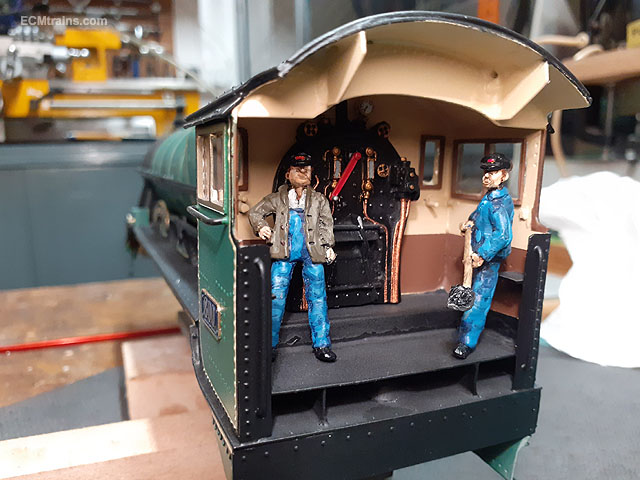
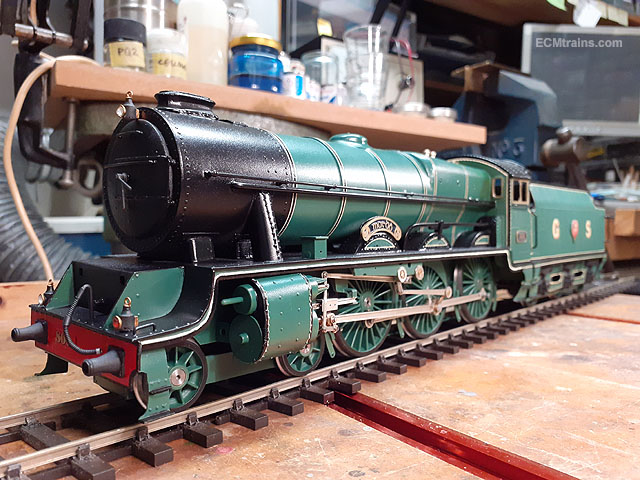
The model is now complete. The cab window frames and glazing were finally installed after the body was given two coats of satin lacquer. The lads posing again! Then final assembly to take a run on the rolling road. I'll post up a short video soon. Eoin
-

Can’t get DCC Murphy models to run with Guagemaster express.
murrayec replied to Thom's question in Questions & Answers
I did an edit on the post above and it came in as a quote? I was responding to the question on ''running a DC loco on DCC track'' -
Can’t get DCC Murphy models to run with Guagemaster express.
murrayec replied to Thom's question in Questions & Answers
It can, depending on the type of controller- some of them allow for a DCC loco with ID 0 to run, but as you say they make more noise and not really recommended for long running as it can damage the motor! Could what you took out of the 201 to replace with the MM DCC chip be the DC blanking plate? It's rather different to a DCC chip, as in very few components on it..... Eoin -
Can’t get DCC Murphy models to run with Guagemaster express.
murrayec replied to Thom's question in Questions & Answers
Thom You say the two locos run fine on DC with the DCC chips installed! which means the chips may be OK, this would make me think- your accessing the locos with the Gaugemaster DCC controller may be at fault, also the fact the two locos are doing the same thing at the same time? Does the Gaugmaster controller have an 'identify' option for a DCC loco on the test track? if it does use that to ID the loco and see if you can operate it and do the factory reset if required. or If you know the loco ID for certain!- when you do a factory reset (or any CV change) the loco should jiggle a bit with low volume clicks to tell you its doing something- did that happen in your previous factory resets? If you get no jiggle n clicks your not programming that loco! eoin -
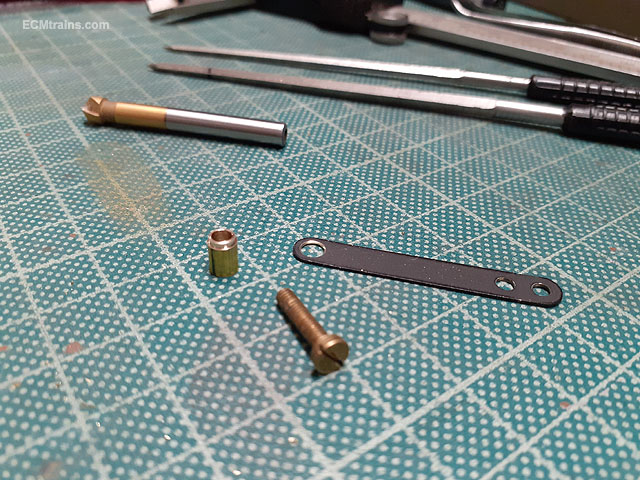
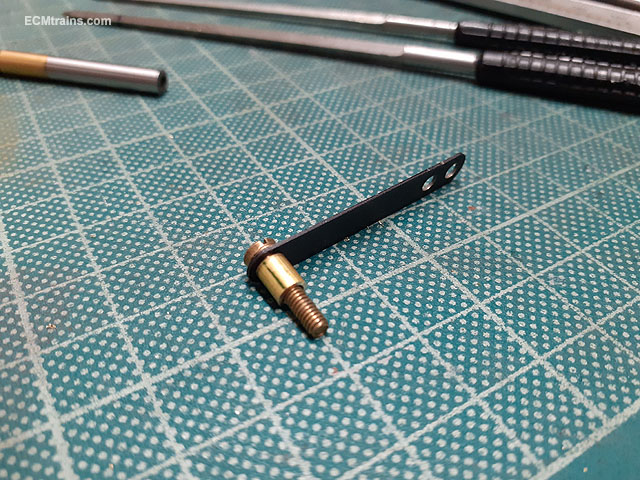
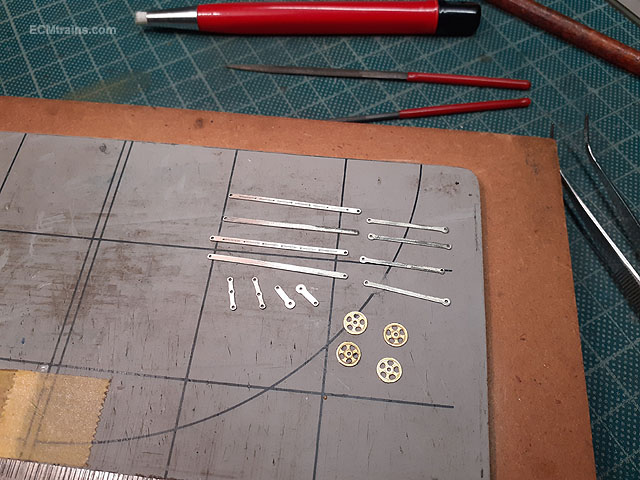
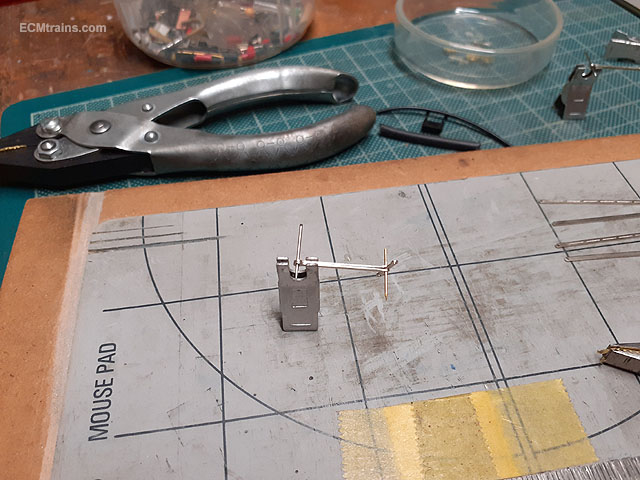
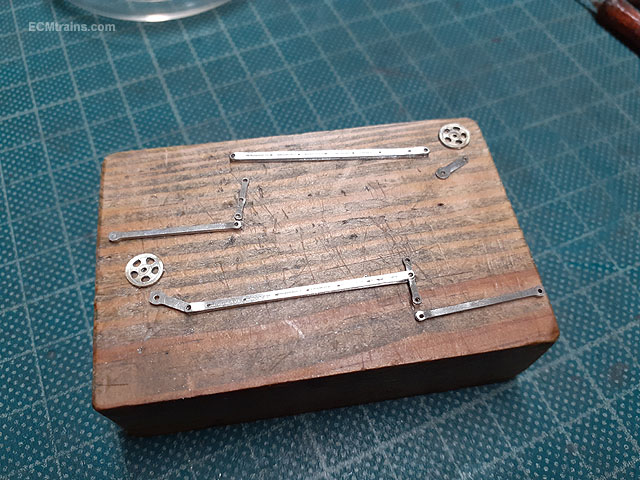
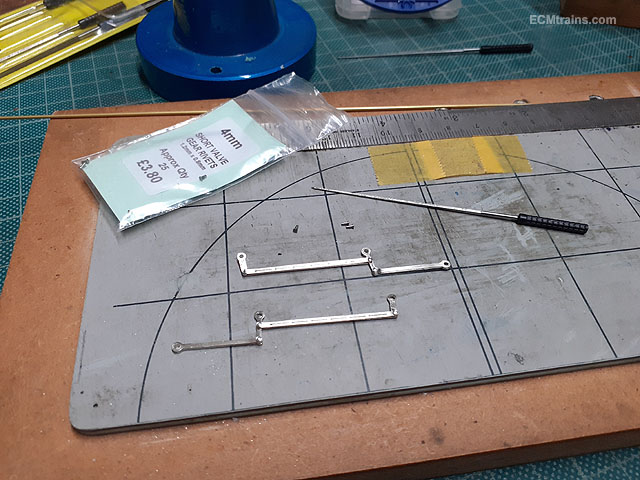
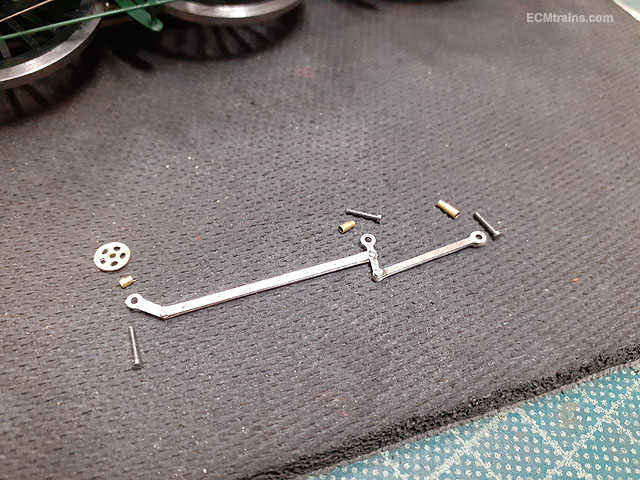
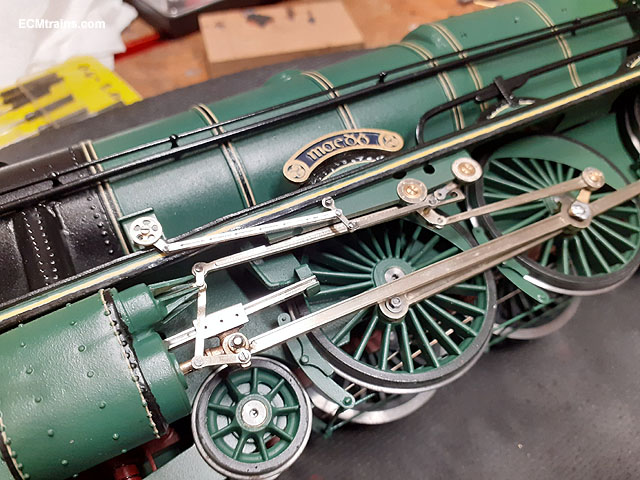
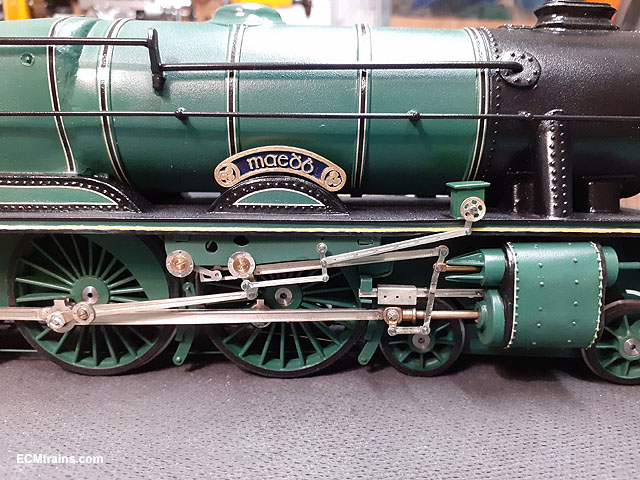
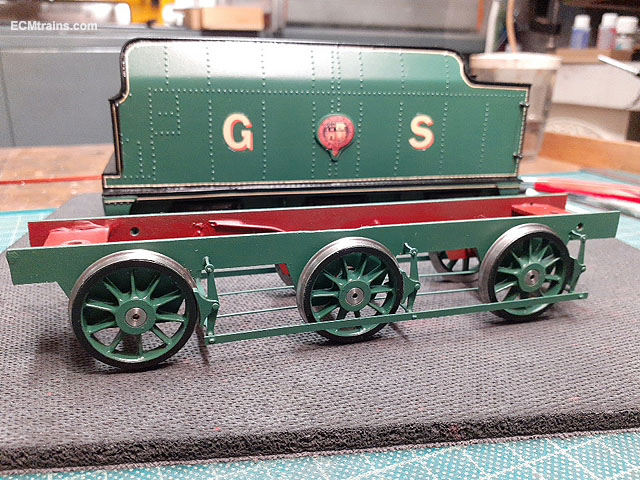
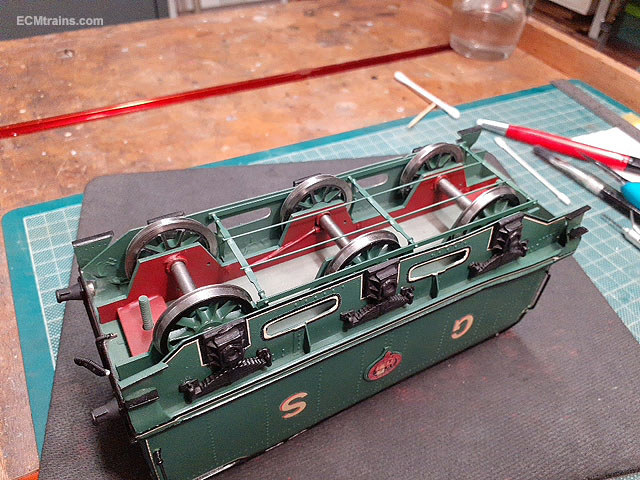
The last mechanical parts are complete;- The Tender drag bar was set-up with a brass tube collar to capture the bar and allow to rotate. The oil pump drive gear was cnc cut from .35mm NS sheet and brass handwheels cut from.3mm brass sheet, the parts were cleaned up, holes sized, and then prepared for sweat soldering. Parts are now soldered and ready for installing. Test fitting the handwheels to the pump box with 14BA screws. .8mm Steel rivets were used to assemble the gear. All the bits ready to go on, using a sleeved 1.2mm brass tube as bearings and more 14BA screws. And done both sides. Eoin
-
The ESU chip does run in DC with limited sound, generally they are set to startup the engine at 50% of the throttle, the loco will drive from there with more throttle applied, the engine sound runs up with the more speed and runs down with break squeal, and switches off when the throttle is turned down to less than 50%..... Not sure how Murphy's chip is set, so the above is an example Eoin
-
until
-
Here is the October date for the Fair, due to the Covid situation please keep an eye on this post for updates near to the date.
-
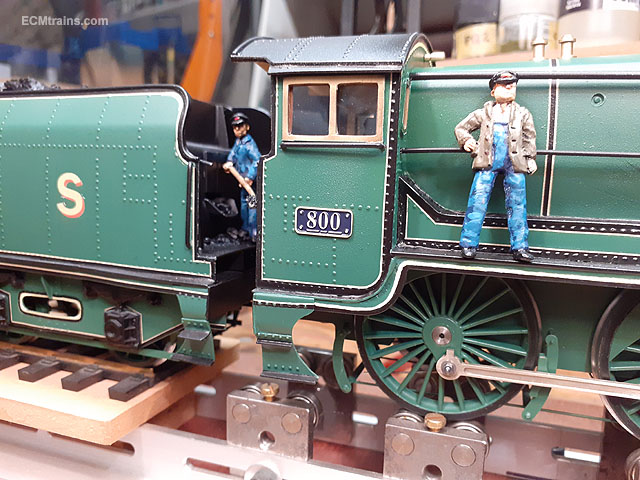
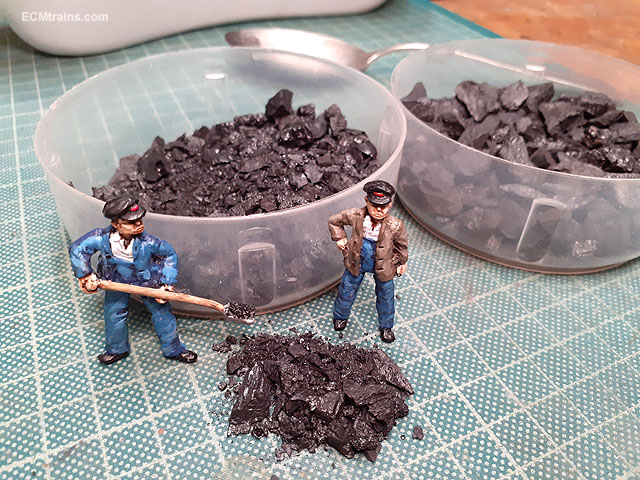
Thanks guys, the best I can do is show it running on the rolling road very soon. The crew were by yesterday on inspection and set about preparing the coal.... Eoin
-
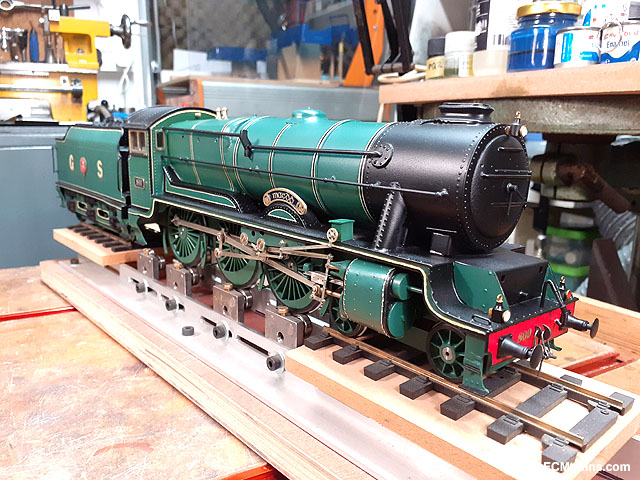
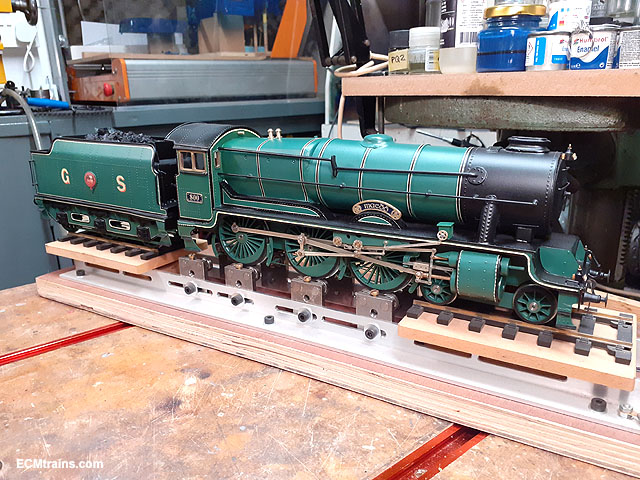
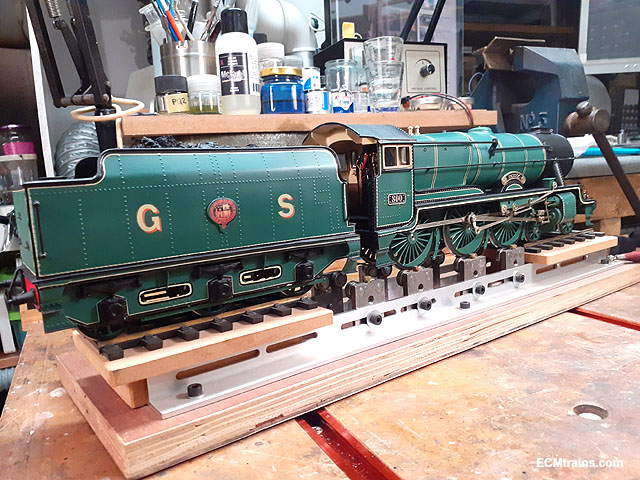
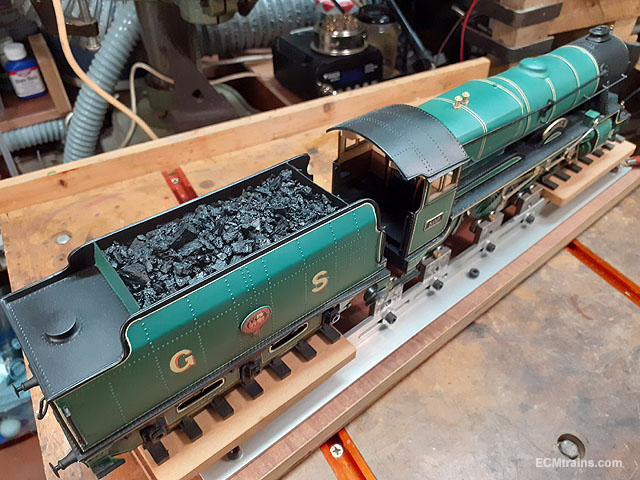
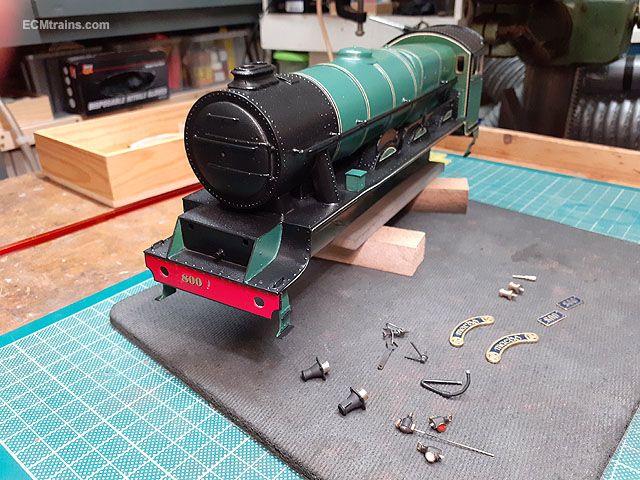
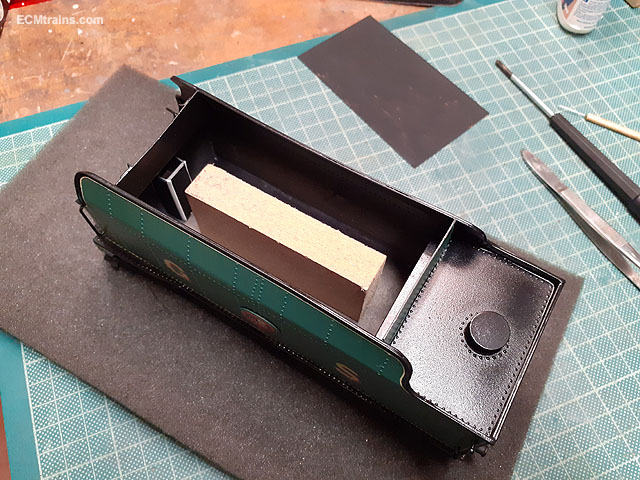
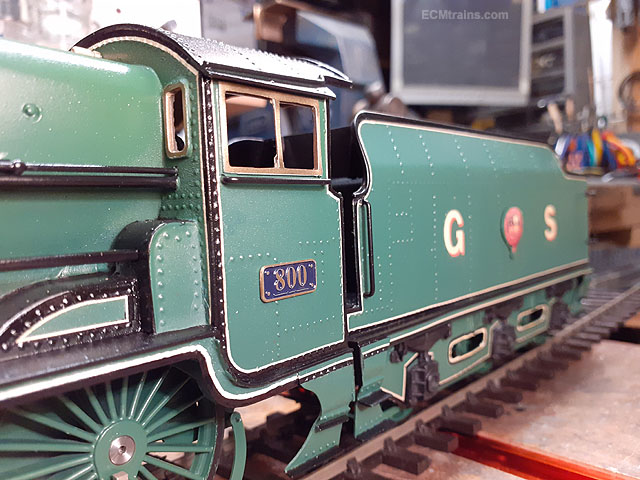
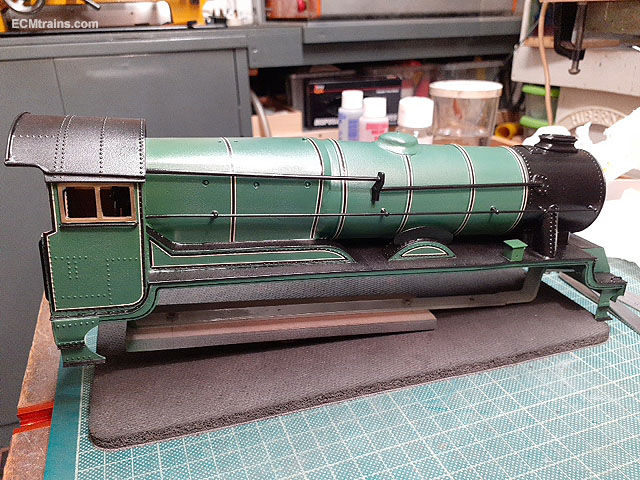
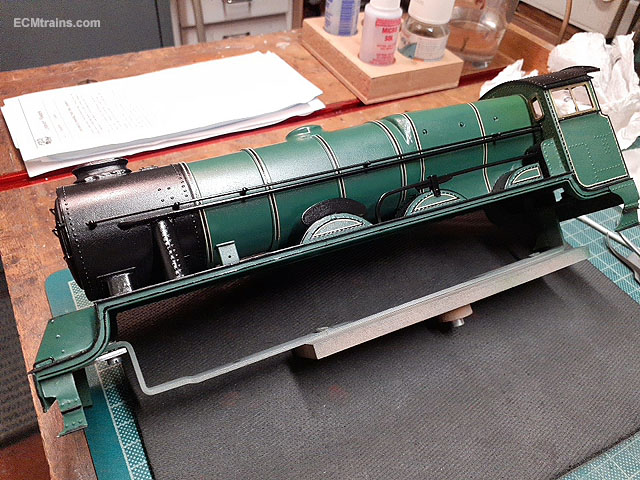
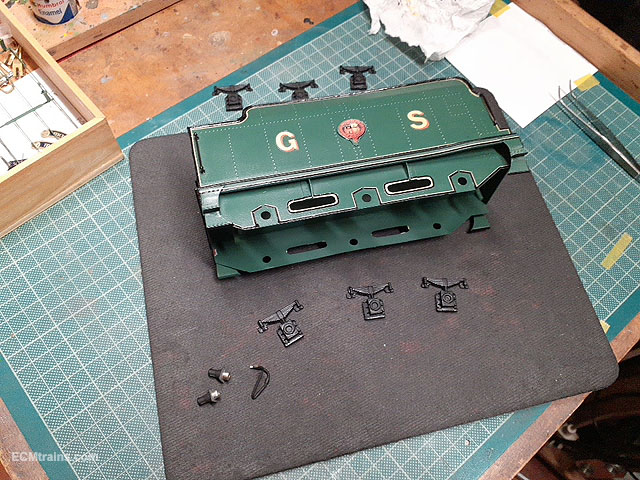
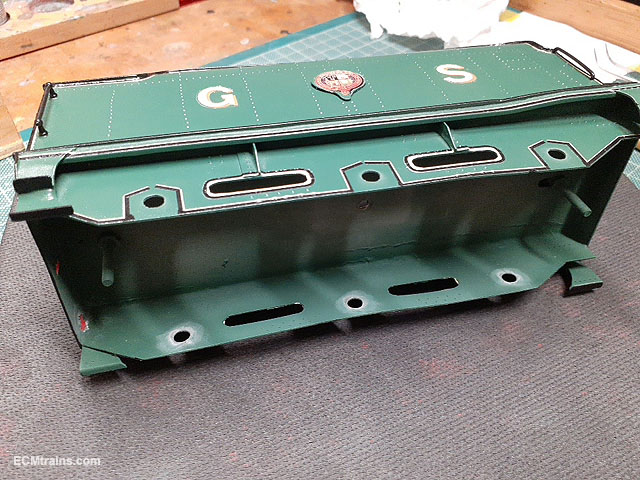
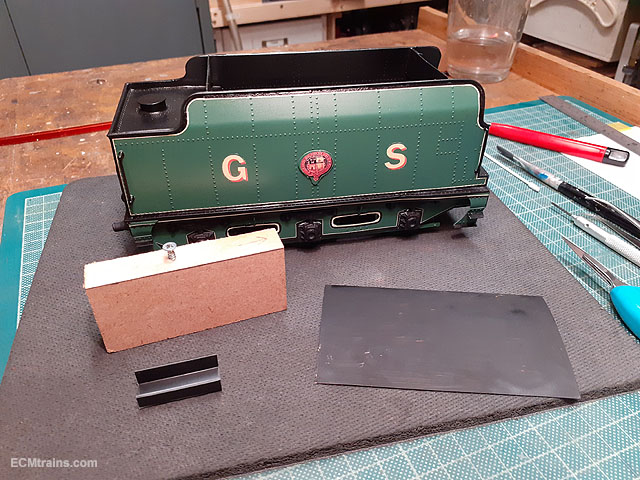
Parts being epoxy glued on the loco body, the name/number plates are stuck on with Glue n Glaze. Decided to install the card base for the coal now so that it will get a good lacquering against the Mod Podge glue sticking the coal in. The coal chute has it's baffle epoxied in and the mdf spacer stuck in with Sticksall adhesive. And the card is stuck in and sealed around the edges with Sticksall so the glue hopefully wont leak down through the model- best to keep it in the coal! And then with nearly all bits stuck on a test assembly of the loco & tender to check for adjustments n jiggery-poke- to be done before lacquering just in case finishes need touching up, the tender footplate height also been checked for a few mdf spacers to bring it up level with the cab footplate, and setting up the tender drawbar fittings........ .....and maybe a few more;- Still have to tone down that valance & the cab front line, a tad bit heavy also and thinking about what could be done! The gear n wheels to drive the oil pumps also needs fitting... and a few other bits. I think were pretty close now- to the end!! Eoin
-
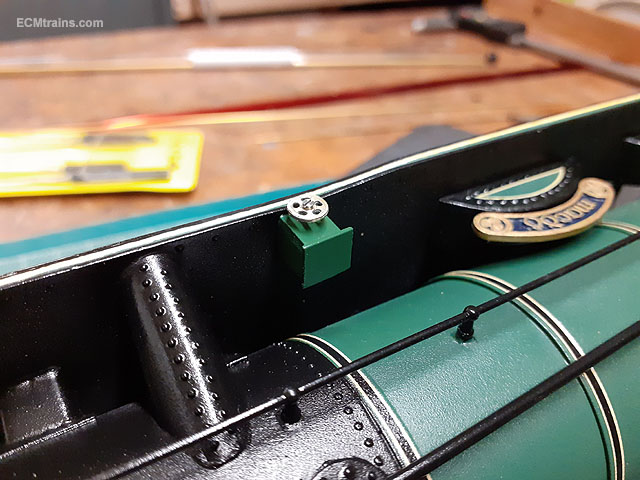
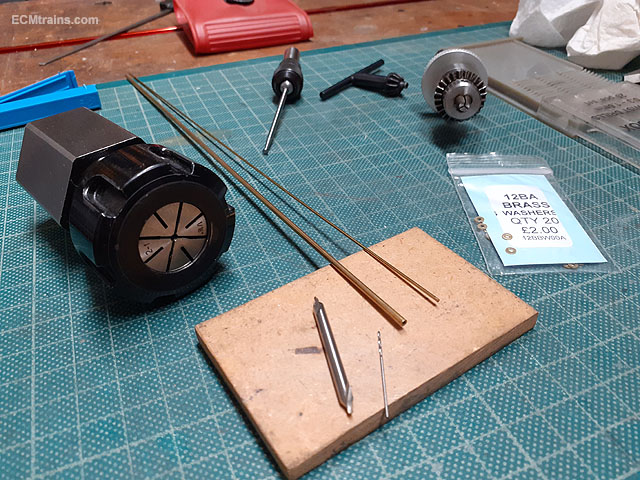
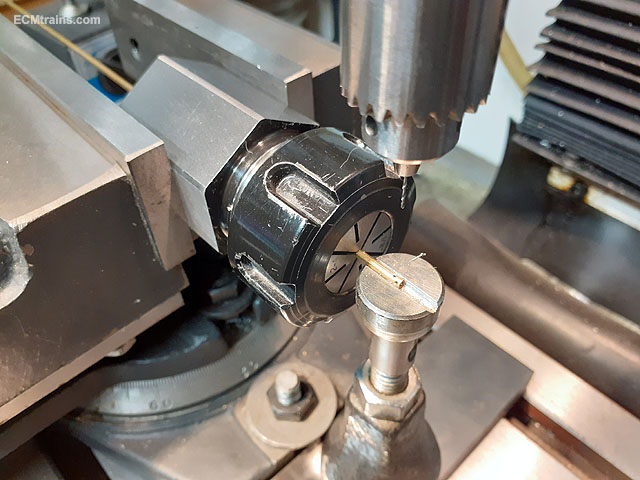
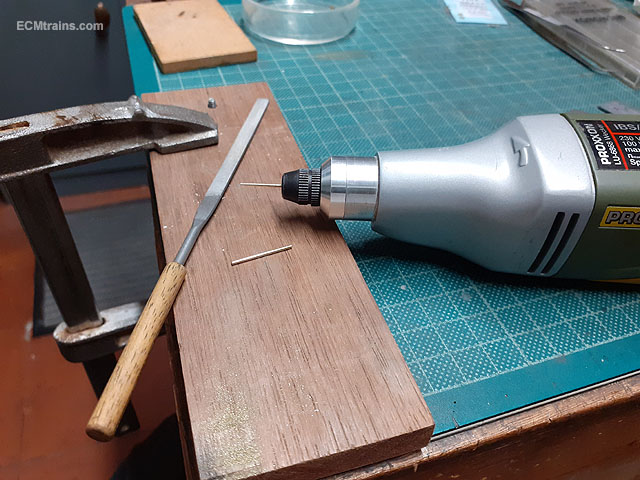
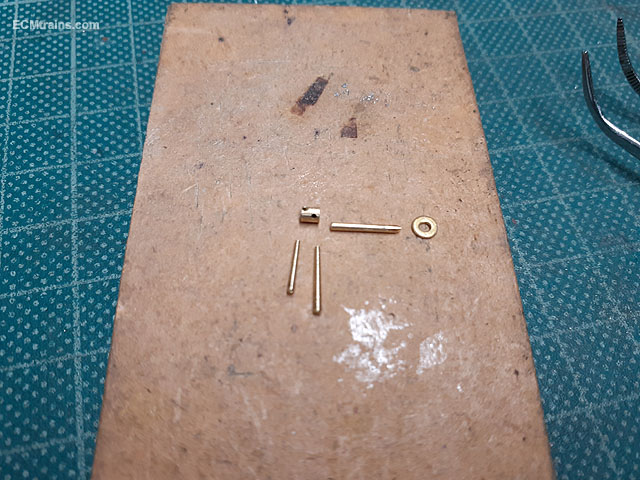
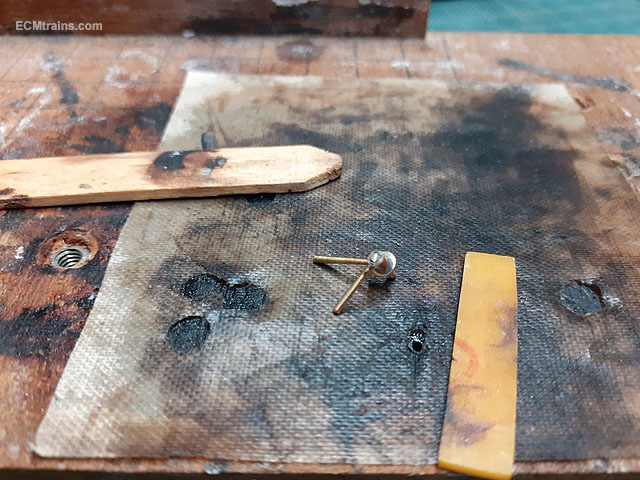
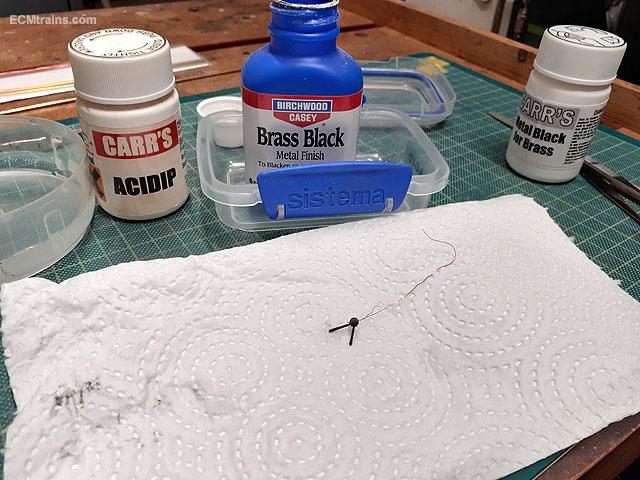
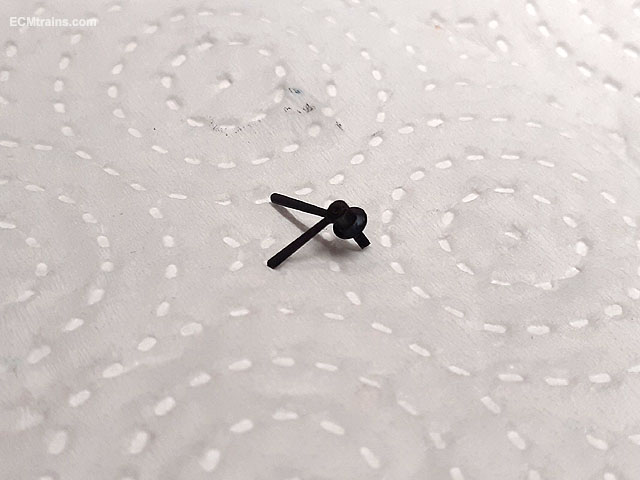
Marking Dart handles for the smokebox door. Making the handles out of 2mm brass tube, 1mm brass wire and a 12BA washer. The brass tube will form the main body and is held in a collet chuck with a hexagonal body for indexing in the mill vice while drilling .6mm holes to take the handles. One can just about see the two holes in the end of the tube, this end is then cut off in the lathe using a fretting saw while the tube is rotated. Two pieces 20mm long of the 1mm brass wire is cut off and mounted in the mini drill for filing the taper of the handles down to 6mm dia, the brass is rotated against the hardwood block while the filing is done. When the filing is complete the handles are trimmed to 8mm and 5mm. All the bits ready for soldering, a 1mm brass rod will go through the tube body and washer, it will protrude out the back for gluing to the smokebox door. Jigged up for soldering with a small spot of 180deg solder, the 1mm wire protrudes out the front and into the timber base to hold all in place- this is cut off after soldering. Flux is liberally applied to the parts and the soldering iron is only touched off the wire above the washer, after a second or two the solder wicks down through the assembly..... ......and done with protruding wire cut off. After a wash and clean up with the fibre pen the unit is acidip cleaned and acid blackened. Finished part. Eoin
-
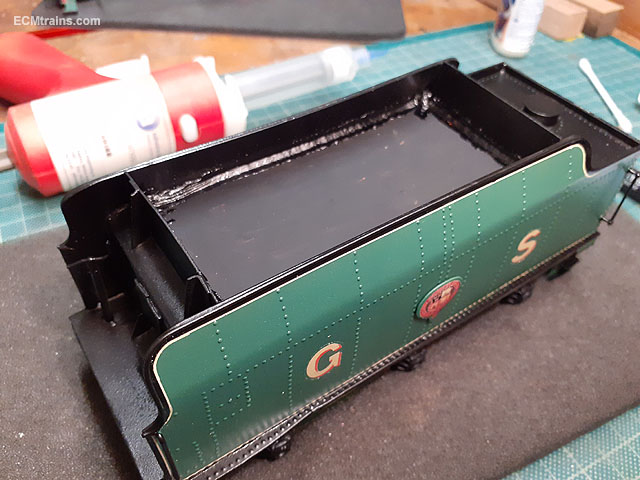
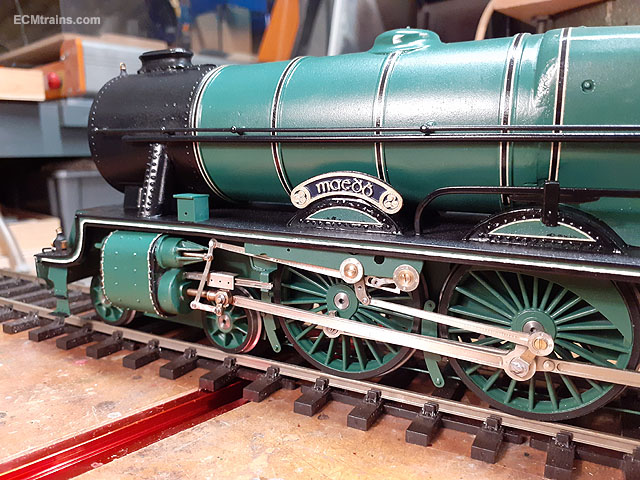
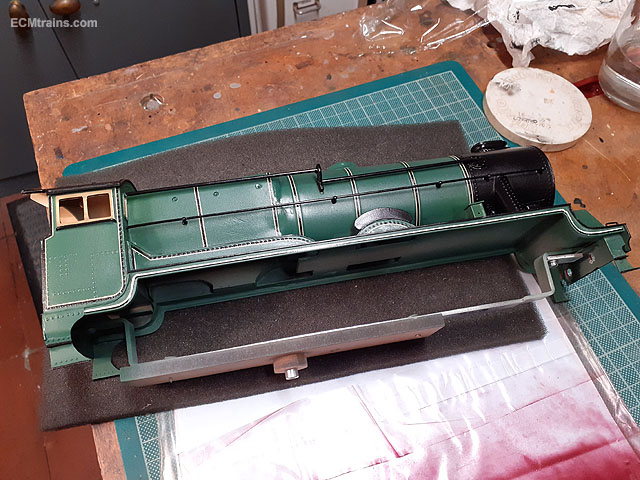
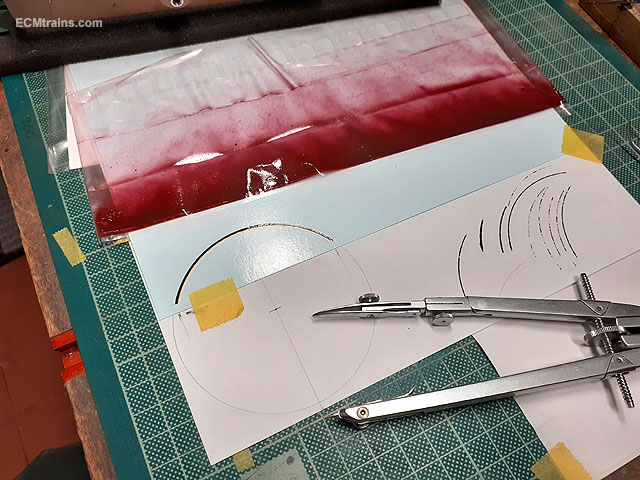
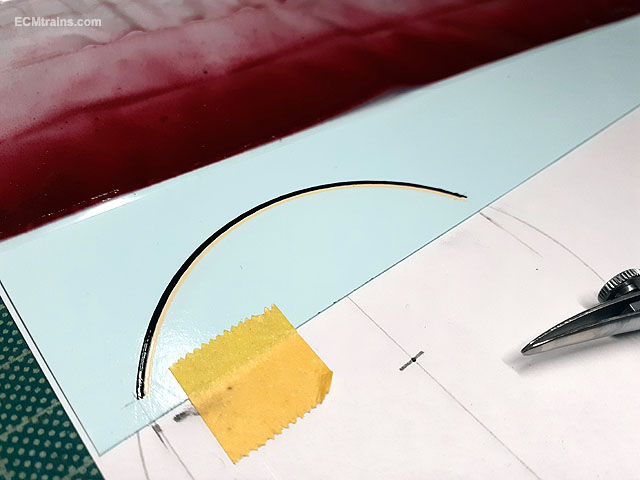
Thanks guys for the comments and likes. Lining proceeds, the loco body lining is coming to completion except that I am running out of decal lines, there is no decals for the valance curves and for the cab front at roof level! I have just enough lines to complete the tender which involves trimming boiler bands (which a few extra were on the sheet) of one of the yellow lines. Valance lining with the bow pen- black line done. Setting up a cab front line on clear decal paper- black line done. Tender lining complete and getting ready to epoxy on the axle boxes, buffer shanks and vac pipe. The inside of the frames were abraded with a fibre pen back to the metal for best glue fixing. Tender chassis with breaks fitted. The tender is now ready for a few coats of lacquer. And these are the parts for coaling the tender- a folded styrene cover for the coal chute, a bit of MDF to fill the gap under the coal, and a card base for holding the coal, these will go in after lacquering. Yellow lines going on the loco valance, I got this paint mix a bit light but was chuffed with the neat line so decided to leave it there and dull it down later. After making an adjustment to the paint mix I did the yellow line for the cab front. Eoin
-
One of Ken's photos posted earlier in this thread;-
-
Excellent Ken, it looks amazing. Eoin
-
There is a note in Mr Murphy's 121 instructions 'use of a non MM chip voids the loco warranty' one should keep that under consideration when using non MM chips..... Eoin
-
Hi ken Hard parts to come by! Best way to make them is with electrical copper wire and a few washers soldered on after one cuts the bend out, brass can work but would have to be annealed first- heat up to dull red and leave it to air cool. Eoin


until