murrayec
-
Posts
2,730 -
Joined
-
Last visited
-
Days Won
70
Content Type
Profiles
Forums
Events
Gallery
Blogs
Store
Community Map
Everything posted by murrayec
-
T-Cut can be got in a motor factors, it's a car product for cut restoring & polishing car paint. SSM can be contacted through their website;- http://www.studio-scale-models.com/Index.shtml A very small quantity of T-Cut is required, gently rubbed over the decals with the bud, no force is required and after a few minutes the decal will rub off. The T-Cut should be washed off and the paintwork buffed with a clean cloth to take the new decal. Eoin
-
A dab of T-Cut and cotton bud will remove the existing numbers and SSM do decal numbers for this job. On hacking your own sound chips;- if your not a user of the ESU programmer- buy the MM chip and have an easier and less costly 121 life! The 'Experts' would have you believe it's easy! - capture this, edit that, and learn to program the thingie! 'Don't'...... Eoin
-
until
-
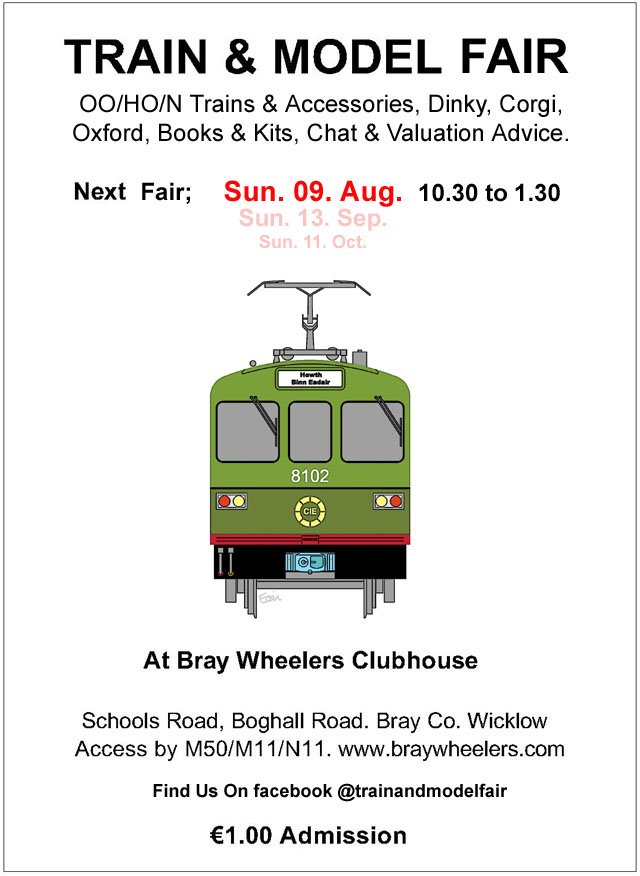
Next Train & Model Fair date- Sun, 09, Aug;-

-
I can hear it, but cant see it? Sounds good Eoin
-
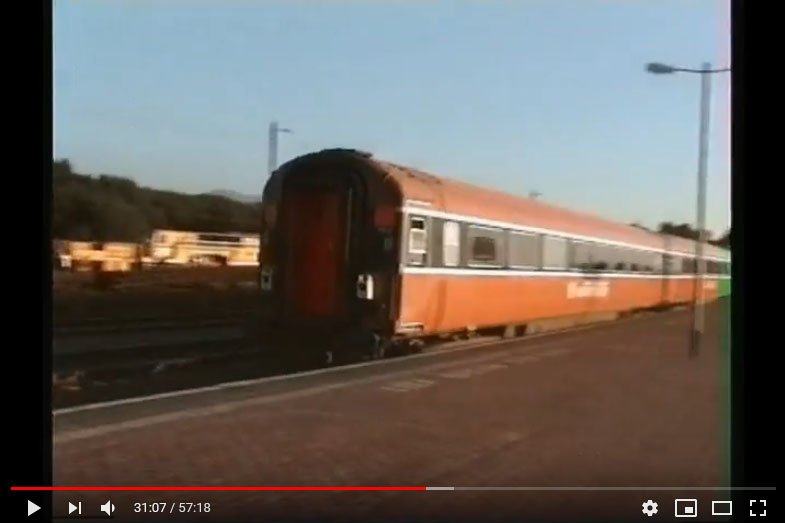
I visited one of the Fair's patron's garden railway layout in the Avoca hills, Co. Wicklow yeasterday;- Eoin
- 734 replies
-
- 10
-

-

-
Hi John I'll go for two kits - Luggage van & Heating/Luggage van Eoin
-
Have a look here;- http://www.tower-models.com/towermodels/ogauge/dapol/dapolloco/jinty/index.htm Eoin
-
@Georgeconna yes the higher it gets the better shots I can get from the garden, the city lights become less interfering and with a guided camera I can get longer exposures- hopefully!! Eoin
-
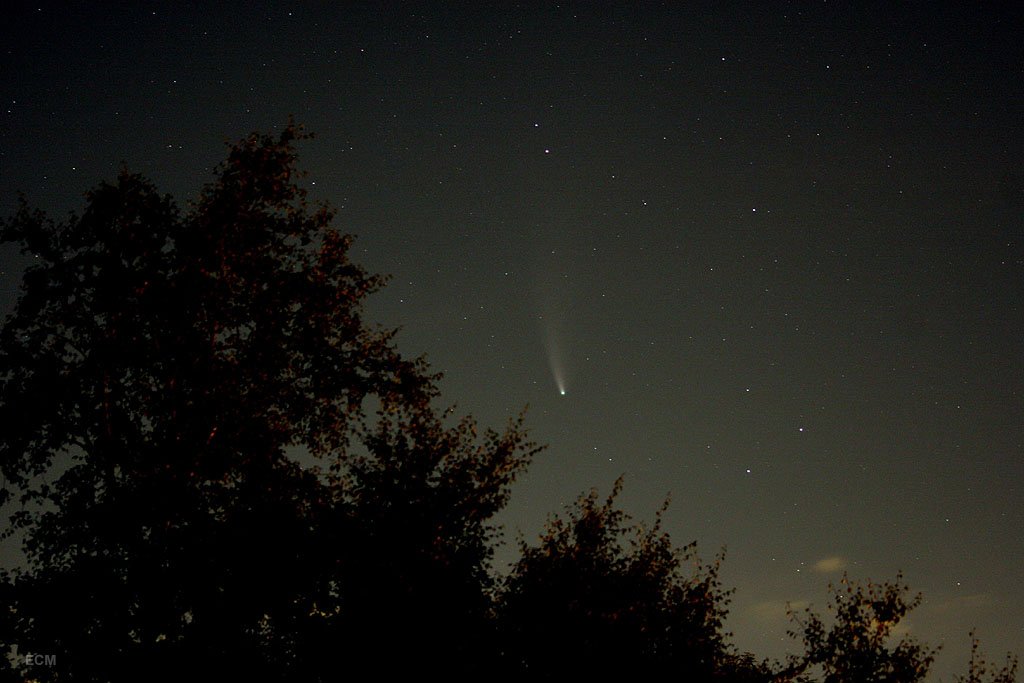
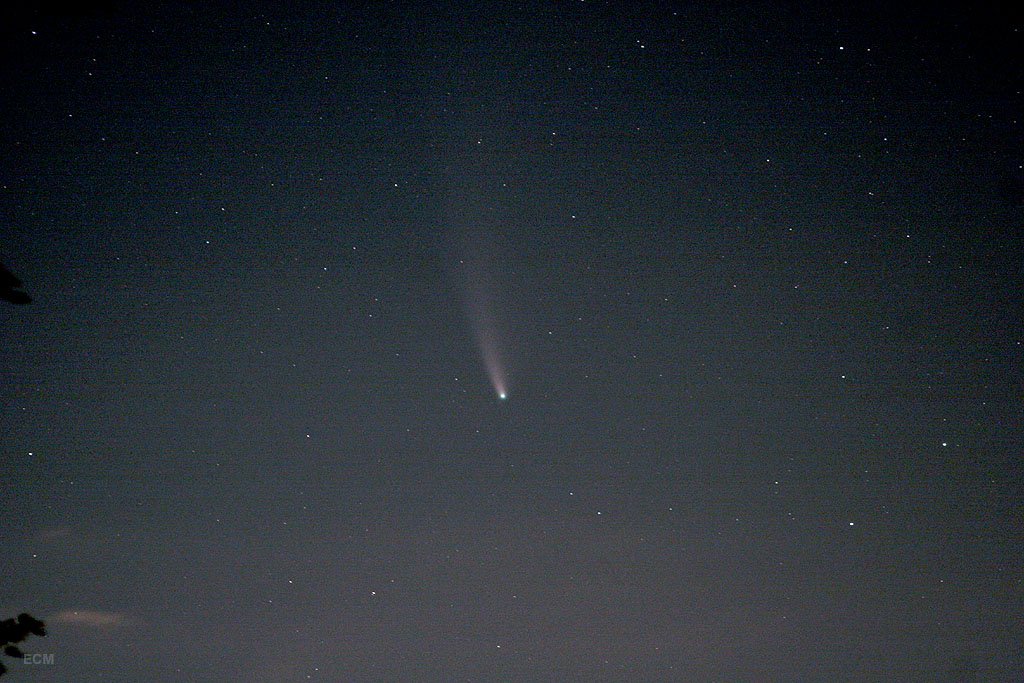
Yes, some success in getting a few photos last night, 6 seconds unguided shots;- The glow in the lower part of the pictures is Dublin city sodium lights, adjustment has been done to remove as much sodium red, on the second photo the red can be seen in the comet tail but adjusting that further messes up the shot...... Eoin
-
Maybe a chance tonight!!;- Comet Neowise over the Poolbeg power station in Dublin in the early hours of Saturday morning. Photograph: Antonio Martin-Carrillo
-
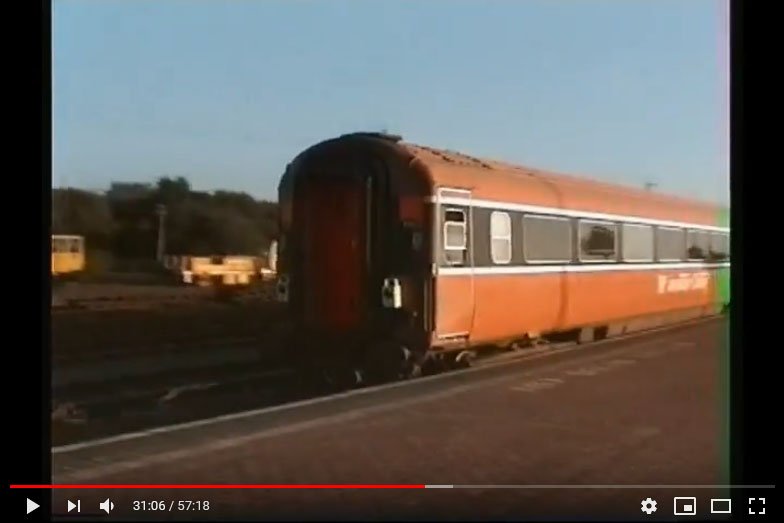
Thats a wagon behind the Tamper Machine;- Eoin
-
Really need to go for 1:87 scale for modern stuff, Oxford do have some Range Rovers & a Volvo but not much else for modern times. Here is a Ford Focus at 1:87;- https://www.minichamps.de/kategorie_neu/street-car/?order=ASC&orderby=title&suchbegriff=&filter_scale=187&filter_material=&filter_jahr=&filter_hersteller=&filter_lieferbarkeit=&filter_fahrer=&filter_haendler=&filter_sammler=&filter_marke=ford Eoin
-
@WRENNEIRE is the man to talk to, the MM 141s are up here with today's models and their the only 141s available! Eoin
-
Hi JB Yes, it's going to be silver Eoin
-
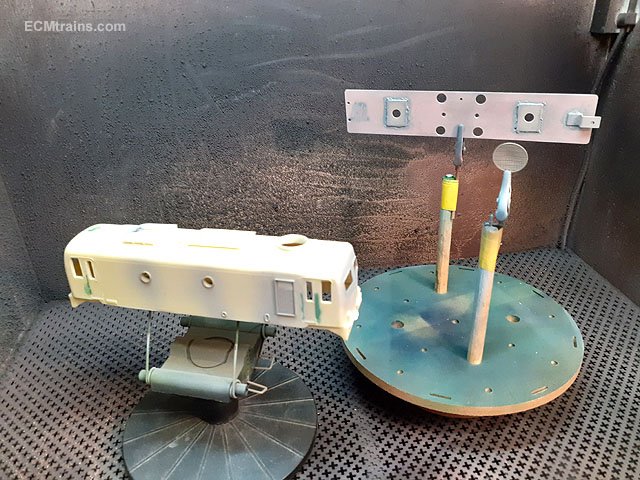
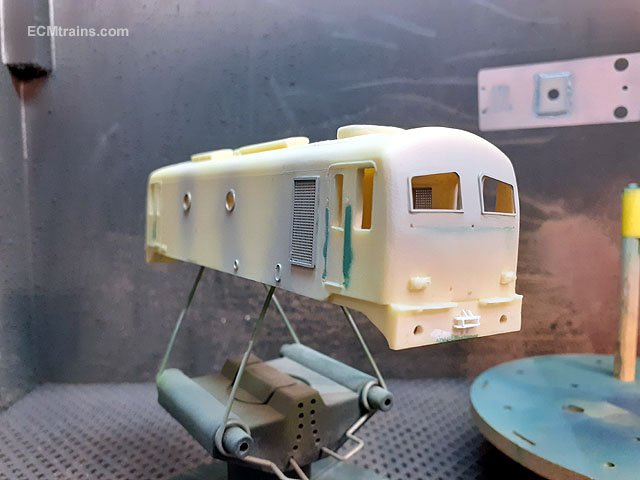
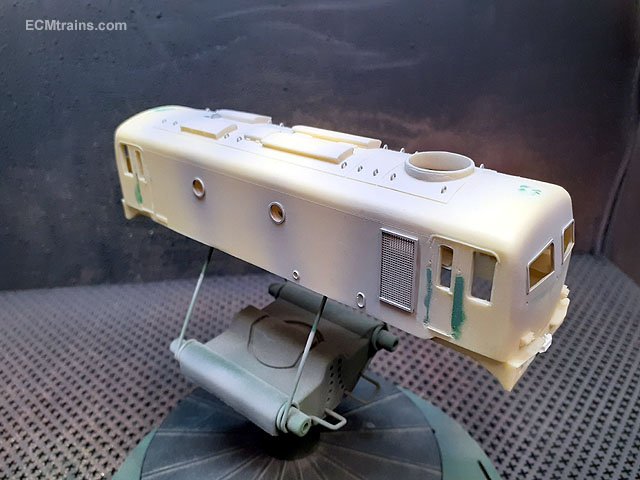
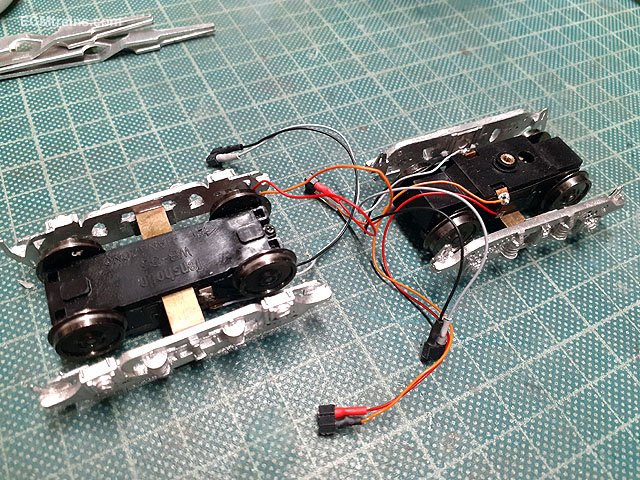
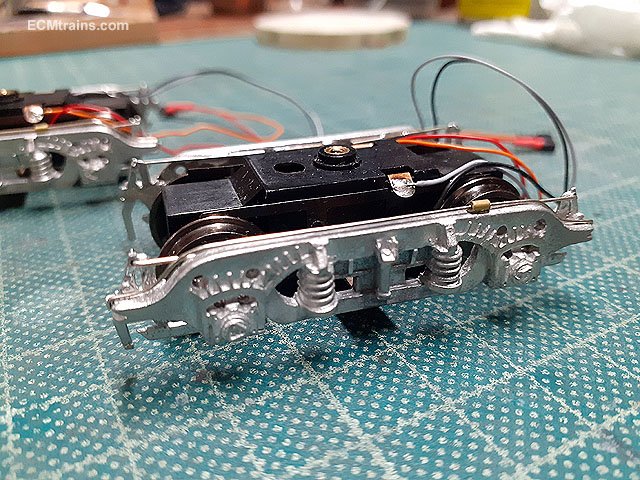
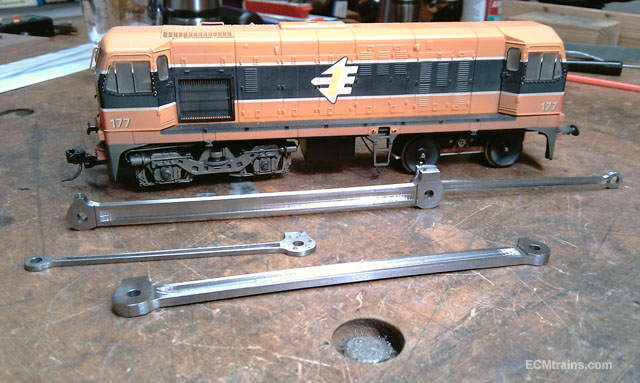
The painting started last night, first was a light coating of etch primer to the metal parts. I decided to paint the chassis also. I was going to metal black the roof plate lifting hooks and stick them on later, but recently saw a photo that showed them in the same colour as the body, so I stuck them on and primed them to. The bogie sides were 70deg soldered to the brass motor out-riggers, thinning the brass with 180deg solder first. Some of the sides detail going on- brake pull rods and a bit of over frame piping, I'll hold off on the ladders until the body and chassis are out of the paintshop just to get the alignment right! The front of the bogies is looking a bit crude so I have worked up a drawing to do a front crossframe and revised wheel guards, the guards cast on the bogie frames are way out from the track..... Eoin
-
The best solution for this is to use Deluxe 'Tacky-Wax' to hold them on, then they can be easily removed and attached elsewhere..... Eoin
-
The hills and the city lights are in my way Eoin
-
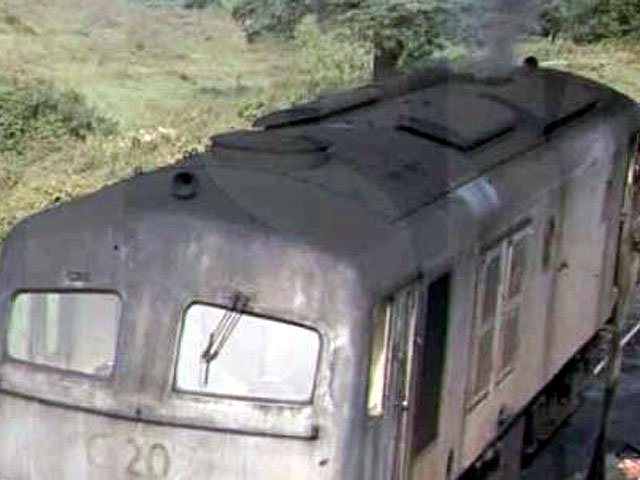
This is the photo of the roof I worked from, hard to see exactly what's there but exhaust smoke is coming out of one of the ports- why at first I amused one port! A chap on fb posted a picture of two ports and confirms this is correct;- The exhaust ports were moved when re-engined, I reckon popeye has it correct Eoin
-
The Roco Multimouse is an economical and very simple entry into DCC controllers, one can then upgrade to the Roco z21 for a bit more punch and can be optioned to be controlled from your mobile phone, the Multimouse can be used with it also and not become redundant. The Multimouse is around €100 but many second-hand are available for less. The z21 is up in the €250 - upward region. Eoin
-
I just cut n pasted the pic from one of my threads, it's the only photo of the 171 I have- their Gauge 1 VS rods.... I did get the parts from Mr Murphy just haven't installed them yet! Eoin
-
My trusty 171, one of the Marks Models commissions was picked up in a charity shop for €5.00 a few years back- it does need a little bit of work though!!
-
@DiveController The fan is at the other end and it's still in, I'm now considering a smoke generator for the exhaust! the only thing was the colour of the smoke- 'C's' belched out black stuff and the generators do white/grey? Eoin
-
It would all be the same, it's to do with stock hanging out over the rails on the bends and fouling a train doing the same thing on the other track, you may have some leeway with HO stock but if your going to be running OO Irish stick to above 65mm- at that dim Irish Cravens get pretty close! Eoin
-
@mmie353 65mm minimum, Peco recommend 67mm Eoin