murrayec
-
Posts
2,718 -
Joined
-
Last visited
-
Days Won
70
Content Type
Profiles
Forums
Events
Gallery
Blogs
Store
Community Map
Everything posted by murrayec
-
Hi DART818 My comment about a Google search and the title you are using is an example if Google themselves did a search they would find evidence that passenger carrying railways were in existence before 1834 and it may influence their decision negatively in supporting your request. The 'Commuter Railway' descriptor has been under long debated as to what it means. UK railway historians and avid followers of the early first railway systems argue who was first to carry passengers proper! whether pulled by horse, pulled by steam, taking passengers from town to outlying areas, or from town to town.... - endless! and are still debating! Interestingly some UK historians ignore most railways as 'commuters' until 1836 with the opening of the London & Greenwich Rail Road connecting London to the English Channel and boats to France, which they say was based off the L&MR, and they claim was the first to solely carry passengers!! Interestingly again- this railway was first developed as the Kentish Railway around 1826, while under development an anti-railway writer penned words referring to ''Congreve's richocher rockets'' (from the American national anthem) while having a go at discrediting the railway, it is said that this quote led R Stephenson to name his 1829 loco 'Rocket' Eoin
-
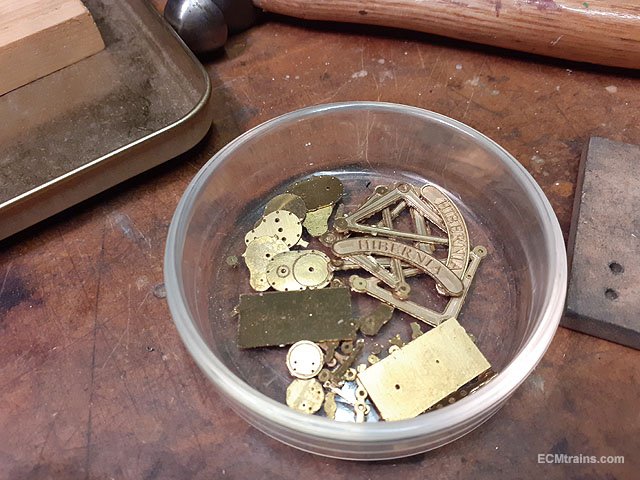
Hi DART 8118 Ireland's first commuter railway, a monumental occasion to be sure, I'm a fan of Mr Dargan and as you know I model D&KR stuff and my DART display layout currently being worked on is based around Dun Laoghaire and Seapoint. I'm also developing a model of the ' Hibernia', which can be viewed on this forum in the 'Manufactures' area...... But, may I suggest that your future canvassing should relate to 'Ireland's First' or 'One of the World's First' and not 'The First'. If one does a Google search for the first passenger railways in the world, you will find that a number of passenger railways were in existence before the D&KR- the Stockton & Darlington of 1825, passengers were hauled by horse up to 1833- when steam took over, and the Liverpool & Manchester of 1830- to name two of the most significant. We should also consider that the 'Hibernia' type loco was purchased from Sharp Roberts in Liverpool- a box of spares a number of years old, leftovers from Mr Roberts unsuccessful 'Experiment' loco for passenger hauling on the LMR or who ever they could sell his de-funked invention to. Passengers on the D&KR suffered the same fate as the Liverpudlians- knocked heads, sore bums and also the poor drivers had a difficult time staying on the footplate. Although the D&KR were advised not to purchase it I'm glad they did- it's my no. 1 favourite Irish Loco........ Eoin
-
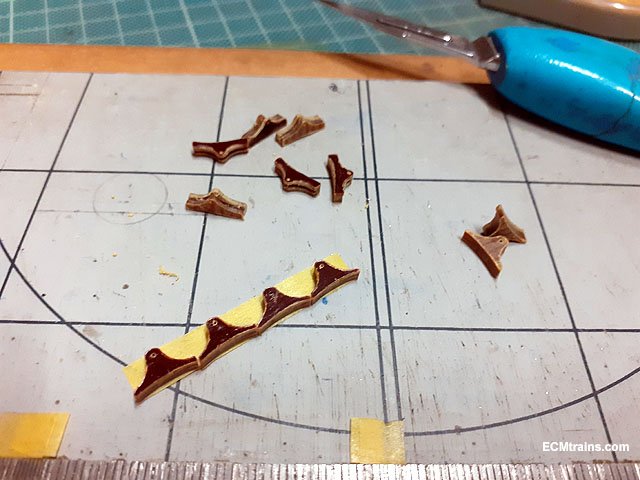
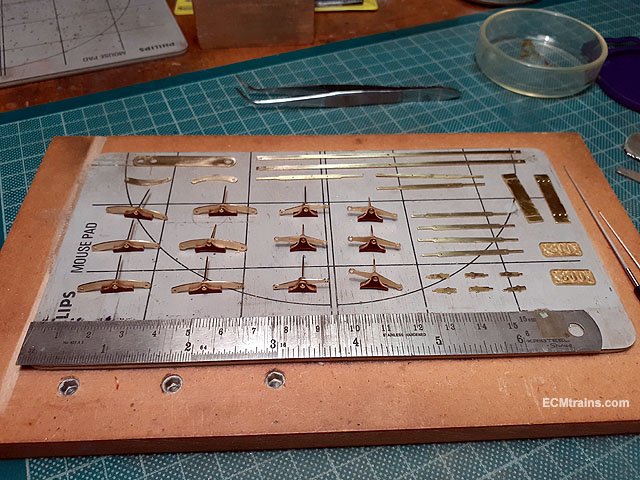
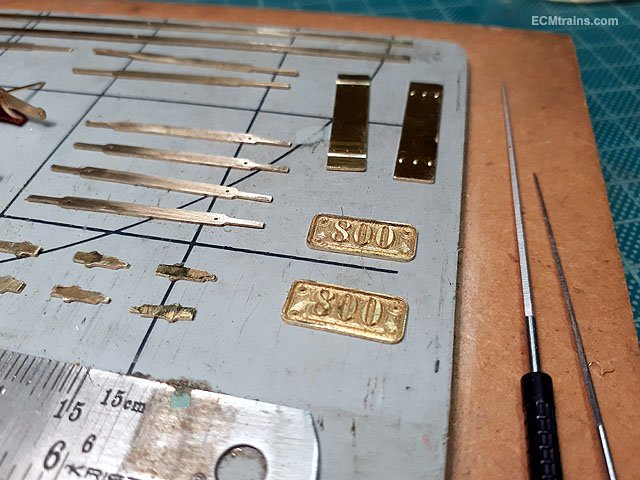
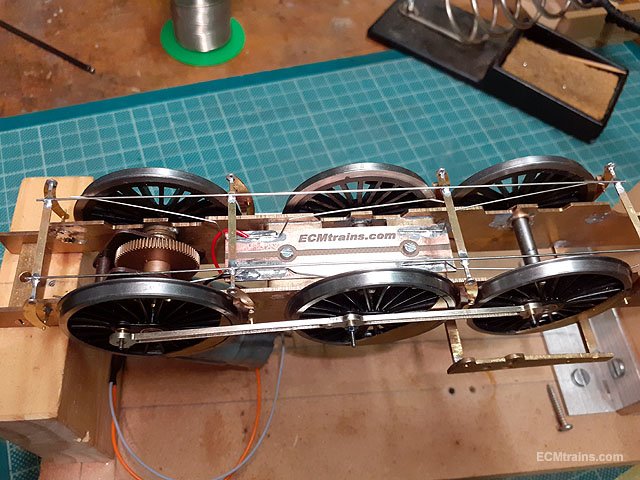
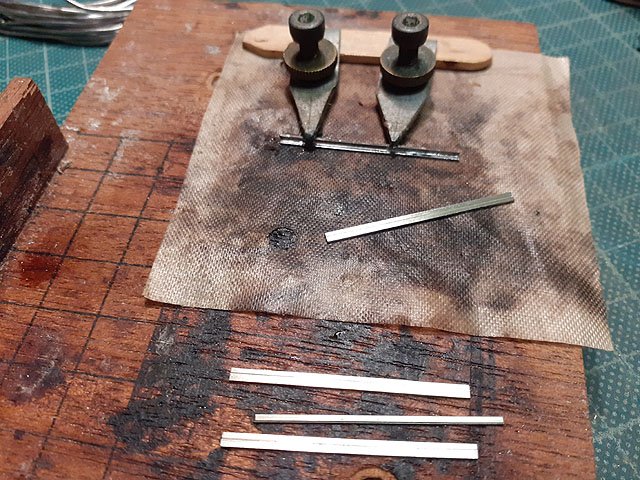
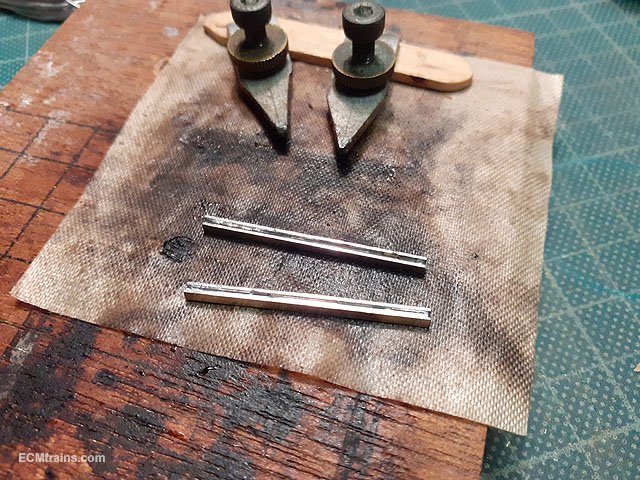
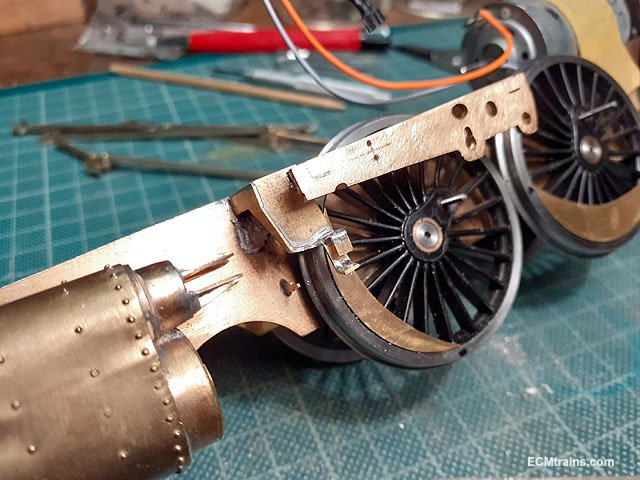
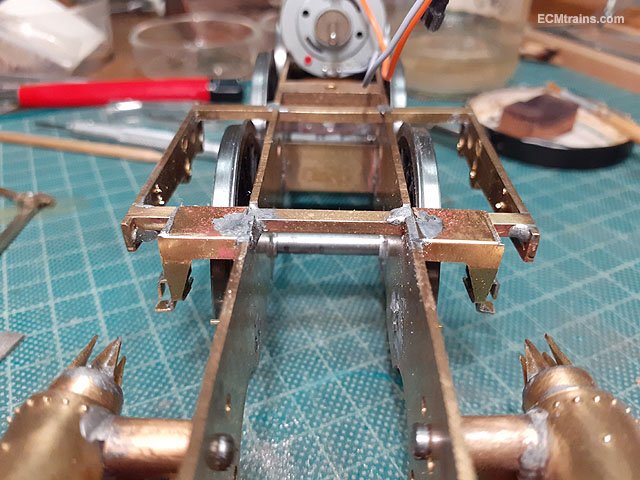
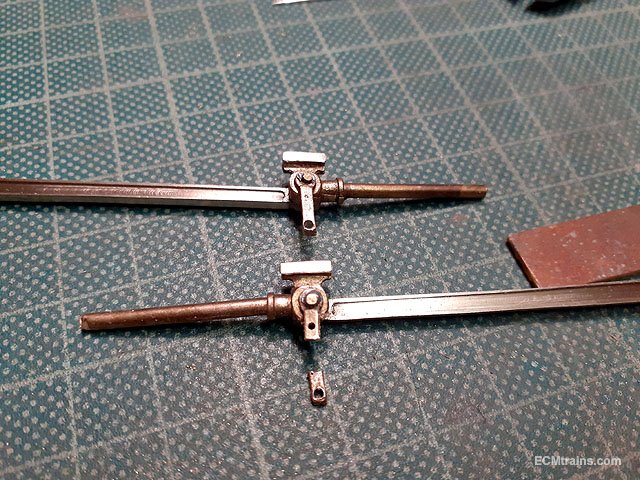
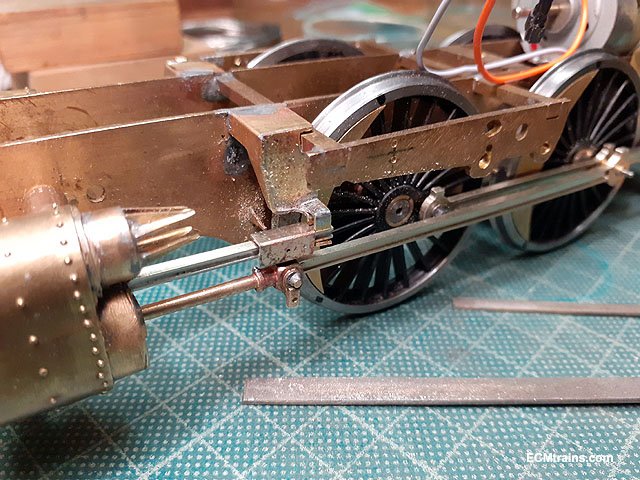
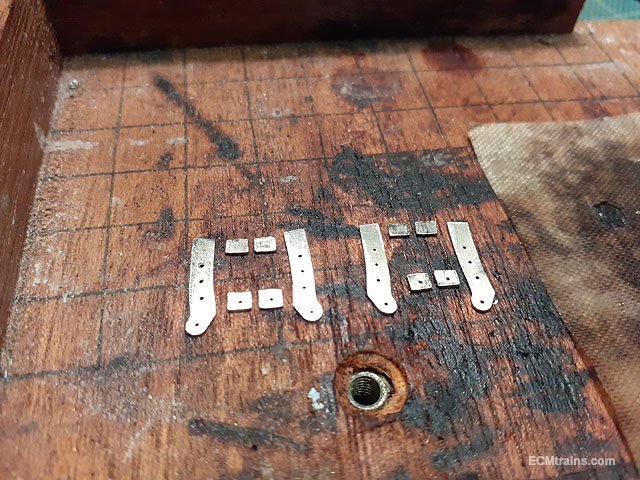
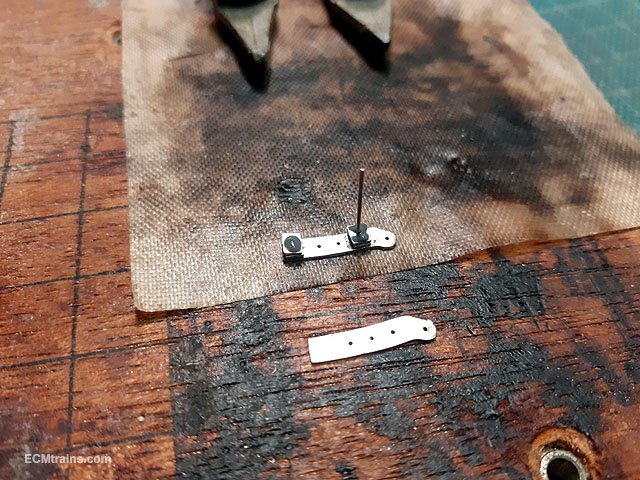
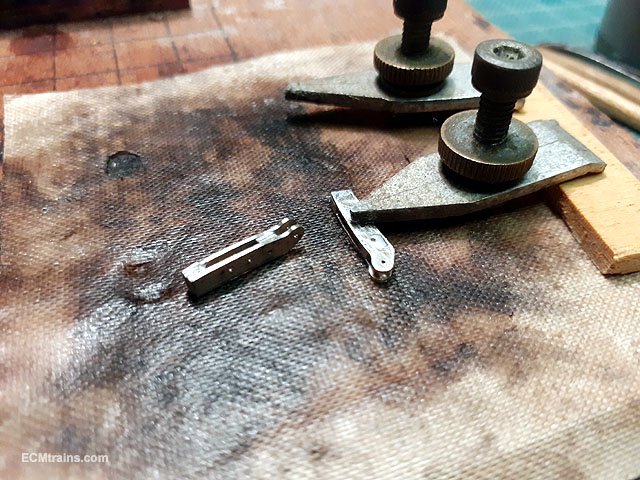
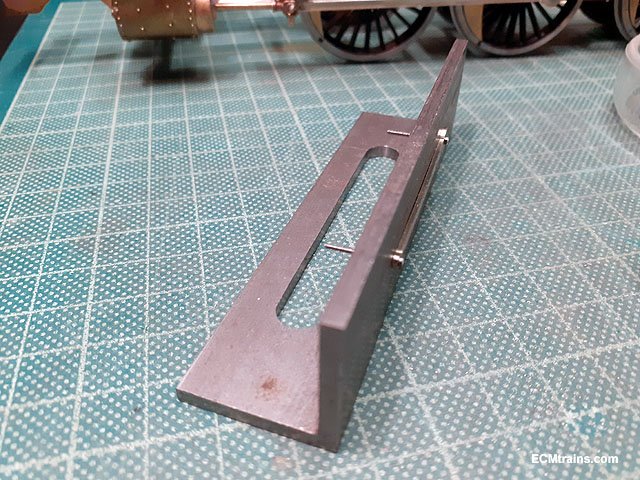
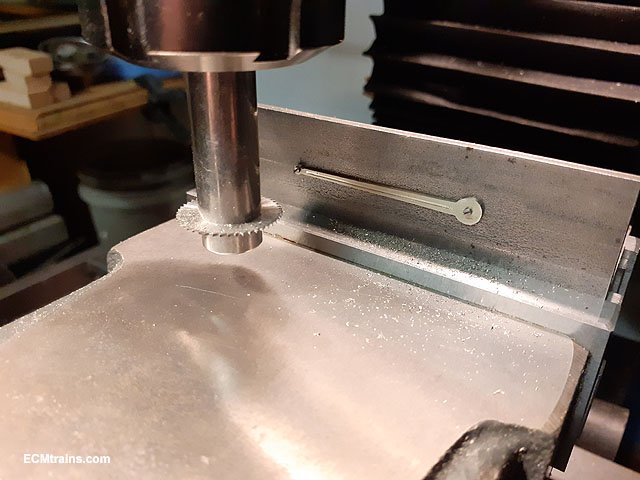
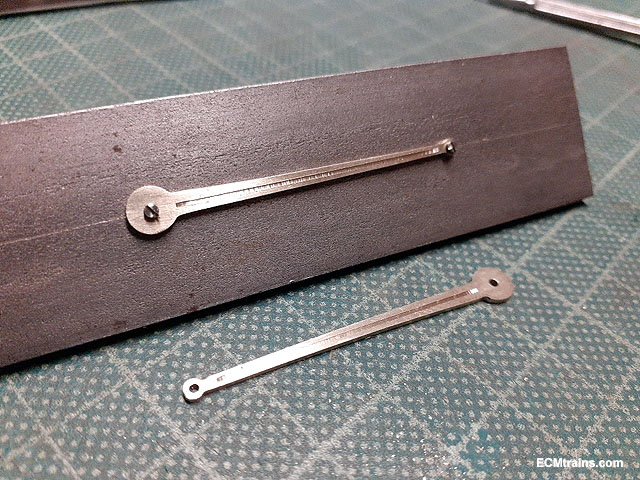
The replacement valve parts and other nickel silver parts were cut out and cleaned up. Break shoes cut from Tufnol and been prepared here to slit the backs and mount them on their hangers. Shoes mounted on hangers with brass pins yet to be trimmed and glued, break rods and other break parts prepared for assembly. Nice set of cnc engraved engine plates and those little bit to the left are the break hanger spigots which will be soldered onto the chassis to hold the break gear. Breaks on, this assembly is removable by springing the break hangers off the support spigots and it comes away in one piece. Electrical pick-ups installed and wiring just completed. A quick test on the rolling road to see if the breaks need adjusting and check for electrical shorts- all fine. Next was to start on setting up the valve gear, the motion brackets to hold the crosshead slide bar were folded up and soldered. Then the crosshead slide H bar is made up of 3 .5mm NS parts, jigged and soldered. Then the slide bar brackets are soldered onto the chassis, quite a bit of fettling to get the bracket to hold the slidebar horizontal. The LNER valve kit crossheads needed some mods- the drop link was shortened and drilled for riveting the Anchor Link to, and the slides on the heads was modified to take the NS 800 type slide covers. When the crossheads were done and the 800 cover soldered on all was offered up to the cylinder, fettled & fitted. The slide bar is filed down at one end and fitted into a hole in the cylinder, this part will be fitted after the painting is done. Next was the Expansion Link, I was not happy using the LNER open type link as the 800 has a solid link and the LNER just doesn't look right, also I've cut parts for working oiler gear which needs a pivot hole right where there is an opening in the LNER one. So NS .5mm laminated parts were used to do this. I went with solder paste for this one as the parts are so small it's hard to use standard wire solder without flooding the parts and having a whole lot of cleaning up afterwards. Pasted, clamped, soldered, and minimal clean up. Link completed except for opening up the holes. Thats one of the discarded LNER Expansion Links to the left. Then the Eccentric Rods, they needed a flute cut down the middle, so they were mounted on an angle plate, viced up in the mill and a .5mm flute cut. That looks a lot better, better scale! Eoin

-
Don't forget the Train & Model Fair is on this coming Sunday, KMCE's 'Wicklow South' diorama will be paying a visit, don't miss the opportunity to see this fantastic layout in the flesh and see his beautiful scratch built stock - which will hopefully feature his armoured train! Eoin
-
Looking superb David
-
I'll bring the blowtorch
-
The last Fair date of 2019;- There may be mince pies!!
-
until
-
That looks fairly intact, the deck seems to be there n all? Eoin
-
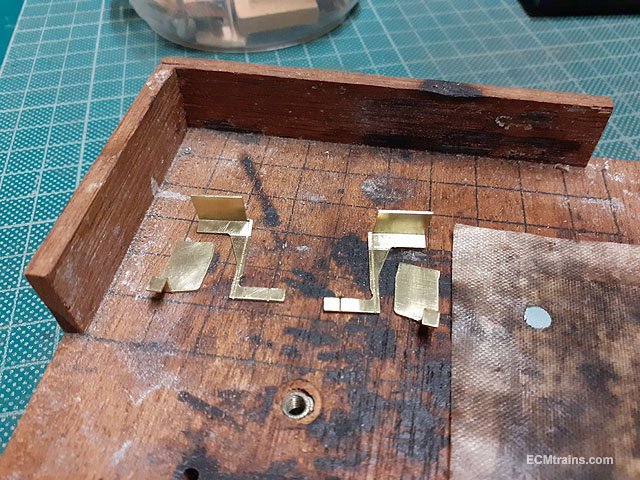
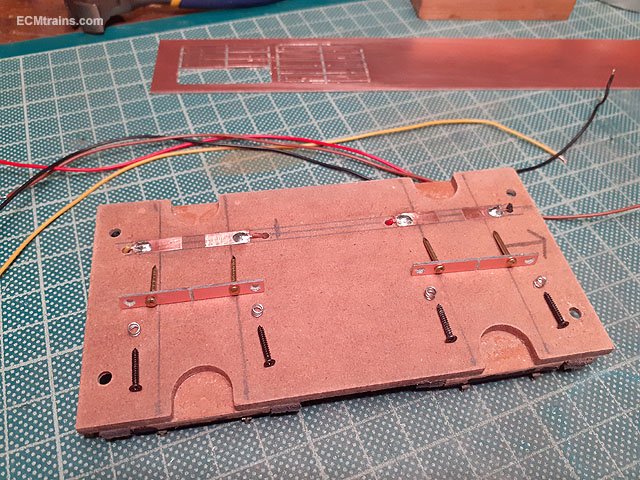
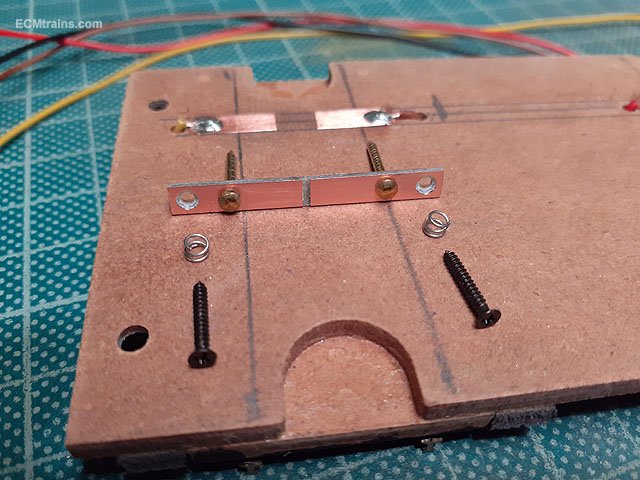
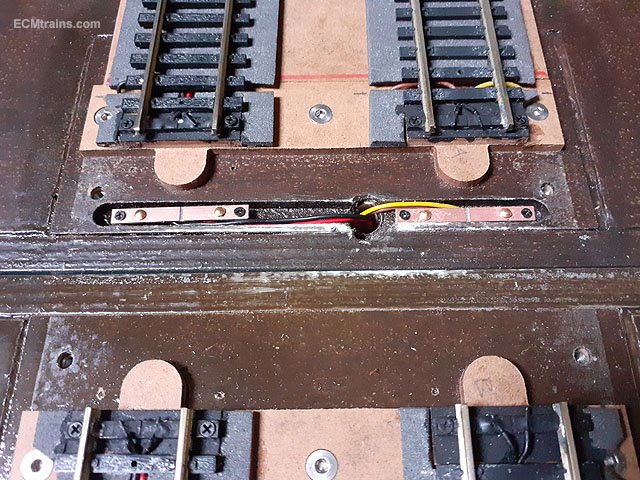
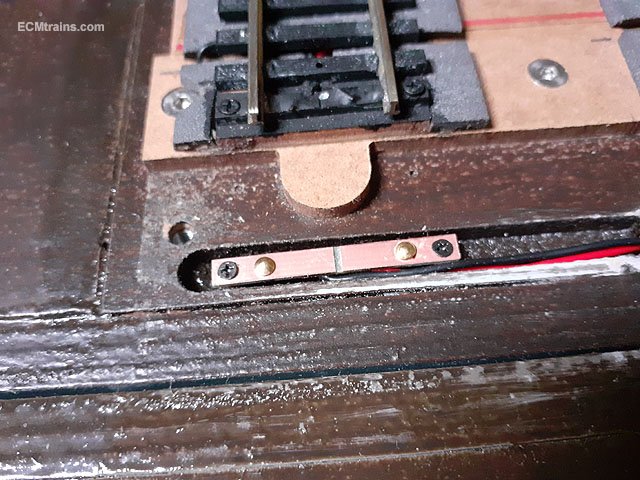
So then after a number of outings with the baseboard I've decided the wires for the jigsaw plug-in track parts is just to fiddly, we need an upgrade- no wires at all! The solution I came up with is sprung loaded PCB board contacts fixed into the routed slot that was made for the wires, with copper contact tape to the underside of the jigsaw boards..... This is the underside of the jigsaw board with contact tape installed and wires to the tracks soldered on. The contact BCB board, brass dome head nails to be soldered in and ends snipped off, the mounting screws and the little springs wound from guitar strings. The PCB boards mounted in the slot and wired up. Close up, the heads of the brass nails are just above the slot and the springs allow movement down when the insert board is screwed down. It works. Now just another 14 to go....... Eoin
-

'Hibernia' Dublin & Kingstown Railway 2-2-0 Loco Build Gauge O
murrayec replied to murrayec's topic in ECM Model Trains
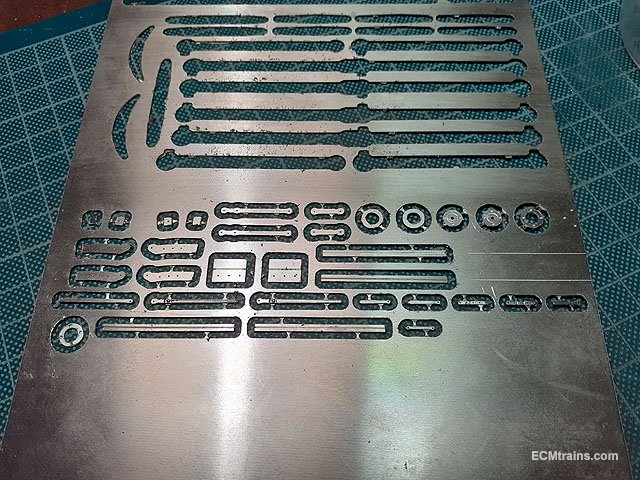
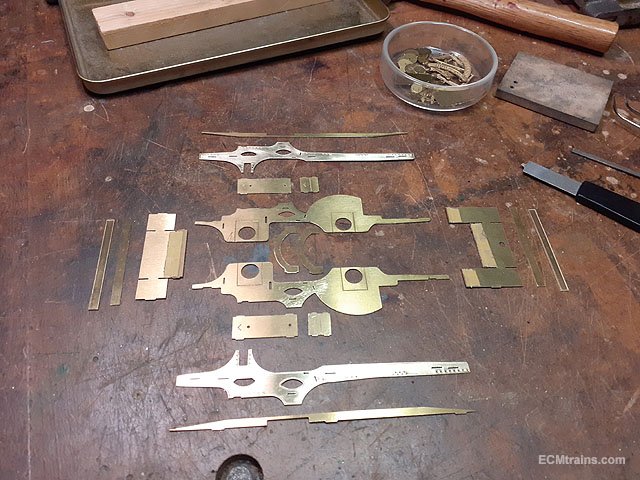
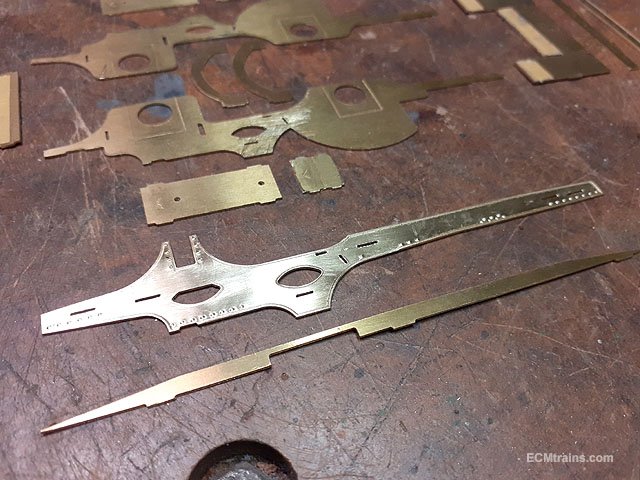
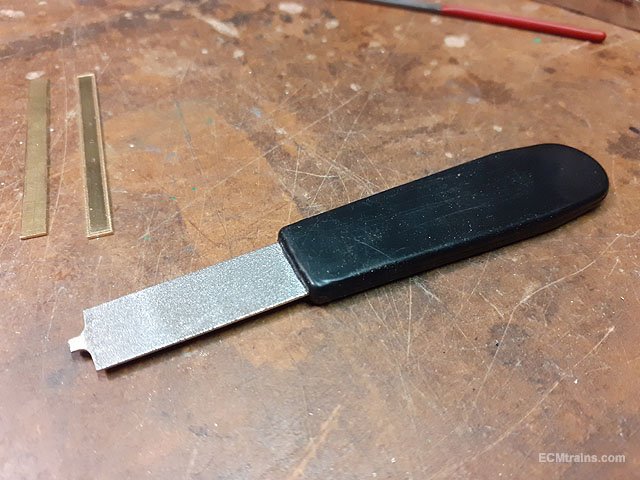
After the parts were machined and cut from the sheet I started to process the bits;- First the outer frames were stamp with a few rivets, unfortunately the scale spacing of the rivets does not fit the tool correctly so the previously stamped rivet gets a bit squidged when stamping the next one, but I carried on! They still look pretty Then the slots which were chain drilled .5mm in the machine, were opened up and sized for the tabbed parts. All slots done but still a bit of fettling required to fit the chassis together. It's now I remembered that because of the outside frames I have to use horn blocks to install the axles as the outer frame obstructs the access to thread the axle through if one were to use bush bearings!! I did engrave lines on the inner frames for this- a bit more cutting required. More parts to process. Just if your wondering how I opened up the .5mm slots- first I cut through the chain drilling with the piercing saw, using the saw like a file the rough edges were removed, then with a modified .5mm thick diamond coated nail file cut and ground down to a width of 2mm, which is the size of the smallest slot, I used it to clean up the slots to size. The file does loose its grit over time but I got through this work OK and next time I will give it a bit of a grind beforehand..... Soldering next I think. Eoin
-
Hi Peter I do repairs, is it an Gauge N GF 185 and do you know how many tooths are on that gear? I have some gears in stock- if I don't have that one we will have to try and order it!! The old type intermediate bogie GF gears all split over time- so it may need a few to be changed! I'm in Bray on Sunday at the Train & Model Fair if you want to drop out 10.30 to 1.30 or pm me to arrange if you want. Eoin
-
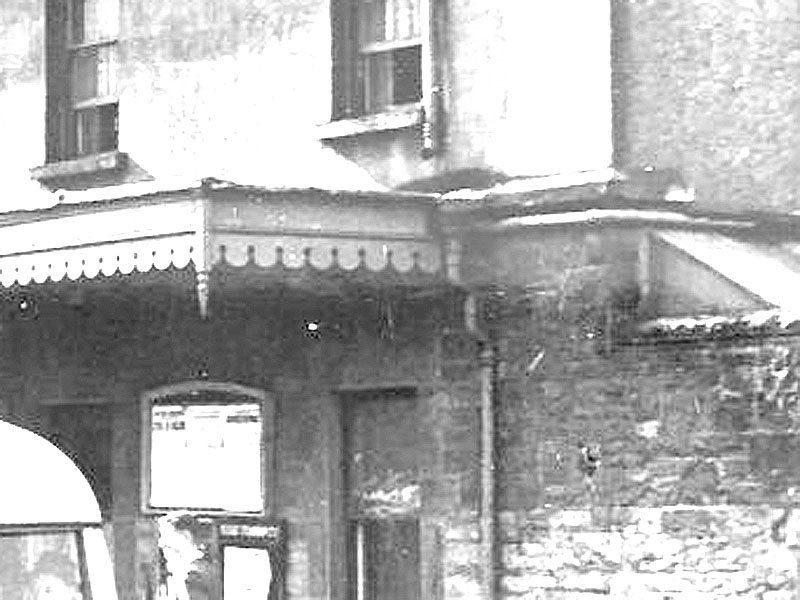
It's like David says The porch roof looks like a lead or copper sheeted roof, the up-stands along the front eaves- is the detail one uses to join the sheets! the roof falls to the rear against the station building wall which would have a gutter or flat surface laid at a fall towards the rain water pipe, this gutter discharges into a hopper just below the roof covering and fixed to the fascia then through the double bends and down to ground. The rain water pipe from the roof above discharges onto the porch roof and carried from there into the hopper. To do this detail correctly one should carry the roof finish- ie; a lead flashing , up the station wall approx 150mm scale height above the porch roof to weather the station wall and form the back of the porch roof gutter. Eoin
-
Spray paint the rails with a mat rust colour before ballasting, while the paint is wet rub down the top of rails with the edge of a block of MDF- a-la BaseboardDave technique. If the paint dries wrap some wetted wet-n-dry fine sand paper around the MDF block and rub down. Graphite as well as being a conductor is also a lubricant- one may have traction problems with this one, but sure if it doesn't work, out with the eraser! Eoin
-
I don't like this stuff, it's TV- people & personalities for voyeurism- TV! But as Garfield says it promotes railway modelling and that is a good thing..... Eoin
-
Studio Scale Models do a brass etch phone box kit;- http://www.studio-scale-models.com/Scenics.shtml
-
https://www.google.com/search?q=old+irish+phone+box&client=firefox-b-d&sxsrf=ACYBGNQFpWAHswsU6kKUdzpRGDgbHFo32A:1572732743564&tbm=isch&source=iu&ictx=1&fir=OhuA1BrEu4IaiM%3A%2Cvl67x6fI0vBxoM%2C_&vet=1&usg=AI4_-kT3EJwXiQ9UO2BA1_C8QNzRCMPNig&sa=X&ved=2ahUKEwisz4aExszlAhWDr3EKHf9FBWwQ9QEwAHoECAcQHA#imgrc=OhuA1BrEu4IaiM:
-
A bit of cream n green and it will be grand! Eoin
-
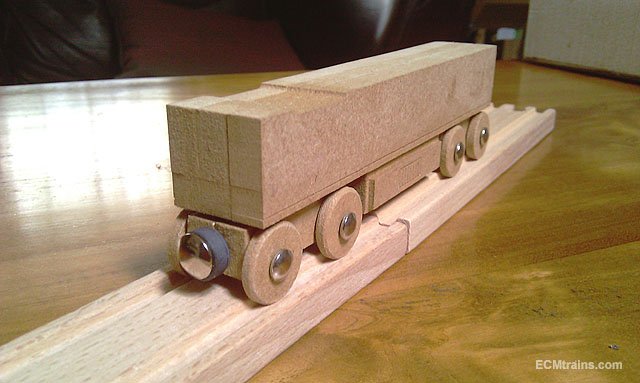
Hi Guys Yes Broithe is correct time is a major problem, but more of a concern is my DARTs are a fine detailed model and would not be suitable for child play and are expensive! On the other hand- I am developing a timber toy DART, one that runs on a timber track available in toy shops and Lidl (which is in their stores now), this DART would be more suitable for child play, but the problem again is time. This is where I am at, rolling chassis and currently working out the body curves and pantograph;- Eoin
- 2 replies
-
- 10
-

-
until
-
The date for the next Fair;-
-
@Broithe Now that's a big circuit breaker! Eoin
-
I made an aluminium side casing for a BSA motorbike restoration a long time ago, we made it from Coke & 7up cans cast into a home made oil sand mould in a metal bucket, using a styrene-foam master which burned out as the metal was poured in, it worked but boy did we need a lot of cans! the casing has lasted for a long time.... Eoin
-
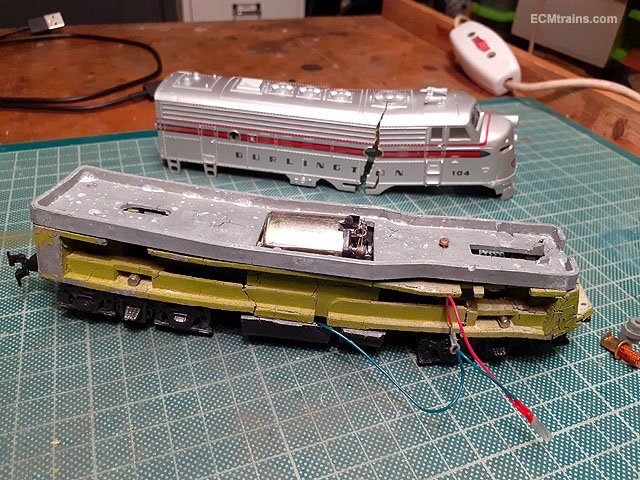
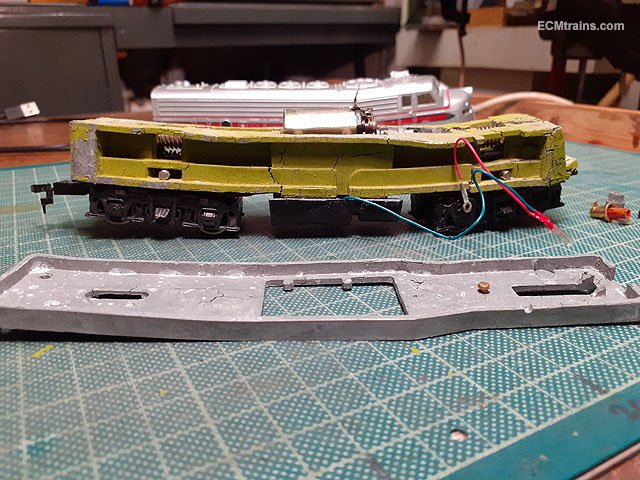
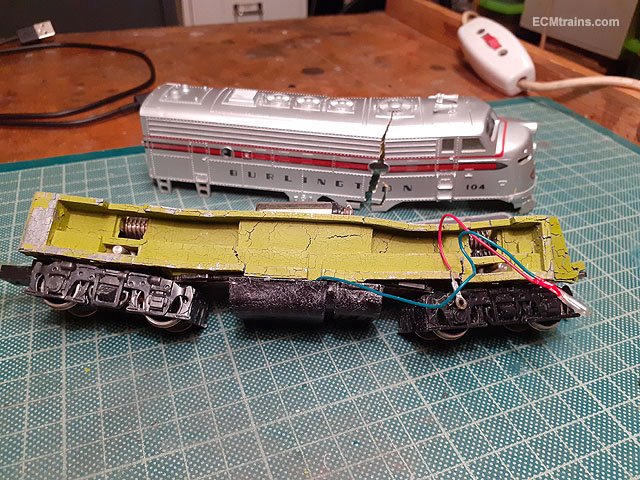
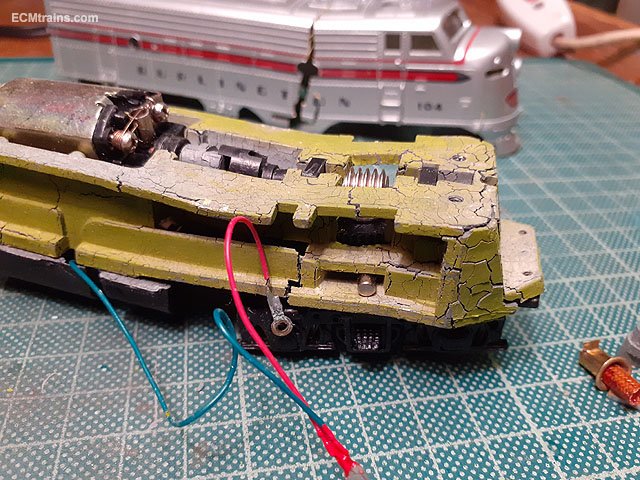
Here is something we generally only see on those old Hornby clockwork loco wheels 'Zink Pest' This is the first time I've seen it on a more modern die cast model, a Bachmann Hong Kong made American thingy.... The chassis expanded to the point that the plastic body had no choice but to split and give more room for the expanding chassis. https://en.wikipedia.org/wiki/Zinc_pest Eoin
-
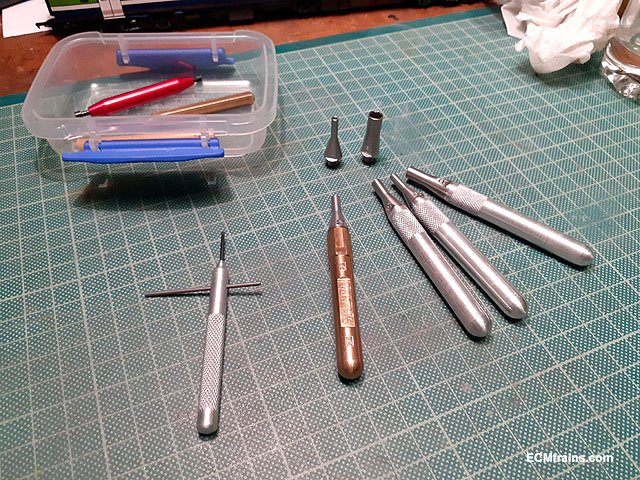
and more tools;- Roxey Mouldings do a nice set of nut spinners 16BA to 8BA with a nicely machined brass handle, I made the other aluminium handles. The heads do need to be screwed on tightly or use thread lock as when unscrewing a nut or bolt the head has a tendency to unscrew itself! nail varnish would work also- I see David doesn't like pink so how about blue with metal flake! The Expo Tools spinners are a pain- the socket is to deep and those little 16 & 14 BA nuts get lost in there- do get the Expo BA spanners though. The tool to the left is an allen key for Slater wheels, a tuned up stick of aluminium with a cut off key forced in the end and Loctited, with the cross bar one can get the right torque and the screw taper locks- the problem with the 'L' allen is it twists n bends and most people give in before the taper locks! Eoin