KMCE
-
Posts
540 -
Joined
-
Last visited
-
Days Won
29
Content Type
Profiles
Forums
Events
Gallery
Blogs
Everything posted by KMCE
-
There is little or nothing left of the works. They were very cramped, however they managed to turn out a considerable amount of work for the available space and managed to keep the DSER including all the commuter trains running; quite a feat in such a small space compared to Broadstone or Inchicore. It would make a really good layout given the cramped site and the amount going on!
-
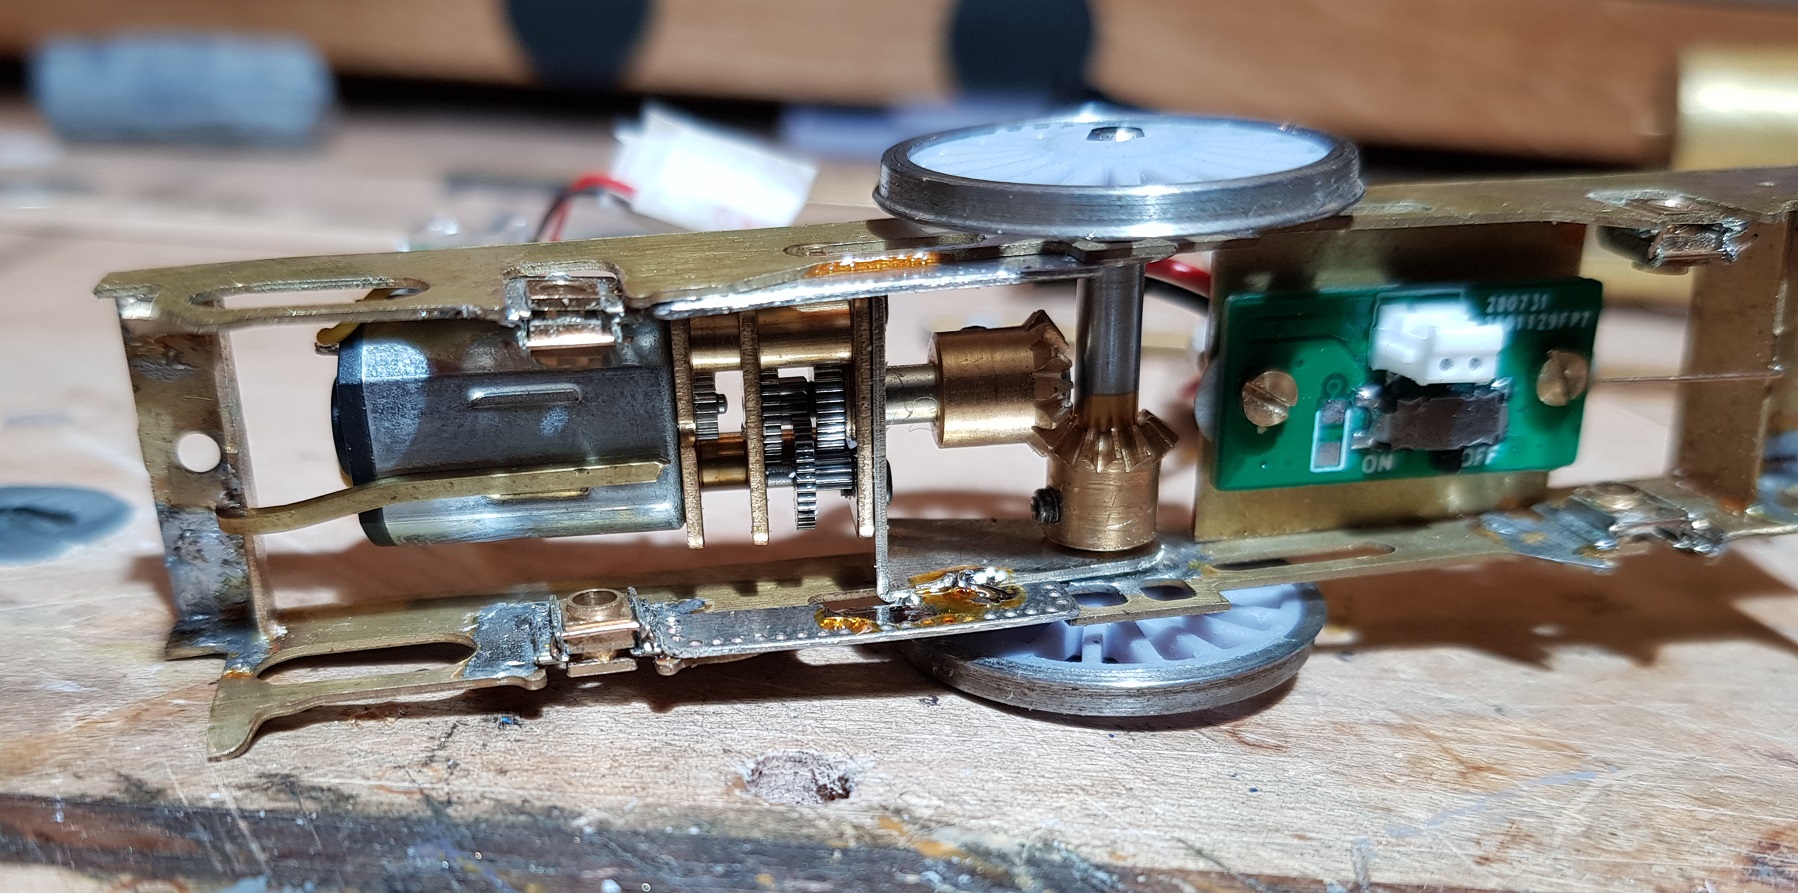
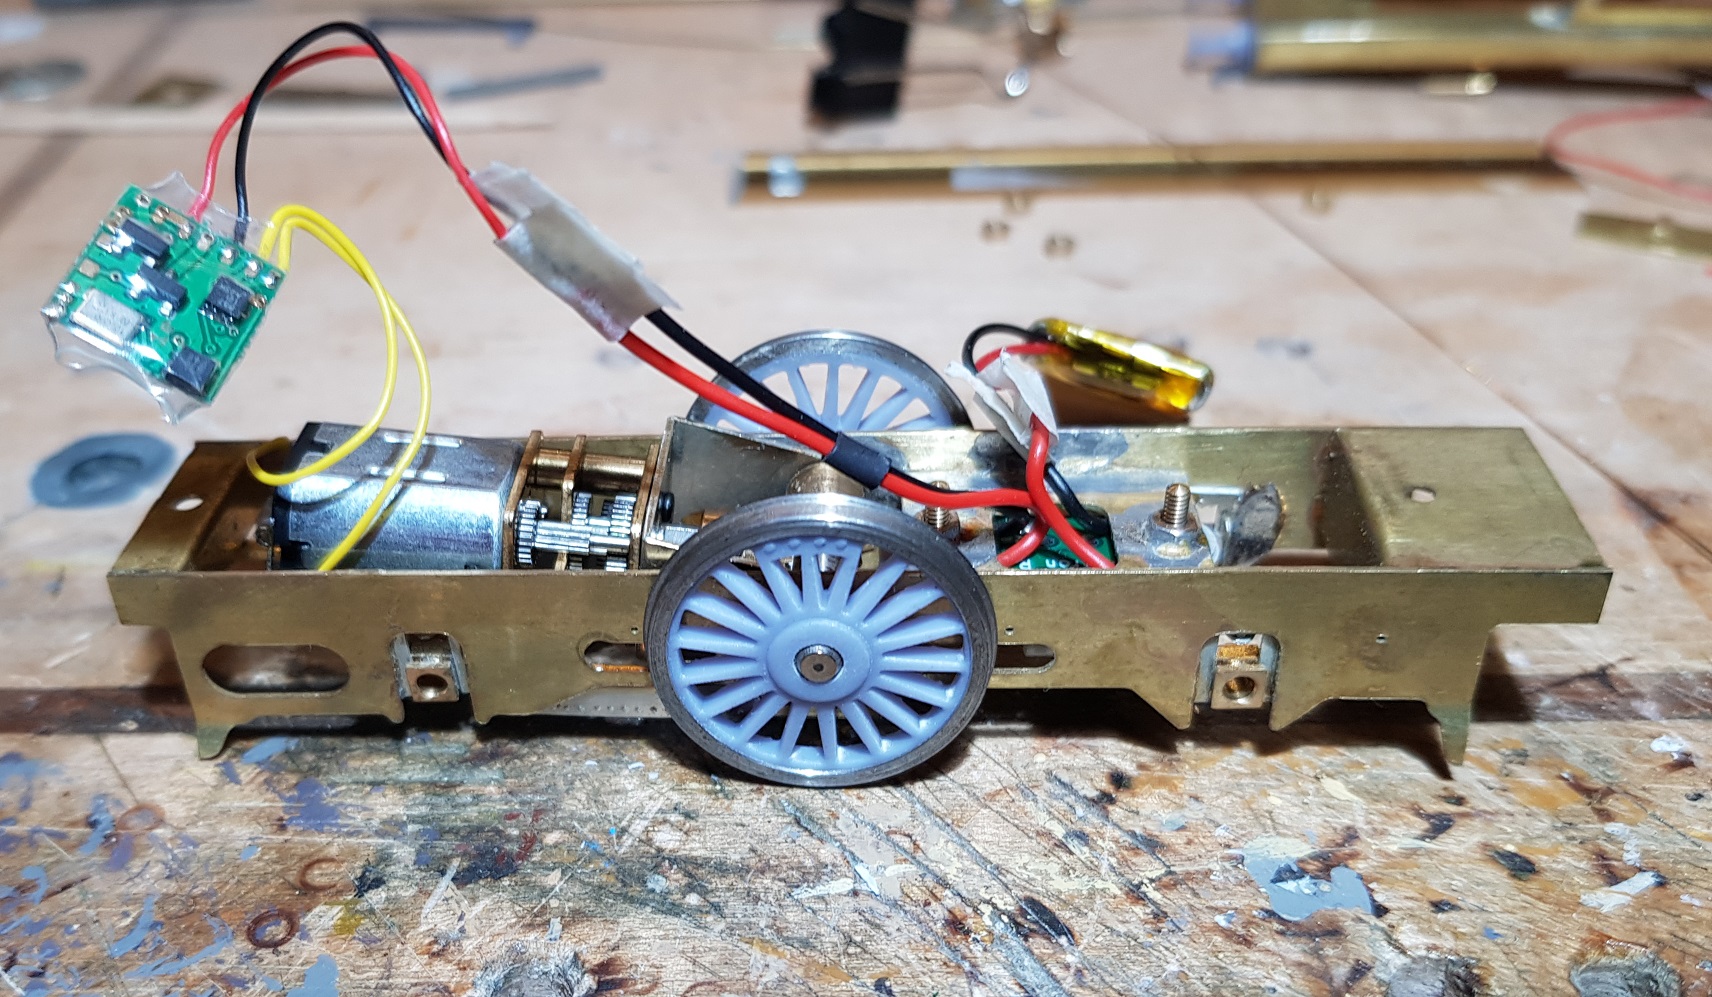
It's been quite a while since I posted in here, but then I suppose I had other stuff to do!! I was reading through Iain RIce's book on chassis construction and realised that I needed to make some changes to the 2-2-2. I was using a single centre PB spring for the front axle, while the book recommends two. I also removed a lot of side play in the rear axle and reduced side play in the front axle which greatly helped balance and general running. As has been mentioned before, I have moved to RC for loco power, and given the batteries in question are 3.7V, I have also changed motors (to remove the voltage regulators), and in this instance gearboxes also. I bought a few N20 gearmotors with various gear reductions, in this case 300, 200 & 100 RPM at the shaft - this then required some form of bevel gears to transfer this shaft speed to the axle. Some brass bevel gears were bought and amended to fit the shaft (1/8" rather than 3mm as bought) and a motor /gearbox mount designed and cut on the CNC. This last addition solved a lot of problems with mounting the gearmotor & ensures consistent meshing of gears. The different shaft speeds were to work out which gearmotor provided the smoothest slow speed running - this loco (and the prototype) were never designed for high speed mainline running, and given the size of my layouts, would never get up to speed anyway! Gearmotor, bevel gears & motor mounting on display here, along with the on/off & charging port. What is really nice about these gearmotors is that they are very compact and can be mounted nicely between the frames (in 21mm anyway) so that it does not take up cab space. The battery and receiver were added, which for now do sit up in the cab, but there is a little more space in the firebox area, which may hide them in the future. All of this clears space in the boiler area for a rather large lump of lead; this little loco needs quite a bit of weight over the drivers to avoid wheelspin. Cables between switch and battery & switch and receiver are a little long, but can easily be shortened once the chassis is painted & I can make the final installation. So with the mods made to motor & gearbox, plus the few suggestions from the Iain Rice book, the loco runs very well and negotiates points and other track impediments rather well. It runs smoothly without wheel spin, and as this was never designed to haul a long train of heavy coaches, should do just fine on my small layouts. Still more work to do, as boiler bands, handrails, brakes, etc still need finishing. I may paint the chassis once the brake work is done to get it complete and then focus on the body afterwards. Getting everything into this loco, plus sufficient weight for adhesion has taken some time and planning, albeit with some revisions where the first attempt was not quite right, but I think I am on the final stretch. All for now. More as progress and energy levels permit. Ken

- 379 replies
-
- 16
-

-

-
That's quite sad as I used them regularly, just had a delivery from them last week - I always found them to be very quick to ship & had really good range of stock. Obviously I got in before they went wallop.
-
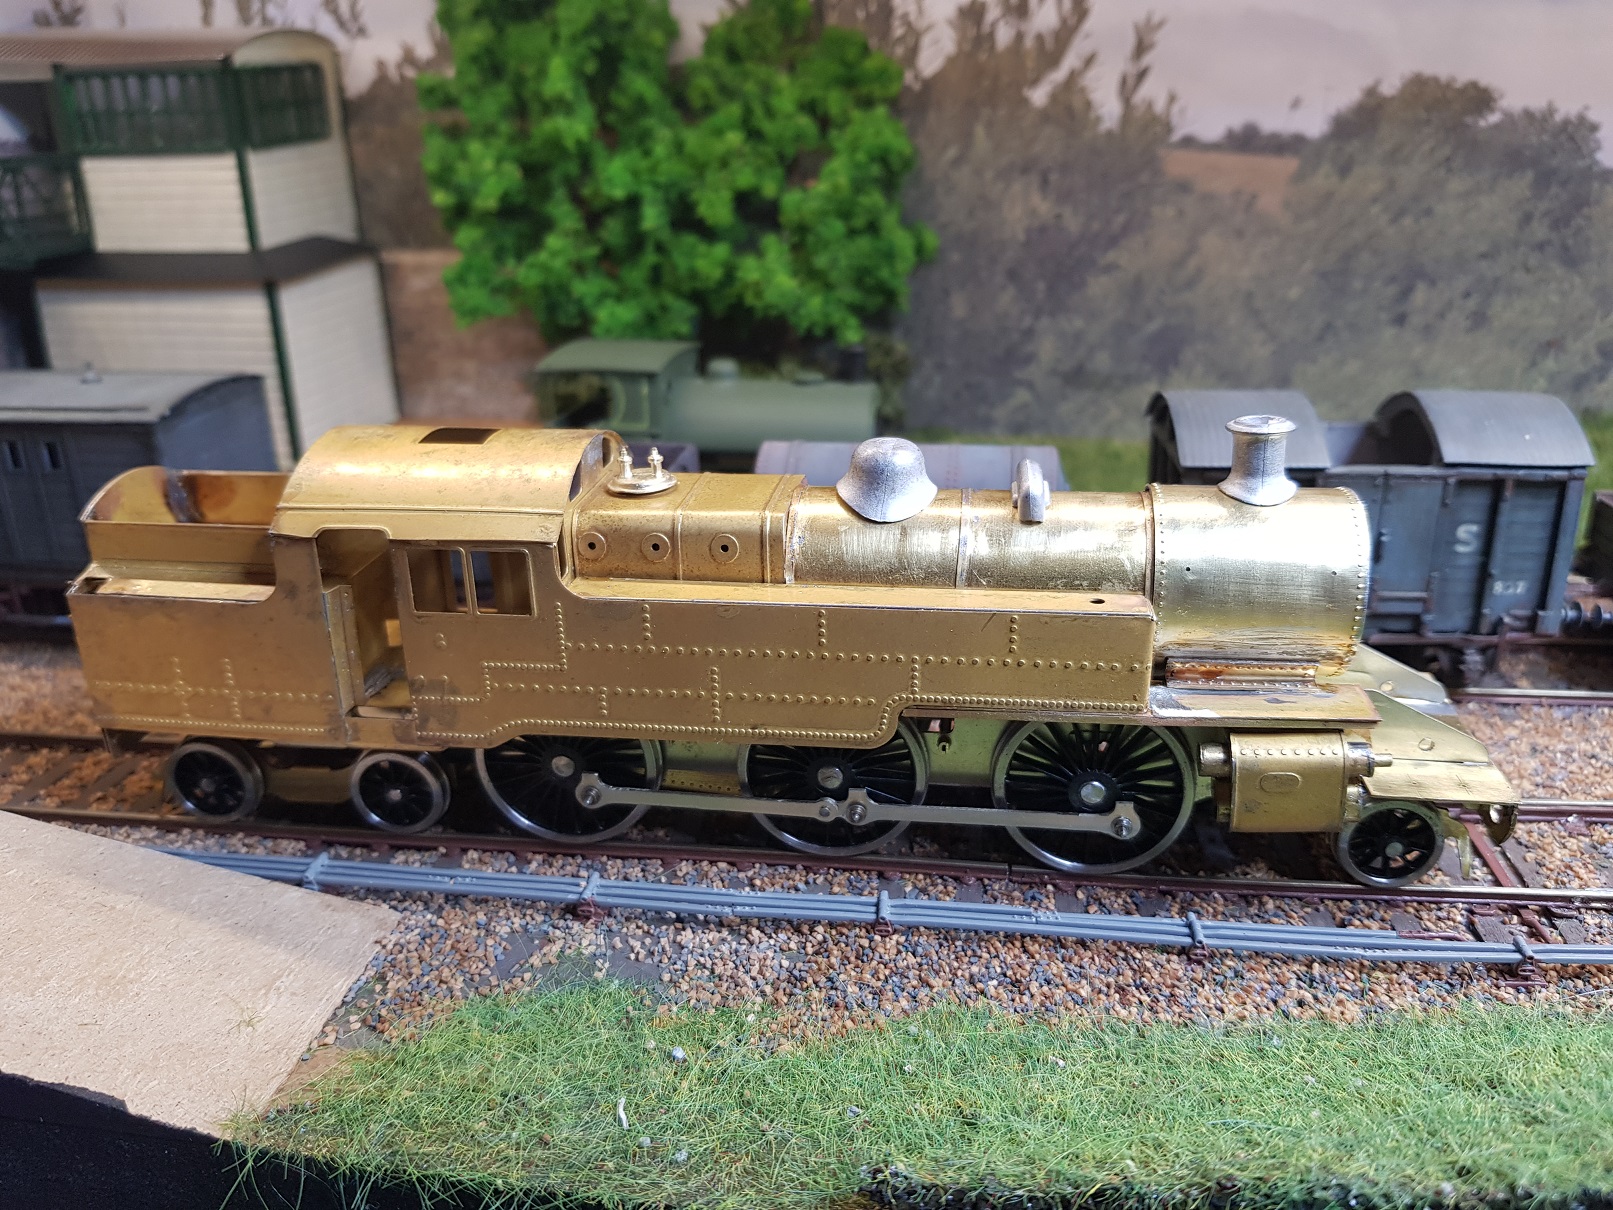
That is some serious modelling - I still need to finish the one I have; it's nearly there, but I will not be doing working motion!!
-
Love the details - people and cargo really bring the scene to life. Acla is really looking good, and weathering will really help to improve it even further. Keen to see how the crane will integrate into the scene. Excellent work, as per usual!! Ken
-
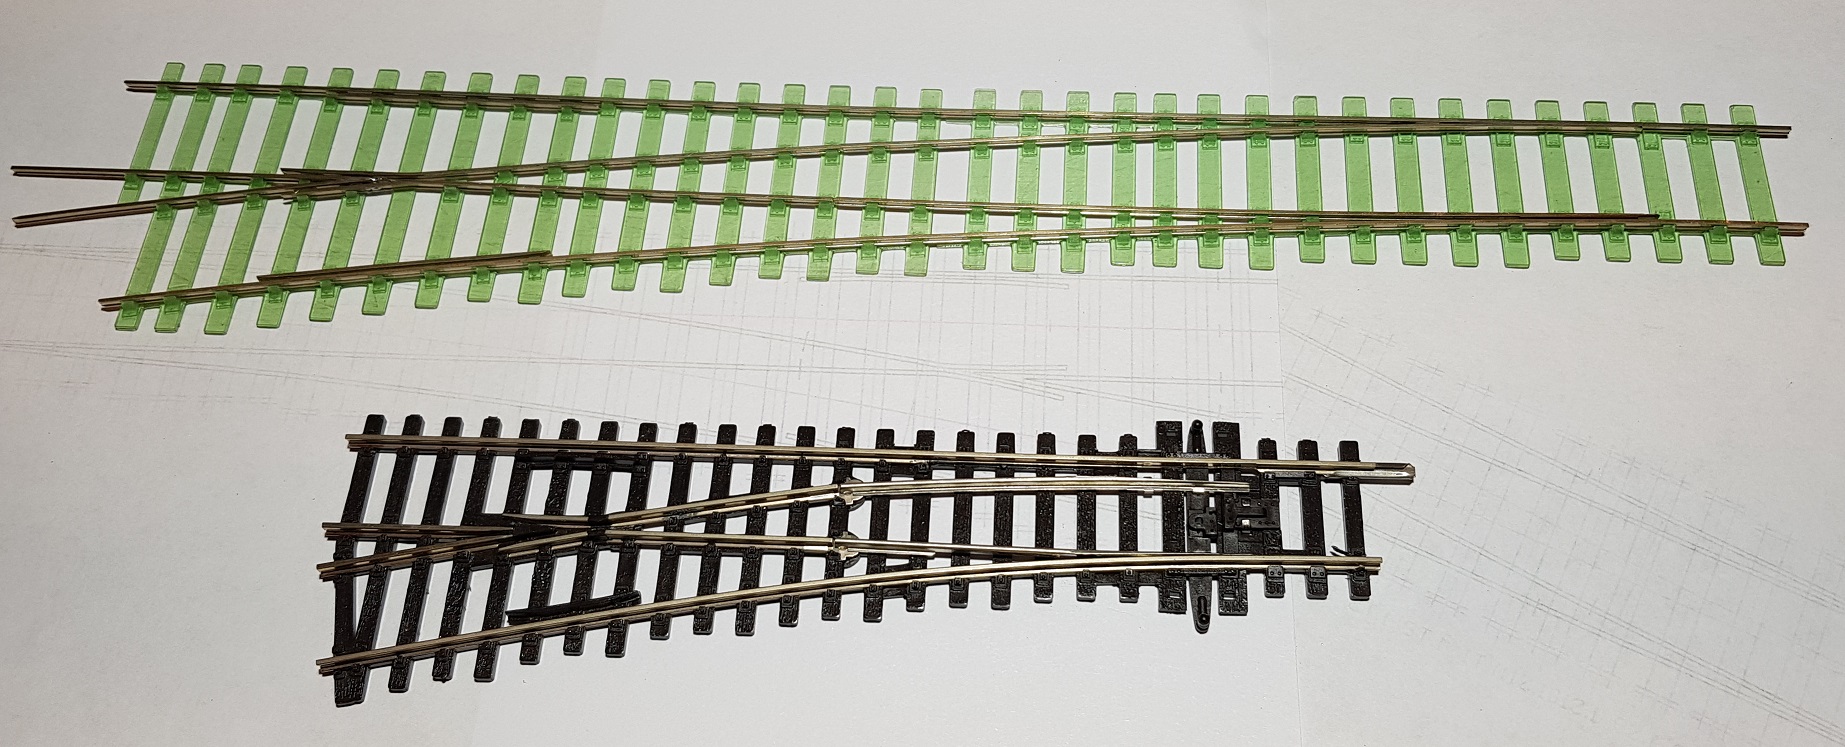
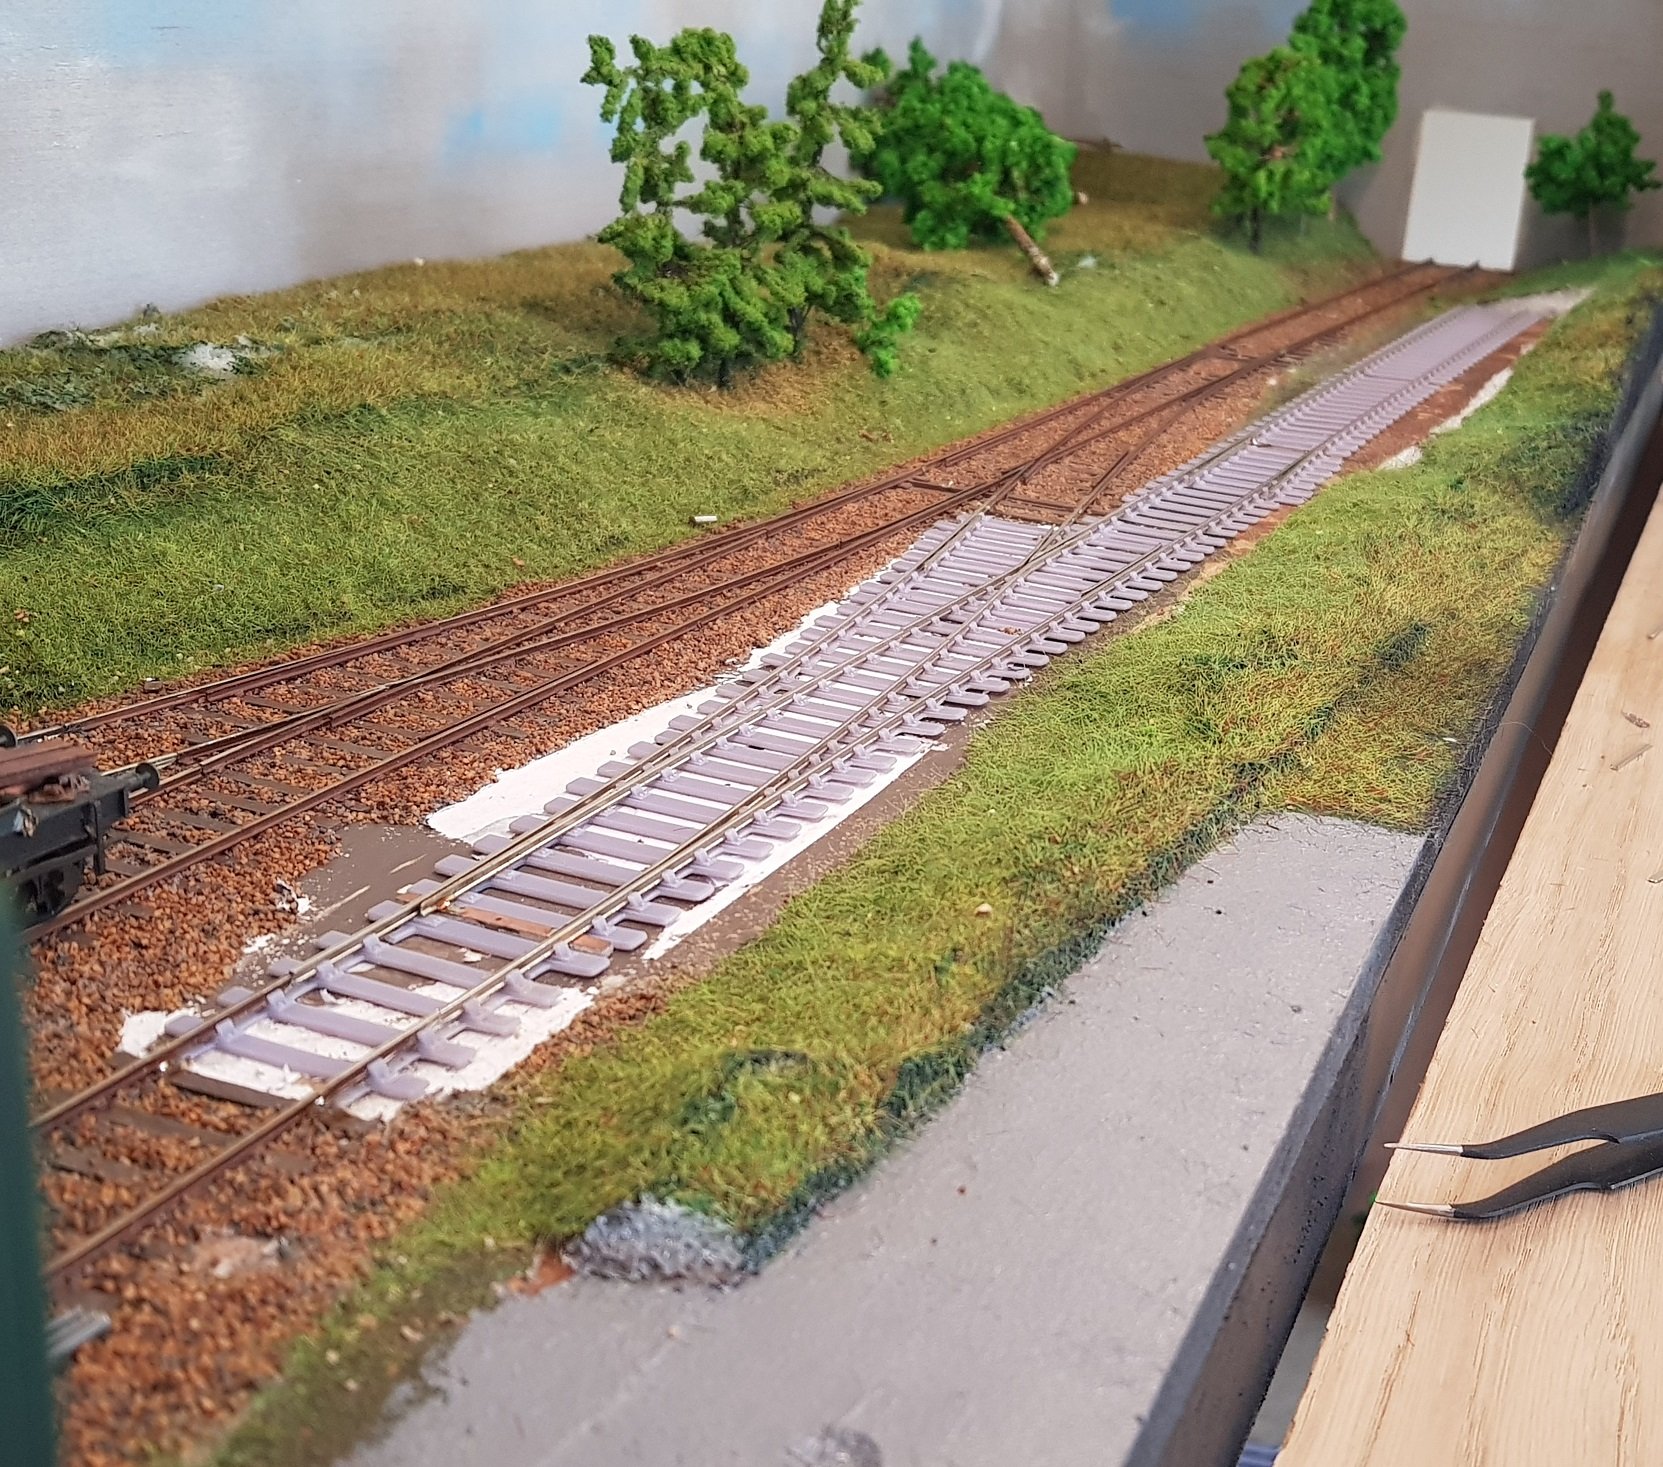
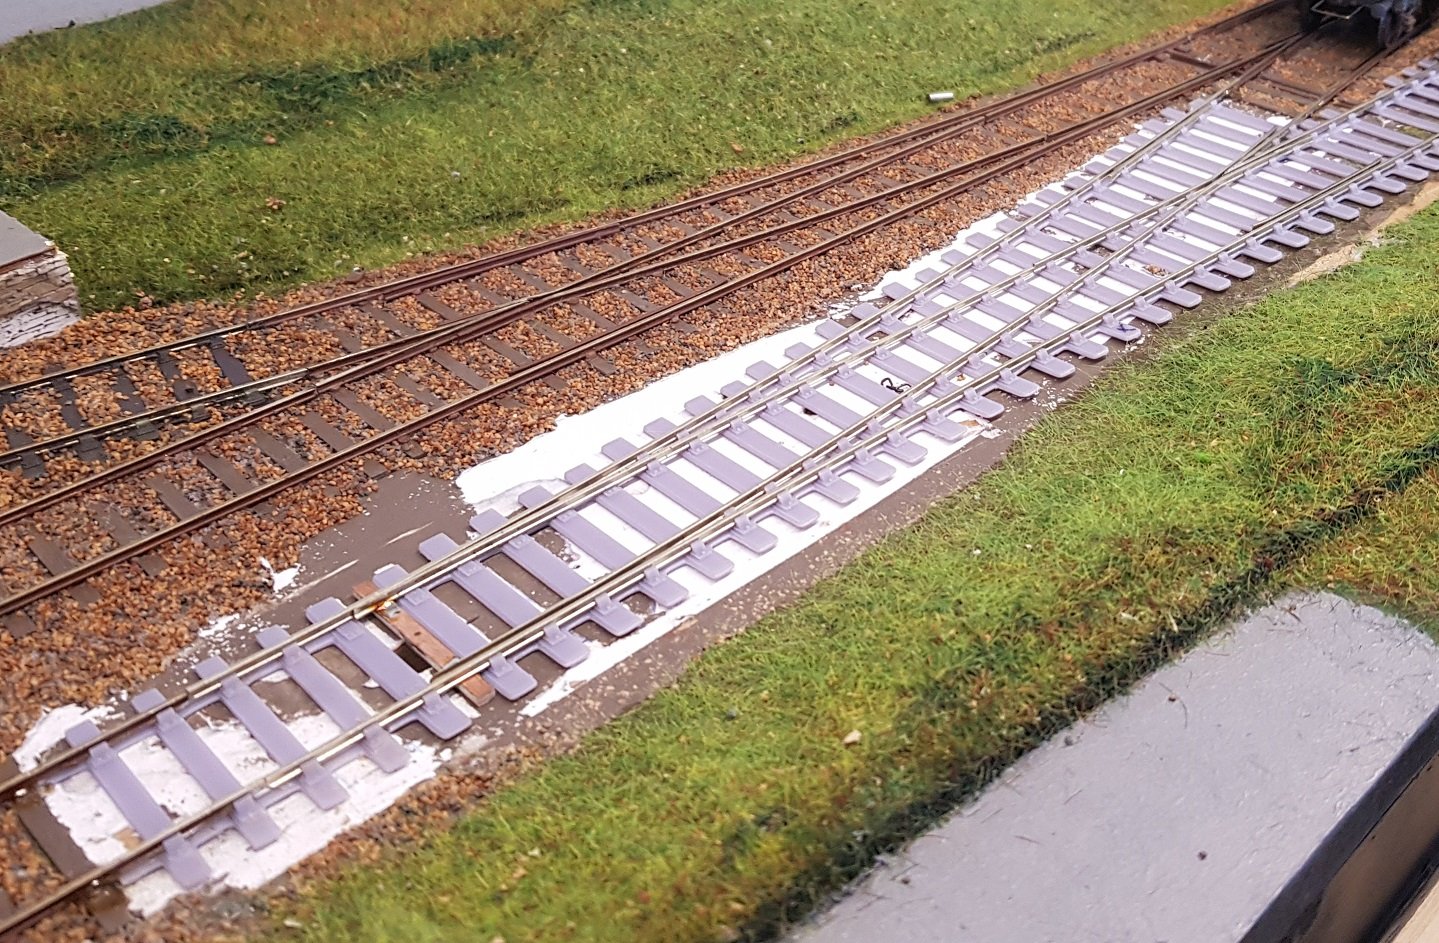
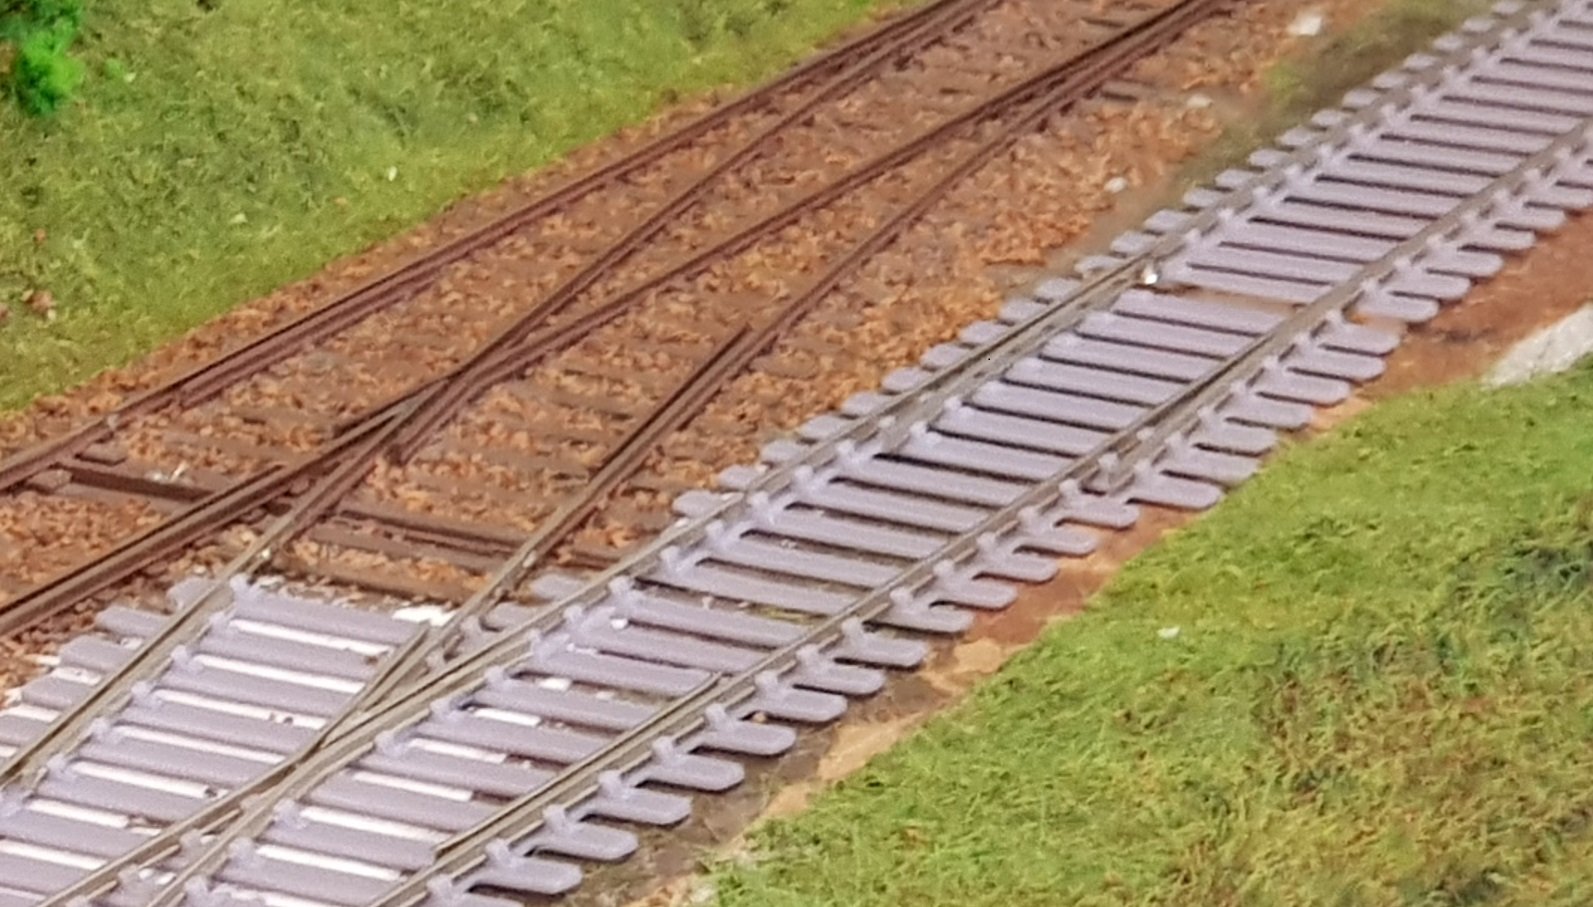
Thanks @Galteemore, I suppose given my journey so far, I can provide some insights..... MGWR110Bat, I model in 21mm and as it happens P4. I agree with Andy regarding P4 vs EM - you do not have to jump straight to P4. As noted P4 flanges and tolerances are much tighter which does take time to get right. As to your model, I would hazard that it is a TMD kit originally released in 1981 which was the building blocks for the Studio Scale Model (SSM) version. I built one of the TMD versions, but built it as 560 as used on the Tramore line - my area of interest is the DWWR / DSER / GSR. To provide some additional information on your questions: 1.) Where would be a good place to start sourcing some suitable axles for 21mm Stock? Either make your own as Andy suggested, or split the axle and sleeve with 2mm ID brass tube, or shop with Scalefour society shop (https://www.scalefour.org/stores/stores.html) 2.) Has anyone tried regauging 16.5mm stock to 21mm? What was required and how did you go about doing it? I generally build my own locomotives and stock so don't have much experience. I do know modifying steam locomotives is difficult as there is insufficient space in the splashers to allow the wheels move out. 3.) Any recommendations for sourcing further M&GWR and GNR(I) locos and rolling stock from the latter part of the 19th Century through to the 1920s? There is not much out there for MGWR - @Mayner does some models kits in brass, and @leslie10646 does quite a few kits for GNR. My stock https://irishrailwaymodeller.com/forum/65-kmce-models/ is mainly DSER for now. 4.) Unrelated to the M&GWR, but anyone tried converting a Hornby 4P tank into a UTA 'Jeep' in 21mm or is that a stretch too far? The Hornby 4P can be converted to a lookalike and others have done it. As mentioned by others Worsly Works do some etches for the Jeep, but they are really scratch aids and need a lot of work to develop to a running model. I am building one (now and again) and it has proved to be quite a task. With regard to building track and points in 21mm, the traditional route was ply and rivet with the necessary gauges, again all available from Scalefour shop, however with improving technology, 3D printing is getting closer to being mainstream. Straight track in any methodology is quite simple and straightforward, points take a little more effort. I have been dabbling with the 3D printing route, but started with the ply and rivet method - 3D printed version is so much quicker! This is a mix of ply and rivet and 3D printed - older finished track is ply & rivet, and obviously new point and headshunt is 3D printed. One thing to bear in mind is that 21mm track needs quite a bit more space- points are longer than mass manufactured versions. Top point is 21mm B6 point, while bottom is Peco short point for reference. Hope this is of some assistance. Overall 21mm is a challenge, but well worth the effort. Good luck with your venture either way. Ken
-
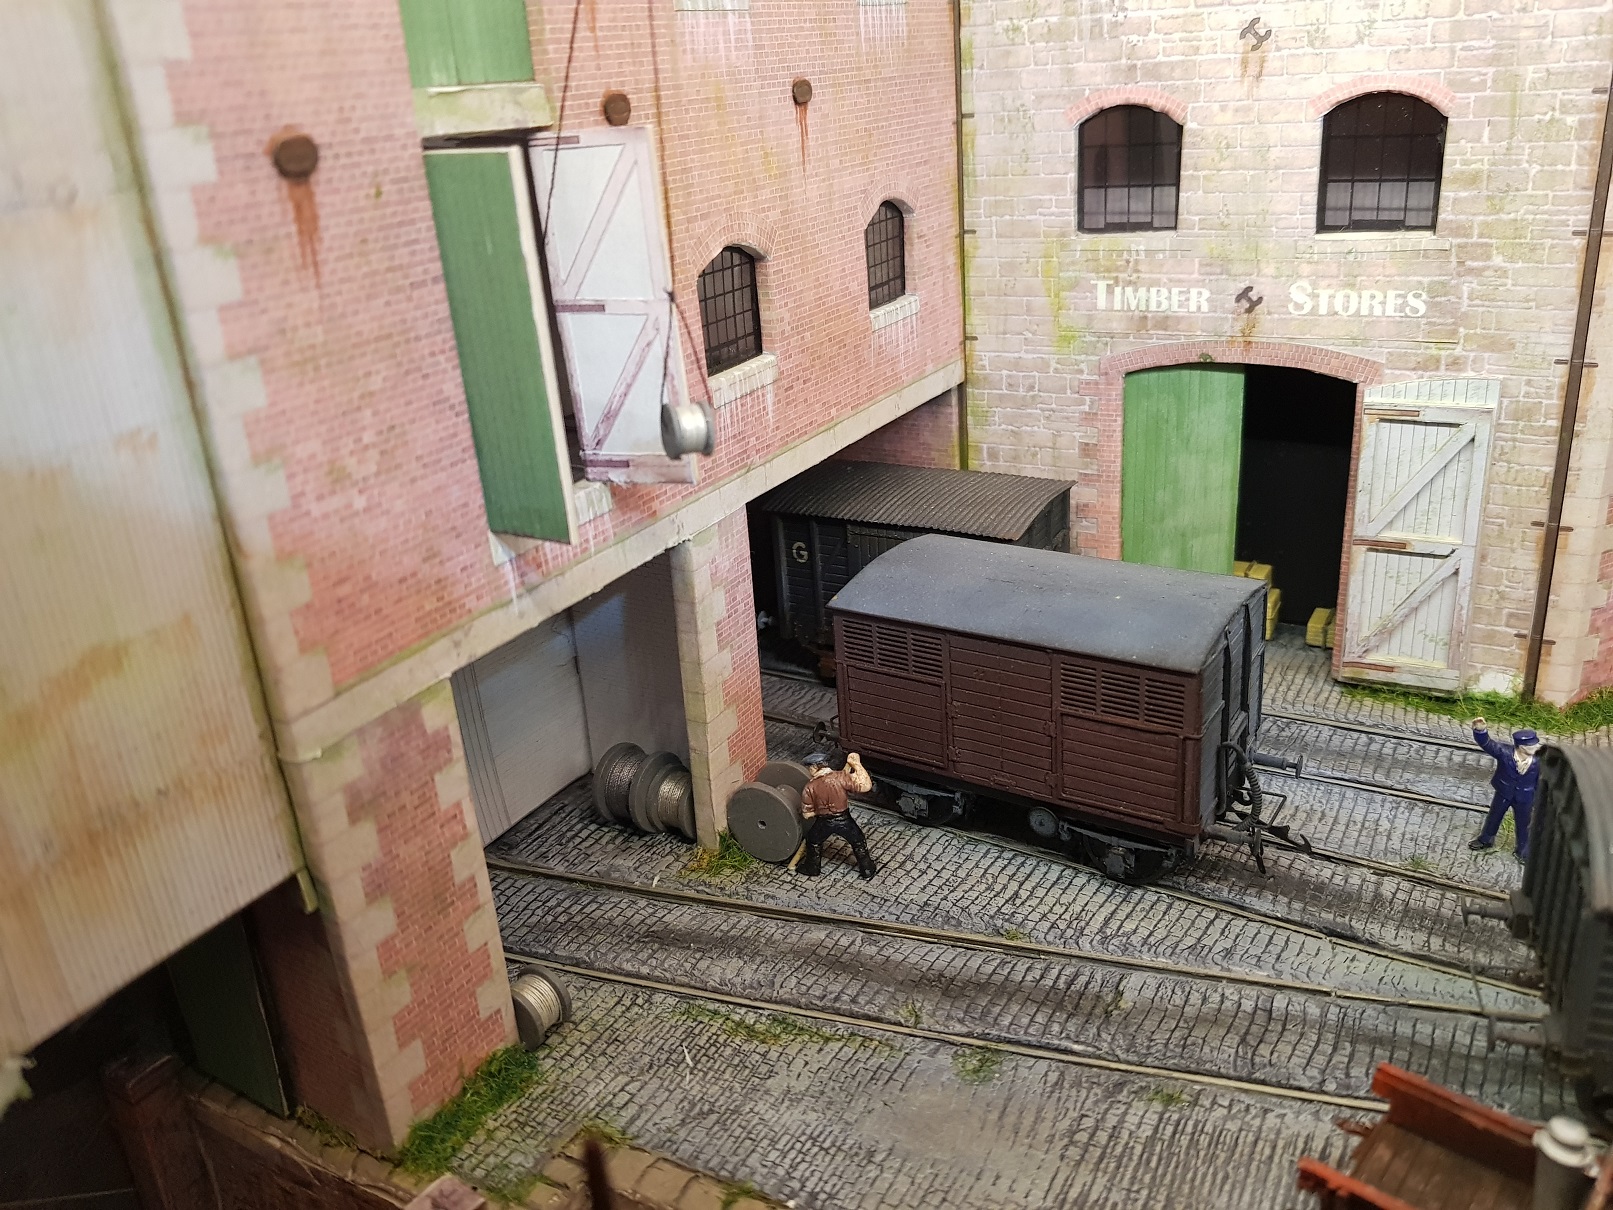
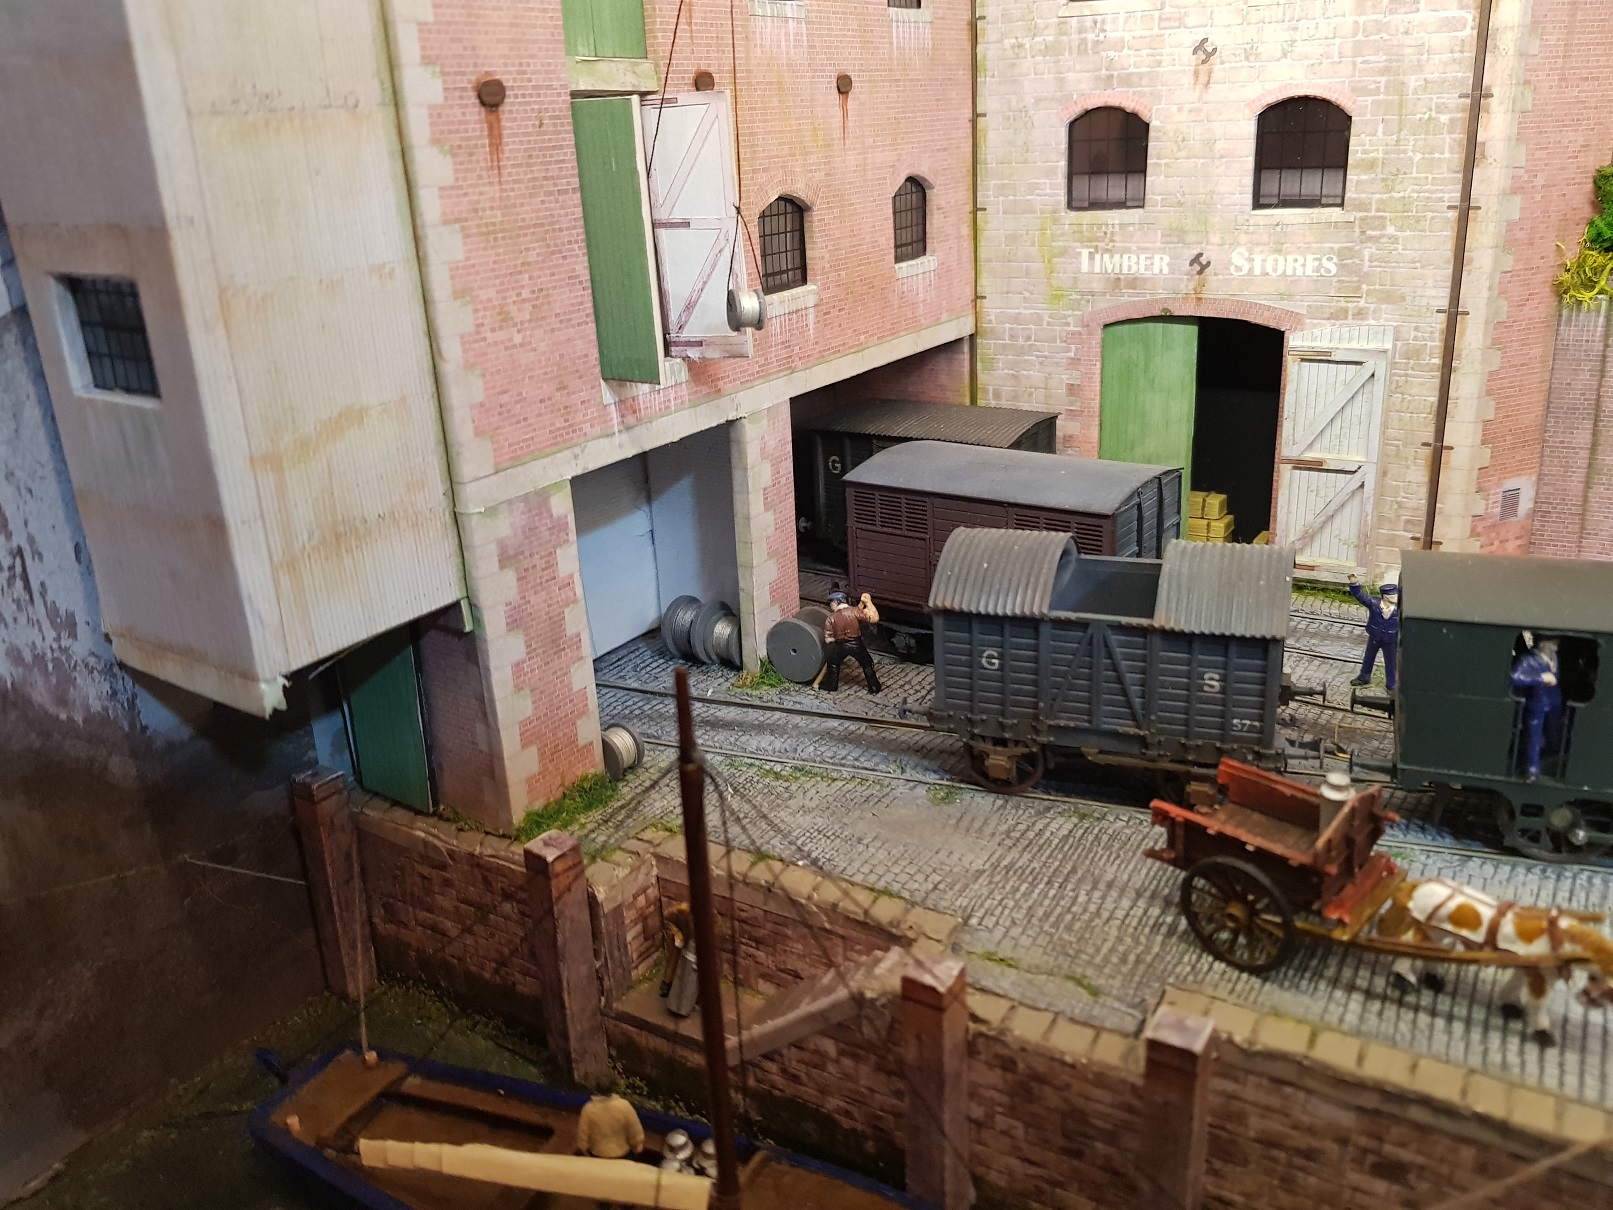
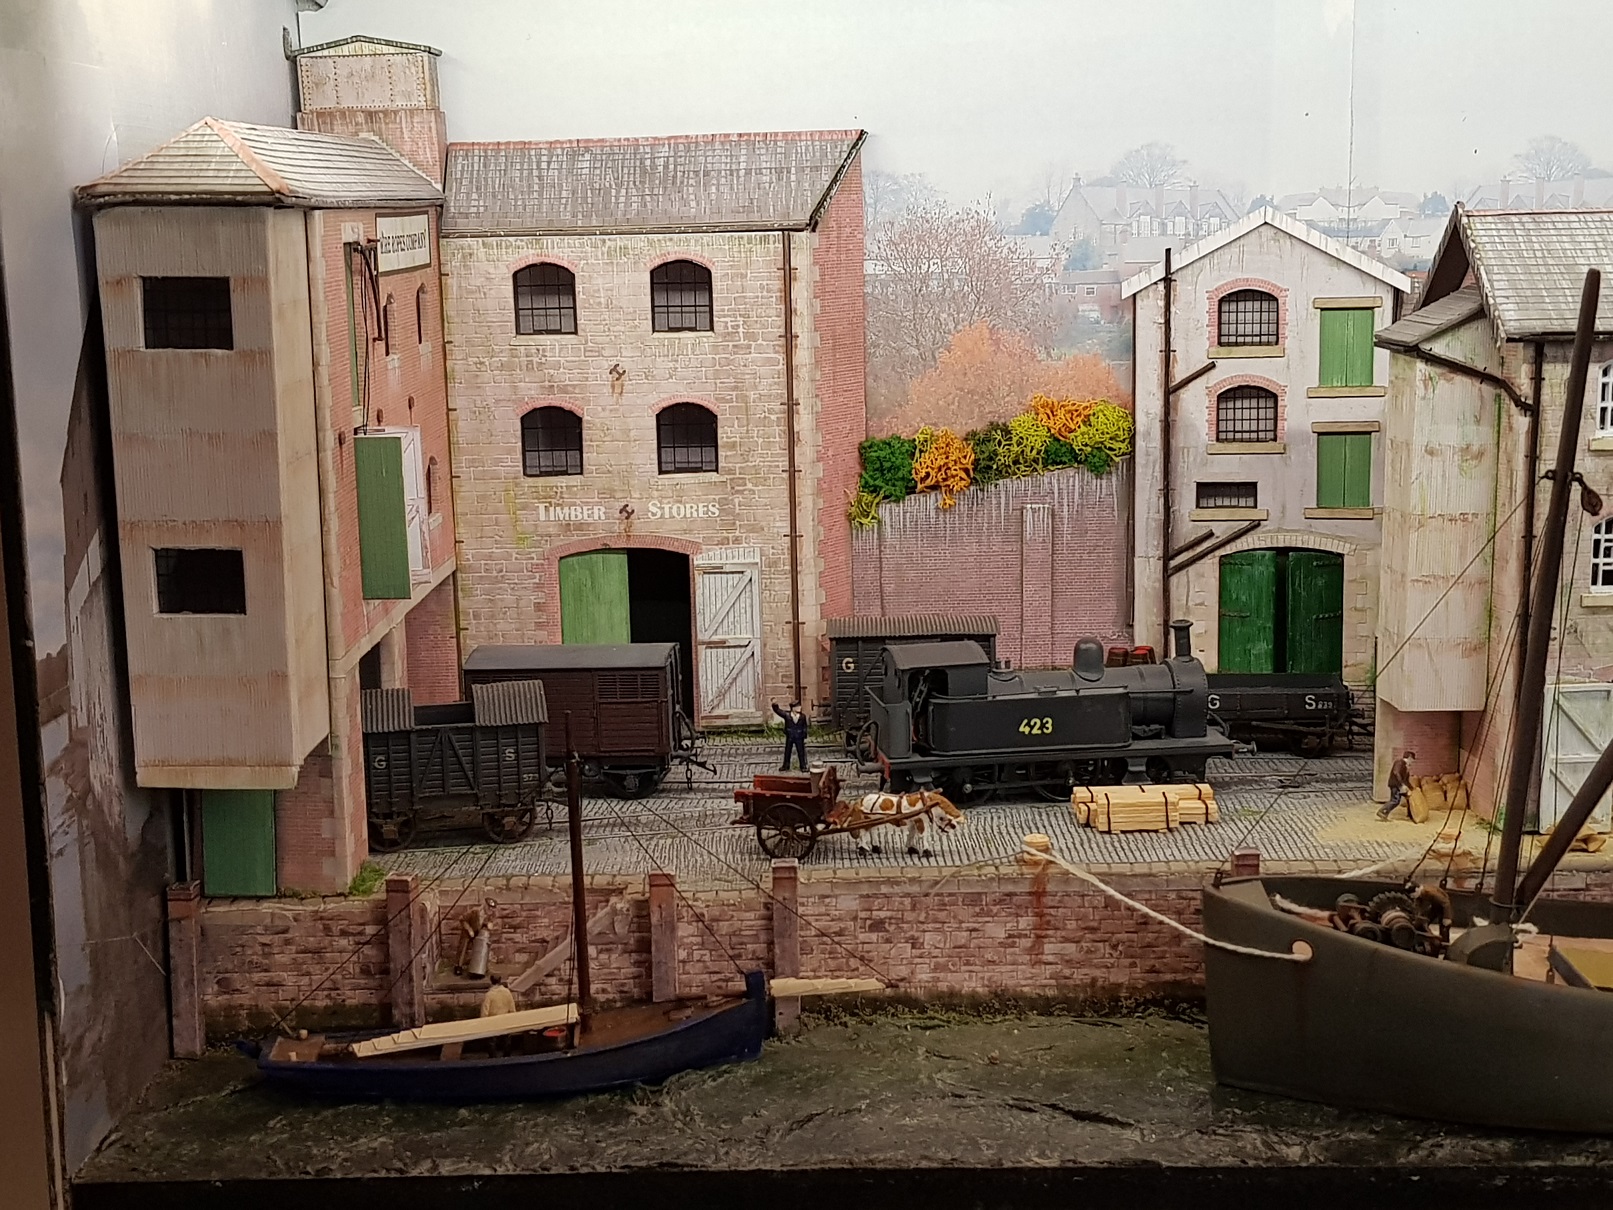
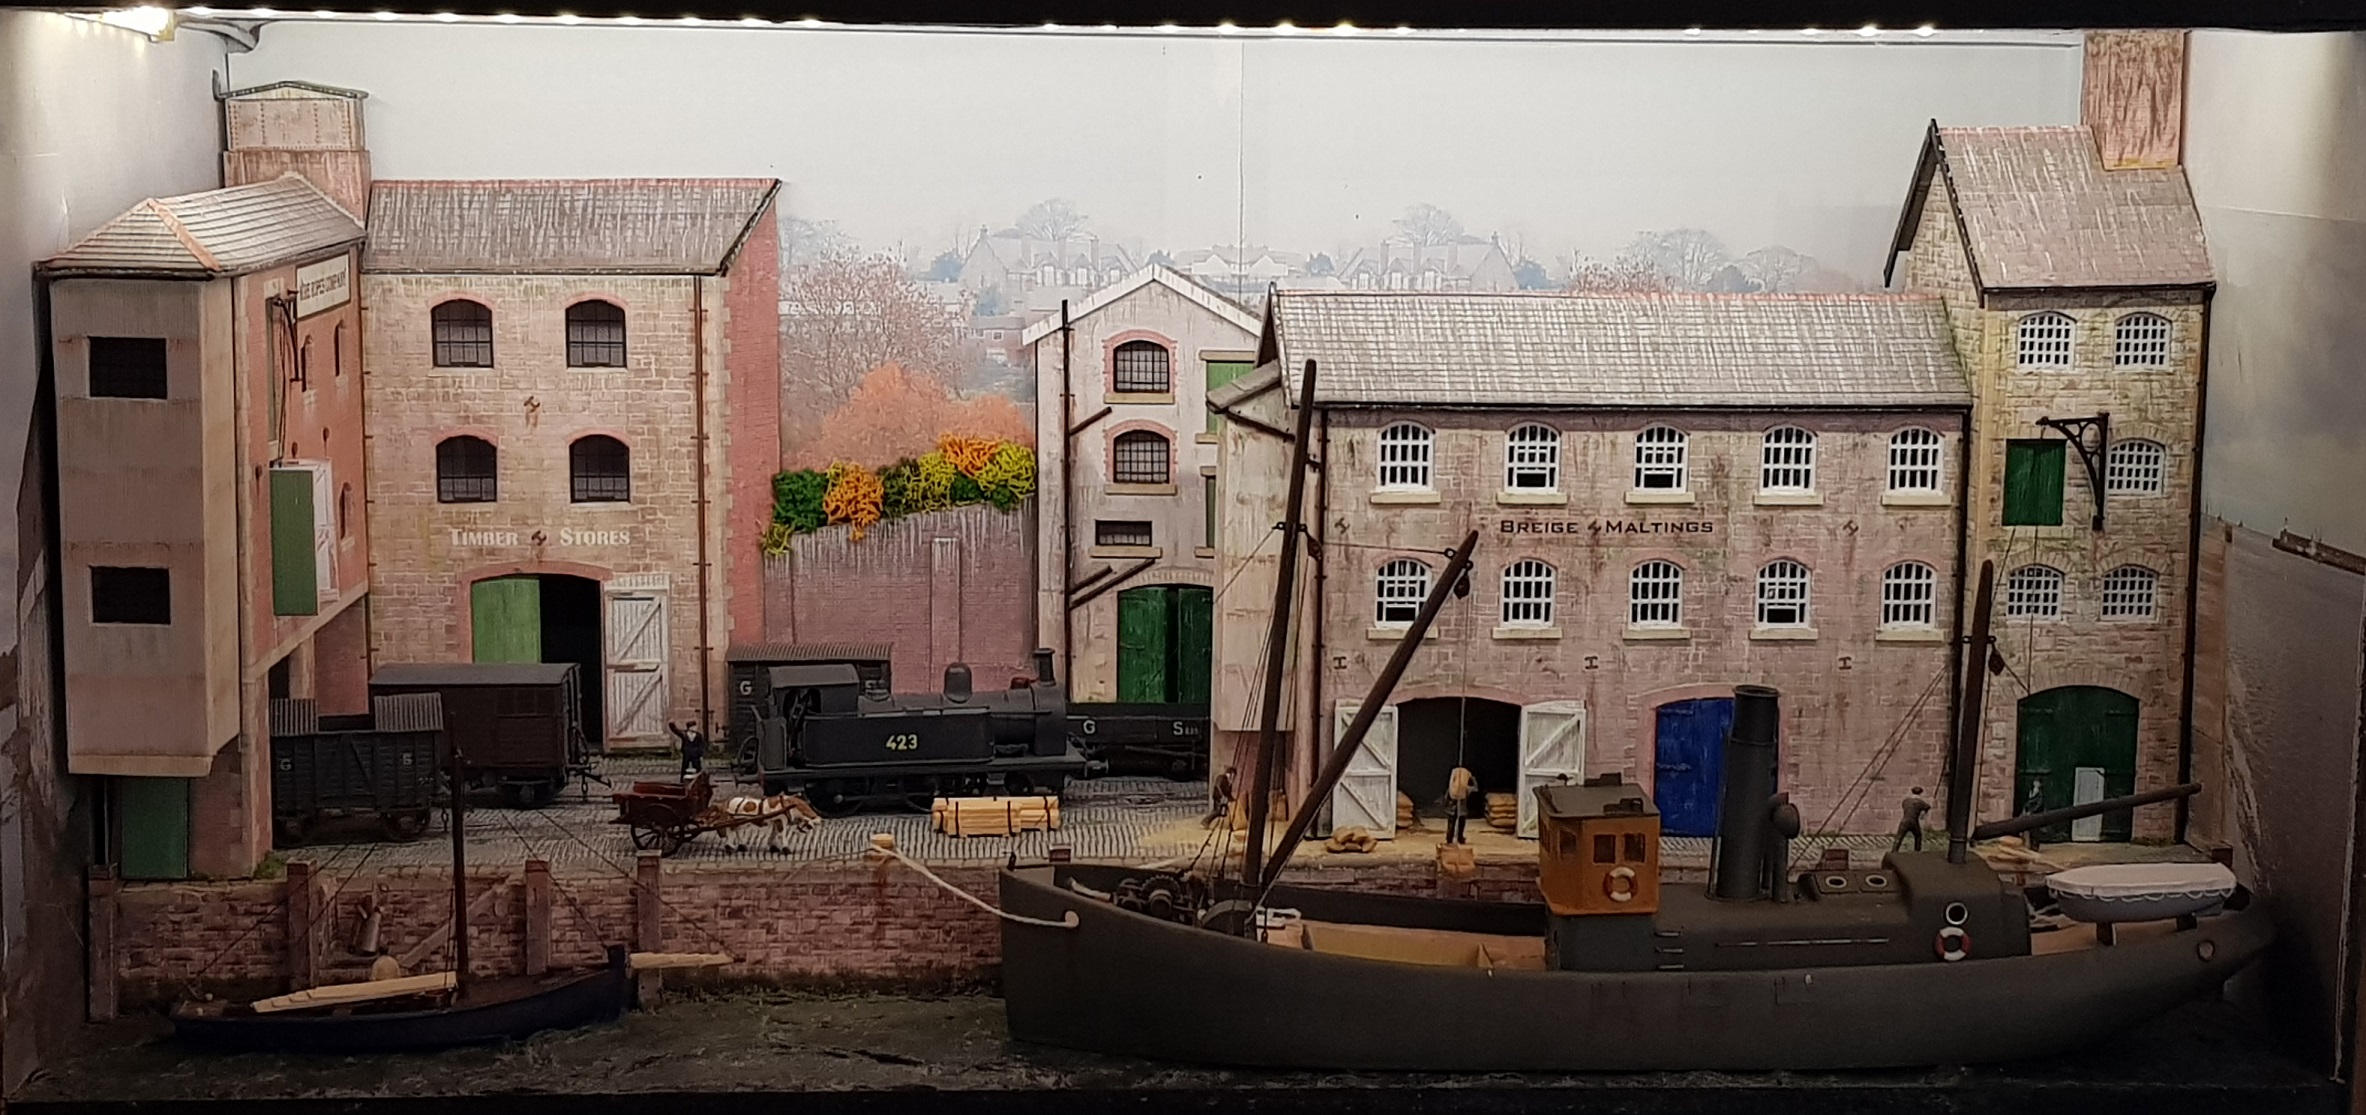
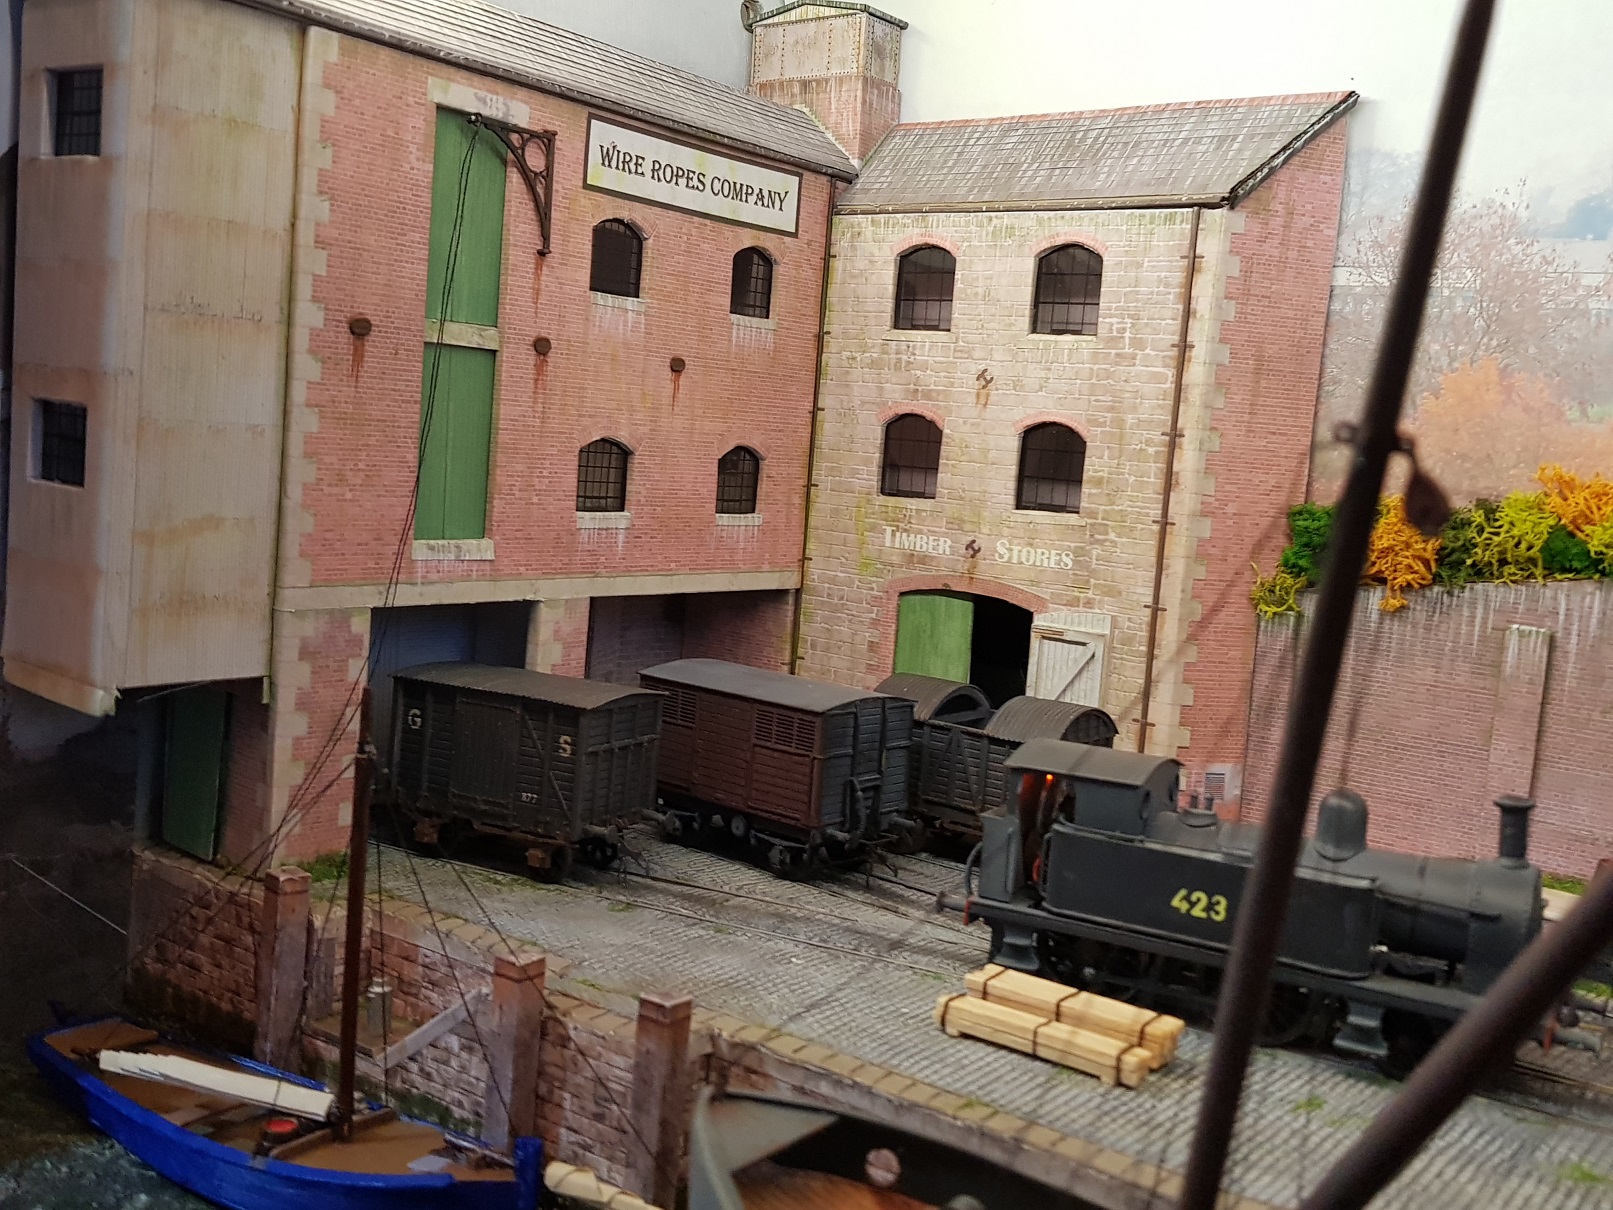
Finally got round to doing some work on the wire ropes company building & accessories. Some 3D printed cable drums full ready for shipping and some empty drums coming back with a delivery of timber for the timber store. Timber bales were also 3D printed in various sizes. Timber store really needed some timber, some bales were added for interest. Busy docks.... Some work to get those drums back in place - can't beat the leverage of a long stick. That other wall hoist is getting some use after a few tweaks. Some empty cable drums coming back to the port with a delivery of timber for the timber store. Happy with how this is coming together with some good interest to flesh out the scene. All for now. Ken
- 71 replies
-
- 13
-
-
-
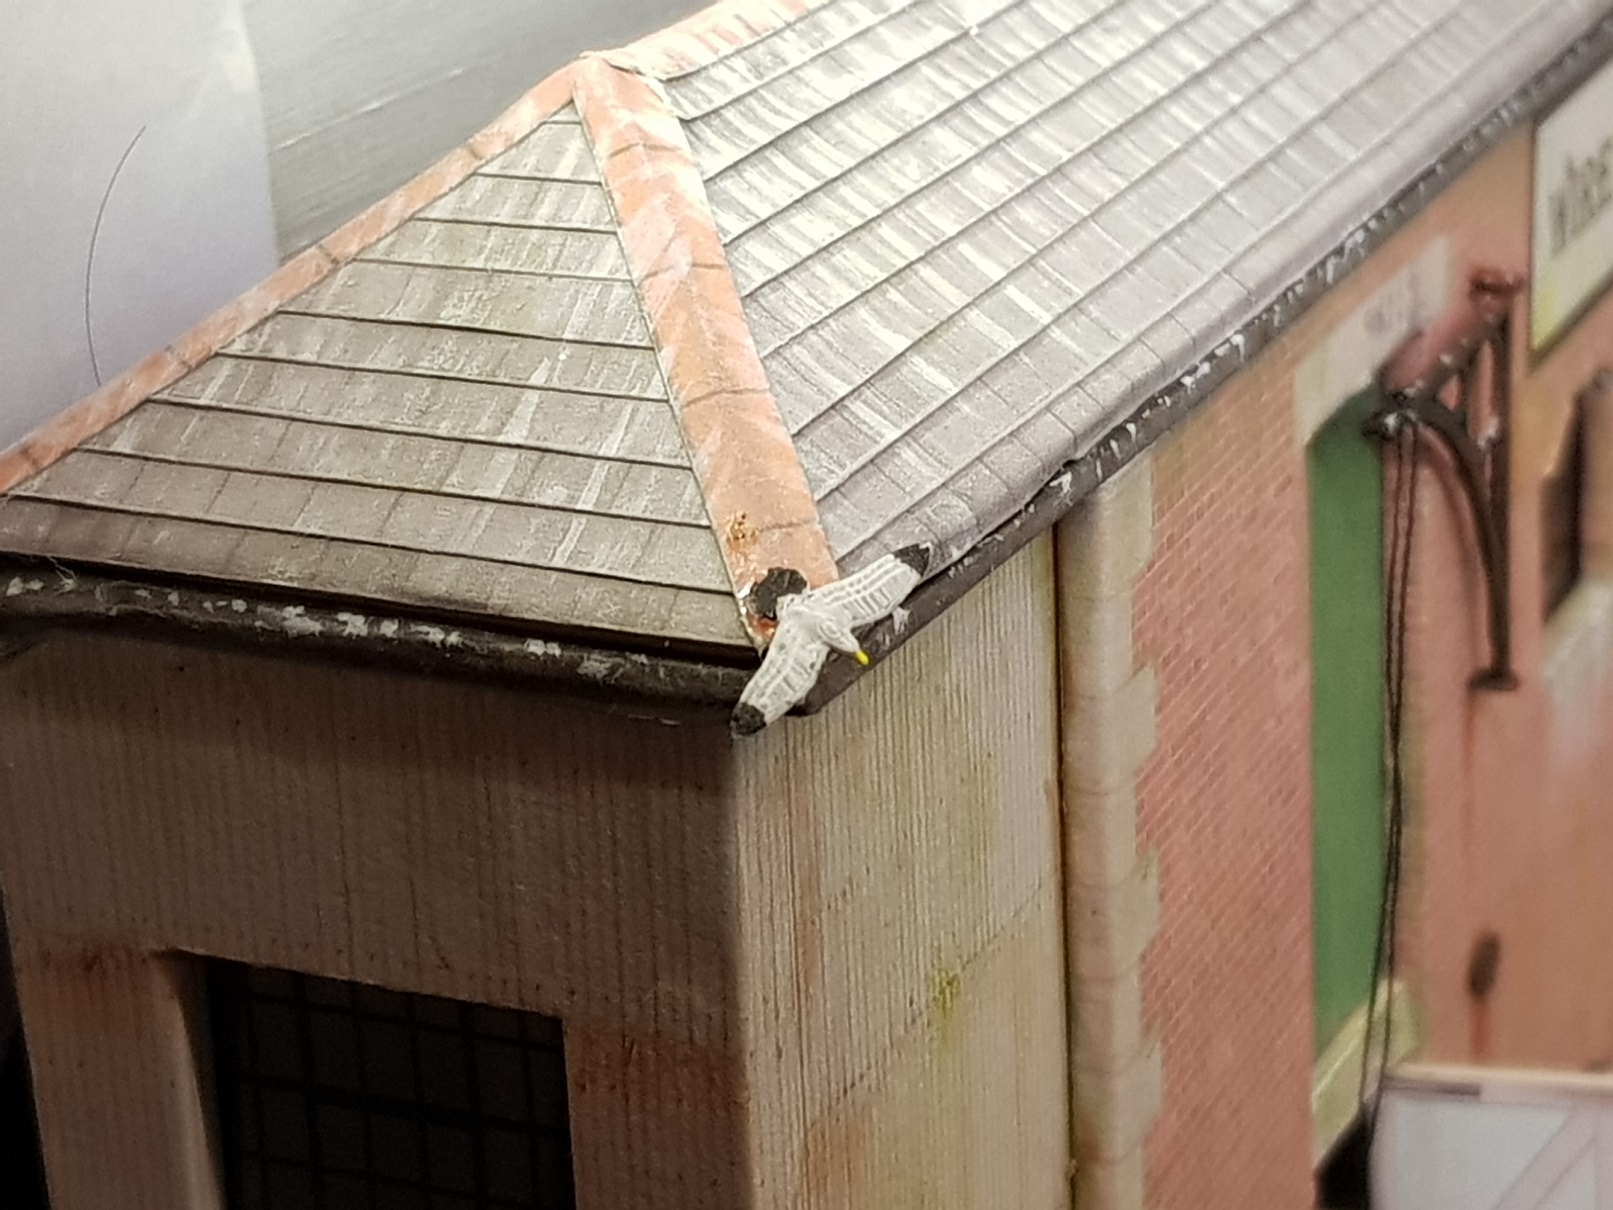
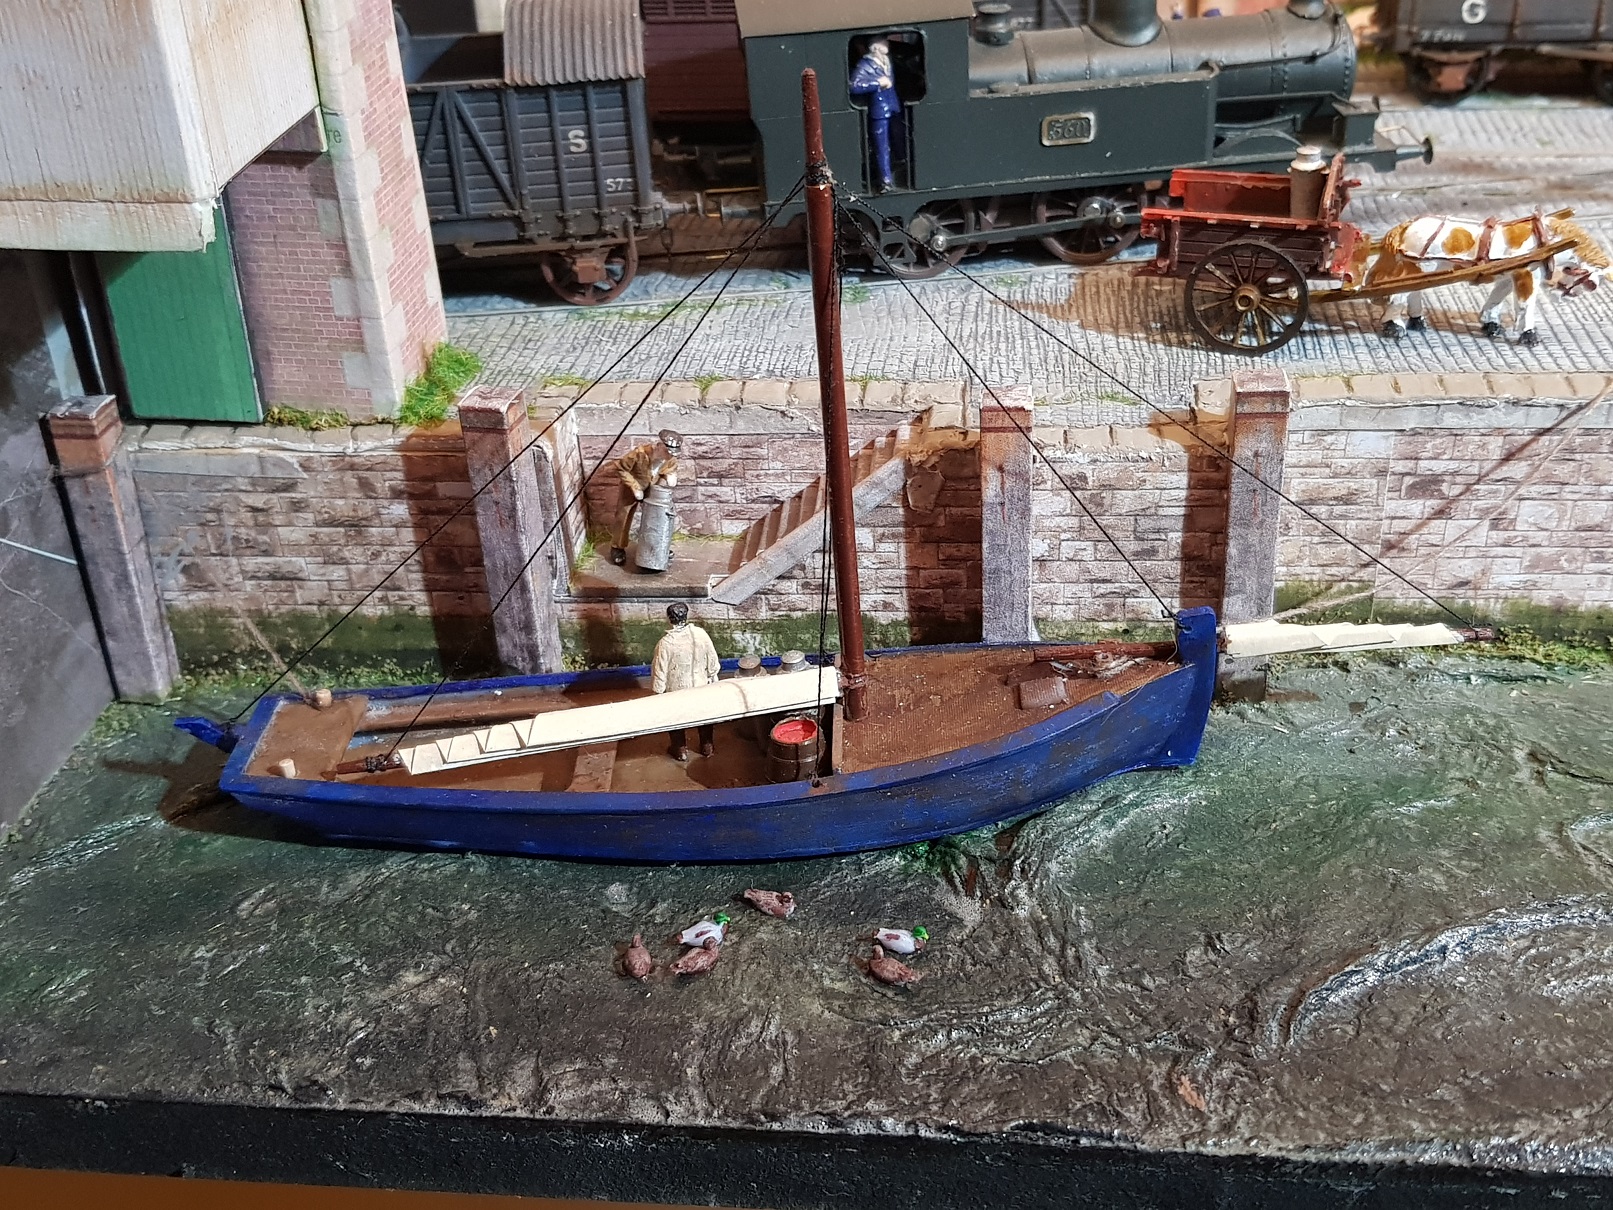
Little bit of work on the layout. Some fine 3D printing allowed me to add some wildlife to the scene. First up, a few ducks to bother the skipper of the Galway Hooker - got any bread???? And no port would be complete without the ubiquitous seagulls, or in this case seagull. Very fine print and only one of the models came away intact from the supports. Need to re-visit the supports and run off a few more. Some sitting gulls needed for the rooftops to complete the look. More as time and energy permit. Ken
- 71 replies
-
- 23
-
-
-
Excellent - that's looking good!
-
Looking good David. It is a bit of a pain and the rigging does get in your way as you progress, however it is worth doing as it really gives presence to the model. Well done for sticking with it!!
-

Would you model in 21mm if RTR track and models were readily available?
KMCE replied to BosKonay's topic in Irish Models
Sorry for the delayed reply, but I use this ballast as it is more in keeping with that on the east coast line. Ken
-
Two Axel Coaches in Ireland?
KMCE replied to Auto-Train Original's topic in Photos & Videos of the Prototype
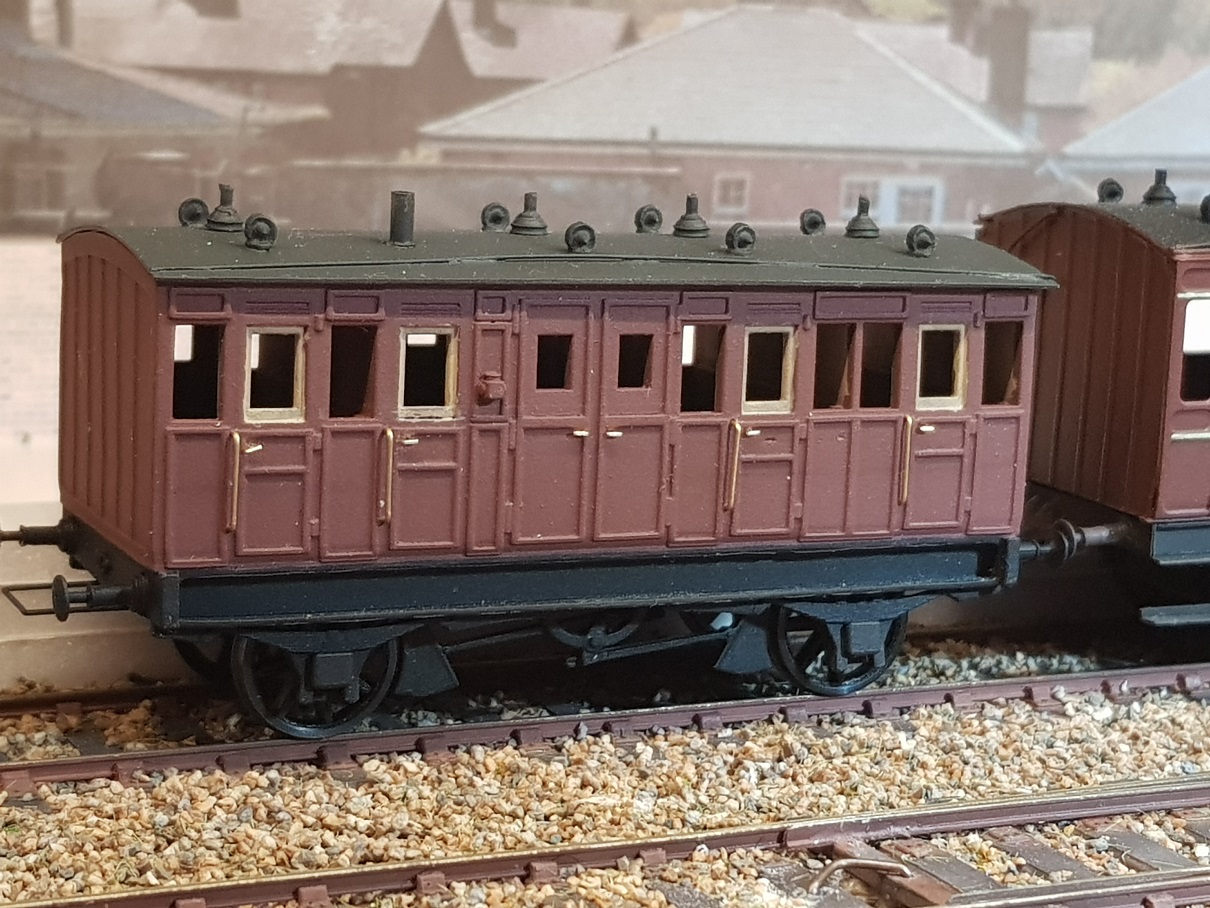
There is also the 1878 Metropolitan Carriage Works 21' 6" 4-Wheeled Third Brakes operated on the DSER line. As far as I know there were at least two and were in use on commuter trains between Dublin & Bray. Both appear to have ended up being used by the loco dept. in their later lives. Quite small overall, and noticeable in the lack of tumblehome and narrower loading gauge than standard Irish stock. Ken
-
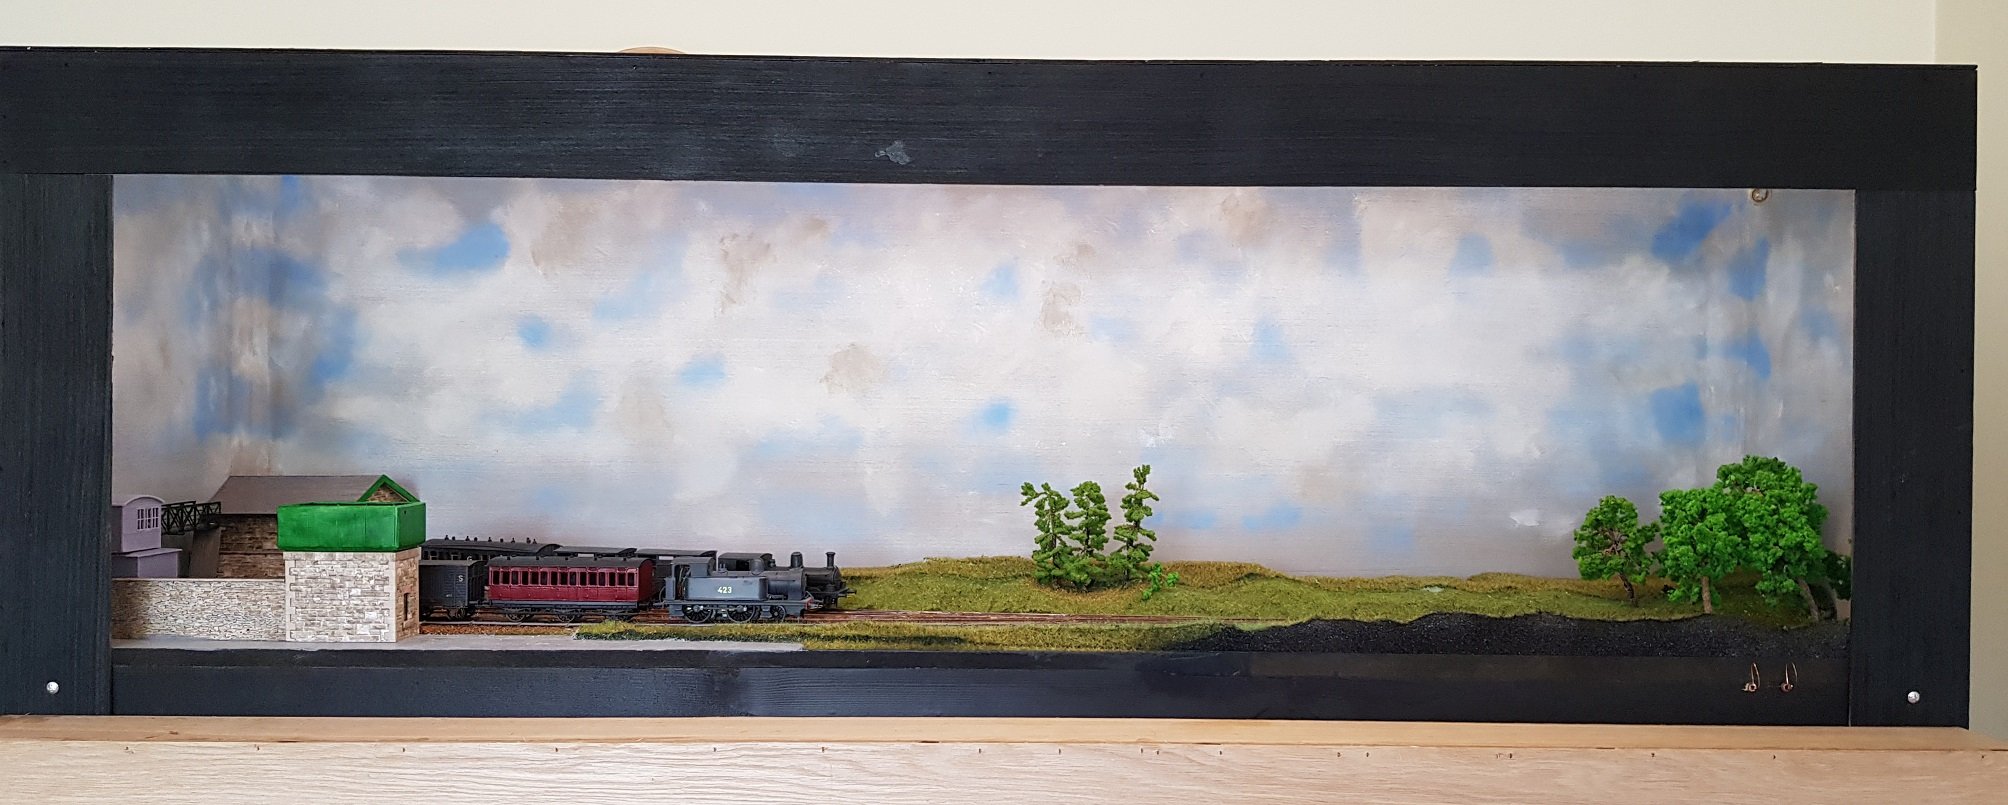
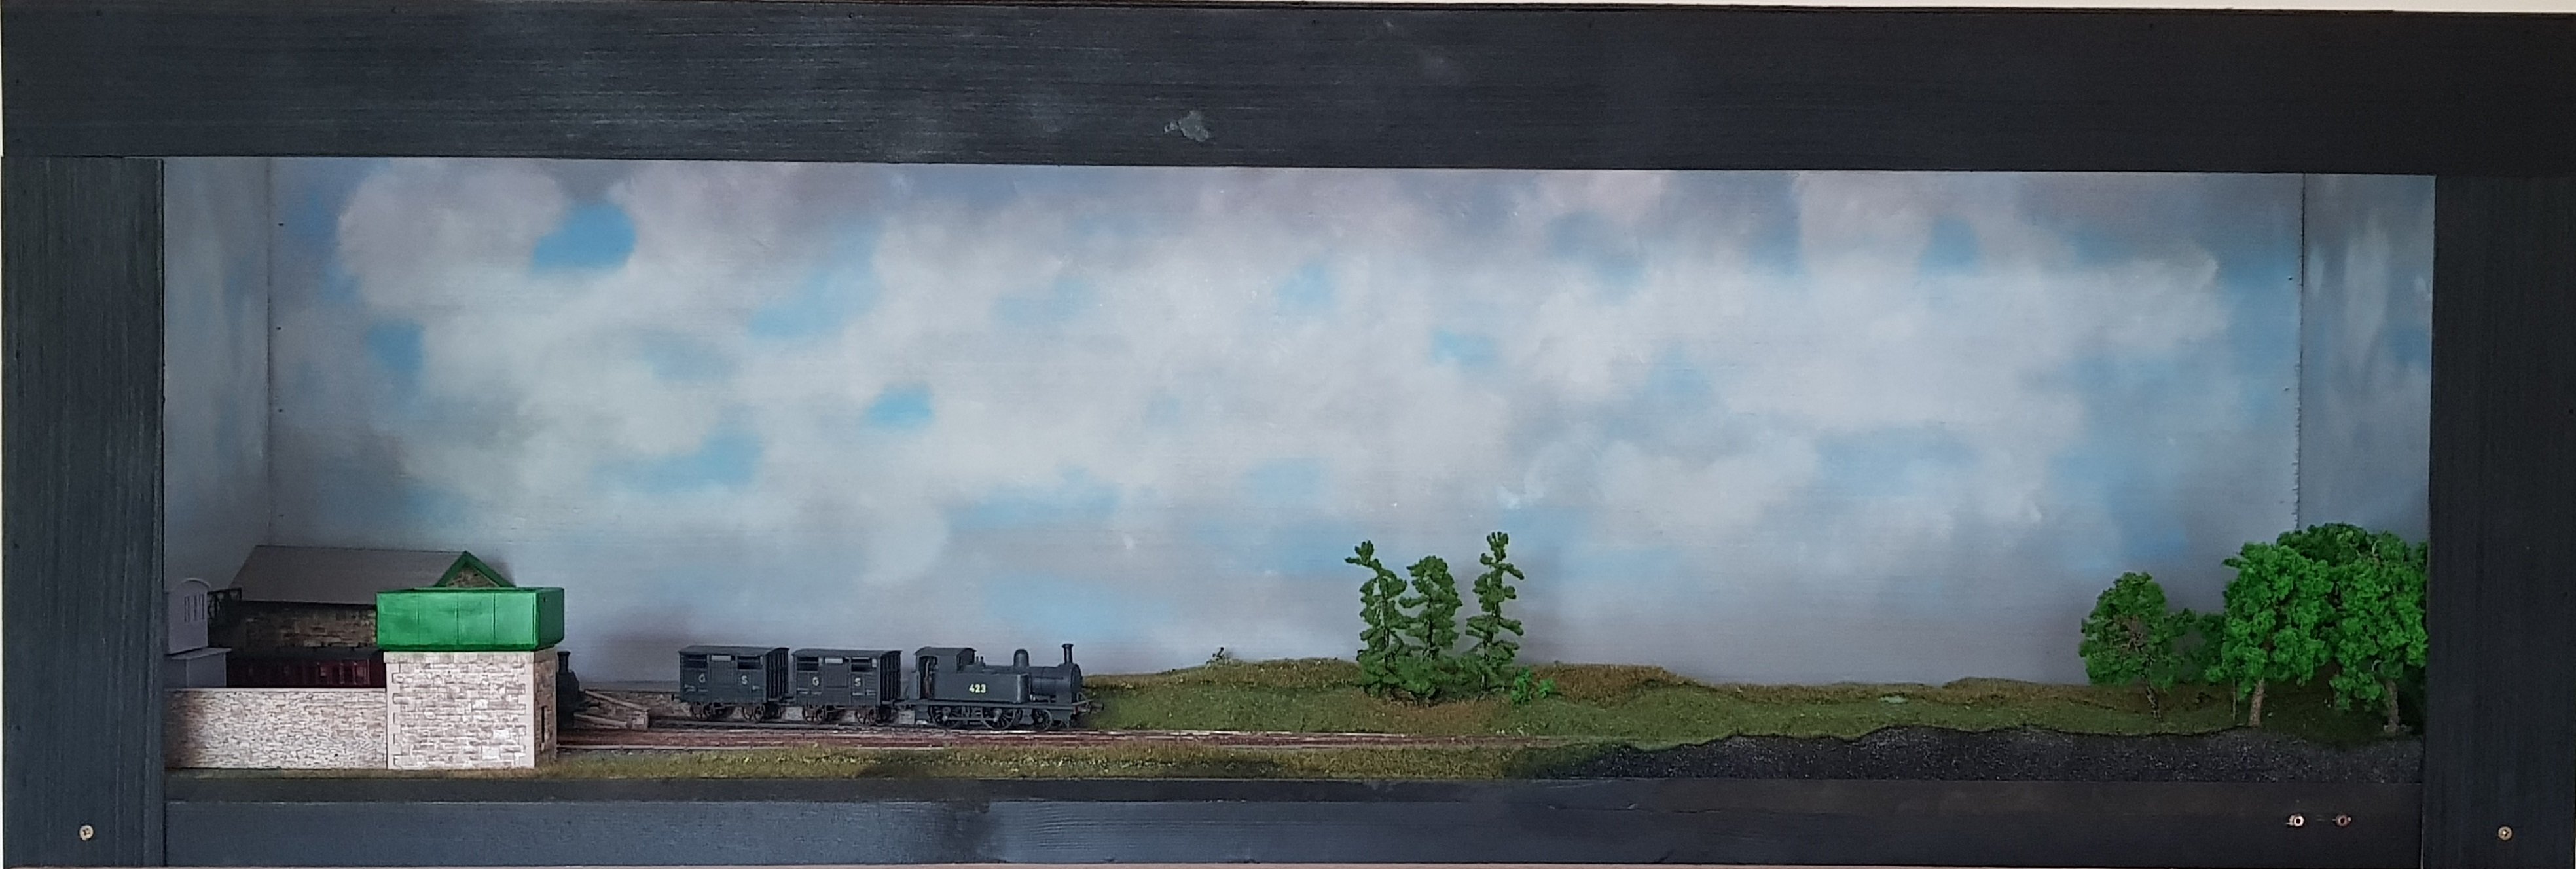
Phil, the standard backdrop supplied as part of the scalescenes kit was already faded so it does give a nice effect. What I did was to mirror the image, print both and find a line where they could be spliced together with out being too obvious - although, I could do with smoothing out that seam somewhat!! I have to agree with the sentiments though, the muted image is more in keeping with reality as colours and detail fade with distance. Ken
-
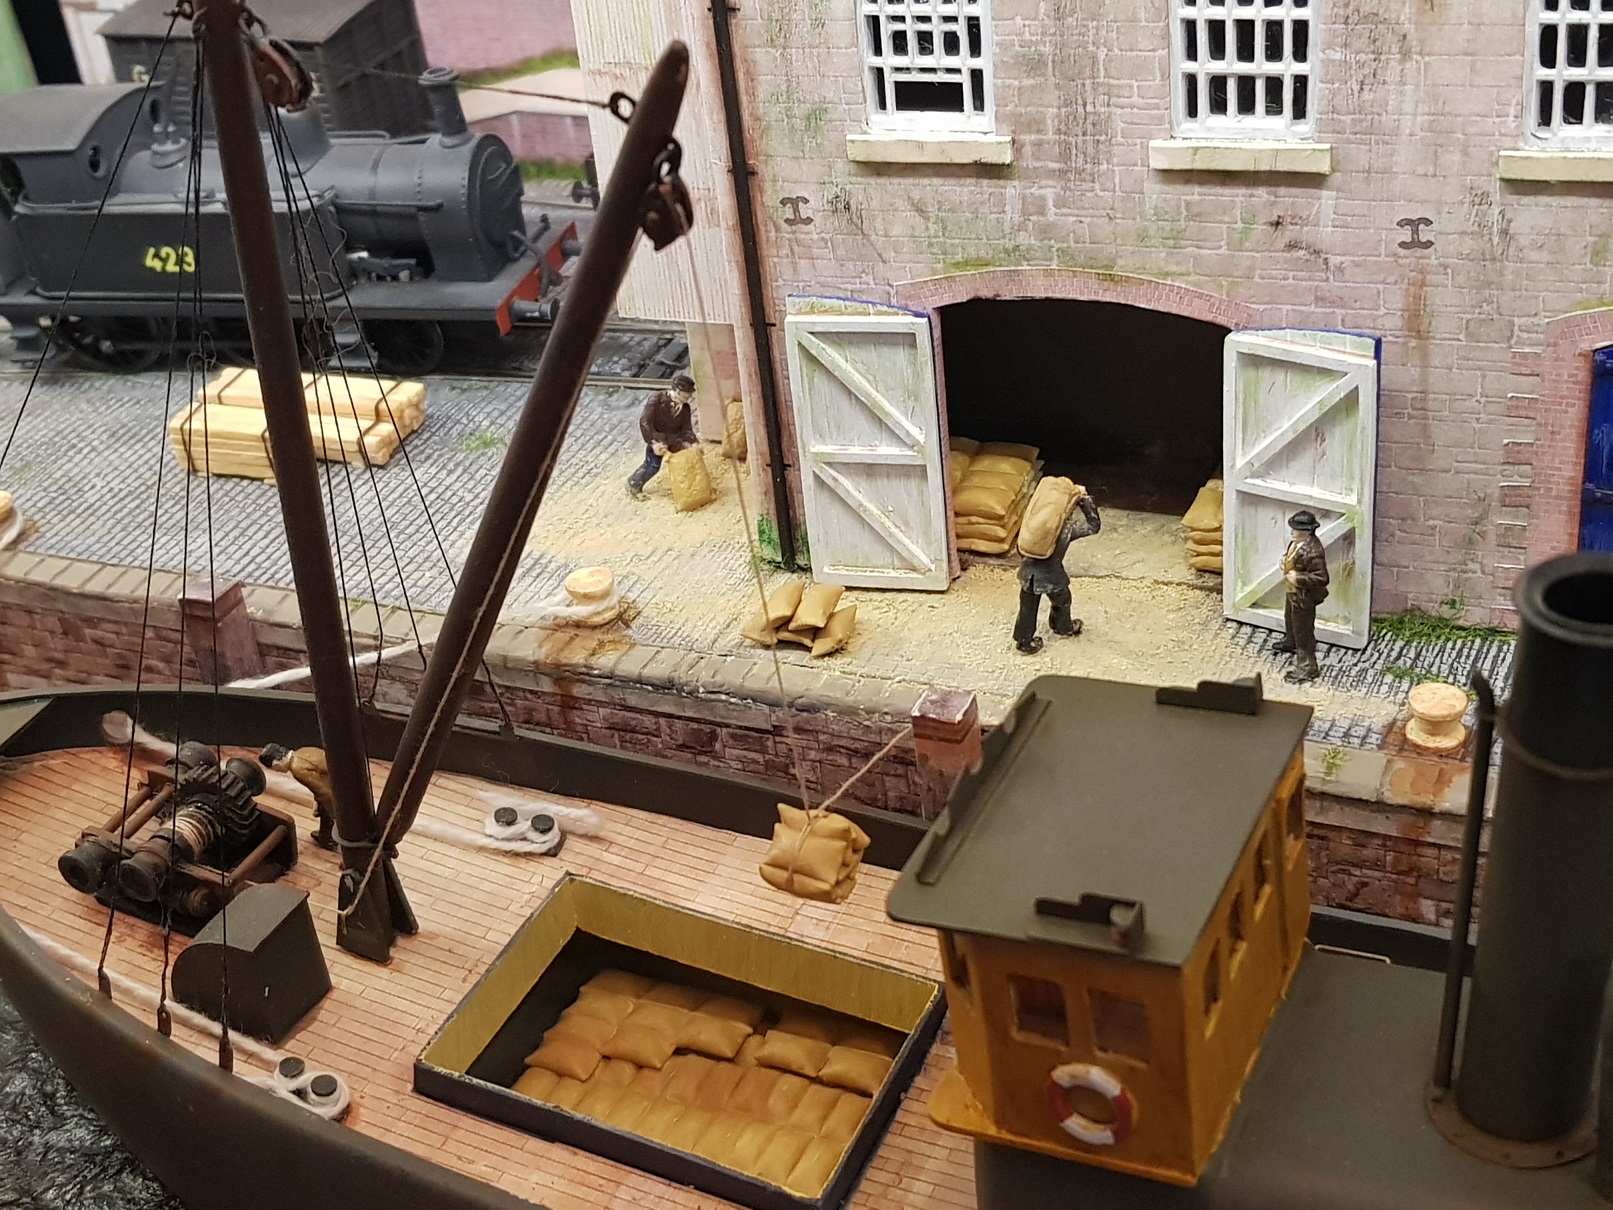
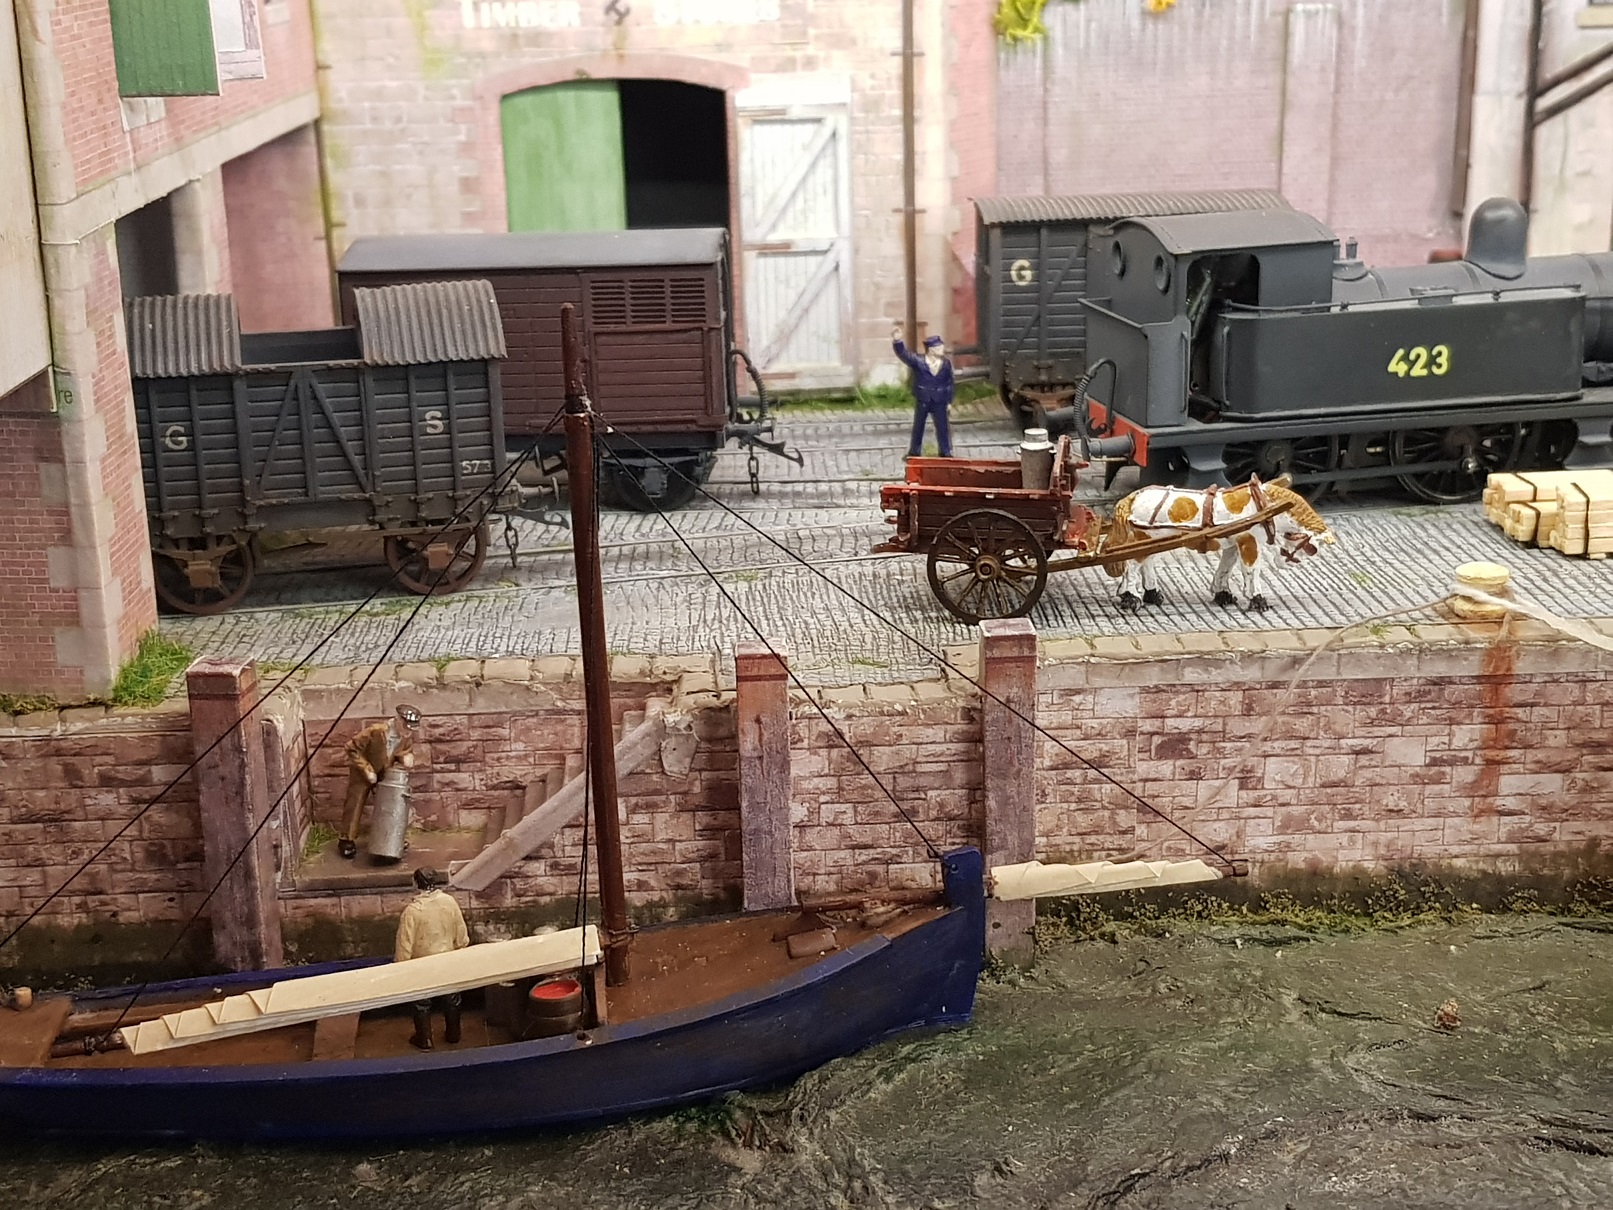
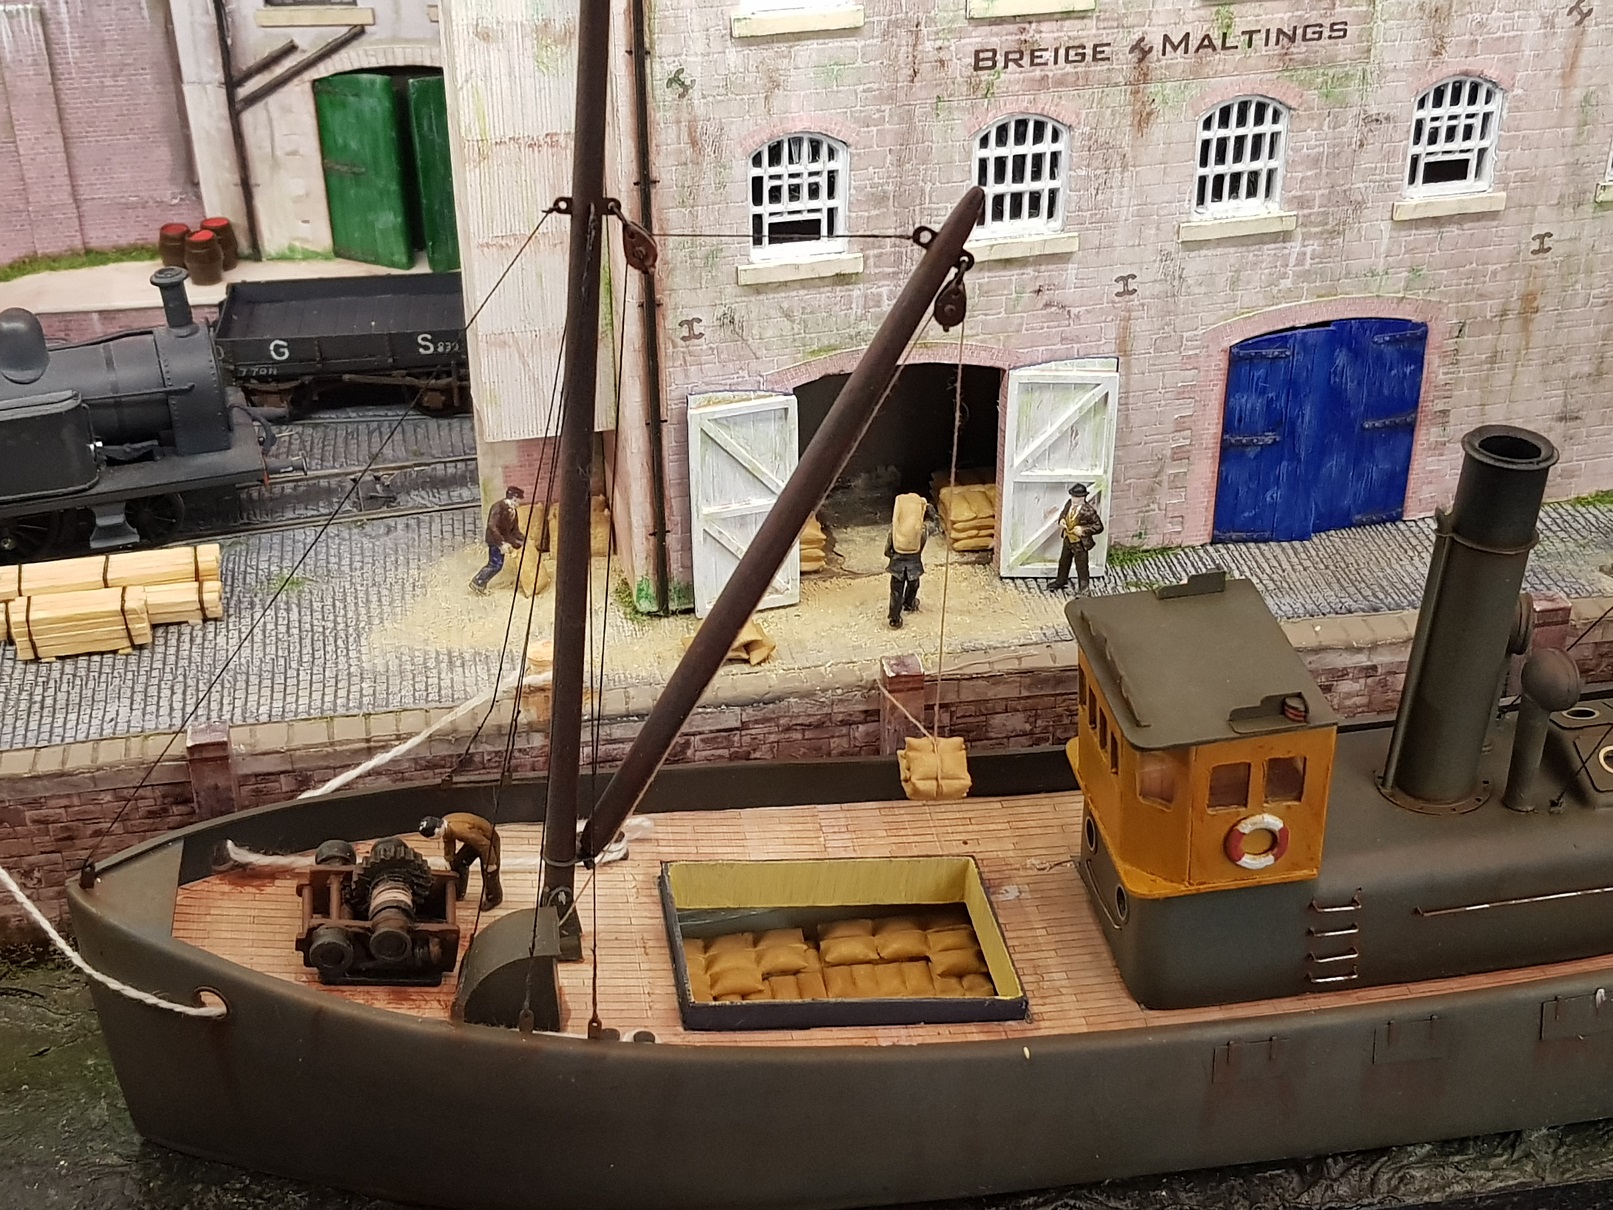
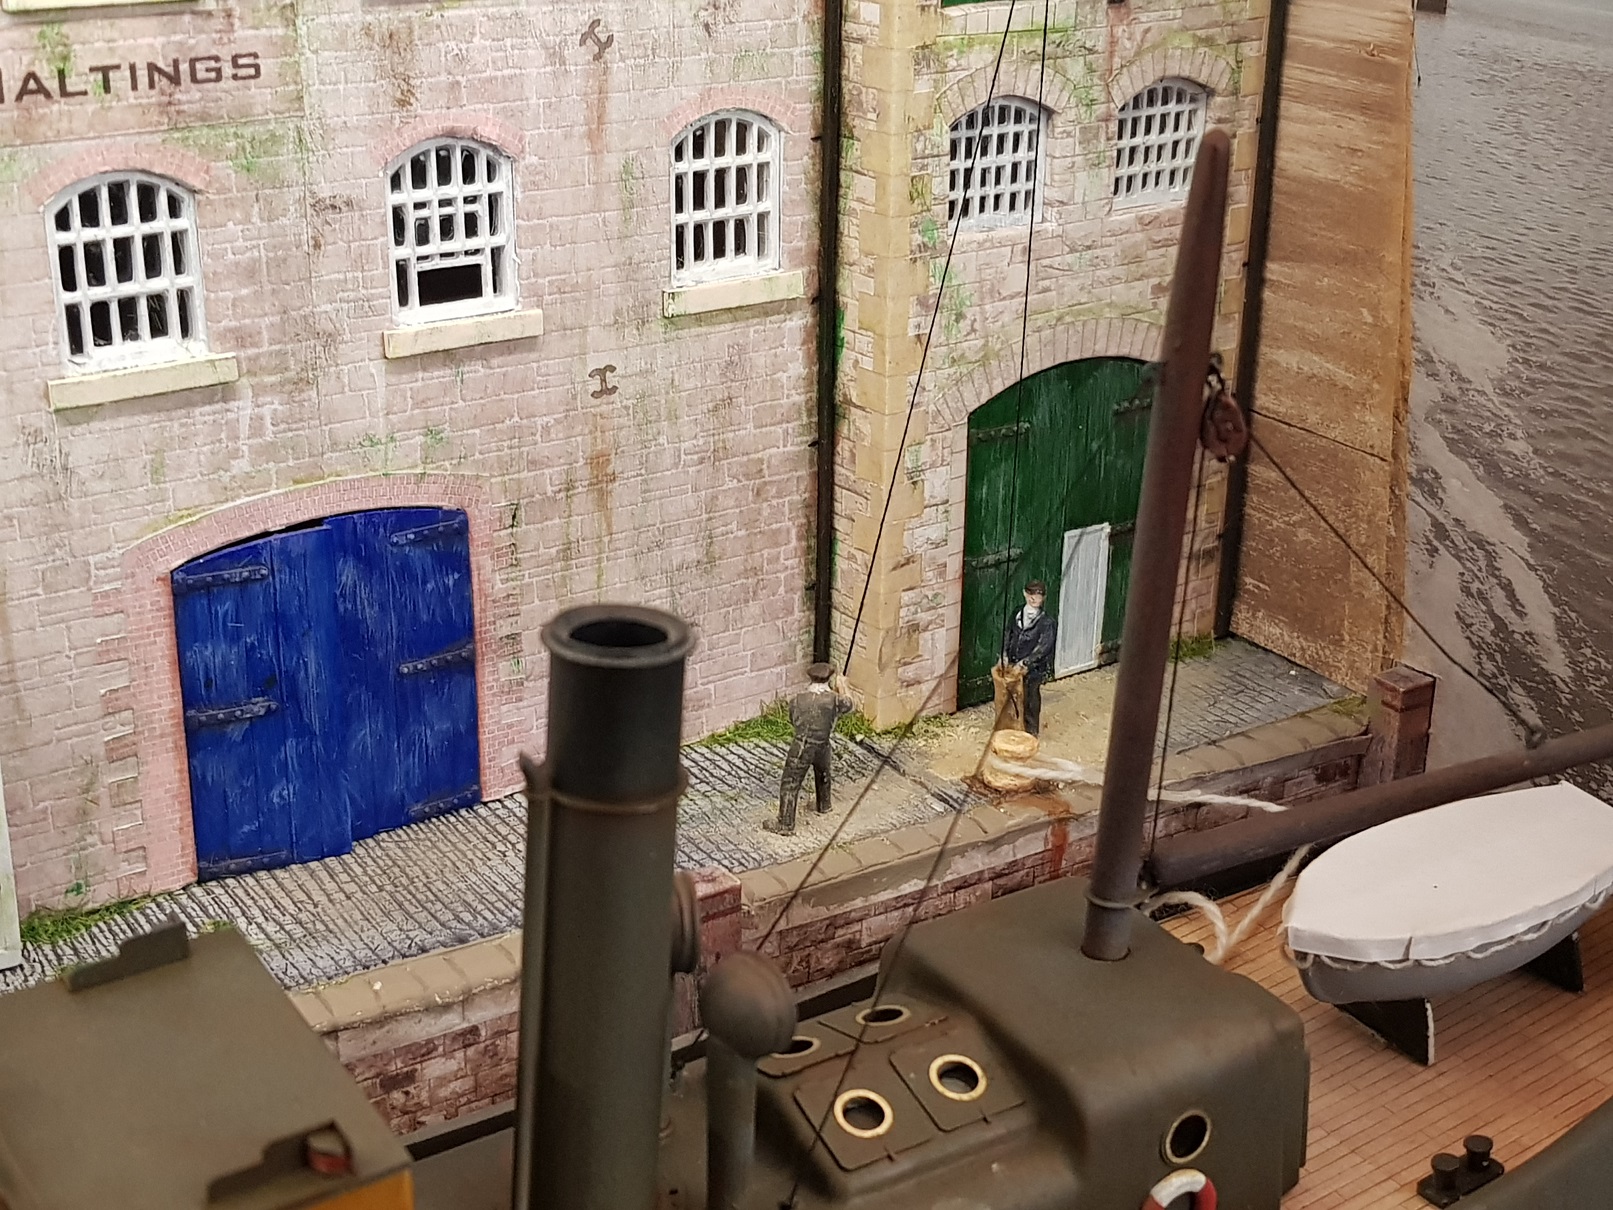
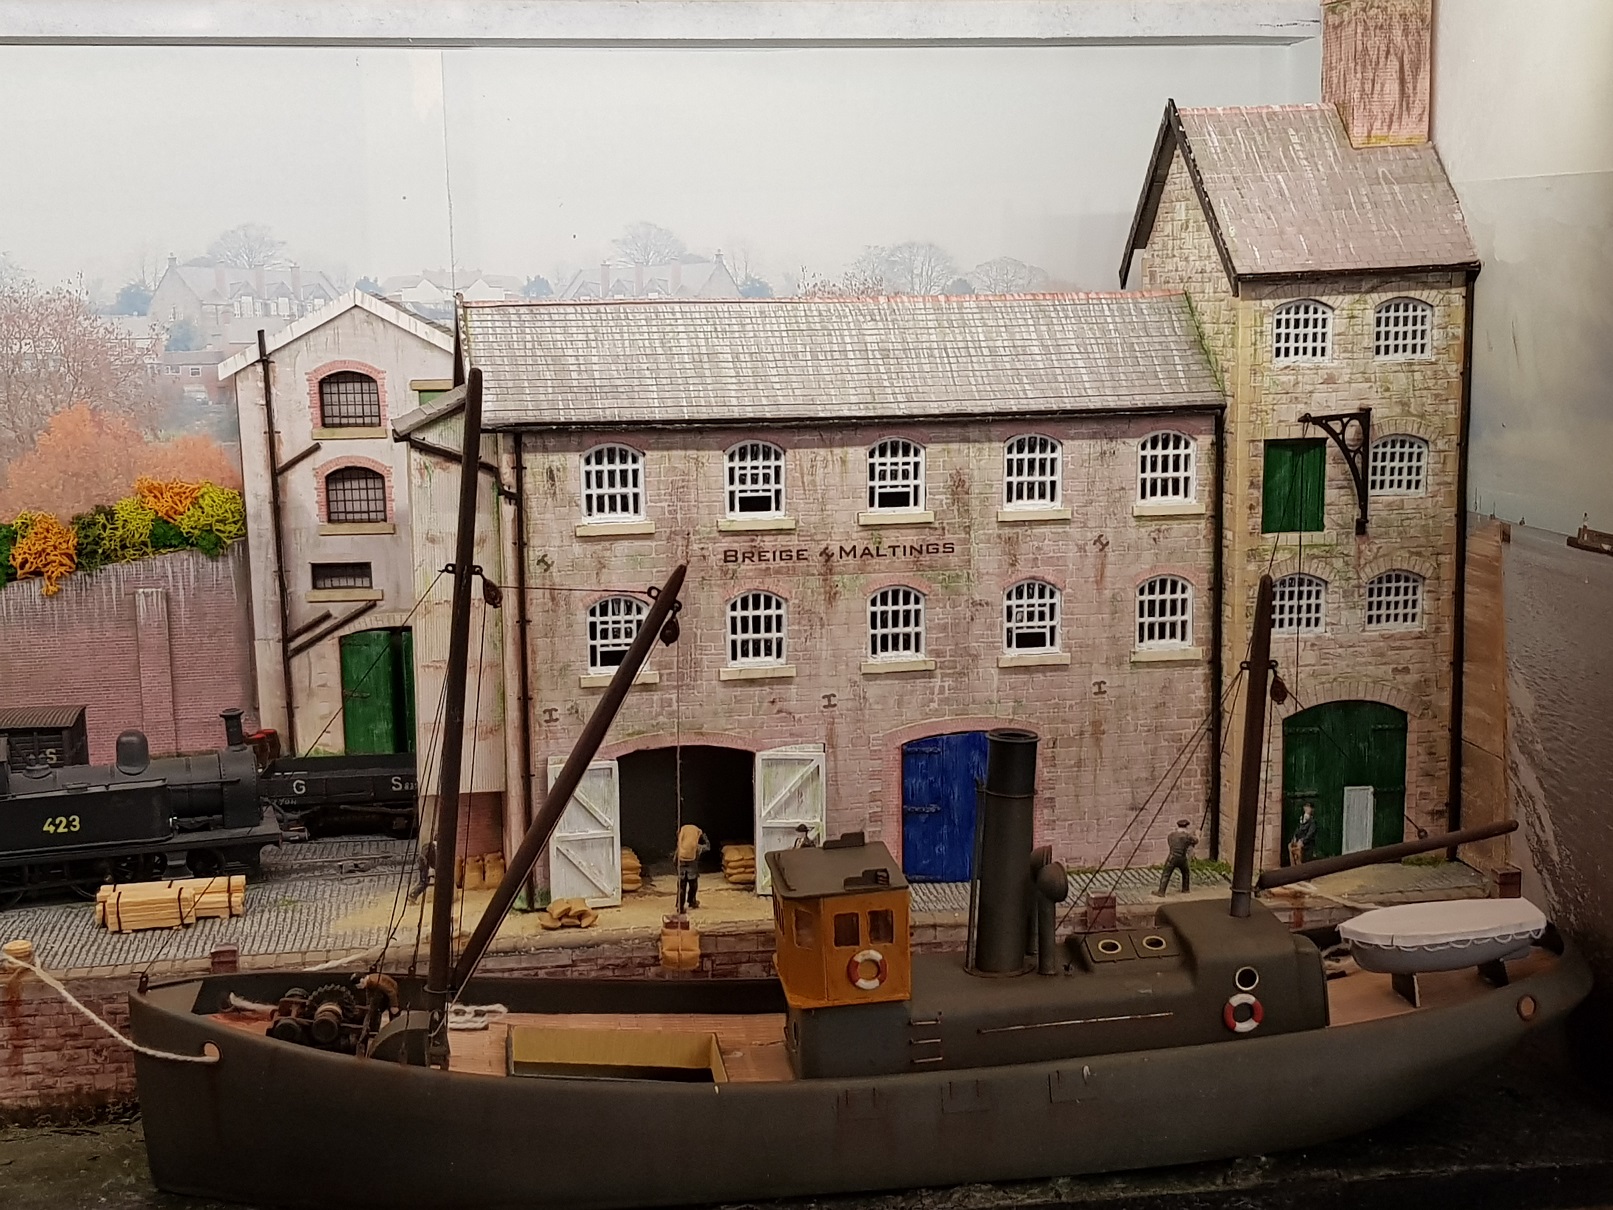
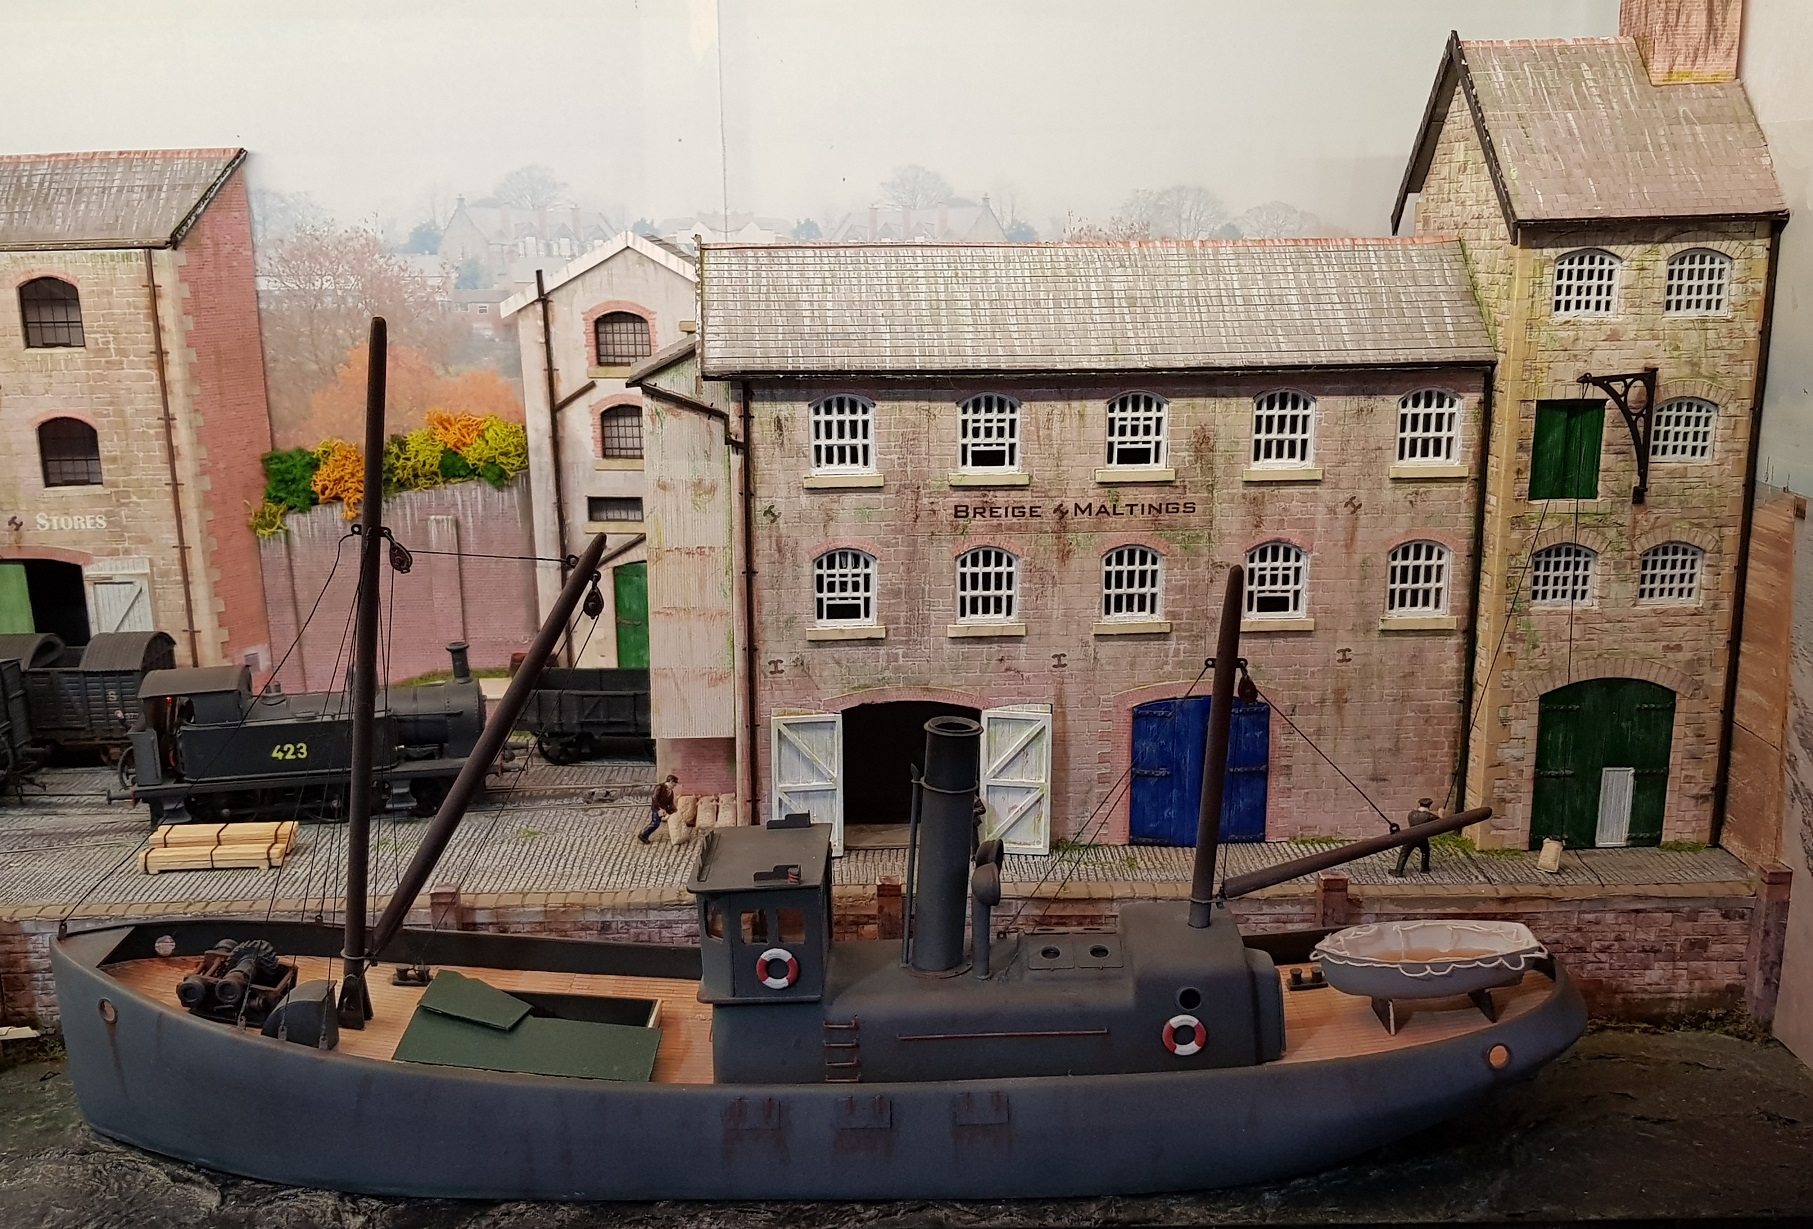
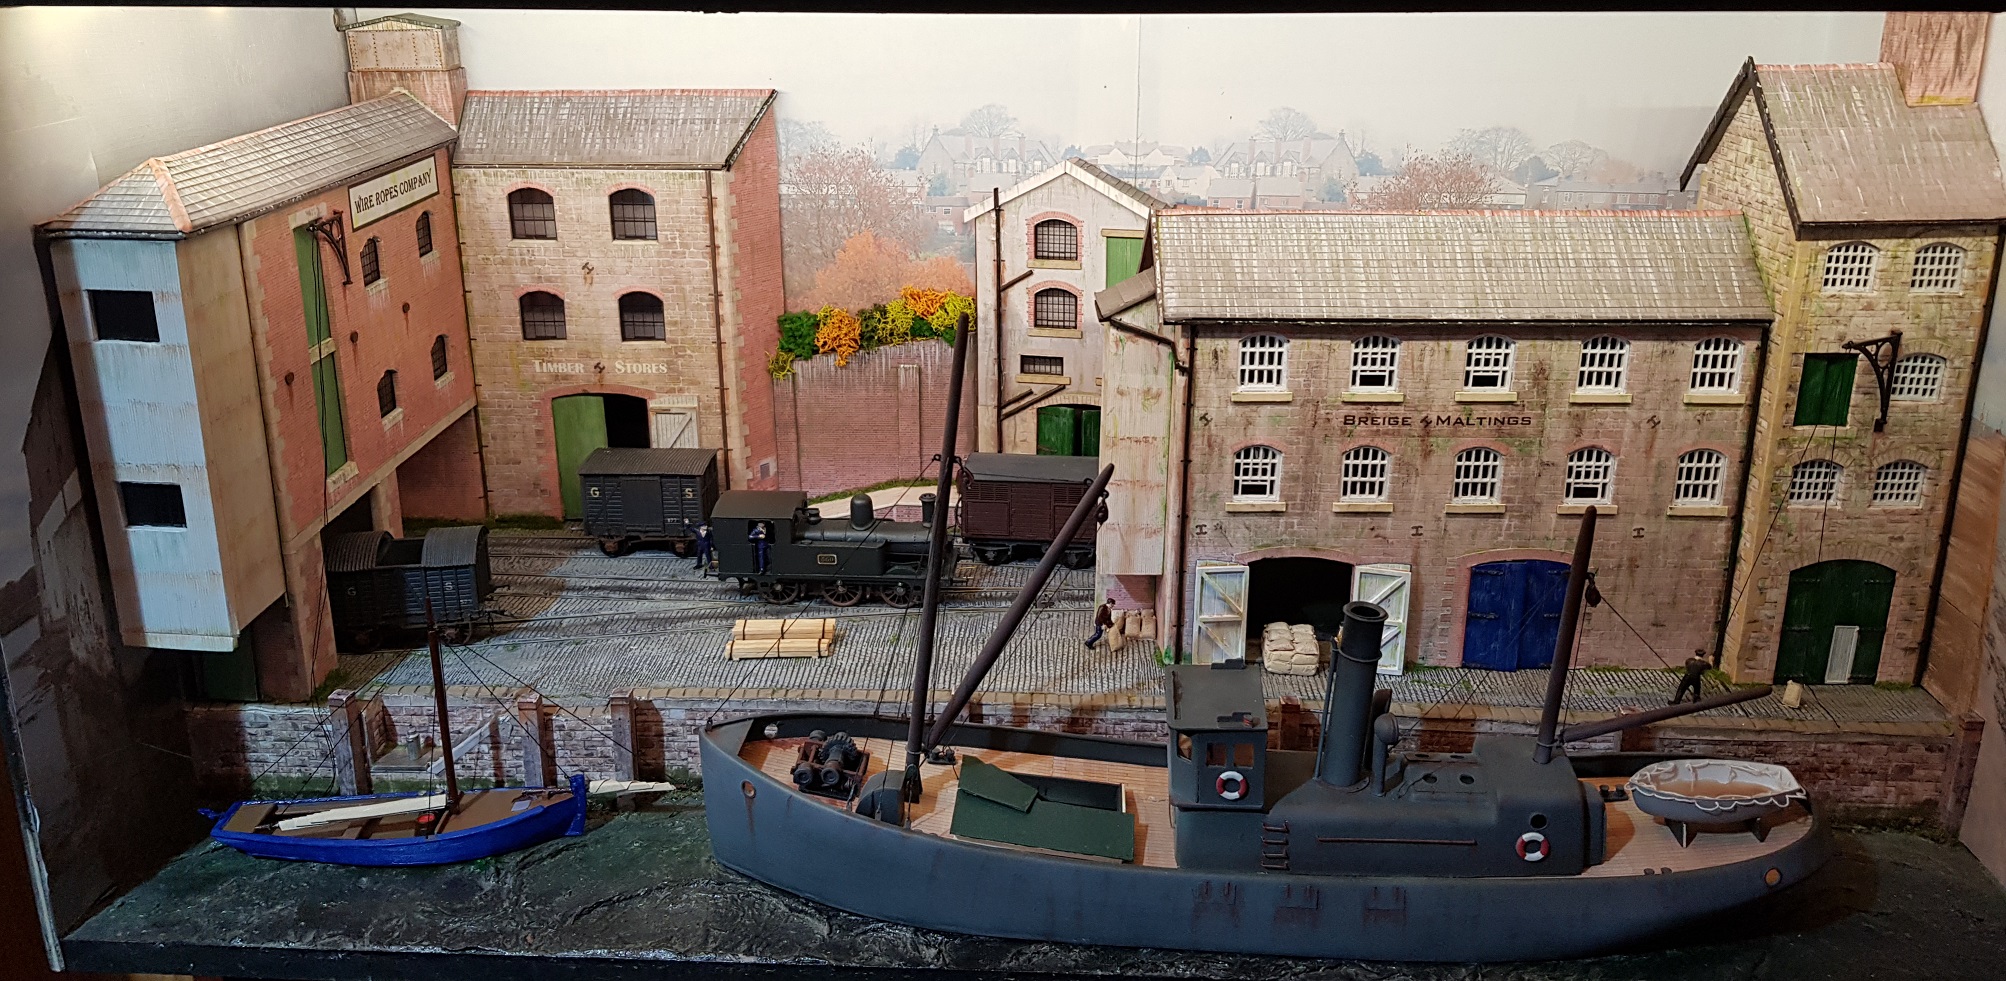
First of all, many thanks for the heartfelt good wishes, they are much appreciated. My treatment is going well and in time I should be back fighting fit. In the meantime, I have been doing a bit of detailing on the port layout and some additional figures arrived from Dart Castings which helps to populate out the layout somewhat. The drifter needed quite a bit of work with wheelhouse painted to brighten up the look, the lifeboat finally covered, hatch opened and stocked, some mooring lines, etc. The Galway hooker got some weathering and stocked with some goods for market from the islands. Some additional figures help to add to the business of the port. That poor guy on the hoist finally got some assistance! Unloading grain from ship in the day was a manual and laborious process, but it's got to get done, and the gaffer is keeping a good eye on progress. Back to the milk run from the island - the man from the creamery cannot be overly pleased with having to lug those churns up the steps to his cart. "And now he wants me to take the empty beer barrels to the pub for refilling!" Anyway, all for now, more when time and energy allows. Ken
- 71 replies
-
- 25
-
-
-

-
One option you might consider is the toilet tissue and glue solution as demonstrated by Marklin of Sweeden on Youtube which I used to good effect on the micro port layout. A somewhat better representation of the water in a port affected by waves & weather than flat perspex. Just a thought!
-
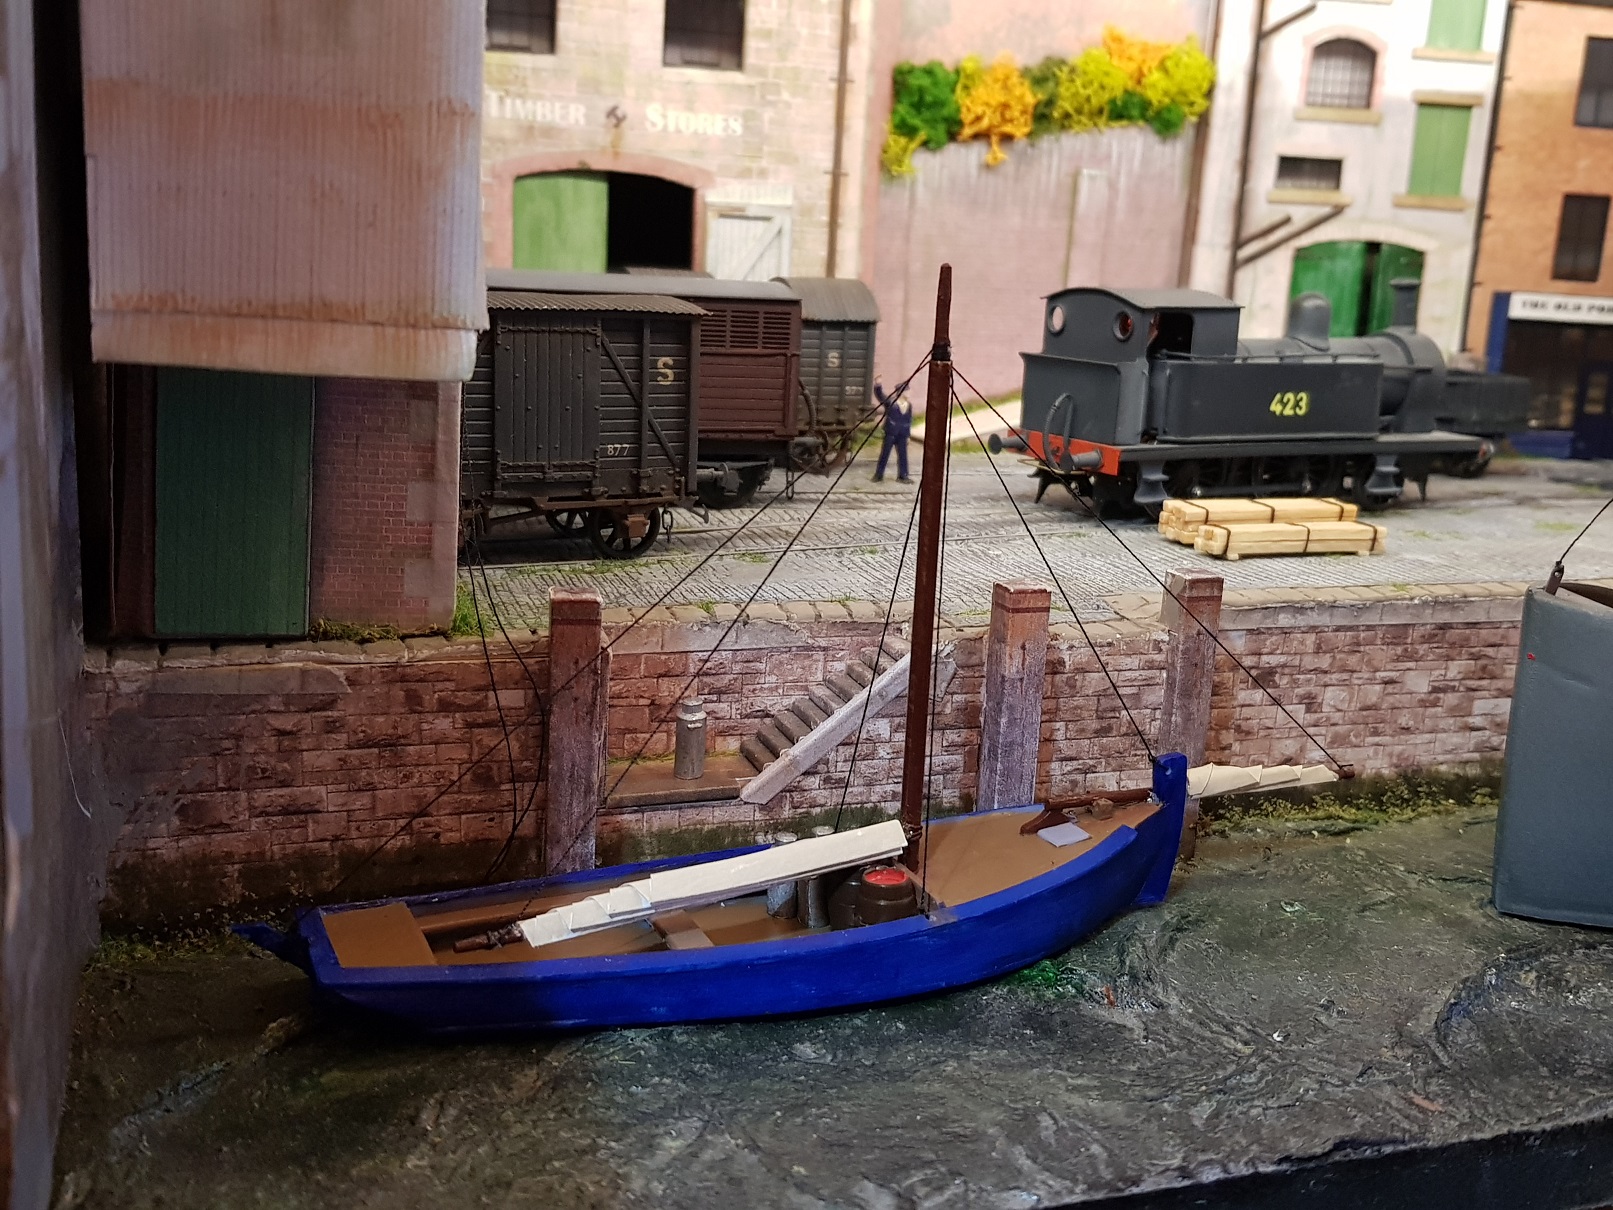
Really have not been doing any modelling for a while - kinda been struggling through Chemotherapy. For those who don't know, I was diagnosed with cancer in July and have been going through some aggressive treatment since. I got a weeks break between chemo sessions, and feeling a bit better, I turned to the modelling for a much needed diversion. I decided to work on the Micro Port model as I have been thinking for a while that it needs some activity to bring a bit more life. I had a limited amount of figures to work with (more on order) but with what I had, I was able to make a start. Some time ago, I developed a model of a Galway Hooker which I printed in 3D, but never got round to rigging it, so no time like the present. It needs some more work, as it is painted without any weathering, which will need to be heavily applied. The Galway Hookers were used to service the Islands and were effective cargo vessels & I have seen a photo of one packed with cattle, so a big enough boat & capable of handling the off shore conditions. The scene needed more boats, and I still think a few more wouldn't go astray. This boat is in from the Island with a load of milk for the creamery, and some empty beer barrels for re-fill. Some more activity on the pier. The buildings needed some purpose, so I added some signage, but some more evidence of products to be added yet. I decided the front building would be good as a malt house with the drifter delivering a load of bagged grain for malting. Helps to tie the scene together. I have some more figures on order, so hopefully in a while I will be able to add to the activity. Anyway, all for now. Ken.
- 71 replies
-
- 26
-
-
-
-
The throw is 14" as the cylinder stoke is 28". Wheel diameter is as Eoin noted 6'7", however I believe that to be a wear figure with a nominal 6'6" design diameter. The series drawings I prepared may years ago have been scanned but are in pdf format, so not conducive to uploading here. I can share copies of the drawings, and my notes of figured dimensions taken from the original drawing offline if that is of use. The purpose of the drawings I made was to take layer information off the original drawing, and are on negative film - the intention is that they can be overlaid to get various levels of information out. I suspect that the drawing seen by most (which you refer to) was also built up in this way, as when you examine the print in detail, you can see some lines not entirely matching up. Let me know if this is of assistance. I would caution that I am somewhat under the weather at the moment and my not be able to respond quickly to requests, but hopefully I should be able to make some progress. Regards, Ken
-
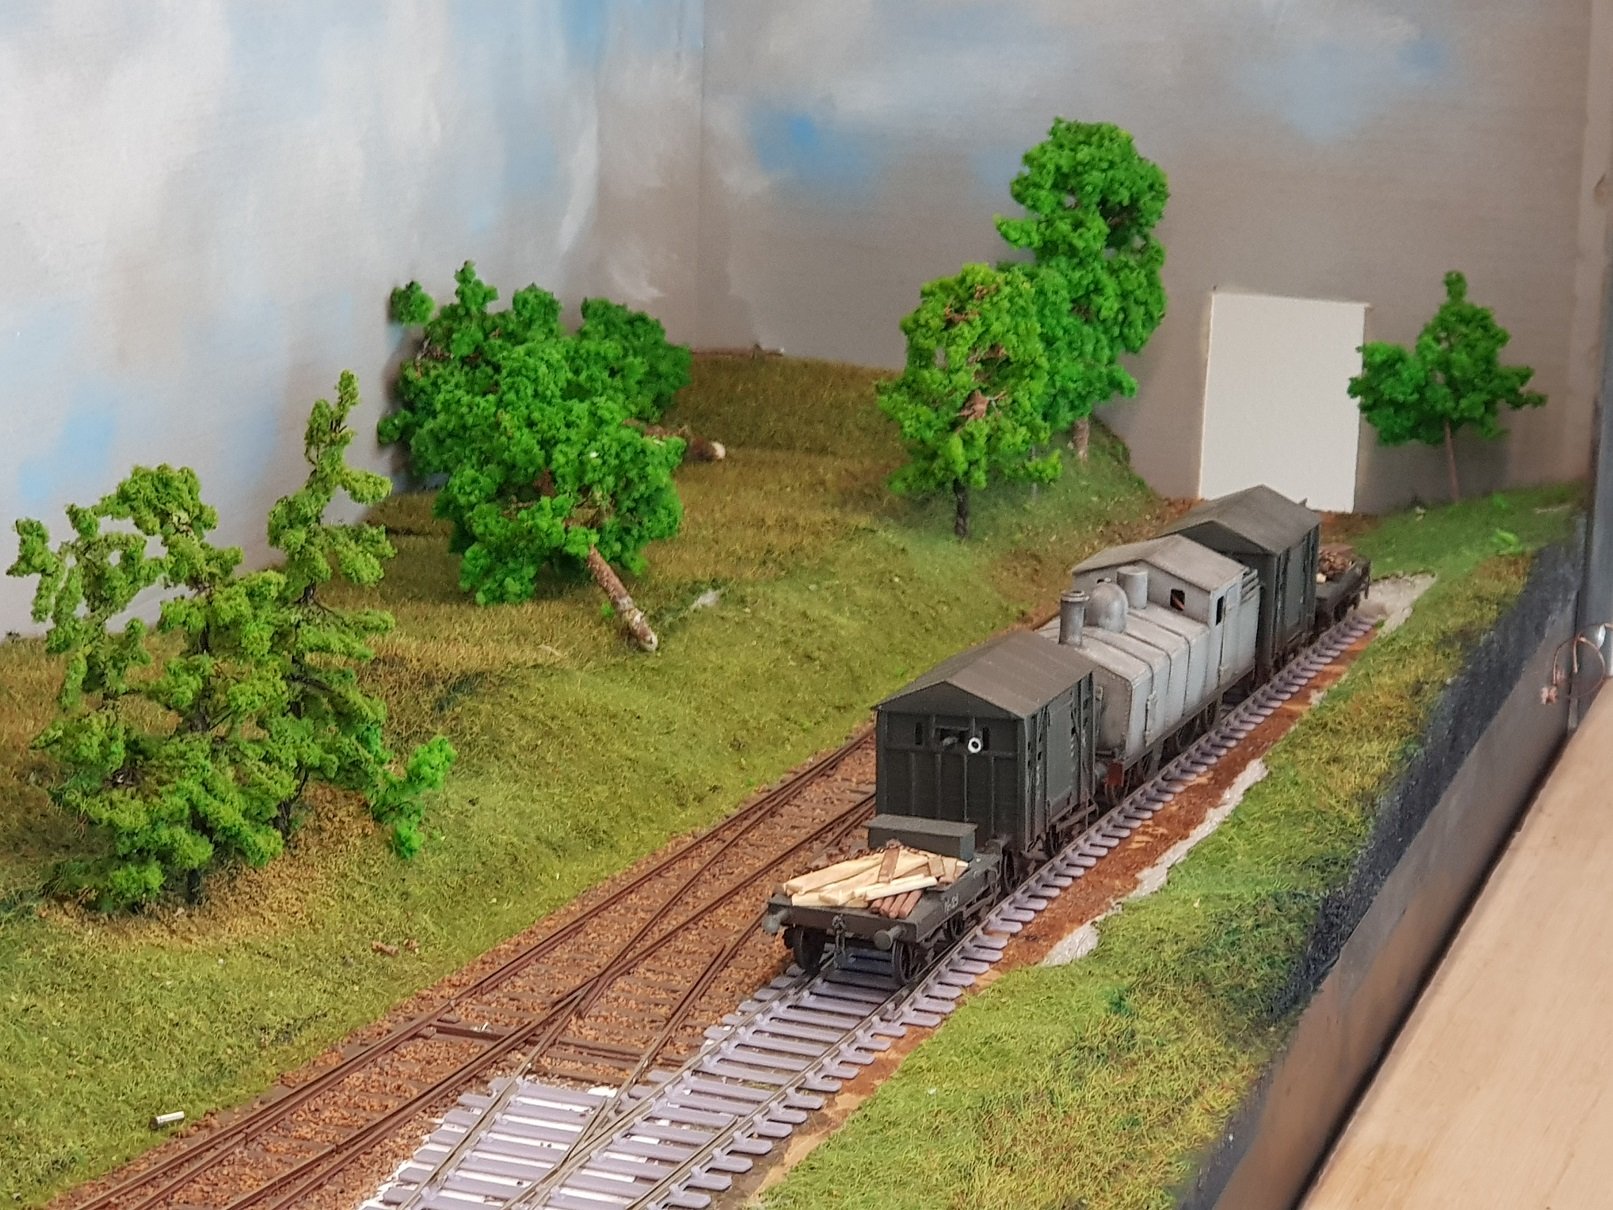
The layout was out at the last Bray fair, however it proved somewhat limited in operation, so I decided to add a headshunt which will provide more operating possibilities, plus more space to show models. The existing points were A6, so an A6 point was printed off and made up with some straight lengths for the headshunt itself. Existing track was cut and new rails modified to match the divergent rails from the incoming point. Straight track added to provide space - scenic section needed to be cut back a little, which should provide a nice detail when dressed down to the track level. Nothing fixed down yet - just needed to check all is working and stock moves freely in all directions. What looks like a wobble in the straight track is a catch point, basically made up of the leading section of the point print. All working fine so I can get on with fixing down, painting and ballasting. But in the interim, a quick shot with the armoured train. All for now. Ken
- 22 replies
-
- 22
-
-
-
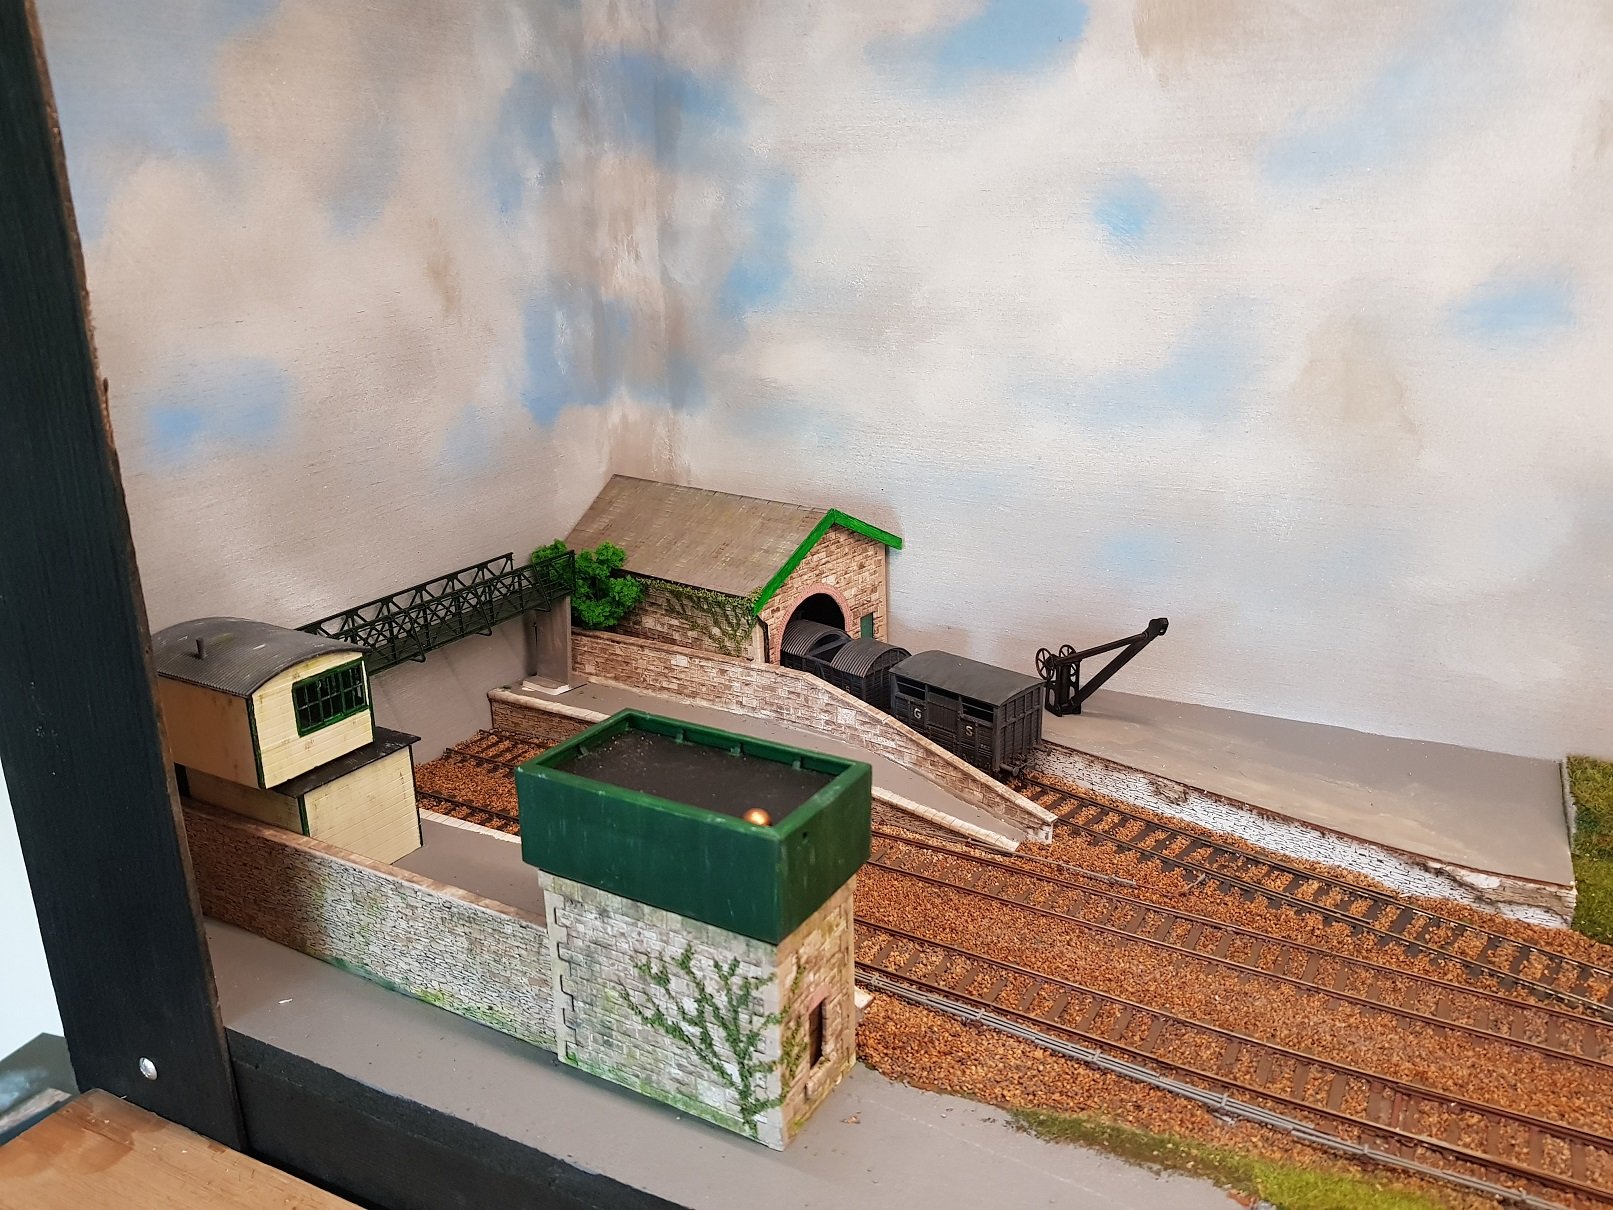
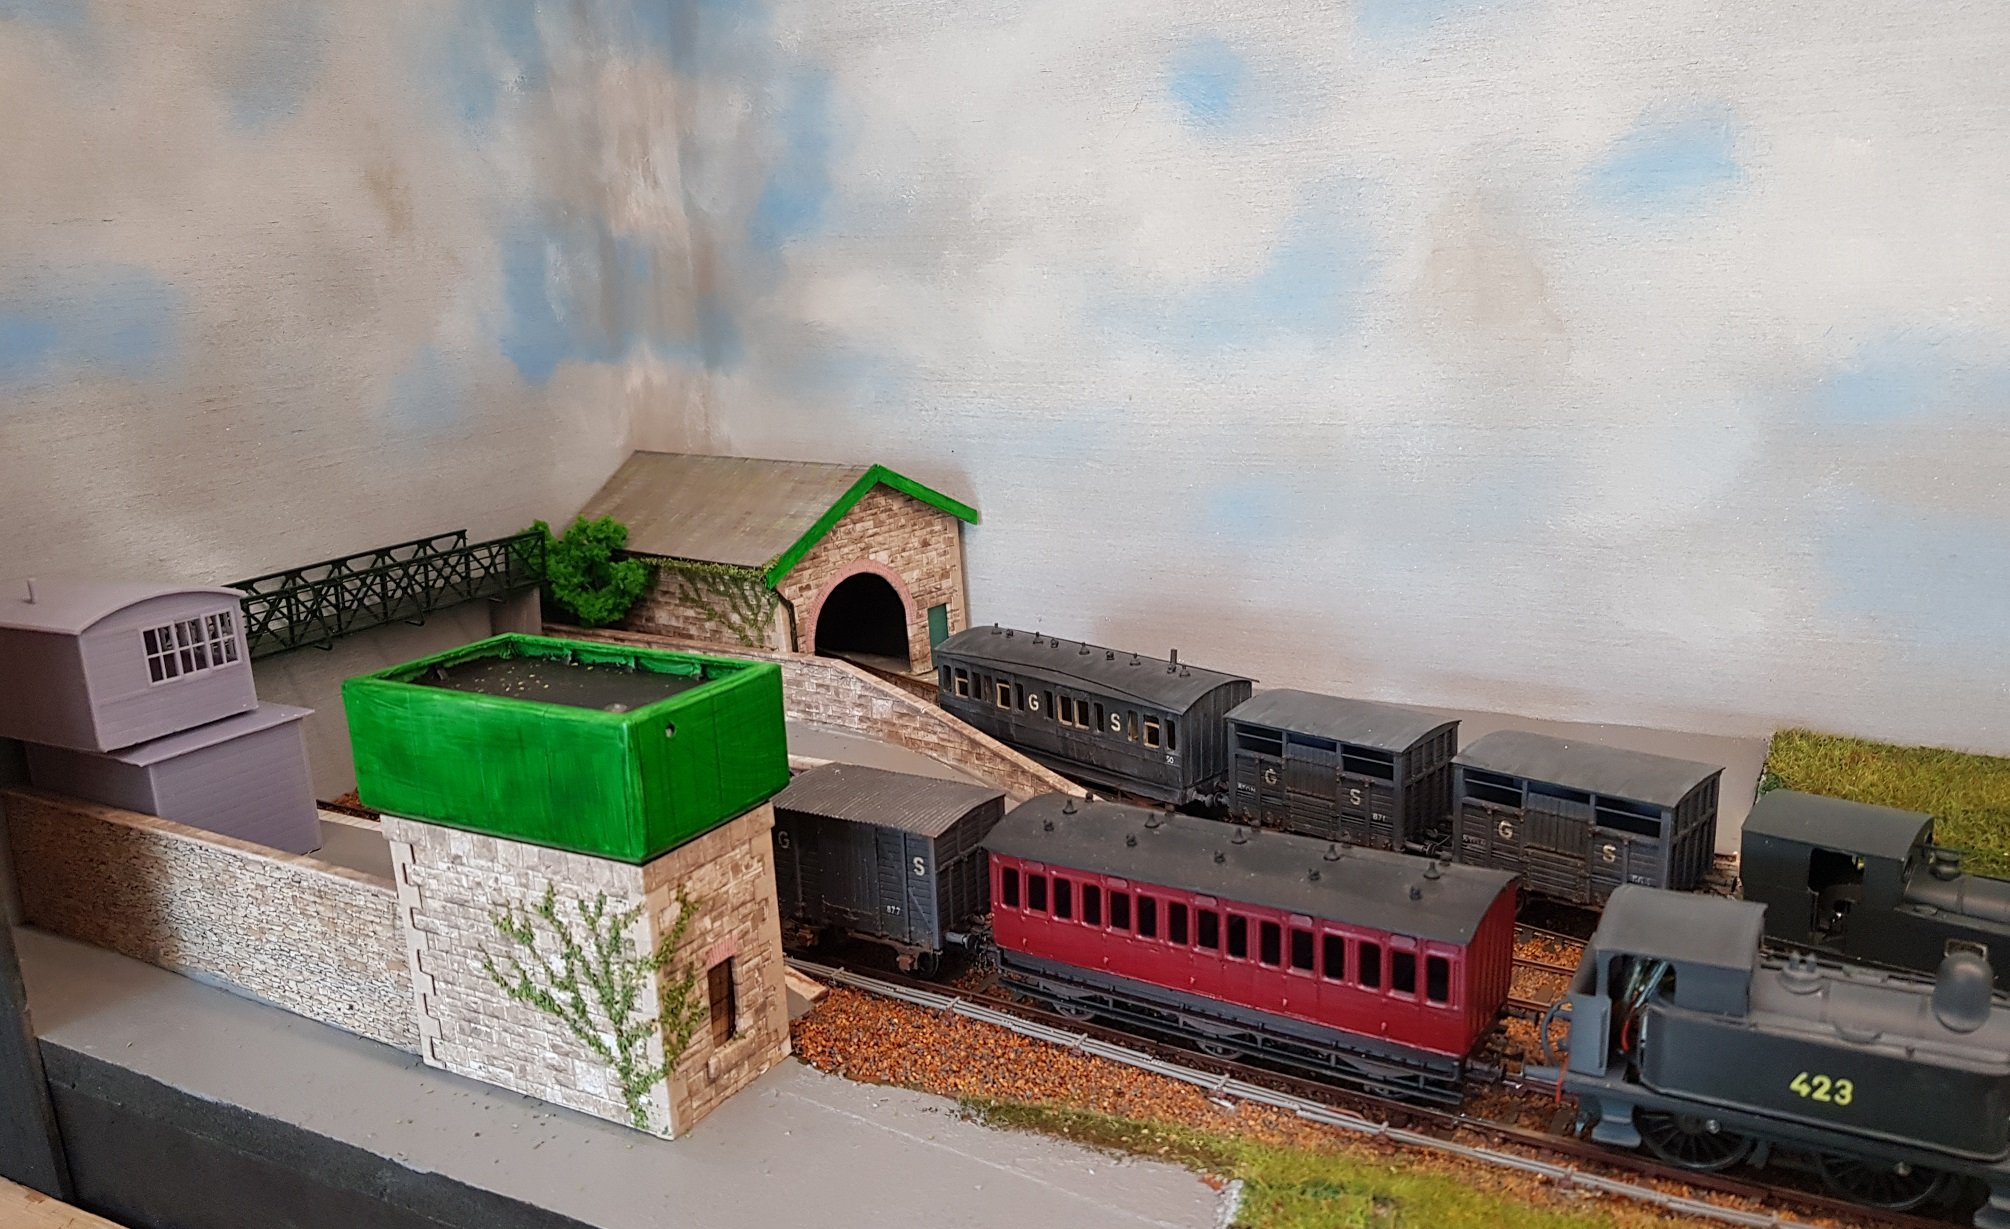
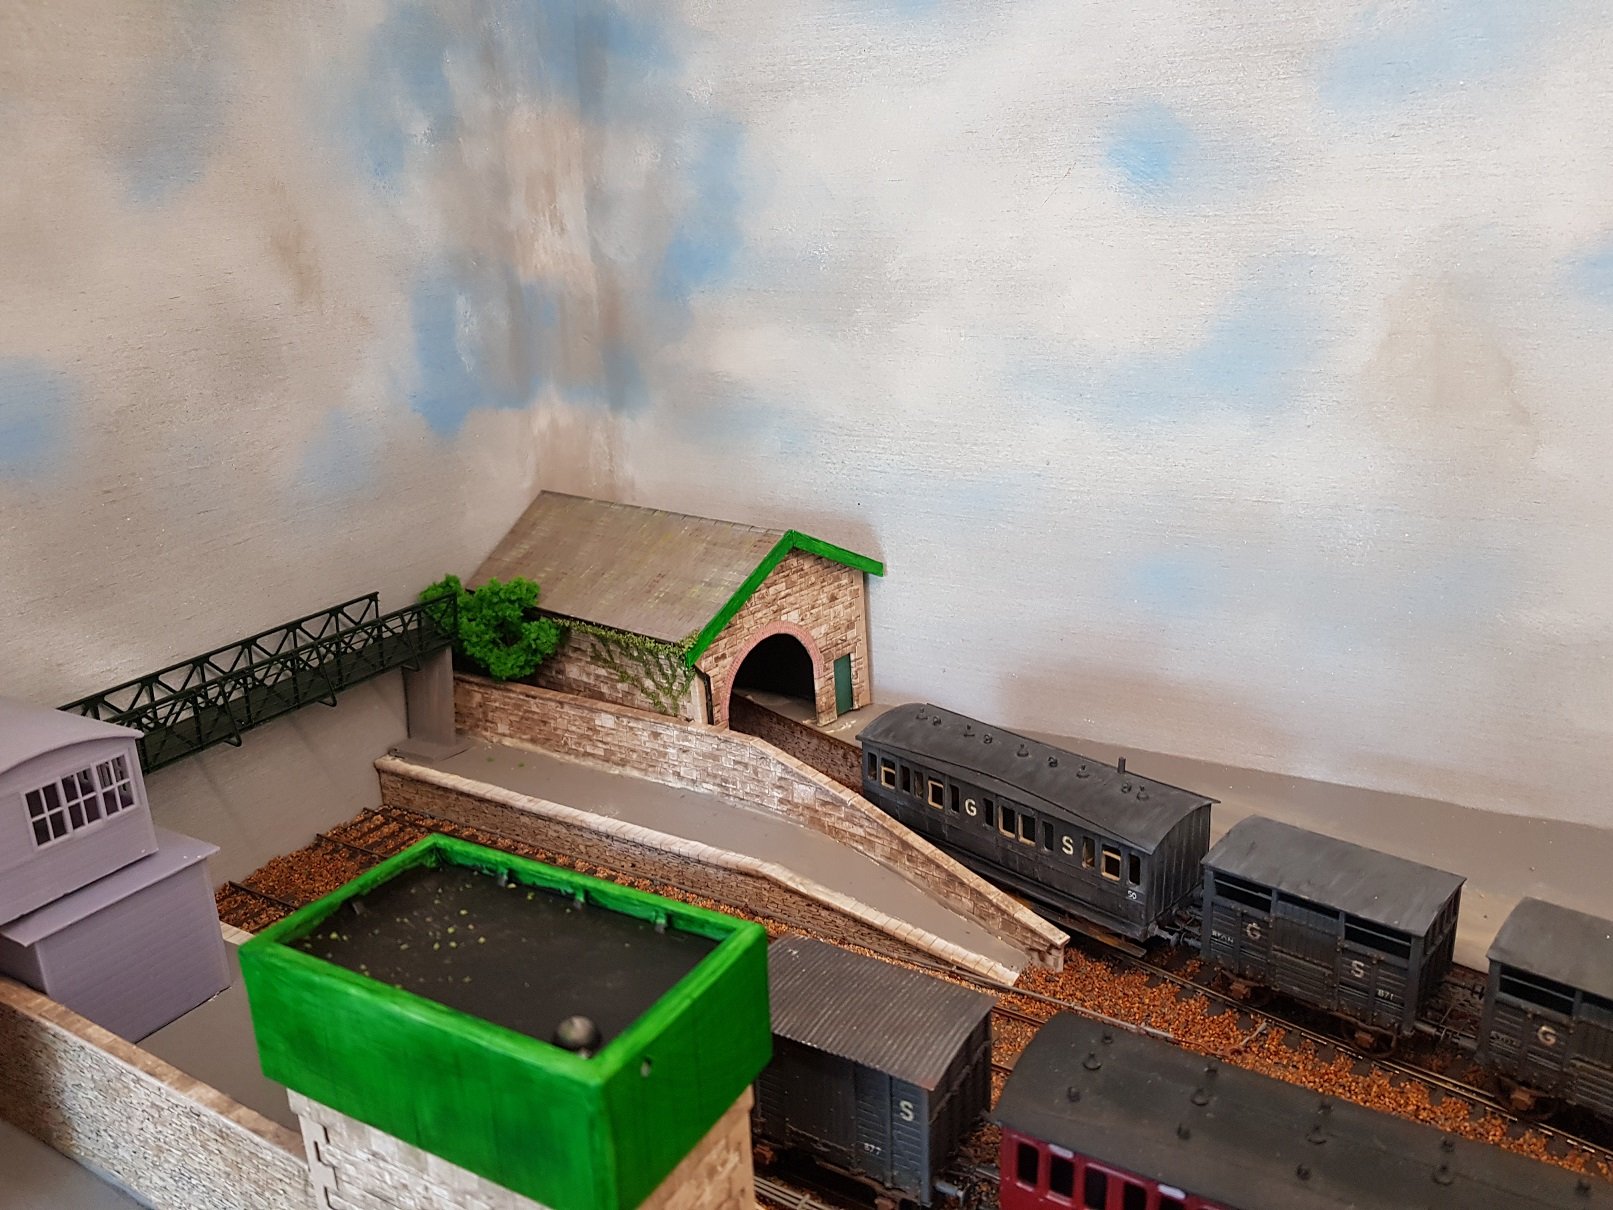
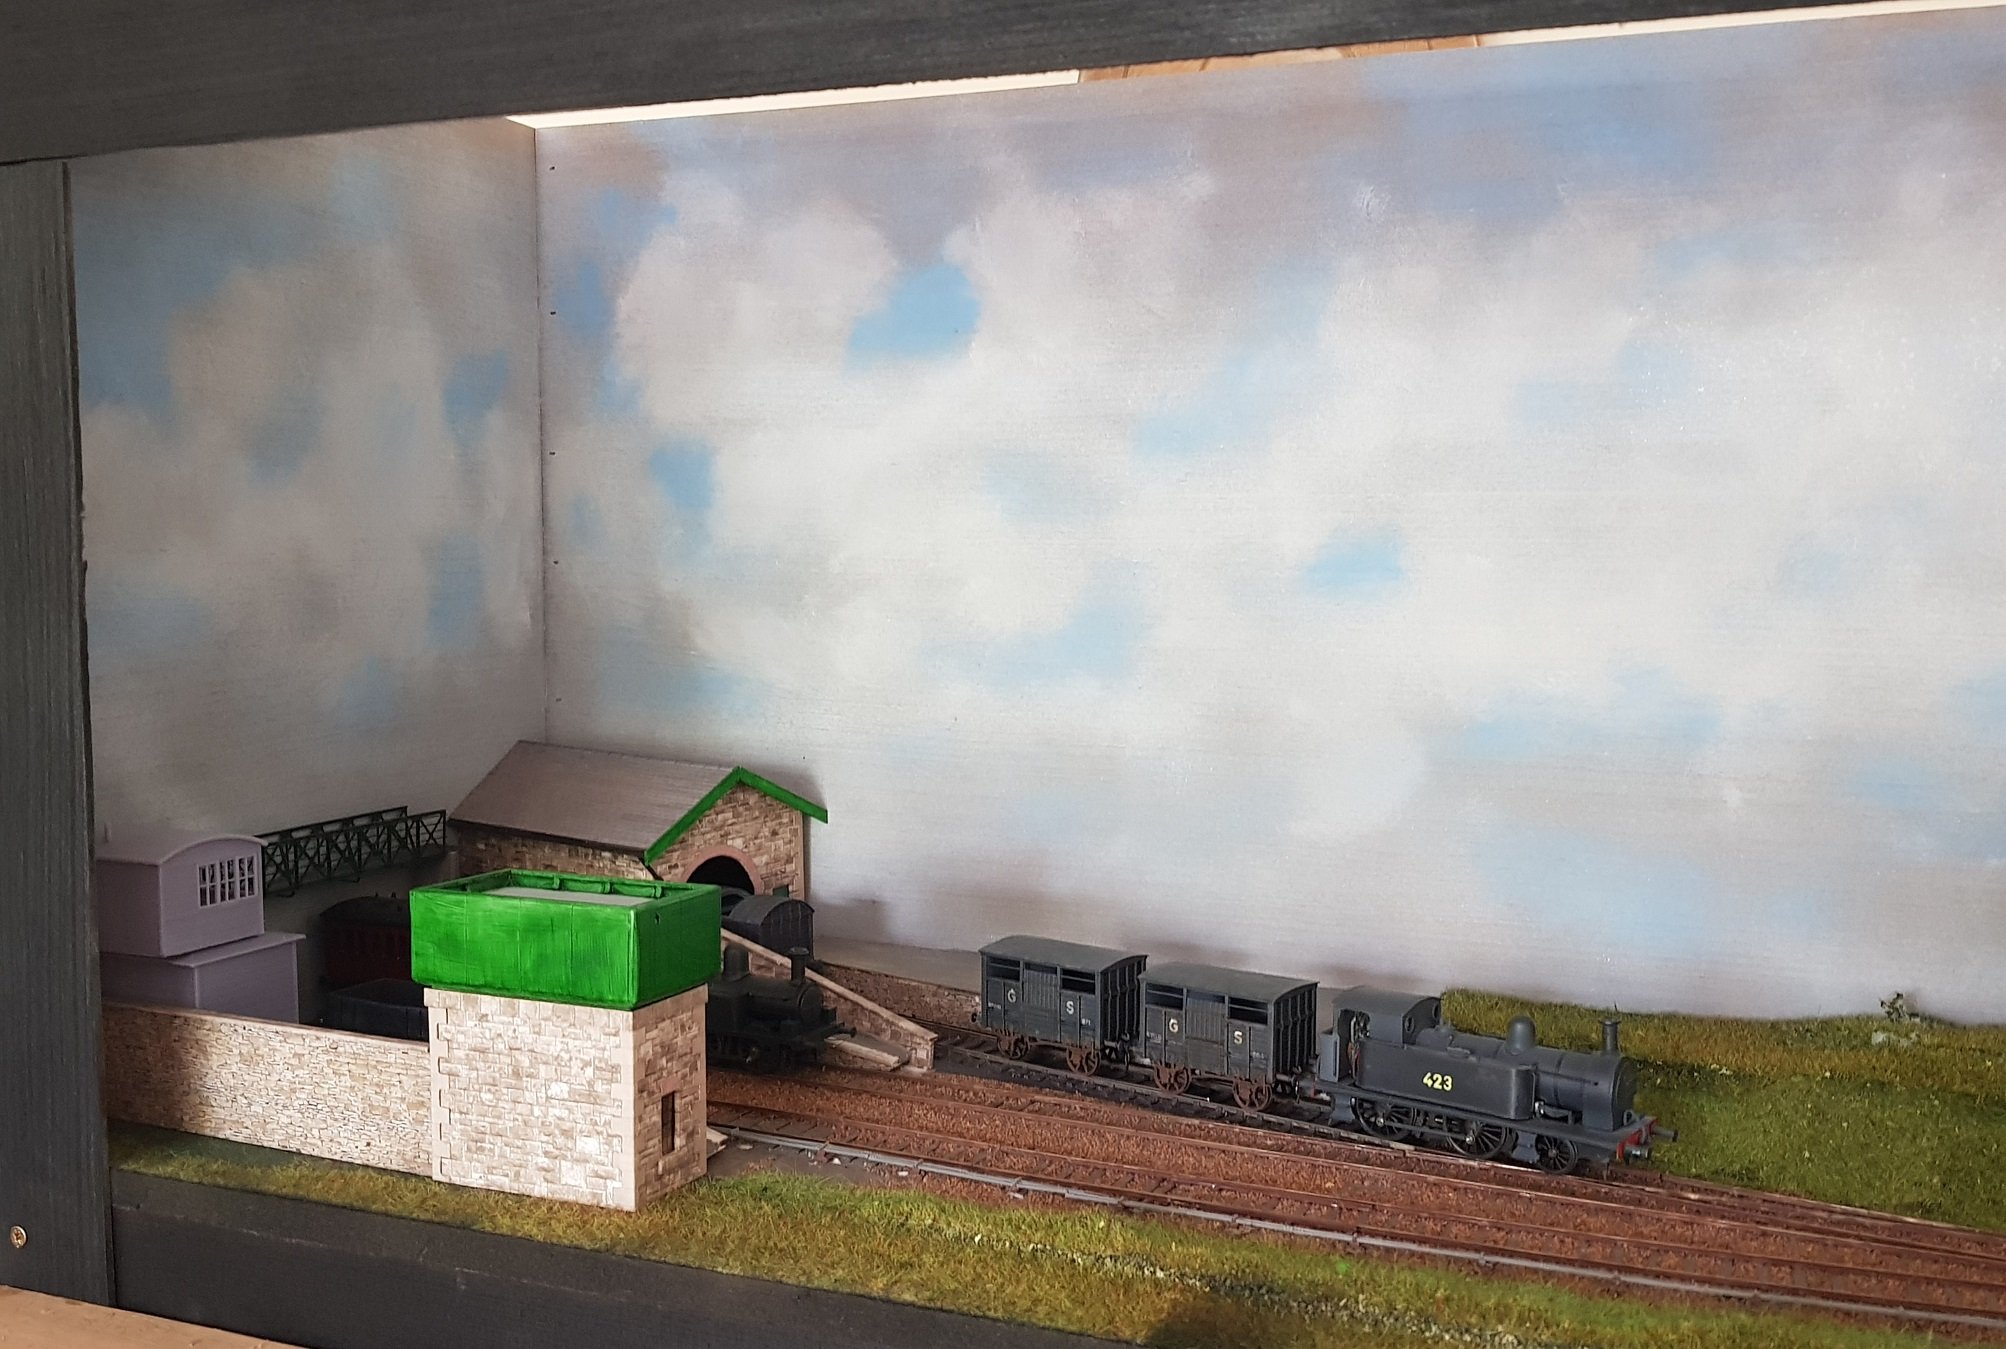
Little bit of progress. Water tank painted & slightly weathered. Signal box painted, weathered & planted into the layout. Yard crane installed on the platform - hook & weathering needed to blend it in. Goods platform wall will need to be redone - it picked up moisture when I was doing the ballast. Not a big one, but needs tidying up. All for now.
- 22 replies
-
- 15
-
-
-
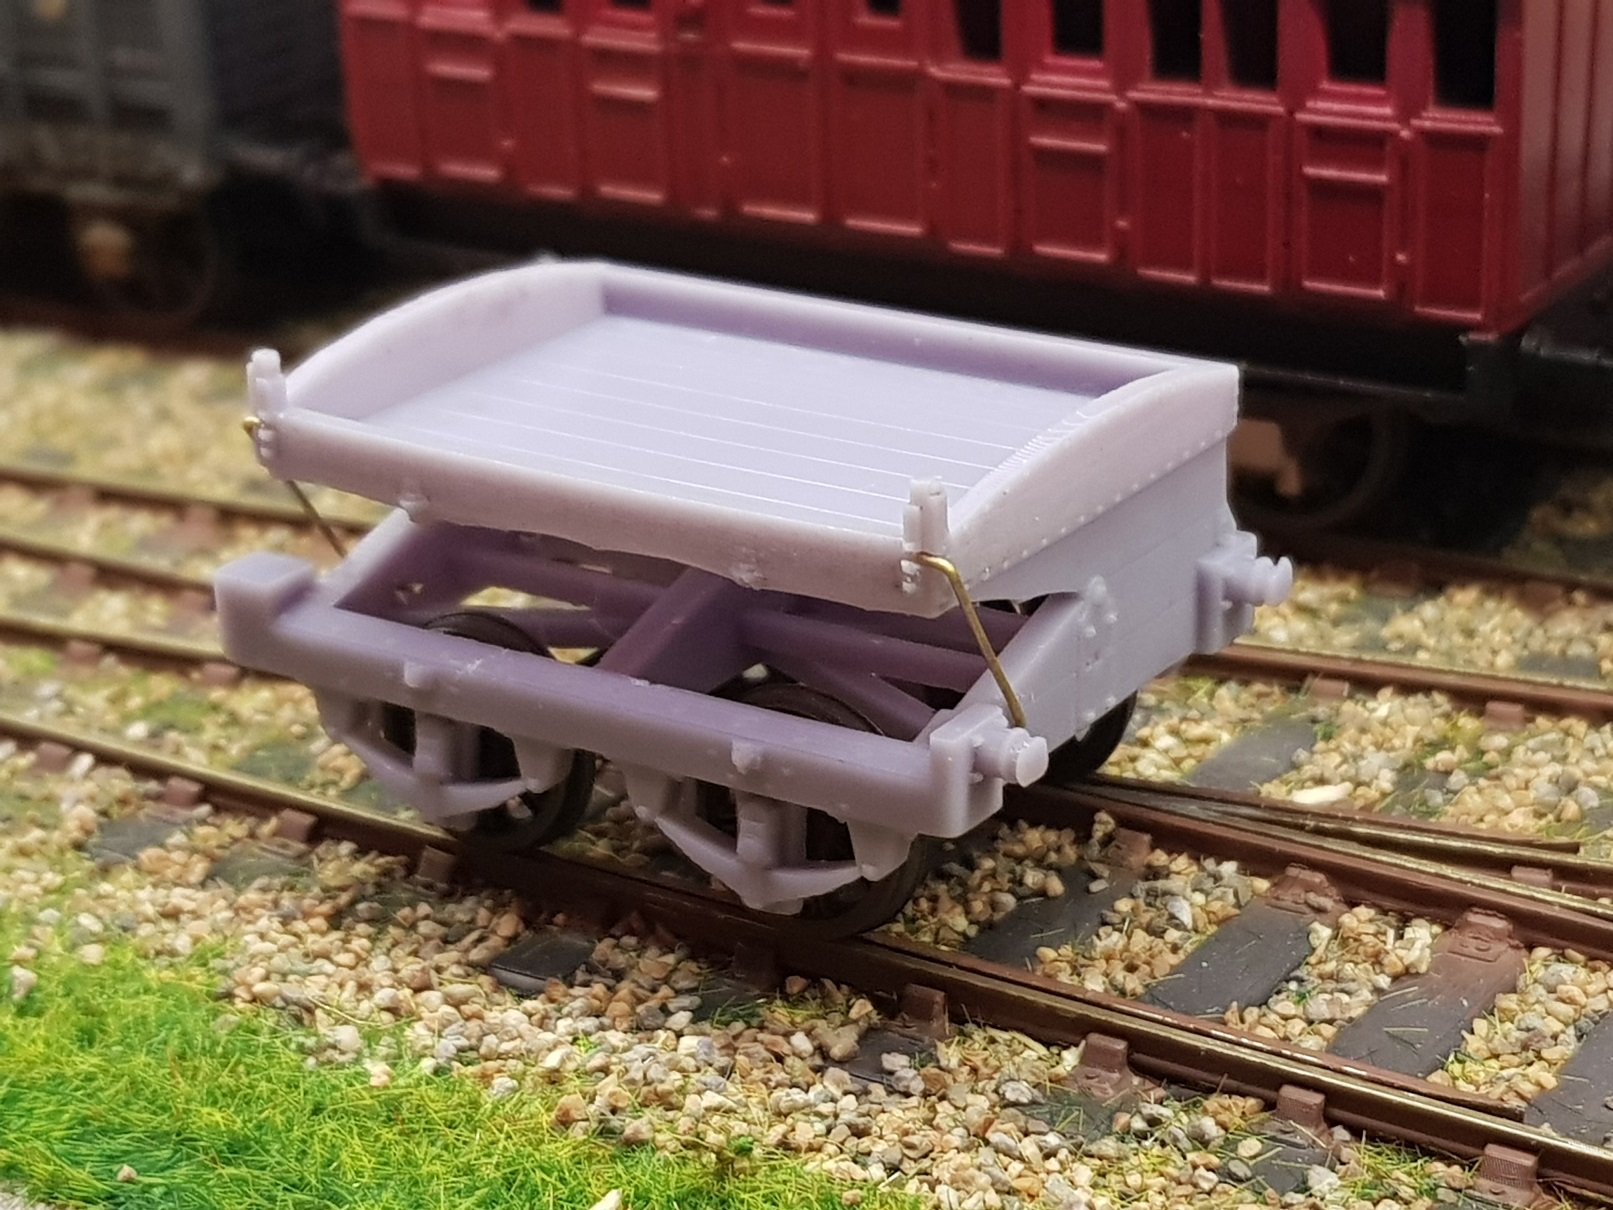
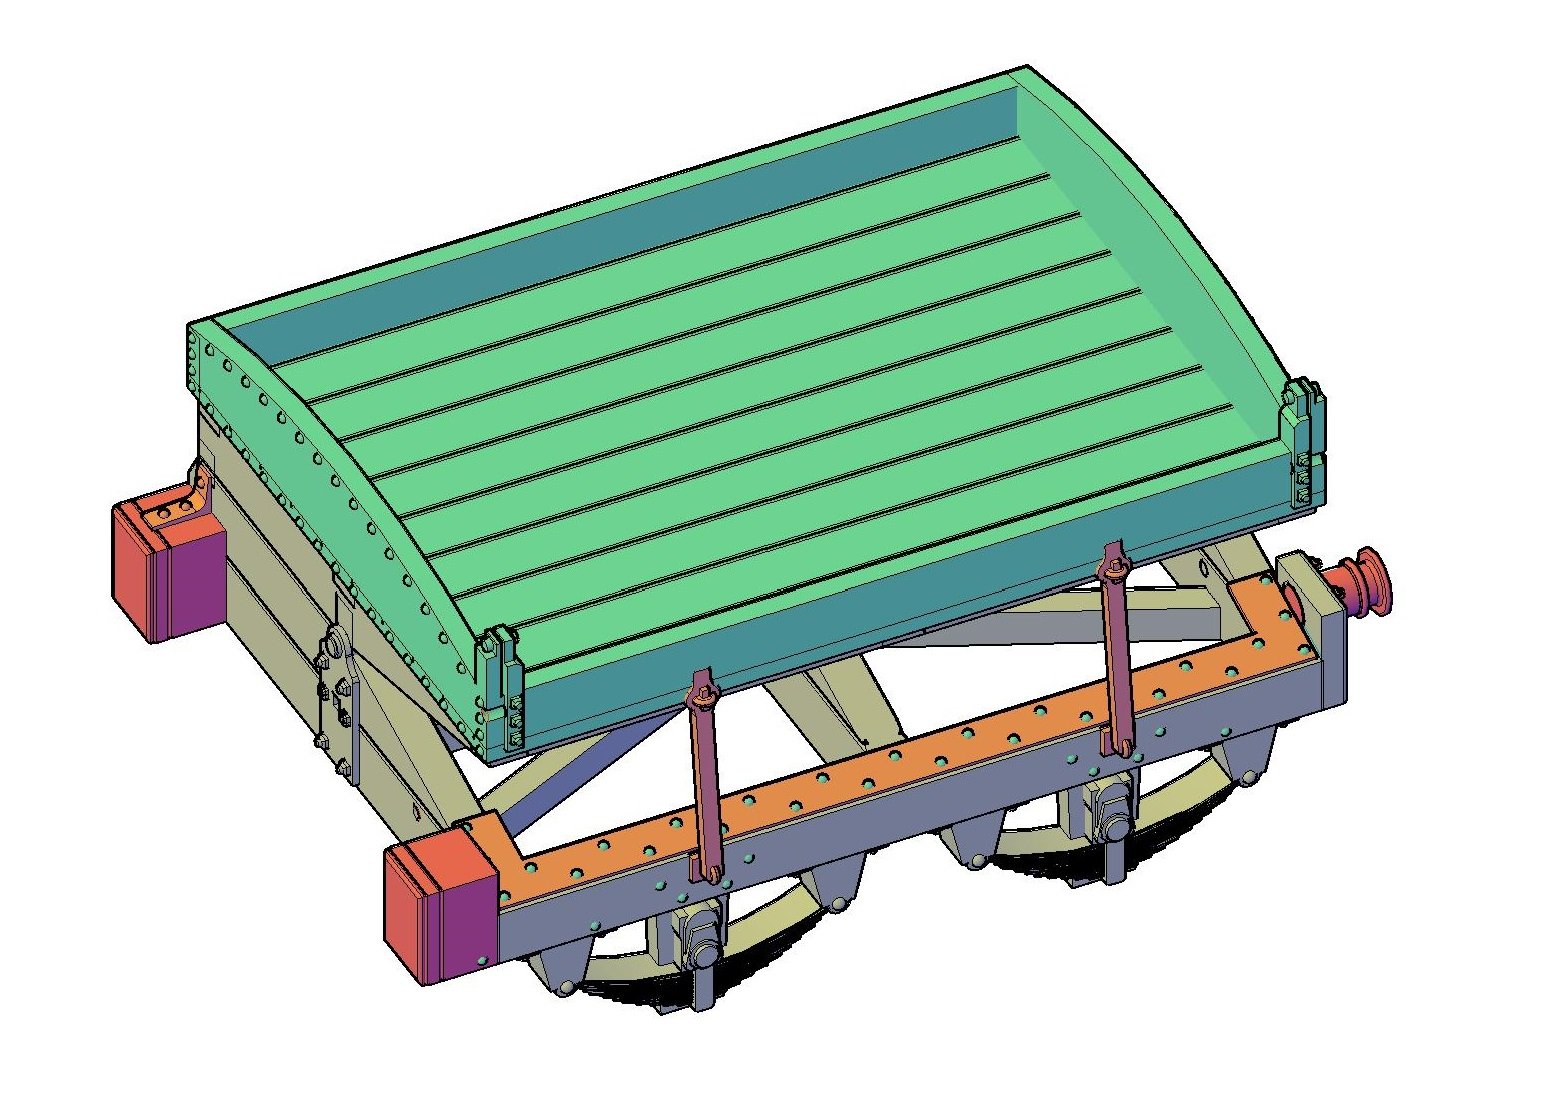
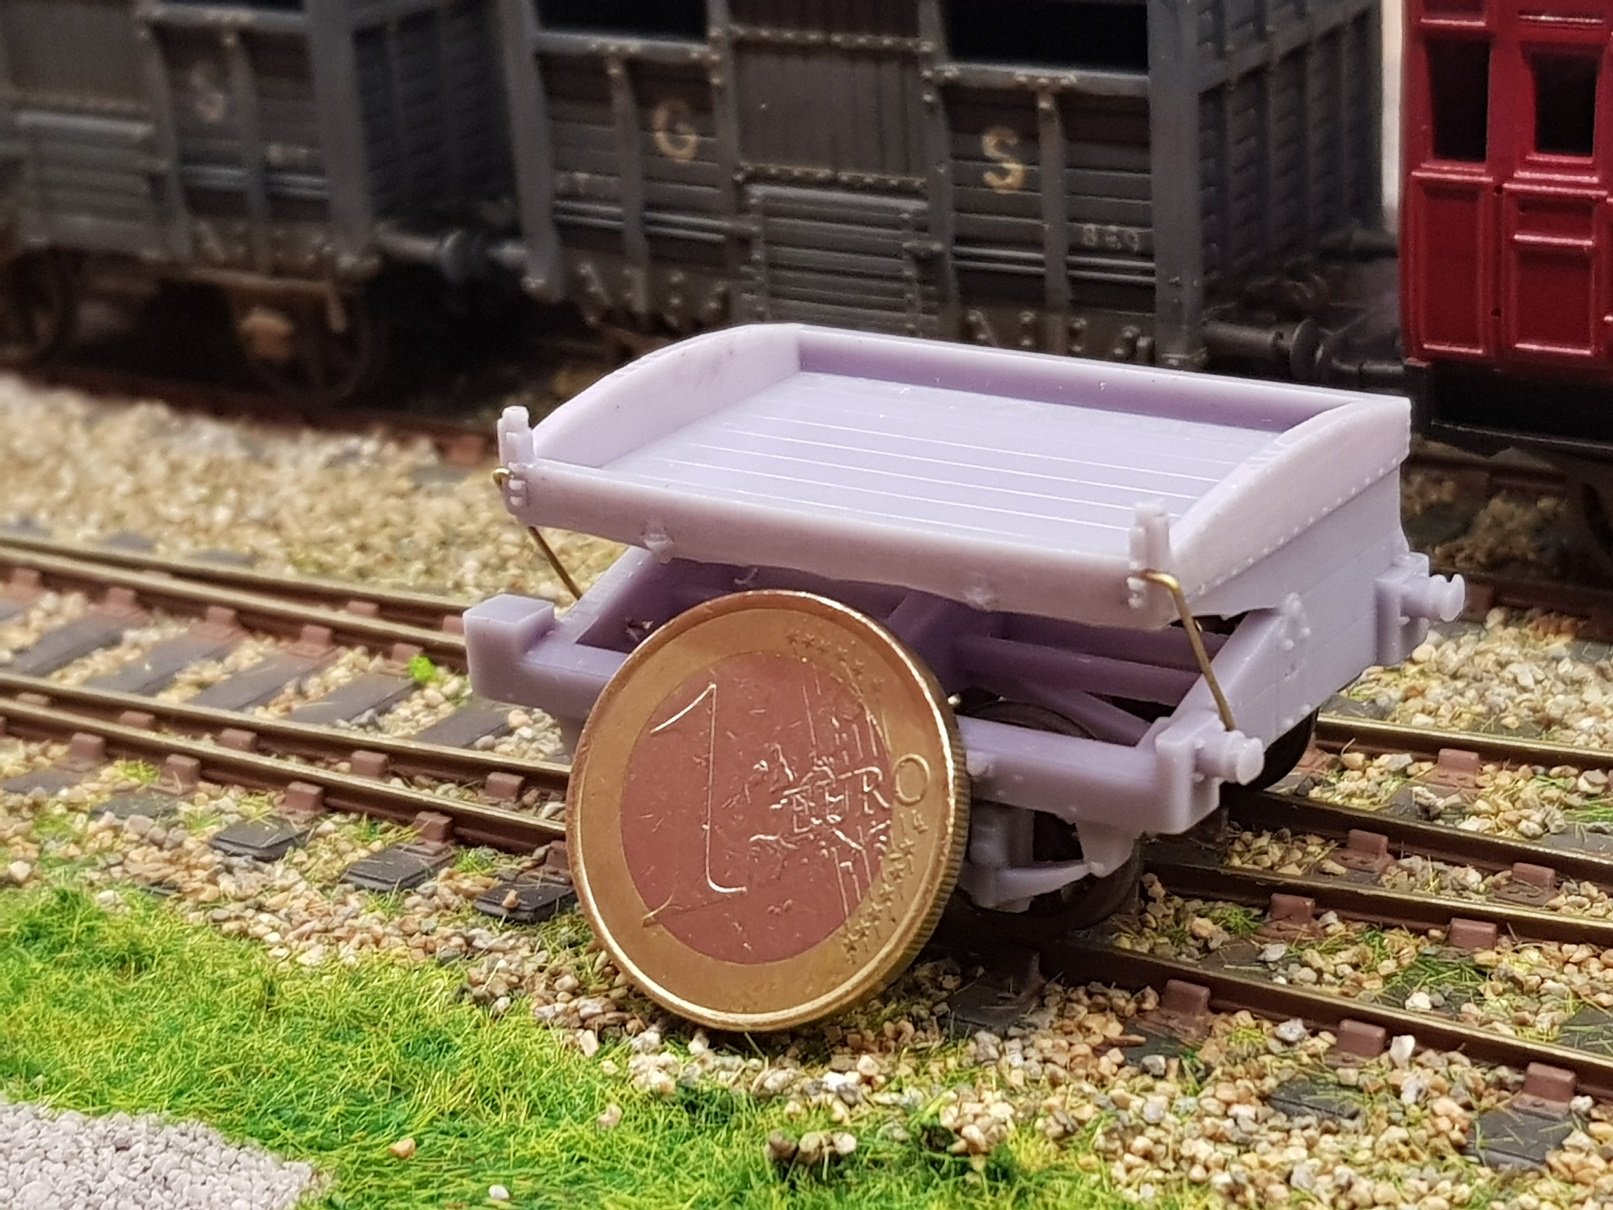
The Vale of Avoca was a considerable source of raw mineral materials which up to the famine period 1845 – 1848, was transported to Arklow port by local manpower and horse drawn wagons. The mines were owned / operated by Henry Hodgson who realised that the mass emigration from Ireland would reduce his ability to move ore to the port and developed the mineral railway in c. 1847/8. This line would facility the increased output from the mines and appears wagons were horse drawn to the port in Arklow. In 1859, Hodgson decided to sell his mineral railway to DWWR which facilitated the expansion of their network to Gorey by re-using the route of the old mineral railway, space in the valley being at a premium. Ovoca (Avoca) station was completed by late 1863, however it was January 1864 before DWWR started to convey ore to the wharf in Kingstown. One of the first ore wagons to be used by DWWR was the 5’ wheel base side tipping wagon built by Metropolitan Railway Carriage & Wagon Co (MCW). These short wagons quite distinctive and very few images remain, however in general photos of the Vale of Avoca, it is possible to catch a glimpse of them in the distance. They can be seen in the upper Left hand corner of the attached image https://catalogue.nli.ie/Record/vtls000328581 Luckily, the manufacturers drawings are still available from HRMS in the UK, and a digital copy was purchased with a view to developing a model wagon. The wagons are quite basic with simple buffers on one end and dumb buffers (leather covered) on the other. A steel rod ran from the chassis to the side door which allowed the door to pivot up when the wagon was tipped. Straps were provided on both sides to old the wagon flat for normal transport operations. In line with wagon safety, these wagons were fitted with side chains in addition to simple three link couplings. In line with other wagons of this era, brakes or in this instance – brake is on one side only. As these are tipping wagons, it is reasonable to assume these were coupled in one direction to facilitate unloading & thus brake levers would be on one side of the train in any given rake to allow banksmen to secure the train without recourse to crossing the train. This wagon was then printed in 4mm scale to 21mm gauge. These are very small wagons, and for context, a photo of the wagon with a €1 coin. The model will be offered with limited options: The body will include W frames, axle boxes, & springs, Brakes, & Buffers The only options available will be: Drag hook NEM coupling pocket (OO gauge) Prices: N-Gauge: € 10 OO / P4 Gauge: €40 O-Gauge: € 80 All costs will be exclusive of shipping costs which can be determined at the time of sale and will be based on actual cost where applicable. Hope this is of interest, and if so, please reach out by PM Ken
-
- 6
-
-
-
Excellent work David, as always. Really like the effect of render crumbling away from the stones - very effective and adds a worn down effect to the building.
-
Very nice & well done Sir.
-
Actually I couldn't - the sharp corner in the sky was just distracting, so a bit of filler & painting, those corners are softened which helps to focus the eye on the models themselves. So progress on the layout included track ballasting and some weathering on the goods shed & water tank. Points have have also been connected and are manually operated via wire in tube - so now the layout is operational & trains can trundle up and down! All for now!
- 22 replies
-
- 12
-
-
So, Layout in box. Some 4mm plywood with MDF bracing to help hold it together. Bit of black spray paint for the outside and some sponge painting on the inside. Corners are not ideal. but as a moveable layout for display, I can live with it. Need to get some lighting installed as it's gotten quite dark over the layout. All in all it's starting to come together now.
- 22 replies
-
- 12
-
-
Really love the weathering on that back wall. Also the goods yard looks excellent - nice tones & good use of grass to give a used, but not overly tended space. Looking good.