-
Posts
4,878 -
Joined
-
Last visited
-
Days Won
119
Content Type
Profiles
Forums
Events
Gallery
Everything posted by Mayner
-

Thursday Walkabout on the Main Trunk Line
Mayner replied to Mayner's topic in Photos & Videos of the Prototype
NZ Rail action is a good source of videos on contemporary rail operation in New Zealand produced from an enthusiasts perspective https://www.youtube.com/channel/UCXdPEyOlCE9uzs2IB_QhhqA -
Apart from systems where trains are automatically controlled on systems like the Docklands Light Railway or Airport people movers the driver is usually responsible for stopping and starting trains at stations and nothing to do with the signalling system. In the days of mechanical system the signalman usually obtained authorisation for an approaching train to enter the next station and lower the section (or starting signal(s) regardless of whether or not the train was stopping. This practice speeded up train working as a stopping train could approach a station at a higher (less restricted) speed than when the signal for the next section was at danger.
-
I would not single out the Chinese for particular criticism all nations have their national holidays when everything stops, factories have production schedules, if you loose your slot you go to the back of the queue or you pay a fee to have your work expedited which happens everywhere. In my experience British suppliers/manufacturers are no better or worse than the Chineses, I regularly experience delays and quality assurance issues with kit components supplied by British manufacturers.
-
Think it might actually be 548 or 549 one of the larger Celtic or D5 Class there is no record in the "GSR Locomotive Bible" or other sources of a D6 being rebuilt in that particular form. 542 at Inchacore she was withdrawn from service in 1959 round the same time as the remaining CIE 4-4-0s so they can't have been all that bad. The large Midland 4-4-0s were often required to work cattle trains and had smaller driving wheels that the GSWR express passenger locos and would have had to have been worked harder than the Southern engines to run at high speed which probably contributed to their reputation of sluggishness and rough running. I will probably do one at some stage once I complete the Standard Goods, the Cattle Engine, and some coaches if I live long enough!
-
Its probably heresy but the standard of modelling on the OO gauge layout appears to be more realistic and to higher standard than the Tom Tighe O Gauge railway which was more reminiscent of the 1930s tin plate era than pictures of Fry's original Irish International Railway and Tramway system.
-
It reminds me of an Austrian train driver directing us to get off at the wrong station. Our station was a request stop and my wife asked the driver to let us off at our station Willendorf in reasonable German our driver pulled up at Spitz a Donau and announced Willendorf! and did a very good Basil Fawlty impression when we refused to get off the train and pointed to the nameboard, nearly ripping the transmission out of the railcar as he took off.
-
The GSR appears to have operated a pool system for boiler repairs for the "standard" ex-GSWR & MGWR Classes to speed up repairs. Locomotives would receive the 1st available boiler following repair, boilers also appear to be swapped in an emergency if an emergency to keep a loco in service if a boiler suddenly failed in traffic. To confuse things further both the belpaire and roundtopped boilers fitted to the Midland 2-4-0s seem to have been treated as a common pool with locos that had belpaire boilers reverting to round topped following repairs with some locos apparently having up to 5-6 boiler changes during GSR/CIE ownership. The 2-4-0s were considered to be the best of the Midland locos running up higher mileage than the Standard Goods and other Small Passenger types between repairs, but not as high as the large Connemara D5&6 Class 4-4-0s which were considered to be "sluggish bad running engines" by the GSR but ran up similar mileage between repair to the Woolwich Moguls. The D5 & D6 had a reputation of being rough running though strong pullers and appear to have had a successful interlude on Dublin-Limerick via Nenagh and on the Mallow Tralee line during the 1930s not bad for 'foreign" locos. A dated photo is the beast option if you want to build a model of a particular loco at a given time.
-
The Stirling cabs fitted to the 2-4-0s and some standard goods looked at attractive but were unpopular with the enginemen complaints of head injuries and poor weather protection and appear to have been replaced reasonably quickly by the GSR. One loco superheated by the GSR in the late 20s even retained a flyaway cab!
-
I basically borrowed the idea from Brassmasters (Martin Finney's) GW loco kits using a fold up spacer rather than threaded rod to keep the profiles at the correct distance. I allowed the bare minimum for etch factor and fitting tolerance in the spacing jig and considerable care and attention is required in the assembly to avoid mis-aligning or damaging the firebox wrapper. I prepared the tutorial in order to finalise & support the instructions for assembling the kit as the fiirebox assembly is a lot more complex that for the round topped versions of the class.
-
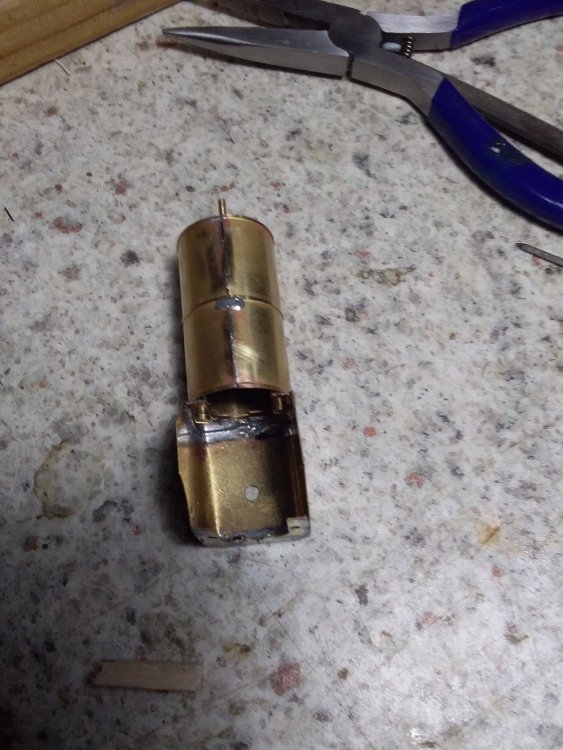
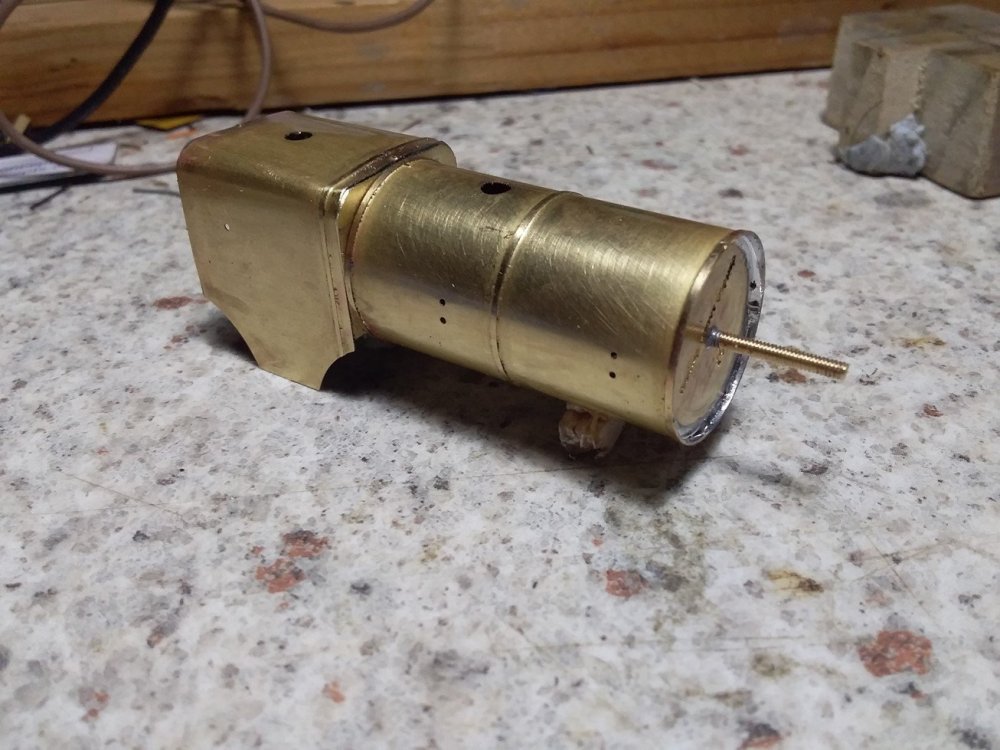
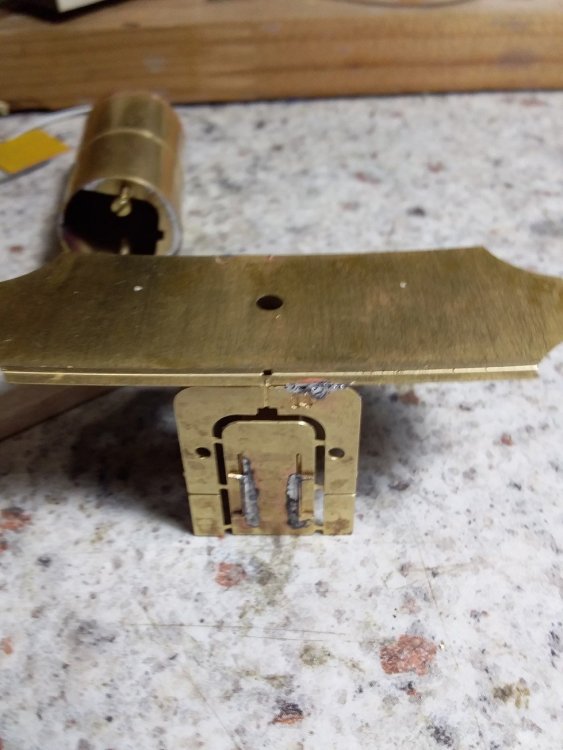
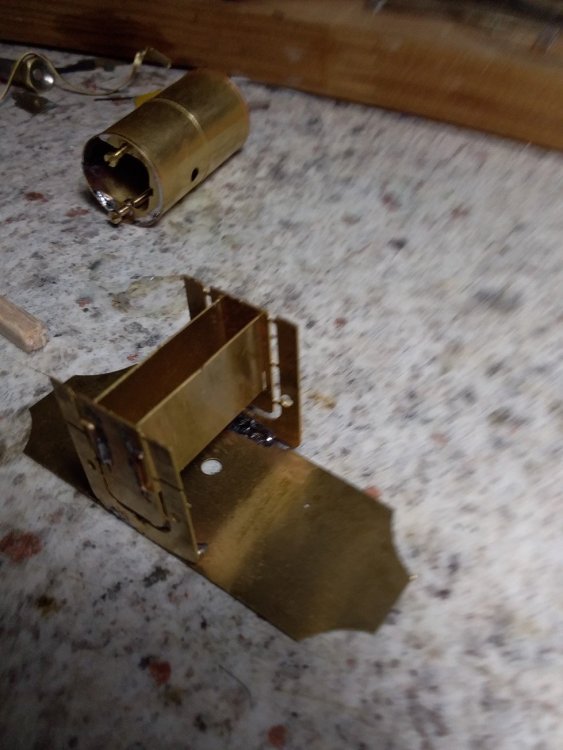
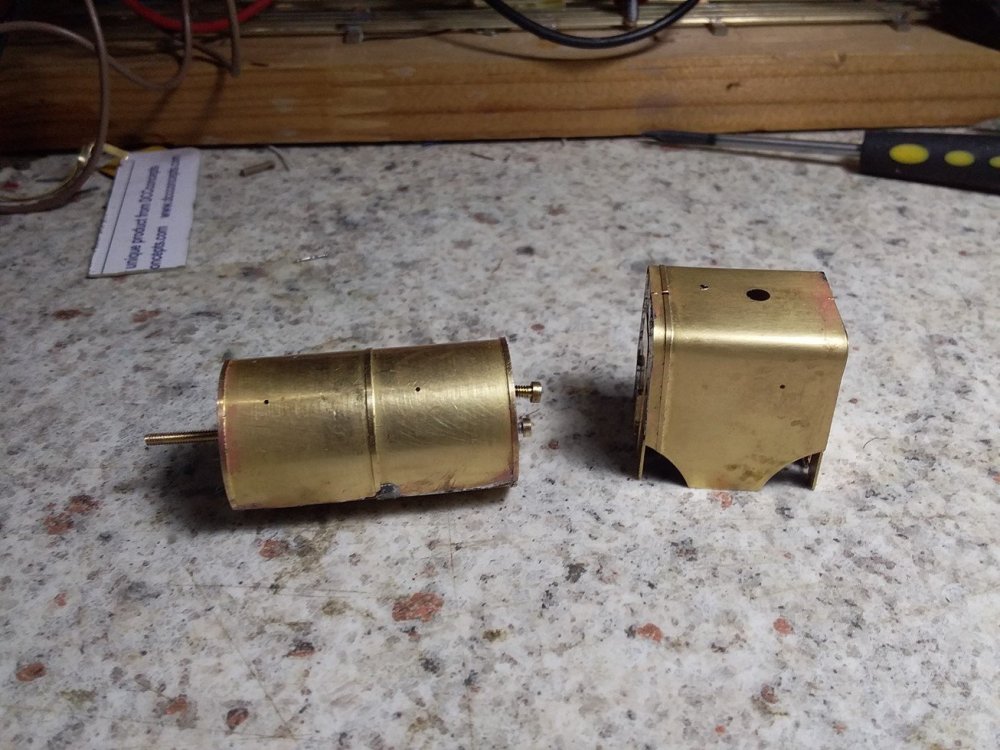
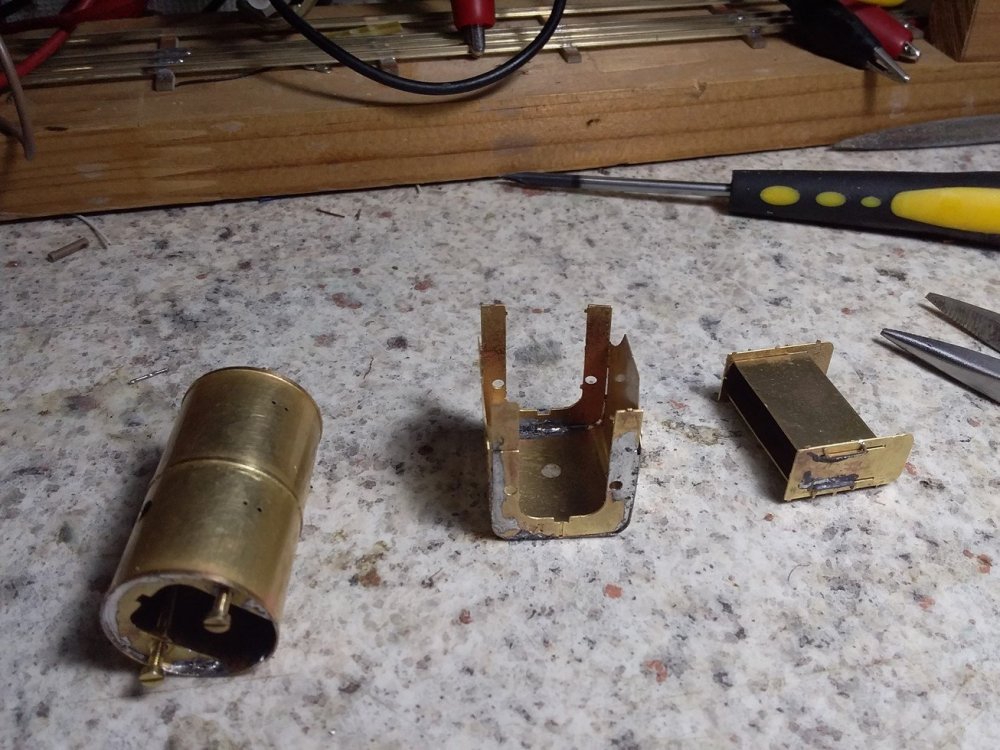
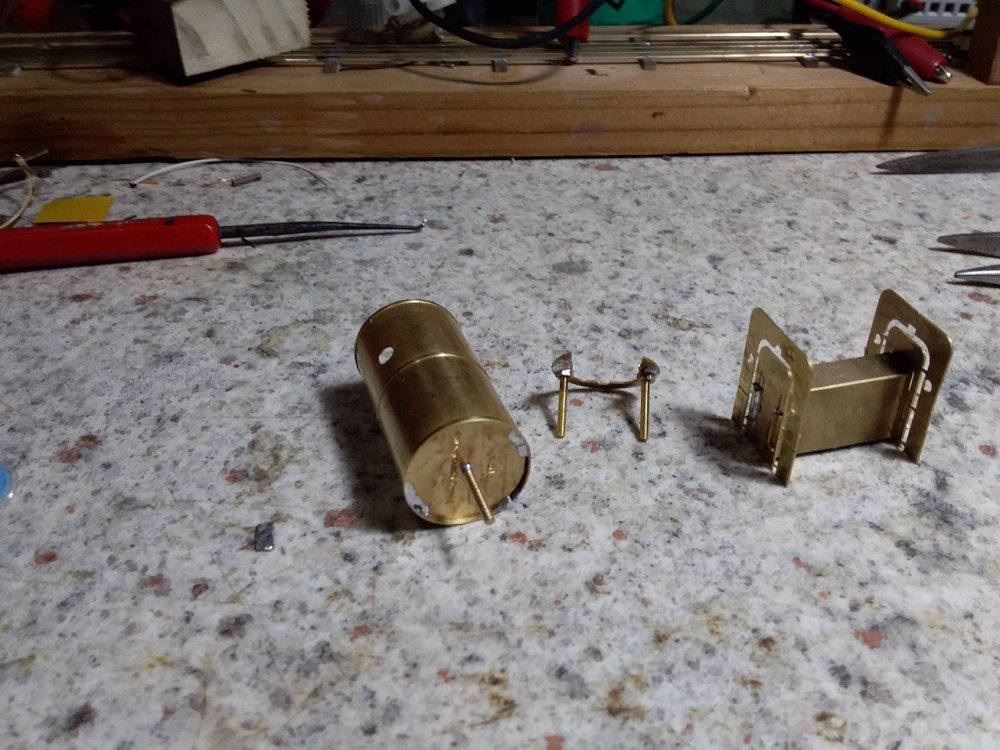
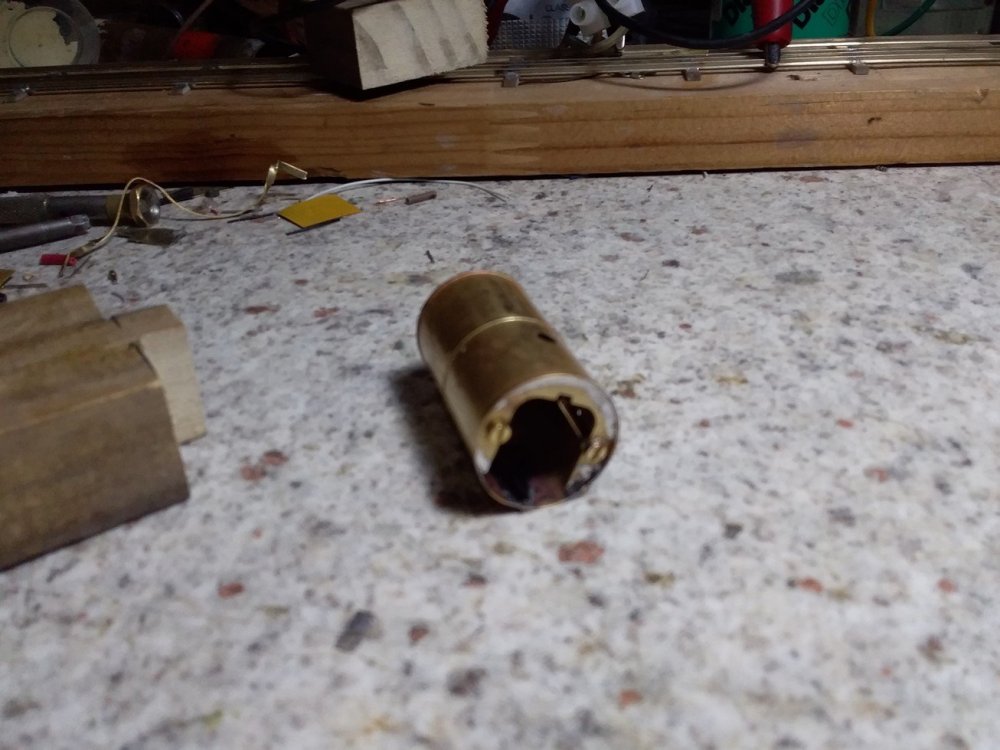
Stage 3. Boiler barrel and outer firebox awaiting assembly. Bolting firebox and boiler together. I originally used captive bolts in the boiler backplate but revised the assembly as it was difficult to tighten the nuts without causing damage to the wrapper. Assembled boiler awaiting a loco! I form the curved fillets at the front corners of the firebox by gentle filing and smoothing using wet and dry paper. View inside firebox the notch in the back plate is to provide space for running a power feed to the motor. I slipped up by getting the hole for the handrail knob in the side of the firebox wrong. In practice it is extremely difficult to get pre-formed handrail holes in two components to line up however accurate the design or the level of care taken in the assembly. Its simpler and quicker to plug the existing hole with solder from inside the firebox and drill the holes in the firebox when the boiler and firebox are correctly lined up and assembled. This boiler is ear marked for 653 the first of the class to be rebuilt with a Belpaire boiler as first re-built 653 was something of an oddity retaining solid valences with a short GSWR cab roof and sidesheets similar to the 52 Class and older GSWR passenger locos, but that's another days/6-12 months work.
-
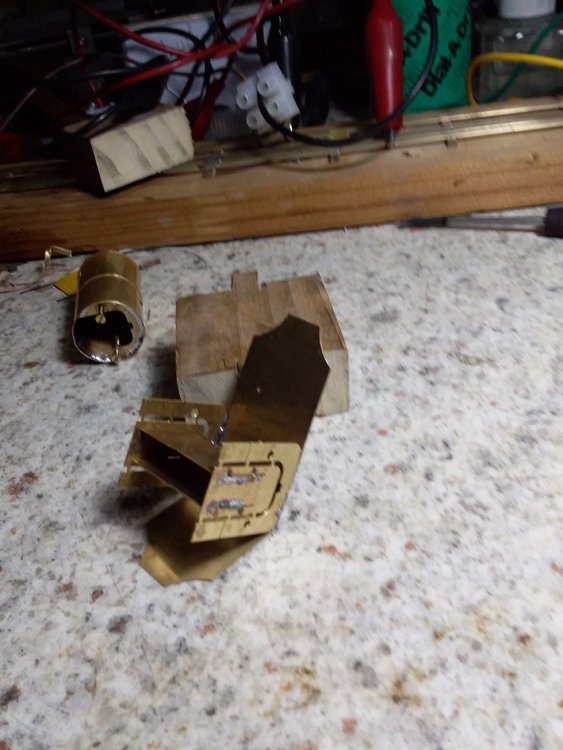
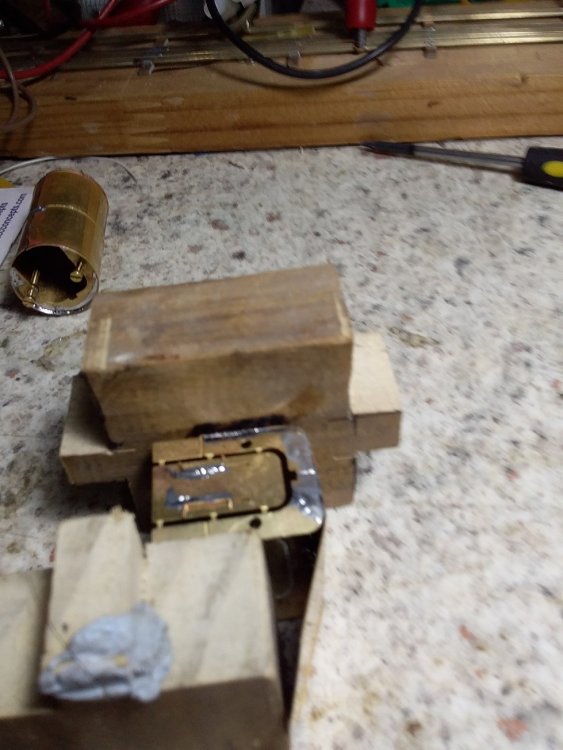
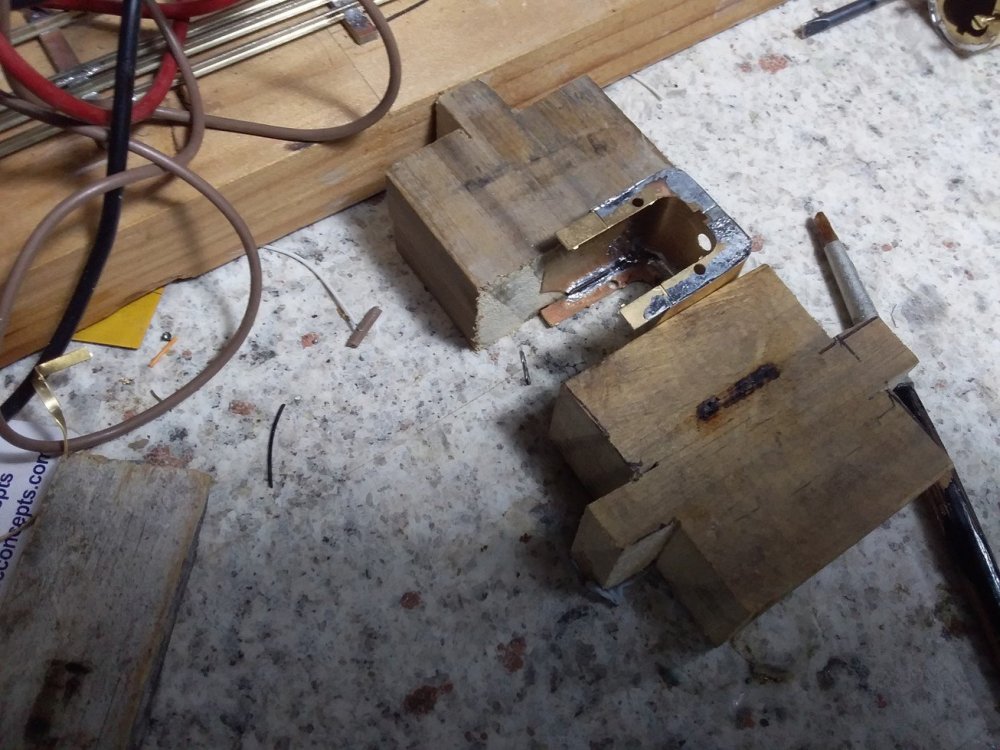
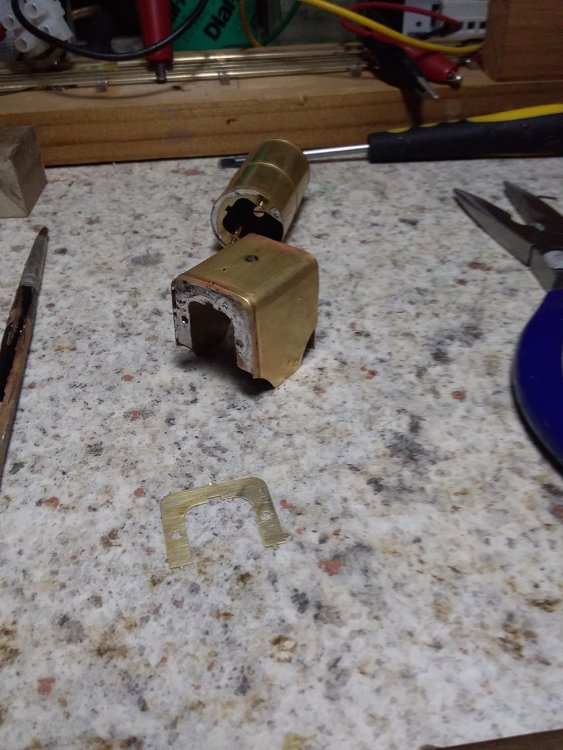
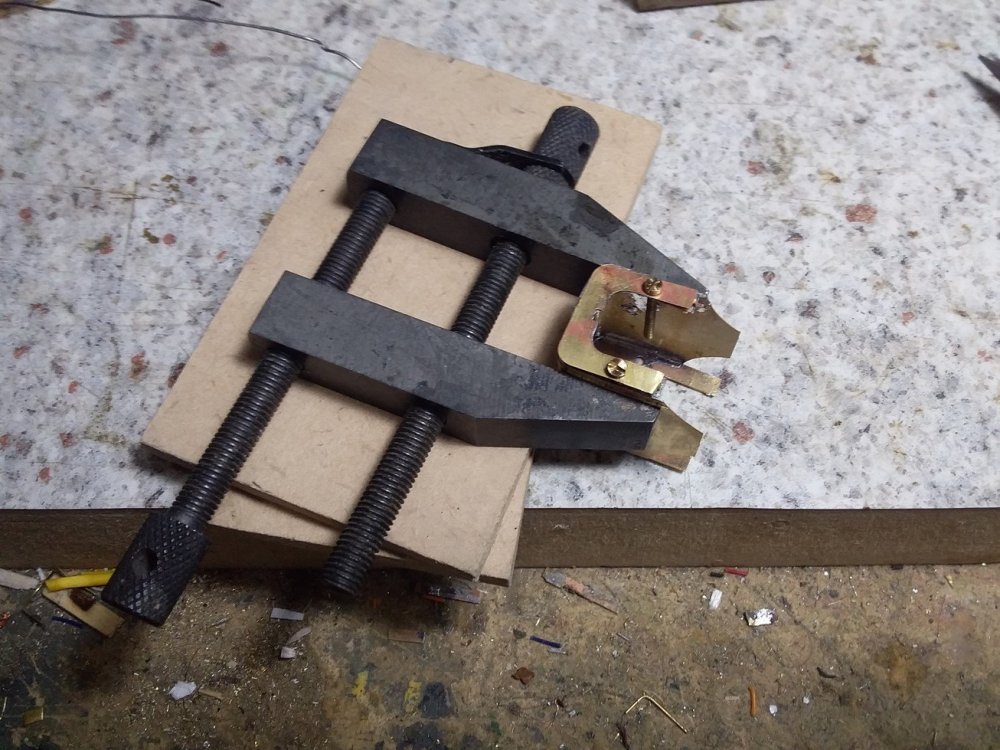
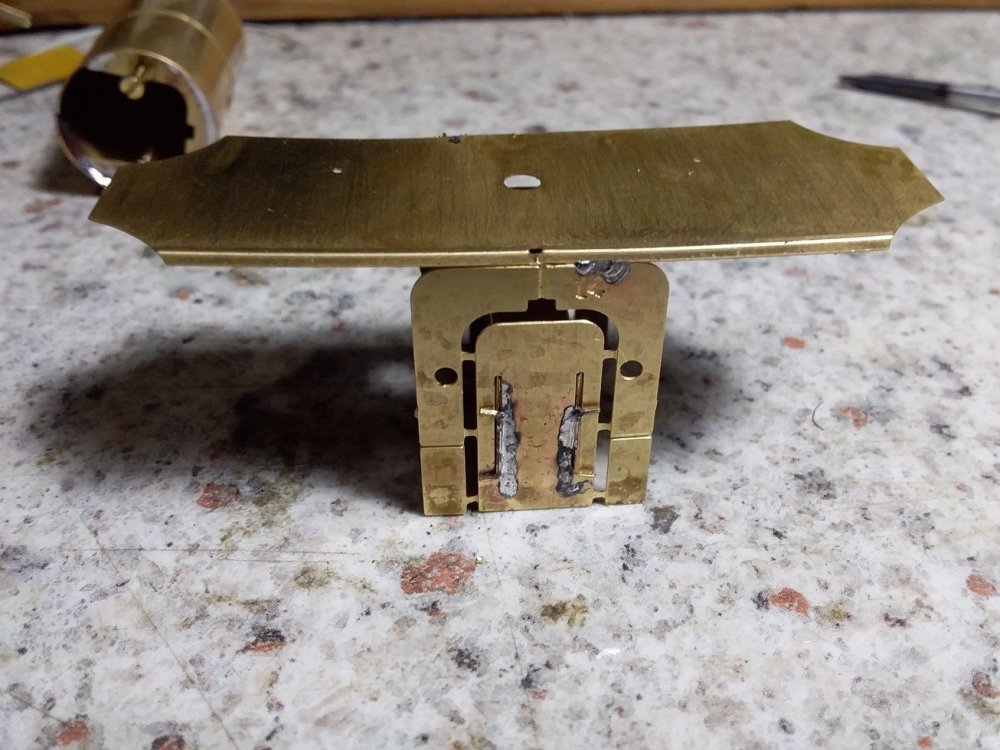
Stage 2 Wrapper tacked to rear plate, re-aligned at front plate and tacked in place. Wrapper soldered to front and rear plates, keeping well clear of curves! I basically applied firm hand pressure to the jig while soldering (in and out quickly!) Forming the curve on one side by lightly pressing down on the jig, the piece of wood is to stop the firebox tipping over while I was taking the picture! Firebox assembly jig 2! I basically clamp the sides of the firebox between two pieces of strip wood using hand pressure while running a light fillet of solder around the outside of the seam using 145° solder. I use a mild phosphoric flux based on a dilute commercial rust treatment similar to Ranex Rustbuster, not sure of a similar product is available in Europe, soldering was with a 25watt Antex with a medium chisel bit. Firebox formed to shape, the boiler and firebox are designed to bolt together. Spacing jig removed from firebox. Solder fillets formed all round between wrapper and front and back plates. Temporary legs removed from front plate half etched overlay to be soldered in place, front plate pre-tinned. I used a toolmakers clamps to ensure that the firebox did not disintegrate while soldering the overlay in position, the bolts are oiled and used to assist alignment during soldering.
-
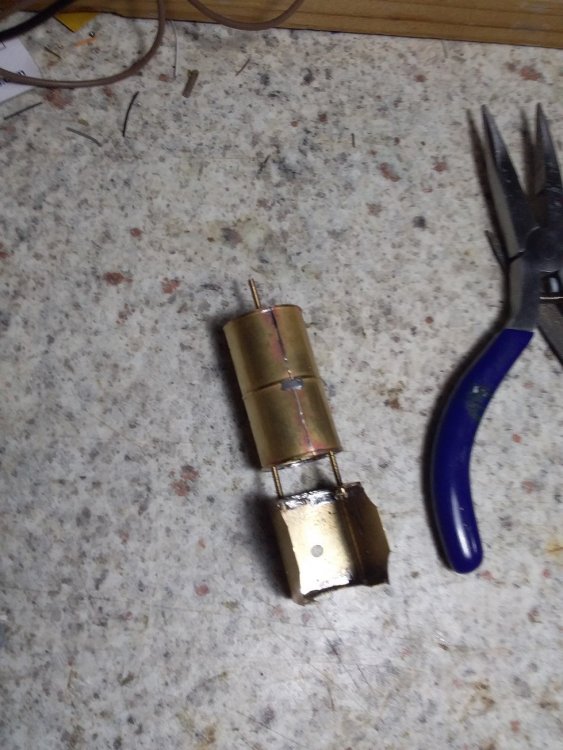
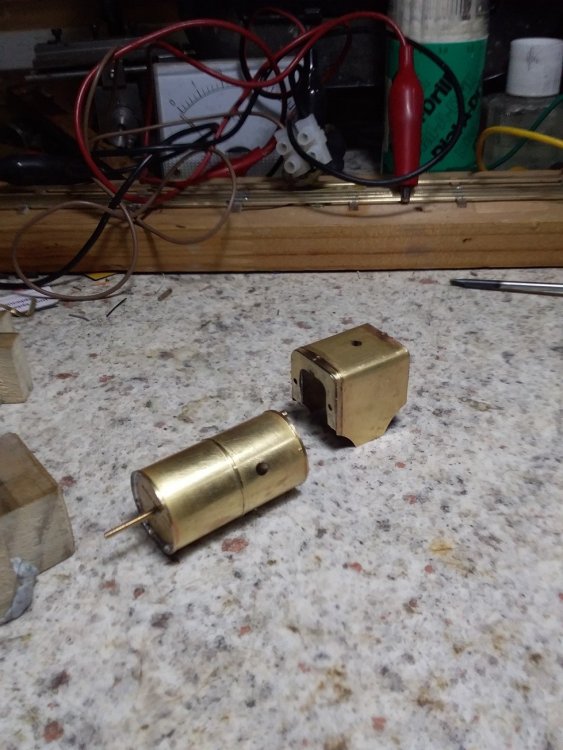
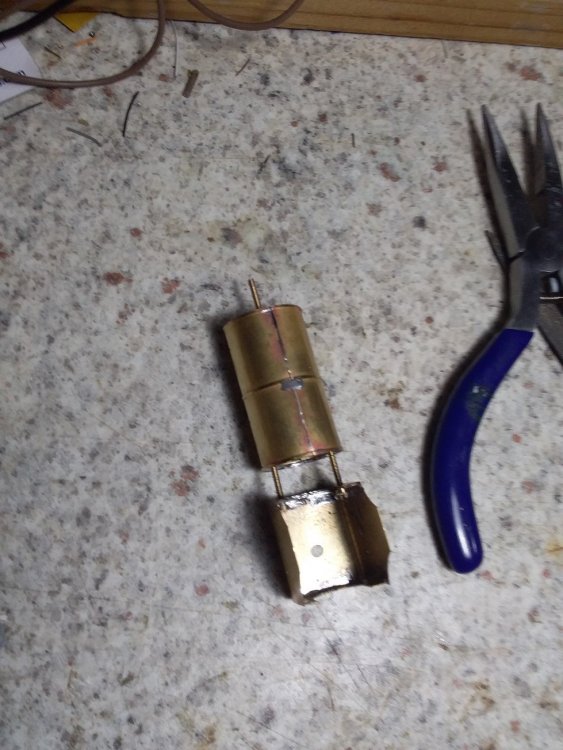
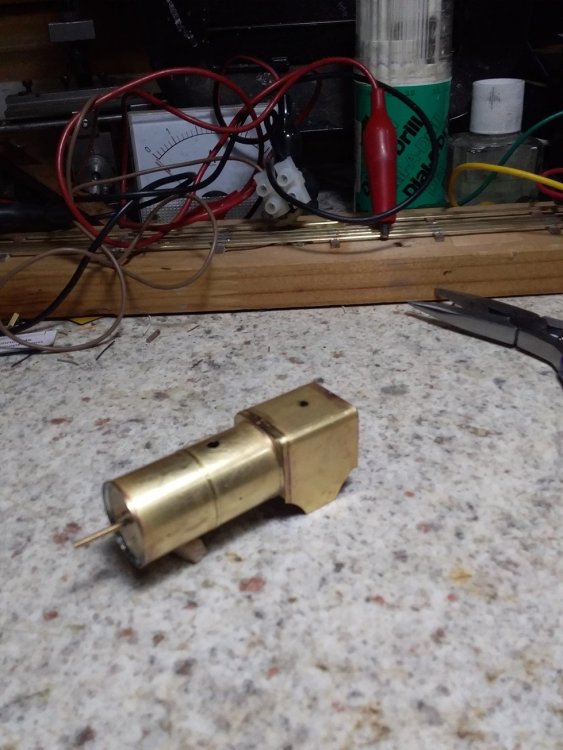
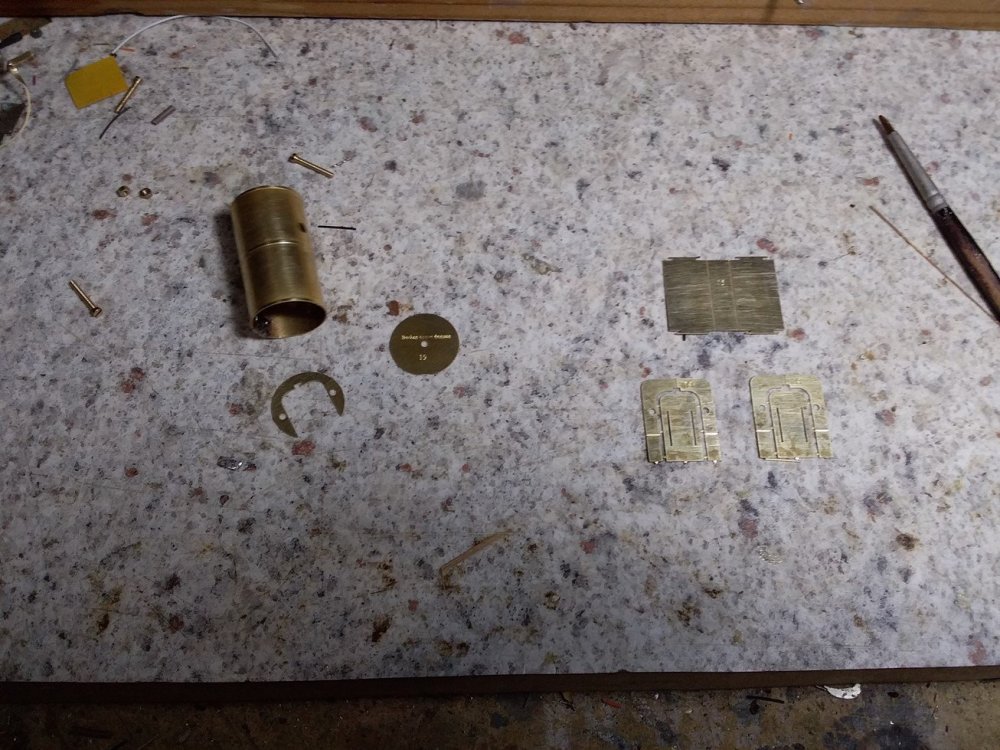
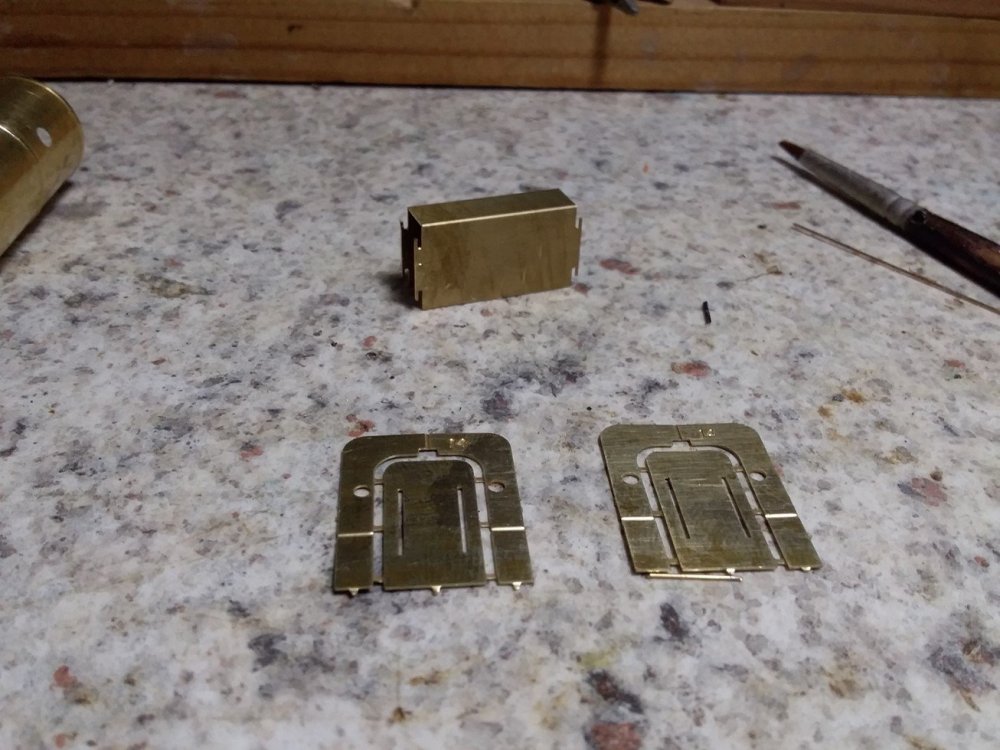
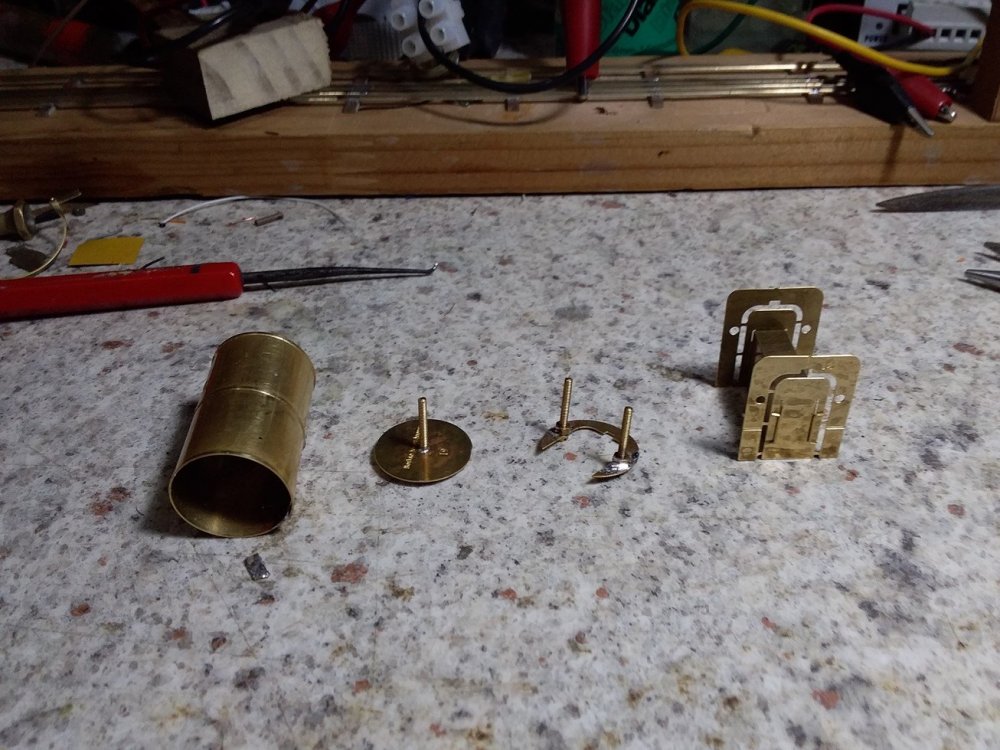
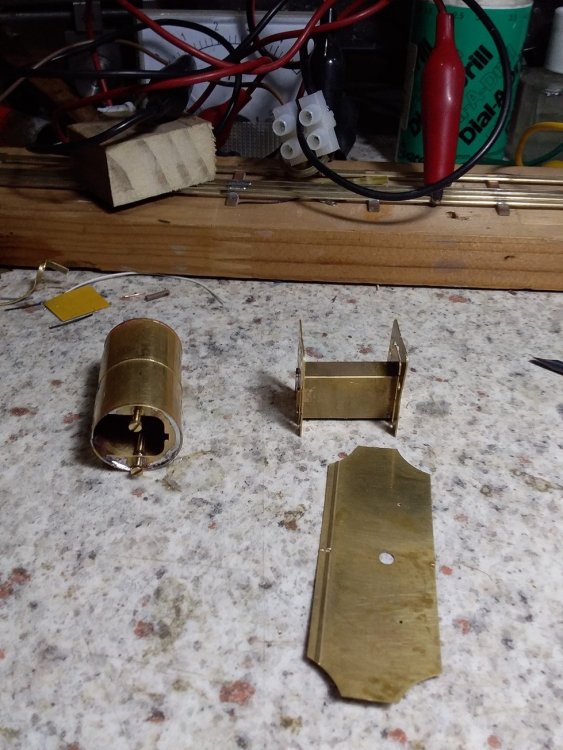
I finally got round to writing the instructions for the Y Boiler 650 Class I thought it would be useful to prepare a tutorial for assembling a Belpaire firebox as I will use the same concepts for the X & Z boilers fitted to the Midland & Southern Standard goods and a number of other classes. The same principals can be applied for scratchbuilding a boiler and firebox. The boiler and fire box wrapper are half etched and easily bruised so a level of care is required in assembly. Stage 1. Pre-formed boiler wrapper, boiler front and back plates and firebox former/assembly jig. Firebox front and back formers with assembly jig bent to shape the vertical half etched line in parts 14 is to assist in aligning the firebox wrapper. Firebox jig assembled captive bolt fixed to boiler front plate, captive nuts fitted to back plate. This stage of the soldering is carried out with a medium temperature sheetmetal solder (179°) to reduce the risk of the soldered joints failing at a later stage of assembly using a lower temperature detailing/general purpose solder (145°). I oiled the threads of the backplate bolts with a light oil before soldering the nuts to the backplate, this avoids soldering everything solid. Boiler front plate tack soldered in position with 145° solder to allow adjustment before finally soldering the plate in position. The firebox former is soldered with 179° solder. Boiler back plate soldered in place with 145° solder, don't loosen the bolts until the back plate is soldered in place! Firebox wrapper there are raised alignment marks on the front and rear of the wrapper and rear of the boiler barrel. Bolts loosened on backplate. Firebox wrapper tack soldered to the front plate to check alignment, there is a slight mis-alignment I will align and tack the wrapper to the back plate before re-aligning the wrapper.
-
Aurora almost ready for a visit to the paint shop. The loco was cleaned with cream cleaner using an old tooth brush to remove tarnish and grease, a surprising amount of dirt remains in the hard to reach places and crevices and will be removed with a fibreglass brush followed by a trip to the sand blasting booth and another scrub and rinse before priming. The photos are good at showing up blemishes and defects that you don't pick up by simply looking at the model, somehow or other the guardiron on the left hand side got pushed back and will need straightening before priming. The track is EM so the loco is literally sitting on the edge of its tyres.
-
In the pre-Liner Train era Lyons Tea was distributed by rail in containers similar to the British Railways B containers https://peco-uk.com/products/lyons-tea-container On CIE usually transported this type of container in open wagons (both wooden & corrugated rather than flats, used to see these container in goods trains departing Heuston Goods or on the yard headshunt, from the top deck of the 23 bus in the late 60s early 70s, usually a single wagon marshalled immediately behind the loco Jacobs/Irish Biscuits used trucks with a swap body system for distribution following their move from Bishop Street to Tallagh and may have used ISO containers in a similar manner. The ISO container on the semitrailer is set up with reflective warning stripes for road use something you don't see on a shipping container. Before road transport de-regulation in the early 1990s many large Irish companies operated their own road transport fleet as it was the only viable alternative to using CIE due to its near monopoly position and also tended to be more efficient and cost effective. The majority of businesses outsourced their transport to hauliers and contractors following de-regulation.
-
Internationally small shunting Tractors like the Duetz tended to be used mainly at small-medium sized goods yards/industrial sidings in order to free up main line locomotives from shunting duties and speed up goods train working. Locally Kiwirail hire out tractors not unlike the G Class for shunting at private sidings, the main line locomotive usually picking up or setting out a complete train or a cut of wagons from the reception track at the customers siding. G601-3 appear to have been introduced for the experimental re-opening of certain branch lines including Banteer-Newmarket to regular goods traffic as an alternative to complete closure. Several branch lines lost their scheduled goods service during the 1947 coal crisis but remained open for cattle & beet specials but were costing nearly as much to maintain as lines with a scheduled goods service. At the time the Newmarket re-opening was successful in reviving goods traffic but failed to cover operating and (very low) track maintenance costs and no doubt rates on buildings. Castleisland and Banager were the other two branches to have their scheduled goods service re-instated, Castleisland seems to have been the most successful staying open into the late 1970s. The Clara would have been an ideal location for a small shunting tractor like a G Class with two goods yards and a number of private sidings in addition to trip workings to Banagher. Steam and later C Class diesels took over Banagher branch workings during the autumn beet campaign. The second batch G611- seem to have been intended for similar work just as branch line closures eliminated the need for small shunting trip working locos. A G611 was based at Tralee for shunting and trip working duties to Castleisland and Fenit. Use at Fenit appears to have been mainly as a shunting locomotive in connection with ship arrivals, working wagons between the Pier and Station with main line locomotives working trains from Fenit to Tralee and other destinations. The G611 rostered as Liffey Junction replaced a Midland tank loco on wagon pilot duties and also worked cattle specials on the Edenderry Branch and over the Meath Line from Liffey Junction to Drumree & occasionally Kilmessan Junction before both branches closed in 1963. A G611 worked the last revenue earning train over the Clonsilla Junction-Navan Junction Line a 17 wagon stock special to Drumree & Kilmessan in 1963, a special dispensation was given for a G Class to load to 17 wagons as nothing heavier was allowed over the line on account of the state of the track. Apparently the loco transmission overheated climbing the grade from Liffey Junction to Clonsilla and the crew waited for a time at Clonsilla for things to cool down before tackling the grades on the Meath Line. Shunting was difficult at Drumree and Kilmessan and the loco was unable to lift the cattle wagons off the loading bank at Drumree, a couple of "farm lads" helped push the train out onto the main line, before running round and running down-grade all the way to Liffey Junction. article by "Spare Link' in GSRPS journal 1980s
-
Apart from Dublin suburban passenger services the 201 regularly worked Platin-Dublin bulk Cement trains in the late 70s & 80. In additional to push-pull work 201 hauled suburban passenger working included hauling trains of conventional hauled stock Howth-Bray-Greystones & Connolly-Maynooth peak hour services in addition to Connolly-Drogheda outer suburban services. I am not sure if the 201s worked the Connolly-Wicklow-Arklow trains. Outer suburban trains during this period were generally made up of Park Royal & Laminate stock with BSGV converted from Bredin stock, rush hour trains tended to be made up of older coaches dating from the early 1950s. Before taking up Dublin suburban passenger B201 Class regularly worked main line passenger trains on the Dublin-Cork/Tralee/Limerick and Connolly- Galway/ Sligo services including 6-7 cars sets of Supertrain stock on the 13;30 Heuston-Cork and 17:30 return.
-
It looks like Keadue slumbered through another year (apart from acting as a background for broad gauge stock!) before suddenly springing to life for a brief operating session, I thought it was as well to clean the track while vacuuming the dust off the layout. Although we are currently down to two engines there were no problems apart from a buckled rail on the main line near the loco shed and two troublesome Tilling points on the lead to the fiddle yard! 3T gave a good account of herself for the cavalcade of visiting enthusiasts with a train made up of C&L, CVR & T&D coaches This scenic section has been problematical, the baseboard was too narrow to incorporate a typical C&L halt/crossing keepers house and I have been unable to resolve problems with the Tilling points leading into the fiddle yard at one end and problems with the C&L 4-4-0Ts on the sharp curve between the roadside section and the station area. It may be simpler to build a new wider scenic section with a roadside section and a halt on a sharp curve similar to Kiltubrid or Ballyduff than attempt a re-build, oh and replace those points in the fiddle yard!
-
Further progress with the assembly of the 52 Class though I might have to re-number the loco or complete in GSWR livery as I managed to assemble the loco with a different boiler to the study photograph without noticing until the loco is nearly complete I was inspired to build the loco in this condition as it looks like the crew and guest are about to set out on a fast if not record breaking run on the main line, at the time the 52 Class appear to have been working Kingsbridge - Tullow & Carlow-Kilkenny trains with fast running to Sallins or Cherryville Junction for the crews honor and to avoid delaying long distance trains. Firemans side. I assembled No 1 with a 3 ring boiler in accordance with the GSR diagram rather than the 2 ring type fitted to the loco in early GSR days. Ironically I designed the boiler to be assembled in either form. Boiler fittings are from the SSM J15, safety valve needs to be re-seated, not sure about the profile of the dome. Buffers and tender toolboxes are brass castings from 3D printed masters. The tender body is SSM GSWR 1864 Gal tender with extended coal plates which often coupled to small ex-GSWR tender locos in GSR & CIE days. Driversides. Vacuum brake pipe 0.9mm brasswire soldered under the running board, the curves in the pipework also tended to look a bit agricultural on the full size locos. I will probably end up replacing the boiler and firebox on this loco as I need to make a number of corrections to the production boiler and firebox wrappers. Assembly of the loco body is substantially complete, whistle and cab interior to be added, I need to fabricate a tender floor and coal plate and fit axleboxes and springs (after painting). Loco and tender brake gear to be assembled, the motor and gearbox is set up to confirm that the motor actually fits in the firebox and boiler! Inside Stephensons gear and compensation pivot. The gear is based on the Beyer Peacock GA for the original members of the 101 Class, available information on the 52 Class is basically limited to weight diagrams and photographs. Underside of loco chassis showing bogie pivot arrangement, I usually build 4-4-0s with a sprung or rocking leading driving axle and a rigid bogie, the slotted guide is an attempt to improve tracking and is theoretically capable of going round a 2' radius curve in OO.
-
All you ever wanted to know about container handling, but were afraid to ask http://konecranes.smartpage.fi/en/2011/portbook/files/Portbook_b_opt9.pdf Reach stackers seem to be preferred over forkilfts in recent years, possibly safer more stable machine with lower maintenance and running costs having a telescopic boom rather than a chain driven mast. There have been a number of incidents with mast type container handling forklifts tipping forward or even suddenly dropping a container if a mast chain fails. Hyster and Boss lift trucks would have been the main suppliers of forklifts to CIE during the 70s and 80s.
-
Try the National Museums of Northern Ireland they have 1/4" scale GA drawings of the S & S2 3' gauge compound tank engines and the Ballycastle T Class 4-4-2, LMS/NCC loco diagram numbers 12, 13 & 14. https://www.nmni.com/Contact-us.aspx. The Manchester Science and Industry Museum Beyer Peacock collection would hold GA for the members of the class The Ulster Museums are surprisingly fast in responding to enquiries through the general website.
-
The 1912 Strike was the 1st national coal strike in the UK which would have affected the coal supply to the Irish railway companies that used steam coal mined in Great Britain rather than anthracite mined at Castlecomer. https://en.wikipedia.org/wiki/National_coal_strike_of_1912 . The strike appears to have been successful with the Government awarding a minimum wage to the miners, previous strikes and lockouts in South Wales lead to a lot of bitterness and distrust towards Churchill and the Liberal Government because of the use of police and the army in breaking up the Tonypandy riots. The railway to Castlecomer and Deerpark Mine and a similar railway from Athy to Woolfhill were built by the British Government to open up access to the Leinster Coalfield for the war effort but did not open until 1919, the Castlecomer branch would make an interesting scenic model with its steep grades, sharp curves, many level crossings and river bridges but there are relatively few published photos of Castlecomer station or the yard at Deerpark.
- 5 replies
-
- 1
-

-
- coal
- castlecomer
-
(and 2 more)
Tagged with:
-
Its odd celebrating Christmas and the New Year at this time of year in the Southern Hemisphere, our real New Year is in July this year when the starts in the Matariki (eyes of God) or Pleiades) constellation rise in the winter sky. The 52 Class has turned out well, but much easier if I had followed Drew Donaldson's, Tim Cramer's or David Holman's example and built the loco in 7mm Scale!
-
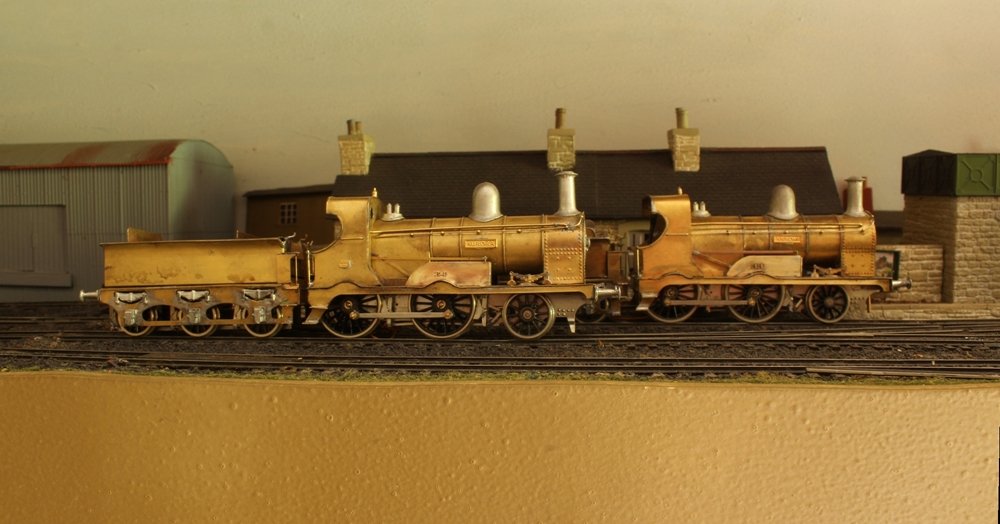
Not quite an ex-works line up! No 33 Arrow & No 34 Aurora. After a number of unsuccessful attempts the photo engraver finally produced the correct brass running numbers for these locos, no 33 is posed on 650s chassis as a result of poor service from wheel suppliers int he UK. The loco running numbers will be finished in polished brass and are part of an overlay that's fixed to the splasher sides rather than individual numerals, both locos would have run in this condition in the early 1920s in unlined black with name, number and makers plates before GSR re-numbering, loosing name and maker plates and sheep dip treatment in grey, before further rebuilding with GSR cabs and boiler swaps from the 1930s onwards
-
Its great to hear that Tim Cramer is still modelling in a way he popularised Irish Railway modelling through his drawings and articles in the British Model Railway Press publishing articles in the majority of the popular magazines. He moved up to O gauge after building some really fine 21mm gauge locos including models of J30 0-6-0T No 90, a J26 0-6-0T (MGWR) a B4 4-6-0T Bandon Tank and some typical West Cork buildings, No 90 would have been particularly challenging as no suitable driving wheels were available at the time and it would have been a struggle to fit a motor into the loco, there was a Railway Modeller article on his 21mm gauge work including photos of his locos and the conversion of a Triang Clearstory coach into a GSWR 45' bogie. He sold some of his 4mm stock including the Bandon Tank (in CIE lined green) and a station building through Southern Model Railways but it was beyond my reach at the time. The Bandon tank ended up working on the MRSI Loughrea layout, the loco was beautifully constructed and finished more a work of model engineering than conventional model making. He helped out indirectly in the design of the tender for my MGWR 2-4-0 with an isometric sketch of the interior of a MGWR tender most likely based on his own observations during the 1950s.
-
I have no plans to produce any of the existing kits in 2mm or 7mm scale at this stage I my modelling time is fully committed to completing current and planned 4mm projects Producing the kits in 2mm scale from existing artwork 4mm would be a high risk strategy, there is a risk that they kits may not fit together and some of the parts may be lost/too flimsy when reduced to 2mm.
.png.c363cdf5c3fb7955cd92a55eb6dbbae0.png)


