Galteemore Posted July 25, 2020 Author Posted July 25, 2020 (edited) Enniskillen turns a wheel. Bogie is more or less done too. Have just put it all together after making this vid, and jury rigged wires direct to the motor to run her down the harbour branch. Didn’t have enough hands to film that! IMG_3667.MP4 Edited July 25, 2020 by Galteemore 1
Galteemore Posted July 25, 2020 Author Posted July 25, 2020 (edited) Thanks Eoin- not sure what’s happened there as I can see it when I click, have changed the clip above just in case it had a glitch Edited July 25, 2020 by Galteemore
jhb171achill Posted July 25, 2020 Posted July 25, 2020 "This type of video file isn't supported"............no vid............?
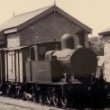
Galteemore Posted July 25, 2020 Author Posted July 25, 2020 (edited) Oh dear. Sorry everyone ! Here’s a still anyway ....she’s doing about 70mph here ! Edited July 25, 2020 by Galteemore 6 1
Galteemore Posted September 2, 2020 Author Posted September 2, 2020 (edited) Very slow progress on ‘Enniskillen’. Compounded by a lack of time and lots of mistakes. But a buffer beam is done, ready to solder up. The safety chain eyelets are Slaters wagon bearings. Much of the learning has revolved around the mighty GW Rivet Press. A capable tool in the right hands - but am sure even I can make something of it. I’m slowly learning its modus operandi ! And literally counting rivets.....the buffers are really meant for a Fowler 4F btw but they seem to pass muster. Edited September 2, 2020 by Galteemore 3 1
KMCE Posted September 2, 2020 Posted September 2, 2020 Very nice buffer beam & I like the safety chain detail. That rivet press is an impressive looking tool. Makes my Kettering model look like a toy!!. Ken 1
David Holman Posted September 3, 2020 Posted September 3, 2020 Very clean, precise work. Nickel silver always seems to look better than brass to me. Perhaps because it is more like the steel of the prototype? Well worth the time and effort. I sense something special is brewing here. 1
Galteemore Posted October 4, 2020 Author Posted October 4, 2020 (edited) Two steps forward. And three back. And that’s just the settings on the rivet machine. Have spent hours embossing rivets on tank sides only to find they are too widely spaced .....you can see the difference between versions below. The better version has more closely packed rivets. Not to worry though - it’s been a huge learning experience and I also now have lots of spare riveted panels to practice weathering on..... Edited October 4, 2020 by Galteemore 7
David Holman Posted October 4, 2020 Posted October 4, 2020 (edited) The mark two version is certainly on the money. Had similar issues when I did Sir Henry - the inner faces of the side tanks are fully (if not prettily) riveted as I made a mess of the first effort. Great work! Edited October 4, 2020 by David Holman 1
Galteemore Posted October 19, 2020 Author Posted October 19, 2020 (edited) Brief lacuna in work, due to relocation of workshops! Mrs Galteemore is a lady of great wisdom and sagacity, and sees the importance of arts and crafts in human life. However, my activity was rather taking over the shared craft room. So she suggested that I move from the craft room and, as it’s so difficult to host guests right now I may as well repurpose the entire guest room for modelling! We have now moved the kit, so hopefully work will recommence very soon (on a Leitrim understanding of ‘soon’.....). It’s a cracking space to use so I have no excuses now ! Edited October 19, 2020 by Galteemore 8
KMCE Posted October 19, 2020 Posted October 19, 2020 That's a level of sagacity that must be admired, and in your case, appreciated! Looking good there. 1 1
David Holman Posted October 20, 2020 Posted October 20, 2020 A fine lady indeed. Layout space, workbench, storage - excellent! Make haste slowly and enjoy. 1
Galteemore Posted November 14, 2020 Author Posted November 14, 2020 (edited) A job I was dreading was the main tanks for Enniskillen. I had the misfortune to come across a well lit photo of the original loco which shows exactly how many rivet lines there are - so had no excuse for skimping a few. These are big bits of metal (relatively speaking) and need to be dead straight - otherwise the rivet machine will produce angled rows ...after many attempts we have a result. I am now more proficient in using an engineer’s square! The rivet press requires one to solder a spacing piece in on occasions to ensure that rivets right to the edge can be embossed - a handy review in MRJ alerted me to how to do it! Couldn’t resist trying out a nameplate ....and trying my own black and white pic...the green stuff is Sharpie marker which helps in showing just where you’ve scribed a line. Edited November 14, 2020 by Galteemore 7 3
jhb171achill Posted November 14, 2020 Posted November 14, 2020 Don't tell Donald you're using Sharpies! SUPERB job with the nameplate. 1
Galteemore Posted November 14, 2020 Author Posted November 14, 2020 (edited) Many thanks JB but the plates are an Alphagraphix etch - the first and for a long time the only item I’d actually acquired for the project! Actually having a tank side to stick it on feels like a landmark though. Edited November 14, 2020 by Galteemore 1
David Holman Posted November 14, 2020 Posted November 14, 2020 May have taken a few attempts, but certainly worth it. No hiding place in a close up like that and none needed. Great work! 1
Galteemore Posted November 17, 2020 Author Posted November 17, 2020 (edited) Every now and then I think I’m taking this project too seriously. Tonight is one example... I really need to stop looking at photos!! A number of depictions of ‘Enniskillen’ show that she had a front buffer beam very obviously made of wood - with very obvious scars. Once seen I couldn’t unsee it. So how to replicate ? Weeks of thought later.... take an old boxwood ruler, Dremel it down to 3mm and glue a nickel silver plate on the back. Mark that out and then drill 21 holes of various sizes. Insert various .5 and 1mm brass rivets, washers and top hat bearings to replicate the iron work. Soldering these in also helps fix the wood and metal together. Attack the wood with a piercing saw and gouge in a few crevices as per the original. Job done...it’s not perfect but gives an impression....and should pass the 2’ rule. Thanks to @Irishswisserniefor 1957 pic. Edited November 17, 2020 by Galteemore 3 4
Irishswissernie Posted November 17, 2020 Posted November 17, 2020 I've just been going through the photos on the Archive and it looks as if all 3 of the large tanks had wooden front buffer beams certainly in their later lives. There are a few on both the front and bunker ends on the smaller locos as well. 1
jhb171achill Posted November 17, 2020 Posted November 17, 2020 Wooden buffer beams were a feature of many classes of many locos, right up to the 1950s / 60s.... The Sligo Leitrim (with the exception of Railcar "B") tended not to move with the most modern aspects of life! 1
jhb171achill Posted November 17, 2020 Posted November 17, 2020 On 25/07/2020 at 11:39 PM, Galteemore said: Oh dear. Sorry everyone ! Here’s a still anyway ....she’s doing about 70mph here ! Yup - I SAW that! I saw 'er going through Kilmakerril Halt at 80 mph at leasht.... sure I was on me way home from the pub............. 1
David Holman Posted November 18, 2020 Posted November 18, 2020 Love the buffer beam! Probably shouldn't mention this but ice lolly sticks a possible alternative, albeit nowhere near as seasoned or close grained. This project is clearly showing the value of challenging yourself and has moved your work up to a new level. Not that there was anything wrong before, I might add! Also shows the value of breaking complex shapes down into simple ones - very much a reminder to self as I pour over that photo of Wolf Dog... Inspiring posts - keep them coming. 1 1
Angus Posted November 18, 2020 Posted November 18, 2020 (edited) Fantastic work on the buffer beam there Galteemore. Just out of interest how are you planning to fit them to the frames? Edited November 18, 2020 by Angus
Galteemore Posted November 18, 2020 Author Posted November 18, 2020 (edited) Thanks everyone- I appreciate the encouraging comments. What I’ll probably do near the end, Angus, is use a small piece or two of right angle brass to solder the ns backing plate to the footplate or frames : not sure which as yet.....I may go for the footplate idea as it will provide some lateral stiffening when I’m doing all the smokebox stuff...this image shows just how much hacking about I’m doing as I learn! I’d made the front splasher aperture too big so have had to close it off a bit. This should look ok up top when the splashers are in and some filler applied. This rear view also shows how the bolt heads and safety chain eyes are soldered in and then filed down. Edited November 18, 2020 by Galteemore 1
David Holman Posted November 18, 2020 Posted November 18, 2020 Continues to amaze me that the body of Richard Chown's Shannon is held together with just a single 12ba bolt in the cab floor! The end of the boiler is a push fit into the back of the smokebox and that's it. Not a light engine either. 1 1
Galteemore Posted December 10, 2020 Author Posted December 10, 2020 (edited) Making one’s own kit of parts is all very well but eventually it all has to be stuck together. Rear parts of ‘Enniskillen‘’s body more or less done...it looks quite basic but adding in beading, coal rails, window frames, window grilles and handrails all takes time, as does getting it square ! Edited December 10, 2020 by Galteemore 7
Galteemore Posted December 21, 2020 Author Posted December 21, 2020 (edited) Enniskillen is a ‘Large Tank’. So she needs...large tanks. And now they are finally on, after weeks of thinking through. She’s fresh from her Viakal bath (to clean off flux) and has a few water drops still glistening. In a good kit much of the planning is done for you with helpful tabs and slots to locate parts. With scratch building I find I spend at least two or three times as long on planning as building. Riveting the tank sides took much effort and many attempts, but turns out it was only half the fun!! 10 thou NS is very workable but also a bit bendy in long sections, so further planning.....Cue much adding of angle and rod to brace the sides and act as anchors for the other sides and ends, which also needed some rivet press attention. The tanks have a raised edge on the outside faces which needs accounting for. Anyway, stuck it all together today, adding beading and handrails as we went. Final job was adding some brackets at base of tank fronts. Thankfully all the reject rivet panels from previous work have given me a rich storehouse of ready riveted strips! Tack soldered cab faces in for now, just to give an idea of how she will look in terms of height, although cab front plate should be a good bit further forward. These were a huge task in themselves - especially the 0.3mm wires individually added one at a time for window grilles - but are effectively finished now including window frames. Hopefully the character of the loco is beginning to emerge. That’s now the ‘square’ bits of the loco effectively done. On to the round and curvy bits....or for those of you remember Playschool, time to look through the round window.... Edited December 21, 2020 by Galteemore 8
jhb171achill Posted December 21, 2020 Posted December 21, 2020 I wish Senior could have seen this develop.........! There would have been compliments about, and reminiscences about the horrors to be found when inspecting the SLNCR's track, culverts and bridges! 1 1
KMCE Posted December 21, 2020 Posted December 21, 2020 (edited) Looking good. Getting the tanks right is essential on tank locos as they dominate the loco. Worth the time and effort as it will show later. As you can probably guess, I'm a big fan of tank locos..... Edited December 21, 2020 by KMCE 1 1
jhb171achill Posted December 21, 2020 Posted December 21, 2020 I must try to find an outline I had for the proposed 820 class 4.6.2T proposed but never built by the GSR. I don't know what I've done with it. My grandfather did an outline diagram of it - it was basically a tank engine version of the 800 class with a huge coal bunker at the back. 1
KMCE Posted December 21, 2020 Posted December 21, 2020 17 minutes ago, jhb171achill said: a tank engine version of the 800 class Now that, I would like to see......
jhb171achill Posted December 21, 2020 Posted December 21, 2020 4 minutes ago, KMCE said: Now that, I would like to see...... If I ever find it, Ken, you'll be the first to get it! For the livery freaks like me, it was also to be the same lined blue/green that the trio of 800s were. Senior believed that five were planned, and they would have been used at least on the DSER section. But we will never know. 1
David Holman Posted December 21, 2020 Posted December 21, 2020 Having done two Small Tanks from kits and a scratchbuilt Large Tank, I can testify just how much time and effort has gone into those few bits of nickel silver! Great work, the loco is indeed emerging. 1
Recommended Posts
Create an account or sign in to comment
You need to be a member in order to leave a comment
Create an account
Sign up for a new account in our community. It's easy!
Register a new accountSign in
Already have an account? Sign in here.
Sign In Now