flange lubricator Posted December 14, 2015 Posted December 14, 2015 Super modelling so realistic well done .
JasonB Posted December 14, 2015 Author Posted December 14, 2015 Jason, First time I've had the chance to look through the thread in it's entirety and I find it most impressive, and even better to see some actual modelling on here - the finish on those cement wagons is really top top stuff. Any chance you'd share your workflow? Is it enamel/acrylic ? Weathering powders or airbrush? The streaking down the canvas sides is particularly tidy, and since you've "a few" to do, maybe even a tutorial? Richie. Thanks very much Richie,regarding the weathering i used most of what you mentioned.Enamel washes which were mixed to make certain colours and airbrushed on.The weathering powders i brushed on dry and also used wet in some areas which helps with the streaking.The rust effect was also made up from the powders,and i buy cotton buds in bulk quantities 1
JasonB Posted December 14, 2015 Author Posted December 14, 2015 Stunning. 10/10. Is this railway outside? Cheers thanks,no its just a small shelf I keep in the shed for storing bits and pieces on while I'm working on them,it was just handier to take the photos on that while I was outside. 1
jhb171achill Posted December 15, 2015 Posted December 15, 2015 What's the ballast in your autoballasters made of?
JasonB Posted December 15, 2015 Author Posted December 15, 2015 What's the ballast in your autoballasters made of? It's just a bog standard bag of ballast i picked up in marks Jb.I mixed up some pva and water and spread it with a syringe and then let it harden.The colour of the ballast wasn't great so i made up the grey with powders and brushed on,then sealed with matt varnish. 1
JasonB Posted January 15, 2016 Author Posted January 15, 2016 I didn`t get much done over christmas.I had planned to finish of the remainder of the cement wagons but it was getting a bit repetitive so i didn`t bother in the end.I`ve got stuck back into them the last couple of weeks so im just about done now,but here are some small bits that i`ve being doing in between.First up its a 00 kit that makes 2 portacabins.These can be used individually or stacked whichever suites.The other is some 1:76 scale transits from Oxford Diecast.I`ve kept 2 white and just added Eircom decals,the other 2 ive sprayed and added ESB decals,the ladders were made up from the spares box.I`ve a fair few containers now which ive been picking up here and there so ive weathered a 20ft as well just to see how it looked. 1 1
JasonB Posted January 16, 2016 Author Posted January 16, 2016 Hubba Hubba!!! Thanks Richie :tumbsup:and congrats on the new arrival. 1
DiveController Posted January 16, 2016 Posted January 16, 2016 Very nice, Jason. Especially love the ESB vans, especially the clapped out one 1
Warbonnet Posted January 16, 2016 Posted January 16, 2016 Love the rust effect in the container, super job! 1
RedRich Posted January 16, 2016 Posted January 16, 2016 Excellent work Jason. You are setting new standards here. Rich, 1
craven1508 Posted January 16, 2016 Posted January 16, 2016 love it, very realistic rust effect to the container and esb van.
Portoman Posted January 16, 2016 Posted January 16, 2016 Great weathering effects , well done. Where did you get portocabin kits ?
JasonB Posted January 16, 2016 Author Posted January 16, 2016 Thanks alot for the comments lads,appreciate it. 1
JasonB Posted January 16, 2016 Author Posted January 16, 2016 Great weathering effects , well done. Where did you get portocabin kits ? I'm not sure my Dad picked it up for me a while ago,as far as i remember its from Knightwing kits.They also do security fencing and other stuff along them lines. 1
Dave Posted January 16, 2016 Posted January 16, 2016 Lovely work Jason, the colours on the the cabins are spot on. Great weathering too! 1
JasonB Posted January 16, 2016 Author Posted January 16, 2016 Lovely work Jason, the colours on the the cabins are spot on. Great weathering too! Thanks Dave,yes it took a while to settle on a colour but they seemed to suite so I went with it. 1
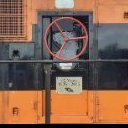
JasonB Posted March 5, 2016 Author Posted March 5, 2016 Heres a couple of new additions that ive gotten recently.229 was birthday present from the other half a few weeks ago,ive just been adding the detail to the front this afternoon,i think it always makes a big difference to the appearance of the loco.I havent made up my mind if im going to weather it yet or not.I also picked up this kit from SSM ,i havent tried anything in brass before now so im itching to make a start on this. 1 1
JasonB Posted March 11, 2016 Author Posted March 11, 2016 Bit of progress with the SSM level crossing.I know it was probably better to tackle this by soldering it,but i used super glue instead which seems to have worked fine.Its been primed and had a couple of coats of white so im going to start on the main paint job over the weekend. 1
JasonB Posted March 12, 2016 Author Posted March 12, 2016 Looking great Jason,well done Thanks Harry,its not much to look at at the moment but it should start to take shape once the detail is added. 1
daryl43068 Posted March 12, 2016 Posted March 12, 2016 Nice work there Jason, some very nice weathering, especially on that container! Daryl
JasonB Posted March 13, 2016 Author Posted March 13, 2016 Nice work there Jason, some very nice weathering, especially on that container! Daryl Thanks Daryl,love what your doing with the gv,I'm really enjoying watching this progress. 1
brianmcs Posted March 20, 2016 Posted March 20, 2016 The four together are Bachmann twin packs which were produced for marks models,the one on its own is a railtrack re spray with SSM decals. very nice work Jason , any chance of a photo of the resprayed one ? I have a few railtrack ones I want to respray. Is one generator wagon plus 3 others the correct configuration ?
DiveController Posted March 20, 2016 Posted March 20, 2016 very nice work Jason , any chance of a photo of the resprayed one ?I have a few railtrack ones I want to respray. Is one generator wagon plus 3 others the correct configuration ? 3-4 to 1 seems to be the correct ratio 6:2 etc. We spoke about this a little while back in another thread. Seem like a maximum of 6 without a second generator and that seems rare
JasonB Posted March 20, 2016 Author Posted March 20, 2016 very nice work Jason , any chance of a photo of the resprayed one ?I have a few railtrack ones I want to respray. Is one generator wagon plus 3 others the correct configuration ? Any footage I've seen seems to be spot on with what DiveController has said.6 or more standards and its 2 generators.I'll post a picture of the 2 railtrack if i get a chance later. 1
JasonB Posted March 25, 2016 Author Posted March 25, 2016 I hit the shed for an hour yesterday evening to finish off the SSM level crossing.I have to say i really enjoyed working on this kit.Its a really nice addition to any irish themed layout.Heres a couple of pics. 1
Recommended Posts
Create an account or sign in to comment
You need to be a member in order to leave a comment
Create an account
Sign up for a new account in our community. It's easy!
Register a new accountSign in
Already have an account? Sign in here.
Sign In Now