Galteemore Posted December 31, 2020 Author Posted December 31, 2020 (edited) Final post of 2020! Started on the curves. Splashers done - eventually. I spent a long time matching them up to the chassis ensuring that the front drivers could run freely without rubbing. It’s still a tight fit! It was really tempting to crack on with more interesting work but I have tried to hard to keep the rolling chassis free rolling as the build progresses / will hopefully reduce the final fettling. Boiler rolled - eventually. Belpaire firebox made and fitted - after a few goes!! Had made it too long initially, as I’d forgotten to deduct the 1’1” of firebox that projects into the cab. In an effort to remedy this I trashed the laboriously constructed cab front and had to make another. The windows are the tricky bit and since the photographs I have filed them into a more prototypical profile. Washout plugs are Great Central Rlwy pattern (another Beyer Peacock customer) white metal castings from JPL. This is a great store for model railway parts in Manchester, with a vague connection to Beyer Peacock, so it’s nice to have at least one Mancunian part on the model. Corners of firebox filled with plumbers solder and then filed into shape, rounding off the corners. A 6ba threaded rod - basically a very long screw - runs right through from smokebox to firebox to keep all aligned. All loosely in place to get an idea of what it will be like when brought together - so don’t worry if the fittings look a bit askew! The boiler will be pitched higher up when fixed in, as I still need to fit the dummy frame extensions that the smokebox will perch on. They really are huge boilers on these locos when you see them shorn of the side tanks. Happy New Year to all! Edited December 31, 2020 by Galteemore 8
David Holman Posted January 2, 2021 Posted January 2, 2021 (edited) A loco emerges! Sounds like it has been a battle at times, but got to be worth it. As for that long boiler, with the firebox perched behind the rear drivers, these locos must have been the last 'long boiler' engines ever constructed - and around 100 years after they went out of fashion everywhere else! Well done -really starting to take shape now. Edited January 2, 2021 by David Holman 2
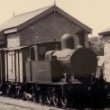
airfixfan Posted January 2, 2021 Posted January 2, 2021 Looking for something else and found a photo that 173 might enjoy? 4 1
Galteemore Posted January 2, 2021 Author Posted January 2, 2021 (edited) That’s terrific Jim - thank you! Broadside views like that are brilliant for detail but not as common as one would like. Thanks too, David - has been a battle with numerous skirmishes! Edited January 2, 2021 by Galteemore
airfixfan Posted January 2, 2021 Posted January 2, 2021 1 hour ago, Galteemore said: That’s terrific Jim - thank you! Broadside views like that are brilliant for detail but not as common as one would like. Thanks too, David - has been a battle with numerous skirmishes! Thought you would be interested. Jim
David Holman Posted January 13, 2021 Posted January 13, 2021 Very much the Beyer Peacock face. Those rivets just keep on coming, don't they! 1
Galteemore Posted January 28, 2021 Author Posted January 28, 2021 (edited) It had been going so well. Happy thoughts of fitting lamp irons and vacuum pipes were in the air. Then I tried fitting the ‘piano front’ that covers the cylinder heads under the smokebox. And I found myself running out of footplate - had I made it too short ? This had been one of the vaguer elements of the BP drawing, with few measurements to work off. So spliced on a scale foot of brass etch on the front and off we went. Lots of room now for the lamp irons etc. Then last night I tried fitting the springs and it was obvious what was wrong. A distinctive feature of the large tanks is that the springs are joined to the frames inside the edge of the smokebox - they overlap. You can clearly see a thin slice of smokebox behind the spring. Mine didn’t look like that. There was daylight behind the spring. Why? I had made the boiler too long! Hence why I had also run out of footplate..... Three courses of action were open to me : 1. Live with it. Not really an option as I’ve been working on this since May and want to get it right. Looking at the loco, I’d always know it was wrong!! 2. Take the loco apart and start again. No thanks. 3. Take a slice off the boiler and stick back together. A scary option but the only viable one. Thankfully I’d fitted copper boiler bands which could function as a robust saw guide, keeping the blade fairly true. Theory being that I could run the piercing saw down each side of the band and that would produce a neat slice - just enough to restore equilibrium. I’ll spare you the gory details - it wasn’t quite so straightforward as that - but it’s done: before and after pics below. Of course, the footplate extension is still in place, but I’ll leave that on until we see how much room brakes, sandboxes and guard irons take up.... Last night - picture 1 - vs tonight- picture 2 - and the real thing. It may look a tiny issue but it was really bugging me...onwards and upwards ! Edited January 28, 2021 by Galteemore 6 4
Robert Shrives Posted January 28, 2021 Posted January 28, 2021 "WoW" barely covers that modification - it does not show and as you can see certainly gets you back on course.. Some deity likes model railways. 1
murrayec Posted January 28, 2021 Posted January 28, 2021 Nicely done - it's looking great. I'm tempted to go at one of these myself- but a few other things to finish first! Eoin 1
Angus Posted January 29, 2021 Posted January 29, 2021 Much better and well worth the effort, however I'm glad I didn't have to start the butchery. Committing to the first cut must have been hard?
Galteemore Posted January 29, 2021 Author Posted January 29, 2021 Thanks everyone. Just glad it worked. It was hard to start, Angus! I did the first two cuts before I went to bed that night - meant I had to fix it... It’s not over yet though - just noticed now boiler is set in place, the washout plugs are too high..... 1
David Holman Posted January 29, 2021 Posted January 29, 2021 As Noel says, "Respect". There's been more than a few times when I've been building locos and got to that nearly there stage only to find something's not right. However, the bullet has been well and truly bitten and well done you. Scary stuff, but worth it! The loco is well and truly emerging now and definitely looking the part. 1
Galteemore Posted March 24, 2021 Author Posted March 24, 2021 (edited) It’s 1956 and Dundalk Works have outshopped ‘Enniskillen’ in full SLNC livery - including the red coupling rods which quickly dirtied in service. The livery has been comprehensively researched using SLNC sources, and colour pics/film, which overturned some of my own conceptions - such as the black/red nameplates rather than the red/shiny brass that I’d expected. Mr Egan, the SLNC CME, described the large tanks as ‘splendid engines’. 9 months of frustration and burnt fingers later, I still agree. When I was about 14, I found a picture of Sir Henry in our attic and had it framed as I just thought this was the perfect SLNC loco. Like Goldilocks and her porridge, the Large Tanks are just right - not too spindly and not too bulbous. That picture is still on my office wall today....see below. We are more or less done now I think - just a bit more detail painting (such as cab and rear buffer beam) and general fettling to do. Lots of bits are only on loose for now - such as cab roof and coupling rods. It’s been a frantic few months since I last posted - lots of fettling bits and taking off/replacing bits that were irking me! Also took some time to workout techniques to replicate signature features such as the water balancing pipes under the cab (solution was a brass D-ring for handbags, squeezed in a vice). In her later life, ‘Enniskillen’ had a GNRI chimney, replicated here by an NER one with a brass ring soldered on top for the capuchon. It’s not perfect, and some significant compromises have been made. Hopefully it captures the look more or less. And it’s my first ever scratch build, so I can’t expect too much! She will be gently weathered in time but for now she is pristine as a tribute to GF Egan and Gerry Lambe of Manorhamilton works, and the men and women of the SLNC who kept the wheels turning to the end. Seeing her posed at Rosses Point (which is of course simply a terminus version of Dromahair) in front of the scales that my grandfather’s salmon were weighed on makes all the burns, cuts and frustration worth it. Thanks to all on the forum who have helped with photos, postings and saying nice things... Anyway, here’s a few snaps....my other 2 kit-built locos are included - a nice MGW/GSW cameo! Edited March 25, 2021 by Galteemore 14 4
jhb171achill Posted March 25, 2021 Posted March 25, 2021 Absolutely superb! If that's your FIRST scratchbuild, there's some mighty stuff ahead, I'd say! 2
Noel Posted March 25, 2021 Posted March 25, 2021 Gobsmacked, wow David ‘Enniskillen’ looks utterly sublime, another brass maestro is born. Respect. Amazing it’s in brass, a scratch build and your first is a striking achievement. 1
David Holman Posted March 25, 2021 Posted March 25, 2021 Wow, how fab is that? Suspected something special was brewing and so it has proved - well done you! Can think of easier locos for a first scratchbuild, not least ones with a few less rivets - however, very worthwhile in the end, not least because it looks so 'right' and has all the presence of these fine locos. A great day at Rosses Point too! 2 1
Galteemore Posted March 30, 2021 Author Posted March 30, 2021 (edited) Thanks everyone. She moves, and here’s video proof of her prepping the 7:20 mixed ! Bit of fine tuning needed but no shorts or binding apparent so it’s hopefully minor tweaking.....the motor is still free floating and not all pickups are live so that will smooth things out...the track and wheels aren’t gleamingly clean either. Quite how she is moving at all is a mystery - if you look in the cab the reverser is firmly in mid-gear with regulator shut ! Loads to do yet but this was pathetically pleasing Edited March 31, 2021 by Galteemore 8 3
Noel Posted March 30, 2021 Posted March 30, 2021 She looks fabulous underway. Serenely realistic layout scenes also. Class. 1 1
David Holman Posted March 31, 2021 Posted March 31, 2021 Doesn't matter how many locos you build, there is something wonderfully satisfying when they run well. Makes all the hard work worthwhile and certainly know what you mean in the 'pathetically pleasing' comment. Small pleasures but oh so nice! Nothing in Enniskillen's movements to suggest any issues with the chassis, so should be a joy for years to come. 1 1
Galteemore Posted April 11, 2021 Author Posted April 11, 2021 (edited) I started the ‘Enniskillen’ saga with a long post so may as well finish with another one. You may wish to make a mug of tea! I promise that when you’ve battled through the text, there are pictures. Lots of pictures, as I got rather carried away.... I have long admired those - including those on this illustrious forum - who can take an expensive box-fresh model and gaily waft an airbrush over it, to great and convincing effect. I’d never have the nerve for that! So you can imagine how anxious I was about weathering an engine that has taken me almost a year to build from scratch. But weather it I had to do. It wouldn’t fit with the layout if I left it, as it would stick out, and all the details I’d added would be hidden in the plain unvarying black. Martyn Welch’s excellent book was my guide - and I had the gall to contact the guru himself for extra tips. I also practiced on some old Wrenn/Hornby Dublo bodies - sorry @WRENNEIRE - but hopefully the sacrifice was worthwhile!! Welch warns that bad weathering looks like a loco has been attacked by an incontinent bullock and I know what he means. Even the SLNC’s overwhelming cattle traffic couldn’t justify that ! So I determined to follow his approach religiously. BTW I don’t have an airbrush....so this is all hand applied. I think it could have turned out worse. First off is a coat of gunmetal/grey/leather stippled on with a brush. The lovely black engine starts to look like a shotgun barrel - what have I done ! But hold your nerve - carefully applied weathering powder tones all down nicely - but do work from photos and not what you imagine. Hours have thus been spent on studying grime......Underframe and wheels are a similar process - with lots of talcum powder added. Even the lovely red coupling rods were plastered in gunge. Much detailing work remained. Coal and glazing were added to the cab, plus screw couplings and dummy inside motion, made from plastic rod and strip. I had the chance to poke my head between Lough Erne’s frames a few years ago which was helpful for this. The crew were painted up and glued in, along with the boiler backhead and Wakefield lubricator (although it should really be a Detroit). The crew’s position in the cab is based on a quote from the SLNC CME Mr Egan, who described how crews on the steep banks would anxiously watch the water disappearing from the gauge glass and pray for a third injector to appear. That’s exactly what they are doing in this pose... Before we let loose on the photos, which are taken in a mixture of day and LED light, and show details plus overall views, I do apologise for the cheesy cotton wool ‘steam’. I did get carried away.. One last vignette. N W Newcombe travelled behind ‘Enniskillen’ in Apr 57. I read his piece 30 years ago and recently rediscovered it. Here’s a brief edited excerpt - I’ll let him have the last word. If my small effort does any honour to this wonderful railway as he describes it, I’ll be happy with my year’s work. But the next project will be plastic - I’m over soldering and filing for a while....the cab roof needs stuck down, and she is still a bit light on the front drivers so I’ll squeeze some lead in -but we’re now effectively signing this off!! ‘Enniskillen’ laboured terribly on the restart from Glenfarne, climbing to Kilmakerrill. Soon we were belting along in the dusk, a fine moon coming up behind us. It felt like 50-60-70mph but the sober evidence of my watch said it was just over 16mph. ‘Enniskillen’ was simply pounding along, waggling her shoulders so ferociously that I had doubts we should arrive safely at Manorhamilton. It must have been quite exciting on the footplate too. I saw now and then the driver’s head against a lurid background of fire, sometimes it protruded against a greenish night sky. Now and then showers of sparks went up from the funnel, once even a rush of fiery smoke billowed out from the cab itself. And always there was tremendous black smoke.... Edited April 11, 2021 by Galteemore 10 5
David Holman Posted April 12, 2021 Posted April 12, 2021 For me, that is a fabulous piece of weathering. So much subtlety - the overhead view along the boiler looks so right. As for all the oily bits, just superb and against the background of Rosses Point station the colours compliment each other beatifully. First glance, I thought you'd unearthed some new, digitally enhanced prototype photos. It really does look that good! 1
Georgeconna Posted April 12, 2021 Posted April 12, 2021 16 hours ago, Galteemore said: I started the ‘Enniskillen’ saga with a long post so may as well finish with another one. You may wish to make a mug of tea! I promise that when you’ve battled through the text, there are pictures. Lots of pictures, as I got rather carried away.... I have long admired those - including those on this illustrious forum - who can take an expensive box-fresh model and gaily waft an airbrush over it, to great and convincing effect. I’d never have the nerve for that! So you can imagine how anxious I was about weathering an engine that has taken me almost a year to build from scratch. But weather it I had to do. It wouldn’t fit with the layout if I left it, as it would stick out, and all the details I’d added would be hidden in the plain unvarying black. Martyn Welch’s excellent book was my guide - and I had the gall to contact the guru himself for extra tips. I also practiced on some old Wrenn/Hornby Dublo bodies - sorry @WRENNEIRE - but hopefully the sacrifice was worthwhile!! Welch warns that bad weathering looks like a loco has been attacked by an incontinent bullock and I know what he means. Even the SLNC’s overwhelming cattle traffic couldn’t justify that ! So I determined to follow his approach religiously. BTW I don’t have an airbrush....so this is all hand applied. I think it could have turned out worse. First off is a coat of gunmetal/grey/leather stippled on with a brush. The lovely black engine starts to look like a shotgun barrel - what have I done ! But hold your nerve - carefully applied weathering powder tones all down nicely - but do work from photos and not what you imagine. Hours have thus been spent on studying grime......Underframe and wheels are a similar process - with lots of talcum powder added. Even the lovely red coupling rods were plastered in gunge. Much detailing work remained. Coal and glazing were added to the cab, plus screw couplings and dummy inside motion, made from plastic rod and strip. I had the chance to poke my head between Lough Erne’s frames a few years ago which was helpful for this. The crew were painted up and glued in, along with the boiler backhead and Wakefield lubricator (although it should really be a Detroit). The crew’s position in the cab is based on a quote from the SLNC CME Mr Egan, who described how crews on the steep banks would anxiously watch the water disappearing from the gauge glass and pray for a third injector to appear. That’s exactly what they are doing in this pose... Before we let loose on the photos, which are taken in a mixture of day and LED light, and show details plus overall views, I do apologise for the cheesy cotton wool ‘steam’. I did get carried away.. One last vignette. N W Newcombe travelled behind ‘Enniskillen’ in Apr 57. I read his piece 30 years ago and recently rediscovered it. Here’s a brief edited excerpt - I’ll let him have the last word. If my small effort does any honour to this wonderful railway as he describes it, I’ll be happy with my year’s work. But the next project will be plastic - I’m over soldering and filing for a while....the cab roof needs stuck down, and she is still a bit light on the front drivers so I’ll squeeze some lead in -but we’re now effectively signing this off!! ‘Enniskillen’ laboured terribly on the restart from Glenfarne, climbing to Kilmakerrill. Soon we were belting along in the dusk, a fine moon coming up behind us. It felt like 50-60-70mph but the sober evidence of my watch said it was just over 16mph. ‘Enniskillen’ was simply pounding along, waggling her shoulders so ferociously that I had doubts we should arrive safely at Manorhamilton. It must have been quite exciting on the footplate too. I saw now and then the driver’s head against a lurid background of fire, sometimes it protruded against a greenish night sky. Now and then showers of sparks went up from the funnel, once even a rush of fiery smoke billowed out from the cab itself. And always there was tremendous black smoke.... Love the wood Bufferbeam ! 1 1
the Bandon tank Posted April 12, 2021 Posted April 12, 2021 Very realistic, I love the slightly bent grab rails, showing years of hard work. 1
Galteemore Posted October 18, 2021 Author Posted October 18, 2021 (edited) It was delightful exhibiting Enniskillen on Belmullet this weekend but I also anticipated that I might have some work to do afterwards, and so it proved. When I compared the shots of the two ‘Large Tanks’ together, something wasn’t quite right. Mr Holman’s - on the left - had a subtly different smokebox profile to mine. Or to put it another way, mine’s slightly off! Drawing this had taken an immense amount of care and effort - the Irish ogee smokebox is a deceptively complex shape and the bane of many a railway artist - but I’d clearly messed it up a bit. There just seemed to be too much meat on the lower half of mine. On closer examination, I had left too much metal outside the rivet line. The circled pic clearly shows a huge flange of metal where there should be air! So out with the the files tonight (it wasn’t easy starting to file at what had taken much patient painting and finishing work….) and some trimming was done. The shape now conforms more closely to that carefully measured riveted line on the smokebox front, so hopefully looks a bit better, and more like the background photo of the real Enniskillen. I’ll be pressing the Archer’s rivets into service, I think, to patch up all the ones on the smokebox side I’ve filed off! Edited October 18, 2021 by Galteemore 6
jhb171achill Posted October 18, 2021 Posted October 18, 2021 That just looks SO realistic. The scenic quality matches the modelling quality of the locos - seriously top notch. 3
David Holman Posted October 19, 2021 Posted October 19, 2021 Didn't notice, but see what you mean and thank goodness for Archer's rivet transfers! The photos also show the considerable 'presence' Enniskillen emits - a combination of both model making and that paint job, which just looks so right. 2 1
Midland Man Posted October 23, 2021 Posted October 23, 2021 Looks amazing. Does look a scene from Sligo engine shed. Looking forward to what both of you build in the future. 1
Galteemore Posted November 4, 2021 Author Posted November 4, 2021 (edited) One of the most famous pieces of SLNC rolling stock was coach 9, a regular on the 7:20 ‘mixed’. Although it wasn’t really a mixed - simply a passenger train which bolted on any empty wagons left at Enniskillen after the 2pm goods had gone. Already an obsolescence when built in the 20s, its quirkiness delighted enthusiasts, from the coupe at the front to the longitudinally divided first class smoker/non-smoker. So I had to build one, my first ever scratch bogie vehicle. Used an Alphagraphix card kit as a drawing, but body fabricated from plastic card, using David Jenkinson’s inner/outer skin methods. It’s a bit tricky as the large windows on each end don’t make for structural strength. Bogies are Slaters 8’, cut down to 7’6. I finished it in the greyish brown that SLNC stock tended to finish up in. Although 9 was spruced up towards the end, the painting was done by a wagon painter and the finish quickly deteriorated. I have done her as she appeared c 1955, before the final repaint. Bizarrely enough, I have dim memories of seeing one of these SLNC coaches, despite being born a decade and a half post closure. In a field near Dromahair a farmer had half of one as a shed. It was near the road and a regular sight until c1980 for me. As a child I also had a painting of Lissadell and her coach on my wall. Image courtesy @Irishswissernie. Those early memories really dictated how I should paint up my No 9. It’s far from perfect, and I’m not completely happy with it, but it’s better than the No 9 I didn’t have a month ago! Taking photos does help identify some of the remedial work I will undertake - in time! You will see that ‘Enniskillen’ has also recovered from her recent cosmetic surgery……resin rivet patches in, spot repainted black and weathering gloop applied. Also interesting to see how short No9 actually is compared to a 6w - probably a requirement for getting round those bends in the SLNC route! Connoisseurs did consider the trio of SLNC bogies to be rather shorter in length than was desirable. Coach 4, the little saloon, is in the pristine finish as she was in 1950. Interestingly, David Holman and I have both made 4 and 9, but reversed the finish - his 9 is immaculate and his 4 is worn! Of course, now I post the pictures I notice the buffer that’s crept round ! Edited November 5, 2021 by Galteemore 7 5
David Holman Posted November 5, 2021 Posted November 5, 2021 Certainly works for me and oozes character from every corner. The perfect companion for a Large Tank 1
Angus Posted November 5, 2021 Posted November 5, 2021 That's very evocative and captures the creature of the prototype very well. Lovely modelling Galteemore! 1
Recommended Posts
Create an account or sign in to comment
You need to be a member in order to leave a comment
Create an account
Sign up for a new account in our community. It's easy!
Register a new accountSign in
Already have an account? Sign in here.
Sign In Now