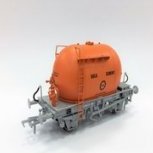
Warbonnet Posted October 12, 2013 Posted October 12, 2013 Hi everyone, When it comes to kits I am some what of a novice. Indeed, I'm miles behind some of the masters on this site. However, I've decided to get stuck in and get my hands dirty and give it a go. I also want to show other beginners that kits are nothing to fear, and the fun is in building the kit itself. I'm definitely one who believes 'If I can do it, then anyone can!' Now, my interests are BR and American. However, I've decided to do a step-by-step guide on the Parkside Dundas kit of the BR Palvan. This kit will be of good interest to Irish modellers as it's very similar to the Irish Pallet Van shown here I'll be keeping mine BR though! Now, this isn't a top professional job, and my sloppiness will receed with practice, but all I can say is that the kit itself goes together beautifully. What you begin with First, remove the sides from the sprue and cut the protective 'L' section off. Then glue the vents to the end (I used plain old Humbrol poly cement for all these jobs. I think I'd use Revel's in future though) Stick Sides to chassis ends. Ensure you test fit EVERYTHING before you make merry with the glue, and file any tabs left by the sprue with fine sandpaper or very lightly with a file so you get a nice square fit. When they're stuck in and dry and look even then attach the sides. Test fit the roof to see if all is well and square between the four sides. I got some superglue and stuck in a couple of coins inside to give the wagon a bit of weight. Stick them over each axle. A couple on each will do. After that I stuck the roof down once I was happy. Next up, we turn our attention to the chassis Cut the solebars off the sprue, and clean them up before adding the brass bearing cups into the back of the axle boxes. This will ensure smooth rolling of the wagon Once that's done, attach the tiny axle box covers to the front of the axle box mounting Once all is dry you can attach the solebars to the chassis, making sure you've lined them up properly. Glue them to the guides. While the glue is still soft clip in the wheels to make sure they go in correctly, are free rolling and are square fitting. Once dry you should have a nice free rolling wagon! Next up comes the brake gear. This fits in line with the wheels and can be a little fiddly but overall not a problem. Just make sure you attach square and that they dont rub off the wheels when in place Brake cylinder comes next, as per instructions... Just glue it to the underframe and make sure it doesnt foul any wheel movement. Finally, attach buffers, cosmetic coupling hook and hinges. And there you go, one built wagon! Couplings come separate, but parkside provide a mounting and instructions to add normal hornby/bachmann couplings. I just need to pick them up myself. Then it's on to painting. There you go, it might be a bit rough and ready but it rolls beautifully and with a bit of paint and weathering it'll look the part I reckon. You don't need to have major skill, just patience and a willingness to give it a go. The kit cost around a tenner off parkside's site so you're not losing a fortune by having a go. I bought a few other wagon kits to try out, and I have to say I'm hooked! With more Irish wagon kits on the way from the likes of D&M models and SSM now is the time to give it a go. This is a cheap but good place to start and can be made look Irish and look great behind a black and tan 141. If you want to go for a true rendition of the Irish van then I'm sure some of our more learned members can tell you the detail differences and where to modify the parkside kit. Any questions, just shout. I hope it was of help.
heirflick Posted October 12, 2013 Posted October 12, 2013 nice job fran:tumbsup: got 4 of those kits myself and as far as i know the doors on the irish wagons were sliding ones(open to correction here!) i put a square sheet of plasticard over the doors on the model - looks ok:)
RedRich Posted October 12, 2013 Posted October 12, 2013 Top marks Fran for the work, and the tutorial. One point that you have made and it is worth repeating, is adding extra weight to the models. Adding the weight over the axle's or bogies (depending on the model) as you have done is the place to put it for better road handling. Putting weight in the middle of a wagon, coach, or loco doesn't really benefit the model as much or give it better adhesion. Rich,
Warbonnet Posted October 12, 2013 Author Posted October 12, 2013 nice job fran:tumbsup: got 4 of those kits myself and as far as i know the doors on the irish wagons were sliding ones(open to correction here!) i put a square sheet of plasticard over the doors on the model - looks ok:) Cheers Seamus, that sounds pretty straight forward to convert them. I'll bare that in mind when I do some Irish ones for my 141s. Top marks Fran for the work, and the tutorial. One point that you have made and it is worth repeating, is adding extra weight to the models. Adding the weight over the axle's or bogies (depending on the model) as you have done is the place to put it for better road handling. Putting weight in the middle of a wagon, coach, or loco doesn't really benefit the model as much or give it better adhesion. Rich, Thanks Rich, just wanted to show that there is no voodoo magic in doing these, it's just about having a go and if you muck up then nothing much lost, just try again and learn from your mistakes. Stuck a couple of the queens pounds I had left over, one over each axle. Don't intend on travelling across the water for a while so they wont be missed!
Warbonnet Posted October 17, 2013 Author Posted October 17, 2013 Well it wasn't long until I turned my attention back to Yankee projects. I recently bought a body for a Kato SD45 as I had a spare frame and bogies. I will be detailing this as a Penn Central unit, so a bit later in its life to this current Pennsy guise. I have a Kato motor with the proper mounts somewhere in stock but for the life of me I can't find it right now! Once I do the chassis will be a runner. In the meantime I'll be drawing up a list of parts for detailing and getting them from the States. Always loved SD45s, those flared radiators just look so good.
Garfield Posted October 17, 2013 Posted October 17, 2013 I have a soft spot for the Penn Central so I'm looking forward to see how this progresses.
RedRich Posted October 17, 2013 Posted October 17, 2013 Looks good Fran. Where would we be without the cottage industry to add bit's and pieces to rtr models. Most American prototypes I have any (mostly limited) knowledge of switchers, GP's SD's, all seem to be single cab. I have seen footage of single cab locos working alone cab forward on consists, but is there a reason behind the fact that most seem to be single cab. Is because they are mostly double headed and multi consisted. I really haven't been a huge fan of US motive power even though five of our own classes have come from accross the Atlantic, but I am looking forward to seeing this progress and get a lesson in US railways at the same time. Rich,
Warbonnet Posted October 18, 2013 Author Posted October 18, 2013 Looks good Fran. Where would we be without the cottage industry to add bit's and pieces to rtr models. Most American prototypes I have any (mostly limited) knowledge of switchers, GP's SD's, all seem to be single cab. I have seen footage of single cab locos working alone cab forward on consists, but is there a reason behind the fact that most seem to be single cab. Is because they are mostly double headed and multi consisted. I really haven't been a huge fan of US motive power even though five of our own classes have come from accross the Atlantic, but I am looking forward to seeing this progress and get a lesson in US railways at the same time. Rich, Cheers guys. Pat; At the rate I work at expect a bit of a wait! I have a rake of unfinished projects around the place. I really need to sort that out. The Alco is almost there though Rich; As you said, since they usually run in lash-ups there doesnt seem to be a point in having cabs at both ends. Railroads like Southern and Norfolk & Western also specified their diesels to run 'long hood forward' namely to run with the cab at the back as it was like driving a steam locomotive. Norfolk Southern inherited their locos in their merger and still run this way from time to to with their older locos although it's getting rarer. I was the same as you about American locos, but when I looked closer at the EMD units I saw just how similar they are to our locos. Cabs aside it's uncanny. And then when you look at stuff like these SD45s running in consist attacking a climb it's seriously impressive. After all, 071s have 12 cylinder versions of the 645 engine, the SD45s have 20 cylinder versions of the same engine. Amazing locos.
RedRich Posted October 18, 2013 Posted October 18, 2013 Cheers Fran, really interesting that the Norfolk and Western would have specified that the locos run long hood forward to replicate the experience of driving a steam loco. This must have been at the time of the change over from steam to diesel.The limited knowledge I have is of the B&O. I remember reading a book years ago from a guy that had worked in Keyser yard in the 50's. I like the dark blue livery and the B&O in yellow on the bonnet sides it may look dull but it looks powerful. I'm off now to check out some SD45 action on youtube now. Rich,
Warbonnet Posted October 18, 2013 Author Posted October 18, 2013 Cheers Fran, really interesting that the Norfolk and Western would have specified that the locos run long hood forward to replicate the experience of driving a steam loco. This must have been at the time of the change over from steam to diesel.The limited knowledge I have is of the B&O. I remember reading a book years ago from a guy that had worked in Keyser yard in the 50's. I like the dark blue livery and the B&O in yellow on the bonnet sides it may look dull but it looks powerful. I'm off now to check out some SD45 action on youtube now. Rich, If you've got a decent set of speakers/headphones stick this through it. The later SD45-2's but you get the idea...
UP6936 Posted October 18, 2013 Posted October 18, 2013 Just watched that, incredible! I have the spectrum range sd45 , how does the Kato compare?
Warbonnet Posted October 18, 2013 Author Posted October 18, 2013 And NS SD40-2s running long hood forward
Warbonnet Posted October 18, 2013 Author Posted October 18, 2013 Just watched that, incredible! I have the spectrum range sd45 , how does the Kato compare? I've never seen a Spectrum one up close. The Kato one is nice if a little dated. Beautiful weight and running though. I have a couple of Proto 2000 ones too which are fab but the new ones are too pricey. Athearn do them too but I have yet to see the latest version but they're meant to be very nice.
UP6936 Posted October 18, 2013 Posted October 18, 2013 The spectrum runs smoothly, if a little noisily. Doesnt bother me though, its a good loco at a decent price. Might get a Kato or athearn one eventually
RedRich Posted October 18, 2013 Posted October 18, 2013 Fran I just listened to it with the nephews beats audios, he was waiting here to be collected from training. It sounds like a building falling down. The last scene with the 4 locos must have really sounded amplified in the cutting and with the hills behind it. Rich,
Warbonnet Posted October 18, 2013 Author Posted October 18, 2013 Fran I just listened to it with the nephews beats audios, he was waiting here to be collected from training. It sounds like a building falling down. The last scene with the 4 locos must have really sounded amplified in the cutting and with the hills behind it. Rich, One last one, the two GE Dash 8's sound impressive chugging at the front, but then the 4 SD40-2s at the rear bring the house down. Again, plug it into a decent stereo or head phones... [video=youtube;VPA-SrEFWvw] No DCC sound set-up will ever get near this!
Glenderg Posted October 19, 2013 Posted October 19, 2013 fran, there was this an article in model railroader where a chap had hoodwinked his dcc setup and hooked it up with a marantz amp and a bazillion speakers, all driven by his custom written piece of software so that as the loco travelled down the line, the sound followed on speaker. It was on a dvd that came with mag, so i'm not sure if its on youtube, but this guy had a subwoofer that would make armin van buuren blush. Now "that" is how to get them sd40's sounding mad in model form! Really impressive...must look it up again.
patrick Posted October 19, 2013 Posted October 19, 2013 This thread is bringing back fond memories of fall 1996 when I was working as field technician for a security business in the western New York and central Pennsylvania area. I frequently stayed in Salamanca NY and in Johnstown and Altoona Pa and during down time watched trains on the Buffalo & Pittsburgh and on Conrail on the former PRR Pittsburgh line over Horseshoe Curve. The B&P had an interesting fleet of locomotives at the time including SD45's GP9's and GP40's, two of the latter still in Allegheny RR blue. On the Pittsburgh line just bout every train had helpers in both directions.
Mayner Posted October 19, 2013 Posted October 19, 2013 Cheers guys. Pat; At the rate I work at expect a bit of a wait! I have a rake of unfinished projects around the place. I really need to sort that out. The Alco is almost there though Rich; As you said, since they usually run in lash-ups there doesnt seem to be a point in having cabs at both ends. Railroads like Southern and Norfolk & Western also specified their diesels to run 'long hood forward' namely to run with the cab at the back as it was like driving a steam locomotive. Norfolk Southern inherited their locos in their merger and still run this way from time to to with their older locos although it's getting rarer. I was the same as you about American locos, but when I looked closer at the EMD units I saw just how similar they are to our locos. Cabs aside it's uncanny. And then when you look at stuff like these SD45s running in consist attacking a climb it's seriously impressive. After all, 071s have 12 cylinder versions of the 645 engine, the SD45s have 20 cylinder versions of the same engine. Amazing locos. Many of the earlier road switchers like the Alco RS2 & 3 models and EMD GP7 were set up to run long hood forward this was as much to do with crash protection as tradition. Funnily enough Kiwirail found that drivers would sometimes turn a double cabbed loco if a wye or turning triangle is available rather than change ends. This happened at one particular terminal where turn-round time was tight and did not give enough time on a cold winter night to adequately heat the second cab before departure. Basically after several hours on the road, drivers did not like leaving a nice warm cab, to cart their gear to the other end and face problems with de-misting the windscreen and warming up the cab on the return journey. The American export locos are very close in detail to their US cousins, in New Zealand most locos were basically scaled down American road switchers, the 645 engine locos are on the way out mainly because of age and poor fuel economy, the GE U Boats 40 years on still highly regarded for their fuel economy, smooth riding and low speed hauling ability.
NIRCLASS80 Posted October 19, 2013 Posted October 19, 2013 Great stuff but don't forget the old Alco's. [video=youtube;o-s8ujItvqo]
Mayner Posted October 19, 2013 Posted October 19, 2013 Some SD45s and other 6 axle power have gone to short lines and regionals in North Dakota for working shuttle elevator and coal trains. The DMVW operates an interesting mix of leased units including some ex Canadian National comfort cabbed GP40-2, WC SD45. The RRVW operates an unusual fleet of ex-Burlington Caterpillar powered GP20s they look like pure bread EMDs but can put out clag like an Alco! [video=youtube;Awa3Oam4K-g]http://www.youtube.com/watch?v=Awa3Oam4K-g http://www.youtube.com/watch?v=3EUVOSq5UeE
Warbonnet Posted March 2, 2014 Author Posted March 2, 2014 So it's been many months since I uploaded anything. Today's fun has been fitting the many detail parts, chipping and ultrascale wheel sets to a couple of vitrains locos.
Warbonnet Posted March 7, 2015 Author Posted March 7, 2015 Something Irish for a change! An ancient Leinster Models O Gauge MGWR J26 tank kit. My first stab at soldering a kit together. I've had some invaluable tutoring and assistance from the lads in the MRSI. Did the running plate and most of the body so far. The kit itself is a bit basic and rough and plenty of cleaning up/detailing will be needed but I'm enjoying it so far. The body still hasnt been soldered to the plate below as I still have to add the boiler etc, but you get the idea.
Dunluce Castle Posted March 7, 2015 Posted March 7, 2015 Great start so far, it's going to be a stunner
burnthebox Posted March 7, 2015 Posted March 7, 2015 Well done Fran, this is another that belongs in the "How To " tread !
Garfield Posted March 7, 2015 Posted March 7, 2015 Can you still get those kits anywhere? Alphagraphix have an O gauge J26 kit in their Tyrconnel range, JB. One can be seen on David Holman's 'Arigna Town' layout elsewhere on the forum.
Warbonnet Posted March 8, 2015 Author Posted March 8, 2015 Thanks gents, I'll keep you posted as she progresses so. Can you still get those kits anywhere? I picked her up on EBay a while ago Jonathan, they were kits made by the McGowan brothers in Monck Place. As Pat says Tyrconnel do a nice one that's reasonable price that would be more detailed than this one. SSM also do a 00 gauge version.
Recommended Posts
Create an account or sign in to comment
You need to be a member in order to leave a comment
Create an account
Sign up for a new account in our community. It's easy!
Register a new accountSign in
Already have an account? Sign in here.
Sign In Now